
Week 05: 3D Scanning and Printing
Assignments:
Group Assignment
- Test the design rules for your 3D printer
- Document your work to the group work page and reflect on your individual page what you learned
Individual Assignment
- Design and 3D print an object (small, few cm3, limited by printer time) that could not be easily made subtractively
- 3D scan an object (and optionally print it)
Things to Complete This Week
- Learn how to use the 3D printer
- Work on the group assignment
- Figure out what to design
- Learn more about 3D scanning
- Include design files!
Like usual, here is my updated schedule for the week.
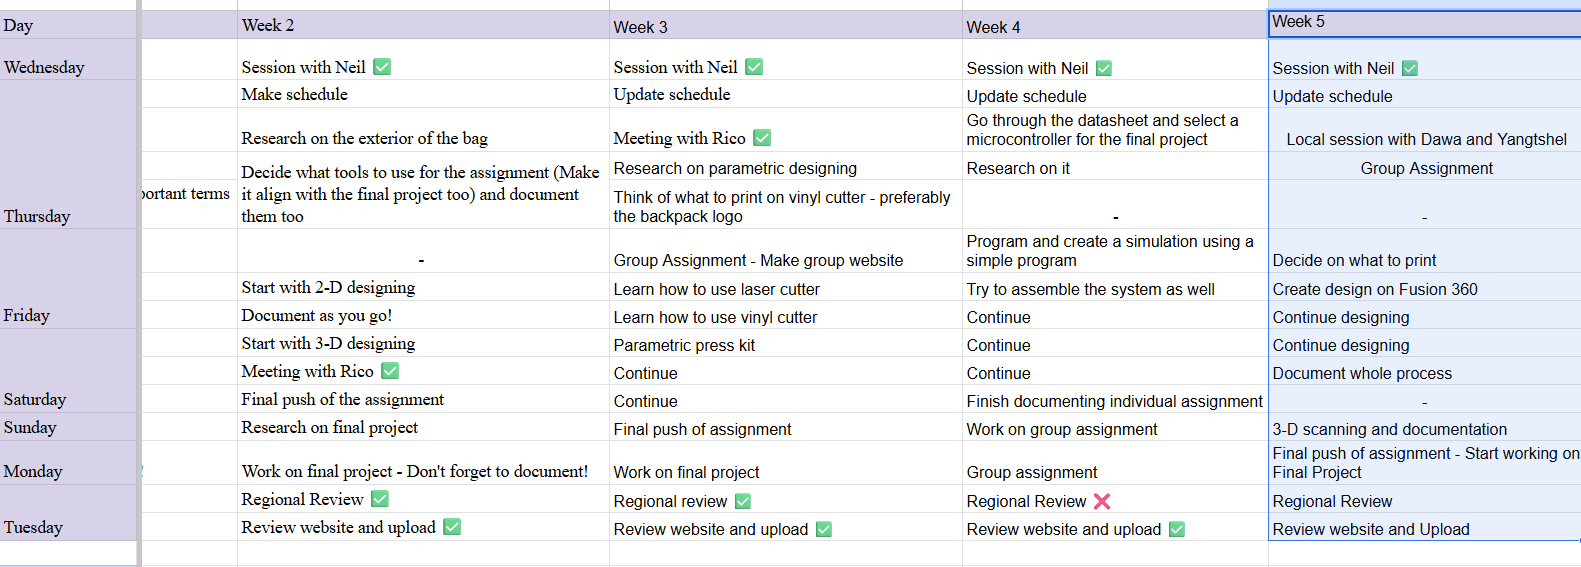
Here is the link to my schedule
Group Assignment
You can access our group assignment here.
The printer that we have in our lab is the Prusa i3 MK3.
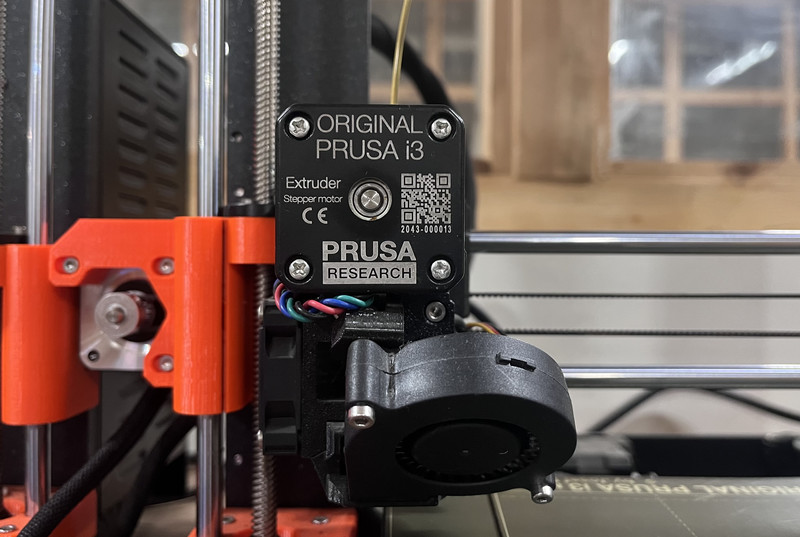
The Prusa i3 MK3 is a Fused Filament Fabrication(FFF) 3D printer.
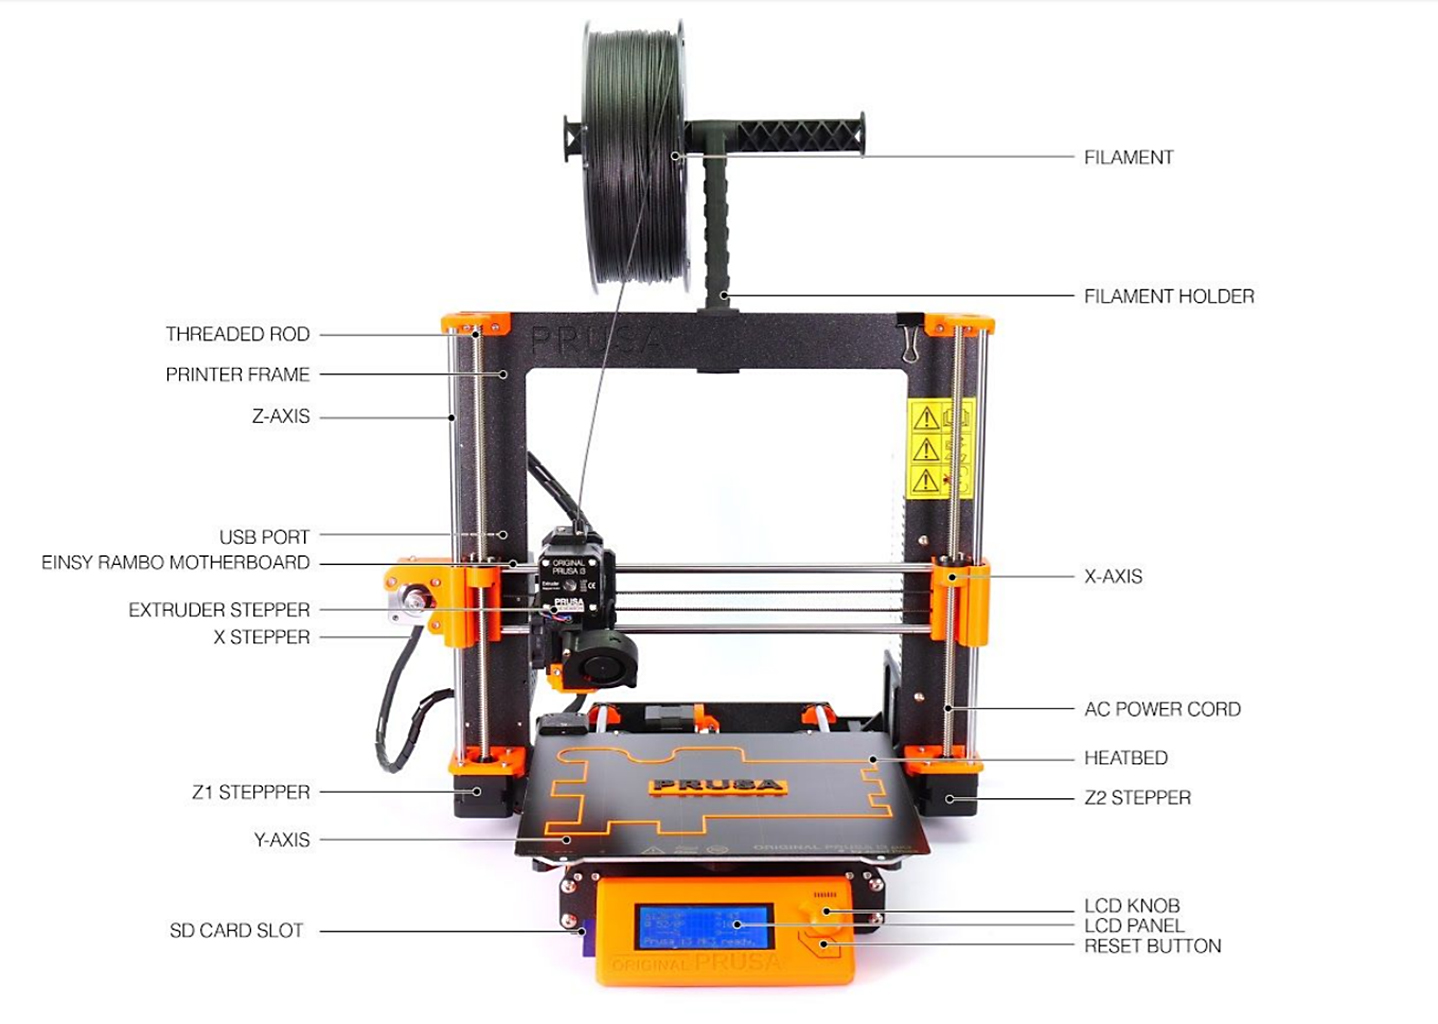
Machine Specifications
- Build volume: The maximum size of an object the printer can make is 250 × 210 × 210 mm.
- Layer height: The thickness of each printed layer can range from 0.05 mm (very detailed) to 0.35 mm (faster printing).
- Maximum travel speed: The printer can move at speeds of over 200 mm per second.
- Maximum hotend and heatbed temperature: The nozzle can heat up to 290 °C, and the heated bed can reach up to 120 °C.
- Mainboard: The printer uses an Einsy RAMBo 8-bit control board.
- MMU2S/3 support: The printer supports multi-material printing.
- Nozzle diameter: The default nozzle size is 0.4 mm, but other nozzle sizes can also be used.
- LCD screen: The printer has a monochrome LCD screen for user control.
- Print surface: The printer uses a magnetic heated bed with removable PEI spring steel sheets.
- Cutting tool chuck: A collet method is used to hold the cutting tool.
- Filament diameter: The printer uses 1.75 mm filament.
So far, this week’s group assignment has been the most challenging. We faced some problems while calibrating the printer, and also some problems due to the lab’s temperature conditions. But despite these challenges, we were still able to enjoy the process and were also able to learn a lot.
Individual Assignment
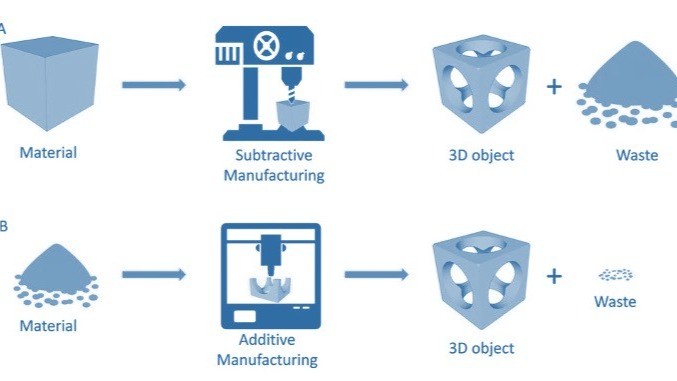
I started this week by learning the key differences between the two types of manufacturing.
Additive Manufacturing
Additive manufacturing is a process where objects are made by adding material layer by layer, most commonly through 3D printing. The material is placed only where it is needed, which allows for complex and detailed designs that are difficult to make using traditional methods.
Advantages:
- Uses less material, so there is less waste
- Can create complex shapes and internal structures
- Ideal for rapid prototyping and custom designs
Disadvantages:
- Parts may be weaker compared to traditionally manufactured ones
- Printing can take a long time for large objects
- Limited material choices compared to other methods
Subtractive Manufacturing
Subtractive manufacturing is a process where an object is created by removing material from a solid block using tools like cutting, drilling, or milling machines. The final shape is achieved by carving away the unwanted material.
Advantages:
- Produces strong and durable parts
- High precision and good surface finish
- Wide range of materials can be used
Disadvantages:
- Creates a lot of material waste
- Complex shapes can be difficult to make
- Requires expensive machines and tools
3D Designing and Printing
For my individual assignment, I referred to this YouTube video that clearly explains the process of creating an infinity cube.
I used Fusion 360 for my design ╰(*°▽°*)╯
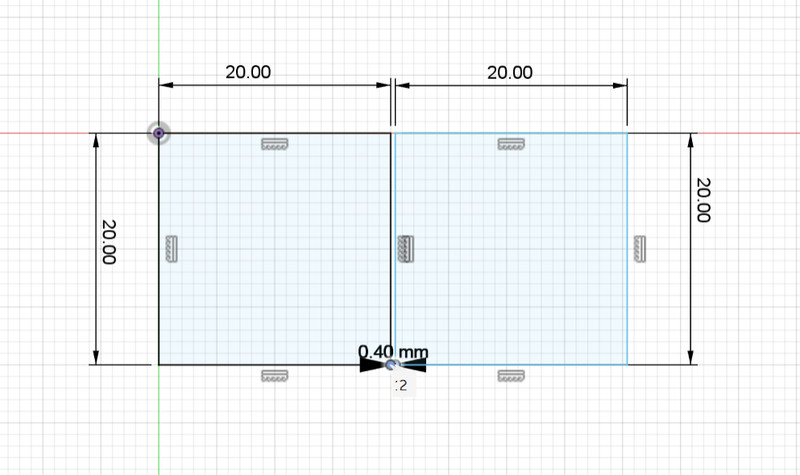
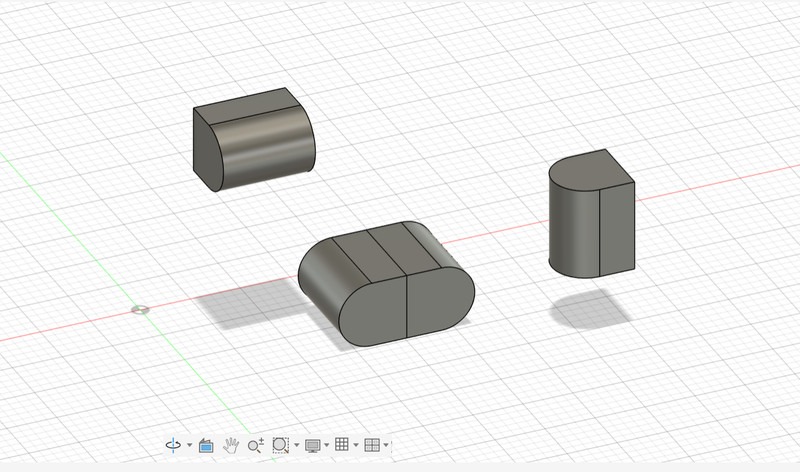
1. I started by creating a sketch of two squares, each with a side length of 20mm (Should be 0.4mm apart). I then extruded the shape by 20mm.
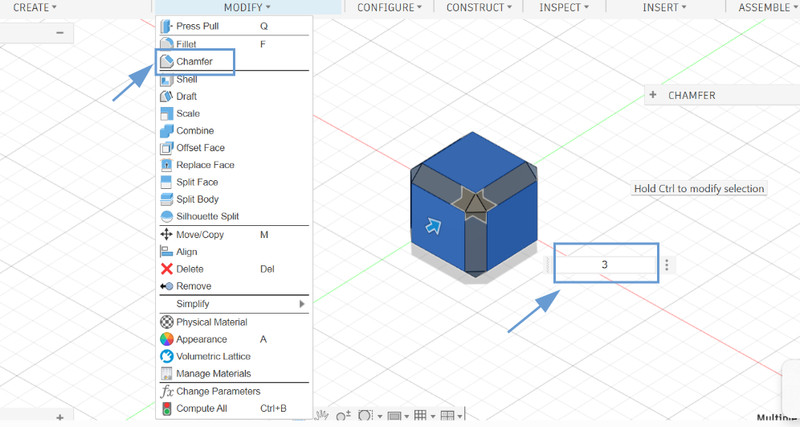
2. I then added a chamfer of 3mm to each cube .
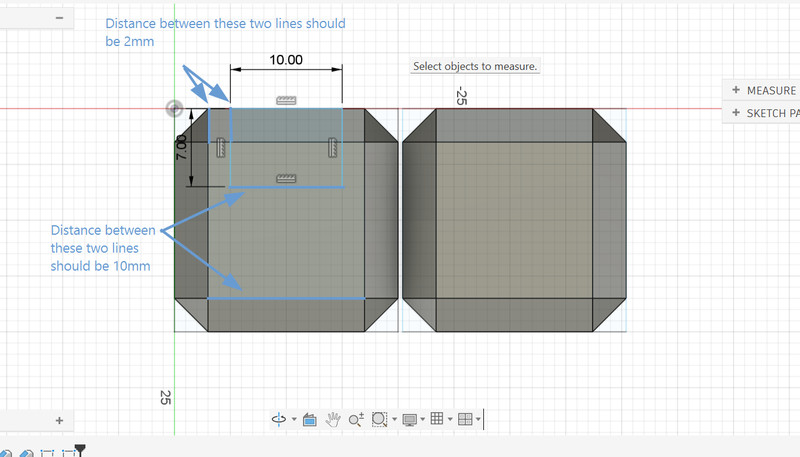
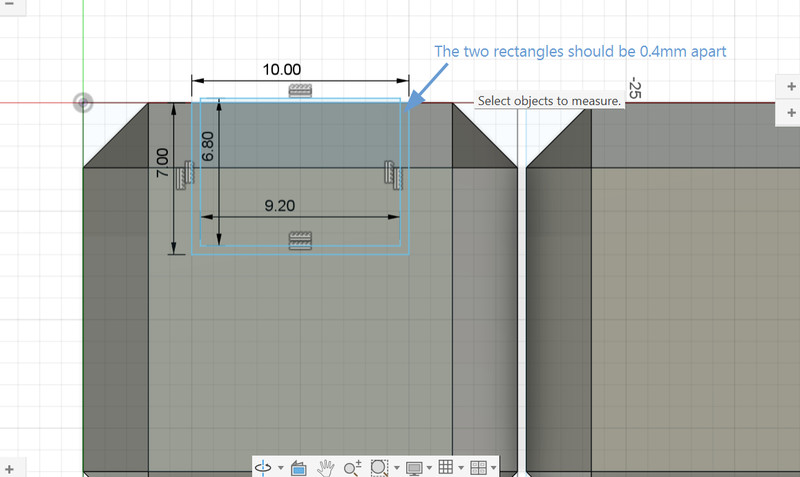
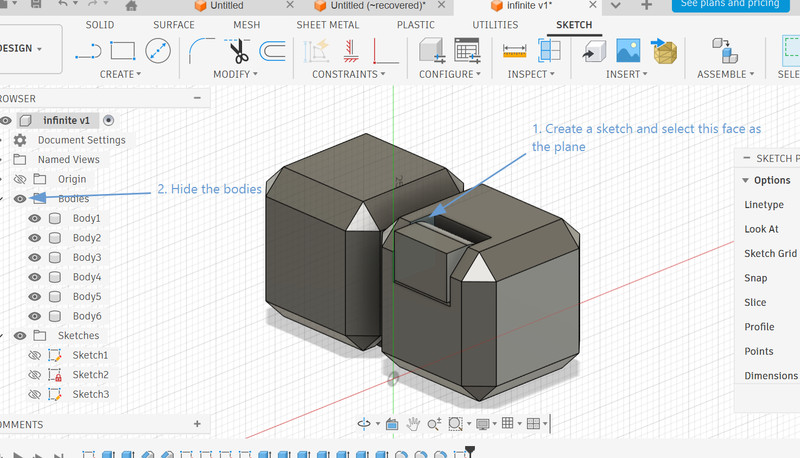
3. Using one of the faces as the plane, I created a rectangular sketch with a length of 7mm and a width of 10mm.
4. I created another rectangular sketch inside the previous one and gave it a length of 6.8mm and a width of 9.2mm .
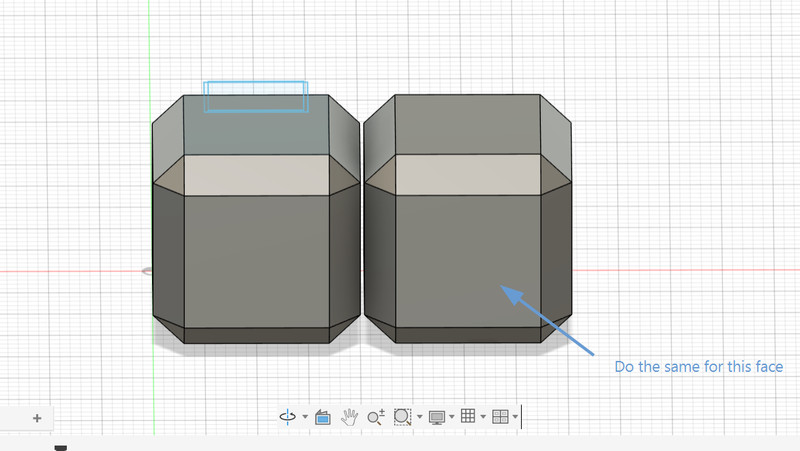
5. I followed the same process for a different face of the other cube .
6. I did the same for the bottom faces as well.

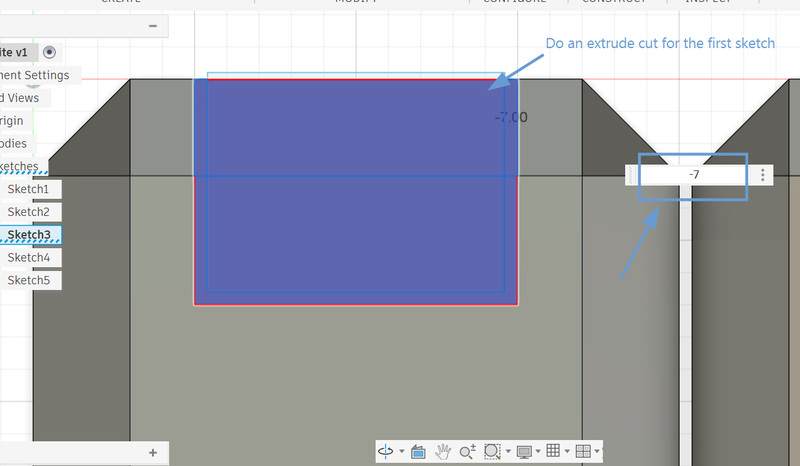
7. In the first sketch, I selected the outer and the inner rectangle, and did an extrude cut of -7.
8. I then selected the inner rectangle and the small bit that's coming out, and did an extrude cut of -6.6. I did the same (step 7 and 8) for all the other sketches as well.

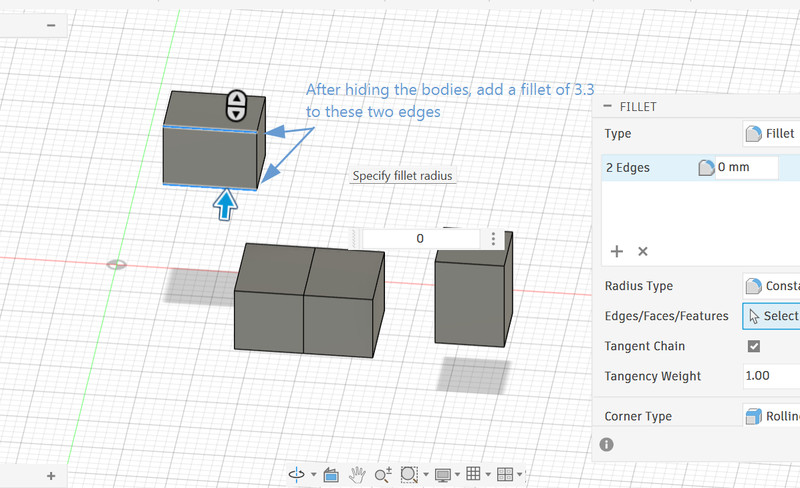
9. After hiding the bodies, I added a fillet of 3.3mm to two of the edges of the newly created hinge structures.
10. Here is how it looks so far.
11. Then I selected the left face of the hinge as the plane for my next sketch.
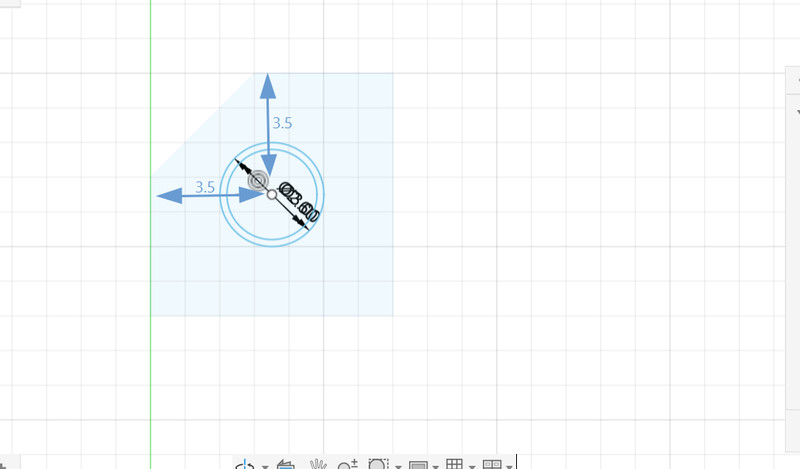
12. On that plane, I created two circles, one with a diameter of 3mm and the other 2.6mm.
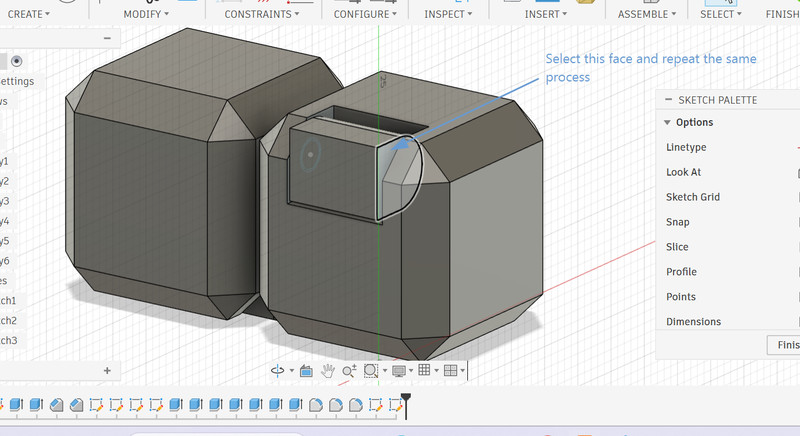
13. I selected the other face and repeated the same process.
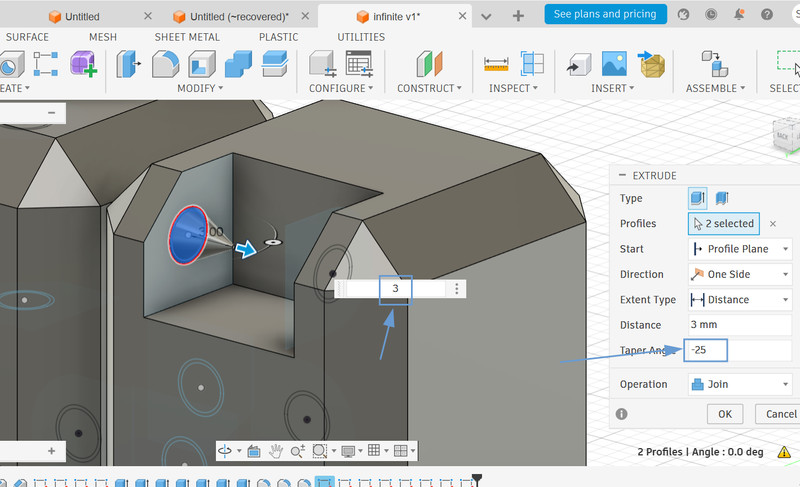
14. After doing the same for all the other sketches, I hid the structure, selected the circle and extruded it by 3mm. I also gave it a taper angle of -25mm.
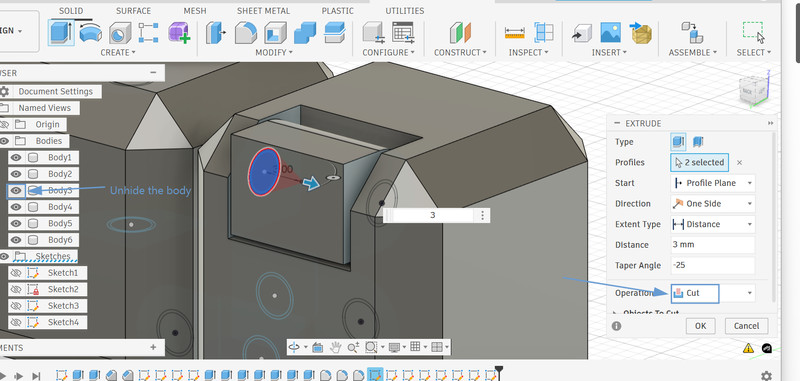
15. I then unhid the structure so that the operation would automatically switch to Cut and clicked OK.
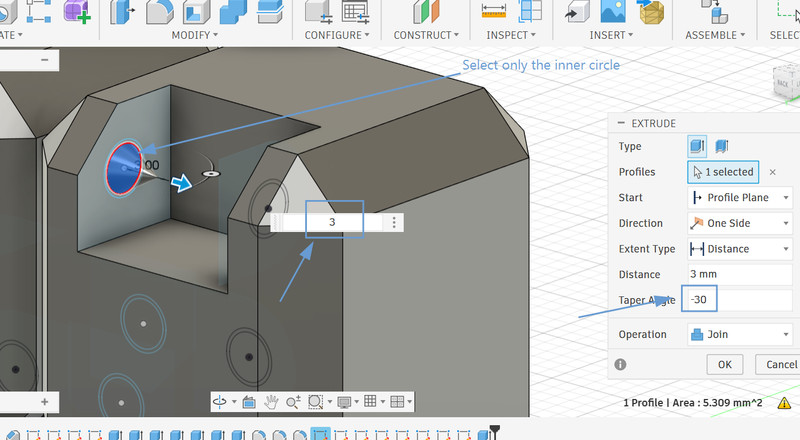
16. I hid the structure again and this time, I only selected the inner circle and extruded it by 3mm. I gave this one a taper angle of -30.
17. I repeated the same process for the other face as well. Then I did the same process for all the other sketches (starting from step 11 to step 16)
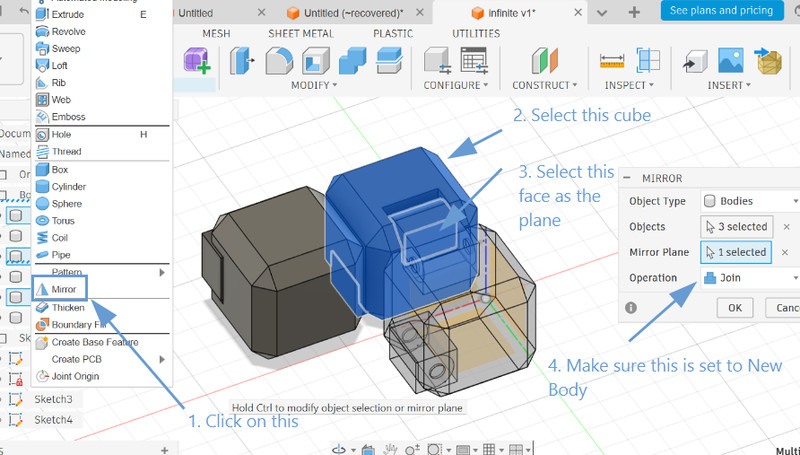
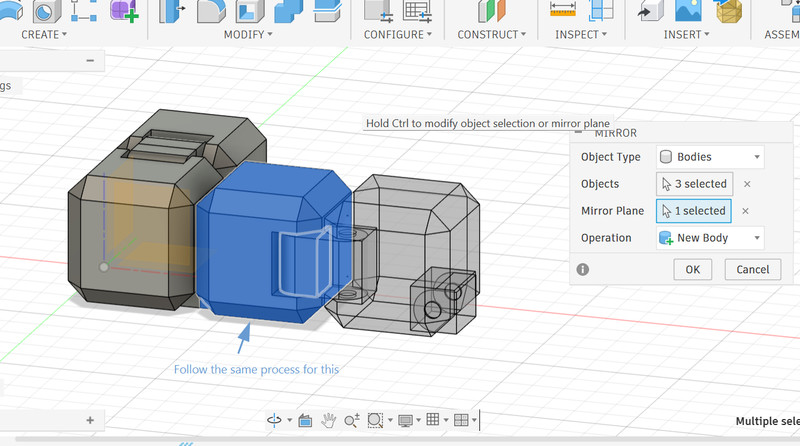
18. I followed the same process for the other cube and mirrored it this way.

19. I repeated the same process for the other face as well. Then I did the same process for all the other sketches (starting from step 11 to step 16).
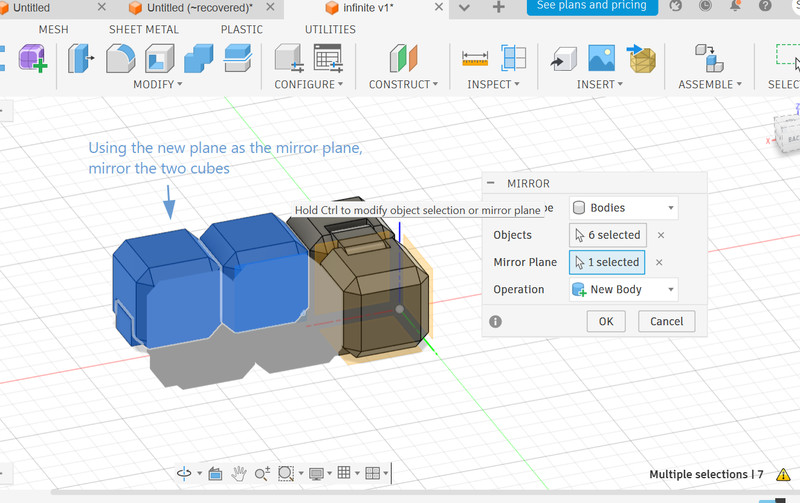
20. I clicked on Construct > Offset plane to create a mirror plane that I could use to mirror the two cubes while leaving just enough spcae between. In this case, I set the distance to 0.2mm.
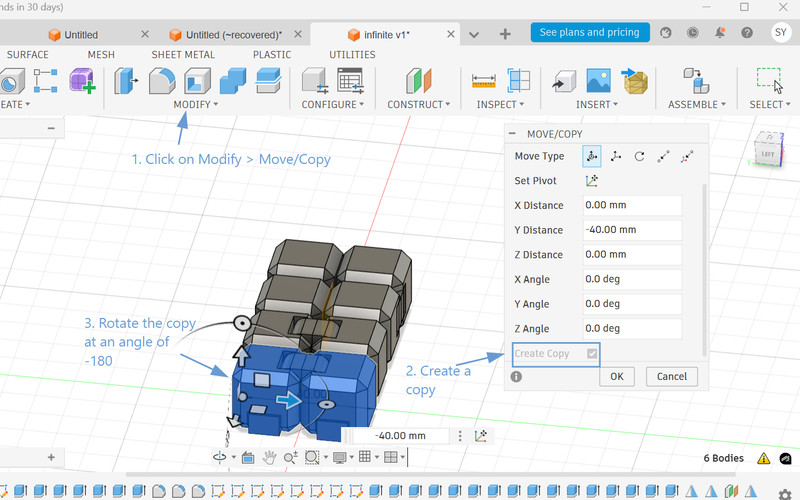
21. For the last two cubes, I made a copy of the first two ones and rotated it to an angle of -180.
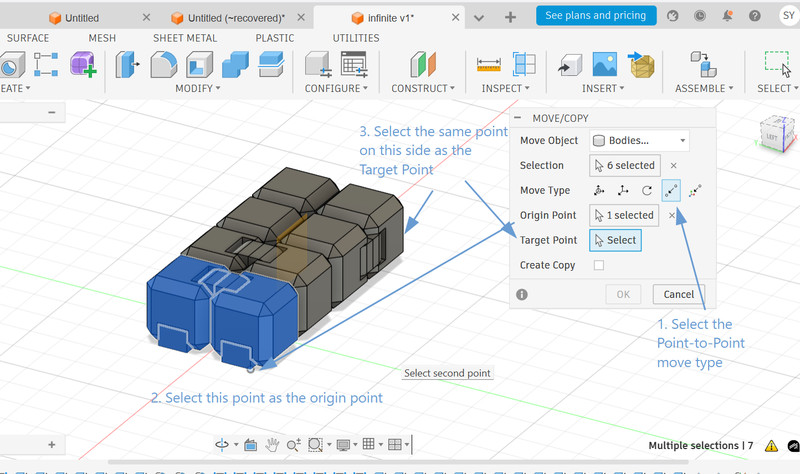
22. I changed the Move Type to Point-to-Point and selected a point on the copy as the origin point. I then selected a target point (Has to be on the same side as the origin point) on the other side to move it there.
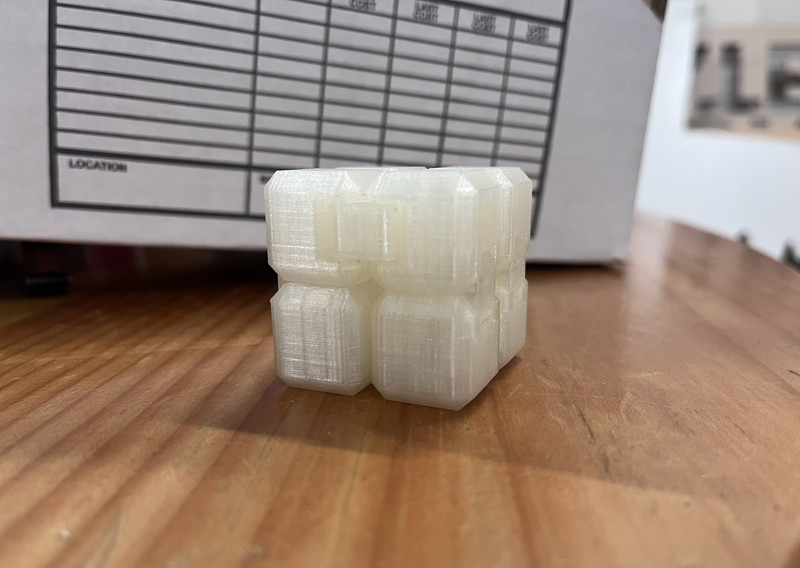
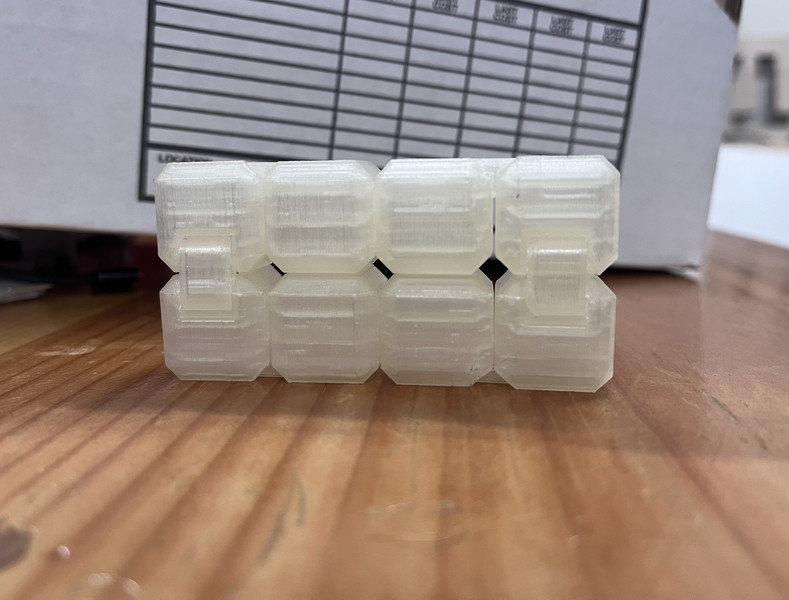
23. This is the final look!! 😁
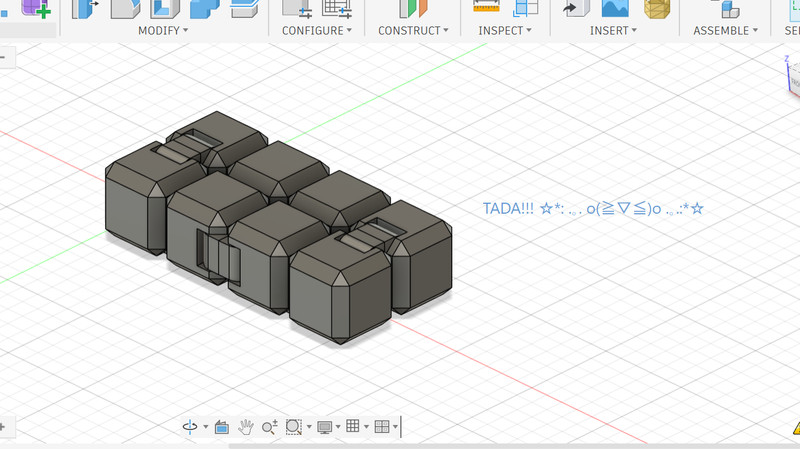
You can access the design by clicking on this link .
Using PrusaSlicer
1. I began by importing my design into PrusaSlicer.
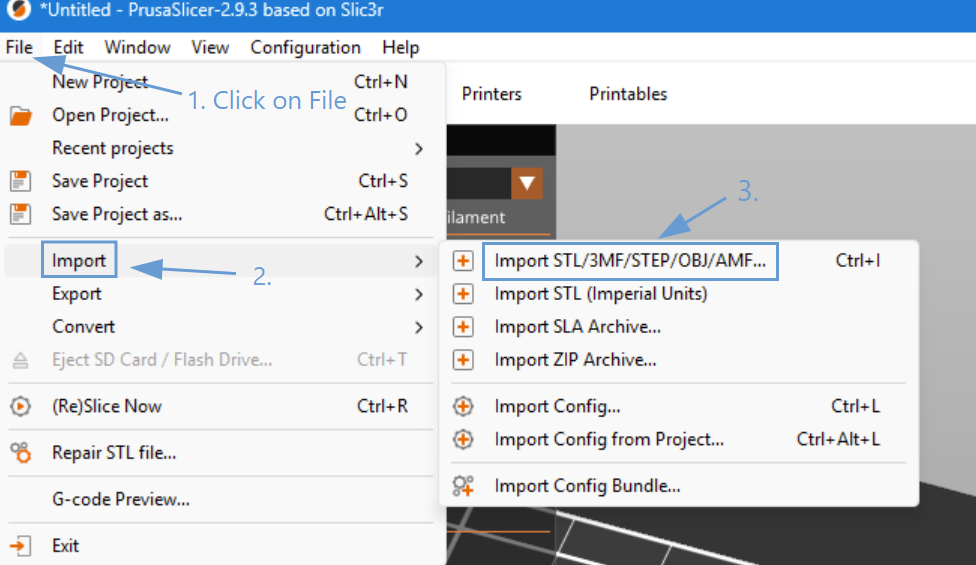
2. After importing the design, I adjusted the necessary settings and exported the file.
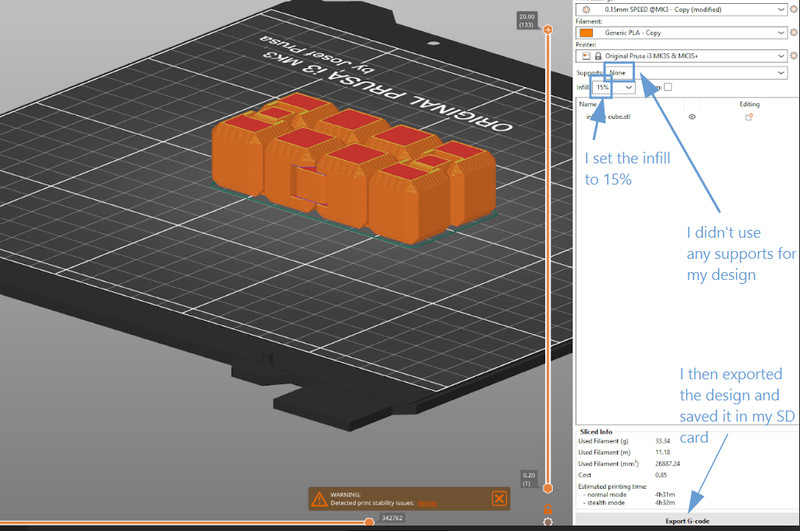
3. Printing!!! For my design, I set the print speed to 75% (It took 6 hours to print it out). Since no supports were used, the fidget was able to move freely once it was removed from the build plate.
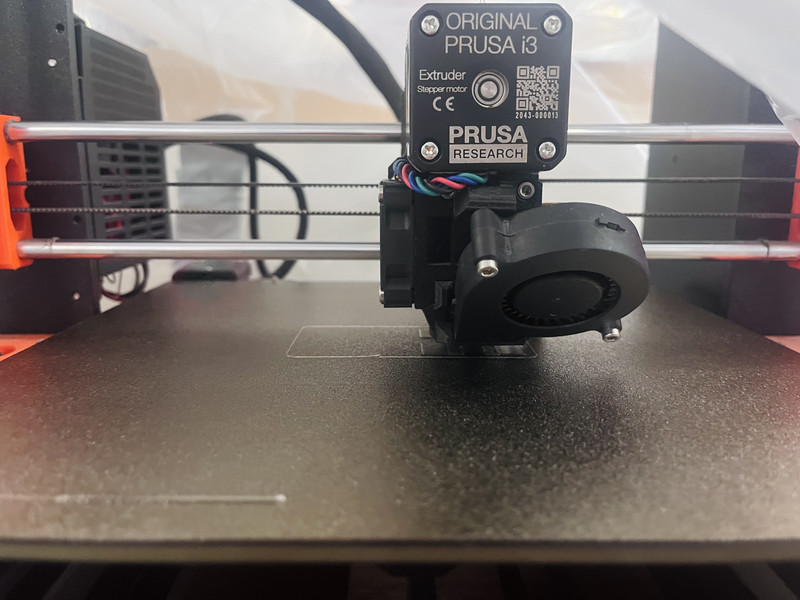
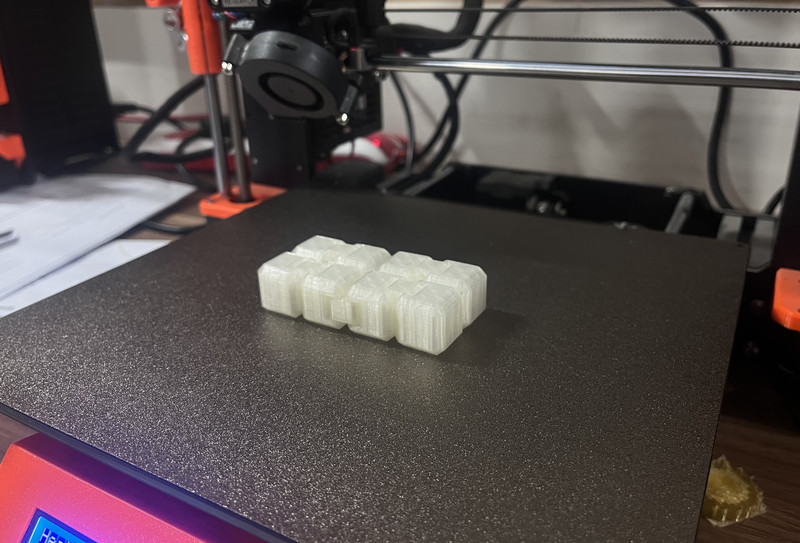
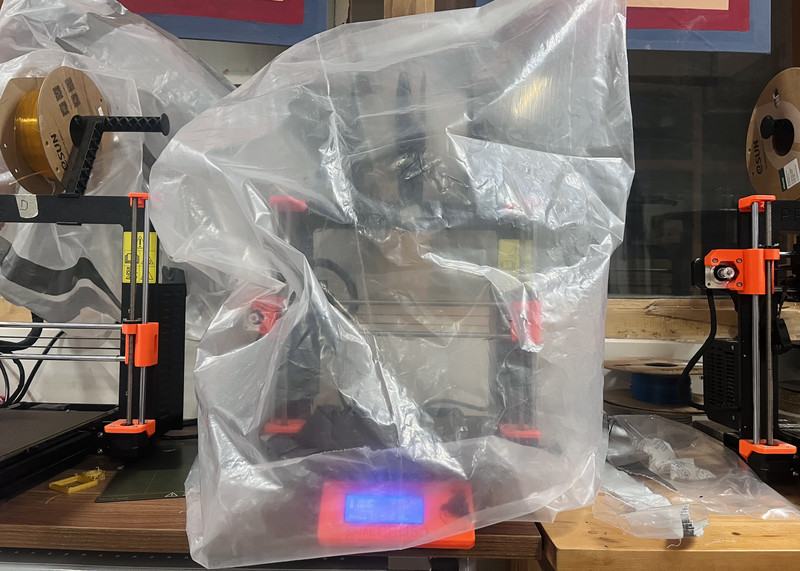
While printing, we had to use plastic sheets because the temperature in our lab was not suitable for the printer (It was too cold ☃️). When printing one of my friend's designs, the filament (We used PLA) would not stick to the plate properly and would cause the edges of the print/previous layers to lift.
Here is a short video of the infinity cube and what it can do.
I am really happy with how the design turned out 😄. Although the design process felt quite long, it was all worth it in the end (I can't bring myself to stop playing with it😅).
Now when I look at the design I feel like it would have been really hard to create this subtractively, mostly because of how it has internal joints and hinges. Moreover, subtractive manufacturing would have required multiple separate parts that would later need to be assembled, whereas additive manufacturing produces products that don't require post-print assembly. Therefore in this case, I feel like additive is the winner 💪🥳
3D Scanning
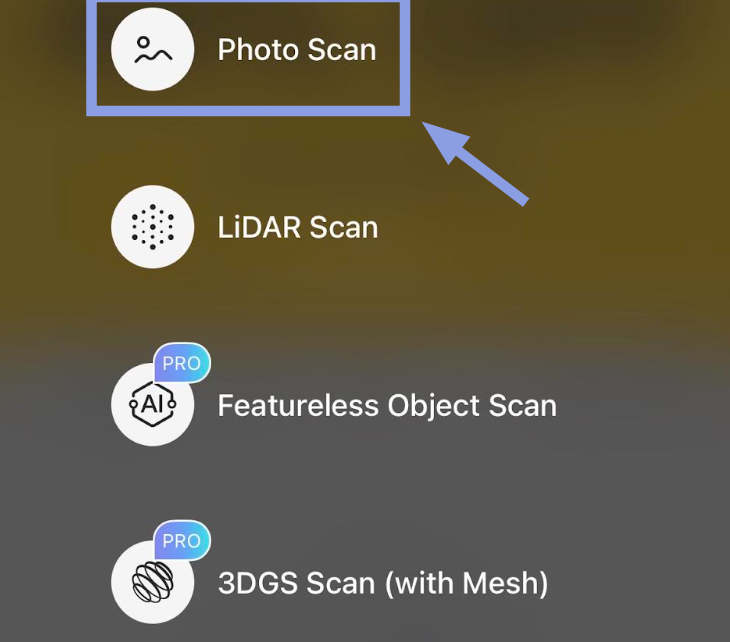
For 3D scanning, I used KIRI Engine which is a mobile application that can create 3D models of real-world objects by capturing multiple images or videos and processing them into a digital 3D mesh.
To get started, press the "+" button and click on "Photo Scan"
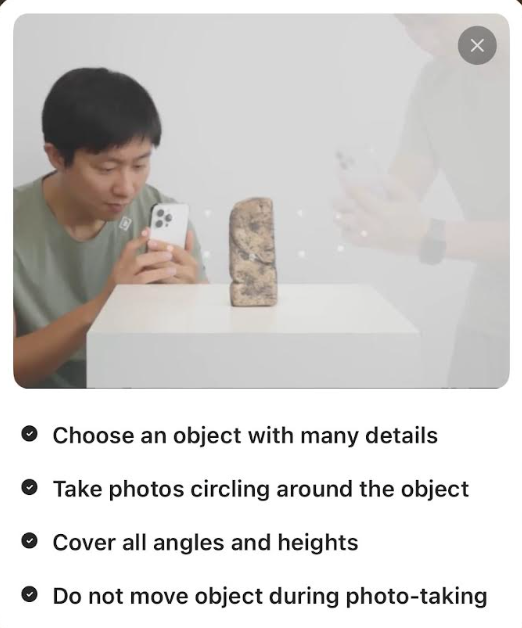
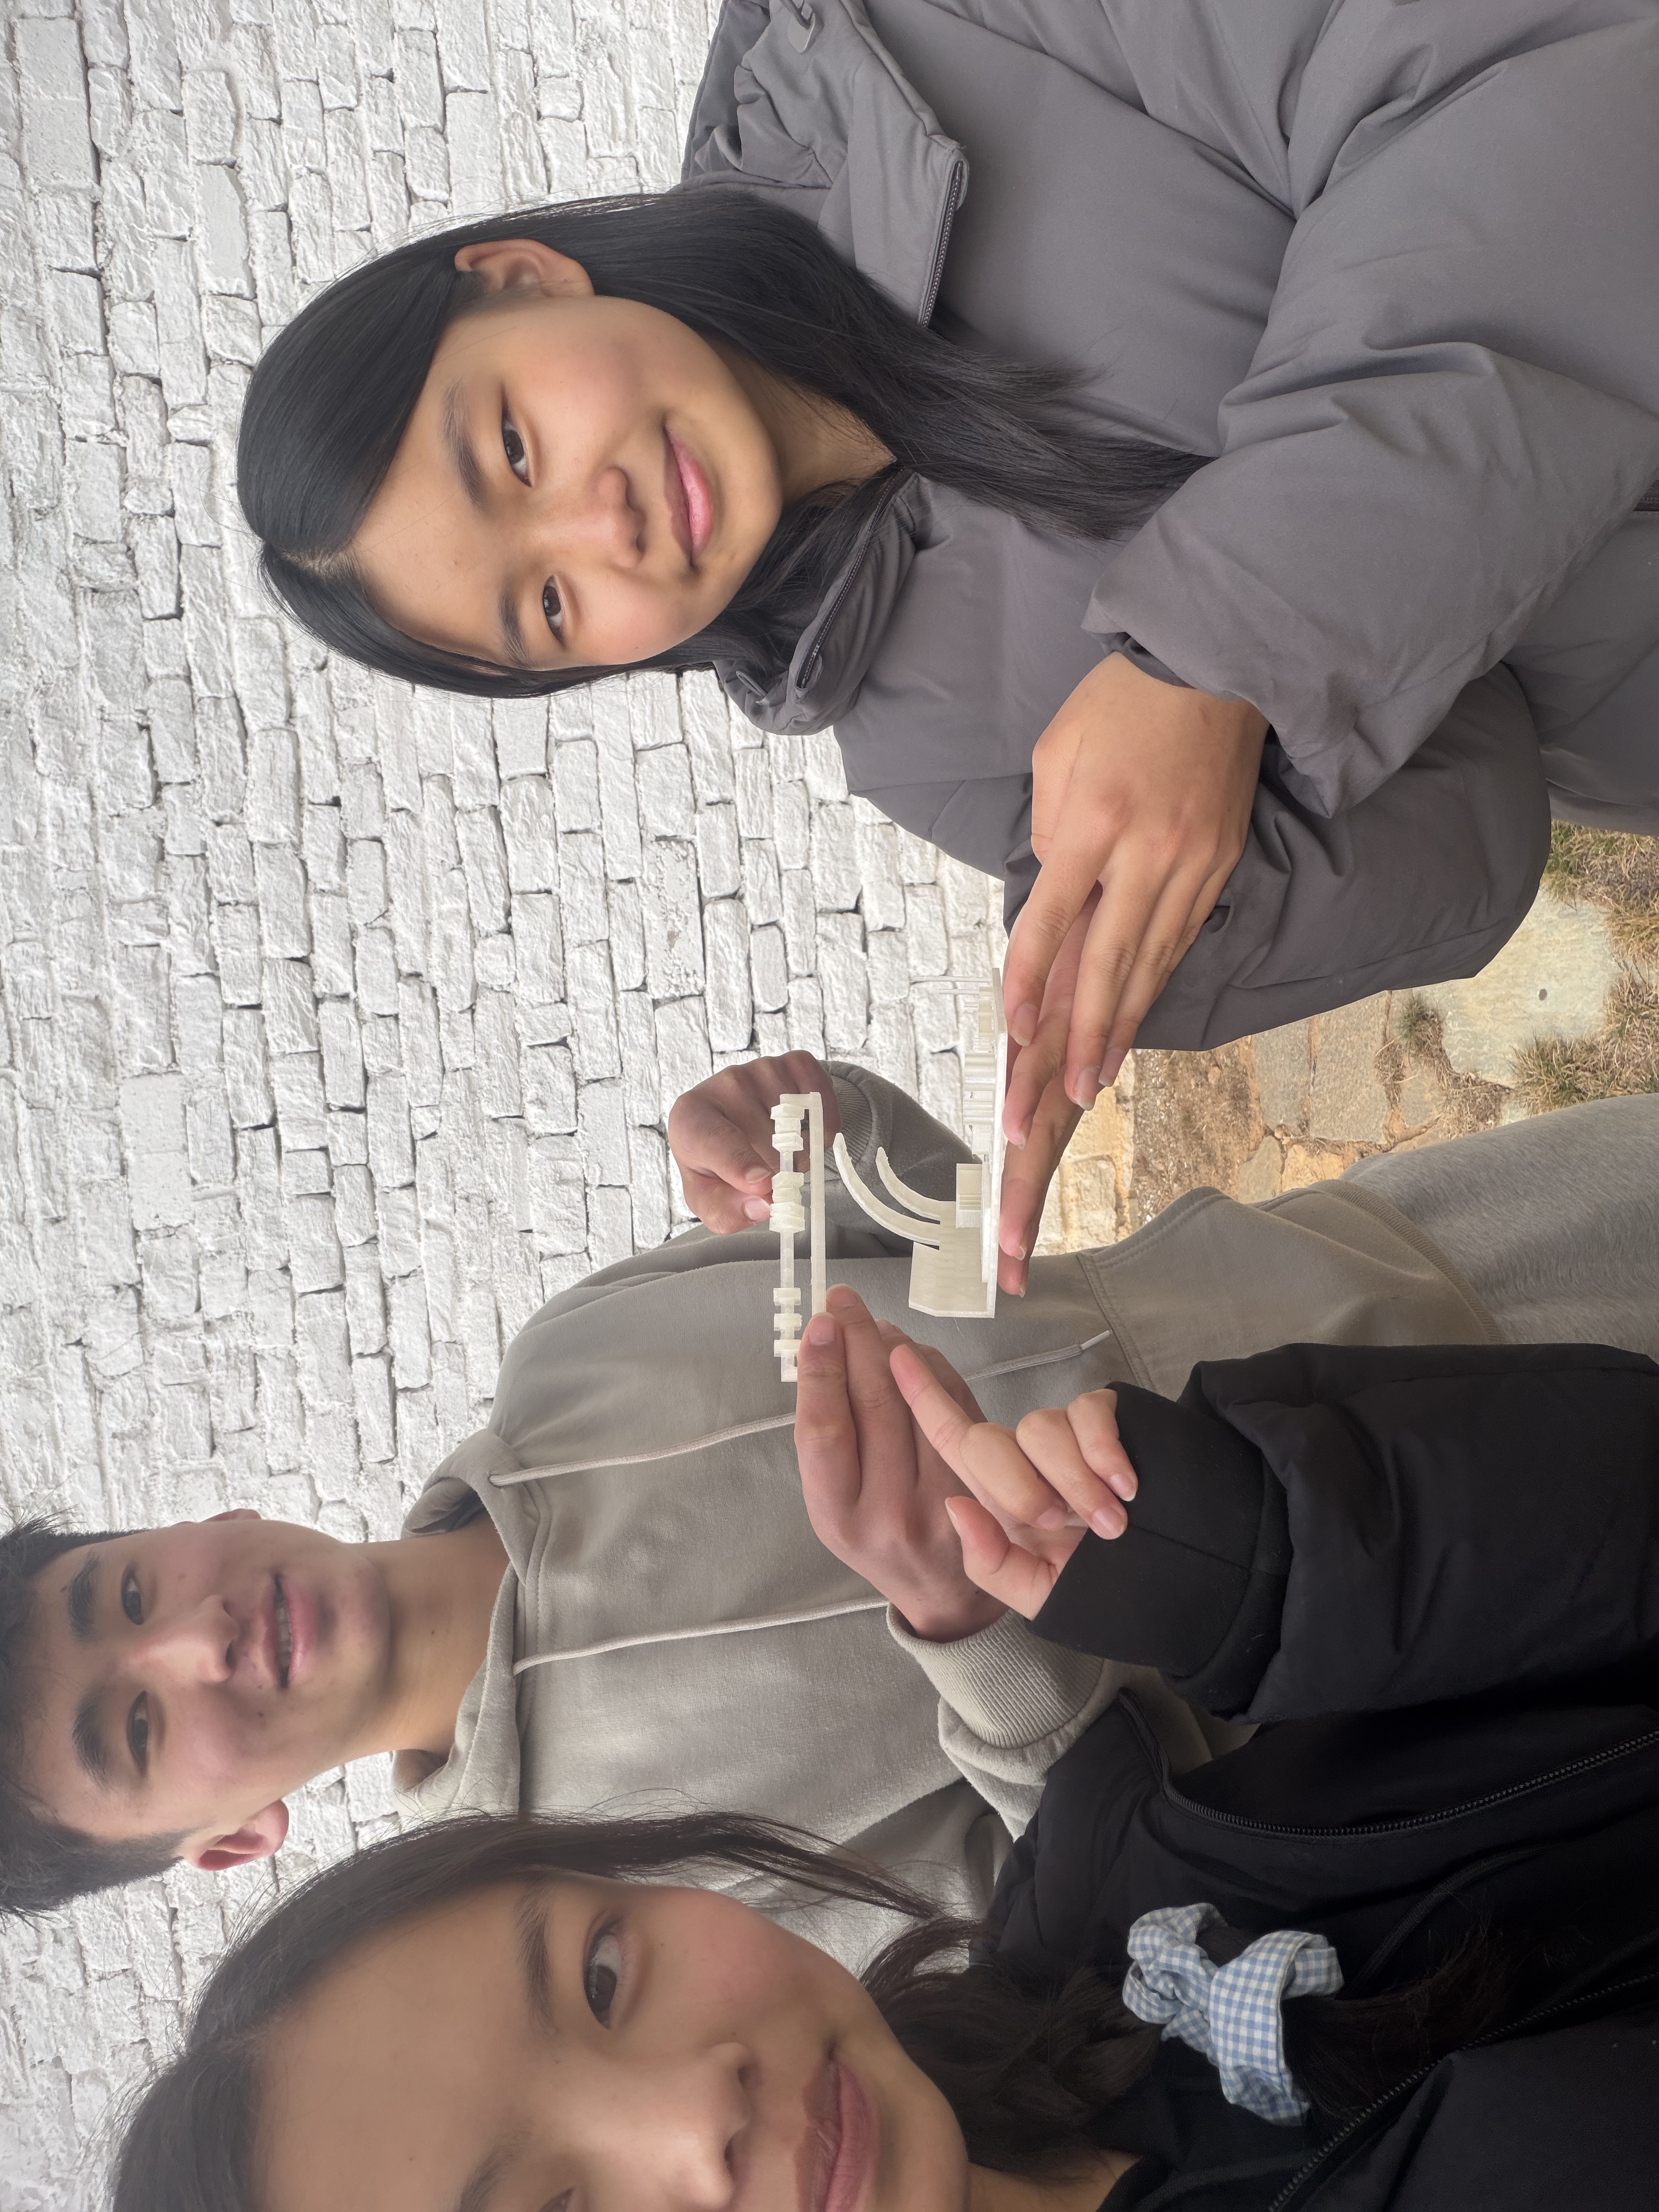
The object I chose is a sculpture that was actually made by one of the students in our school. 😃
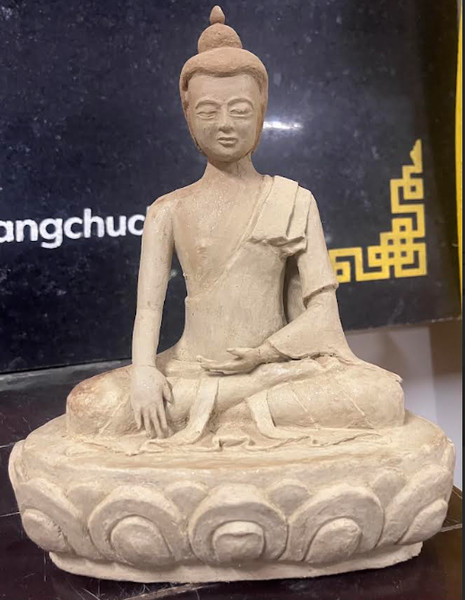
KIRI Engine allows you to take a maximum of 150 photos (also videos). In my case, I took 96 pictures and here is how it turned out.
This was my second try and I am quite happy with the results. The first try was a fail because the pictures I took were in bad lighting; this made my scan blurry and uneven.
I found KIRI Engine super simple and easy to use so I definitely recommend it 👍.
I really liked this week. Not only did I end up with a cool fidget to play with, but I also learned a lot along the way. This was my first experience with both 3D printing and 3D scanning, and I can honestly say that I enjoyed them equally.
That is all for this week.