Week 5
Check List
This week's project requirements:- Test the design rules for your 3D printer(s)
- Document your work on the group work page
- Reflect on what you learned about the characteristics of your printers on your individual page
Individual Assignment:
- Design a 3D print that could not be easily made subtractively
- Try out a 3D Scanning software and 3D scan an object
Images/Files:
- Include your original design files
- Properly compress or use a zip folder if needed
- Include hero shots of your results
Extra credit:
- 3D Print your scanned object
Group Assignment:
Learning Outcomes
- Identify the advantages and limitations of 3D printing
- Apply design methods and production processes to show your understanding of 3D printing.
- Demonstrate how scanning technology can be used to digitize object(s)
Group Work
My Contribution to the Group Work
My group downloaded a 3D printer settings tester from Thingiverse and we each ran the test on our personal 3D printers. We also ran the tester on different 3D printers we have access to in the lab. As a group we reviewed the testers and made observations about the print quality of each of our printers. It was really interesting to see how similar all of the different Bambu printers seemed to be compared to the alternate brands like Anycubic and Prusa. We also discussed as a group how the filament we used could also make a difference in the quality, as some of use used brand new filament rolls and others older filaments we had on hand.
-
My Contributions to this week:
- I performed a test print on each of my personal 3D printers. I tested on a Bambu Labs A1 and an Anycubic Kobra.
- I performed the test prints with two different brand filamets, a new roll of filament and an older roll of filament. The goal was to see if that made a difference.
- I taught Kim how to send 3D prints to the lab printers using the Bambu Studio software and the process we use in our lab.
- I shared my classroom resources with my group that I use to teach about 3D printing in my classroom. This document is available for viewing on our group page.
- I worked with Kim to determine the overhand failing points for all of our test prints. The different printers were able to get to at least 45 degrees before failing.
- I set us up a table to document all of our group work findings.
- I did a visual inspection of stringing and overhang quality for all of our test prints.
What I learned:
- Older filament when stored properly can preform successfully but still not as good as brand new filament
- Bambu labs automatically sets overhangs at 30 degrees, since all of the printers hit at least 45 degrees before failing I believe this is an intentional setting, but can be safely changed depending on the printer.
- Bambu labs overall were more successful with the test print than any of the other brands we tested.
Designing my Robot as a Ball Joint Doll
Getting Started
For this week I decided to design a ball jointed doll version of my desk robot.
Unlike my planned robot, I was going to need to figure out legs for the doll version.
I asked chatGPT to give me some suggestions based on my desk robot design.
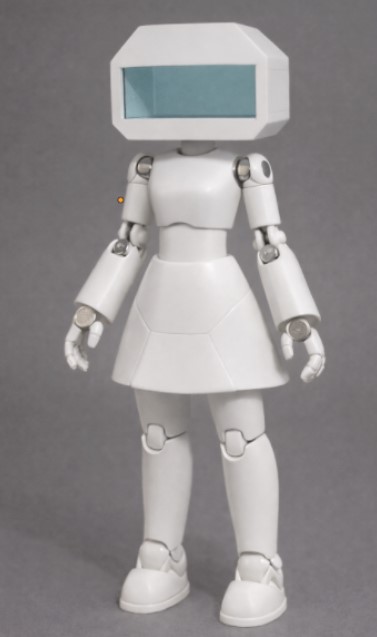
Using the image as a reference, and the model I had from week 1, I started to design the body arms and legs of my doll version.
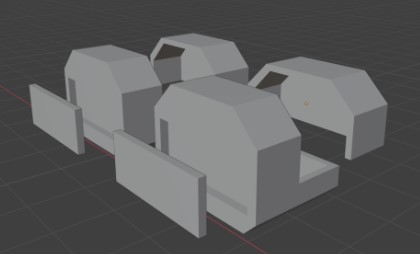
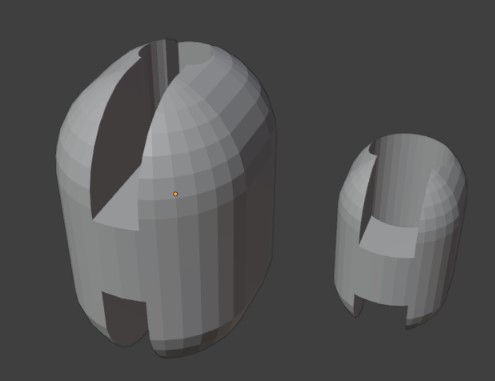
Creating the Body
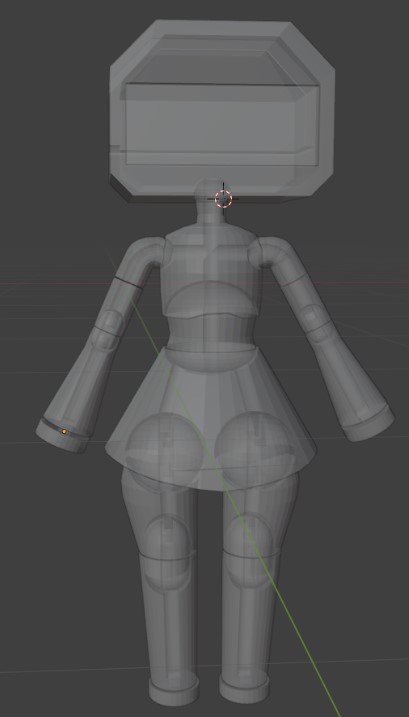
Creating the main body went quickly and easily.
I used the body form from my desk robot to act as a sort of skirt bottom and extended the shape upwards to create the torso.
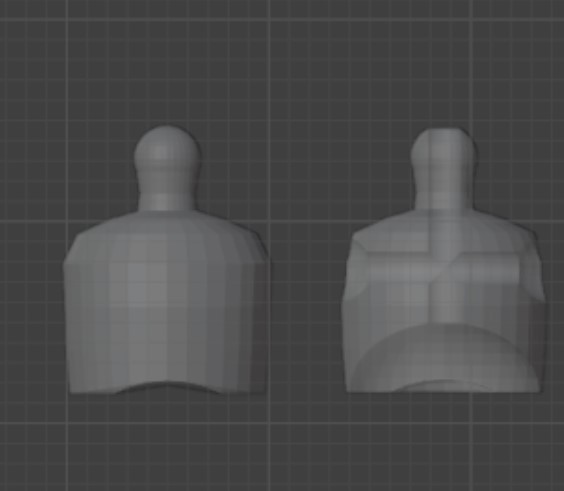
I made the torso part as two separate pieces and created a center piece so that there can be a pivot point on the doll at the stomach.
Creating the Arms and Legs
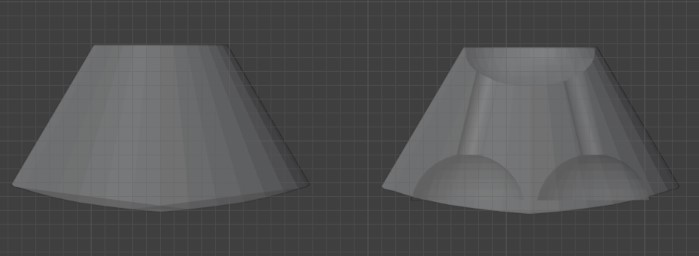
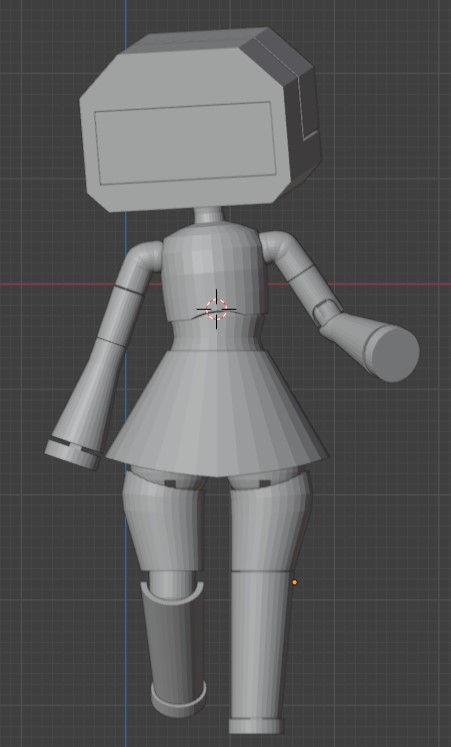
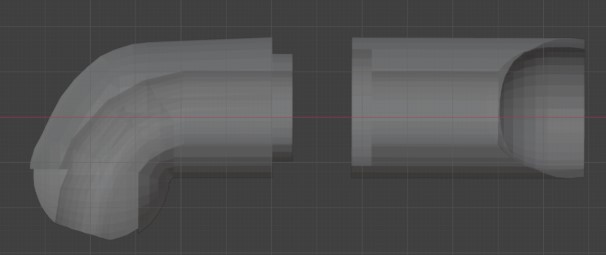
Next I worked on the basic shape of the legs and arms which were just modified, elongated cylinders.
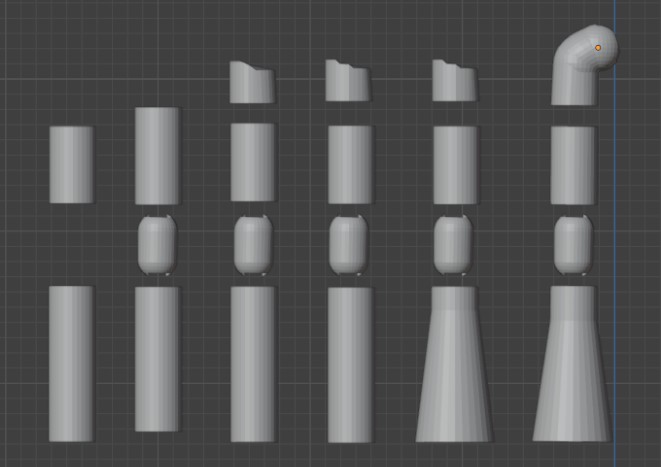
At each joint connection point, shoulder/thighs/elbows/knees, I added a sphere as a place holder. For a ball joint doll to work properly, a spherical connector point is needed at these locations to allow for smooth movement of the joints.
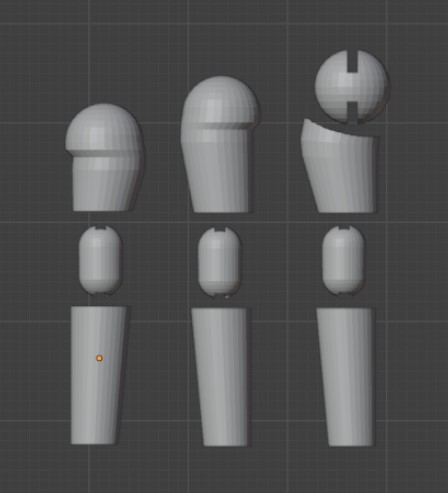
While trying to design the shoulder joint, I realized I couldn’t remember what the standard joint looks like on this type of doll. I grabbed one of the few I keep on my desk and examined the shape. I created about 5 different shoulder connector points, tweaking each one a bit at a time, until I found a design I was happy with.
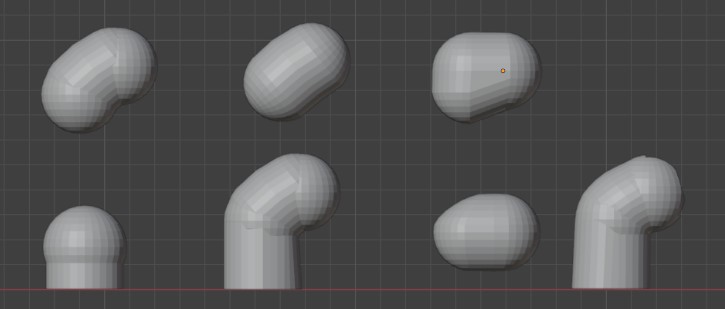
With each design I would test the rotation in the shoulder socket to see how the movement looks and where the stop points were. It took a few iterations before I had a design that I liked the look of, and also worked.
Creating the Hands and Feet
For the hands and feet, I wanted to make something simple that looks clean and neat against the arm and leg ends.
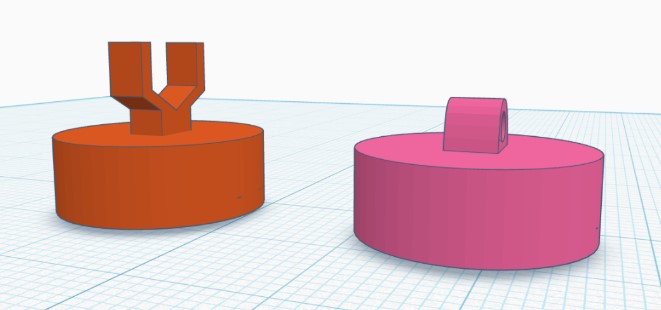
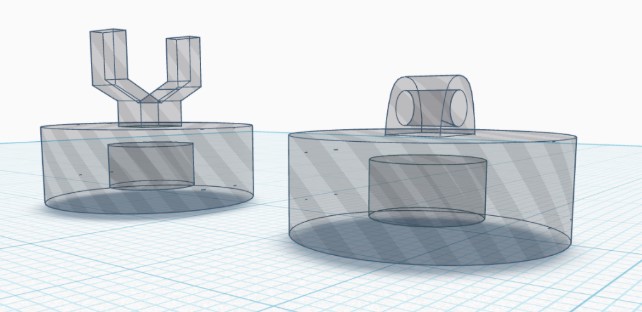
My plan was a simple cylinder that I could embed a magnet into with a small loop attachment.
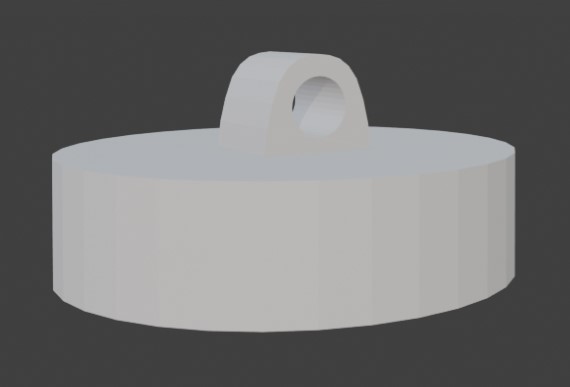
Since the hands and feet are crucial for the stringing process, I had to make sure the loop fit cleanly inside the arm and leg channels!
This allows the hand base to look neat and tidy on the printed doll. With the hidden magnets, the hand also has the hidden ability to have robot hand and feet attachments via magnets, the ability to hold metal objects in the hands, and additional foot support on metal.
3D Printing my Ball Joint Doll Robot
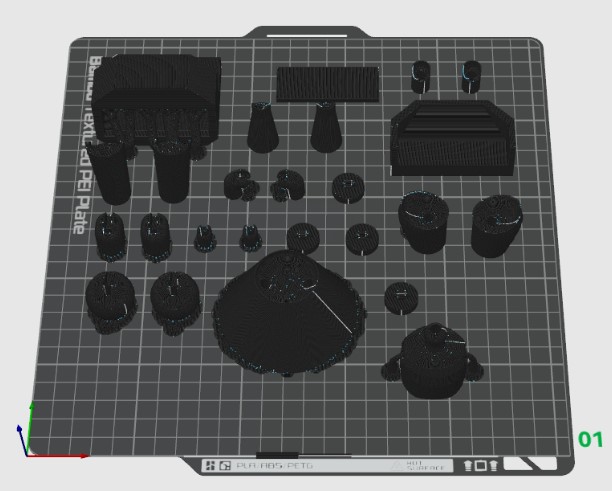
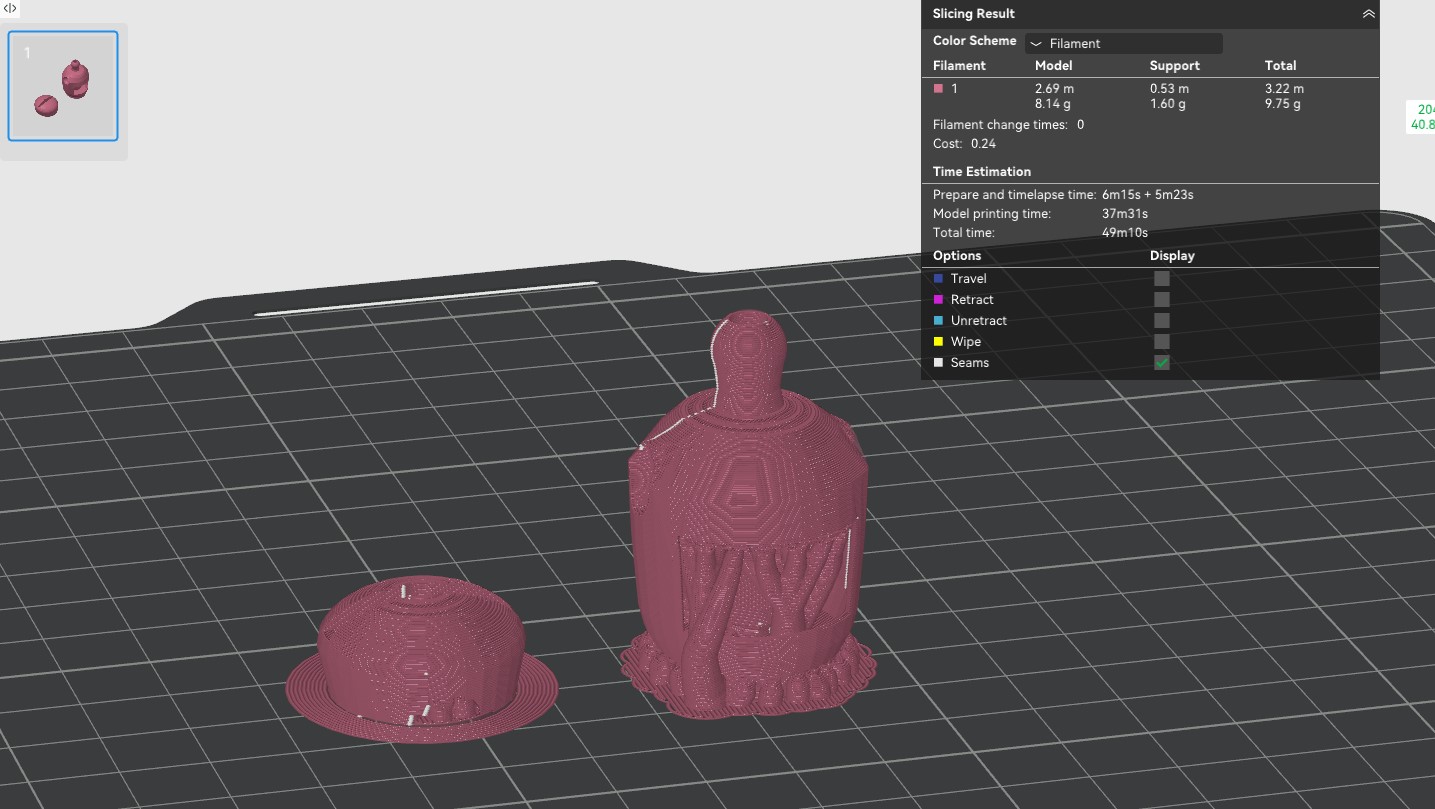
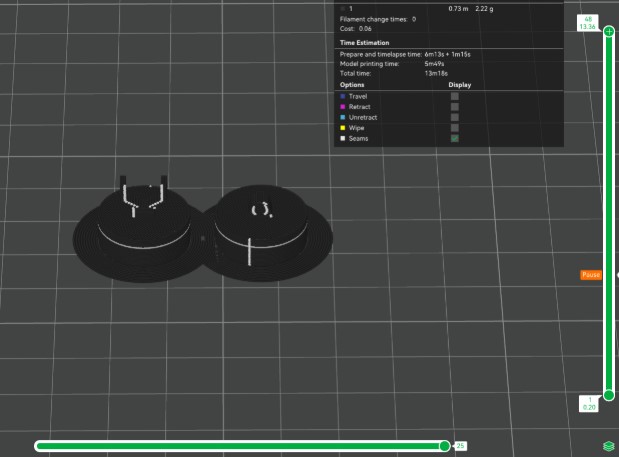
The process to 3D print my doll parts was very simple. I loaded each body part file into the Bambu Slicer by pressing the Add cube. I oriented all the parts into thier printing position by manually placing the parts to fit the bed. I could have also used the auto orient and arrange all objects features, but I wanted to make sure the orientation for each part was exactly how I wanted it to be. For most of the parts, that was their largest flat part down. For the small thin parts, like the the upper arms, I had to orient them with their flatest part down. This meant, for some of the pieces, they were placed upside down.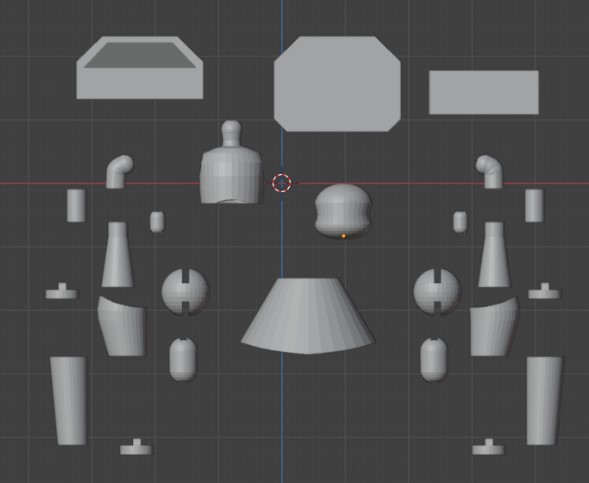
Version 2 Updates
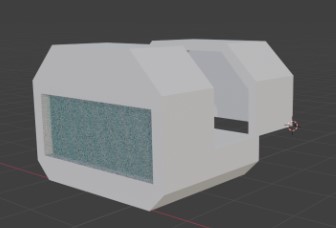
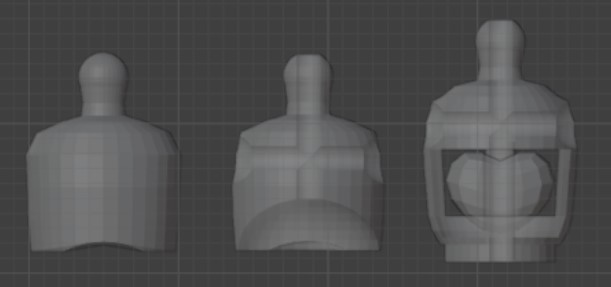
Modifying the Chest
I wasn’t sure if the channels in the body would be enough to count for this week's individual task.
I showed my completed print to two of my labs Fab instructors, David Taylor and Garrett Nelson, and they both said maybe but weren’t sure.
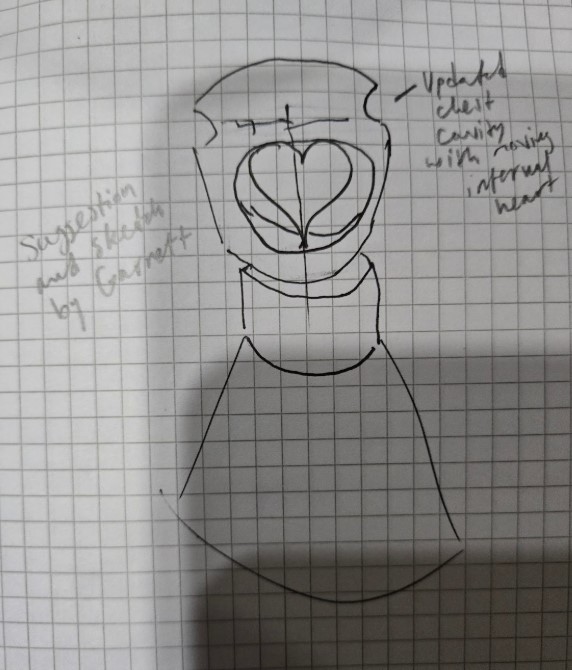
One of my instructors, Garrett, suggested I create a more advanced part for my robot body.
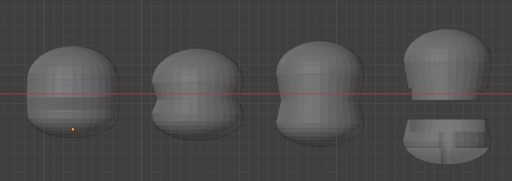
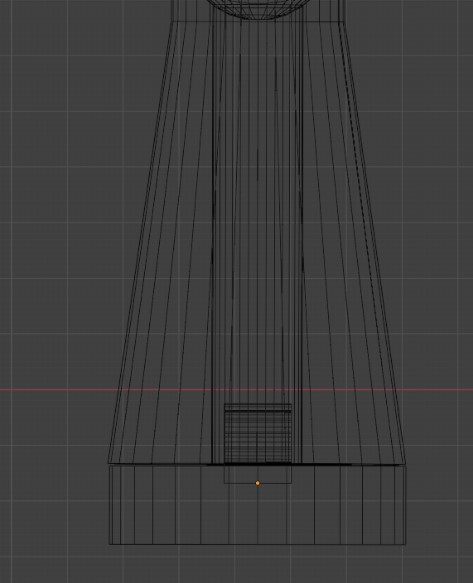
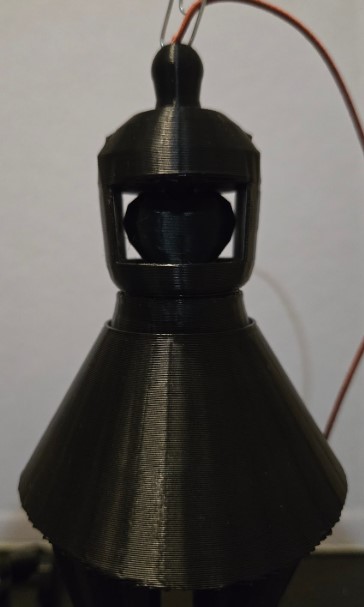
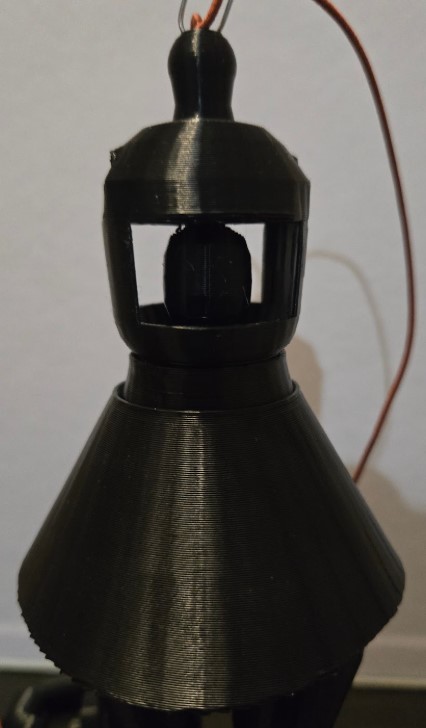
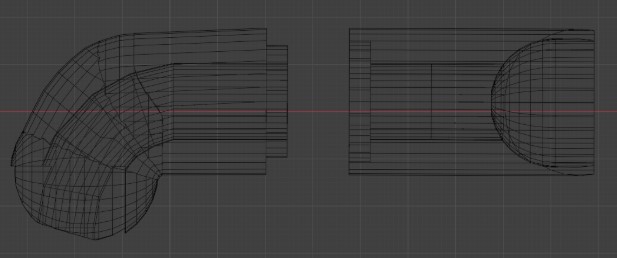
We sat down and brainstormed some ideas and came up with a movable heart inside the chest cavity.
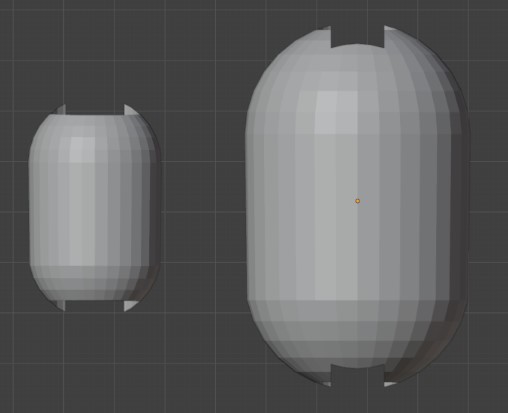
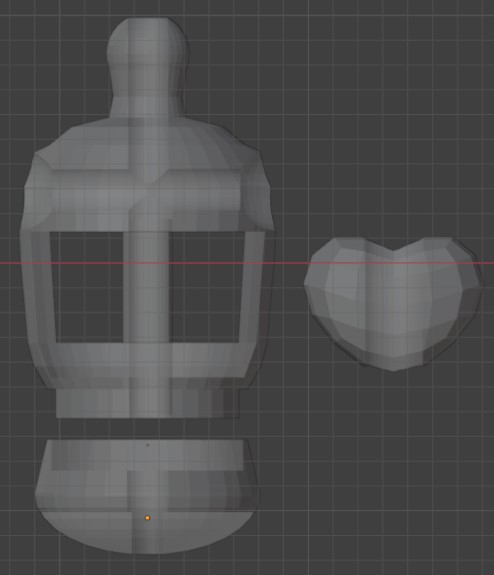
That evening, I went back to my blender file and began working on creating the new chest piece. Since the heart would need more space, I had to extend the chest piece down and shorten the middle piece.
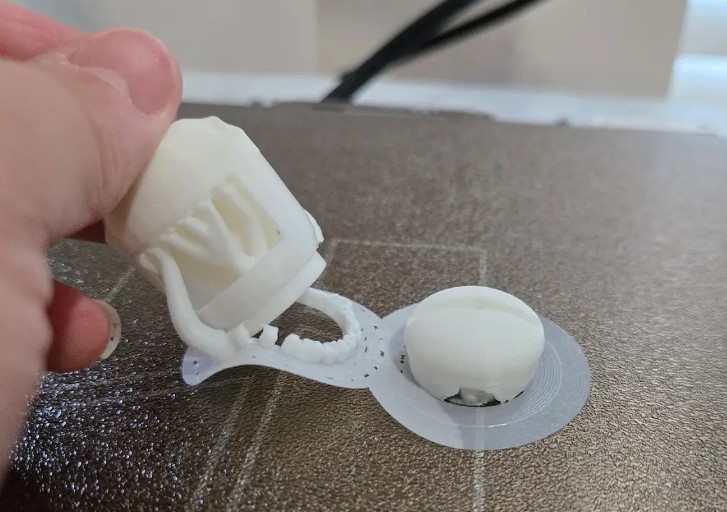
I printed the new chest piece on my Bambu Studio using the same Bambu Slicer settings as listed above. I used tree and brim supports to stability of the pieces and to help with the overhangs.
After printing, I removed the supports with the help of needle nose pliers and snippers. I removed the brim and outter tree supports with my fingers and carefully used the tools to remove the smaller inside supports.
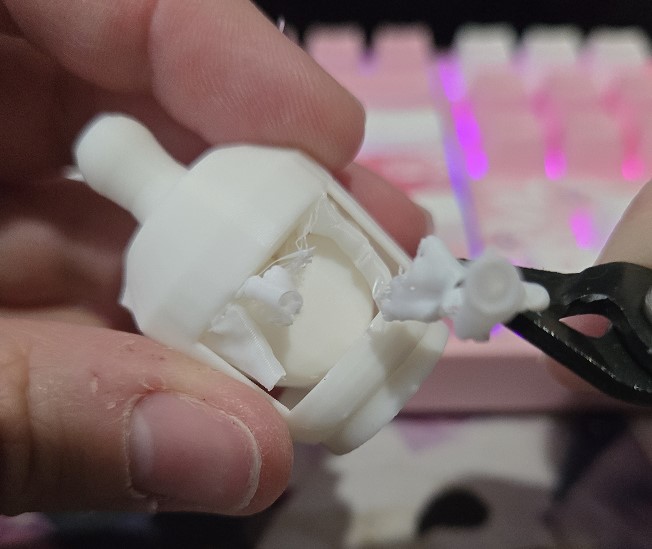
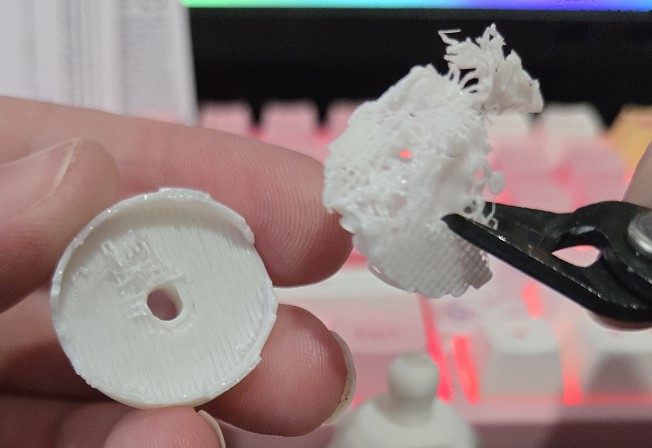
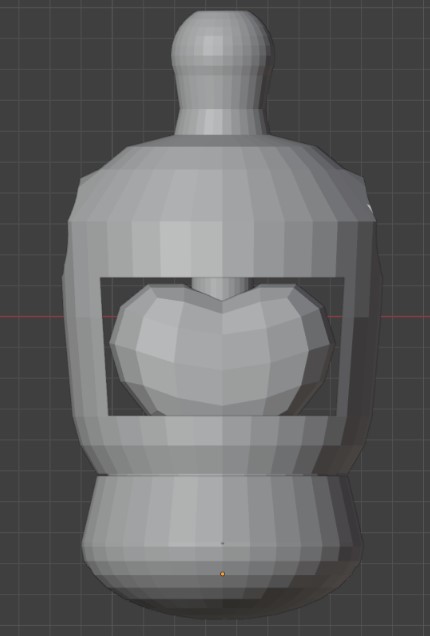
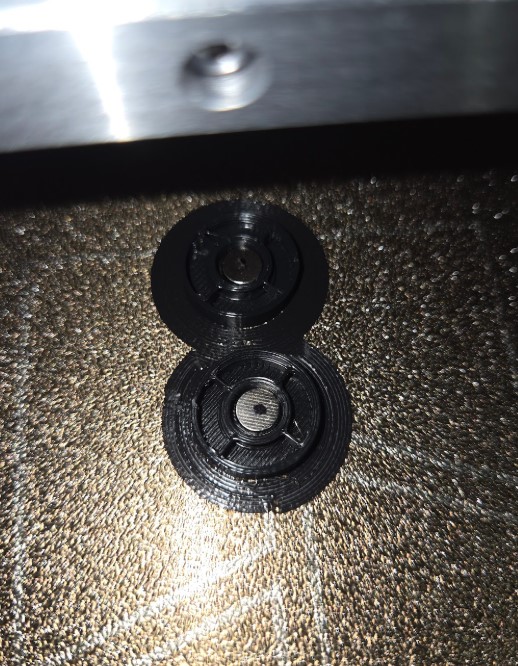
Once the bulk of the supports were removed, I gently twisted the heart piece back and forth to break off any remaining supports. The more I twisted the heart piece, the more it loosened and eventually it was able to freely move inside the chest.
Here you can see the cleaned up heart chest piece added to my doll body.
Updating the arms
While I was back in my file, I also updated the part of the arm where the shoulder meets the upper arm. On the 3D printed model, that piece being two flats against each other tends to slip around. So in version two I added a peg and slot to those two pieces.
This allows them to still have the rotation but without the slipping.
Version 3 Updates
Embedding Magnets in the Hands and Feet
I had a chance to work on updating my hands with the holes for the magnets to be inserted.
Since I was not at my home computer, I did not have access to my full blender file but I did have the basic hand piece in my TinkerCAD account.
I had to make some minor modifications to the file since I had made updates in blender, but it was helpful since I had the measurements I needed.
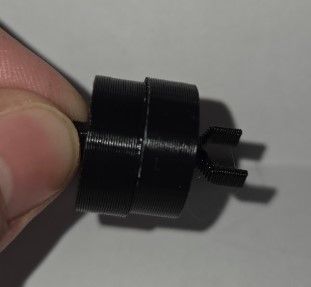
I created a hole cavity in the hand piece to fit the magnet and slightly increased the cylinder part of the hand to adjust for the height of the magnet hole cavity.
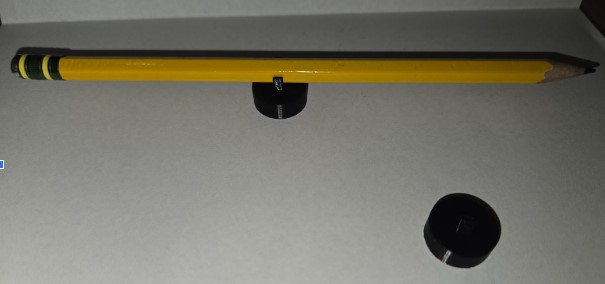
I then created the first robot hand attachment which was a simple robot claw measured with a cutout to be able to fit around a standard pencil.
For embedding the magnets into the print, I had to add a pause at layer 16 in Bambu Studio. Something important to note is that Bambu Studio performs the pause at the START of the layer, not the end. Technically layer 16 is where the printer will cover the hole, but since the pause is at the start I can drop in the magnets and when the print continues it will cover the magnet.

One annoyance I had while doing the magnets, is that I kept getting my polarity mixed once I dropped it into the paused print. I kept having to take them out and recheck that I have them in the print the correct way. After a few annoying attempts, I had the bright idea to grab a sharpie and put a dot to represent facing up for each magnet.
I am a bit disappointed in the strength of the magnets after they were embedded in the print. There are only 3 layers on each print covering the magnets, so a total of 6 layers in between the magnets. On their own the magnets are very strong and even a little difficult to separate from the stack, but once they were in the prints the magnetic field felt really weak and while it does the hand attachment it doesn't take any force to knock it off.

3D Scanning
3D Scanning and Printing
For 3D scanning, I tried to use the PolyCAM scanner app on my Samsung Galaxy S24 phone.
I was able to download the app and create a free account which should have given me a few free scans, but the app would crash every time I tried to exit the sign up for a plan pop up page.
I tried a few times with no luck. One of my group mates offered to let me use their phone to take my scan.
I accepted, but in the end did not end up using their phone.
While waiting for my turn to use their phone I downloaded a couple more apps from the app store to test out.
The first one I downloaded ended up being a bit misleading in the name and description, because it ended up being a 360 degree video recorder and not a 3D scanner like the description said.
It is possible that the app did have 3D scanning functionality, but it wanted me to set up a paid account for most of the features and the only free feature gave me 3 scans to create a “360 video and model.” The video part did sort of work, but I was never able to get a model from that app.
I looked through this week's page for app suggestions and researched the ones listed and settled on trying Kiri next.
Kiri was an open source 3D scanning app and according to the site was free for unlimited 3D scans.
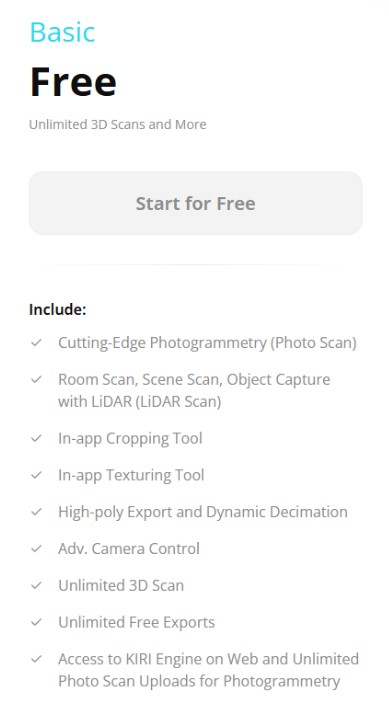
I went into the app expecting a pop up to buy a subscription like all the rest, and there was one but it also did give a free unlimited 3D scan option. The free scan option had some limitations on quality settings and features, but my first scan with the app worked great!
I found a little paper crane on the desk that a student left behind and I used that for my 3D scanned object.
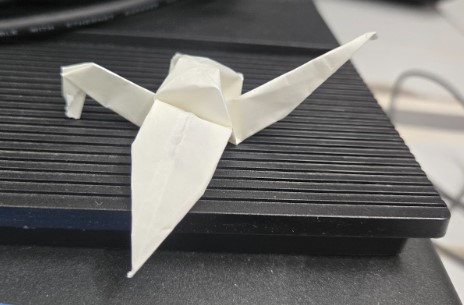
I set the paper crane on the center of a clean table and walked around it with my phone to capture the scan. Their was no additional or special lighting setup aside from the normal overhead classroom lights. I chose the auto capture option which automatically takes photos as you walk around the object.

Thier is a nice little haptic feedback every time a photo is taken which is a nice touch. In this mode it looks like you can take up to 150 photos but I took about 40 for my crane.
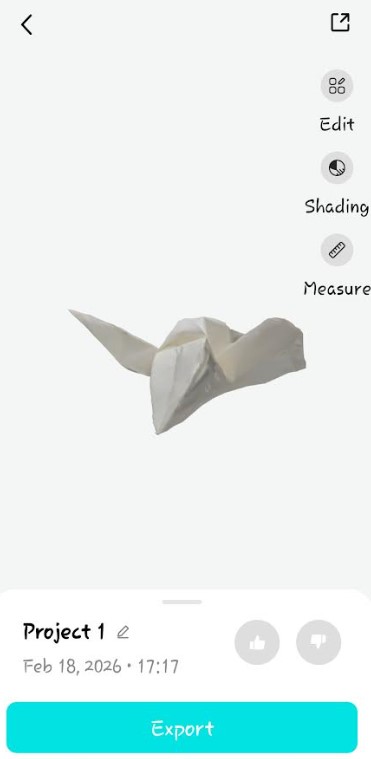
I chose the default settings for the conversion tool in the app, partly because some of the other options are paid, and partly because I wanted to see how good the default options would be. Within a few minutes the scan was turned into a decently accurate 3D model.
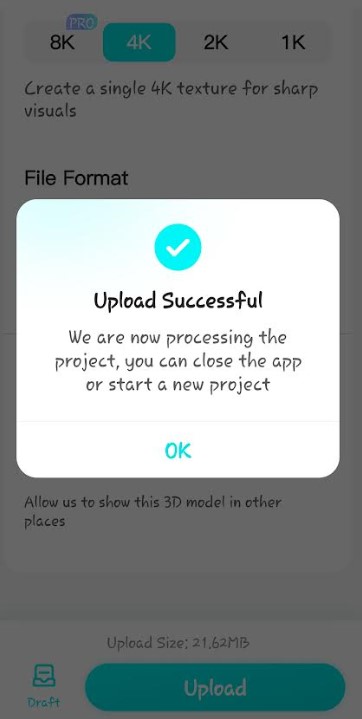
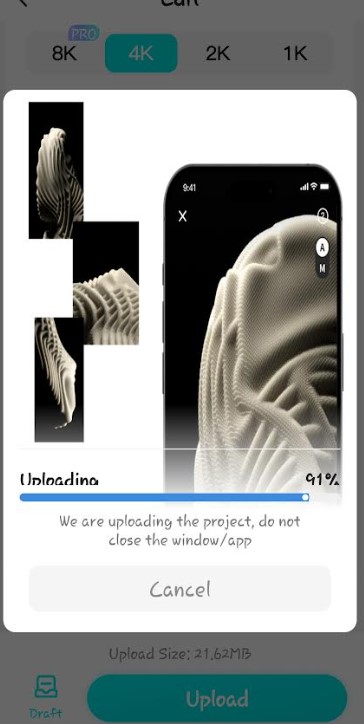
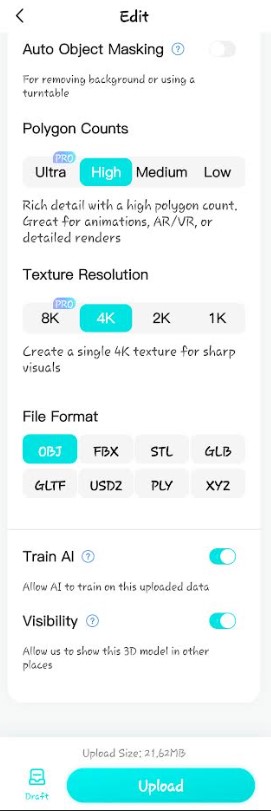
On the next screen you can do some basic editing of the model like cropping and resizing, you can measure different parts of the model, and you can orbit around the model to inspect it. I chose to keep the model as is and export it as an STL file.
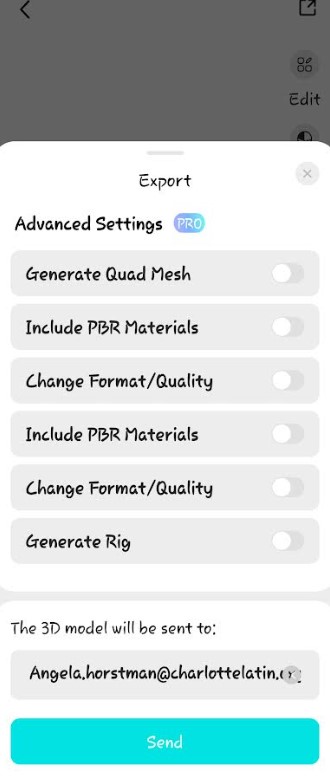
It sent me the file download link via email within about 2 minutes and I was able to bring the file directly into Bambu studio and send it to the printer.
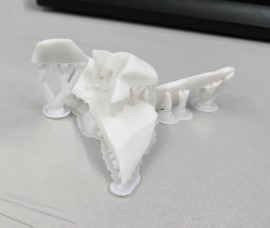
It did have some parts that were thin and ended up missing in the prints, but overall I was happy with the app and print considering I did not do additional work to fix the mesh.
-
Limitations of 3D scanning and How to overcome them:
- Thin features were partially lost
- Some areas of the surface appeared warped
- Limited resolution wwhen using the free version of the app
To overcome these limitations, I could try some of the following options. - I could take more photos from different angles and heights to try to capture more of the features.
- I could use a turntable to ensure even coverage of all angles.
- I could try using a high-contrast background to help differentiate my object from the surroundings.
- I could try to add or use better lighting to reduce shadows.
- I could use Meshmixer to manually repair the mesh.
Trying AI Model Generators
For this activity, I tested three different AI to 3D model services to see how well they generate meshes for 3D printing. While evaluating the three services, I looked at the cost of generating the models, the cost of exporting/downloading the model, and the quality of the model.I used the same prompt for all three services.
Prompt:
"Can you create me an anthropomorphic wizard cat in purples and pinks. The cat should be holding a magic book in one hand and casting a spell in the other.""
Tripo AI

Review:
The design came out cute, not quite what I had in mind but close. However, I couldn't figure out how to download the model to try printing it. Every option and file type I tried to use brought me to a payment page to upgrade my plan from free which I wasn't planning to do while just trying the services.
Cost Breakdown:
The cheapest plan, with a new subscriber offer, starts at $11.94/month and you receive 3000 tokens. Normally this plan will cost $19.99/month. This makes each token approximately .004 cents each with the discount or .007 cents without the discount. The higher plans offer more credits, and once you are a subscriber you can also buy additional credits.
Meshy AI

Review:
The overall look was alot different than the Tripo model. I found it really interesting how detailed and realistic this generated cat model was compared to the other two. The other two softwares generated more cartoony files in comparison. When I went to download, I tried all of the export options and they were all blocked behind a higher paid tier. After a little bit of research and finally hovering over all the buttons, I realized that the model was generated with Meshy 6. Meshy 6, is not a part of the free plan export options. It cost me 10 tokens to regenerate the model using Meshy 4 to allow for exporting.
In my opinion, there was a very large difference between the model generated with Meshy 6 and Meshy 4.
Cost Breakdown:
Meshy AI offers a free plan which gives you 100, non accumulating, credits per month. The cheapest plan, with a new subscriber offer for the first month, starts at $15.17/month and you receive 1000 non accumulating tokens. Normally this plan will cost $20.00/month. This makes each token approximately .015 cents each with the discount or .02 cents without the discount. They offer a higher plan with more credits meant for teams and billed by seat/person per month.
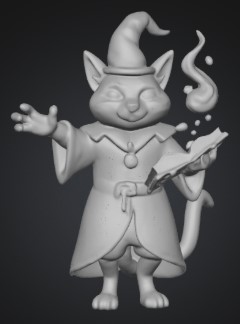
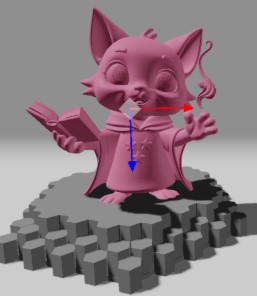
MakerLab: PrintMon

Review:
The last service I tested was the MakerWorld PrintMon tool. This tool creates a good, cute, image and it was closer to what I had imagined and prompted compared to Tripo. It created a cute smoke/magic effect coming from the cat hand, which would not actually work as a printable object because it is floating unattached from the model. I liked that I was also able to make basic edits right in the software, such as adding a base and moving and scaling the model.
It was also really easy to download the model for printing. When downloading it gives you the OBJ, the 3MF, and a painting reference image which I found as a nice touch.
Cost Breakdown:
Makerlab offers a free plan which gives you 20 credits per month, and you can earn additional credits through interacting with MakerWorld and Bambu. According to the MakerReward program information, the approximate value of 100 MakerReward Points is equal to an $8.20 Bambu Lab Store gift card. You can convert MakerReward Points to MakerLab credits at a rate of 1 coin = 10 credits. This makes each Reward Point approximately $0.082 cents and each credit approximately .008 cents.
Week 5 Files
In my repo is a zip folder containing files for my week 5.