Computer Aided Design
This week we were tasked with trying and familiarizing ourselves with different 2D and 3D software.
To really maximize my time and try as many software as possible, I decided to "speed date" different softwares by setting a timer for about 15 minutes and dedicated that time, uninterrupted, with the software.
If I struggled with the software in that time frame, I would find a tutorial to follow and try again.
This method allowed me to try a bunch of different software on various devices, and helped me find ones I really liked, and some I didn't.
Week 2
Check List
This week's project requirements:- Model (raster, vector, 2D, 3D, render, animate, simulate, ...) a possible final project
- Try a variety of 2D software - Raster
- Try a variety of 2D software - Vector
- Try a variety of 3D software
- Create a simulation
- Create an animation
- Try a variety of audio and video tools
- Properly compress your images and videos
- Post a description with your design files on your class page
Tools Explored
Learning Outcomes
- Evaluate and select 2D and 3D software
- Demonstrate and describe processes used in modelling with 2D and 3D softwares
- Demonstrate image and video compression
2D software - Rastor
Infinite Painter
What is the tool:
Infinite Painter is a free/paid painting and drawing app available for android devices, apple devices, and chromebooks. This app has tons of brushes, allows you to create your own brushes, a clean UI, and with the paid version infinite layers that are only limited by your device.Device and Method of Use:
Samsung Galaxy Tab with a Samsung S PenTools Explored:
Layers, varying pen types, pressure sensitivity, masking, layer effectsNotes/Challenges/Thoughts:
While doing this week's activities, I learned that the company that makes this app also makes a vector based version as well called Infinite Design. I will be downloading and testing that app on my tablet. I like their painting app, and as of yet, I have not found a good vector based art app for android so I think this may be a good fit!Krita
What is the tool:
Krita is a free, open source, art app available for Windows, Linux, and Mac. It is a professional grade painting and art app that includes tons of brushes, pattern tools, layers, and animation tools. There is a huge Krita community, so resources, new tools, and helpful tutorials are plenty available!Device and Method of Use:
Windows Desktop and a MouseTools Explored:
Canvas Sizing, Keyframeing, Hold Keyframe, Paint FIll, Line Tool, Circle Tool, Square Tool, Layer Panel, Merge LayersNotes/Challenges/Thoughts:
I found it difficult to get out of the rectangular selection tool. Intuitively I would hit escape like in other art software expecting to turn off the tool, but that did not make a difference. I had to select the tool again and then not select an area on the canvas to turn the tool off. This didn't seem like the right method, so I did a quick search. I found the Krita manual and read through the section on Selections and found it's actually a pretty power set of tools when you know how to use it! At one point I tried to draw a circle and it just had a red no type symbol. I was really confused at first until I realized after a few minutes I had the layer locked. I had forgotten that I locked it earlier in my learning session when I was trying to set up keyframes for my animation, and I kept messing up the circle layer in the process.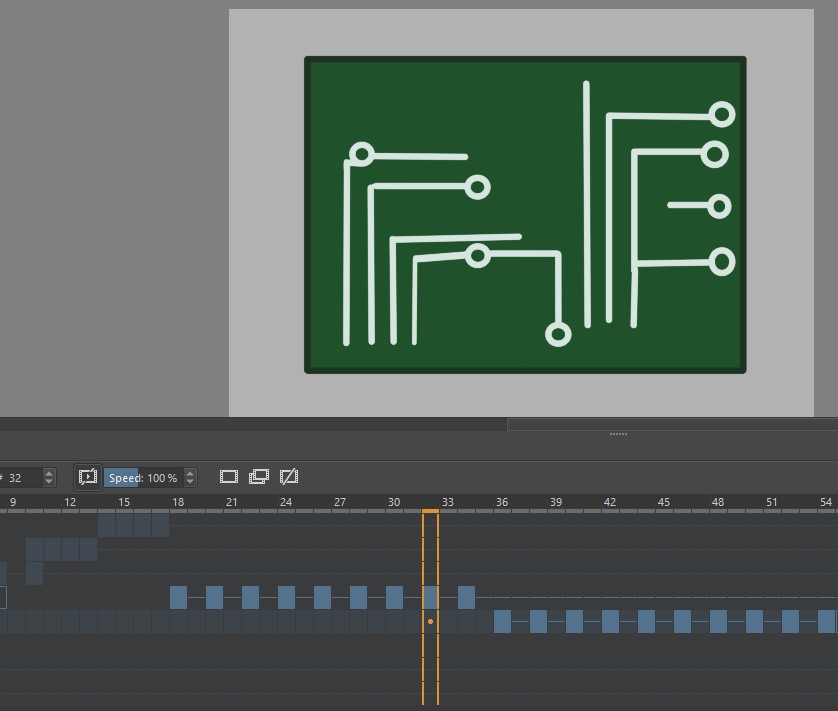
Concepts
What is the tool:
Concepts is a sketching tool for apple devices, android devices, Chromebooks, and Windows. According to their site, they are a hybrid vector-raster drawing app and you can export files as either vector or raster files. This software has an infinite canvas, layers, editable line types, live presentation mode, licensed Copic brand colors to match your real world markers, and multiple export options including the autocad file format DXF.Device and Method of Use:
Samsung Phone with FingerTools Explored:
Layers, tool wheel, basic pen types in Free versionNotes/Challenges/Thoughts:
I did not spend a lot of time with this software as using my phone over my tablet or computer was not ideal. It's a cool app, and I think it works well for quick doodles or sketches. I really like how the tool wheel was set up, it was a well optimized menu for a small screen. There is a great article on their site about the differences between raster and vector and could be a very useful and helpful resource for someone who is just starting to learn about the two.
2D software - Vector
Inkscape
What is the tool:
Inkscape is a free, open-source, illustration app for Linux, Windows, and Macs and has drawing tablet compatibility. It has a wide variety of features from node editing, splines, bezier curves, pattern tools, a large variety of ready to use project templates, multiple export options including SVG and DXF, a large variety of view modes, and according to their site zoom capabilities up to 25600%Device and Method of Use:
Macbook and Trackpad Windows Desktop and a MouseTools Explored:
Mac: Star/polygon tool, pen tool, rectangle tool, layers PC: Draw Bezier Curves and straight lines, combine, handle to cusp nodesNotes/Challenges/Thoughts:
I found the UI for this software on the Mac version to be tricky at first, but as I used it I started to get used to it. The windows version of the software felt more familiar for me since I have used it for years on Windows devices.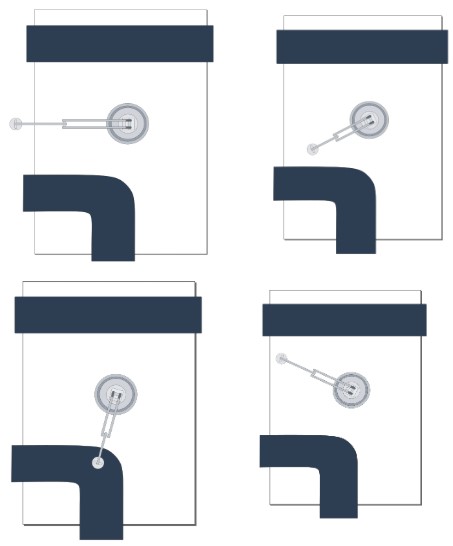
Adobe Illustrator
What is the tool:
Illustrator is a part of the Adobe Creative Cloud and is a paid vector based art app by Adobe for Mac and Windows. Illustrator has a variety of tools and features geared towards design work, such as bleeds and mock ups. It also has an alignment tool called Objects on Path and has an image trace tool to turn raster images into vector lines.Device and Method of Use:
Windows Desktop with a mouseTools Explored:
Virtual segment delete, 2 point line, Rectangular Grid, Transform > Rotate, Transform > Shear, Transform > Scale, Make GuideNotes/Challenges/Thoughts:
Having to click back to the selection tool each time I wanted to turn off an object or the line tool was very unintuitive. I kept naturally trying to use esc as a way to turn off the active tool which was not a valid way to do so.CorelDraw
What is the tool:
CorelDraw is a paid vector graphics software for Mac and Windows. It is a professional grade software that includes a suite of additional design software such as Font Manager, Photo-Paint, Capture, and more. There are built in project templates, the ability to trace images using PowerTrace, access to Pantone color palettes, and non-destructive photo editing capabilities.Device and Method of Use:
Windows Desktop and a mouseTools Explored:
Line Segment, Selection, Direct Selection, Rectangle Tool, Ellipse Tool, Fountain Fill, Bitmap pattern, uniform Fill, Outline WidthNotes/Challenges/Thoughts:
I am very familiar with CorelDraw as I use this software daily in the CLS Fablab. I also teach this software to Middle School students starting with the basics in 6th grade to more advanced features in 8th grade. During this week though, I actually learned about a lot of features built into the CorelDraw suite that I never explored or knew CorelDraw had. So it was really cool to try new things with a software I was already familiar with.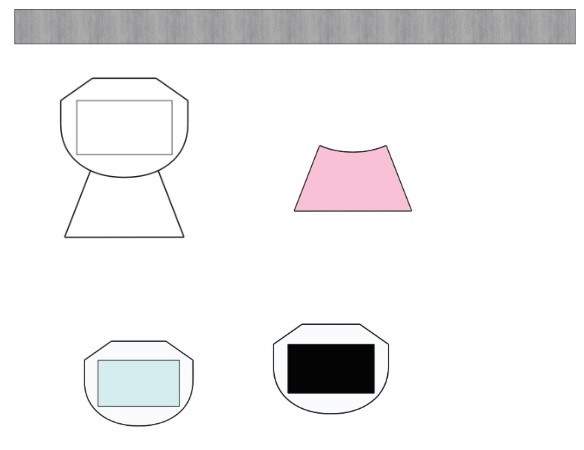
3D software
Nomad Sculpt
What is the tool:
Nomad Sculpt is a paid organic modeling and 3D sculpting software for android devices, apple devices, Windows, and Macs. Nomad sculpt is a sculpting tool for tablets and ipads with a large variety of sculpting tools, painting tools, texturing and material tools, soft and hard surface modeling, customizable brushes, and powerful rendering capabilities.Device and Method of Use:
Samsung Galaxy Tab with Finger and Samsung S PenTools Explored:
Mesh modeling, sculpting brushes, transform, planar, flatten, creaseNotes/Challenges/Thoughts:
I found the UI navigation for this software to be very tricky. With how powerful Nomad sculpt is though, I plan to try again in the future with a long form tutorial and take it really slow. There are some incredible free and paid tutorials from artists available to help learn nomad sculpt.Blender
What is the tool:
Blender is a free and very powerful open source 3D modeling and animation software for Windows, Macs, and Linux with a possible future availability on iPads and android tablets. Blender covers all parts of modeling and animation with features like character rigging, rendering, material creation, physics simulations, sculpting, video FX, and so much more.Device and Method of Use:
Windows Desktop and MouseTools Explored:
Mesh, Plane, Bezier Curve, Curve modifier, Loop Cut, Bridge Edge Loop, Solidify Modifier, Texture Paint, KeyframingNotes/Challenges/Thoughts:
Blender can be intimidating for new users, but it is so worth pushing through and learning how to use the software! I am very familiar with blender so I wanted to try something a little more unfamiliar for this one. I do a lot of modeling and a bit of basic keyframe animations in blender already. However, I don't really work a lot with the material editor. I took this time to try using the material editor and I followed two youtube tutorials to help me create a worn rubber and a scratched metal material.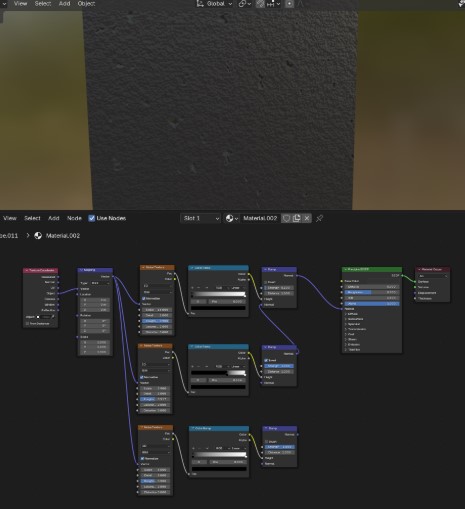
SculptGL
What is the tool:
SculptGL is a free open-source, browser based, 3d Sculpting software for any device with internet capabilities. SculptGL is a great jumping point for 3D sculpting with it's easy to learn sculpting and painting tools, topology tools, remeshing capabilities, and basic rendering options.Device and Method of Use:
Windows Desktop and MouseTools Explored:
brush, symmetry, inflate, twist, smooth, flatten, crease, drag, paint, move, masking, local scale, transform, add, copy selectionNotes/Challenges/Thoughts:
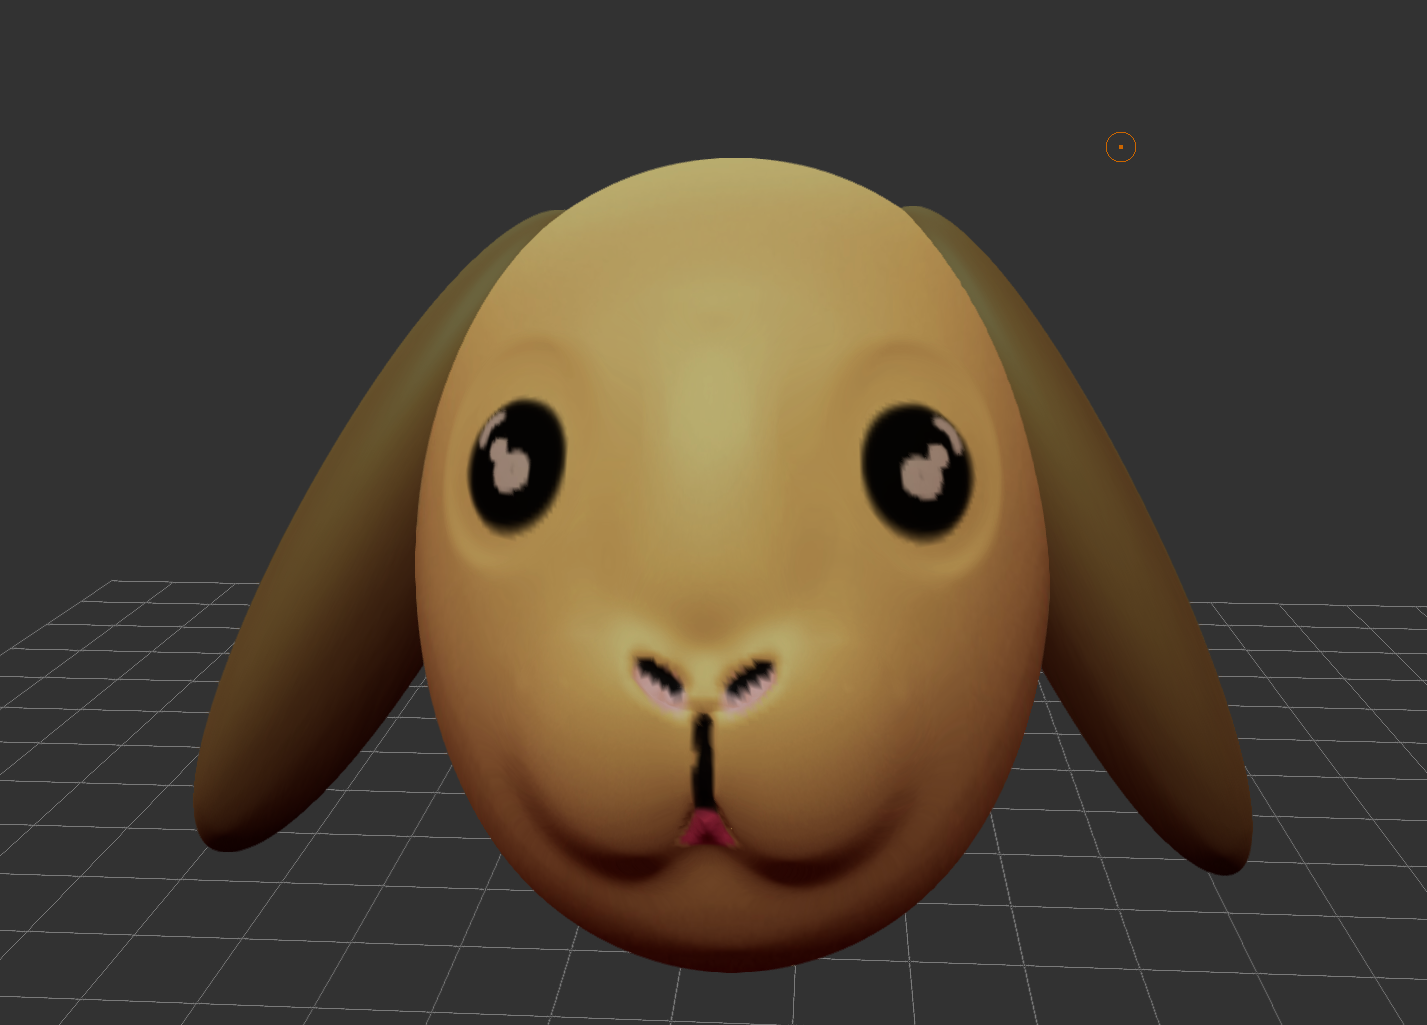
This is a software I use when just trying to have some fun. It's like playing with digital clay without the mess and it works on so many devices since it's browser based. I am not super skilled at this style of modeling, typically in my workflow I may use this type of modeling tool to refine details in a model I made in blender. Otherwise, I just play around with it for fun. I did teach my lab the basics of how to navigate and use the tools in this software and I challenged everyone to a 10 minute design challenge. In only 10 minutes, can you turn your digital clay into a recognizable animal like a cat, bunny, or an elephant.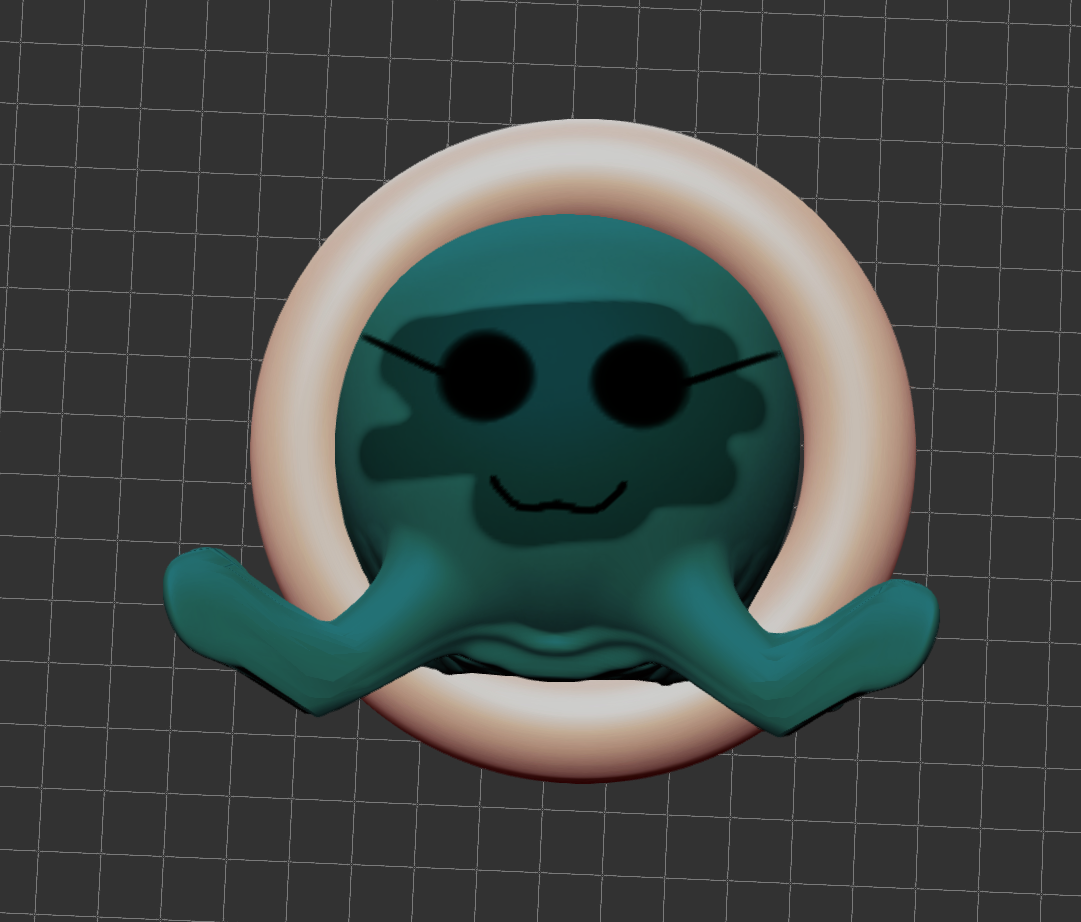

Fusion 360
What is the tool:
Fusion 360 is a paid CAD software by Autodesk for Windows, Mac, and Linux devices. Fusion can be used to create 3D objects and parts from 2D drawings, create dimensioned drawings, create assemblies from parts, make basic part animations and exploded views, and has collaborative features.Device and Method of Use:
Windows Desktop and MouseTools Explored:
Cube, Edge Loop, Materials, Material Creation, BooleanNotes/Challenges/Thoughts:
I am very familair with Fusion360. It is a software that I teach in my 9th grade Engineering class and teach my high flying 8th graders. During prefab, I brushed up on my skills by completing several days of the Kevin Kennedy 30 Days of Fusion tutorials.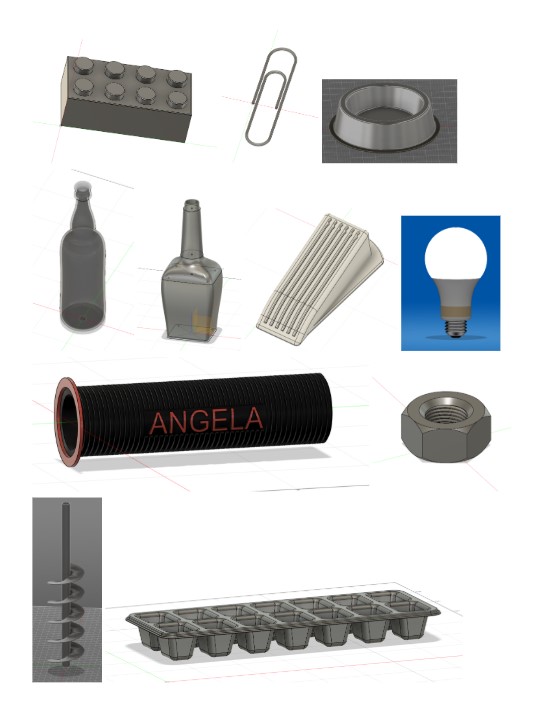
Audio and video tools
VSDC
What is the tool:
VSDC is a free video editing software for Windows. VSDC has powerful editing features such as motion tracking, chromakey, an image manager, multicam editing, beat-syncing for audio, masking tools, animation tools, and a variety of export options including gif.Device and Method of Use:
Windows Desktop with a mouseTools Explored:
Timeline, text, Rectangle, Fade In, Fade Out, Background Remover, Chroma Key, Movement, Files Sequence WizardNotes/Challenges/Thoughts:
I have been using this software for over a decade and haven't touched upon even half of the amazing features it offers! I love using this software for basic video editing, creating stop motion animations, and Gifs from movie or image files. One of the more fun projects I have done with this software was showing a group of middle school students how to use the software to create a stop motion music video using cut paper. They designed a whole video to the Lucas Graham song 7 Years.
Other Software Tested
This is a list of other softwares or apps that I have either tried in the past, or tried briefly during this week but didn't spend a lot of time with.
Photoshop
Through work, I have access to photoshop and have spent a small amount of time with it so far, but plan to really dig in over the summer.Photopea
This is a browser based photo editing software that I use when I am on my tablet or away from my computer and need specific editing capabilities.3Ds Max
This was the first 3D modeling software I ever learned, back in 2005. This software is what sparked my passion for 3d modeling and animation which grew into one of my favorite hobbies.Paint.Net
My favorite basic paint app. It is like Microsoft paint but with layers and some more advanced editing tools.Repaper Studio
This is specific to the iSkn tablet that I have that lets me draw with my own writing utensils on any paper or surface and with the use of a magnet ring it digitizes every stroke.Meshmixer
Meshmixer is a really cool 3D tool that I use to correct errors, like non-manifold issues, in models and to add my own custom tree supports.Sculptris
Sculptris is a free 3D sculpting tool by the same company that makes Zbrush. I like to think of Sculptris as the little sister of Zbrush, their similar but different tools and many Sculptris features were actually rolled into Zbrush 4 around 2010 .Twitch Studio
Twitch Studio is a video streaming software and stream manager system. I poked around with it a bit in 2022 and again in 2023 when I was selected to participate in the World of Warcraft Variety show and I wanted to stream for my friends and family to watch.Simulation
I made two different simulations, one using Blender and one using TinkerCAD. Both of these softwares are ones I know very well, and both simulations are ones that I teach. For Blender, I taught my lab how to use the basics of the software and then we created simple cloth physics simulations. I also used Blenders physics in my animation video below for the screws/bolts later in the video. For TinkerCAD, I taught my 8th grade Engineering students how to use the built in SimLab and we created playable carnival style games. Below is one of my examples I made last week to show them how to use the simulation tools.
If the above embeded, playable, simulation does not load you can view the project through this direct link
Animation
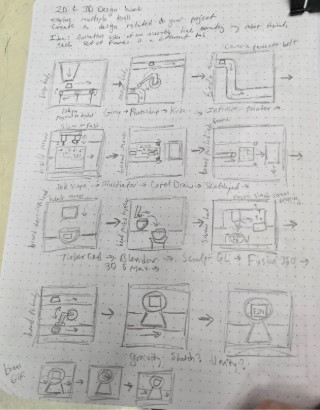
To give my software speed dating time some focus, I decided that I wanted to create an animation of my robot being built through an assembly line.
For each application that I tested, I tried to create a part of the animation or pieces to use in the animation.
I started with a story board and tried to map out which softwares I would use for each scene, however some softwares did not go as planned so the scenes in my story board may not reflect my final animation.
I used VSDC to put all of the animation clips and images together into one video.
Some of the drawing applications had built in animation tools, but for the ones that didn't I treated it like stop motion and created multiple images that I put together using VSDC's tools.
Video and Image Compression
I used two methods for compressing my images.
The first method is an unorthodoxed quick and simple method.
I start by screenshotting the image and dropping the screen shot into my Google doc which I use to store all my documentation as I go.
I shrink the image down in size to save space on my doc and when I am ready for my site I screenshot the smaller image from my doc.
I save the image as a JPEG file format, which is a lower size format compared to a PNG.
The more official method I also use is a cool website I found called Image Compressor.
I really like that it is a browser based tool with minimal ads, and they have a great explanation of what Image Compression is and how it works.
The tool itself gives you the ability to change the quality when compressing jpeg images, or the color amount when compressing png images.
It also gives you the size value for the before image, an approximate size value for the after image, and a preview of the image before and after compression with each change you make.
It is nice to be able to see in the preview just how far down in size I can compress the image before the image really gets messy.
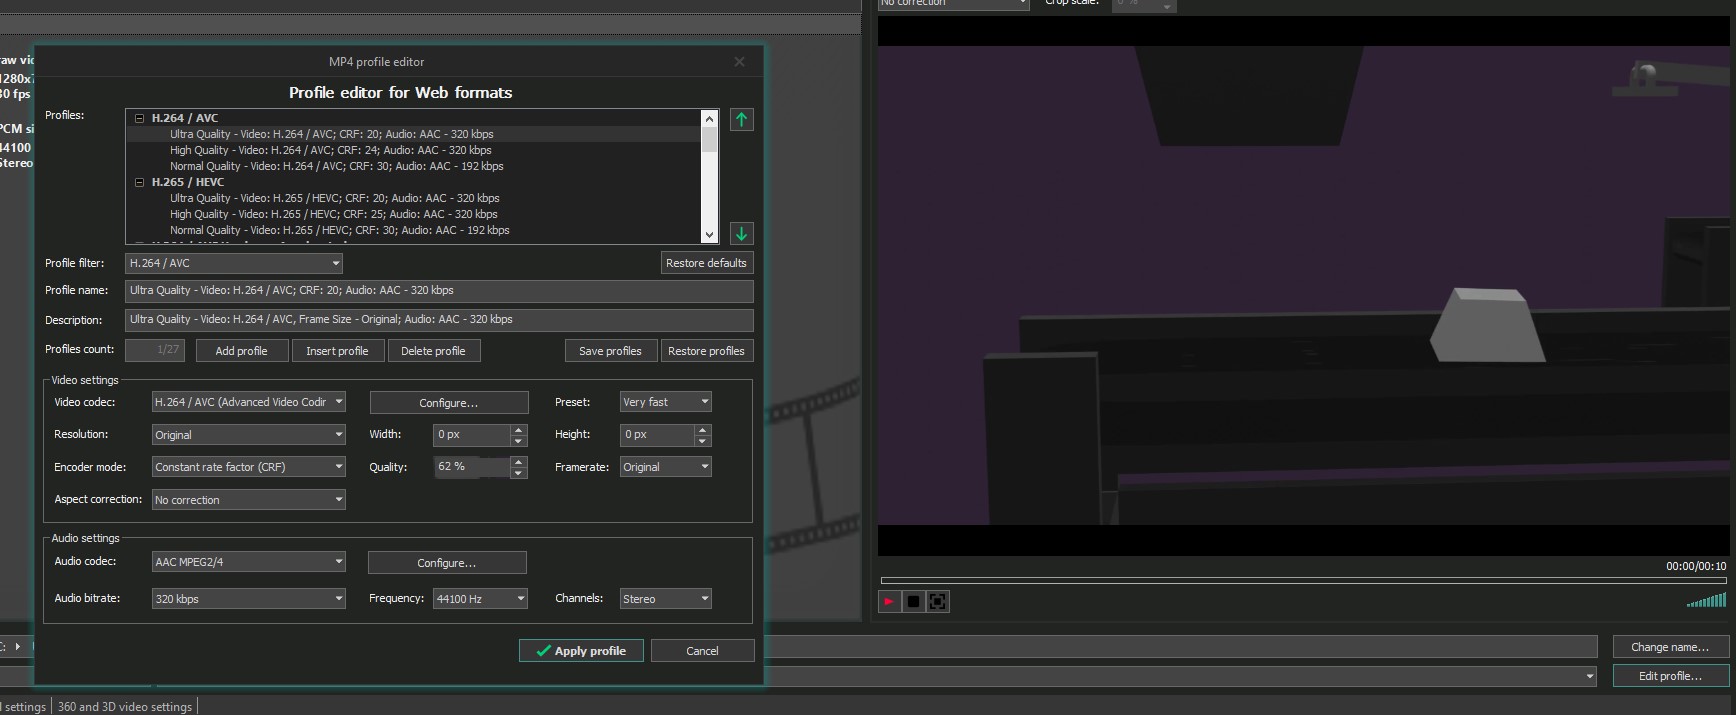
To compress my animation clips and videos I used VSDC and adjusted the export settings in the export configuration panel.
I statred by choosing the smallest video format option which is an MP4 file.
I then chose from the H.265 option and picked the middle quality which is high quality.
I could have compressed further and chose the normal quality, but I wanted to keep a higher quality to start since I would be compressing further in the settings.
In the quality options, I dropped the precentage down to 45%, then exported the file.
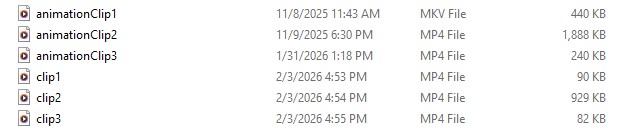
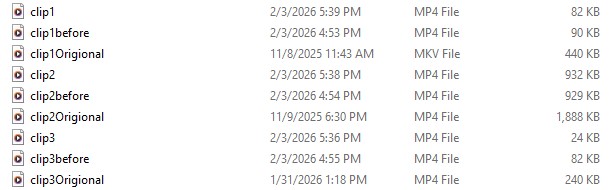
In the comparisson image below, you can see that video clips 1 and 2 dropped in size by approximatley a half and clip 3 ended up nearly 3 times as small.
While trying to fix the video previews in the animation section, I turned to ChatGPT for assistance and learned that the video not showing may be because H.265 formats are not as browser friendly as H.264 formats.
I went back to VSDC and dropped the origional clips into the software and re-exported as H.264 formats with 45% quality.
Interestingly enough, my files droped in size significantly as seen in the fourth photo below.
Week 2 Files
In my repo is a zip folder of a handful of my Week 2 Files.
I had initially imported my zip folder with a high quality copy of my animation clips, as well as the complete Blender and Sculpt GL files.
However, my file size ended up on the top 10 list for the week.
I reached out for suggestions during the Saturday help session and was suggested to only add the parts I needed for the week's project and remove the extraneous to help bring the file sizes down.
With this suggestion in mind, I removed the origional zip folder and modified my files to make a new, smaller, zip folder.
To ensure that the files in the new folder were not excessive in size, I went into my original files and removed any excess or unnecessary parts and pieces.
For example, in my Blender file I had copies of all of my models as well as backgrounds and cameras for my animation.
I removed all of the duplicate objects as well as the extra parts I used for making my renders.
I did the same thing with my SculptGL file.
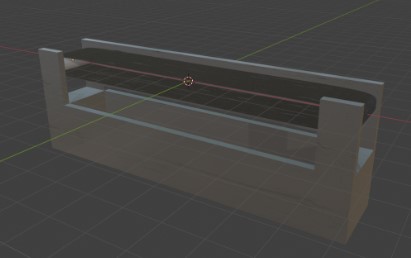
I removed the duplicates of the circuit boards, the background and floor, and I shrunk the remaining circuit board and conveyor belt down in size considerably.