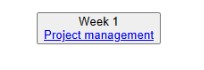
Project management
This week I worked on defining my final project idea, setting up my gitlab repository, collecting and attaching my ssh key, building my website using html and css, and getting used to the documentation process.
Week 1
Check List
This week's project requirements:- Plan and sketch a potential final project
- Described briefly what it will do and who will use it
- Added a page with your sketch and description of your final project idea(s)
- Read, digitally sign and commit your Student Agreement form to your repo
- Student Agreement
- Add to About Me page or home page
- Work through a git tutorial
- Setup Git for using GitLab (including SSH key) - Windows 10
- How to Commit and Push Code to Github Repository (VS Code Example)
- Set up your Git repository
- Document the steps for setting up your Git repository and adding files to it
- Push something to your class GitLab repository
- Build a personal site in the class archive
- Described how you did it
- Introduce yourself/Update your About Me
- Add a photo of yourself
Resources
Helpful resources and sites I used this week
Software
Helpful Sites
Blogs, Videos, Additional Resources
- Visual studio: Make sure you configure your user.name and user.email in git
- Paint.net Icon Creator plugin forum
- Paint.net Icon Creator plugin repo
- W3 Schools: How to add HTML images
- CodePen: How to add images from Google Drive
- How to float three div side by side using CSS
- How to use emoji as bullet points using CSS
- How to add links to a specific part of a page
- How to setup GitLab and SSH Key
- How to Commit and Push to Git from VS Code
Learning Outcomes
- Communicate an initial project proposal
- Identify and utilise version control protocols
- Explore and use website development tools
Getting Setup on GitLab
Getting started with GitLab was fairly easy. When the email from FabAcademy came in, I followed the steps for proper log in from the email and set up my GitLab repo. I downloaded VS Code and set that up. Initially, I was a bit confused about how to log into VS Code and my repo since we use a different type of log in. A few times in the beginning, while setting everything up, I'd get confused between GitLab and GitHub. This confusion caused me to look up solutions for problems I had that didn't apply. Once my VS Code was set up, I began the linking process to my repo which felt straight forward, until I got to the SSH key portion.
Setting up my SSH Key
I really struggled with this at first. I used several different resources online, and the more places I looked the more confused about the process I got. I needed to download a bash, so I used the Git for Windows as it was suggested on one of the pages I had looked at while researching how to set up the SSH key. I continued to try and work my way through the SSH process with little success. Working in the bash was a new process for me. I found it to be very frustrating at times and not really straight forward. Which led me to feel very accomplished when I finally generated my passphrase. To generate my SSH key, I started by checking that git was installed and up to date using the command $ git --version. After confirming it was up to date, the next step was to go to finally generate my SSH Key! I really liked that during this part of the video, the youtuber explained why using SSH is important and its benefits over other menthods. To actually generate the key I had to use the command $ ssh-keygen, pressed enter to confirm the file location, set my passphrase on the next line, and my key generated! Once I had the passphrase though, I didn't know how to copy it correctly. I first tried copying the ascii type image it generated and I closed the bash. I didn't know how to find the passphrase again so I generated a new one. I tried a couple times and I think I generated 3 passcodes while working through the process. I was really struggling, until I finally found this amazing Youtube video. The content creator used a different bash then I had downloaded, but it all worked basically the same. Thankfully, the video broke down the process and by the end of the video I had my Repo up, my VS Code connected, my Repo Cloned, and my SSH key applied! I started over and followed along side the video and was successfully able to setup my SSH key from start to finish! Starting back at generating my SSH key, I learned that the ascii image wasn't what I needed. I copied everything in the terminal to a notepad document as a backup in case I messed up again. I later learned that on windows, SSH keys are stored in a .ssh folder location on your C drive after they are created. I followed the next step on the video to show the public key in the bash and was able to copy that generated string of text. To actually add this to my Gitlab I had a few more steps left. Back in Gitlab, I had to navigate to the user settings. I found this by clicking on my profile in the top right, then preferences. On the left hand side is the User settings navigation bar and their is a section for SSH Keys. In the SSH key menu I clicked the button to Add a new SSH Key, and then pasted my ssh key text into the Key box. I am unsure how important the expiration date is for the key in gitlab, but I did set it for January 1st of 2027.
Linking GitHub to my VSCode
I continued to follow along with the youtube video mentioned above to finish the setup of connecting my gitlab to my VS code. I opened my VScode and started a new project by choosing the clone repository option. I needed the repository clone url to input into VSCode so I went back to Gitlab and under the respository I clicked on the blue code button and in the drop down I copied the url for the Clone with SSH Key option. After pasting the url it asked me to pick a location on my computer and then it started cloning. Within less than a minute I had my gitlab cloned into VSCode!
Starting my Site
One of the first things I did was set up my site. Even before setting up my SSH key and VS Code I was already planning my site and practicing my HTML and CSS. I used an online code site called CodePen which allows me to code HTML, CSS, and Java right in my browser for free. It auto generates a preview of the site every time a change is made, which I loved because I can explore and change things to see how to interact and affect each other in real time. When following code examples or pulling samples from W3 Schools , I find being able to make live changes really gives me a better understanding of what the code is doing. I knew from the beginning that I wanted my page to stand out and have a scrolling effect. Initially I wanted to attempt a parallax style effect, but realized my current skills with building a website is a bit lacking. The plan was to have the background have a simple animation of my robot being built on an assembly type line. As the person scrolls the page, the robot would move into the next portion of the assembly line that matched the week's theme. Each section would have a pop up/floating style box with a brief paragraph about the week and a link to the weeks page. I still love this vision, but it is beyond my current levels of html and css. I still wanted a scrolling effect, but I needed to simplify it for my rusty skills.
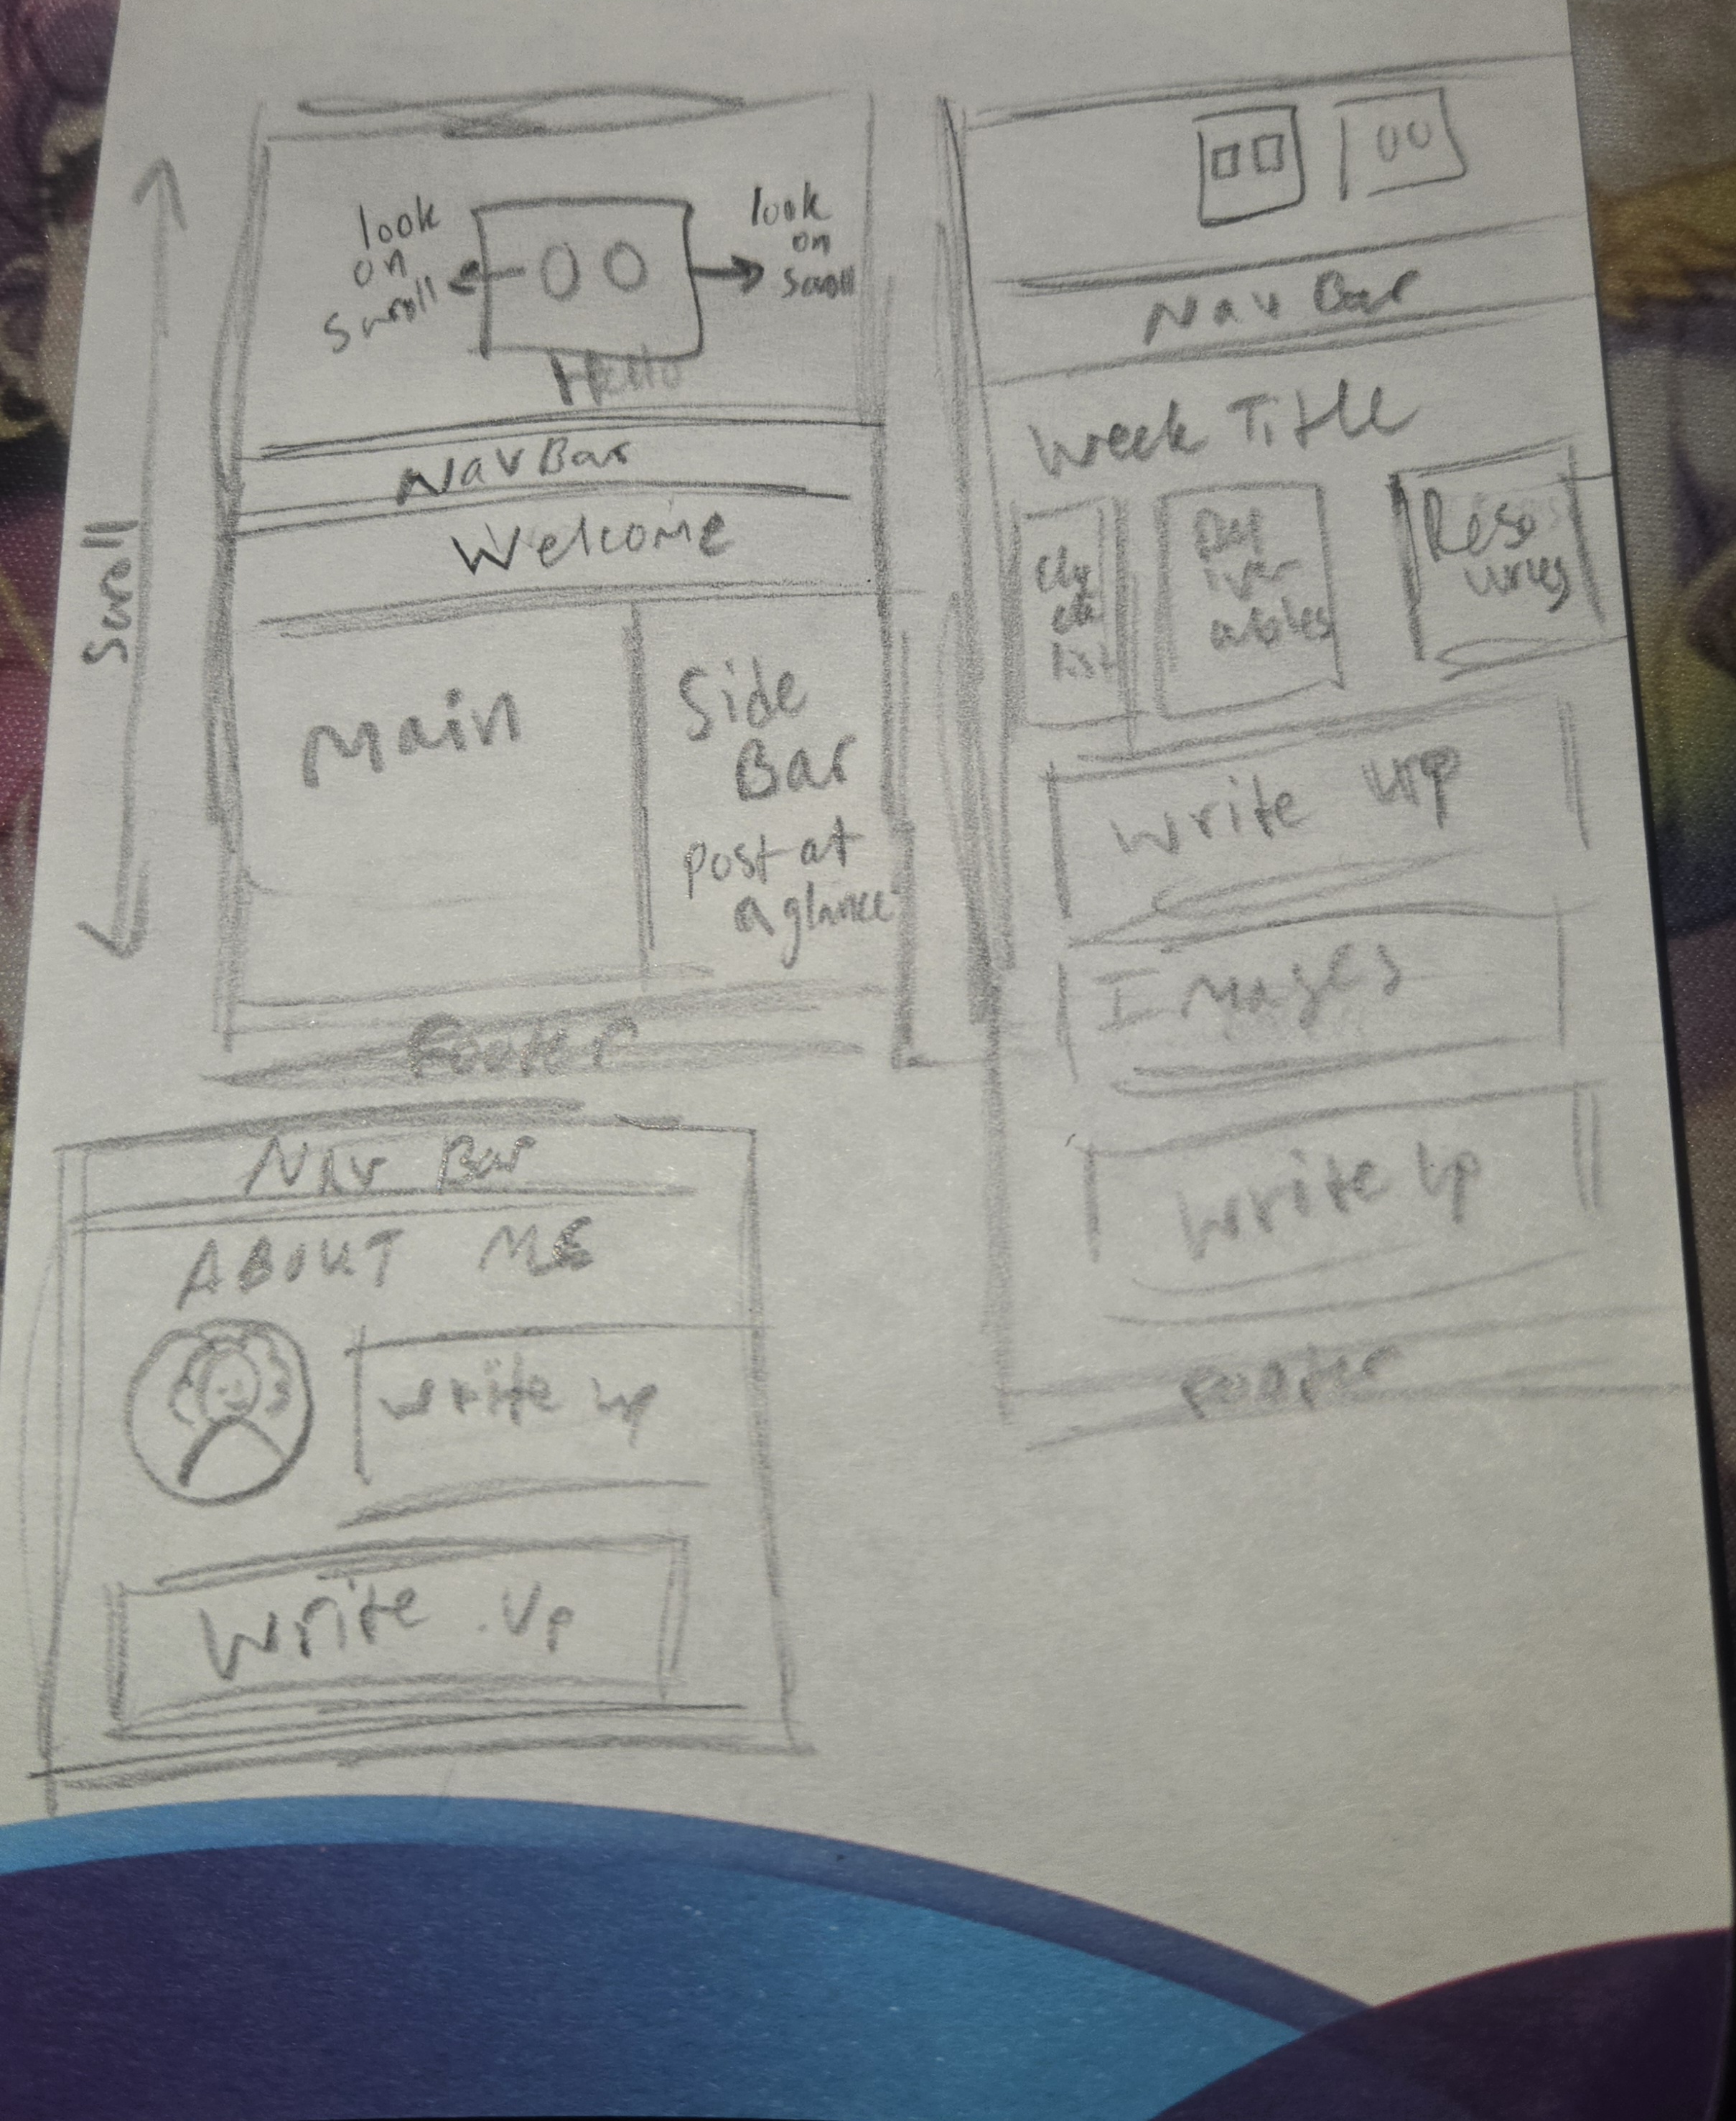
Creating the Robot Animation
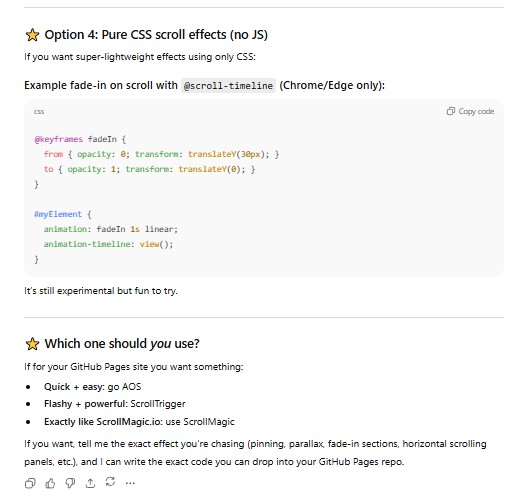
Option 4 became my jumping point for robot eye animation. When I first started I didn't have my robot image designed yet, so I used resources from W3 Schools to help me create a basic shape for the body and eyes using CSS and then played around with the code in Codepen to see how making different changes affected the outcome. The animation effect didn't work every time I made changes, looking online I read that some animation effects like scroll wheel effects don't work on every browser. Due to this I almost scrapped the idea, until I realised the issue was not a browser compatibility issue, it was me having a spelling mistake in my code. Animation vs Animatoin After correcting all the glaring red line issues when I copy and pasted my code into Google Docs, I retested the code and the eyes moved! The small movement width I started with, -6px and +6px, was very fine and almost not noticeable. So I went back in and adjusted the eye movement to +/- 20px. Then I worked on the hello speech bubble. It was not fading in like I thought it would, instead the Hello remained permanently. I used a resource from W3 Schools and went back into the code to do a force invisible on the Hello until a certain scroll action was met to make it appear. Setting the visibility to hidden however, forced the text to remain hidden. The trigger command to fade in never responded so I had to change the code again. This time, instead of doing hidden I decreased the opacity to 0 at start and set it to raise the opacity upon scroll. Once I had a setup I liked, I pushed it to my site and eventually updated the site with my robot design instead of the css shapes.
Pushing my First Commit
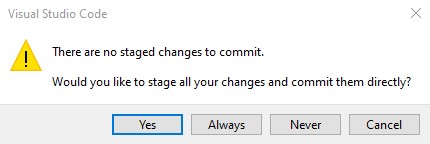
Pushing content from VS Code to my GitLab Report had me a bit confused since this is the first time I have used VS Code to connect to Git. I went into the Source Control, saw my pages that I worked on, and hit the commit button. When I did that, I would get a pop up that said I didn't stage anything.
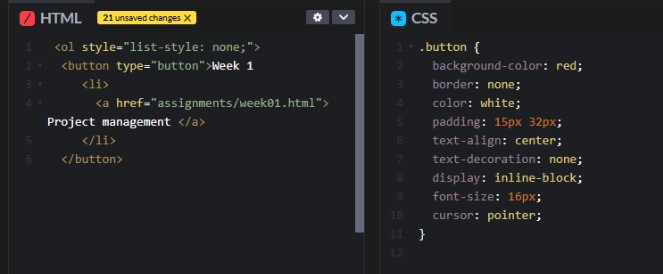
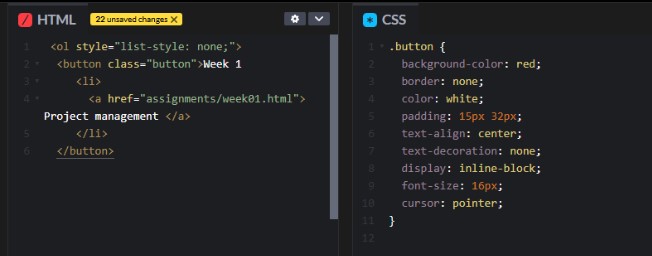
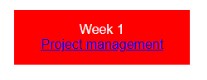
Creating my Site Buttons
To create the buttons on my site I referenced the basic button code from W3Schools which was: button type="button">Click Me! I then added a section in my css style sheet to customize the button. I spent about 15-20 minutes trying to figure out why my style effects were not changing my buttons. After some digging, I realized that by using: type="button"
Creating my Site Favicon
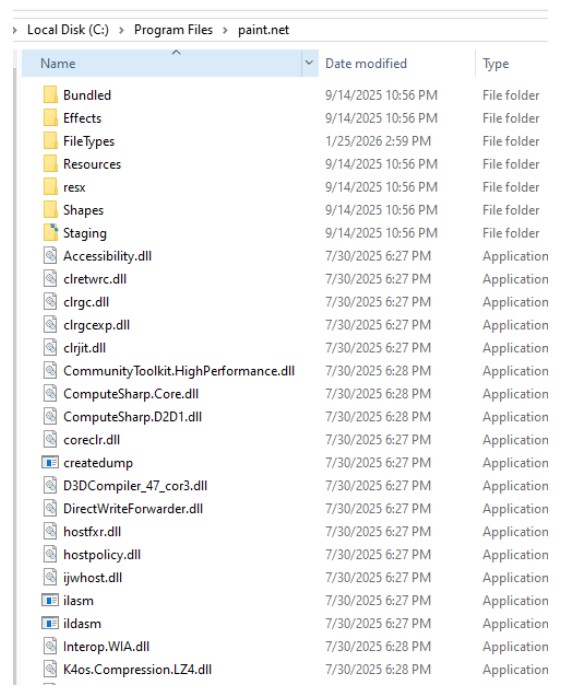
While browsing W3Schools for a resource on creating a sidebar for my site, I noticed a section on Favicons. A favicon is the little image that sits next to your website name in the URL bar. I decided I wanted to attempt to add this to my site using my main robot image. I opened my robot design in Paint.net but realized it couldn't natively export a .ico file which the favicon code referenced. I looked online for an alternative software to do the conversion and in my search found that someone had made a simple plugin for paint.net to be able to export .ico files. After installing the .dll in my paint.net folder, I reloaded the app, and attempted to save the file again. There was still no option to save as a .ico file.

Fixing my Broken Image Links
After successfully setting up my site and pages, I started to add my written and visual content to the About me and Week 1 page. Everything seemed to be going well until I tried to view the site online. Just about any time I added an image to the site, I had issues. Starting with my robot head design not showing, then the image of myself on my about me page, ALL of my images on the Week 1 page, and even the image on my Final Page. I would get one page's worth of images working, and the next page would all break. It felt like it was never ending. The robot image was my own mistake, I was using the wrong pathway. I had ../images instead of just images. This was a quick and easy fix. After finding my error and fixing it, I started to add my other images for the Week 1 page. I had created a folder called Week1 within the Images folder as a way to organize my weekly image collection. I used camelCase for all of my image file naming conventions and committed a handful of images. This is where the headache started. Not one of the images I added would show up. My first thought was to try and change the file pathway like I did with the robot image. I tried several attempts to fix the broken images with little to no success.

../images/Week1/vsCode.jpg
../../images/Week1/vsCode.jpg
public/images/Week1/vsCode.jpg
images/Week1/vsCode.jpg
None of these pathways were successful. Oddly enough though, during this process I also updated my About me page with an image of myself. The About Me page was working fine, I could see the image of myself after a quick fix, and overall I was happy with the start of it. So I tried to use that image on the Week1 page as a known working image. I directly copy and pasted the working image code and it worked on the About Me page, but broke on the Week1 page. I asked my coworker David Taylor if he had any suggestions and we reviewed the file locations in Git and found a really strange thing. Some of the picture files were showing incorrect pathways when you open the image location. This left more questions than answers and led me to try ChatGPT for suggestions. The conversation with Chat started with assuming it was a bad pathway and chat suggested trying many of the same pathways I had already tried. It gave me a web link to test to see if I could pull up the image directly, which I could. Then we discussed file locations for the Images and the HTML file. We checked my header for a base tag to see if that could be overriding my images. It suggested I try an absolute file path, which I avoided. At one point, in my conversation with Chat we discussed folder pathways and naming conventions. This led me to try changing the name of the folder from Week1 to week1, this may have actually caused more issues because now it was the same name as my week1 html page name. I eventually changed the folder name to week01 so it was different from the html file name.
Other Site Updates
Other formatting I have added to the site not listed above:
Separating the scrolling robot animation from the main css style sheet.
Creating a two robot animation style sheet
Creating a side bar on the main homescreen
Creating a 3 box side by side template for the weekly pages