Week 7:Computer-Controlled Machining
Assignments
Group Work : Complete your lab's safety training Test runout, alignment, fixturing, speeds, feeds, materials and toolpaths for your machine Document your work to the group work page and reflect on your individual page what you learned
individual assignments:Make (design+mill+assemble) something big.
Group Work Assignment Reflection
knowledge about the CNC machine
Basic Setting before using the CNC Machine: Set work and tools offset, this step tells the computer the exact location of the part and tools. Define the origin point, by aumo moving the CNC mill,and then set the thickness of the materials.
After designing the 3D model, we need to export the G-code file to the CNC machine, and then import into the CNC machine.Gcode is a language that is used to control CNC machines. It provides the necessary instrucitons for machines to perform tasks. such as cutting ,drilling or engraving materials. The language includes commands that dictate the movement of the machine along the X, Y, and Z axes, and the speed of the movement.mangae the tool opperations and other specific actions required to shape the material according to precise specificaions.
The big different between the two CNC machines
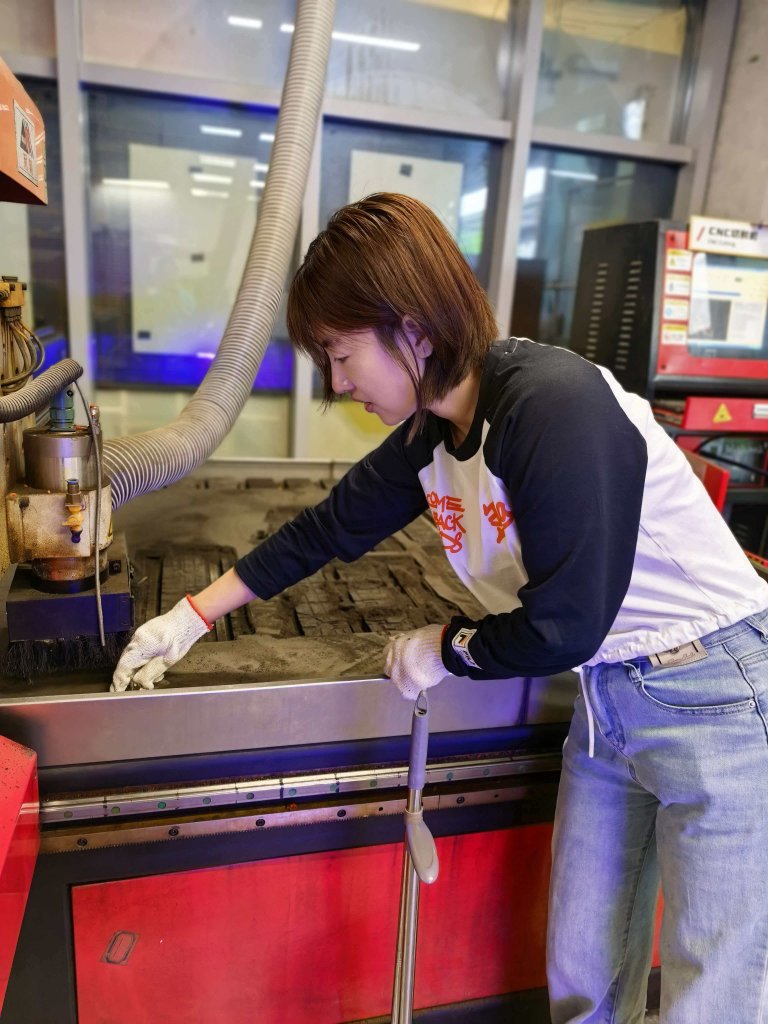
I try to learn two CNC machine which are from different brands, one is the Chaihuo machine and the other is from our school‘s lab.
The Chaihuo machine is a TIANCHENG XINLI Wood CNC engraving machine TC1325B.
This machine need fix the board on the machine tightly,otherwise the board may shift positions that will affect the cutting results.
This CNC machine requires manual tool head changes, after change the tool head, we need to lock the tool head box.
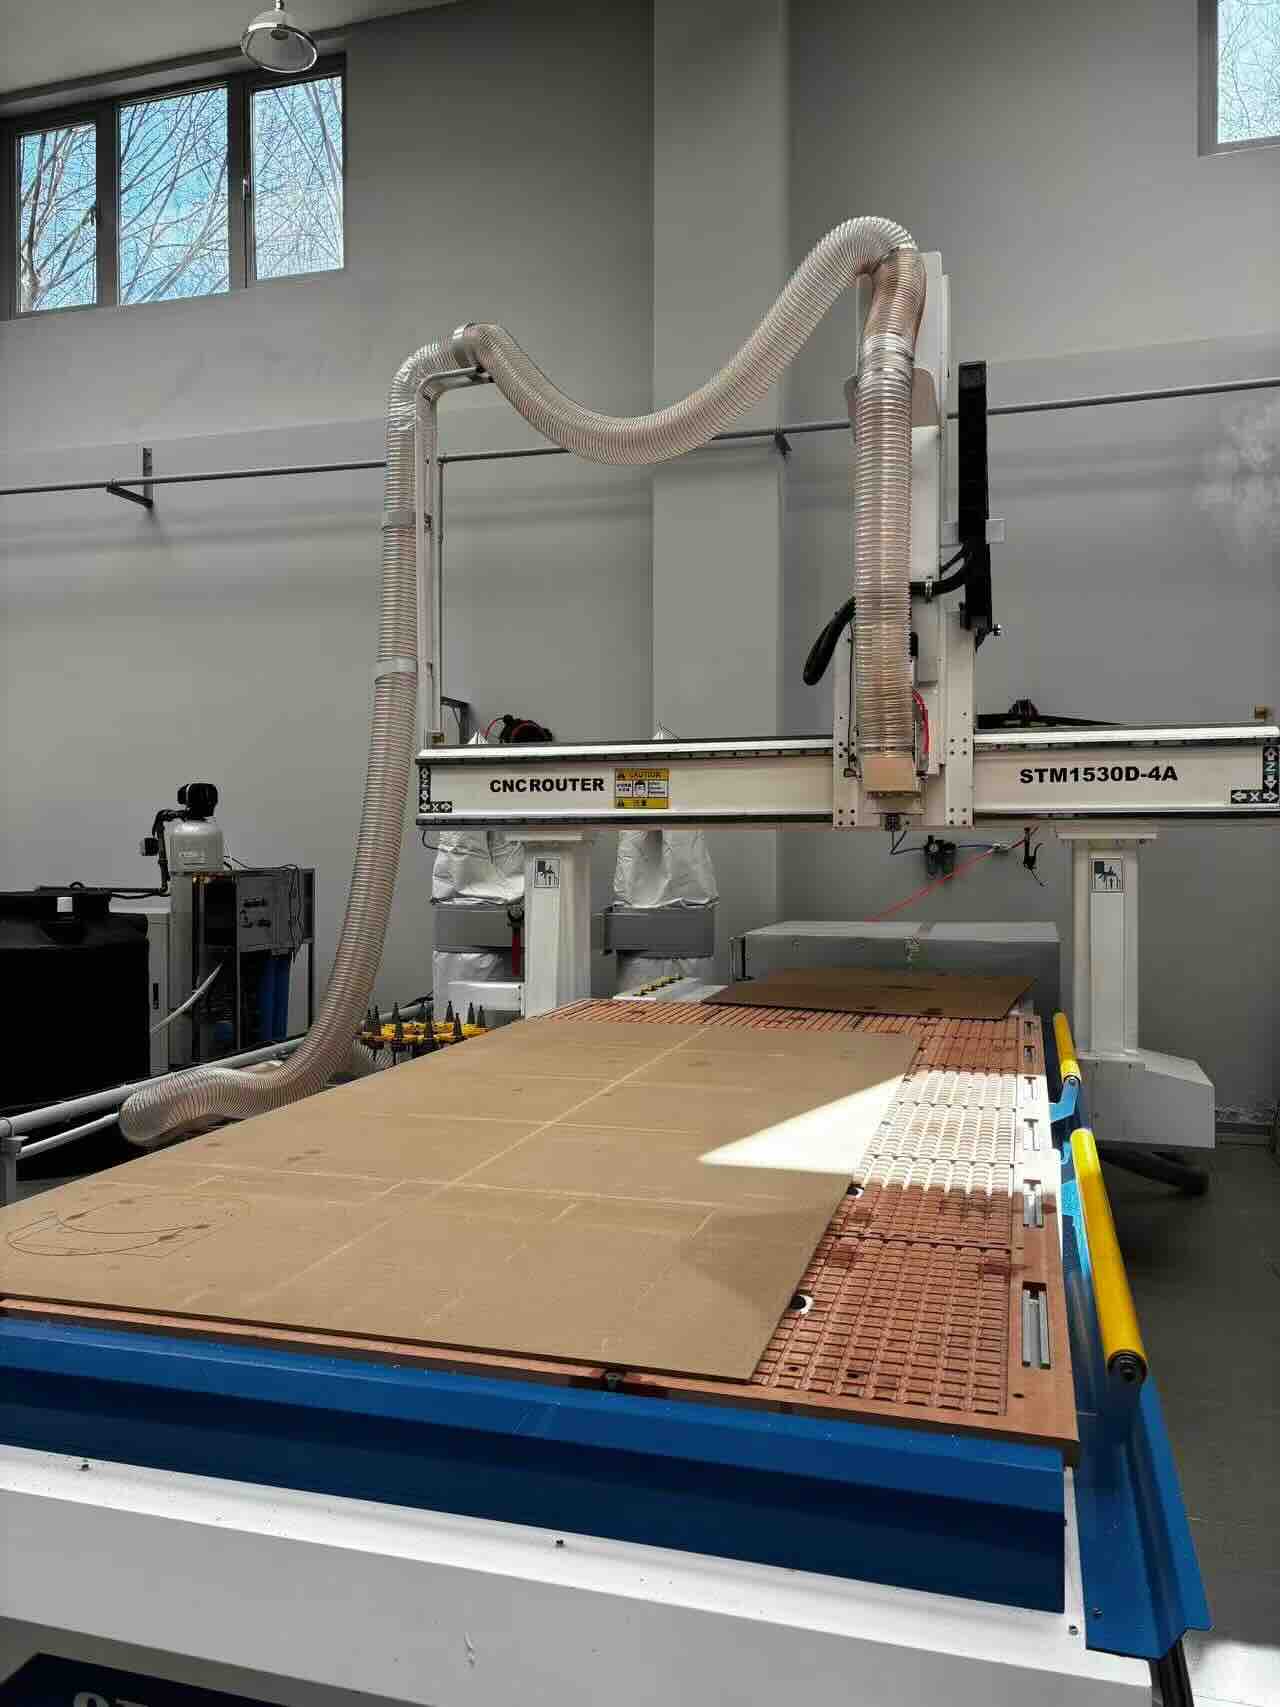
The other is CNC Router STM1530D-4A: Working area 1500 mm × 3000 mm
The machine from our school' lab with vacuum system to help the board to be mounted well. So normally we don't need to use clamps to hold the board tightly.
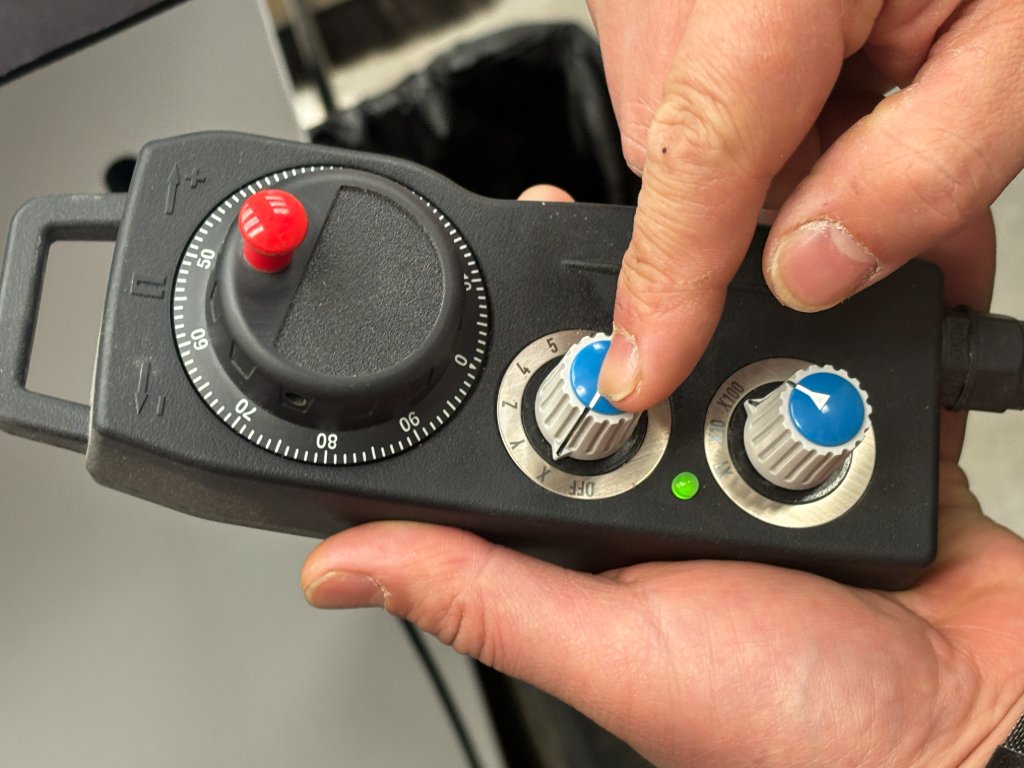
The wheel on the controlling pannel is very useful for adjusting the position of the head slowly and gradually, to protect the machine from being damaged. And it's very easy to use.
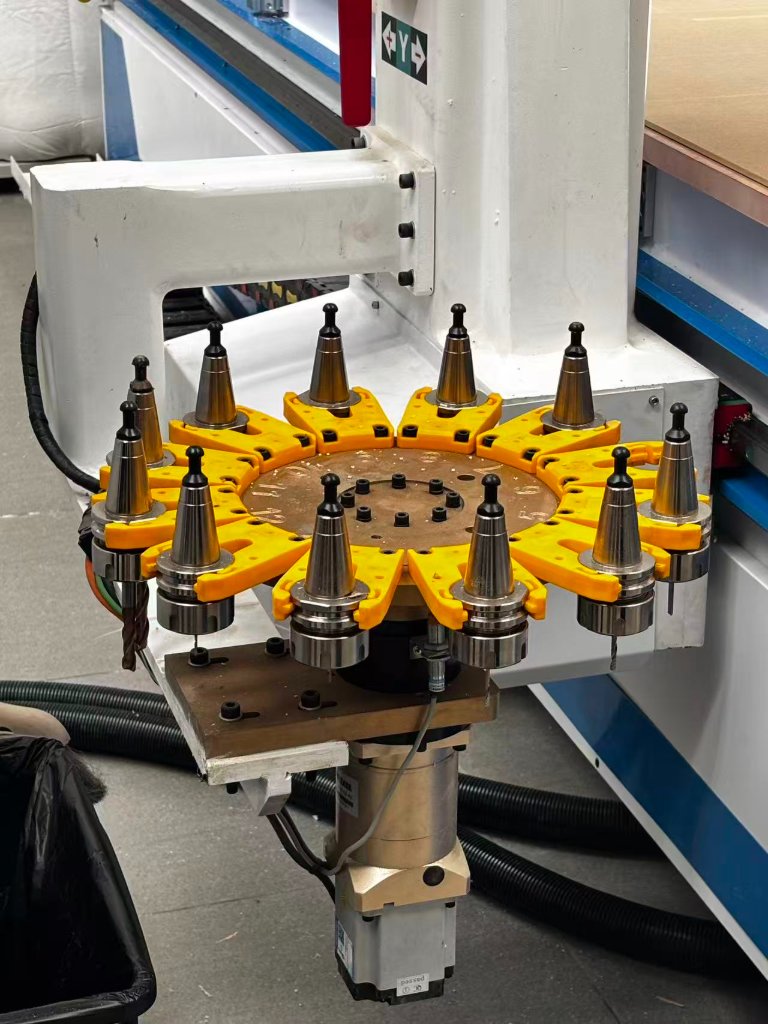
The CNC machine from our school' lab has a automatic tool head replacement system, so the replacement is an automatic process.
Safety Training
1.Personal Protective Equipment (PPE) & Dress Code Safety Glasses: Always wear approved safety glasses with side shields, even if the machine is running automatically. No Gloves: Never wear gloves while the machine is running. They can get caught in rotating parts and pull your hand in. Proper Attire: Wear a fitted lab coat or work apron (buttoned up). Roll up long sleeves or wear short sleeves. Remove all jewelry: rings, watches, necklaces, and bracelets. Secure loose clothing and backpack straps. Hair Restraints: If you have long hair, it must be tied back and tucked into a cap or hairnet to prevent it from being pulled into the spindle. Footwear: Closed-toe shoes are mandatory. No sandals or high heels.
2. Machine Operation Procedures Supervision: Never operate the machine without an instructor or supervisor present in the room. Machine Guards: Keep all safety shields, doors, and plexiglass guards closed and locked during operation. Inspection: Check the machine for any damage or loose parts before starting. Ensure the workpiece (stock) is clamped tightly in the vise or fixture. Verify the tool is securely locked in the spindle or tool holder. Setup Verification: Double-check your CNC program (G-code) for errors. Perform a "Dry Run" (running the program without the workpiece or at a very high Z-axis offset) to check for path errors. Always confirm the "Zero" or "Work Offset" is set correctly.
3.Emergency Procedures:
Train all operators on the location and use of emergency stops on the machine.
Ensure knowledge of first aid procedures for burns, cuts, and other potential injuries.
Regularly review fire evacuation routes and procedures.
Individual Assignments
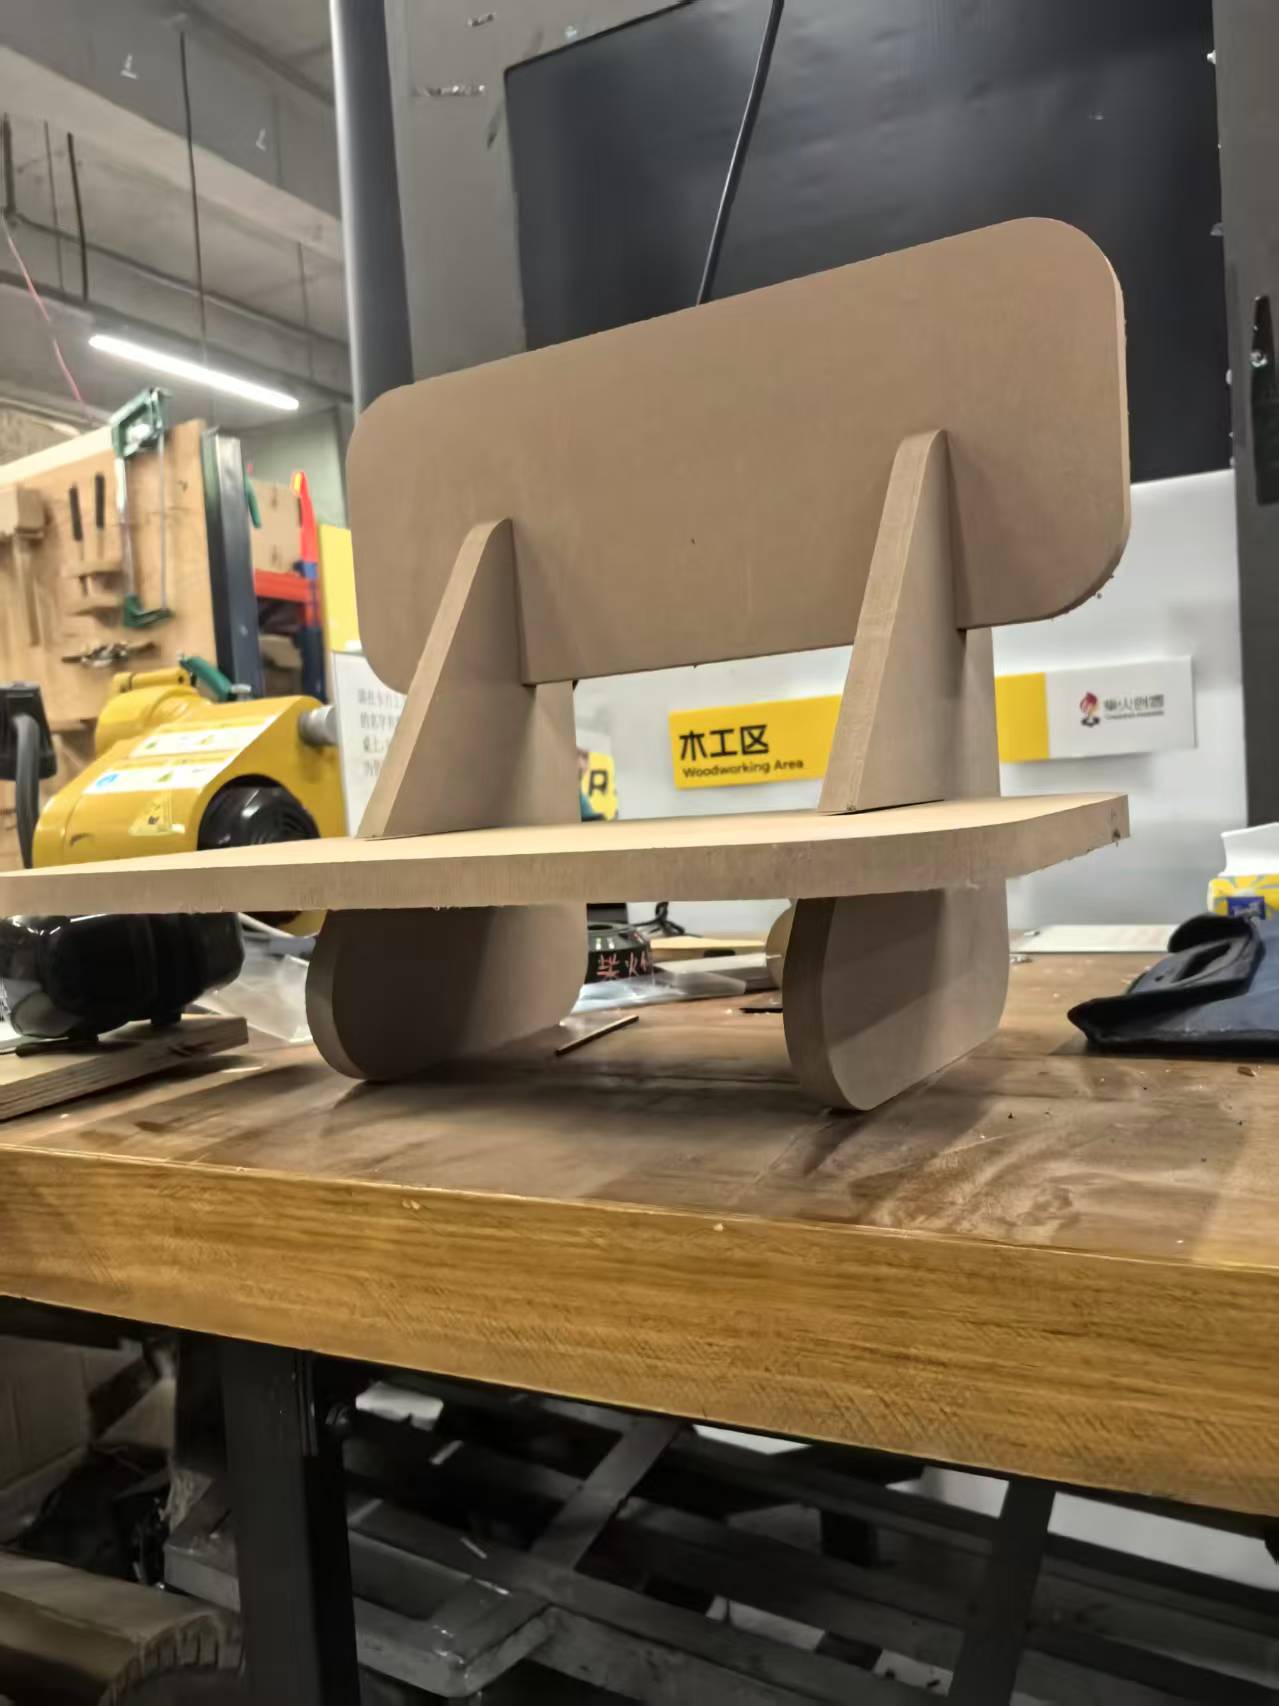
I want to make a small chair for children to sit on, and the chair is made of wood.
Step 1.Design the 3D model of the chair using CAD software Fusion 360.Sketch 4 parts to assemble a small chair.
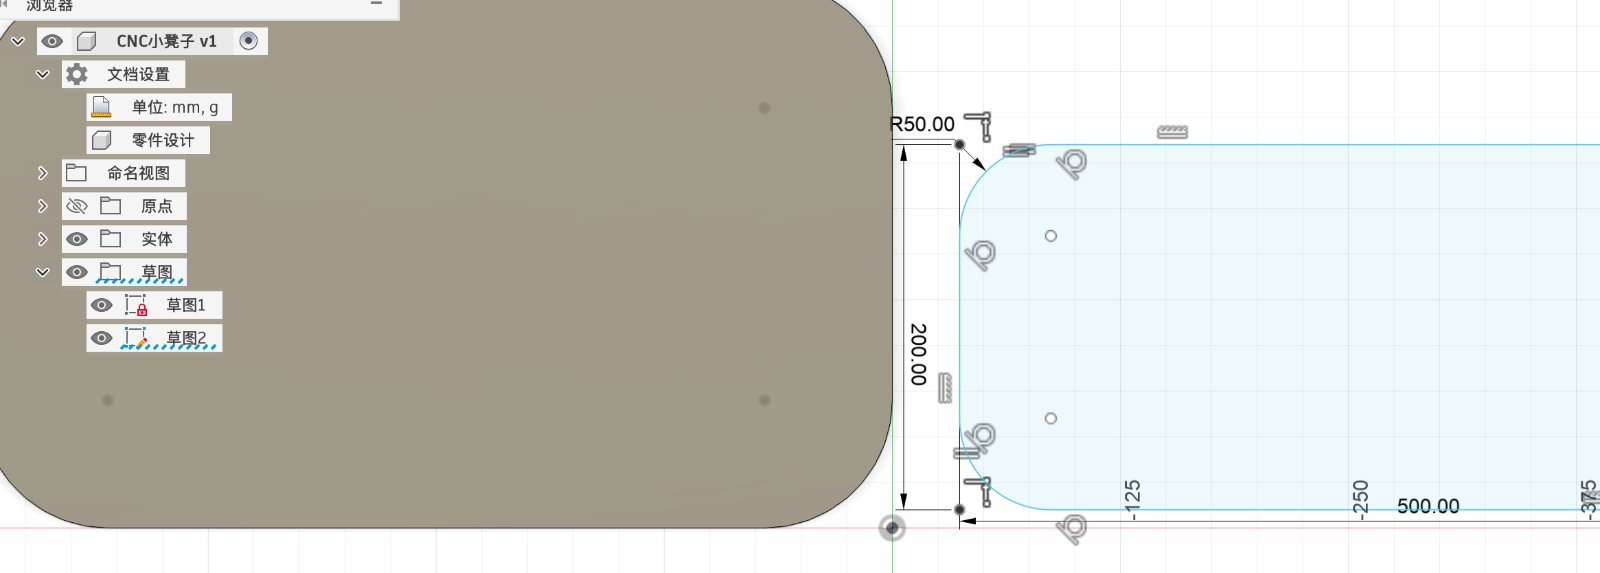
Step 2.I want to make a socket so that each part can assmble together.Select the curve segment that need to be modified.
p>
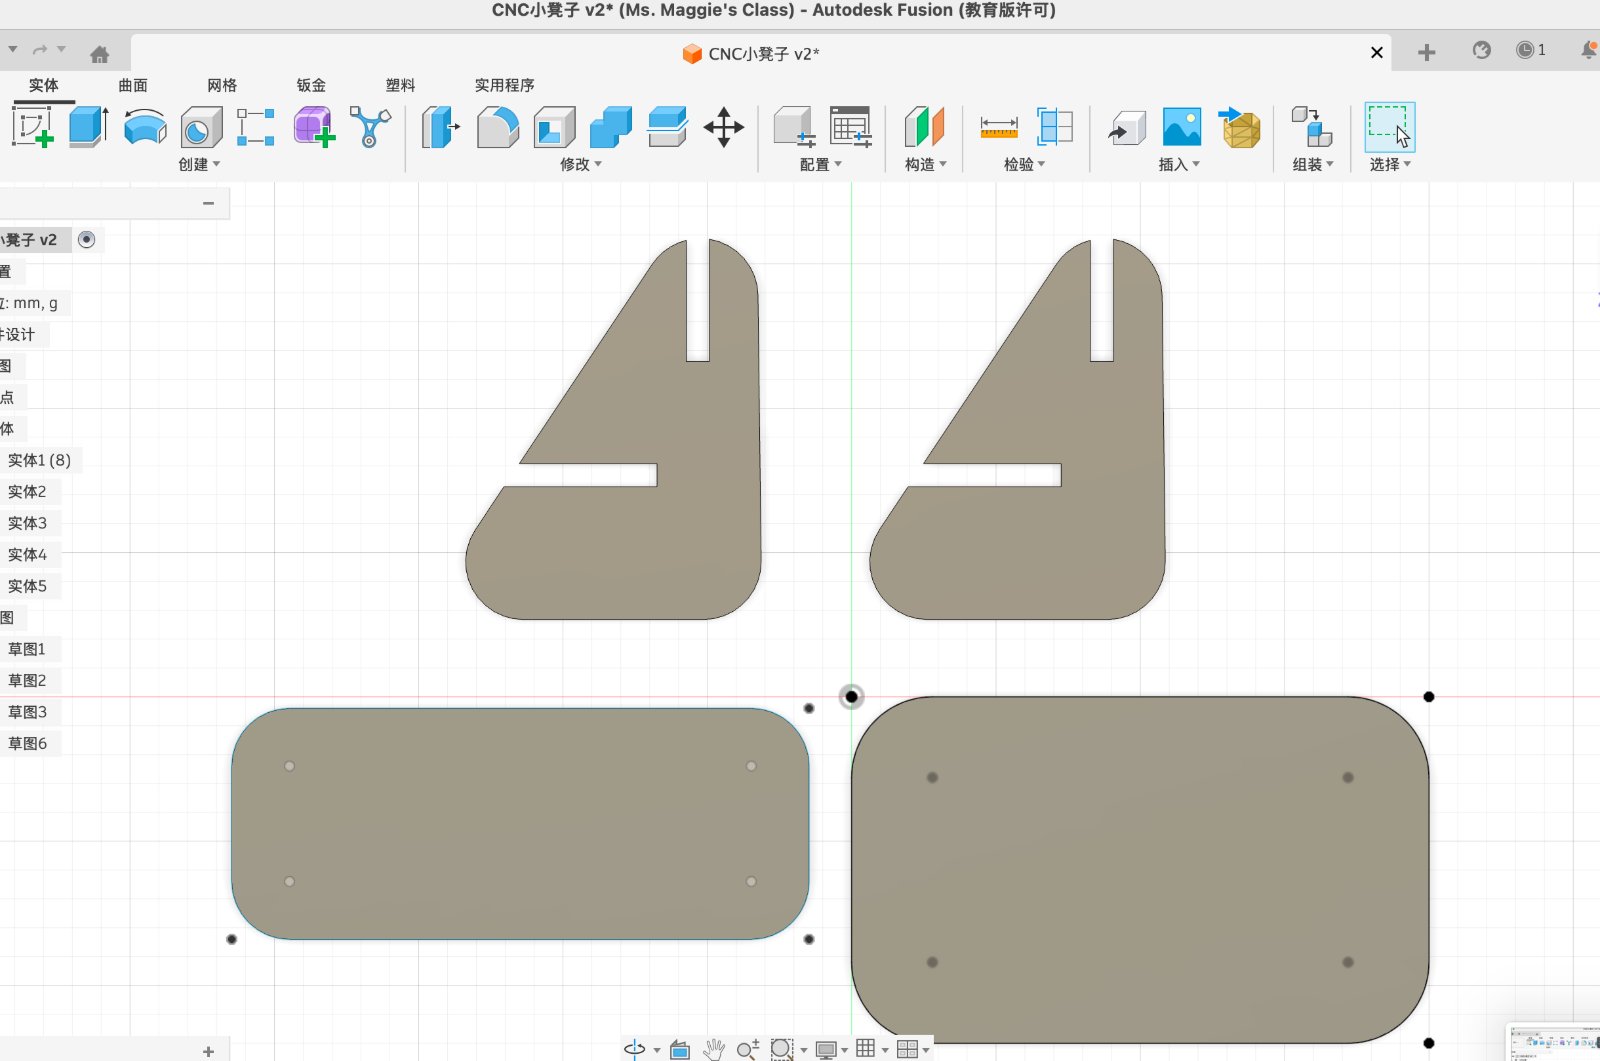
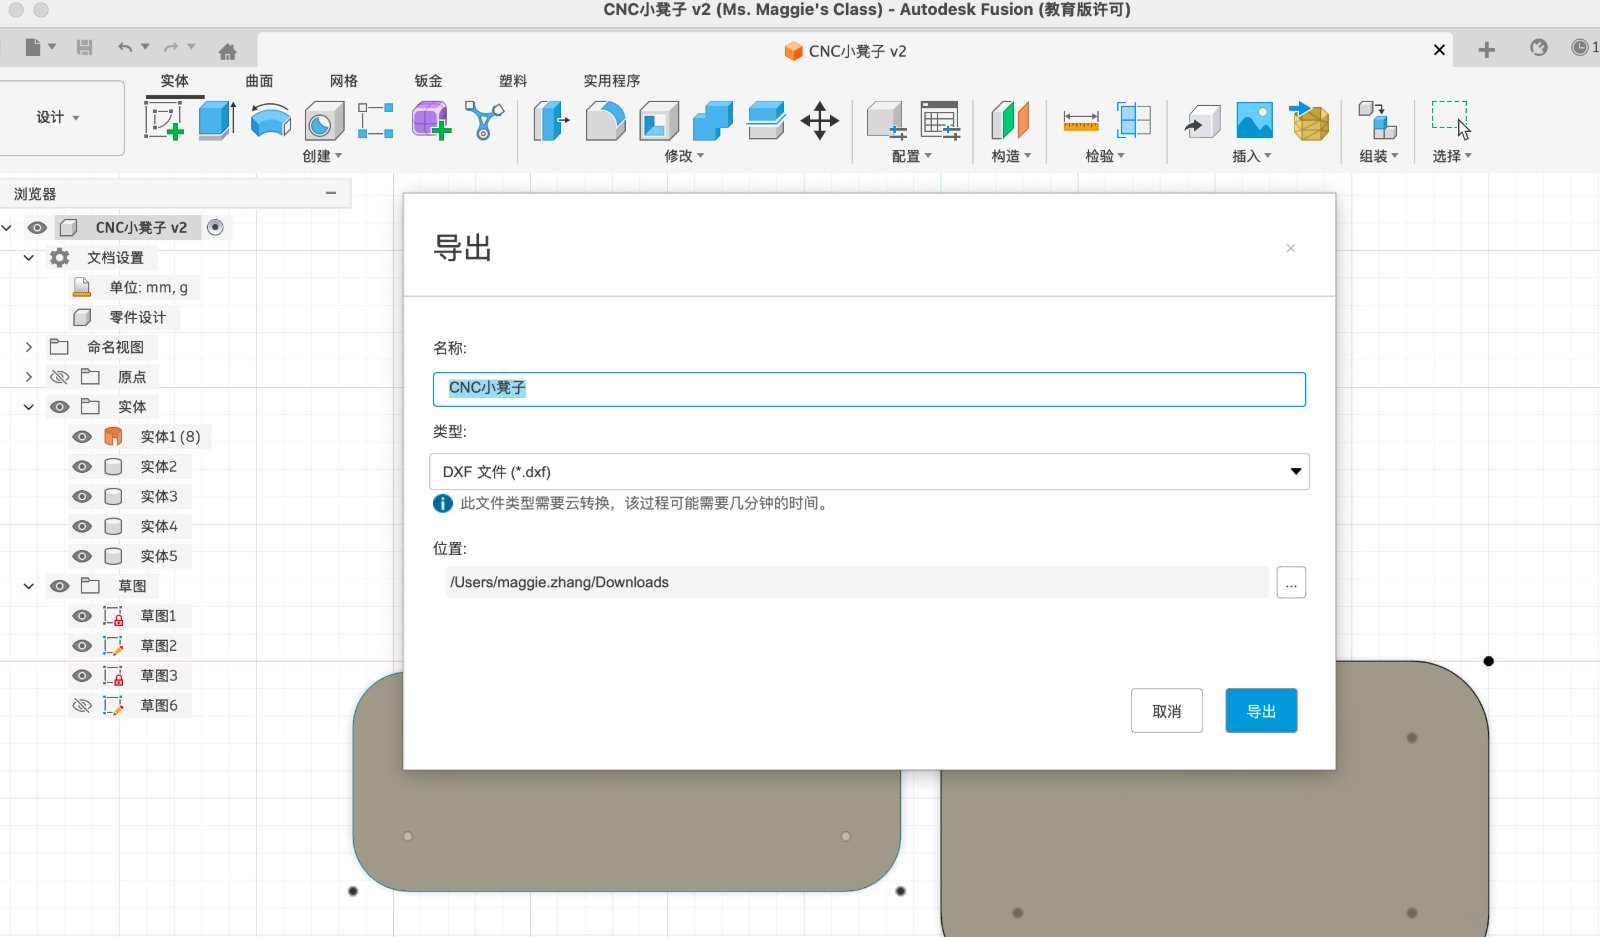
Step 2.Export the 3D model file, but Fusion 360 only support to export each sketch seperately, so after I export 4 parts, I will use Lasermaker to assemble them together, then export again as dxf.file.
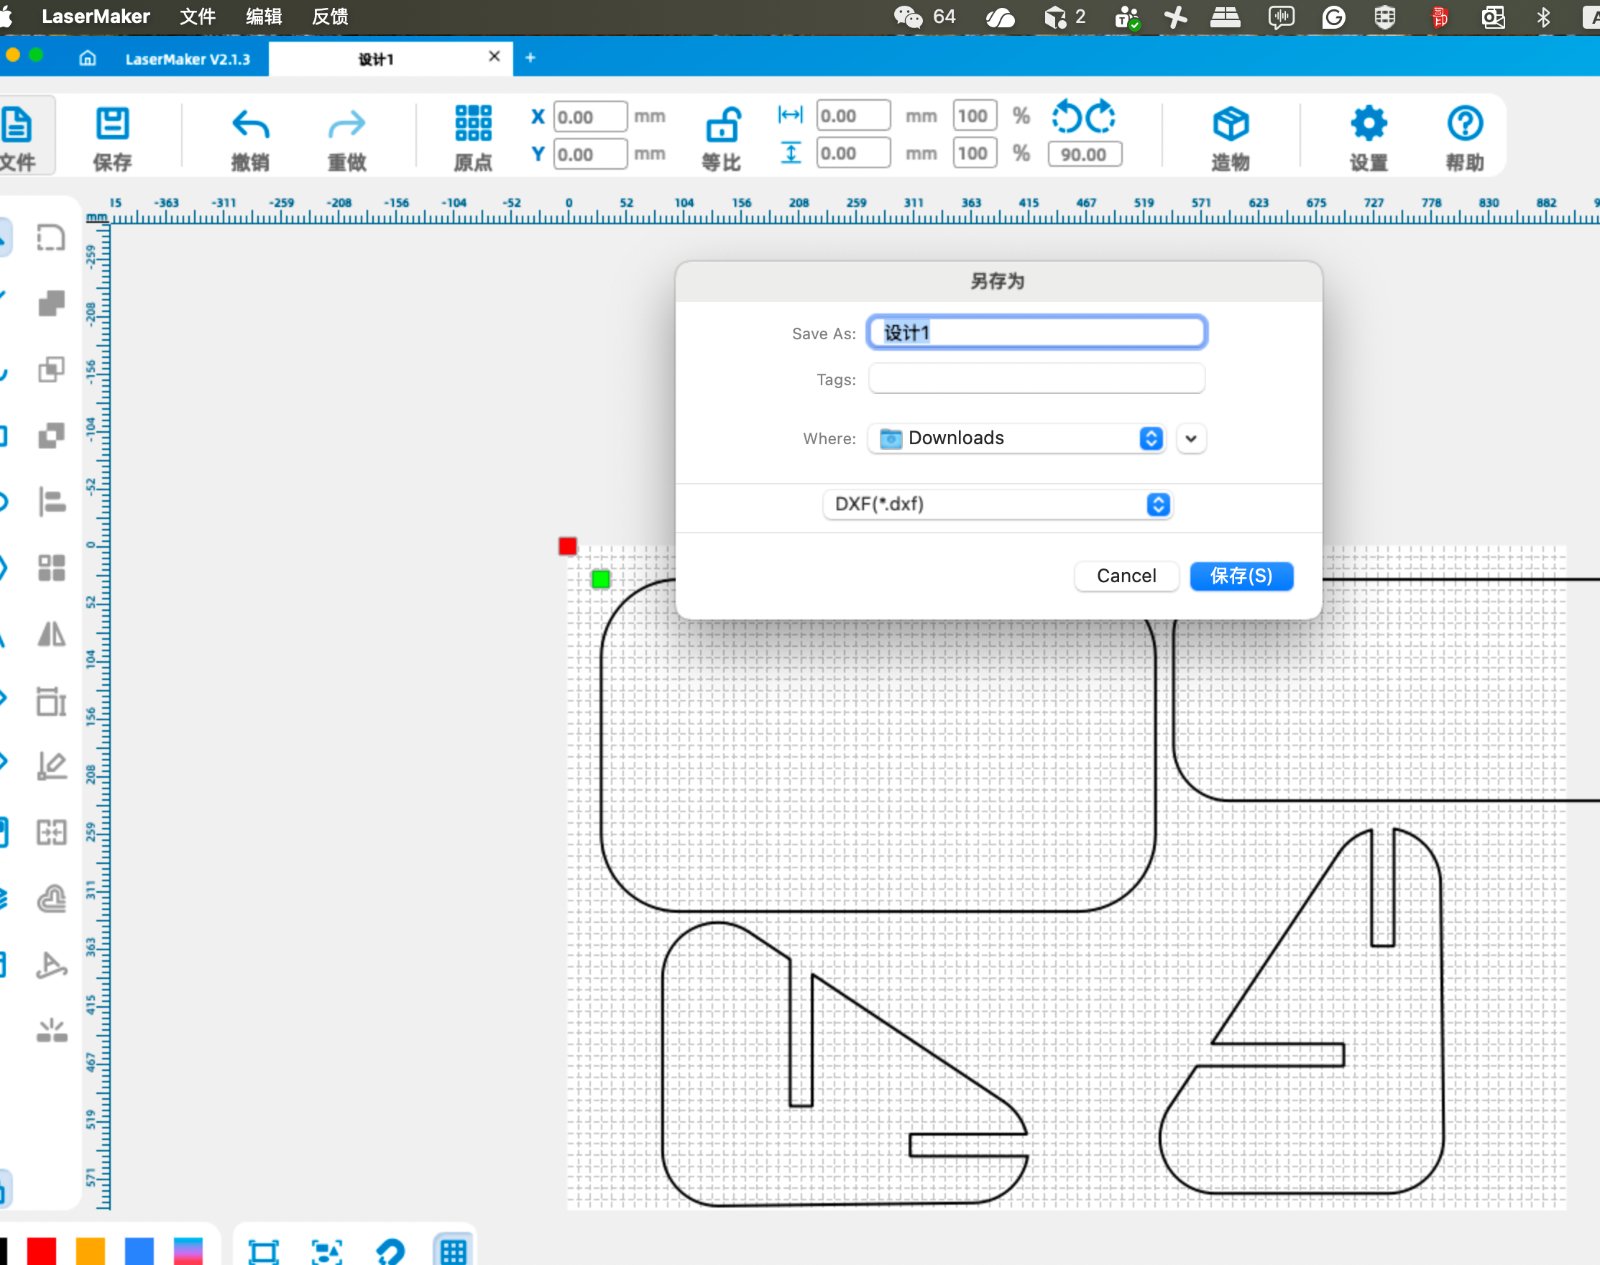
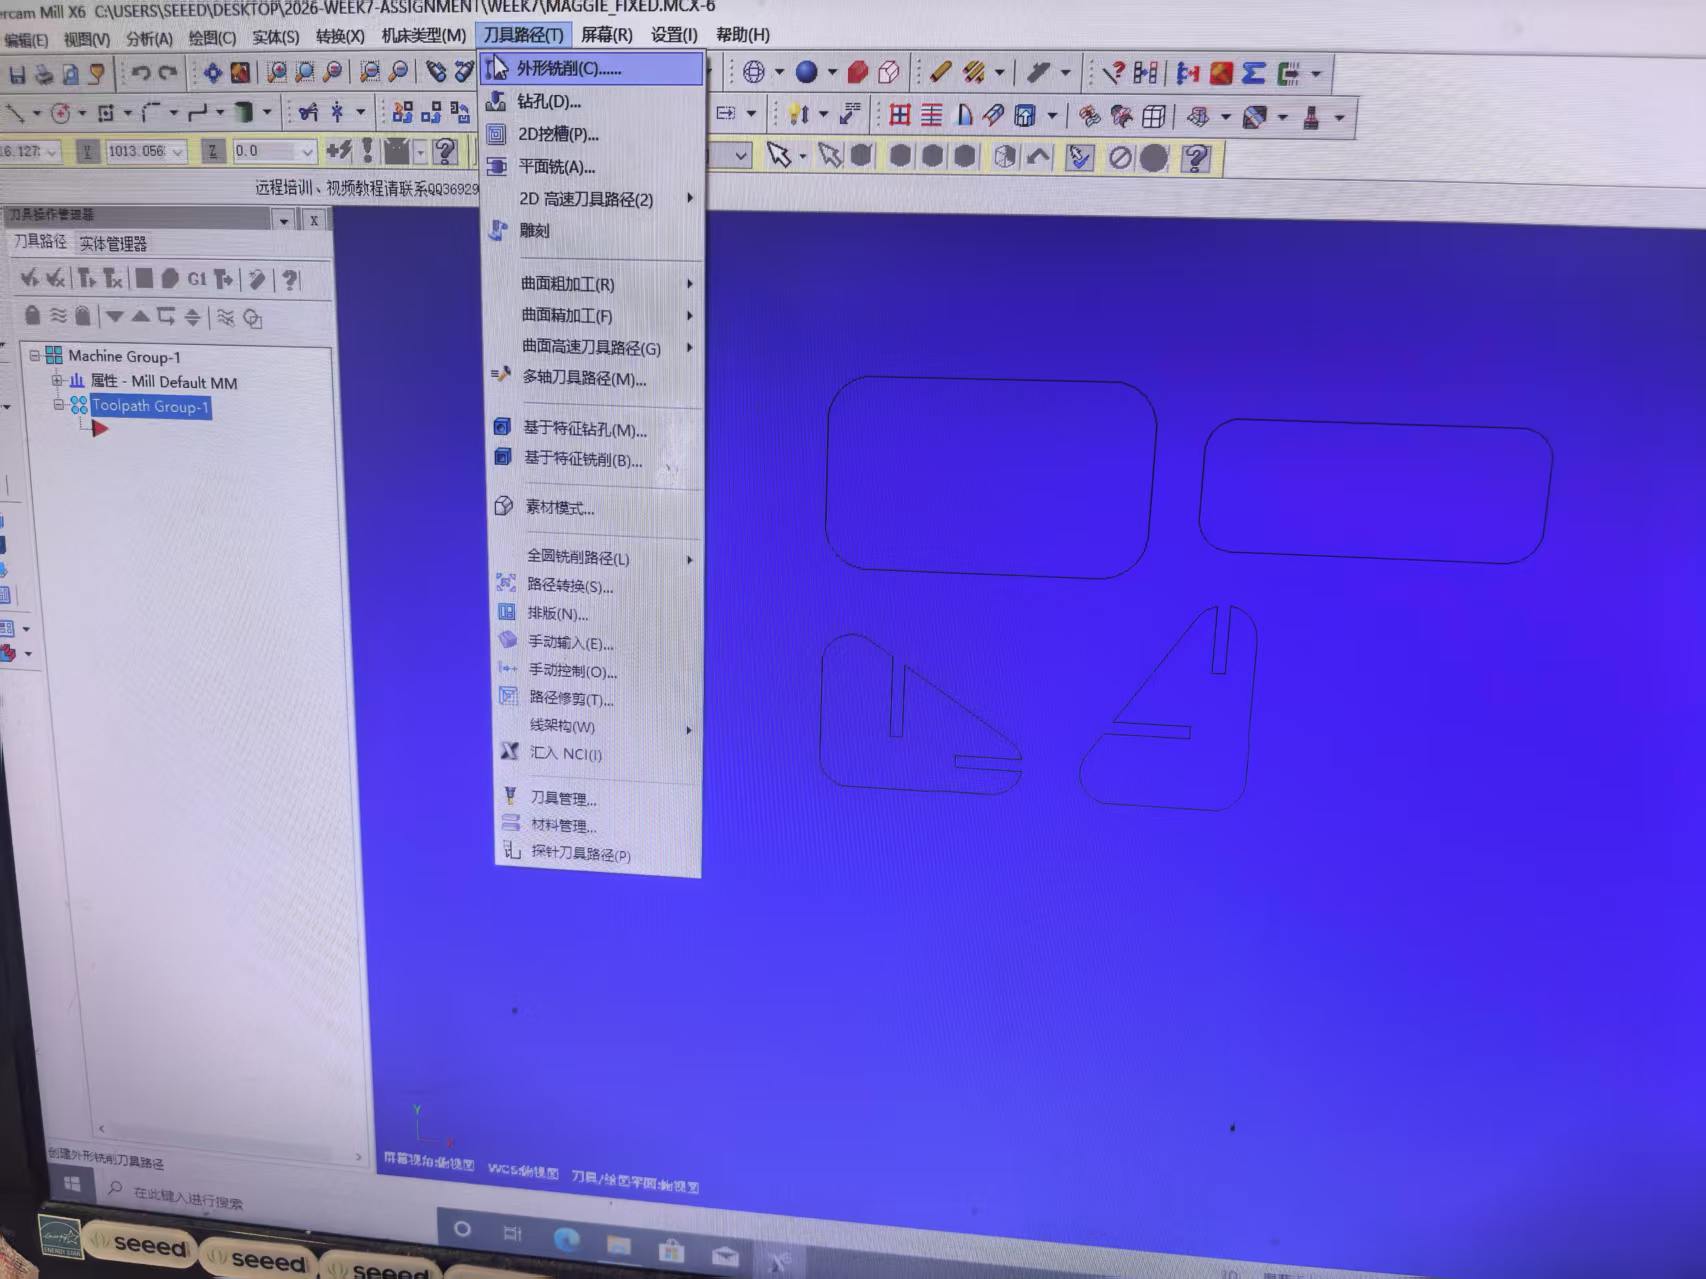
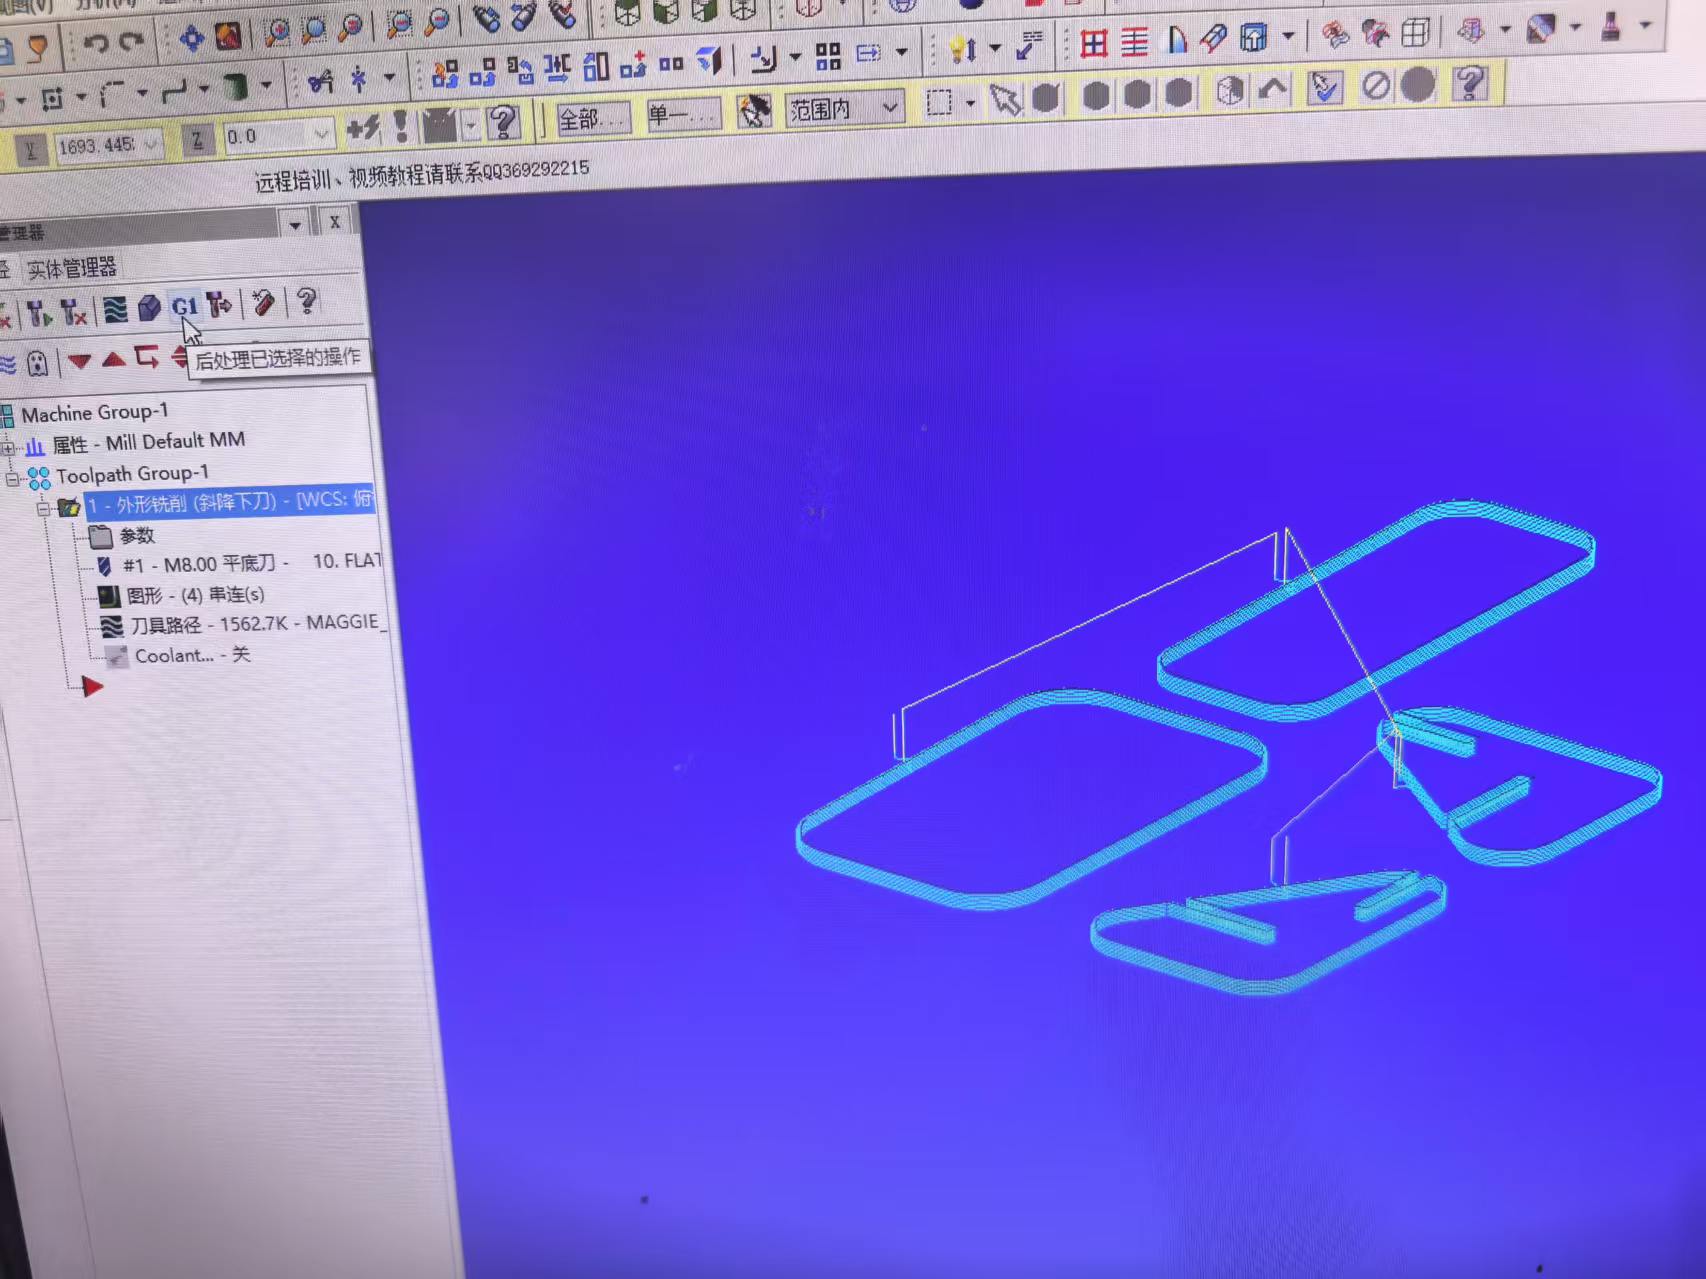
Step 3I used software MaserCAM " to Convert the dxf file to the G-code file and import into the CNC machine.
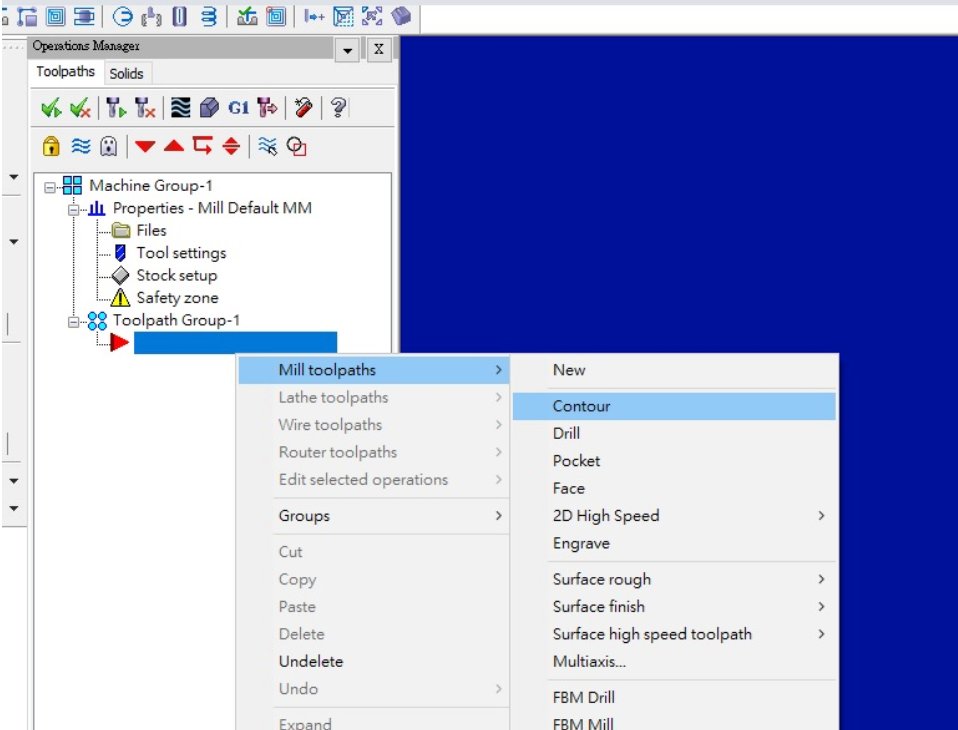
Import dxf file into MaserCAM software, add Contour cutting ni the Mill toolpaths selections.
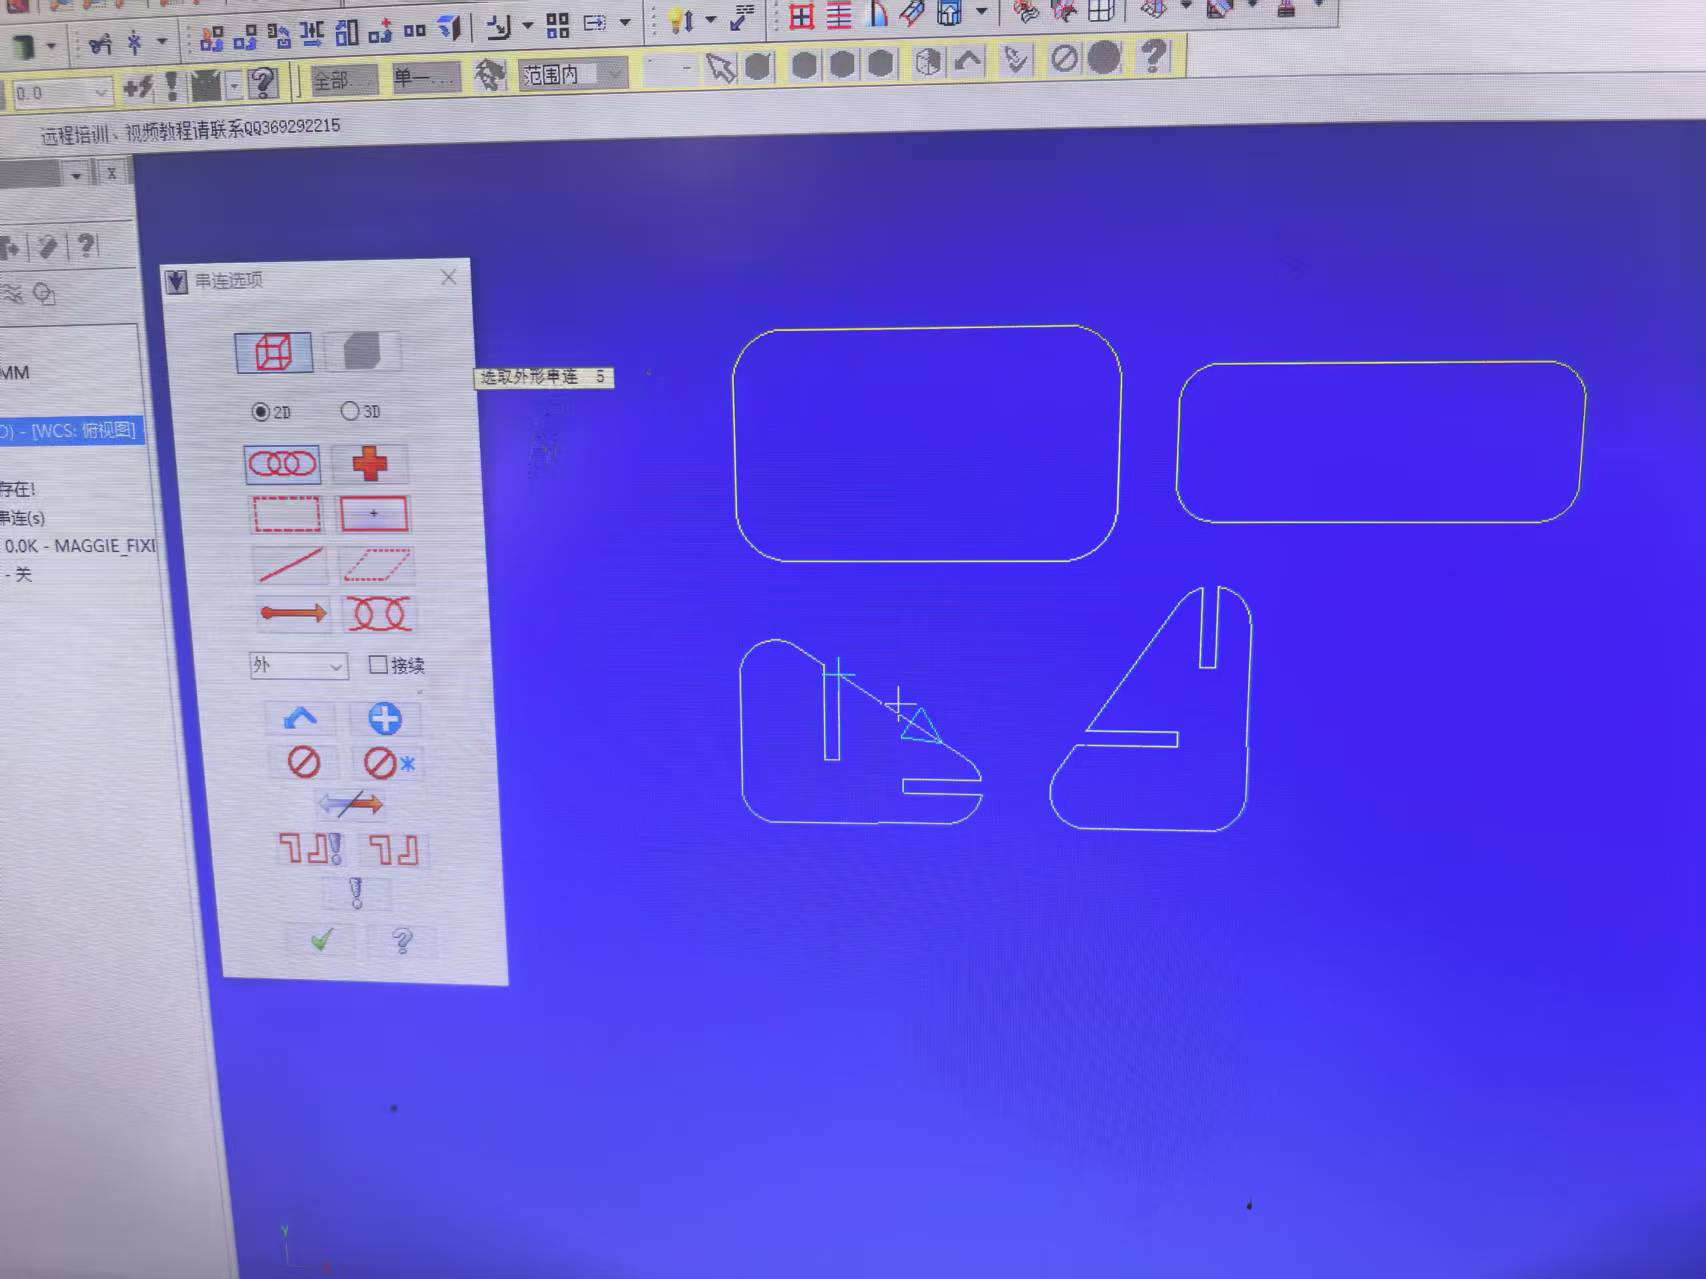
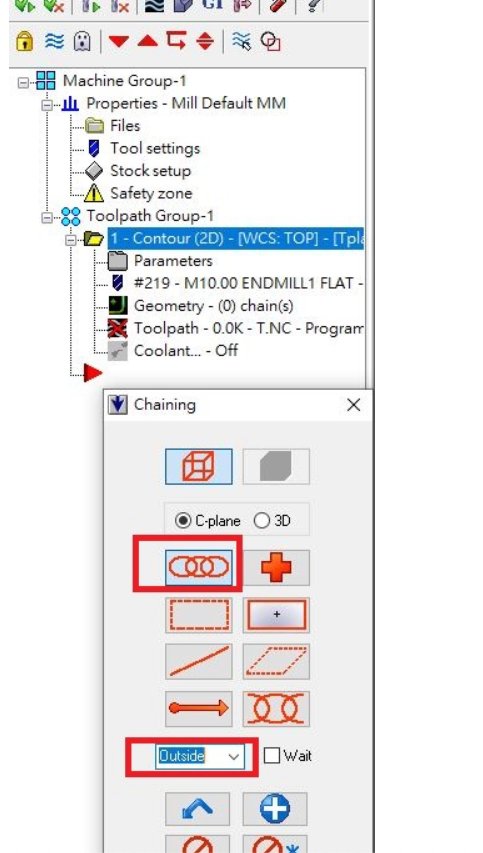
Choose "Chaining"and select "Outside", as the cutting files only existes the outline.
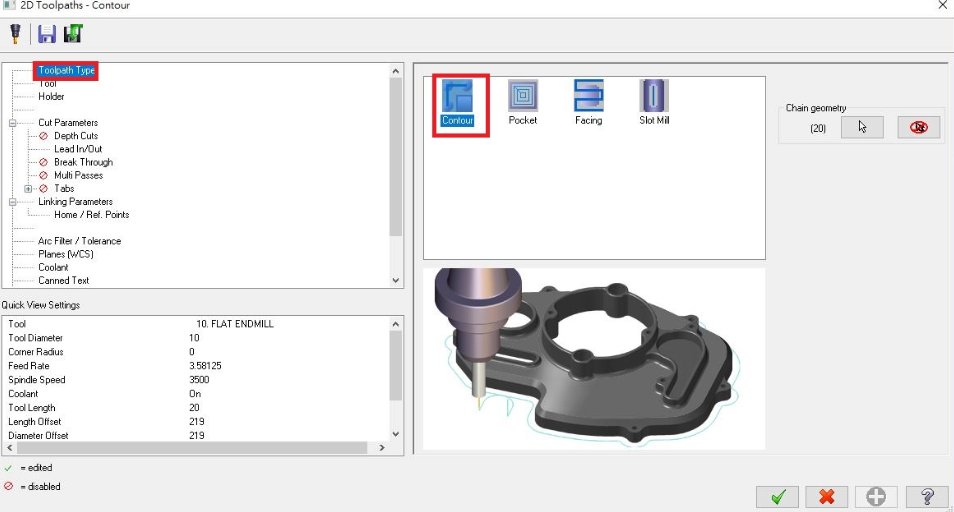
Set up the ToolPath Type as Contour.
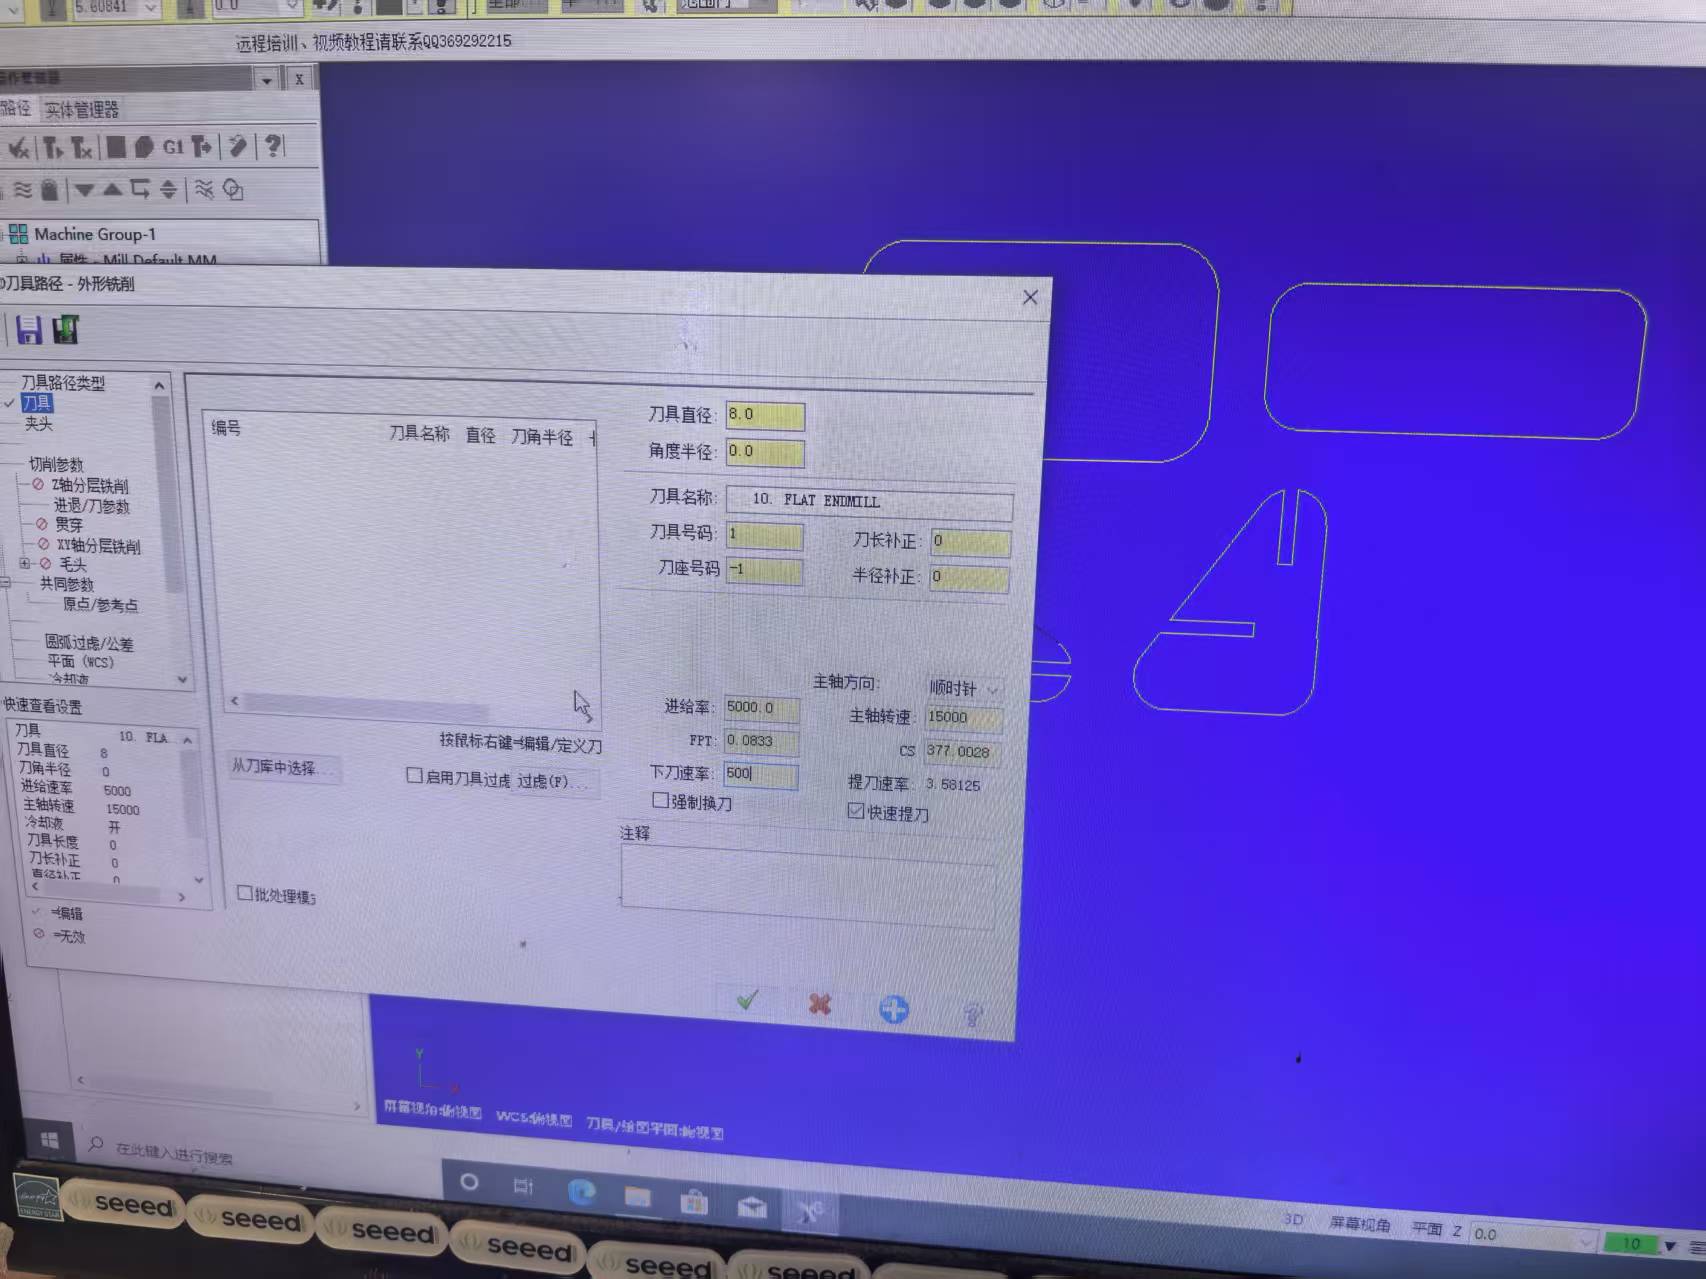
Go to "Tool" selection, then setup the toolpath as 8mm diameter tool. Set the tool parameters as below:
Toolpath type:2D Contour
Tool diameter: 8mm
Feed Rate 5000mm/min
Spindle speed: 15000rev/min
Plunge Rate 1000 mm/min
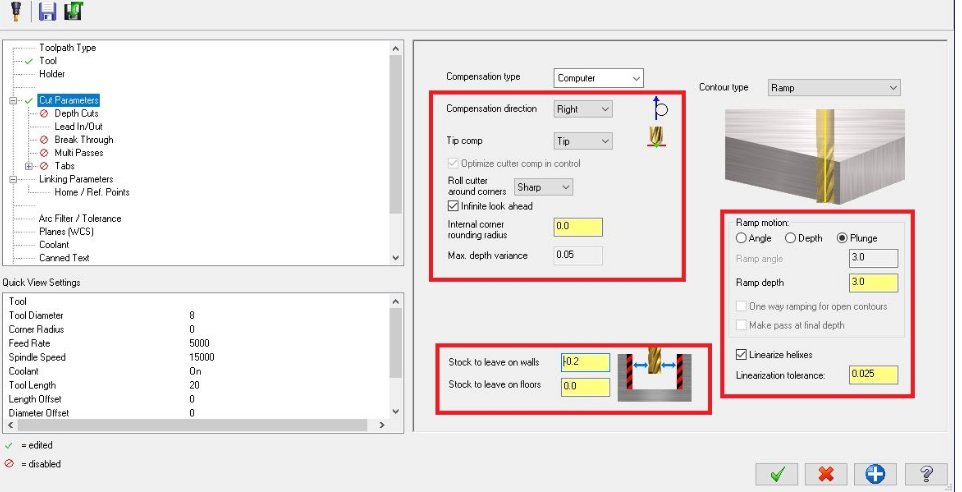
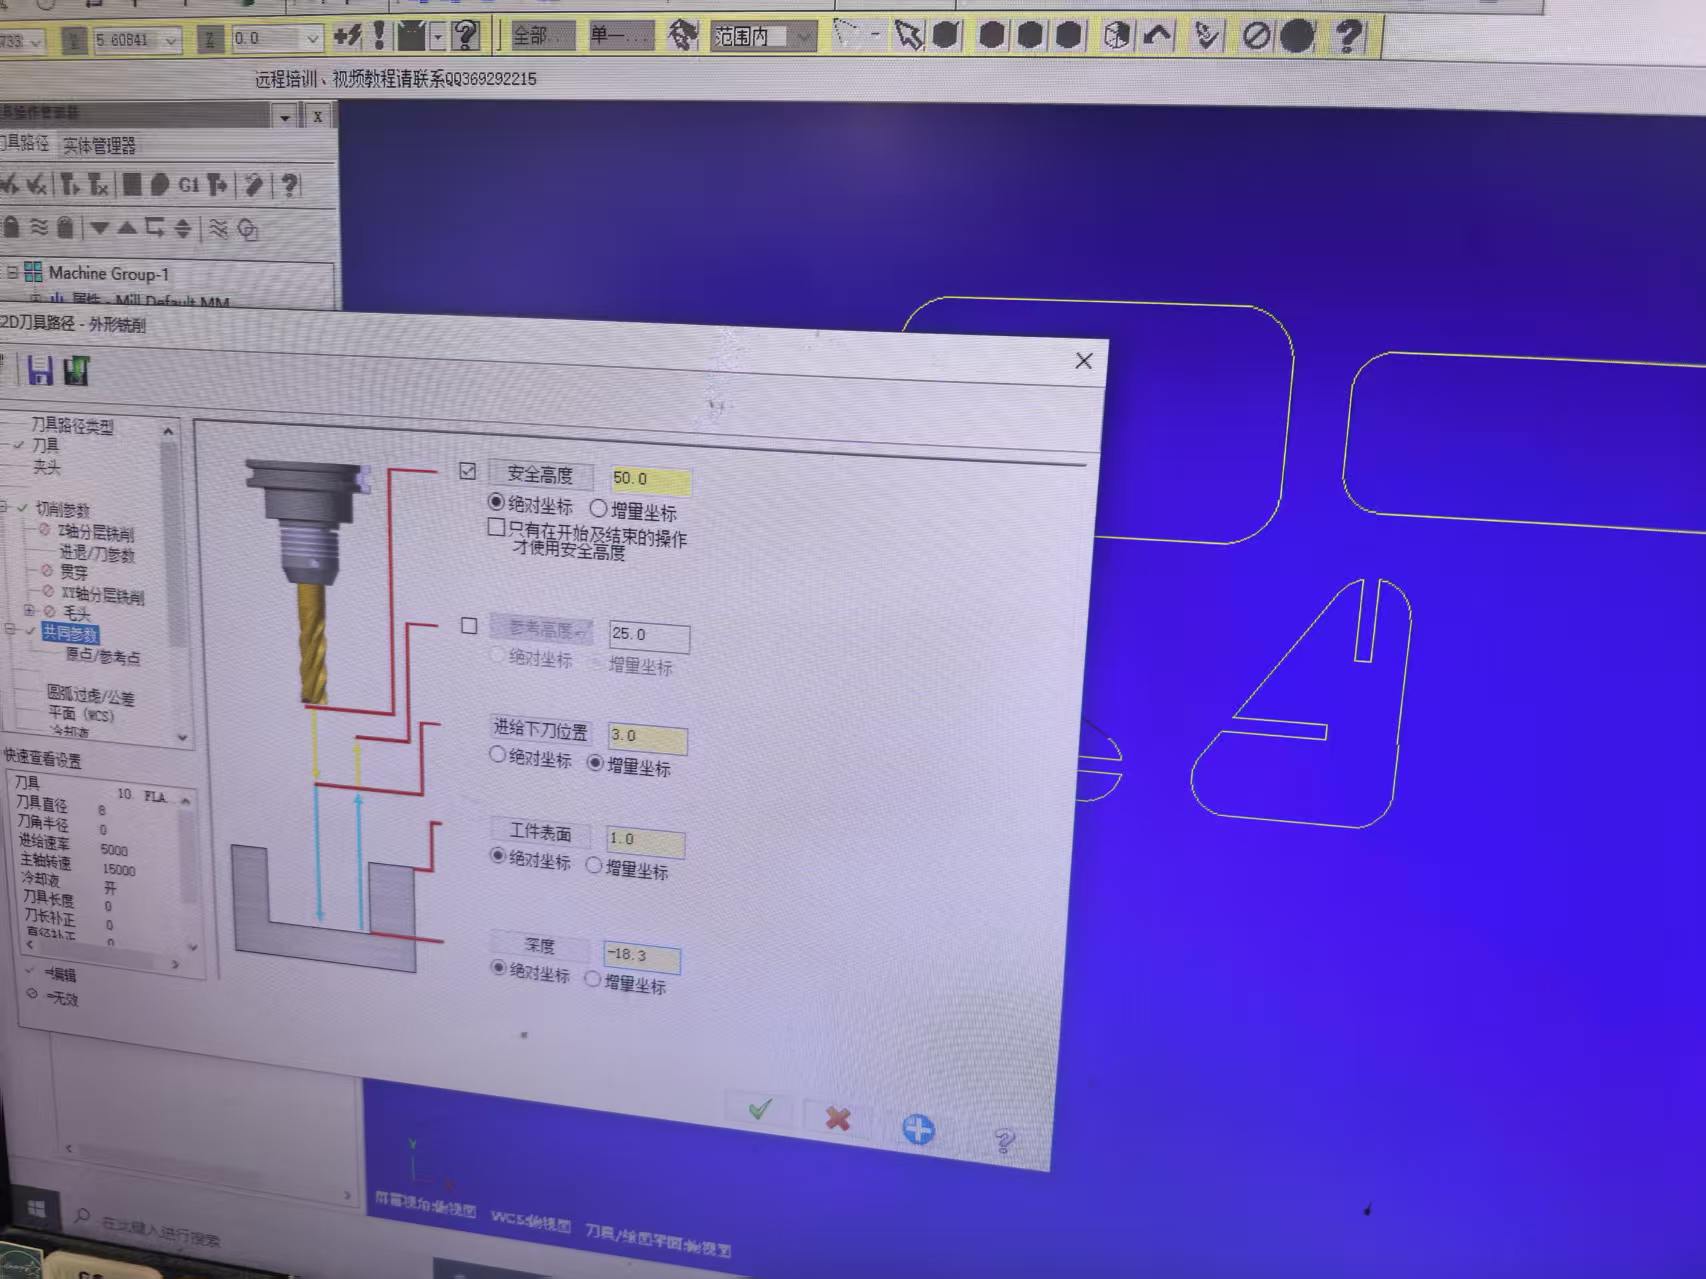
Depth per pass :8mmTotal cut depth: full board tickness +0.3mm
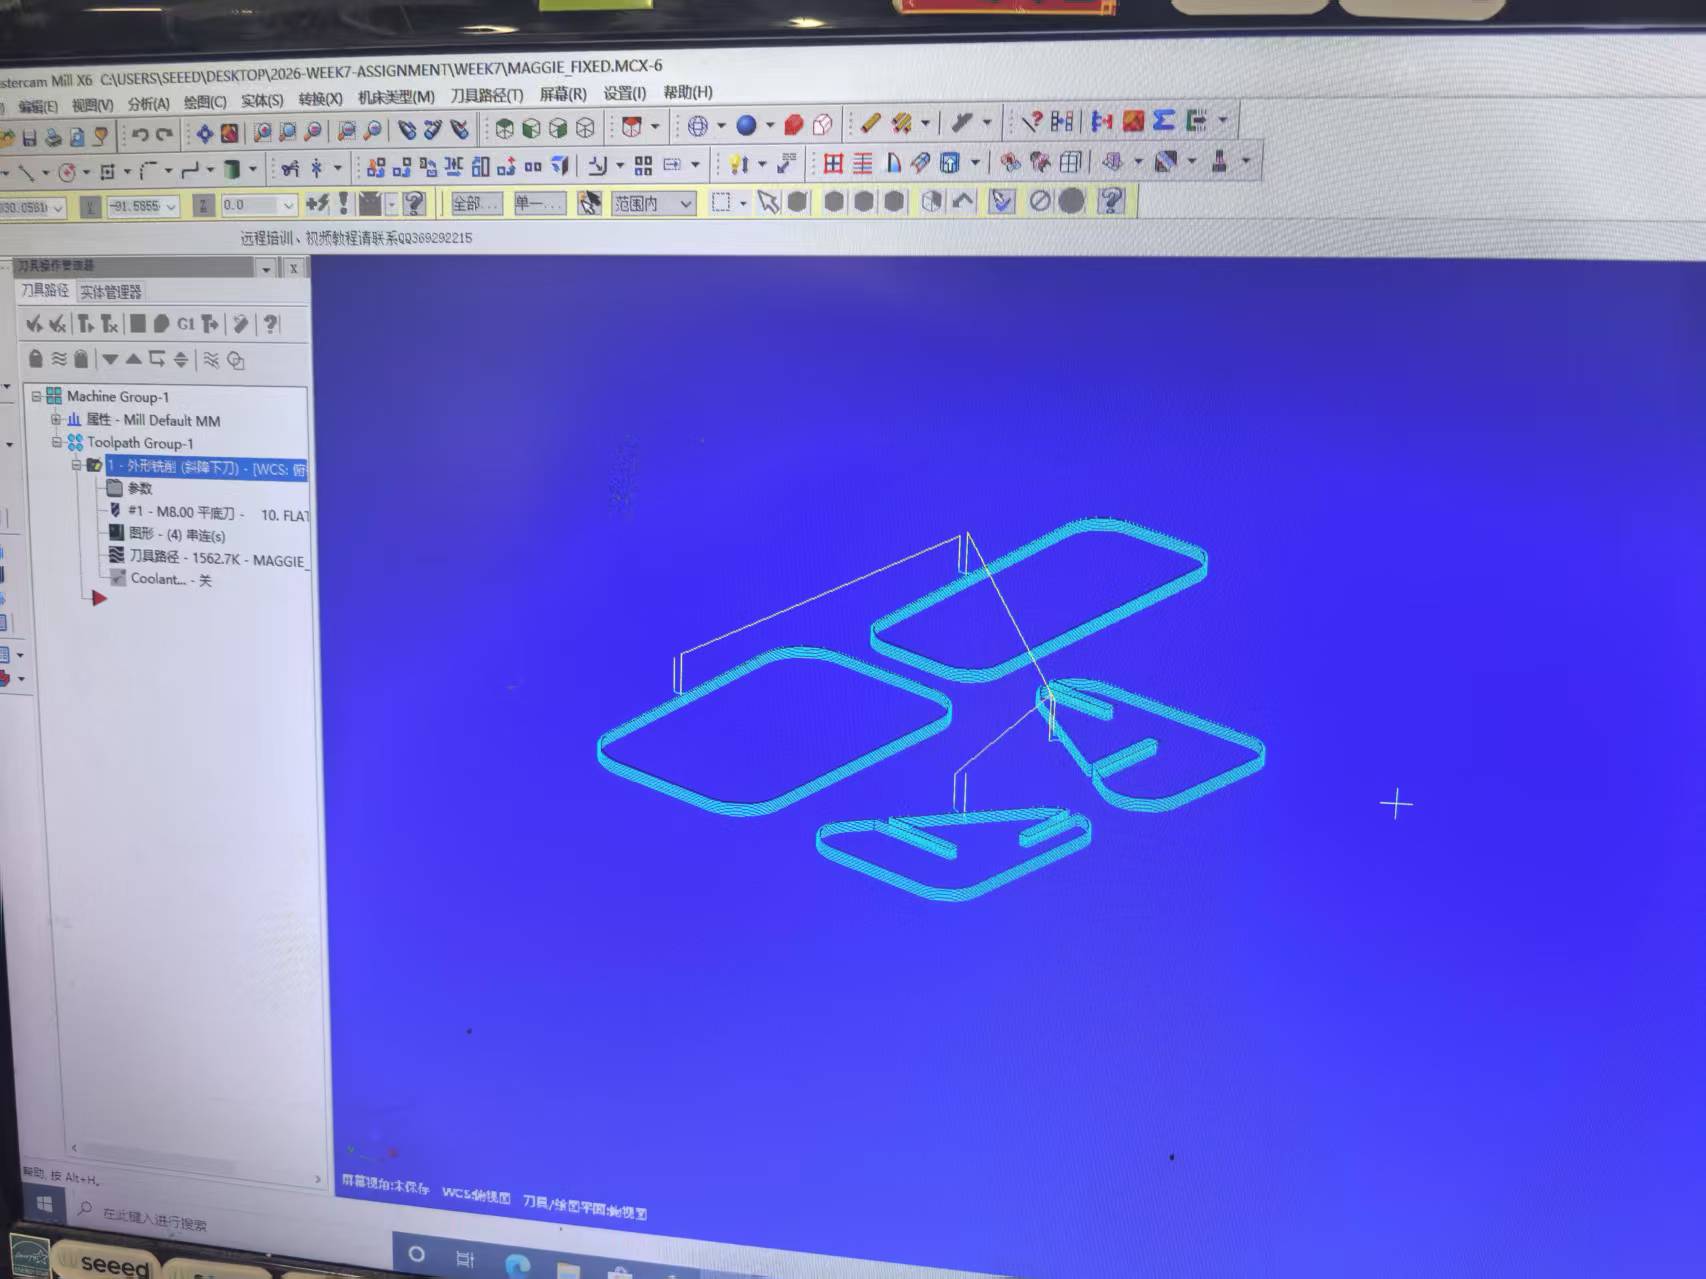
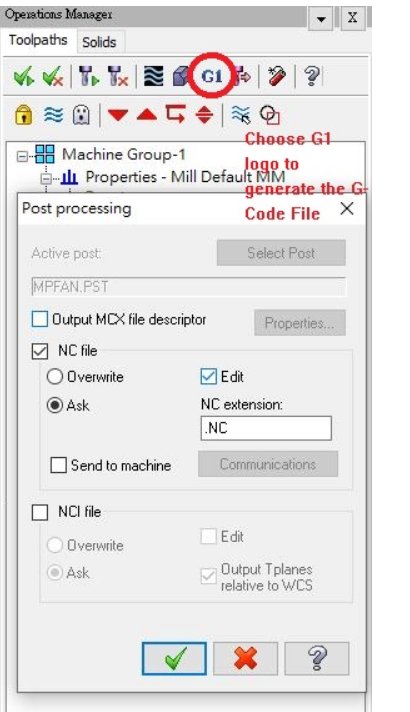
Finally, generate the G-Code file. (.NC files)
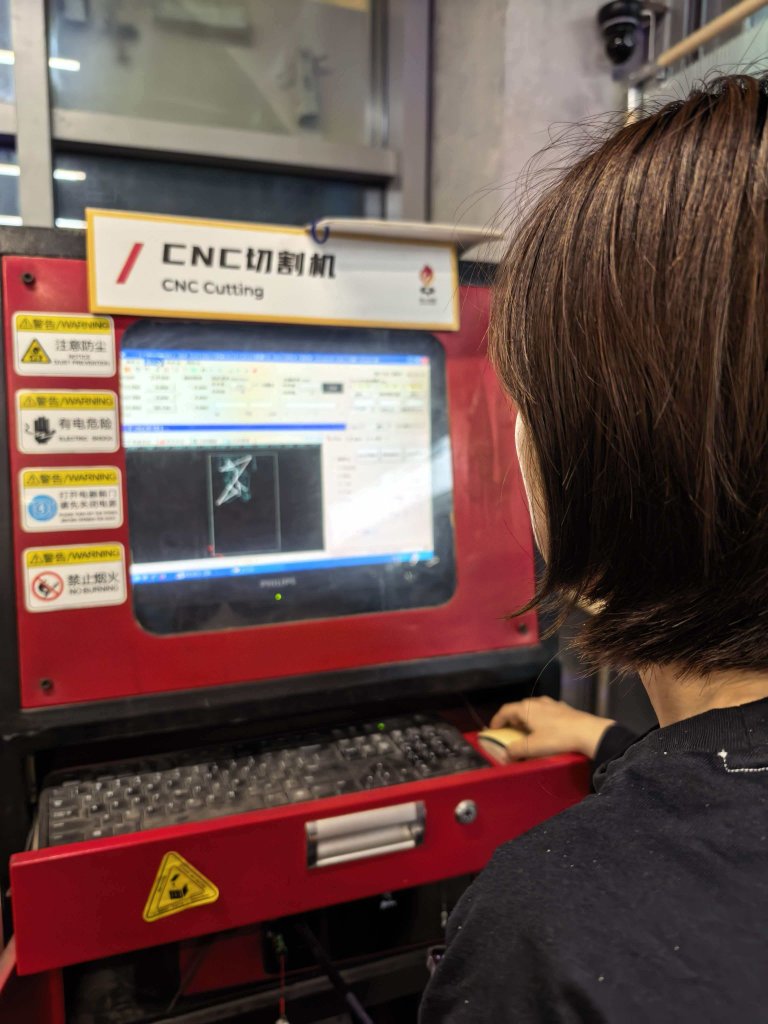
Step 4.Cut the wood using the CNC machine.
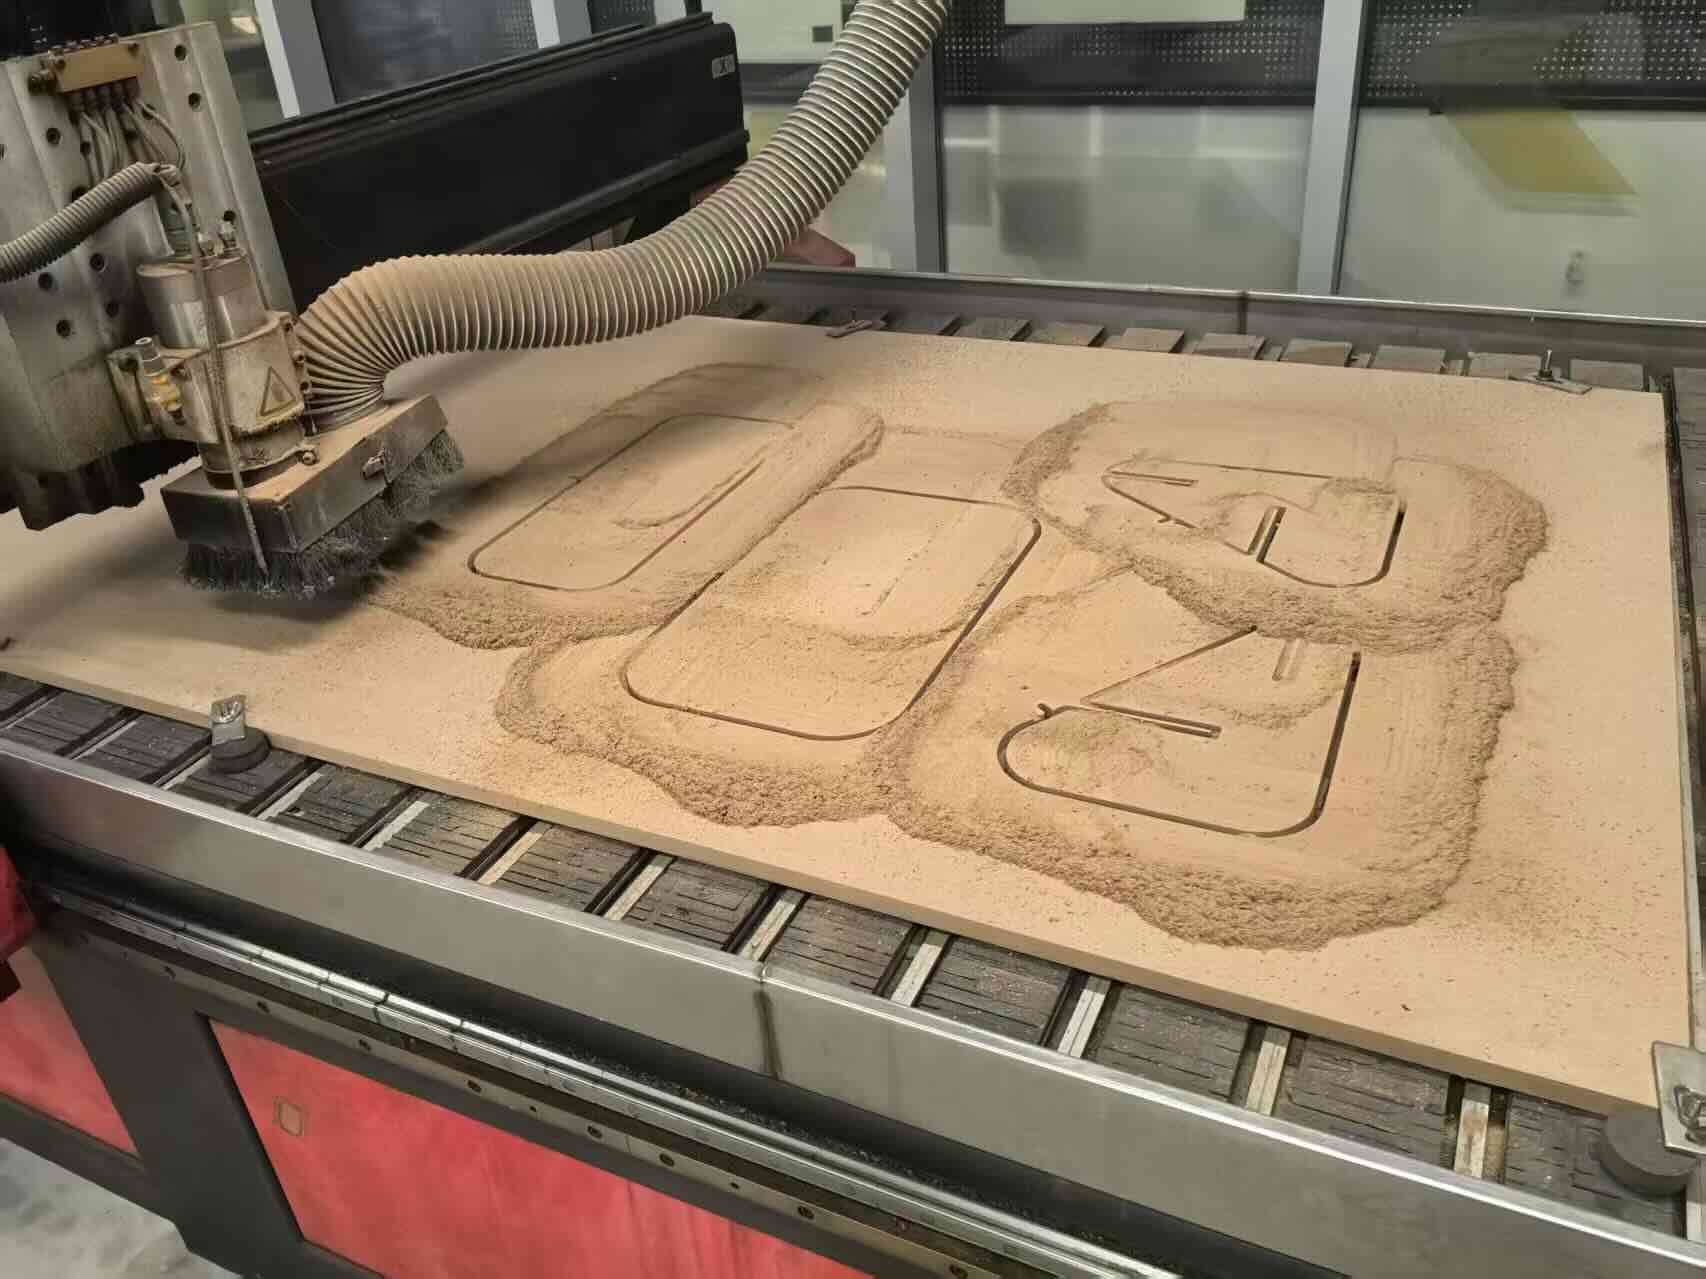
G-code source file: week7_fixed3-more_aligned_to_LONG.NC
3D sketch source file: 3D Design1
3D sketch source file: 3D Design2
3D sketch source file: 3D Design3