Overview
Design a mold around the process you'll be using, produce it with a smooth surface finish that does not show the production process toolpath, and use it to cast parts.
This week: mill a wax mold, cast something flexible into it. I milled a negative of my avatar illustration — the design motif I've used throughout Fab Academy — into blue machinable wax on the Roland SRM-20, then cast a Feroca EasyPlat 00-30 silicone into it to produce a soft rubber stamp. A 3D-printed handle was pressed into the silicone while it cured, so the stamp comes off the mold already mounted on something I can grip and ink.
The path to a clean mold involved a block-sizing mistake, a surfacing pass to fix it, then roughing and finishing in sequence. The mistakes are documented here — they're the actual content of the week.
For the cast I used Feroca EasyPlat 00-30, a two-part platinum silicone — flexible enough to press cleanly, picks up fine wax detail, and de-molds from wax with no release agent. I shared one mixed silicone batch with a teammate who was casting a joystick grip for the Song of the Sea machine; their joystick cast is their project — the only overlap is that we mixed and degassed one batch of silicone together.
The group assignment — reviewing safety data sheets for molding and casting materials and comparing test casts from different processes — is linked in the sidebar, with my reflection in the Safety section below.
The Materials: Wax Mold, Silicone Cast
Machinable wax is a synthetic wax formulated to cut cleanly on CNC machines — it holds fine detail, doesn't melt from tool friction at normal feeds and speeds, and releases cast material easily without a mold-release agent. The blue colour is just a dye; it makes the machined surface contrast clearly against the uncut wax. Critically for mold making, wax is dimensionally stable after machining, and a ball-nose finishing pass leaves a surface smooth enough that the cast picks up no toolpath texture.
Why Silicone (Feroca EasyPlat 00-30)
The output is a stamp, so the cast has to be soft and springy — it needs to flex onto paper, deposit ink evenly, and spring back. Feroca EasyPlat 00-30 is a Shore 00-30 platinum-cure silicone: very soft, picks up fine detail, and cures at room temperature without heat. It de-molds from machinable wax cleanly with no release agent, and it's stable over time — unlike a gelatin or starch bioplastic, it won't dry out, shrink, or stiffen in a drawer.
The trade-offs I had to manage: it's a two-part mix where ratio and bubbles both matter, and the pot life is short once parts A and B meet — so degassing and pouring have to be quick and deliberate.
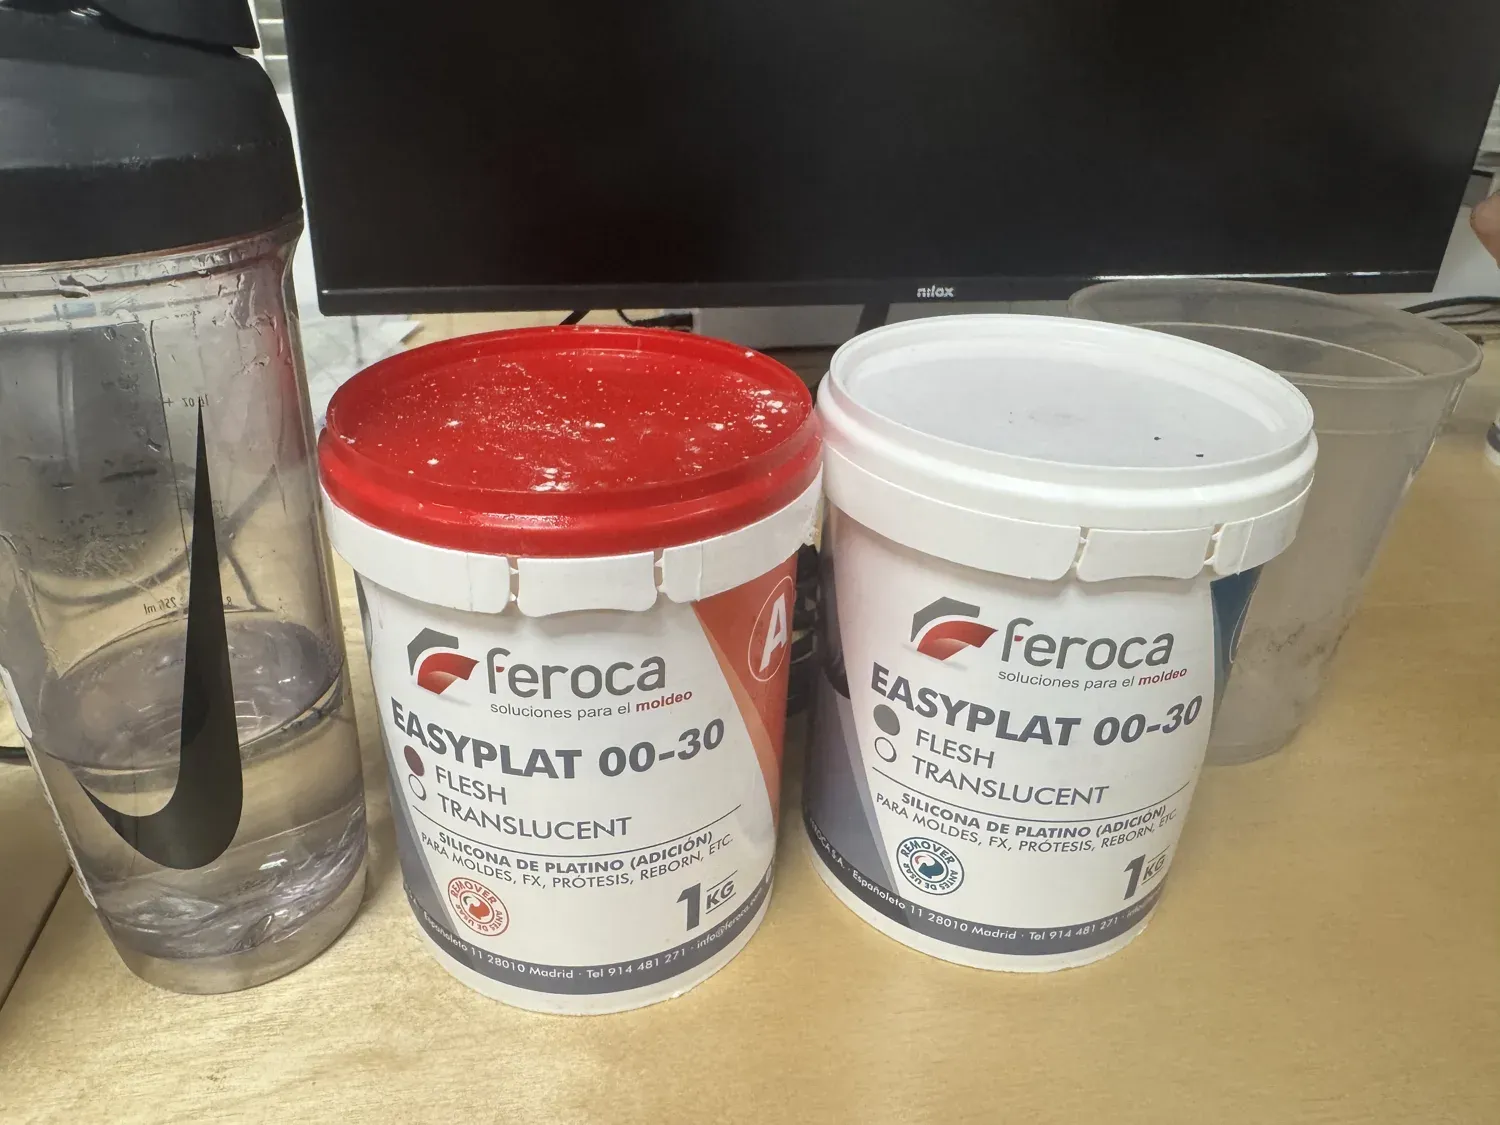
Feroca EasyPlat 00-30 — a two-part platinum silicone, parts A and B mixed 1:1 by weight.
CAM Setup: Modela Player 4
Modela Player 4 is the dedicated CAM software for the Roland SRM-20. Unlike Mods — which works from 2D image exports — Modela takes a 3D STL file directly and generates roughing and finishing toolpaths from the geometry. The workflow is familiar to anyone who's used RhinoCAM: import model, set stock dimensions, select tools, configure passes, export.
Modela Player 4 Workflow
Import the STL file → use the Compass to set
origin at the bottom-left-upper corner → set
Material to Modeling Wax → set all Modeling Form
margins to 0 → add tools (⅛″ square end mill for
roughing, ball-nose for finishing) → create
Roughing process (contour-line toolpath, Cutting
Area: Partial) → create Finishing process (Scan
Line X+Y, same area) → preview the toolpath →
export as
.prn files.
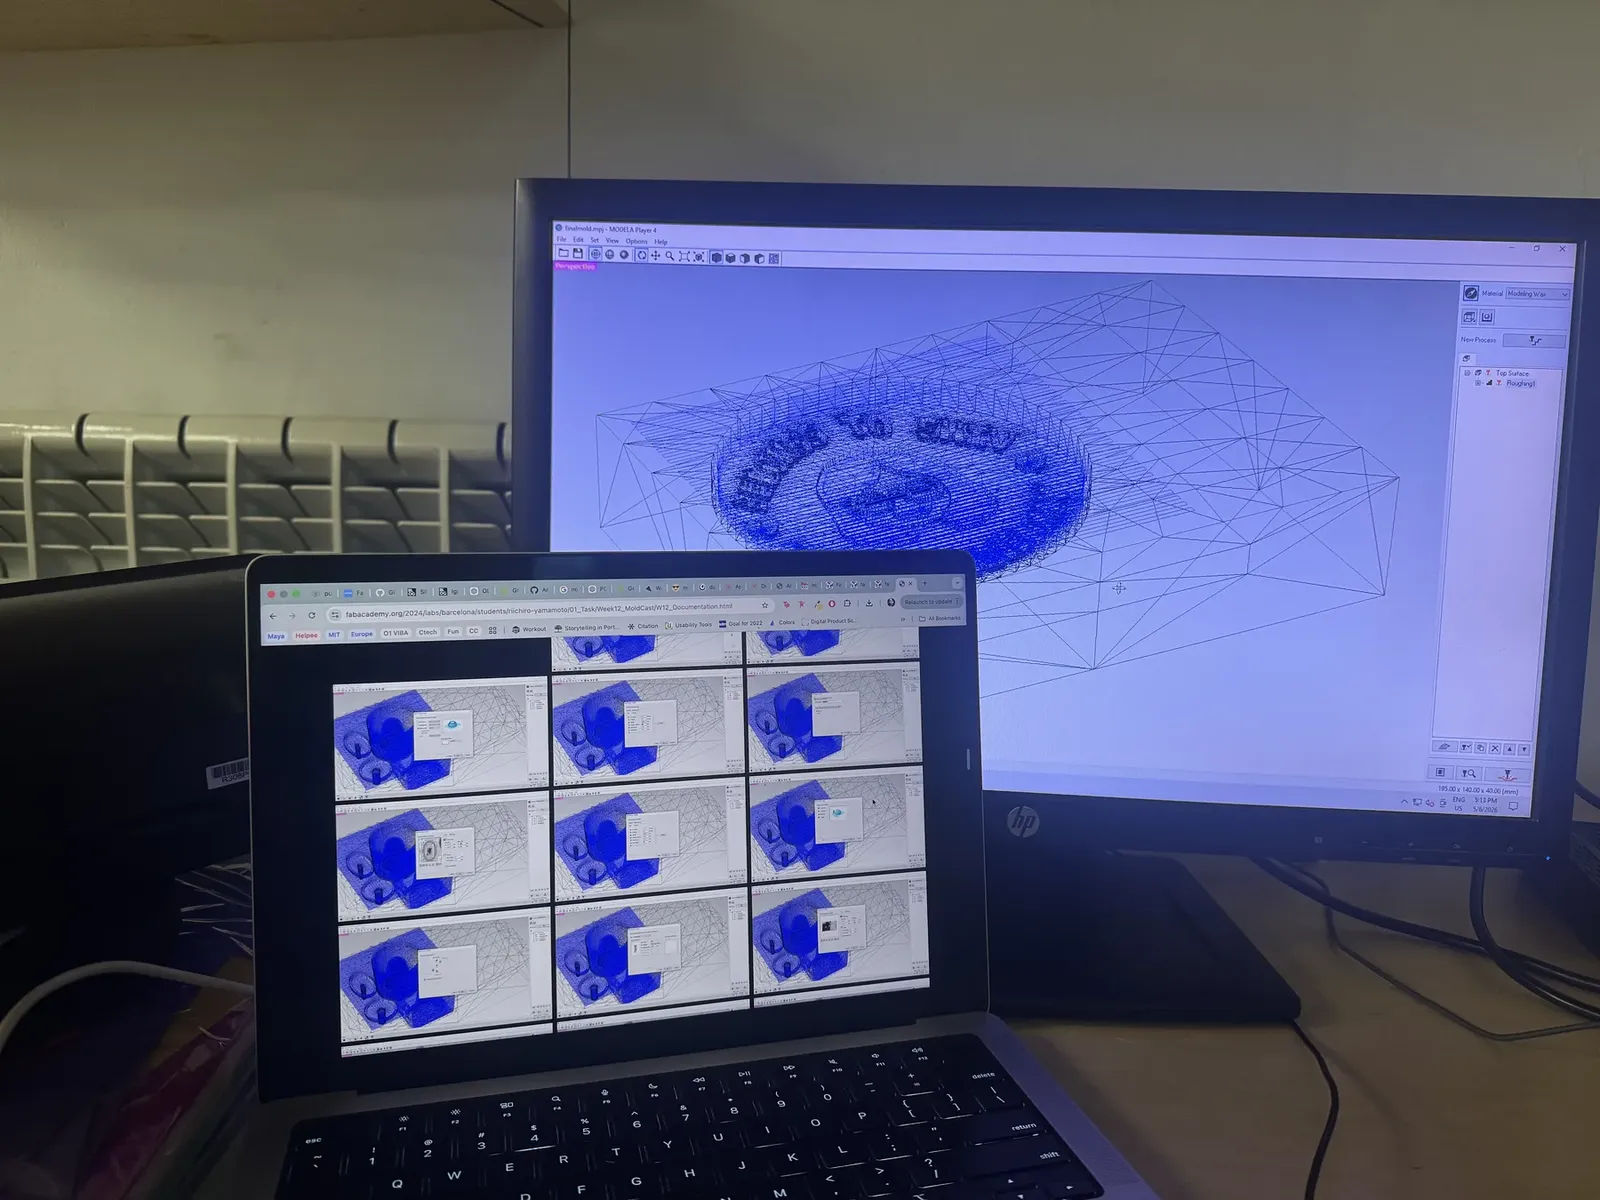
Modela Player 4 with the avatar mold loaded as a wireframe, SRM-20 mold-cast workflow referenced on the laptop.
Machine Settings
Material preset: Modeling Wax. Two tools: ⅛″ square end mill (3.18 mm) for surfacing and roughing; ⅛″ ball-nose for finishing. Settings were loaded from the Modeling Wax preset then adjusted — roughing cut-in set manually to 1.2 mm for a safe step-down in wax.
| Parameter | Surfacing | Roughing | Finishing |
|---|---|---|---|
| Tool | ⅛″ square | ⅛″ square | ⅛″ ball-nose |
| XY Speed | 17.74 mm/s | 17.74 mm/s | 19.49 mm/s |
| Z Speed | 10 mm/s | 10 mm/s | 19.49 mm/s |
| Spindle | 7000 rpm | 7000 rpm | 7000 rpm |
| Cut-in Amount | 0.44 mm | 1.2 mm | 0.2 mm |
| Path Interval | 1.91 mm | 1.91 mm | 0.2 mm |
| Finish Margin | 0 mm | 0.44 mm | 0 mm |
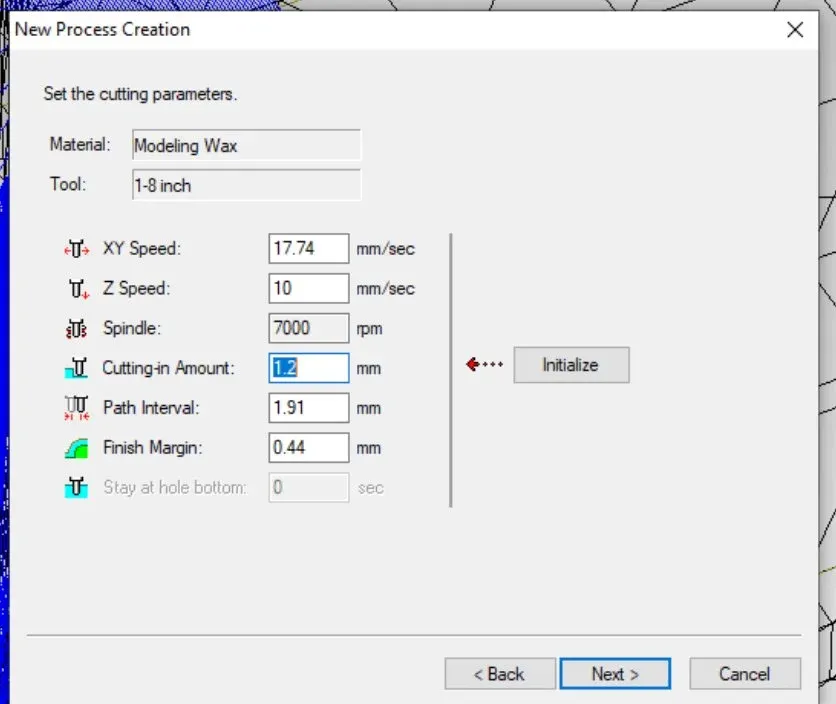
Roughing: ⅛″ square, cut-in 1.2 mm, finish margin 0.44 mm
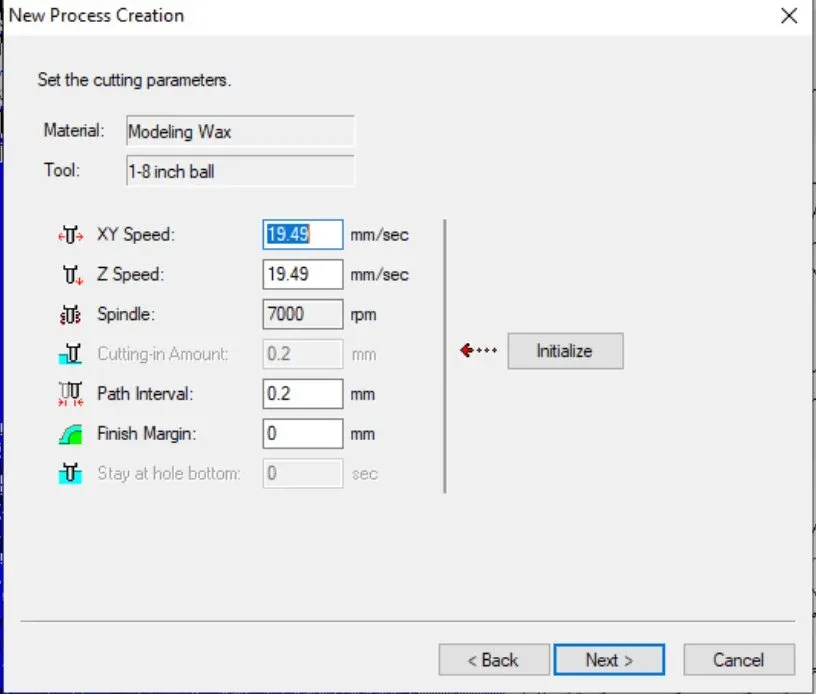
Finishing: ⅛″ ball-nose, 0.2 mm cut-in and path interval
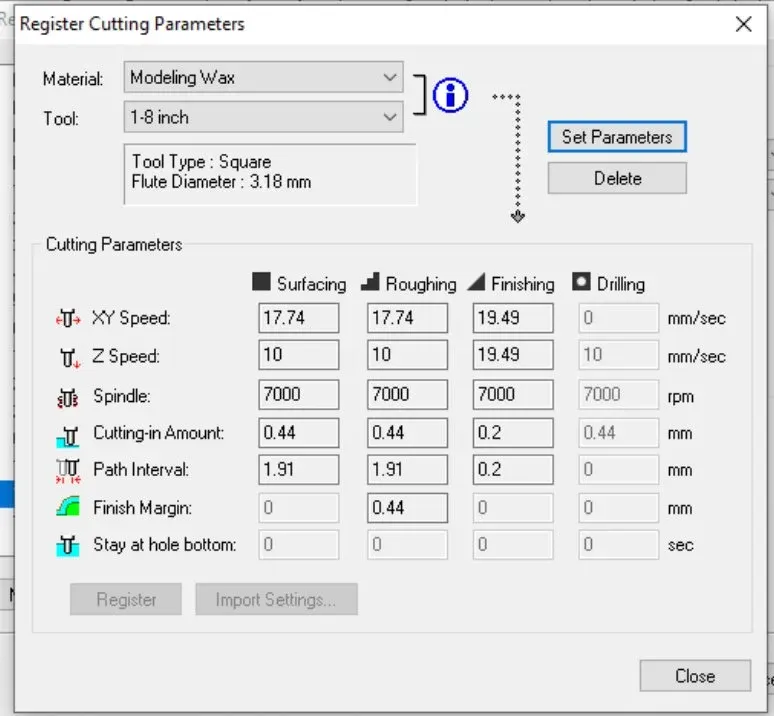
All three passes side by side in the cutting parameters table
Milling the Wax Mold
The milling sequence was four steps: confirm block dimensions, surface the top face, run roughing, run finishing. The surfacing step wasn't in the original plan — it became necessary after a sizing mistake.

The avatar source art. This is the design milled as a negative into the wax block, then cast in silicone to make the stamp face.
Step 1 — Block Sizing (and the Mistake)
Before loading any toolpaths I had to confirm the physical block dimensions matched what I'd entered in Modela Player 4. I hadn't measured carefully enough — the Z height in the software didn't match the actual block, which would have put my origin in the wrong place and cut the first pass at the wrong depth. Caught before running: re-measured with calipers, updated stock dimensions, re-set origin. Ten minutes of checking saved a wrecked block.
Step 2 — Surfacing to Fix the Mistake
The top face of the wax block had a slight warp. A surfacing pass — a single flat skim across the entire top — gave a clean, level reference plane, so all subsequent depth measurements worked from a known flat surface. Without it, the finishing-pass detail would have been inconsistent across the face.
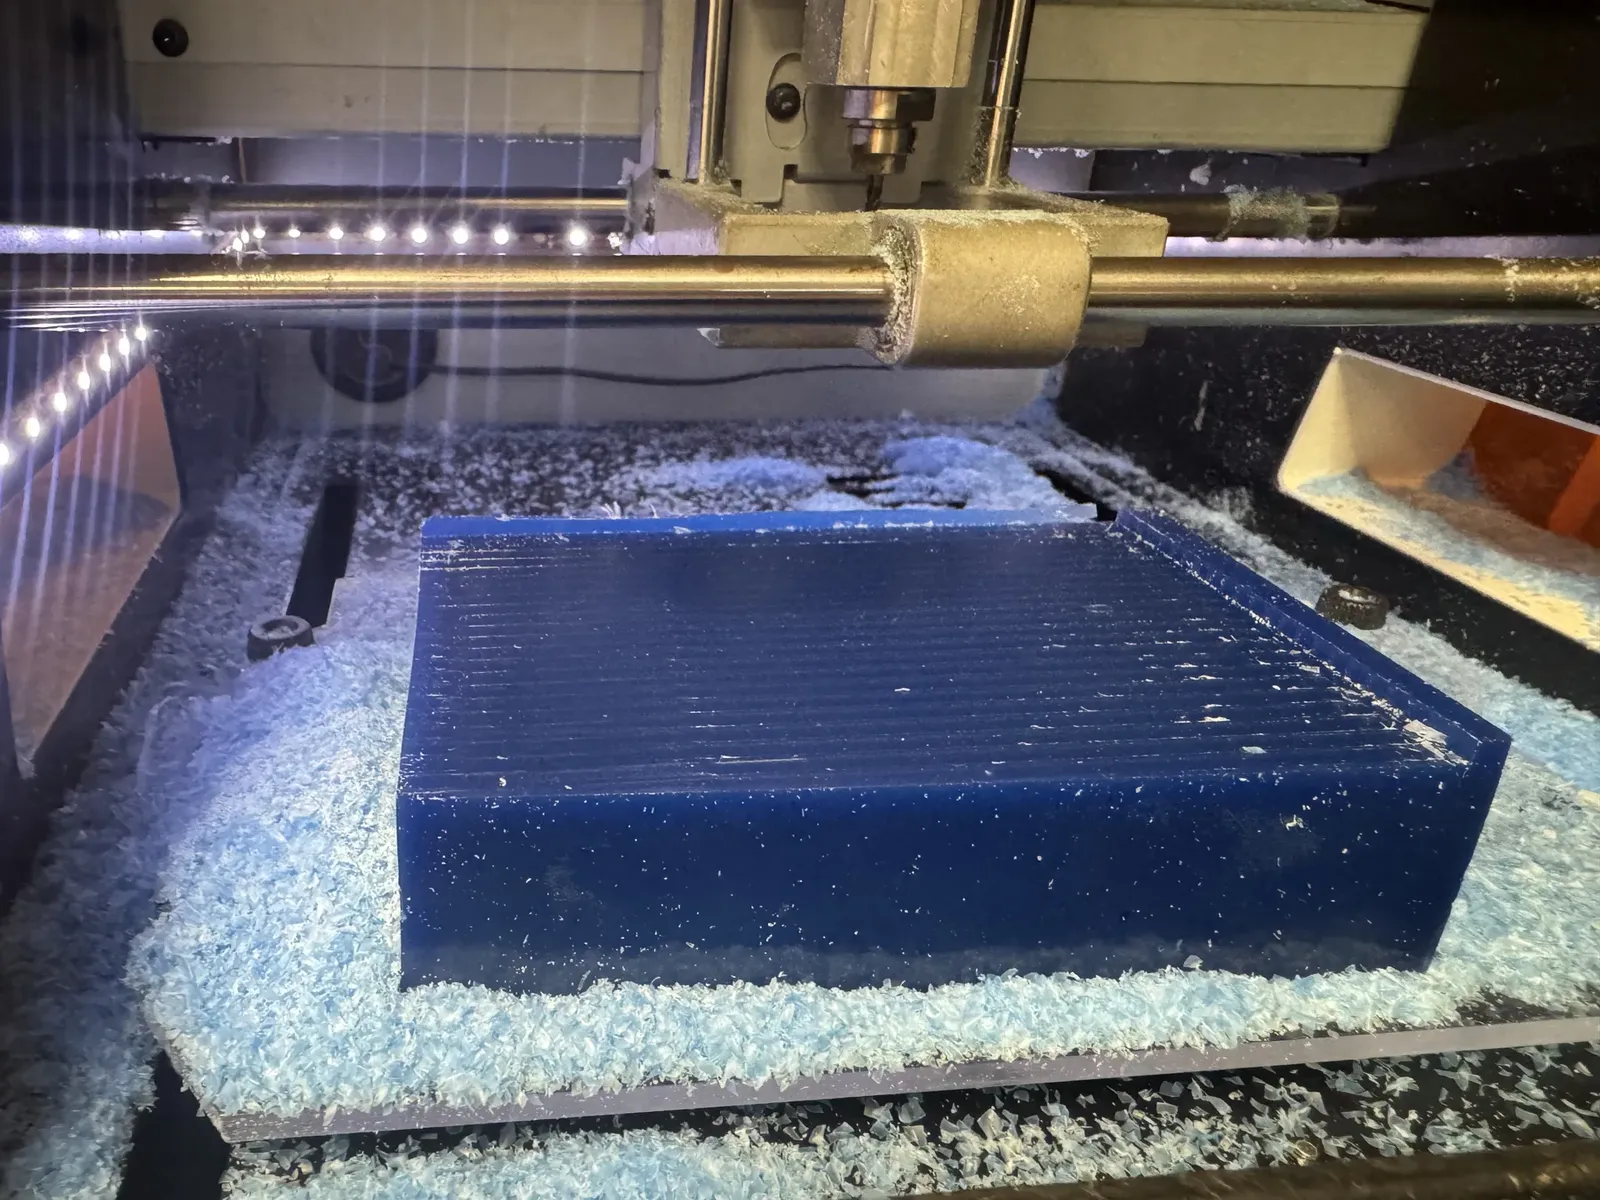
After the surfacing skim: a clean, level reference plane across the whole top face.
Step 3 — Roughing
Roughing used a ⅛″ square end mill with a contour-line toolpath, removing the bulk of material with a 1.2 mm step-down. The avatar shape started emerging partway through — circular border first, then the silhouette of the hair and face. The stepped walls from roughing are expected; the finishing pass resolves them.
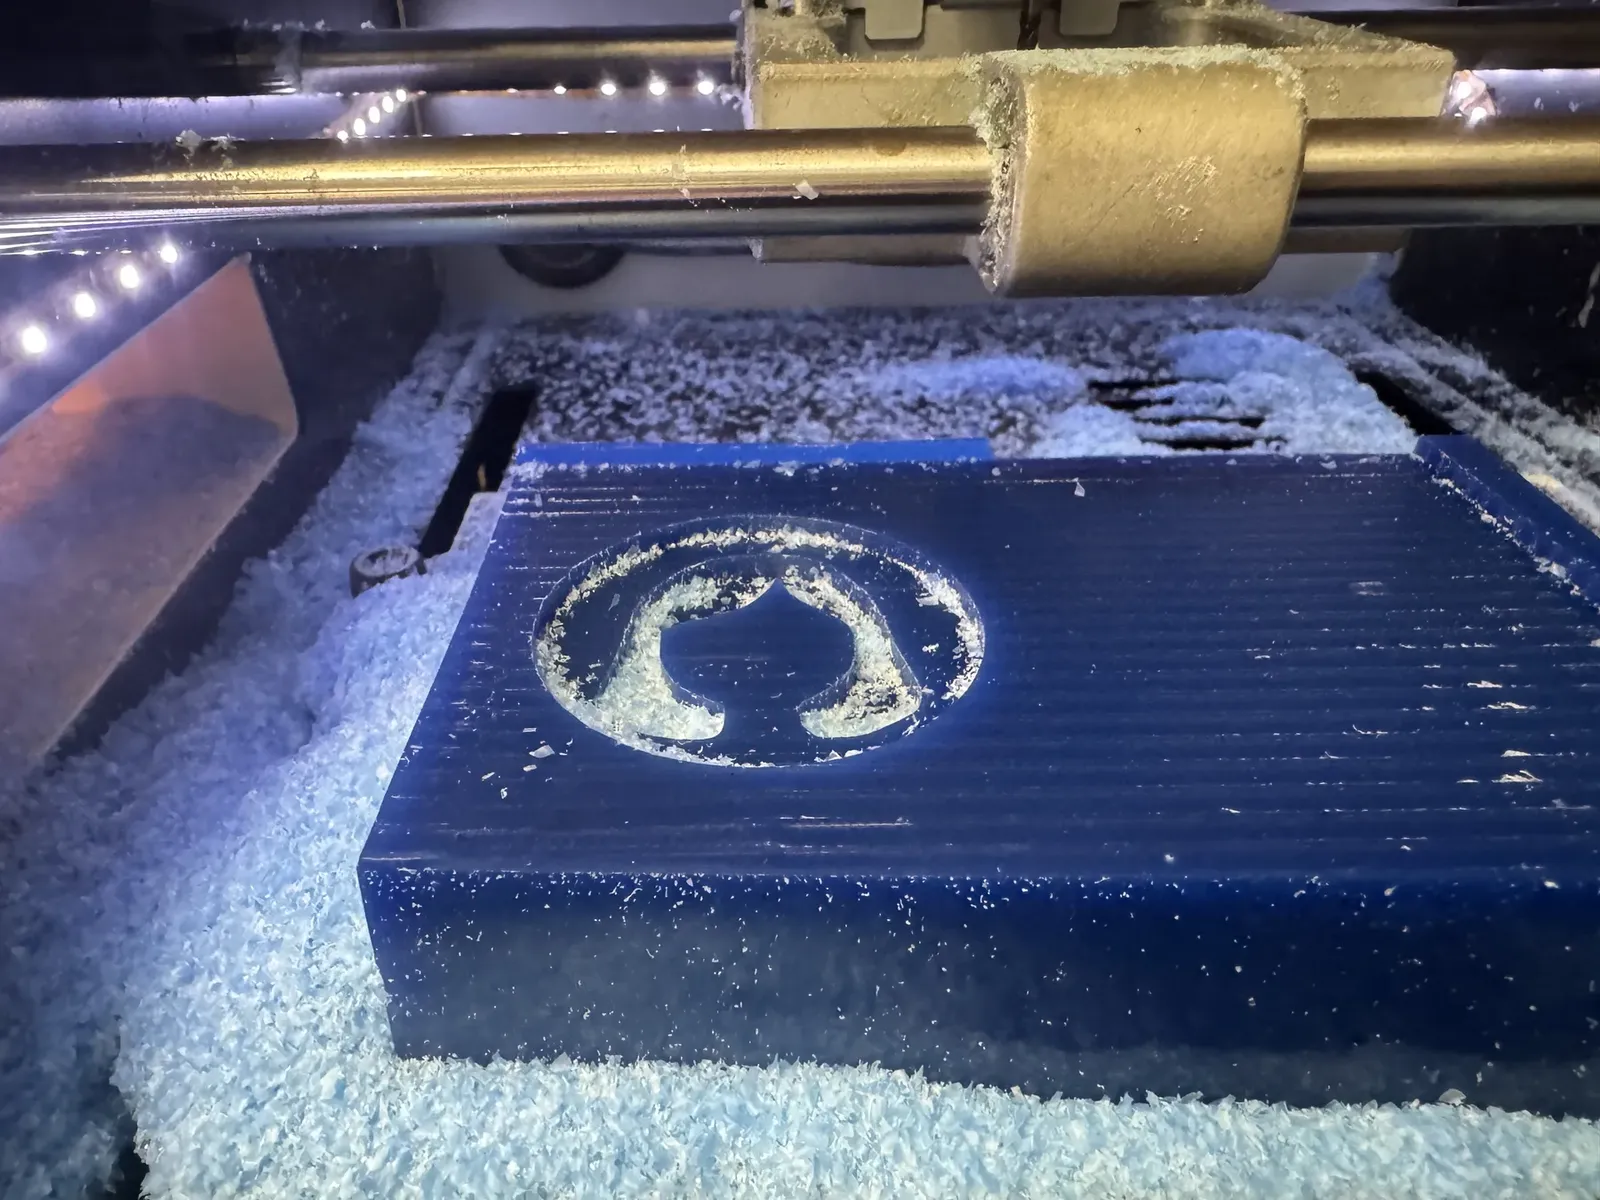
Mid-roughing: the avatar silhouette emerging with stepped walls the finishing pass will resolve.
Result — Finished Wax Mold
After the finishing pass the surface was smooth enough that the toolpath was not visible on the mold walls or floor — glasses, hair, smile all legible. The recessed design is the negative of the stamp face: casting silicone into it gives a raised-relief rubber stamp ready to ink.
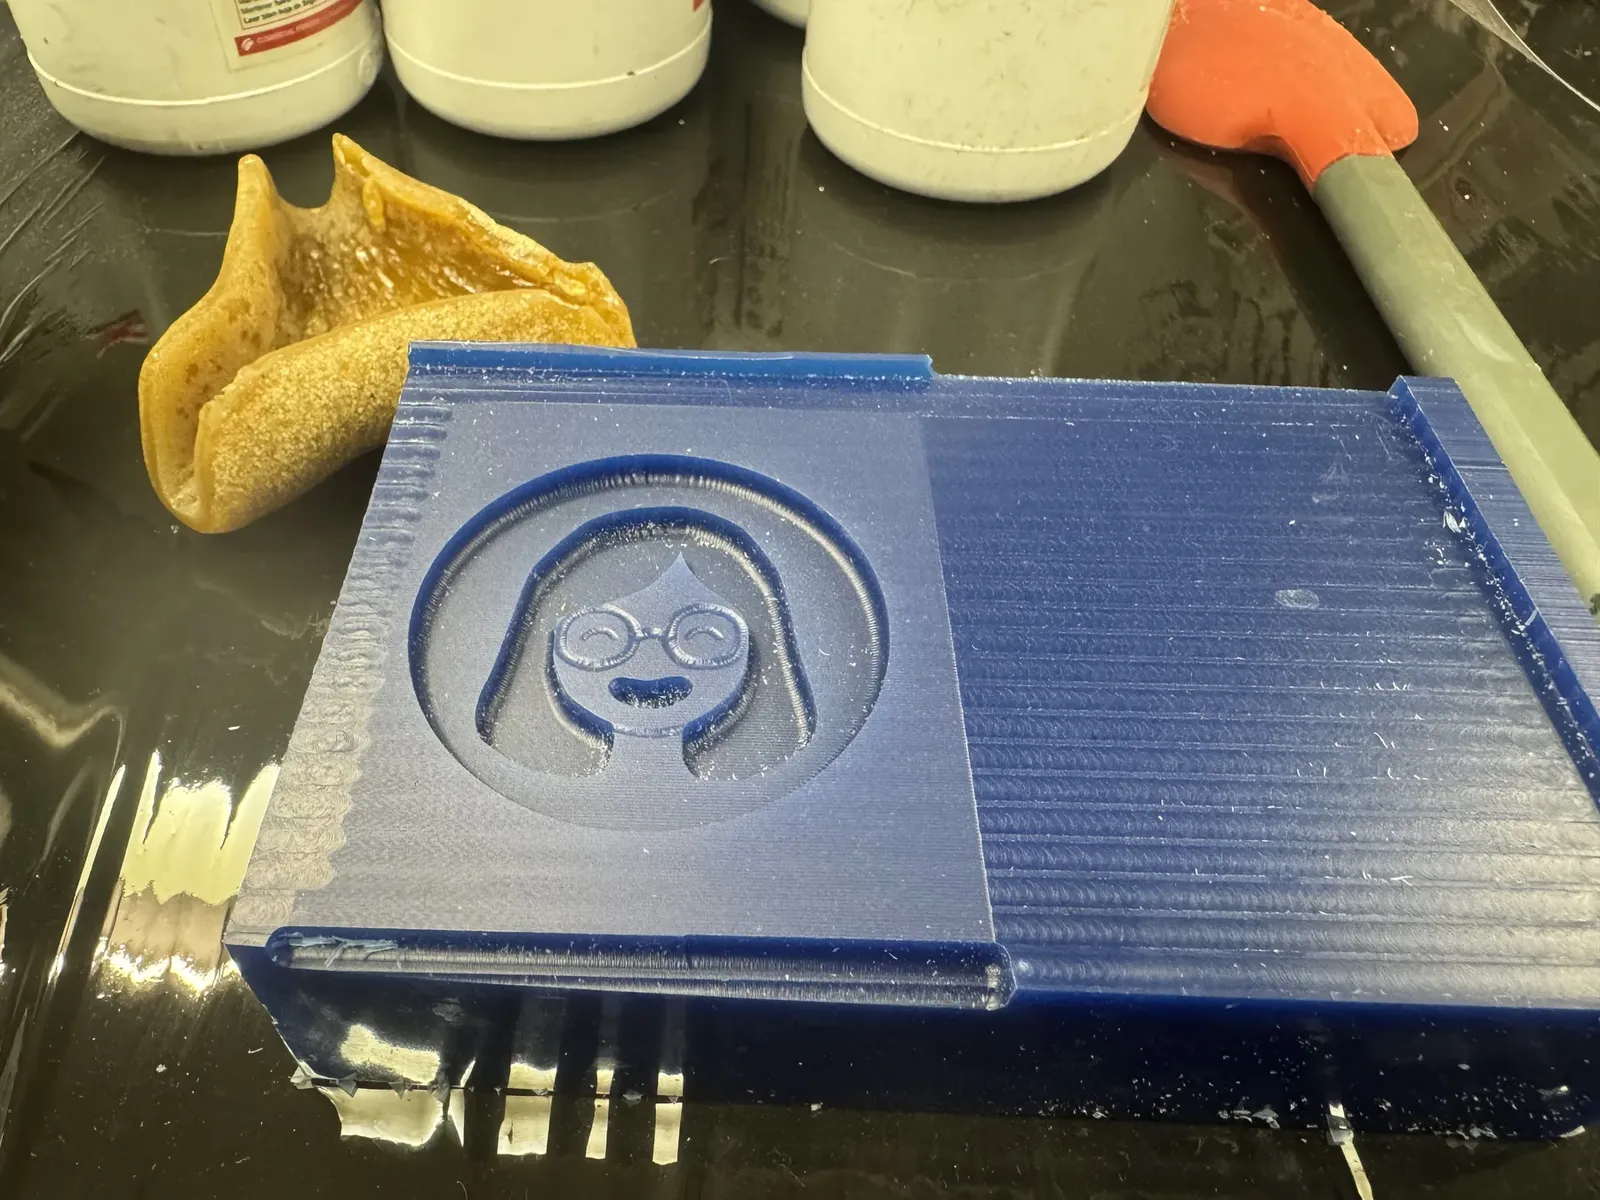
The finished wax mold: glasses, hair and smile all legible, surfaces smooth with no toolpath visible — and no cast in it yet.
Surface Finish Check
The assignment requires a mold surface that does not show the production process toolpath. After finishing I inspected the walls and floor under direct light — no step lines or scallops from the ball-nose. The recessed face and the circular border both have a consistent smooth surface. No postprocessing (sanding, polishing) was needed.
The surfacing step felt like an extra detour but it saved the whole mold. If the block isn't flat, every depth measurement is wrong and the finishing detail disappears. Measure twice, surface once.
Casting the Silicone
With the wax mold finished, I cast Feroca EasyPlat 00-30 silicone into the negative. It's a two-part platinum silicone: parts A and B mixed 1:1, a short working time, then a room-temperature cure.
Mixing & Degassing
Equal parts A and B by weight, stirred thoroughly but slowly to avoid whipping in extra air. The mix then went into a vacuum degassing chamber — pulling vacuum makes the trapped air expand, rise, and pop, so the silicone that reaches the fine avatar detail (glasses, smile) is bubble-free. This is the step that decides whether the stamp face comes out crisp or pitted.
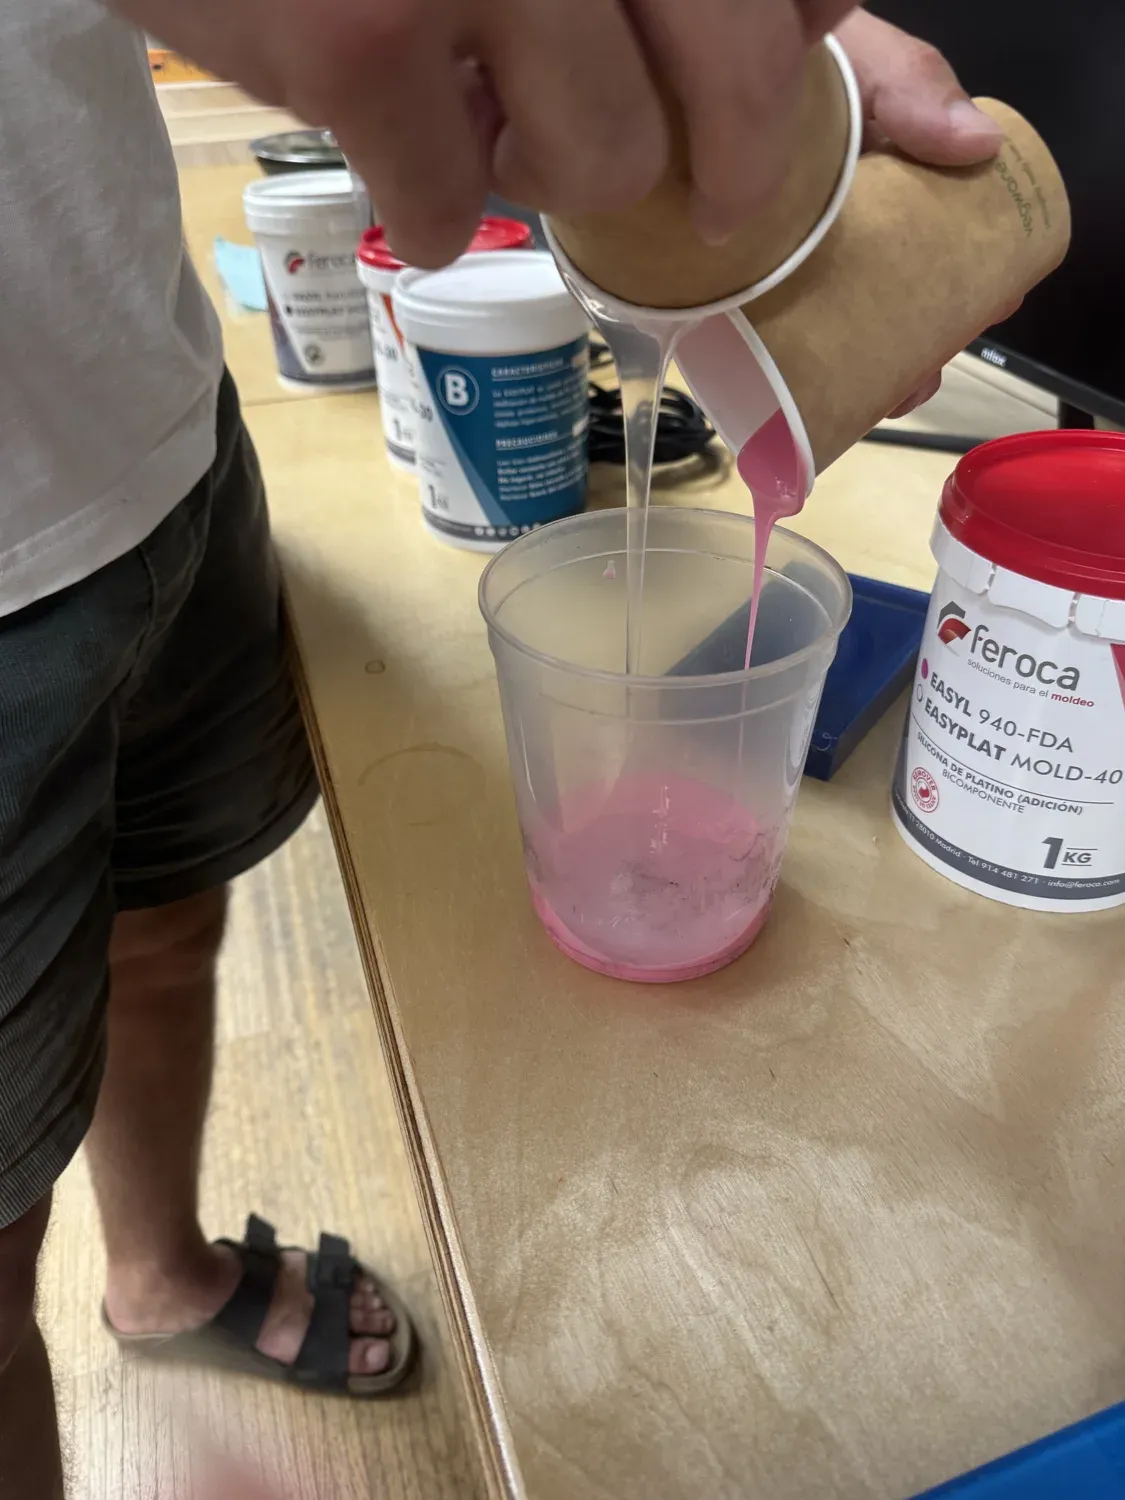
Mixing parts A + B — pink while uncured.
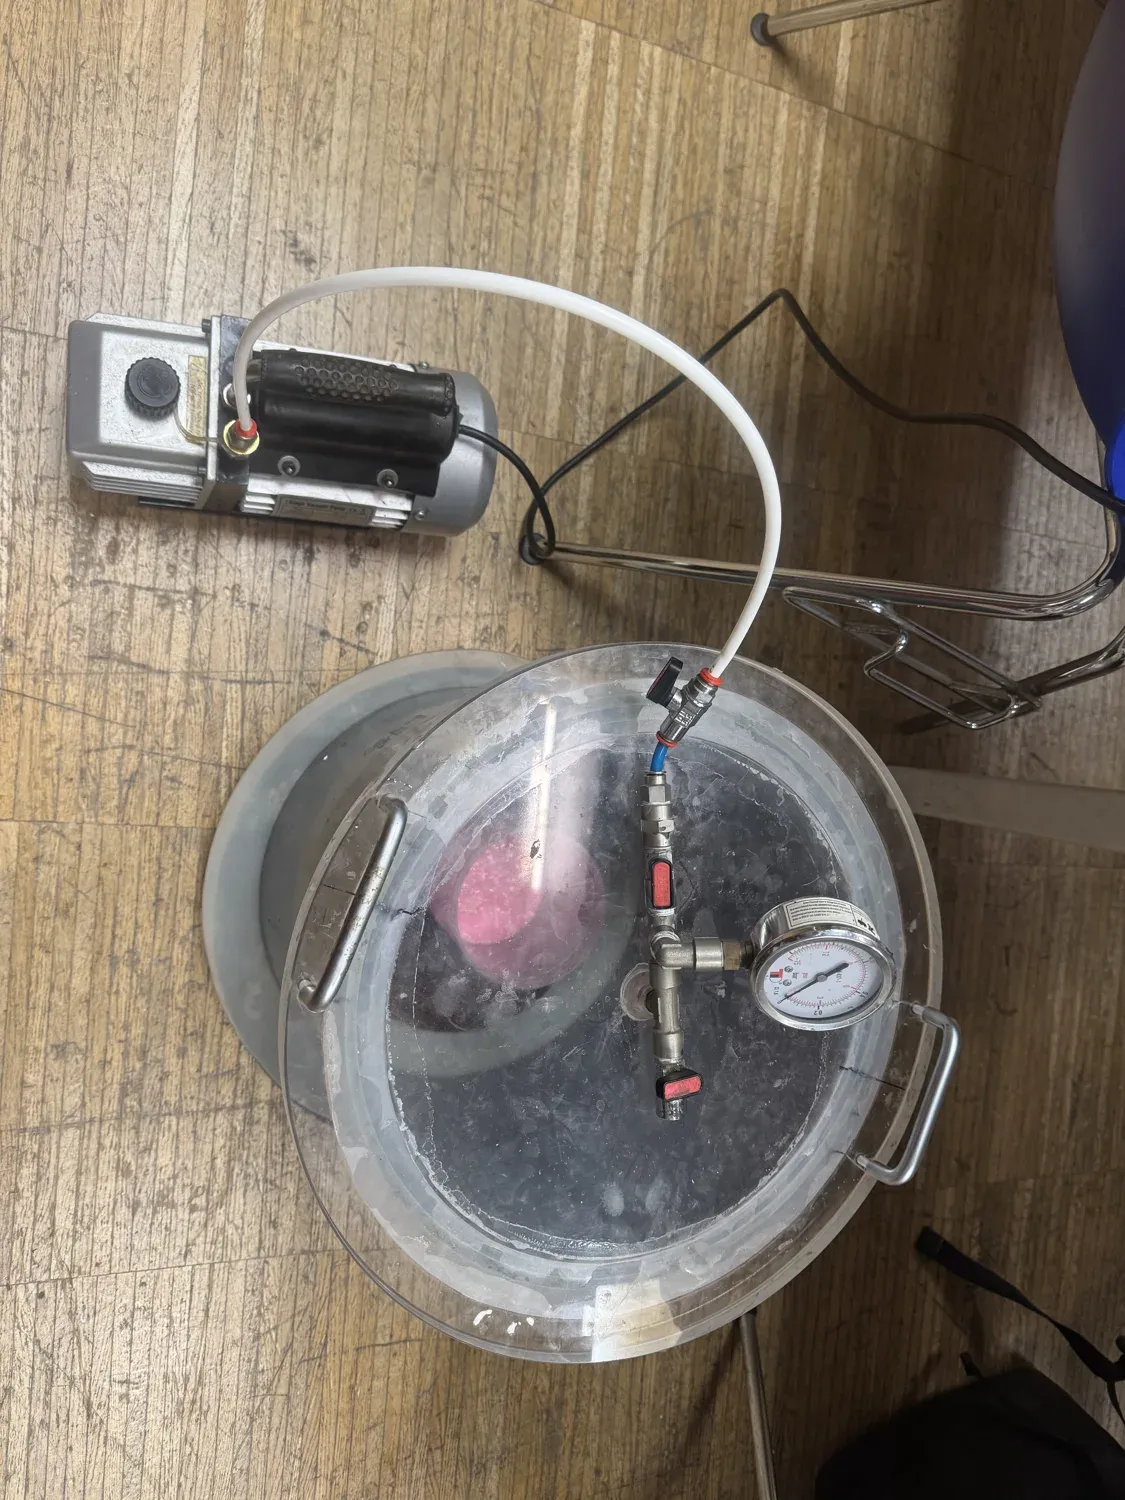
Degassing under vacuum to pull out trapped air.
I shared this batch with a teammate's joystick-grip cast — one mix, degassed together, then poured into our two separate molds. Their joystick is their project; the photo below is just where our shared batch ended up.
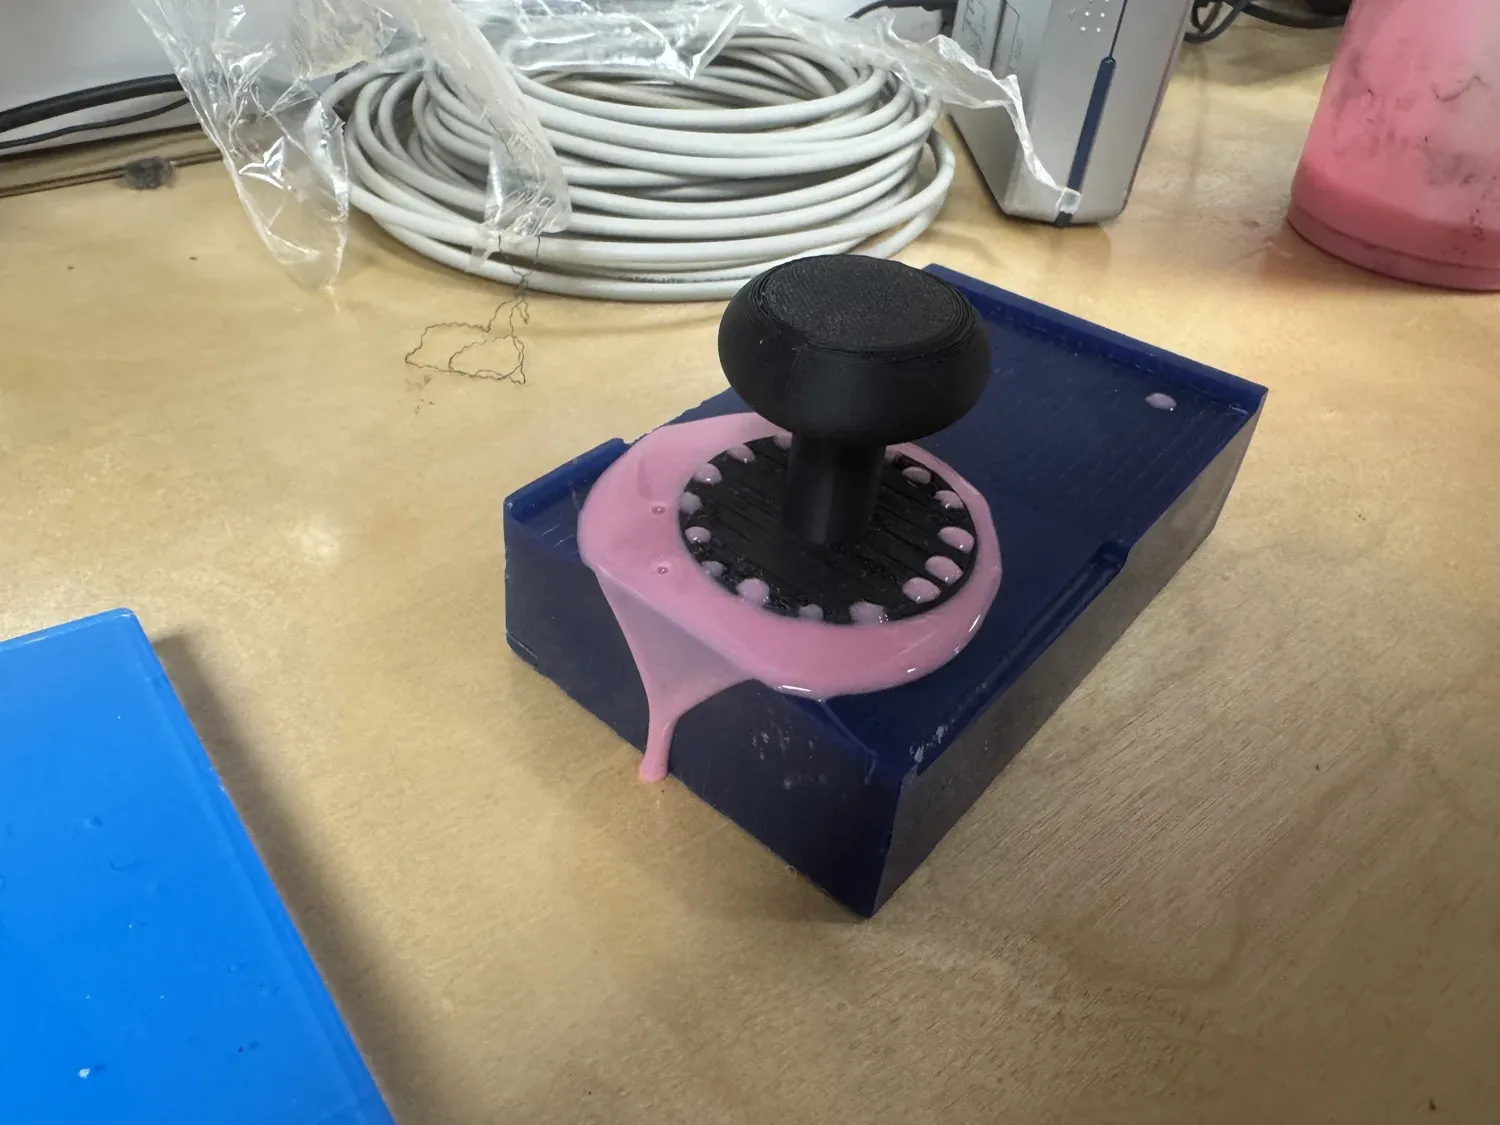
The teammate's joystick grip from the same silicone batch — shared mix only, their cast and mold.
Pour, Handle, and Cure
Poured slowly into the lowest point of the wax mold and let it self-level into the detail. Wax needs no release agent — silicone doesn't bond to it. While the silicone was still curing, I pressed a 3D-printed handle into the back of it. The handle has holes and grooves on its base, so the curing silicone flows into them and locks on mechanically — when it sets, the stamp is already mounted on a rigid handle I can grip and press with.
Once fully cured, the silicone peeled out of the wax cleanly from one corner — soft enough to release fine detail without tearing.
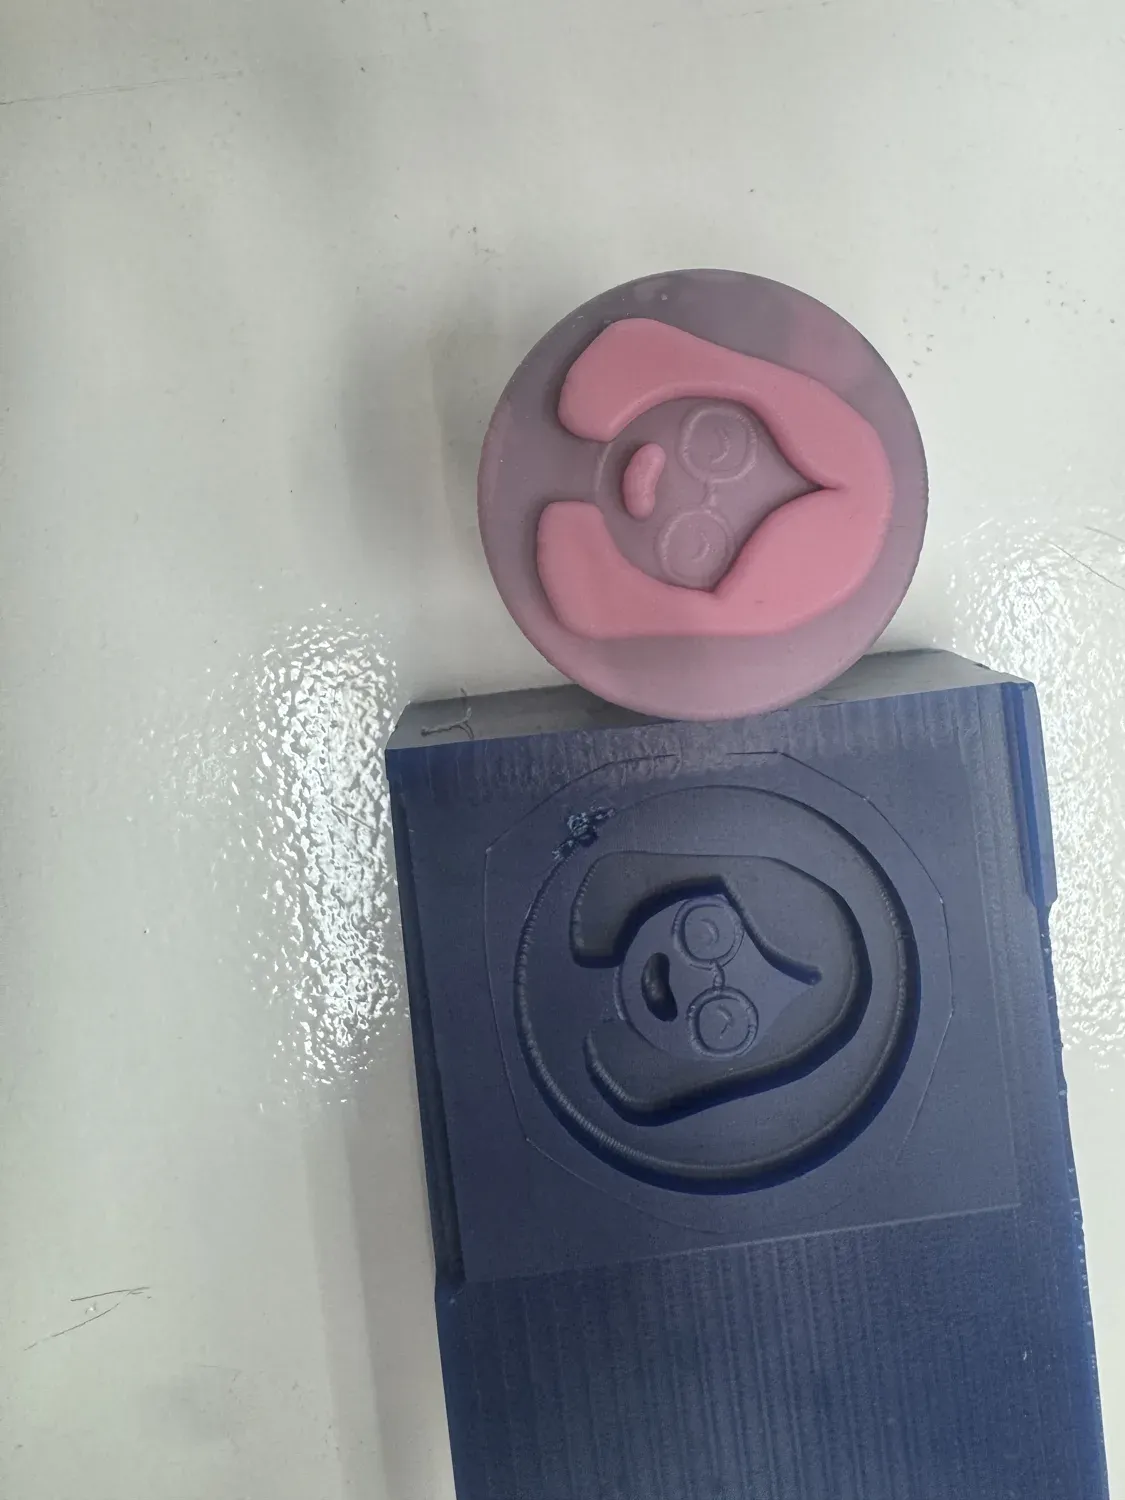
The cured pink silicone sitting in the wax mold, just before de-molding from the corner.
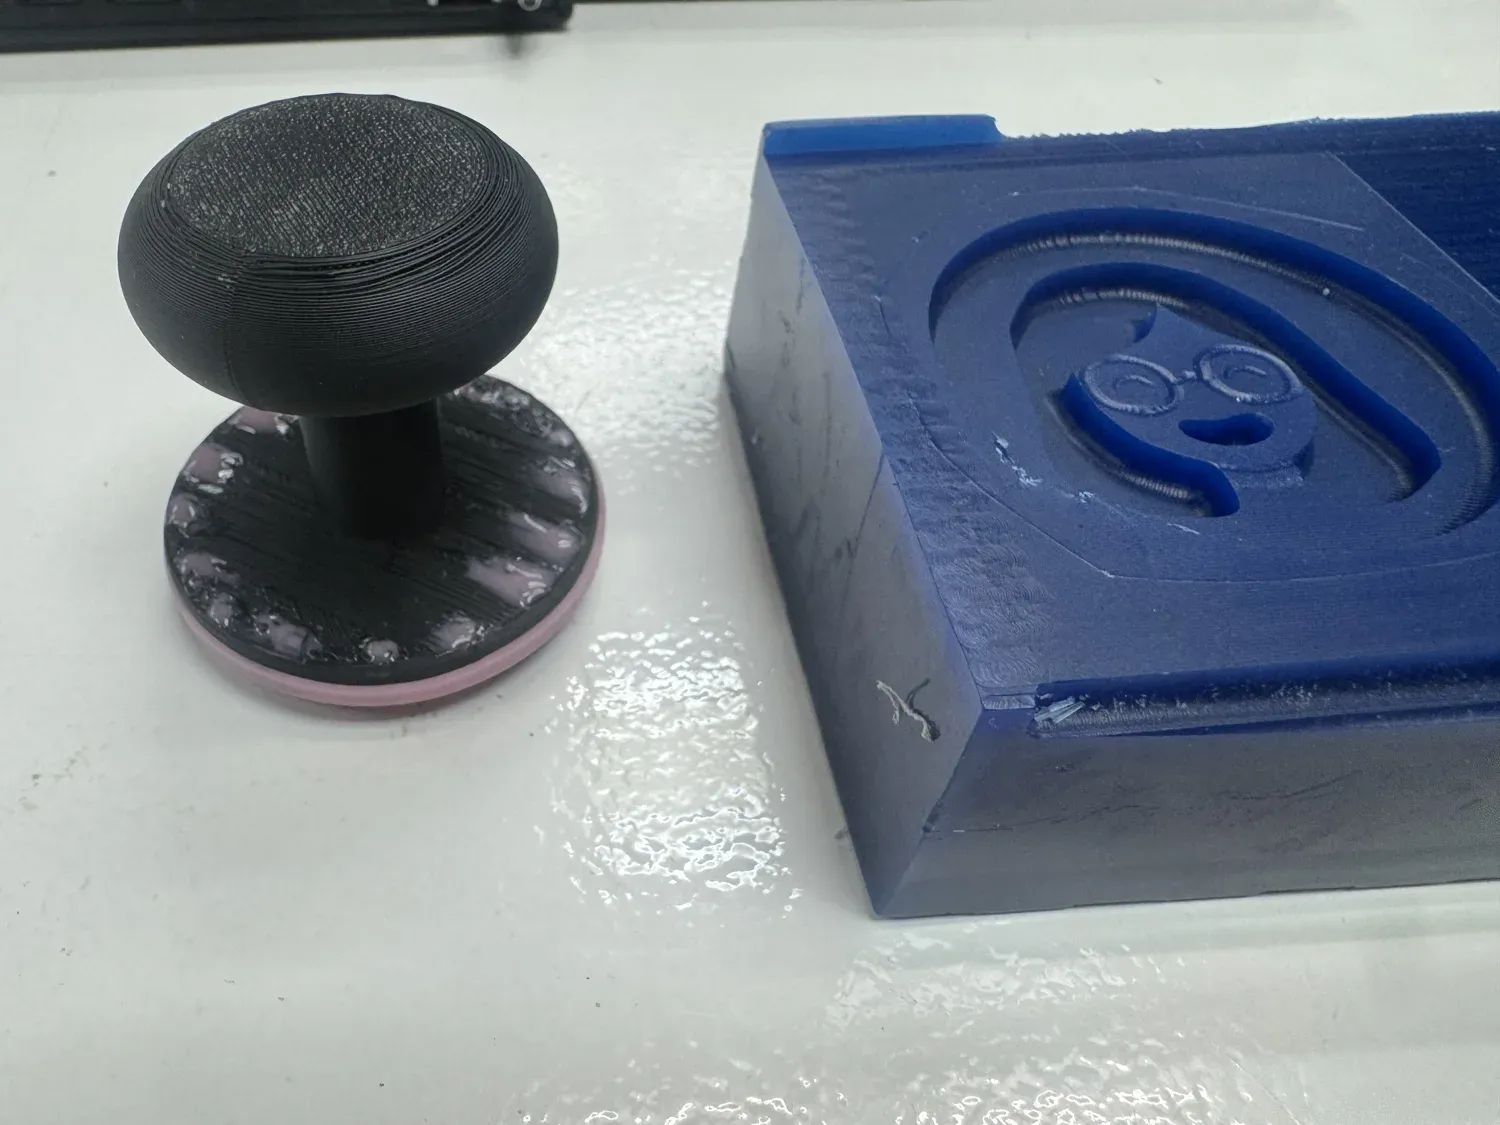
The de-molded stamp: soft silicone avatar face, locked onto the 3D-printed handle by the grooves it cured into. Mold on the right.
The Final Object — Stamping
Inked and pressed onto paper, the silicone deposits the avatar cleanly and springs back. The soft durometer is what makes it work as a stamp — it conforms to the paper under light pressure and releases without smearing.
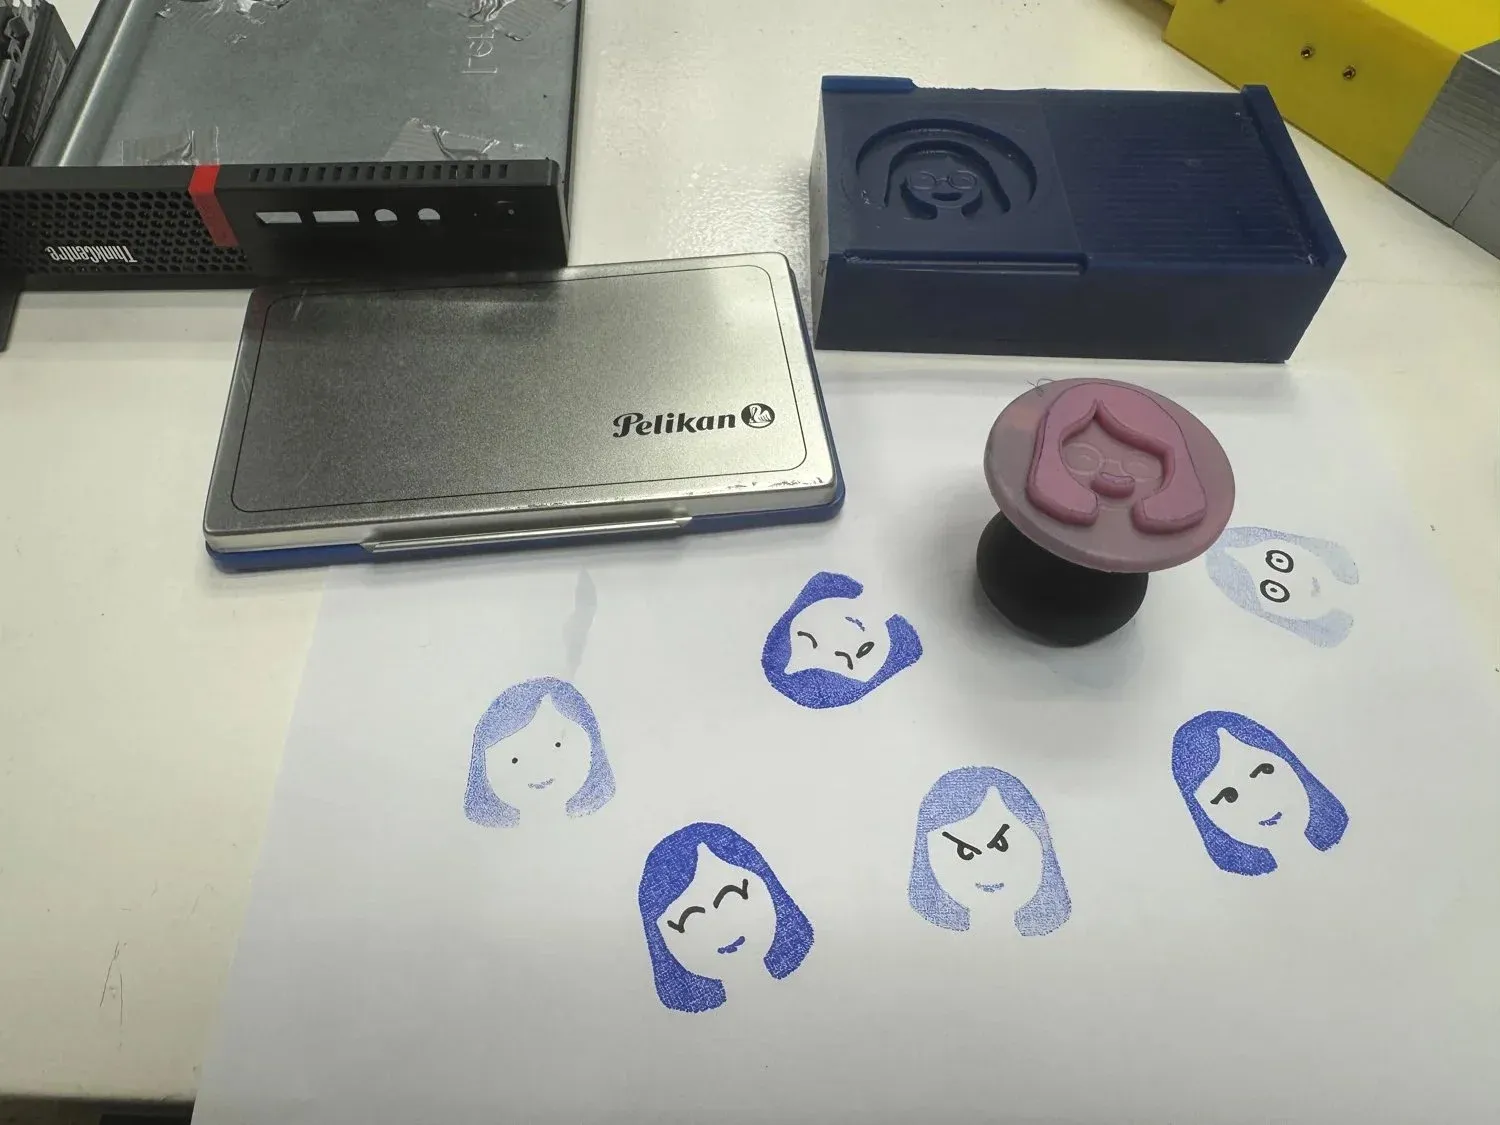
Hero shot: the cast stamp and a sheet of its avatar impressions — the mold, the cast, and what it makes, together.
Safety
Safety Data Sheets
As part of the group assignment I reviewed the SDS for each material before working. The useful thing I learned: neither material here is a significant toxicity hazard — machinable wax and platinum addition-cure silicone are both low-hazard. The real risks are wax dust on the milling side and, on the casting side, cure inhibition rather than anything that hurts me. Summary below; the Feroca page is linked in the sidebar.
| Material | Classification | Key Hazards | PPE / Handling |
|---|---|---|---|
| Machinable wax (blue) | Not classified hazardous | Fine wax dust/chips from milling — avoid inhaling; faint odour at ambient temp | Safety glasses; brush + vacuum chips, no compressed air |
|
EasyPlat 00-30 (Part A — base) |
Platinum addition-cure silicone; Feroca lists it as physiologically inert & non-toxic when cured. Not generally GHS-classified hazardous | Uncured liquid may mildly irritate eyes/skin on prolonged contact; not for ingestion | Nitrile gloves (not latex), eye protection |
|
EasyPlat 00-30 (Part B — catalyst) |
Platinum-complex catalyst component; low hazard | Same mild irritation as Part A; its process hazard is cure inhibition, not a health effect | Nitrile gloves, eye protection, ventilated bench |
The Real Hazard: Cure Inhibition
Platinum addition-cure silicone is fussy about what it touches before it sets. Contact with water, tin-catalyst (condensation-cure) silicones, acids, alkalis, latex, sulfur, and some uncured materials can poison the platinum catalyst and leave the silicone tacky or uncured in patches. This isn't a health hazard — it's a process one, but it ruins the cast. Practical rules I followed: nitrile gloves, never latex (latex inhibits the cure); clean, dry tools and cups; keep it away from anything sulfur- or tin-based on the bench; and don't pour onto a surface that's had a different silicone on it.
Safe Working Practice — Milling
The SRM-20 enclosure stays closed while running. Wax chips accumulate quickly — cleaned with a soft brush and vacuum between operations, not compressed air. The spindle is only touched when the machine is fully stopped; the collet is fragile and the tool tip is sharper than it looks.
Safe Working Practice — Casting
Nitrile gloves throughout — bare skin and latex both inhibit platinum-silicone cure, and the uncured parts are mild irritants. Mixed and poured in a ventilated area with clean, dry tools; mold placed flat and stable before pouring, not held in hand. The vacuum chamber was operated with the lid fully seated before pulling vacuum and vented slowly before opening. Cured platinum silicone is inert and skin-safe — the care all happens in the few minutes it's liquid.
Problems & Fixes
1. Block Z height not measured before CAM setup
Entered stock dimensions from memory rather than measuring the block. The Z was off, which would have placed the origin above the actual surface. Fix: always measure the physical block with calipers before entering anything into the software.
2. Block top face had a slight warp
The wax block wasn't perfectly flat from storage. Even a 0.2 mm warp across the face is enough to affect finishing depth and leave inconsistent detail. Fix: run a surfacing pass first on any wax block that's been stored flat — don't assume it's level.
3. Air bubbles risked pitting the stamp face
Hand-mixing silicone whips in air, and bubbles that settle into the fine avatar detail leave pits on the stamp surface. Fix: degas the mix under vacuum before pouring, and pour slowly into the lowest point so the silicone pushes air up and out rather than trapping it in the recesses.
4. Getting the handle to stay on the silicone
A smooth-bottomed handle won't bond to cured silicone — it just falls off. Fix: the 3D-printed handle has holes and grooves on its base, and it's pressed in while the silicone is still curing so the silicone flows into them and locks on mechanically once set.
What I'd Tell Myself Before Starting
1. Measure the block. Then measure it again.
Stock dimensions in CAM must match the physical block exactly. A wrong Z means your origin is off and every depth is wrong — a wrecked mold or a re-setup, both slower than 2 minutes with calipers.
2. Surface before you rough. Always.
Wax blocks aren't guaranteed flat from storage. A surfacing pass takes 5 minutes and gives a known datum — without it, finishing depth is inconsistent and toolpath marks won't resolve.
3. Degas, then pour low and slow.
The mold surface determines cast quality, but so does bubble control. Vacuum-degas the silicone and pour into the lowest point — the difference between a crisp stamp face and a pitted one is entirely about trapped air.
4. Mount the handle while it cures.
Don't wait for the silicone to set and then try to glue a handle on. Give the handle grooves and press it in during cure so the silicone locks around it — it comes out of the mold already a usable object.
Files
- stamp-mold.stl — wax mold geometry for Modela Player 4
- stamp-handle.stl — 3D-printed handle (grooved base)
- stamp-handle.3mf — BambuStudio print job for the handle