
Before starting Fab Academy, my experience with embedded programming was limited to self-taught Arduino exercises and tutorials.
This list represents the approximate extent of what I had explored on my own:
This was my first time actually reading a datasheet. I had always relied on tutorials and examples before, but a datasheet is the authoritative source on how a chip actually works: what each pin does, what it needs to run, and what it’s capable of. It felt important to understand where that information comes from rather than just taking someone else’s word for it.
I chose the RP2040 instead of the ESP32-S3 because my final project does not require WiFi or Bluetooth (at least for now). I’m less interested in connectivity and more interested in precise timing, predictable mechanical behavior, and direct control over the hardware.
Compared to the ESP32-S3 the RP2040 feels a bit more focused for what I’m trying to build. It offers:
Since I’m building a system with timed motion (stepper motor), gradual LED changes, and sound output, timing matters more to me than connectivity. I want the object to feel controlled and intentional. The RP2040 felt like a better fit for this self-contained experience.
A few things from the datasheet that stood out to me:
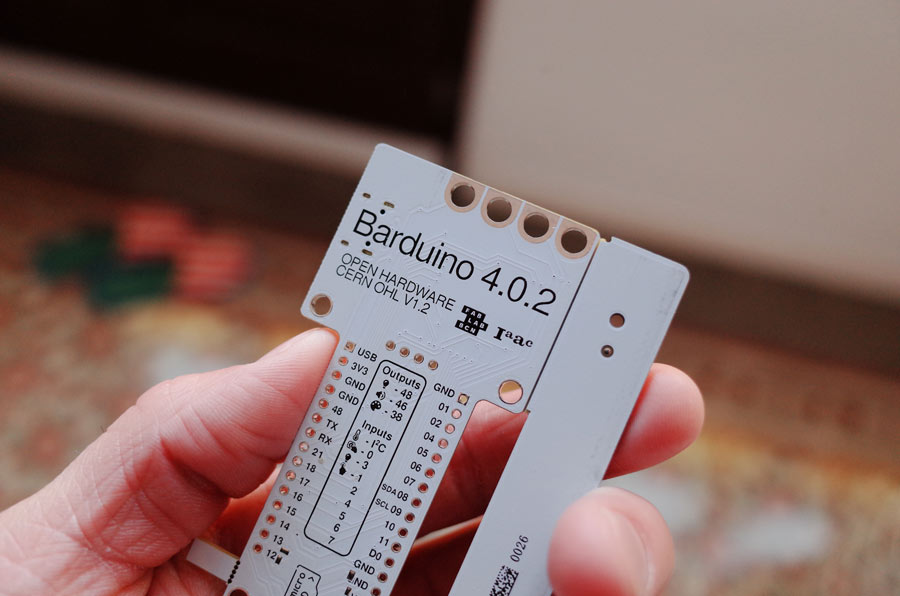
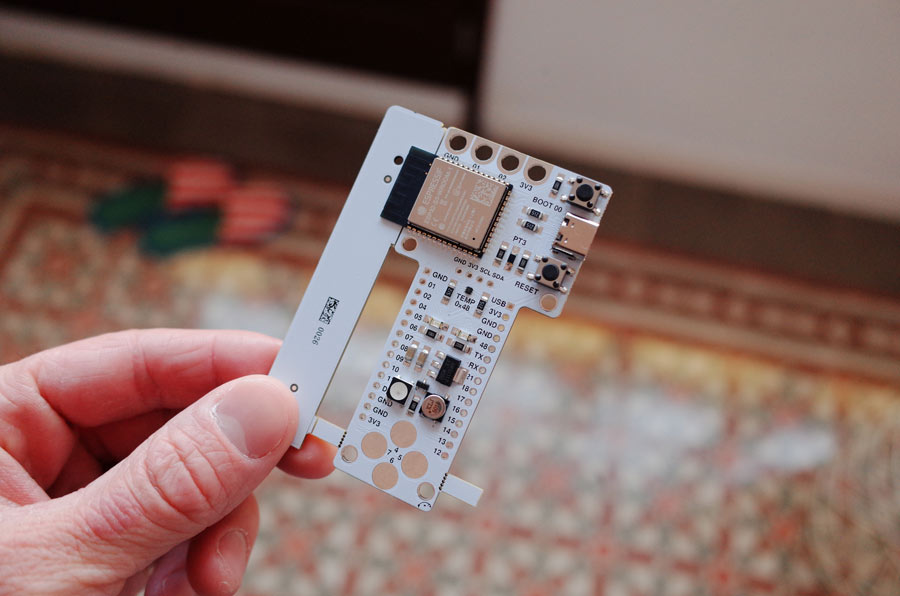
Barduino = Barcelona Arduino. It was designed by a Fab Academy student in 2011. There have been many versions since, with the latest being the Barduino 4 family.
int boardLed=48;
int delayS=200;
int delayO=700;
int delayBetween=2000;
int letterBlink=3;
int j;


void setup() {
  // put your setup code here, to run once:
    pinMode(boardLed, OUTPUT);

}

void loop() {
  // put your main code here, to run repeatedly:

  for(j=1;j<=letterBlink;j=j+1) {
  digitalWrite(boardLed,HIGH);
  delay(delayS);
  digitalWrite(boardLed,LOW);
  delay(delayS);
  }

  for(j=1;j<=letterBlink;j=j+1) {
  digitalWrite(boardLed,HIGH);
  delay(delayO);
  digitalWrite(boardLed,LOW);
  delay(delayO);
  }

  for(j=1;j<=letterBlink;j=j+1) {
  digitalWrite(boardLed,HIGH);
  delay(delayS);
  digitalWrite(boardLed,LOW);
  delay(delayS);
  }

delay(delayBetween);

}
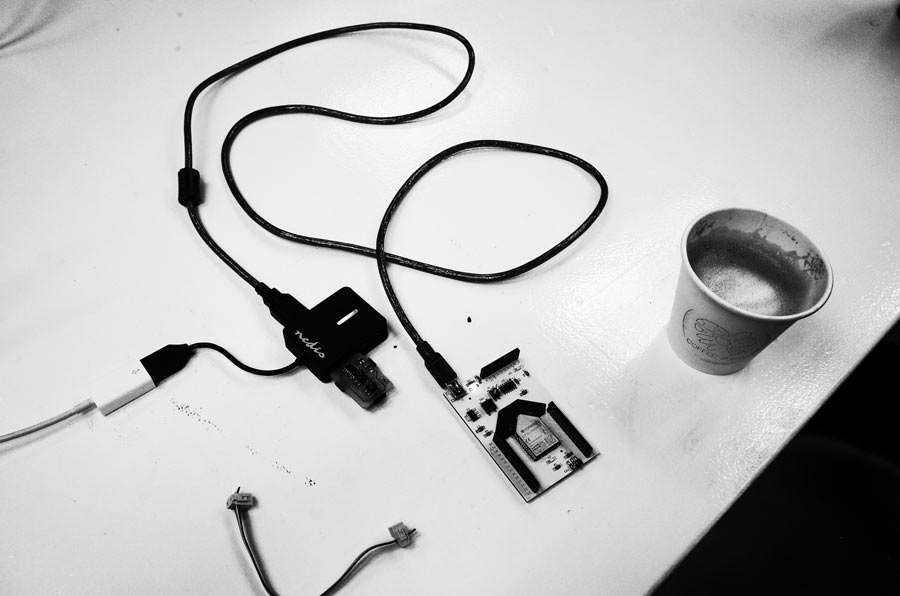
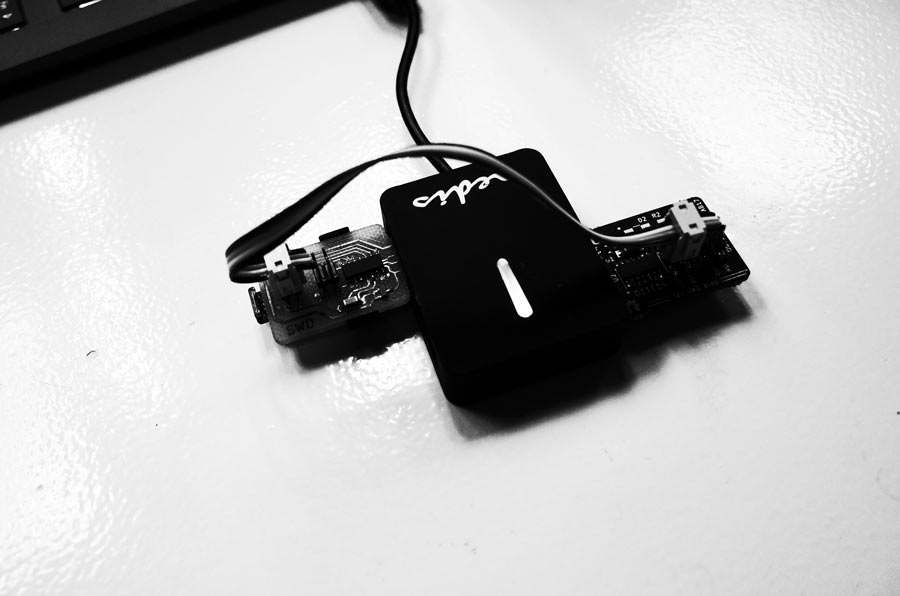
Plugged in SAMD D11C14A to my computer using USB. Barduino 3.0 ESP32 was connected to SAMD using 4 pin serial connector.
I first made sure the JSON was added in my Arduino IDE preferences. I then added Fab SAM core for Arduino to my boards.
I then selected: Boards > Fab SAM core for Arduino > Generic D11C14A
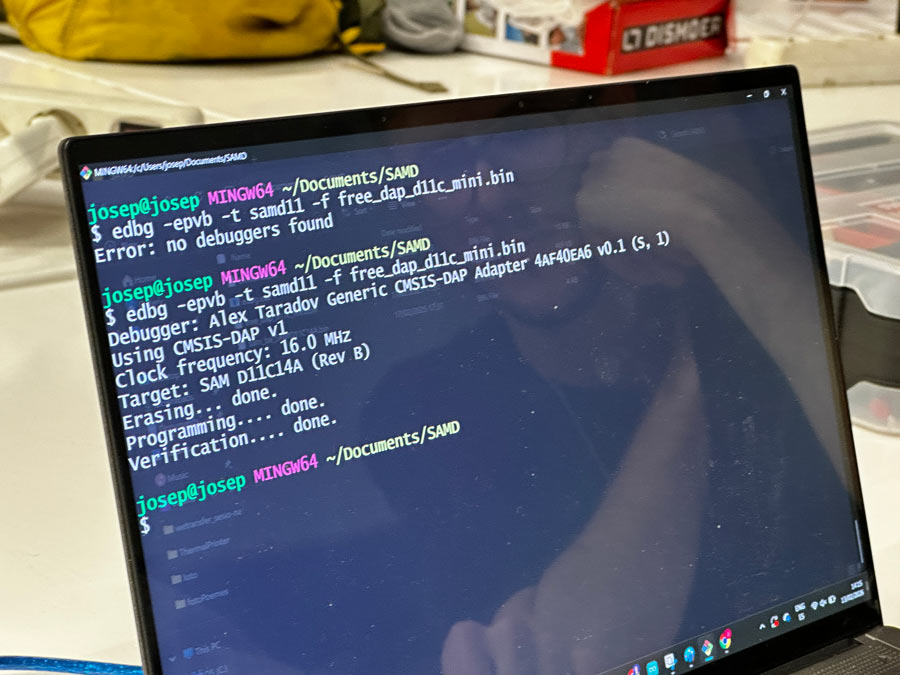
At first, I tried Burning Bootloader. But I had an error: Missing programmer.
I then tried running Sketch > Upload using programmer.
It was pointed out to me by Josep that the 4 PIN I had connected to on the SAMD were the programming pins instead of the output pins.
I also had selected Atmel-ICE instead of CMSIS-DAP as the programmer.
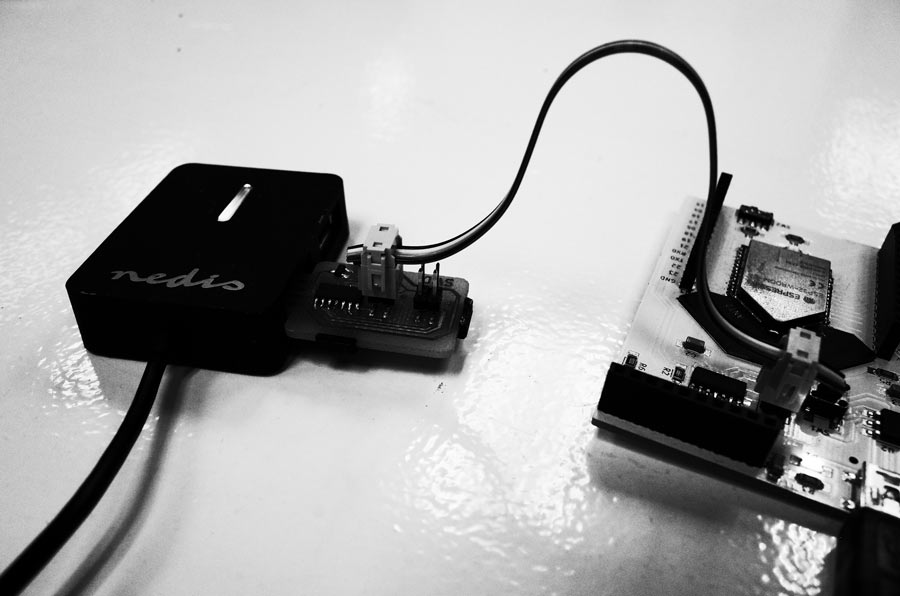
Once I connected the cable to the SWD output pins, I then Burn Bootloader.
I then was able to run Sketch > Upload using programmer and my program started running on the ESP32 Barduino.
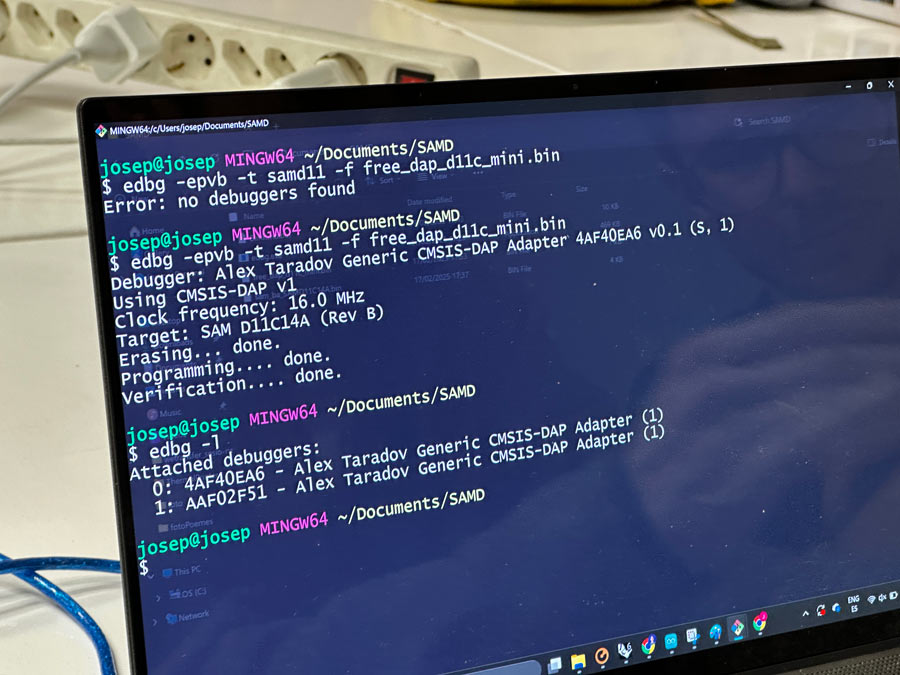
Successfully programmed a board using a SAMD 4 Pin Serial.
I then sanity checked by plugging the USB power cable feeding the ESP32 Barduino to a power supply to make sure (for my own understanding) that it was truly being programmed purely via the SAMD 4 pin serial cable and not the USB.
Everything worked and I was able to fine tune my SOS blink delay settings to produce a good pattern.
Information on how to flash a D11C based programmer
I wanted to create a finite experience using multiple modalities:
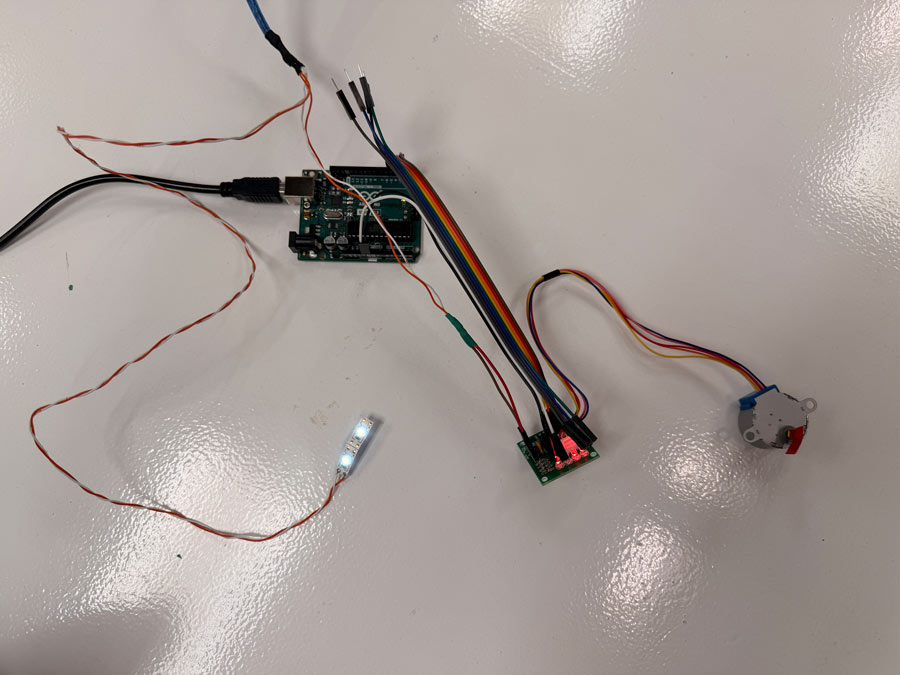
I decided to use my Arduino UNO R3 for this system, in order to be able to quickly plug and play with various inputs and outputs using the female pinouts of the UNO and a breadboard.
“I hate breadboards.”
- Neil Gershenfeld
For the mechanical motion, I decided to use the 28BYJ-48 stepper motor that I already had in one of my kits. The ULN2003 driver board was also included in one of my kits.
I found a stepper motor library to avoid having to energize each coil myself.
Arduino Libraries:
I used the Stepper library
I also found an easy test sketch that could verify that I was setting up the motor correctly: ESP32 with Stepper Motor (28BYJ-48 and ULN2003 Motor Driver)
At first, I powered it using the 5v board supply, despite it not being a great idea. For testing purposes it was fine.
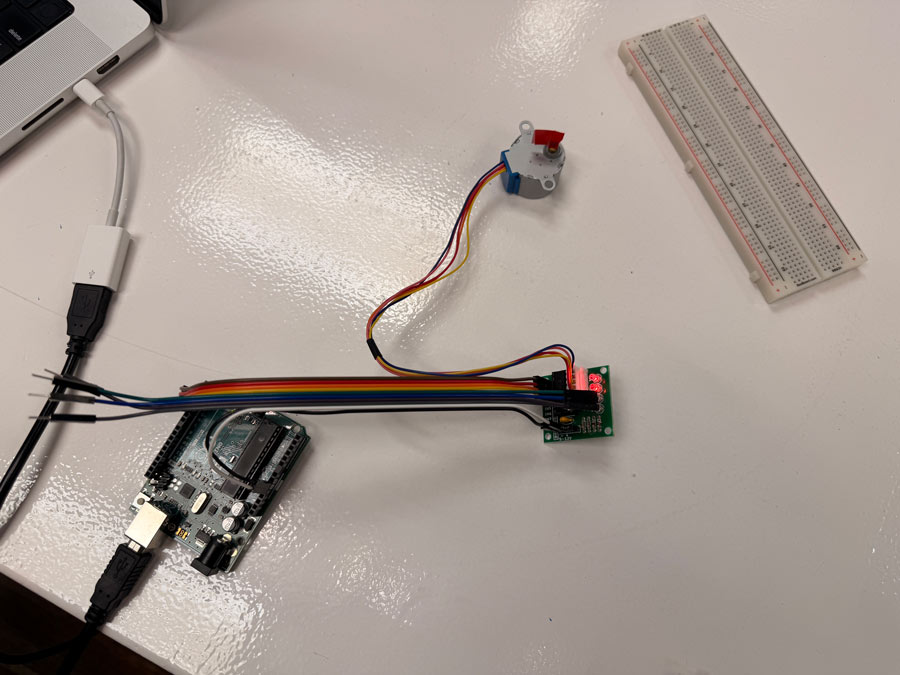
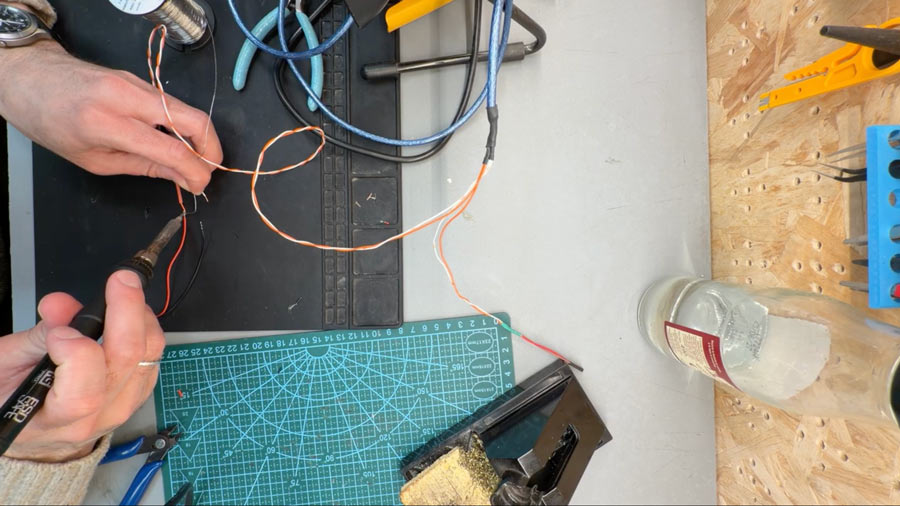
I rewired and soldered the USB cable to add a barrel plug so I could power both the Arduino and the driver. While doing this, I realized (after checking my Arduino book) that the barrel plug input on the Arduino UNO requires 7–12V, not 5V.
I set my own pins and played around with the speed.
/* Rui Santos & Sara Santos - Random Nerd Tutorials Complete project details at https://RandomNerdTutorials.com/esp32-stepper-motor-28byj-48-uln2003/ Permission is hereby granted, free of charge, to any person obtaining a copy of this software and associated documentation files. The above copyright notice and this permission notice shall be included in all copies or substantial portions of the Software. Based on Stepper Motor Control - one revolution by Tom Igoe */ #includeconst int stepsPerRevolution = 2048; // change this to fit the number of steps per revolution // ULN2003 Motor Driver Pins #define IN1 2 #define IN2 3 #define IN3 4 #define IN4 5 // initialize the stepper library Stepper myStepper(stepsPerRevolution, IN1, IN3, IN2, IN4); void setup() { // set the speed at 5 rpm myStepper.setSpeed(10); // initialize the serial port Serial.begin(9600); } void loop() { // step one revolution in one direction: Serial.println("clockwise"); myStepper.step(stepsPerRevolution); delay(1000); // step one revolution in the other direction: Serial.println("counterclockwise"); myStepper.step(-stepsPerRevolution); delay(1000); }
The code ran well and I was ready to start adding the rest of the system.
Continuing to use stepsPerRev to tell the motor to complete 2048 steps for one full revolution.
#includeconst int stepsPerRev = 2048; #define IN1 2 #define IN2 3 #define IN3 4 #define IN4 5 Stepper motor(stepsPerRev, IN1, IN3, IN2, IN4); const int buttonPin = 8; const int ledPin = 9; const int buzzerPin = 10; void setup() { Serial.begin(9600); pinMode(buttonPin, INPUT_PULLUP); pinMode(ledPin, OUTPUT); pinMode(buzzerPin, OUTPUT); motor.setSpeed(12); Serial.println("Press button to begin experience"); } void loop() { if (digitalRead(buttonPin) == LOW) { Serial.println("Start"); digitalWrite(ledPin, HIGH); motor.step(stepsPerRev); Serial.println("Complete"); tone(buzzerPin, 220, 300); digitalWrite(ledPin, LOW); delay(500); } }
Using delay() to create timed steps determined by the time I want the revolution to take / stepsPerRev.
Importantly, with this version I was now able to map the progress of the motor rotation to the brightness of the LED using a float. This added the functionality that I orignally wanted for the LED.
#includeconst int stepsPerRev = 2048; #define IN1 2 #define IN2 3 #define IN3 4 #define IN4 5 Stepper motor(stepsPerRev, IN1, IN3, IN2, IN4); const int buttonPin = 8; const int ledPin = 9; const int buzzerPin = 10; const unsigned long durationMs = 30000; const int msPerStep = durationMs / stepsPerRev; void setup() { Serial.begin(9600); pinMode(buttonPin, INPUT_PULLUP); pinMode(ledPin, OUTPUT); pinMode(buzzerPin, OUTPUT); motor.setSpeed(12); Serial.println("Press button to start experience"); } void loop() { if (digitalRead(buttonPin) == LOW) { Serial.println("Start"); for (int stepCount = 0; stepCount < stepsPerRev; stepCount++) { motor.step(1); float progress = (float)stepCount / (float)stepsPerRev; analogWrite(ledPin, (int)(progress * 255.0f)); delay(msPerStep); } Serial.println("Complete"); tone(buzzerPin, 220, 300); analogWrite(ledPin, 0); delay(1000); } }
For example:
30s revolution with 2048 steps:
30000 ms / 2048 = 14.648 ms per step
At this point I was using delay() for everything, which worked, but it started to feel a bit rigid. GPT 5.2 suggested switching to millis() instead. The big difference is that delay() just stops the whole program and waits. That’s fine when you’re only doing one thing, but I knew I eventually wanted the motor, LED, and sound to all be part of the same timed experience.
Using millis() meant the program could keep running while constantly checking how much time had passed. It felt less like “pause and wait” and more like “keep going and monitor time.” That shift made me start thinking differently about how embedded systems actually handle timing.
#includeconst int stepsPerRev = 2048; #define IN1 2 #define IN2 3 #define IN3 4 #define IN4 5 Stepper motor(stepsPerRev, IN1, IN3, IN2, IN4); const int buttonPin = 8; const int ledPin = 9; const int buzzerPin = 10; const unsigned long durationMs = 30000; unsigned long msPerStep; bool running = false; unsigned long startMs = 0; unsigned long lastStepMs = 0; int stepsDone = 0; void setup() { Serial.begin(9600); pinMode(buttonPin, INPUT_PULLUP); pinMode(ledPin, OUTPUT); pinMode(buzzerPin, OUTPUT); motor.setSpeed(12); msPerStep = durationMs / (unsigned long)stepsPerRev; Serial.println("Press button to start experience"); } void loop() { unsigned long now = millis(); bool pressed = (digitalRead(buttonPin) == LOW); if (!running && pressed) { running = true; startMs = now; lastStepMs = now; stepsDone = 0; Serial.println("Start"); delay(150); } if (running) { unsigned long elapsed = now - startMs; float progress = (float)elapsed / (float)durationMs; if (progress > 1.0f) progress = 1.0f; analogWrite(ledPin, (int)(progress * 255.0f)); if (stepsDone < stepsPerRev && (now - lastStepMs) >= msPerStep) { motor.step(1); stepsDone++; lastStepMs += msPerStep; } if (stepsDone >= stepsPerRev) { Serial.println("Complete"); tone(buzzerPin, 220, 300); analogWrite(ledPin, 0); running = false; delay(150); } } if (!running) { analogWrite(ledPin, 0); } }
Once I had timing working with millis(), GPT 5.2 introduced the idea of using states. At first I hadn’t really thought about structuring the program that way. I was just adding logic step by step.
The idea was to break the experience into clear phases, like: idle → running → finished. Instead of everything happening in one long block of code, the system could ask itself which state it’s in and behave accordingly.
That made the sketch feel more organized. It also made it easier to imagine expanding it later without the logic turning into a mess.
#includeconst int stepsPerRev = 2048; #define IN1 2 #define IN2 3 #define IN3 4 #define IN4 5 Stepper motor(stepsPerRev, IN1, IN3, IN2, IN4); const int buttonPin = 8; const int ledPin = 9; const int buzzerPin = 10; const unsigned long durationMs = 60000; enum State { IDLE, RUNNING }; State state = IDLE; unsigned long startMs = 0; unsigned long lastStepMs = 0; unsigned long msPerStep = 0; int stepsDone = 0; void setup() { Serial.begin(9600); pinMode(buttonPin, INPUT_PULLUP); pinMode(ledPin, OUTPUT); pinMode(buzzerPin, OUTPUT); motor.setSpeed(12); msPerStep = durationMs / (unsigned long)stepsPerRev; Serial.println("Press button to start experience"); } void loop() { unsigned long now = millis(); bool pressed = (digitalRead(buttonPin) == LOW); if (state == IDLE) { analogWrite(ledPin, 0); if (pressed) { state = RUNNING; startMs = now; lastStepMs = now; stepsDone = 0; Serial.println("Start"); delay(150); } } if (state == RUNNING) { // LED brightness based on elapsed time unsigned long elapsed = now - startMs; float progress = (float)elapsed / (float)durationMs; if (progress > 1.0f) progress = 1.0f; analogWrite(ledPin, (int)(progress * 255.0f)); if (stepsDone < stepsPerRev && (now - lastStepMs) >= msPerStep) { motor.step(1); stepsDone++; lastStepMs += msPerStep; } if (stepsDone >= stepsPerRev) { Serial.println("Complete"); tone(buzzerPin, 220, 300); state = IDLE; delay(150); } } }