individual assignment
trying parametric design on Rhinoceros with Grasshopper
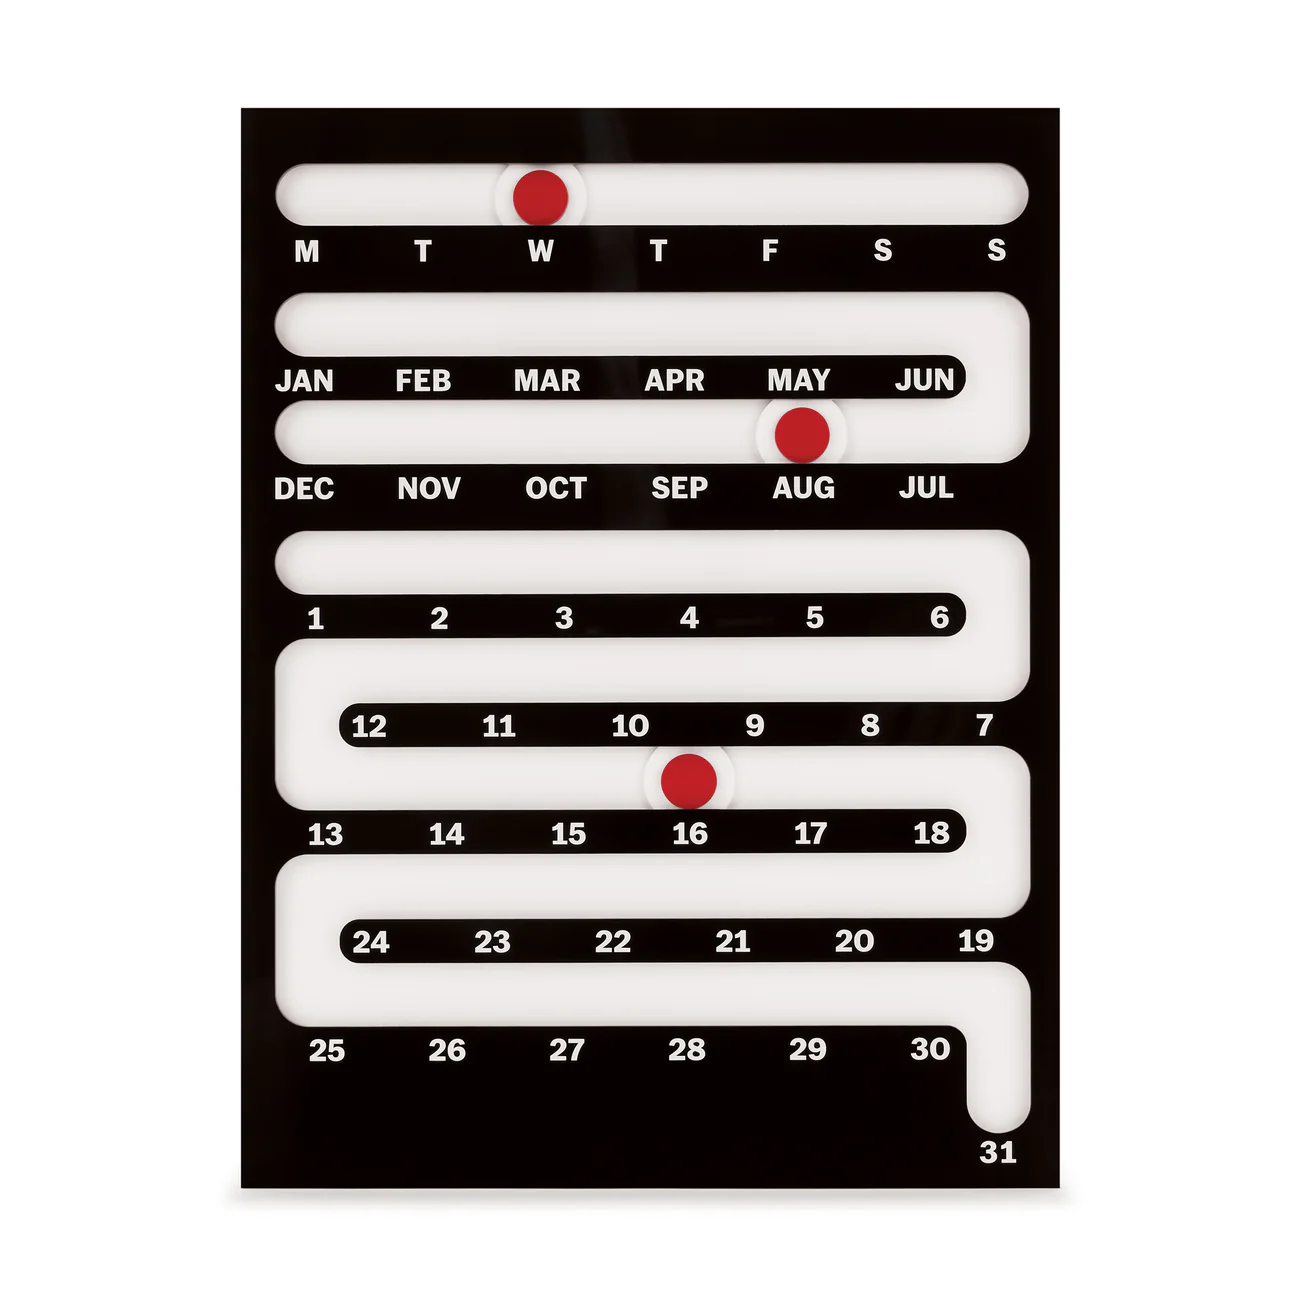
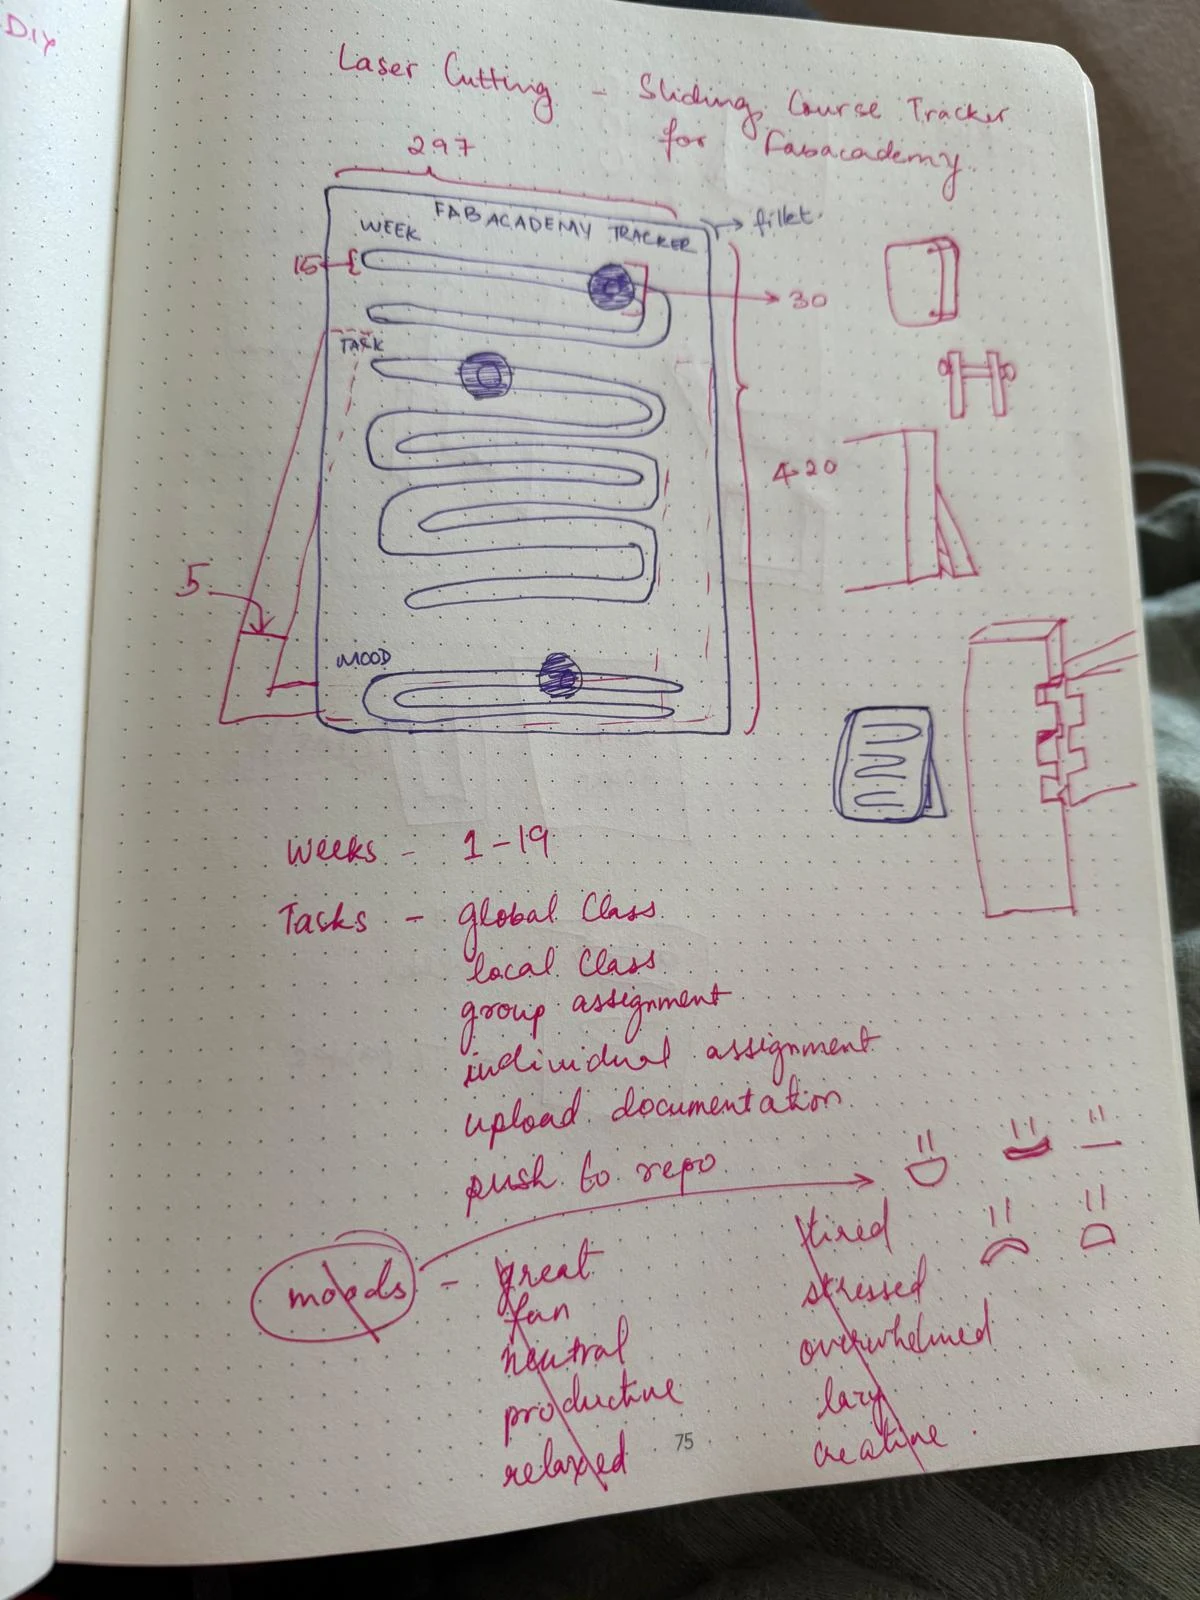
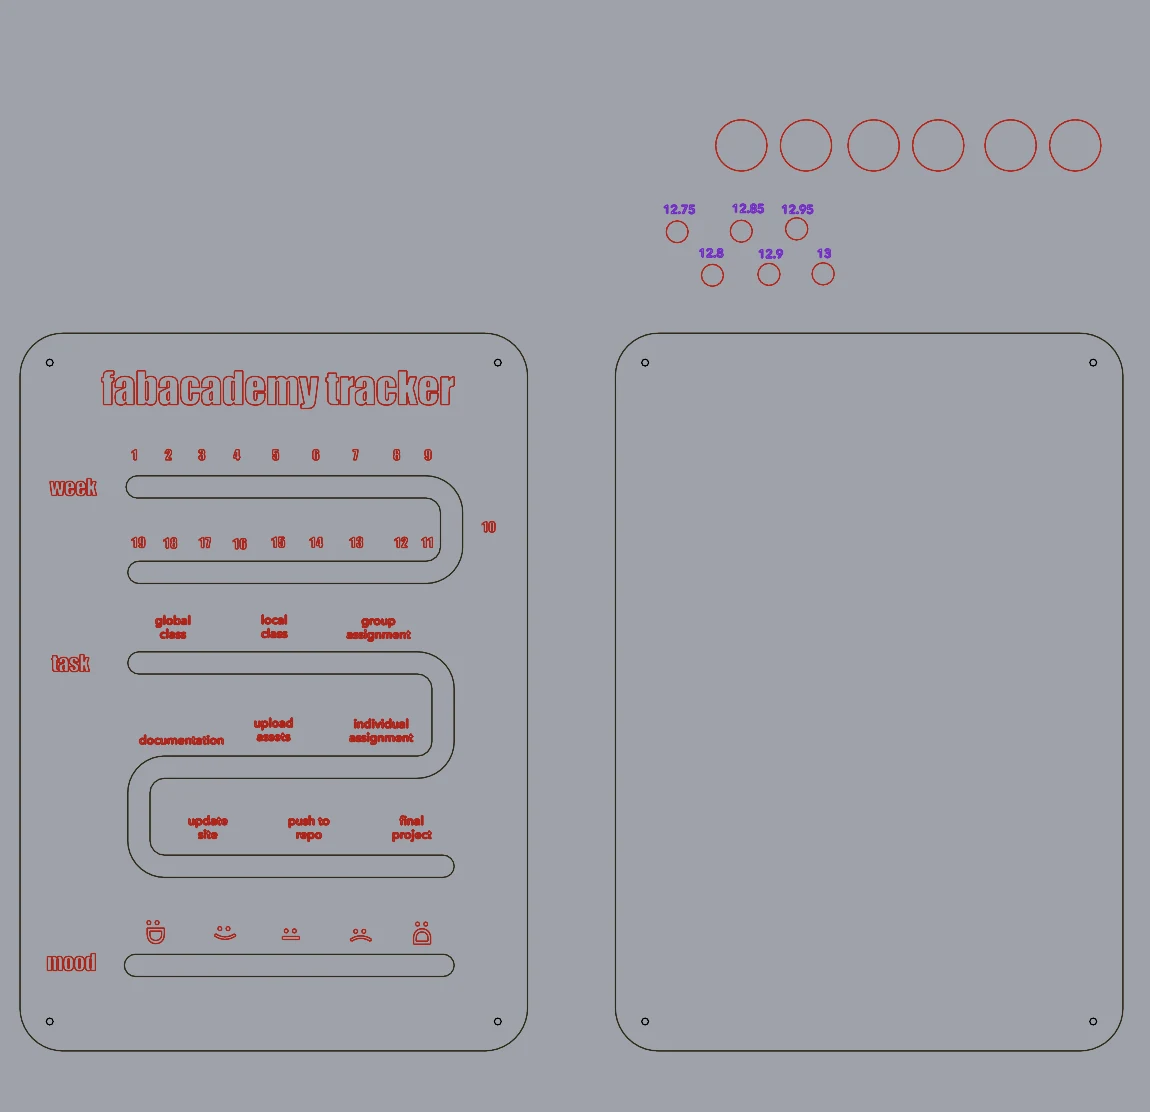
For this week's assignment, I want to make a fab academy tracker in the style of the perpetual calendar designed by Giancarlo Cipri for MoMA
I sketched out the parts I would need to make and the rough dimensions for the parts on paper first
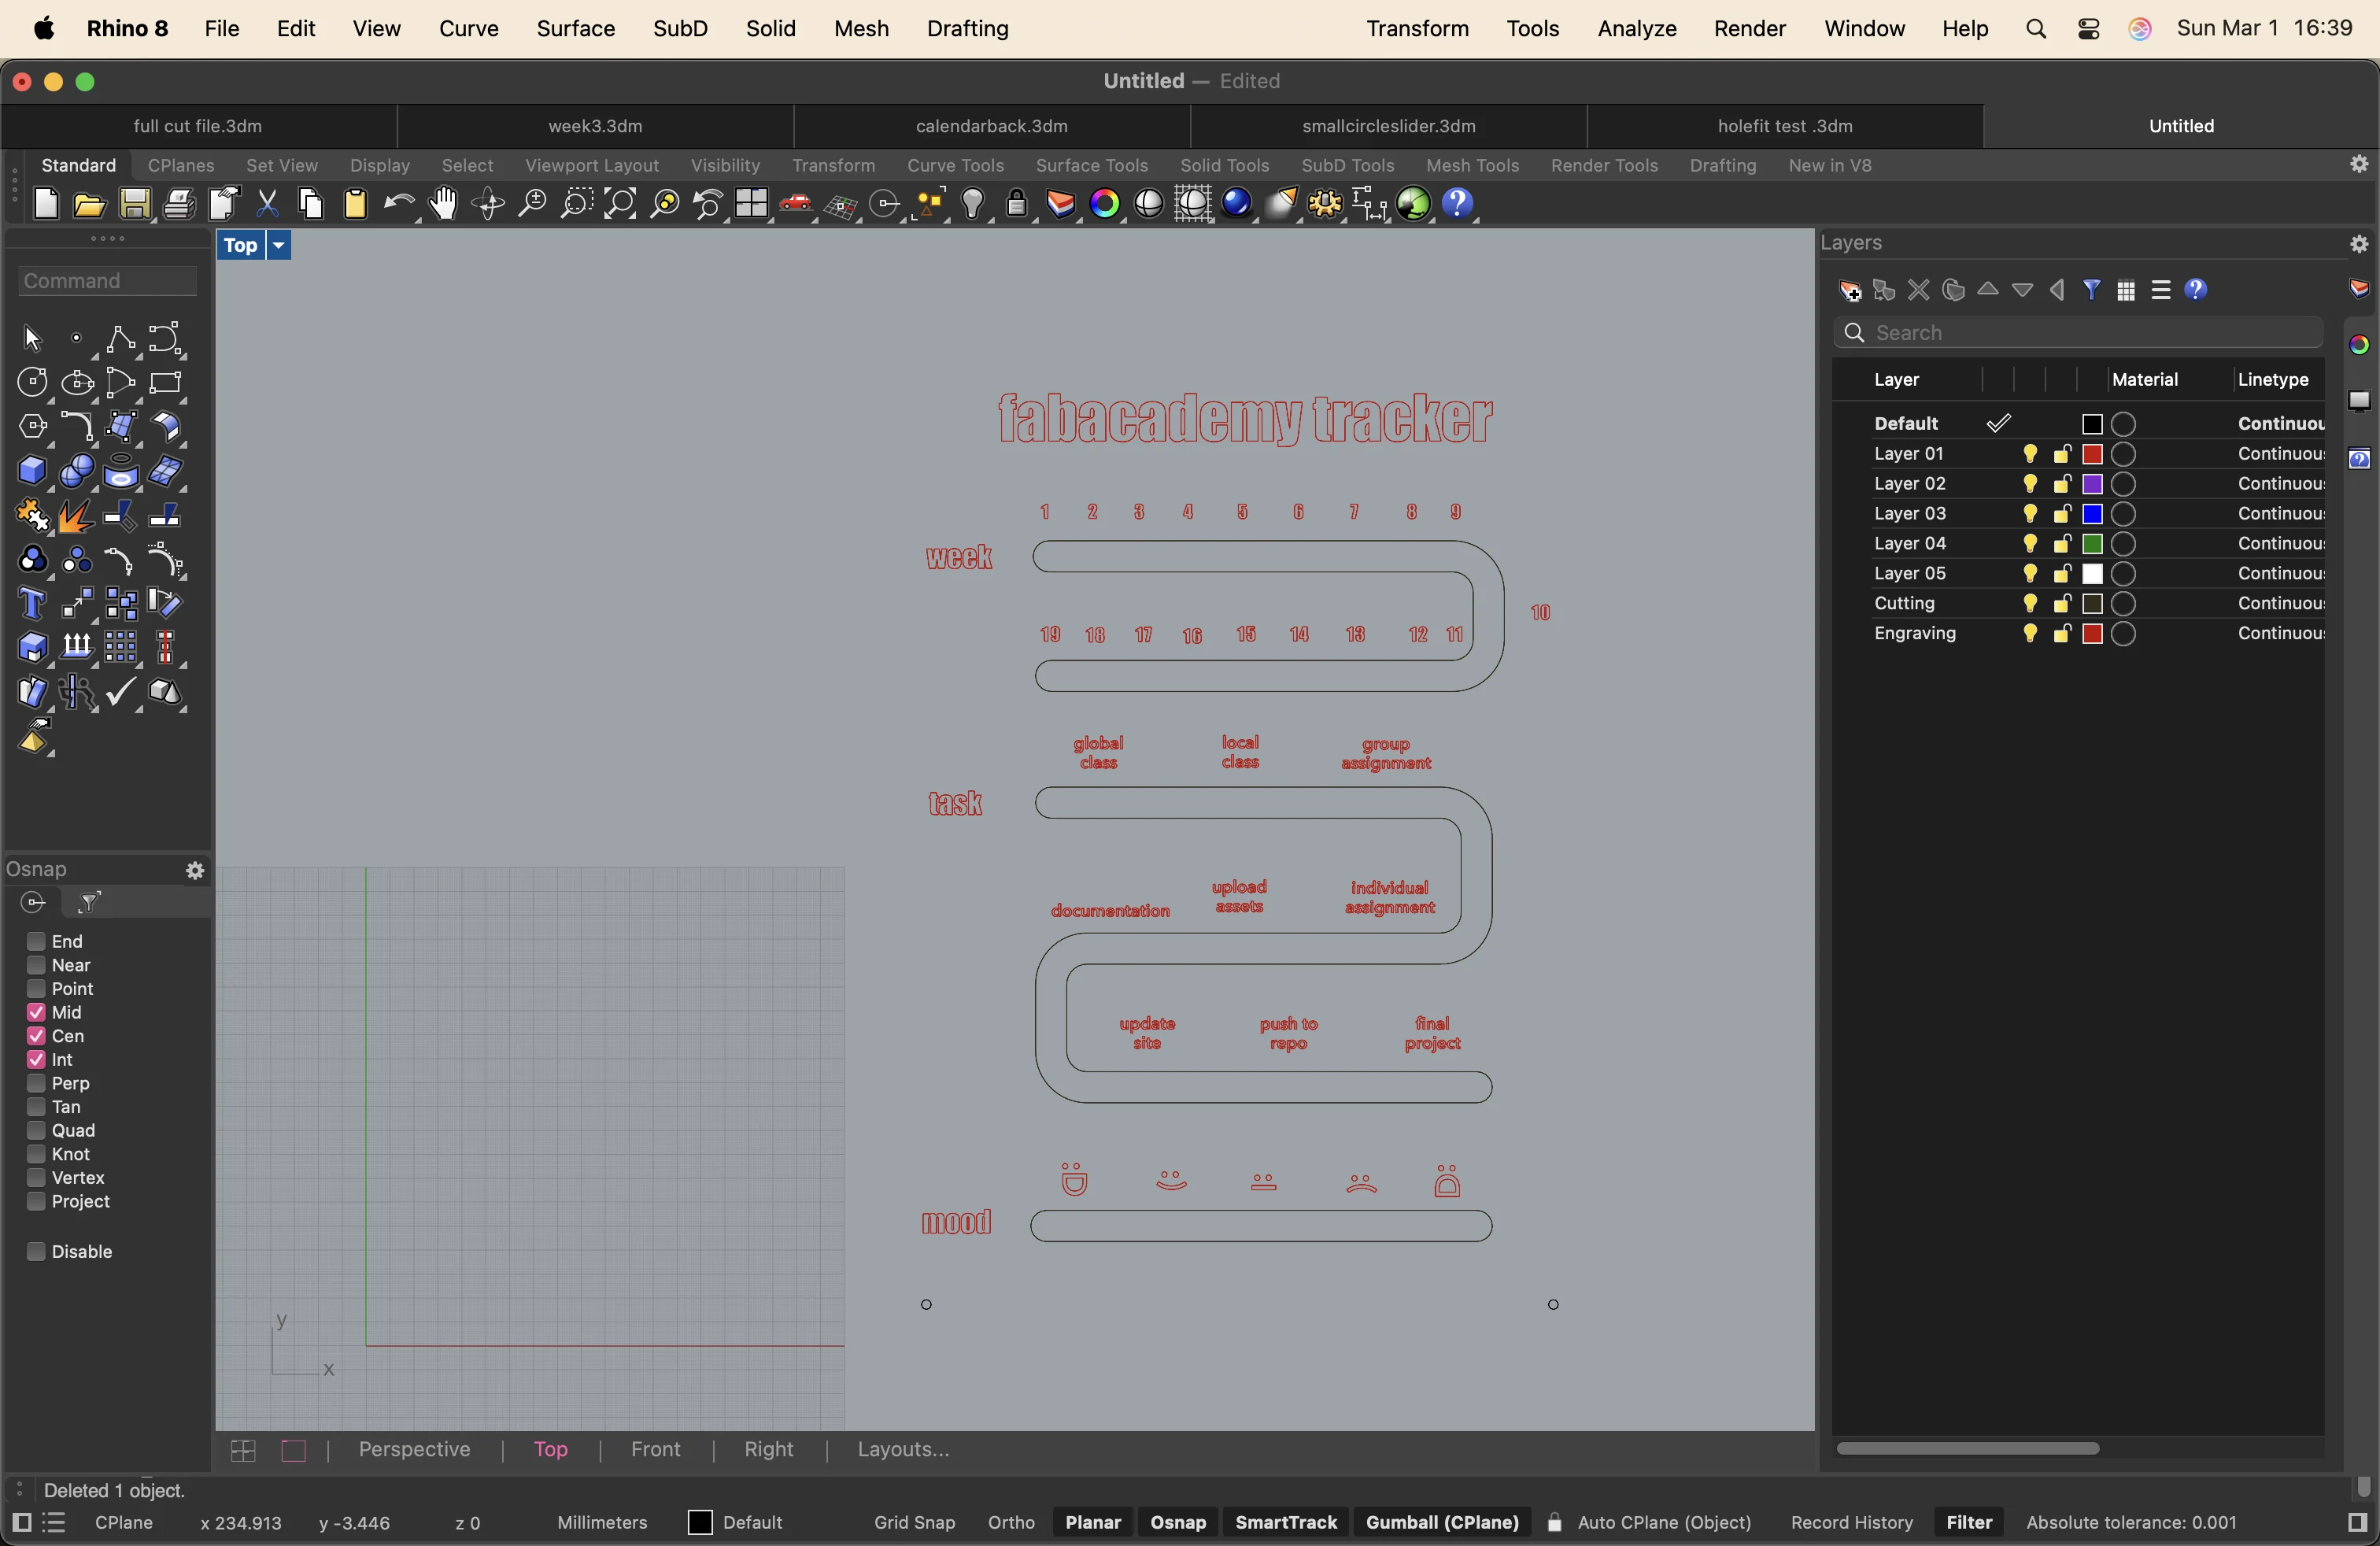
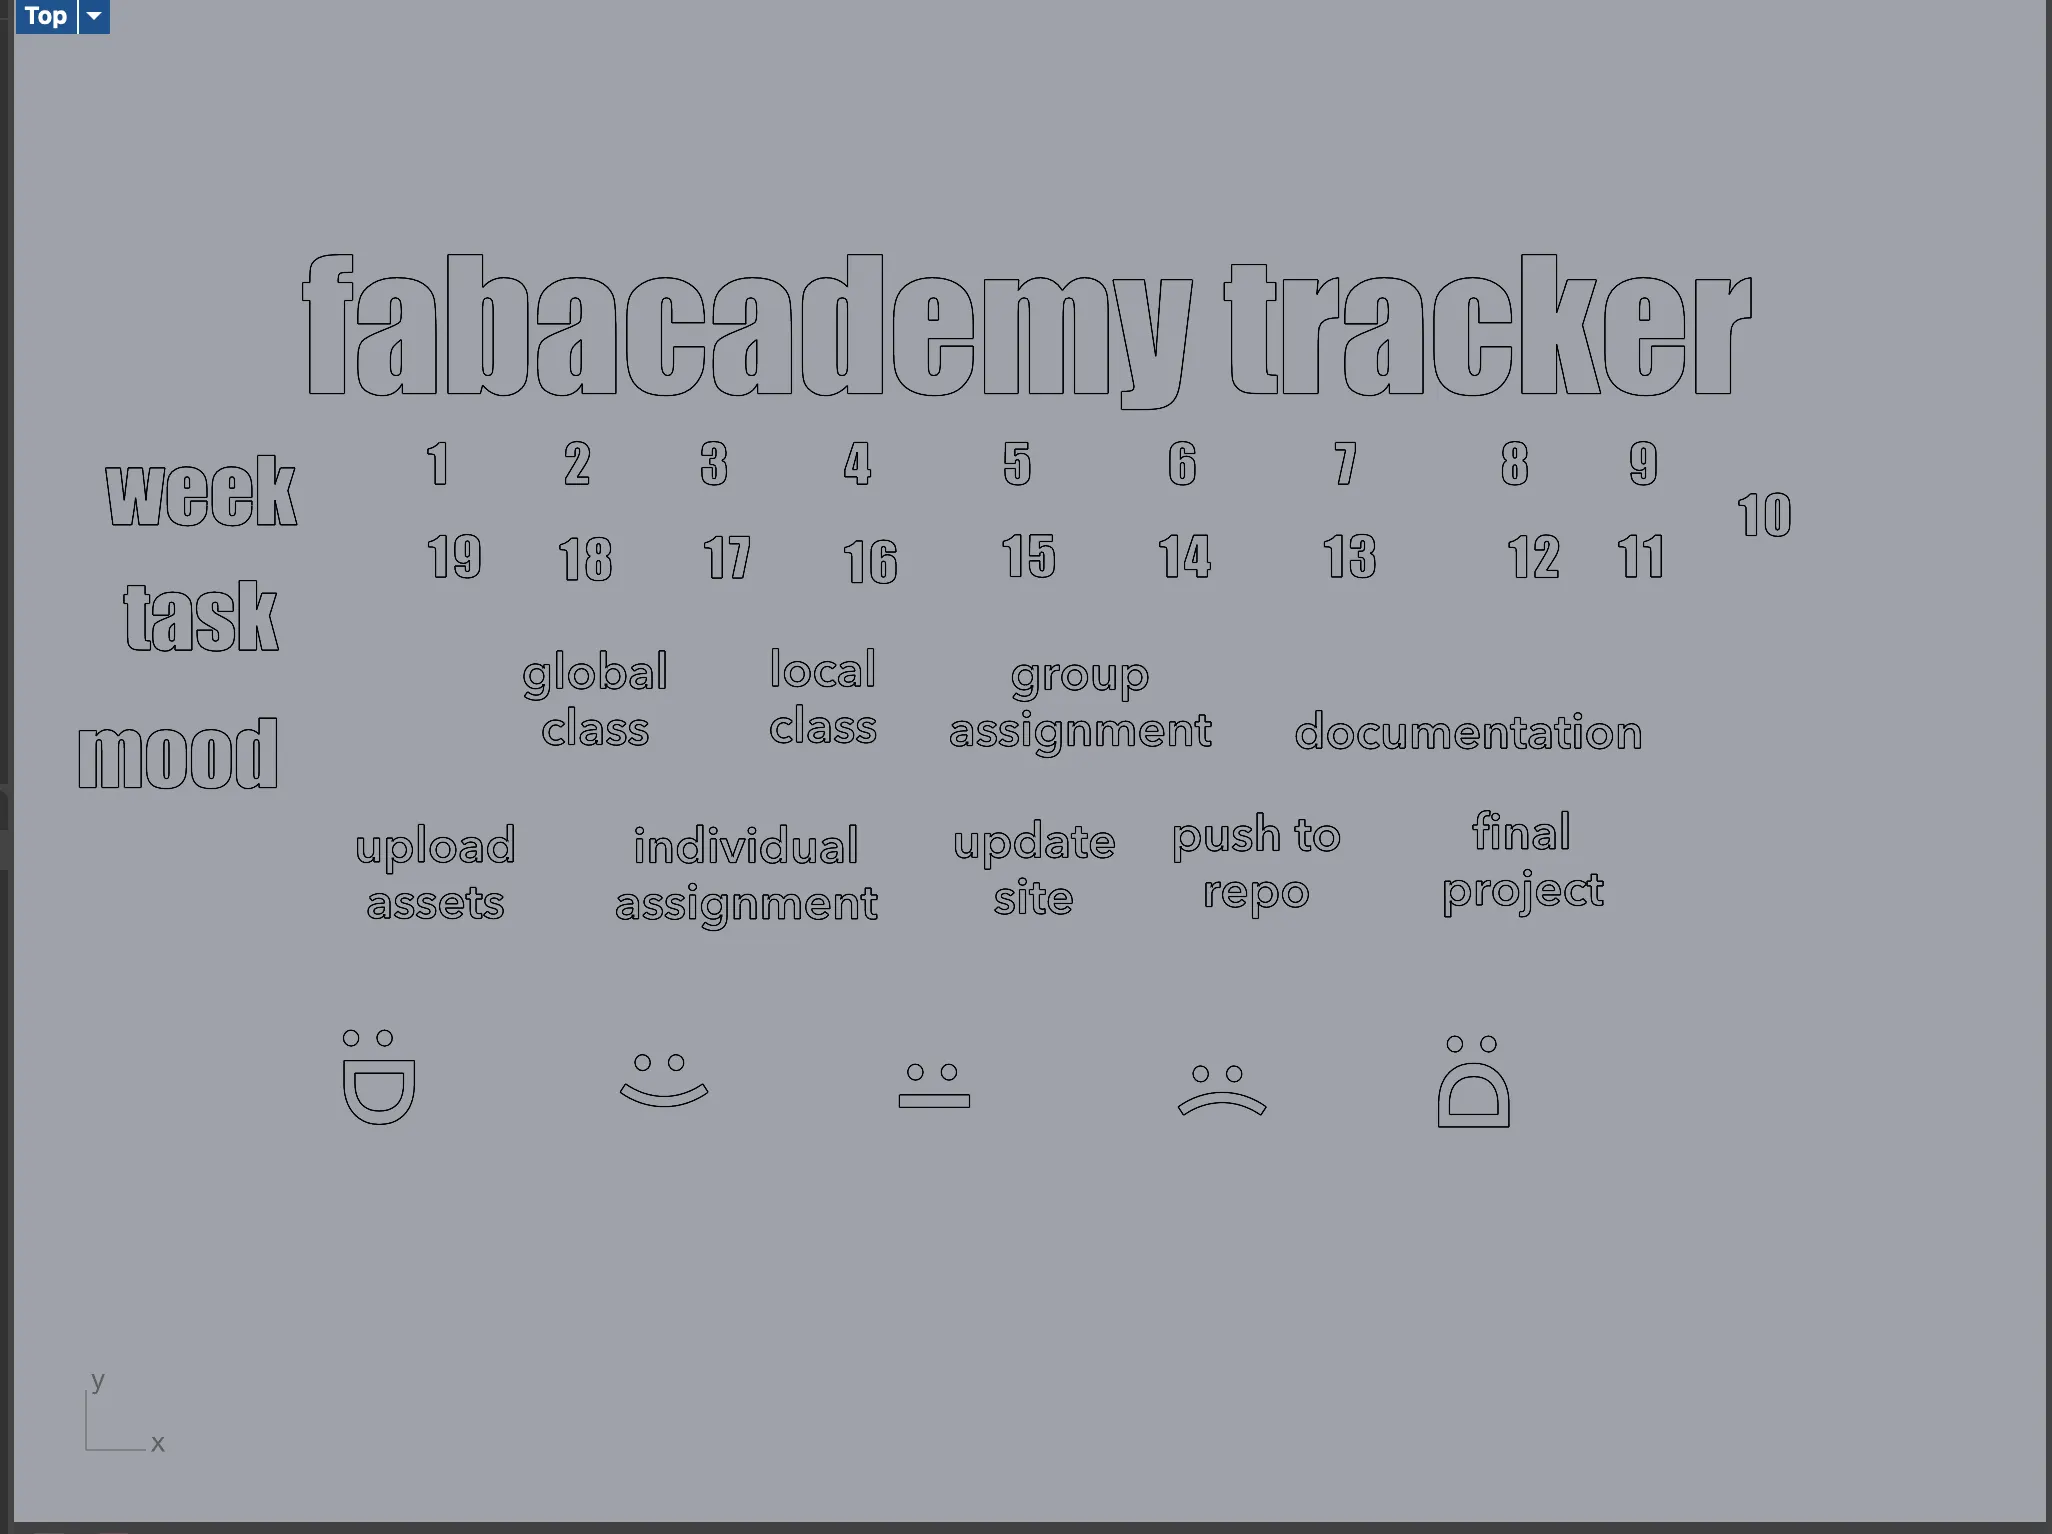
I made the vector drawing on Rhino 8.
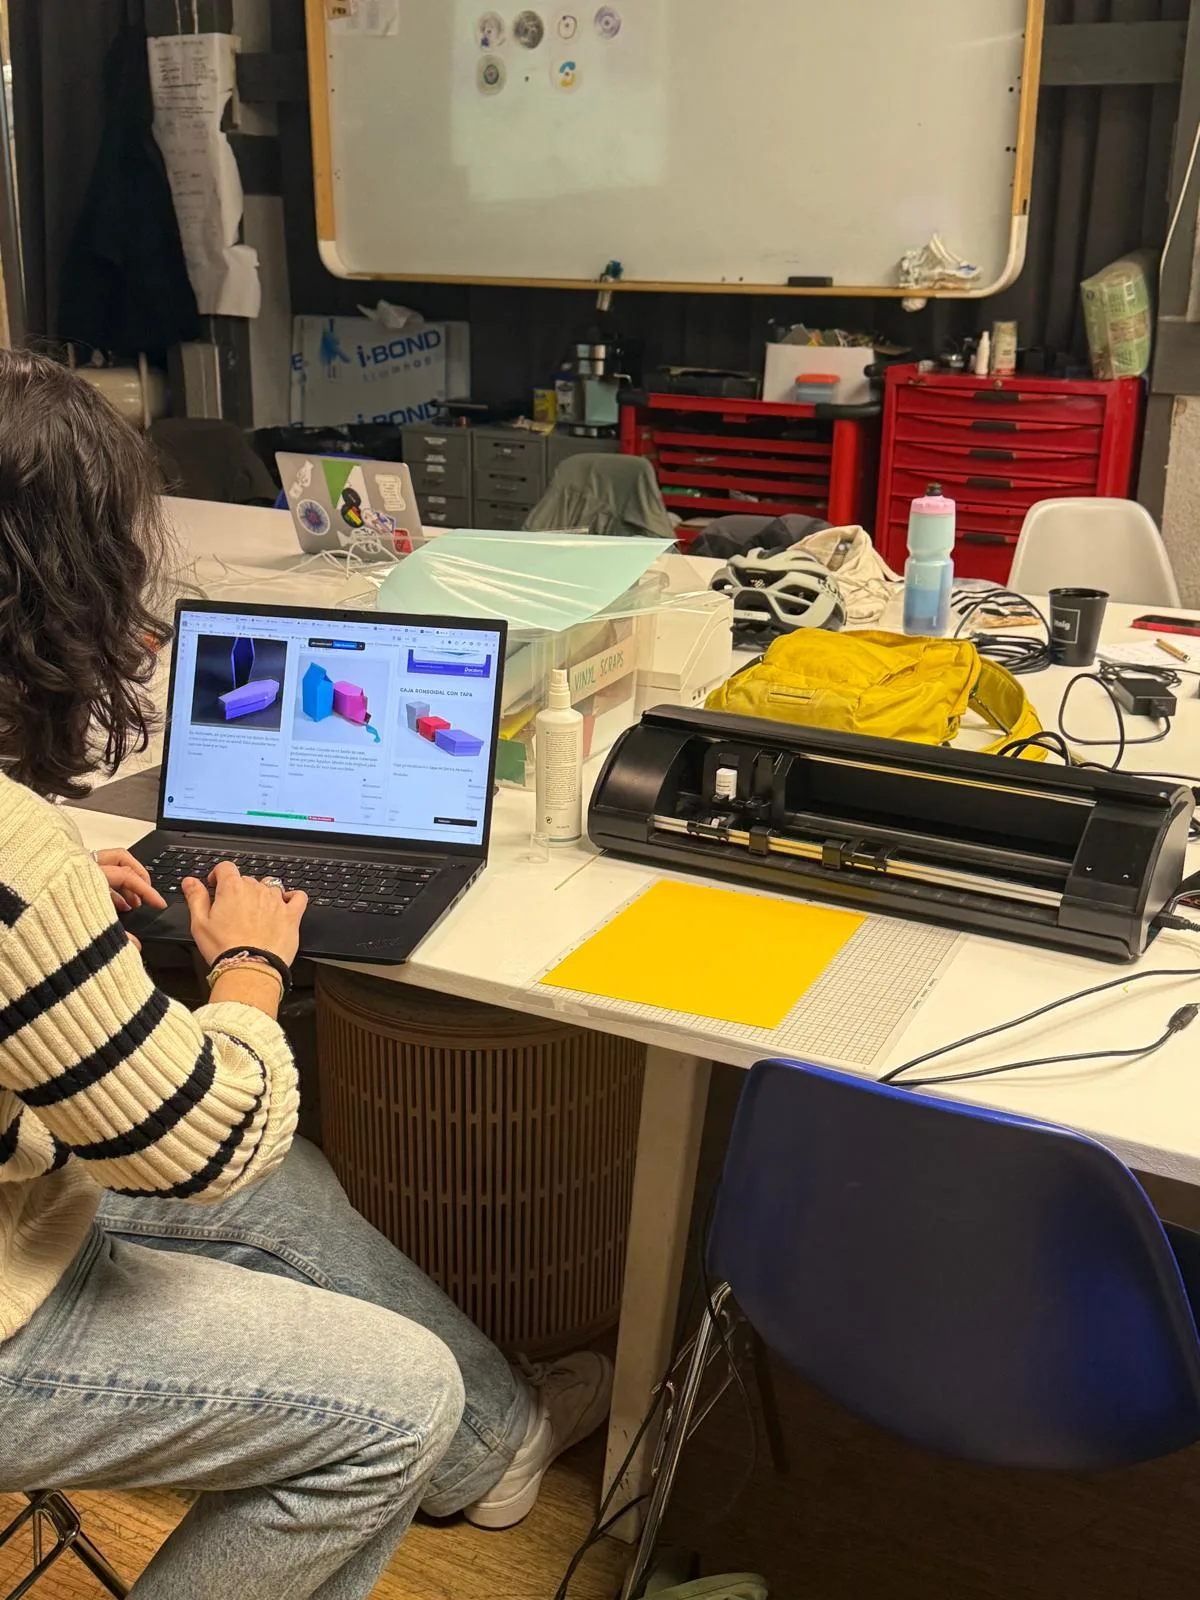
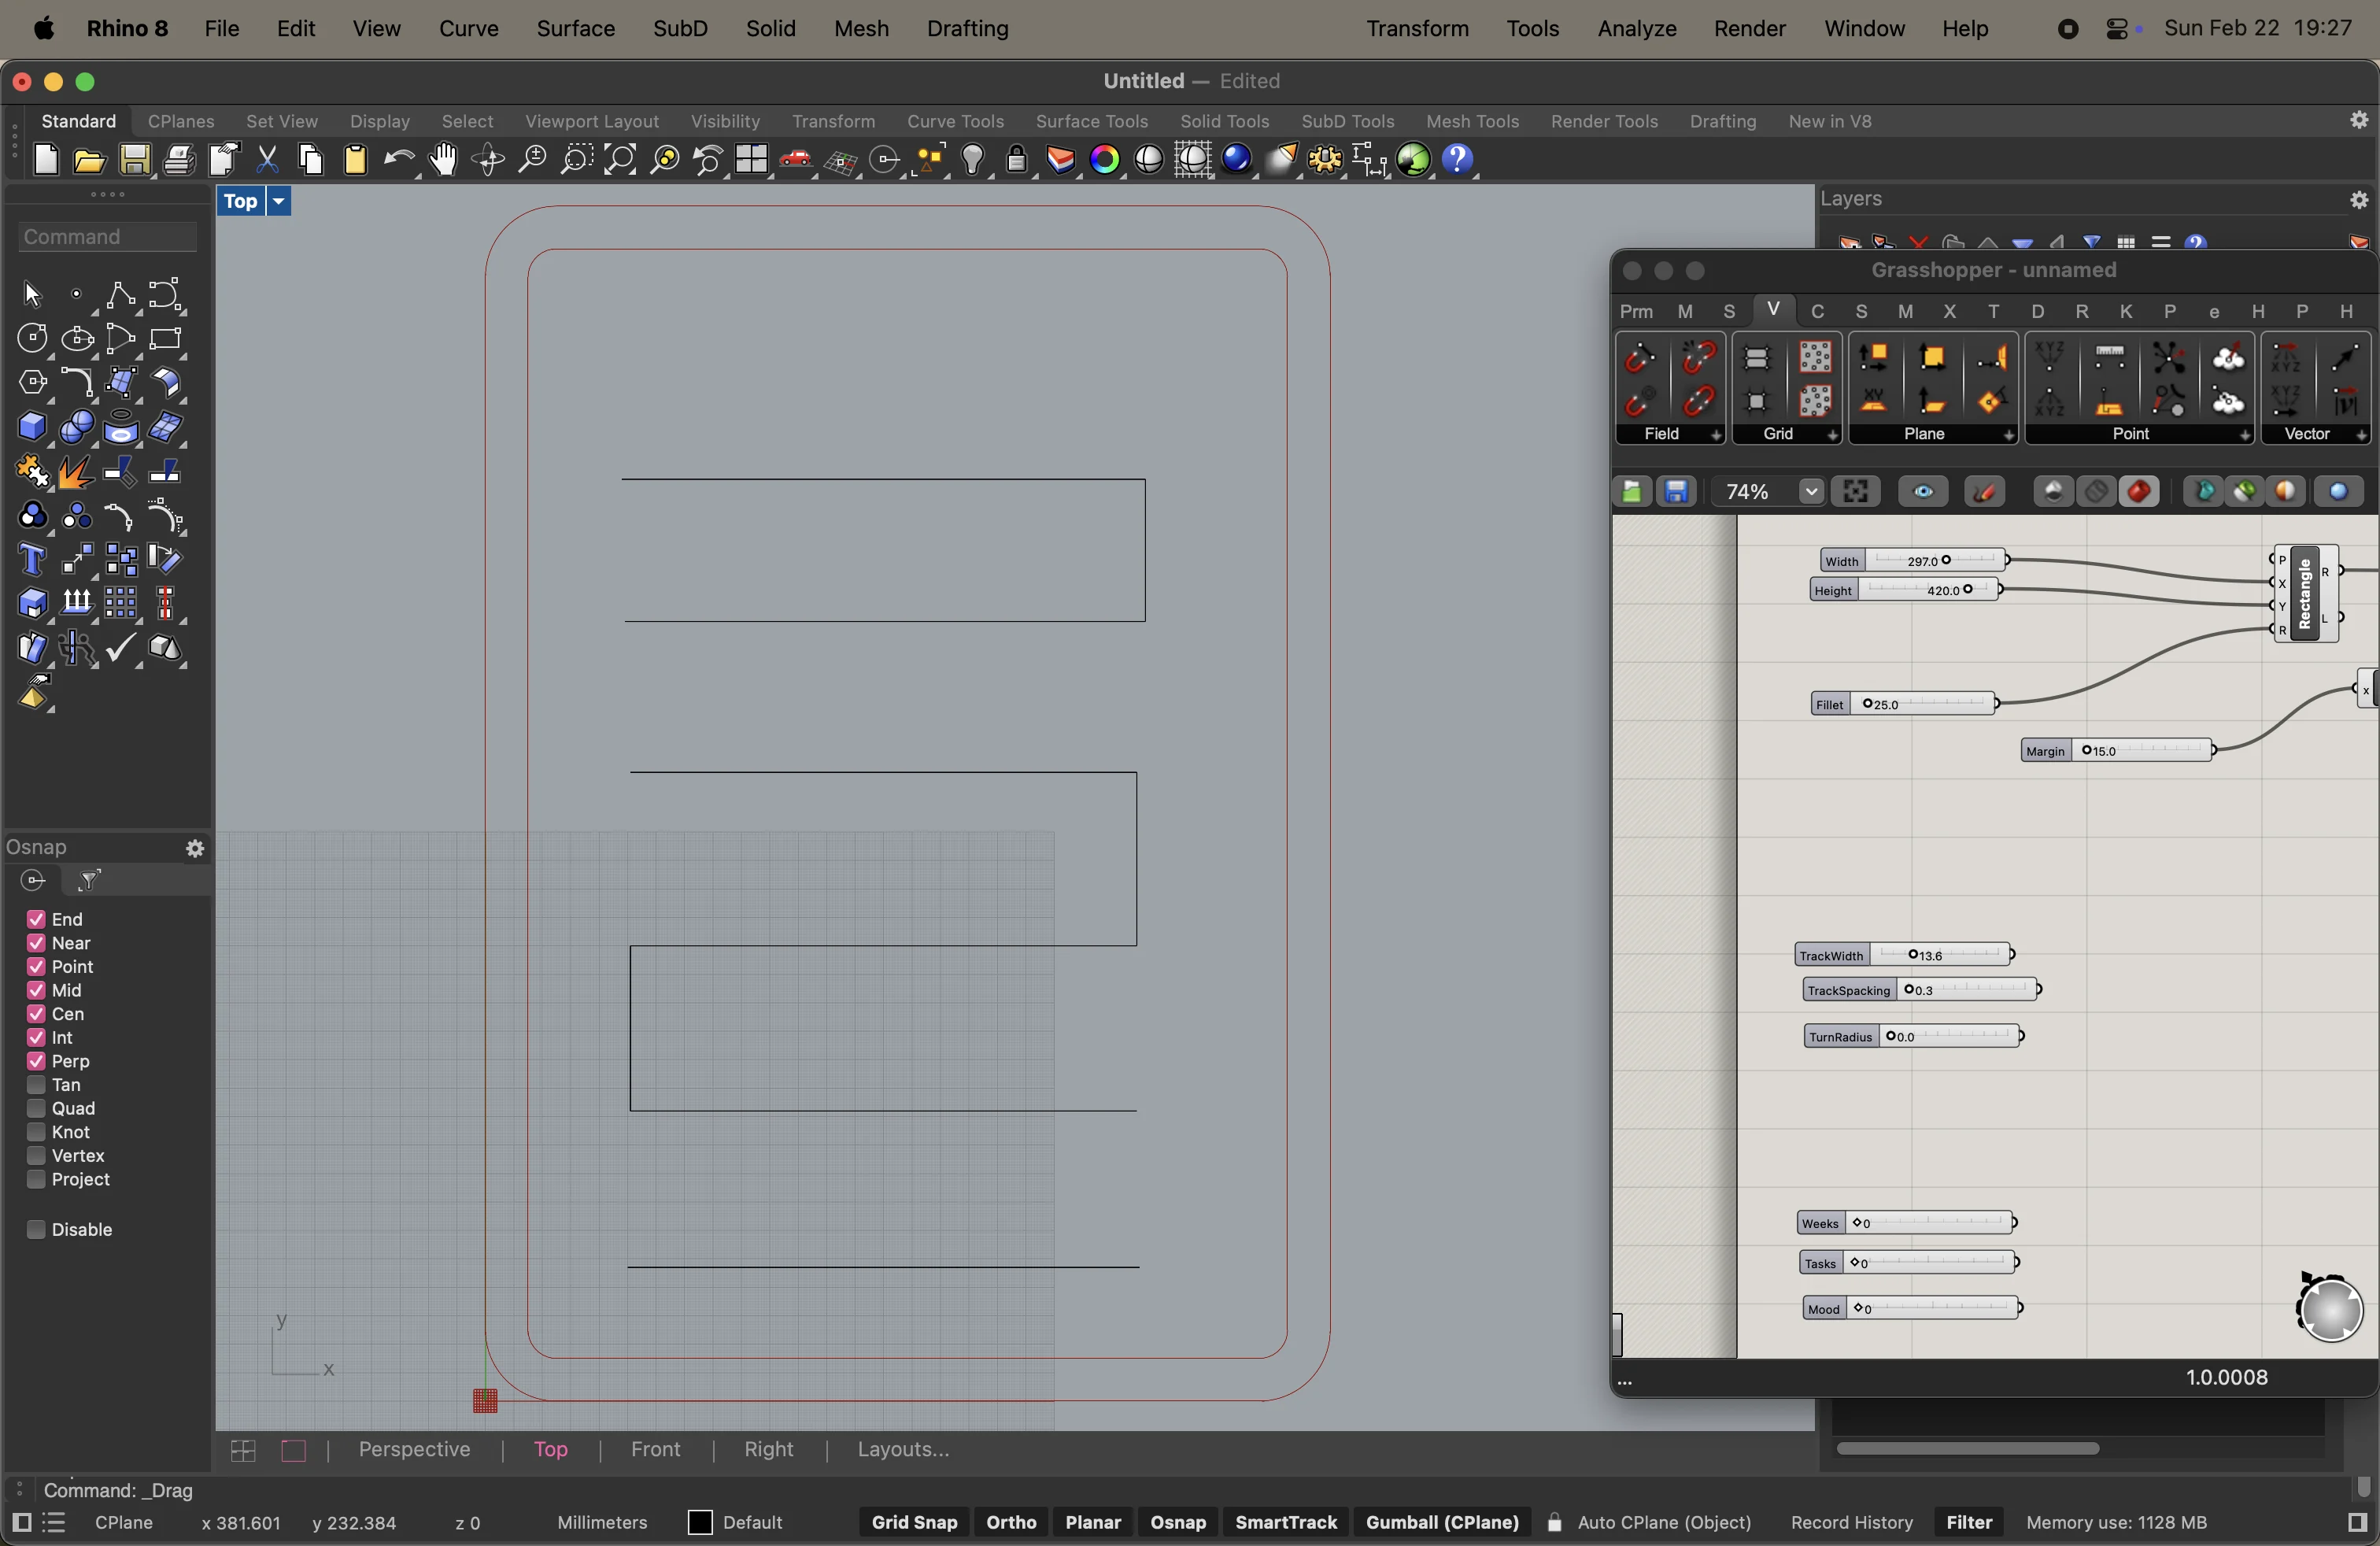
I used grasshopper to parametrically design the tracker.
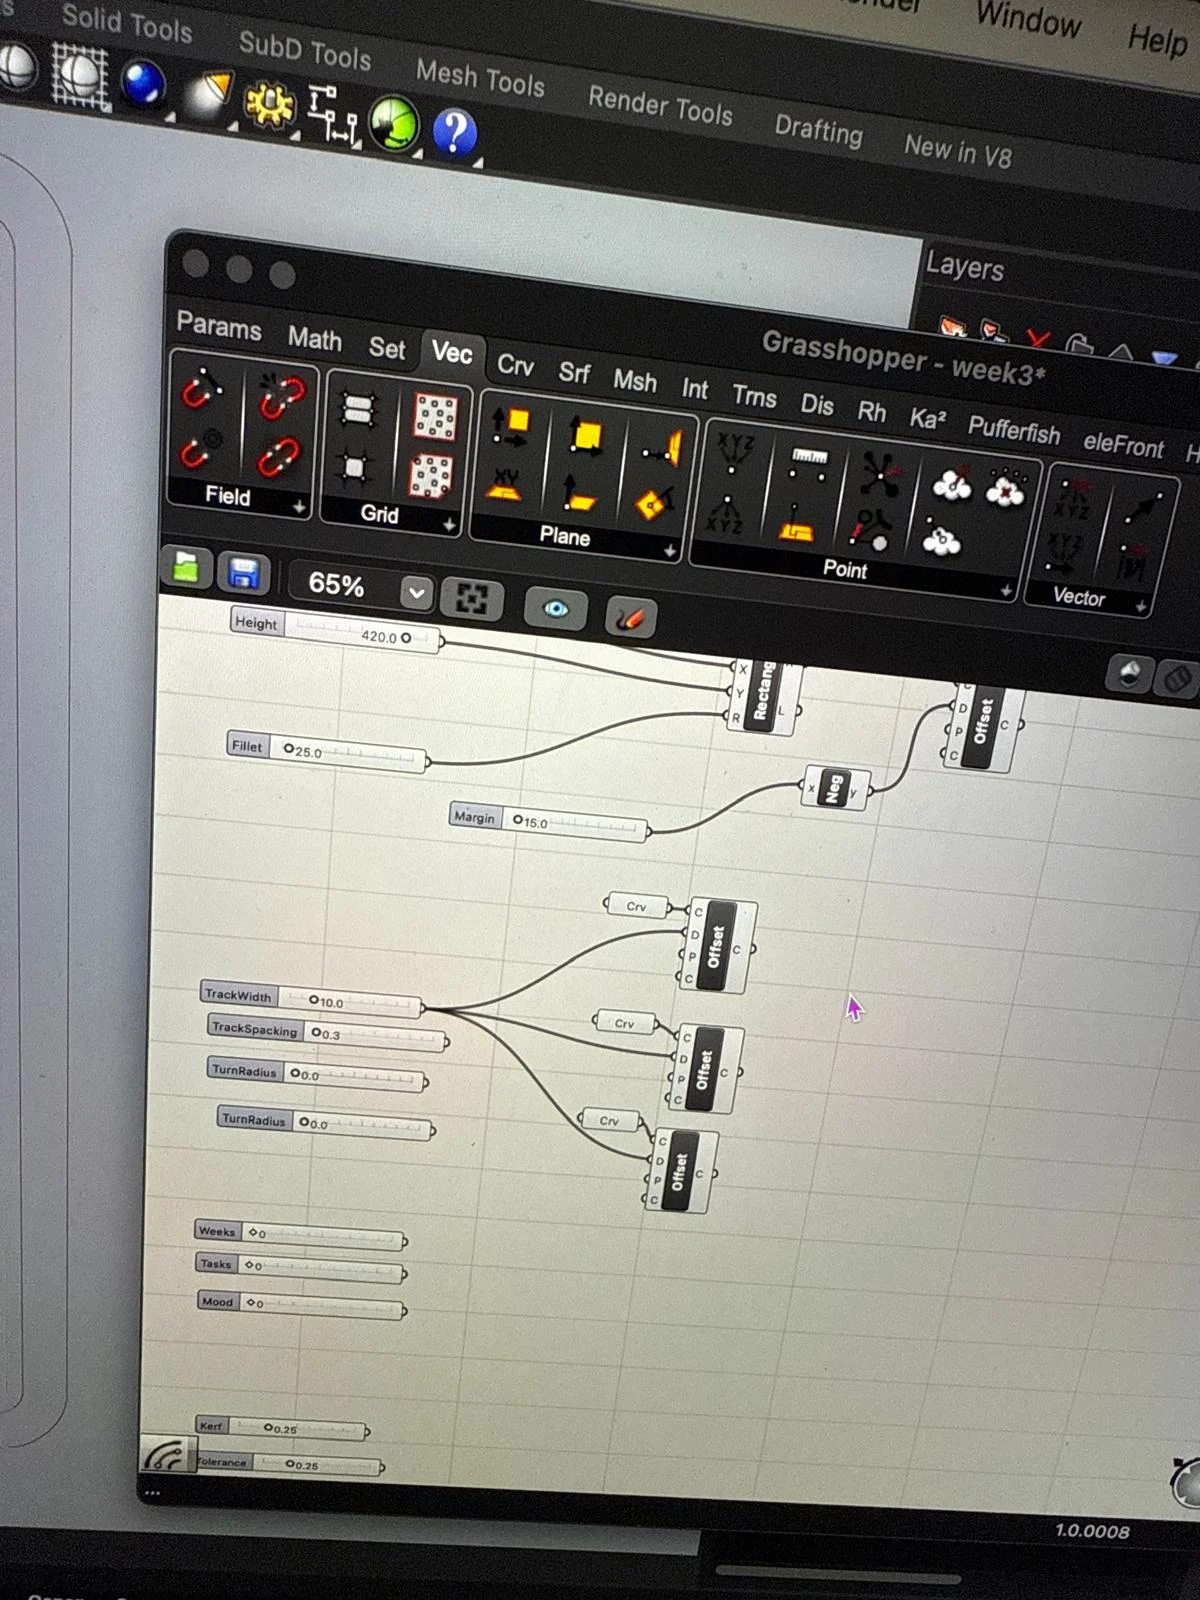
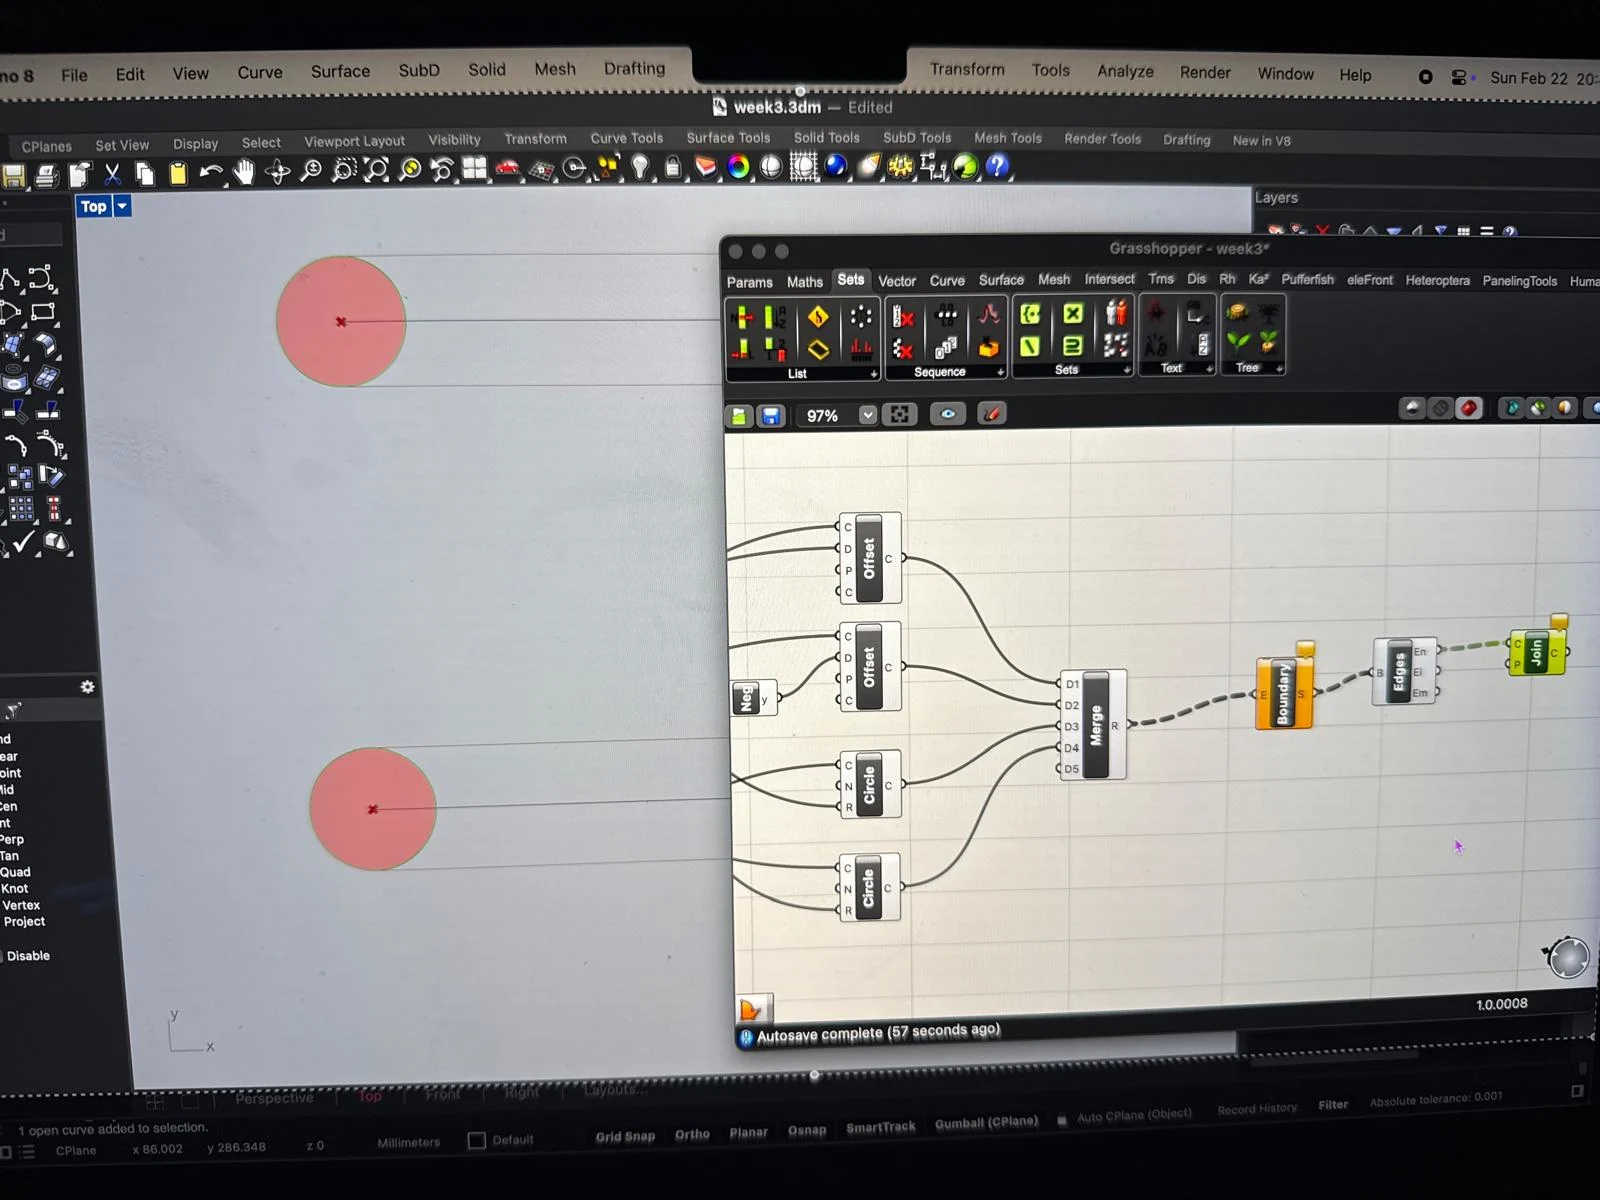
first I added a number of sliders to create and control the first rectangle. Mainly height, width,-for the rectangle, fillet to not have sharp edges and margin- to create an inside offset limit to the elements inside.
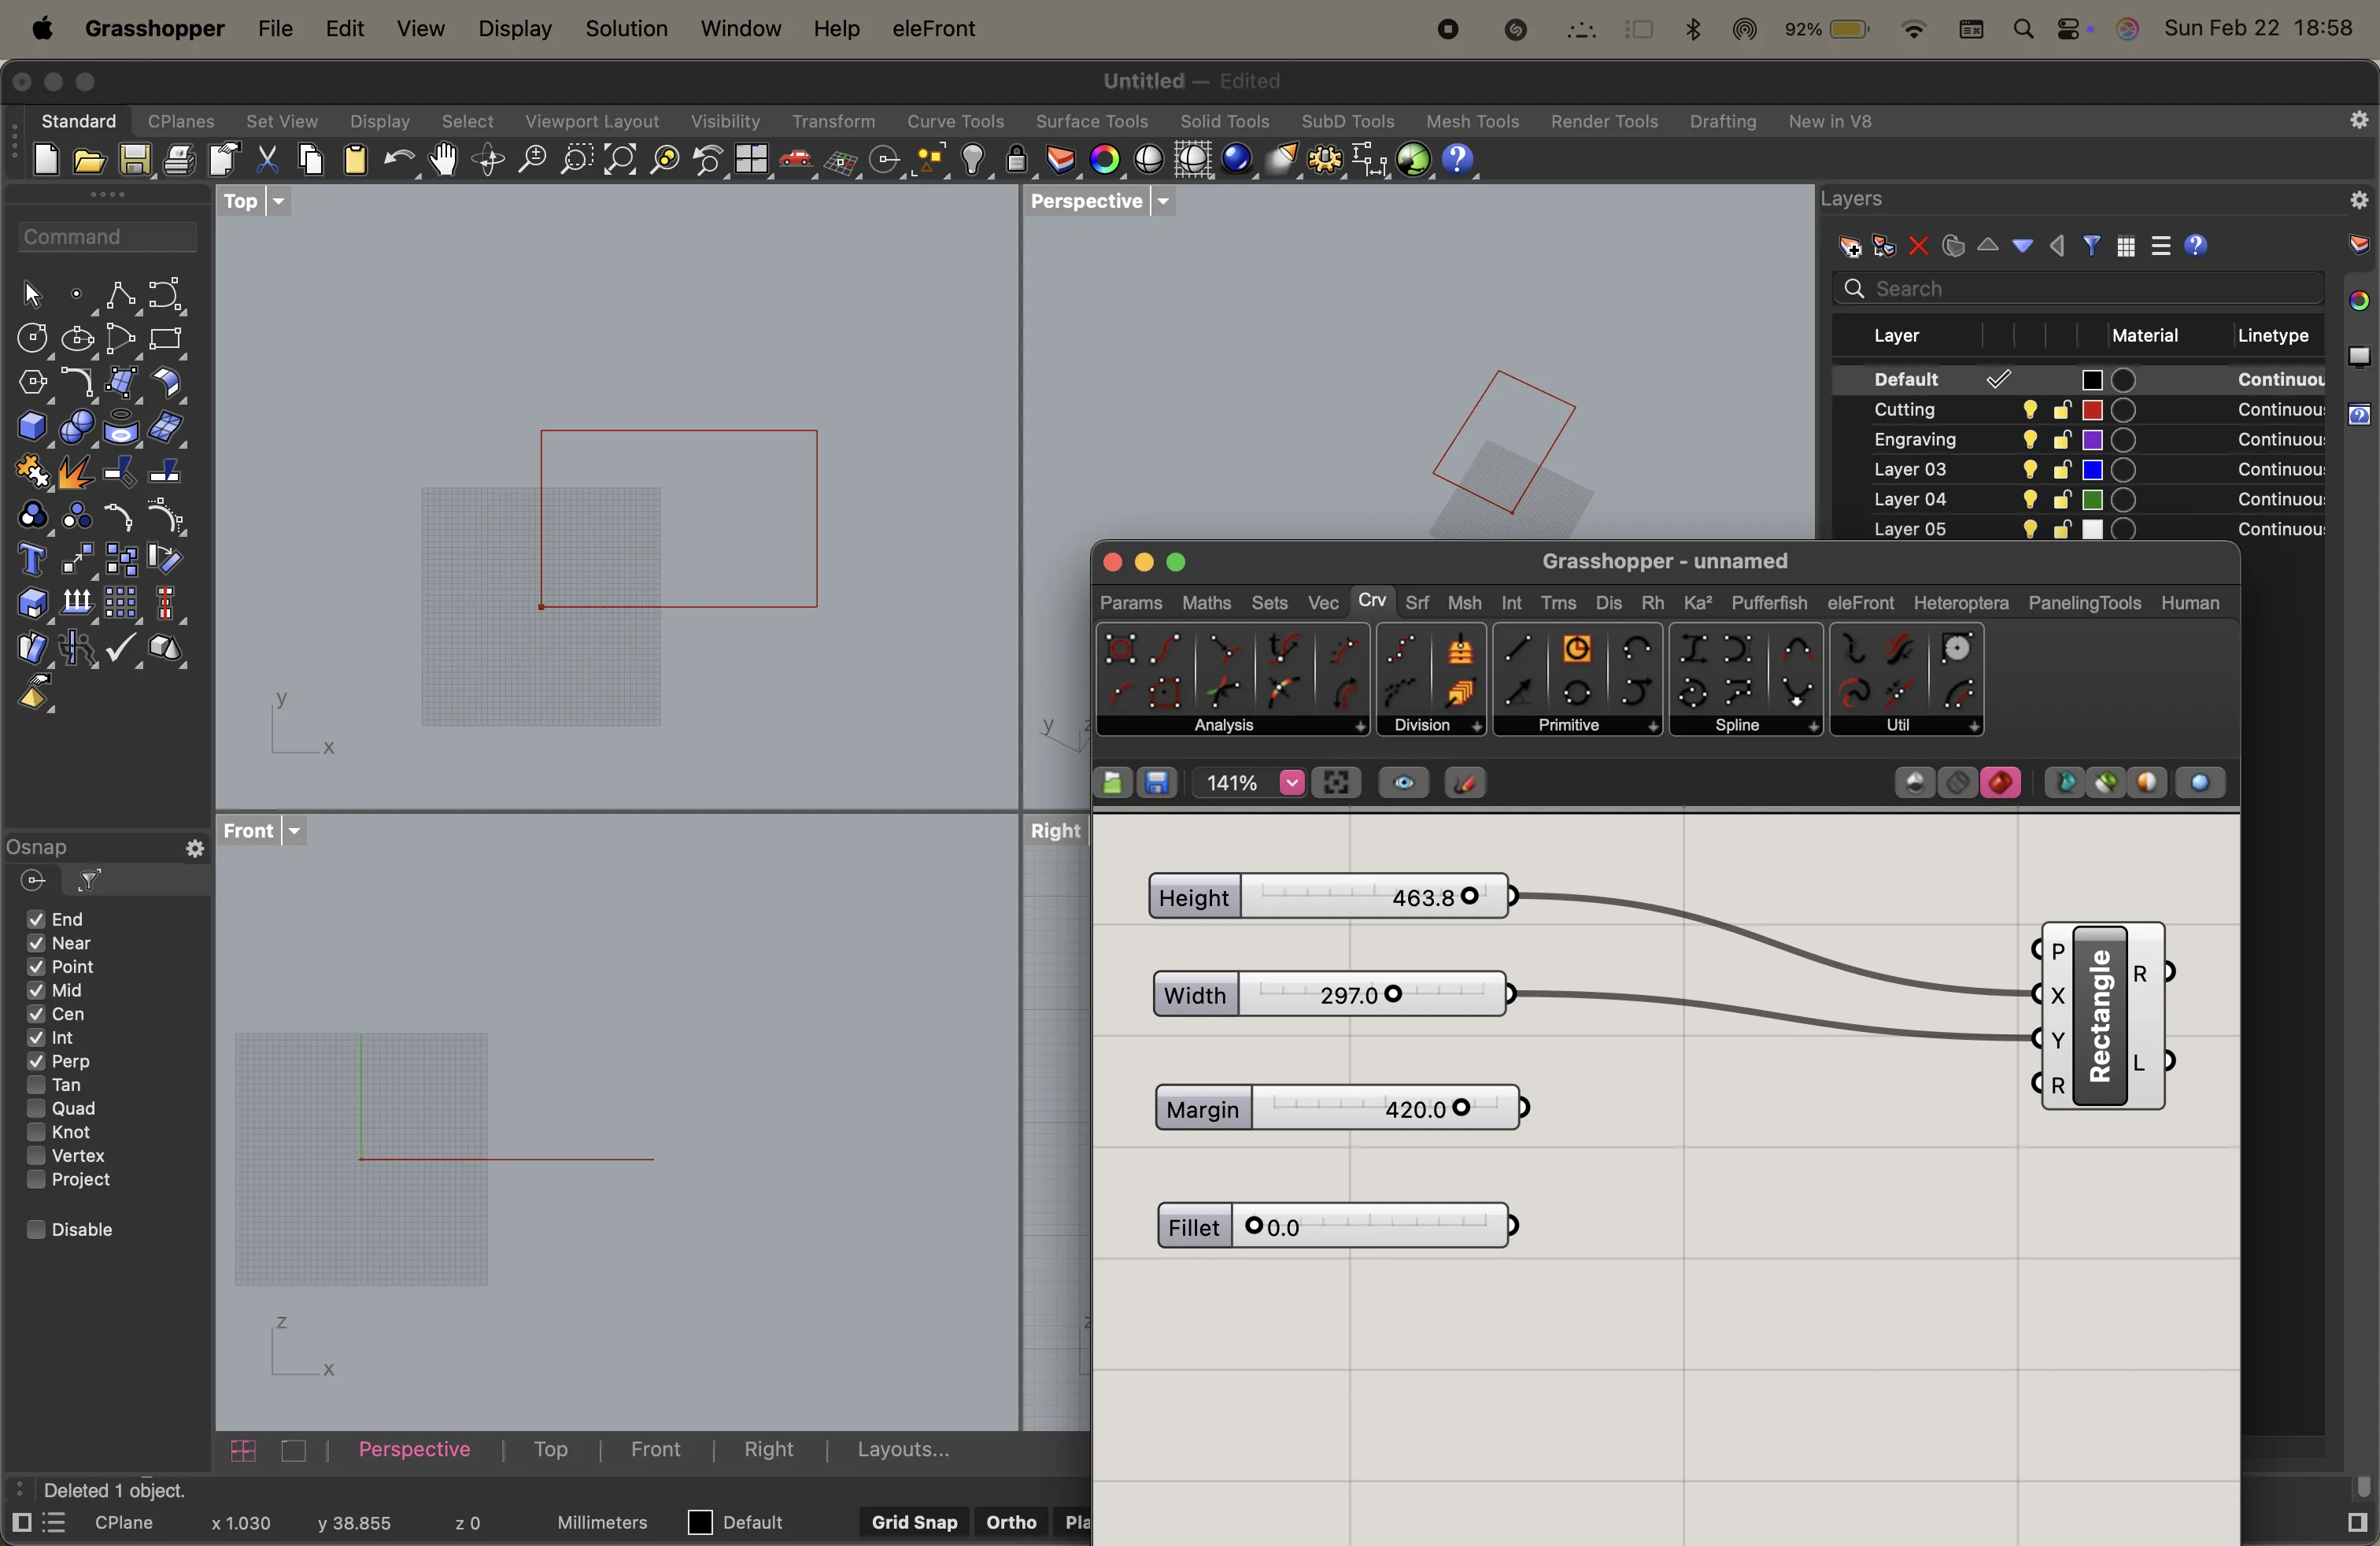
i connect the sliders to the rectangle parameters so that i could control the size and shape of the rectangle dynamically.
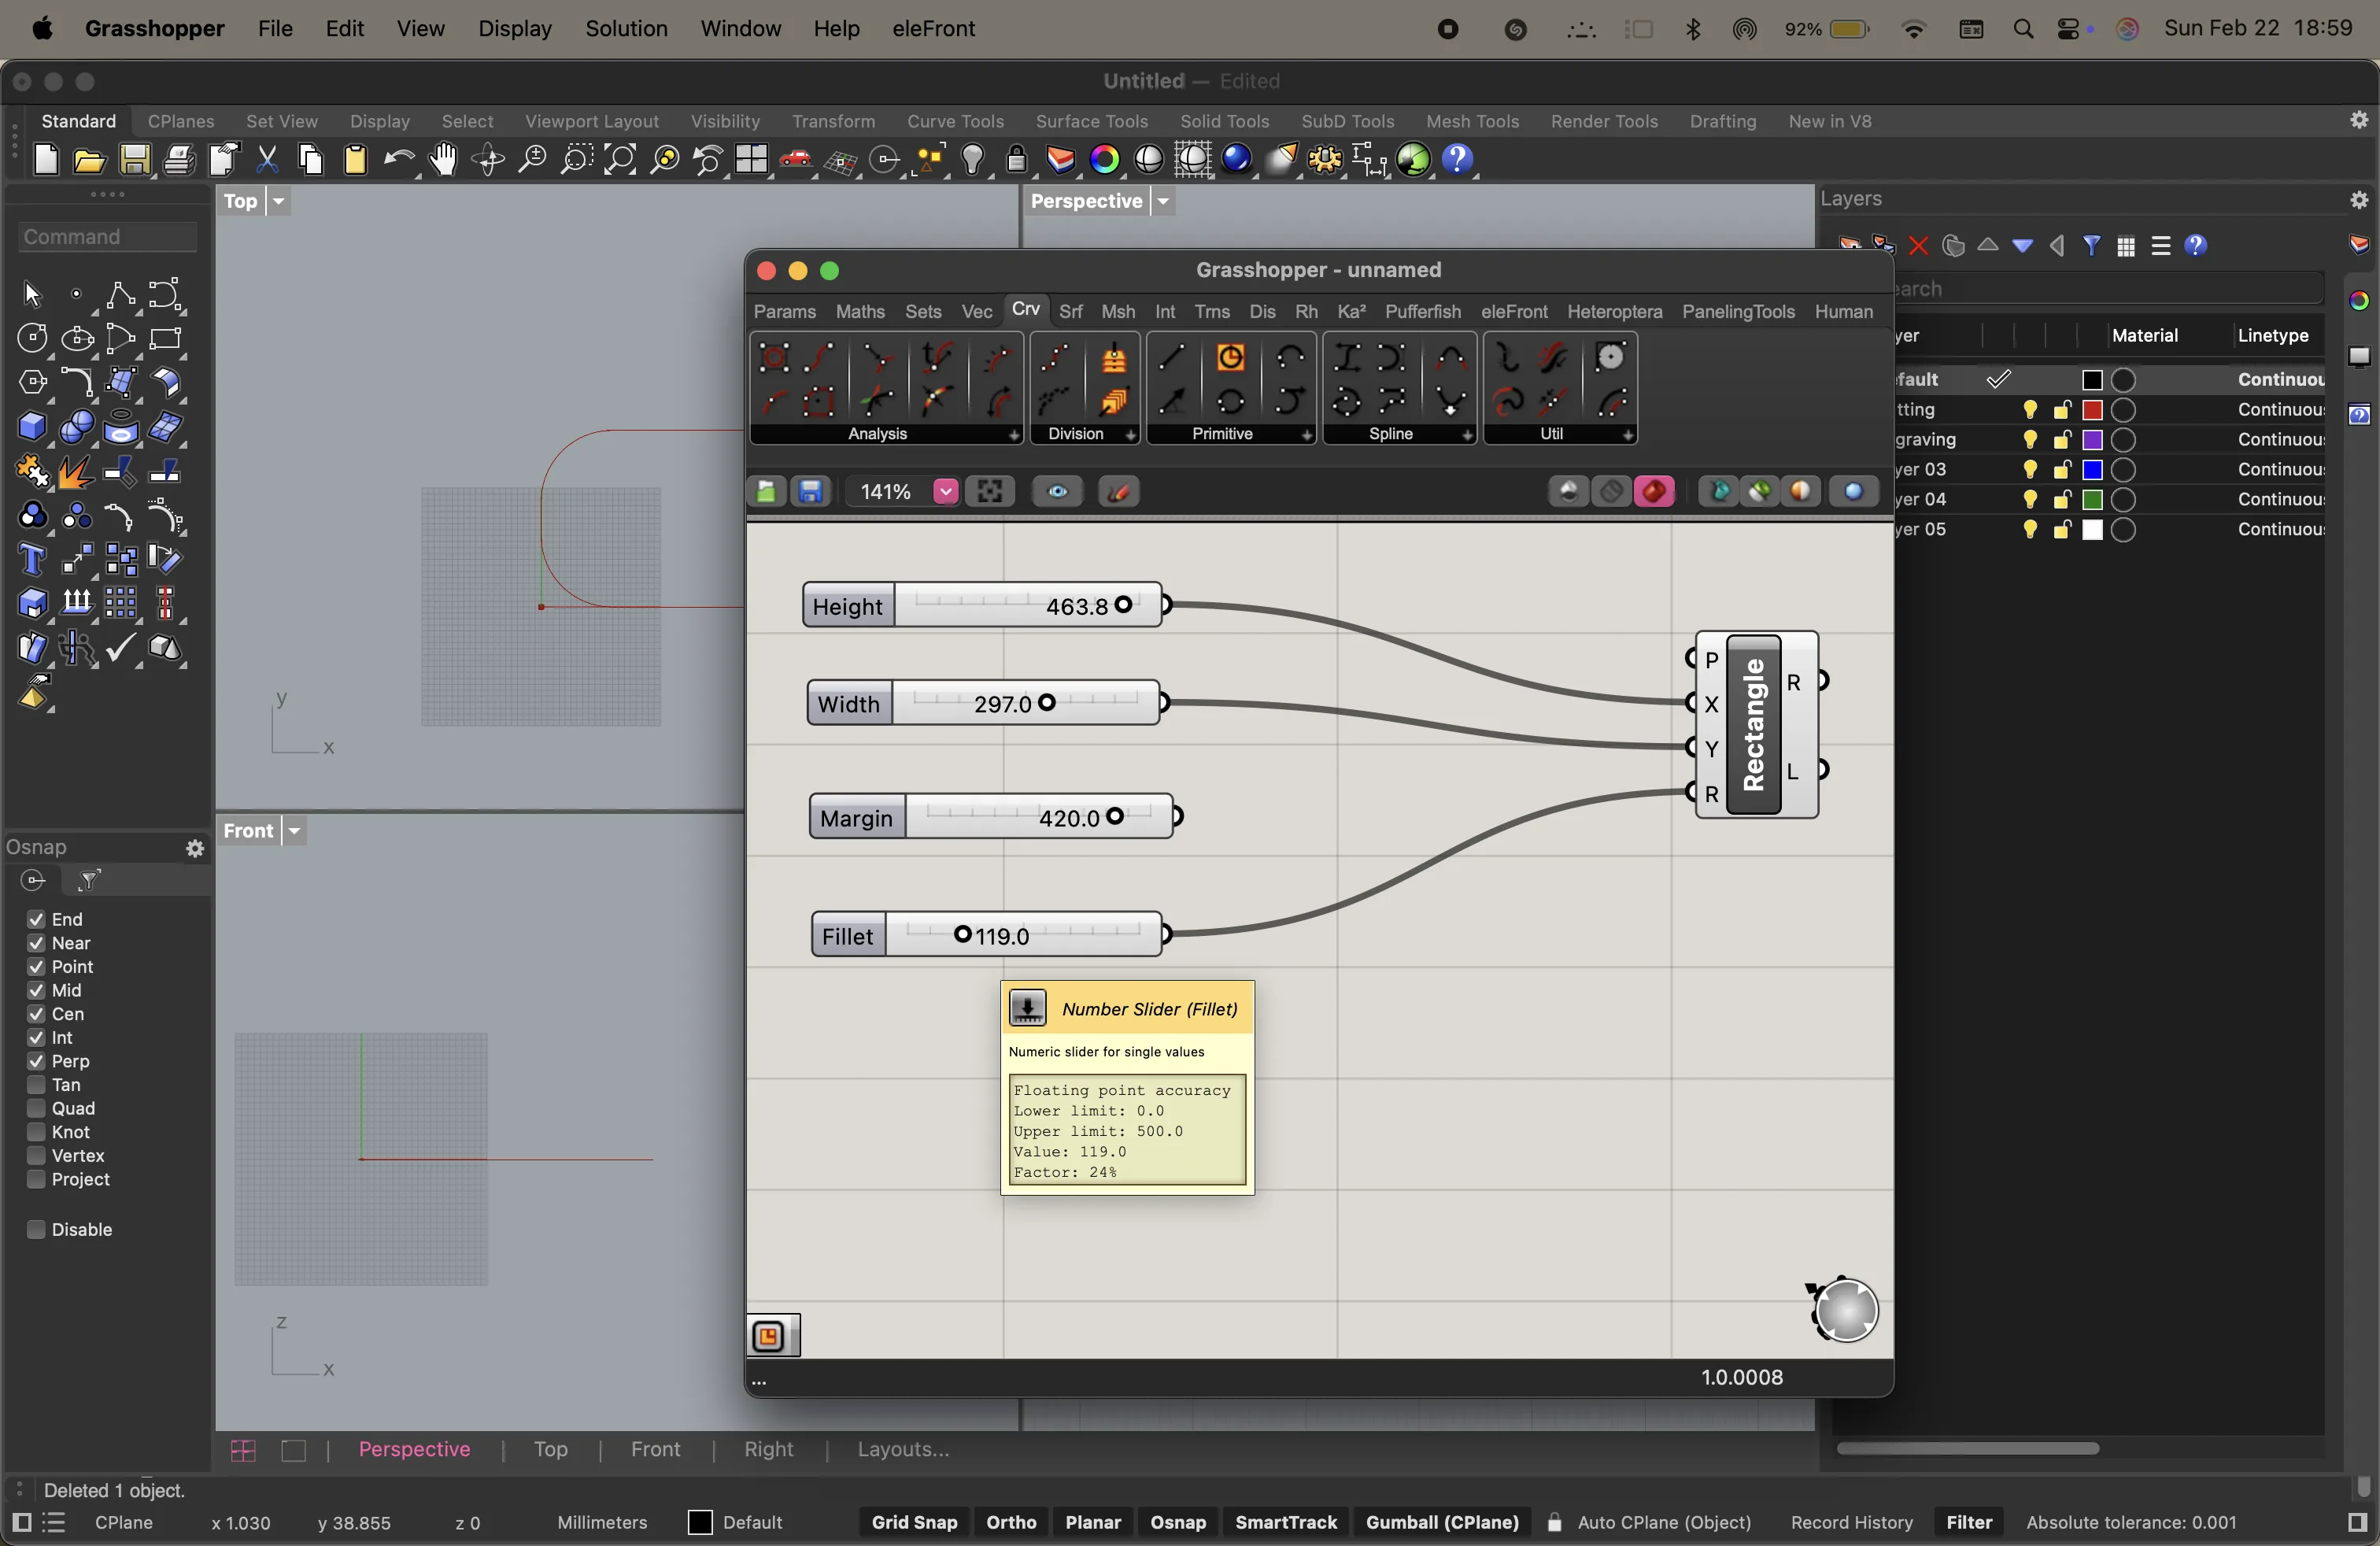
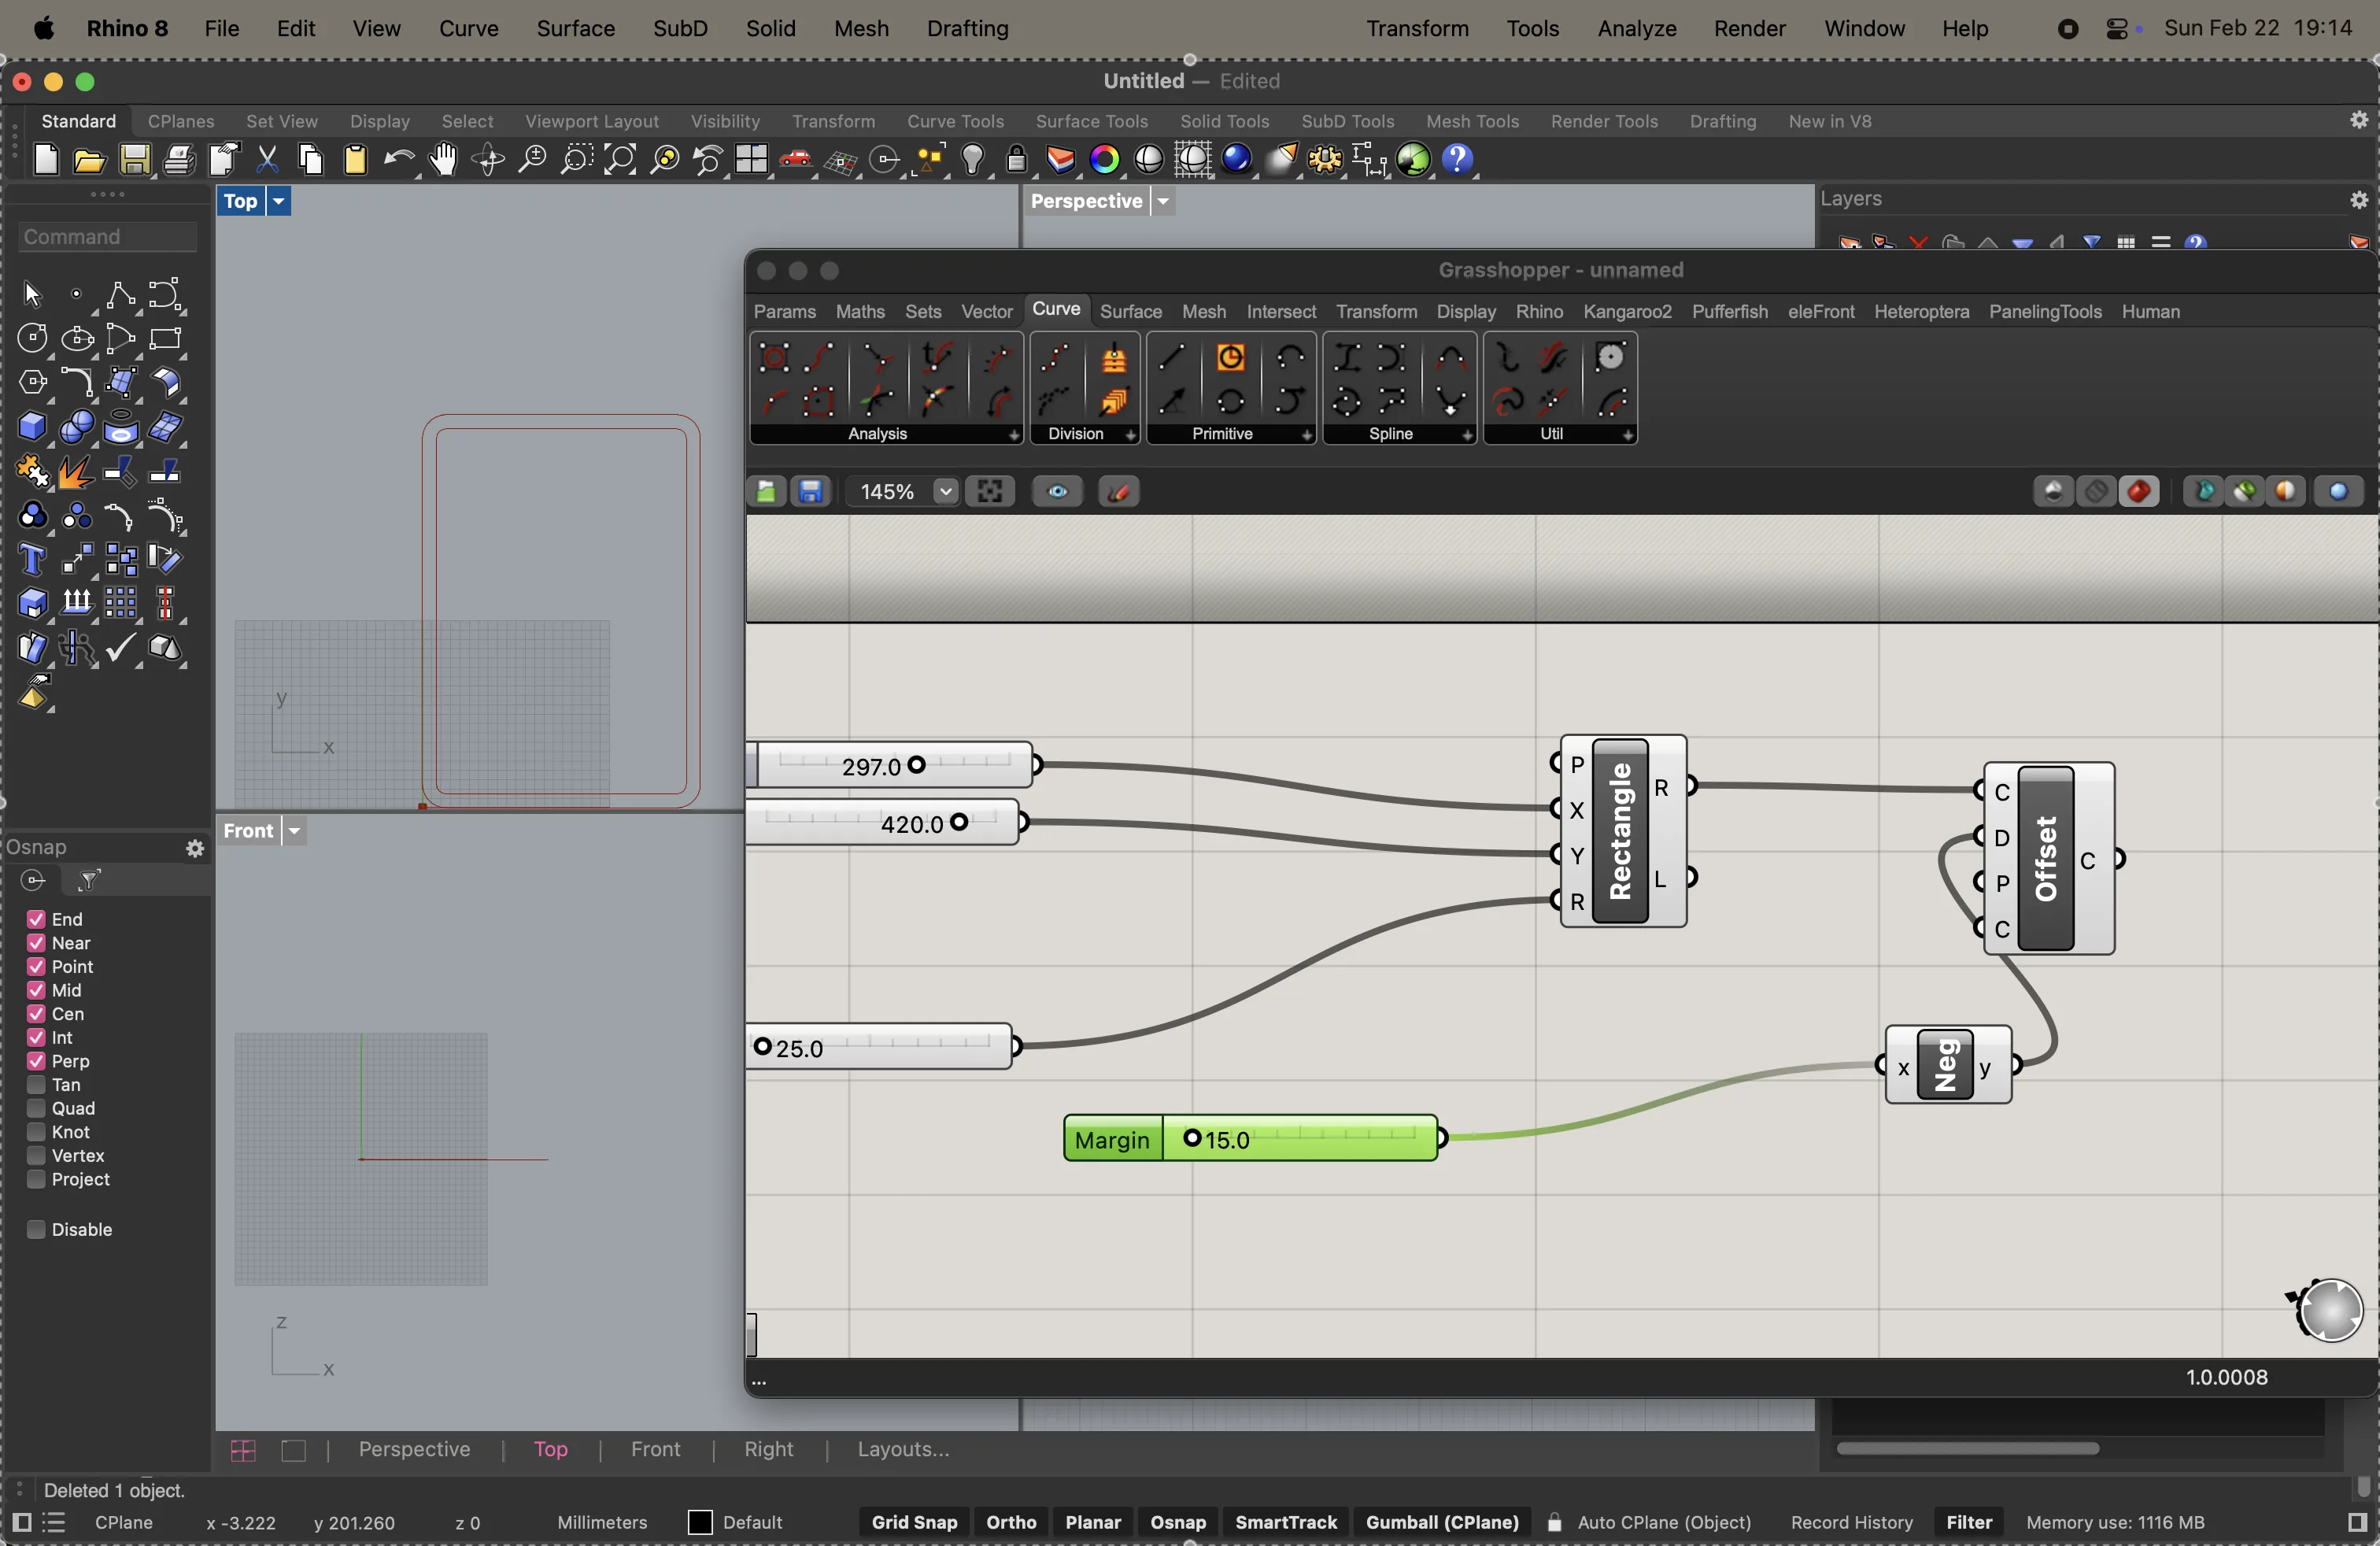
I then add an offset node to create a margin within the rectangle. i also add a negative axis node to put the margin inside the rectangle instead of outside. I use the number slider to visually decide my margin.
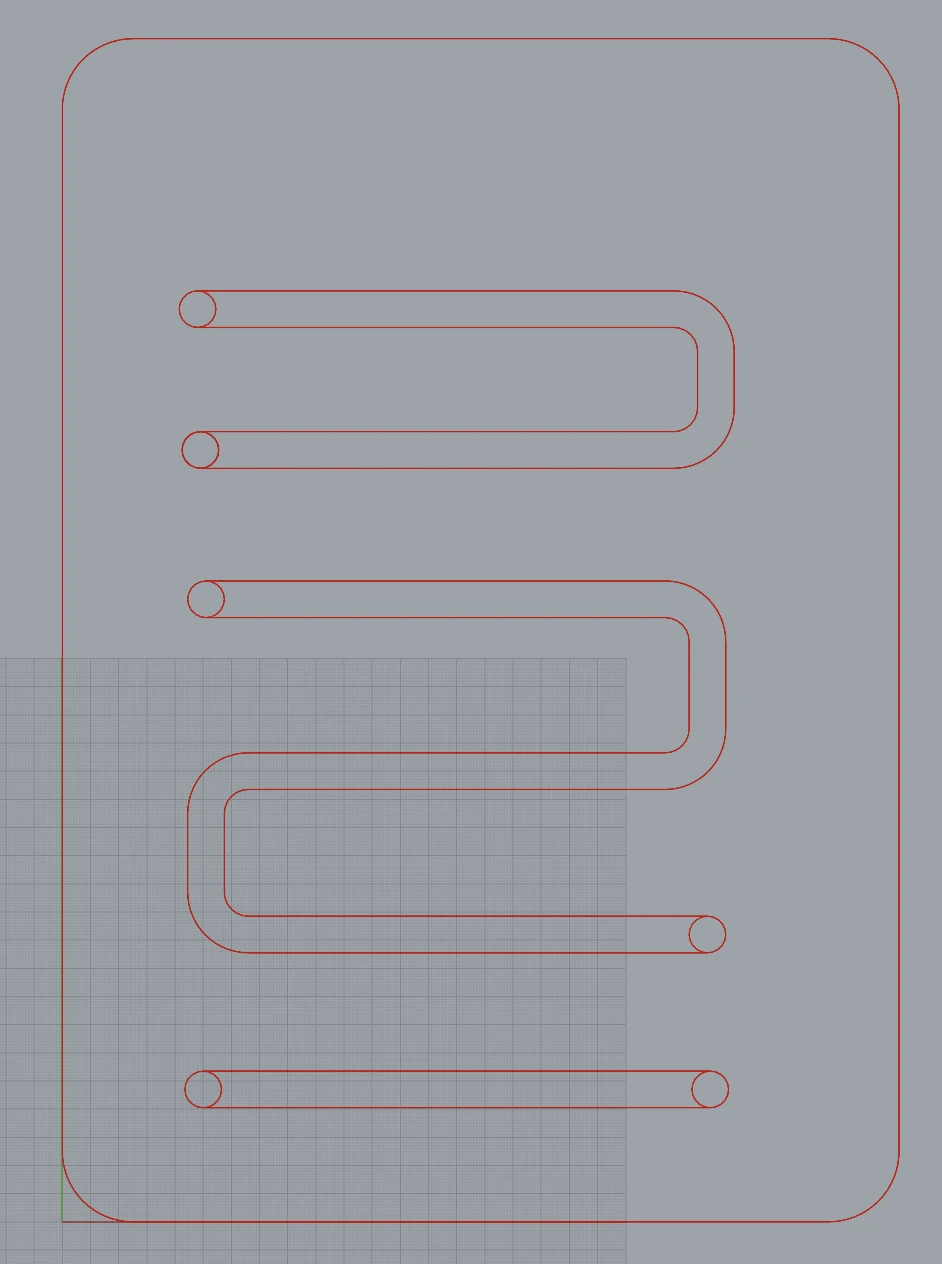
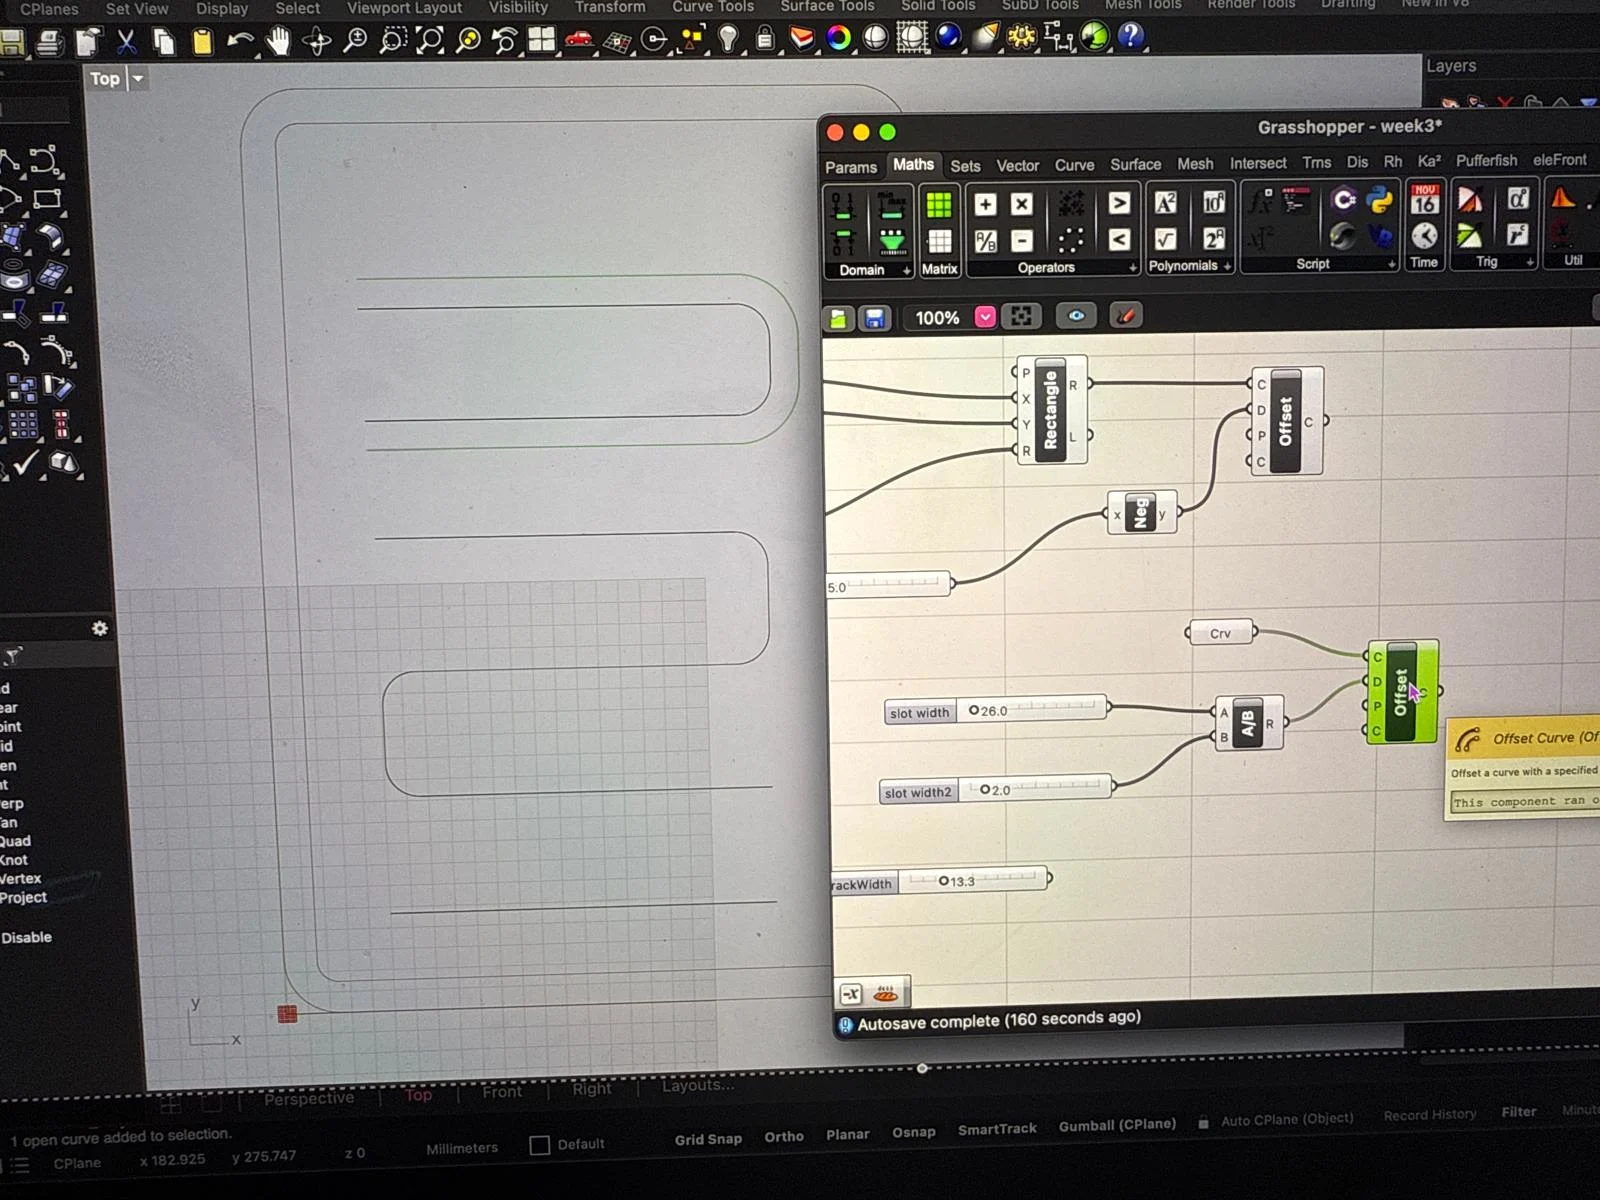
directly on rhinoceros, i choose the enter the "polyline" command and draw the tracks required for the sliders
I use an offset node with a closing curve to create the tracks.
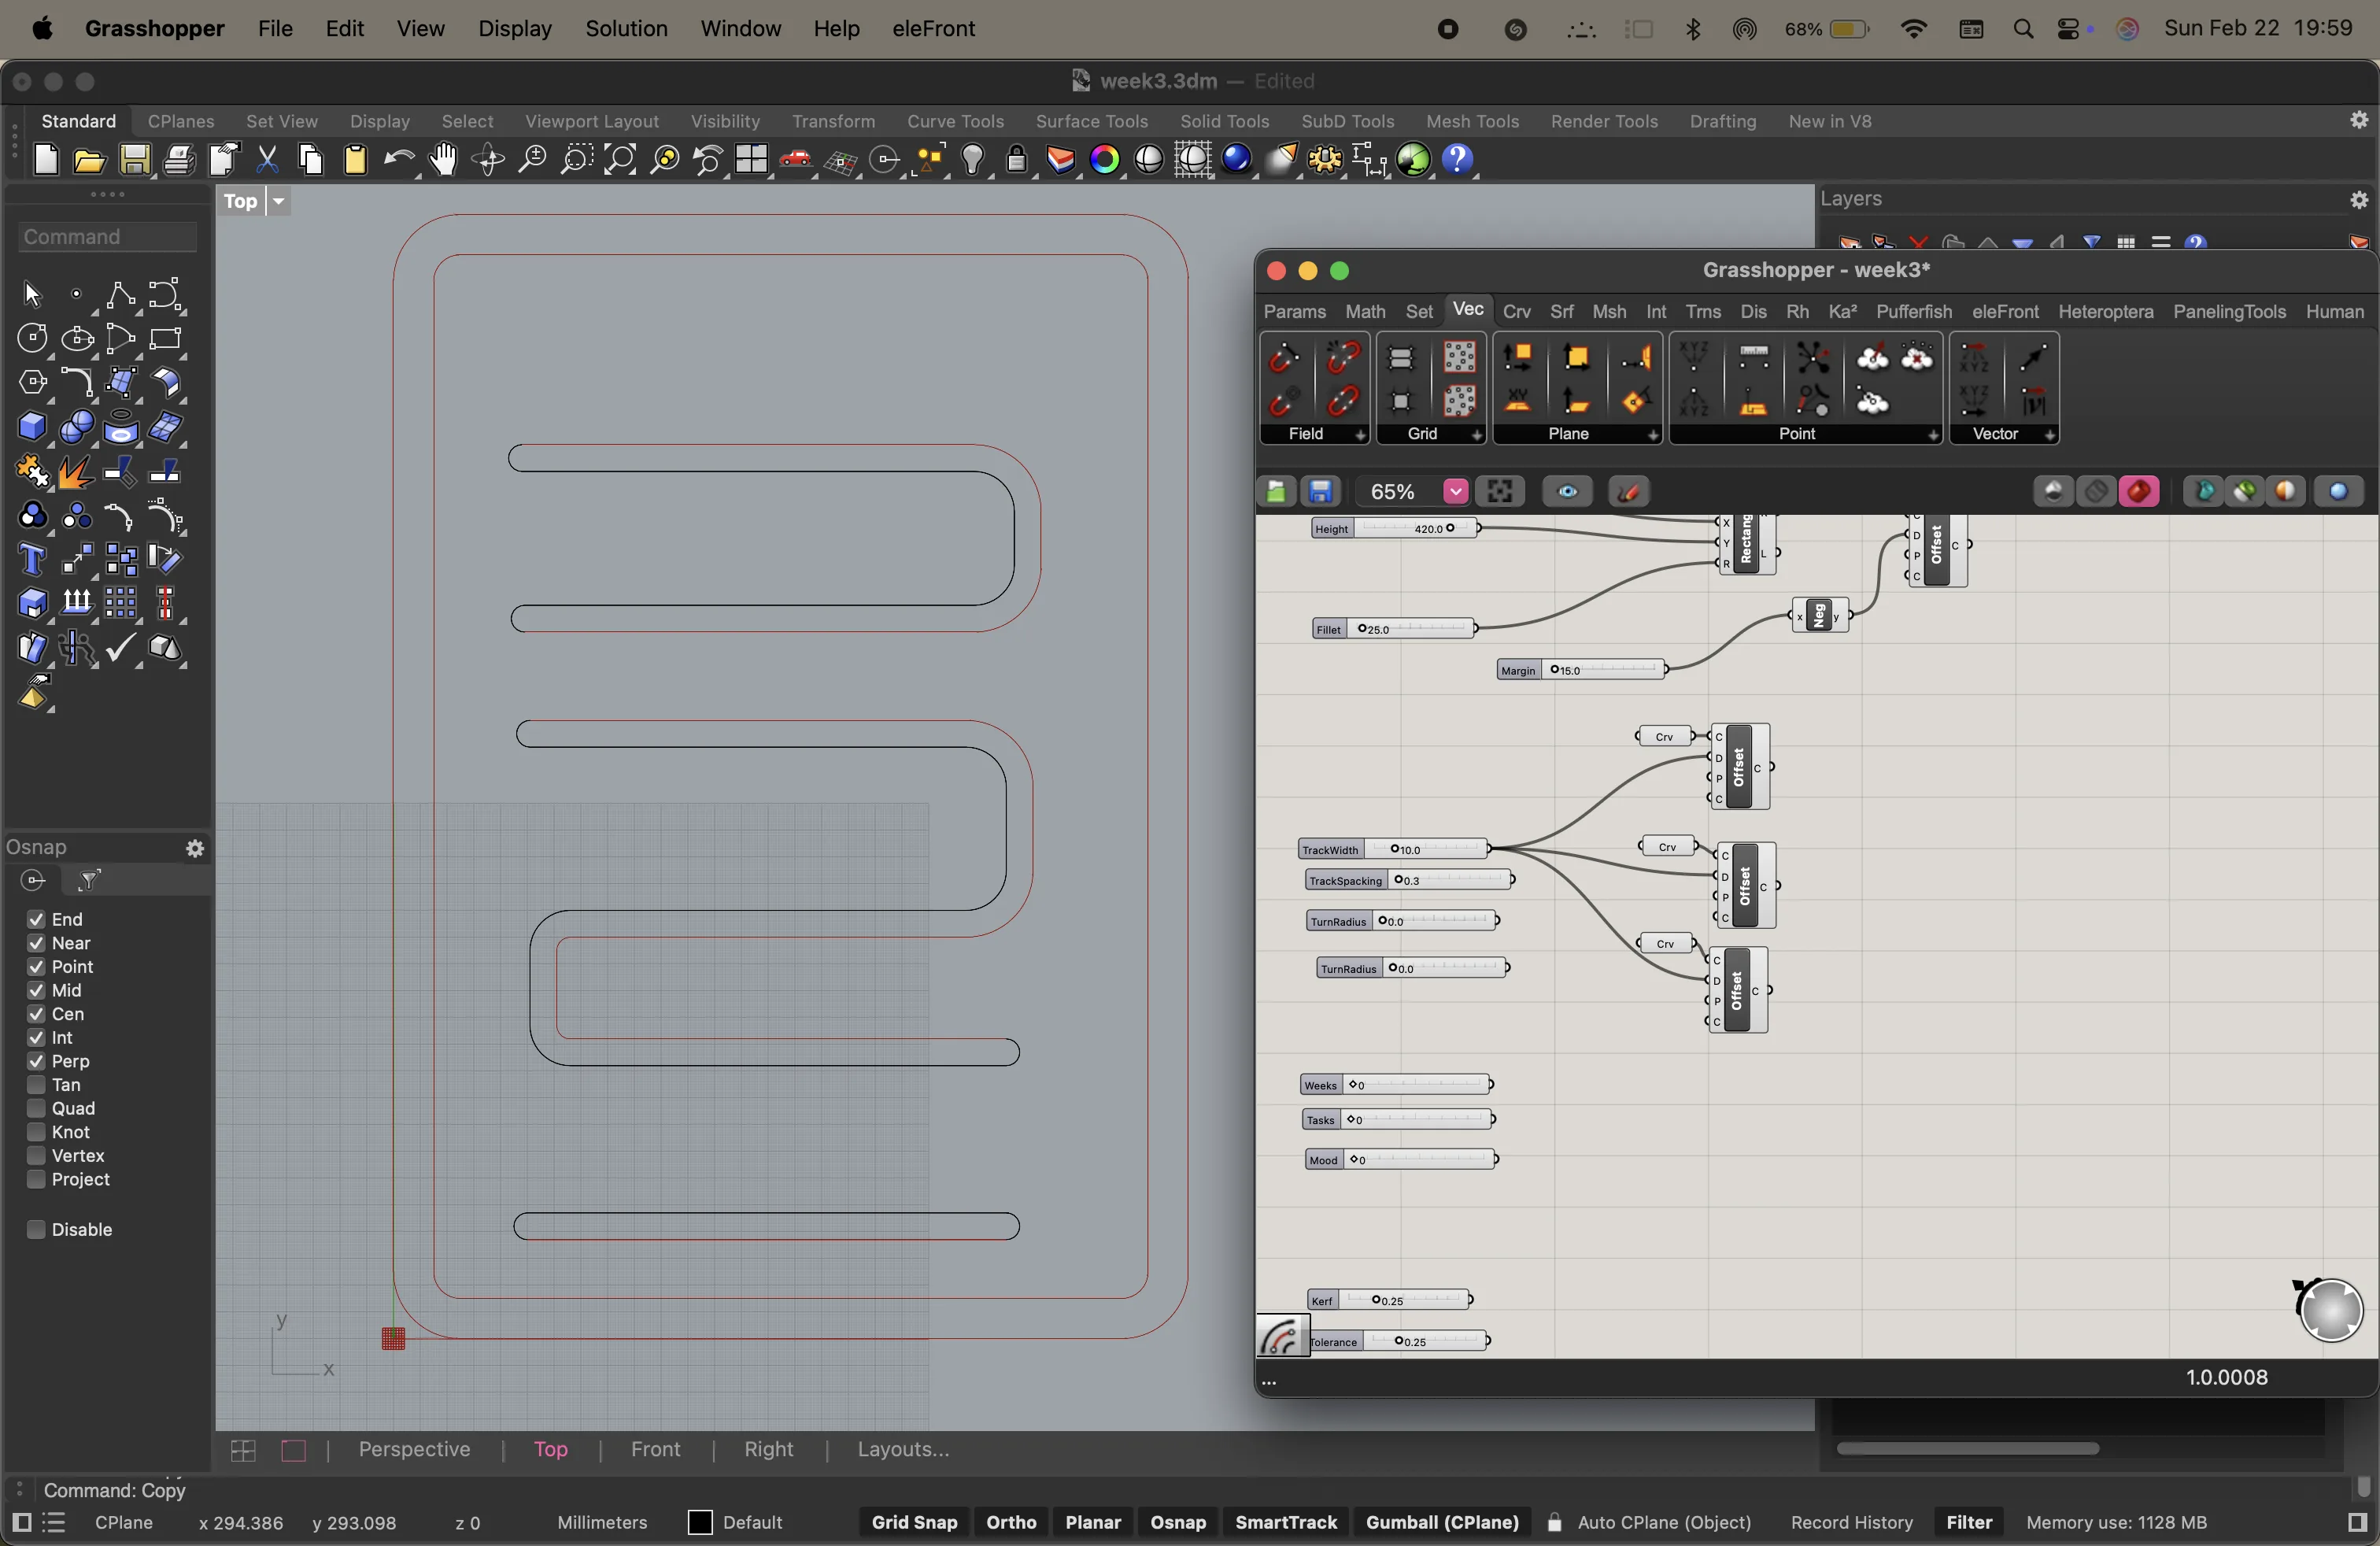
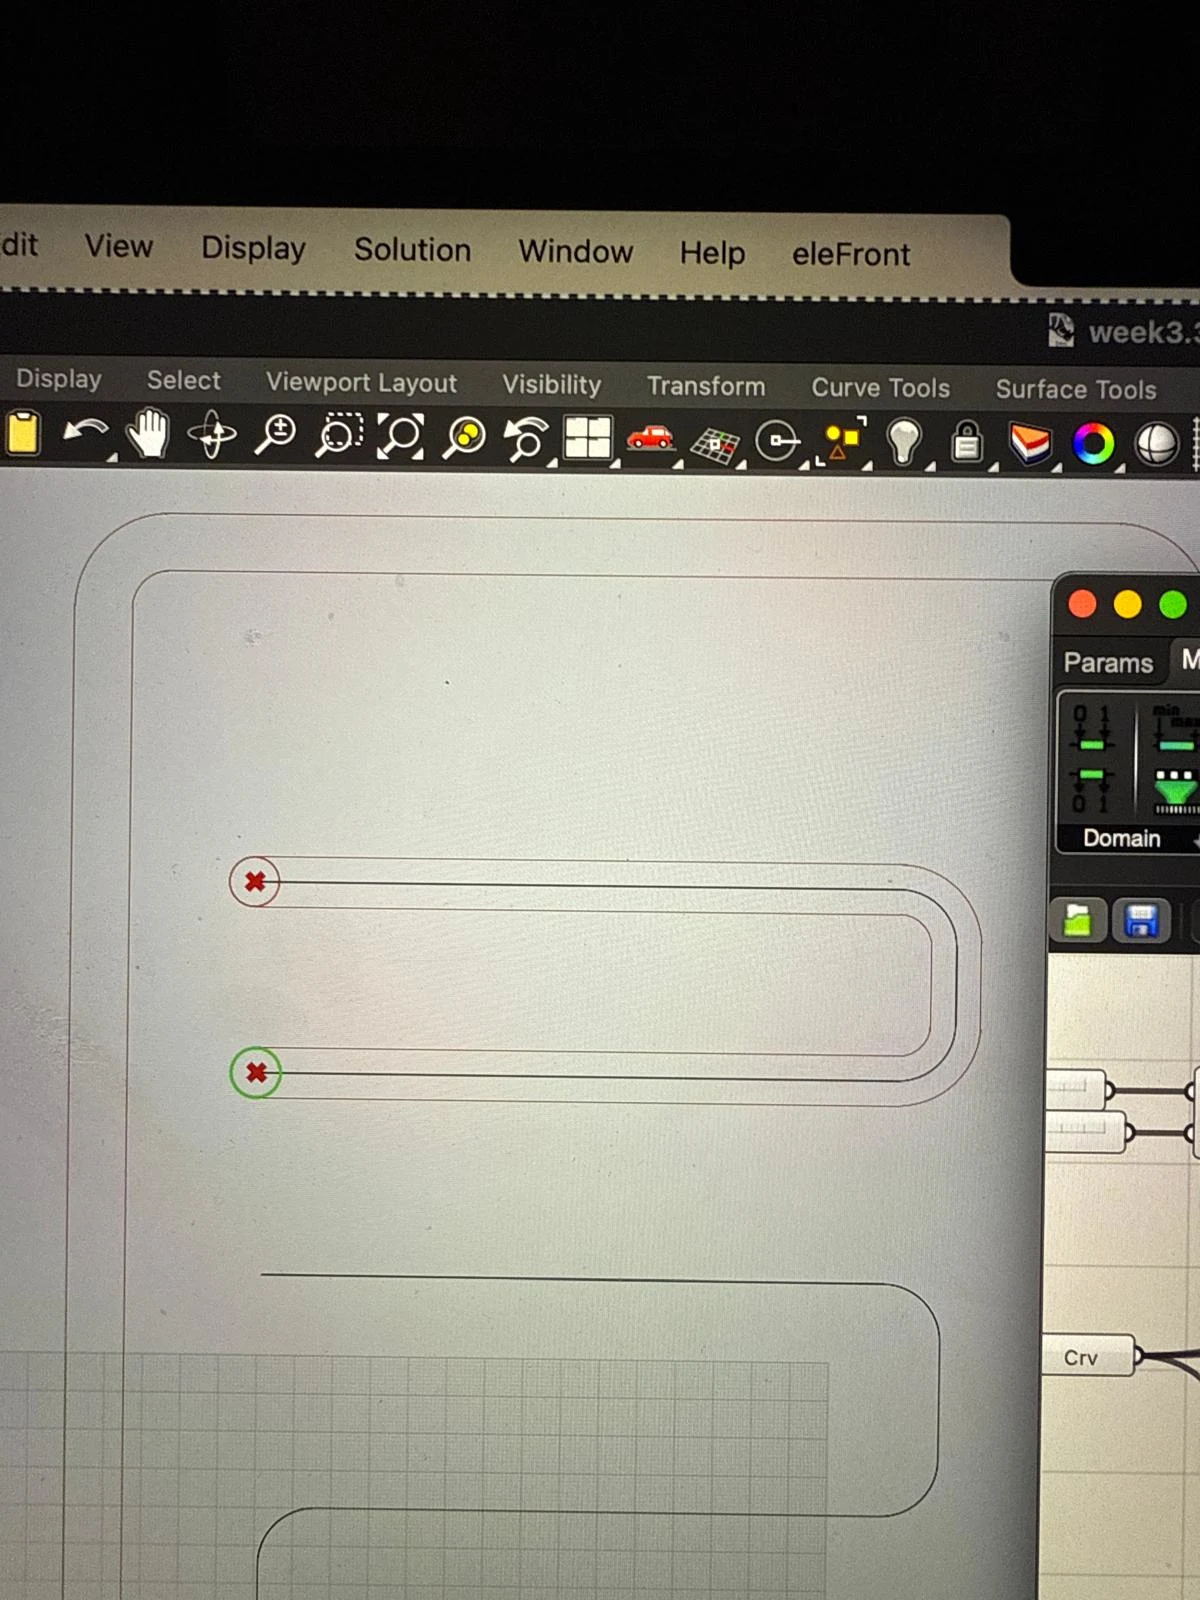
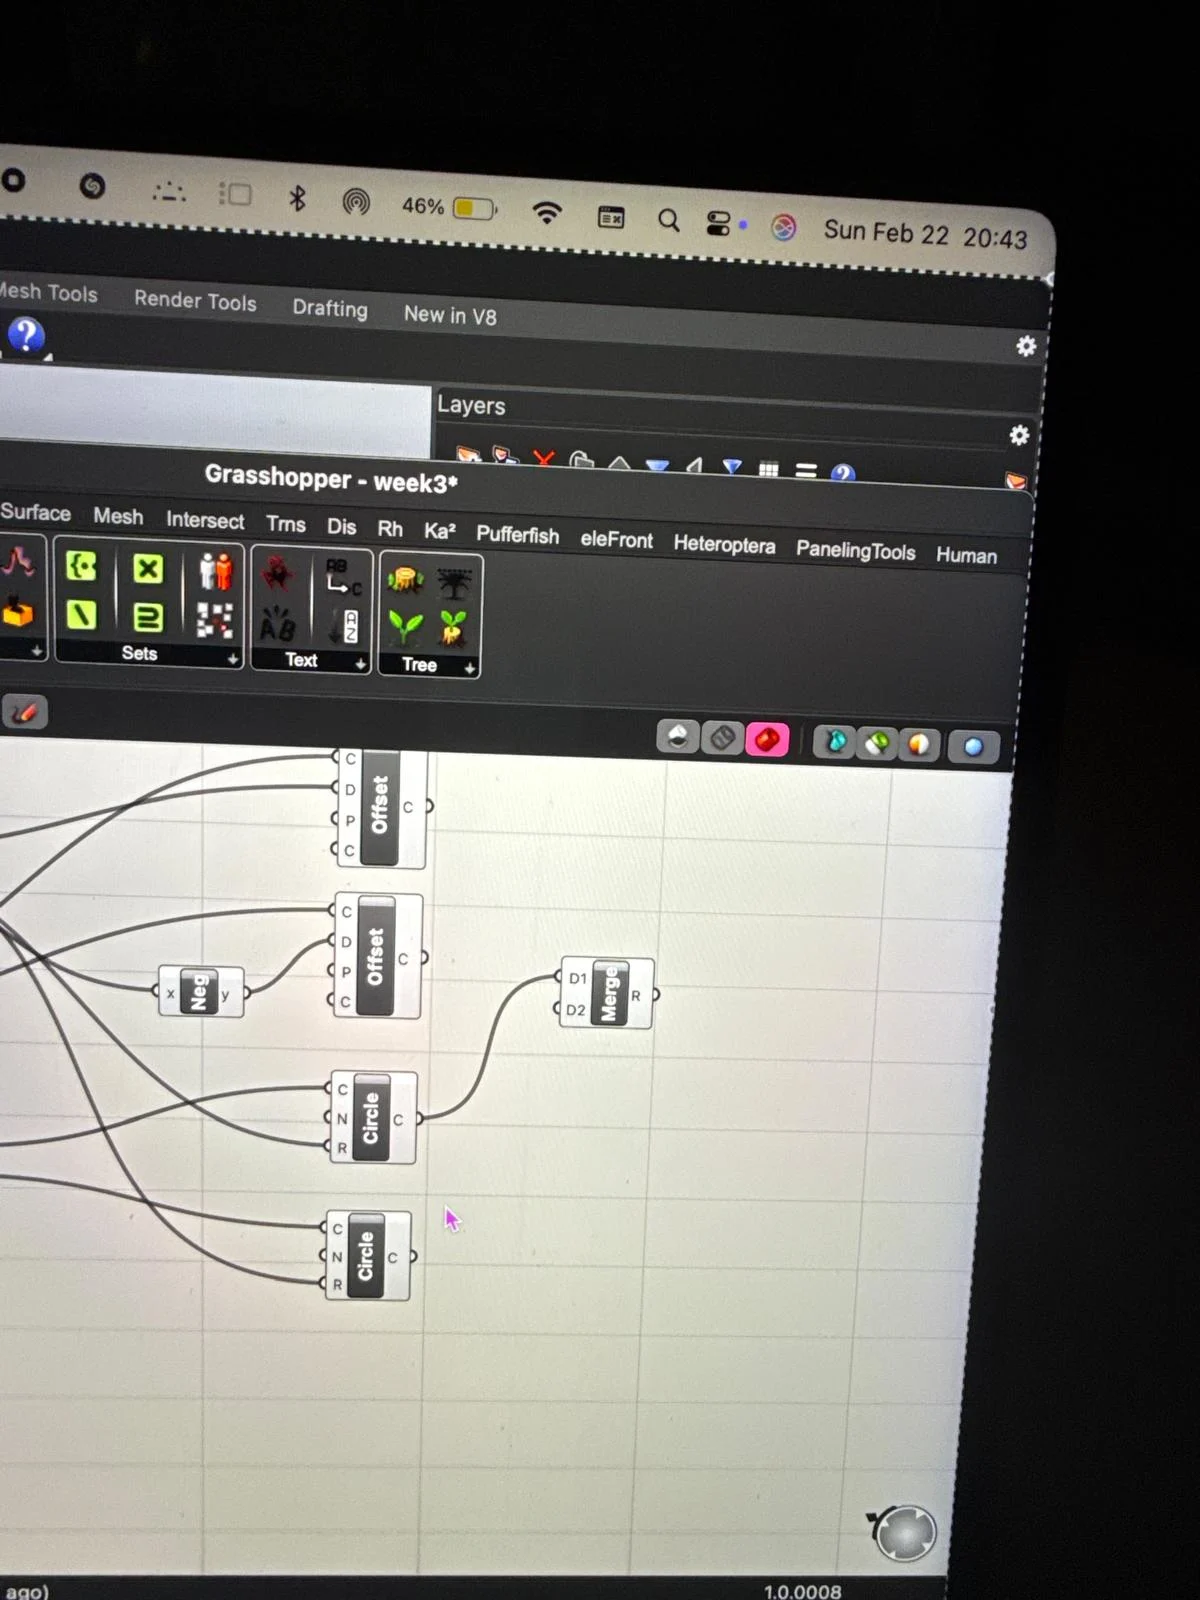
I then realised that the lines generated from grasshopper and rhino cannot be joined together before baking the lines. so i added sliders representing slot width and added 2 offsets. one in the positive direction and one in the negative direction. they use a divider to make sure that the ratio of the distances is accurate and can be changed later.
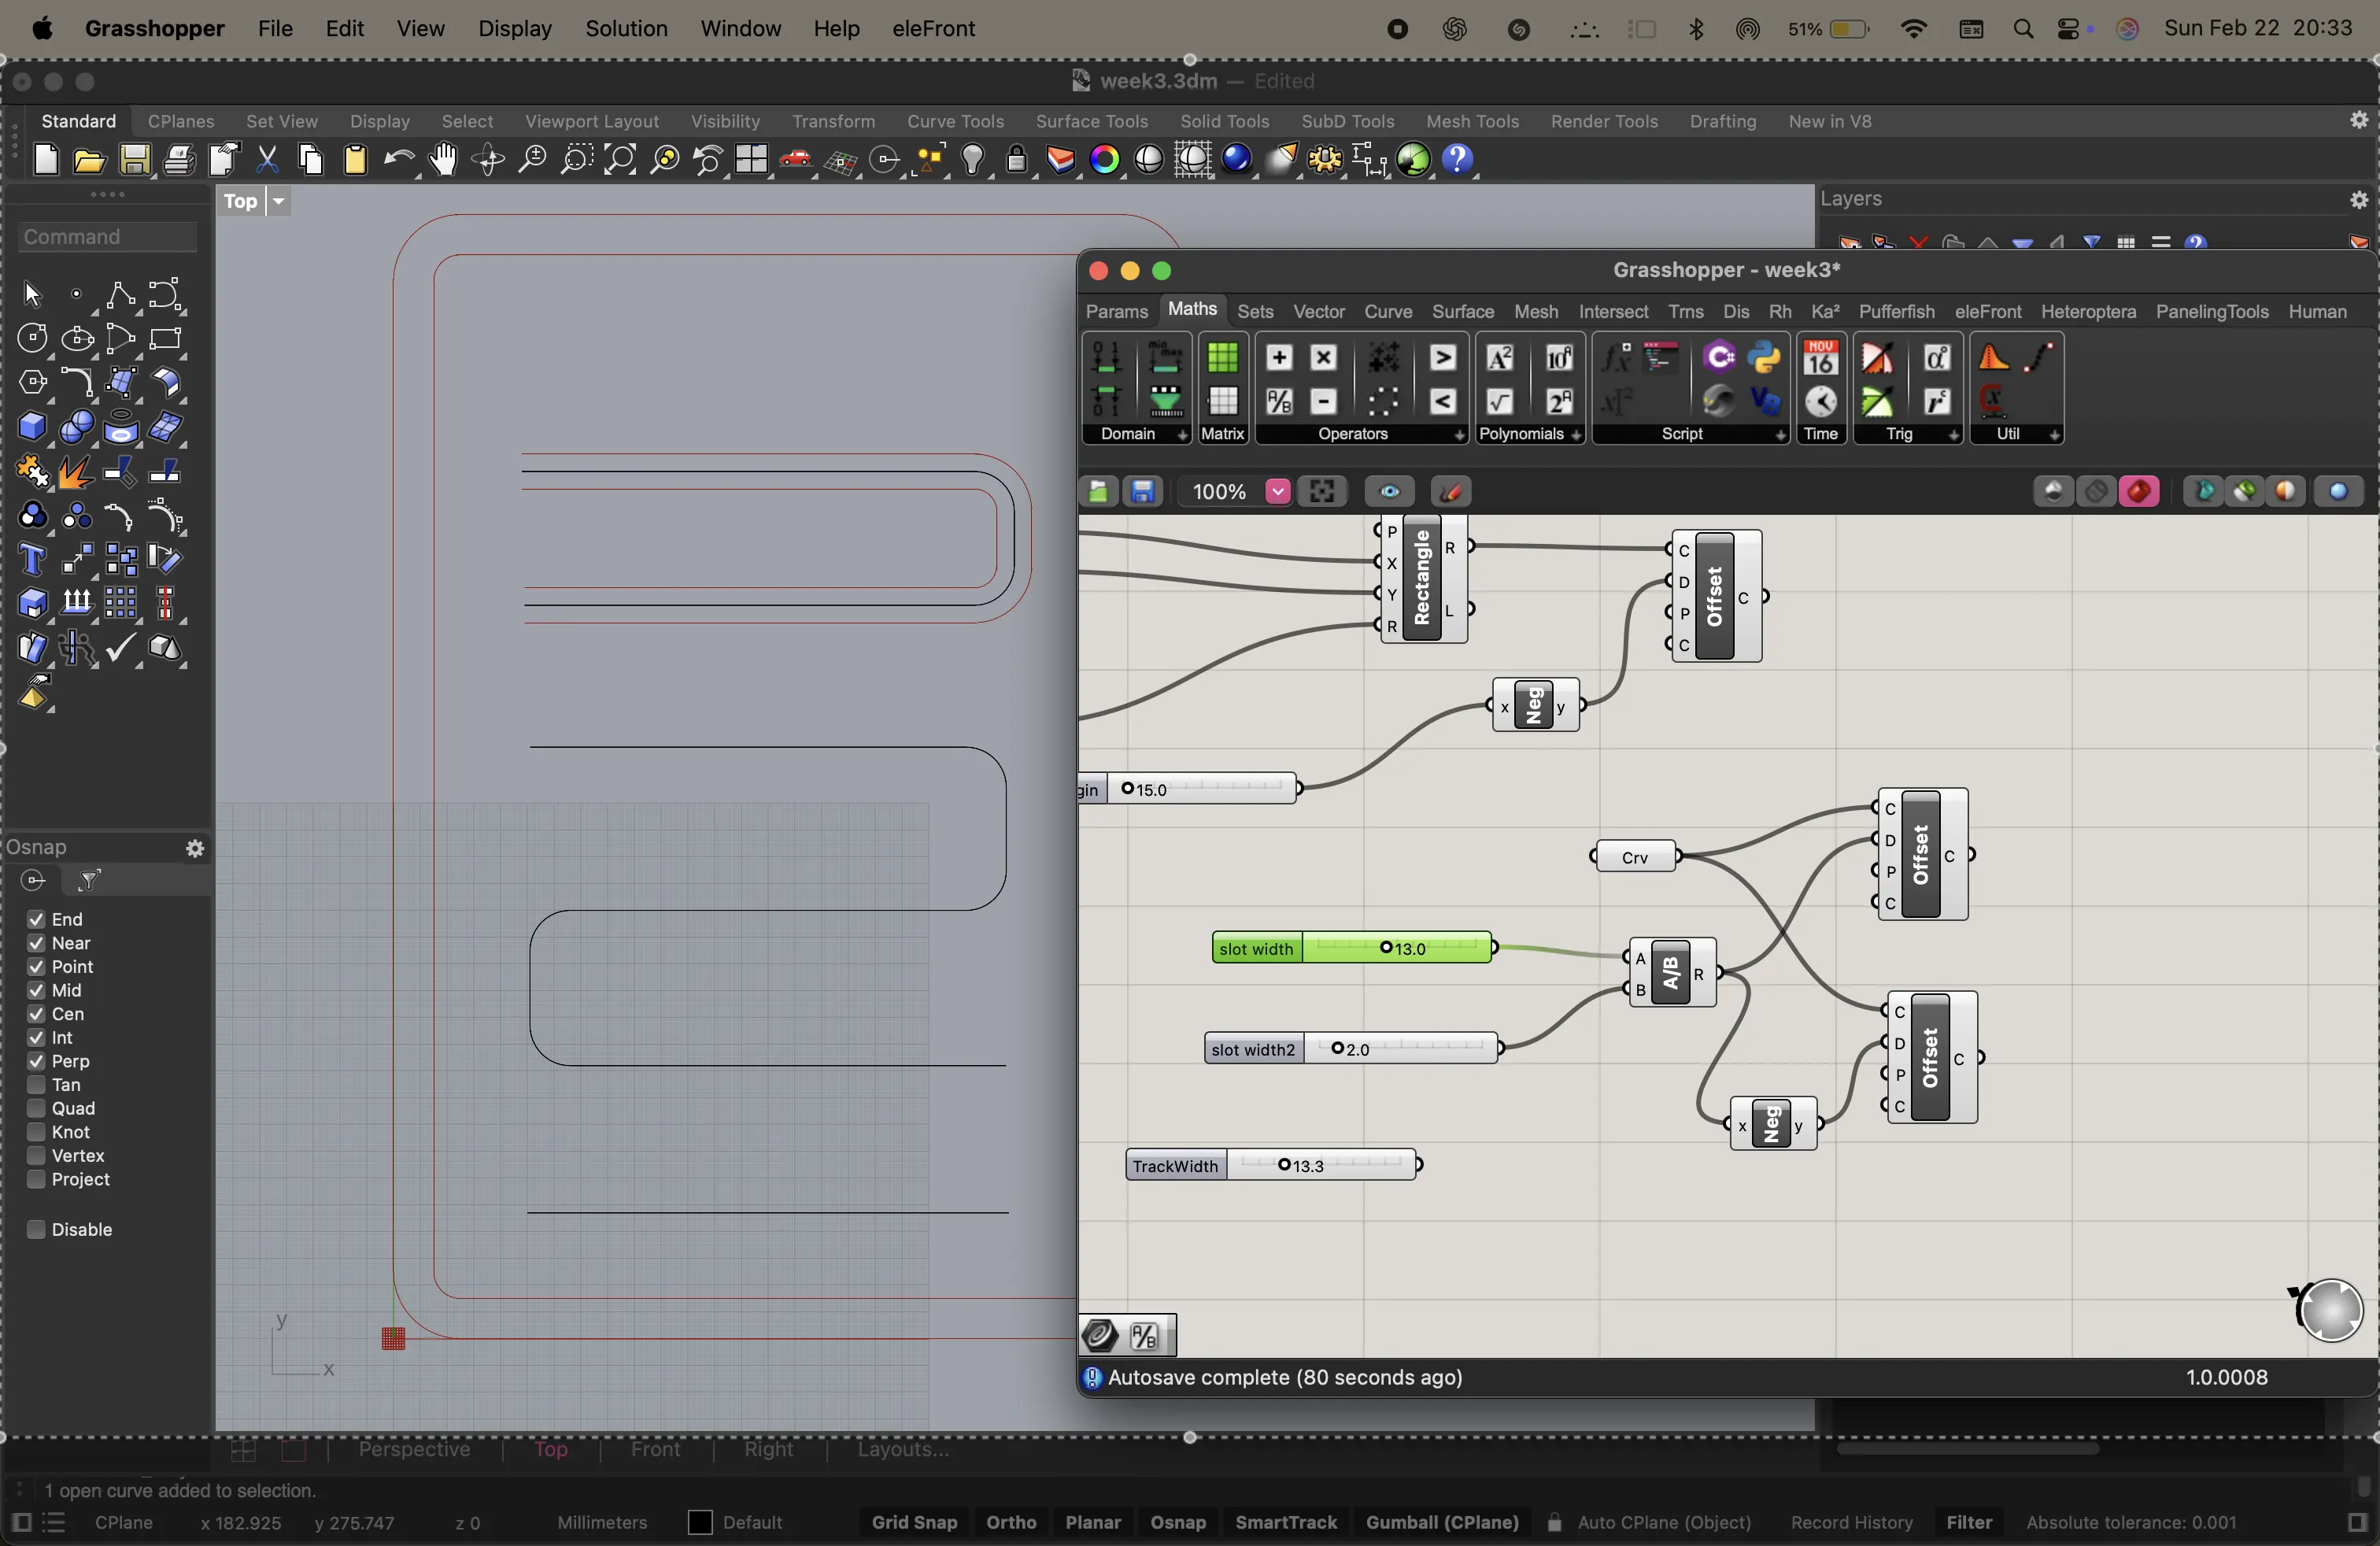
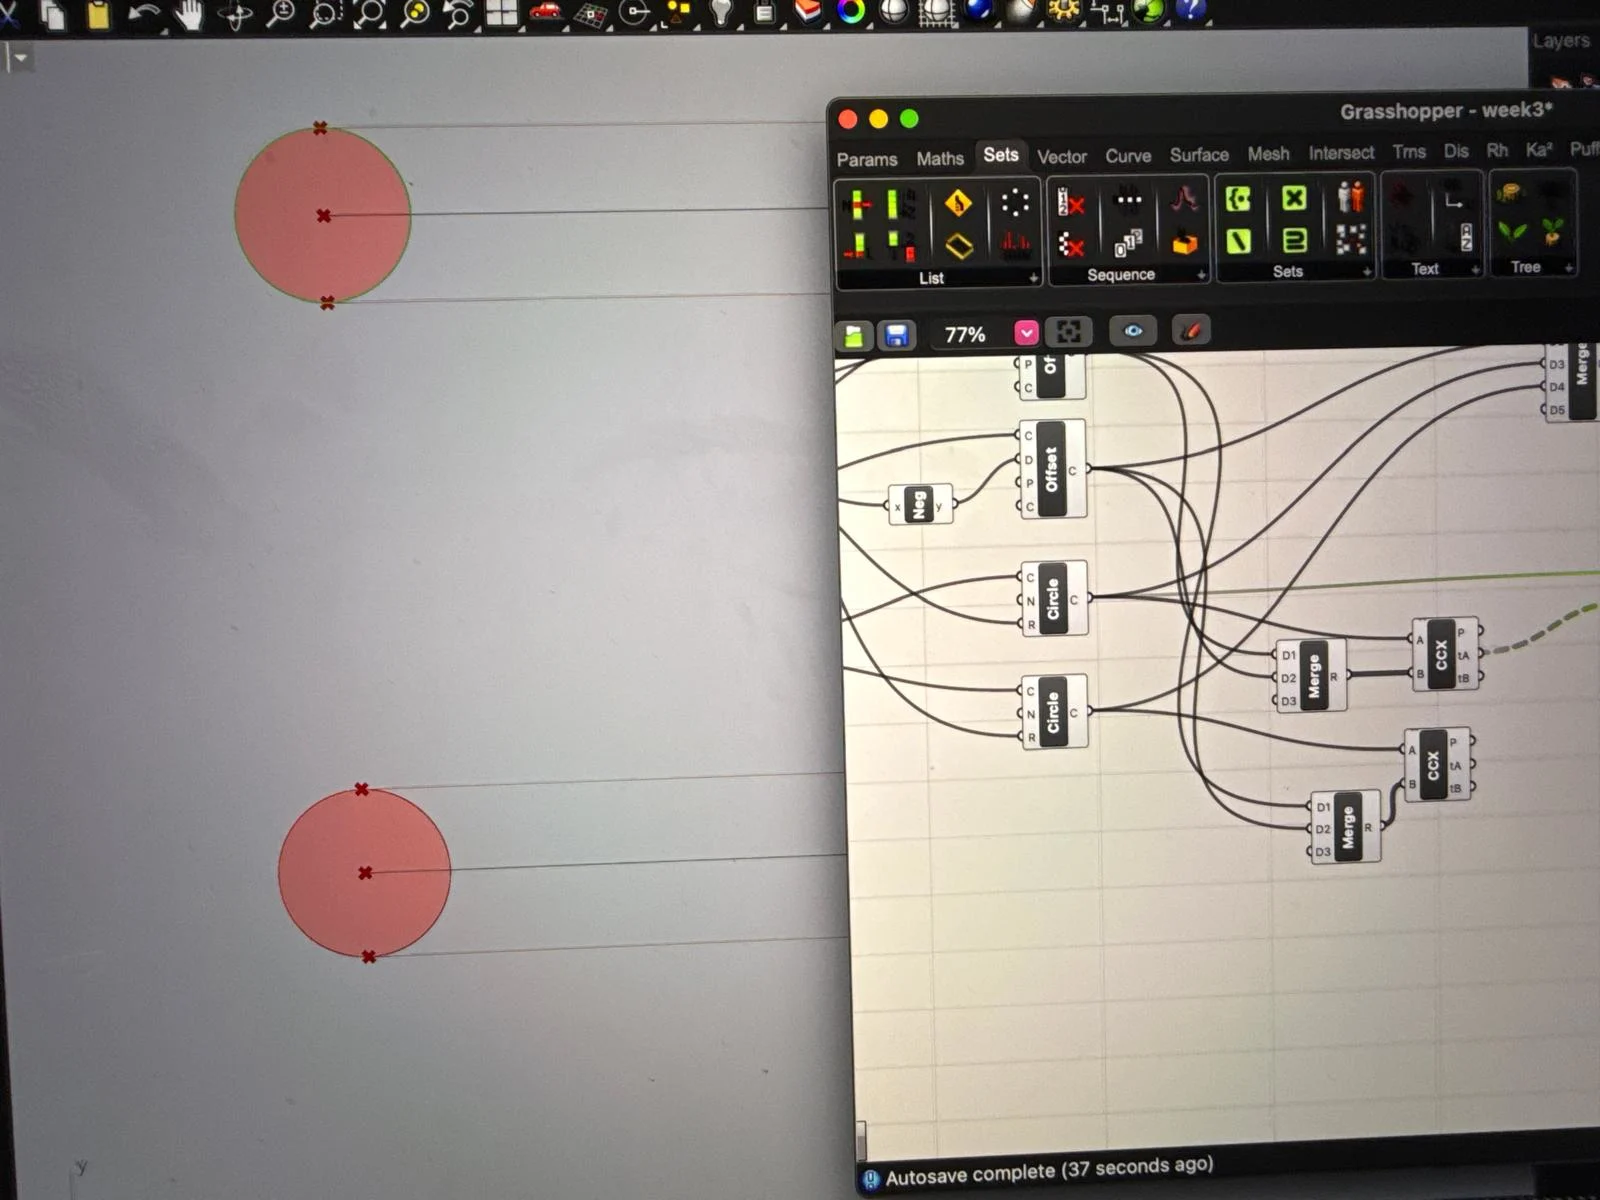
i add circles at the ends and use the pipe node to ceate an open track
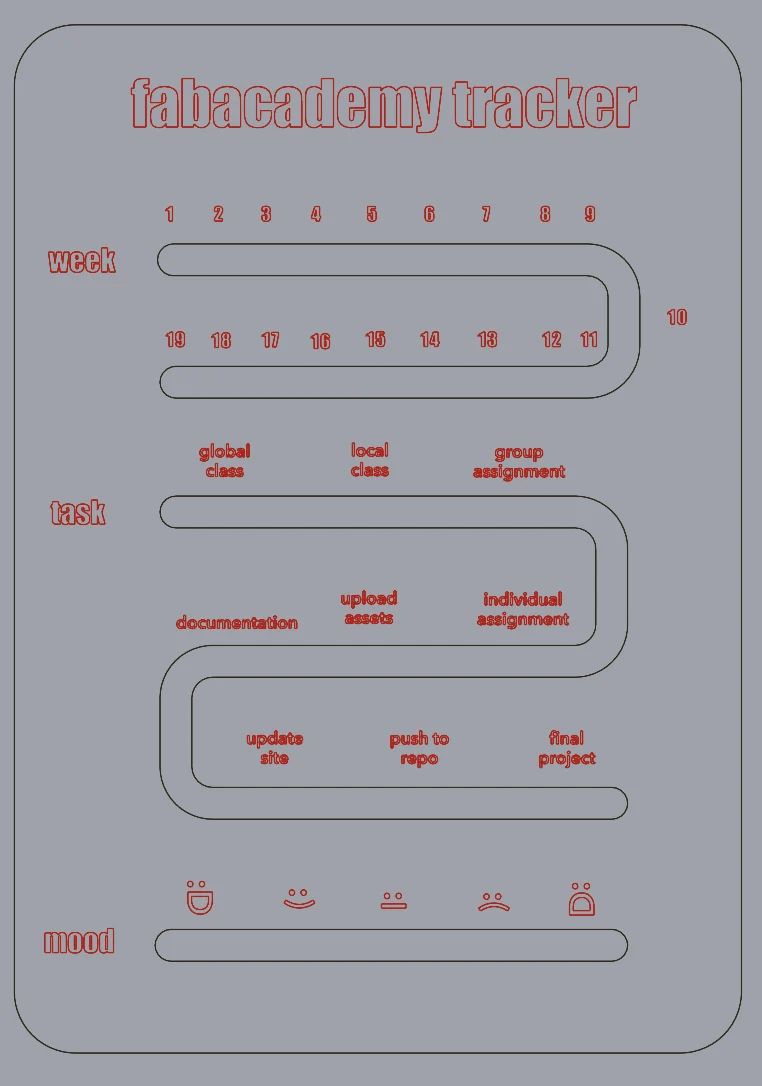
I baked the lines and use the text tool in rhinoceros to write the numbers and names on the tracker. initially, these were supposed to be engraved onto the acrylic.
here are some tests, errors and overcomplications in the process that I later deleted.
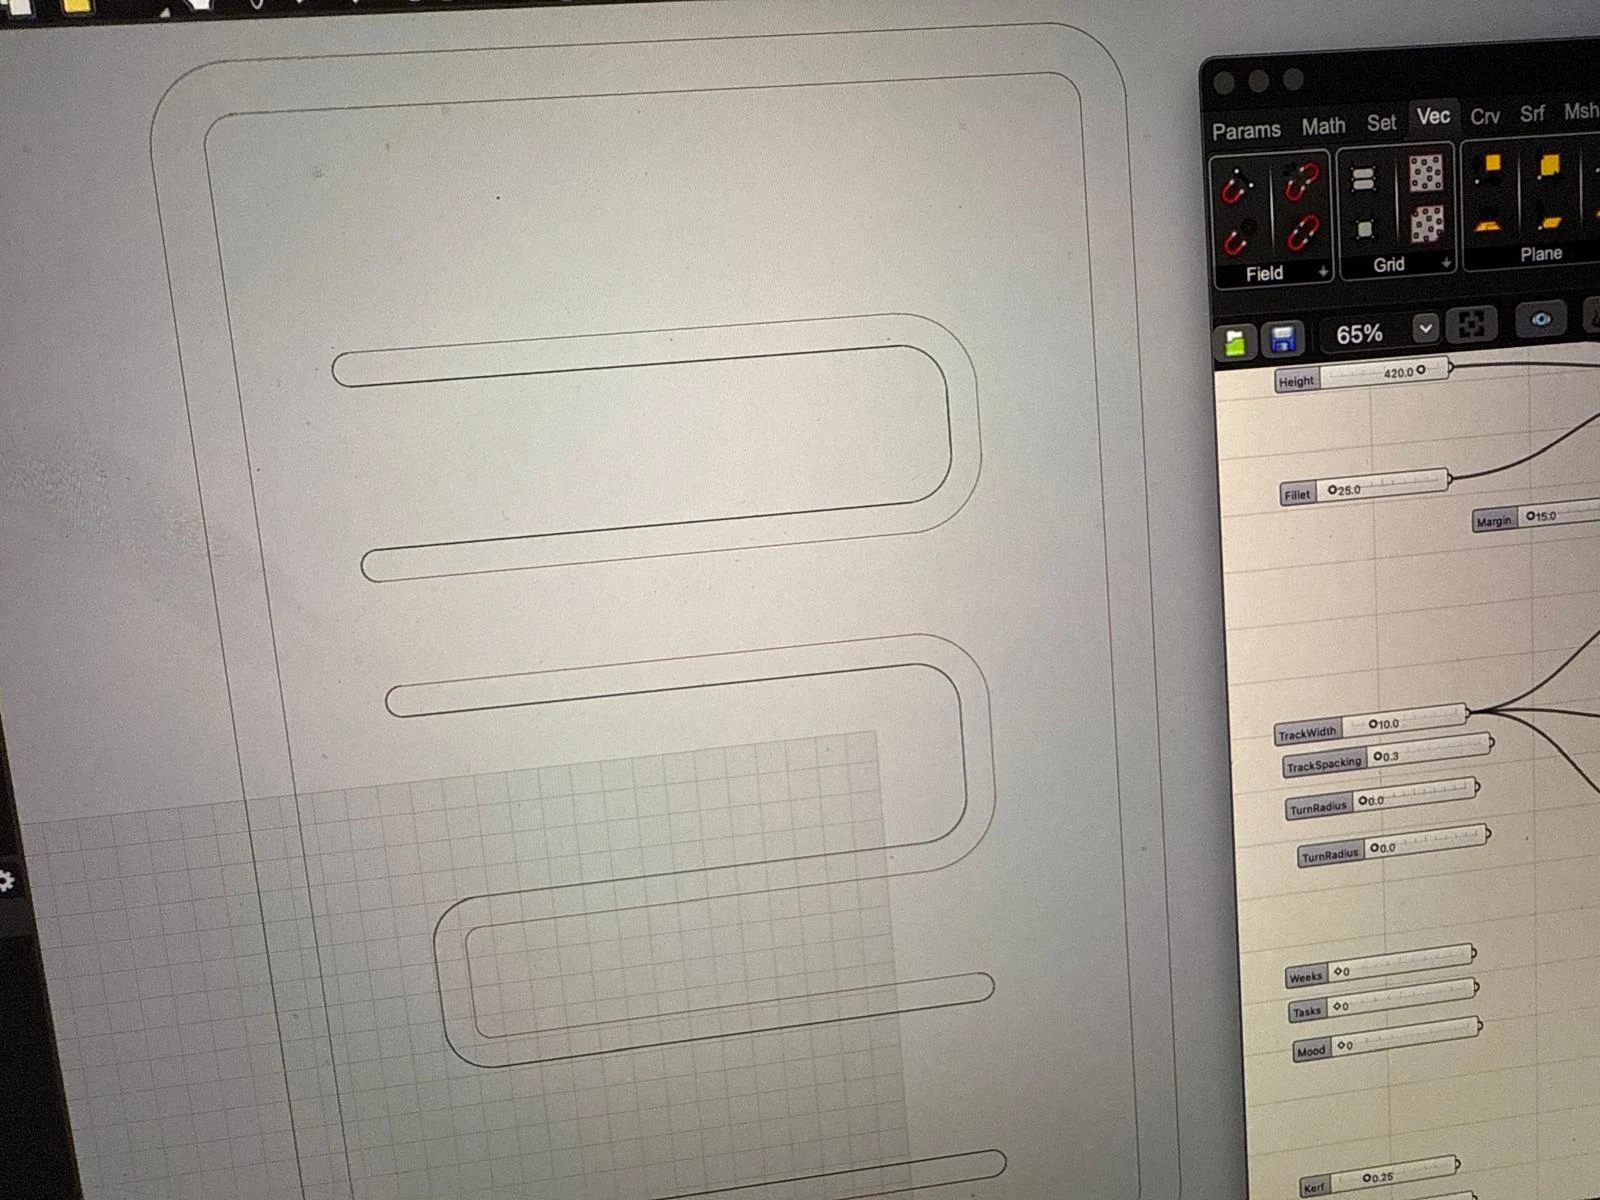
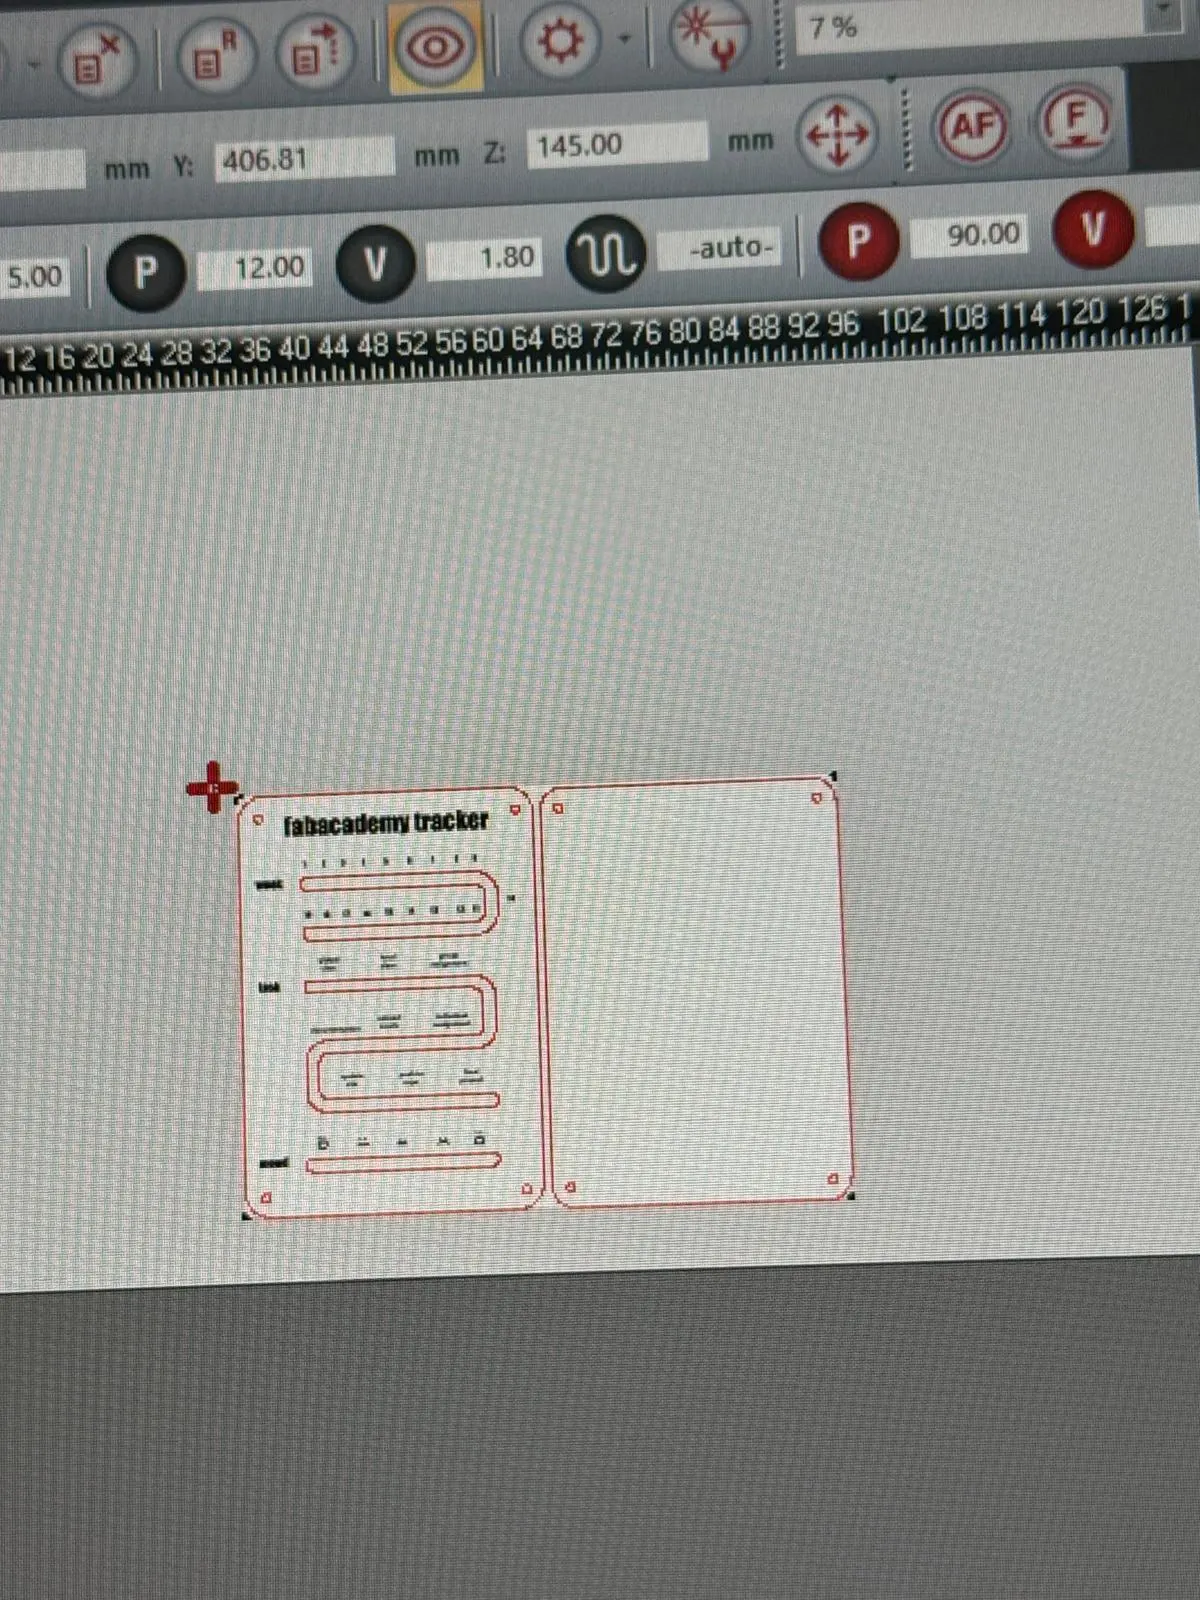
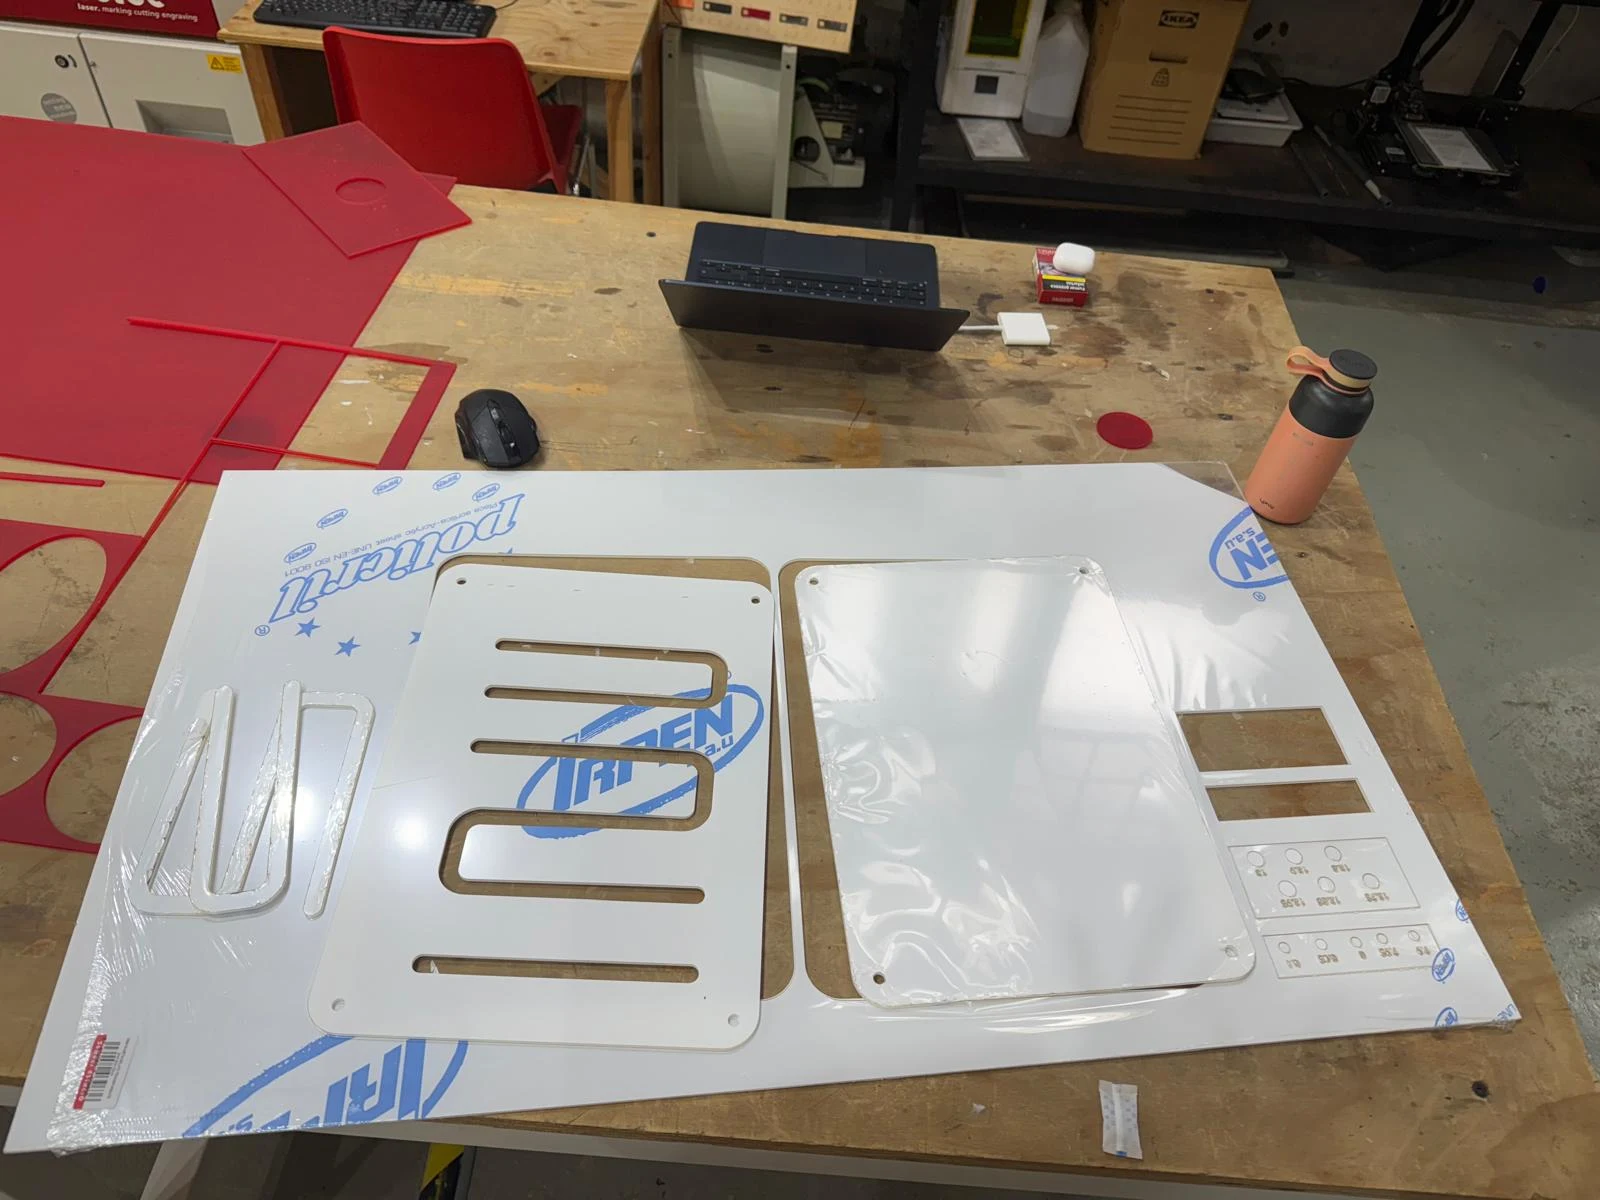
The design for the tracker is ready. I want to cut the lines and engrave the text.
I thought i would use acrylico transparente and acrylic frosted red.
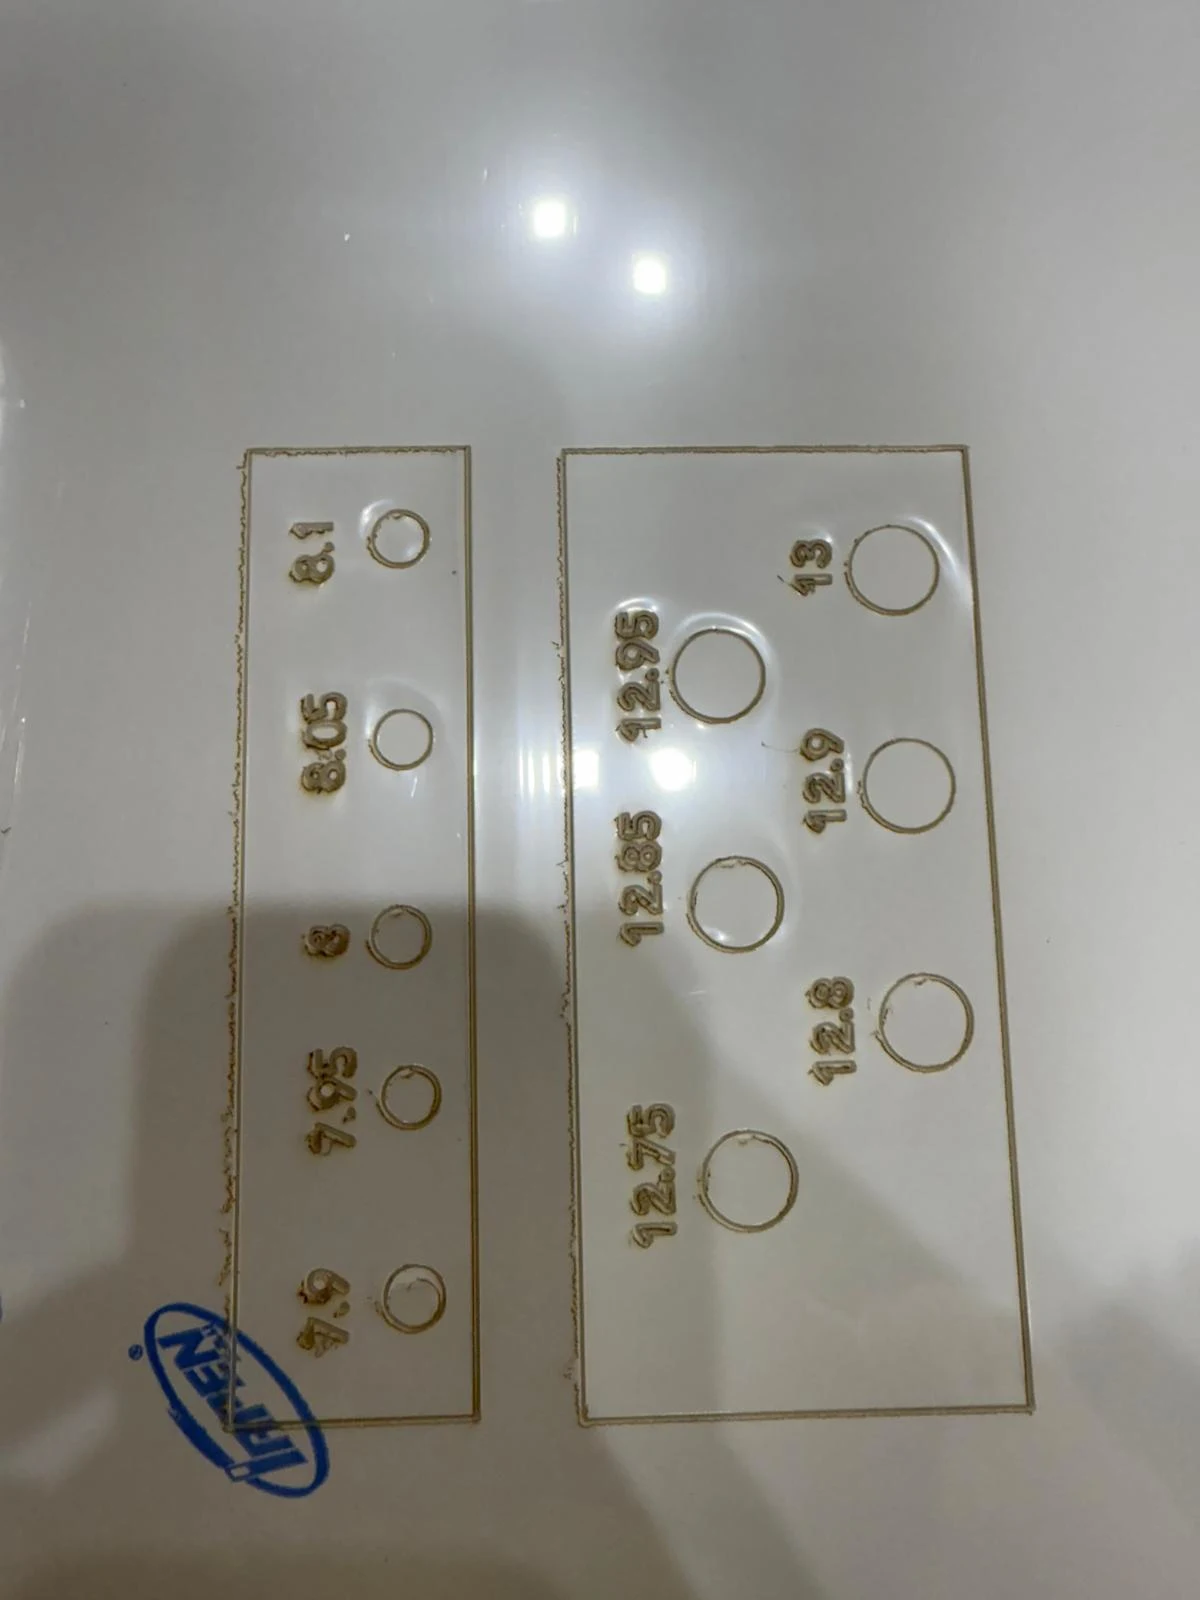
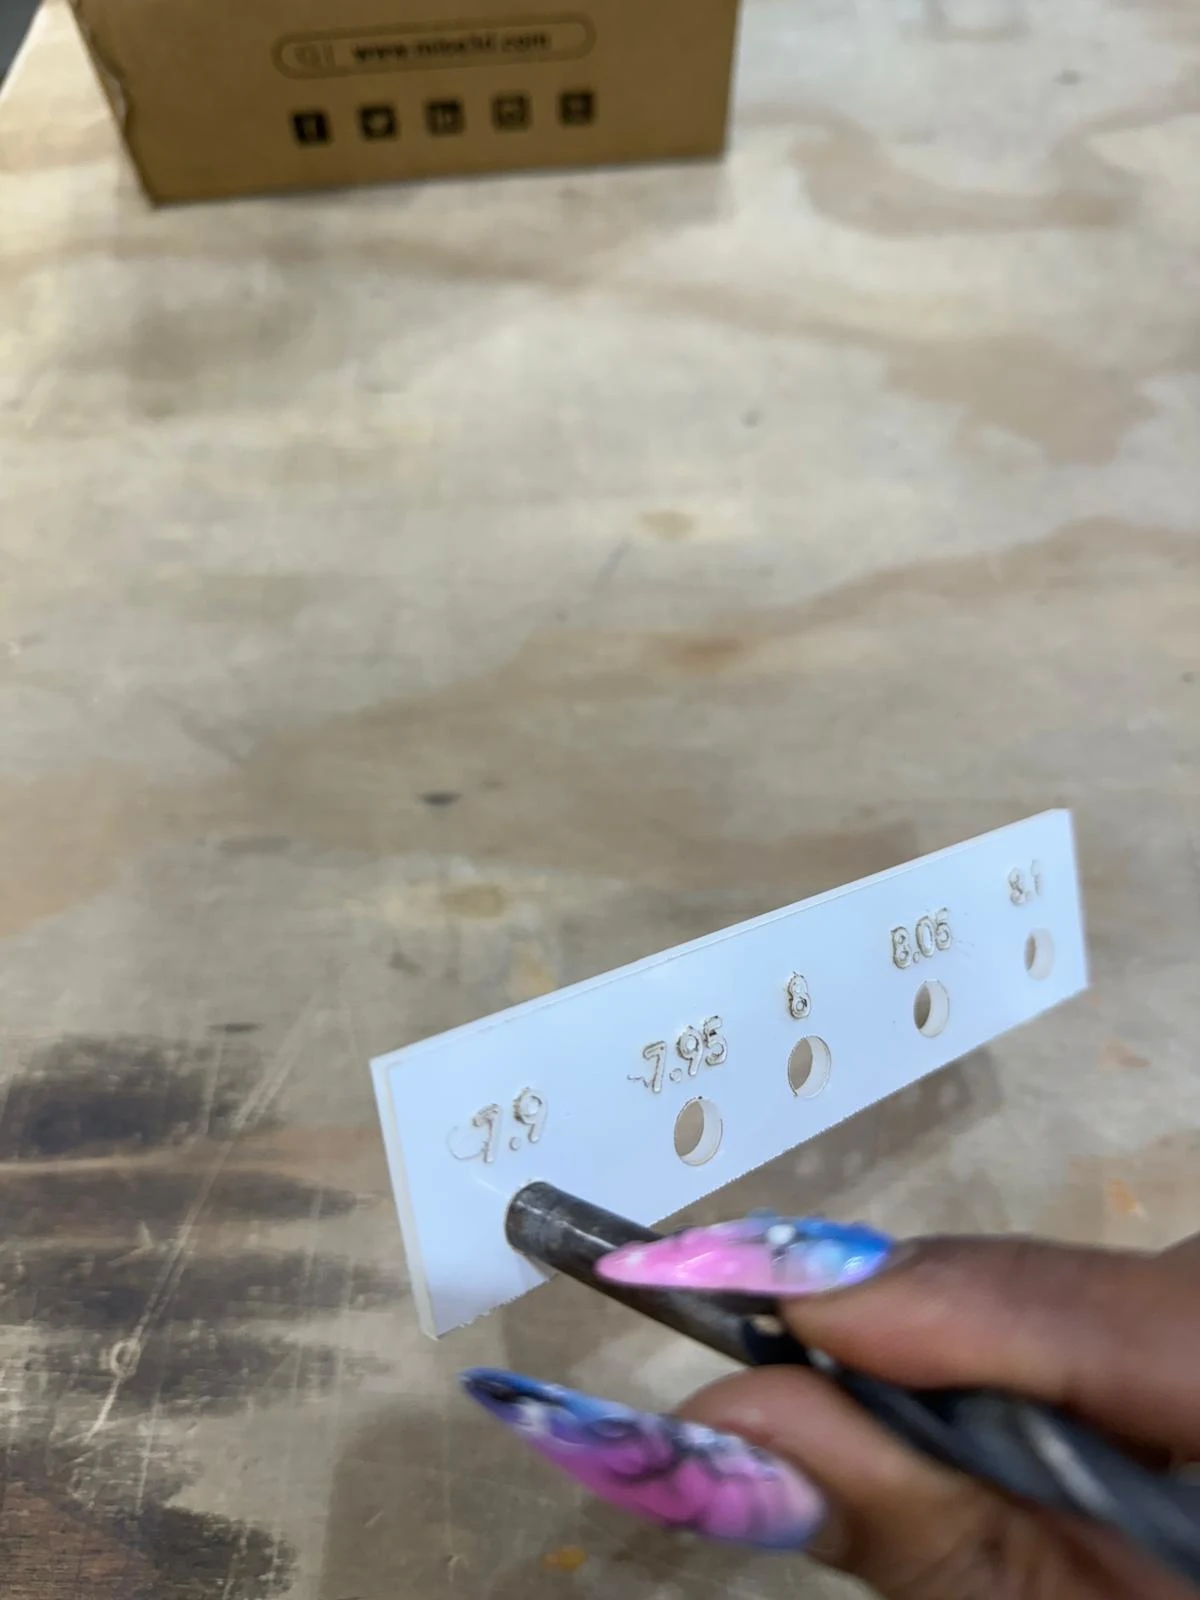
I also made fit test files for the sliders and the screws
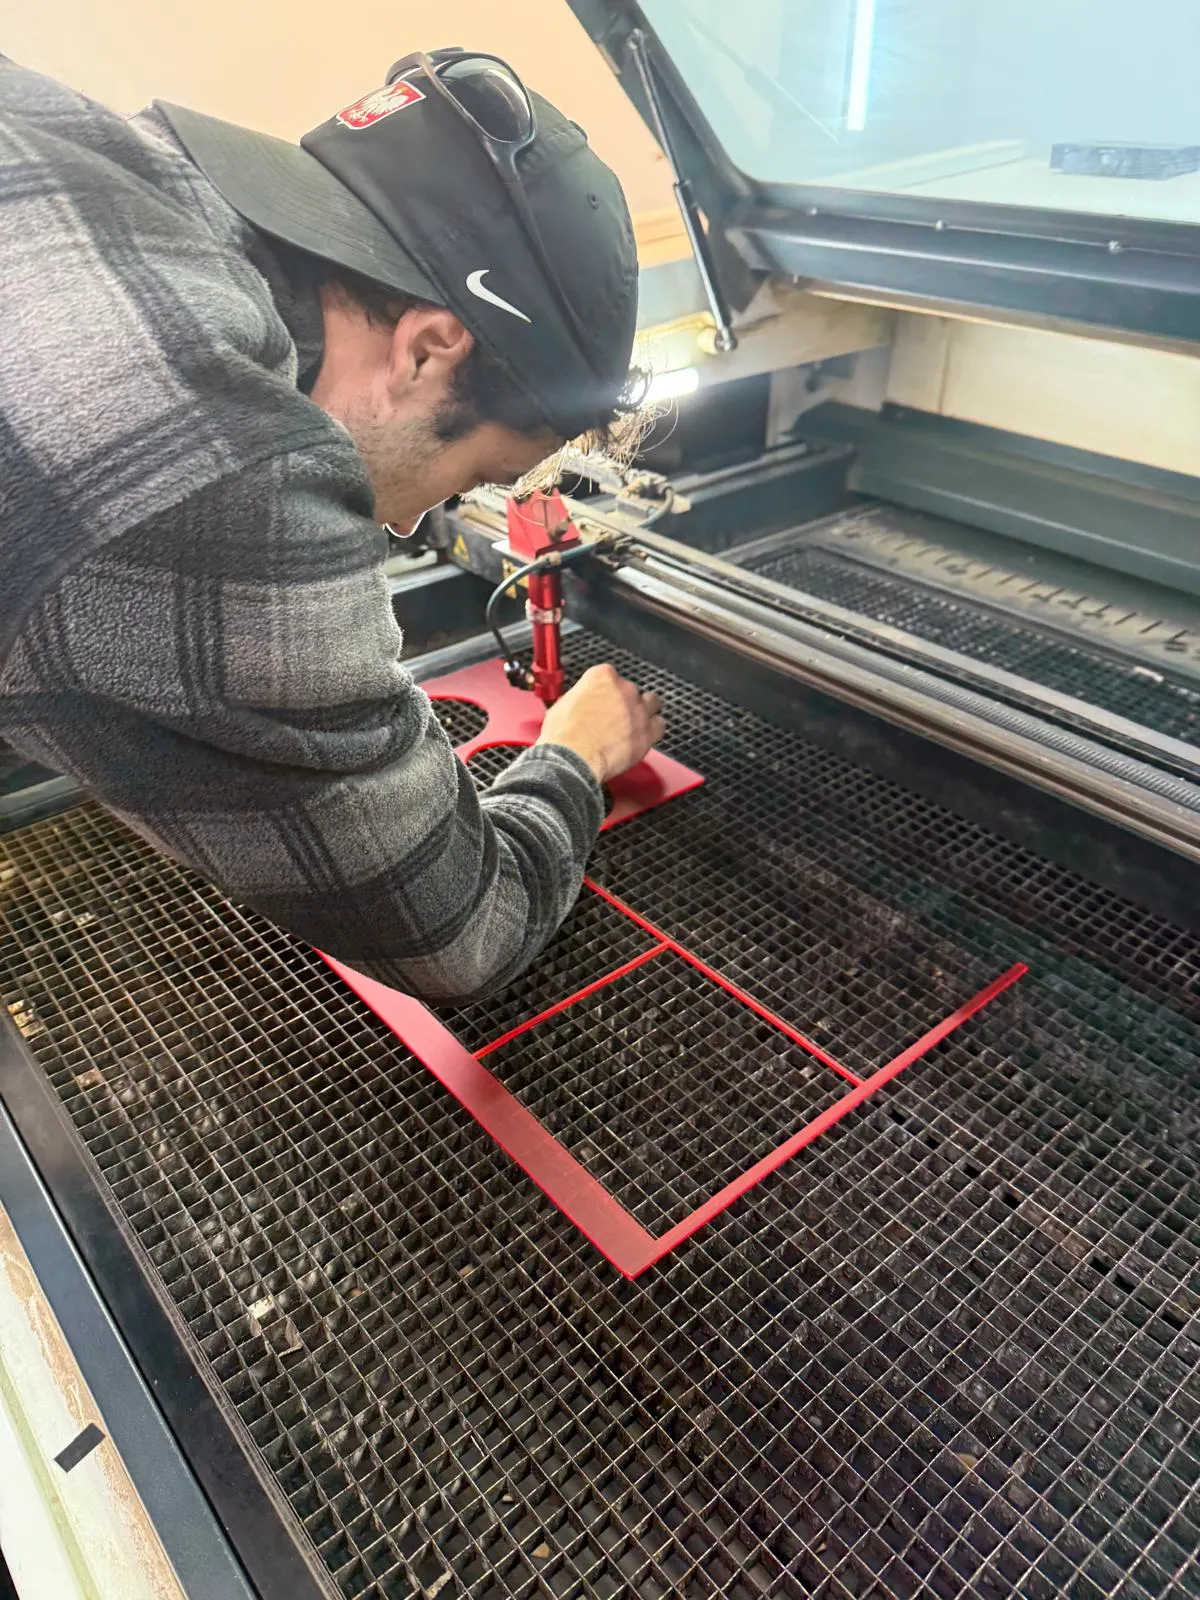
laser cutting
thank u so much to Gennaro and Daniele for helping me in the laser lab to prepare the files for cutting and the set up the machine.
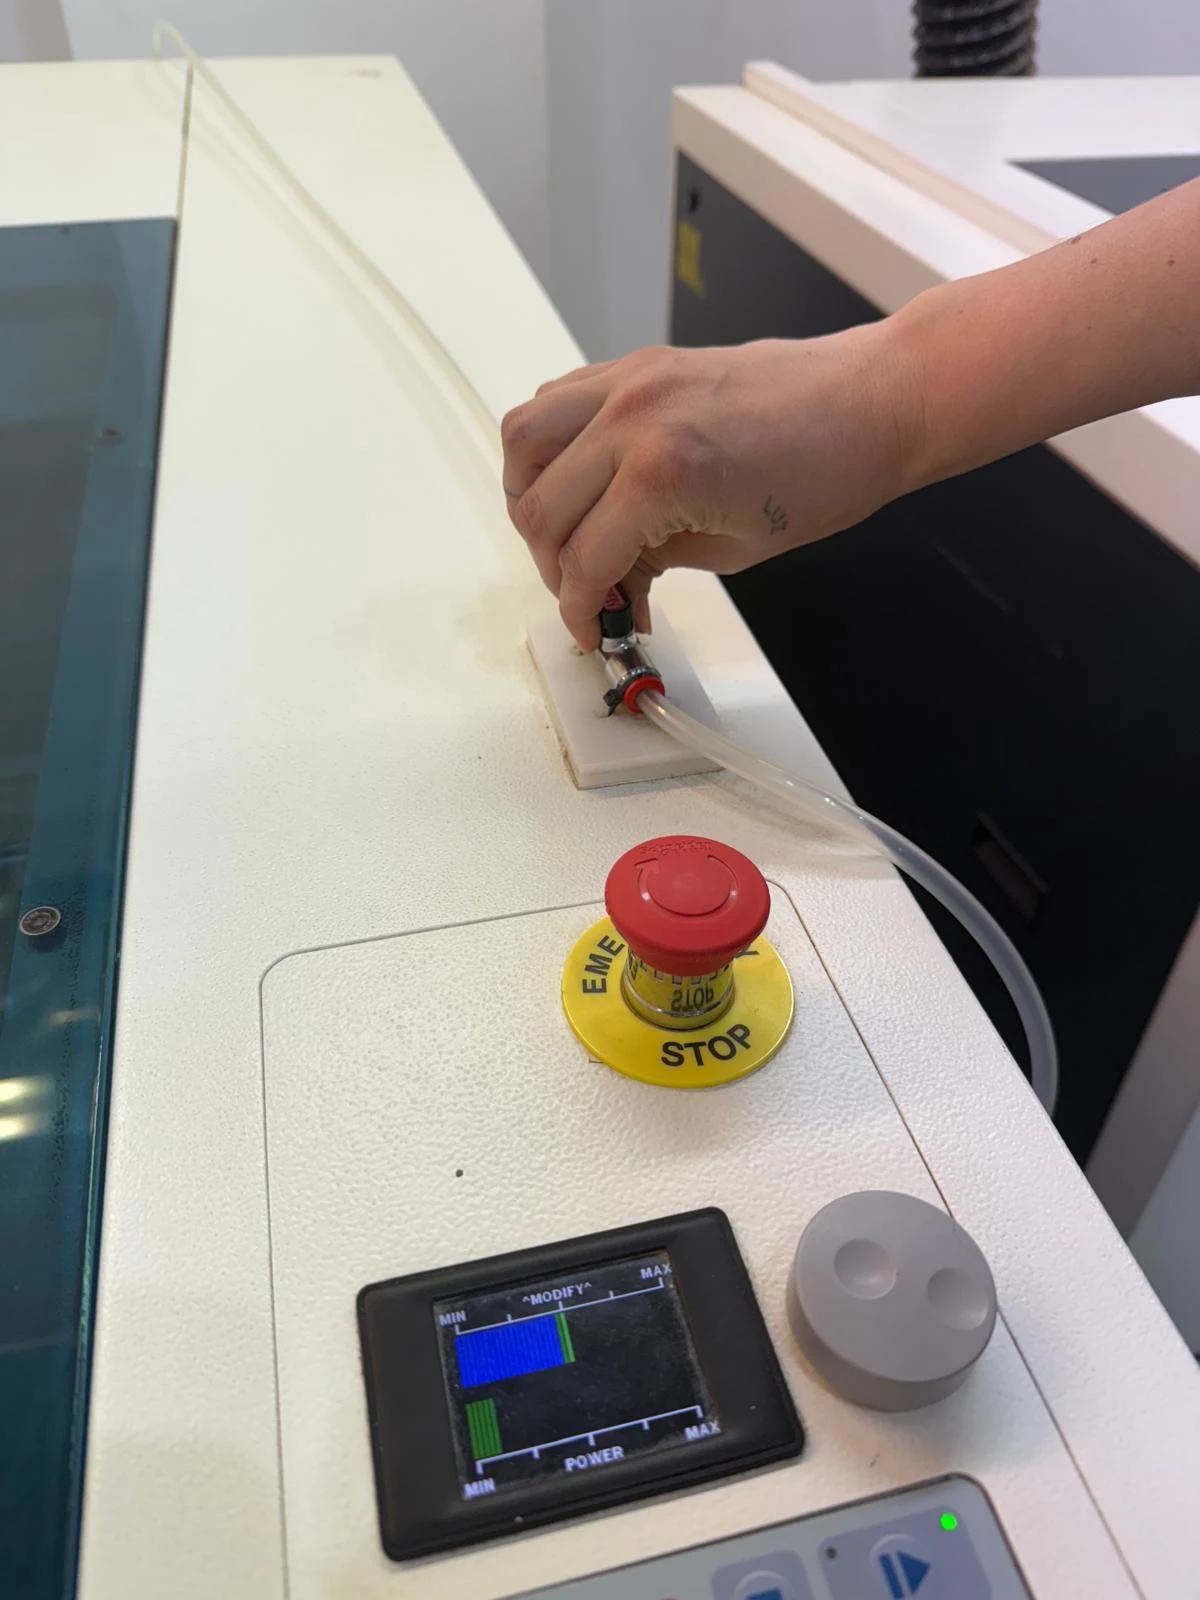
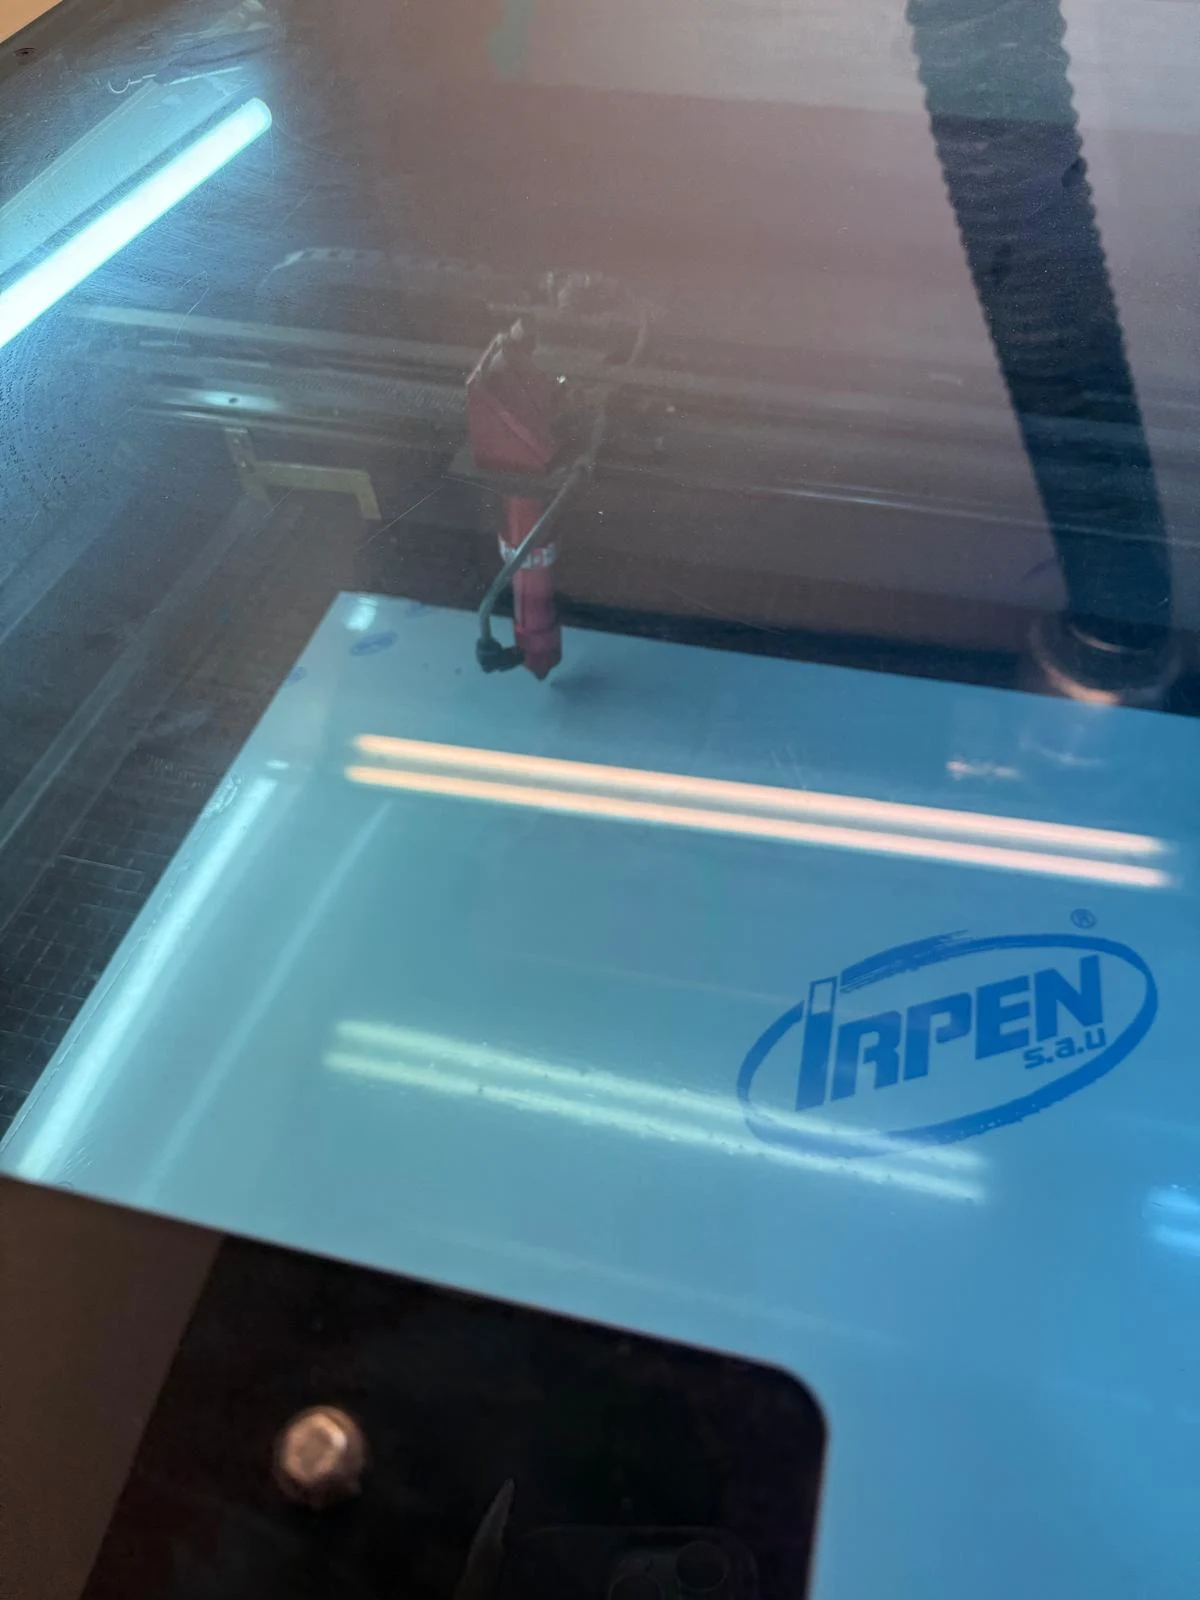
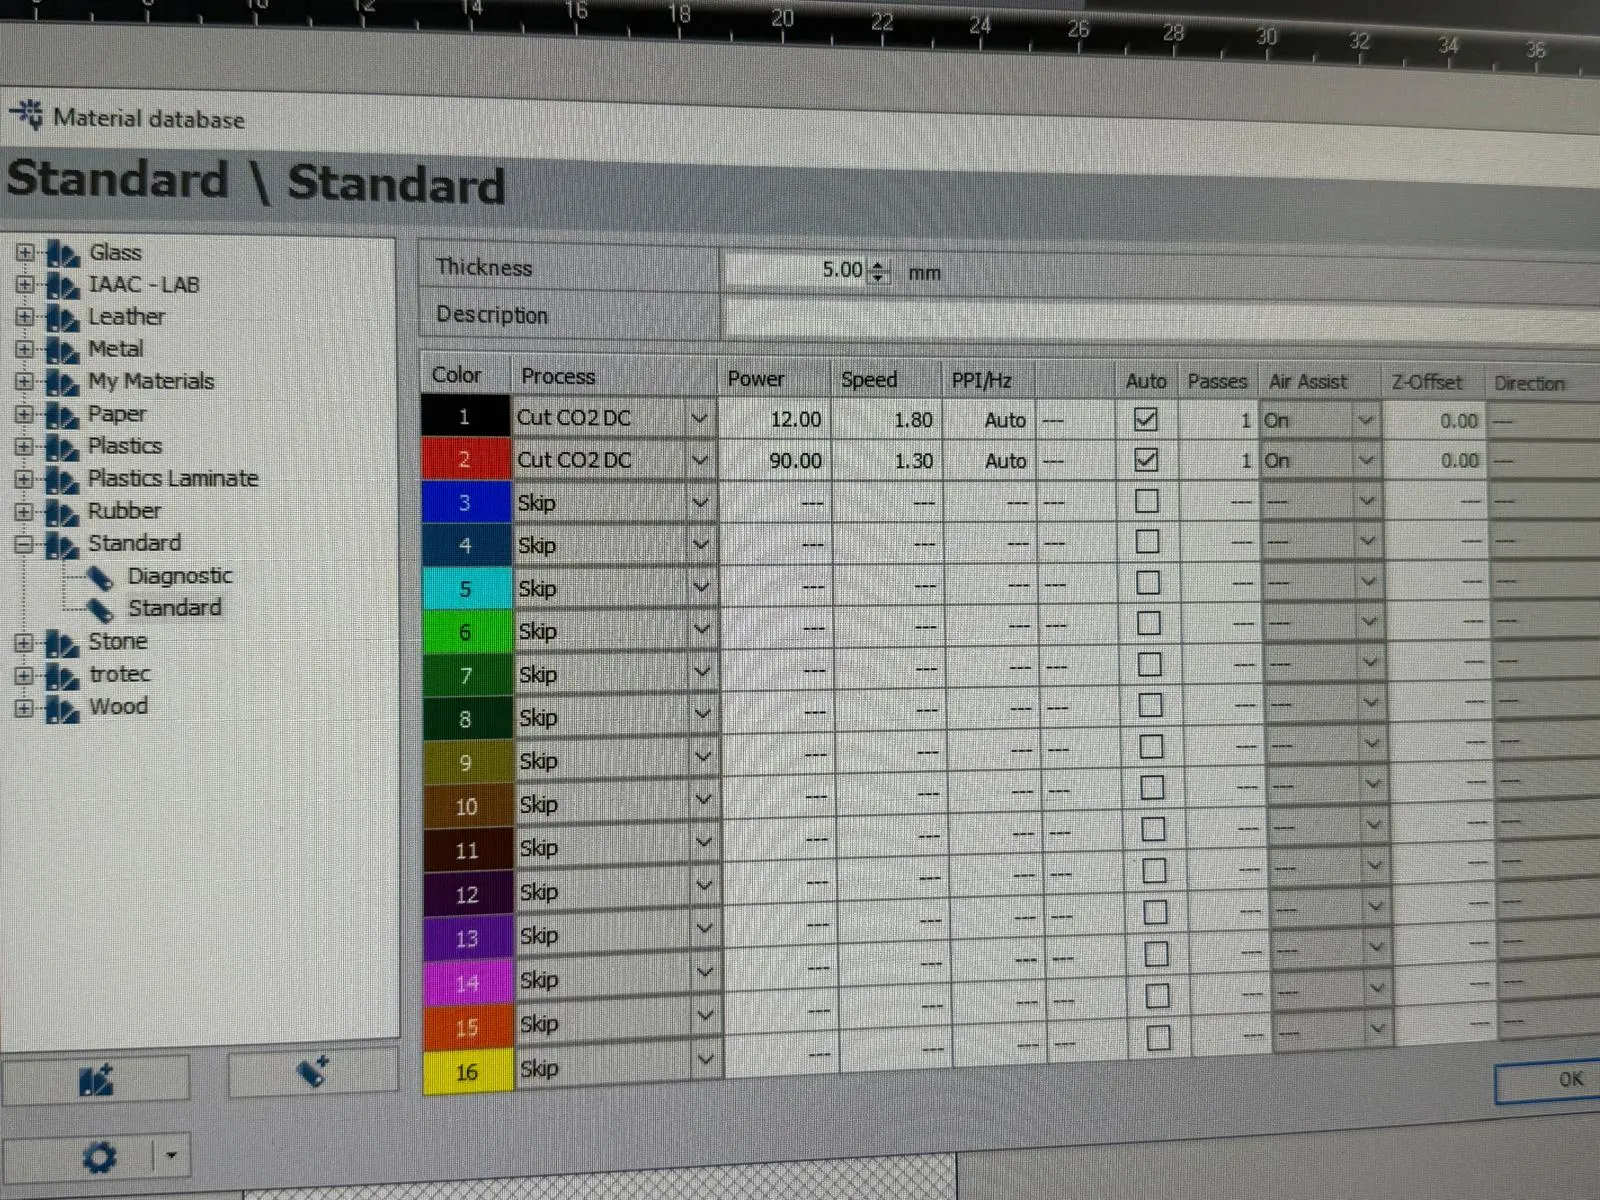
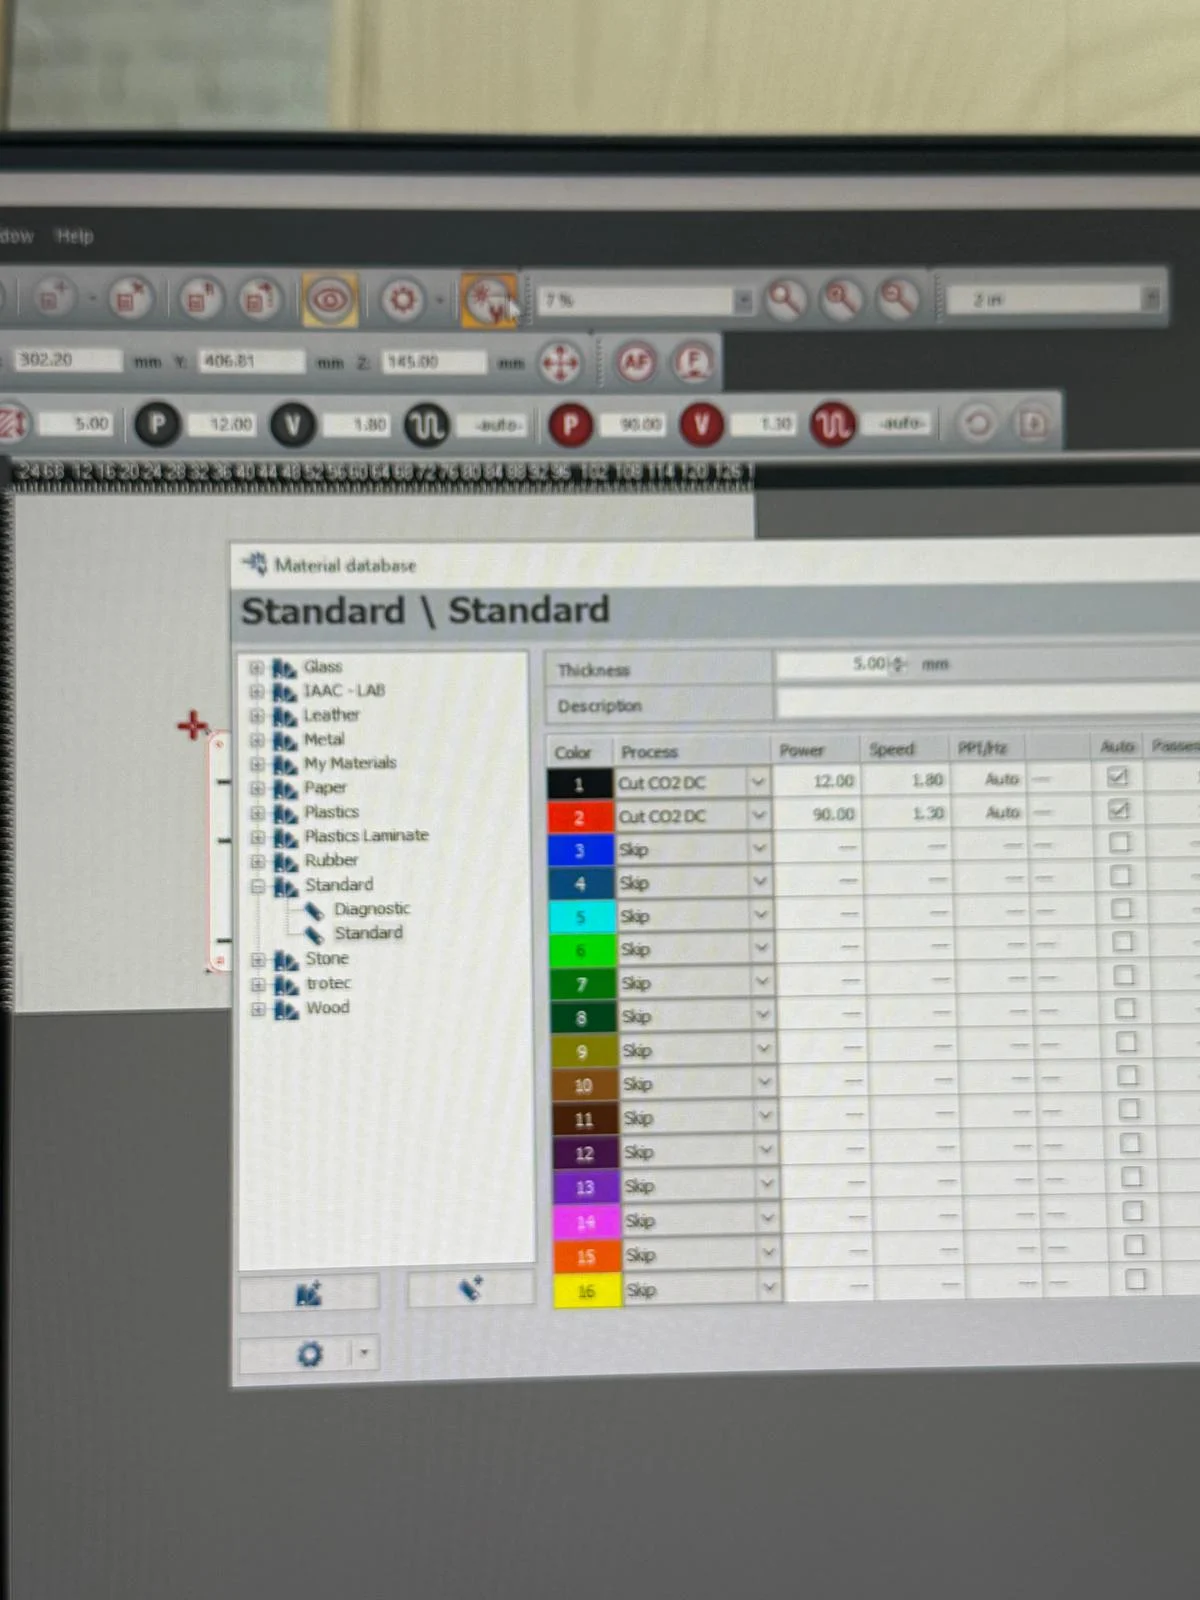
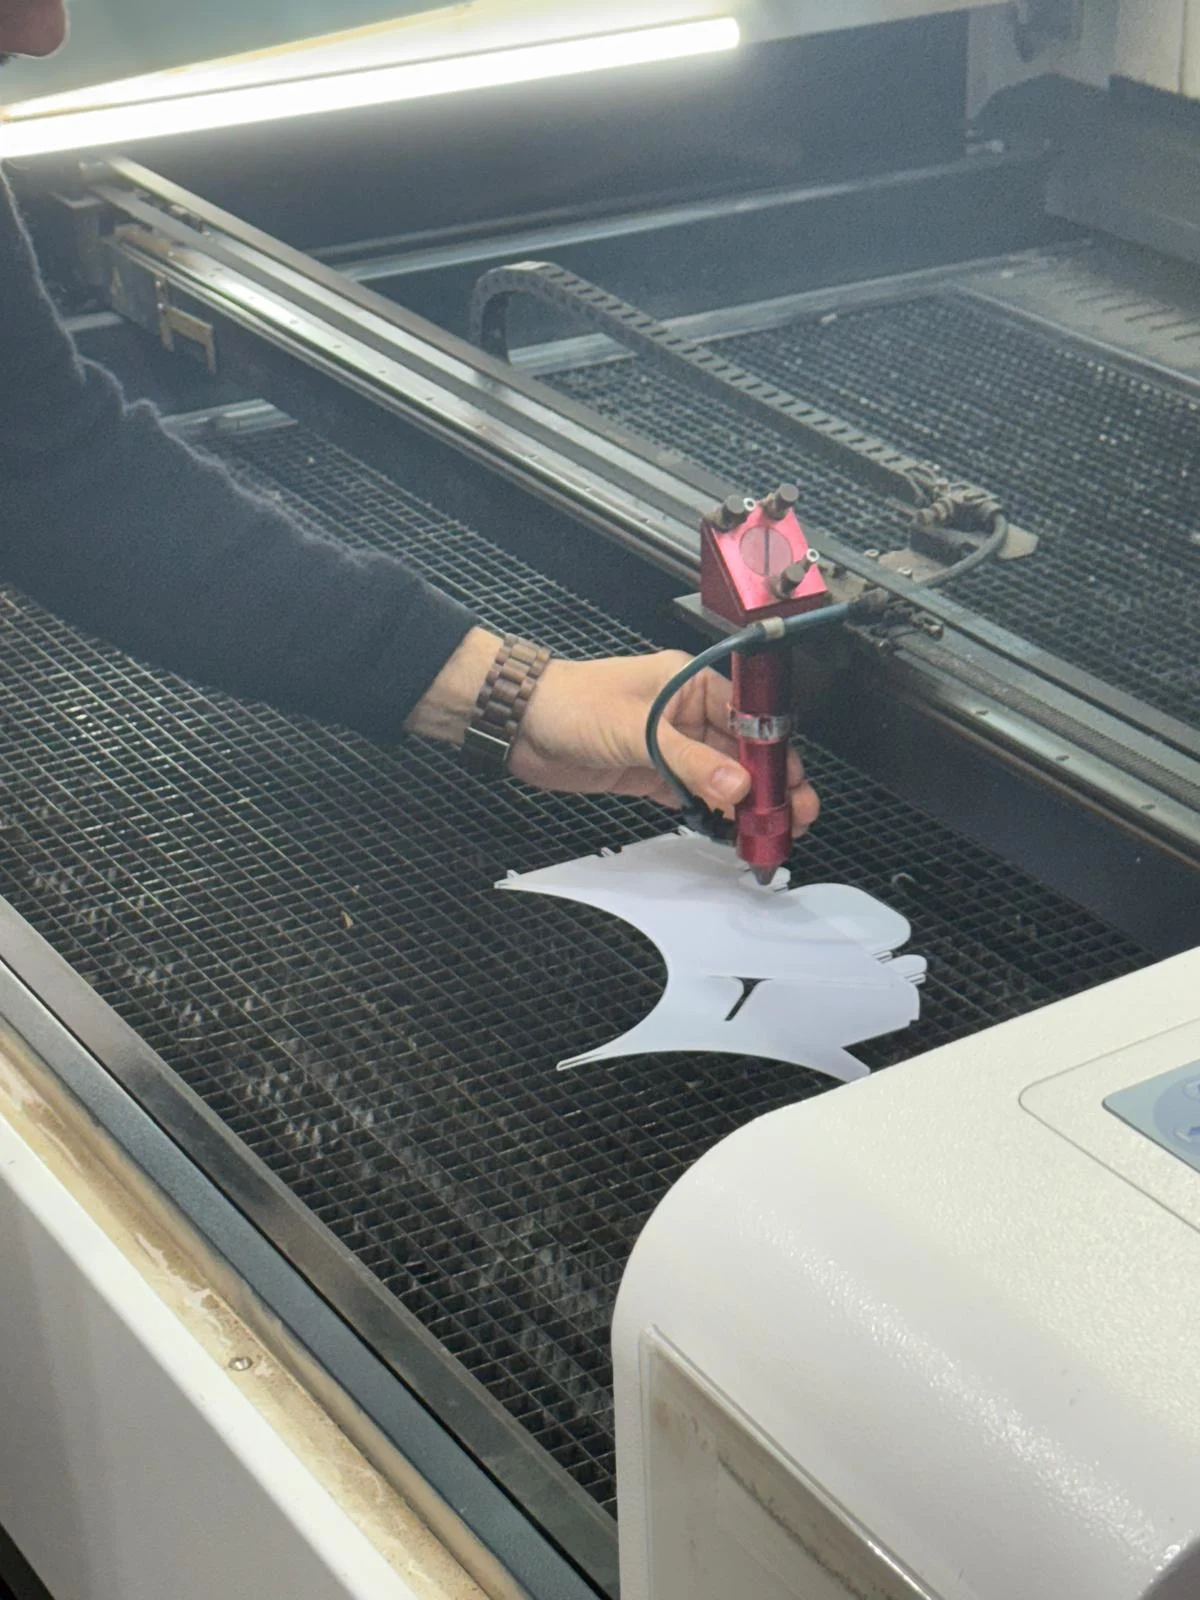
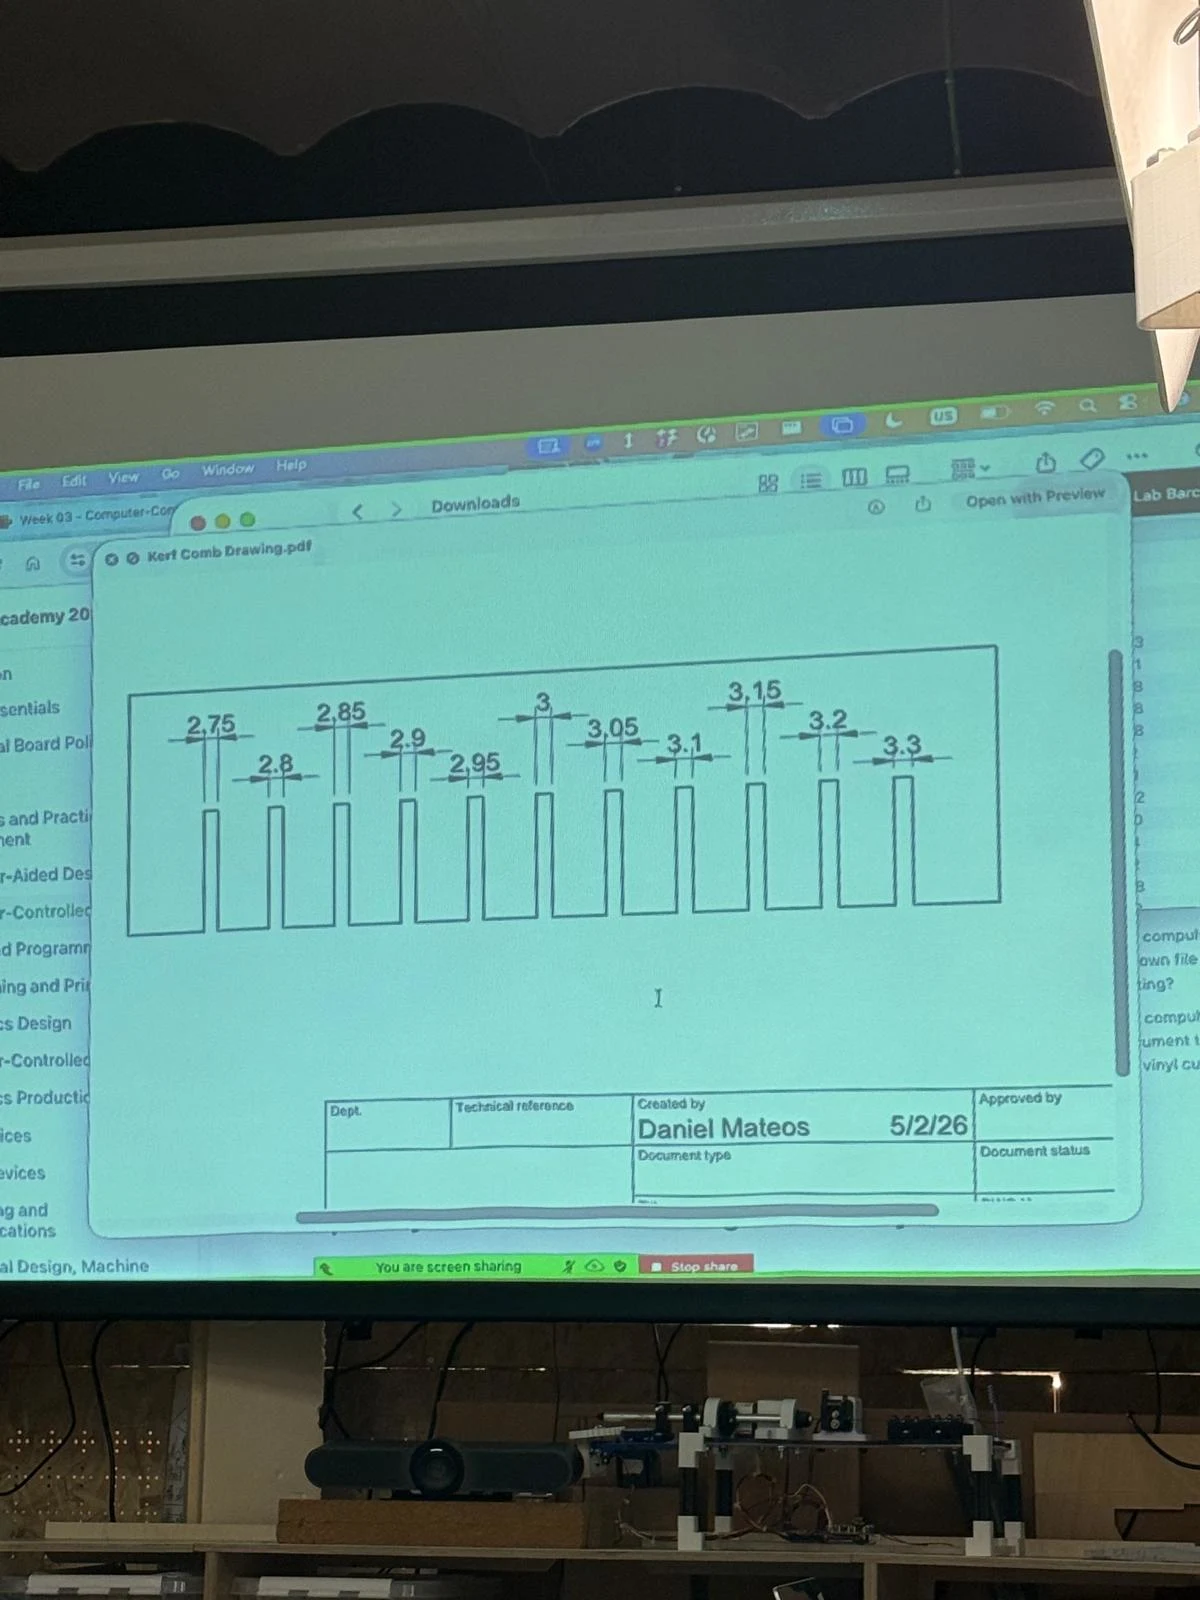
I used the Rayjet 500 to cut 3mm acrylic and followed the settings on the test swatches.

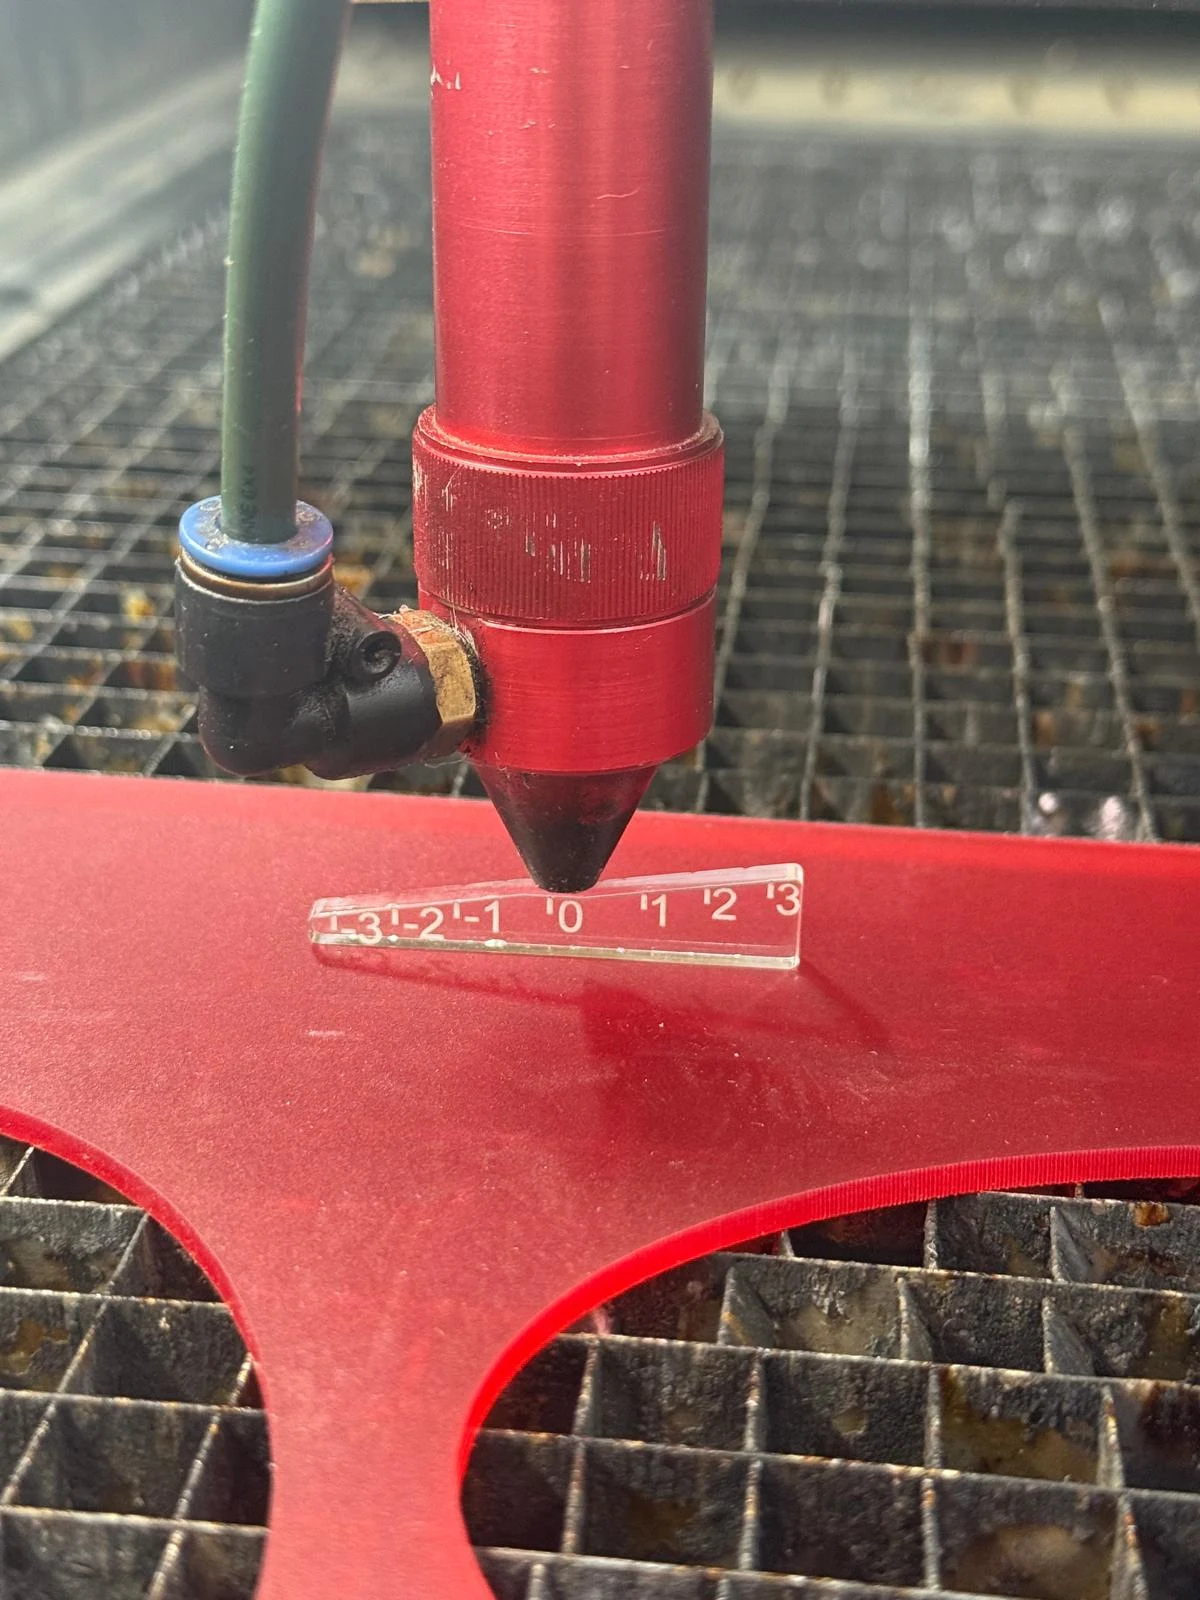
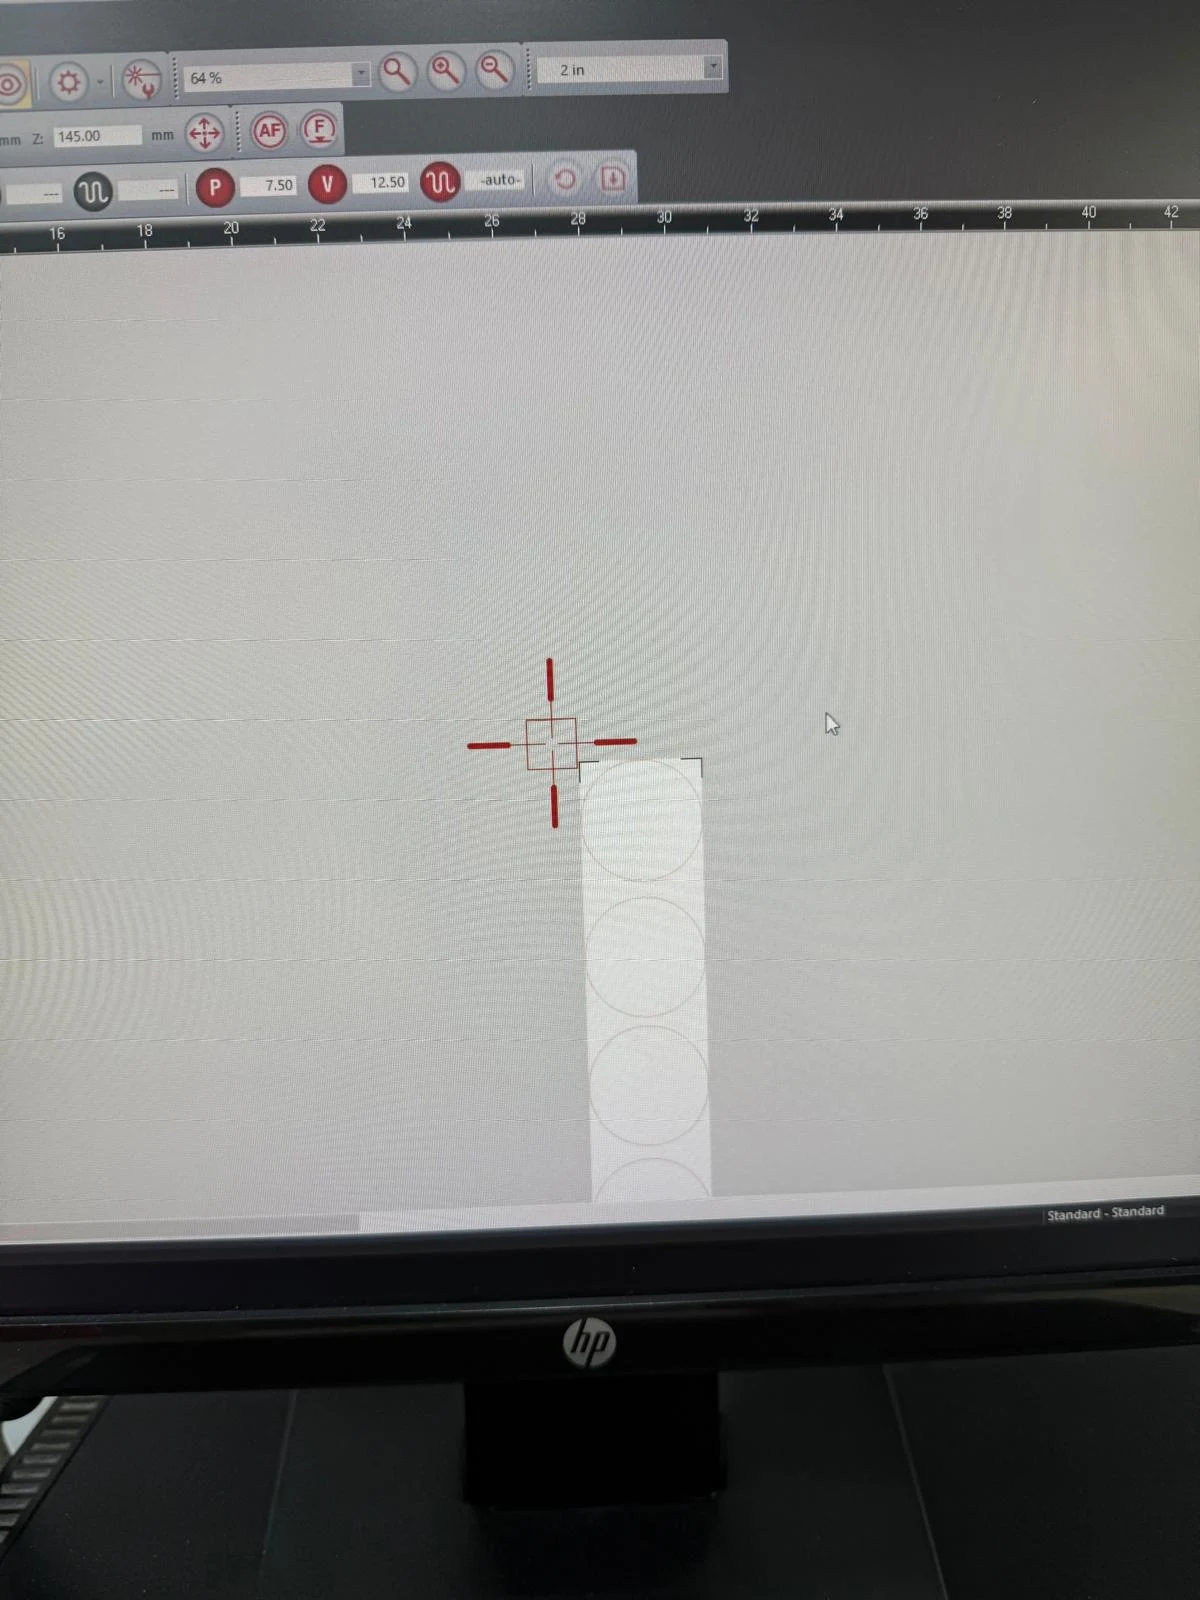
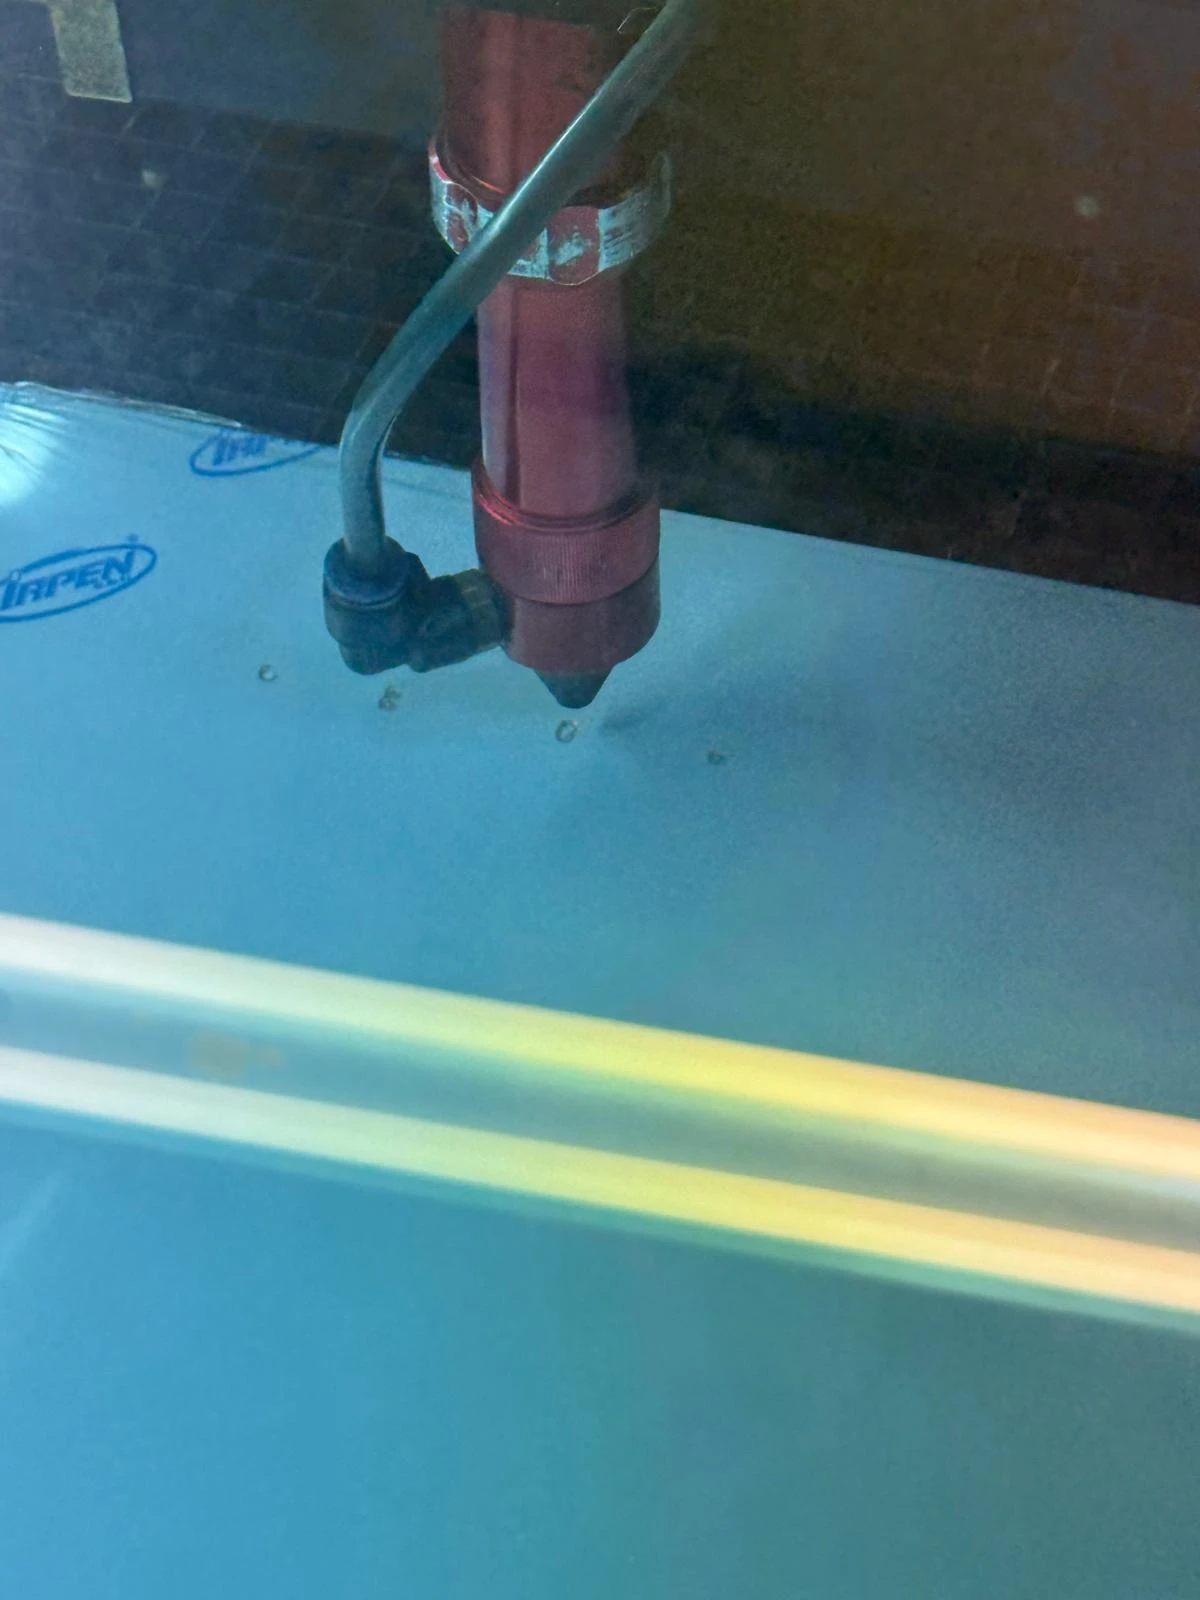
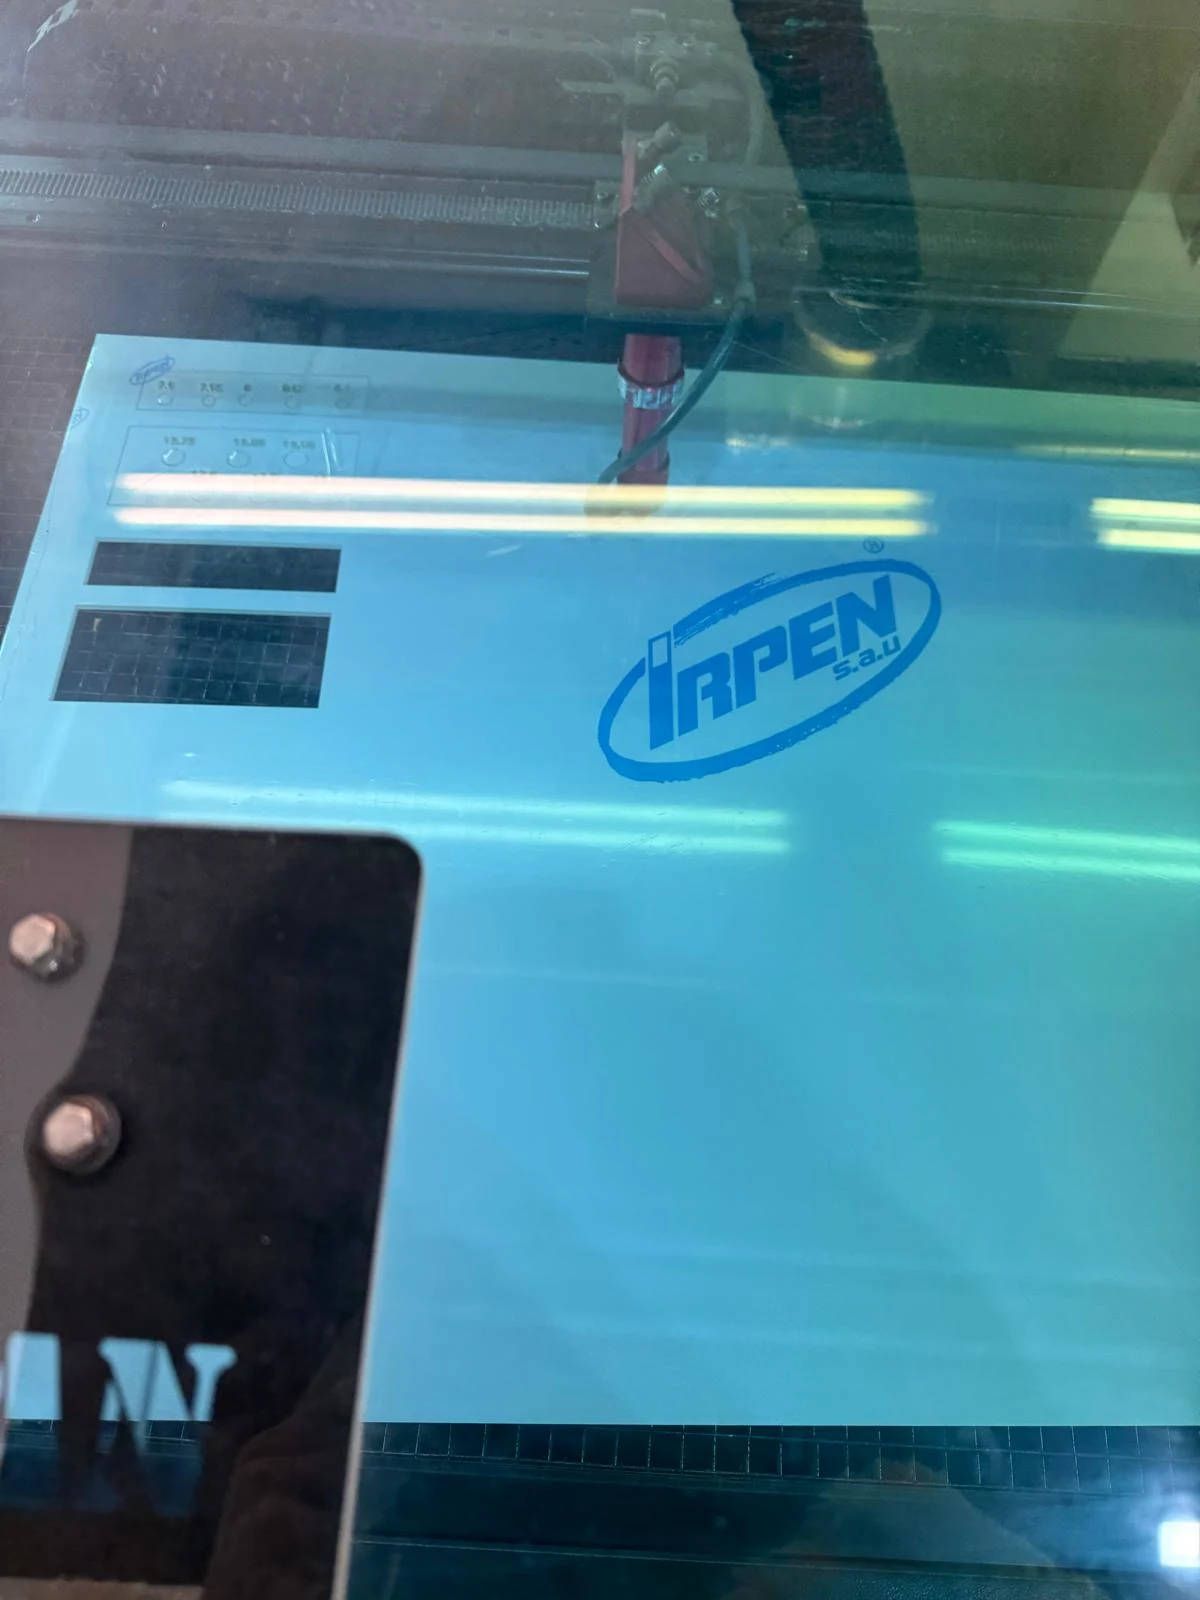
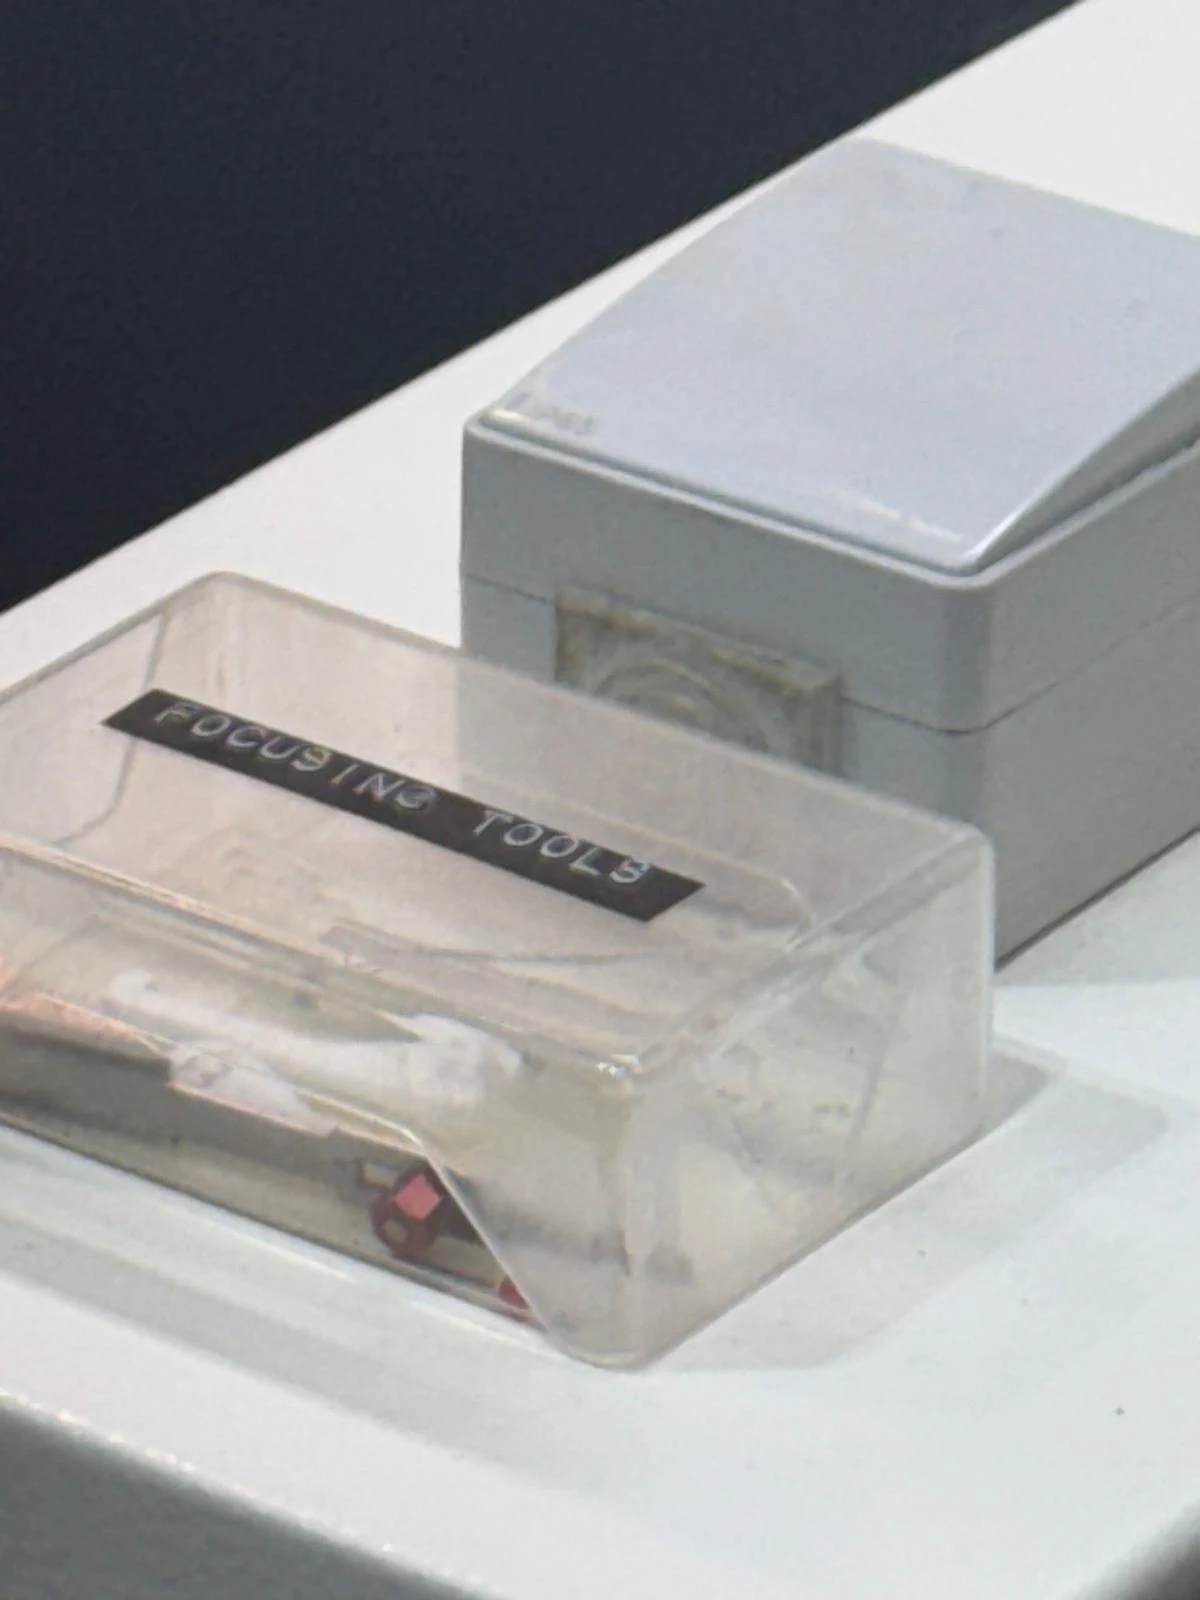
Started by checking the focus on the laser
I used some of Gennaro's scrap material for cutting the sliders since it needed very less material
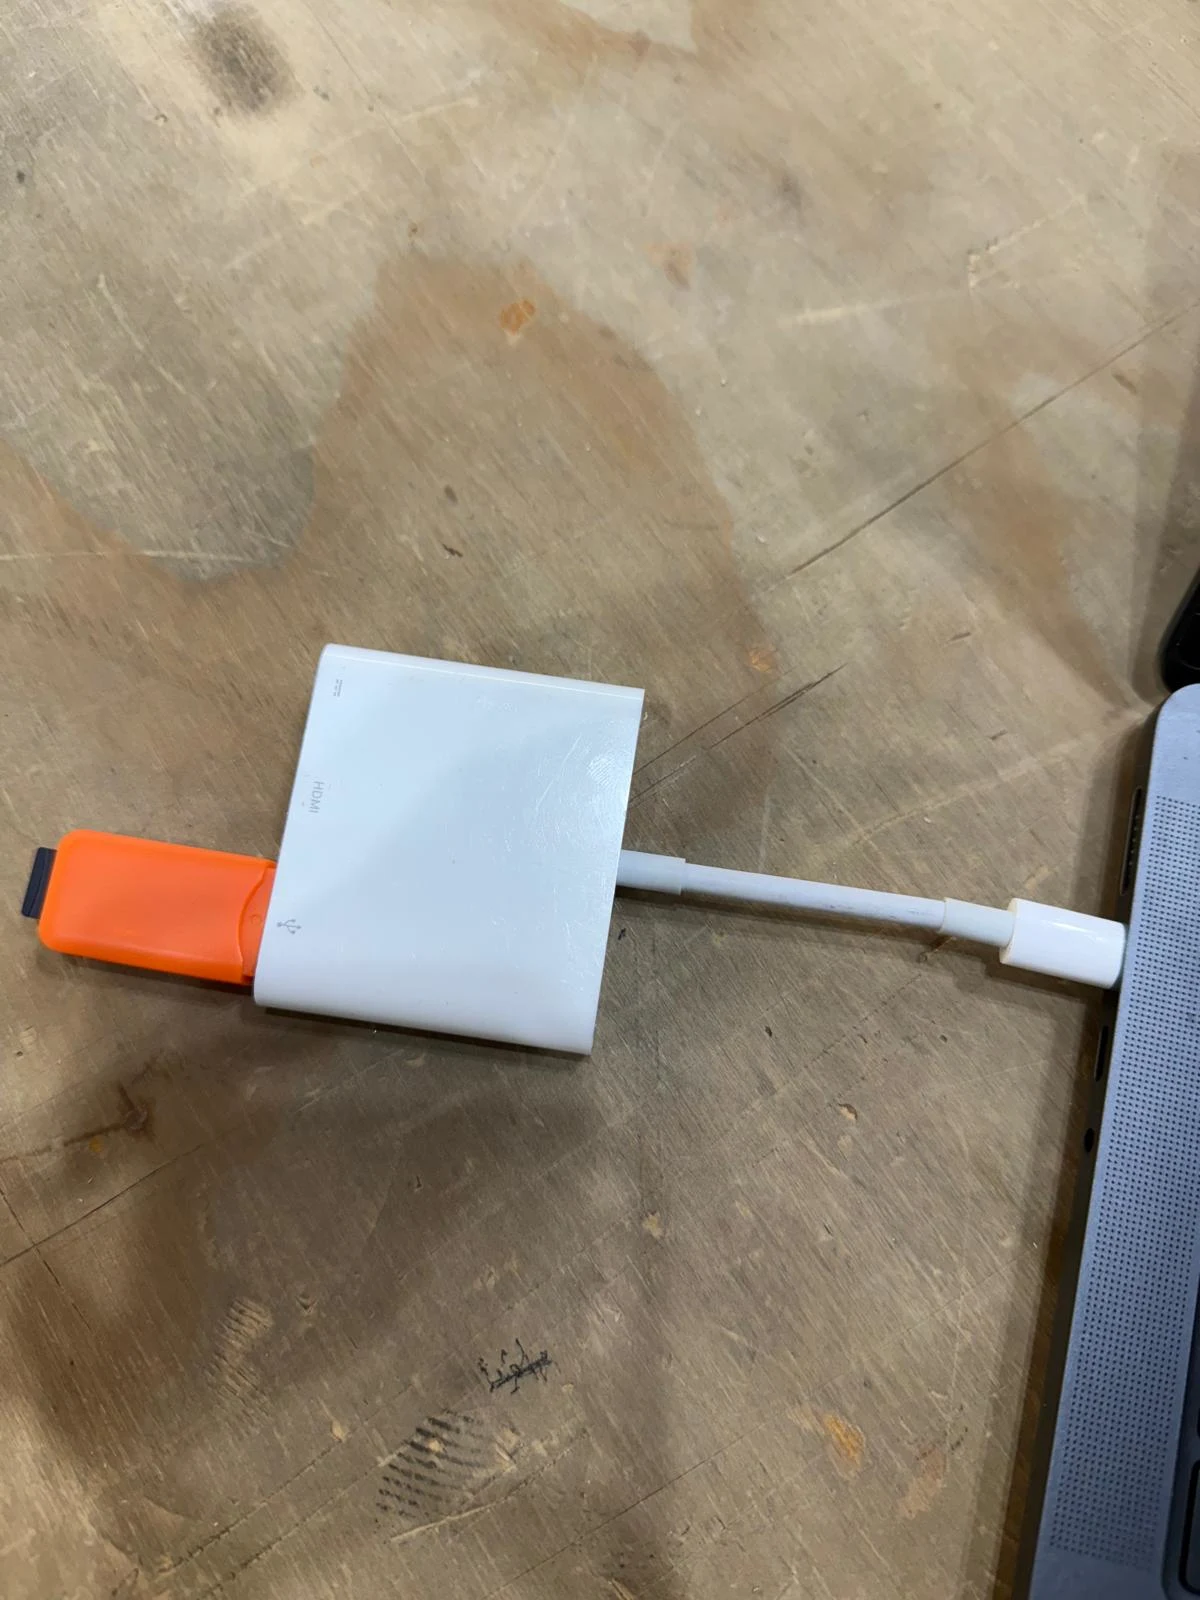
I put the file in a USB drive and put it into the computer connected to the Rayjet 500.
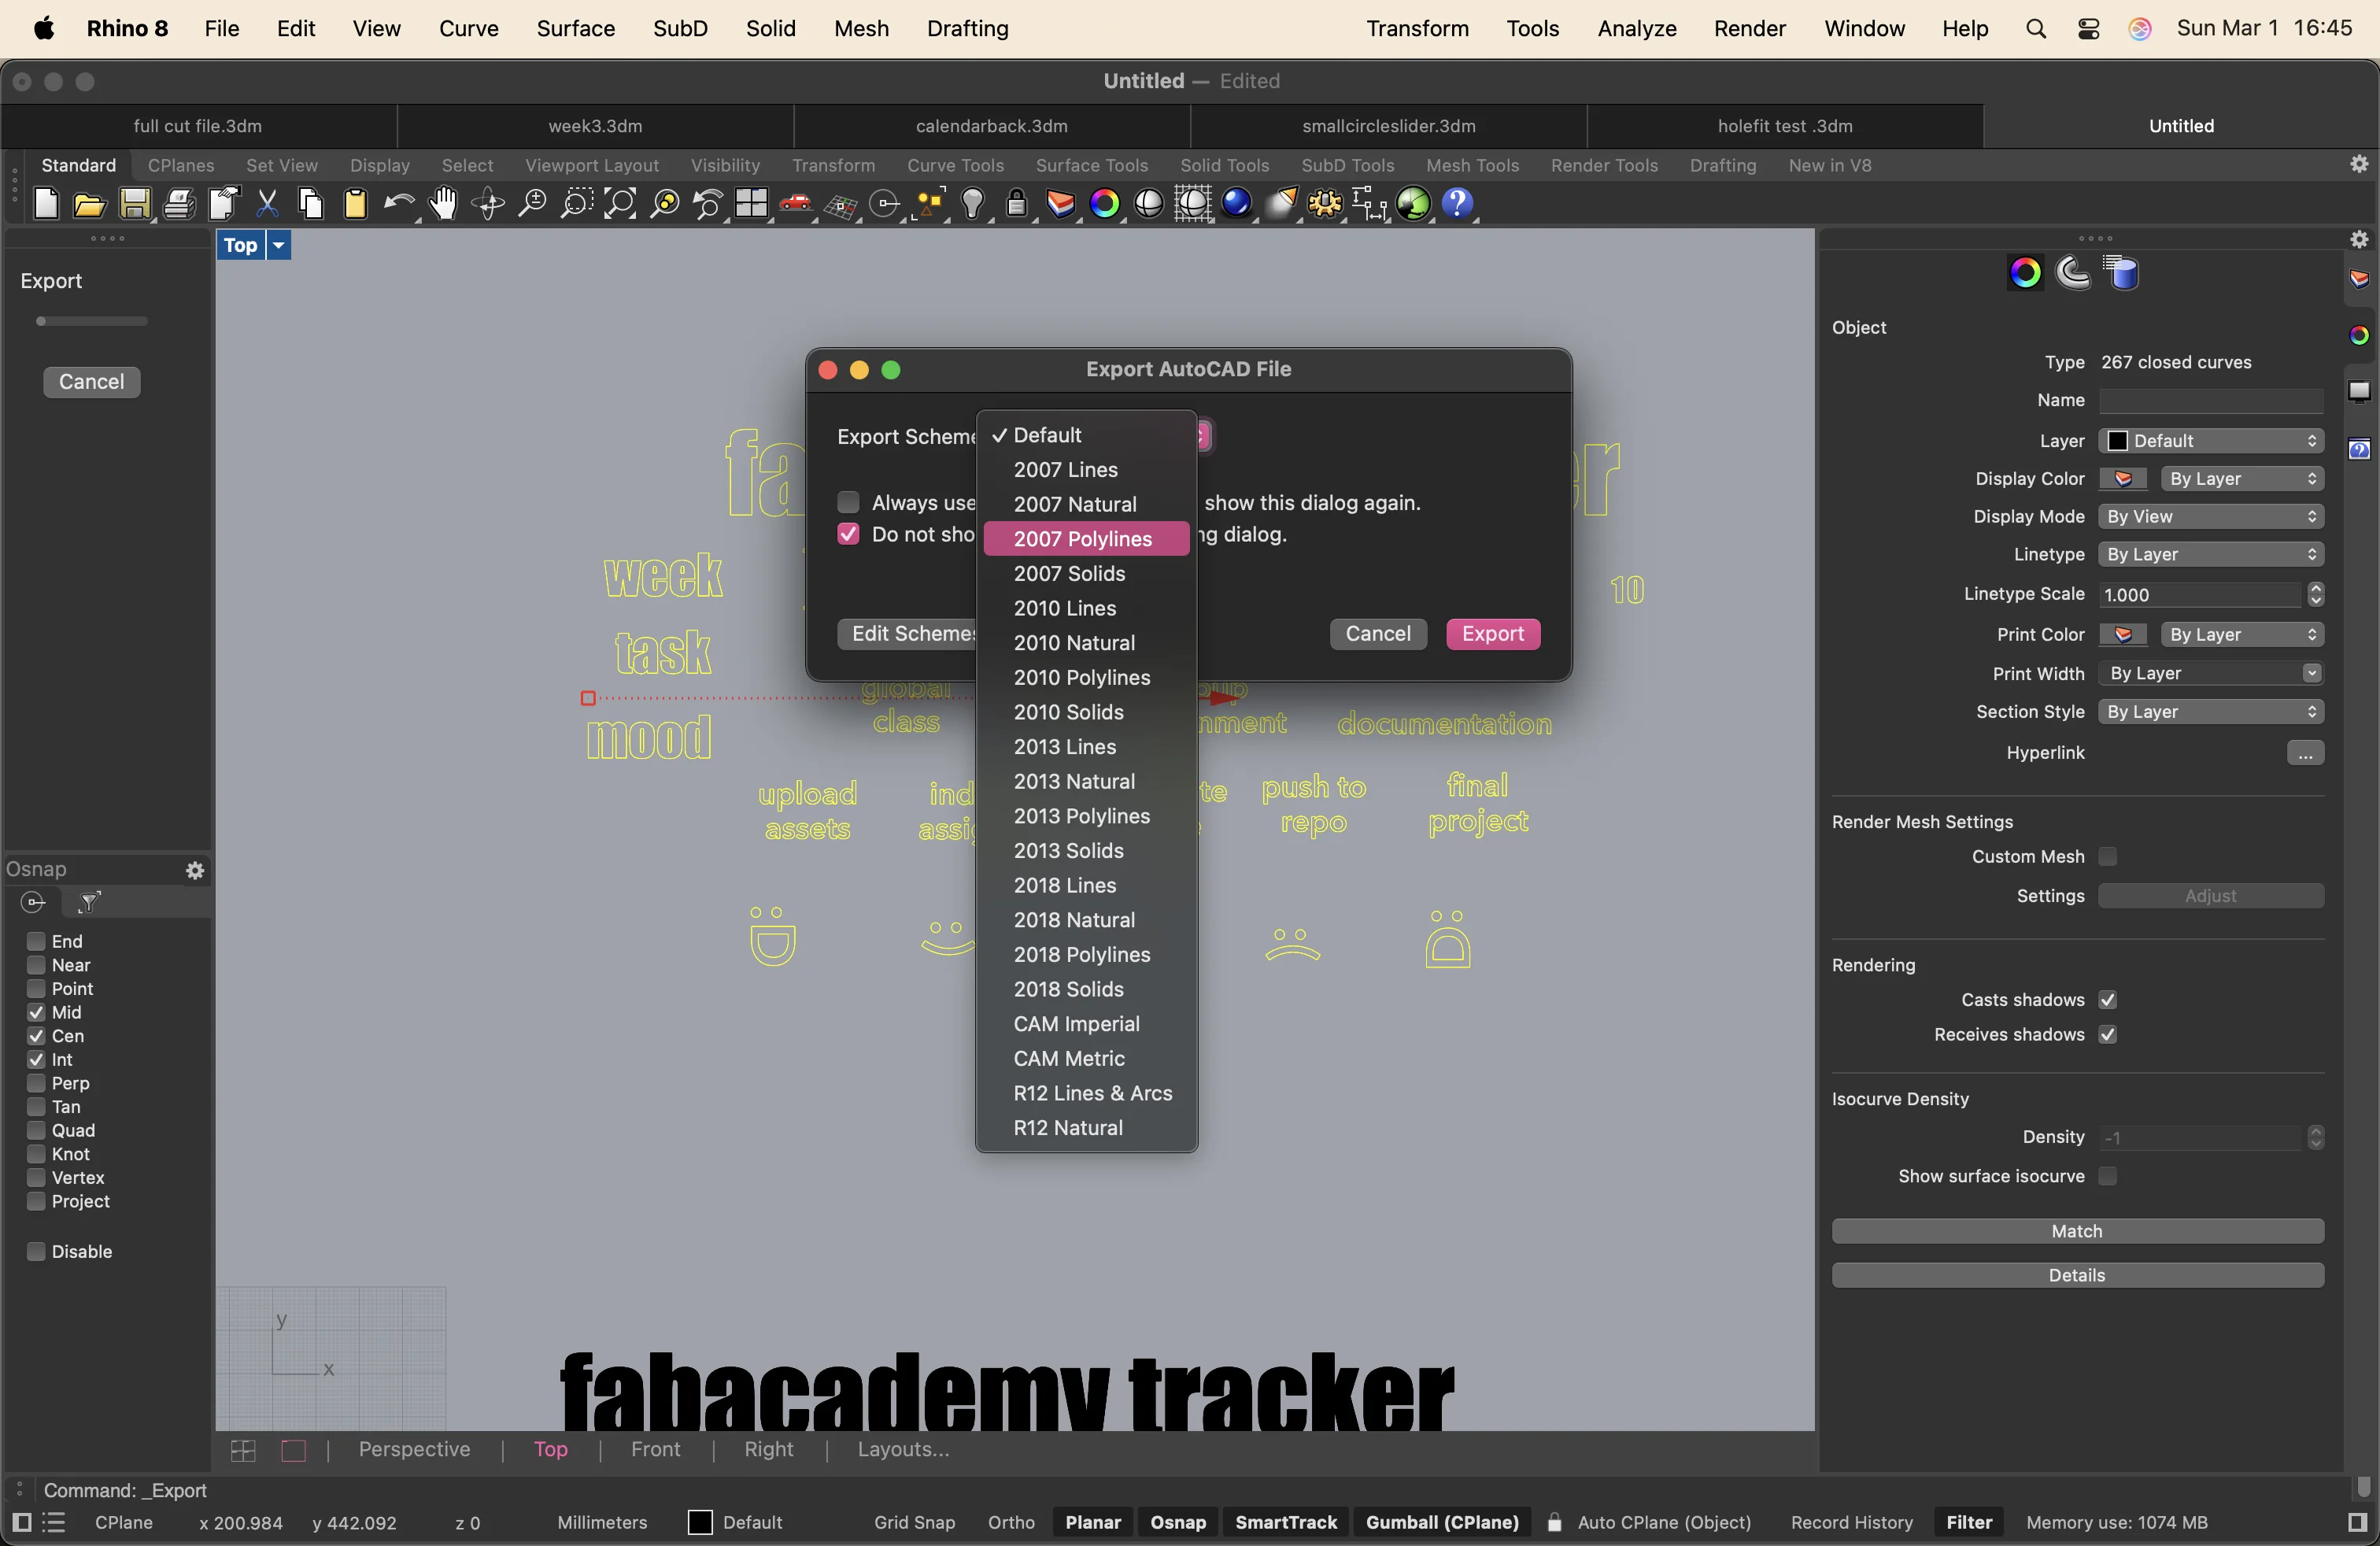
I designed my vector file in Rhino 8. And then I saved it as a Rhino 7 file.
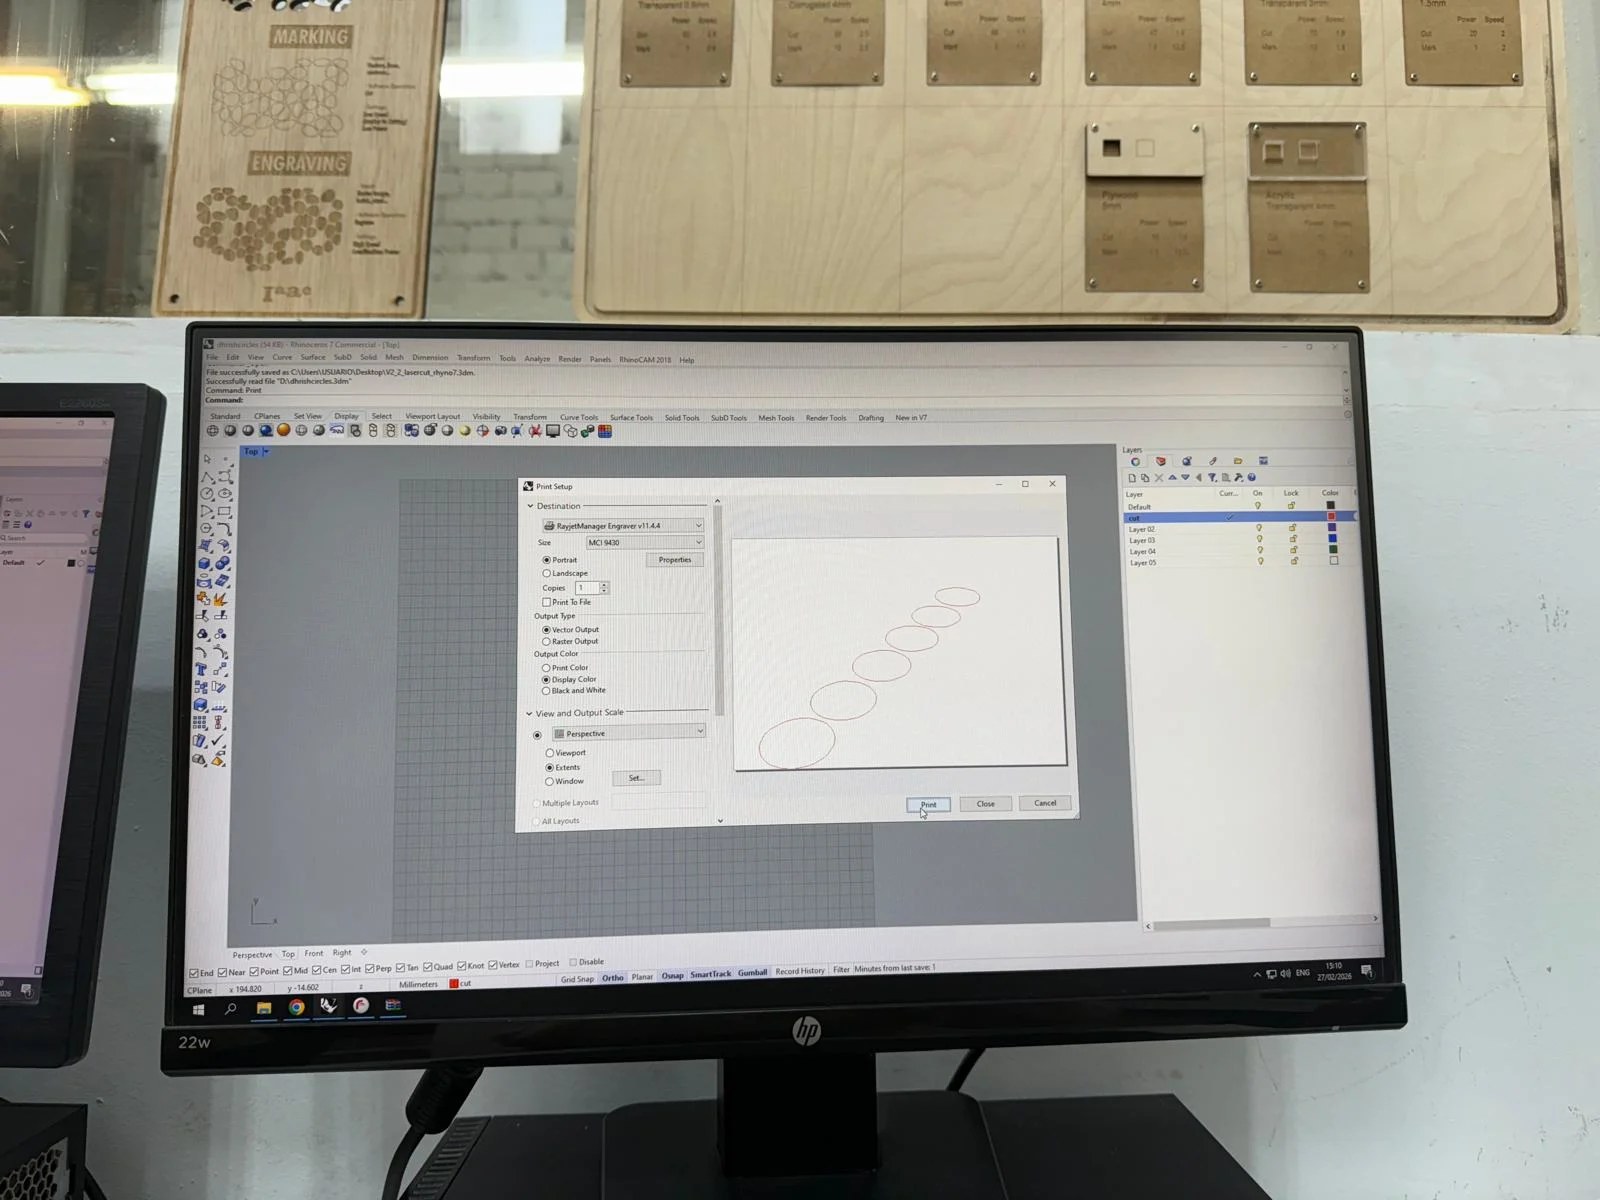
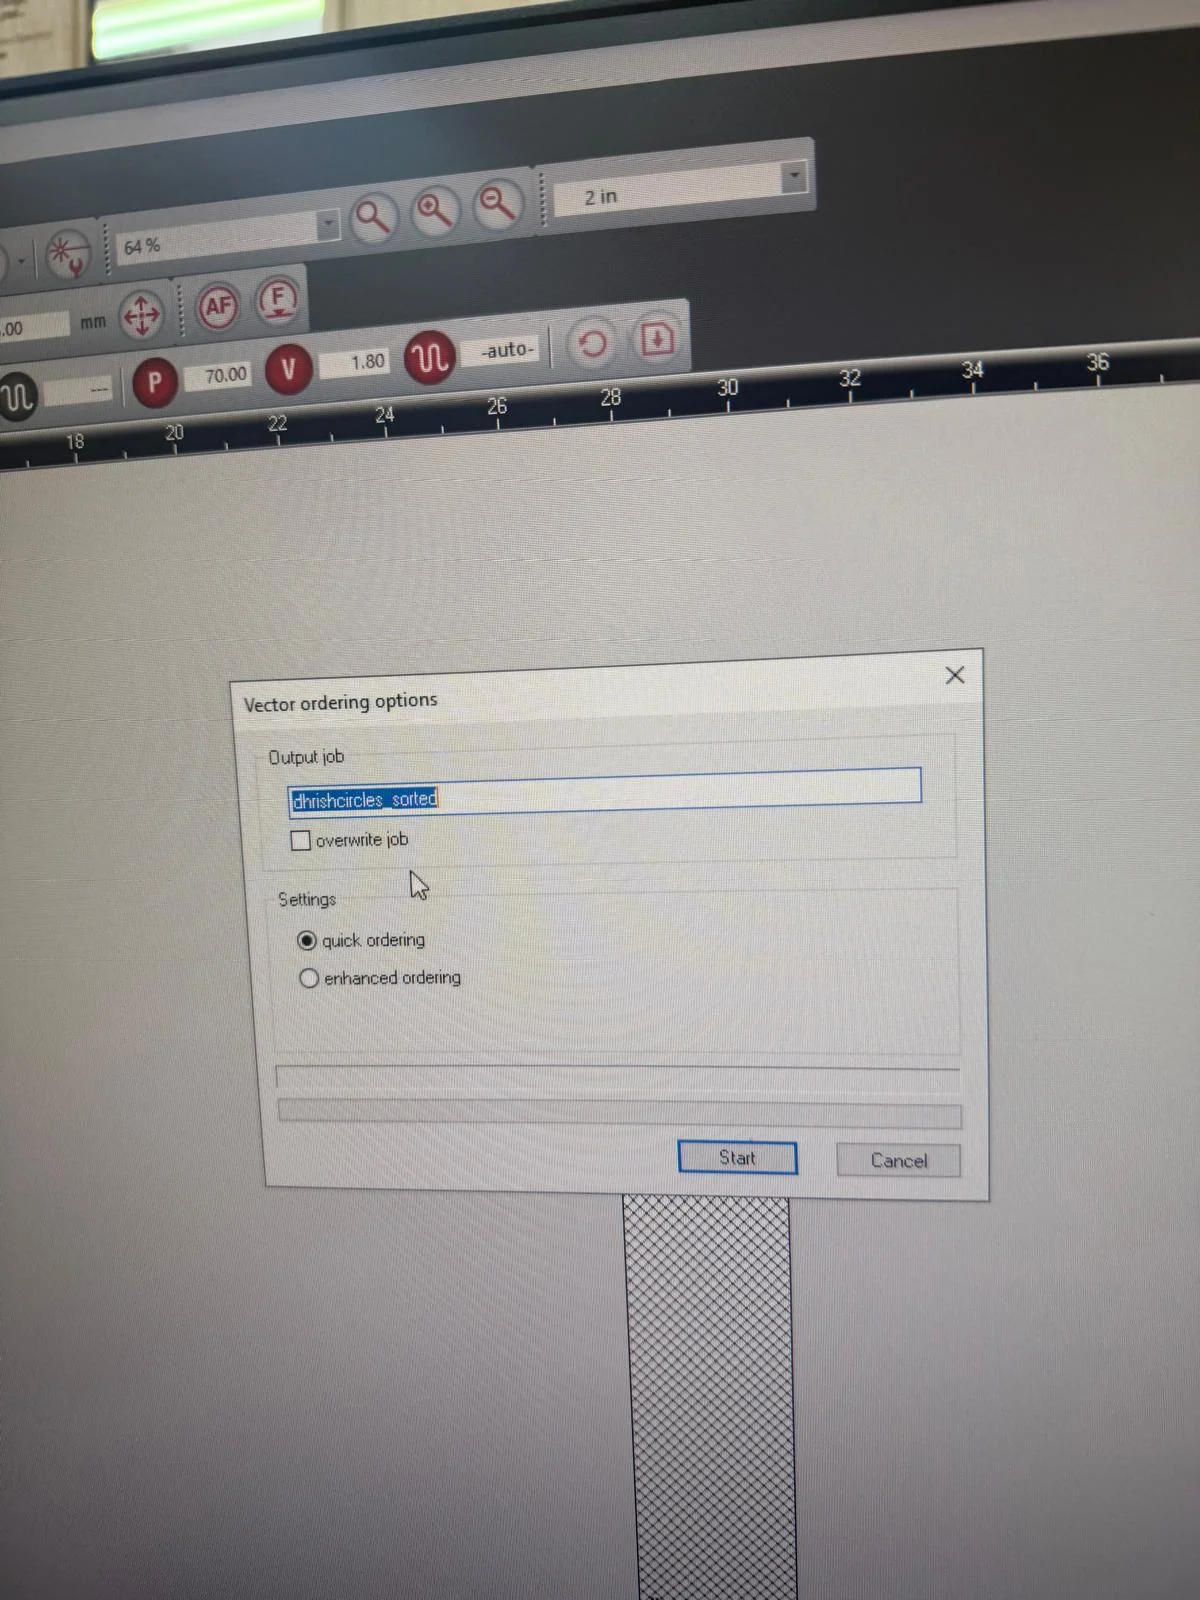
Open the file in rhino on the comuputer connected to the Rayjet 500 and check the cutting line is Red. Then type 'print' to open the laser software.
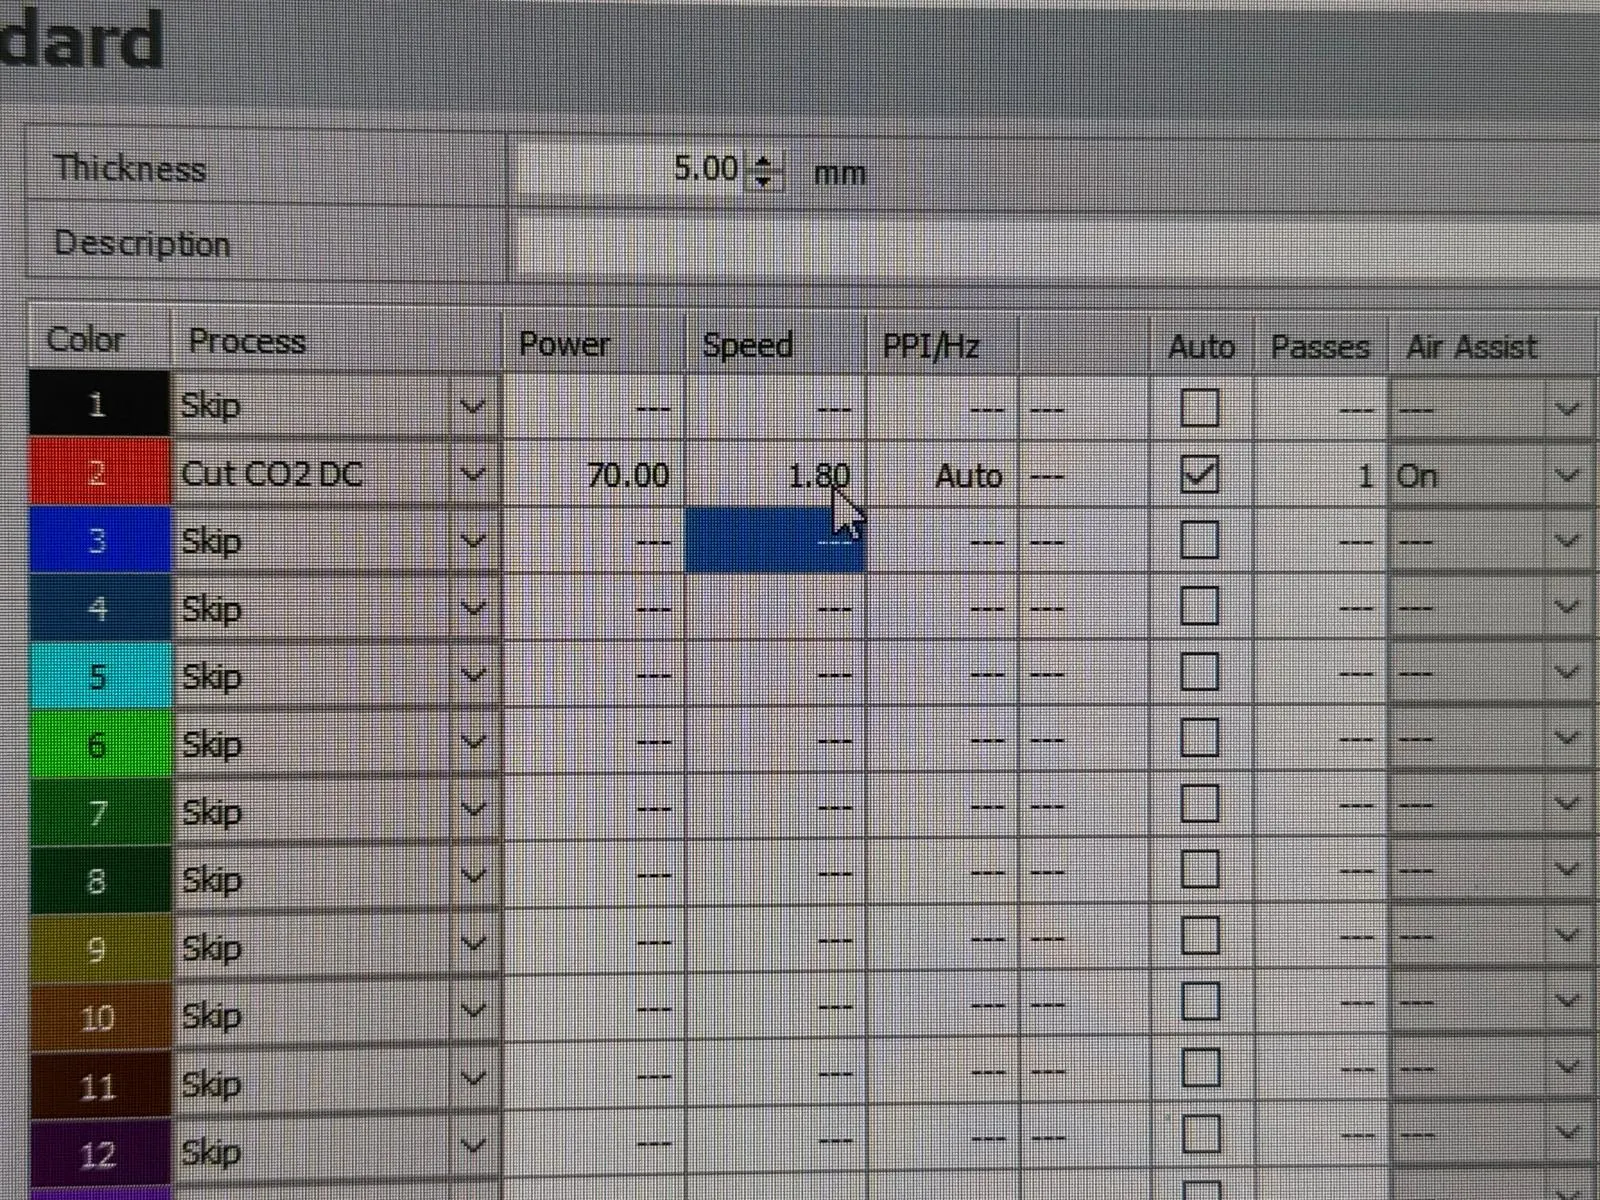
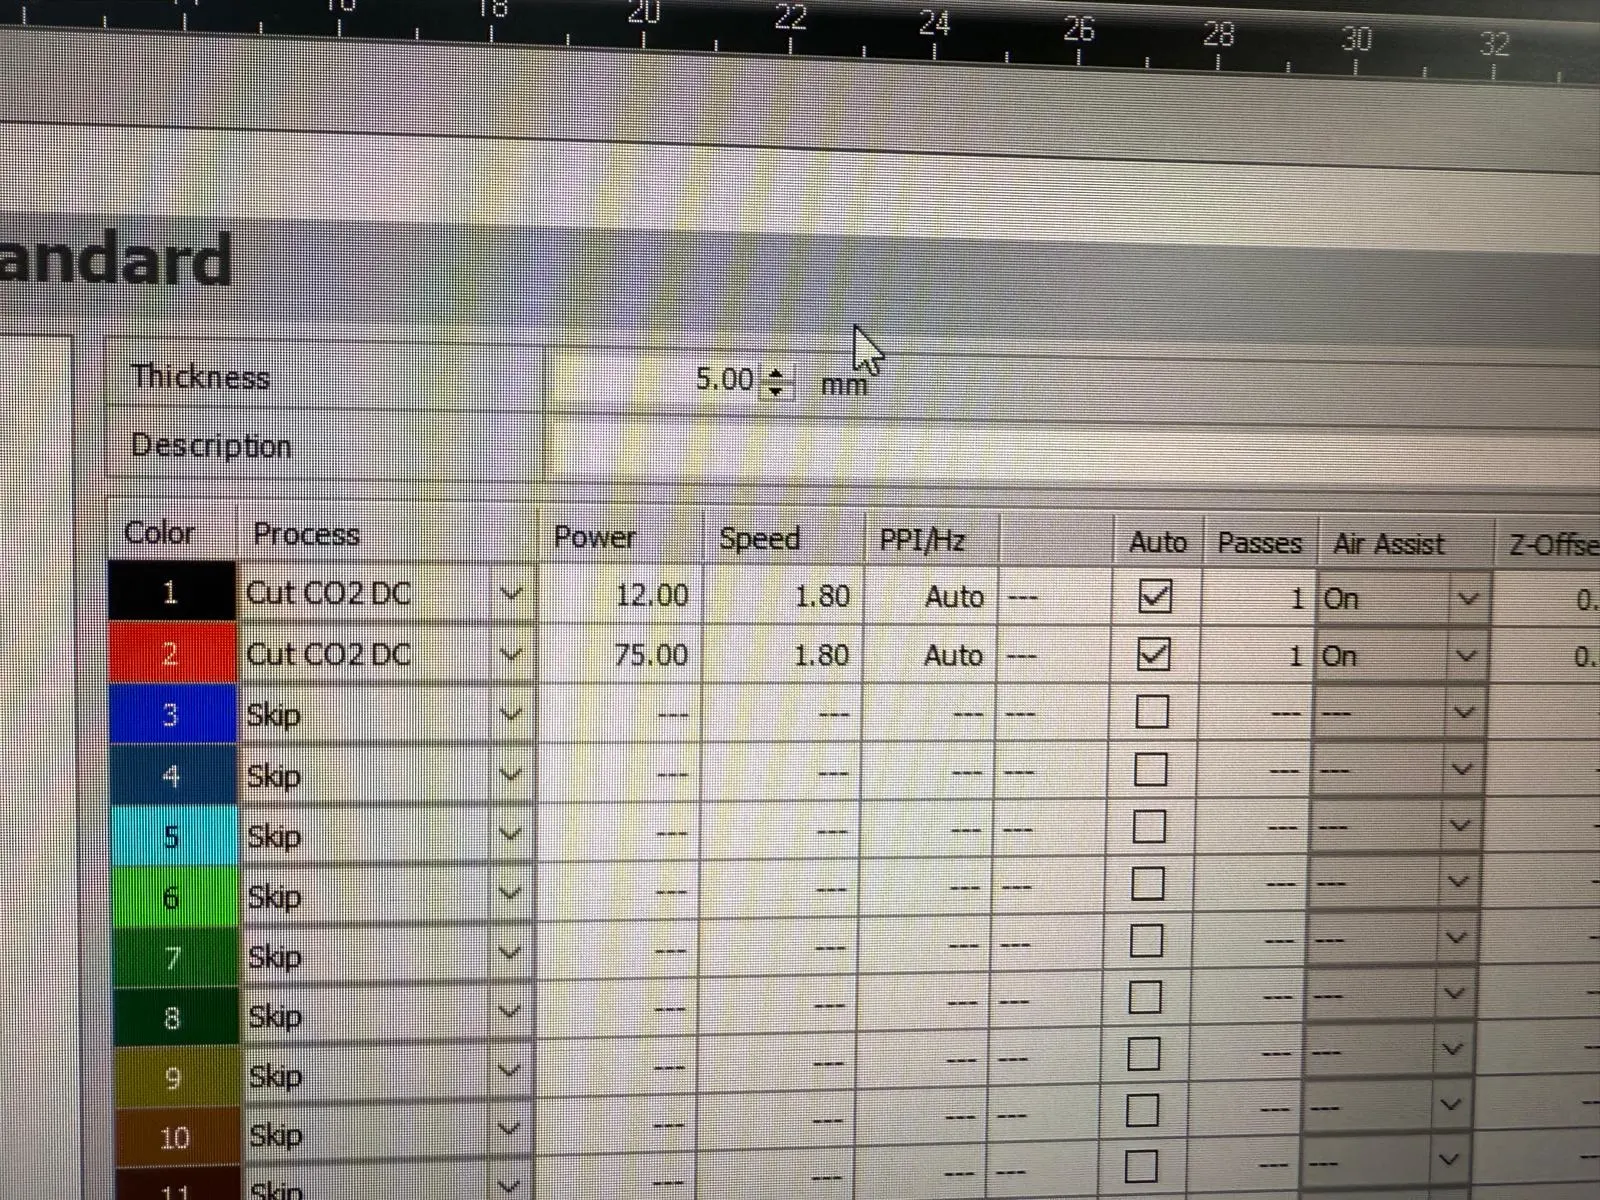
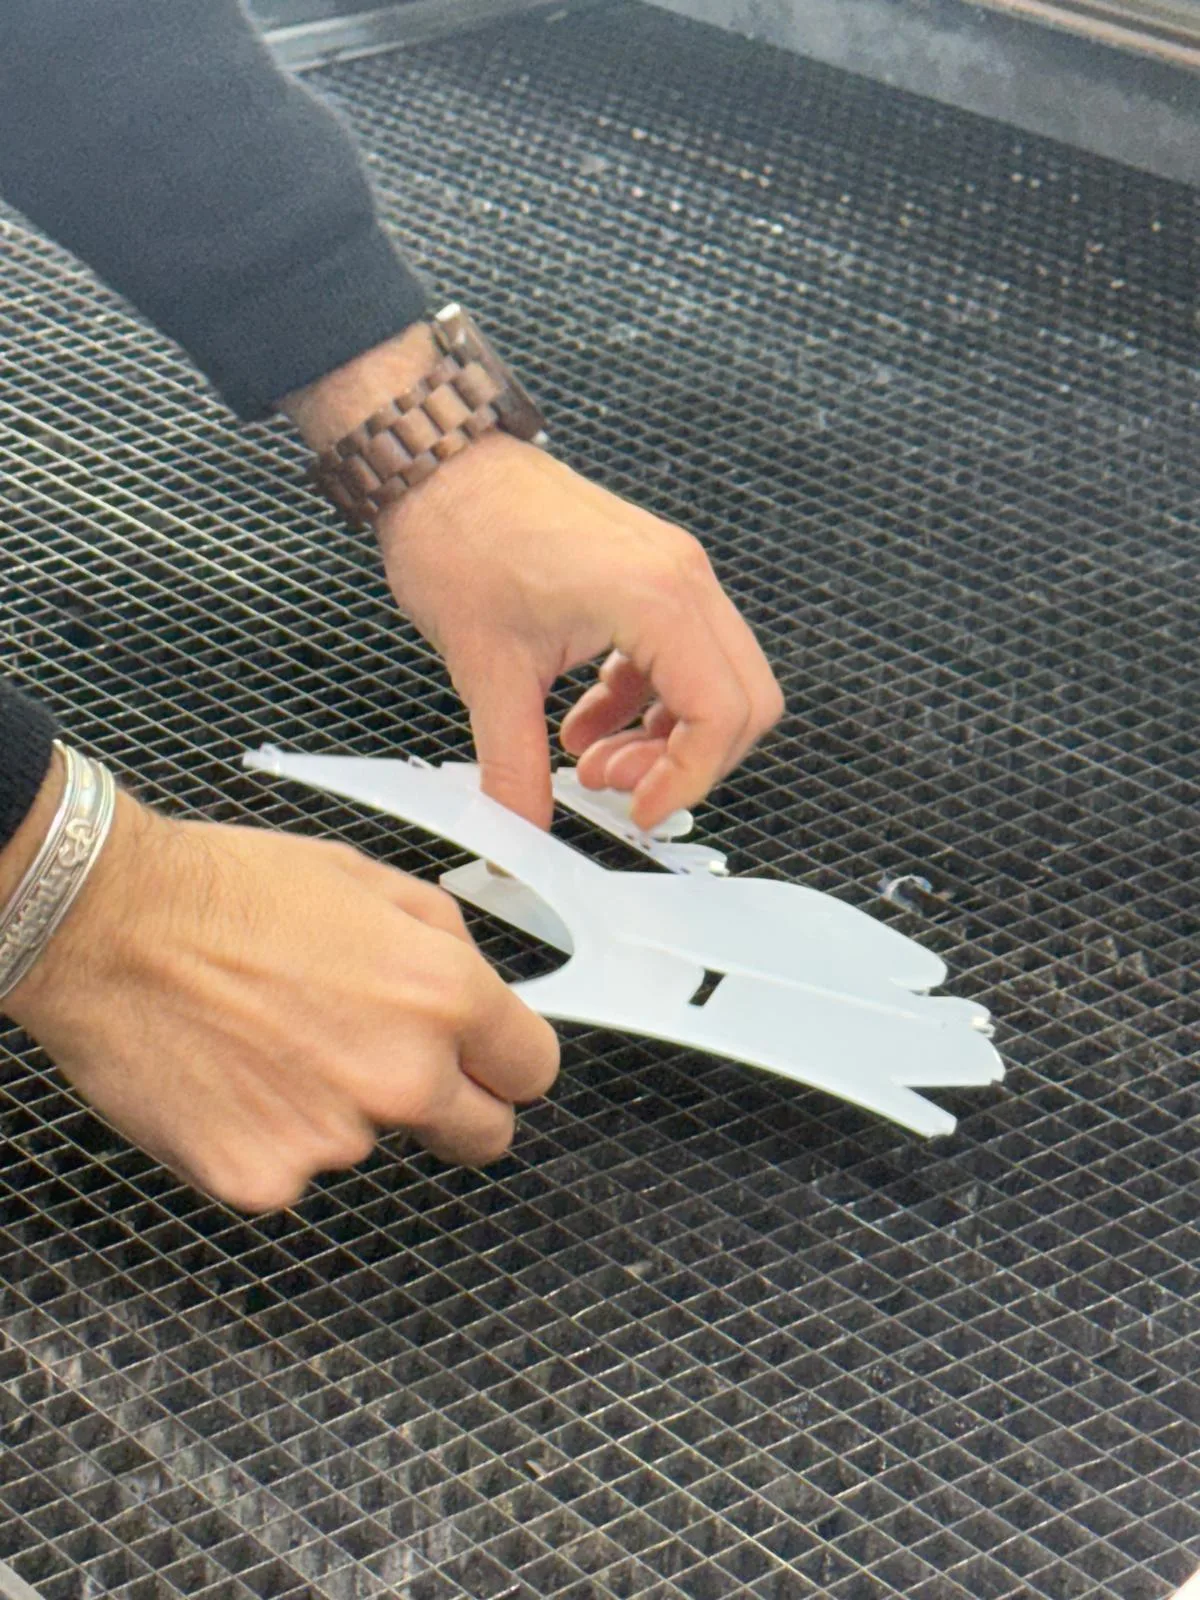
I used the settings of the test swatch to cut, and it worked but the pieces were hard to take out. so I increased the power to 90 and reduced the speed. The cuts later were perfect and the cuts fell right off the board. i had to open the drawer below the laser and colllect the little pieces since they fell into the grid.
some test parts for testing tolerance and smooth gliding of the slider and the corner nails
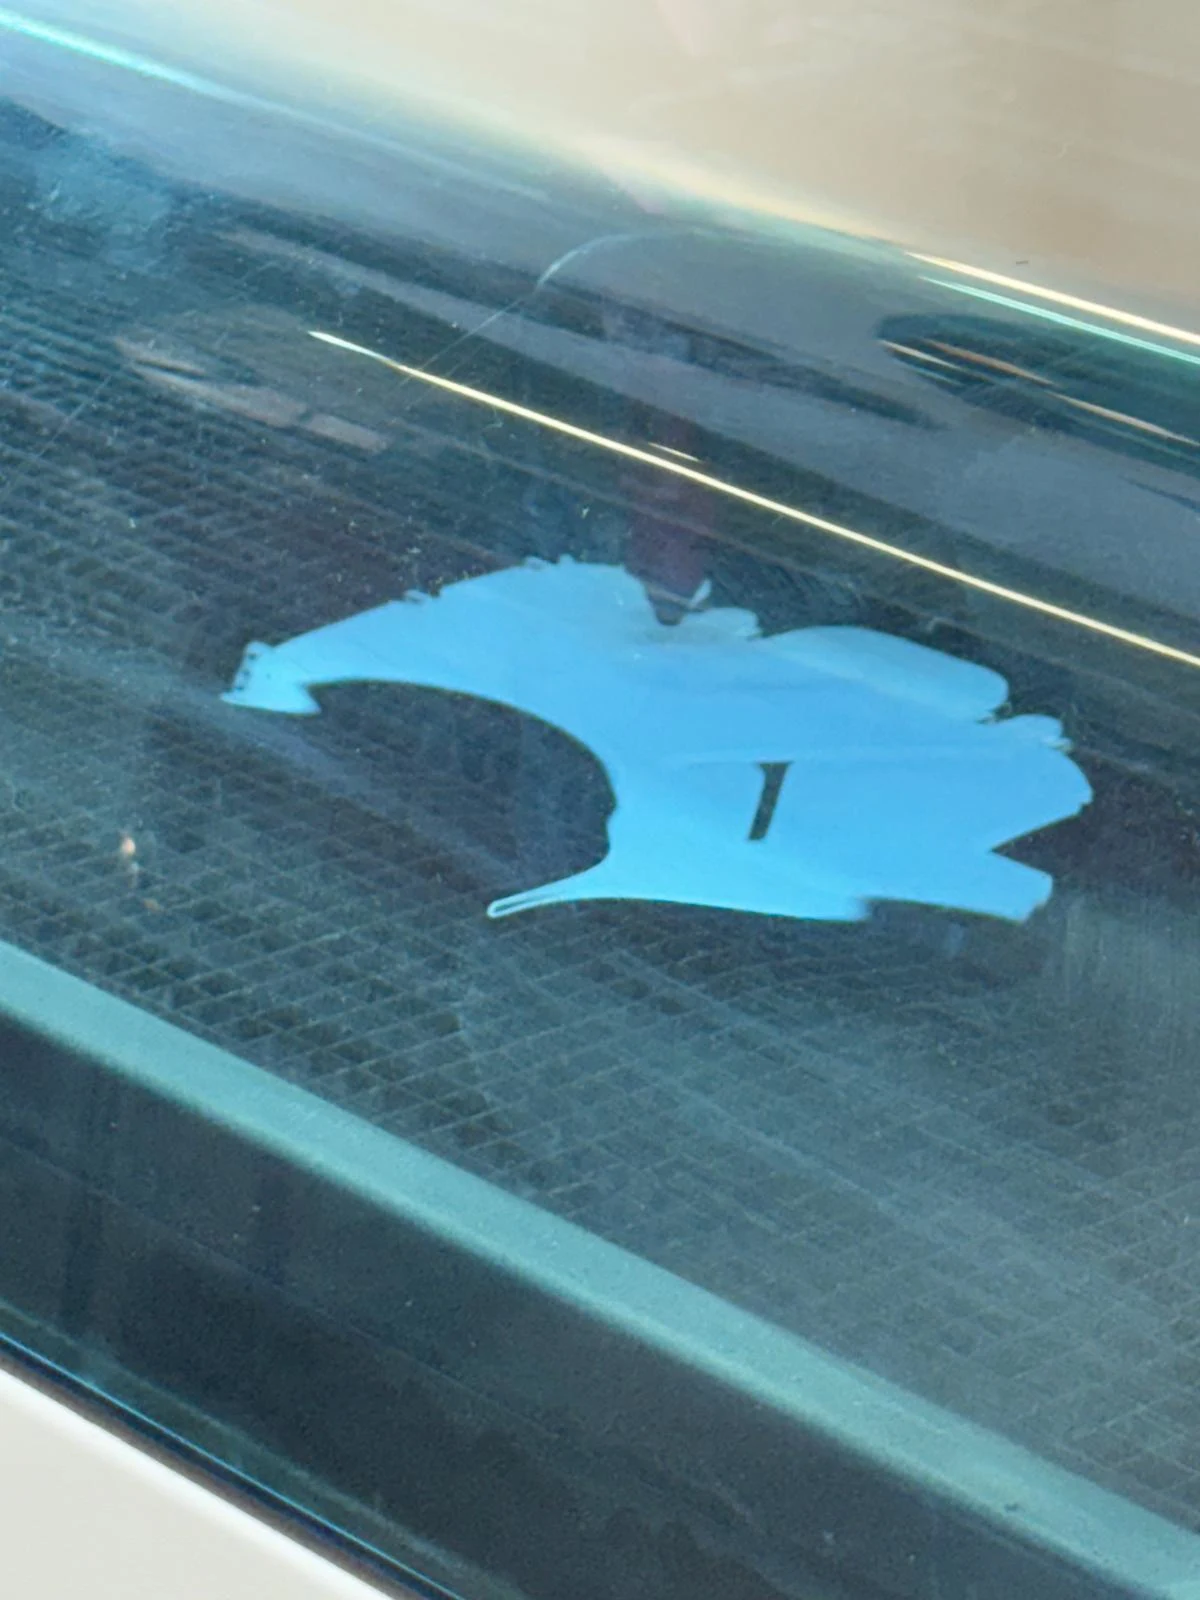
cutting the main board
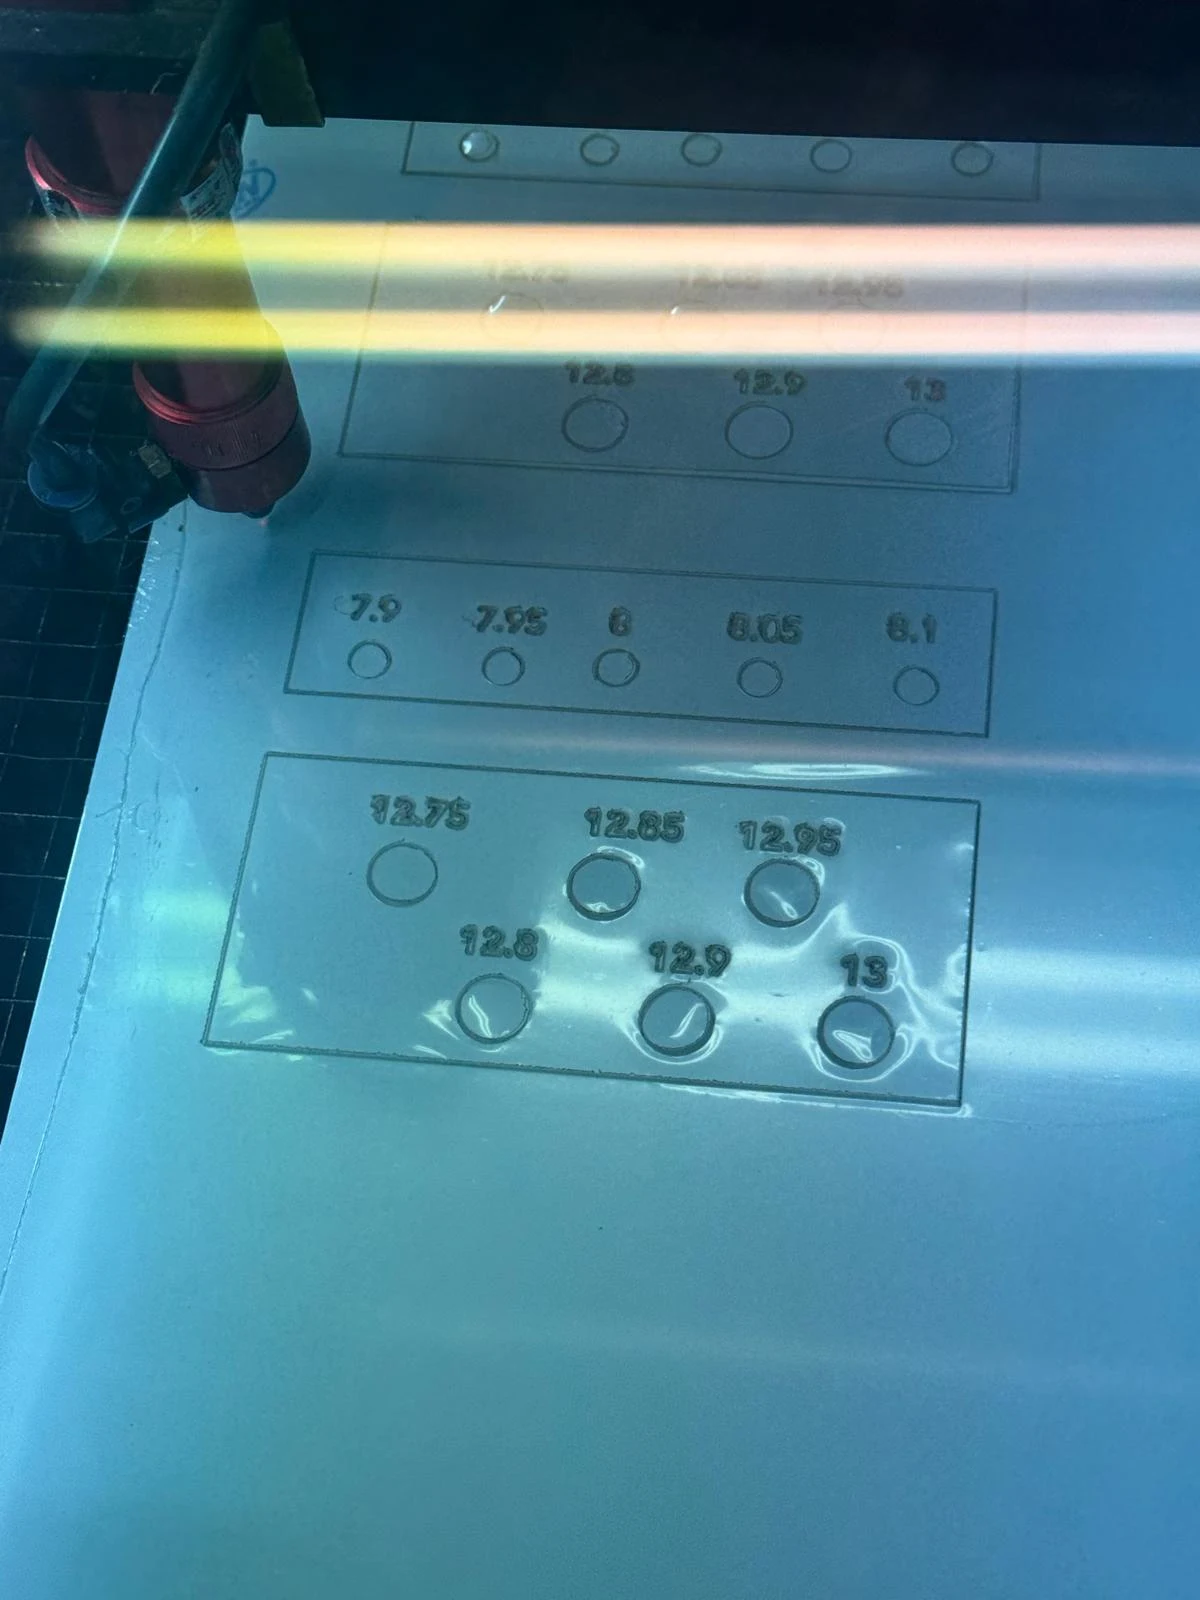
With the type set to cut, the values of 'marking' in the test swatch the cut turned out a good engraving on the tester swatches that i made.
on the main part, i used the engrave settings. The cut finished perfectly but for engraving, the laser kept going over 3 spots and repeating one like of cut. The engraving failed. I was out of time for the week so I decided to vinyl cut the text instead.

vinyl cutting
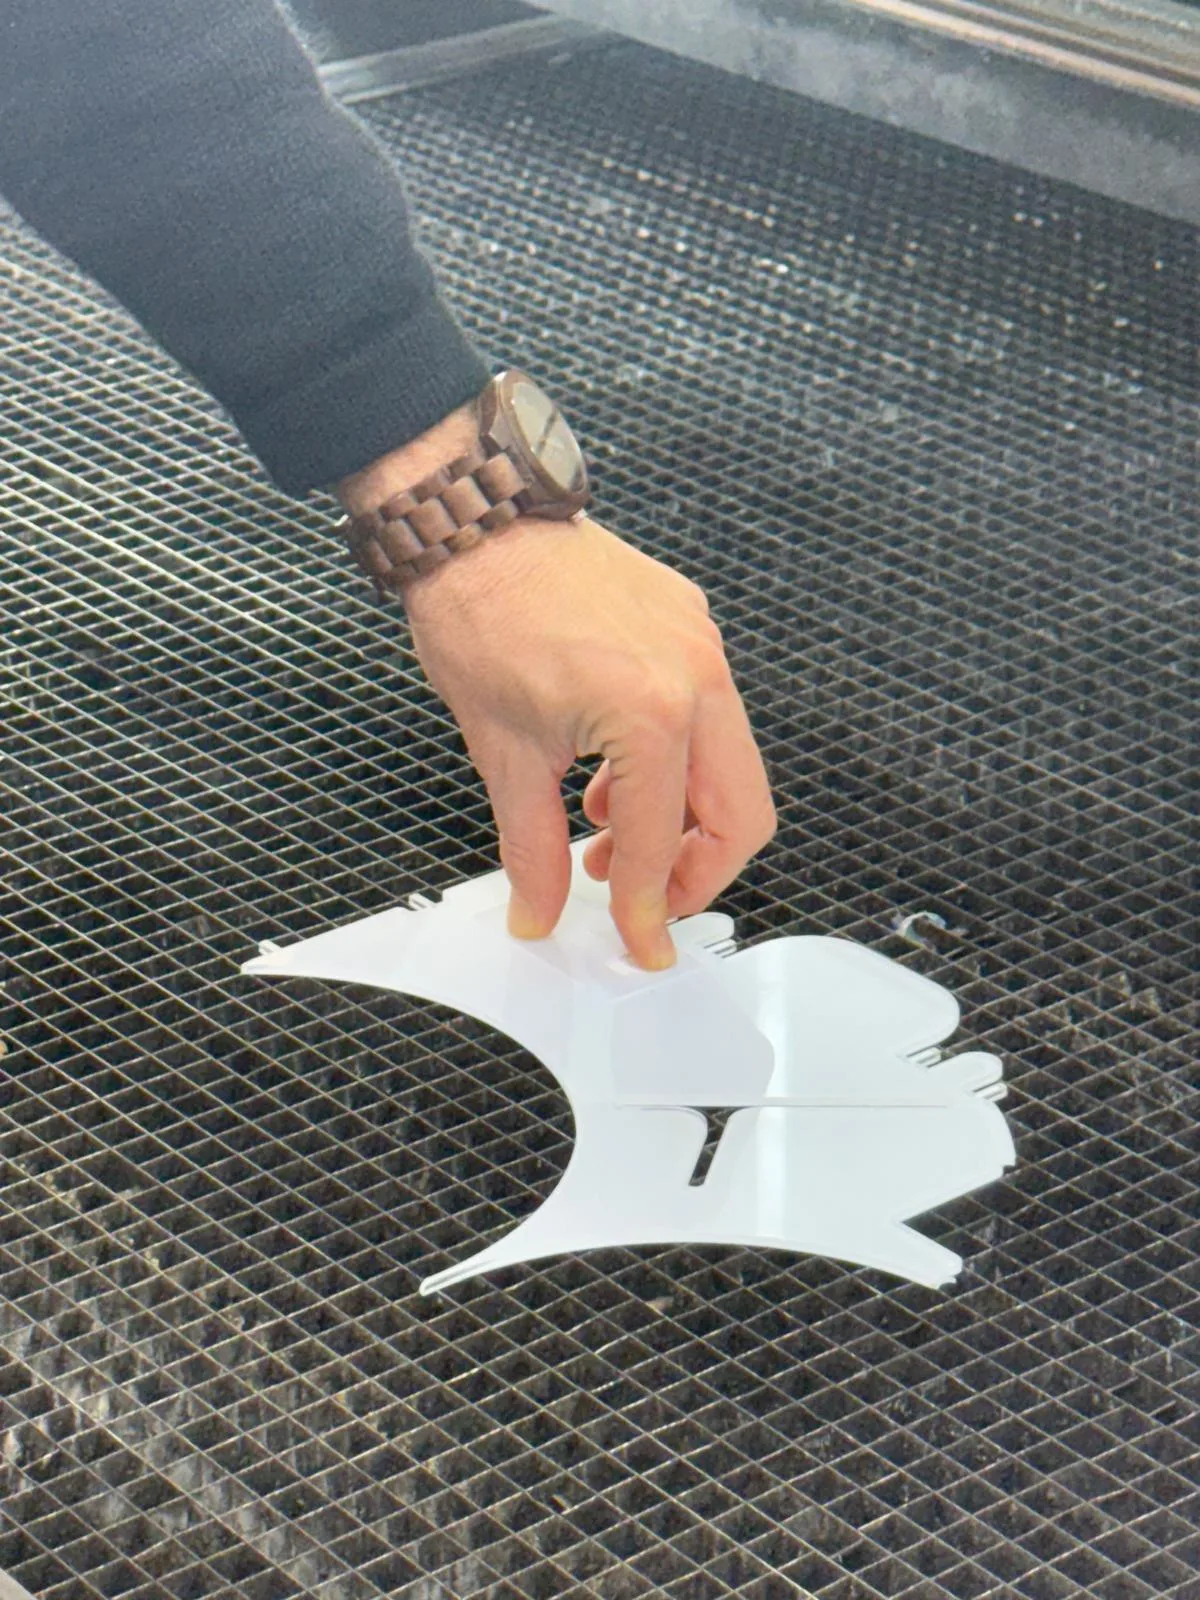
the laser lab was about to close soon and I decided to make the text detail with vinyl cutting. here are the final lasercut pieces.
getting the curves ready in rhino
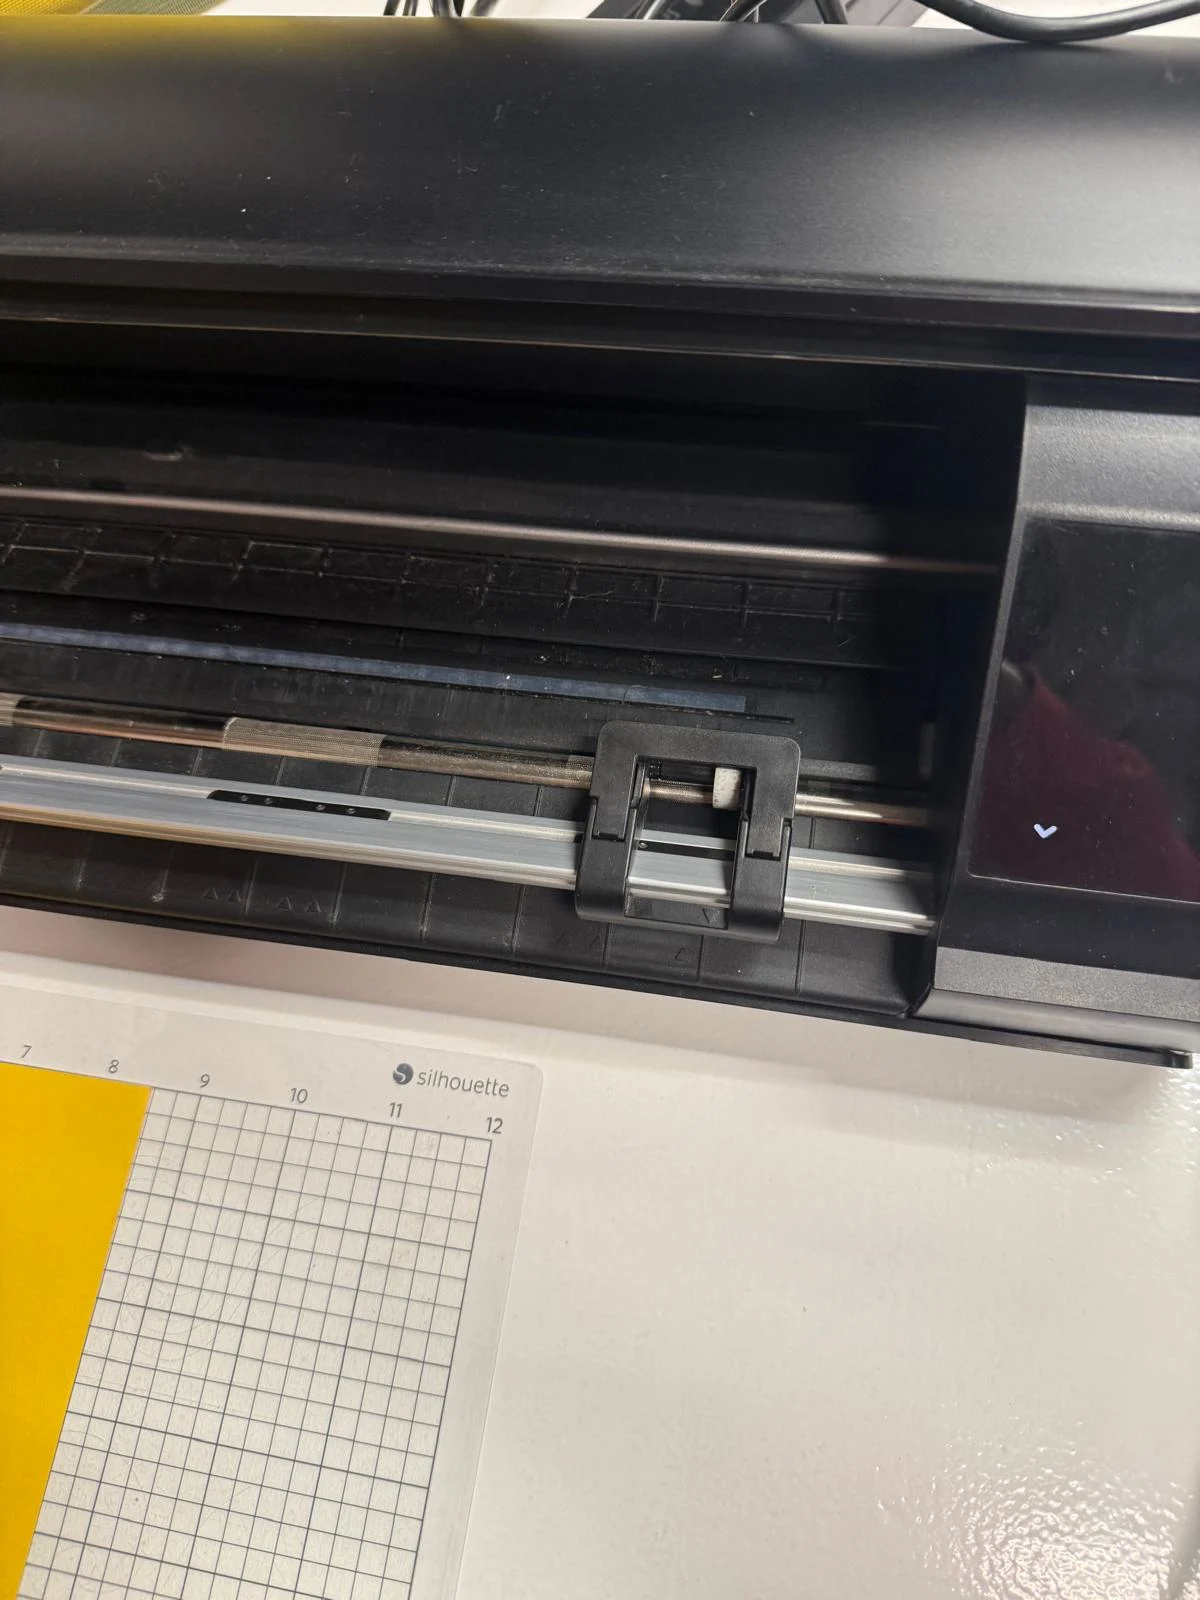
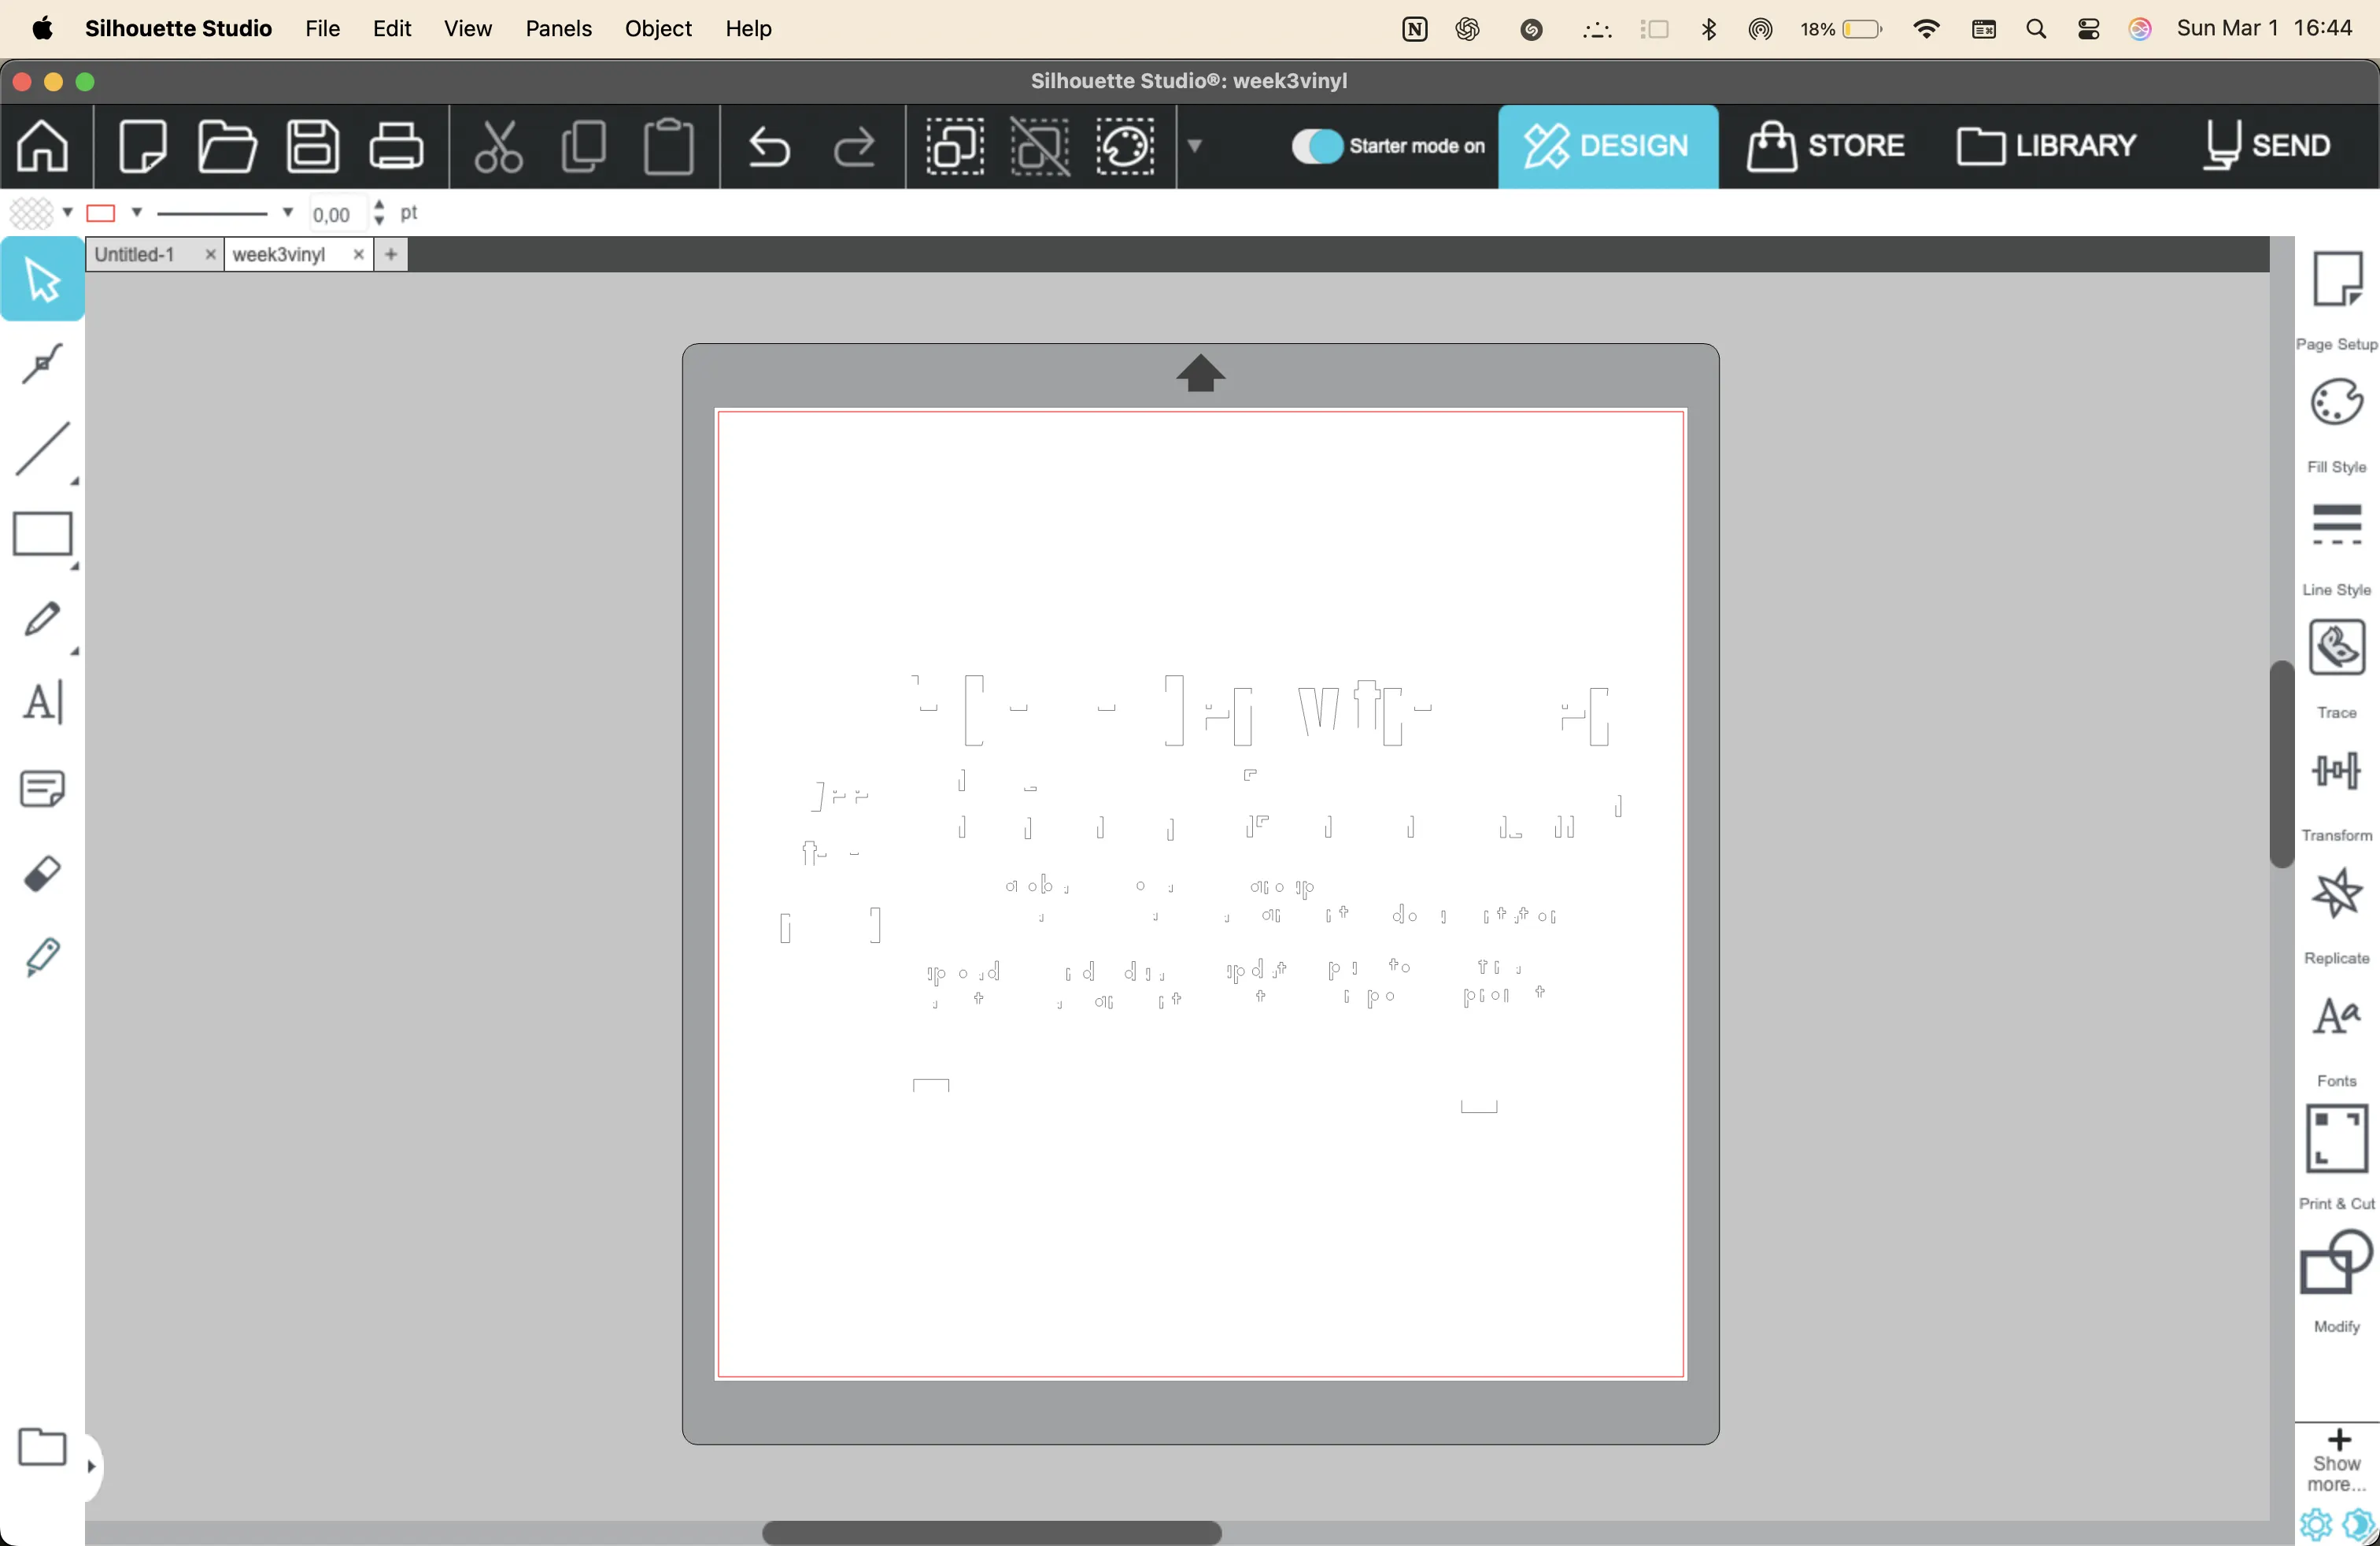
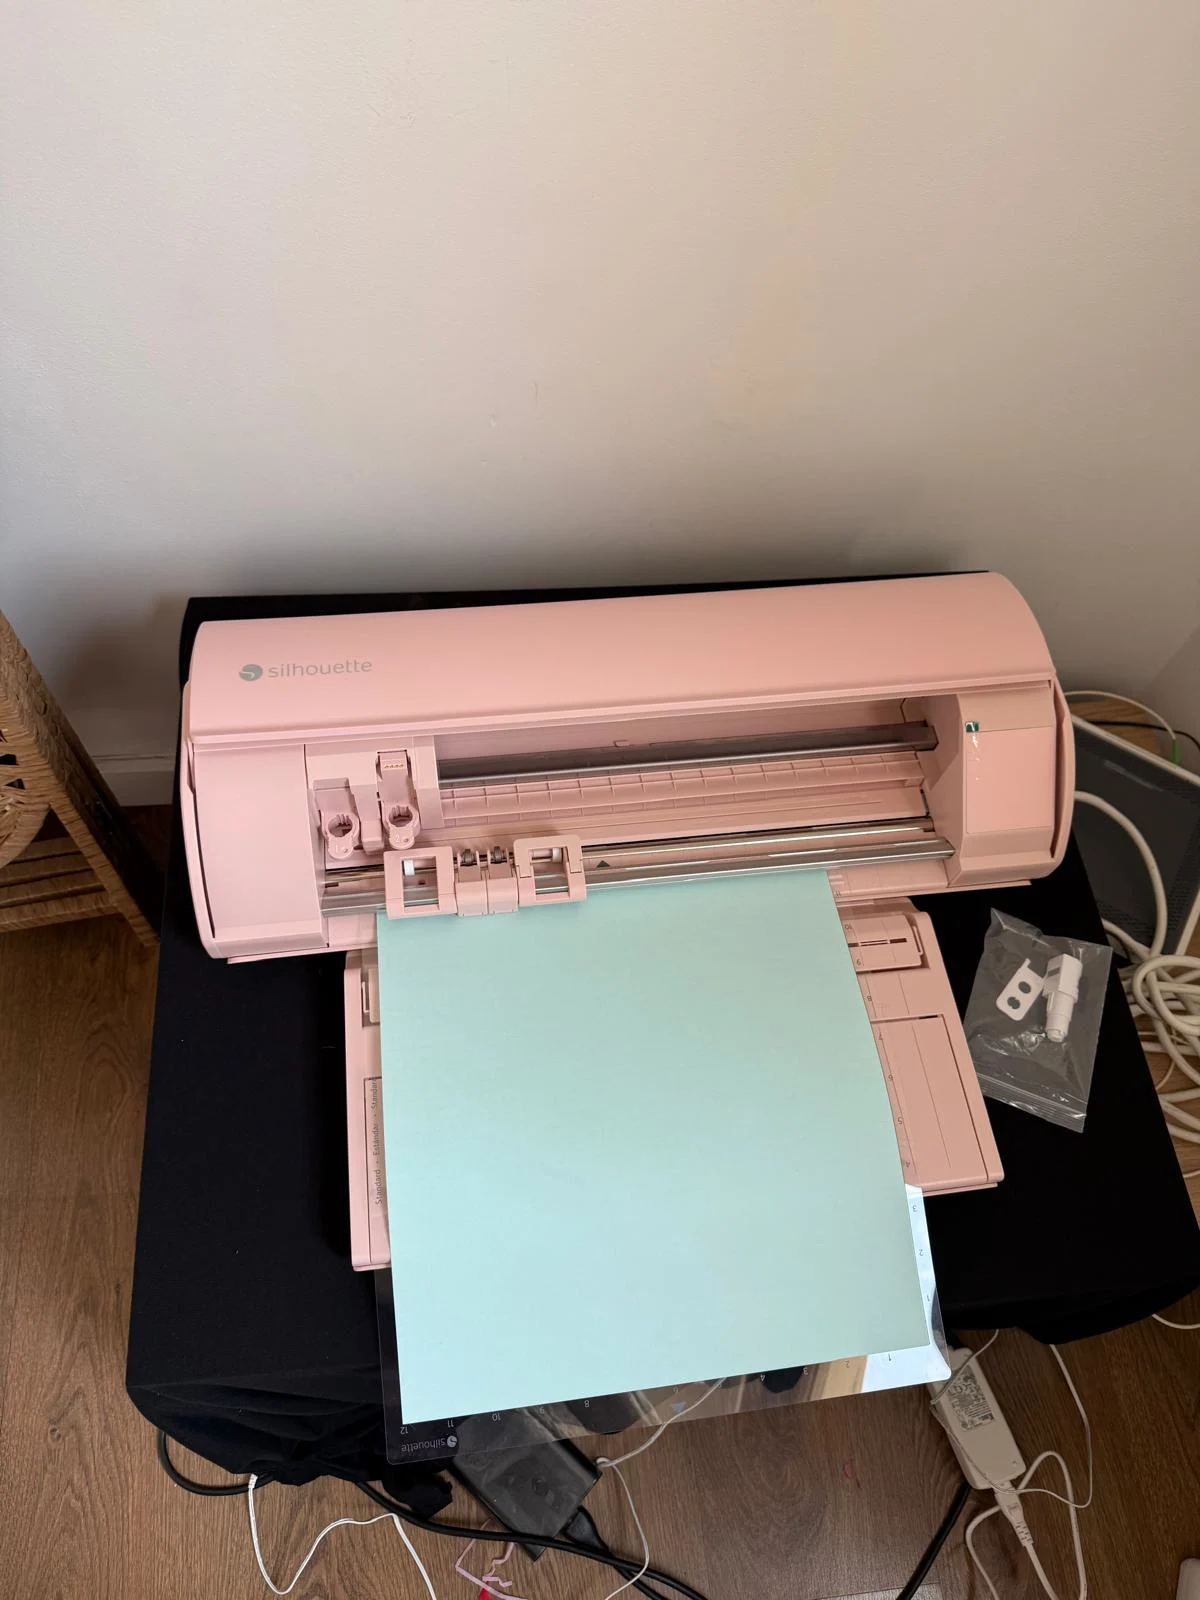
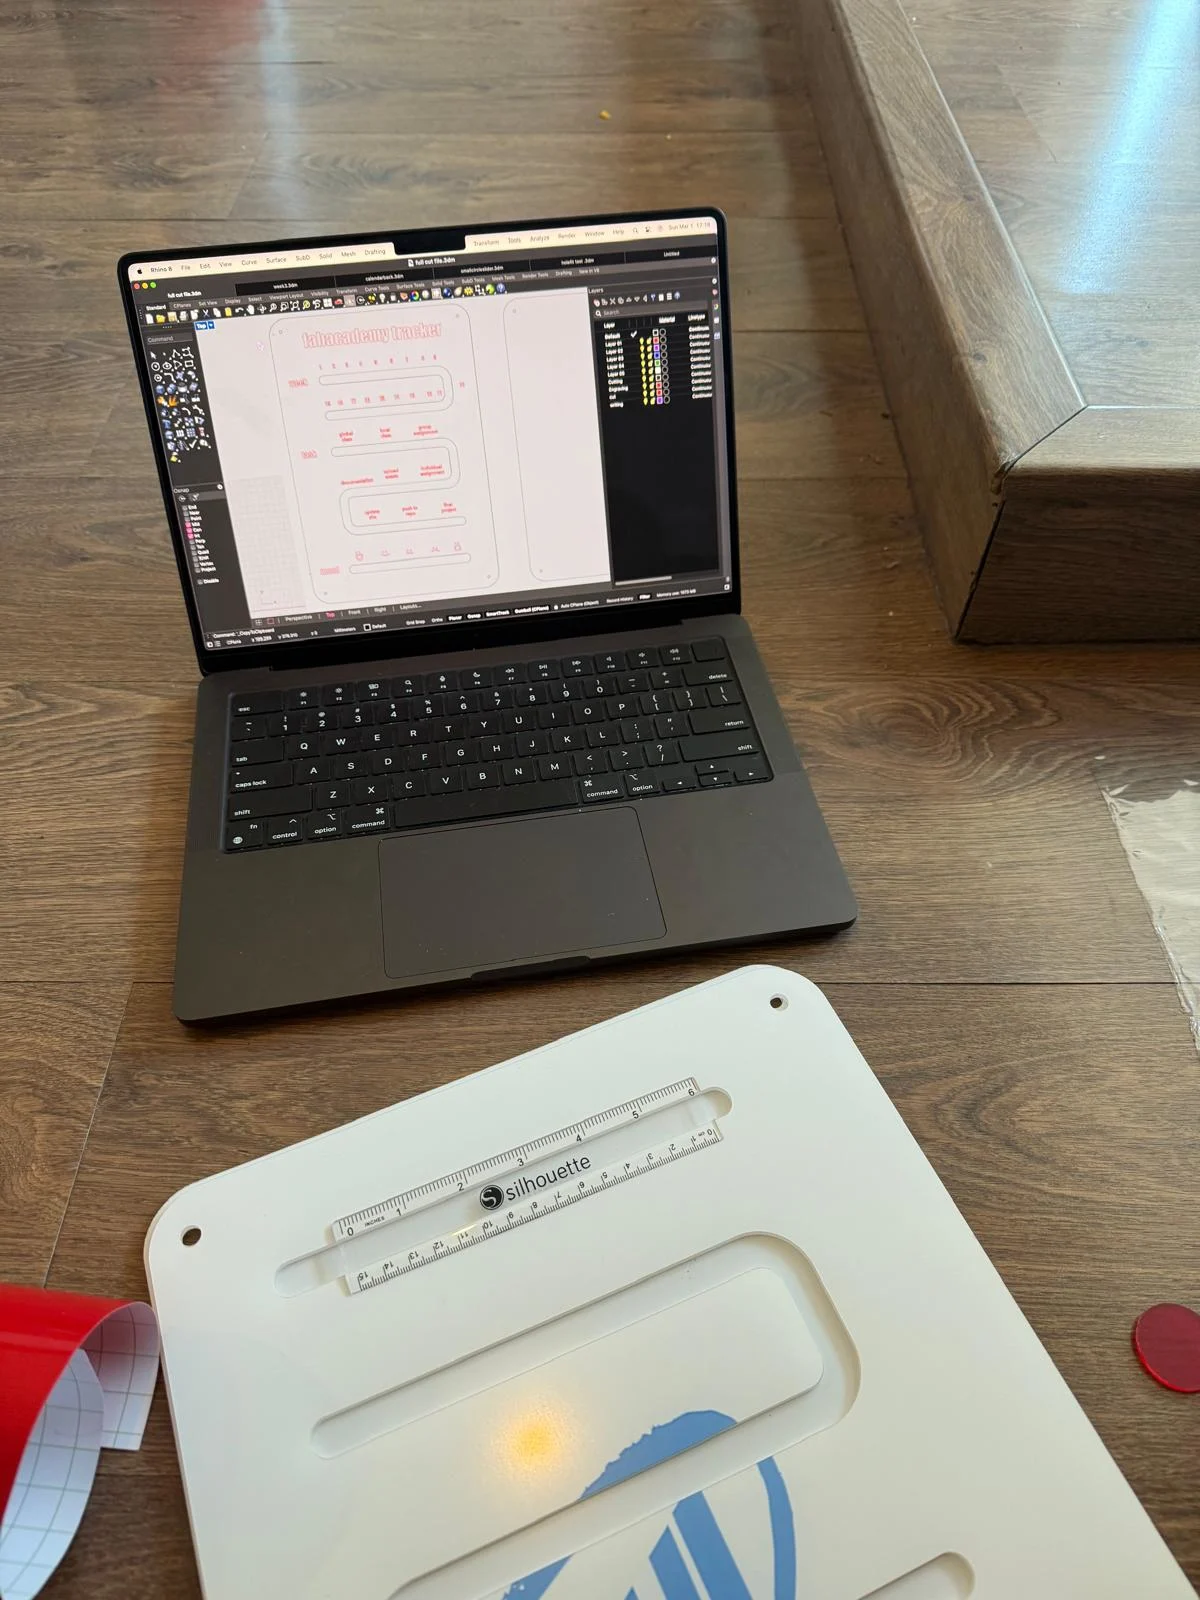
fir cutting I used a silhouette cameo 5 and the software silhouette studio to prepare for cutting
the image exported into silhouette studio in a broken way.
I asked Google and in the forum it said to export with a better scheme like 2007 Polylines. it worked!
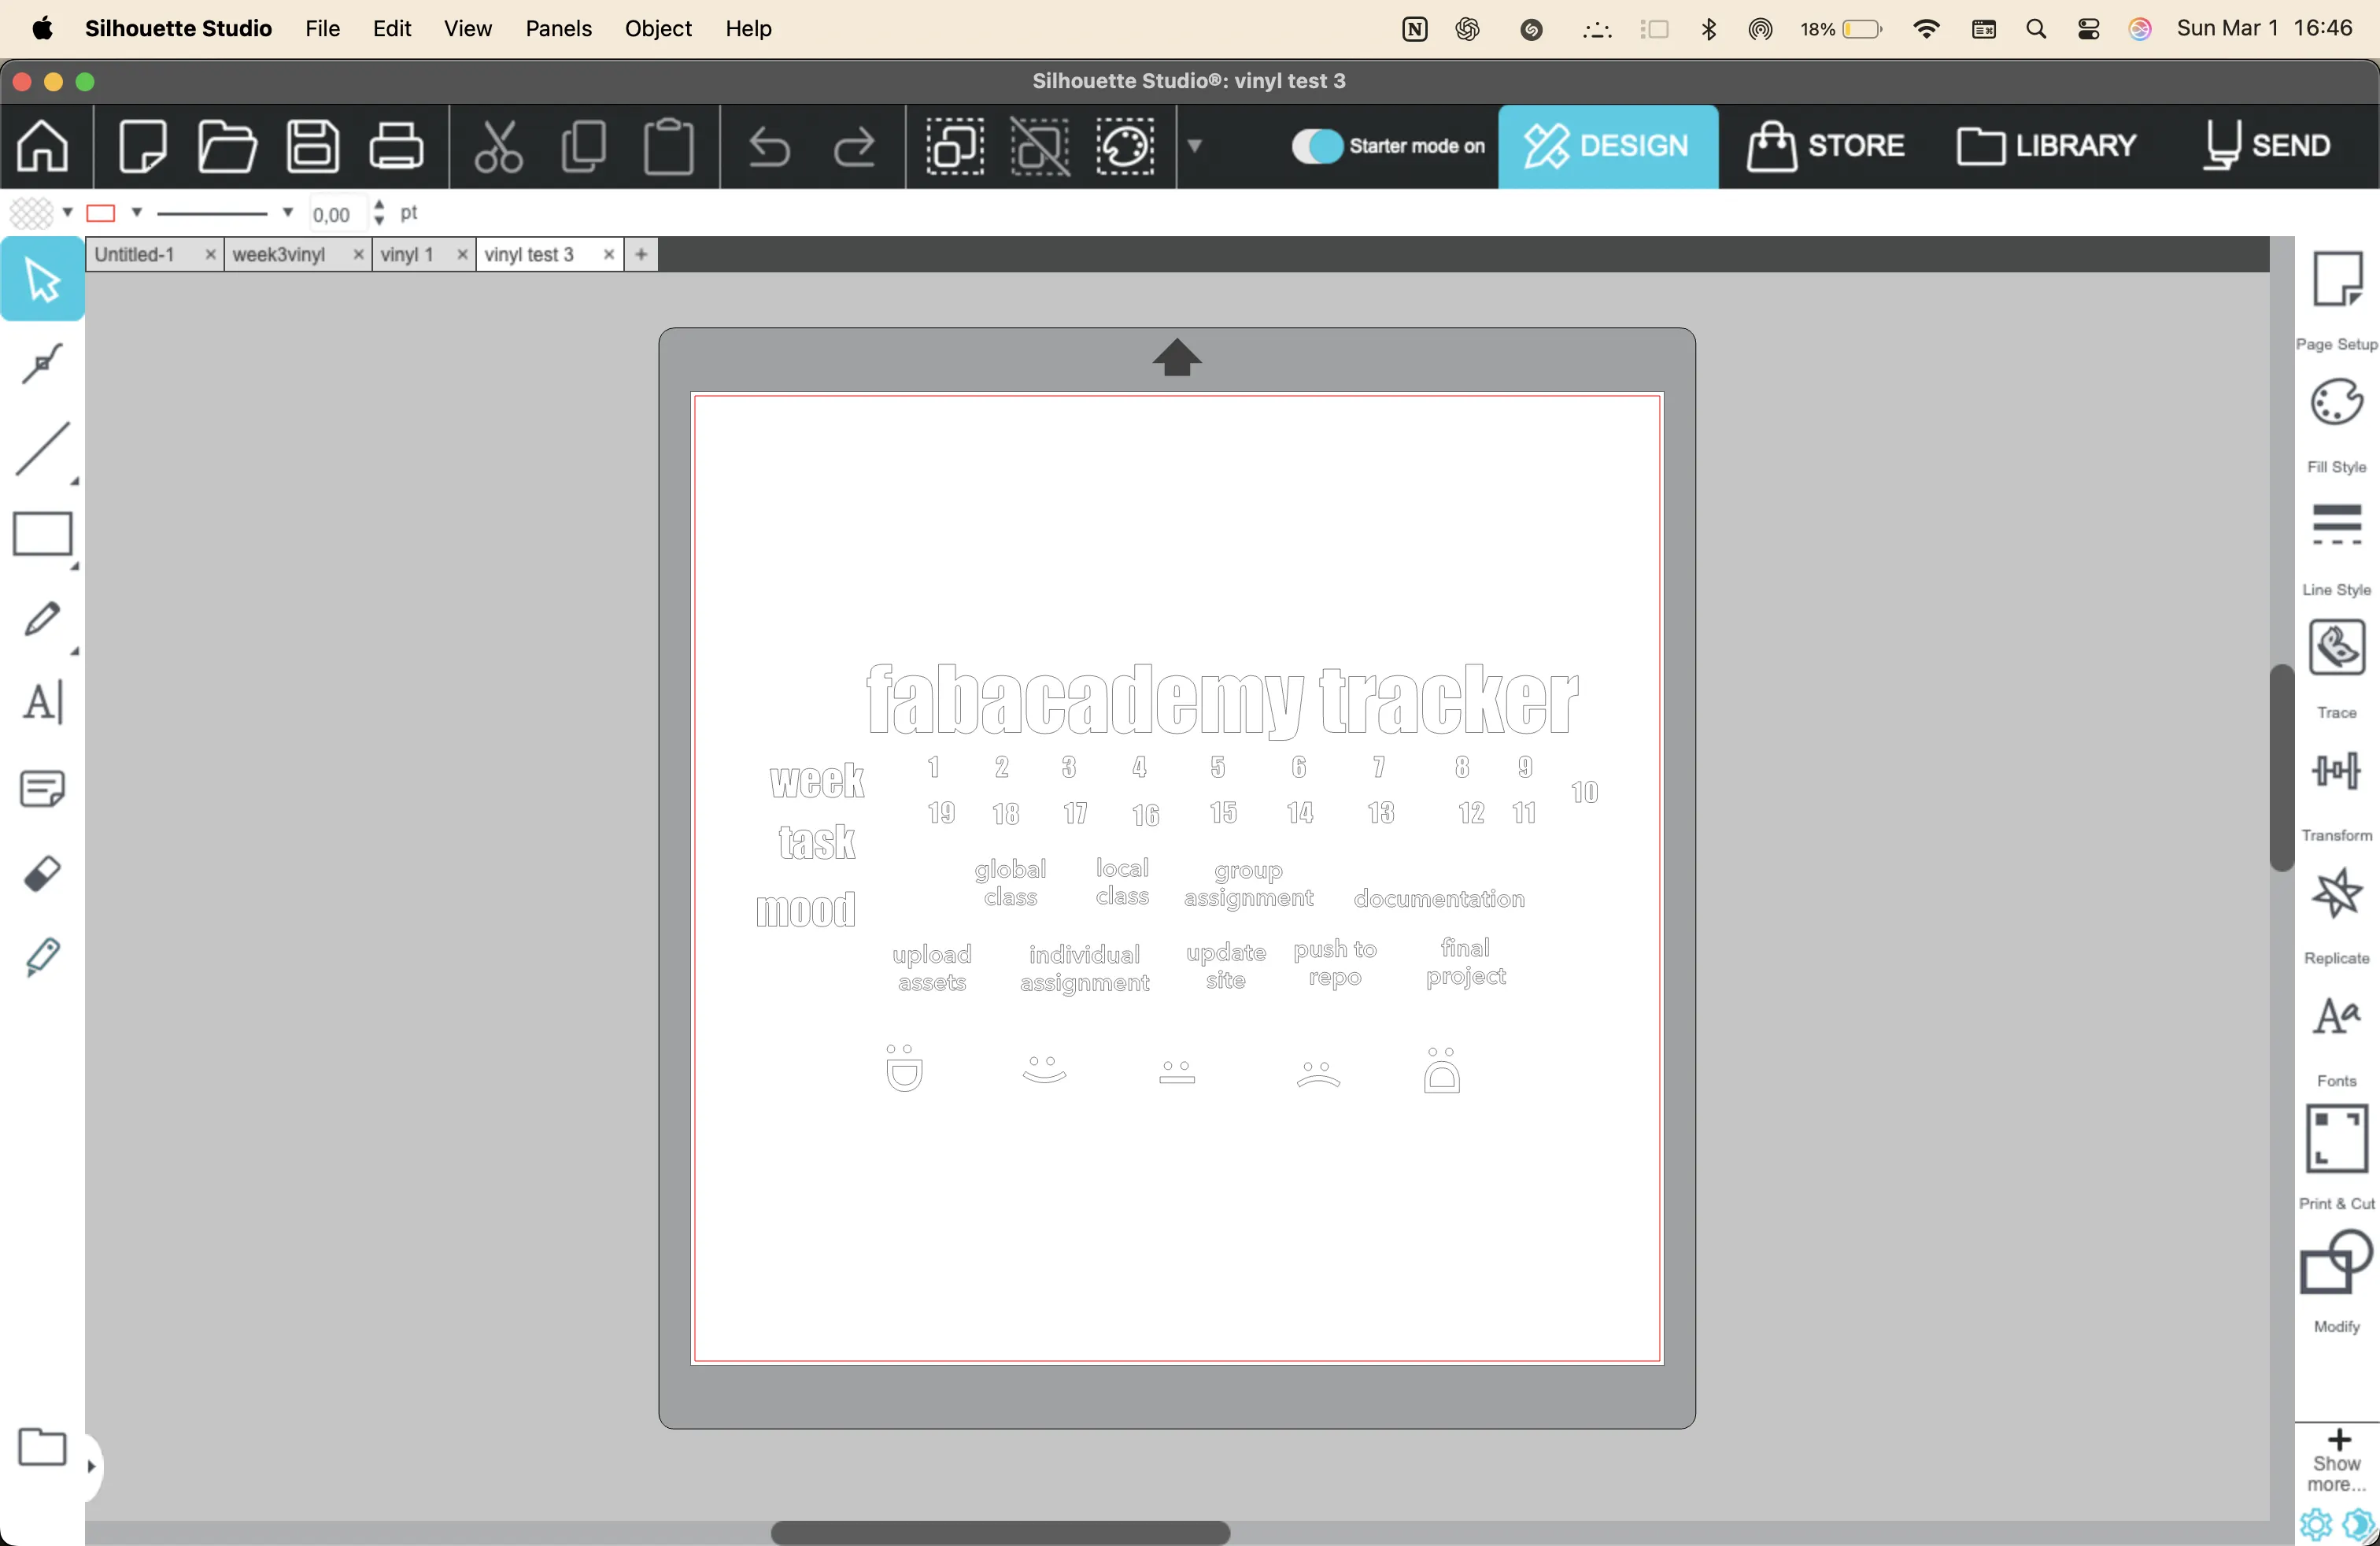
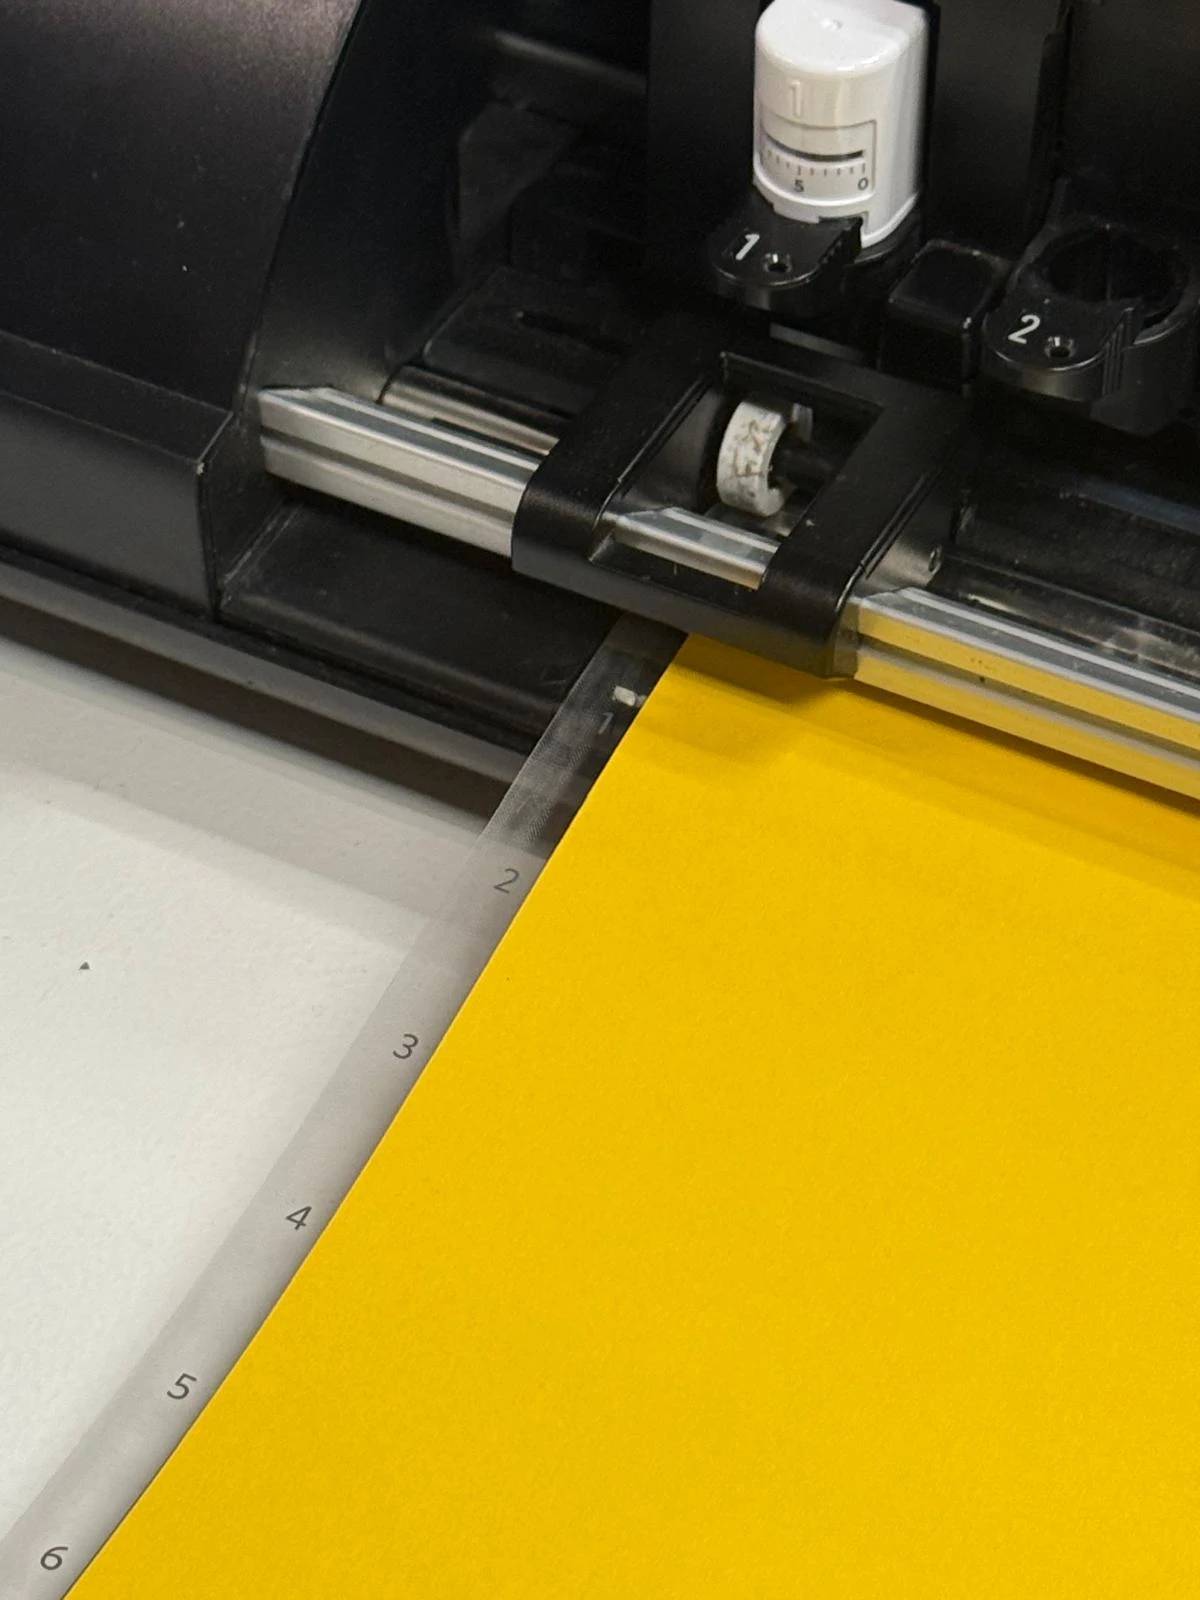
Starting the cut by doing a test
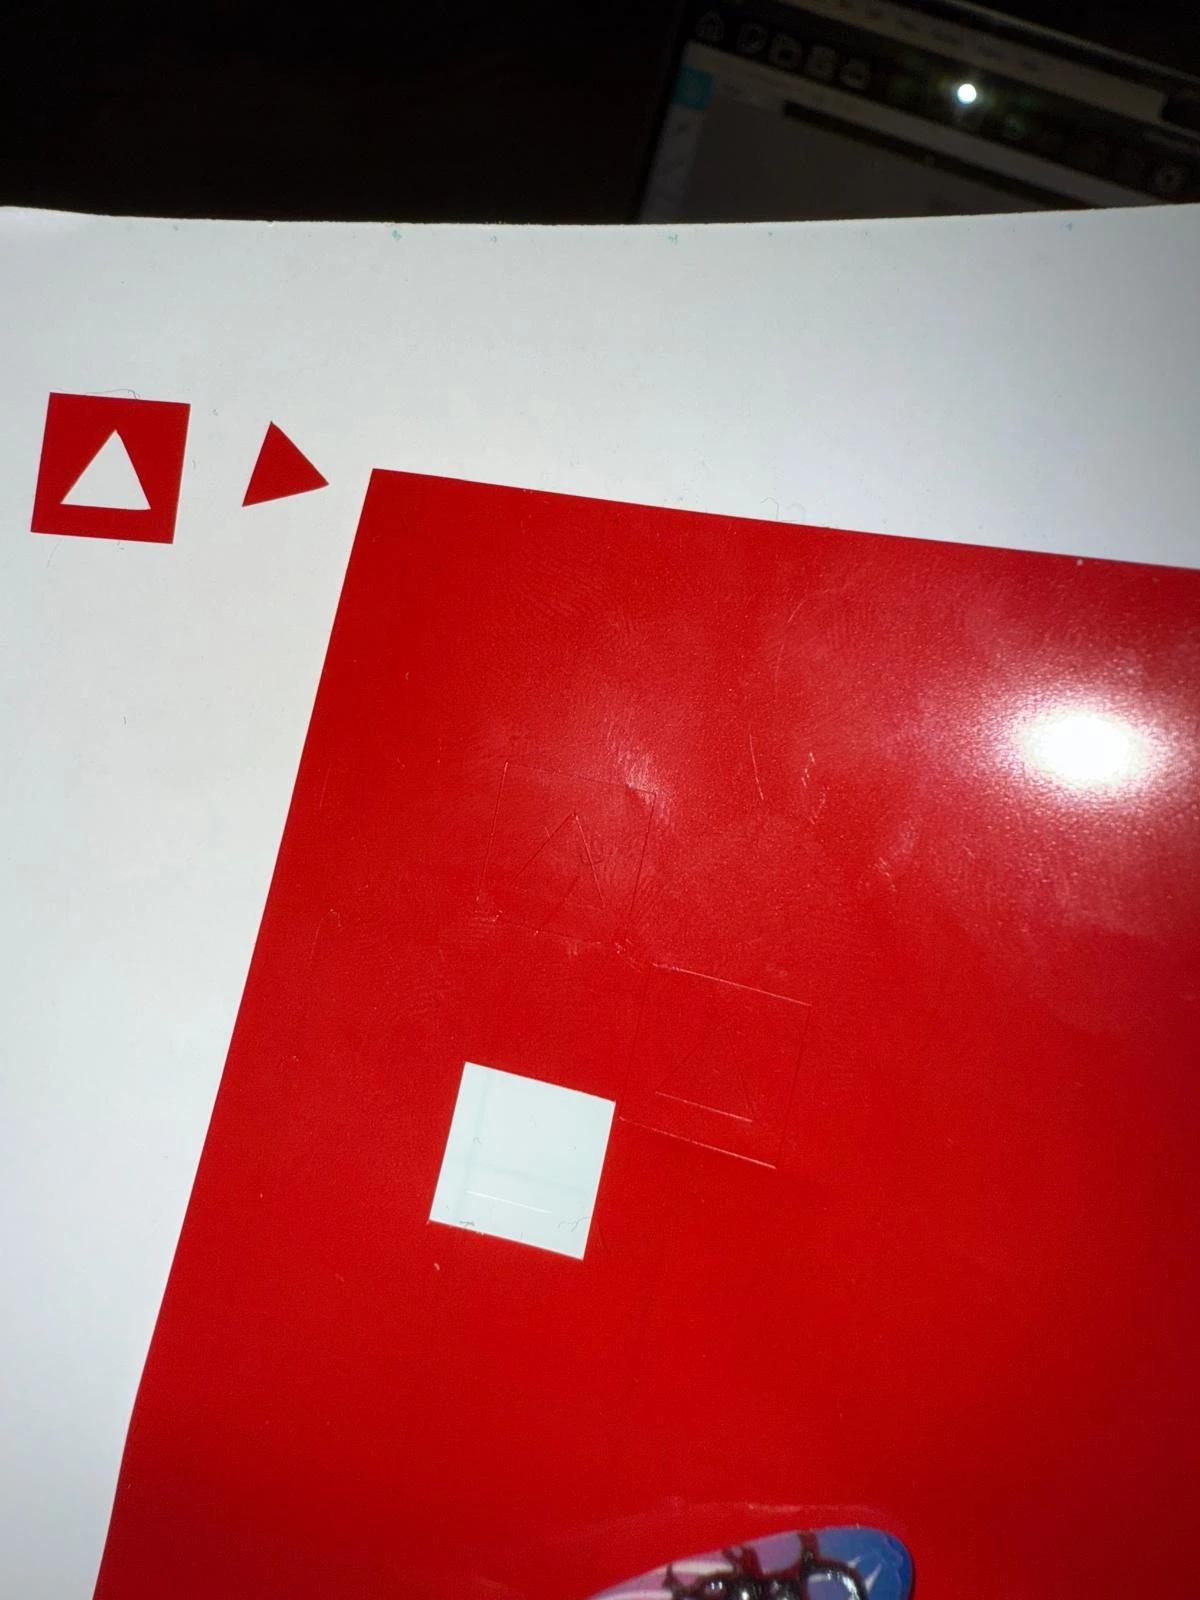
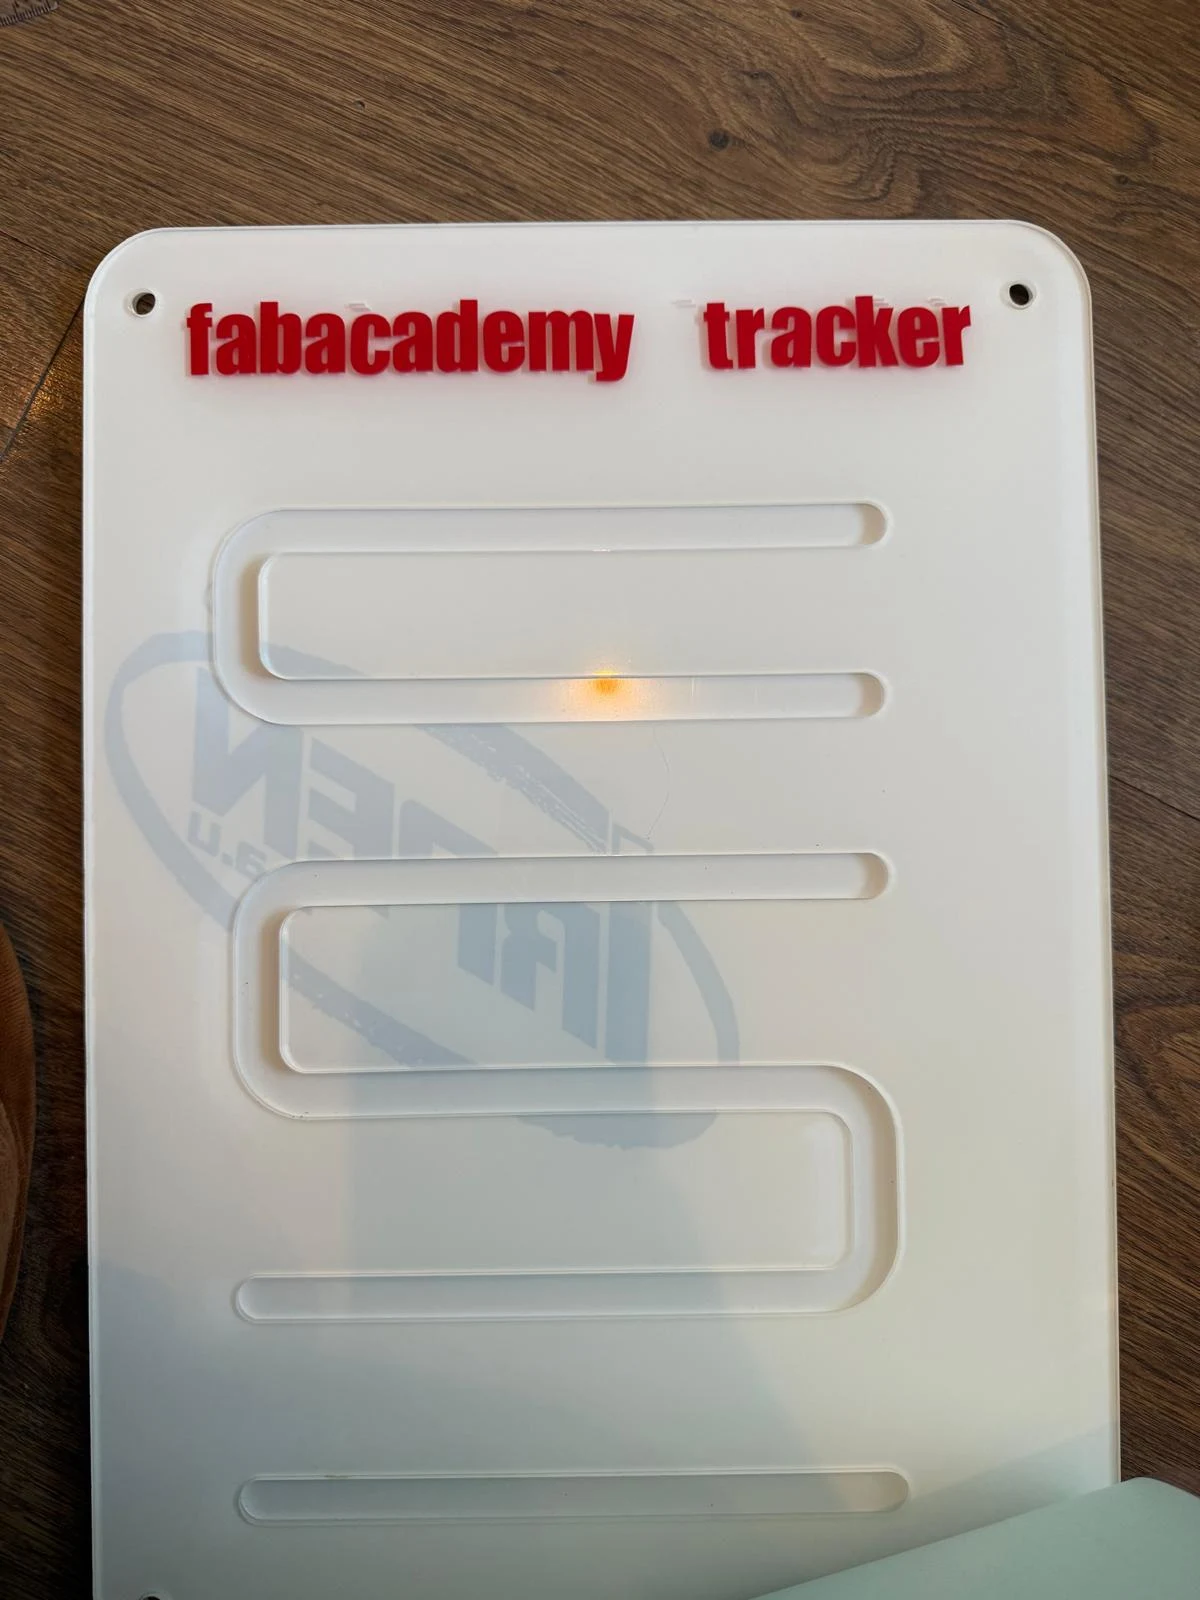
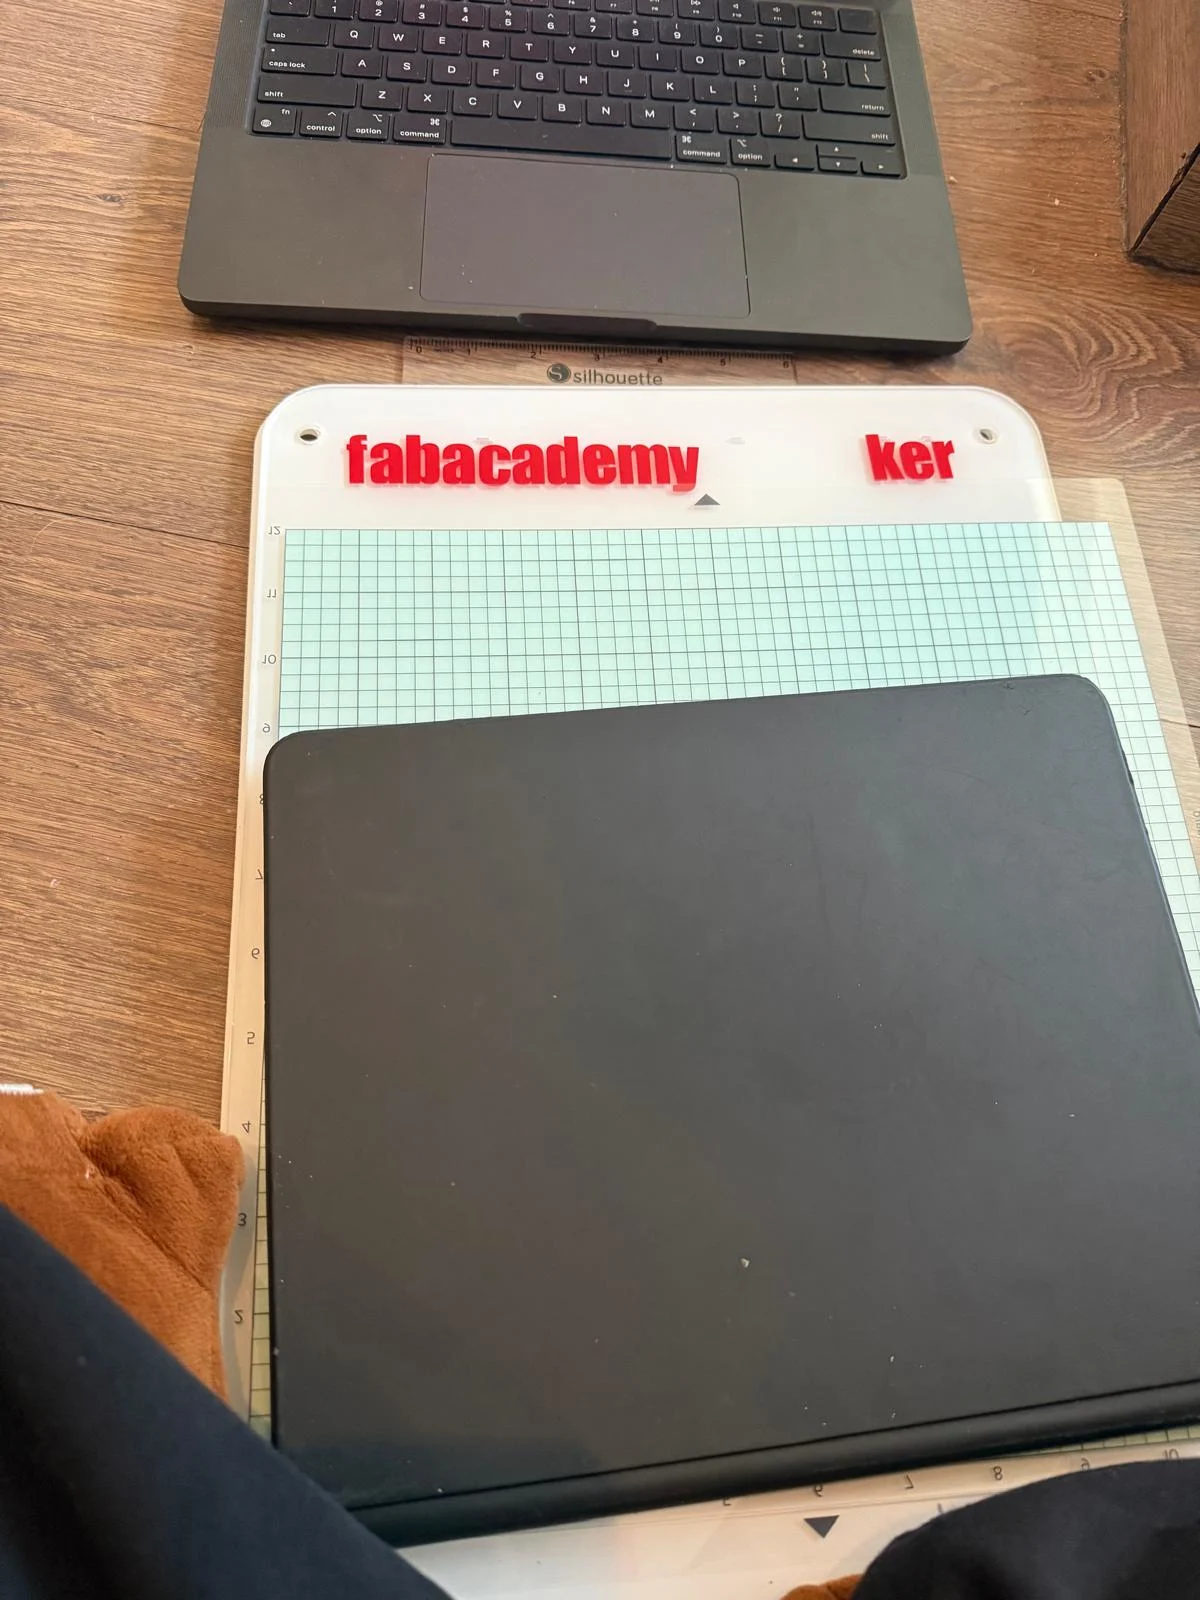
cutting the vinyl and sticking onto the acrylic base.

i noticed way too late that i vertically flipped the base and stuck it on the other side. So I just accepted it and now it works right to left :)
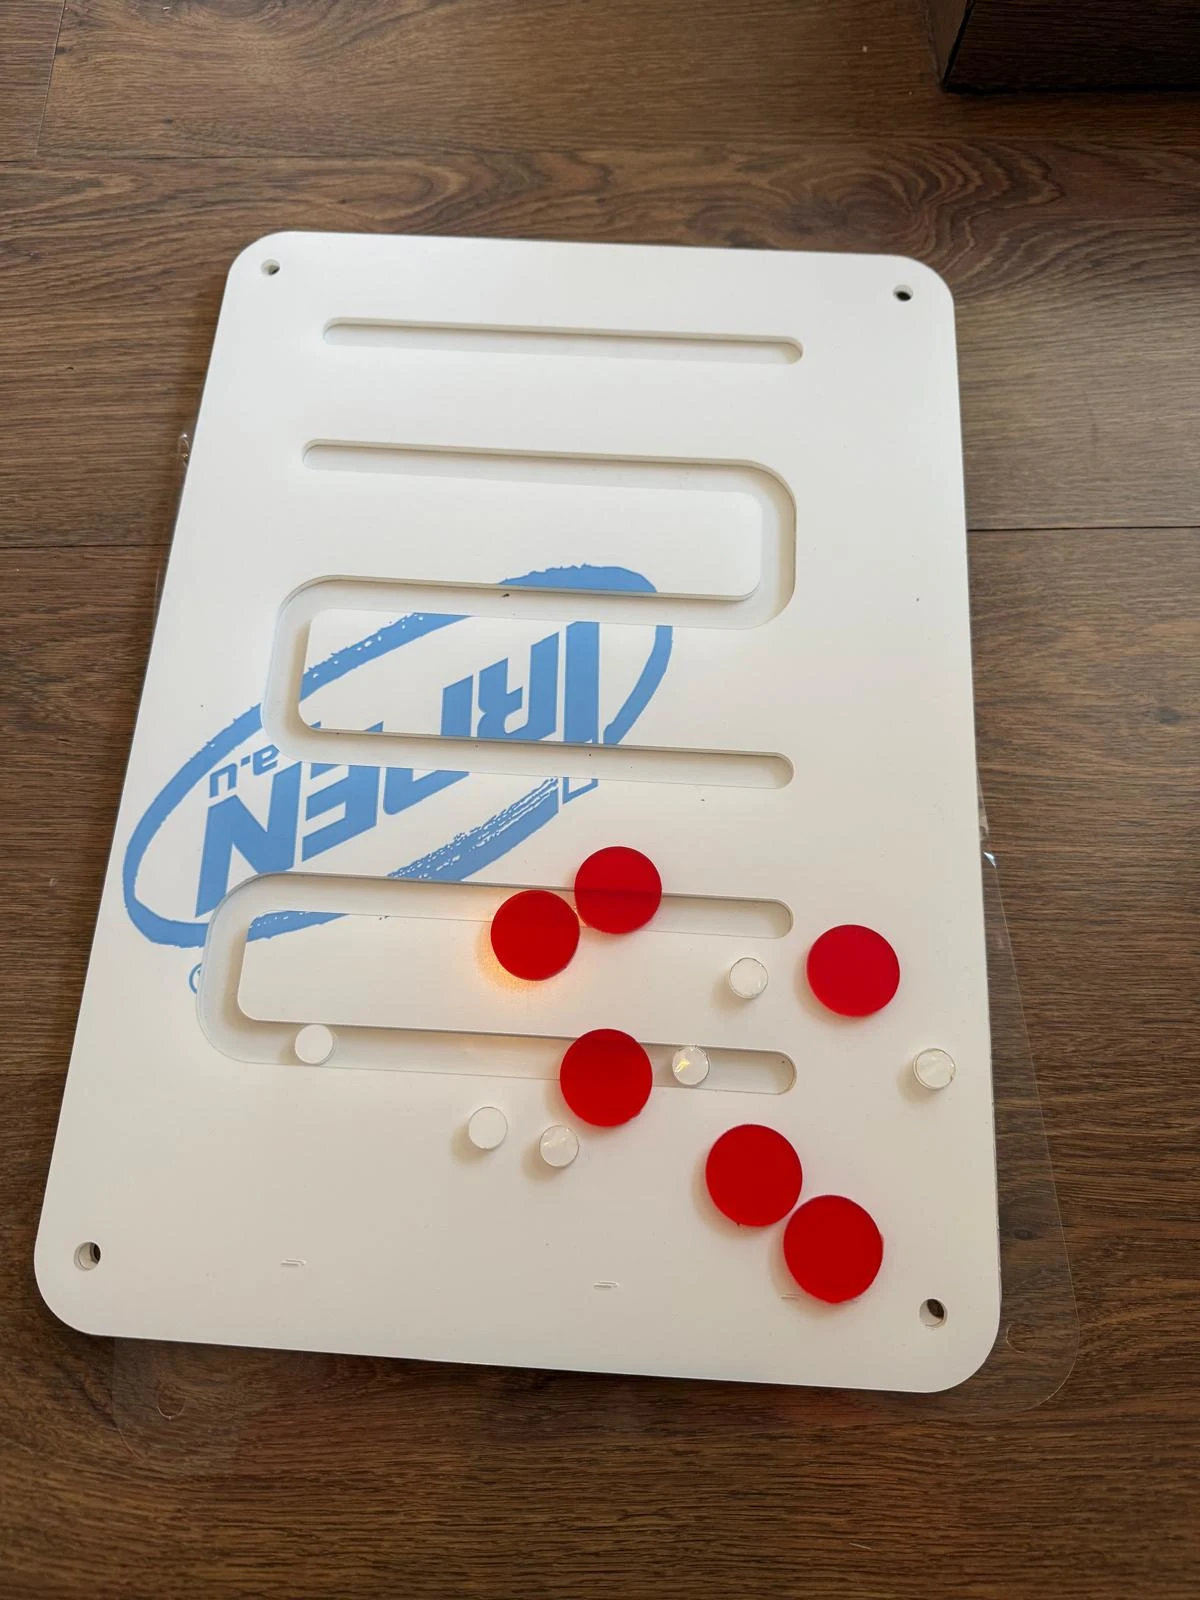
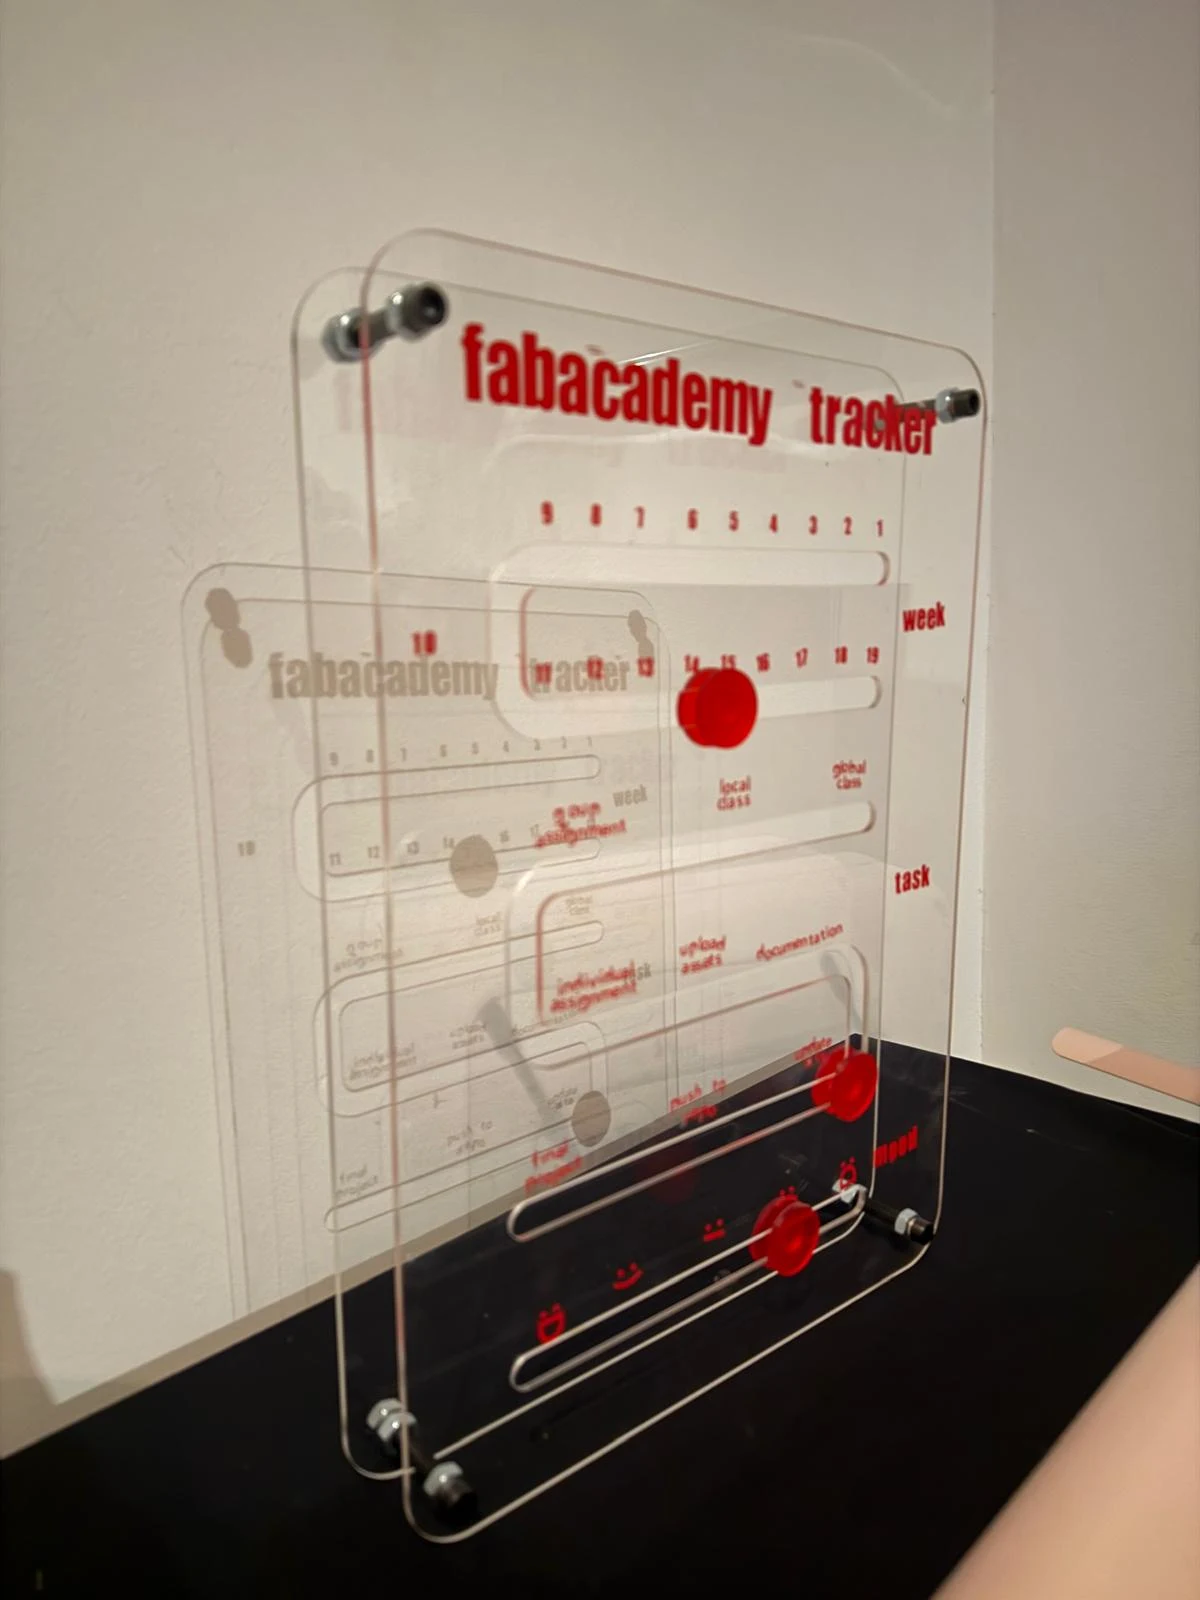
assembling the pieces of the tracker
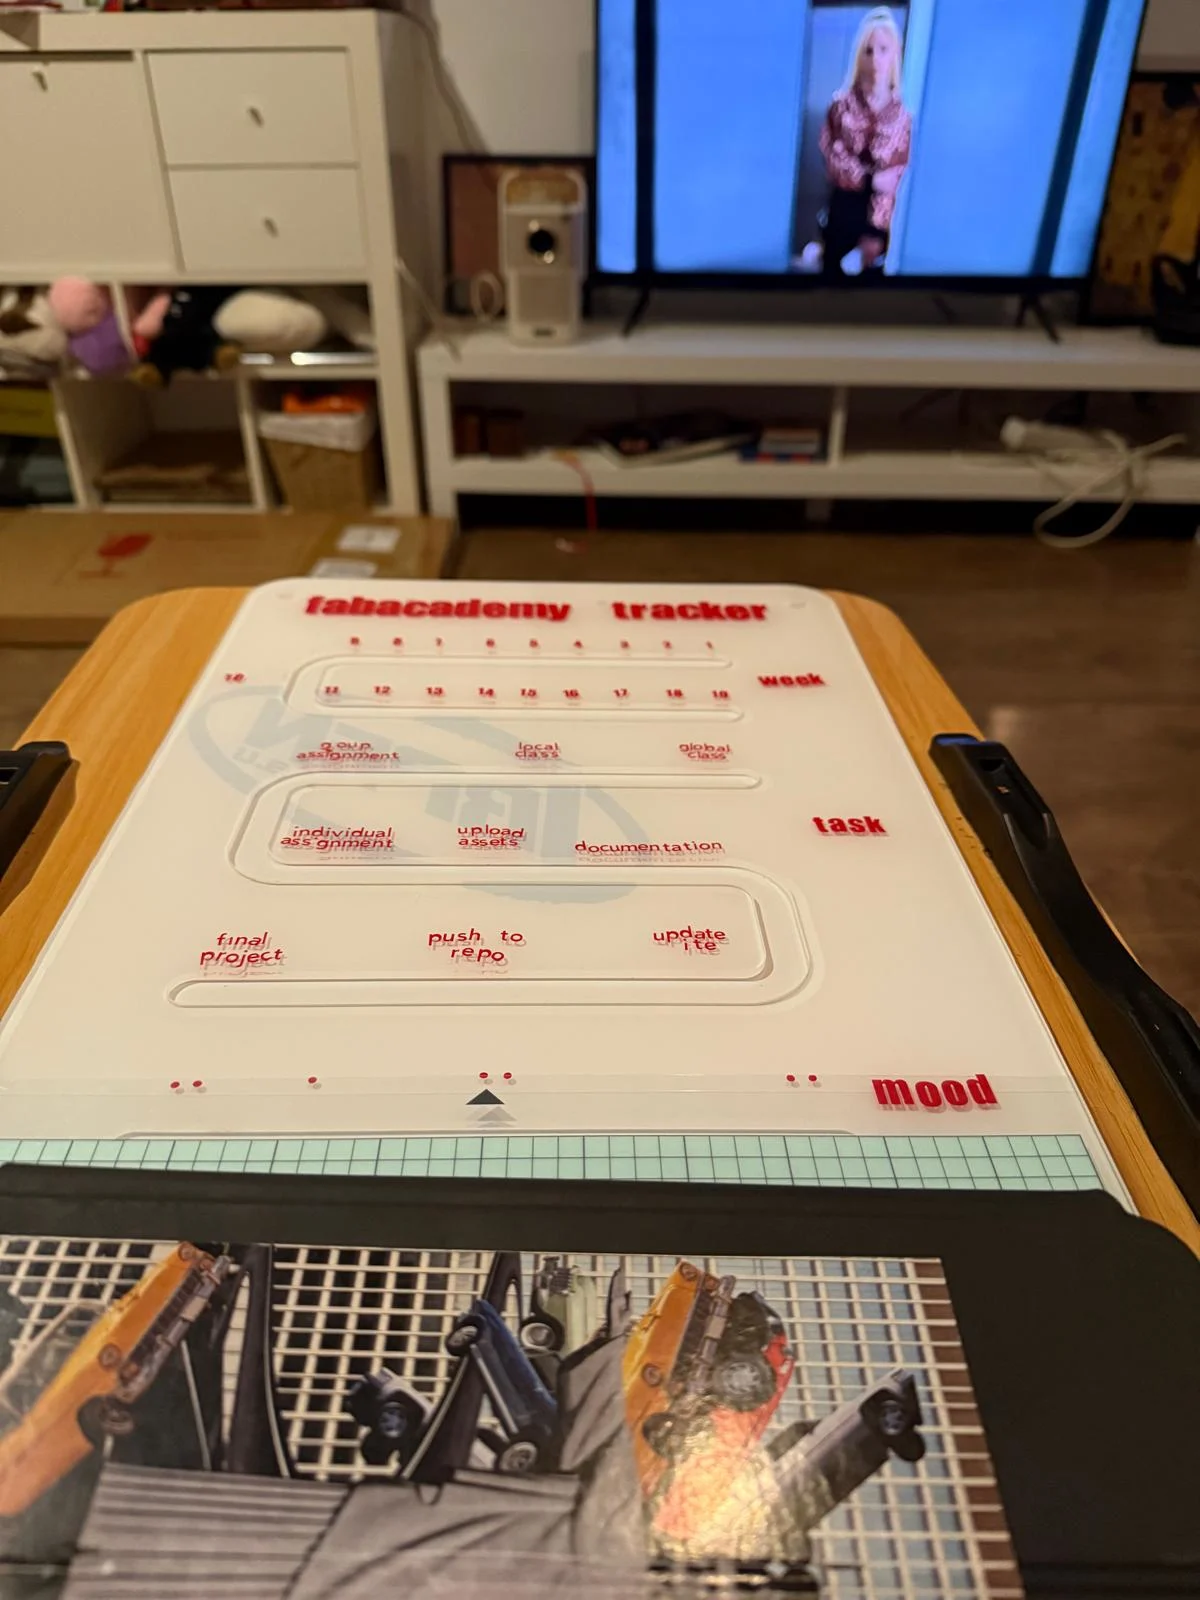
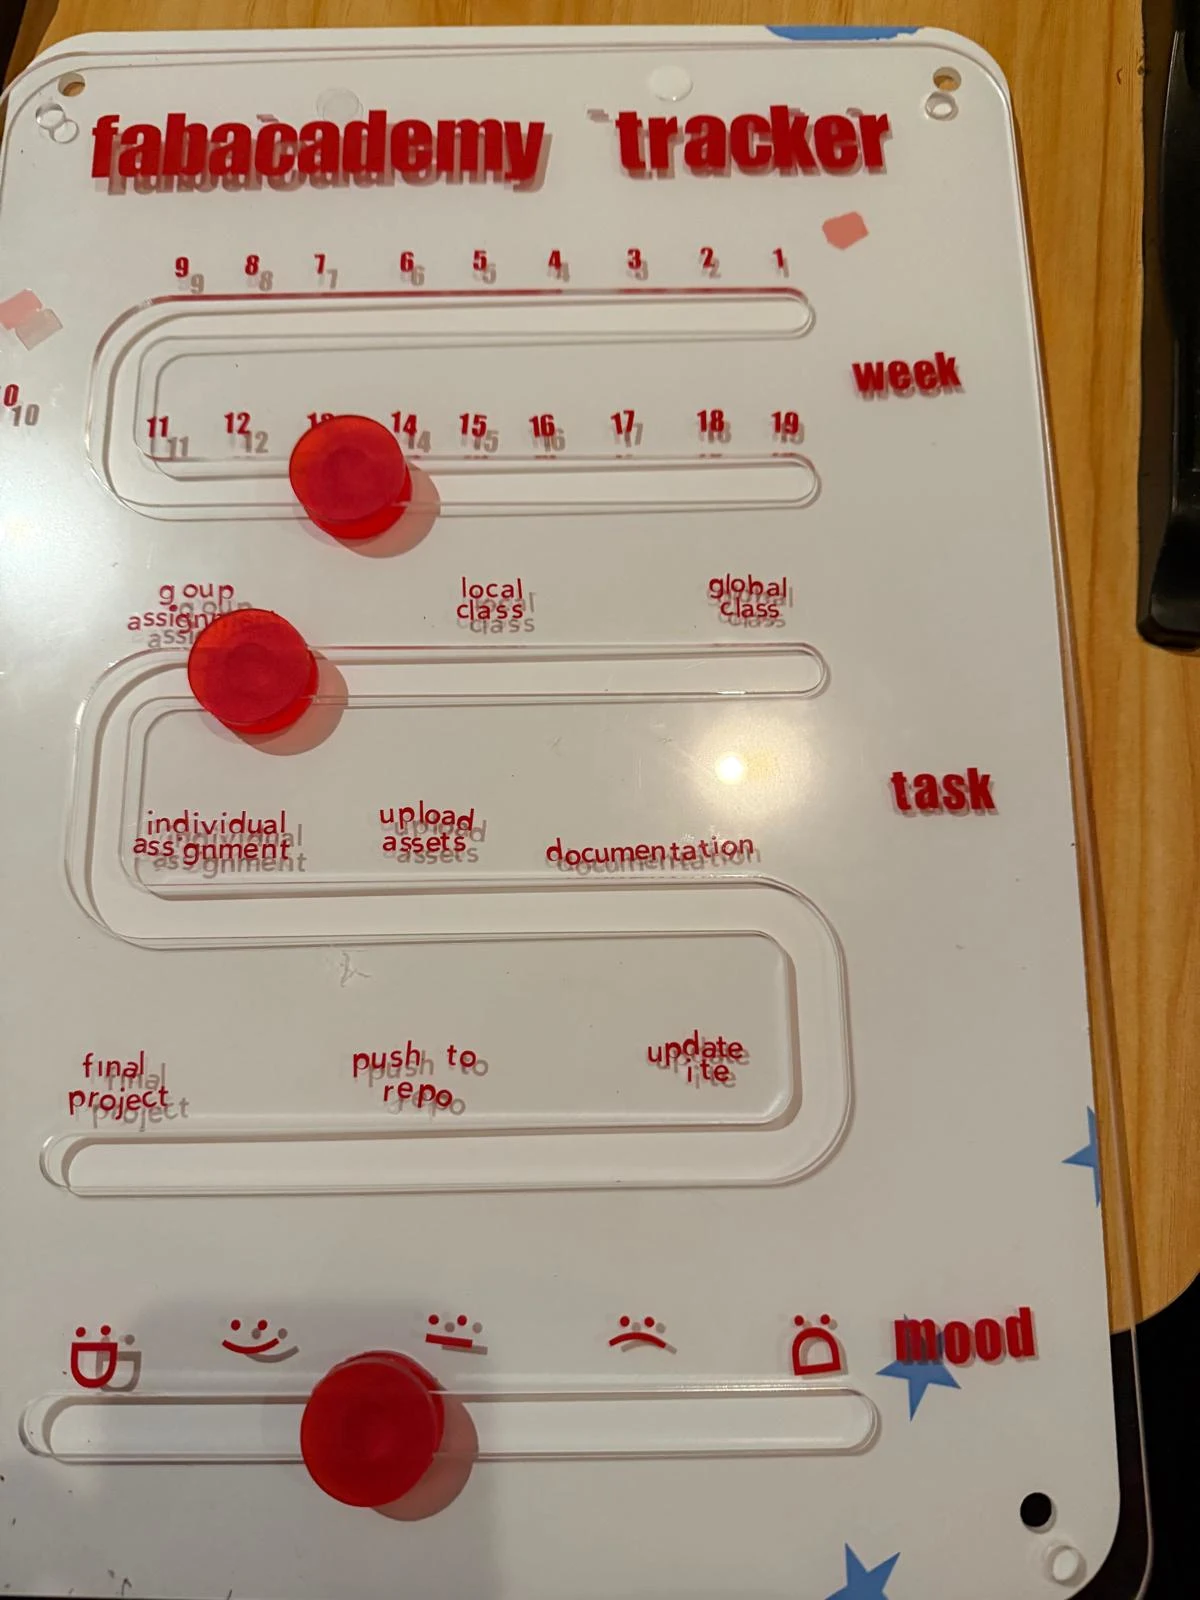
the final piece!
here are some timelapses of me desinging with grasshopper, laser cutting and individually sticking every alphabet onto the board. (because i couldn't find my transfer paper)
original files
personal reflections
this was a very fun assignment to do. it was good to learn how to use grasshopper and see how it can be used to create parametric designs. I find it a bit difficult to use but I think practice will give me a better hang of it. it uses the same commands as rhino a lot of the time so i can connect what's happening. another thing i found was that grasshopper files kind of disappear in my computer and i am not able to open the workflows after some time. the files don't open, maybe the path is broken but i am not able to retrieve the original grasshopper files of any time that i have used it. The engraving did not work - it was good to use the vinyl cutter last minute but I wish i had enough time to identify what settings i had to change. I think i keep it on cut but reduce the power.
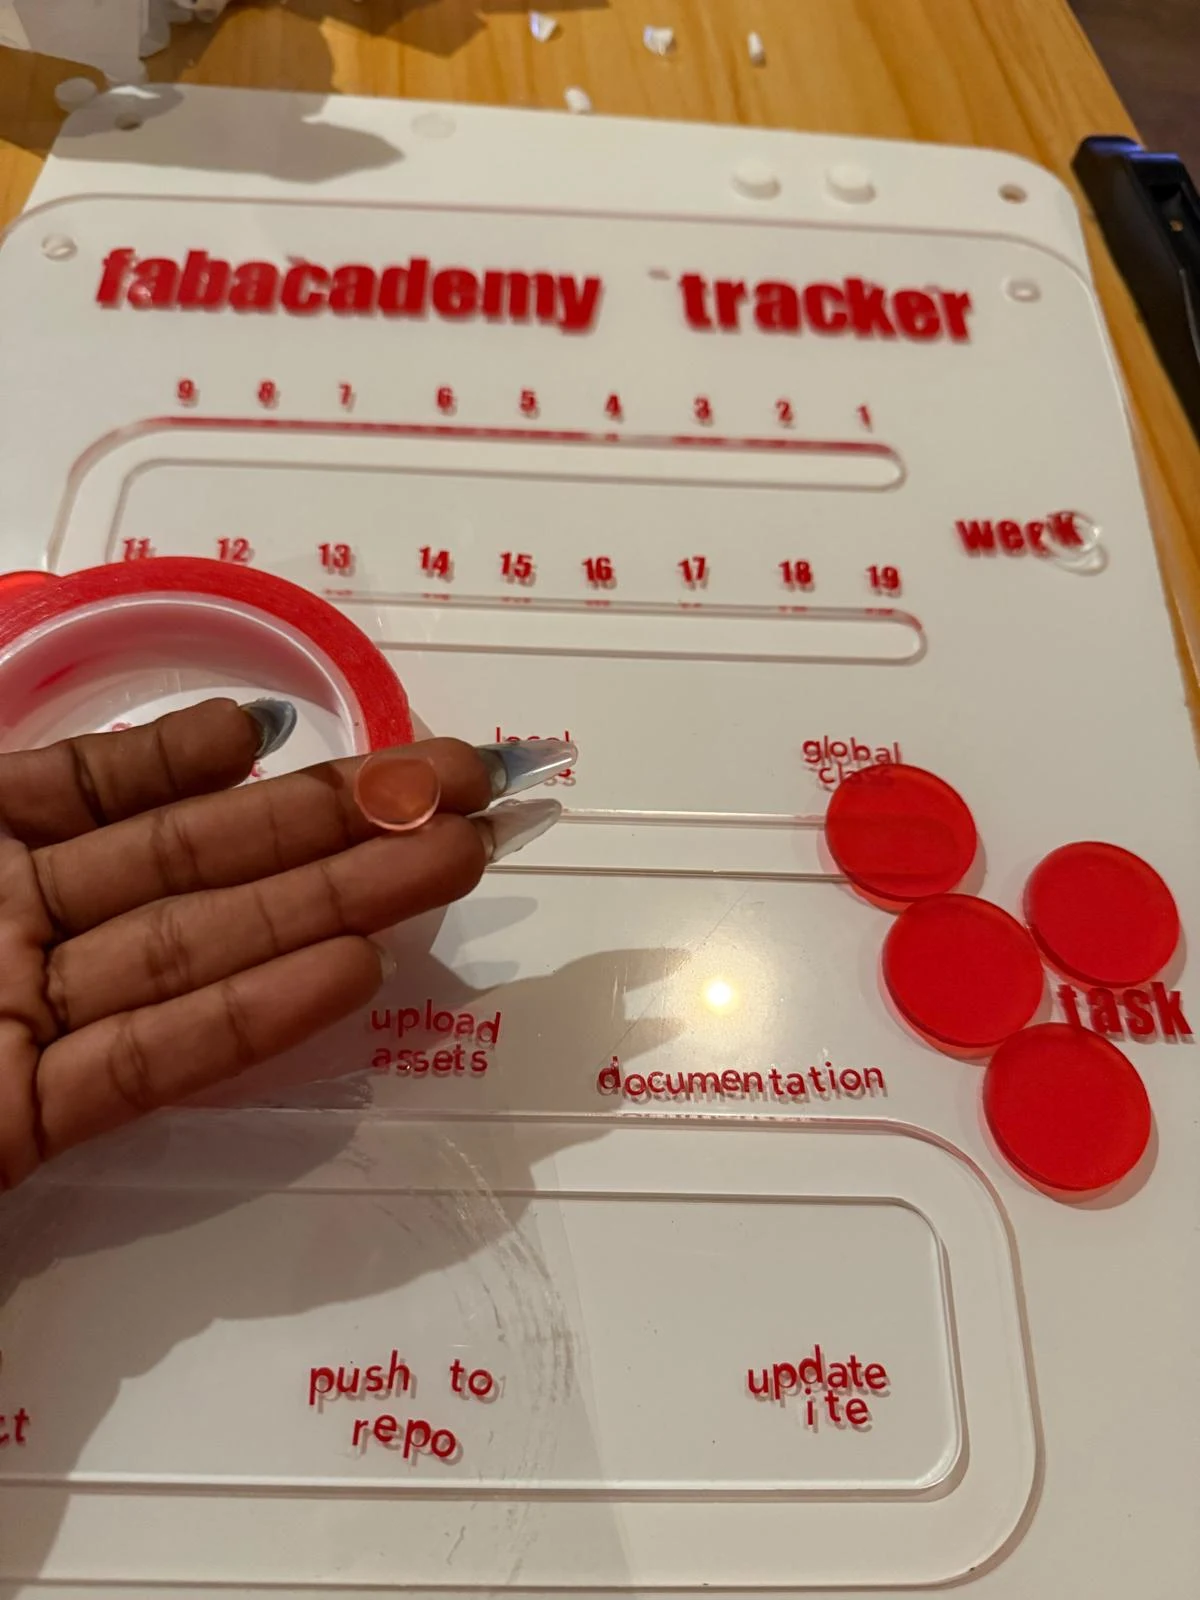
it was really fun to explore vinyl cutting as well. i liked it so much that i bought my own silhouette cameo to use for this and future sticker projects. i realised after painstakingly removing every alphabet and tittle with a tweezer and aligning it as much as possible to stick it, that i couldve just used transfer paper since i already had them spaced dimensionally. it would have saved me so much time and alignment. now the board looks a bit funky, and thats the aesthetic now i guess.
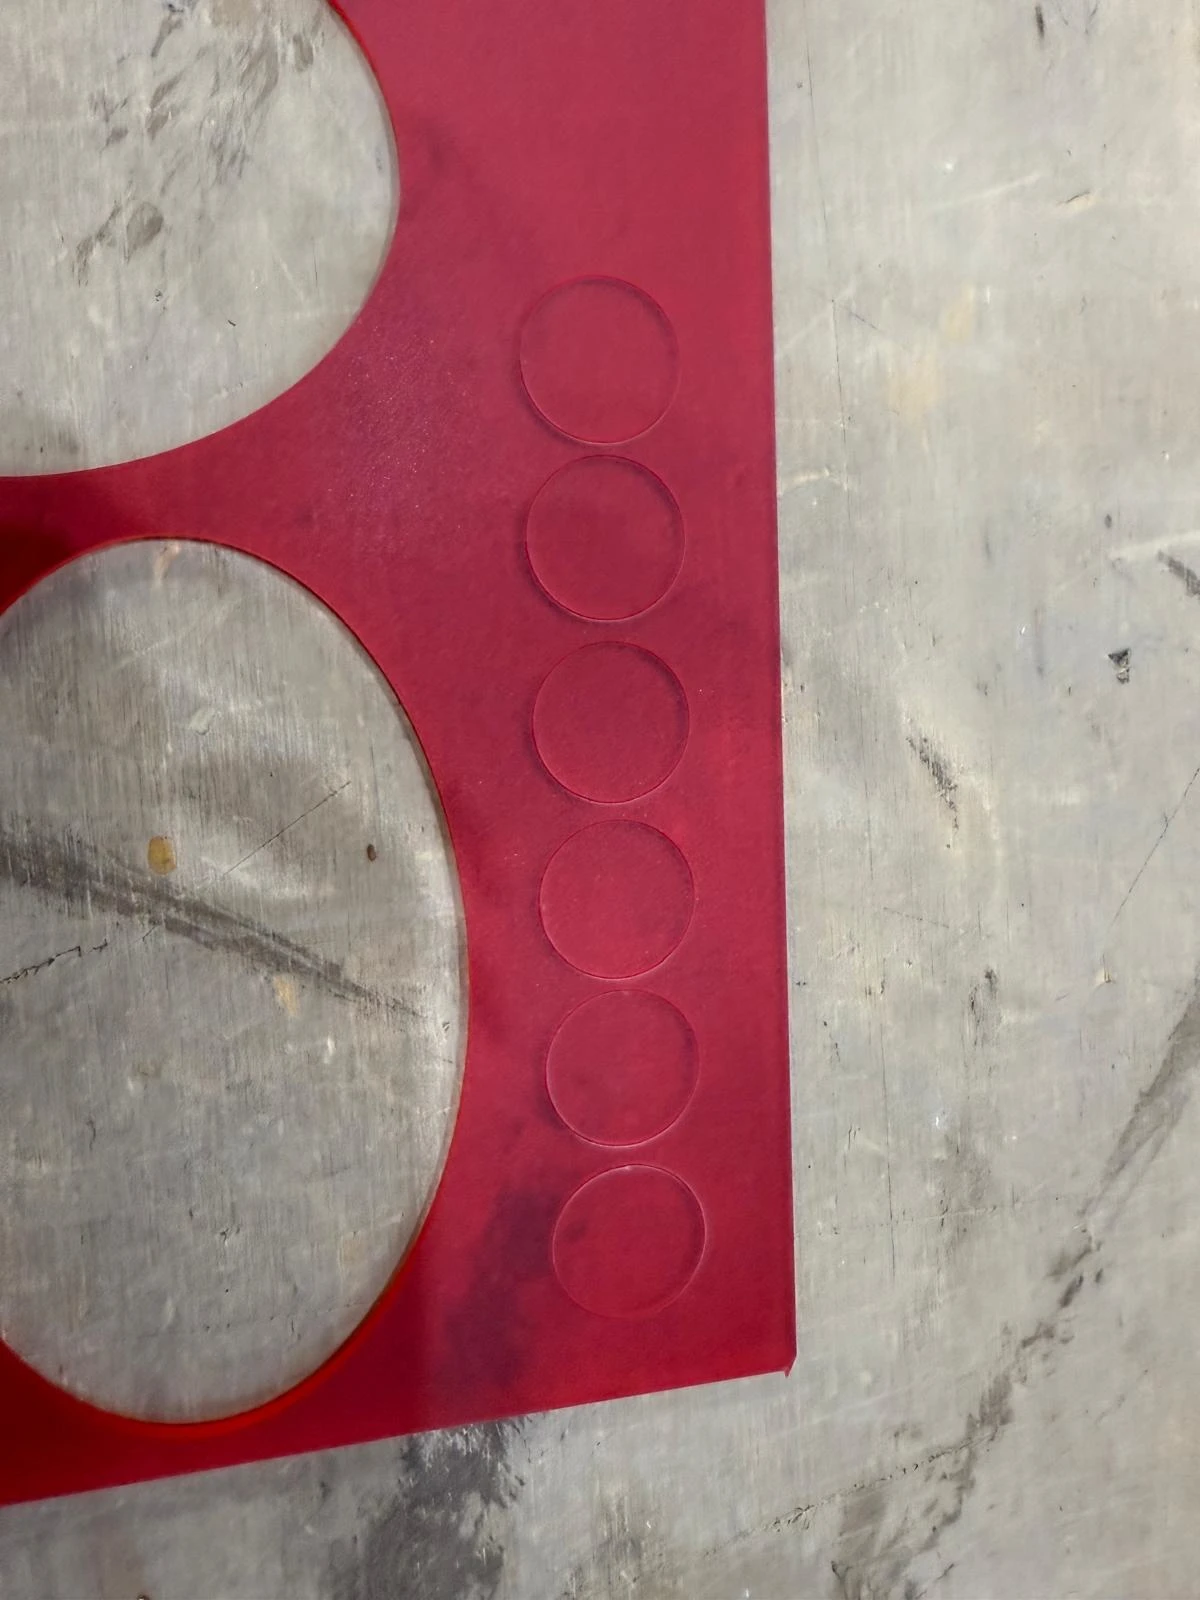
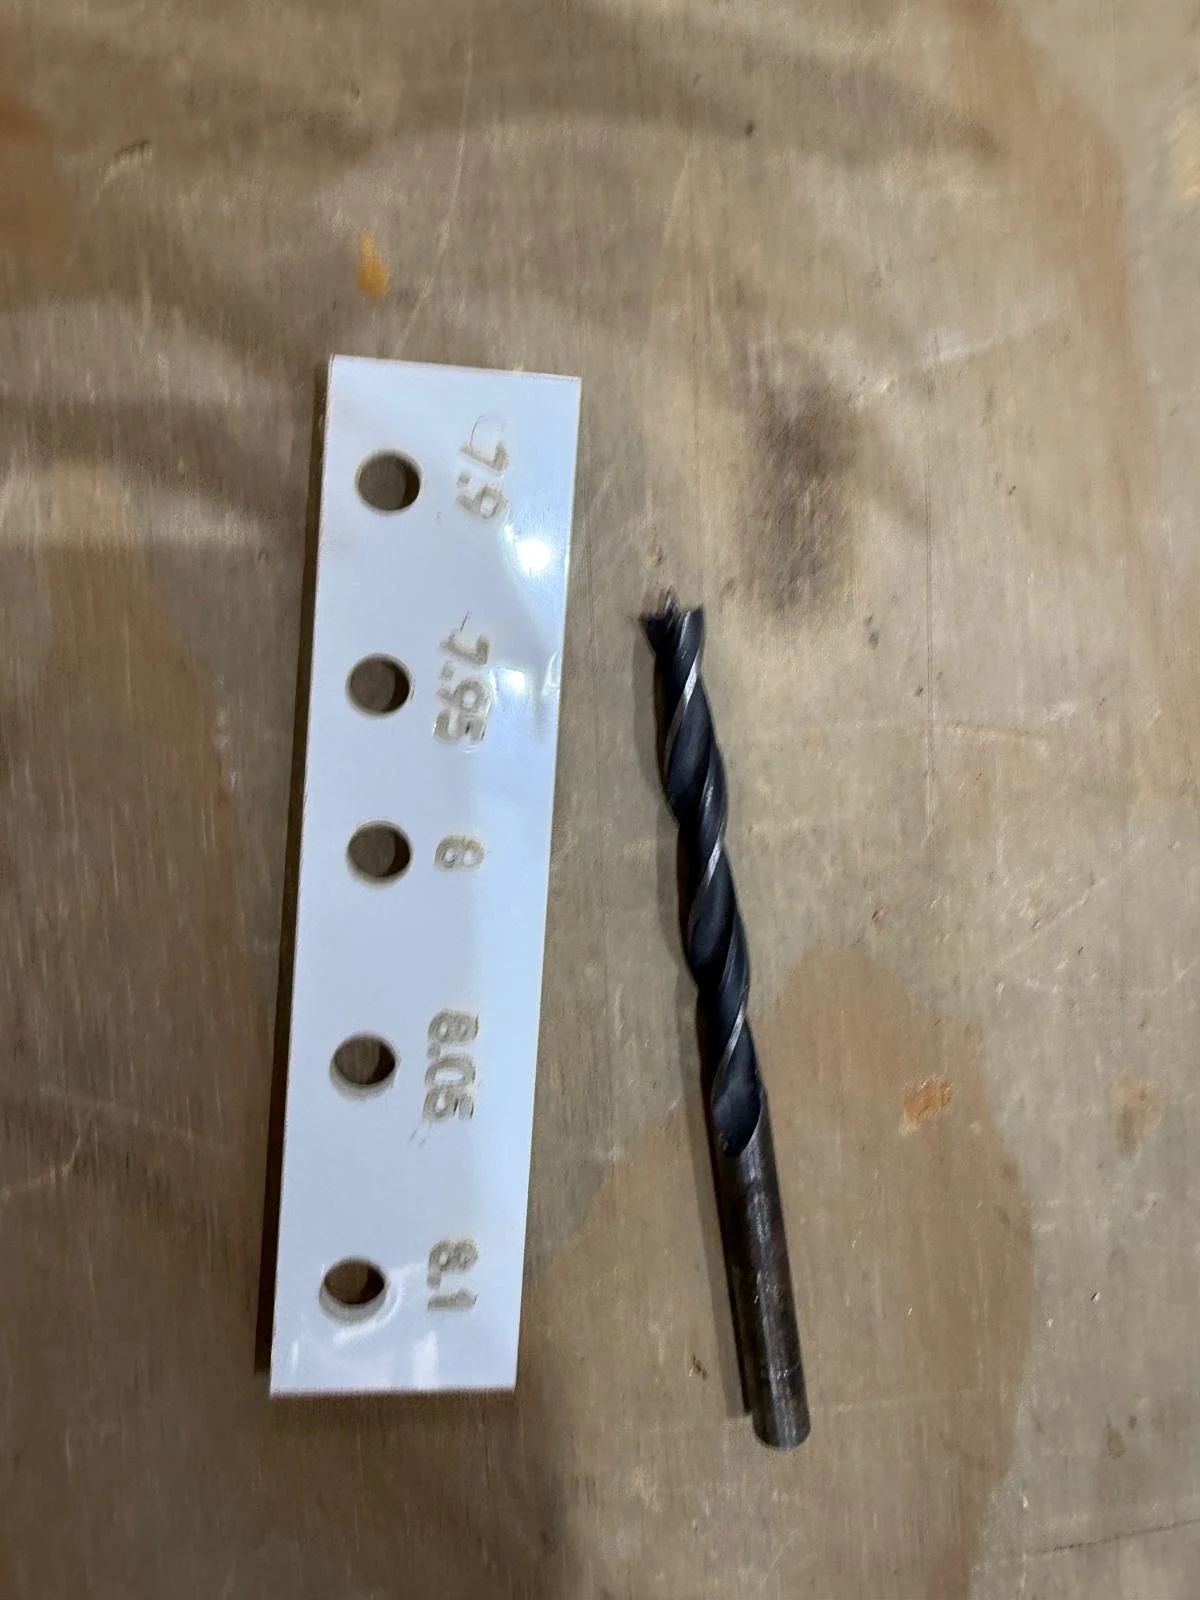
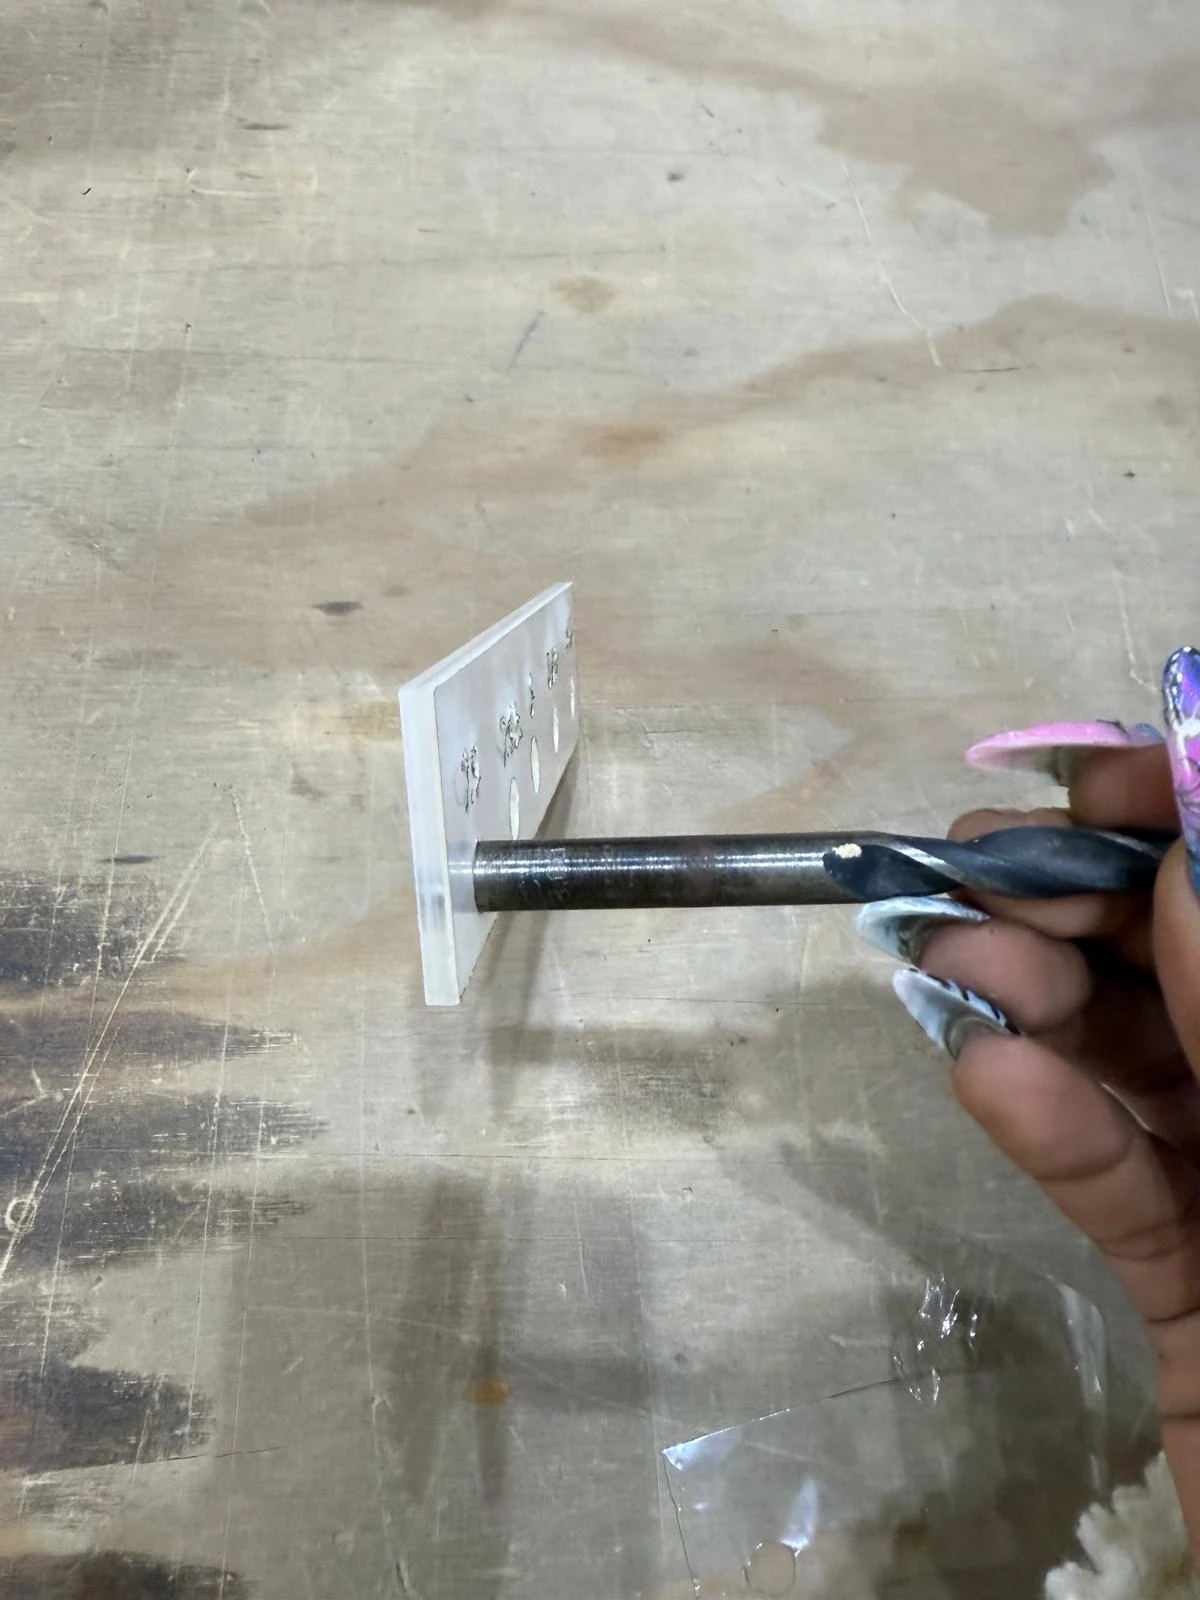
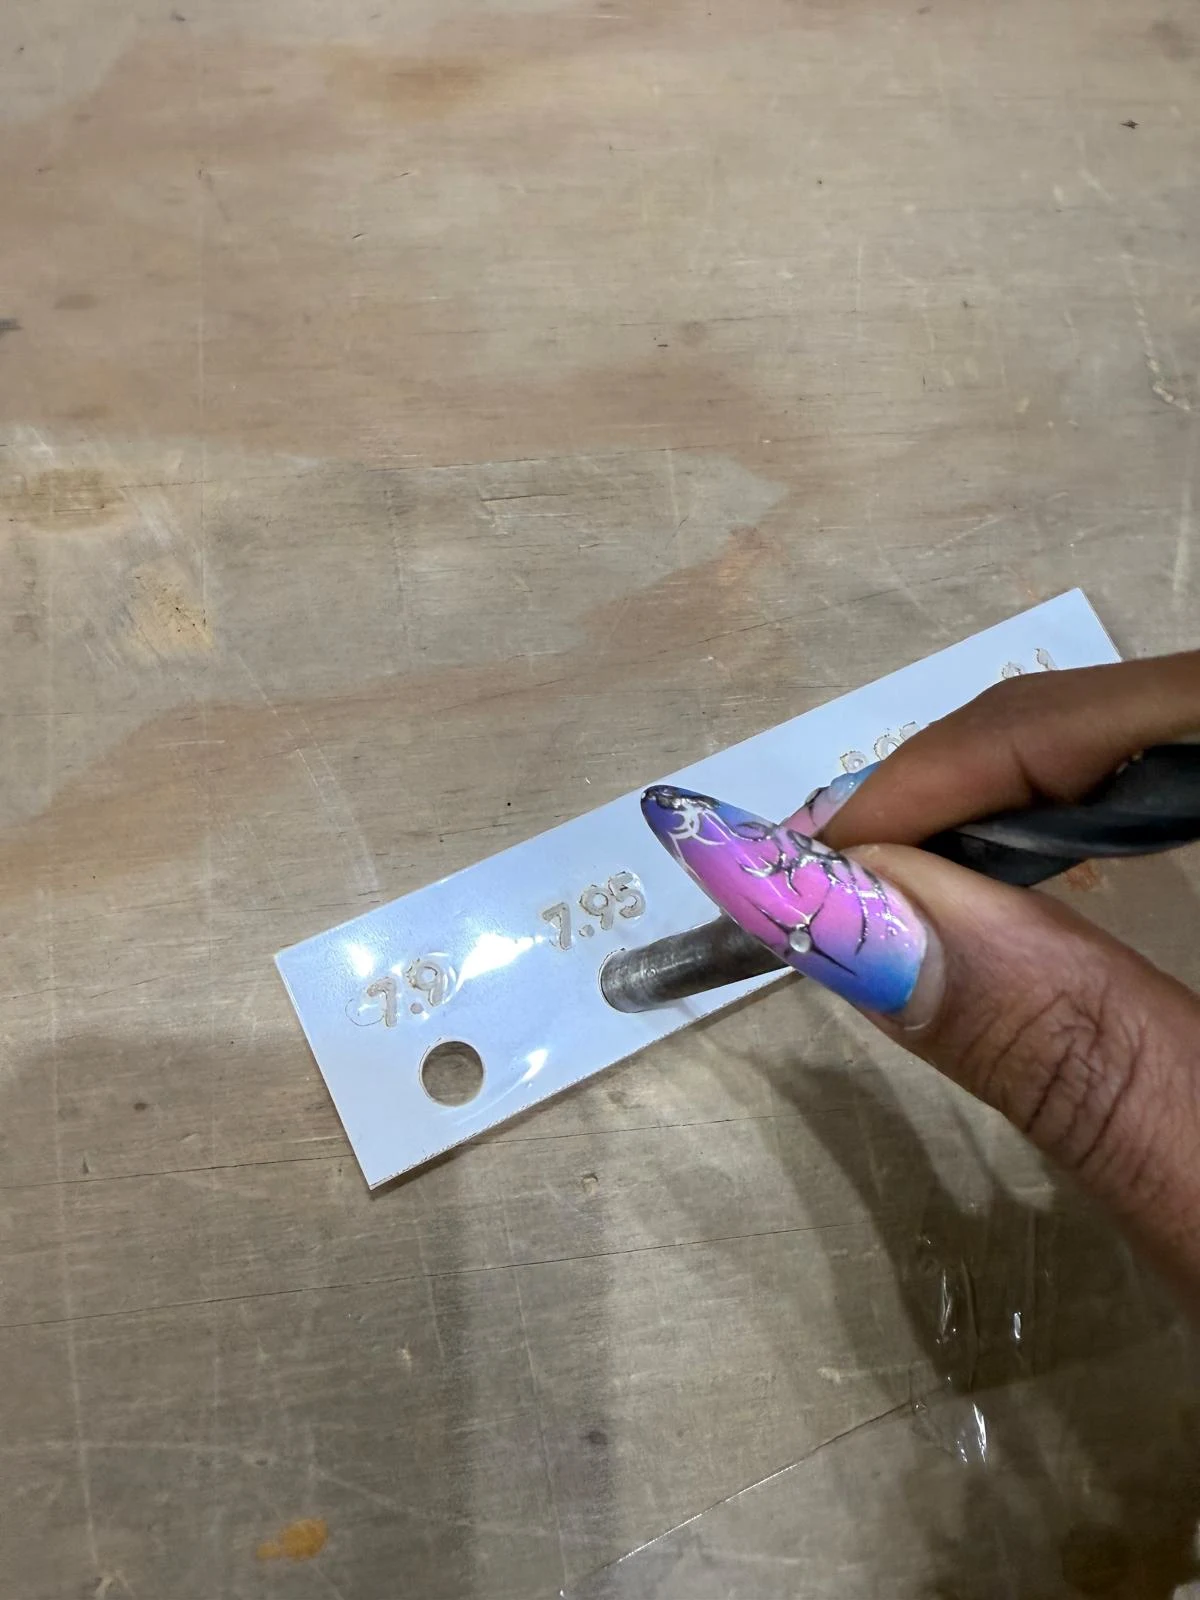
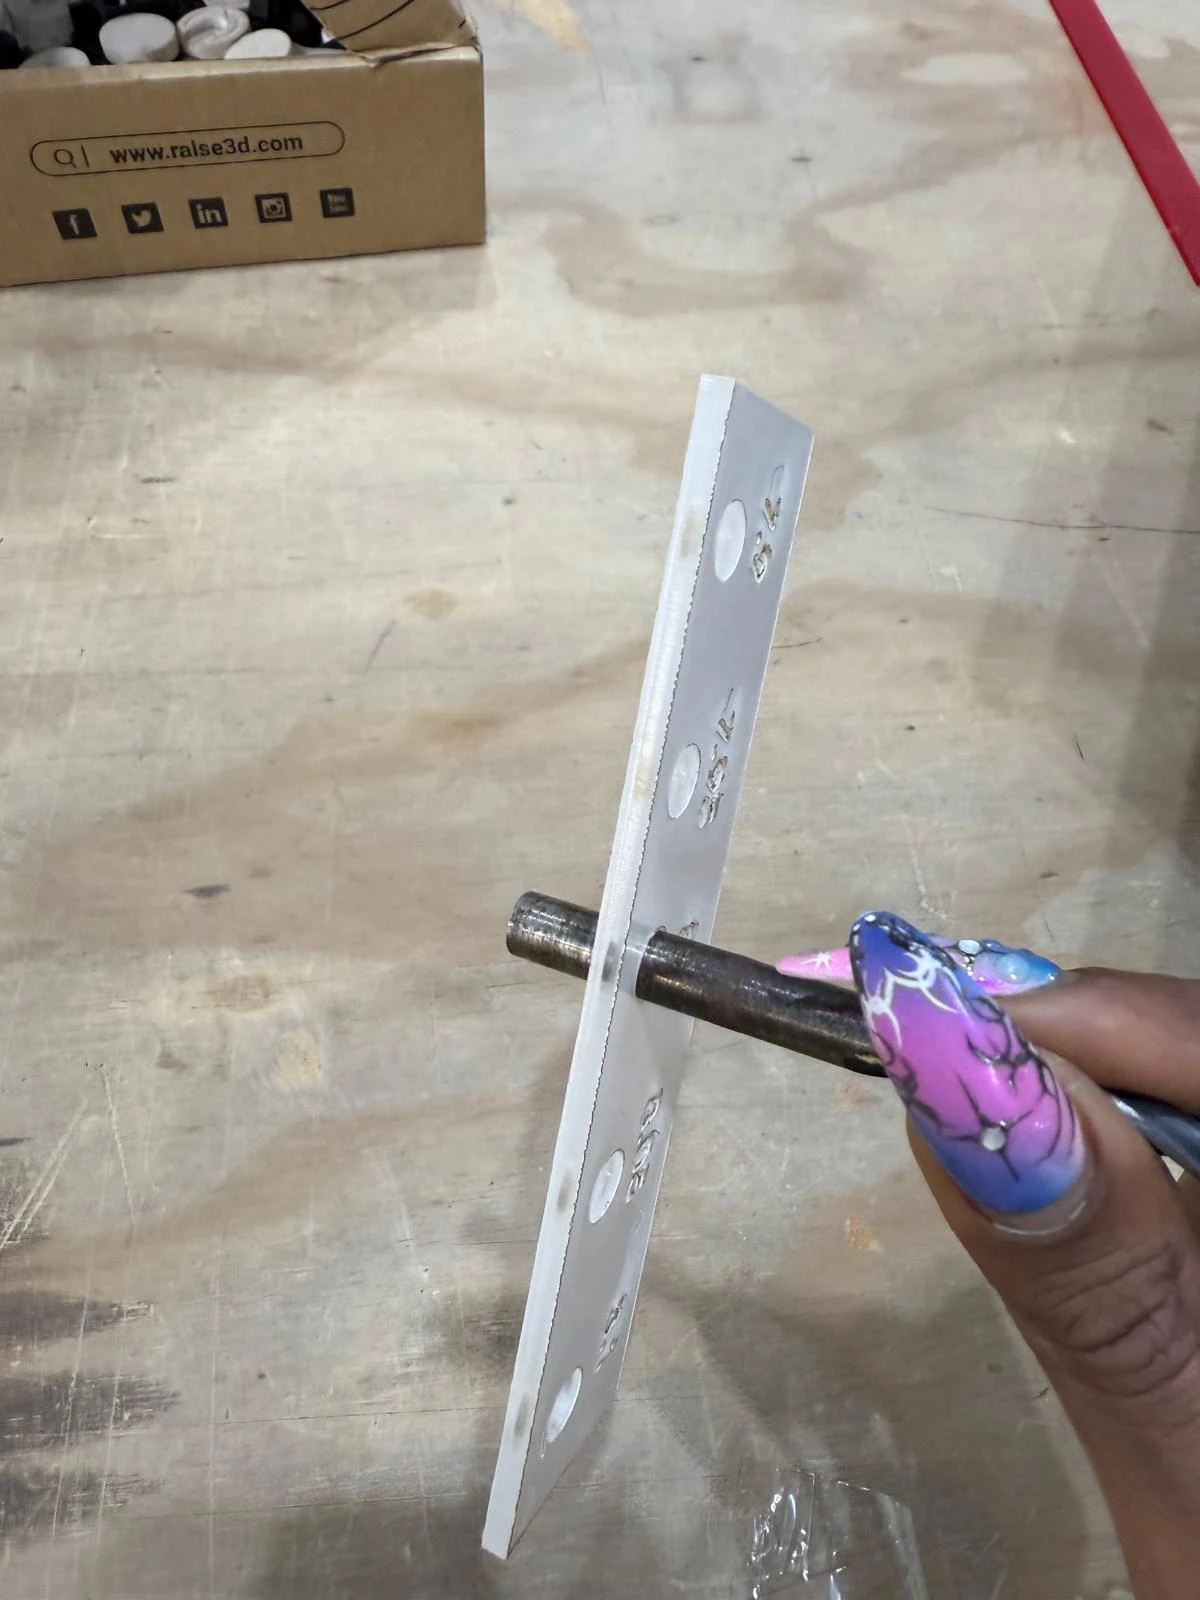
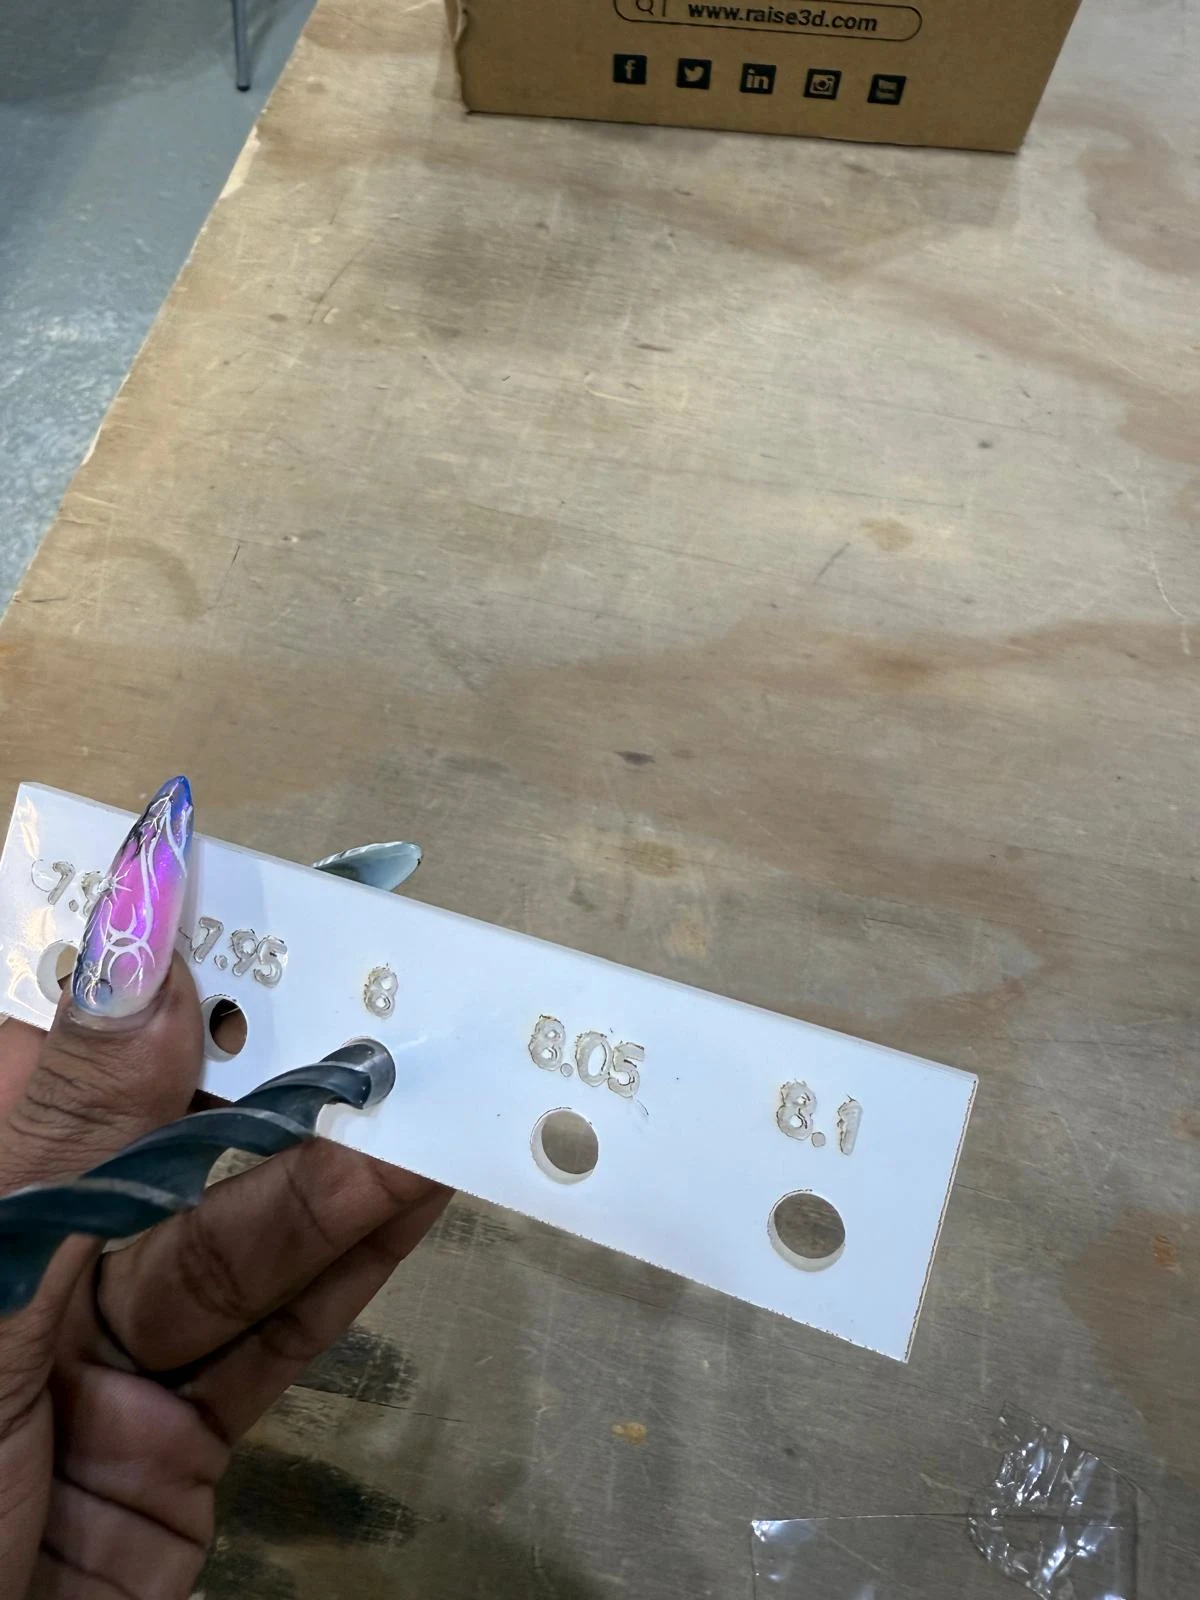
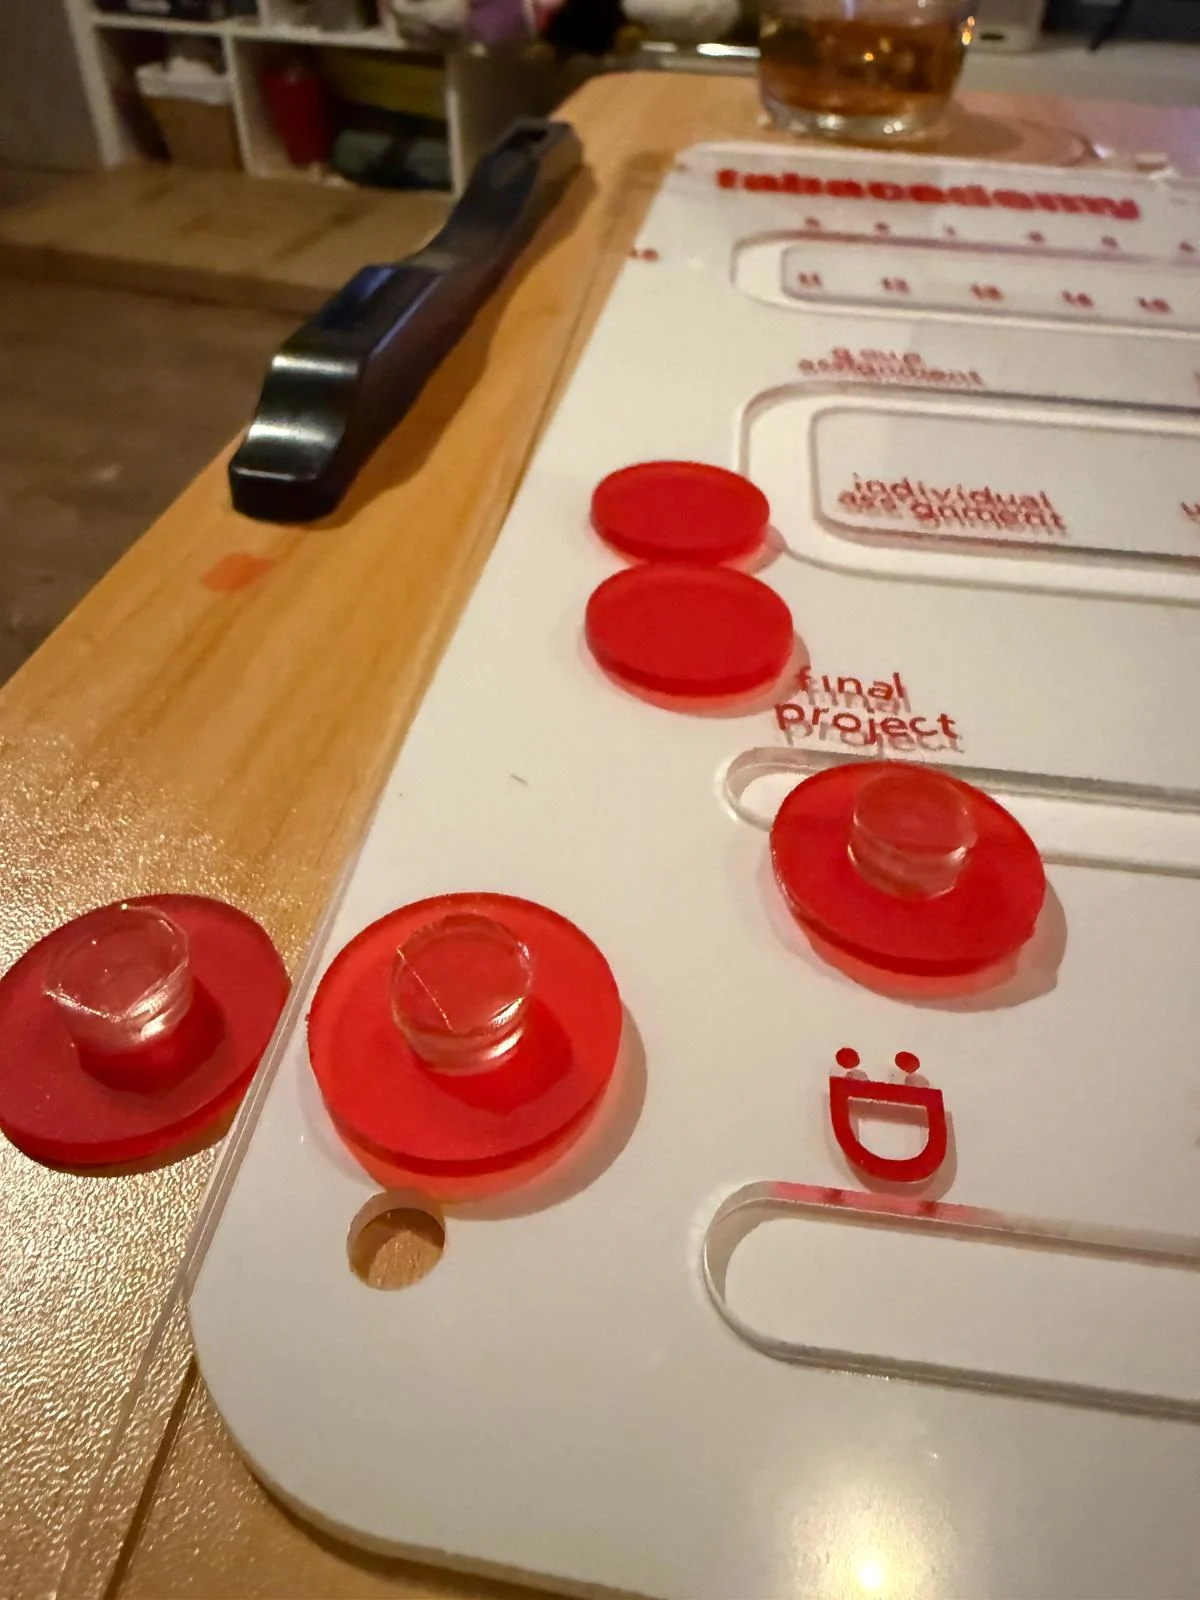
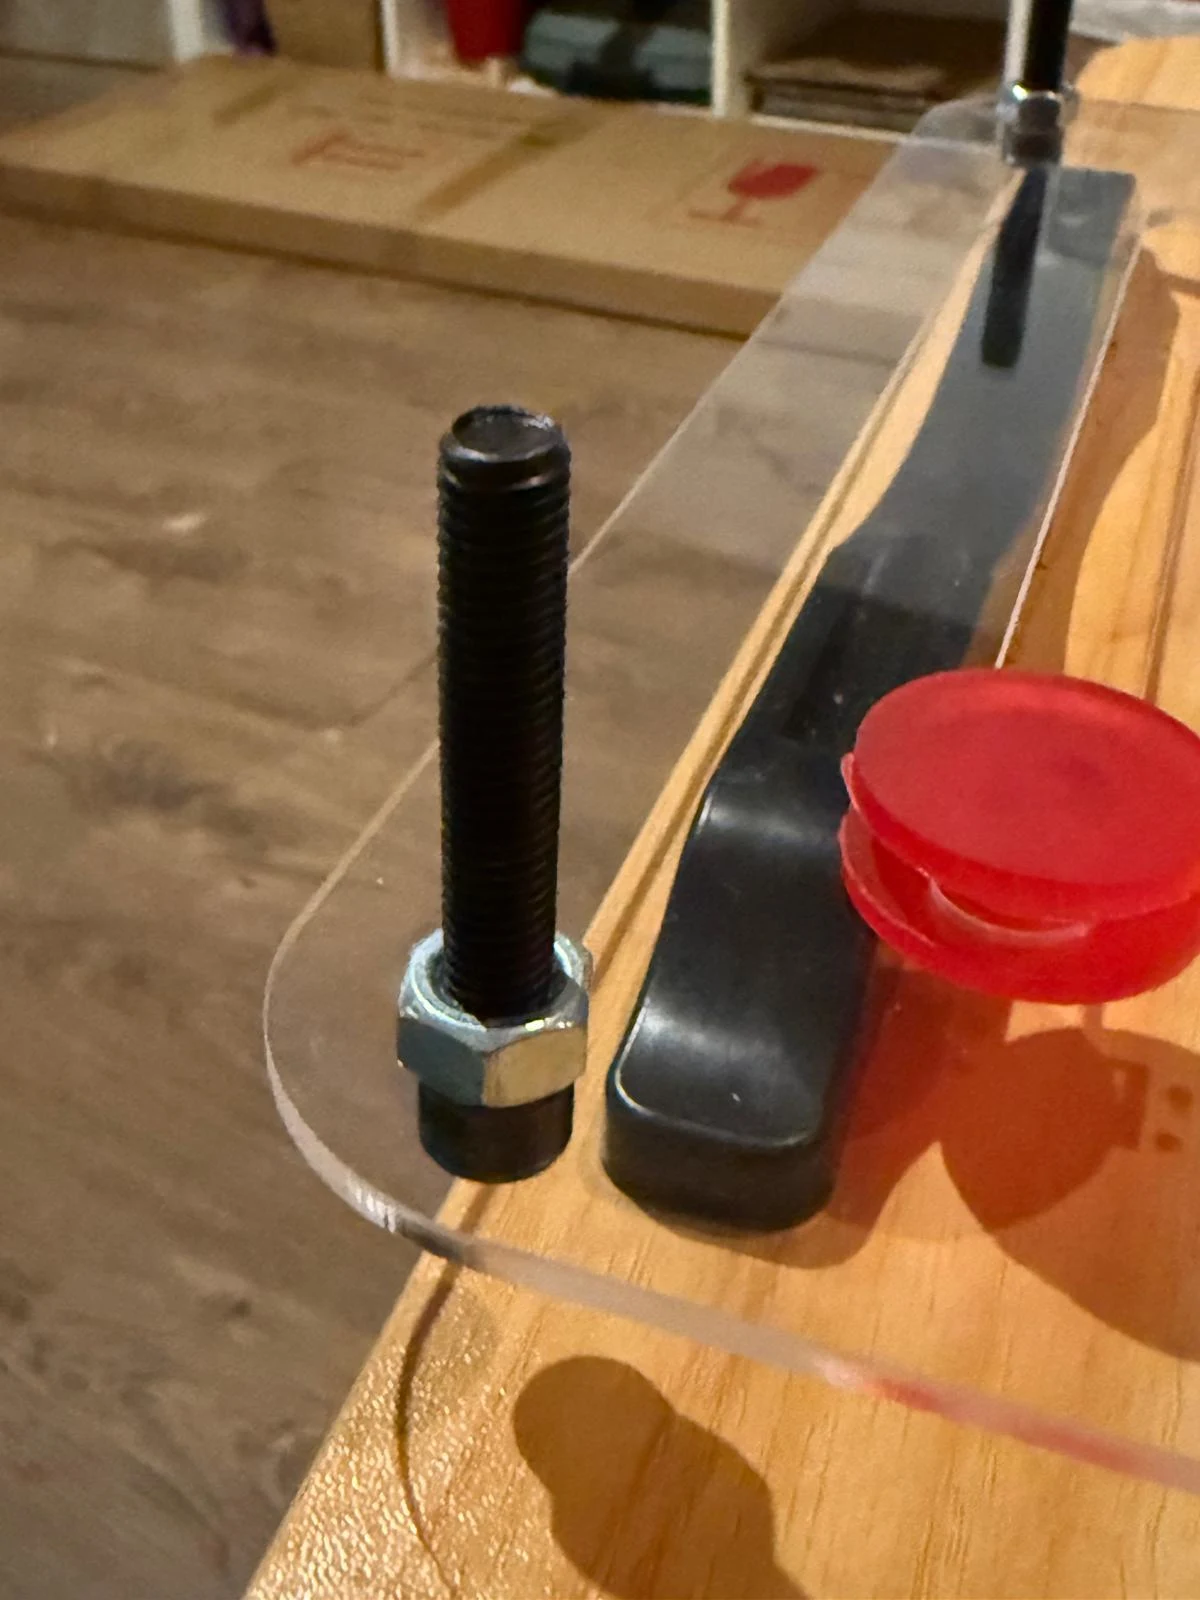
when i was cutting the little test circles, i was able to fit the 8mm screw i used perfectly into the 8.0mm holes. the red sliders were stuck together using fast drying glue below and above the sheet with 2 spacers in the middle. i used bolts to hold the sheets in place. i had some slip ups, like realising i stuck the text on the acrylic on the flipped side of the acrylic midway through, and realising i put week 10 in a falling zone so the slider doesnt really stay there, it just falls to 11. i hope to fix all this in my improved iteration. i reused the little test 8mm and lower circles from the hole fit test as spacers since they are all smaller than the track and hence move smoothly.
group assignment
here is the link to the group assignment page Group Assignment
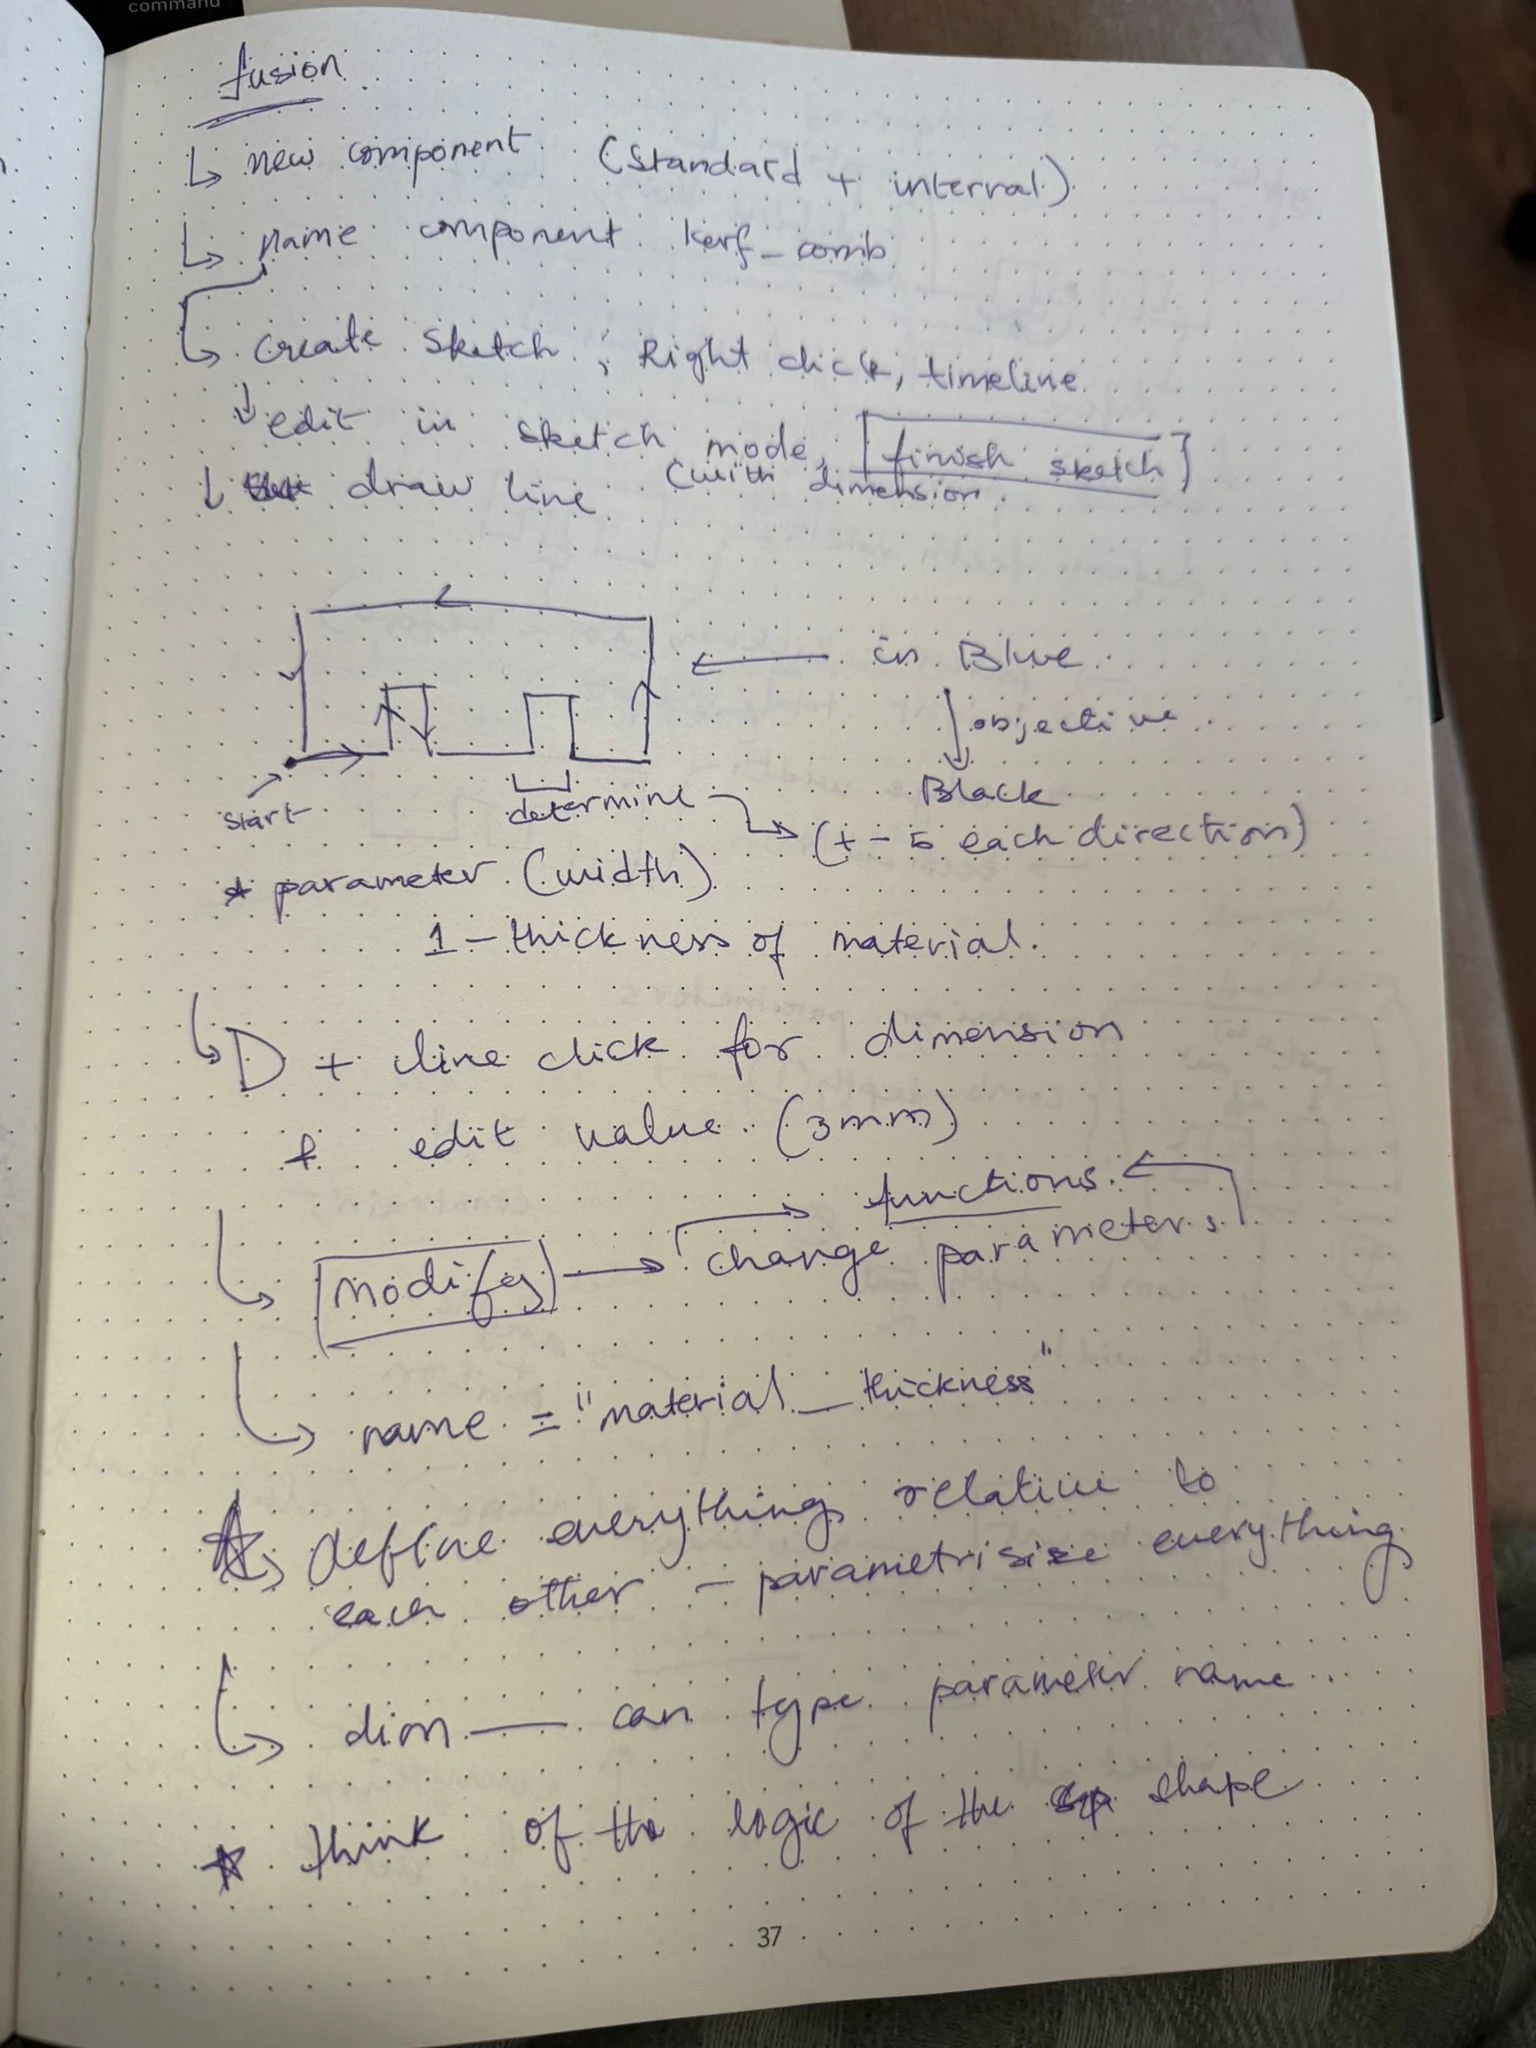
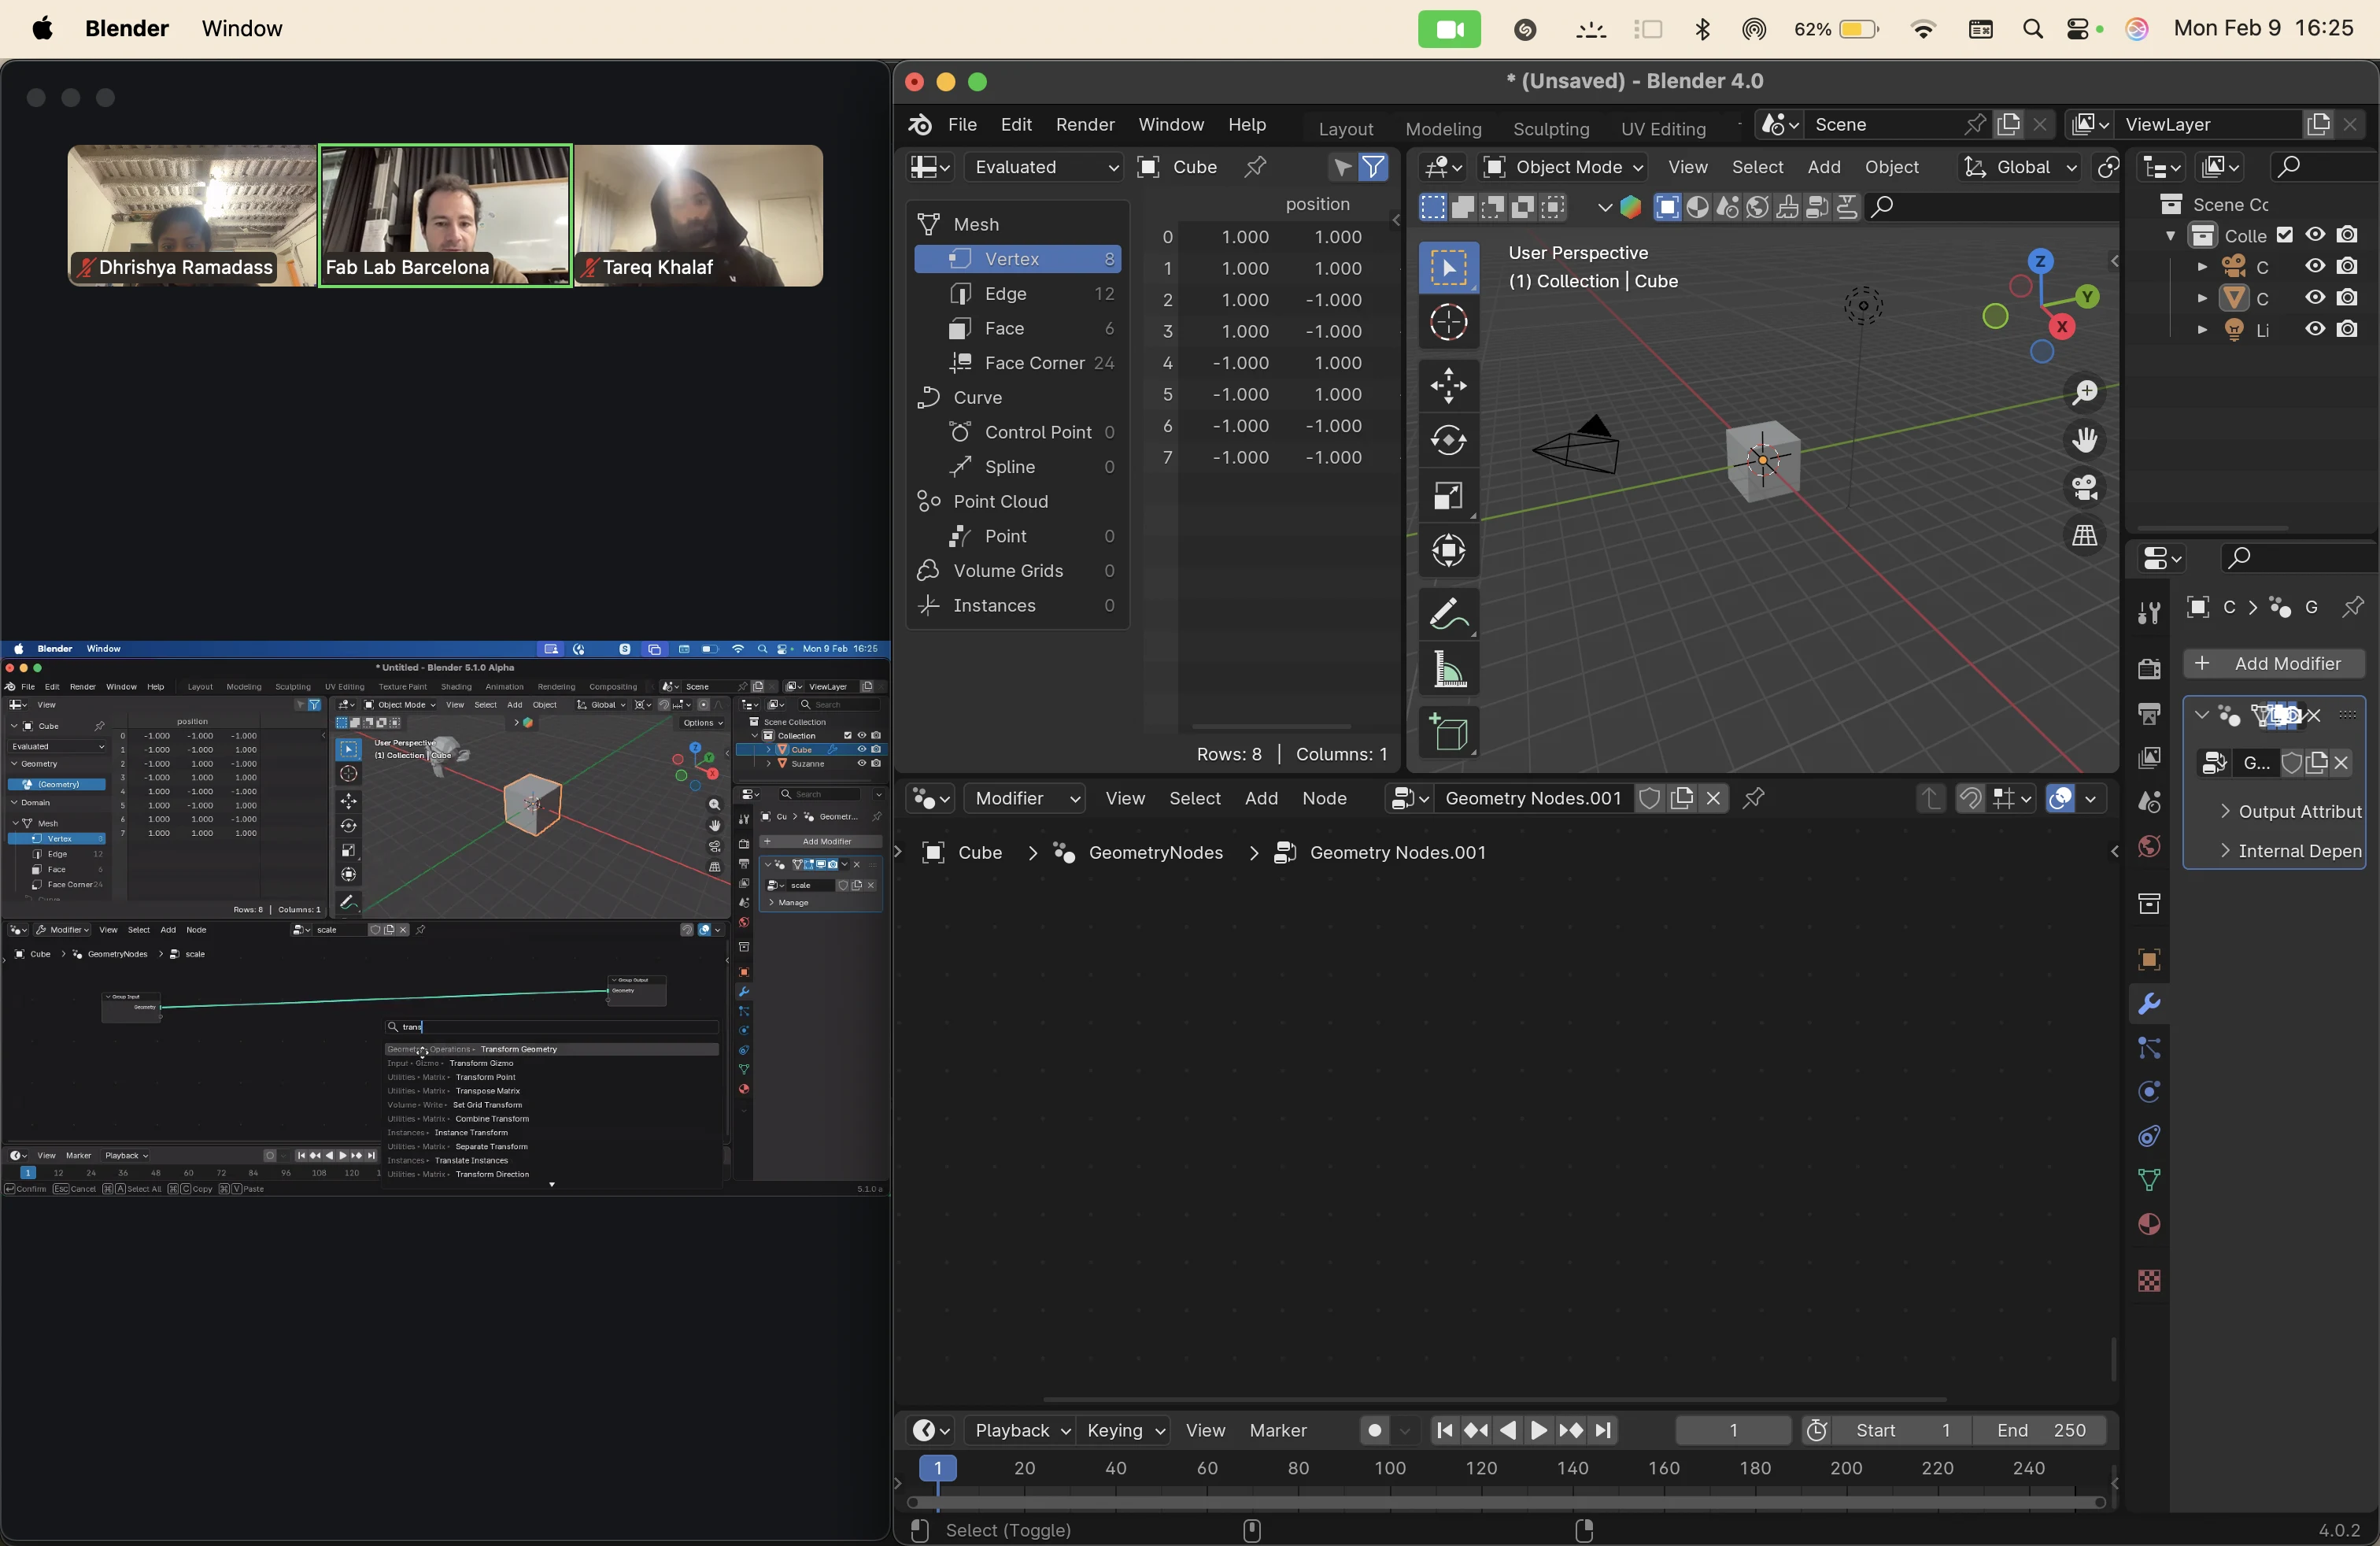
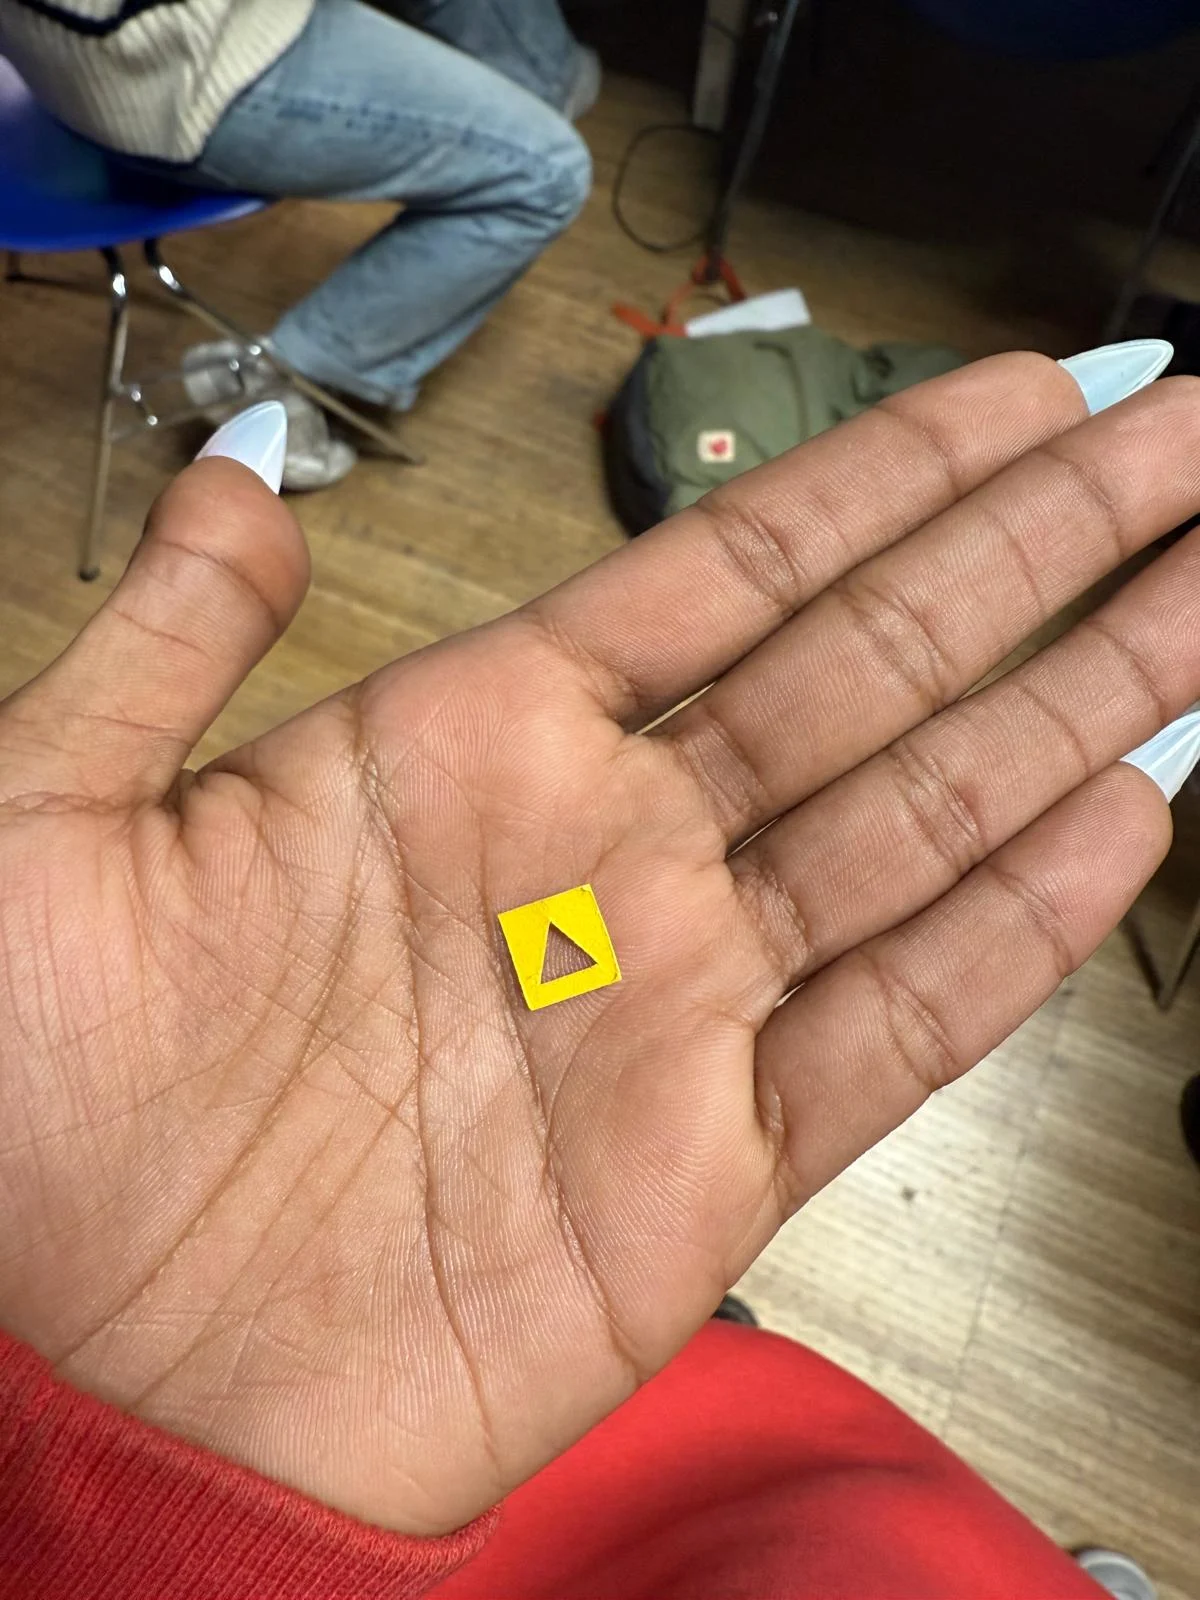
we got an intro to fusion from dani and designed this piece to test tolerance and fit between the joints
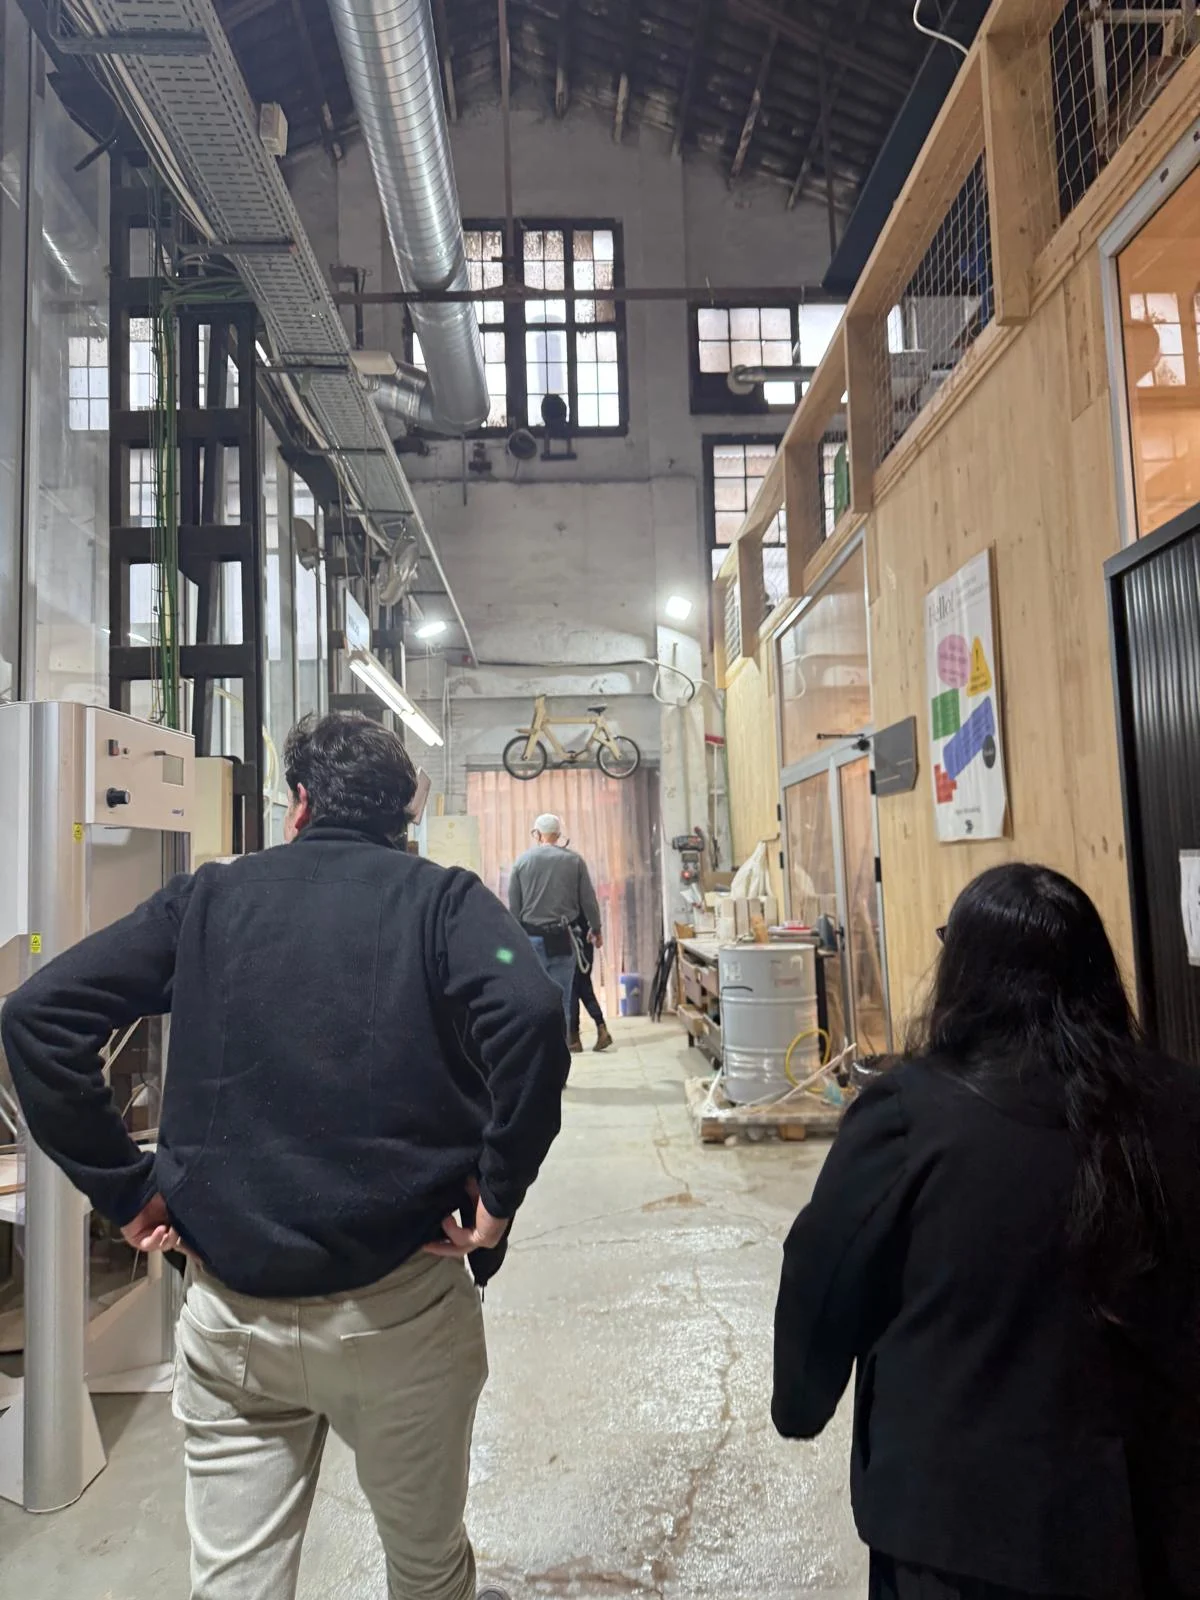
we then got a tour of the lasers at the Fablab Barcelona
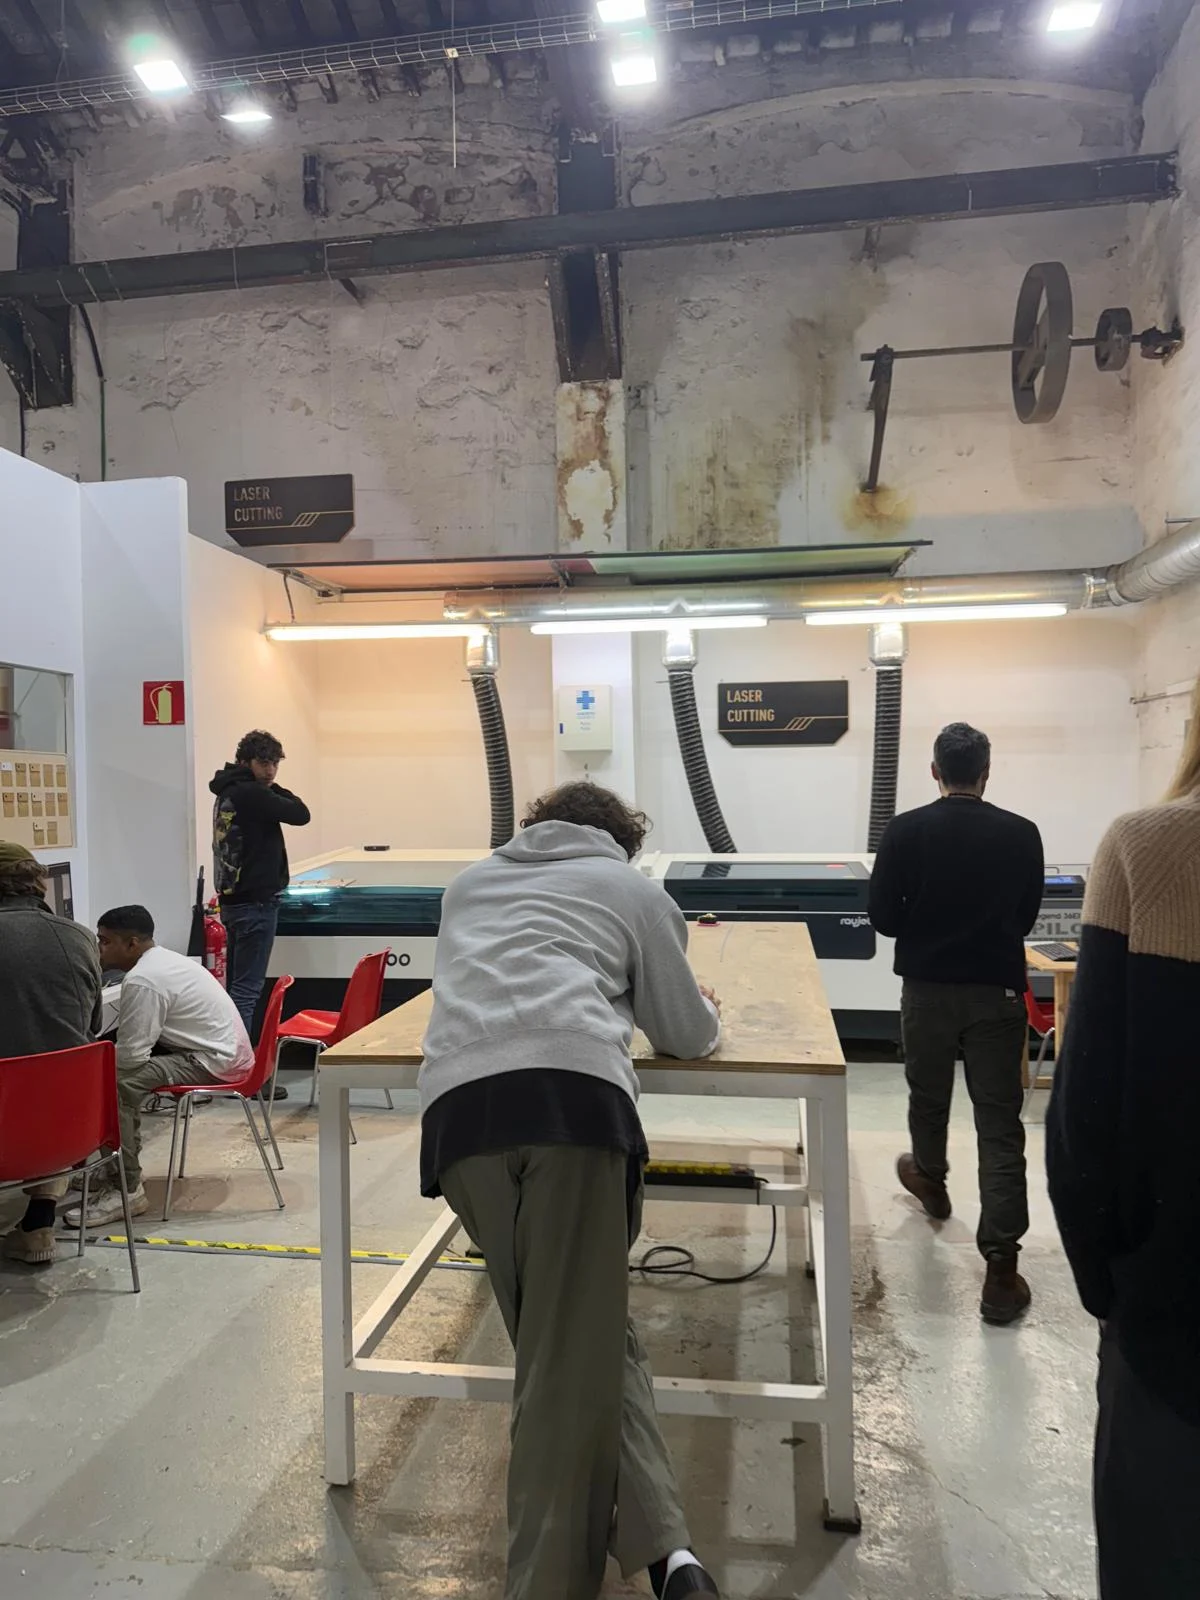
we have
- Rayjet 500: (the one we tested with)
- 60W CO2 laser cutter
- Bed size: 500 x 300 mm
- *Max material thickness: 10 mm - Rayjet 400:
- 40W CO2 laser cutter
- Bed size: 400 x 300 mm
- Max material thickness: 8 mm - Epilog Legend 36EXT:
- 60W CO2 laser cutter
- Bed size: 914 x 610 mm
- Max material thickness: 10 mm - Trotec Speedy 100:
- 30W CO2 laser cutter
- Bed size: 610 x 305 mm
- Max material thickness: 6 mm
*note that material thickness is approximate since it depends on material, focus distance, machine setup and power/speed settings.
we then did a small test on the Rayjet 500 to see how the machine worked.

Each machine has it's own focus tool. we focus the machine by keeping the laser height at 0
safety and process considerations:
- Always close the top of the machine before starting the cut
- Ensure proper ventilation in the workspace to avoid inhaling fumes from cutting materials. Turn the valves and switches on of the ventilator and the exhause fan while working with the machine.
- Use appropriate materials for laser cutting. Avoid cutting materials that can release toxic fumes, such as PVC or certain types of foam.
- Always do the inside cuts first to prevent the material from shifting during the cutting process.
- Always do a test cut before starting the actual cutting process to ensure the settings are correct. There are some test patches in the lab, it is good to test them and the tolerances of your design anyway.
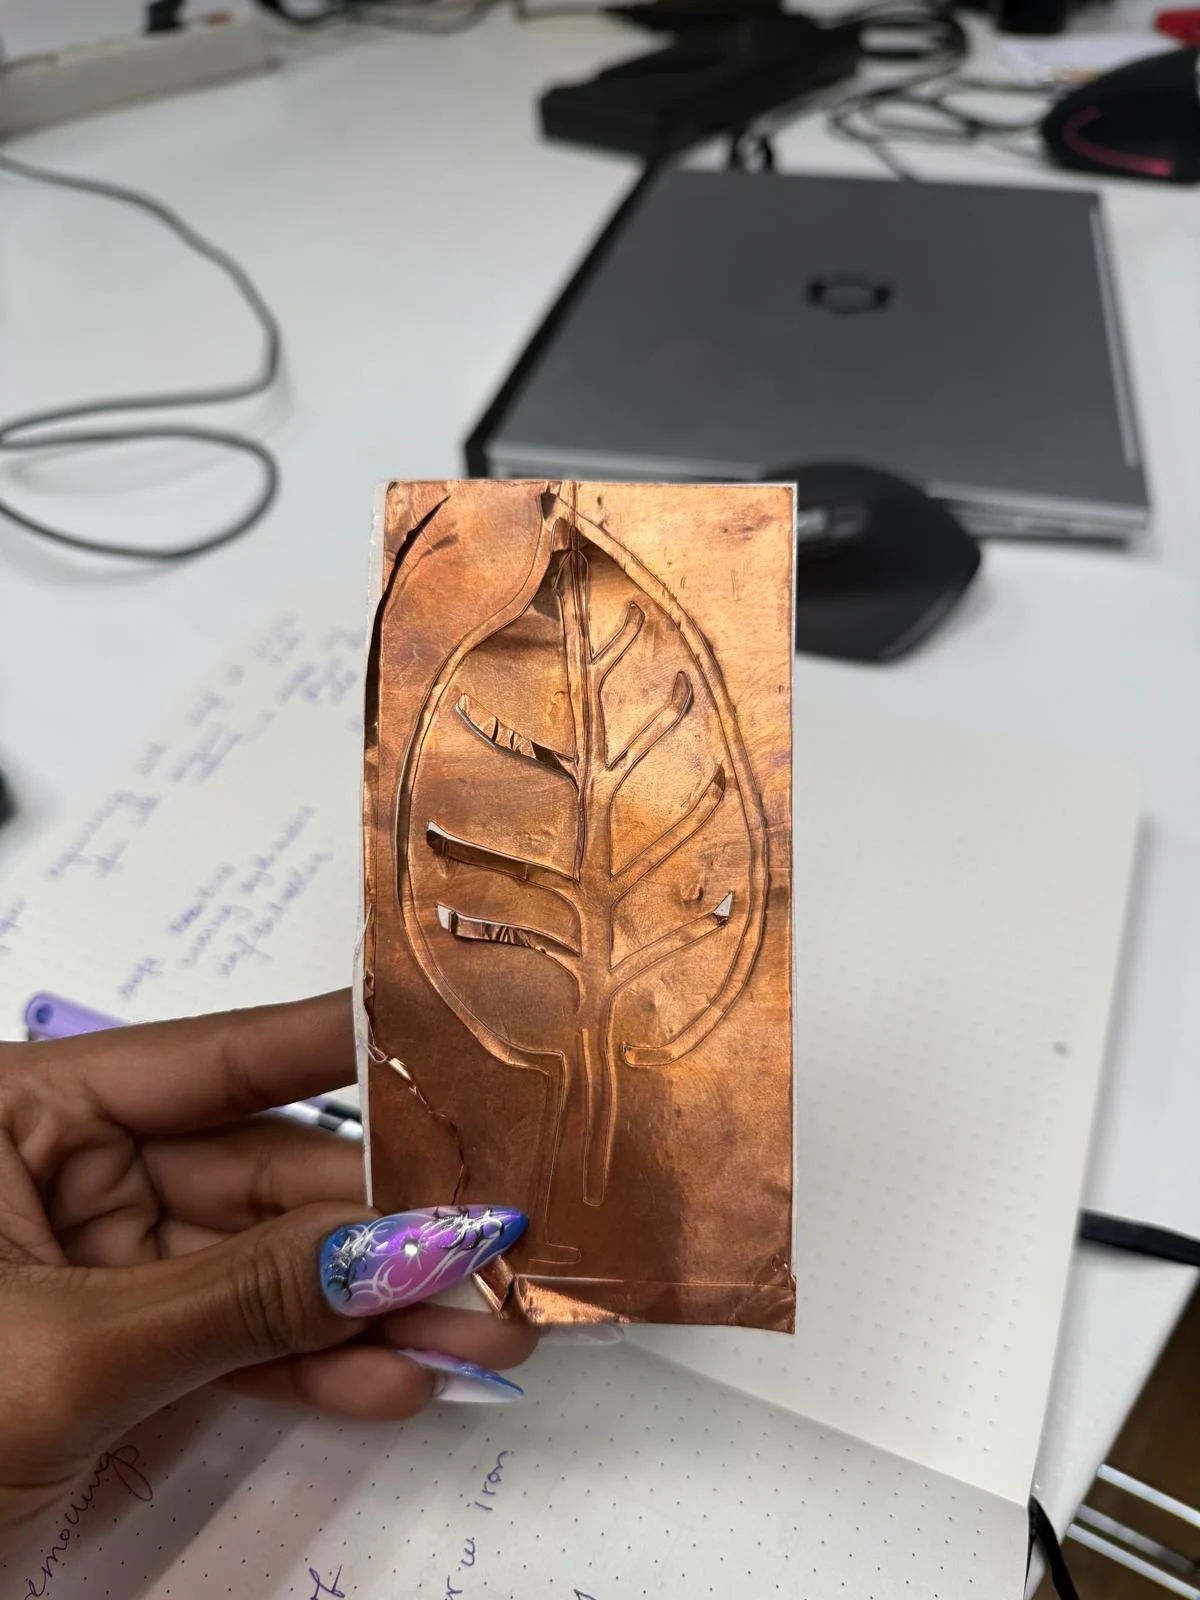
- Be cautious when cutting reflective materials since the laser focus process uses a mirror to direct the beam. This can cause the beam to reflect in unexpected directions, potentially causing damage or injury. It is suggested to cover one side with temporary material to absorb the laser energy.
We cut the parts with acrylic to check the tolerance fit that Dani showed us to design on Fusion.
we used the settings from the test swatch. I used the computer in the lab connected to the machine to start the cut.
we also took the test to join the booking system and learned how to use it.
reflection
for the group assignment i contributed by helping with using the software to identify the tool and upload the cutting settings like speed and power to send it to the machine. it was good to get a refresher of how to use the laser machines. in the class we helped each other with the setup and operation of the machines. with the tests we found the perfect fit with 0 tolerance for a tight fit and a small positive tolerance for a removable fit. most acrylic components are joined together permanently so it is best to get the tightest fit possible. acrylic also tends to wear over time so it is always good to add metalic joinery like screws, nuts and bolts to hold acrylic together for long term or repeated use.
the laser cutter is one of the most precise and efficient tools that can be used with simple vector lines with low effort in a fast timeframe. it is a versatile machine that can cut many materials and can be used to build complex assemblies and parametric designs. i find this fascinating and i plan to use the laser in my final project so i am thankful to have so many options in the lab.
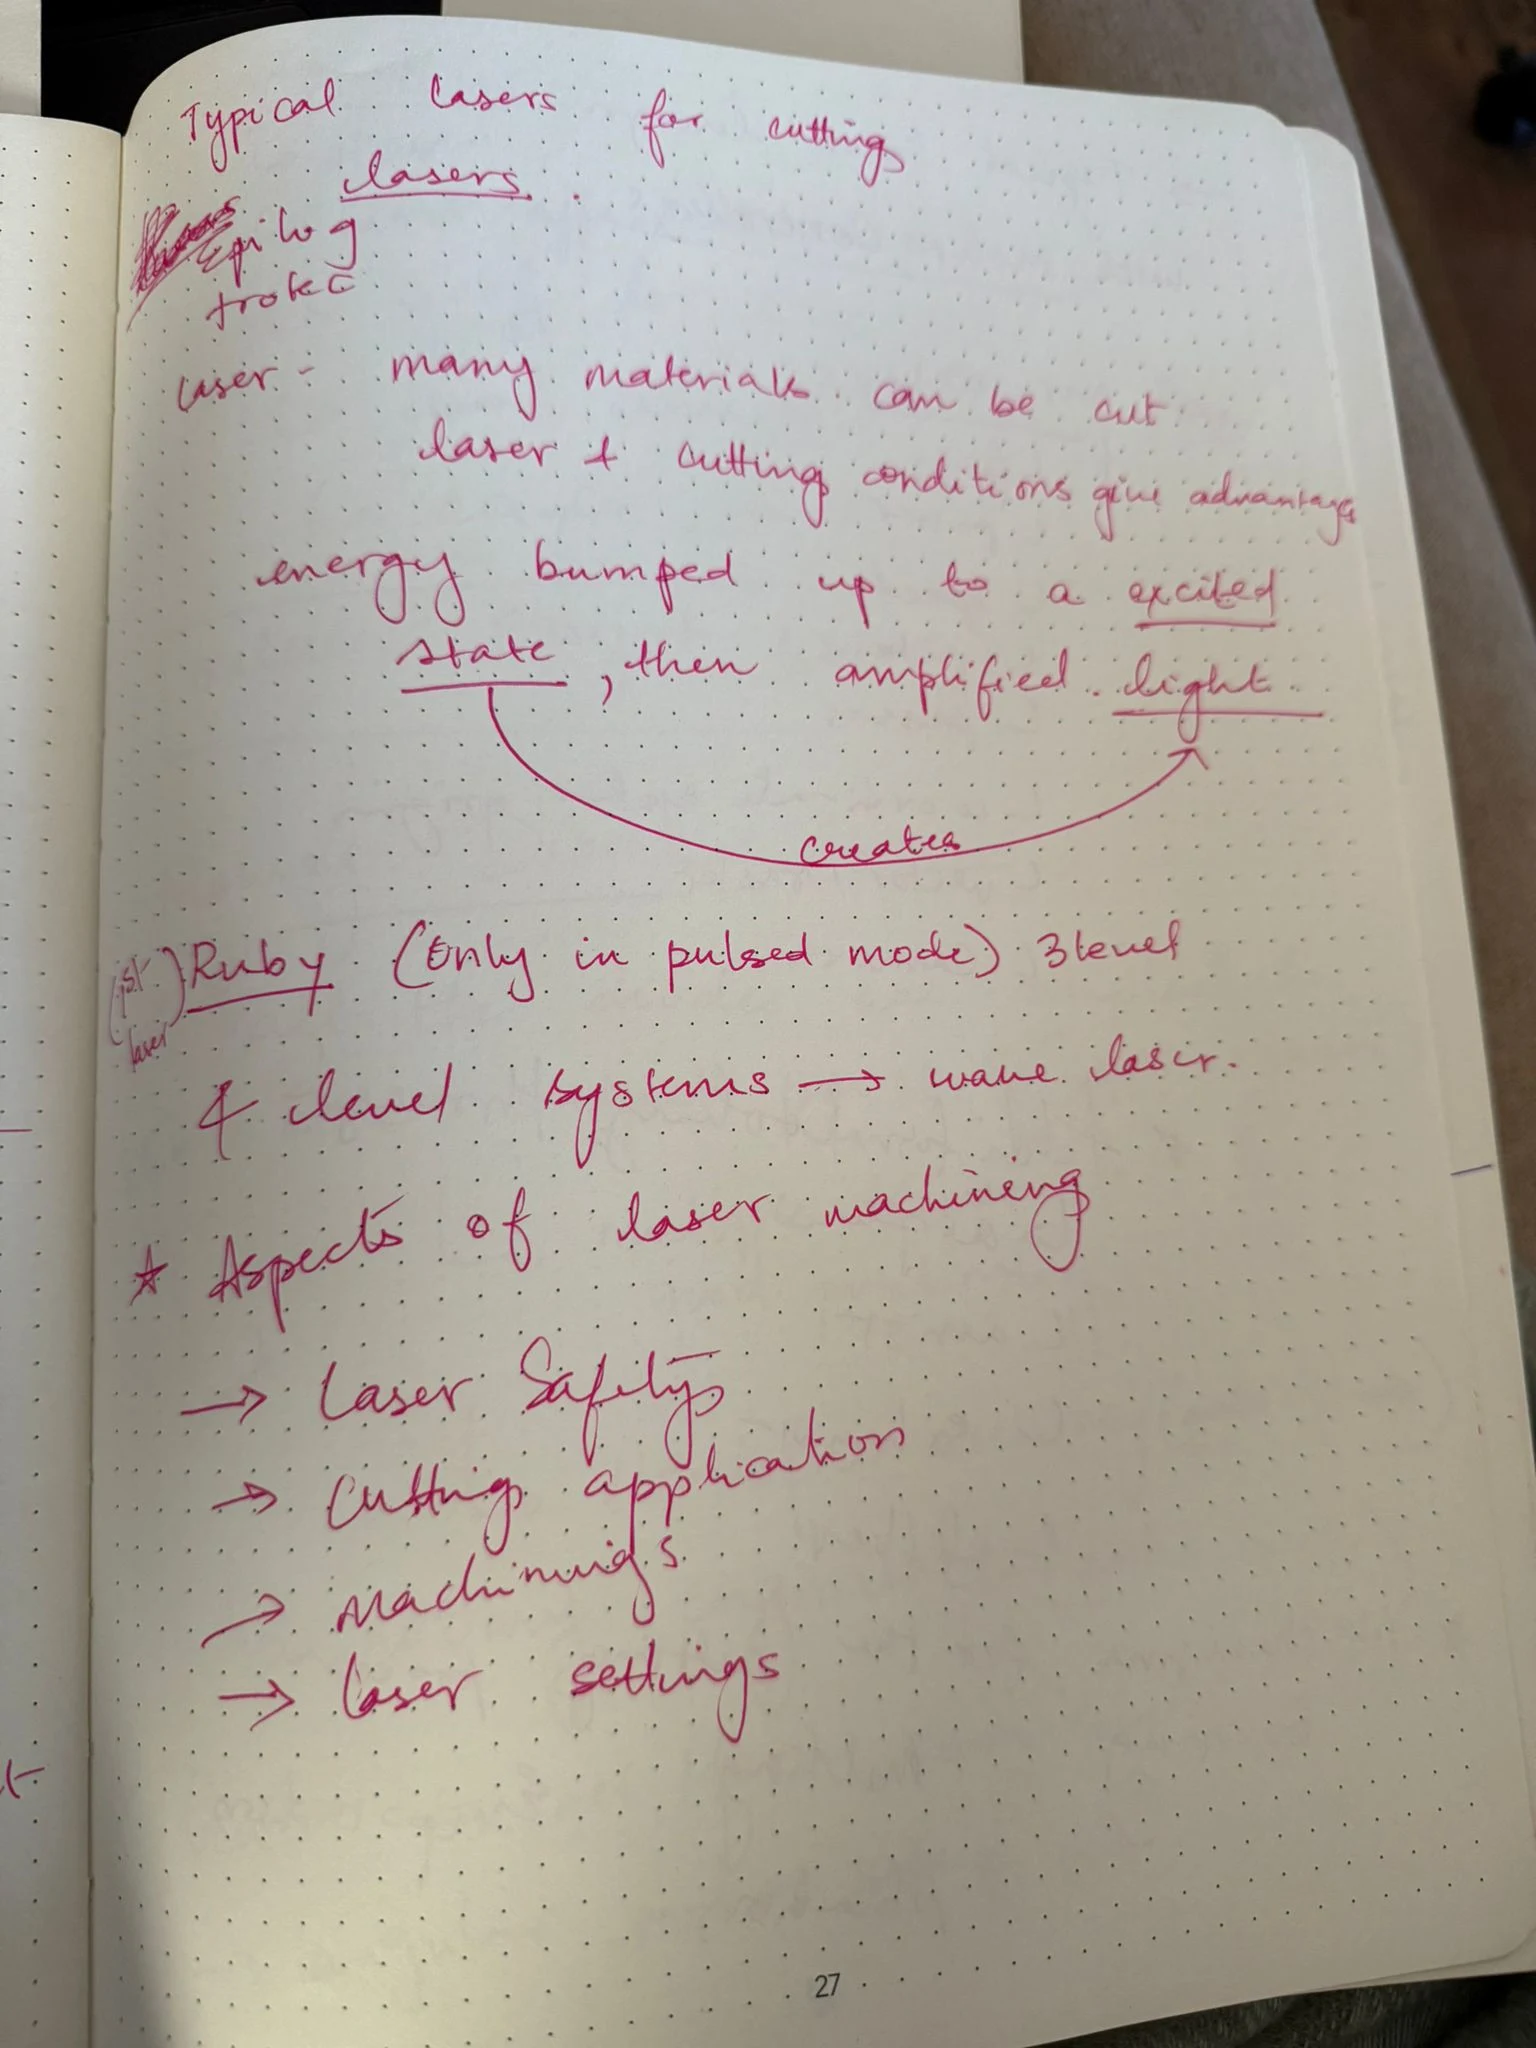
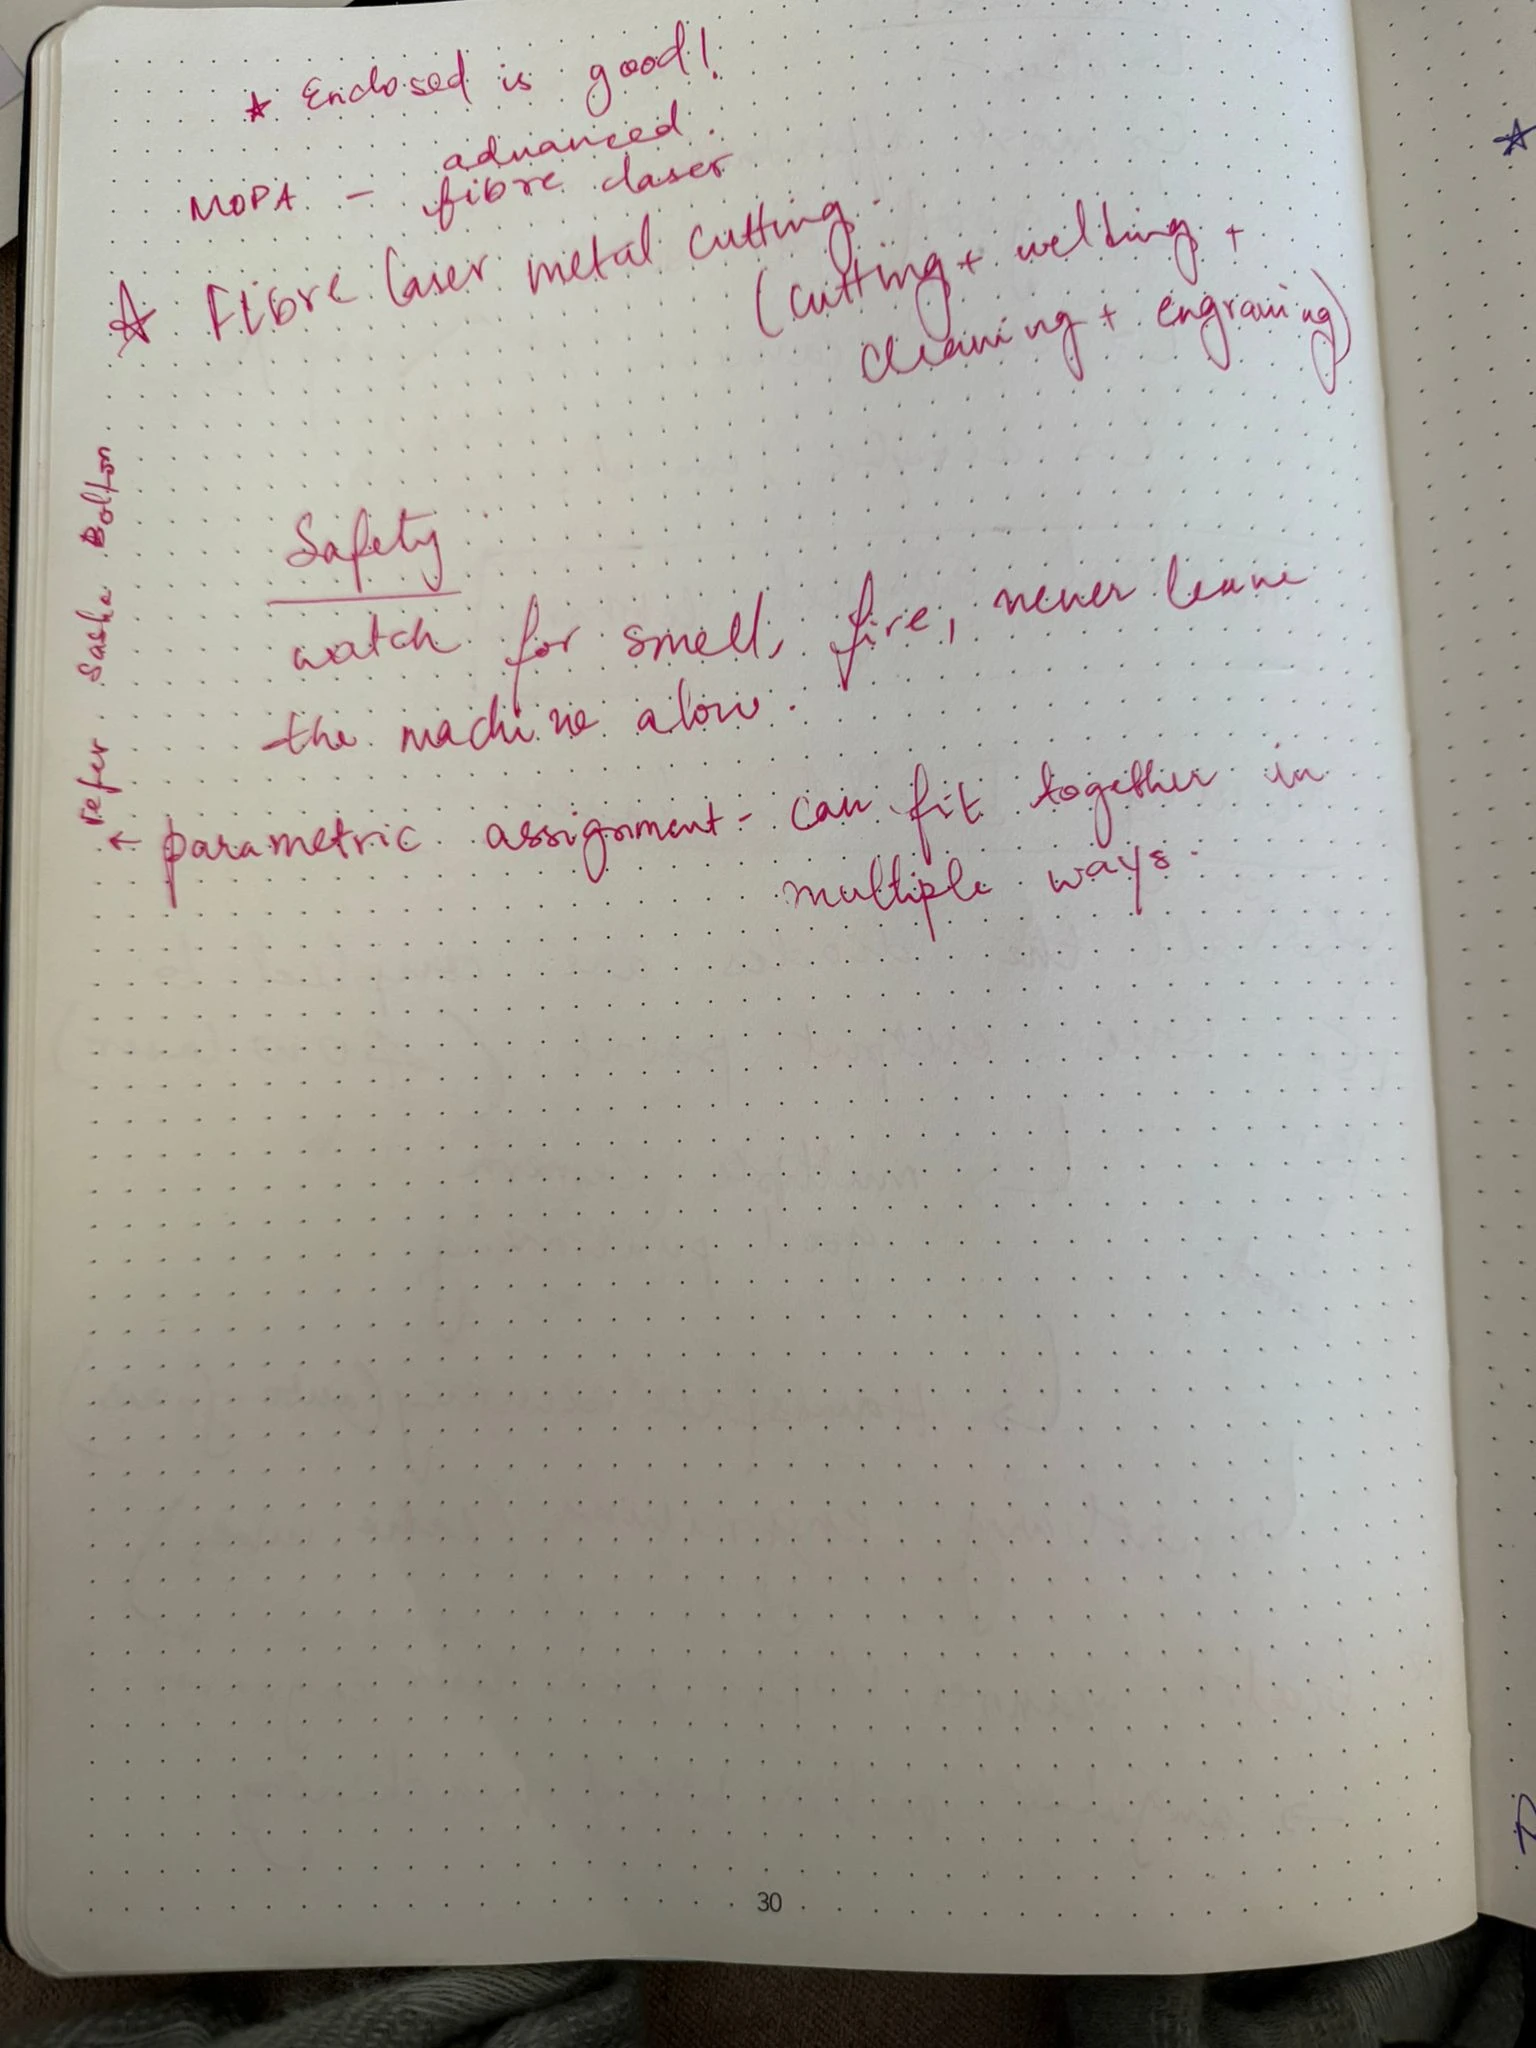
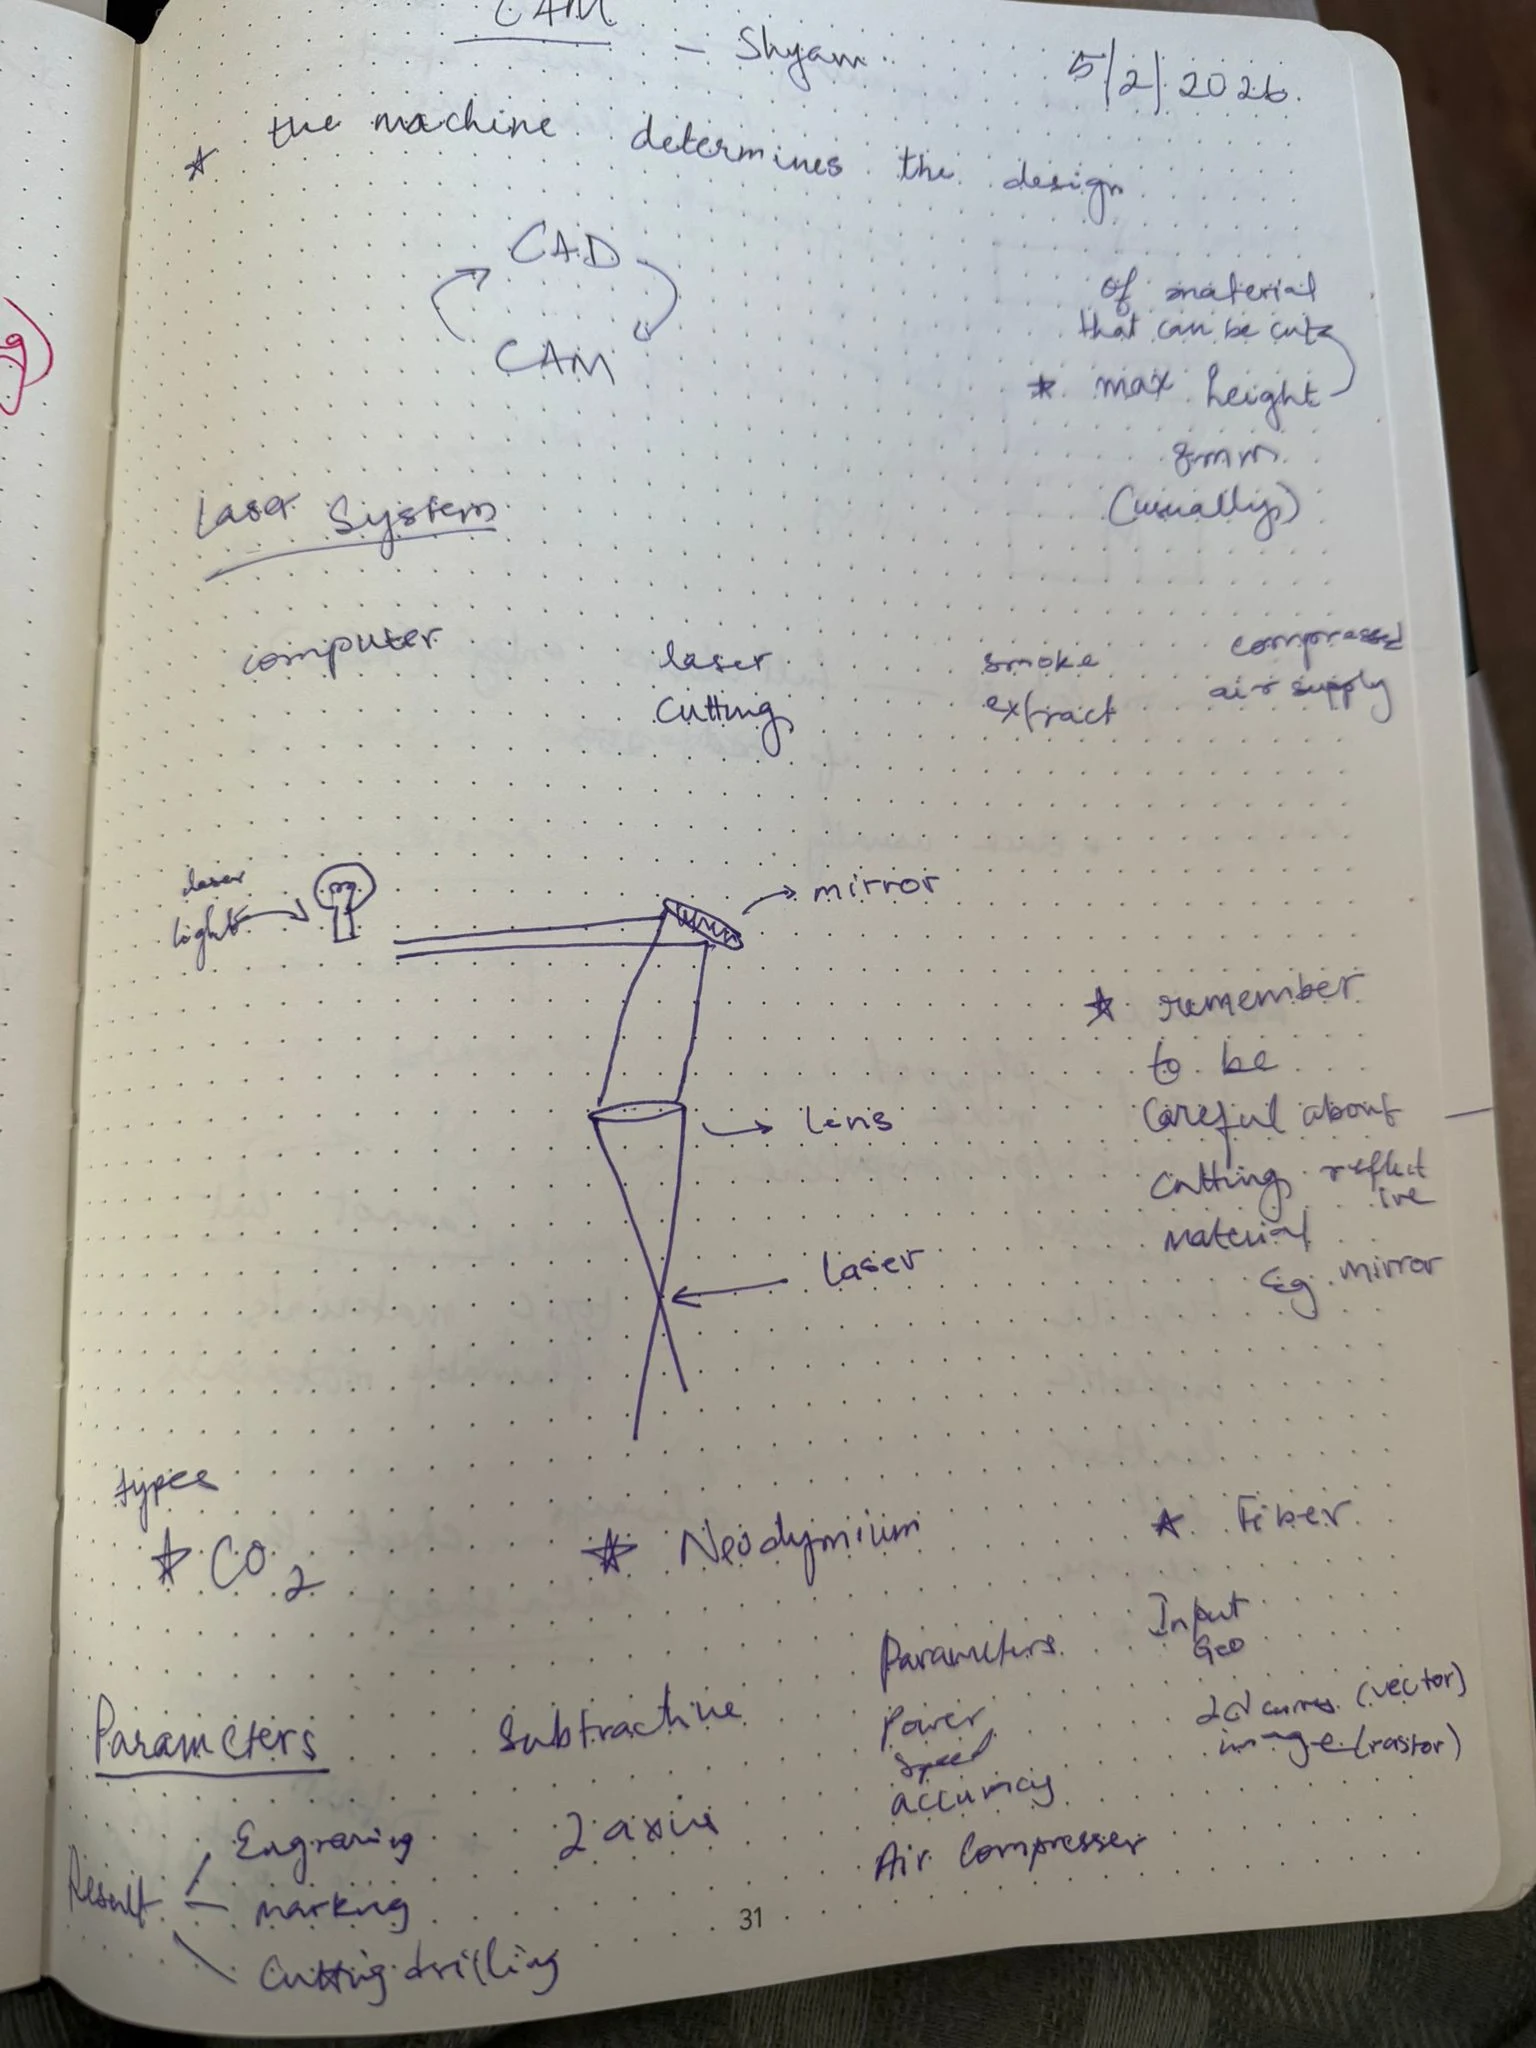
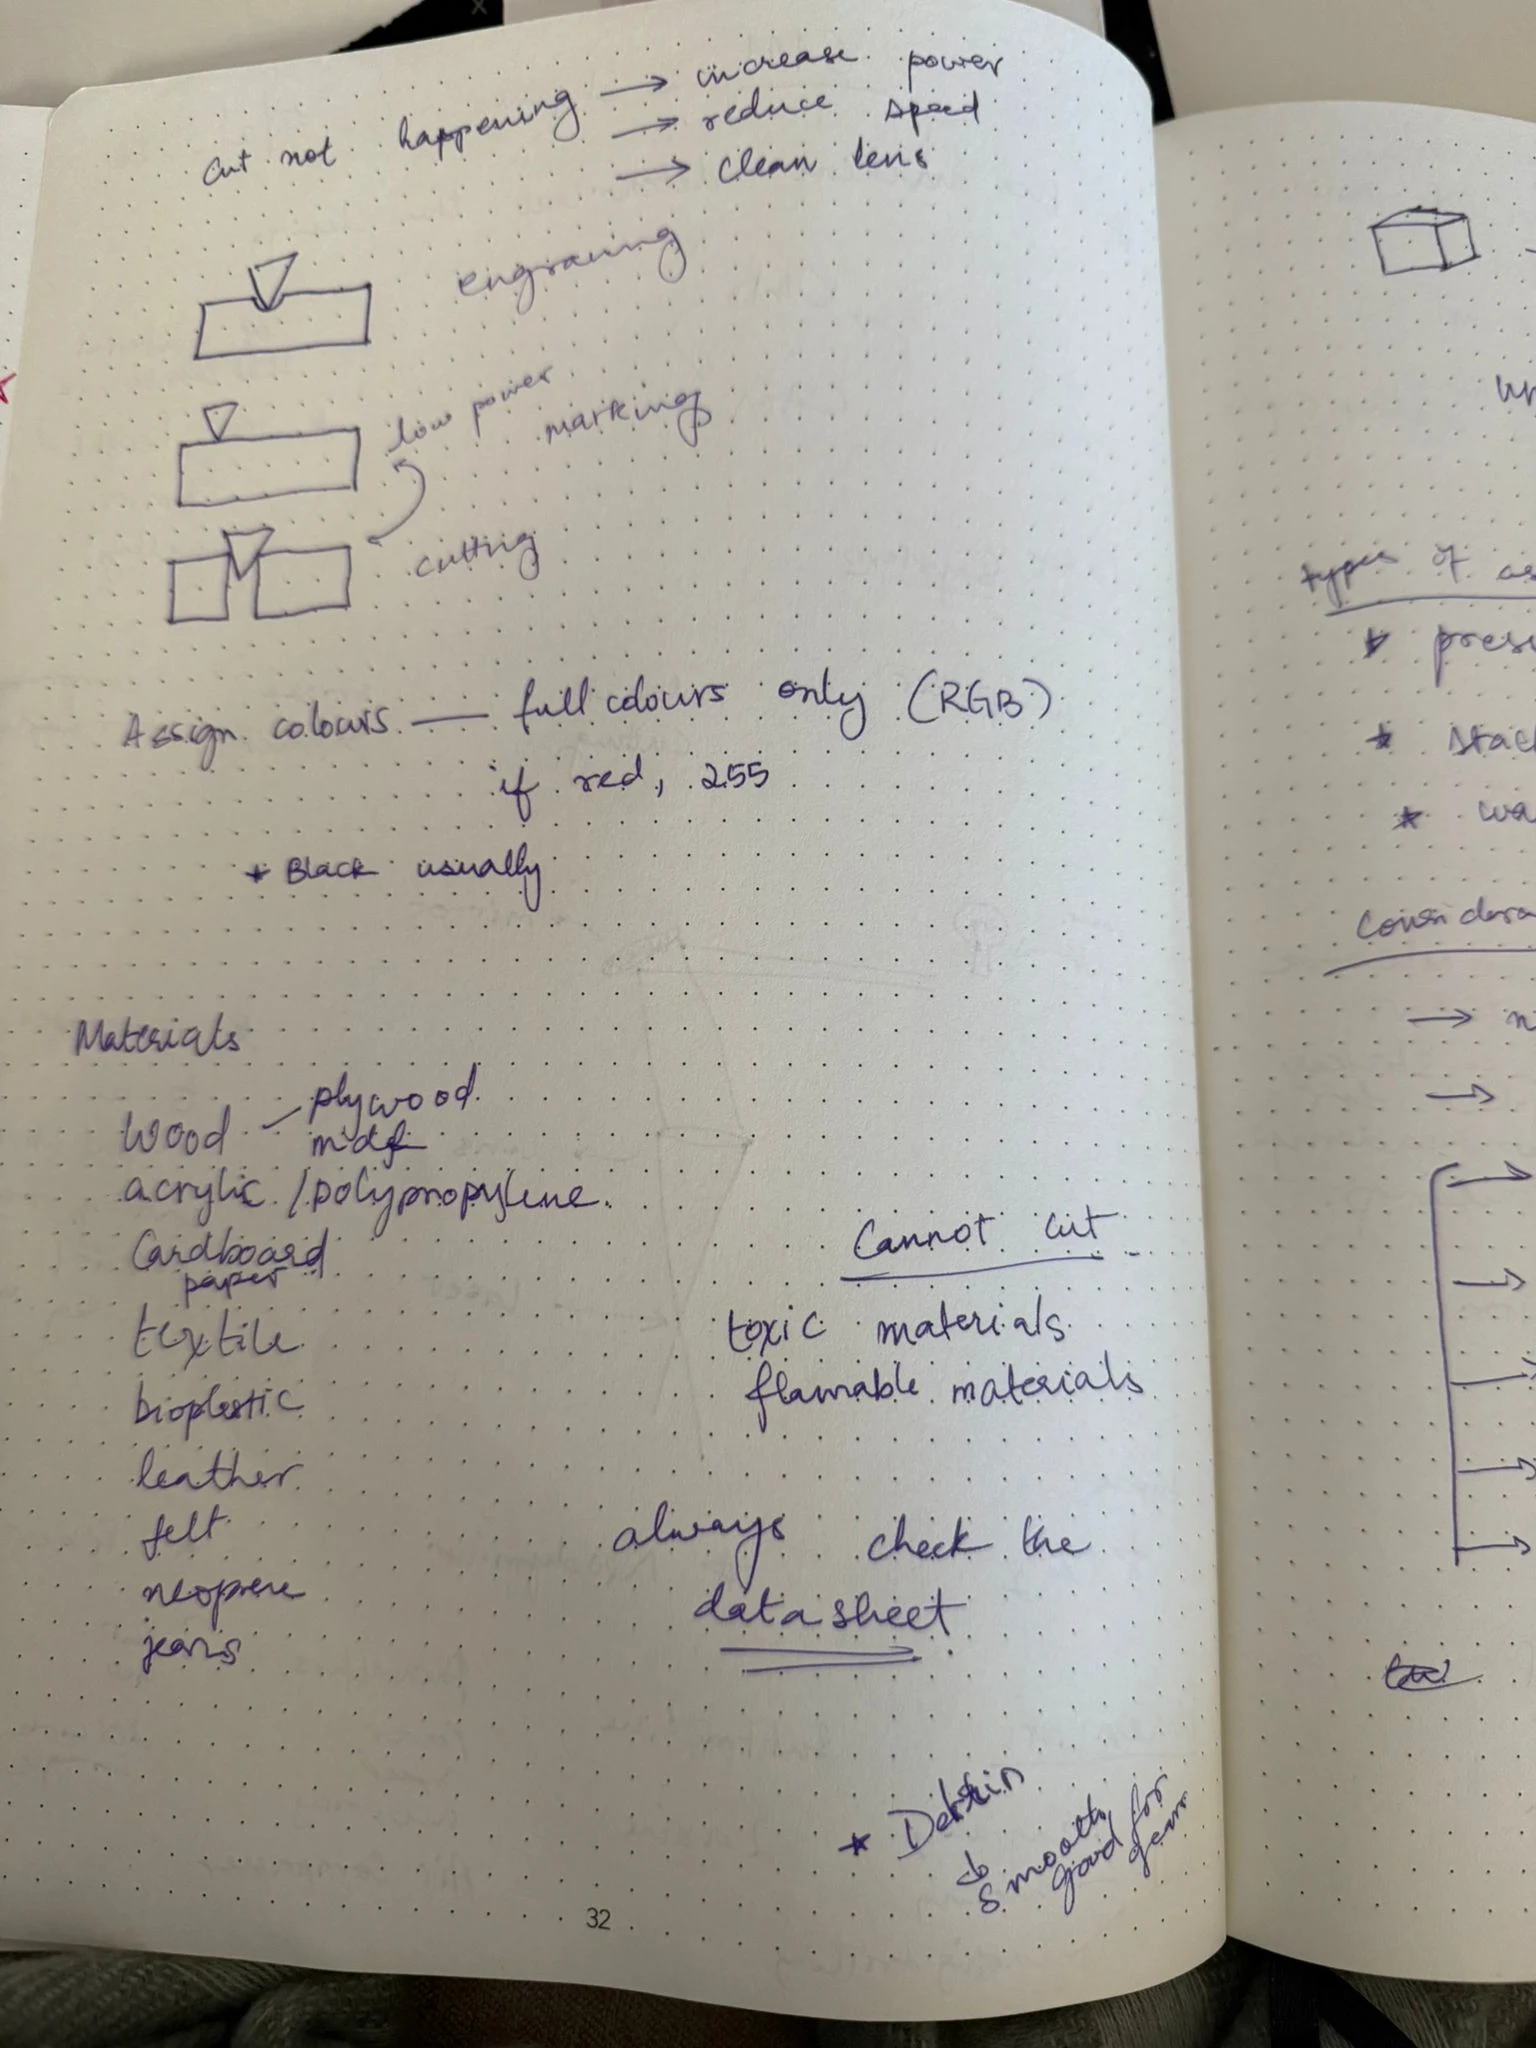
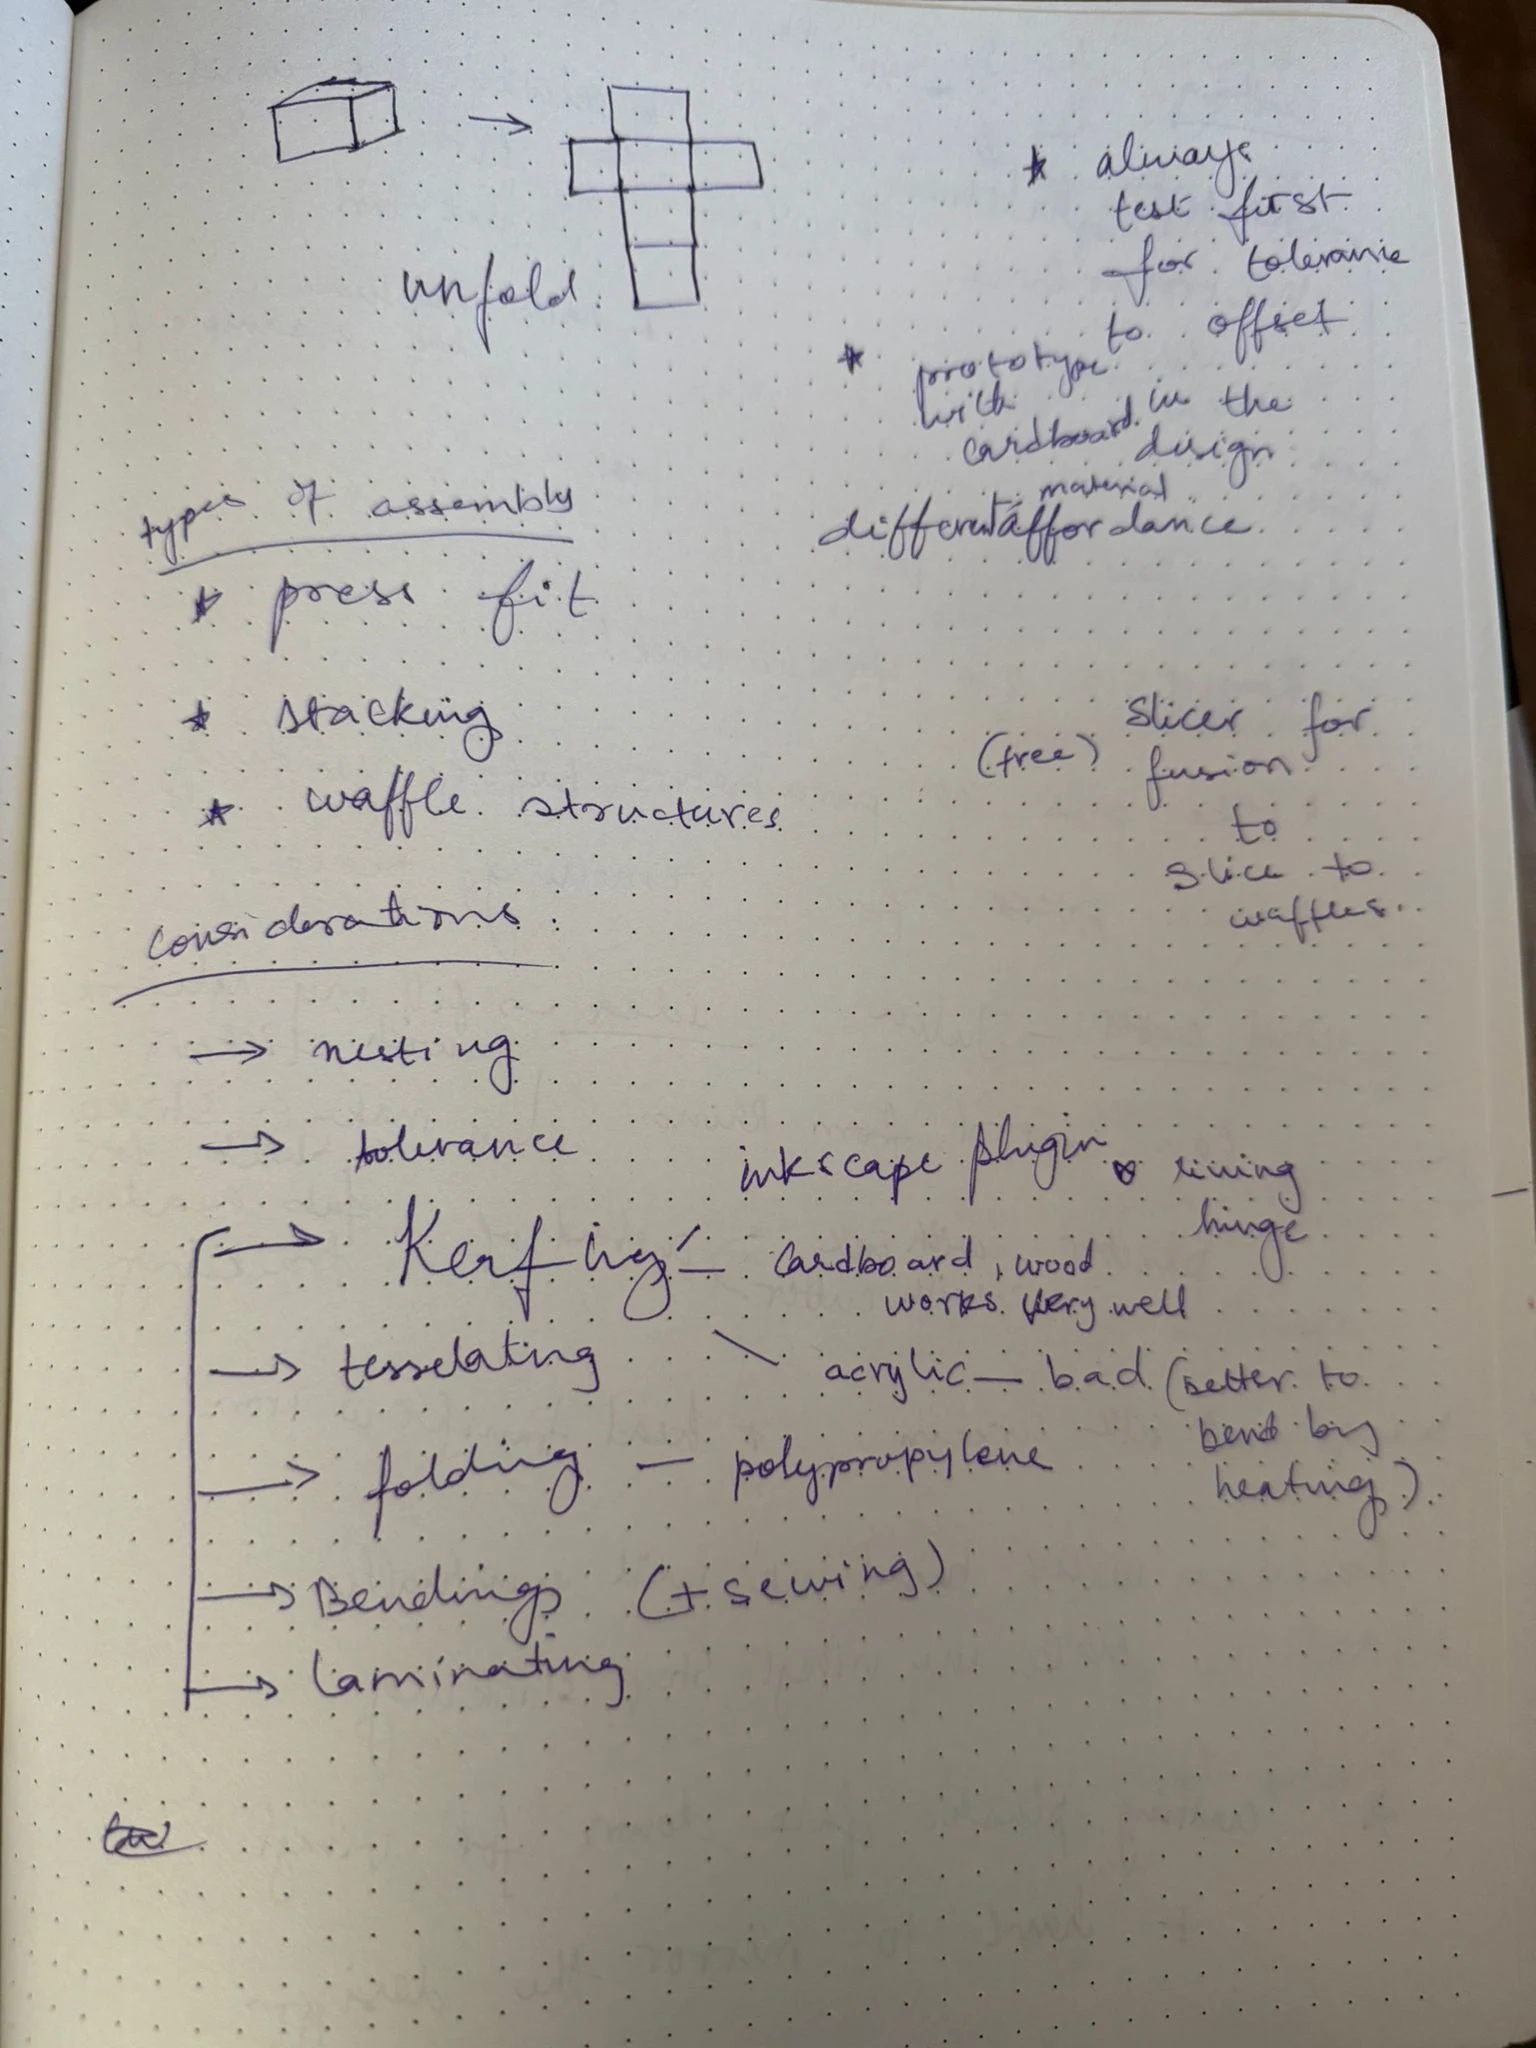
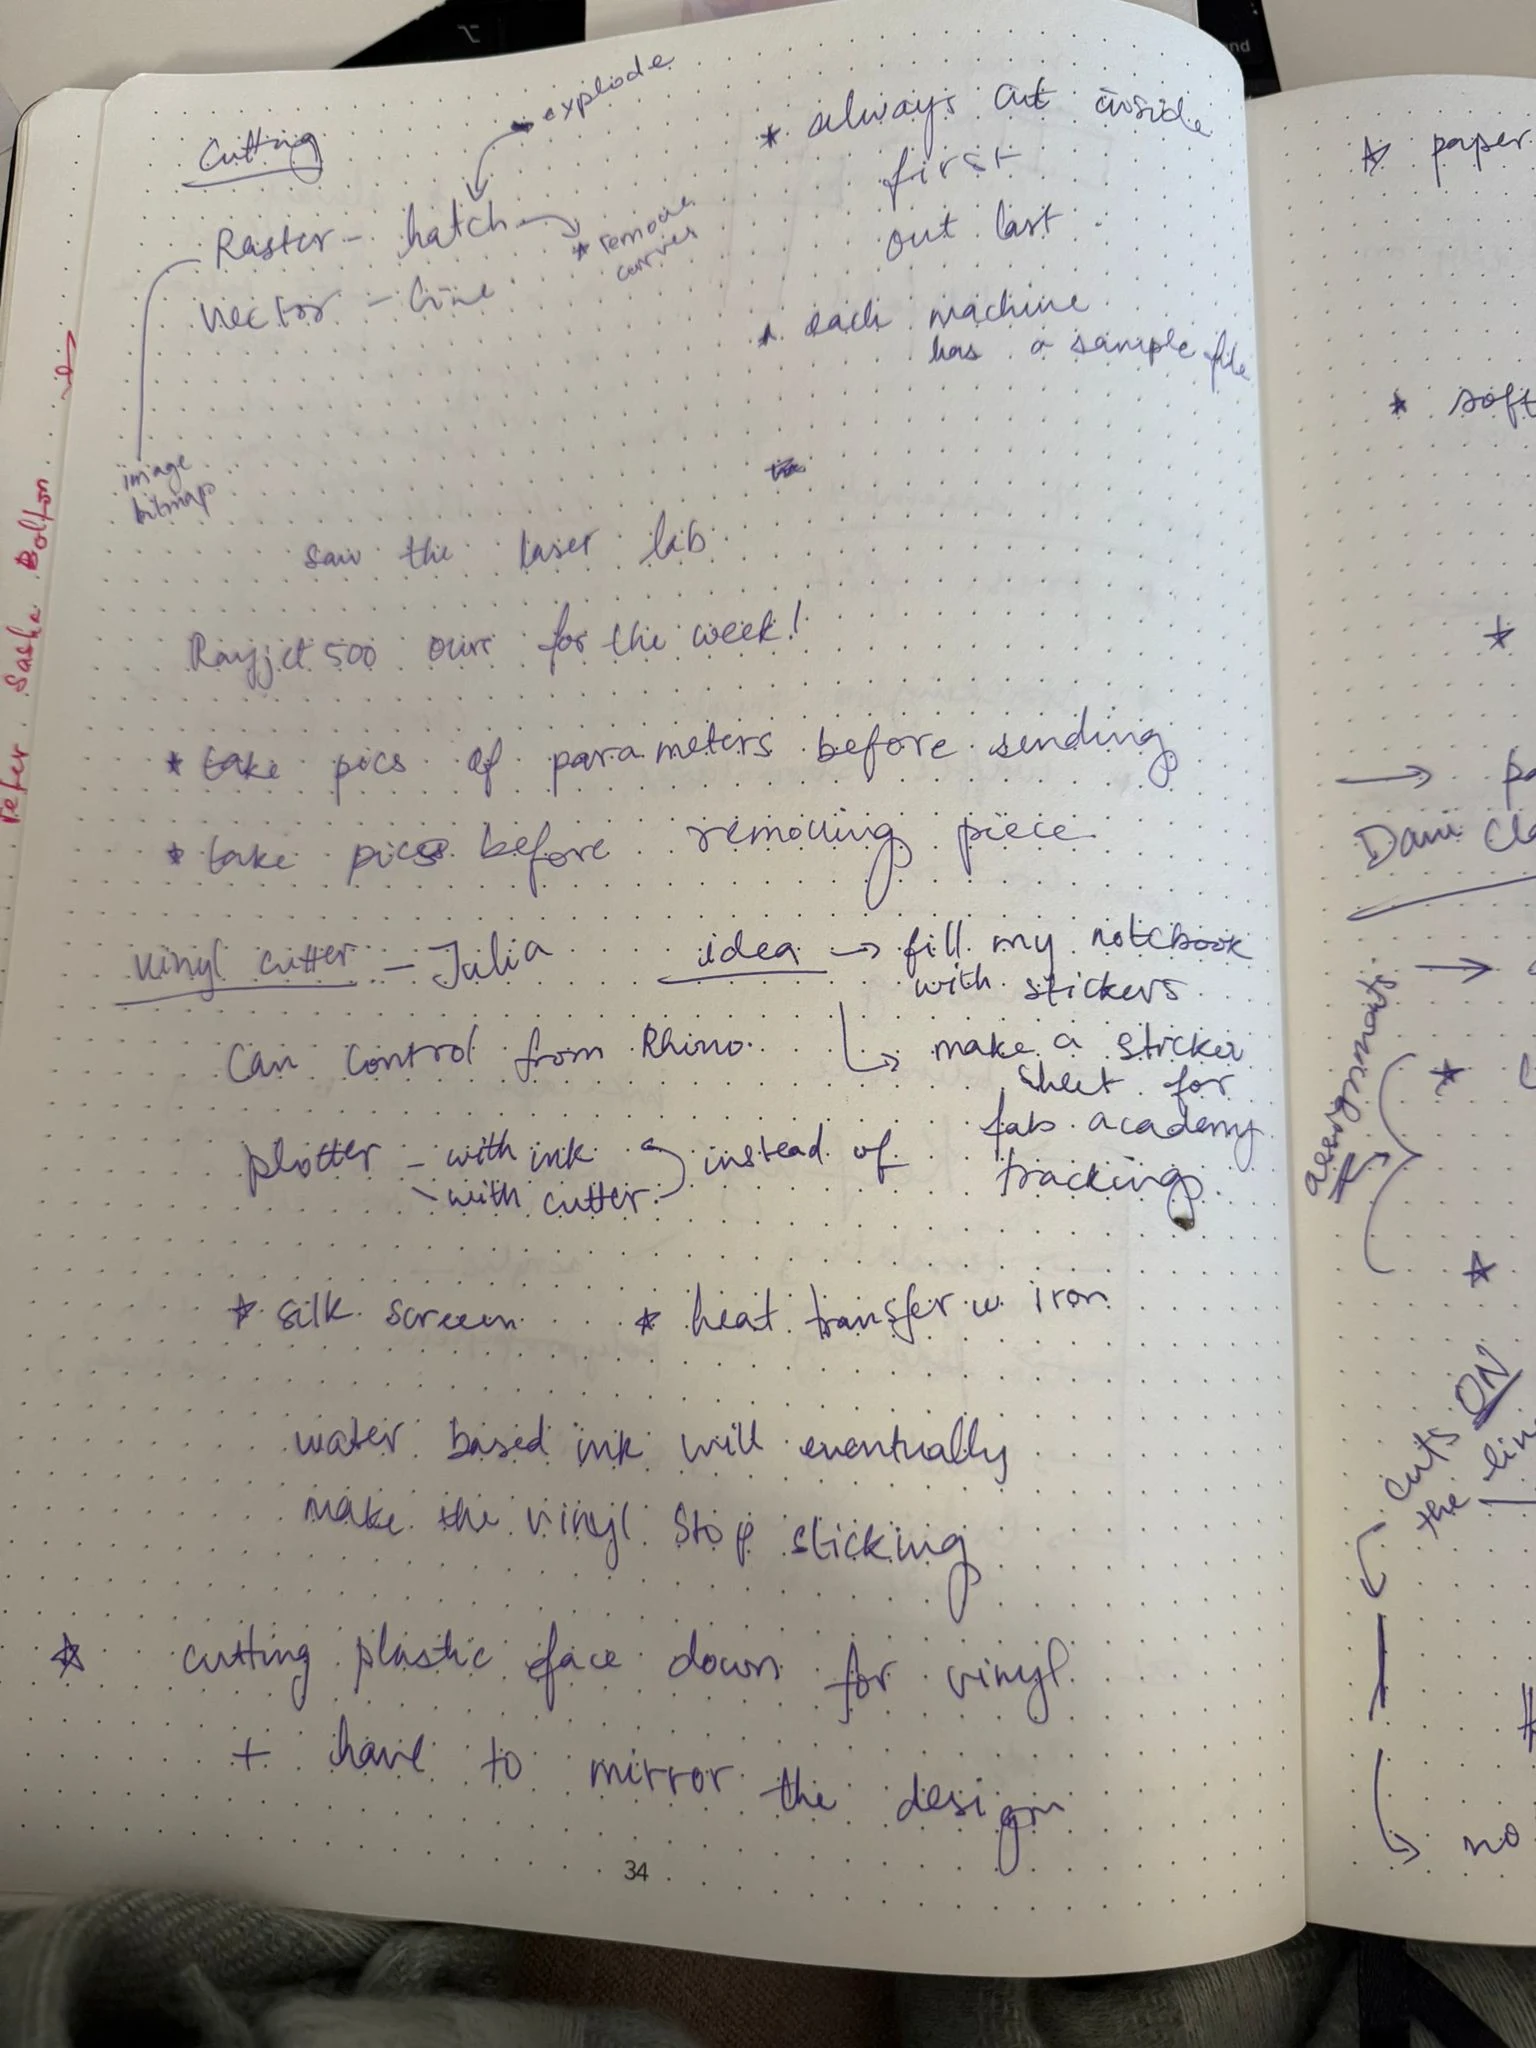
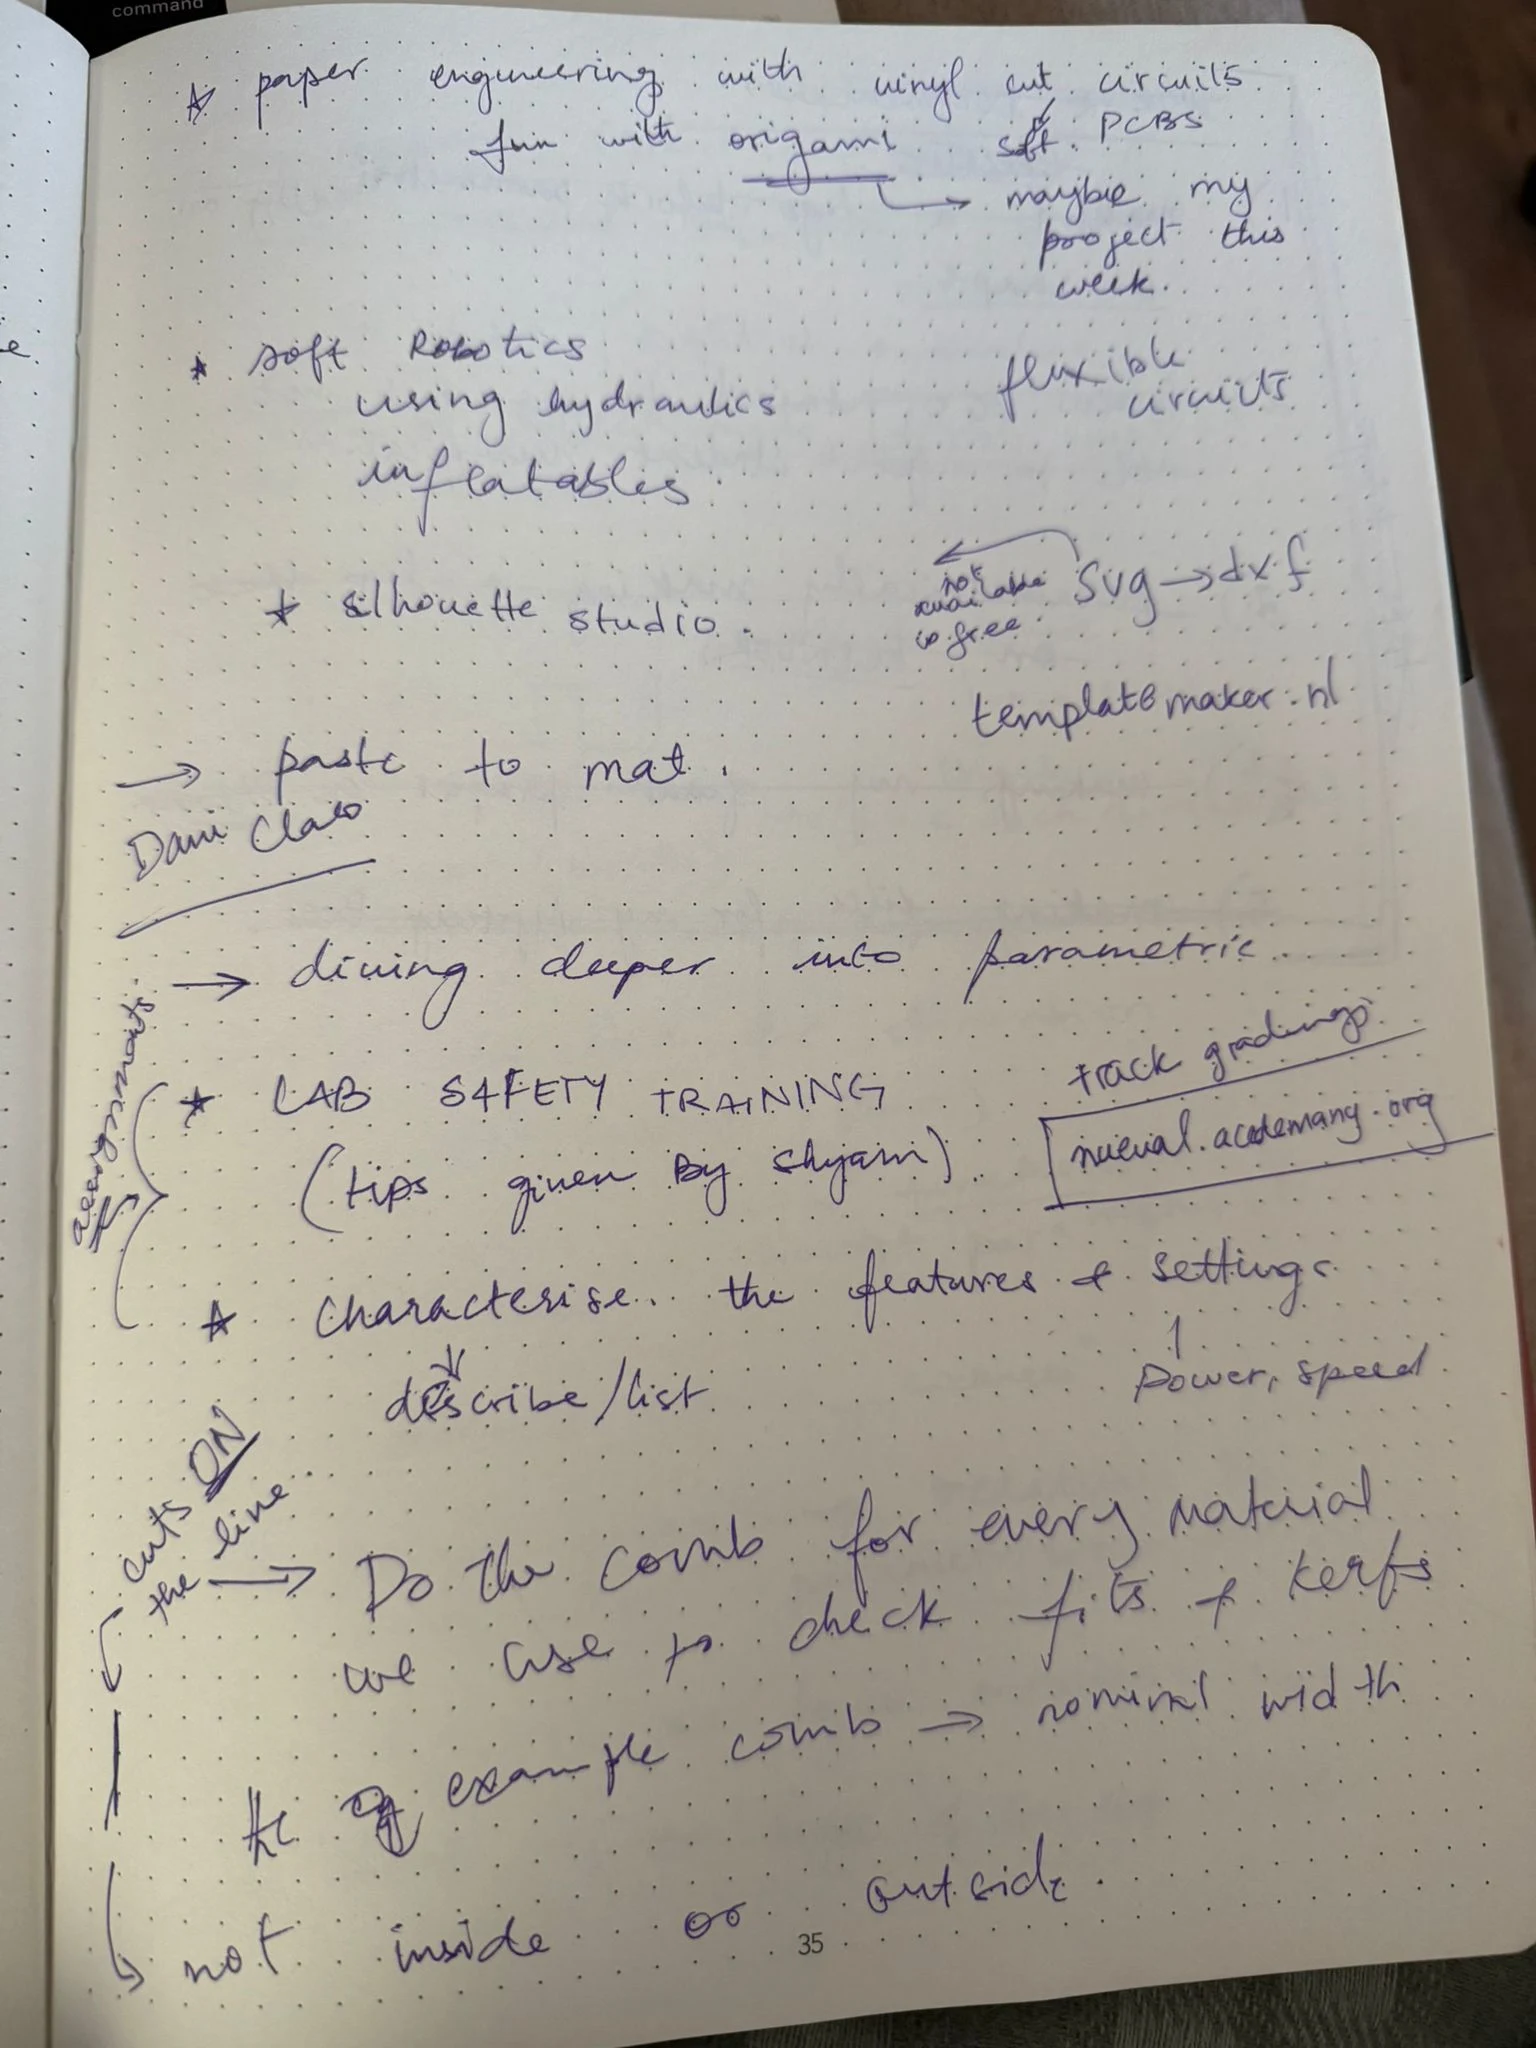
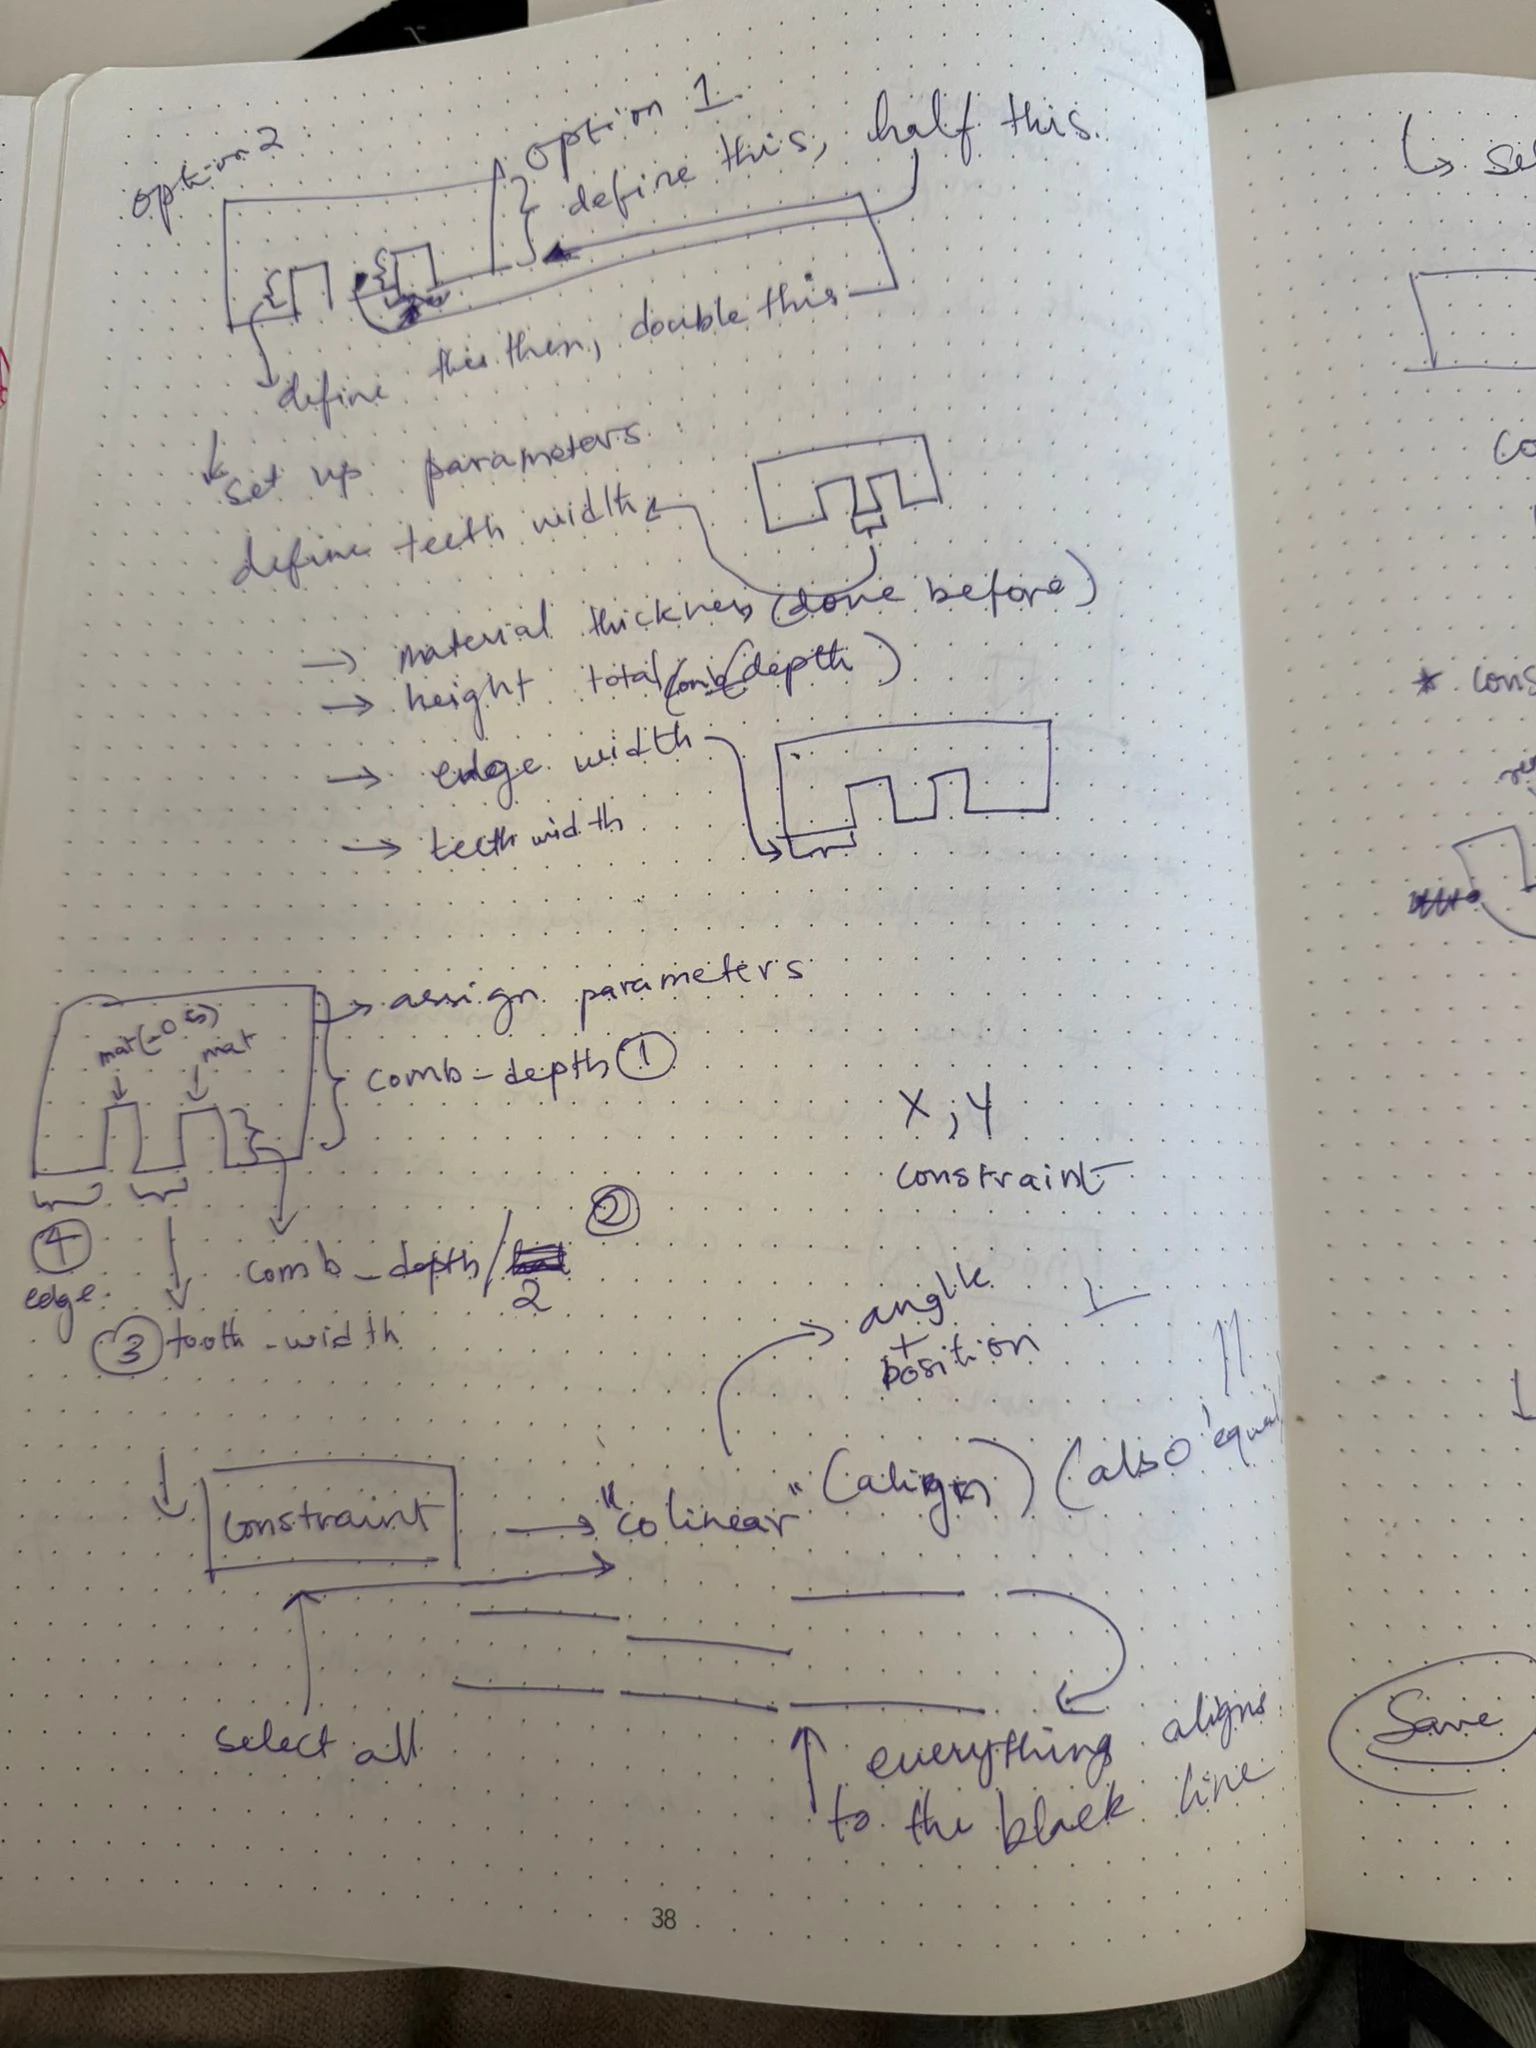
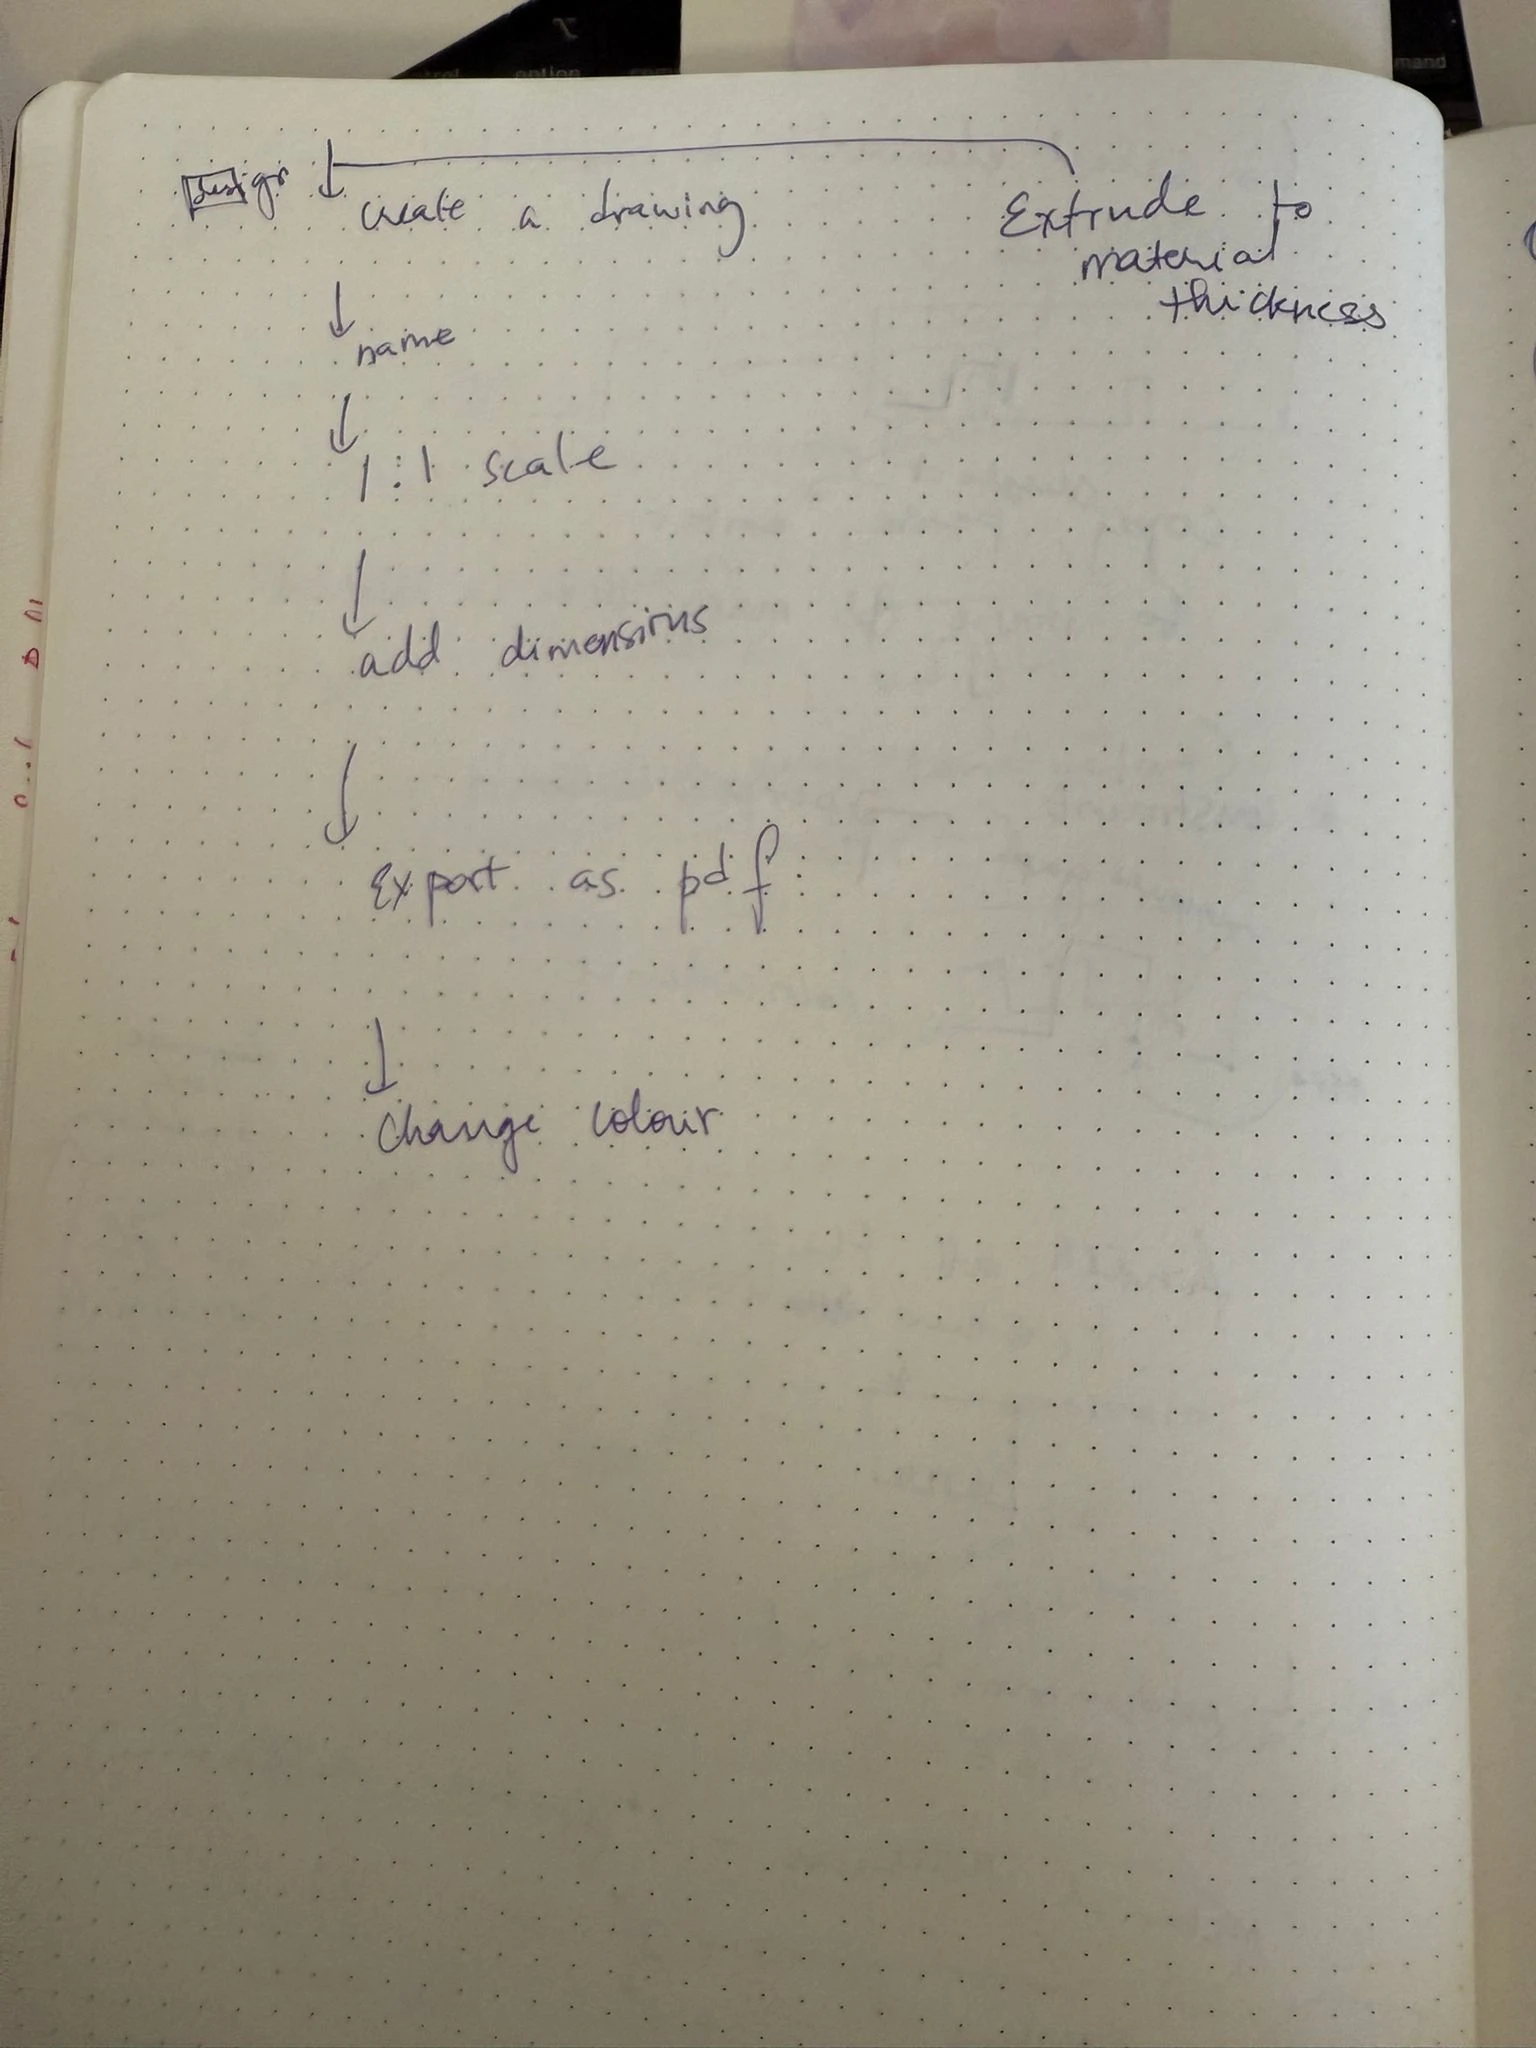
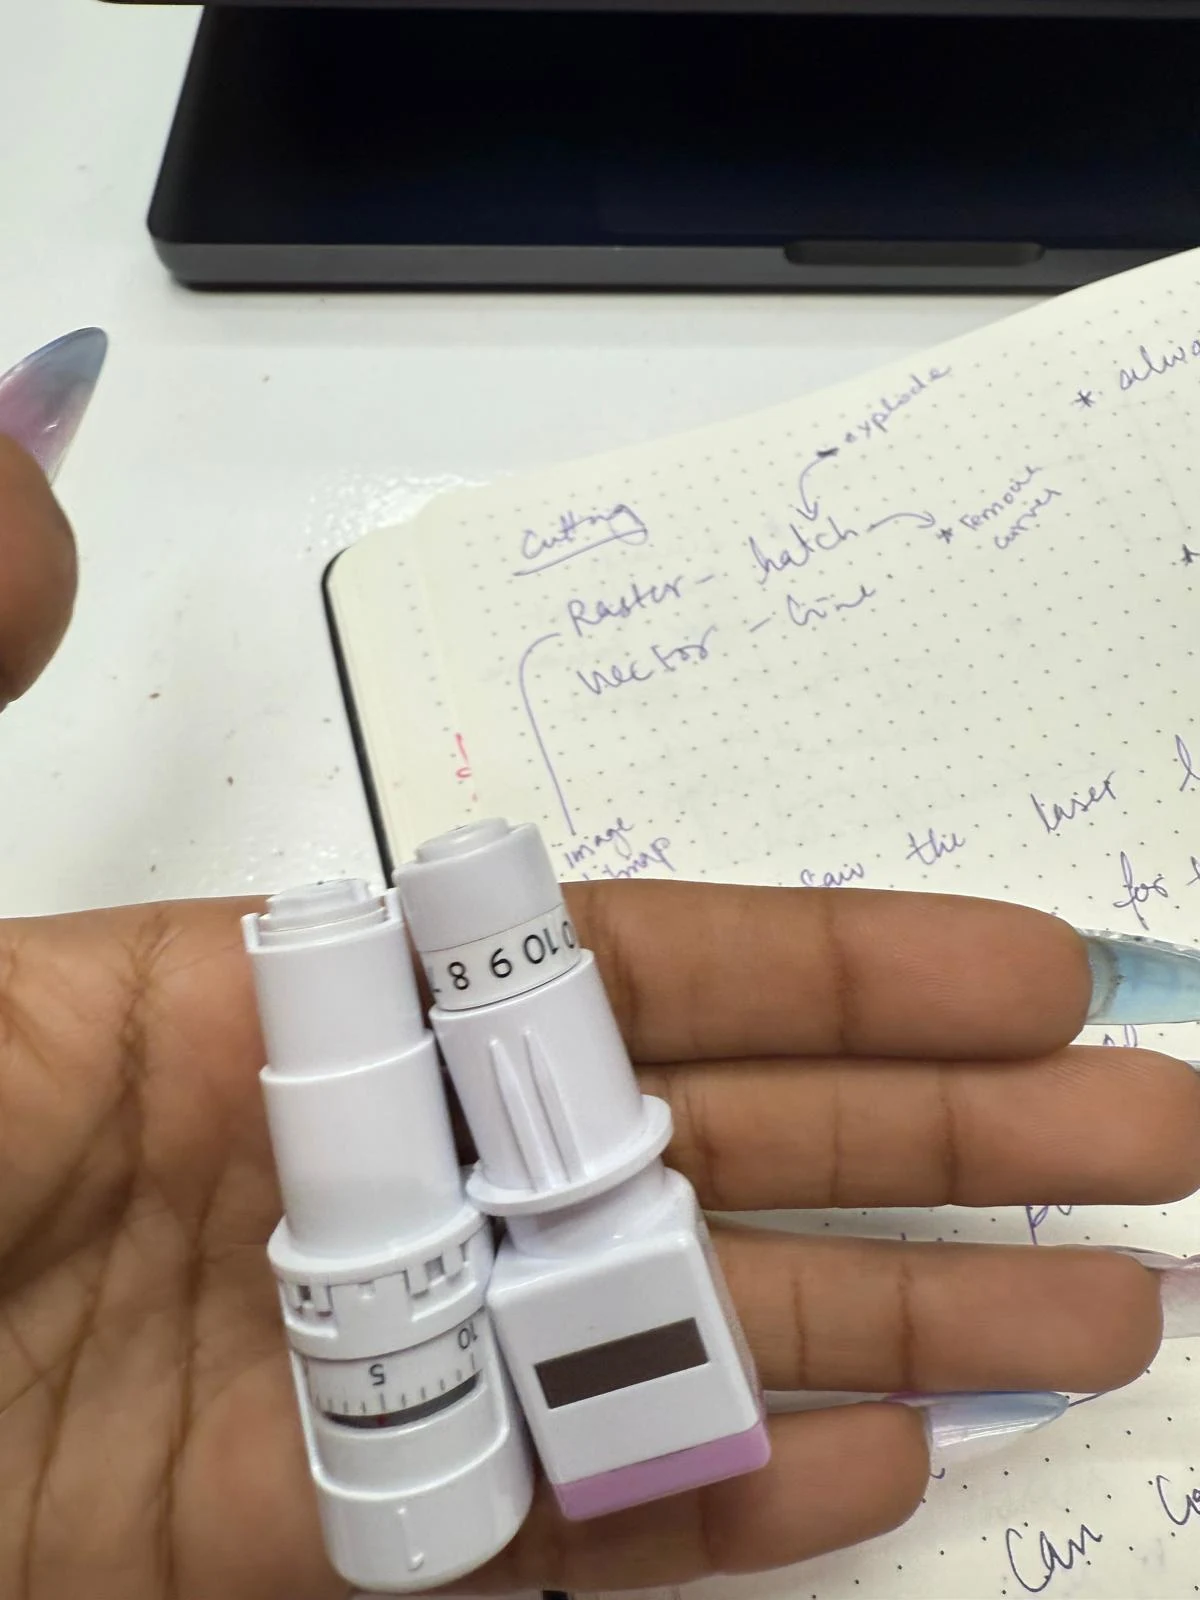
notes
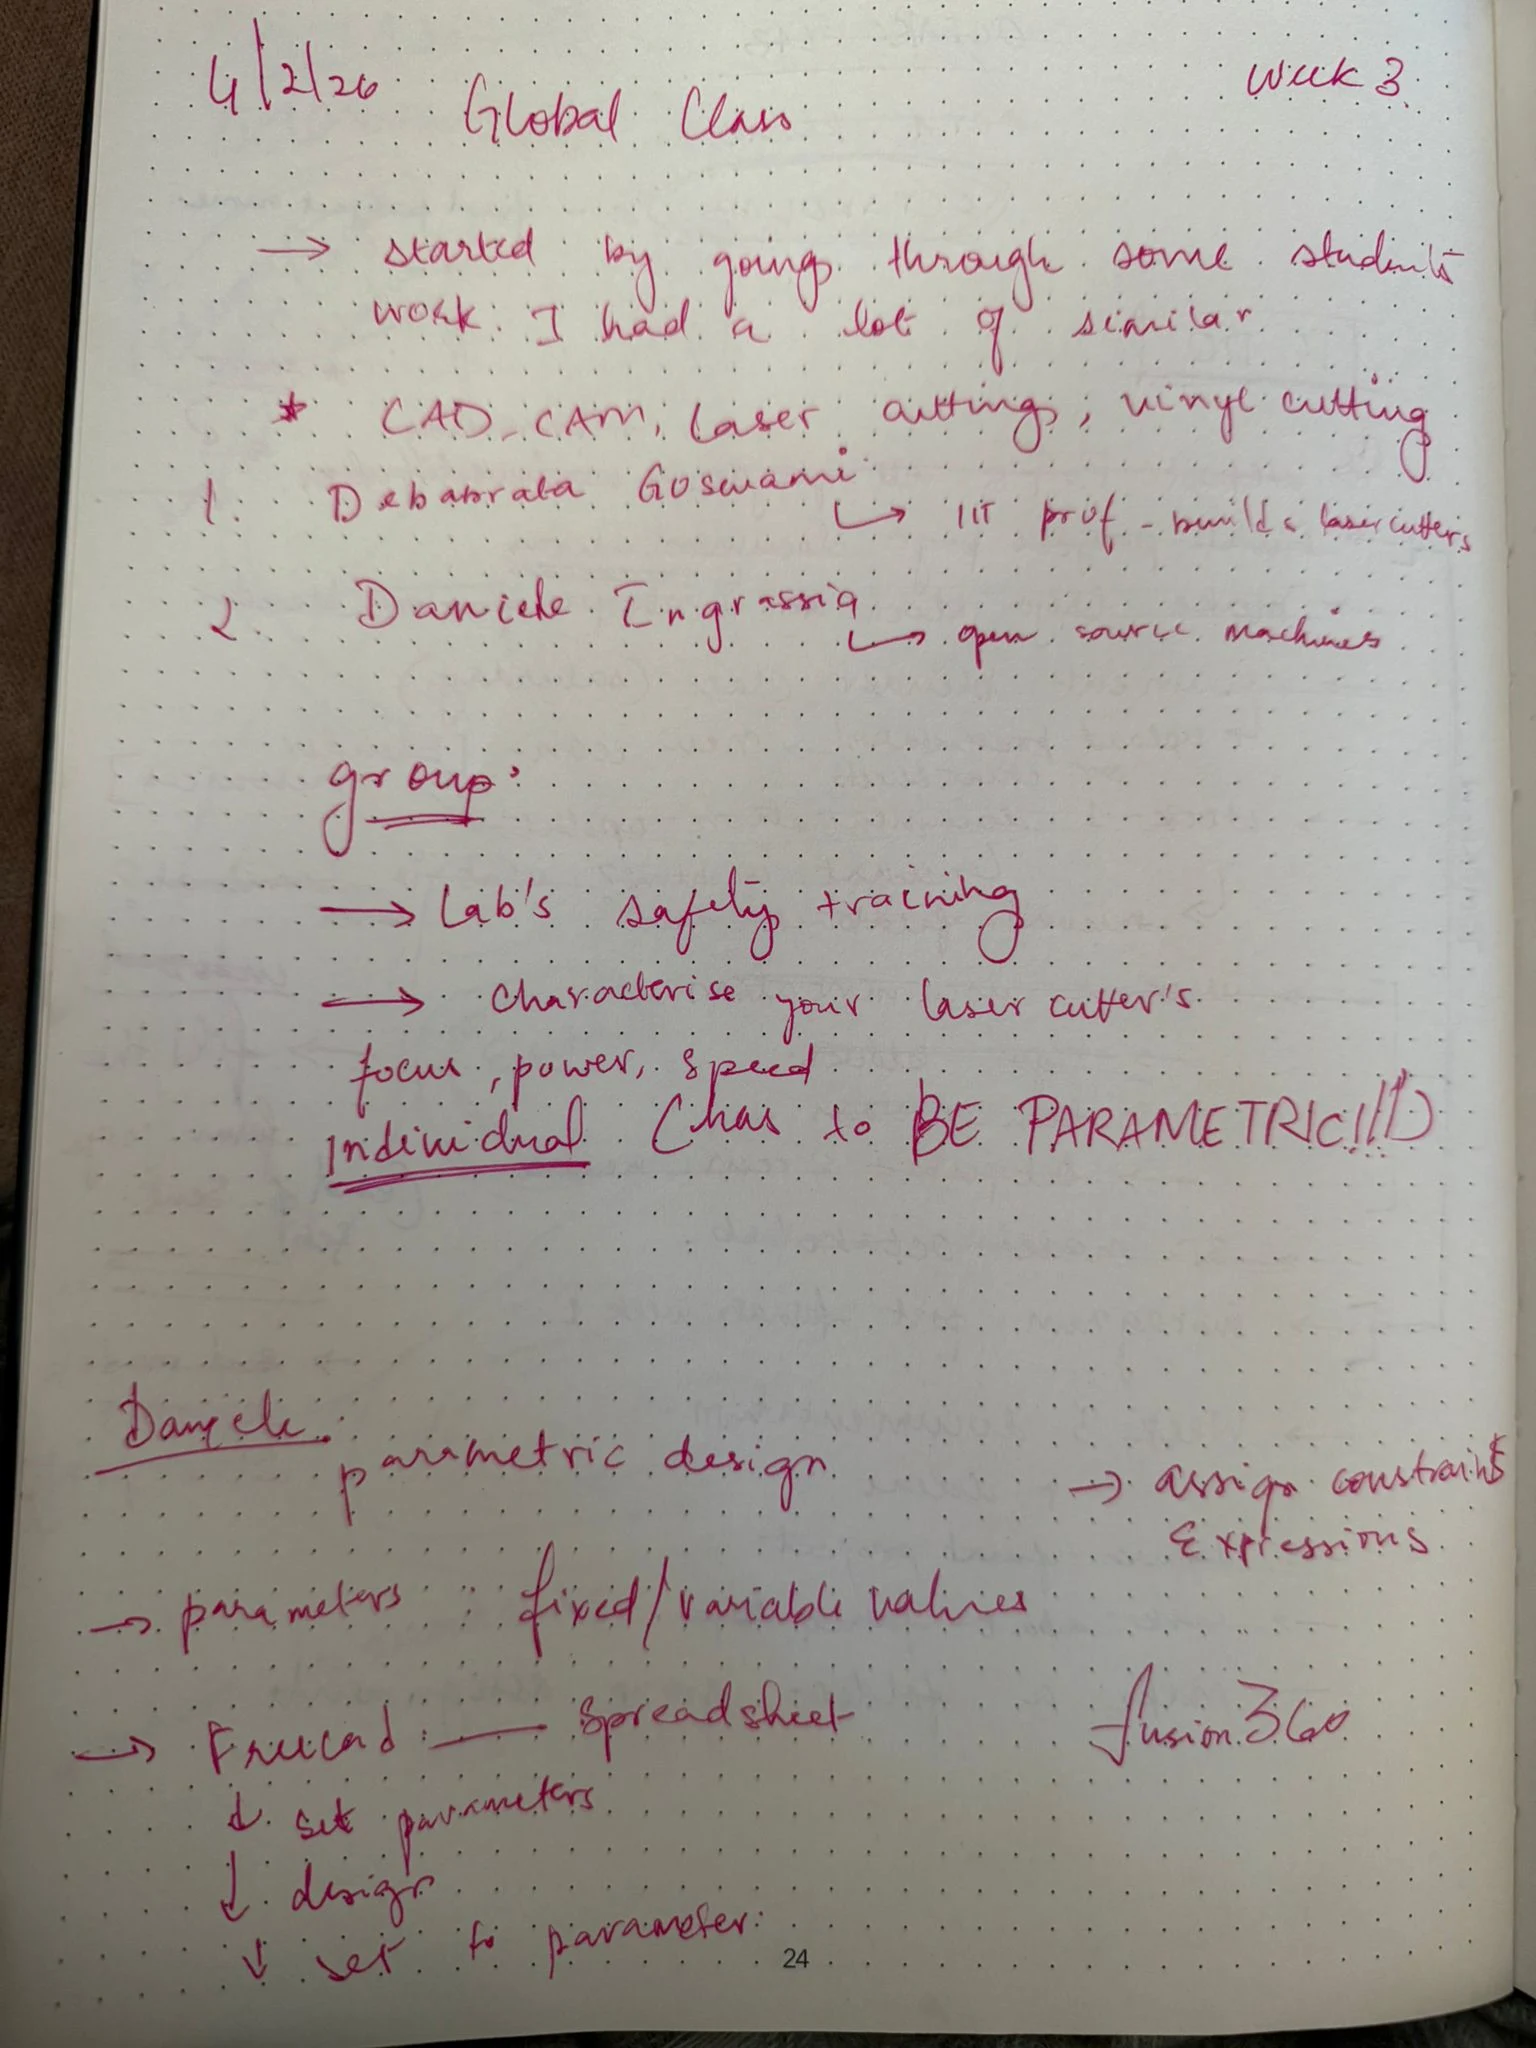
I take notes in my notebook generally, and documenting that is taking the most time—so I will put pictures of my notebook here and document just the assignment parts! Whenever I have time I can transcribe these notes.
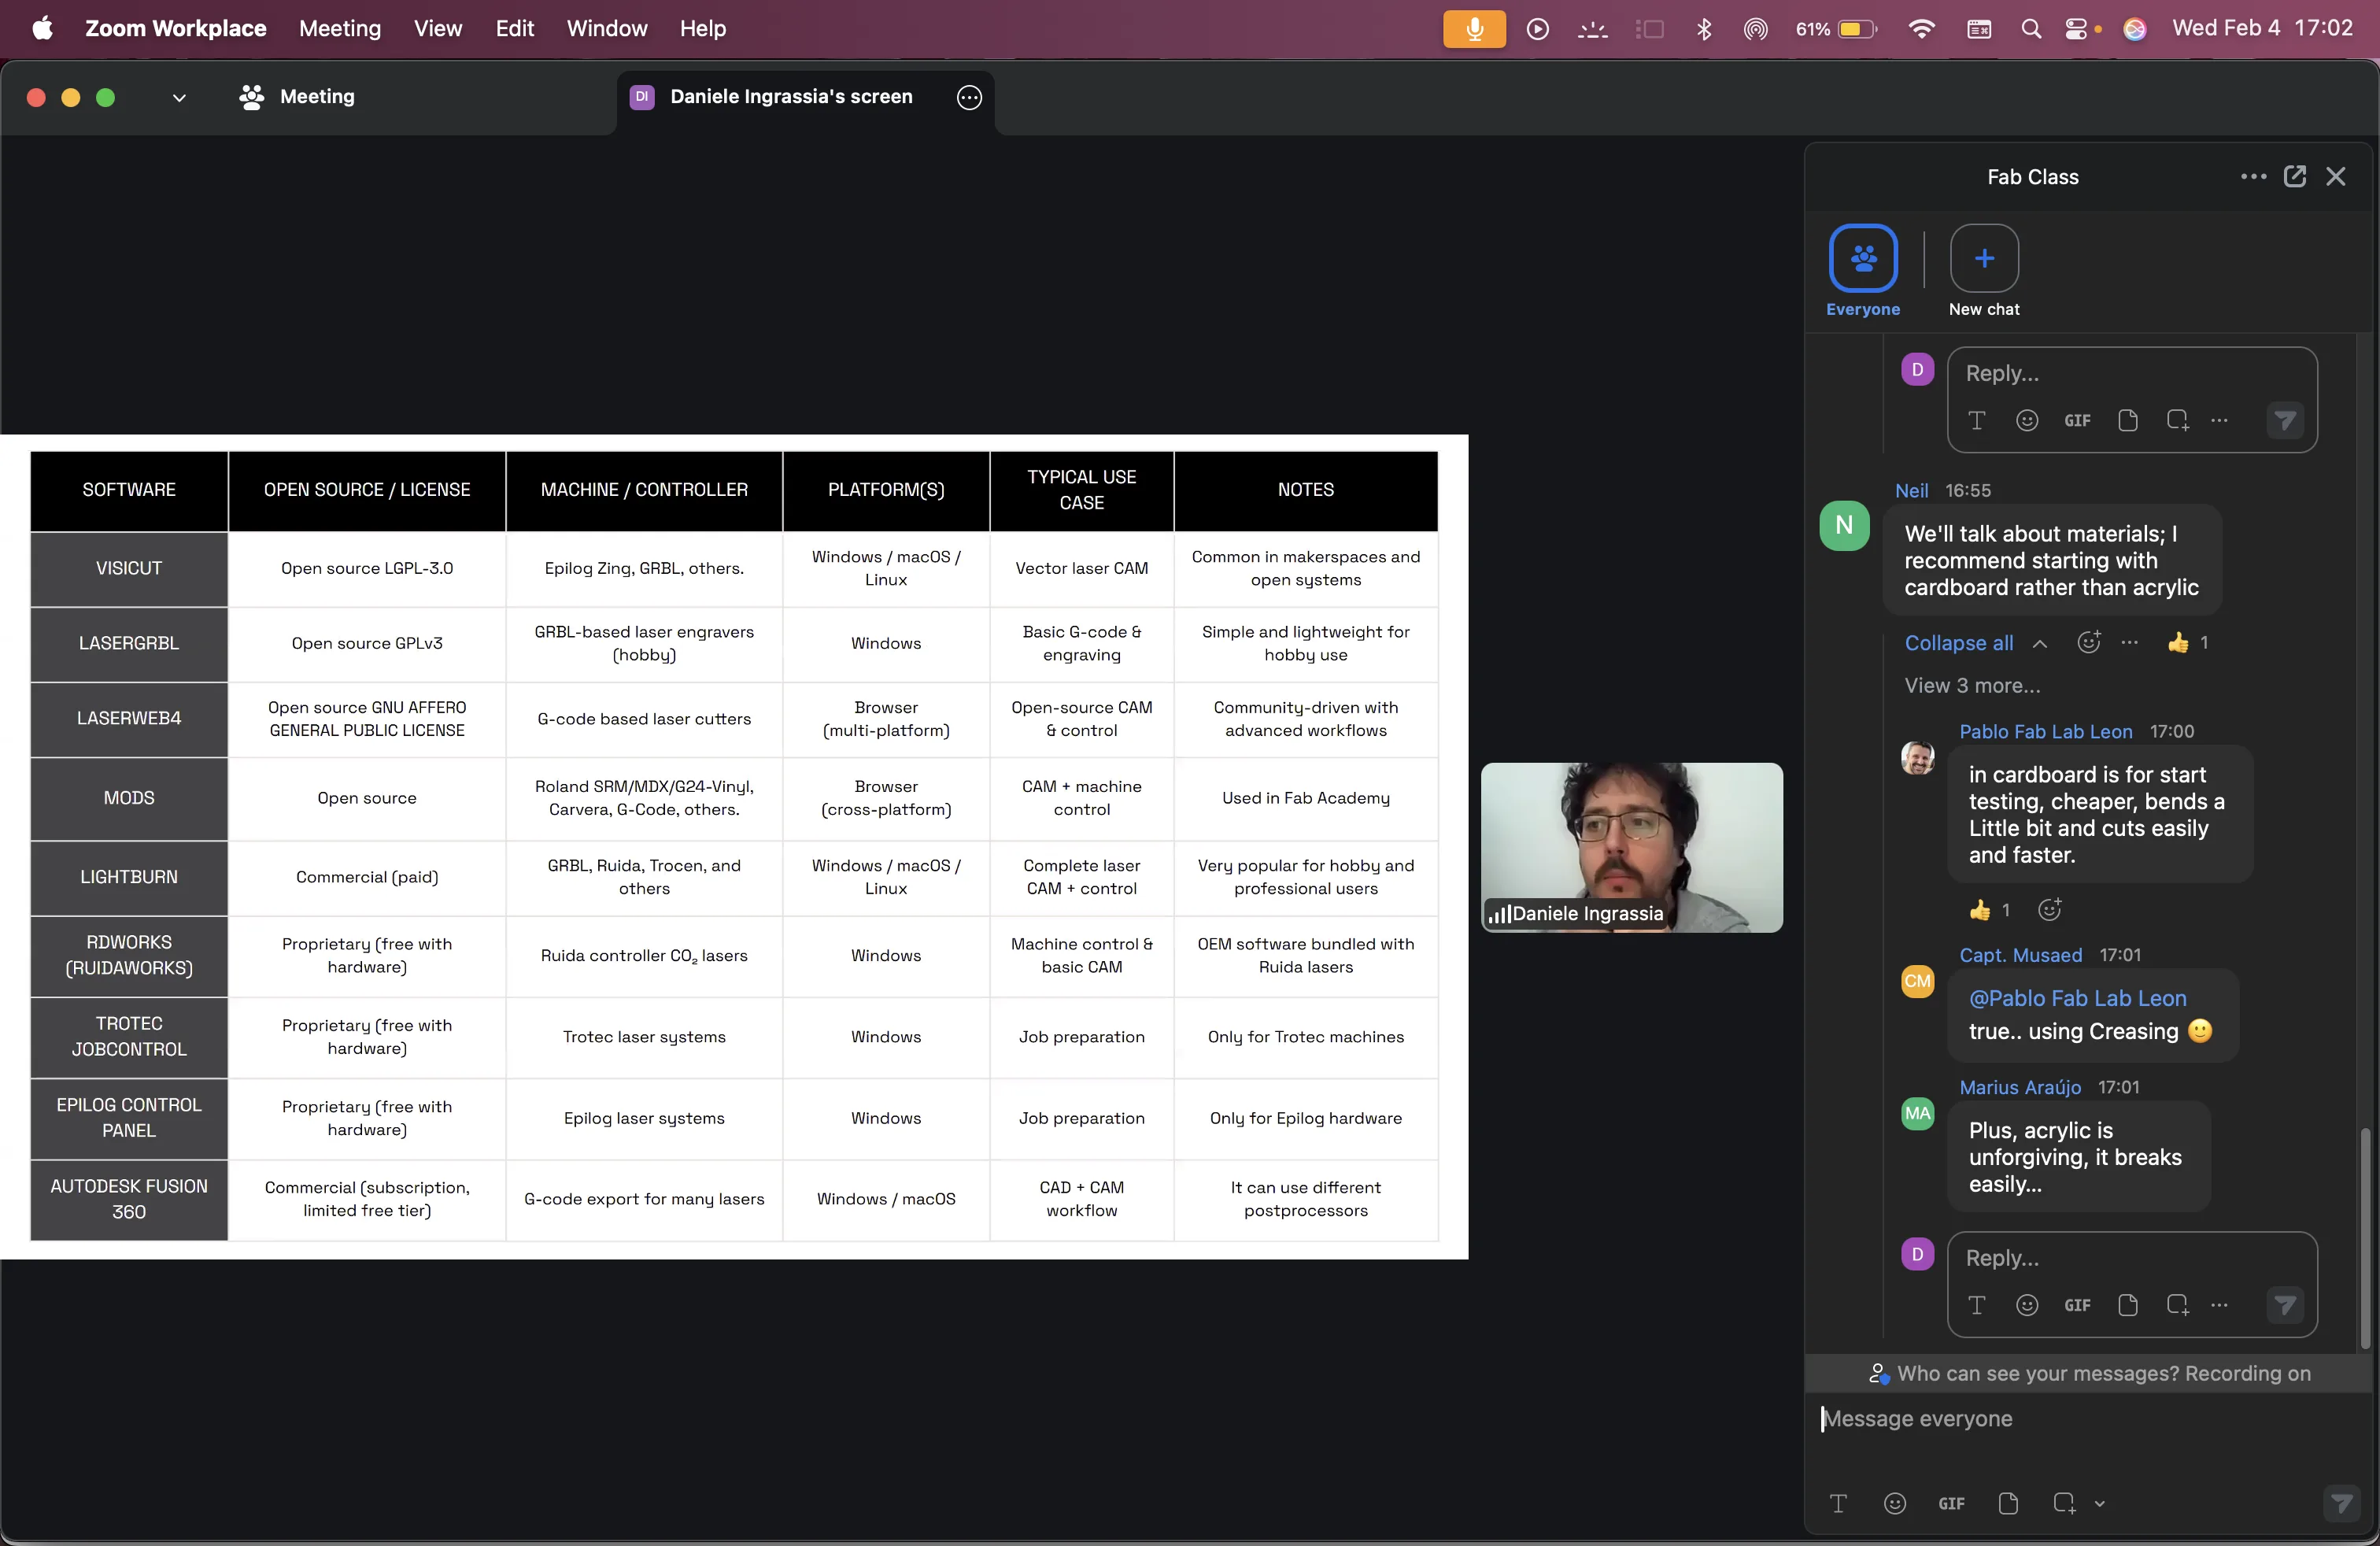
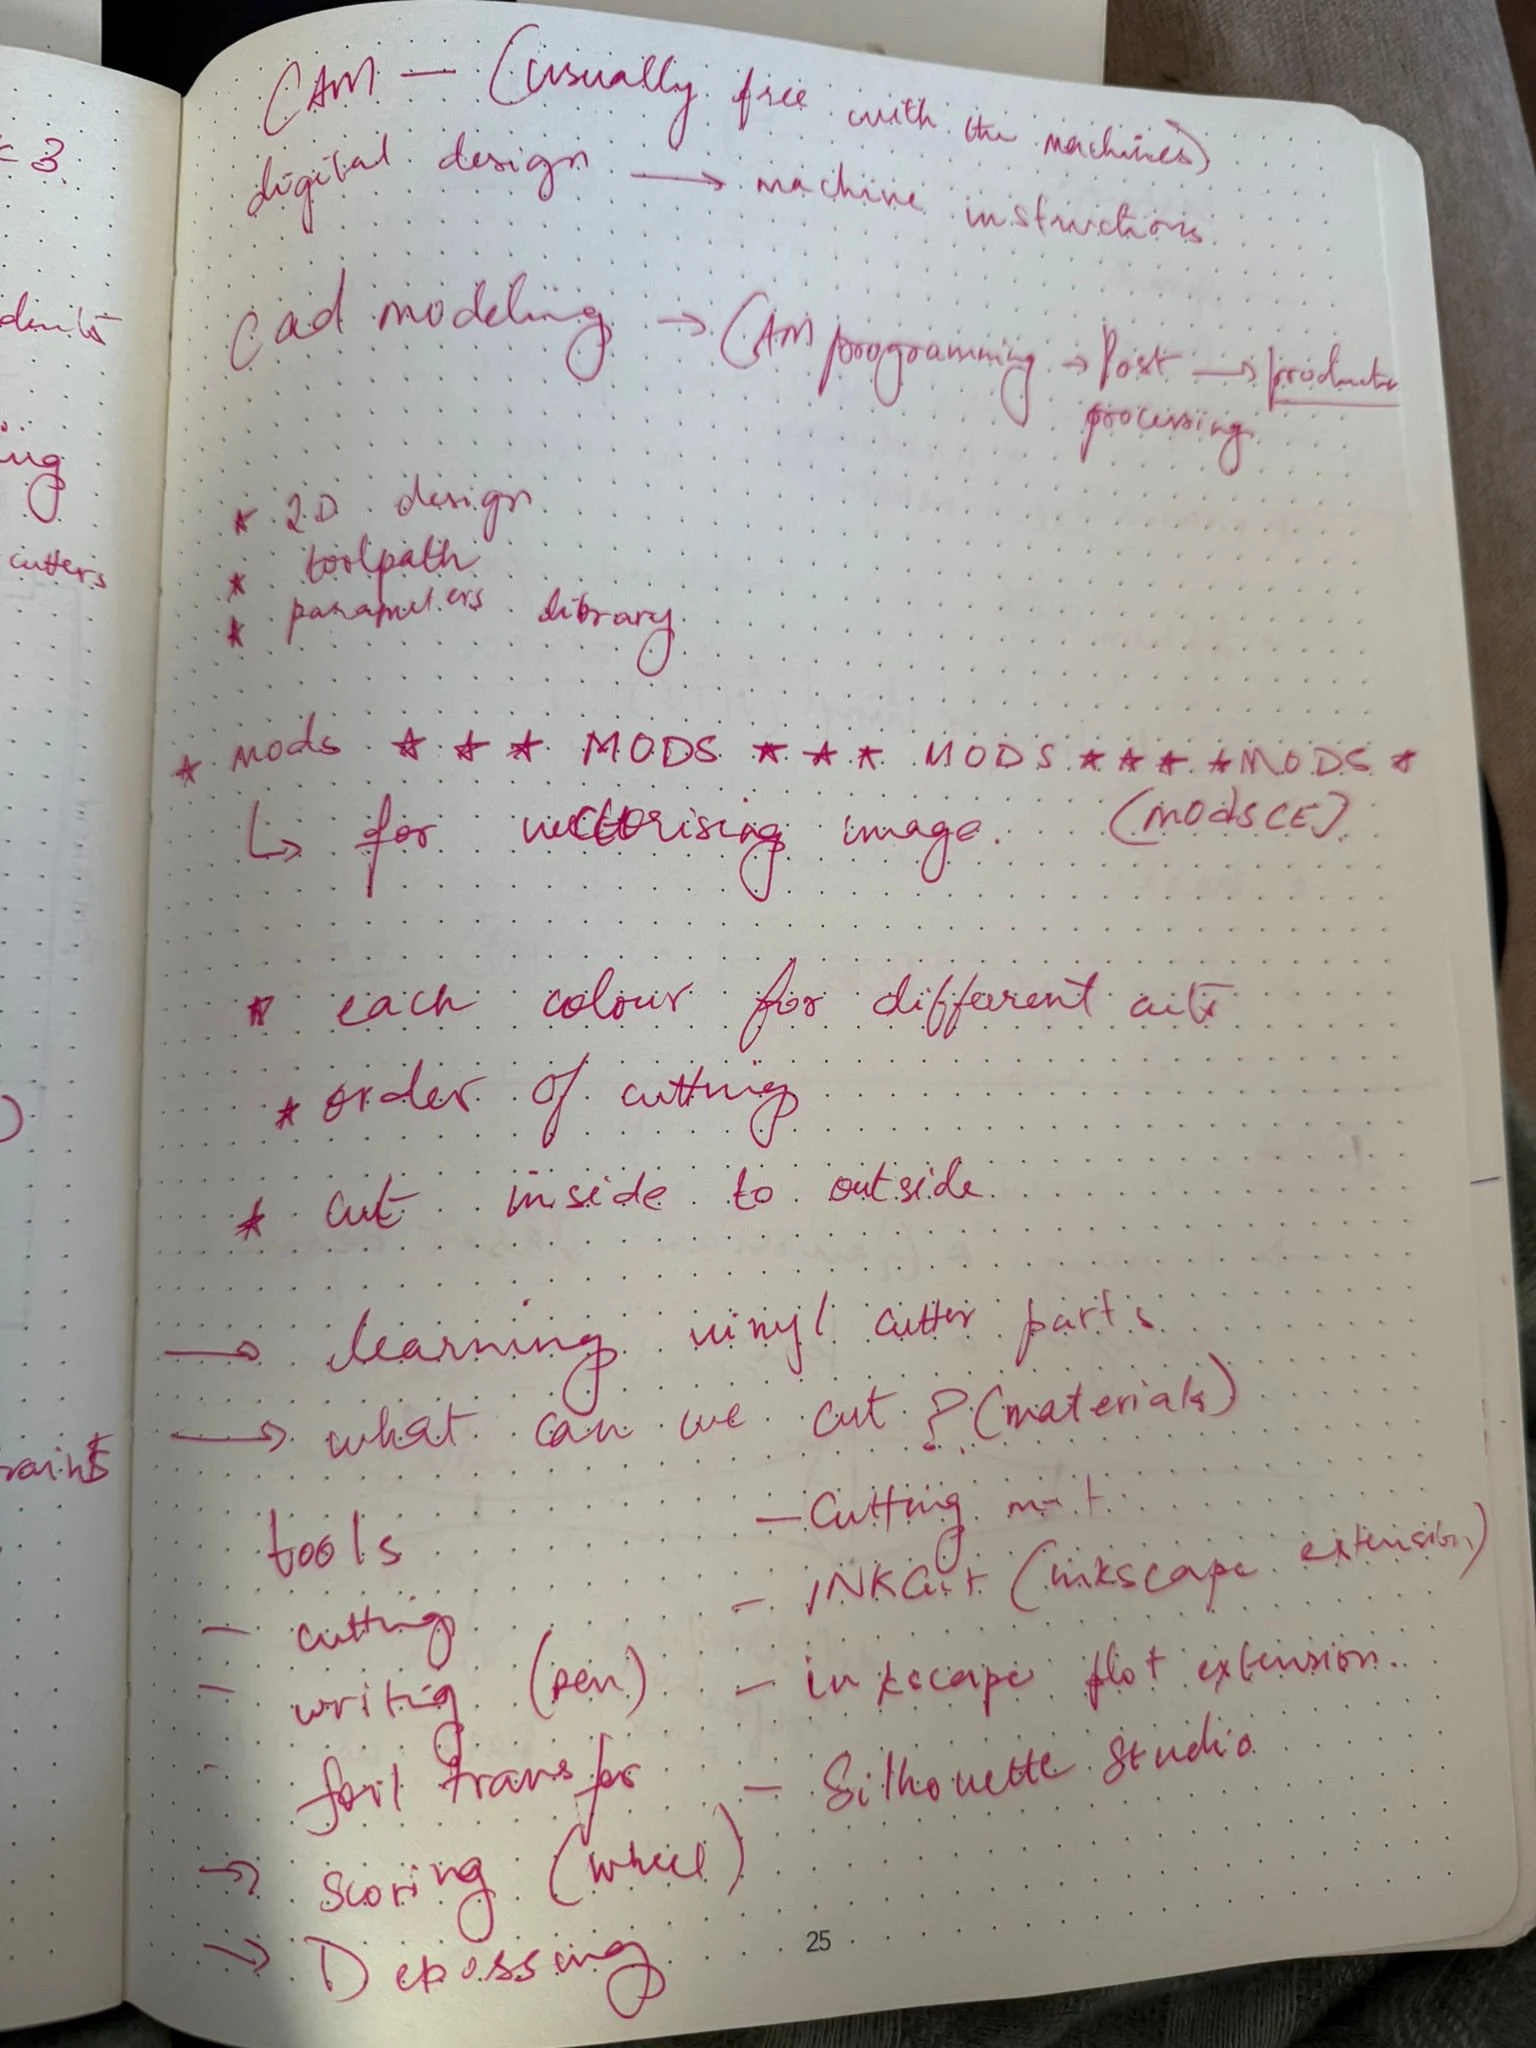
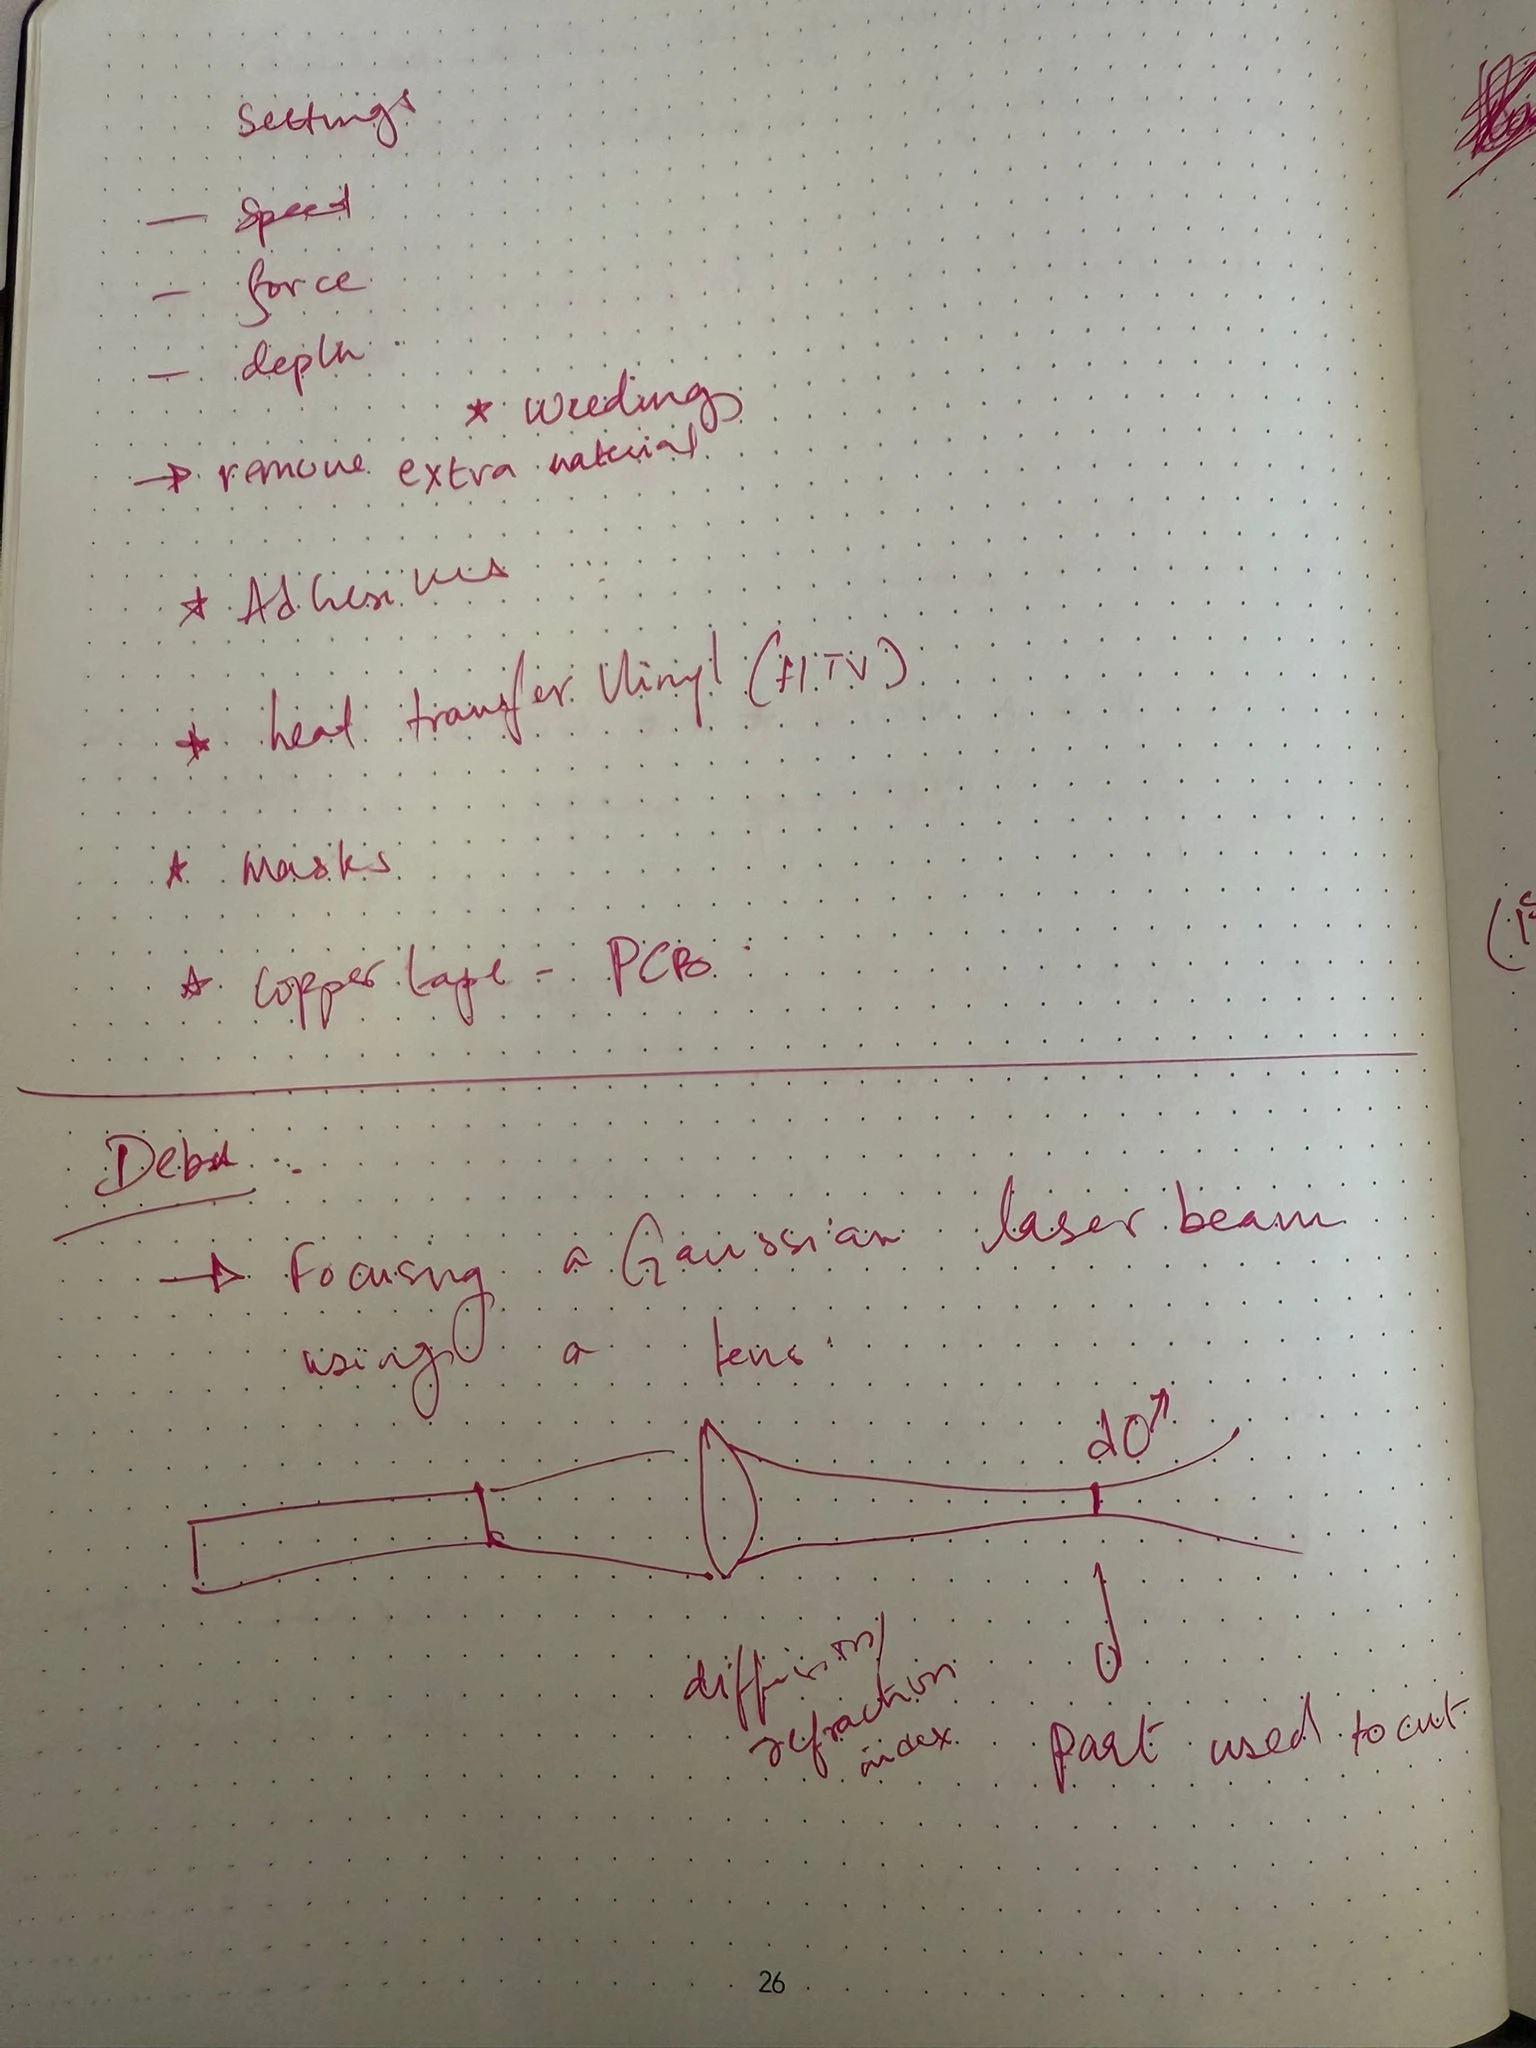
In the global and local class, we got an introduction to CAM and its applications in the fablab. Shyam then gave us a tour of the cutters we have and explained how to set them up, focus them, prepare the files, how to turn on the vents, and how to book the machines.