1. Project management
This week I worked on defining my final project idea and started getting used to the documentation process.
Process
The initial process of training in GitLab I received was during an extra meeting offered to students of Wheaton by one of our amazing professors. Throughout this process I learned all of the following.
Setup Git
First, install Git. As a windows user, I am required to install Gitbash. Next, add your Git username and set your email. In my case, this code appears as, git config --global user.name "Sierra_Nieves". Upon completion, you must then configure your email address for uploading. My code appears as followed, git config --global user.email "nieves_sierra@wheatoncollege.edu"


Configure SSH KEY
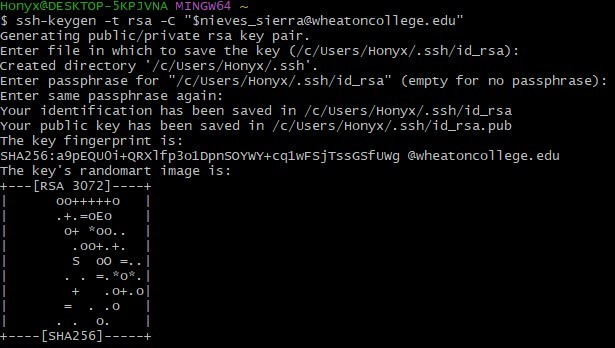
First, check if you have an SSH KEY already. To do so, enter the following, cat ~/.ssh/id_rsa.pub. In my case, a long string starting with ssh-rsa did not appear. To generate this key, my new code appeared as ssh-keygen -t rsa -C "$nieves_sierra@wheatoncollege.edu". This generates a keygen that you then need to copy and add to GIT on the web version.
Personal Repository
First, you want to copy your academy personal repo. Direct yourself to a folder you'd like to put or create your repo. Next, clone your student repository. In my case, the code should appear as git clone git@gitlab.fabcloud.org:academany/fabacademy/2025/labs/wheaton/students/sierra-nieves.git. Next, to upload my repo online, I used five main codes.
1. git add index.html: used to upload file by file and git add., used to upload all files at once.
2. git pull: used to download the last copy of the repository.
3. git merge: usd to have a working copy.
4. git commit -m 'change you did': used to name your update with the recent changes you made.
5. git push: used to upload to the repository.
Useful links
Code Example
  // the setup function runs once when you press reset or power the board
  void setup() {
    // initialize digital pin LED_BUILTIN as an output.
    pinMode(LED_BUILTIN, OUTPUT);
  }

  // the loop function runs over and over again forever
  void loop() {
    digitalWrite(LED_BUILTIN, HIGH);   // turn the LED on (HIGH is the voltage level)
    delay(1000);                       // wait for a second
    digitalWrite(LED_BUILTIN, LOW);    // turn the LED off by making the voltage LOW
    delay(1000);                       // wait for a second
  }