

Assignments
Group Assignments
- Test the design rules for your 3D printer(s)
- 3D scan an object (and optionally print it)
- Design and 3D print an object (small, few cm3, limited by printer time) that could not be made subtractively.
Individual assignments
GROUP ASSIGNMENT
More specific detailed from the worked done with Ernesto Castro in Fab Lab Universidad de Lima here
3D Bambu Lab X1 Carbon Printer
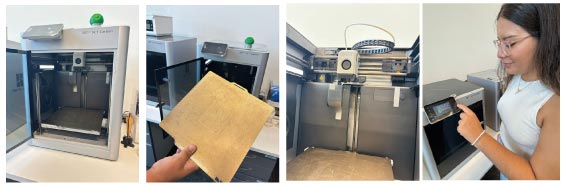
3D Bambu Lab printer parts.
 The 3D printers we have are the 3D Bambu Lab X1 Carbon Printerthat have a printing area of 26cm height max. It works with an app called Bambu Studio and works with lots f filaments, generic and the ones from bambu. In the lab we tried with PolyLite PLA, generic TPU and PETG.
To use the printer we have to follow some steps:
- First, Install the app Bambu Studio.
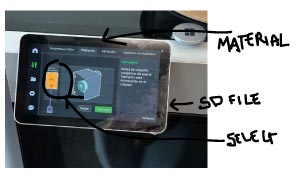
- Charge the material in the back of the printer
- Upload the material settings according to the fabric settings.
- Select your file with the SD card. upload the settings and start.
- Don't forget the base of the printer. It must be clean.
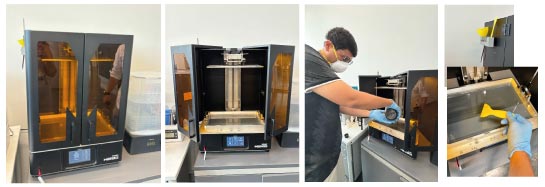
Phrozen Sonic Mega 8K Resin 3D Printer
Resin 3D Printer parts
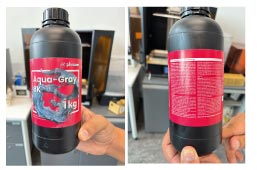
 We also have a 3Phrozen Sonic Mega 8K Resin 3D Printer That works with liquid resin so we have to use gloves and a mask to protect ourselves from the resin. This works different because works with UV rays projecting the layer to print and maing solid the resin.
To use the printer we have to follow some steps:
- First, Install the app Chitubox.
- Charge the material in the back of the printer
- Upload the material settings according to the fabric settings.
- Select your file with the SD card. upload the settings and start.
- Don't forget the base of the printer. It must be clean.
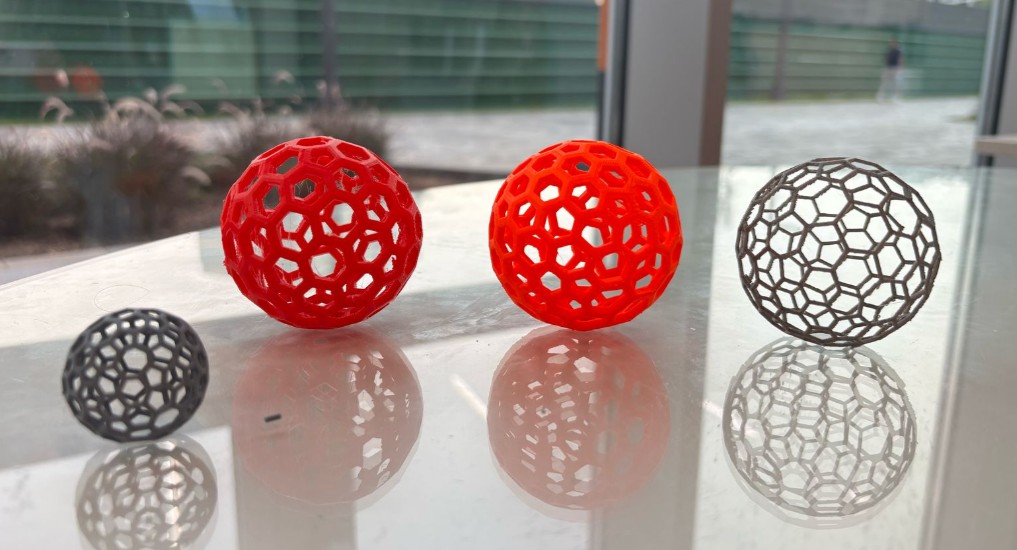
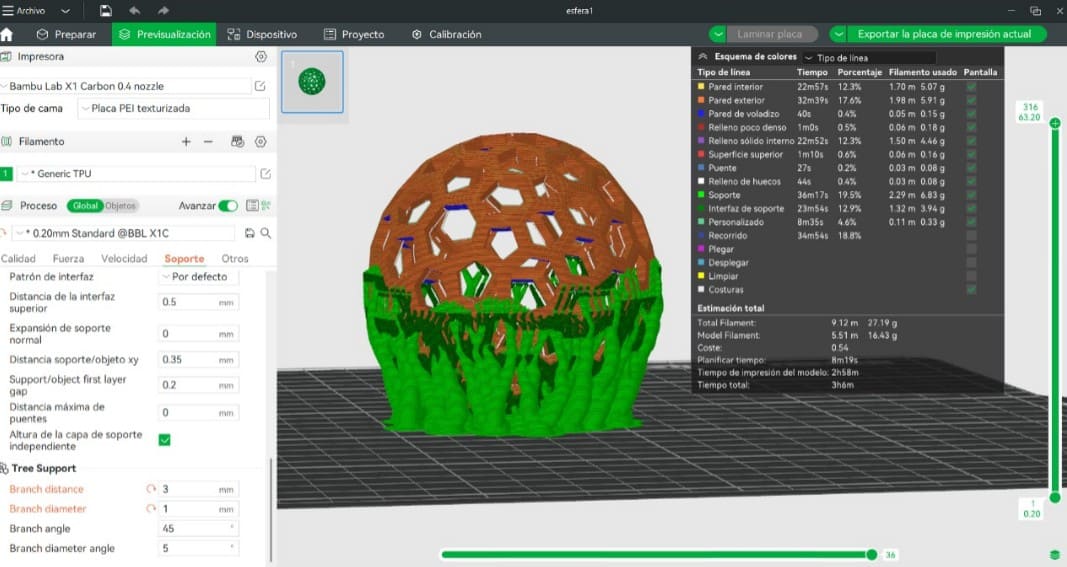
We decided to make the material and settings tests with a voronoi sphere that isnot solid and with different thickness. From 0.2mm to 0.4mm in Resin, TPU, PETG and PLA (order video above). And to see what material can make the sphere bounce more.
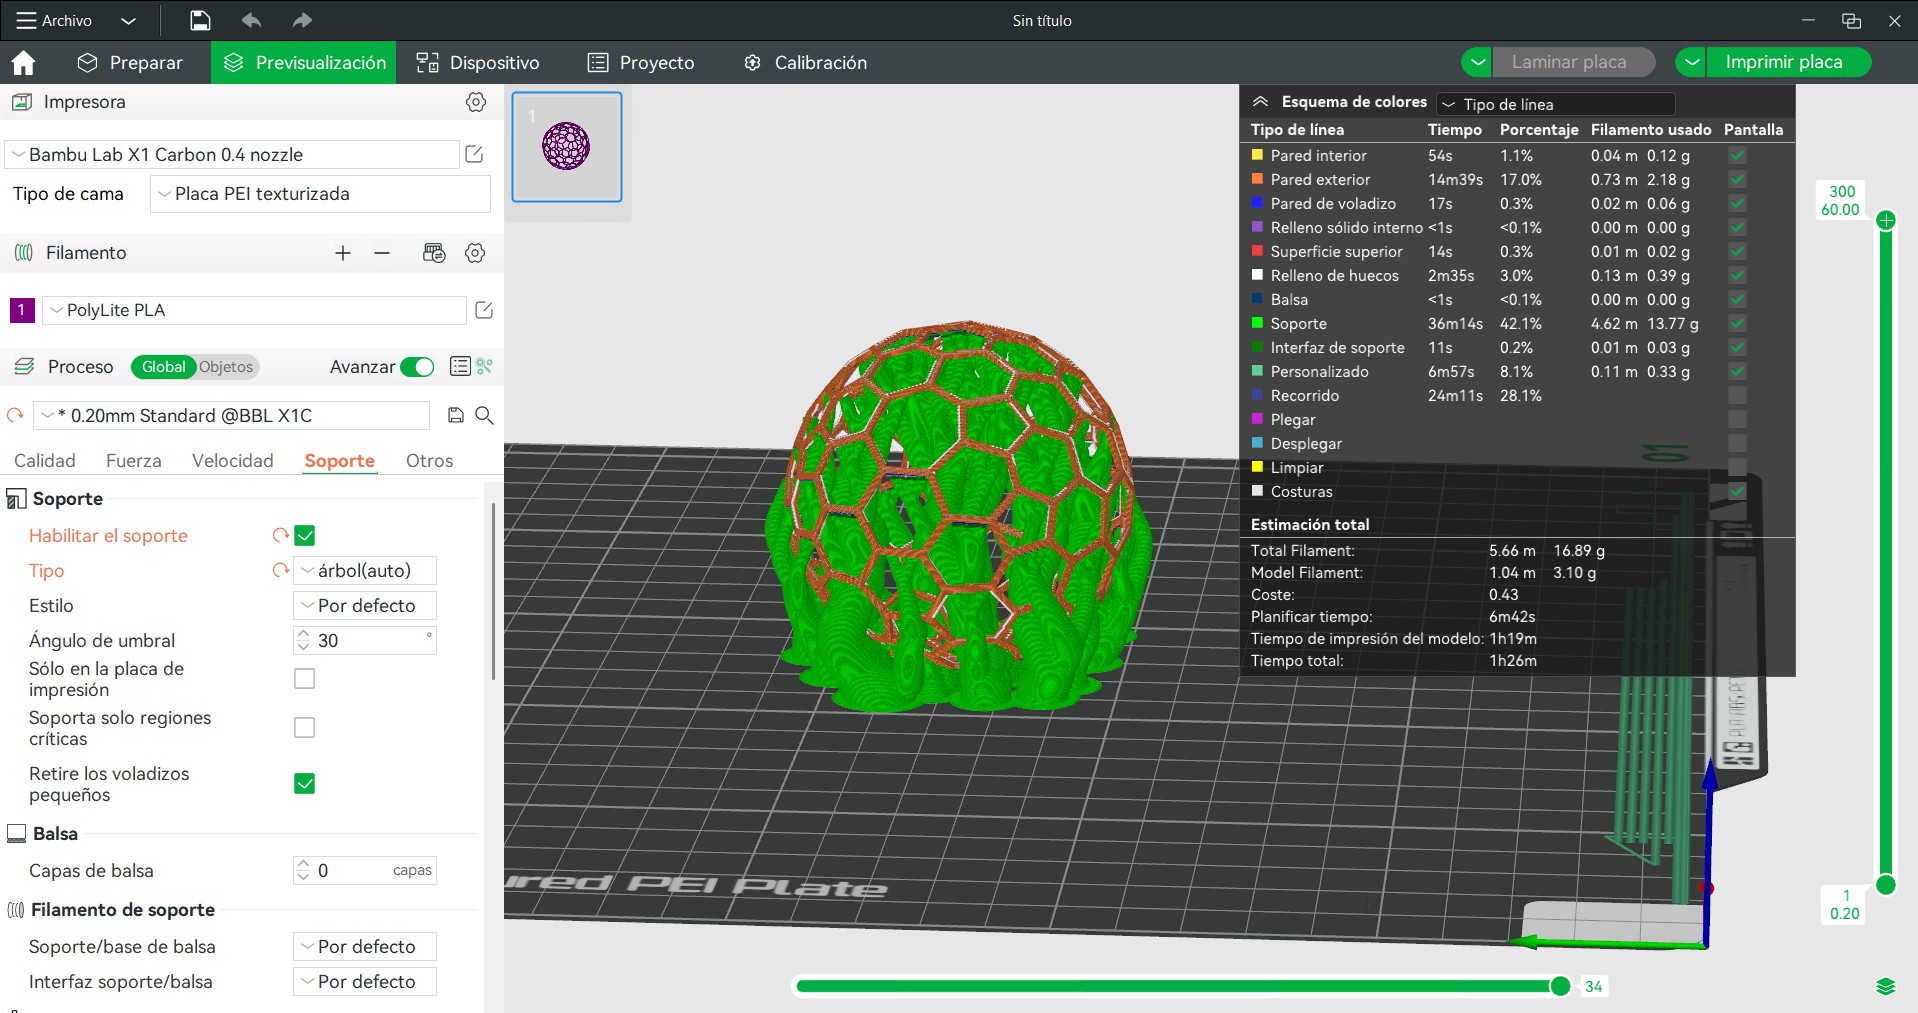
printing s u p p o r t s
The object needs supports to be stable in the printer. As it goes from down to above. The sphere needed a lot of supports since it is not solid. We chose the tree auto supports first and it were inside the sphere in PLA, which was very difficult to takeout.
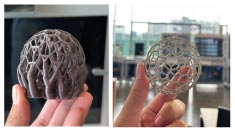
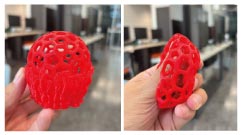
Then with the TPU test we try to make manual the supports and only chose from the middle to the base and only outside supports. We tought it will make an error and not print but it went well! An here you can see how malleable is the TPU.
INDIVIDUAL ASSIGNMENT
Luma 3D Scan and resin 3d printing
Model from Luma app
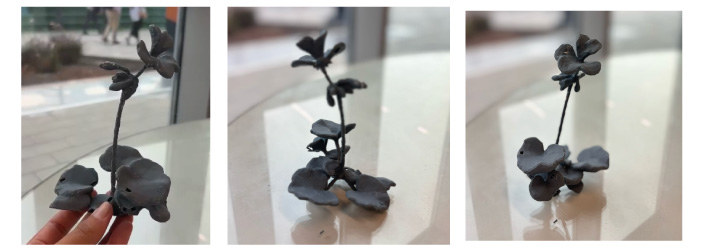
 I knew this app called LUMA 3D for IOS that scans by photo 3d objects. I used in Graphic for architecture classes to show the students how you can digitalize 3d objects scanning and then modelling to be even more precise. So, with this app I scanned a geranium of my moms collection. Then clean the 3d model in Rhino and triangulate the mesh and make thickness with grasshopper.
Luma app process
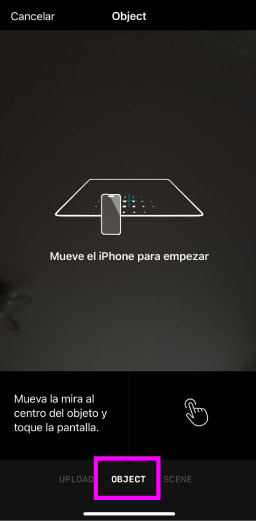
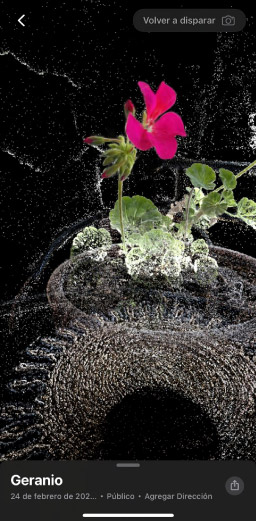
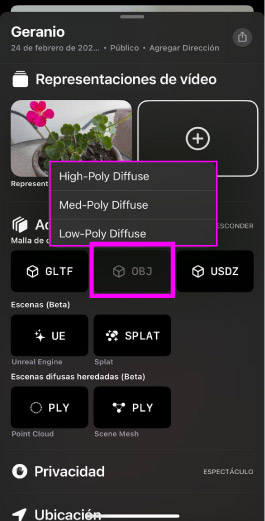
In the app first it will let you choose between an object or a scene. I selected object and followed the instructions, then after the scanning was done you can select to export it in different archives. I selected as .obj to open it in Rhino and also I could choose the quality of the model.
import in rhino

Imported model in chitubox

Imported model in chitubox
I imported the .obj in rhino to edit the model and choose what to print. Because it scanned everything even a portion of the table.
All 3d scanning and printing process
Printing process
Chitubox software
To print de model I used CHITUBOX as I learned in the group assignment.
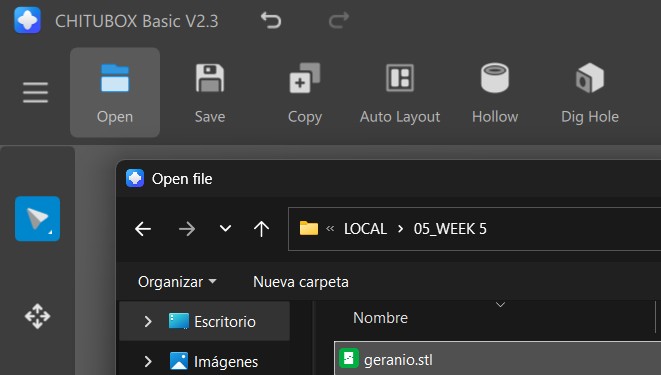
First I imported the OBJ model from LUMA APP to rhino to export in STL format in order to open it in Chitubox that is the software linked with the Phrozen Sonic Mega 8K printer we have in the lab.
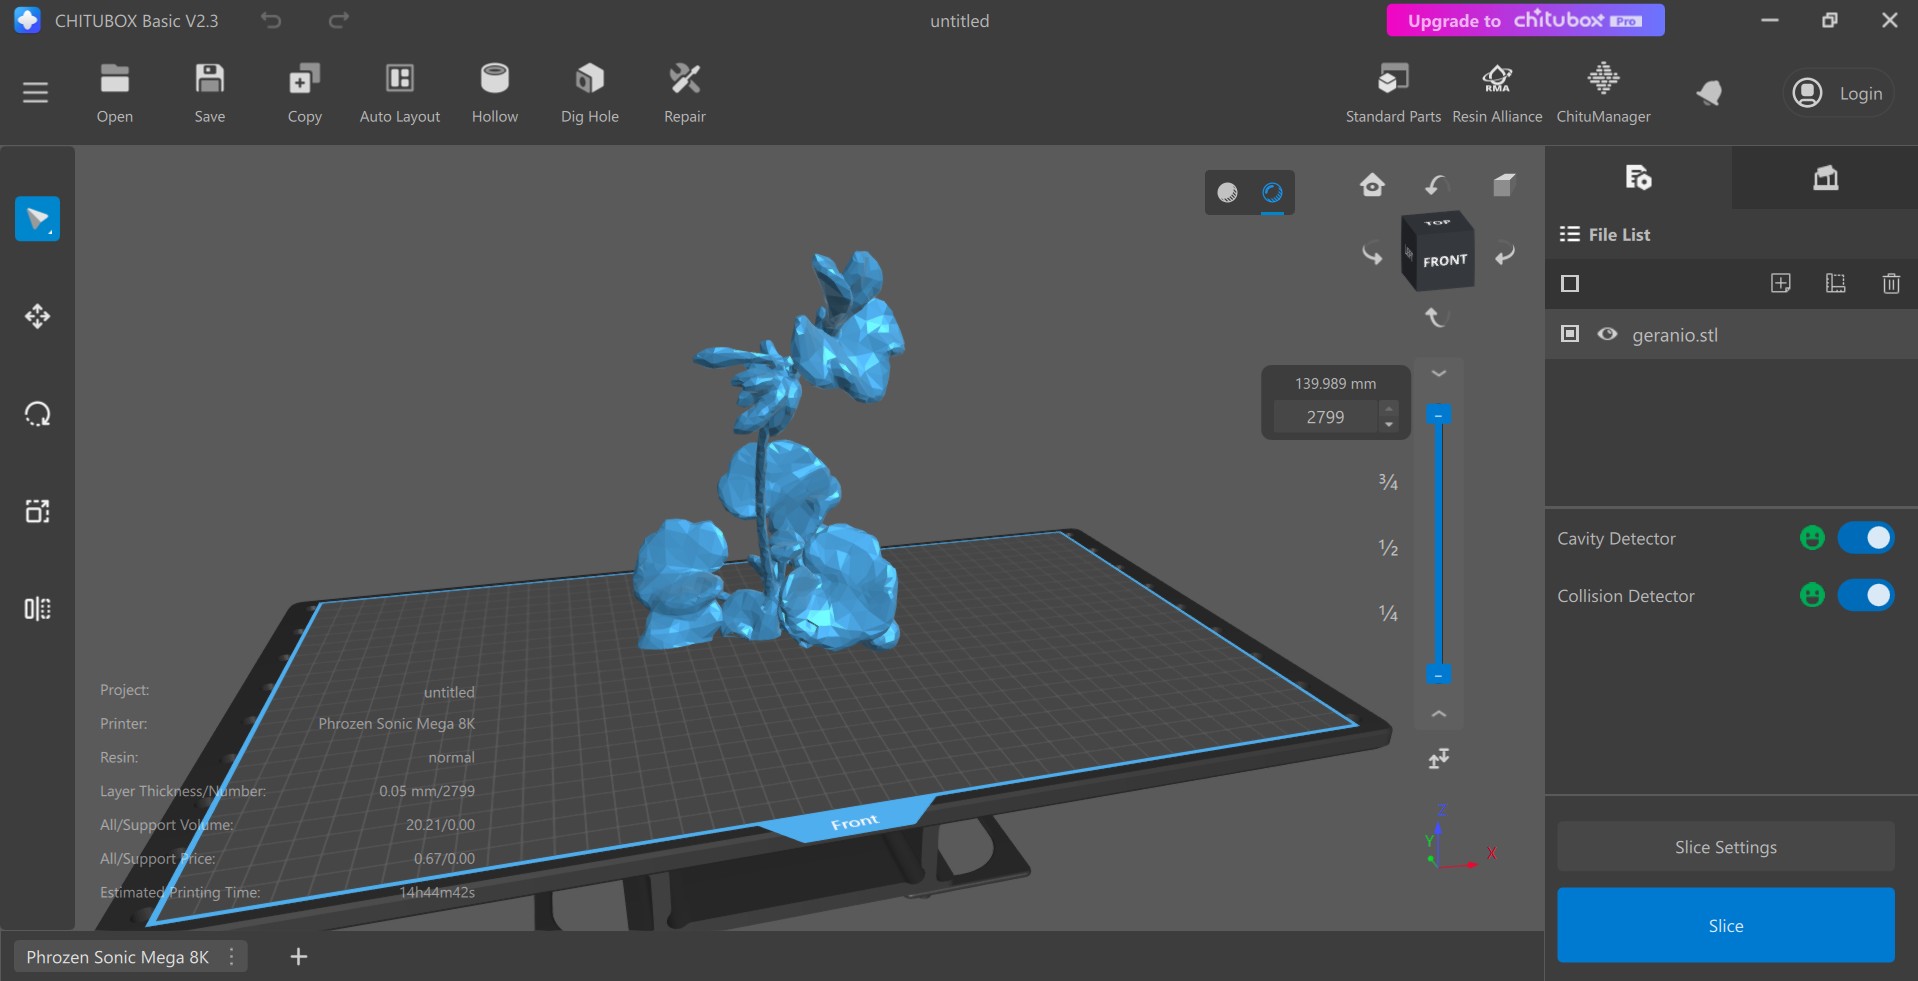
Imported model in chitubox
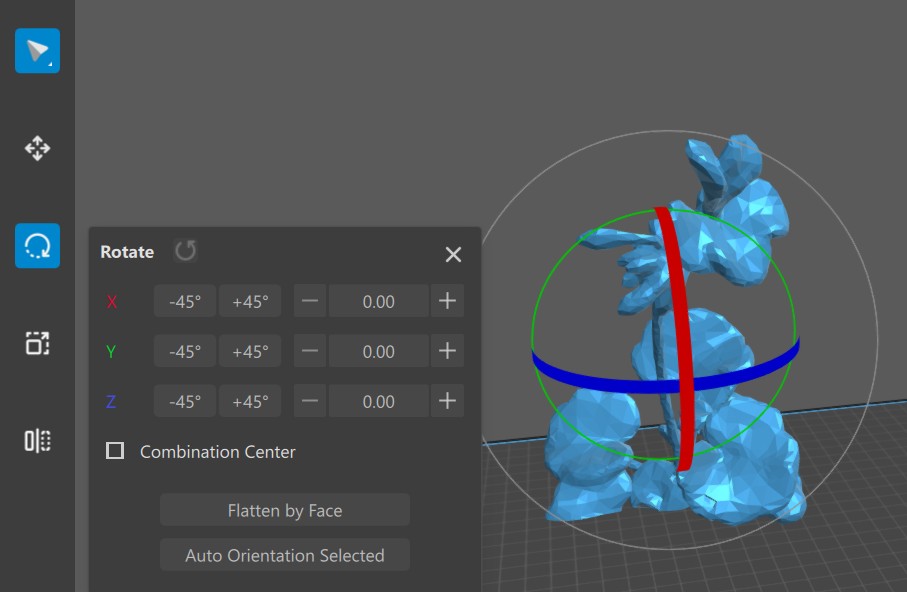
Then to organize the model the most efficient way to print you can rotate the object and move it in the bed printer. I rotated it being the most part of it layed in the base.
Imported model in chitubox
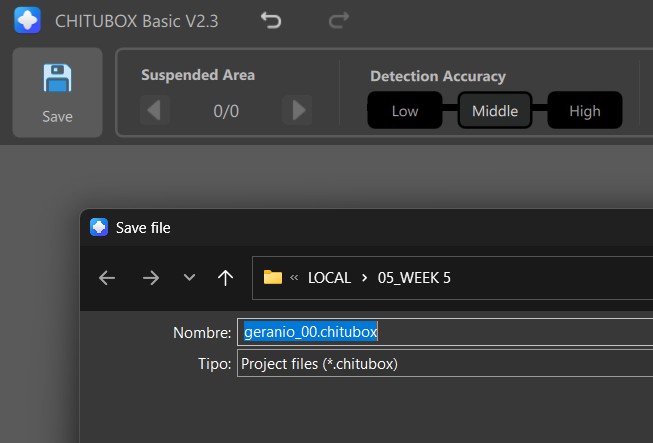
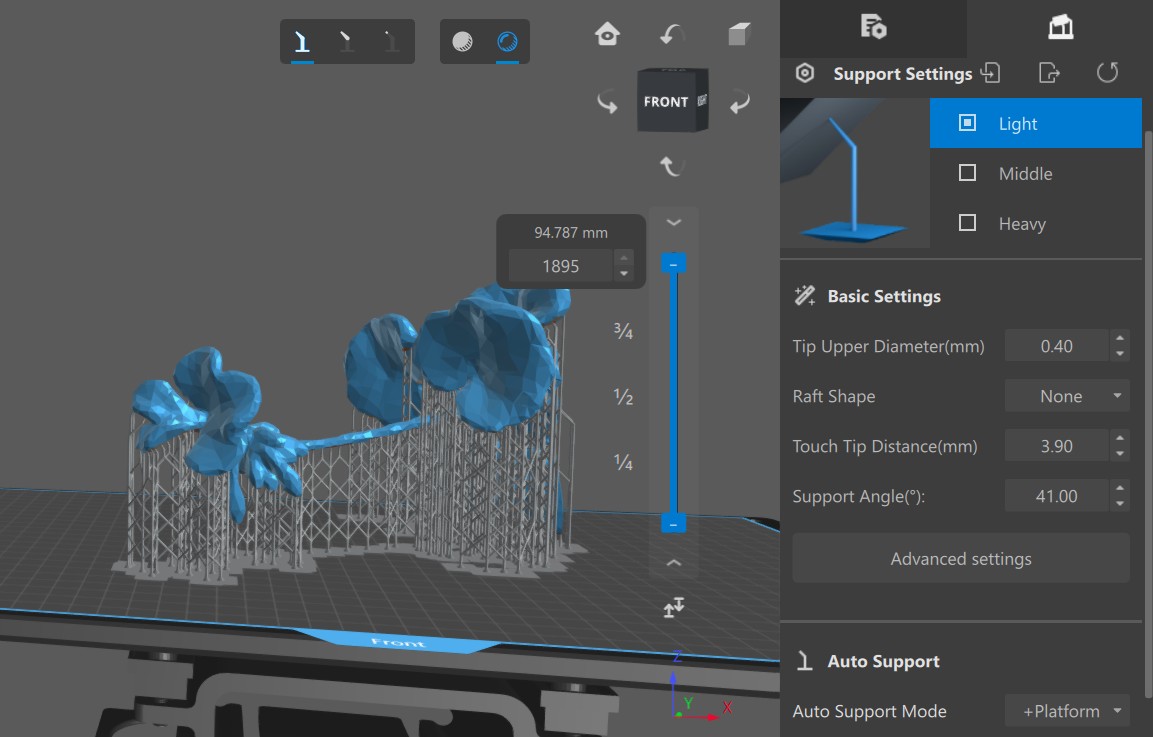
Once the object is the best placed I generate the supports. Here you can do it manually or auto from the software. Also choose light supports or heavy ones. I selected auto light supports so it can be easier to remove. And then asjust the basic settings from my instructor recommendations used in this lab.And then save the archive ready to print.
Curing process To take put the resin printing first it has to take put any rest from resin with a machine that cleans with isopropyl alcohol. And then it drys with another machine.
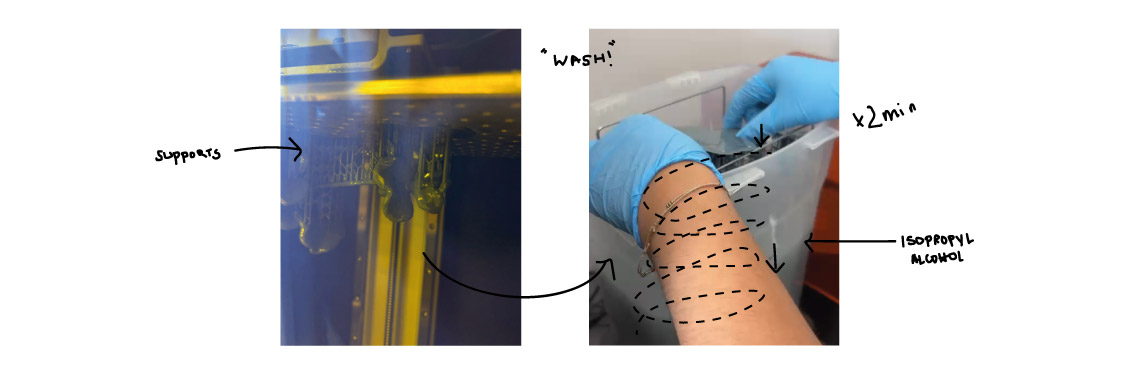
Washing the resin from the printed object
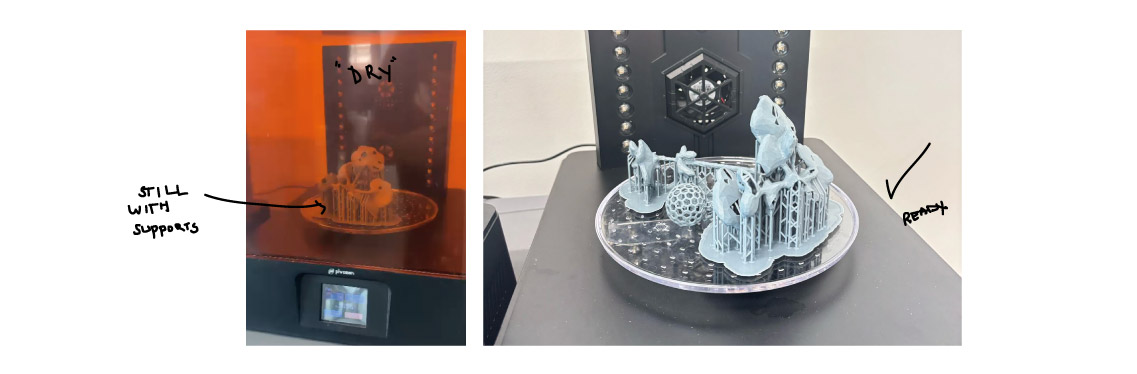
Drying the final printing
Test 2 with Handy Scanner
In the Fab Lab Ulima they also had a 3d scanner. I tried to scan 3 different objects with it to test surfaces. First, an object with fabric, then an object with gloss black plastic and then and object with matt bright plastic.
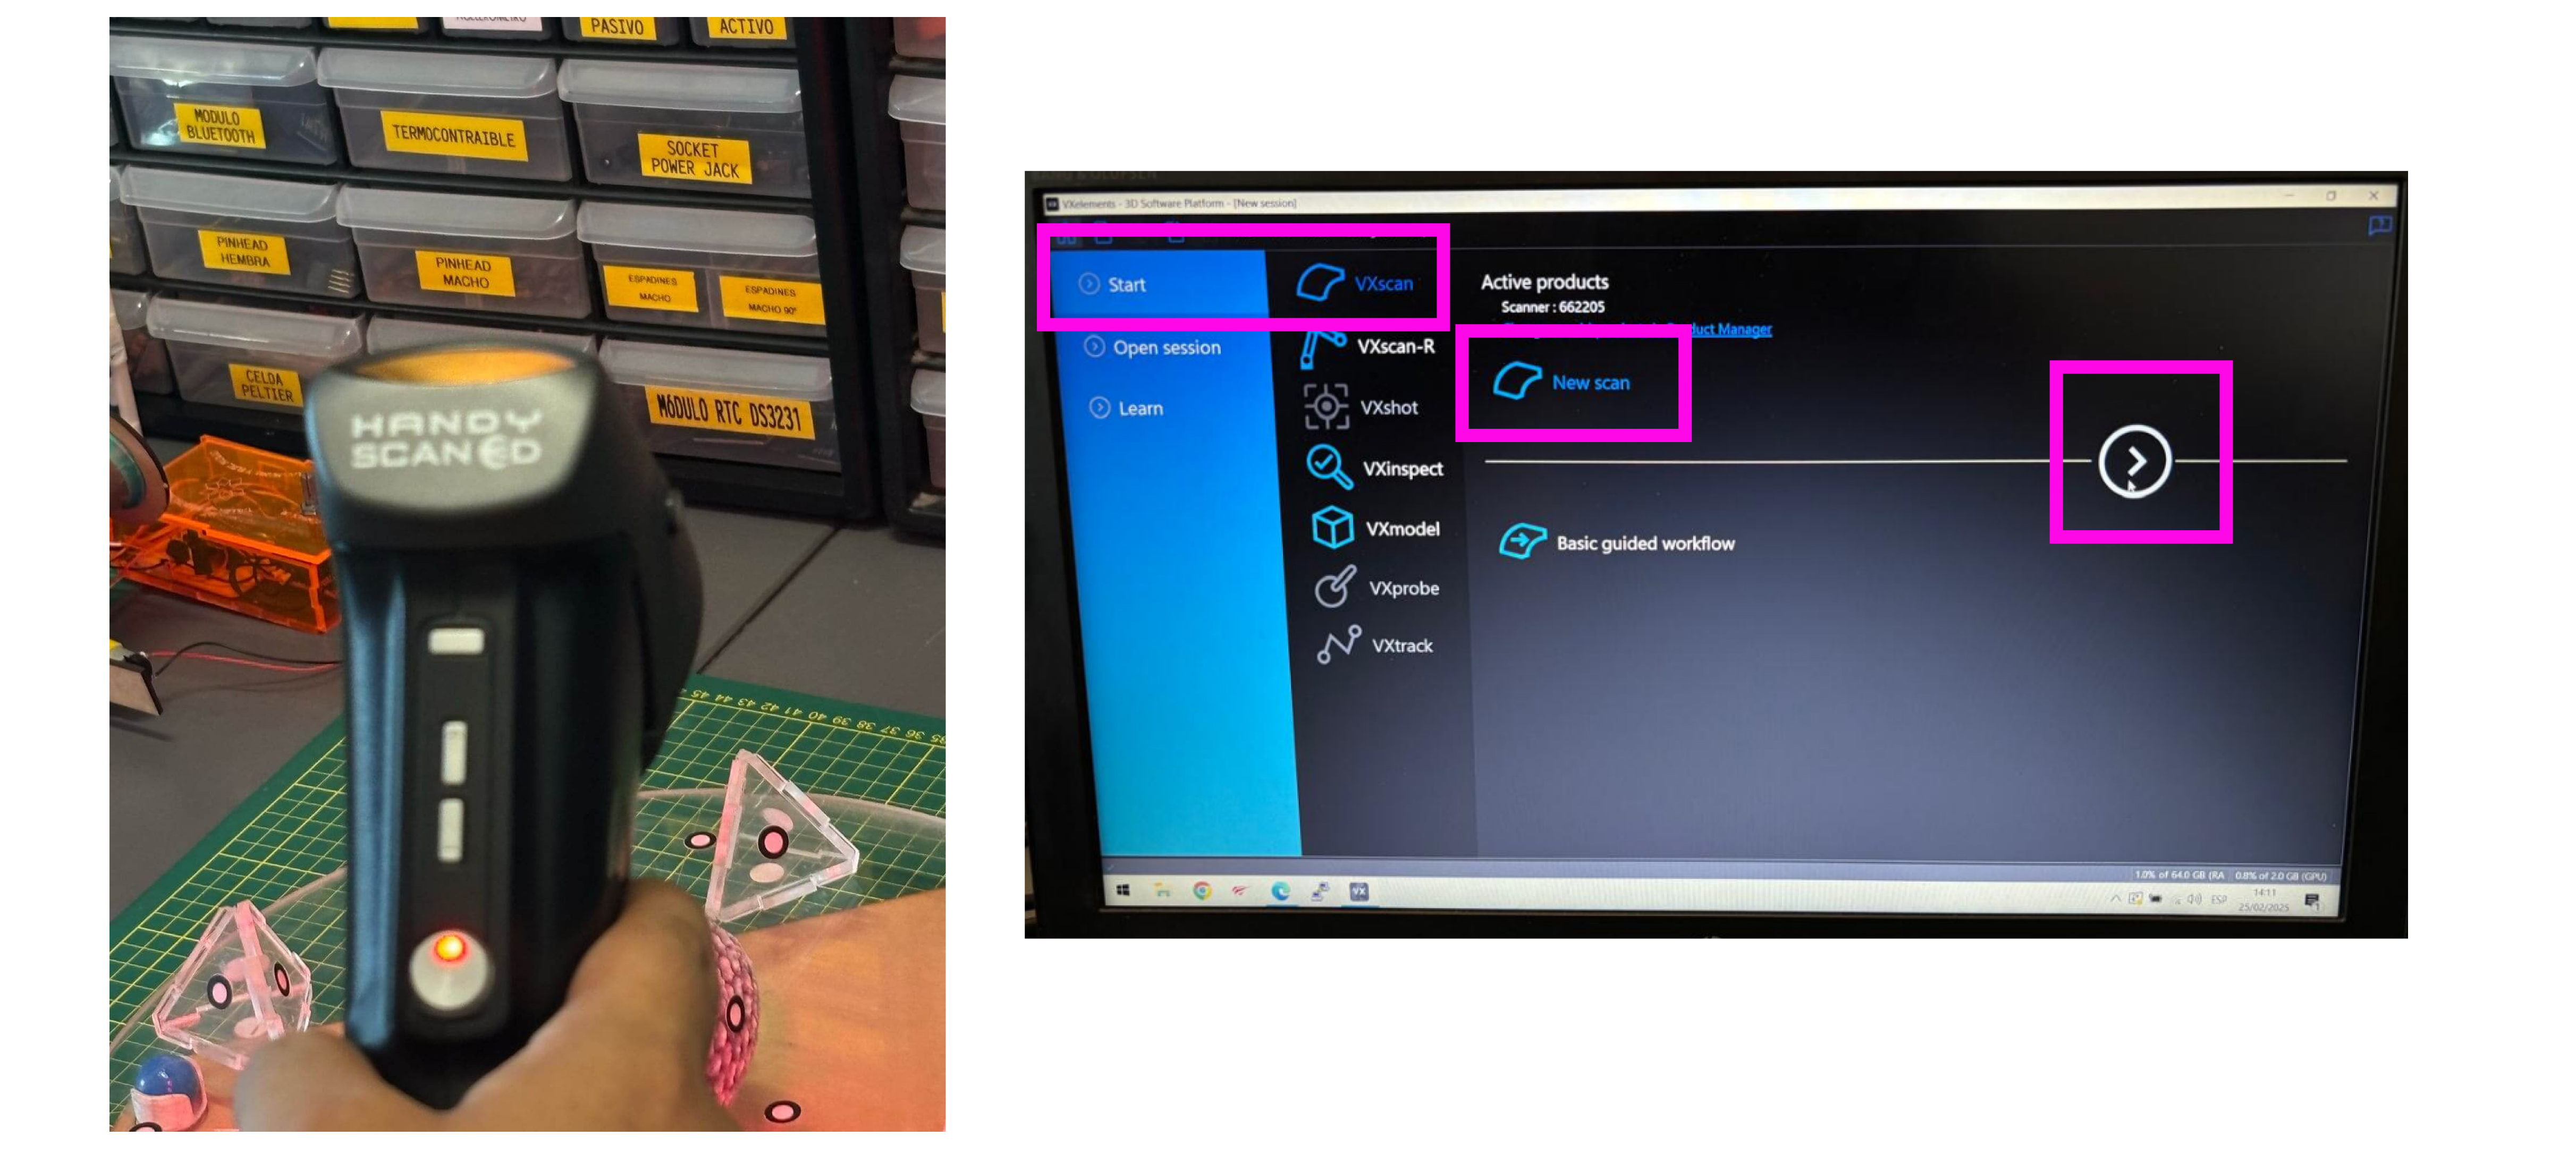
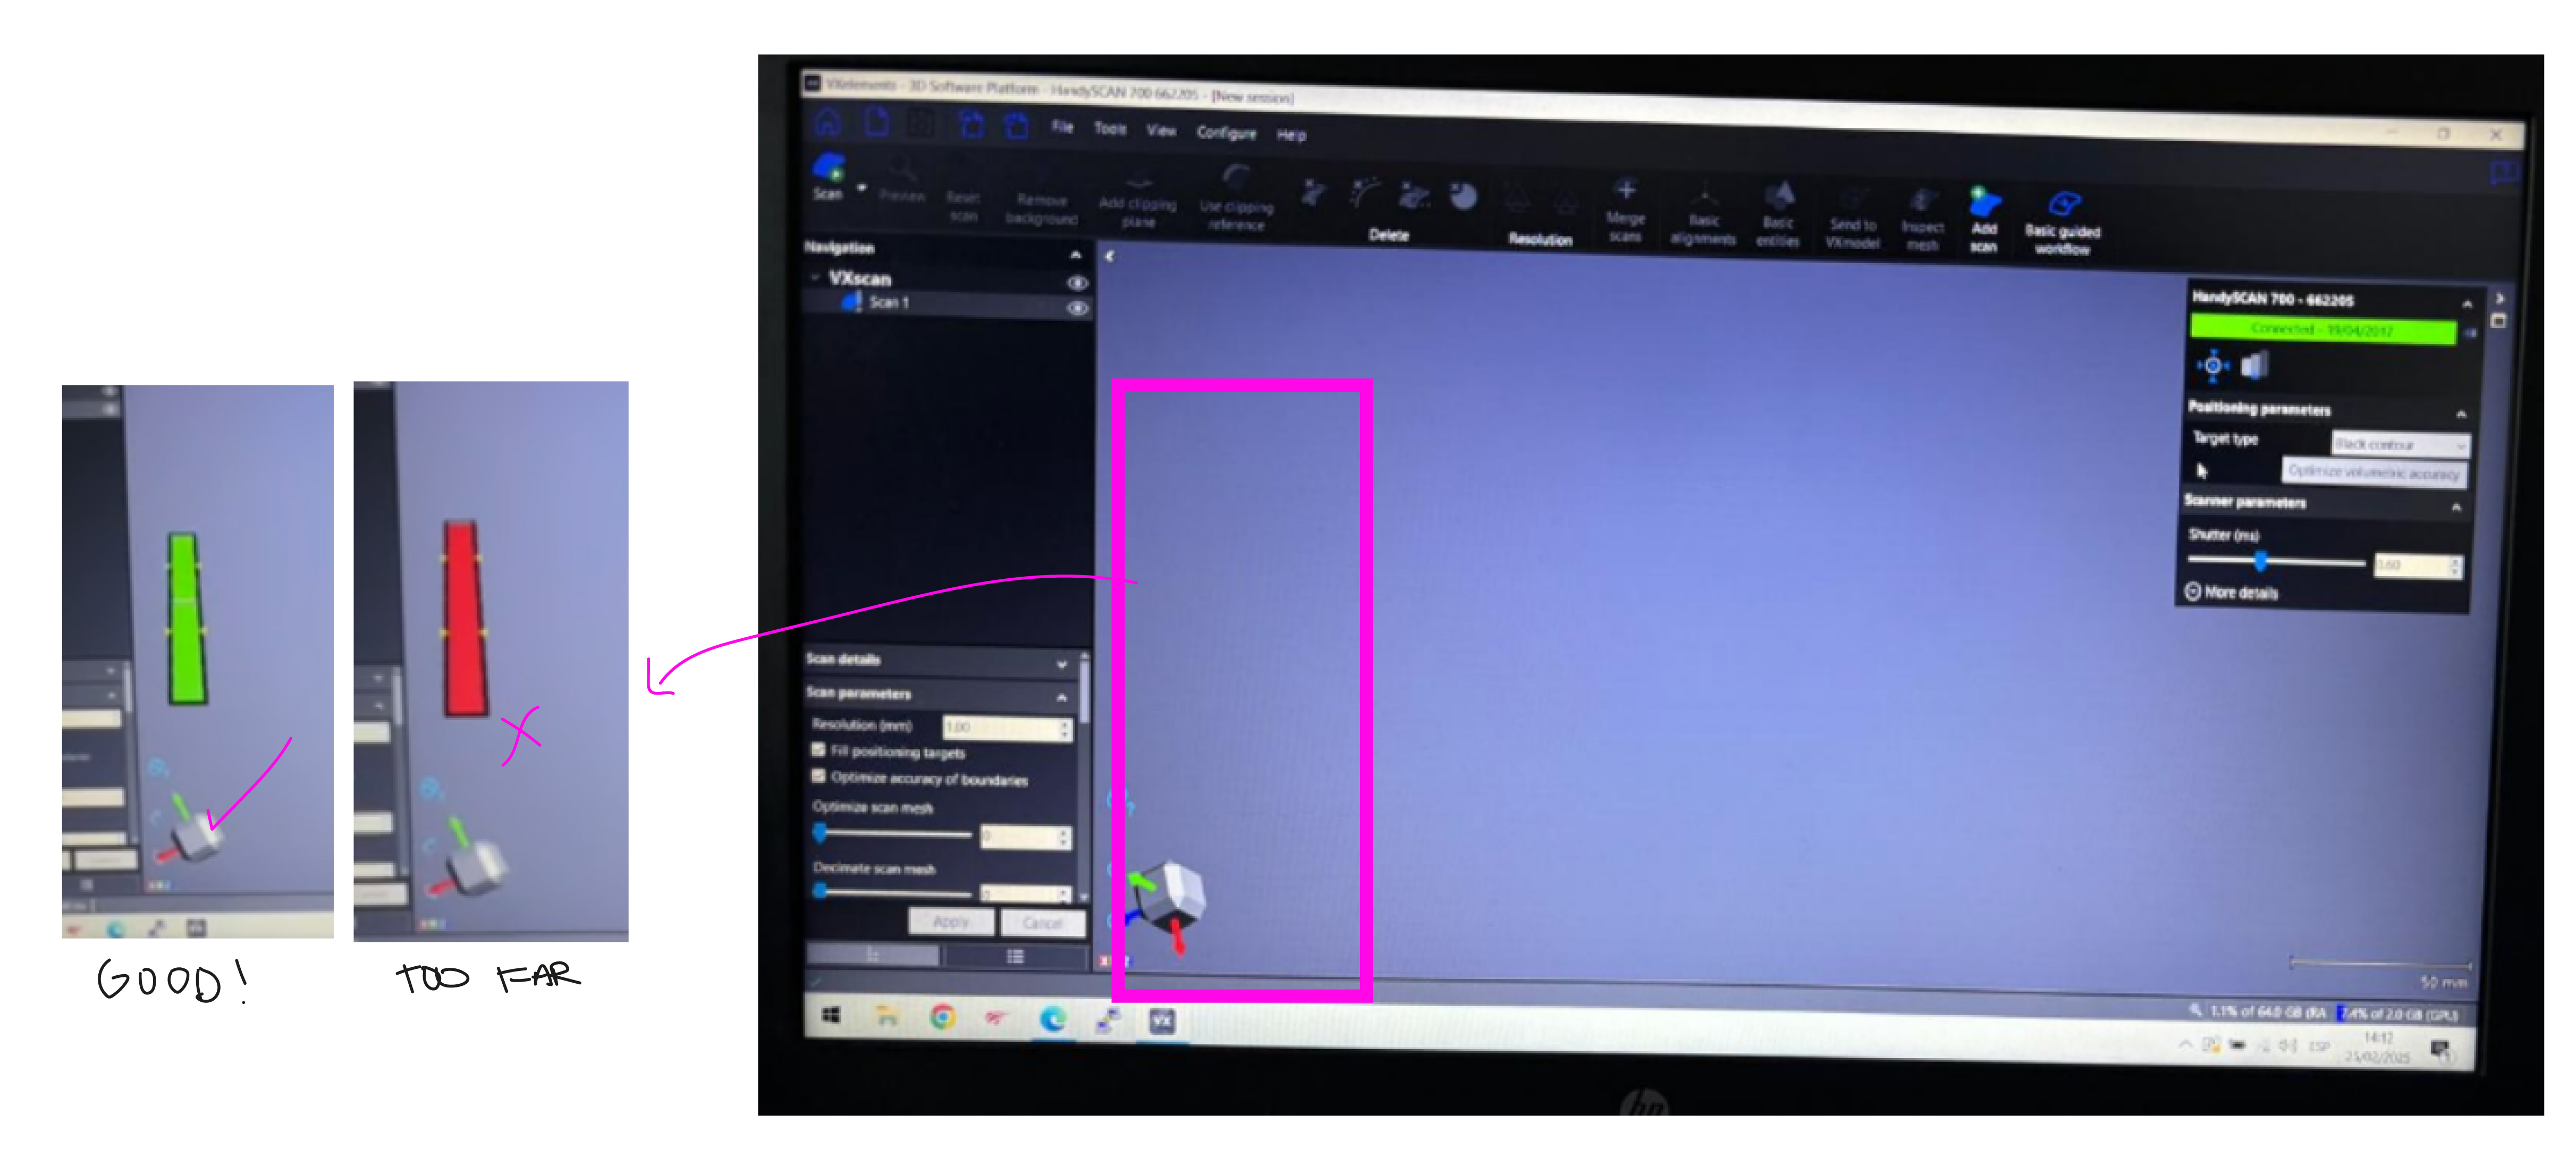
To start scanning I had to open the scanner software and start a new scan while turning on the scanner. To scan correctly I had to make sure the bar that appeared in the left side of the screen was always green. When it was red it mean that the scanner was too far from the object.
1. F a b r i c
The lab has made their own base suppor for 3d scanning. It is an acrilic transparent base theat has like 4 detectors where you can stick the points reference from the 3d scaner. However it did't detect the fabric at all. We believe it transfers the light and cannot recognize the laser at all. It only worked in the first layer of the plush. We tried with low light and also a uniform color base to not distract the laser but it didn't work.
The scanner did't detect the fabric at all.
My instructors and I believe the fabric transfers the light and cannot recognize the laser at all. However it did only worked in the first layer of the plush. We also tried with low light and a uniform color base to not distract the laser but it didn't work. Also the eyes were solid and not from fabric but were glossy black and did not got scanned.
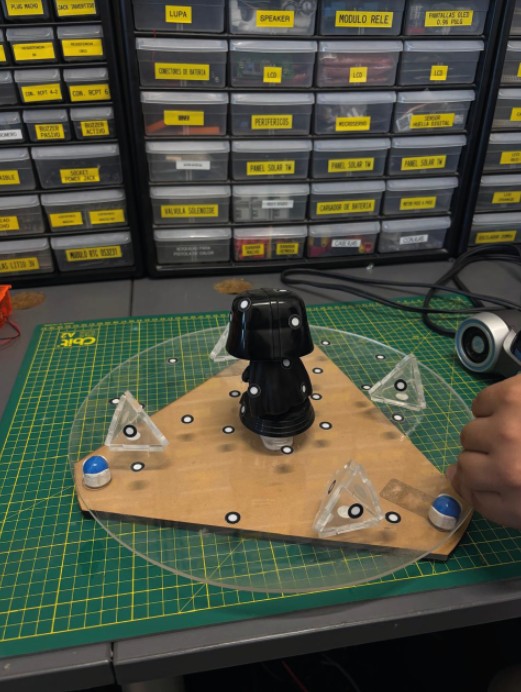
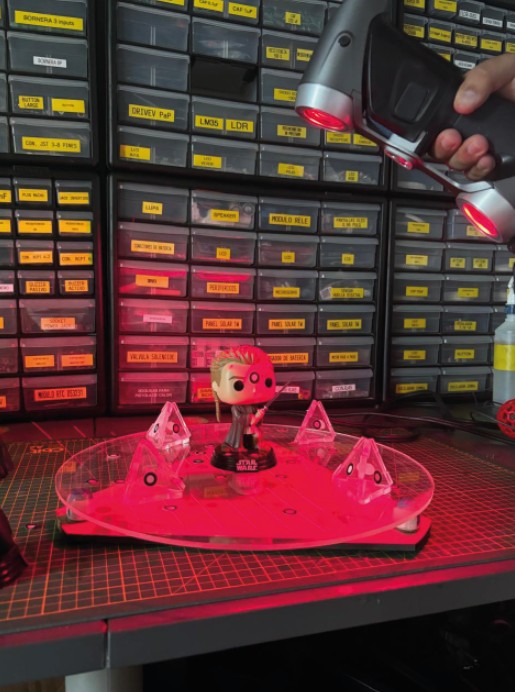
2. G l o s s p l a s t i c
I wanted to make sure if it was the color or the material that failed. So I tried with plastic but I only had black plastic. So we turned on all the lights and as it was gloss plastic I was worried that the light would bounce off the plastic and reflect. So I tried also with another Funko with bright colors.
 3. M a t t b r i g h t p l a s t i c
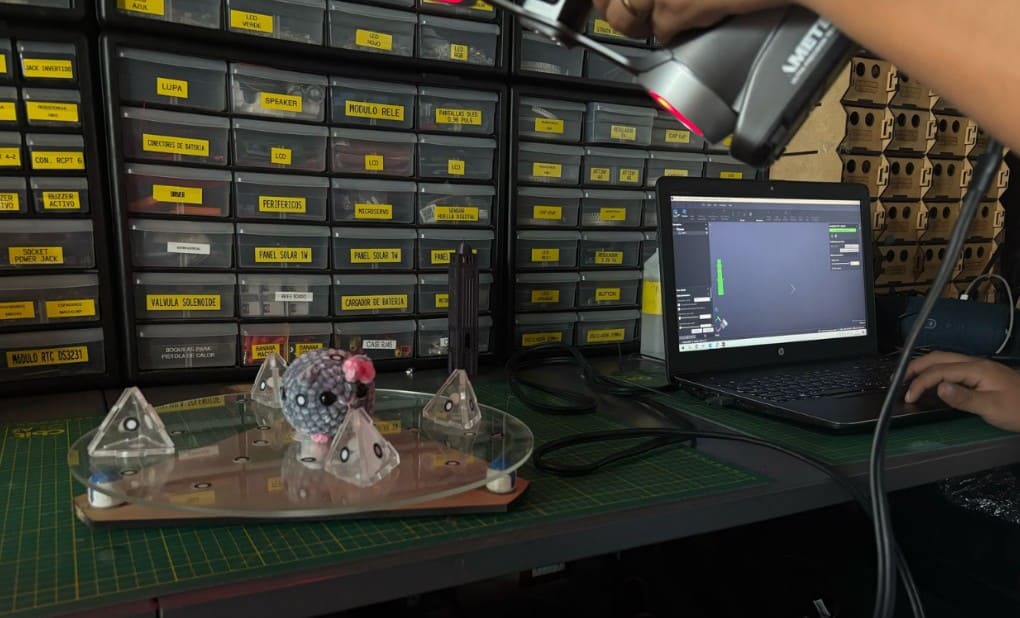
Finally I tried with MATT bright plastic so light does not reflect with my pink mouse. I wantes to see how detail it will scan having buttons and textures.
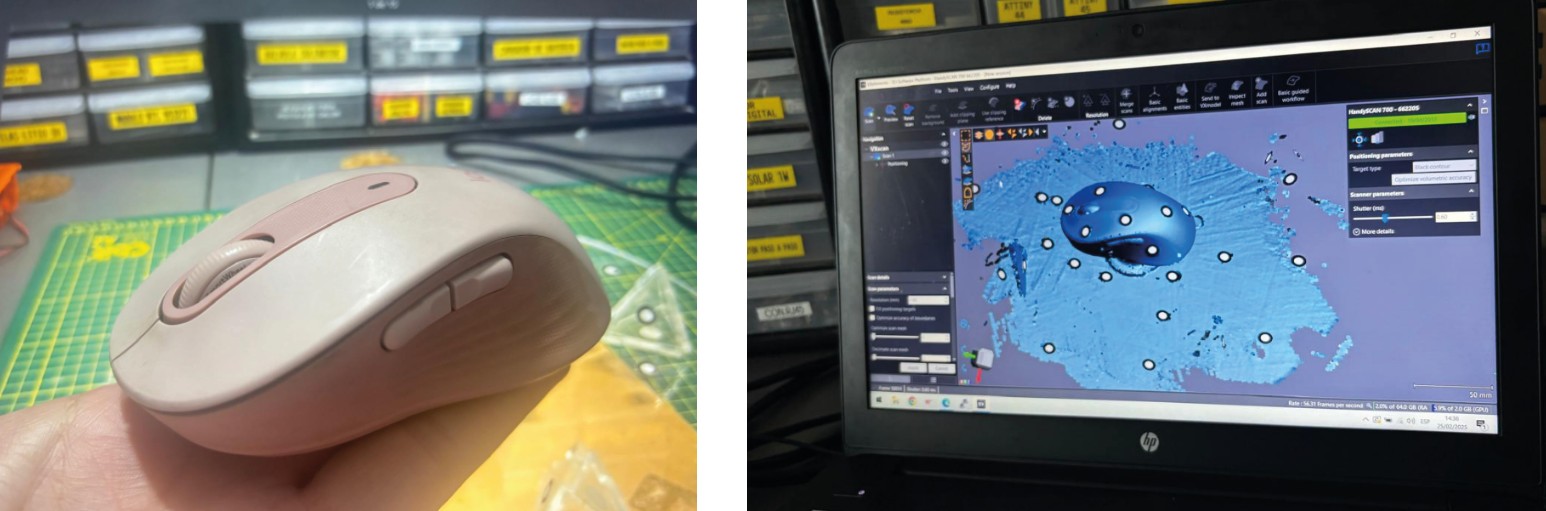
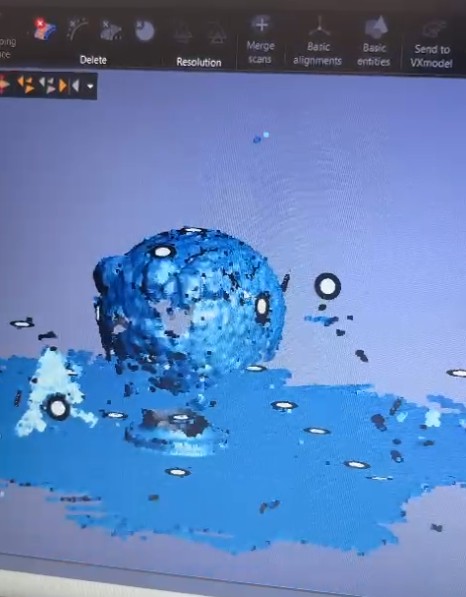
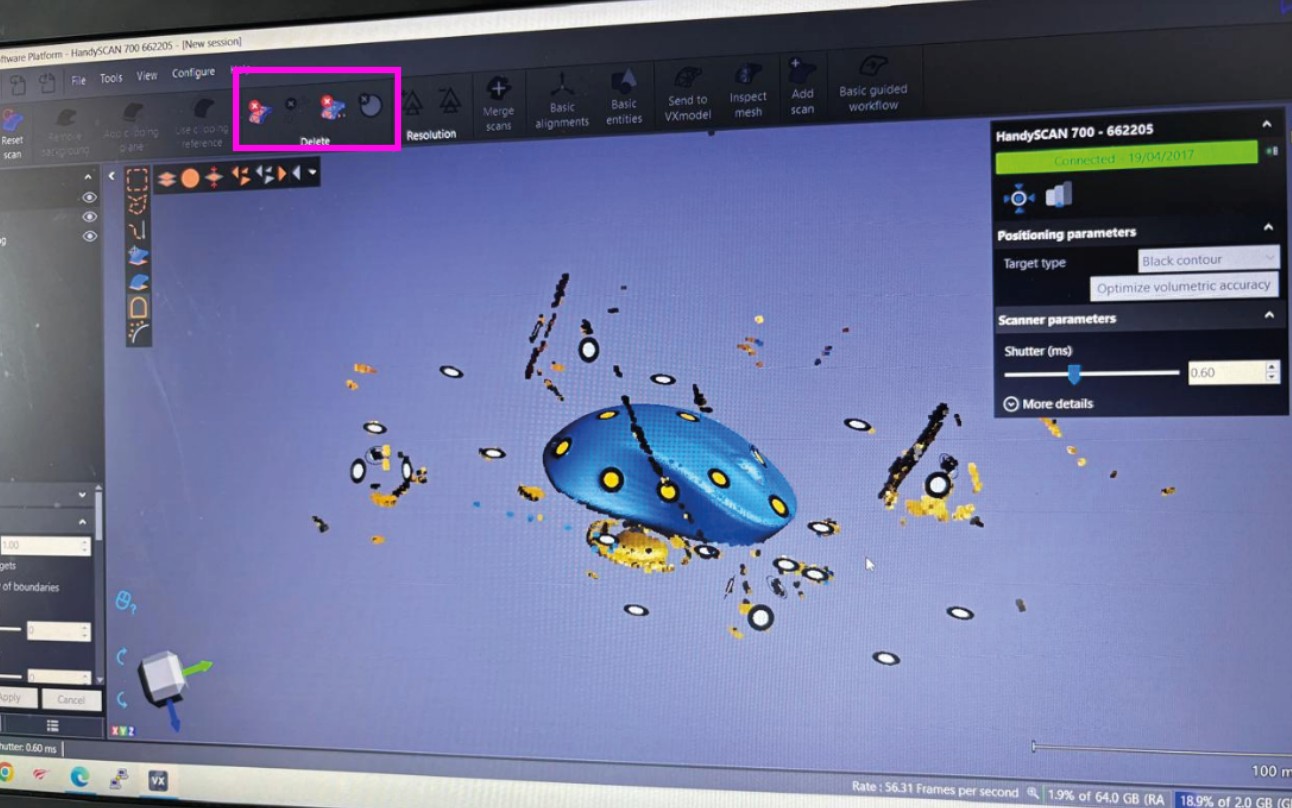
It detected the color and buttons really well. However it also scanned the base of the acrilic and some supports. So in the software I cleaned the model.
After cleanning the object I noticed I couldn't scan the base in this position even if the base was transparent because the scanner cannot point from down. So in the same axis I turned back the mouse and scan the back.
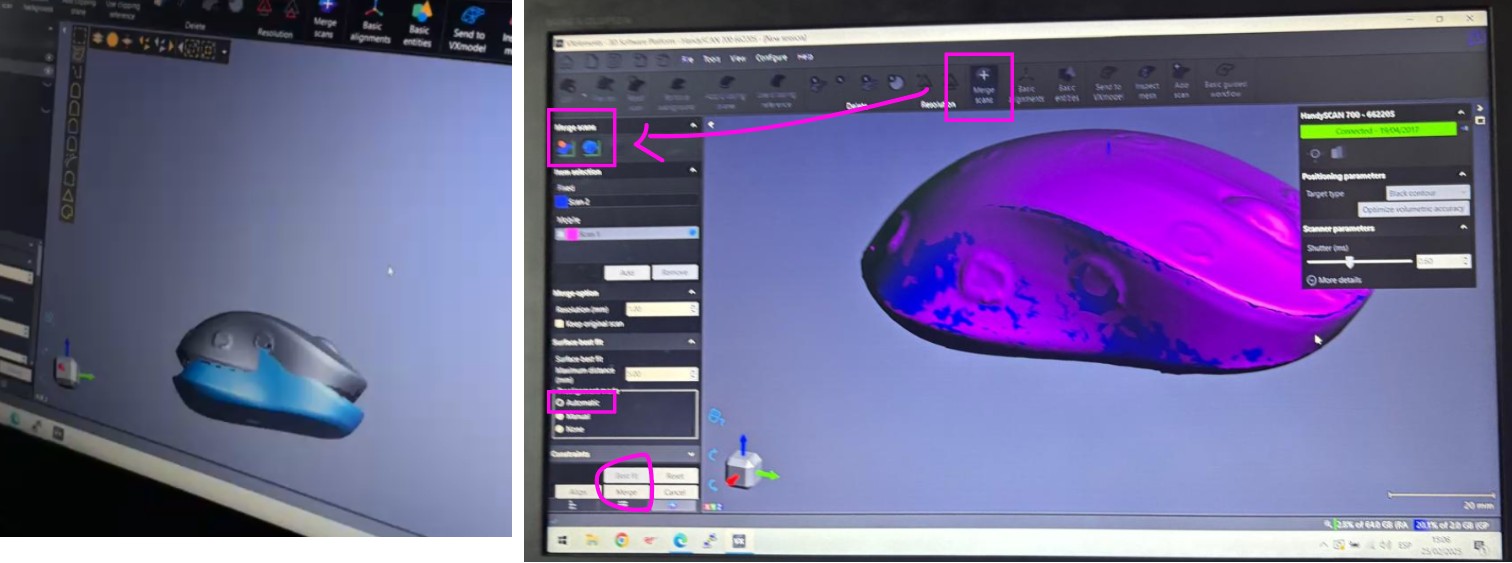
Finally I had to merge the 2 scans with the merge option in the software. And could complete the scan.
Design and print a 3d object
This week I conceptualize the idea of my final project. After laser cutting week and making a parametric tree from one of my urban drawings I wanted my lightstick to be an organic sculpture in which I can add petals as I want to make a changing treethat depends in my mood in form when reacting to music. But first I had to decide that organic shape. So I went back to my drawings and try to make 3d from that one imaginary tree.
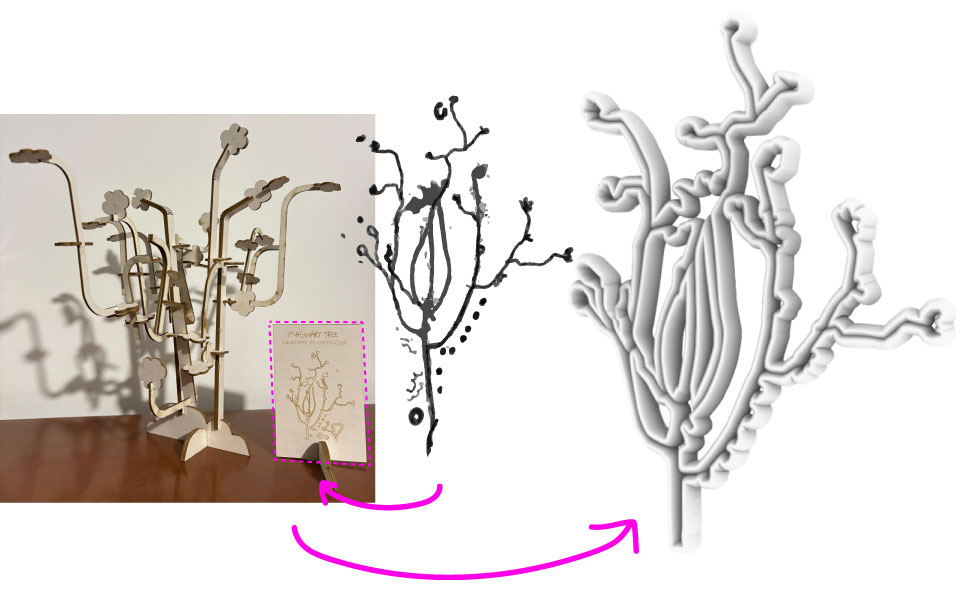
sketch form
As I wanted and organic shape I started from the vectors I alredy had to the lasercut week and make a surface in Rhinoceros. Then after several intents I decided to not make a simple extrusion but to make each vector thick and kinda sticky and glossy.
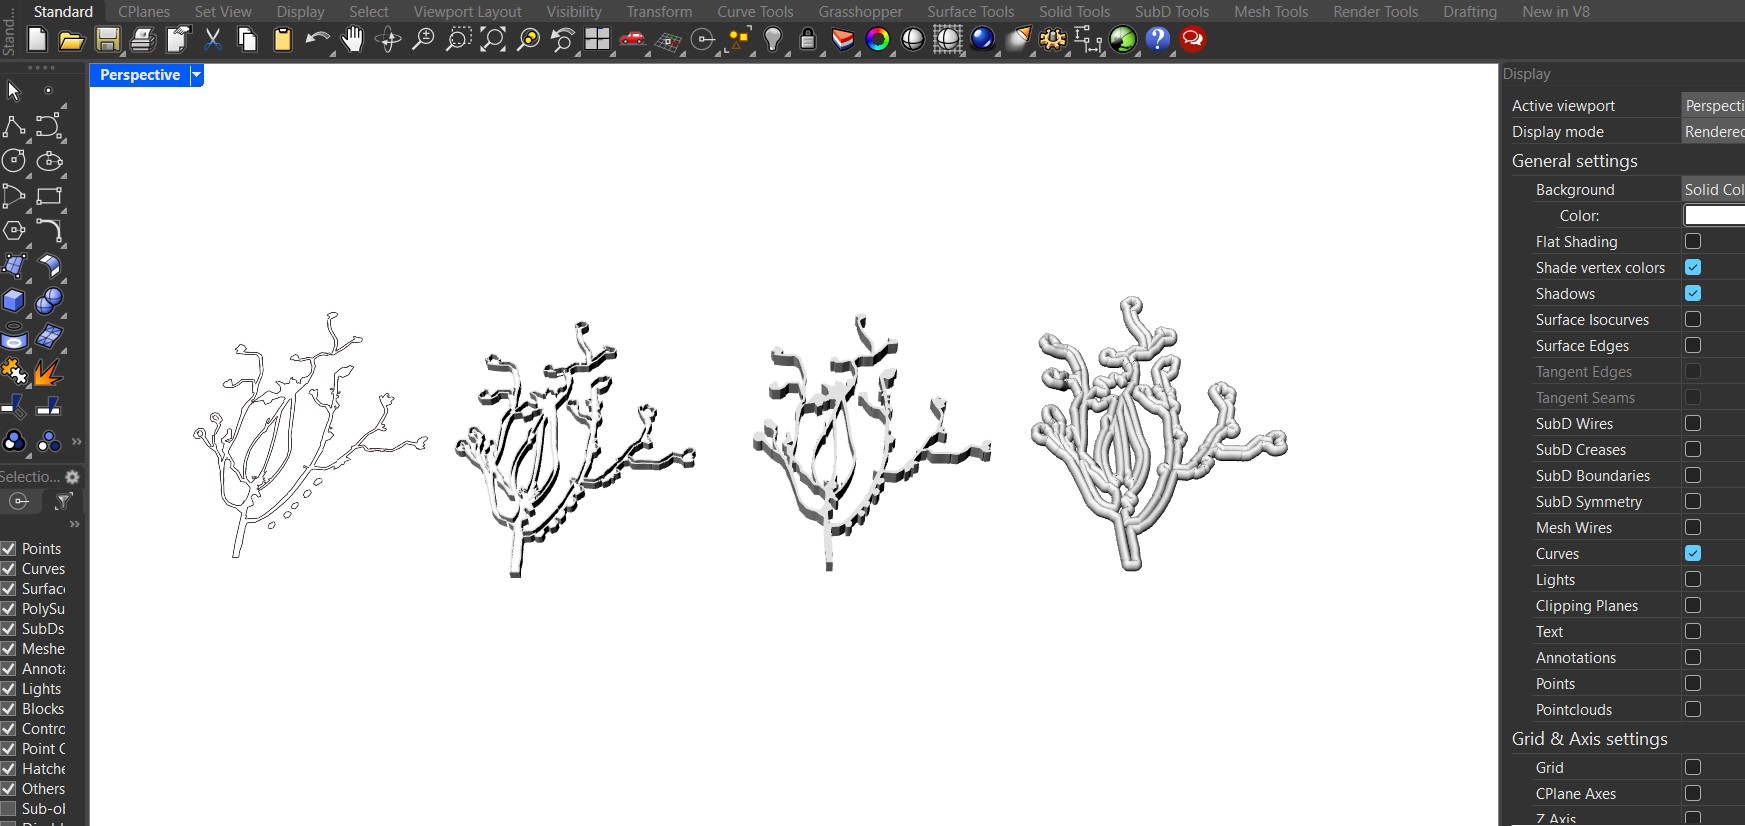
model process
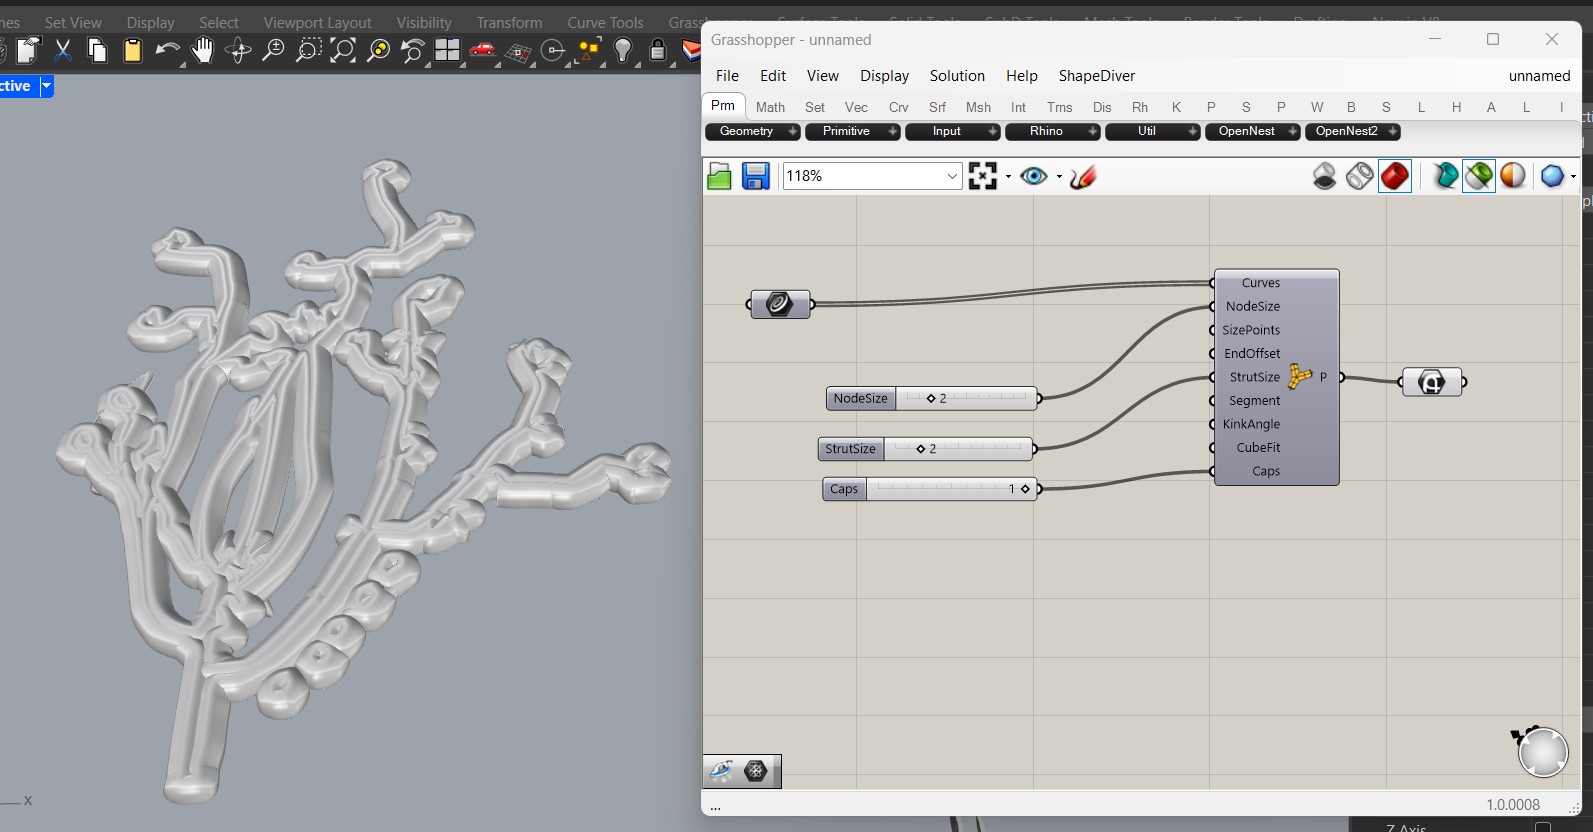
Grasshopper multipipe settings
I made the 3dimension of it in grasshopper as I wanted it to look like a cream surface. And grasshopper let me combine all the edges in one smooth object. I then edited some ends and give it dimension as you can see in the image above from the final printing.
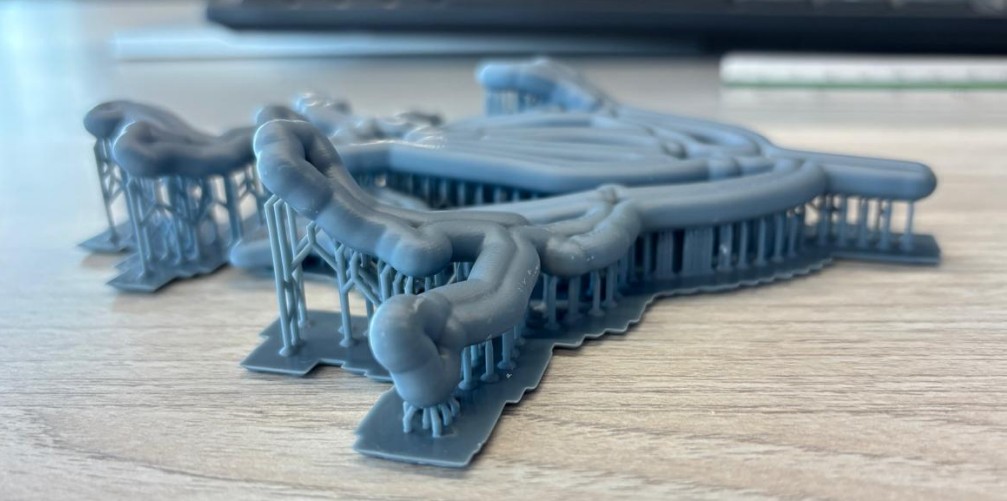
Final 3d printing in resin
What's next?
I want to try to print the same tree in another material. And make a base for this resin tree so it can stand.
I made this like a concept model for the final shape. I like the branches and how the go in diferent axis but still can't see it for the ideas I have. So maybe I will change this form.
The object needs supports to be stable in the printer. As it goes from down to above. The sphere needed a lot of supports since it is not solid. We chose the tree auto supports first and it were inside the sphere in PLA, which was very difficult to takeout.
Then with the TPU test we try to make manual the supports and only chose from the middle to the base and only outside supports. We tought it will make an error and not print but it went well! An here you can see how malleable is the TPU.
INDIVIDUAL ASSIGNMENT
Luma 3D Scan and resin 3d printing
Model from Luma app
I knew this app called LUMA 3D for IOS that scans by photo 3d objects. I used in Graphic for architecture classes to show the students how you can digitalize 3d objects scanning and then modelling to be even more precise. So, with this app I scanned a geranium of my moms collection. Then clean the 3d model in Rhino and triangulate the mesh and make thickness with grasshopper.
Luma app process
In the app first it will let you choose between an object or a scene. I selected object and followed the instructions, then after the scanning was done you can select to export it in different archives. I selected as .obj to open it in Rhino and also I could choose the quality of the model.
import in rhino
Imported model in chitubox
Imported model in chitubox
I imported the .obj in rhino to edit the model and choose what to print. Because it scanned everything even a portion of the table.
All 3d scanning and printing process
Printing process
Chitubox software
To print de model I used CHITUBOX as I learned in the group assignment.
First I imported the OBJ model from LUMA APP to rhino to export in STL format in order to open it in Chitubox that is the software linked with the Phrozen Sonic Mega 8K printer we have in the lab.
Imported model in chitubox
Then to organize the model the most efficient way to print you can rotate the object and move it in the bed printer. I rotated it being the most part of it layed in the base.
Imported model in chitubox
Once the object is the best placed I generate the supports. Here you can do it manually or auto from the software. Also choose light supports or heavy ones. I selected auto light supports so it can be easier to remove. And then asjust the basic settings from my instructor recommendations used in this lab.And then save the archive ready to print.
Curing process
To take put the resin printing first it has to take put any rest from resin with a machine that cleans with isopropyl alcohol. And then it drys with another machine.
Washing the resin from the printed object
Drying the final printing
Test 2 with Handy Scanner
In the Fab Lab Ulima they also had a 3d scanner. I tried to scan 3 different objects with it to test surfaces. First, an object with fabric, then an object with gloss black plastic and then and object with matt bright plastic.
To start scanning I had to open the scanner software and start a new scan while turning on the scanner. To scan correctly I had to make sure the bar that appeared in the left side of the screen was always green. When it was red it mean that the scanner was too far from the object.
1. F a b r i c
The lab has made their own base suppor for 3d scanning. It is an acrilic transparent base theat has like 4 detectors where you can stick the points reference from the 3d scaner. However it did't detect the fabric at all. We believe it transfers the light and cannot recognize the laser at all. It only worked in the first layer of the plush. We tried with low light and also a uniform color base to not distract the laser but it didn't work.
The scanner did't detect the fabric at all.
My instructors and I believe the fabric transfers the light and cannot recognize the laser at all. However it did only worked in the first layer of the plush. We also tried with low light and a uniform color base to not distract the laser but it didn't work. Also the eyes were solid and not from fabric but were glossy black and did not got scanned.
2. G l o s s p l a s t i c
I wanted to make sure if it was the color or the material that failed. So I tried with plastic but I only had black plastic. So we turned on all the lights and as it was gloss plastic I was worried that the light would bounce off the plastic and reflect. So I tried also with another Funko with bright colors.
3. M a t t b r i g h t p l a s t i c
Finally I tried with MATT bright plastic so light does not reflect with my pink mouse. I wantes to see how detail it will scan having buttons and textures.
It detected the color and buttons really well. However it also scanned the base of the acrilic and some supports. So in the software I cleaned the model.
After cleanning the object I noticed I couldn't scan the base in this position even if the base was transparent because the scanner cannot point from down. So in the same axis I turned back the mouse and scan the back.
Finally I had to merge the 2 scans with the merge option in the software. And could complete the scan.
Design and print a 3d object
This week I conceptualize the idea of my final project. After laser cutting week and making a parametric tree from one of my urban drawings I wanted my lightstick to be an organic sculpture in which I can add petals as I want to make a changing treethat depends in my mood in form when reacting to music. But first I had to decide that organic shape. So I went back to my drawings and try to make 3d from that one imaginary tree.
sketch form
As I wanted and organic shape I started from the vectors I alredy had to the lasercut week and make a surface in Rhinoceros. Then after several intents I decided to not make a simple extrusion but to make each vector thick and kinda sticky and glossy.
model process
Grasshopper multipipe settings
I made the 3dimension of it in grasshopper as I wanted it to look like a cream surface. And grasshopper let me combine all the edges in one smooth object. I then edited some ends and give it dimension as you can see in the image above from the final printing.
Final 3d printing in resin
What's next?
I want to try to print the same tree in another material. And make a base for this resin tree so it can stand.
I made this like a concept model for the final shape. I like the branches and how the go in diferent axis but still can't see it for the ideas I have. So maybe I will change this form.
The scanner did't detect the fabric at all.
My instructors and I believe the fabric transfers the light and cannot recognize the laser at all. However it did only worked in the first layer of the plush. We also tried with low light and a uniform color base to not distract the laser but it didn't work. Also the eyes were solid and not from fabric but were glossy black and did not got scanned.
After cleanning the object I noticed I couldn't scan the base in this position even if the base was transparent because the scanner cannot point from down. So in the same axis I turned back the mouse and scan the back.
Design and print a 3d object
This week I conceptualize the idea of my final project. After laser cutting week and making a parametric tree from one of my urban drawings I wanted my lightstick to be an organic sculpture in which I can add petals as I want to make a changing treethat depends in my mood in form when reacting to music. But first I had to decide that organic shape. So I went back to my drawings and try to make 3d from that one imaginary tree.
sketch form
As I wanted and organic shape I started from the vectors I alredy had to the lasercut week and make a surface in Rhinoceros. Then after several intents I decided to not make a simple extrusion but to make each vector thick and kinda sticky and glossy.
model process
Grasshopper multipipe settings
I made the 3dimension of it in grasshopper as I wanted it to look like a cream surface. And grasshopper let me combine all the edges in one smooth object. I then edited some ends and give it dimension as you can see in the image above from the final printing.