


Week 5
3D Scanning and Printing
Welcome to week 5 of FabAcademy! This week's project dug further into the area of 3D printing and scanning, increasing my comprehension beyond what I already knew. I investigated the fundamental distinctions between additive and subtractive manufacturing, as well as the design limitations and laws that apply specifically to 3D printing. I actively participated in both solo and group projects that used 3D scanning and printing equipment. Overall, this week's exploration reaffirmed my enthusiasm for 3D printing and provided me with the information and skills needed to incorporate it into my final project.
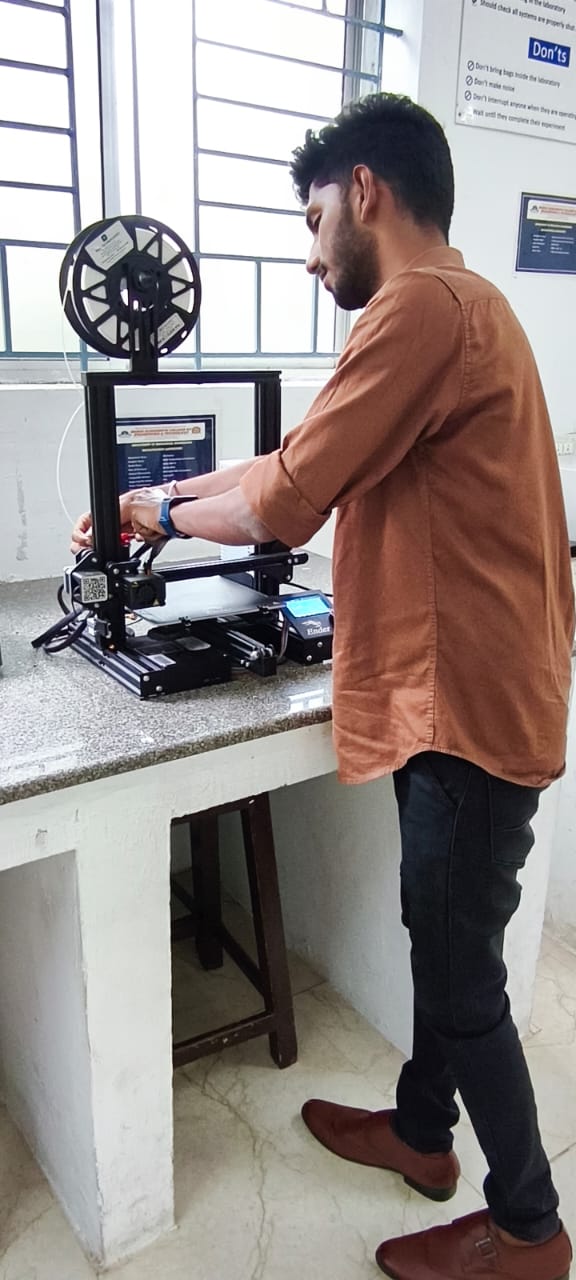
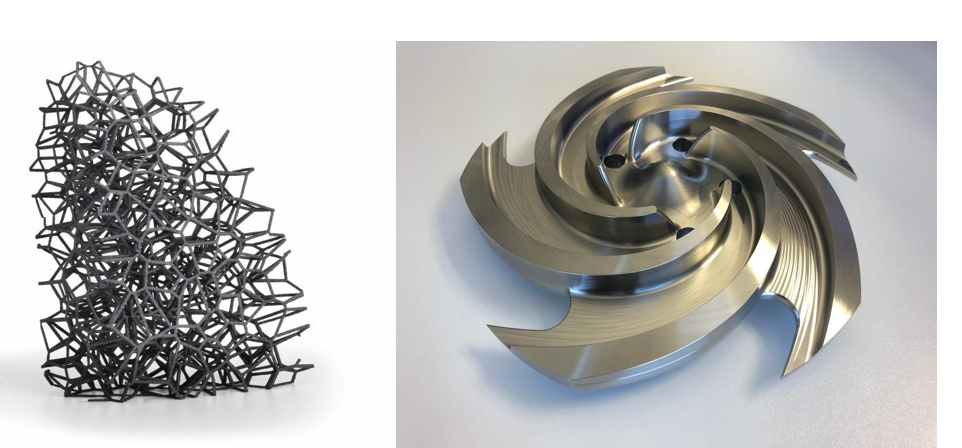
My Heroshot for this Week
 |
 |
What is 3d printing?
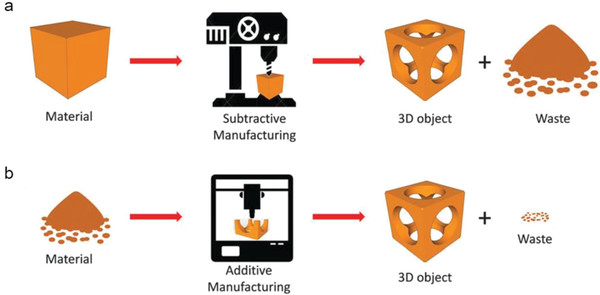
3D printing is the process of adding material to a structure, using an extruder or printhead that adds material by heating, melting, or applying pressure, building an object one layer at a time. 3D printing is a type of additive manufacturing.
History of 3D printing:
3D printing captured the world’s attention in the 2000s as the first consumer models arrived on desktops, but its history goes back much further. Born as a concept at the close of World War II, rudimentary progress was made until it caught on in manufacturing in the late 1980s.
For a few decades, additive manufacturing and 3D printing were strictly heavy industry technologies—printers were large devices costing hundreds of thousands of dollars. But open-source software frameworks and the rise of 3D digital design in the late 1990s and early 2000s prompted a wave of innovation, with additive manufacturing shrinking down to the scale of desktop inkjet printing.
Since the early 2010s, 3D printing has found its groove and is now a fixture in both large and small factory floor processes and environments. As materials science has improved, 3D printing technology has advanced in lockstep.
Outcomes
Group assignments:
Test the design rules for the 3D printer(s)
Document the work on the group work page and reflect on your individual page what i learned about characteristics of your printer
Individual assignments:
Design and 3D print an object (small, few cm3, limited by printer time) that could not be easily made subtractively.
3D scan an object (and optionally print it)
reference links
Benefits of 3D printing
Overall, 3D printing is characterized by being smaller, lighter, faster, and more nimble than more traditional manufacturing methods—here’s how:
Speed
From concept to execution, traditional manufacturing works by designing and building molds and geometries for CNC machining and milling—a lengthy process. A 3D-printed object can be designed, sent to the device, and created in hours or minutes depending on its complexity.
Hyper-development
Finding out that a geometry doesn’t work after a product is in production can be expensive and disruptive—it’s much better to identify what to improve from a single rapid prototype. Small adjustments can be made iteratively until you settle on the perfect design, all in far less time than traditional manufacturing.
Accessibility
The consumer 3D printing market has democratized manufacturing with the widespread adoption of low-cost, compact devices. Ever-smaller players help establish new, innovative techniques and materials that act as a rising tide, elevating the industry as a whole.
Customization
Artisanal and specialist products aren’t suited to mass manufacturing because smaller production runs can drive the economics of manufacture and supply out of reach. 3D printing lets you iterate and endlessly customize a design, making as many or as few of a unique product as your market demands for the same per-unit cost.
Sustainability
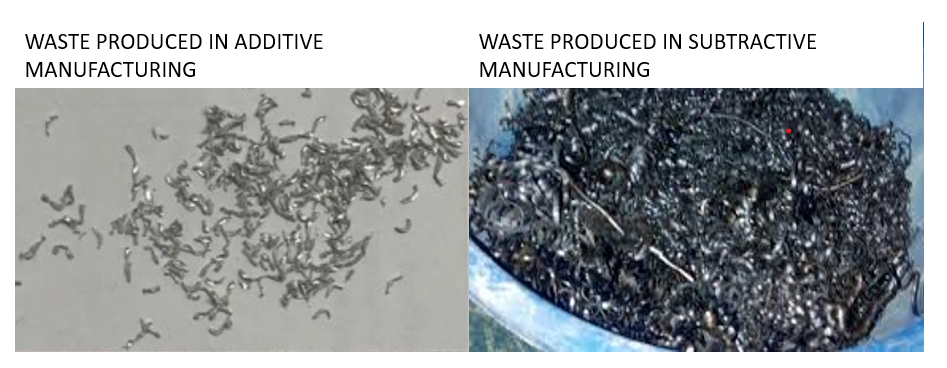
Traditional manufacturing like milling and machining is subtractive—it starts with raw material and removes everything not needed for the final shape, creating waste in the process. Because 3D printing adds only the material needed for the final shape, there’s no large off-cut volume and far less waste.
Cost-effective
Thanks to the speed and efficiency of print devices and the relatively low cost and handling of materials, 3D printing is extremely cost effective. Whether it’s producing final products as a small provider or concepting and designing faster in heavy industry, 3D printing is contributing to the bottom line for countless producers.
How 3D printing works
3D printing starts with a digital model of a design, be it a desk toy, car part, skyscraper, or airliner. When you want to build it, it’s the equivalent of clicking “print” to send a document to an inkjet printer.
The 3D print software arranges the geometry of your design into layers or “slices,” calculating how much, where, and in what style the material is applied to either the substrate or the previous layer. The dimensions and parameters of each slice are interpreted by the printhead or extruder driver as coordinates on the object, and it moves back and forth across the surface applying material with the correct thickness, speed, and position to create the shape one layer at a time.
Depending on the method or material used, there’s usually a cooling or setting period, then your object or part is ready for use.
3D printing technology lays down material layer by layer to build a physical object based on a digital model.
Materials used in 3D printing
The industrial beginnings of 3D printing used metals and hardy polymers and plastics on machines with large build areas/print beds and extruders able to handle heavy designs. Almost every type of metal can be 3D printed because of softening or melting properties, including stainless steel, titanium, aluminum, nickel, silver, and gold.
As smaller, more portable 3D printer models became available, materials shifted to new classes of plastics like PLA, ABS, PETG, TPU, Nylon, ASA, and PVA. Tomorrow’s 3D printing promises even more as additive processes advance to include materials like concrete, wood, and organic materials.
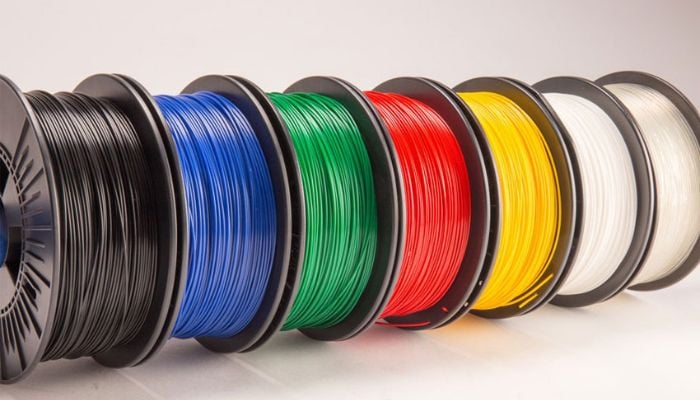
Modern desktop 3D printers use different classes of plastics as their building material.
Subtractive vs Additive Manufacturing:
Why is the printing part subtractive not made easily
Subtractive printing is not made easily because
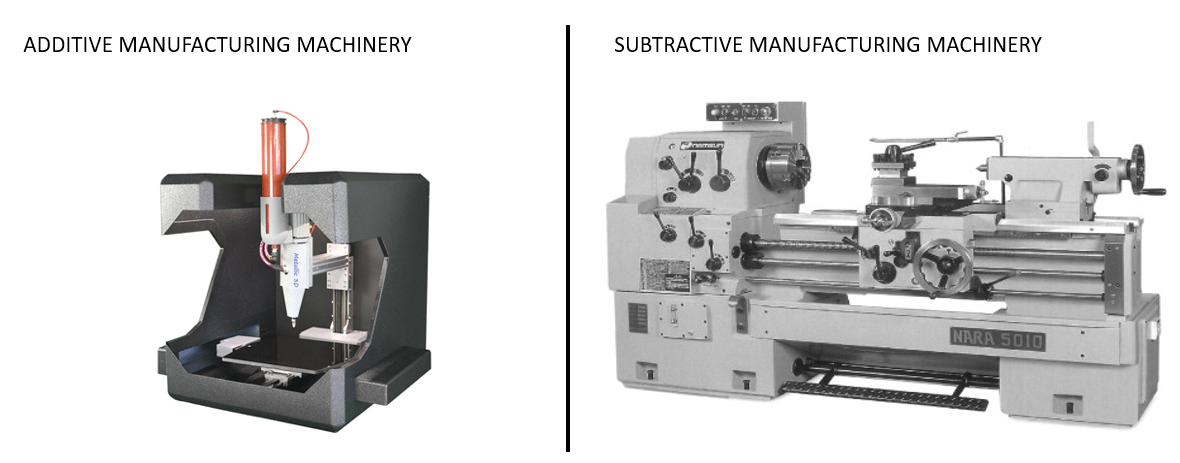
- Material Wastage – In subtractive methods, we start with a solid block of material and cut away parts we don’t need. This leads to a lot of wasted material, unlike additive printing where we use only what is required.
- Complex Setup – Subtractive machines (like CNC mills or laser cutters) need careful setup of tools, alignment, cutting speed, and depth. This makes it more complicated compared to additive printing, where you just load the design and print.
- Limited Shapes – Cutting away material cannot easily create hollow structures or very complex internal designs. Additive printing can build such shapes layer by layer without issue.
- Tool Wear & Maintenance – Subtractive methods use physical tools (cutters, drills, etc.) that wear out over time and need replacement. This increases cost and effort.
- Safety Concerns – Subtractive machines generate sharp chips, dust, or even sparks, which require safety precautions. Additive printing is relatively safer and cleaner.

Design Test
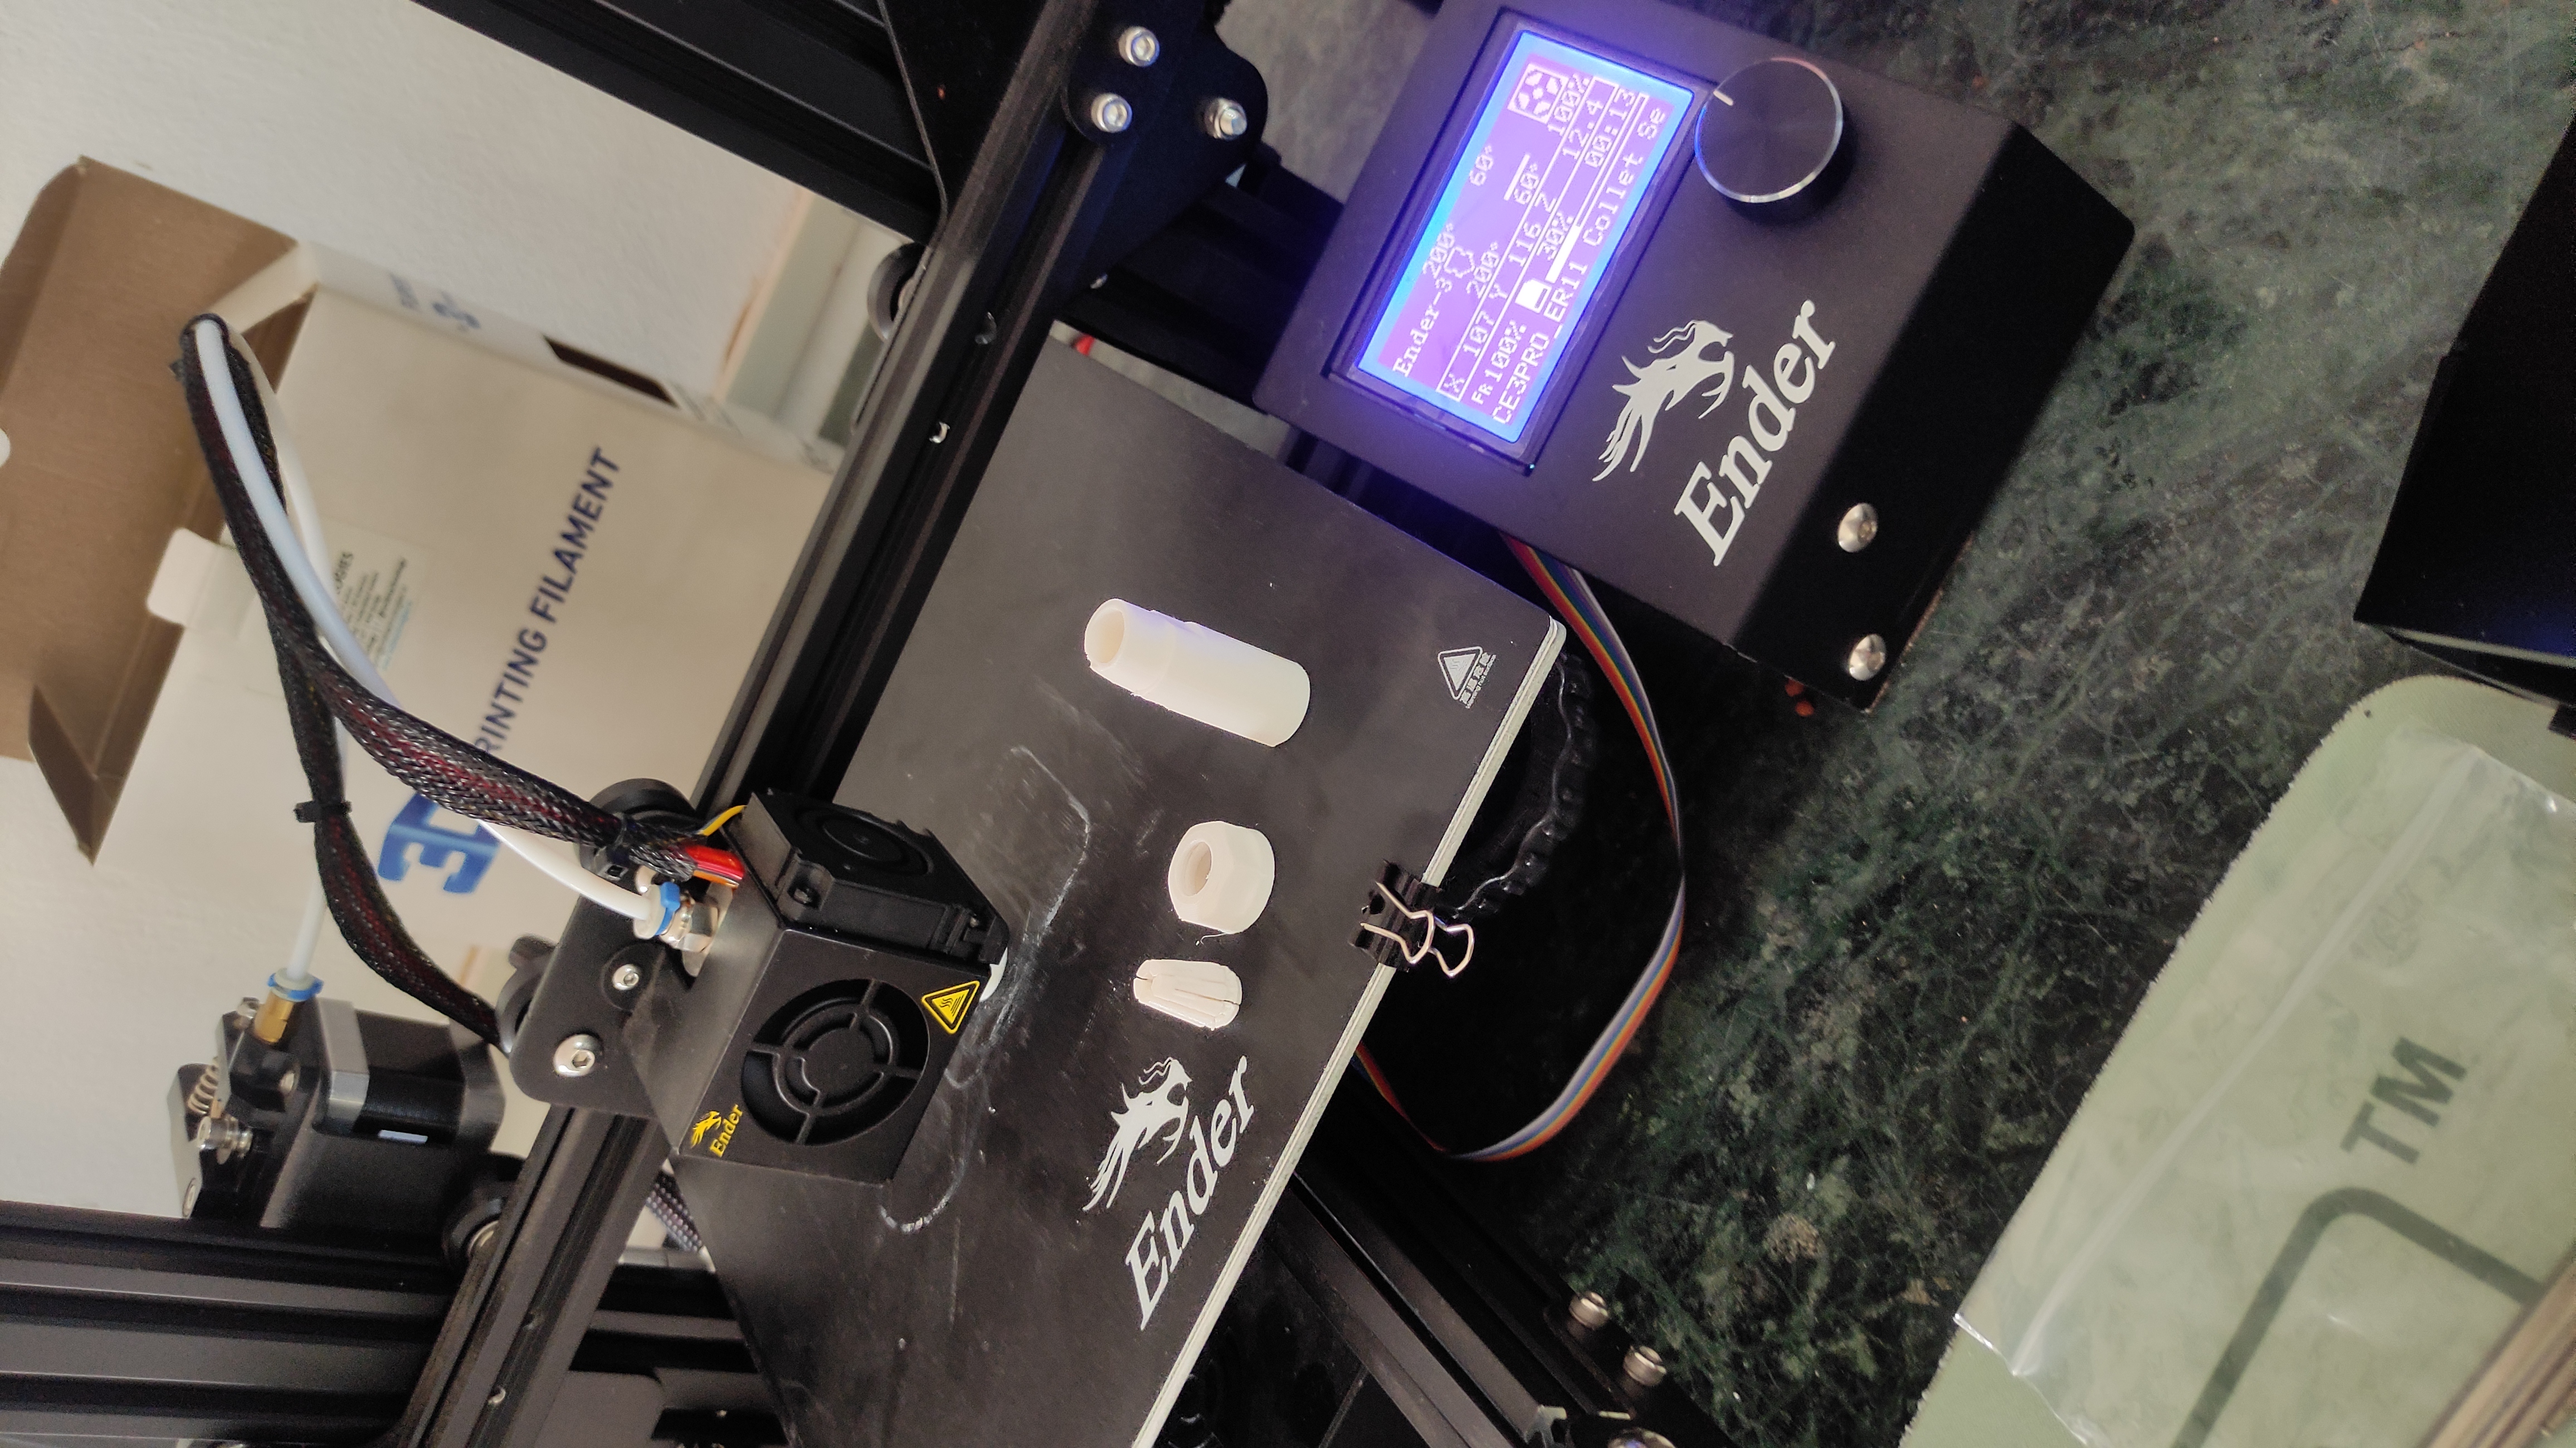
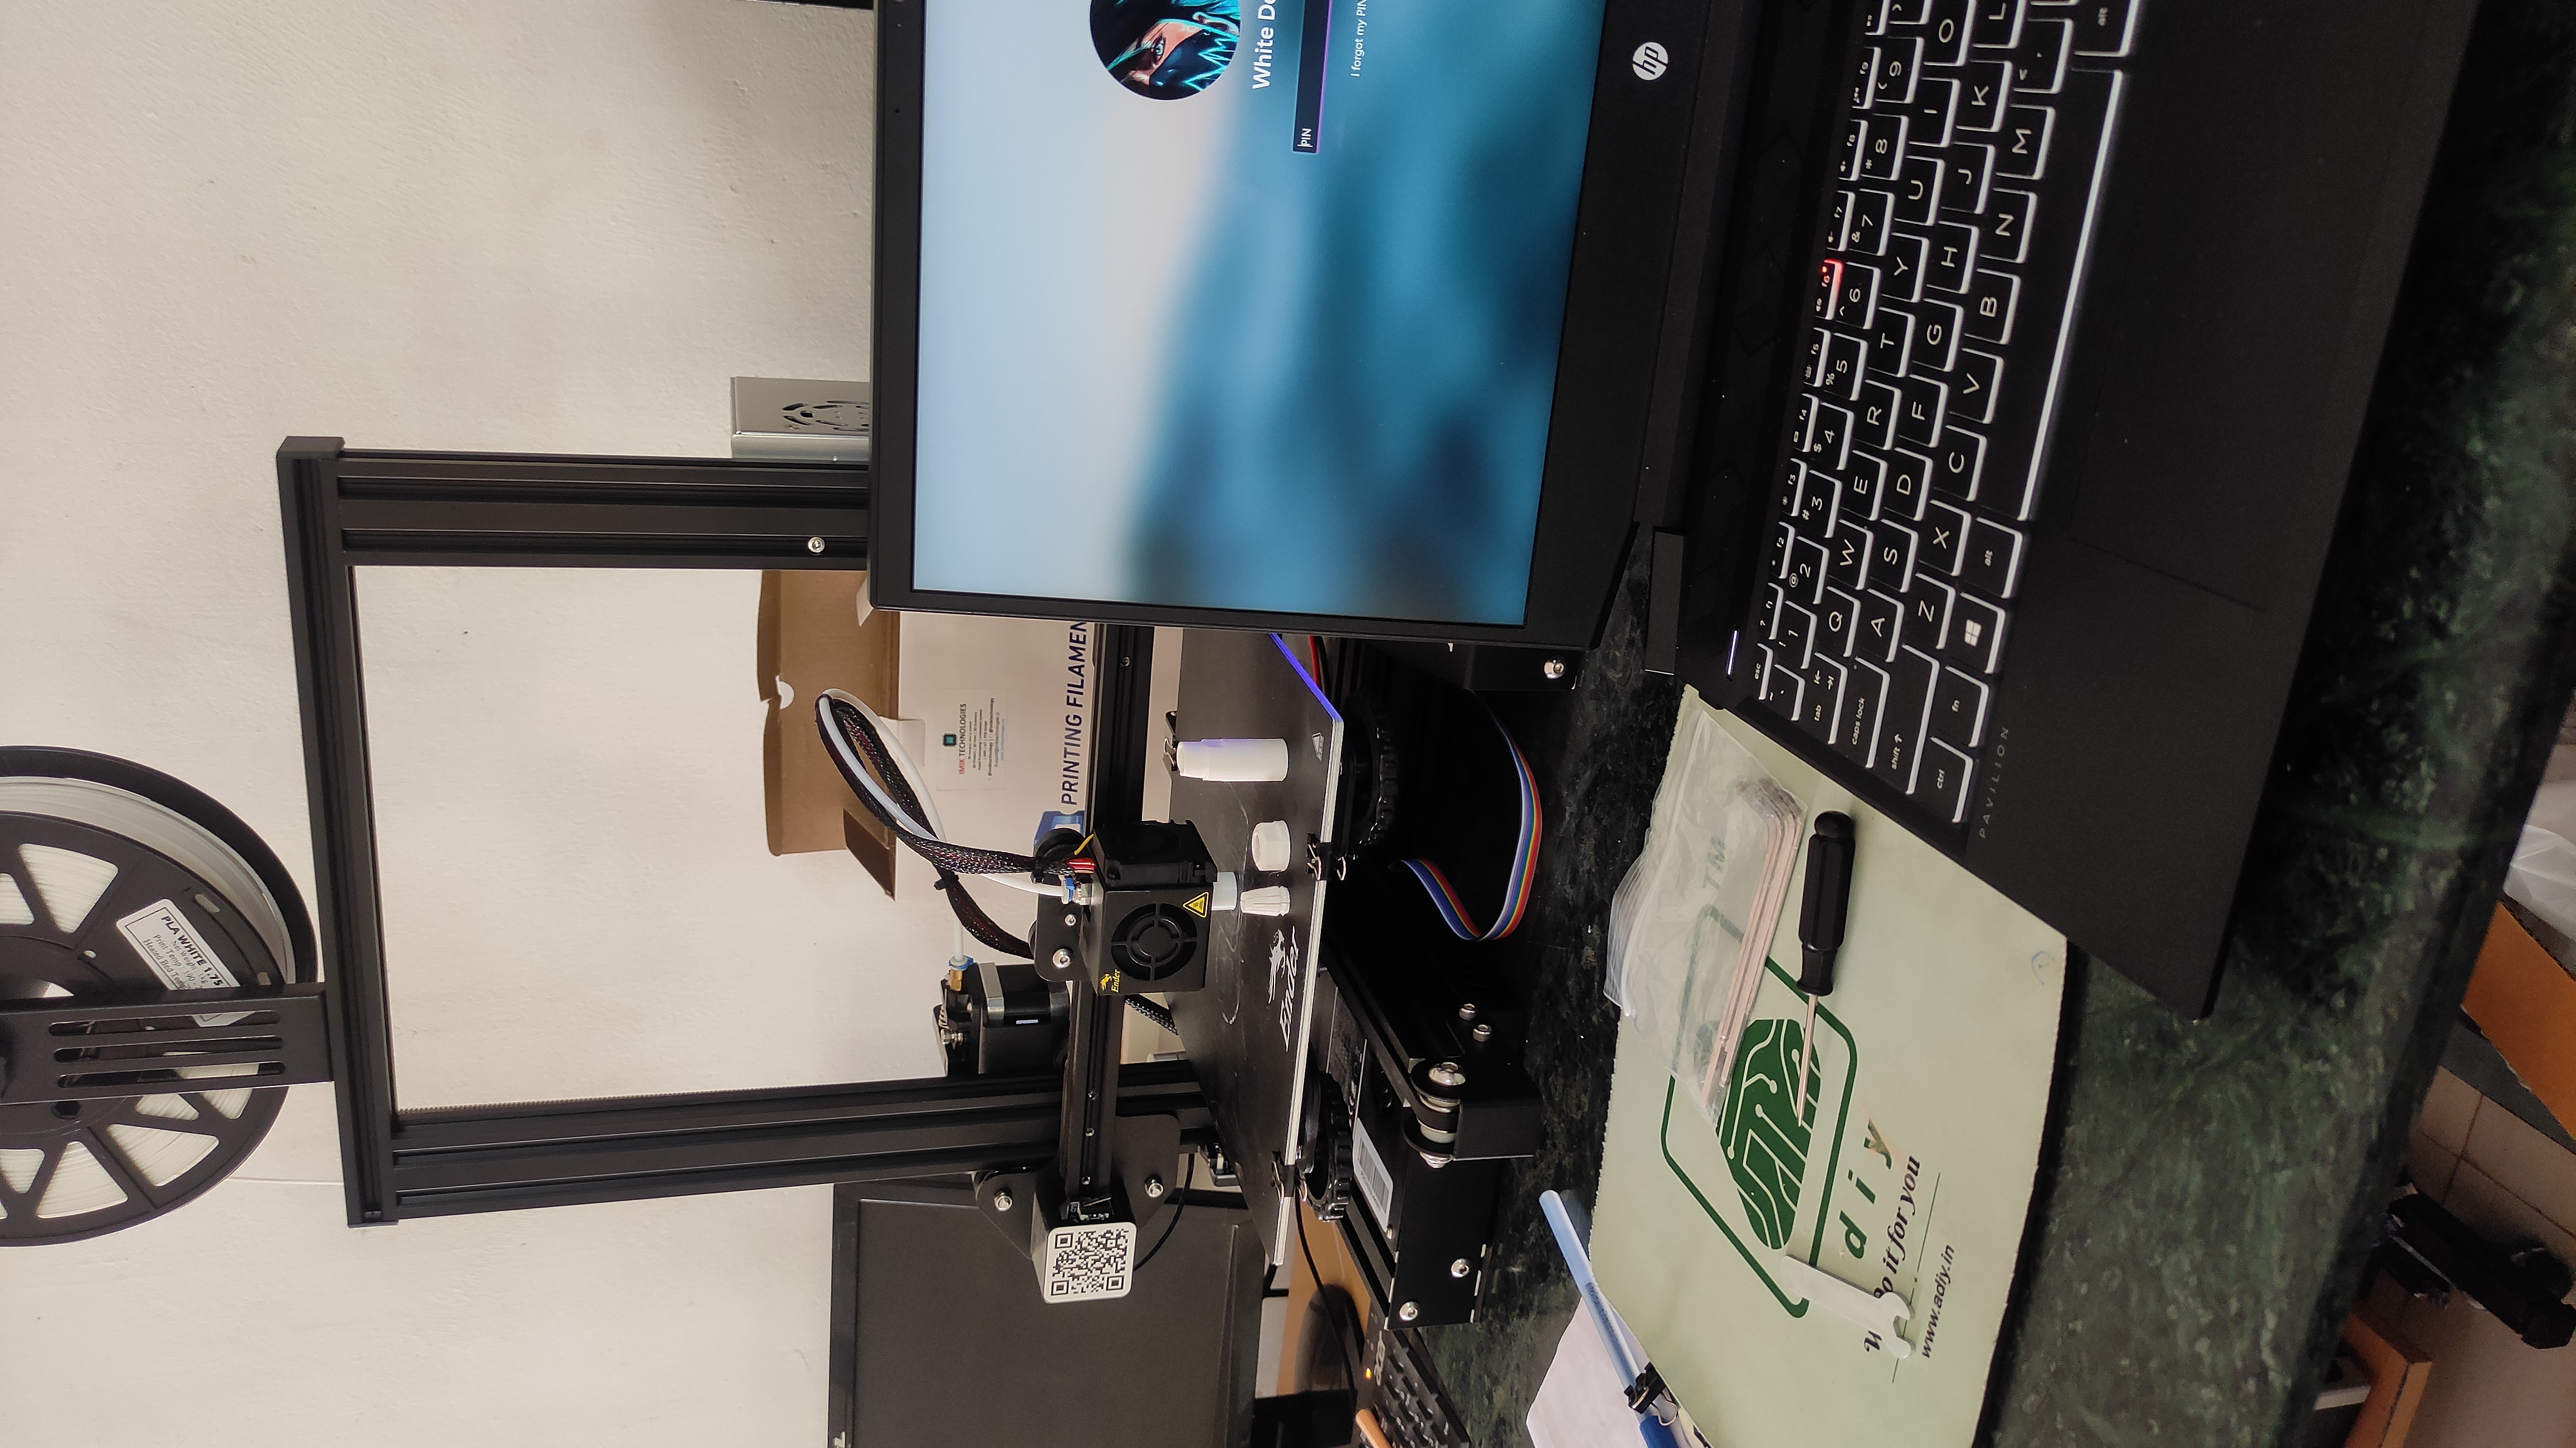
- After the slicing, I started the print and patiently waited for the final output.
- Then I carefully took out the printed part from the 3D printer and inspected the details of the printed section.
Angle
- According to the design, the extrusion of the angled section was successfully printed without any defects.
- We tested it with gap variations of 10 degrees and 15 degrees, extending up to 75 and 80 degrees.
- The sharp angles were able to retain their shape without collapsing, which shows that the printer handled the overhang stresses well.
- At higher angles, slight surface roughness was visible, but the structural integrity of the print remained intact.
- The accuracy of the angled edges confirmed that the slicing settings were well-optimized for this geometry.
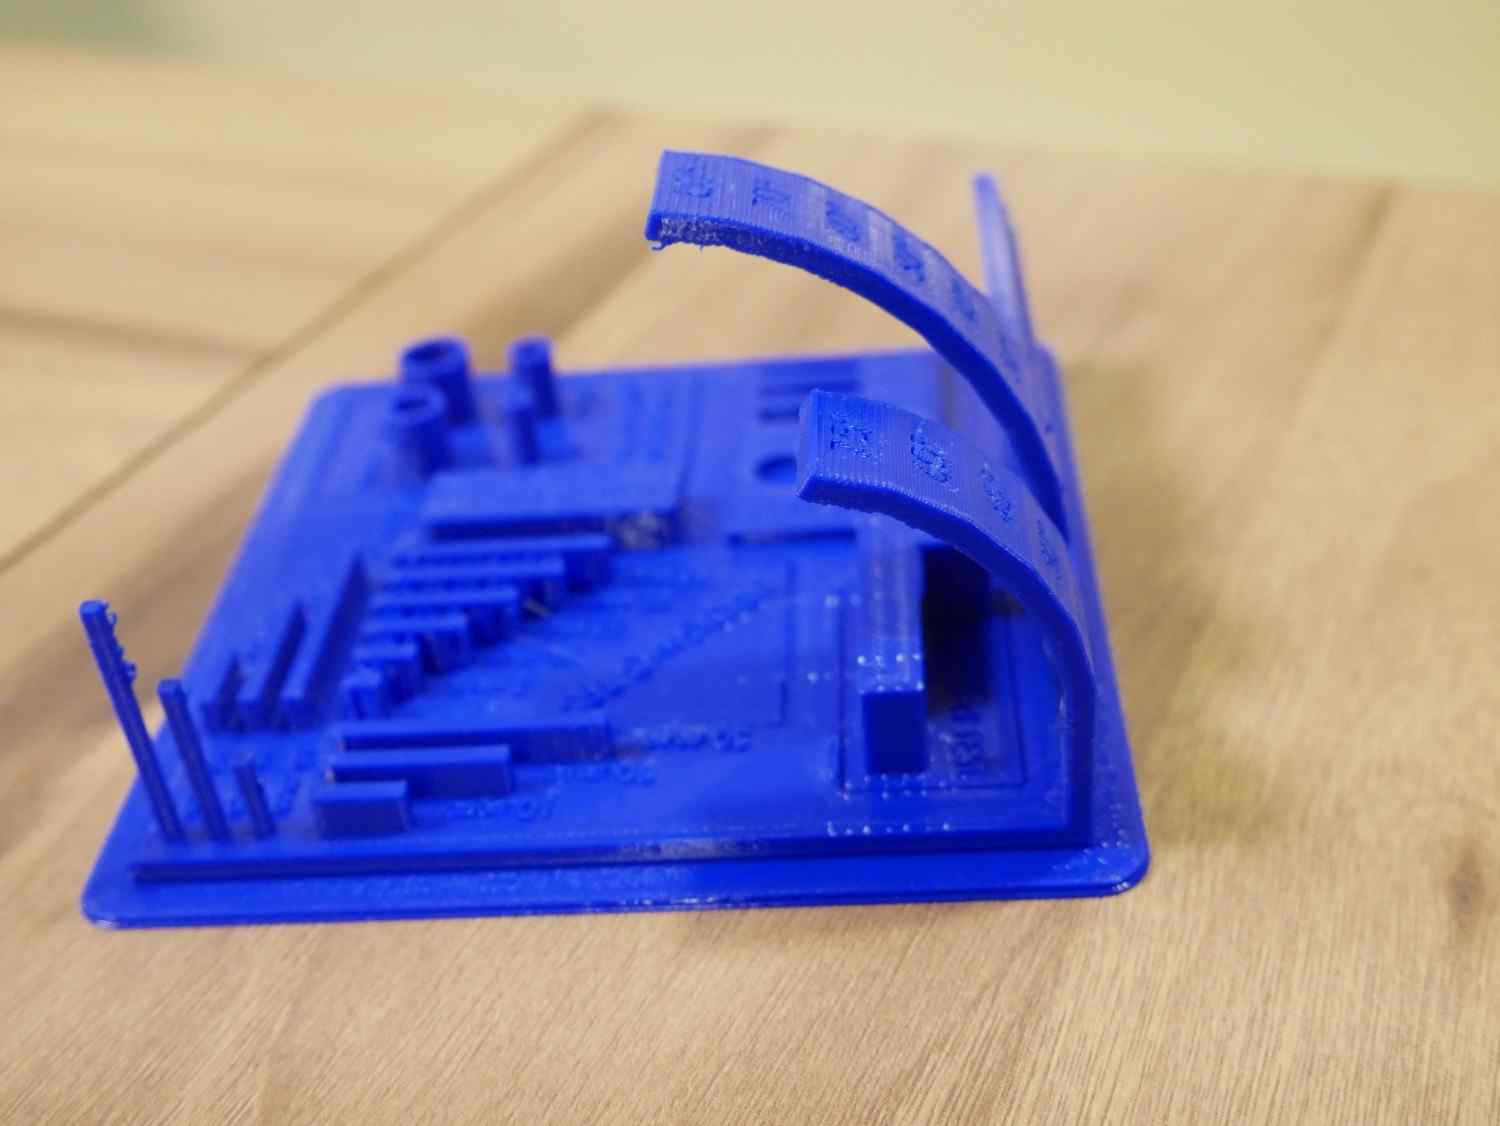
Overhang Test
- This section was formed well with minimal disruption
- The surface quality was also satisfactory
- Even at higher overhangs, there was no significant sagging, which indicates good cooling and extrusion control.
- Layer adhesion in these regions was strong, proving that the printer managed unsupported sections effectively.
- The test also proved that the printer’s fan settings were correctly balanced to support clean overhang formation

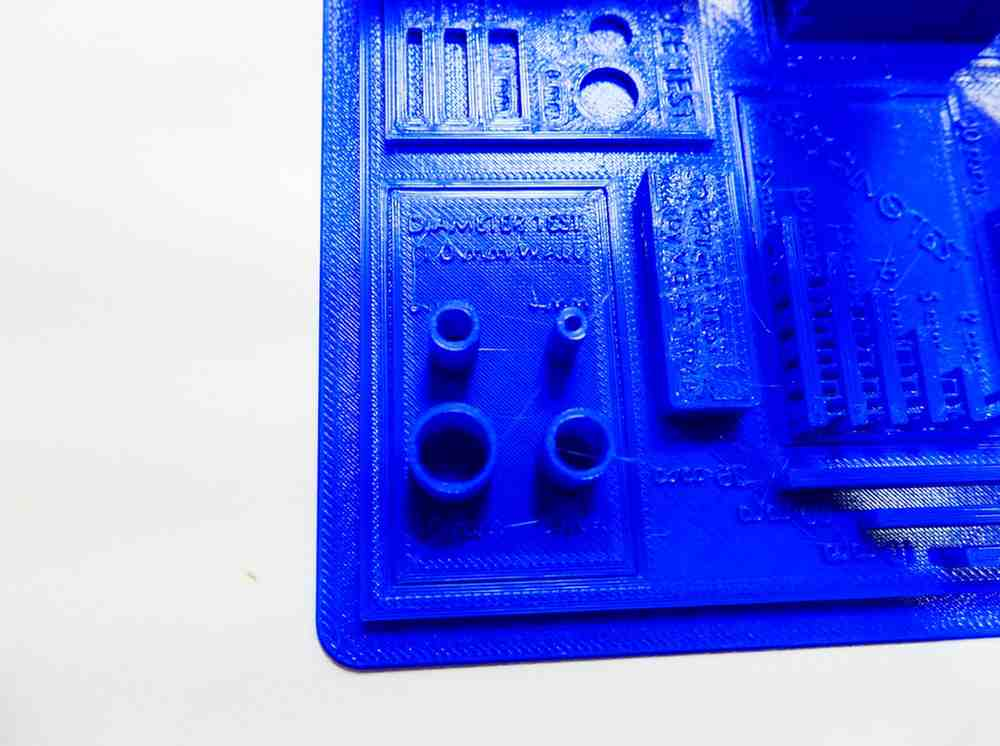
Diameter test
- A web crossover was observed within the inner space of the holes.
- We tested it with diameters of 4mm, 6mm, 8mm, and 10mm.
- The smaller holes (4mm) showed more imperfections compared to larger ones, which is expected in FDM printing.
- Dimensional accuracy was quite close to the design values, with only minor deviations observed.
- The print showed consistent circularity in larger holes, confirming the printer’s mechanical calibration.
- Comparative caliper measurements were recorded to quantify deviations and confirm tolerances for each diameter.
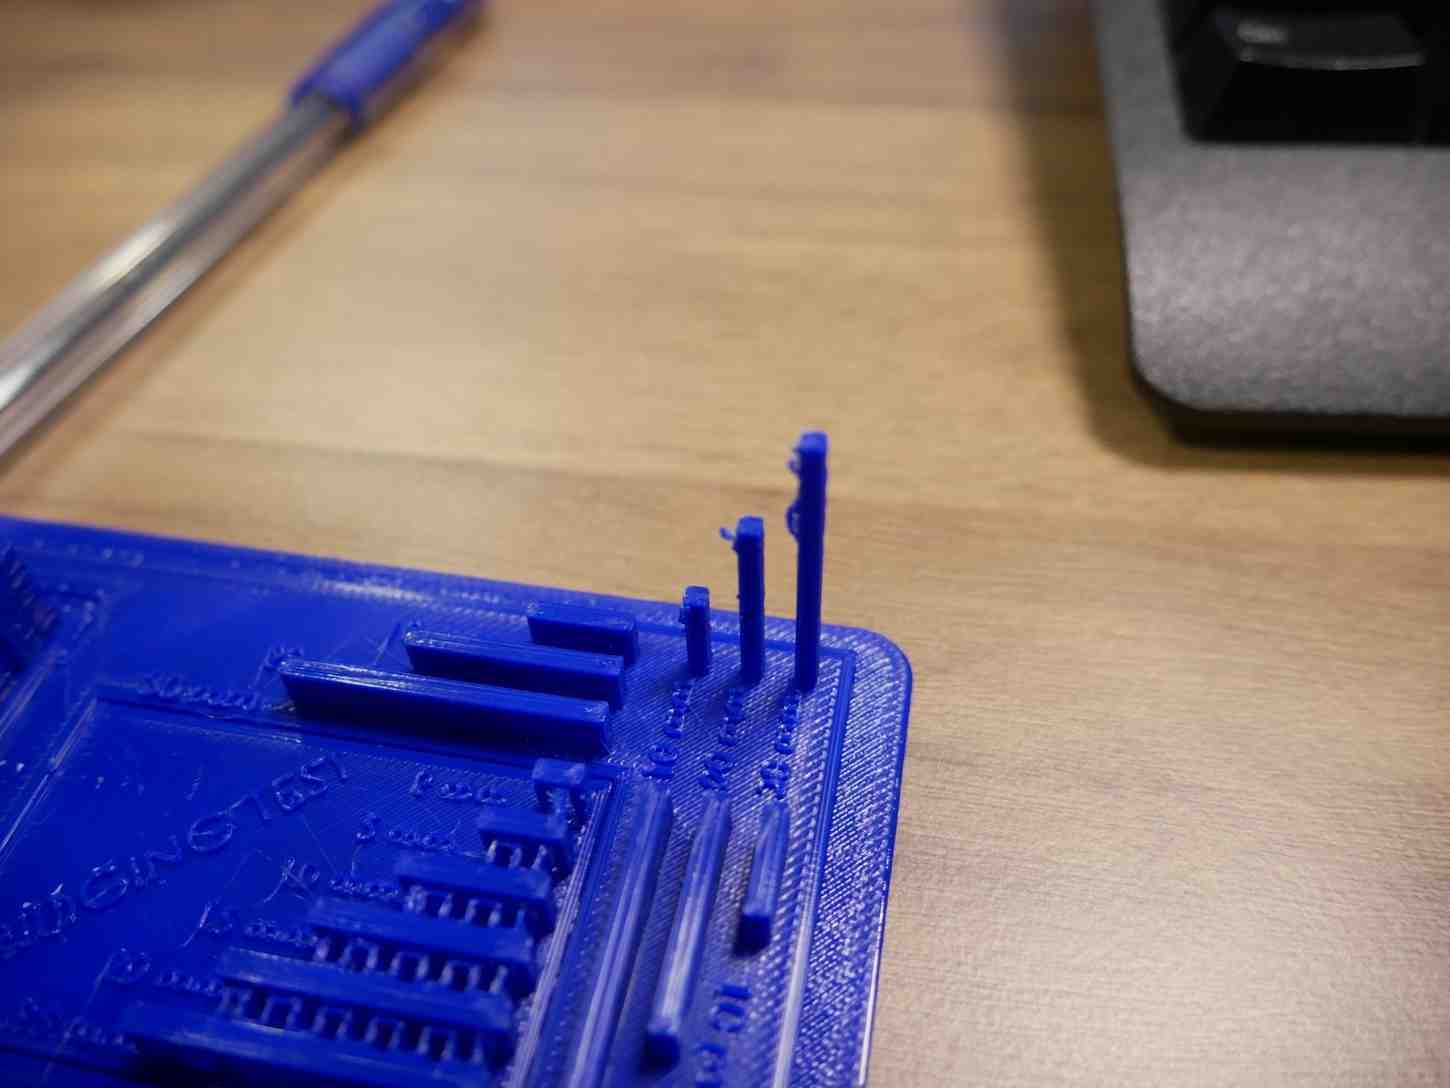
Extrude length test
- We conducted tests on sizes ranging from 10mm to 30mm, dividing them into three separate test sections.
- Minor damage was observed only at the end of the printed part due to 3D printer movements.
- Continuous extrusion was smooth, and there were no gaps or interruptions in the middle sections.
- The consistency of filament flow remained stable across different lengths, showing the printer’s reliability.
- Longer extrusions demonstrated that the printer could maintain accuracy without material under-extrusion issues.
- End-of-print retraction and travel settings were reviewed and adjusted to reduce end-damage in future prints.
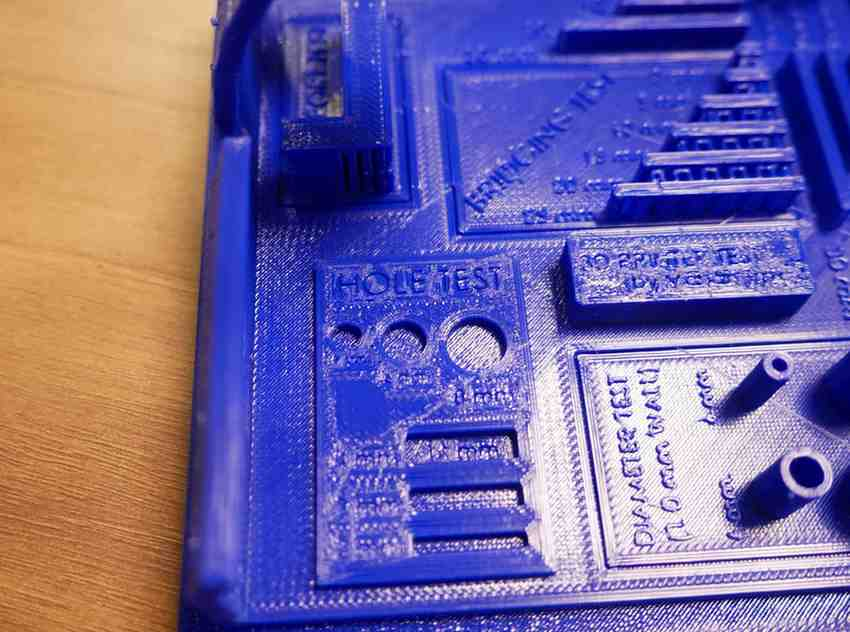
Hole test
- We tested it into 3 different holes - 4mm, 6mm and 8mm
- Surface of the hole only cames not good but the diameter is good.
- The edges of the holes required a bit of post-processing to achieve a smoother finish.
- Despite minor surface flaws, the holes were perfectly functional and aligned with the design measurements.
- Tolerance testing showed that standard-sized pins could fit into the holes with slight adjustments.
- After light deburring and sanding, fitment improved and no functional interference was detected.
This week there are two types of assignments, one group and individual.
Group Assigment :
Visit our Group assignment page here
Individual Assignment:
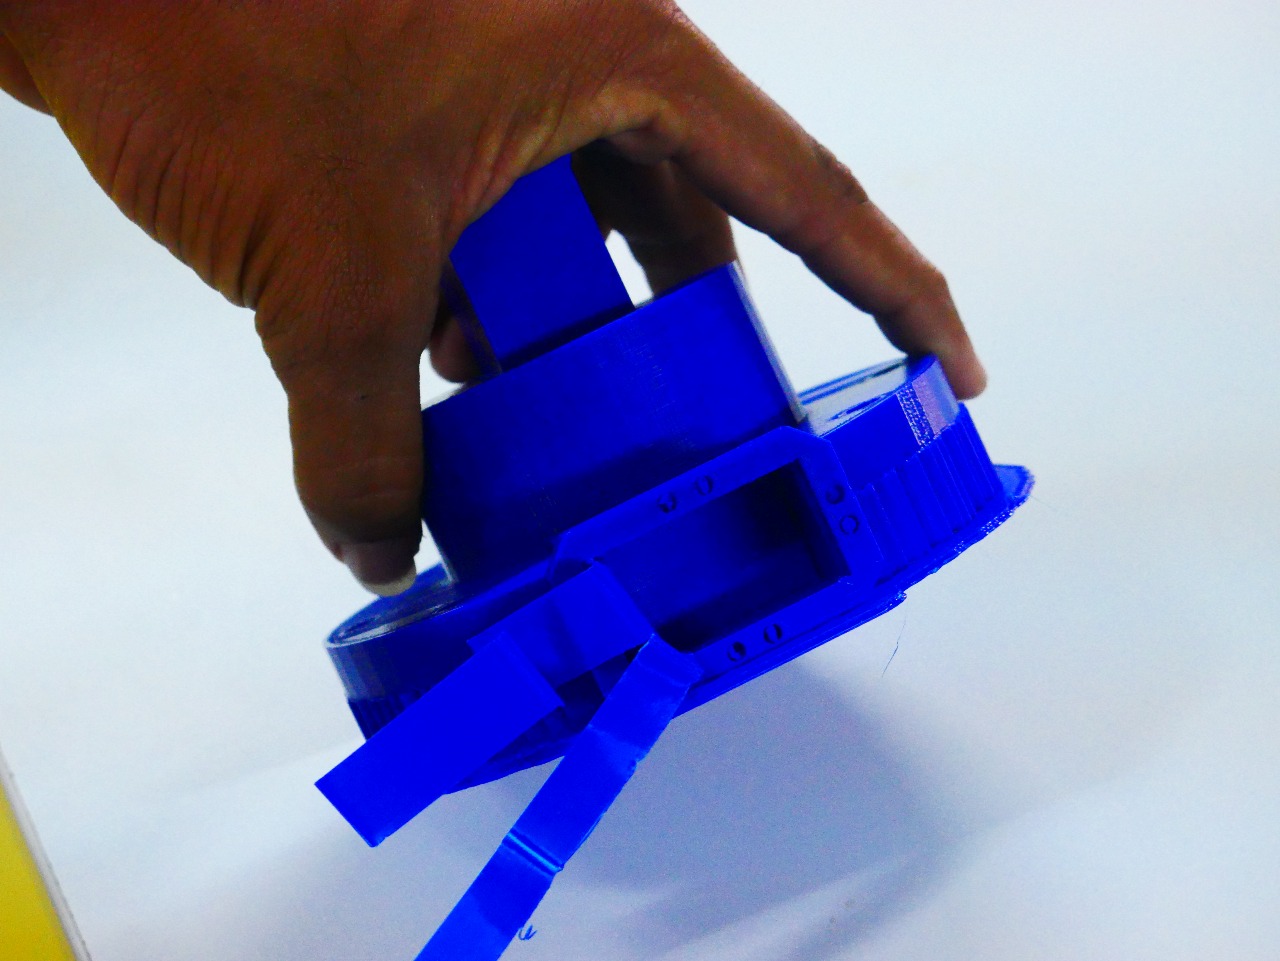
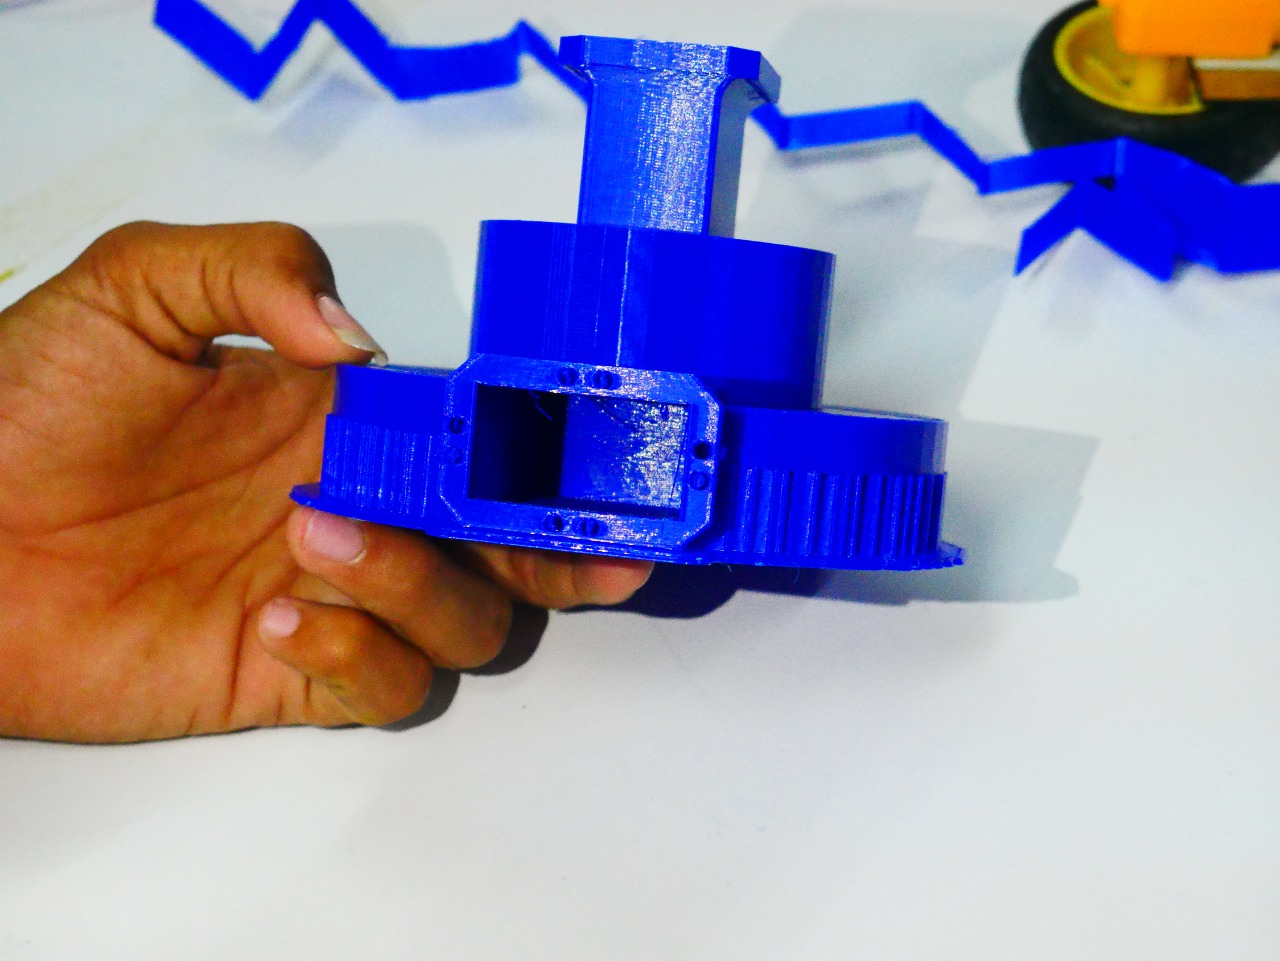
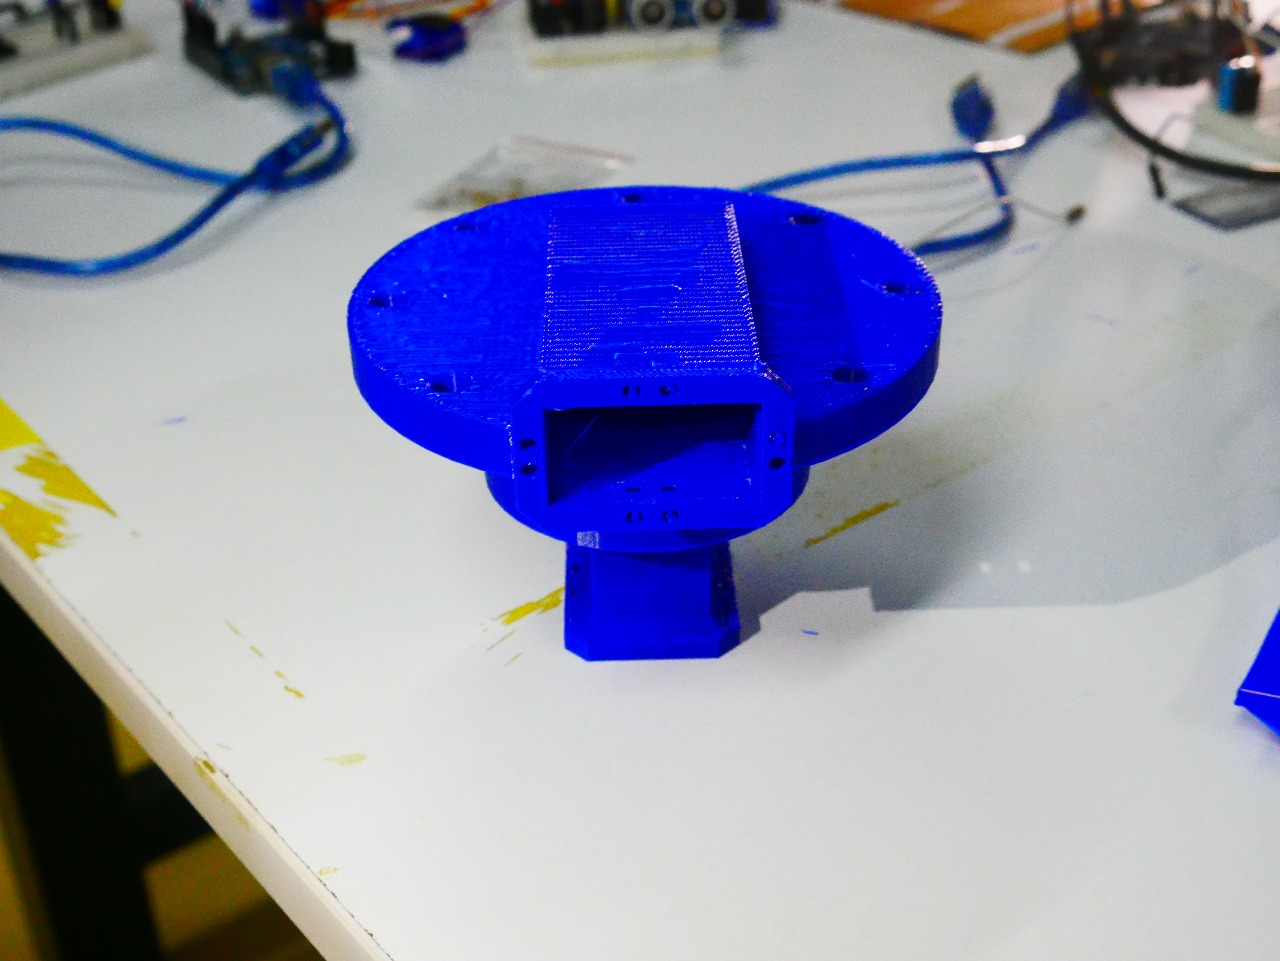
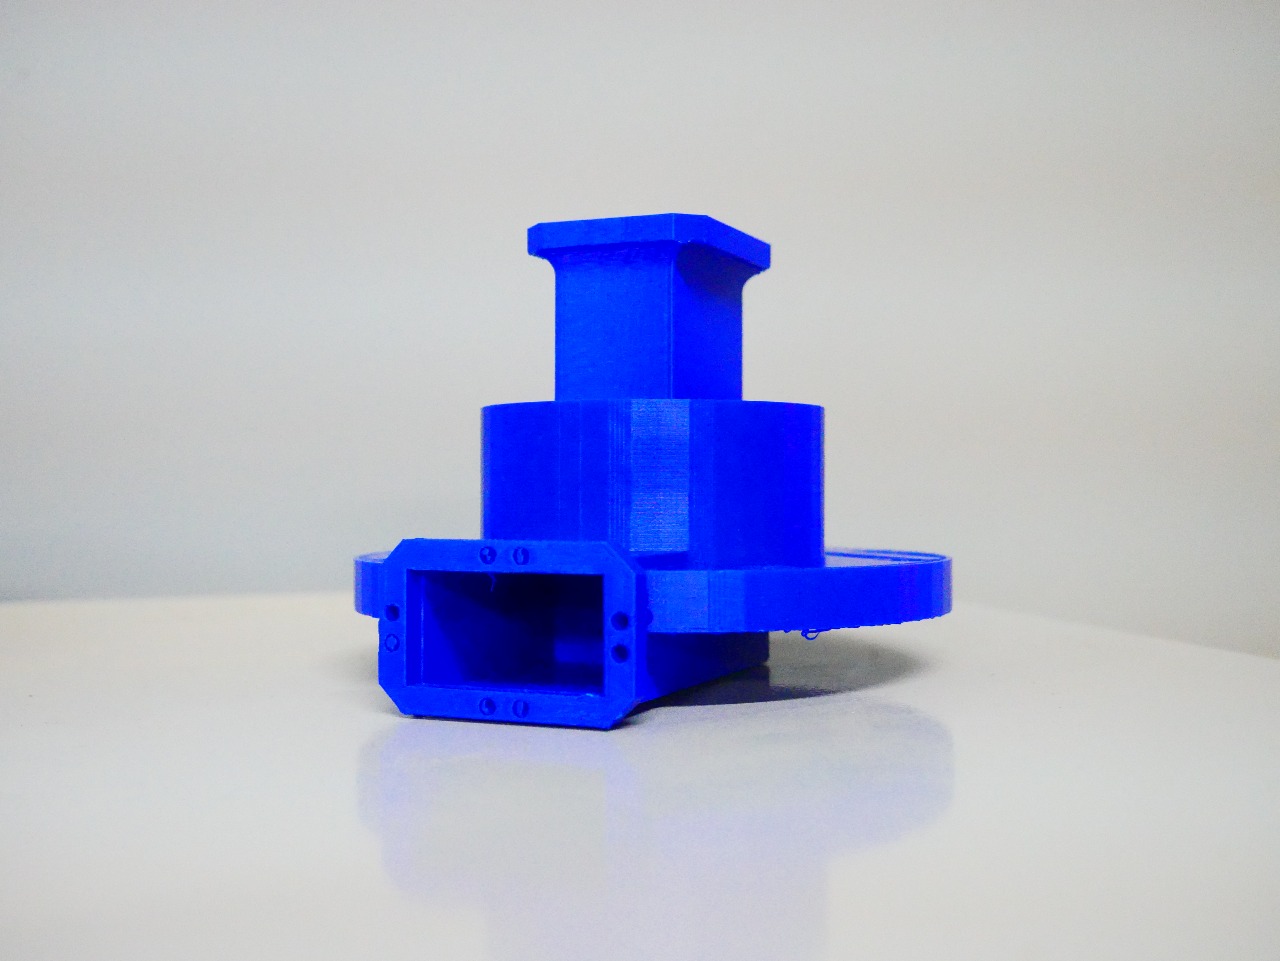
Design and Printing a Part which cannot be easily made by substractive method
I have already designed it in computer aided design week that i'm going to 3d print.
 |
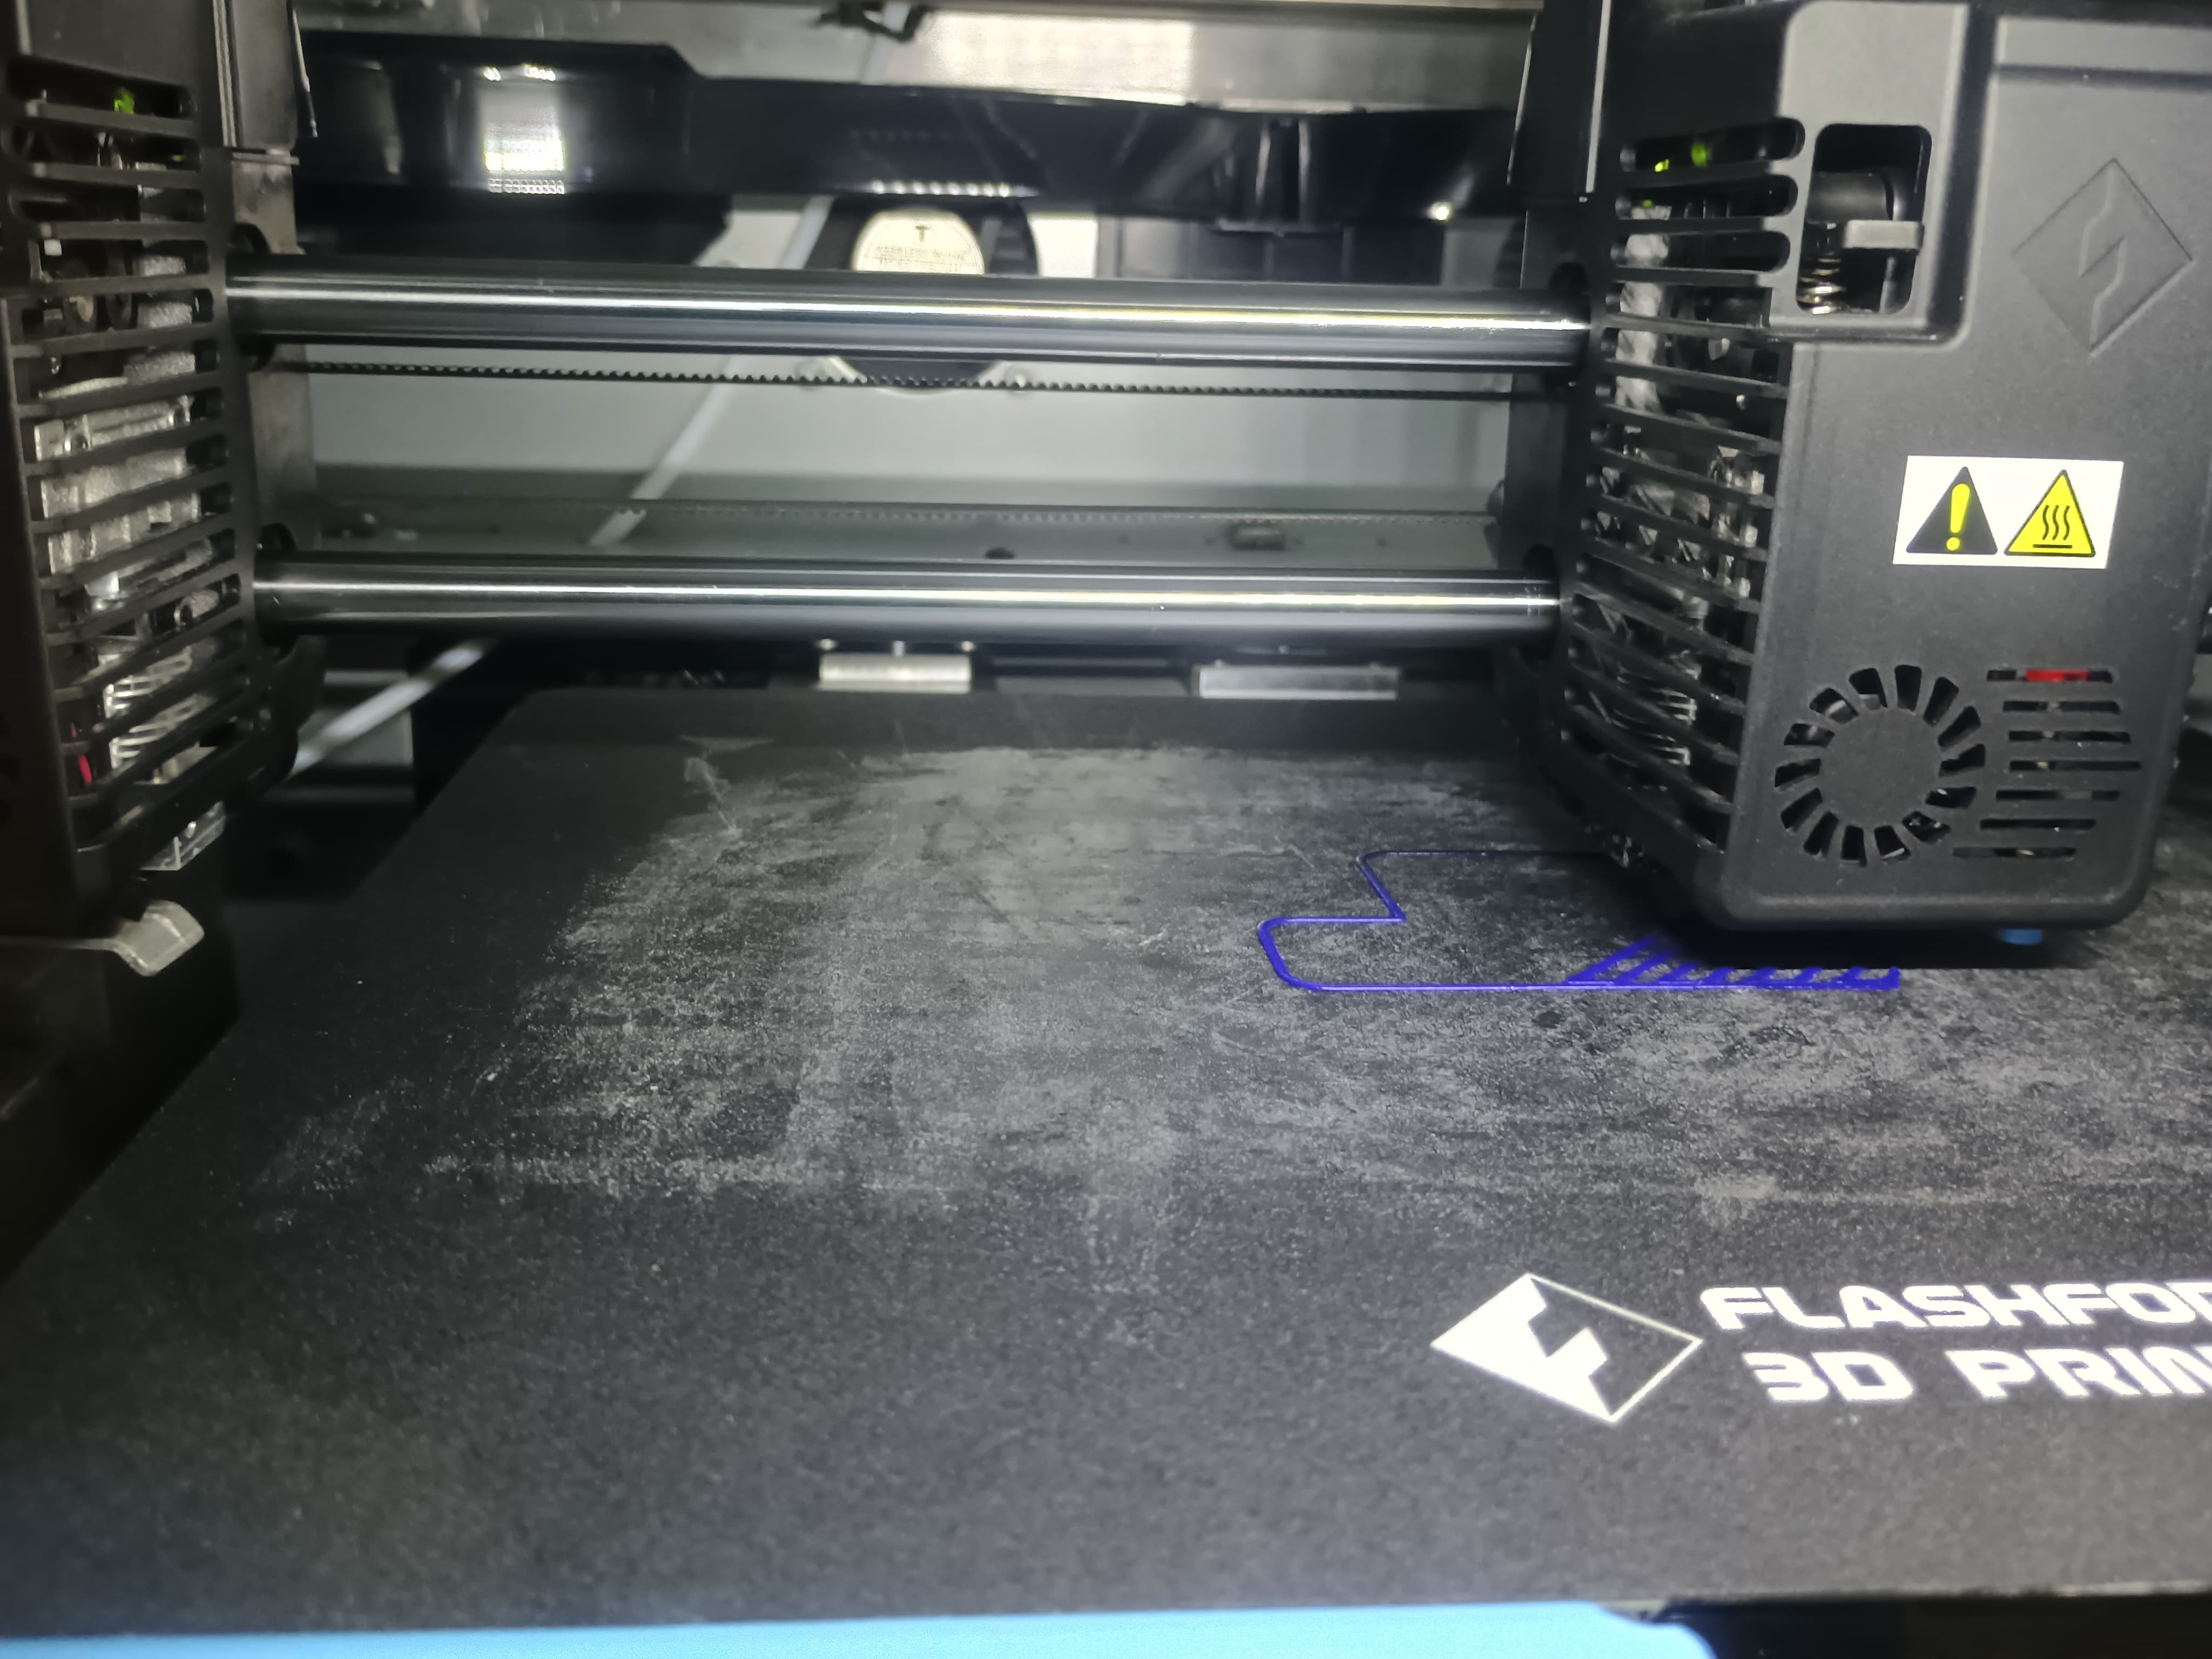
Slicing Process :
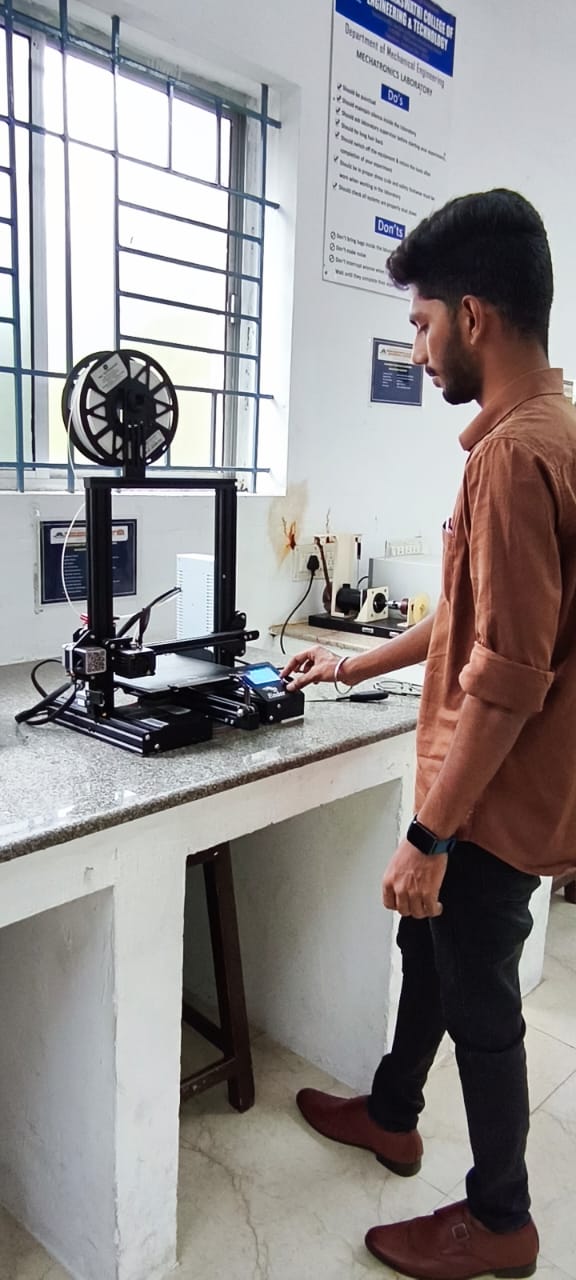
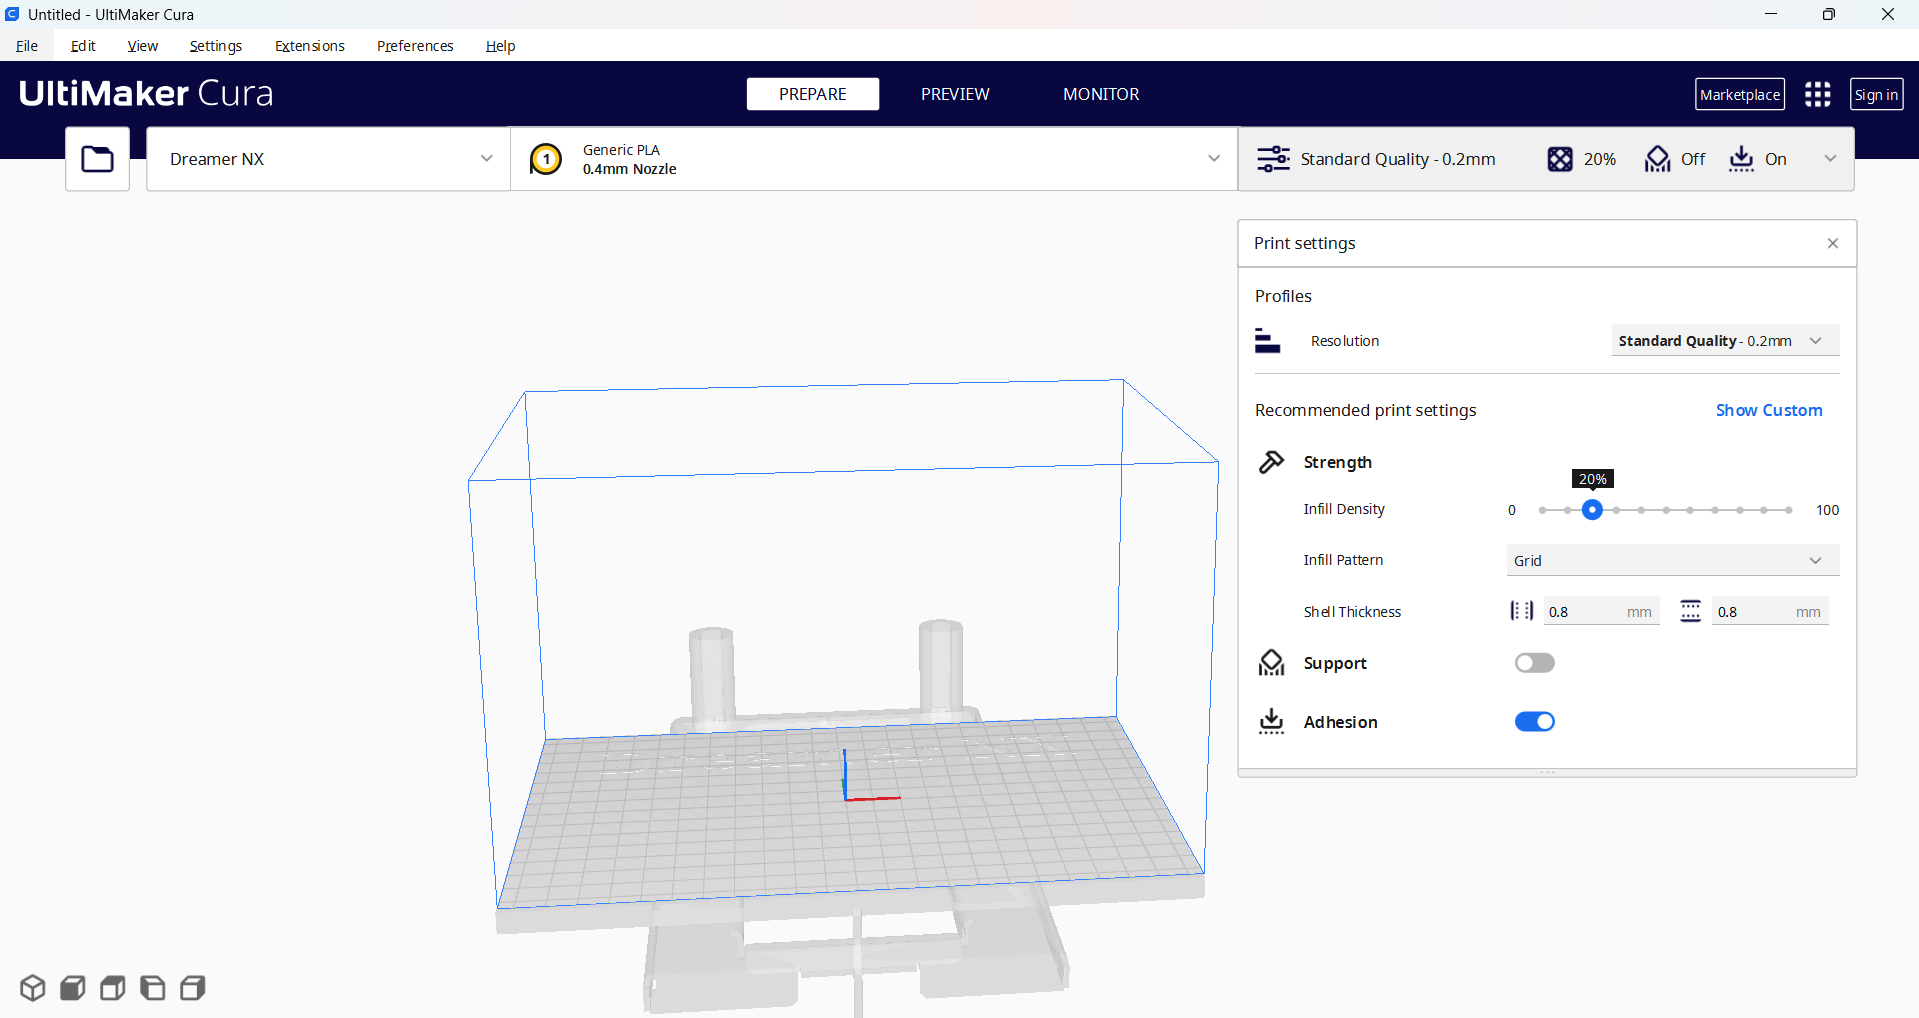
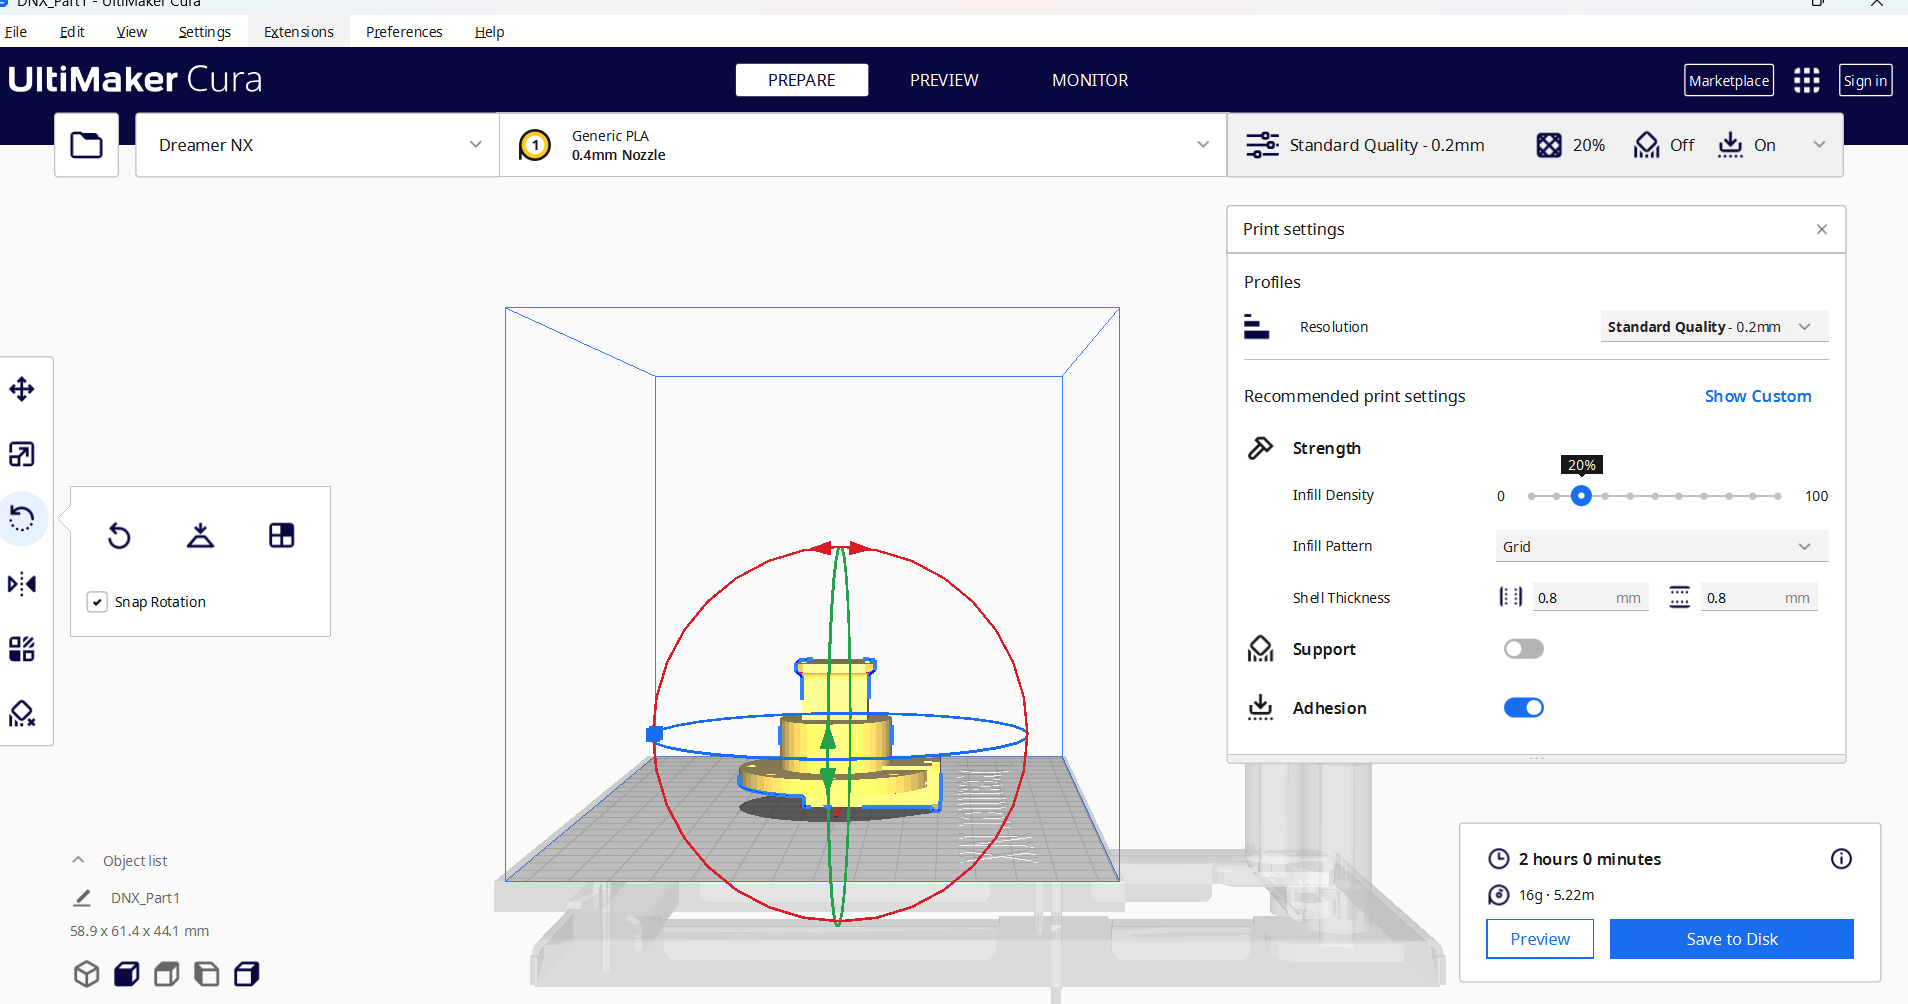
Open the Slicer Software : I have printed this part on FlashForge Creator 3 Pro FDM 3D Printer. I have sliced and genrated a G code on UltiMaker Cura 5.3.0 software
- Select Machine Model and Nozzle Size
 |
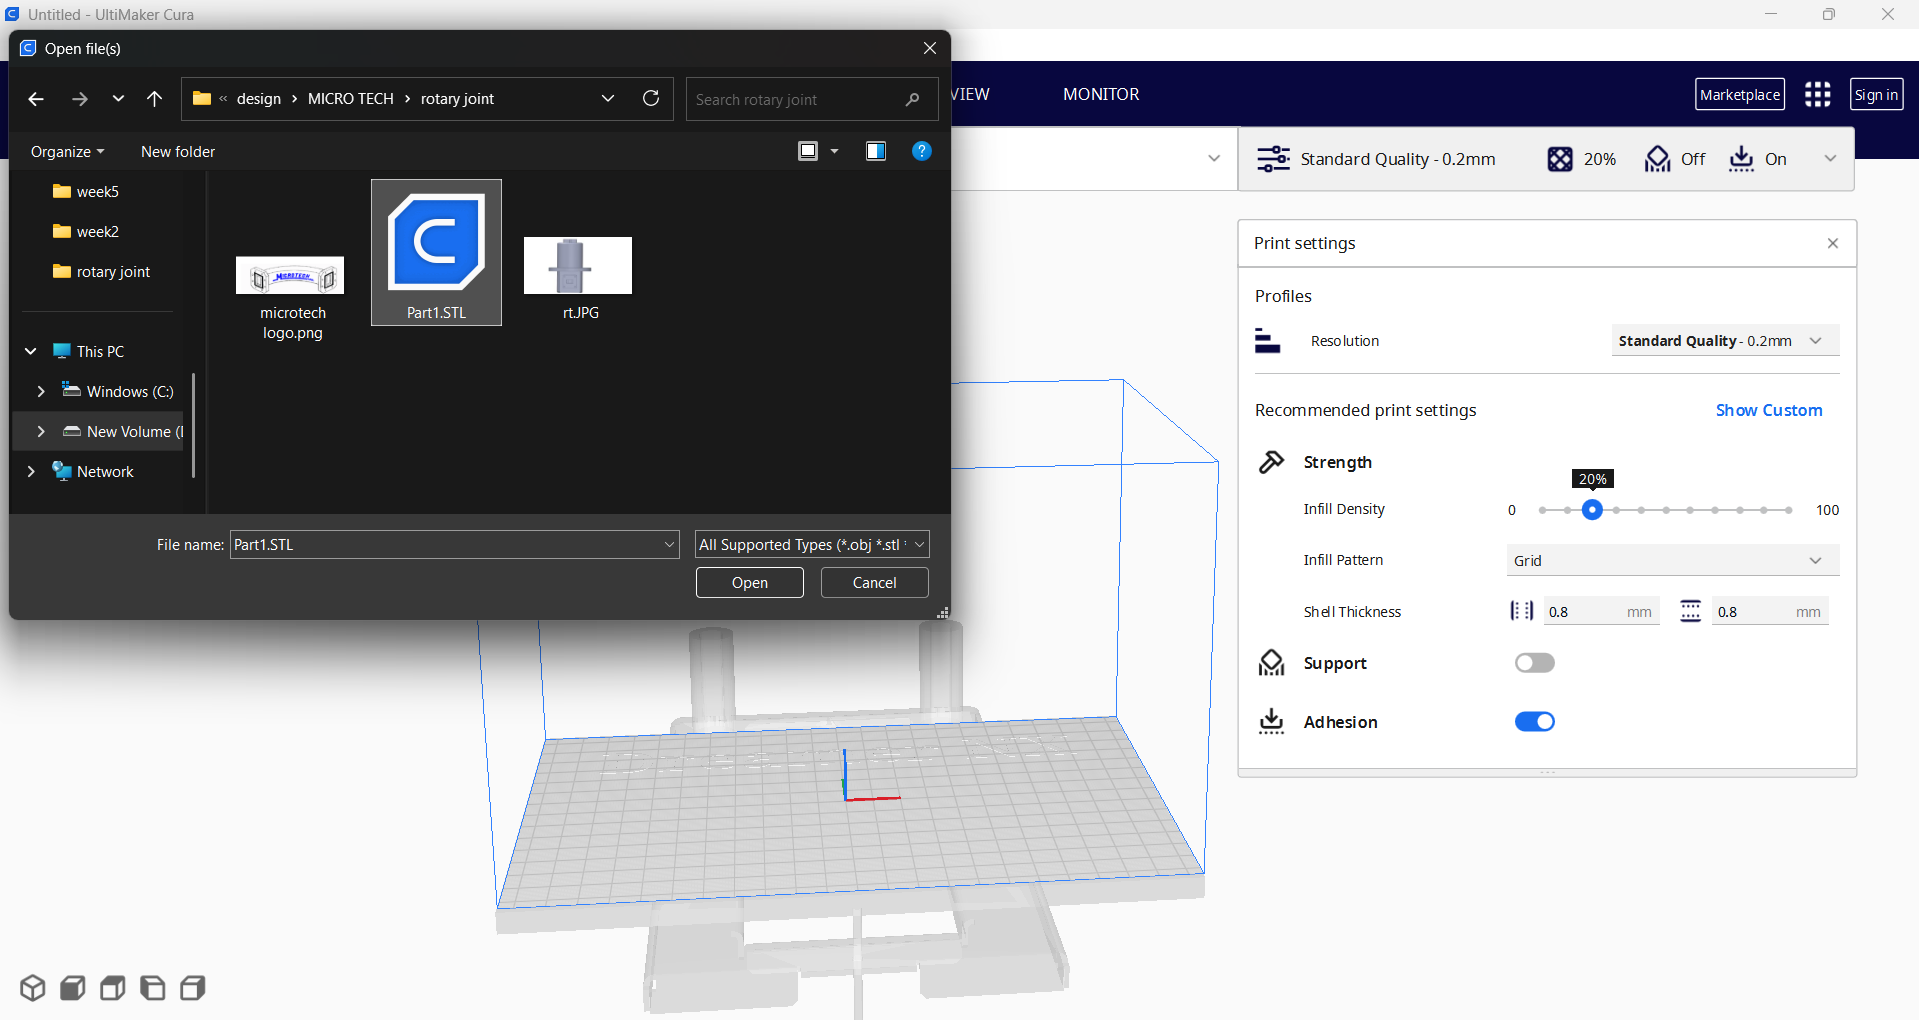 |
- Load the Model File (.stl, .obj, etc)
 |
 |
 |
 |
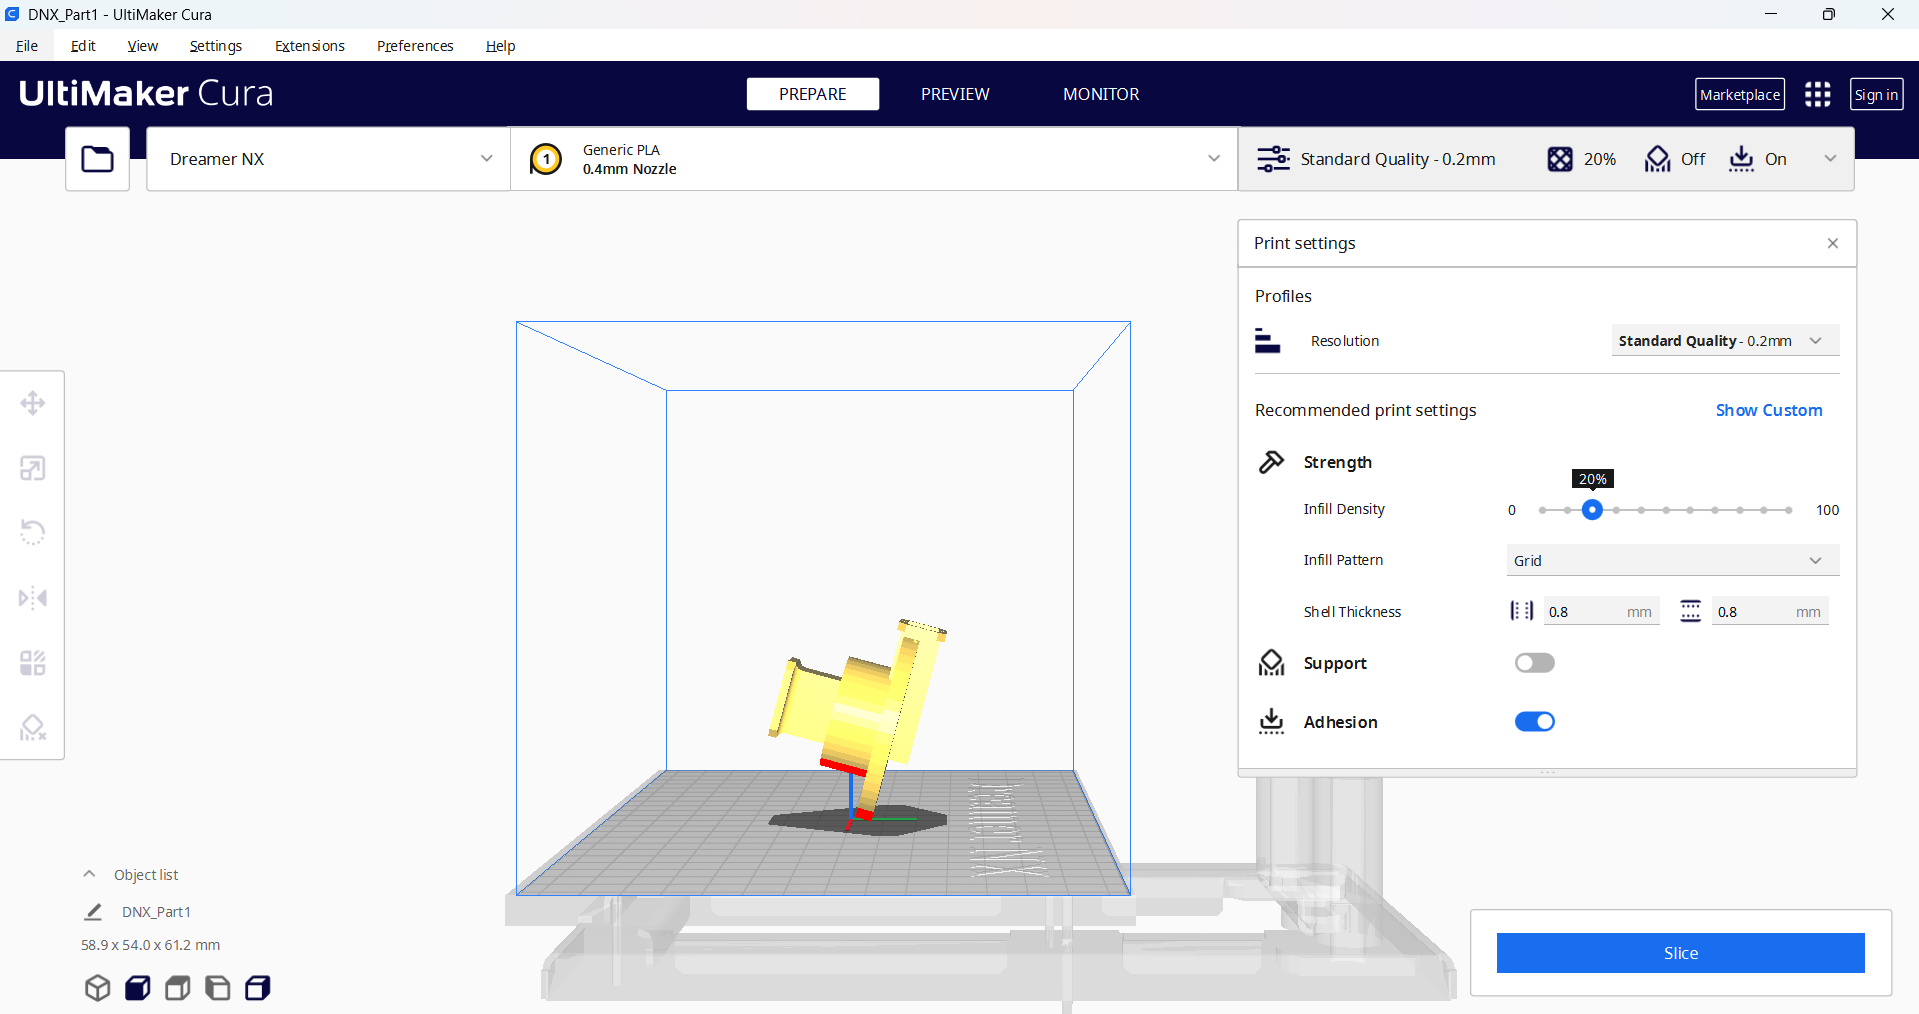
- Adjust the required Parameter from the sidebar menu as per you requirements
- Once the parameter are set click start slicing option at the top of the page.
- The slice window open now, select the slicing parameters and hit the Slice button at the bottom right corner.
- Download the file and send it to 3D printer.
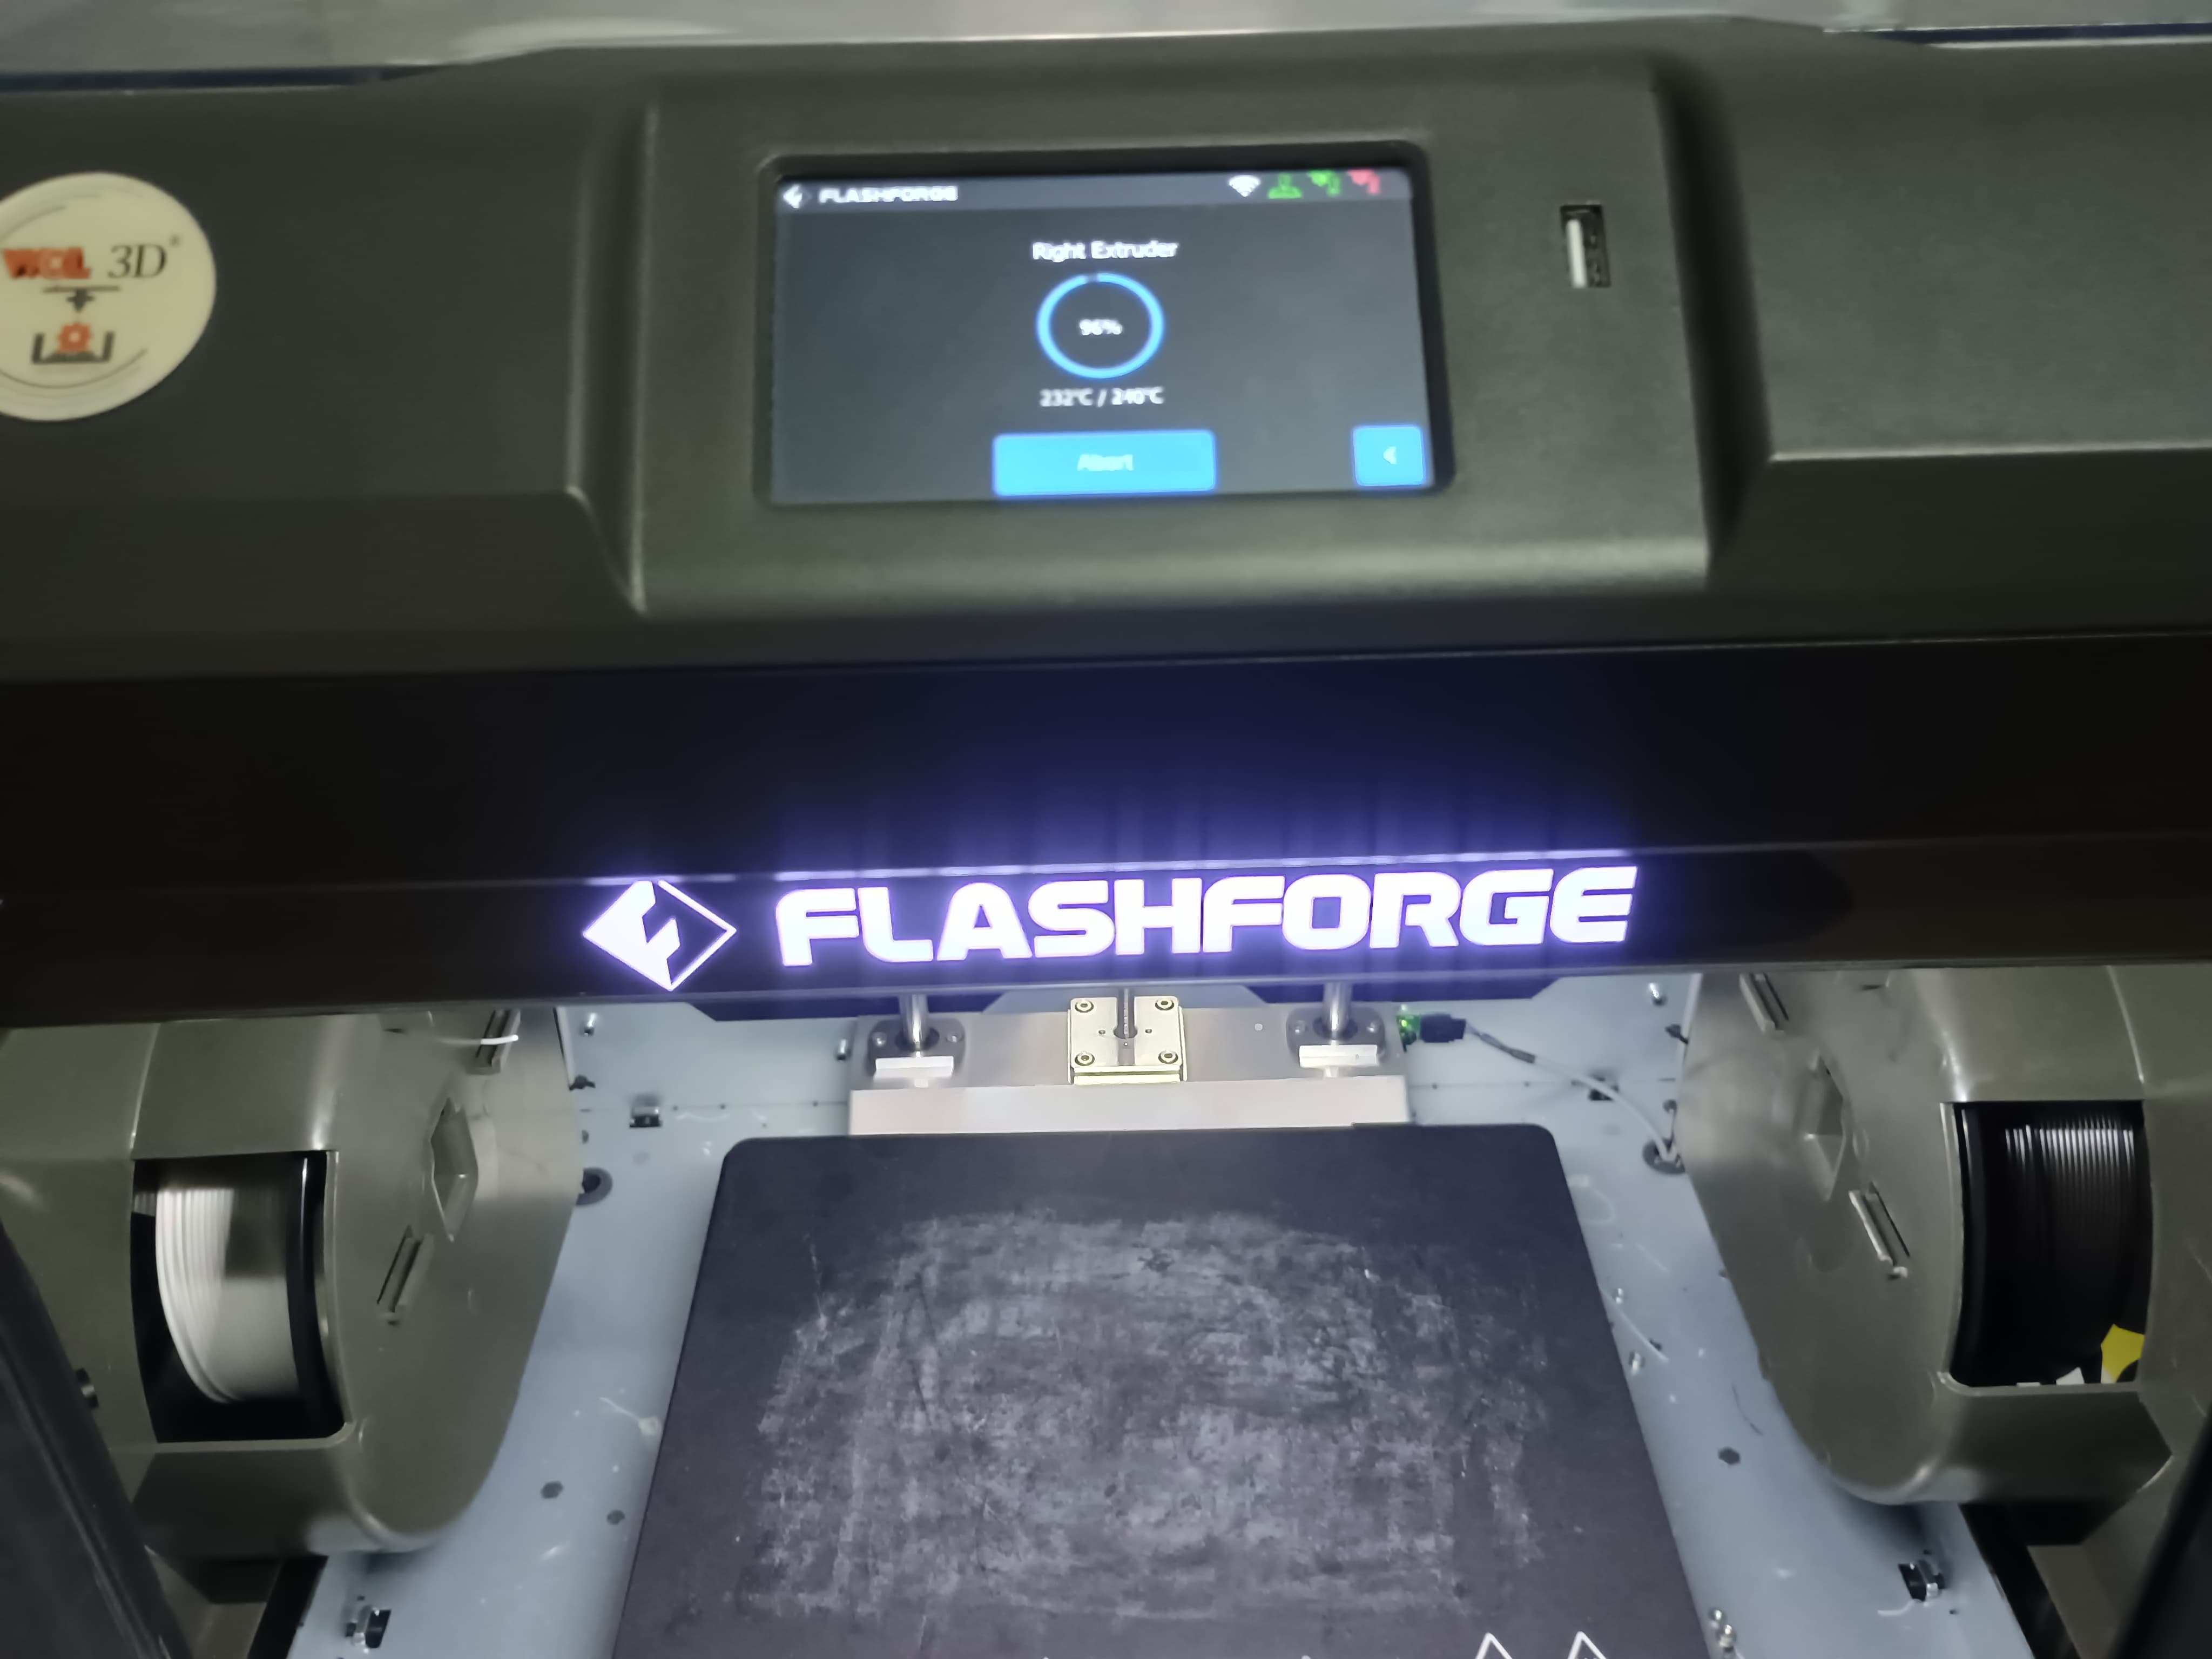
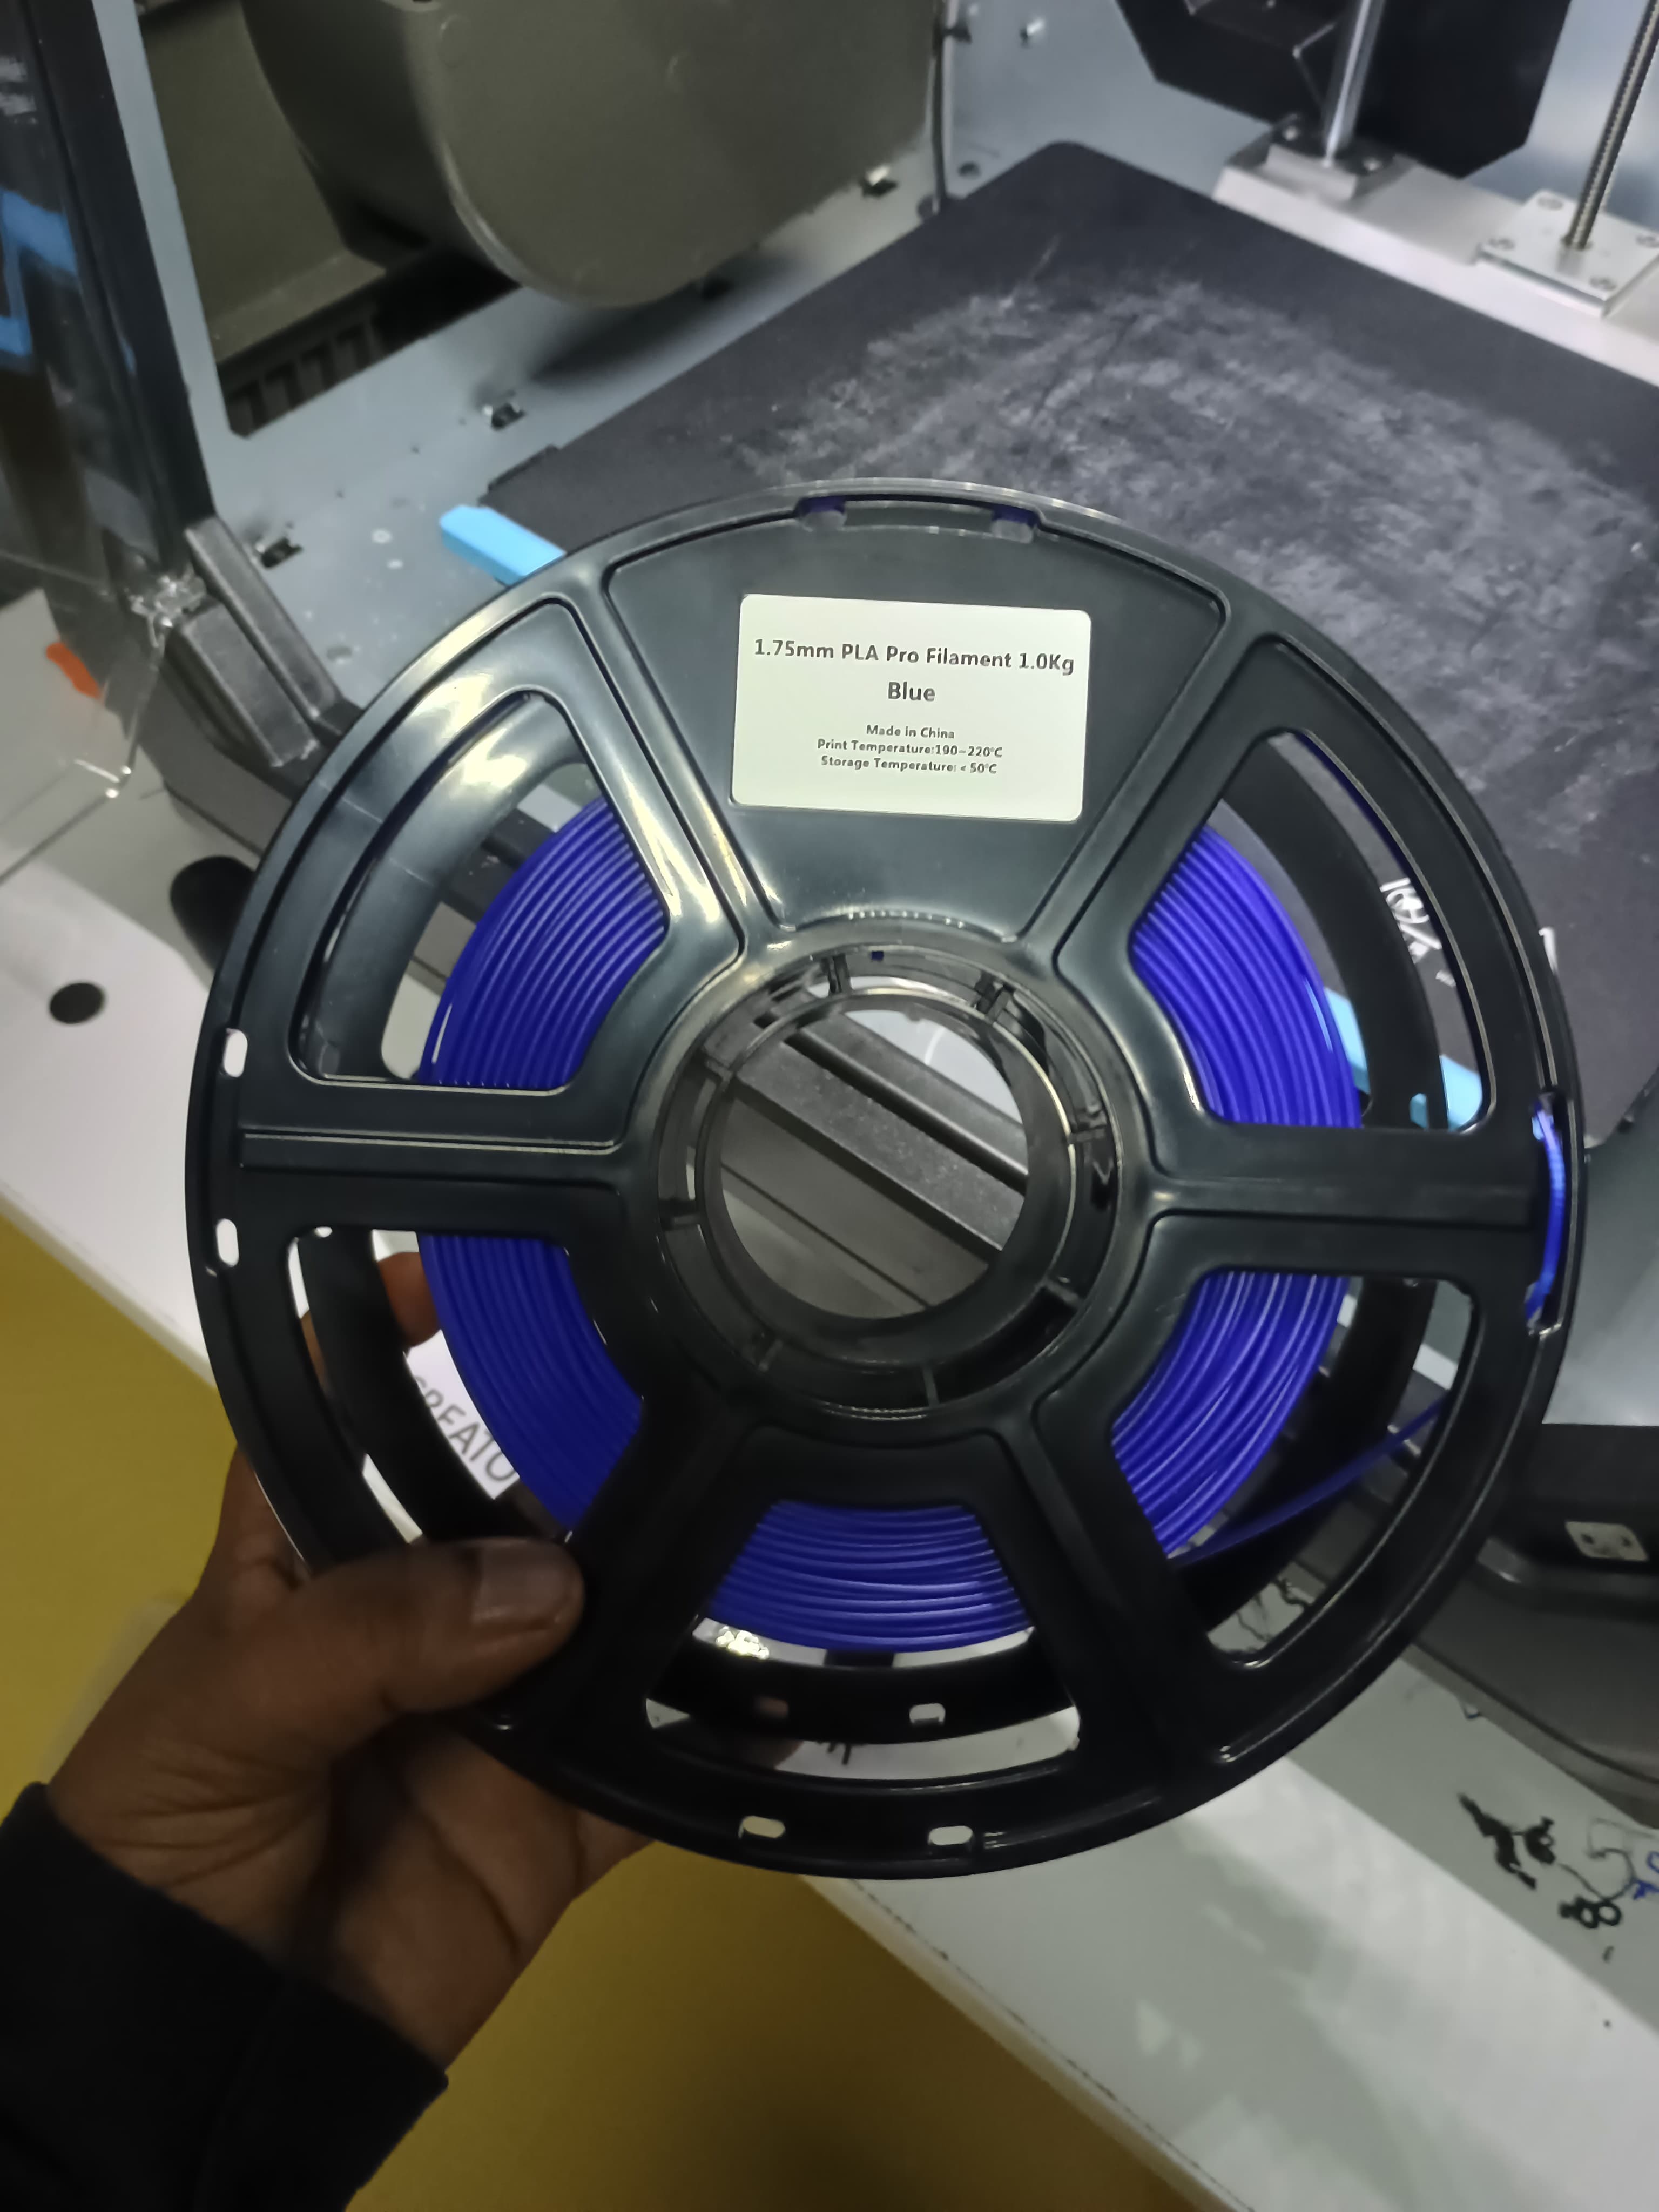
Preparing the printer :
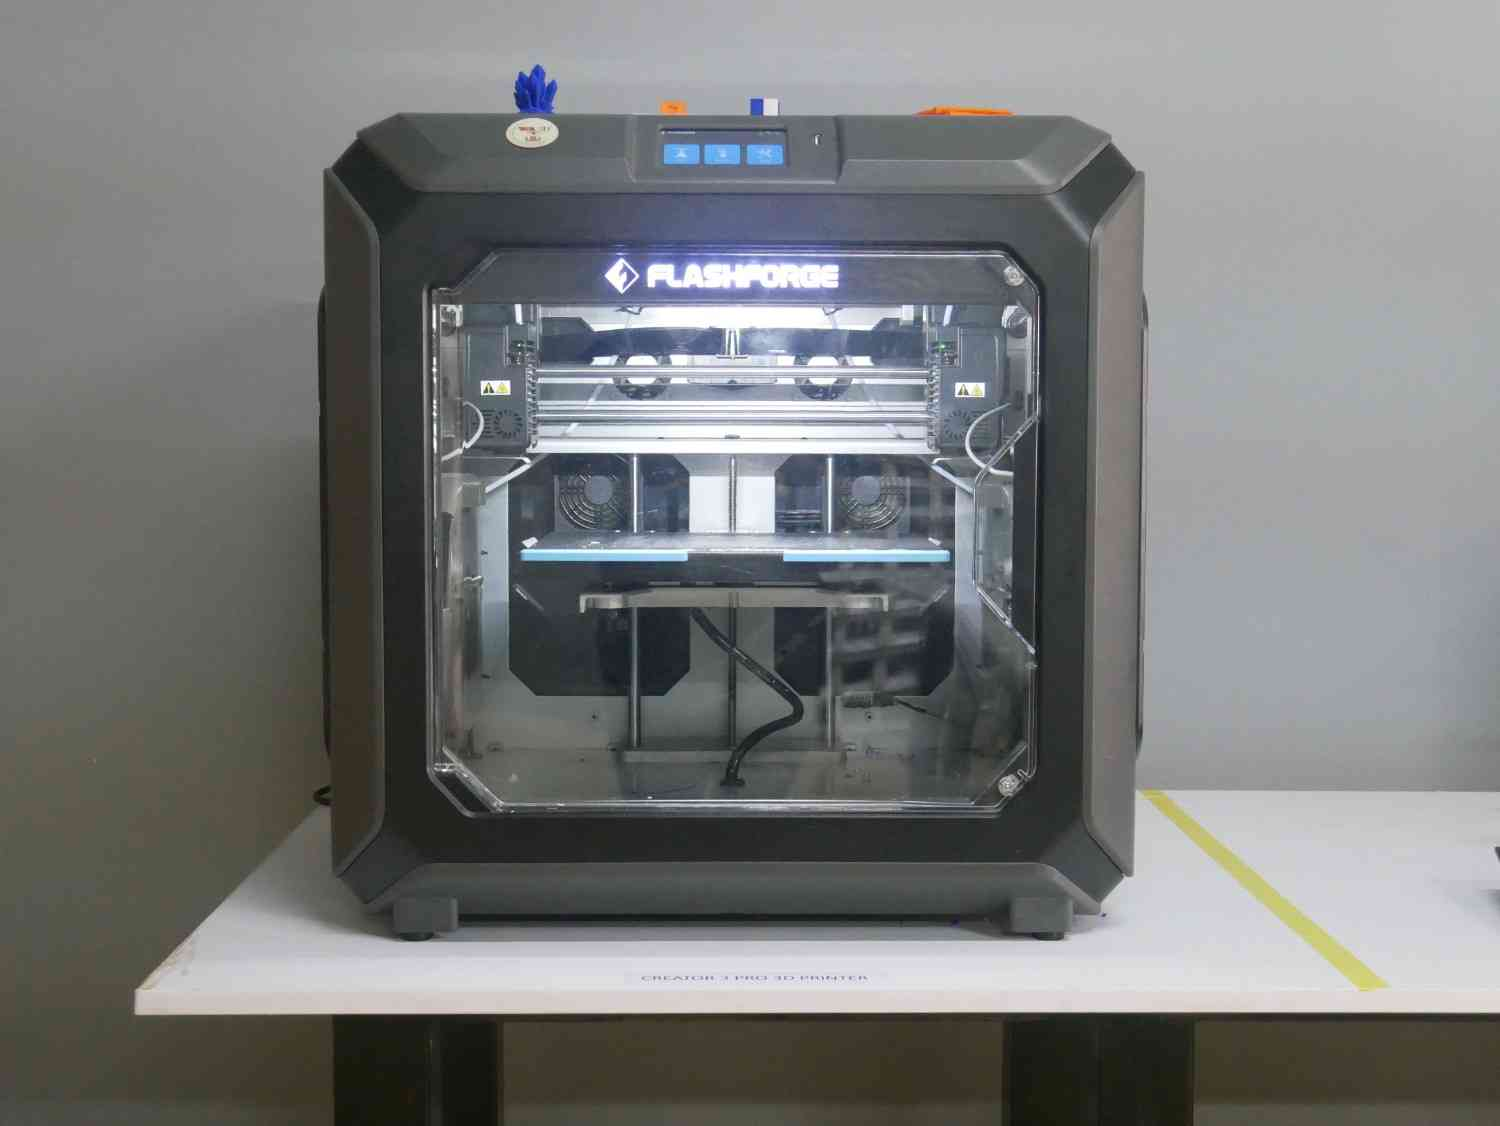
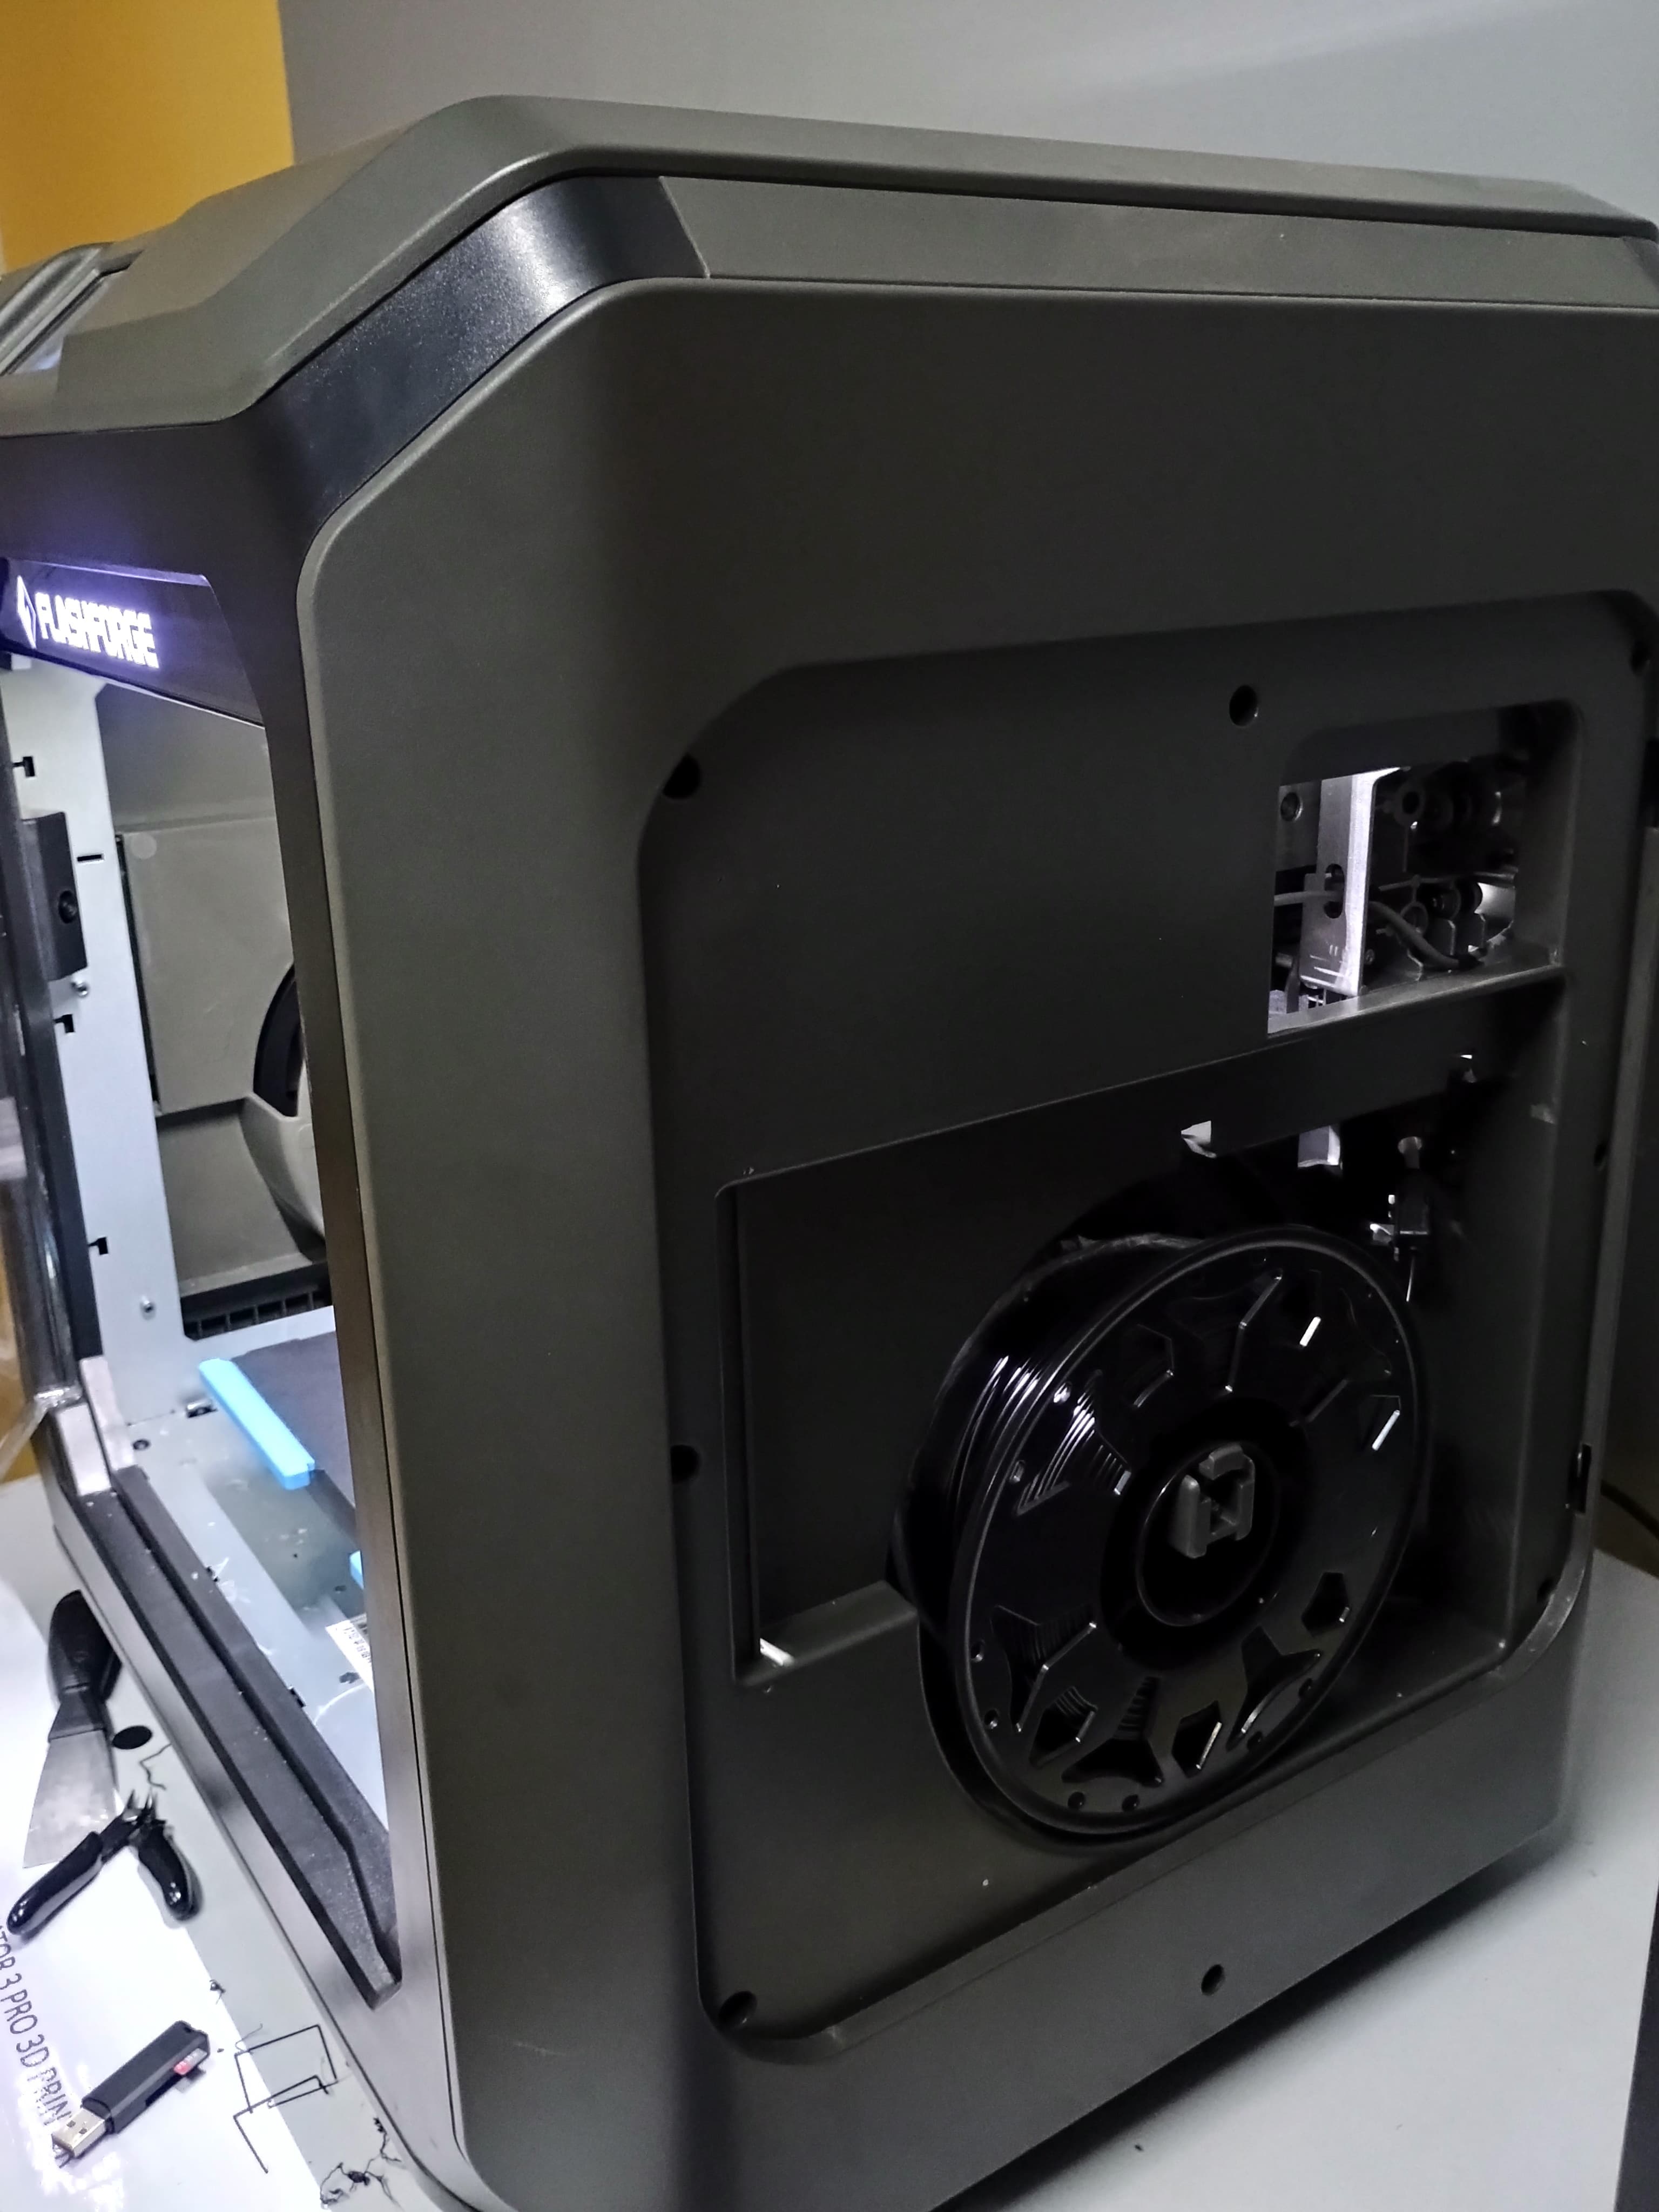
Creator 3 Pro 3D Printer
- The FlashForge Creator 3 Pro is a professional IDEX (Independent Dual Extruder) 3D printer, allowing dual-material and multi-color printing. It has a 300°C high-temperature extruder, enabling compatibility with a wide range of filaments like PLA, ABS, PETG, PC, and Nylon. The heated flexible build plate improves adhesion and makes print removal easy. With an enclosed chamber, it maintains stable temperatures for better print quality. The active leveling system ensures precise calibration. It features Wi-Fi, USB, and Ethernet connectivity for remote operation.
- It cost comes around Rs. 2L
Specification:
| Feature | Specification |
|---|---|
| Printing Technology | Fused Filament Fabrication (FFF) |
| Build Volume | 300 x 250 x 200 mm |
| Layer Resolution | 0.05 - 0.4 mm |
| Nozzle Diameter | 0.4 mm (Standard) |
| Printing Speed | ≤ 150 mm/s |
| Filament Diameter | 1.75 mm |
| Extruder Type | Independent Dual Extruders (IDEX) |
| Compatible Materials | PLA, ABS, PETG, TPU, PVA, Nylon, Carbon Fiber |
| Heated Bed | Yes (Max Temp: 120°C) |
| Nozzle Temperature | Max 320°C |
| Enclosure | Fully enclosed for temperature stability |
| Connectivity | USB, Wi-Fi, Ethernet |
| Power Supply | 24V / 500W |
| Display | 4.3-inch Touchscreen |
| Supported File Formats | STL, OBJ, 3MF, G-code |
| Compatible Software | FlashPrint, Simplify3D, Cura |
| Weight | 40 kg |
Safety Precautions
| Safety Aspect | Precaution |
|---|---|
| Ventilation | Use in a well-ventilated area to prevent harmful fume exposure. |
| Stable Surface | Place on a stable, heat-resistant surface to avoid tipping. |
| Electrical Safety | Use the original power supply and avoid overloading sockets. |
| Heated Components | Do not touch the hotend (260°C) or heated bed (110°C) to prevent burns. |
| Fire Safety | Never leave the printer unattended; keep a fire extinguisher nearby. |
| Filament Handling | Store filaments in a dry, cool place to prevent moisture absorption. |
| Nozzle Cleaning | Use proper tools for cleaning; avoid touching the nozzle when hot. |
| Bed Leveling | Carefully use auto-leveling or manually level to prevent damage. |
| Cooling Period | Let the printer cool before performing maintenance or moving it. |
 |
 |
 |
 |
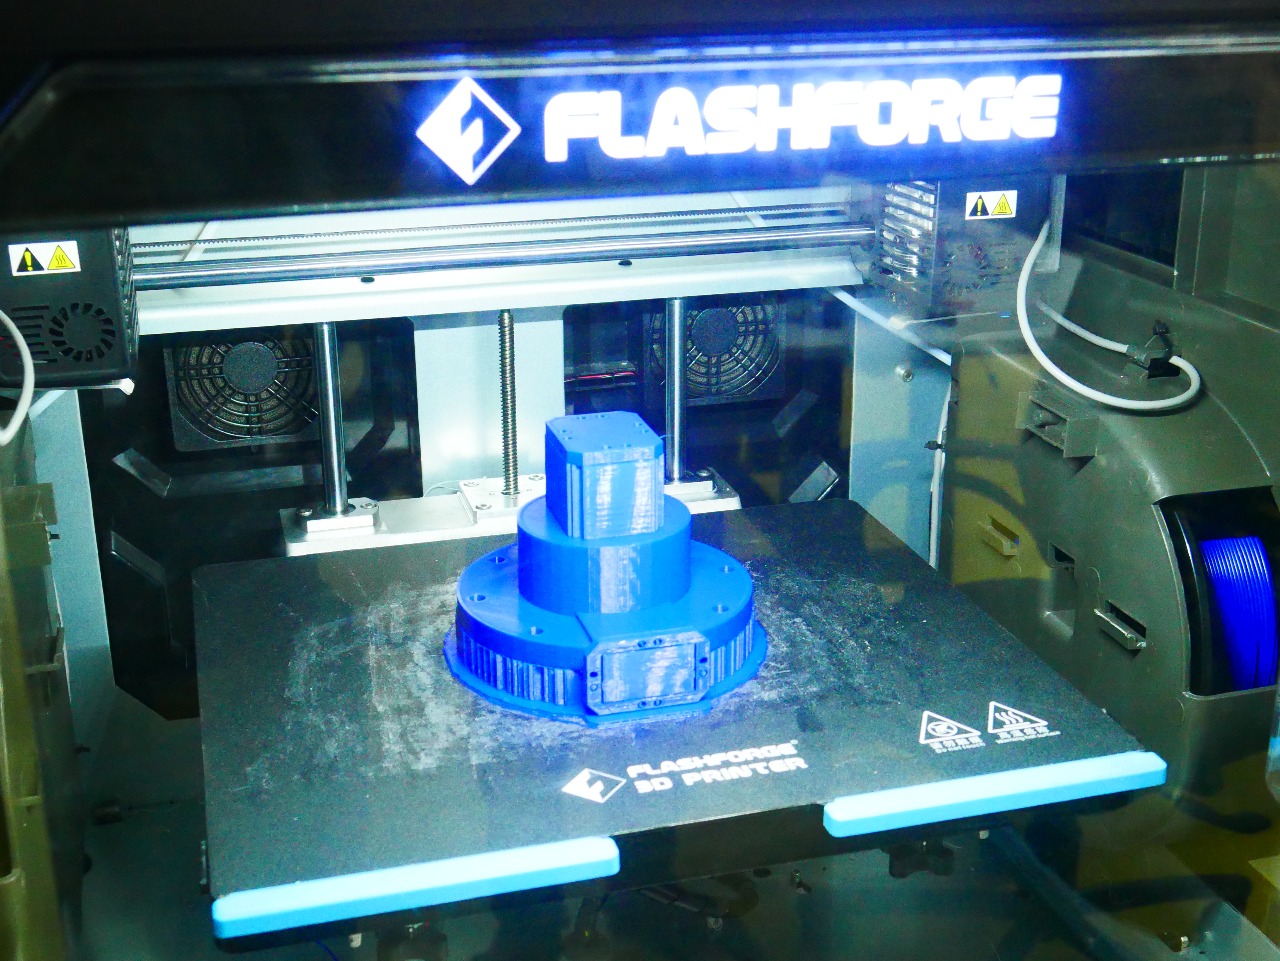
Final process :
 |
 |
 |
 |
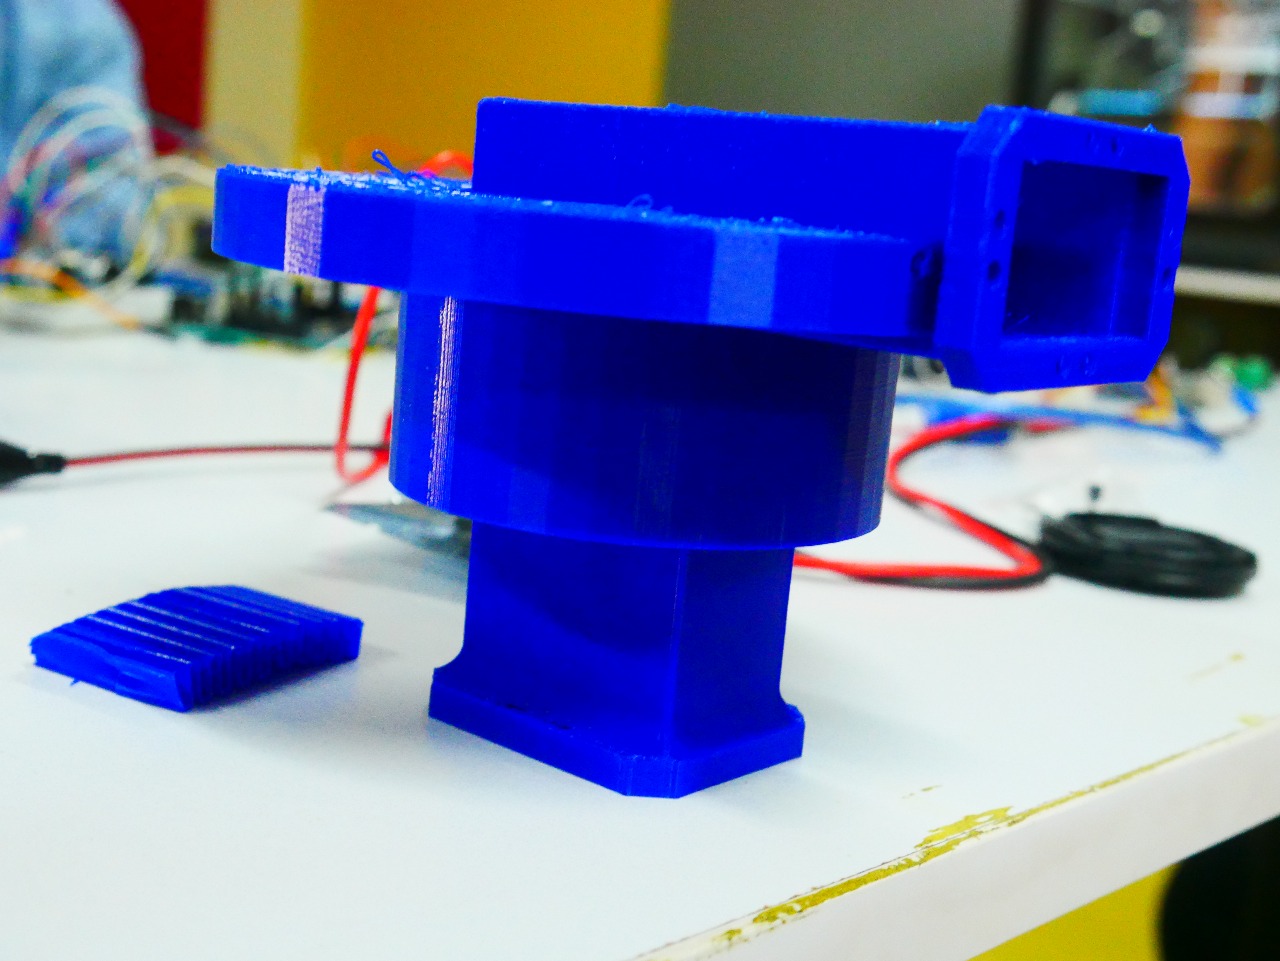
Final Object Ready :
 |
 |
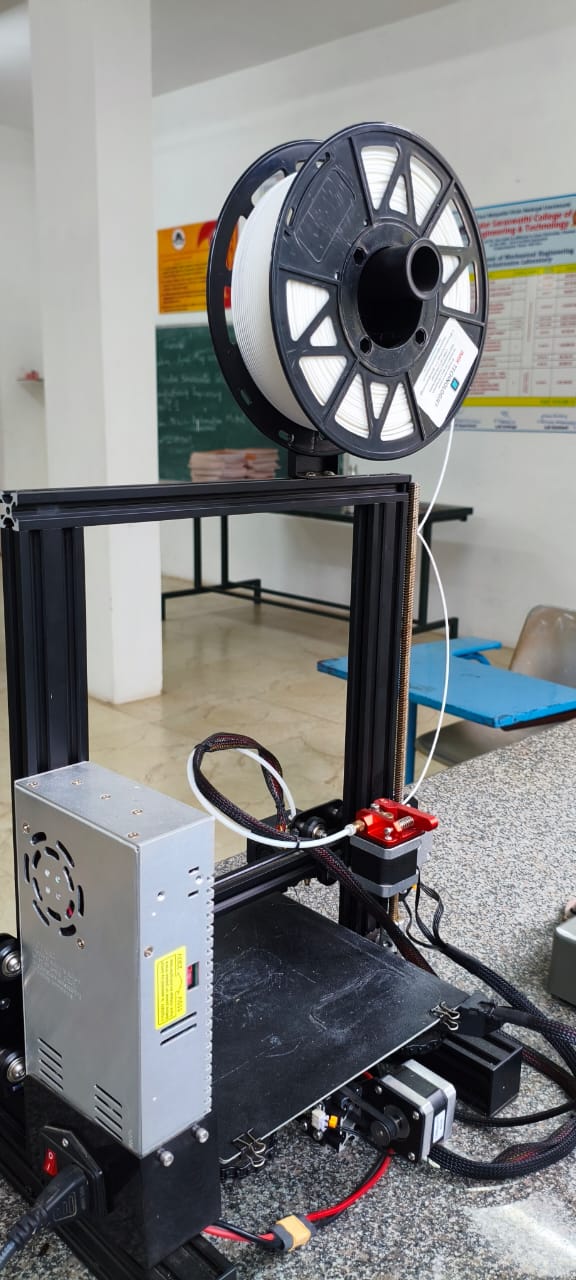
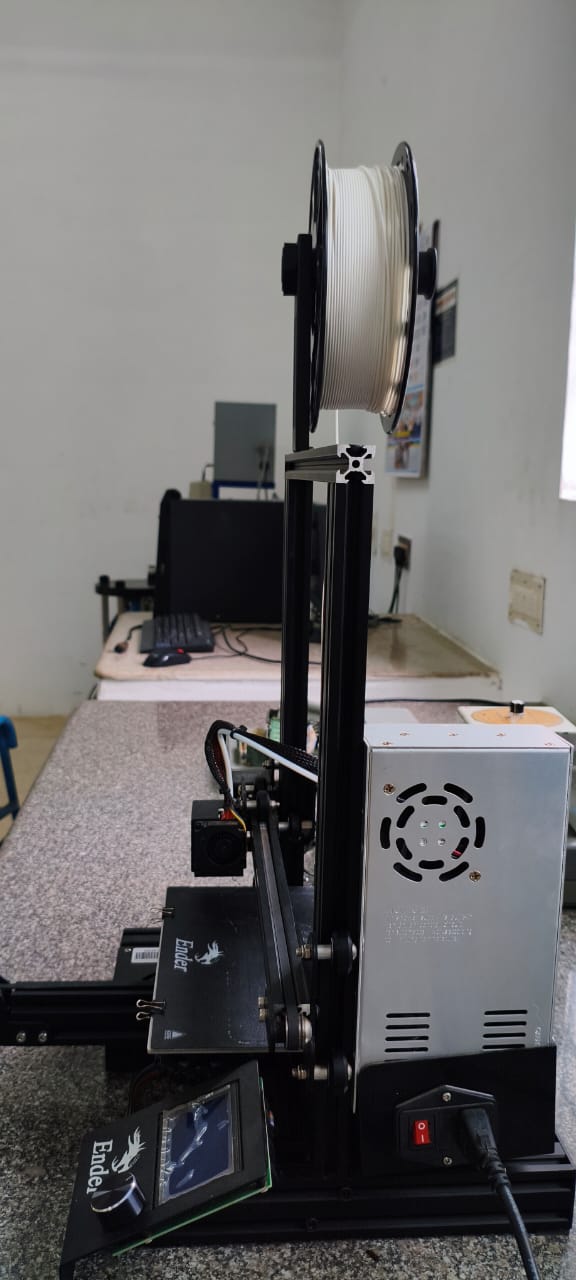
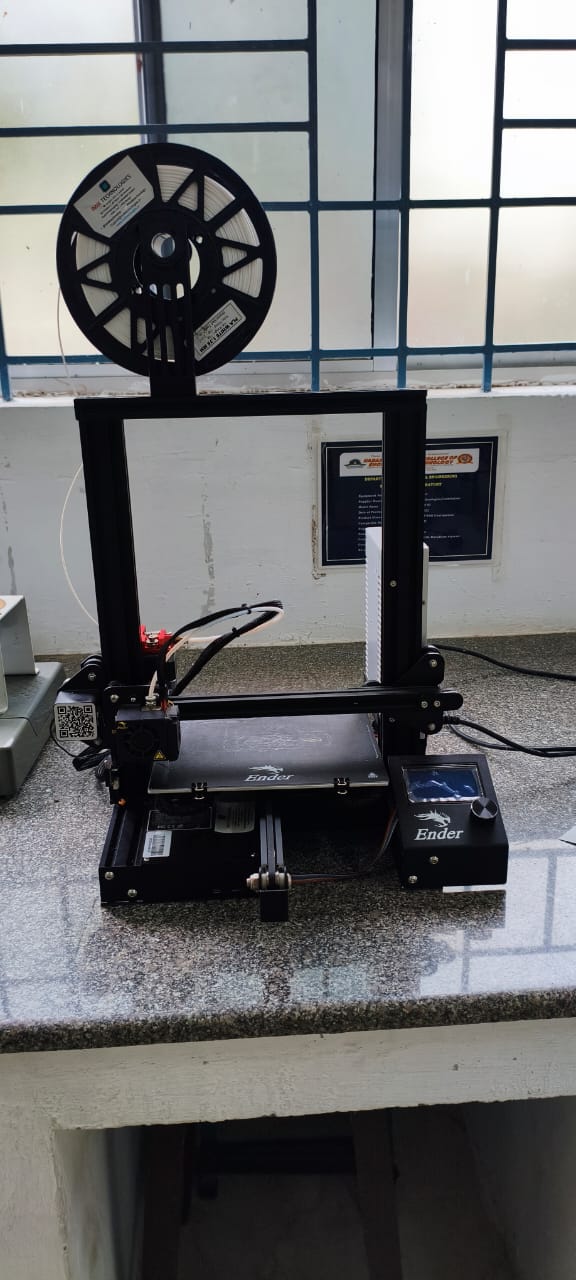
Extras: Ender 3 pro
|
|
 |
 |
 |
 |
 |
 |
 |
3D Scanning and Photogrammetry :
3D Scanning :
3D scanning is a technology that uses scanners to record intricate, three-dimensional information about items or settings. Digital 3D models are then produced using this data. Applications for these models are numerous and include quality control, 3D printing, and reverse engineering, among others.
How 3D Scanning Works:
- Data Acquisition:3D scanners use various techniques to capture data, including laser triangulation, structured light, photogrammetry, and contact-based methods.
- Point Clouds:Many 3D scanning methods create a "point cloud," which is a collection of small points in 3D space that represent the surface of an object.
- 3D Model Creation: Software then processes the point cloud data to generate a 3D model of the object.
Types of 3D Scanners:
- Laser Scanners:Use lasers to measure distances to a surface.
- Structured Light Scanners: Project a pattern of light onto the object and measure the distortion of the pattern.
- Photogrammetry:Uses multiple 2D images to create a 3D model.
- Handheld Scanners: Portable scanners that can be used to scan objects in various locations.
- Mobile Scanners: Scanning using mobile devices, such as smartphones or tablets.
Applications:
- Reverse Engineering: Creating CAD models from existing physical objects.
- Quality Inspection: Checking product dimensions against specifications.
- Healthcare: Designing custom prosthetics, medical aids.
- Cultural Preservation: Digitizing historical artifacts and structures.
- Entertainment: 3D models for movies, VR, and video games.
This video demonstrates how 3D scanning can be used to clone a face with a free app vs a professional scanner:
Photogrammetry :
Multiple overlapping photos of an object taken from various angles are used in photogrammetry to extract 3D information. In order to rebuild the geometry of the item, specialized software assists in finding common spots across the photos.
How it works:
Photogrammetry uses the principle of triangulation. By taking multiple photos from different angles and locations, lines of sight are created from the camera to points on the object. These lines of sight are then intersected to determine the 3D coordinates of those points.
- Aerial photogrammetry:Uses images taken from an aerial perspective, often from drones or aircraft, to create maps and models of large areas.
- Terrestrial photogrammetry:Uses images taken from ground level, typically with close-range cameras, for smaller objects or structures.
- Close-range photogrammetry: Specifically refers to the use of photogrammetry when the object size and camera-to-object distance are both less than 100 meters.
Types:
Applications :
- Surveying and Mapping: Generating topographic maps and 3D models of terrain.
- Architecture: Documenting buildings and creating as-built models.
- Archaeology: Digitally preserving artifacts and sites.
- Film and Game Development: Creating realistic environments and assets.
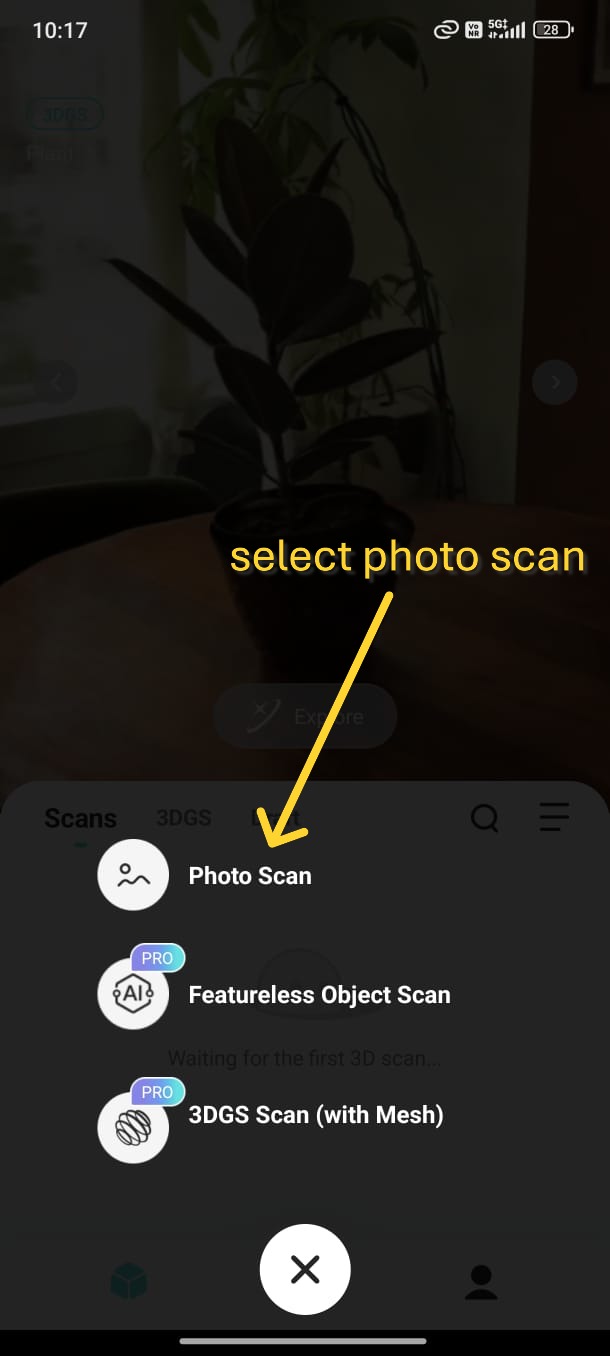
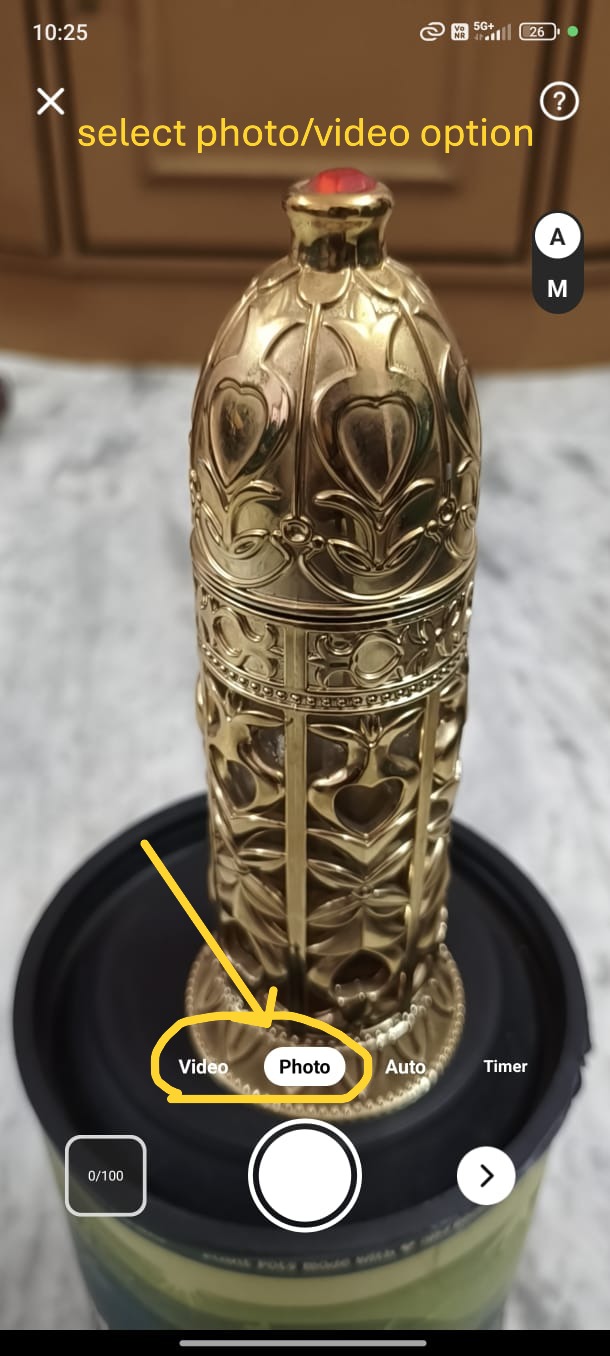
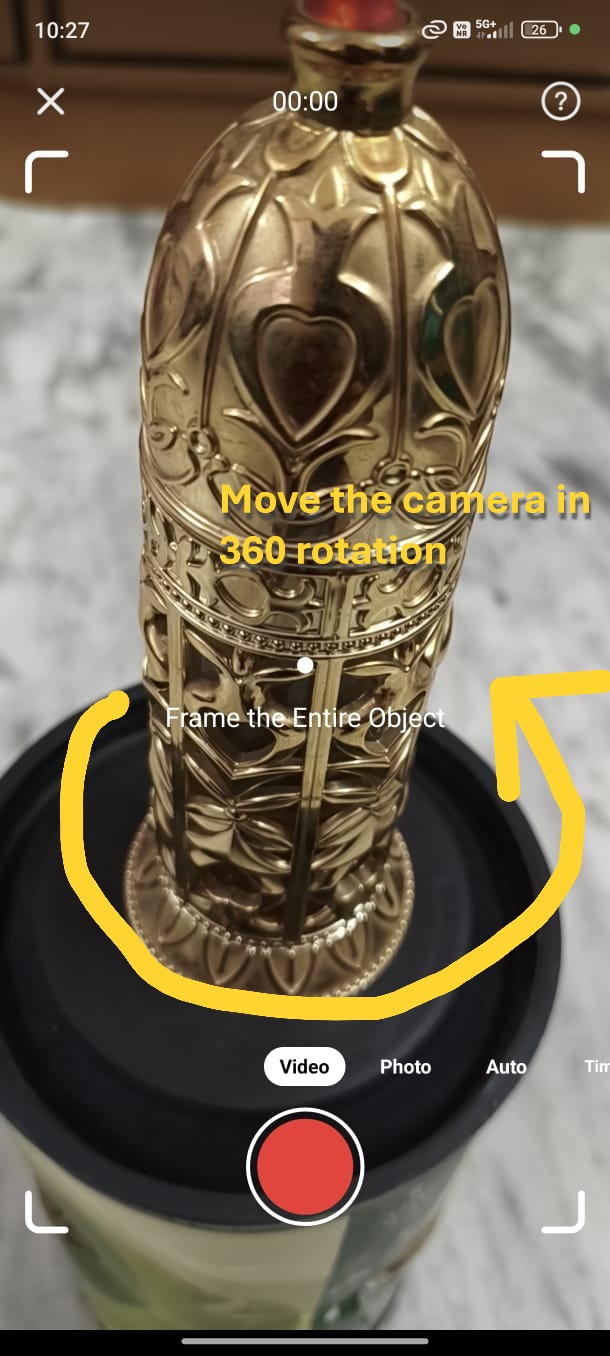
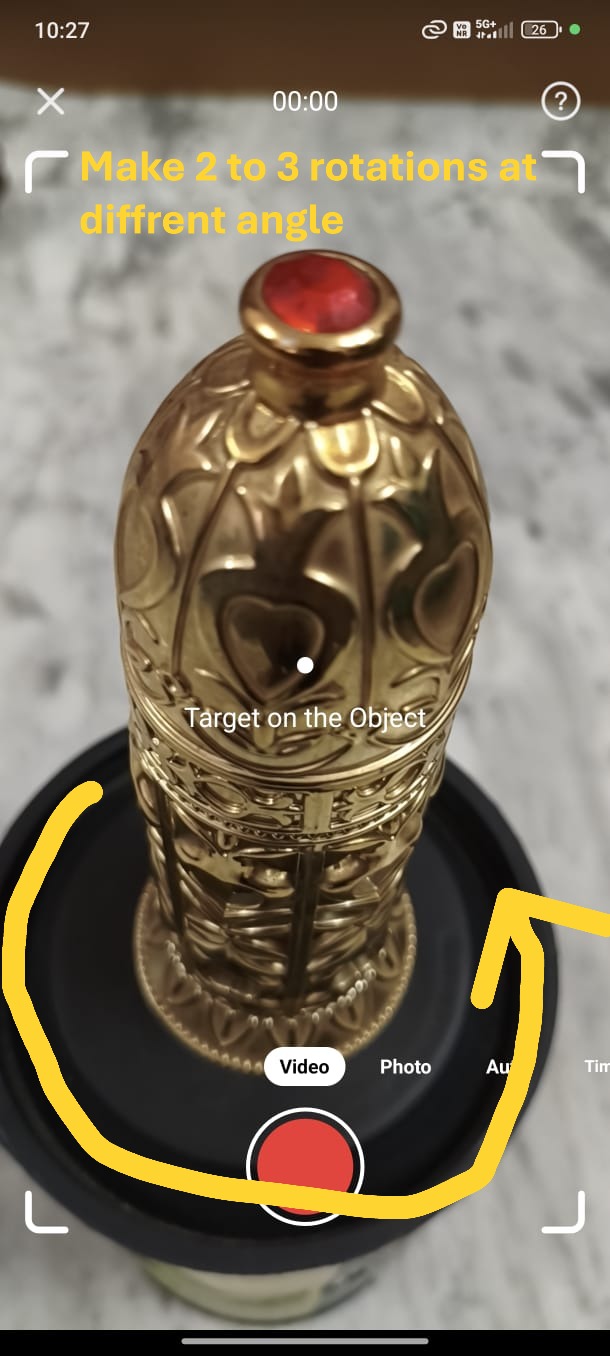
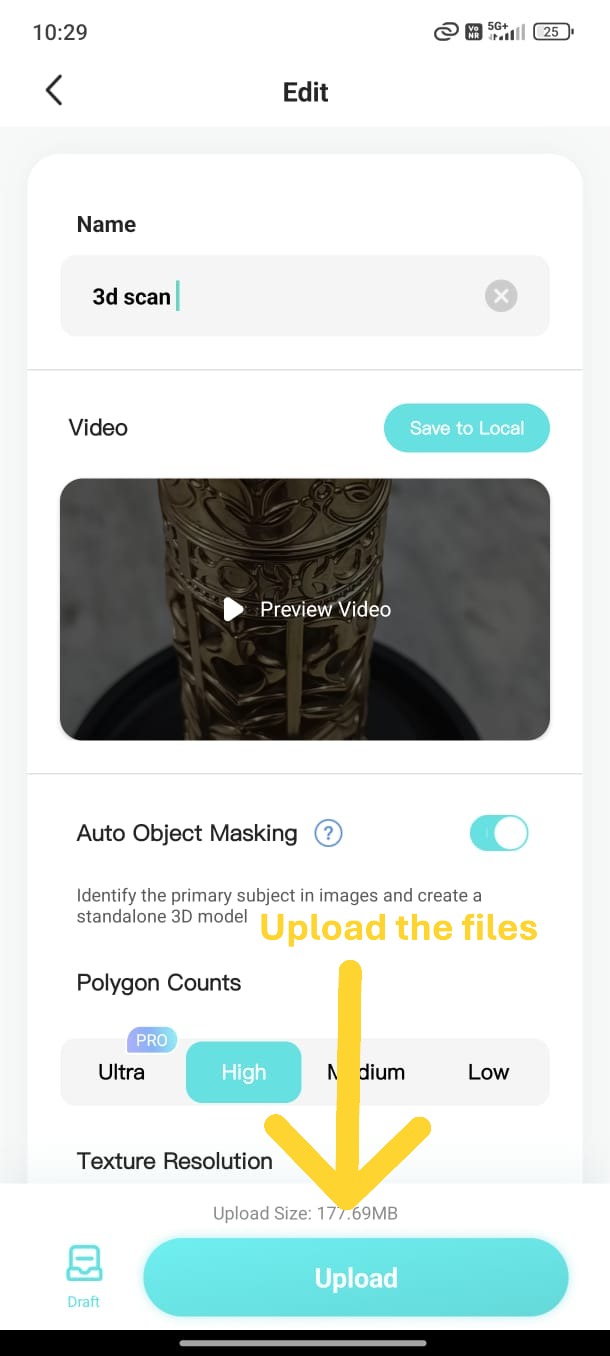
3D Scanning object on KIRI Engine Andriod Application
KIRI Engine :
KIRI Engine is a 3D scanner app for Android, iOS, and web browsers, powered by cloud computing to create detailed 3D models. It utilizes techniques like photogrammetry, Neural Surface Reconstruction, and 3D Gaussian Splatting to generate 3D visualizations from photos and videos. The app offers both free and paid (Pro) versions with varying features, including unlimited scanning and exports, and quad-mesh retopology for refining models.

Transforms photos into 3D models by analyzing multiple images of an object.
Scanning Object using Photos and Video Shots
 |
 |
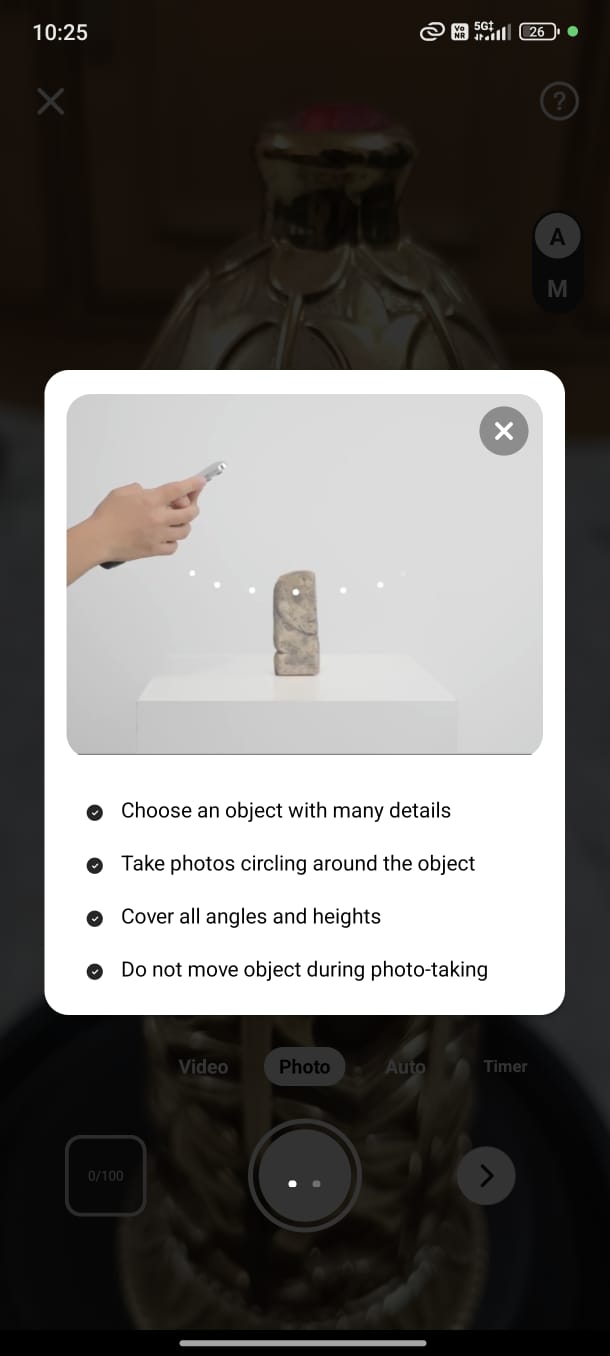 |
Collect ample of shots with different angles and resolutions
 |
 |
 |
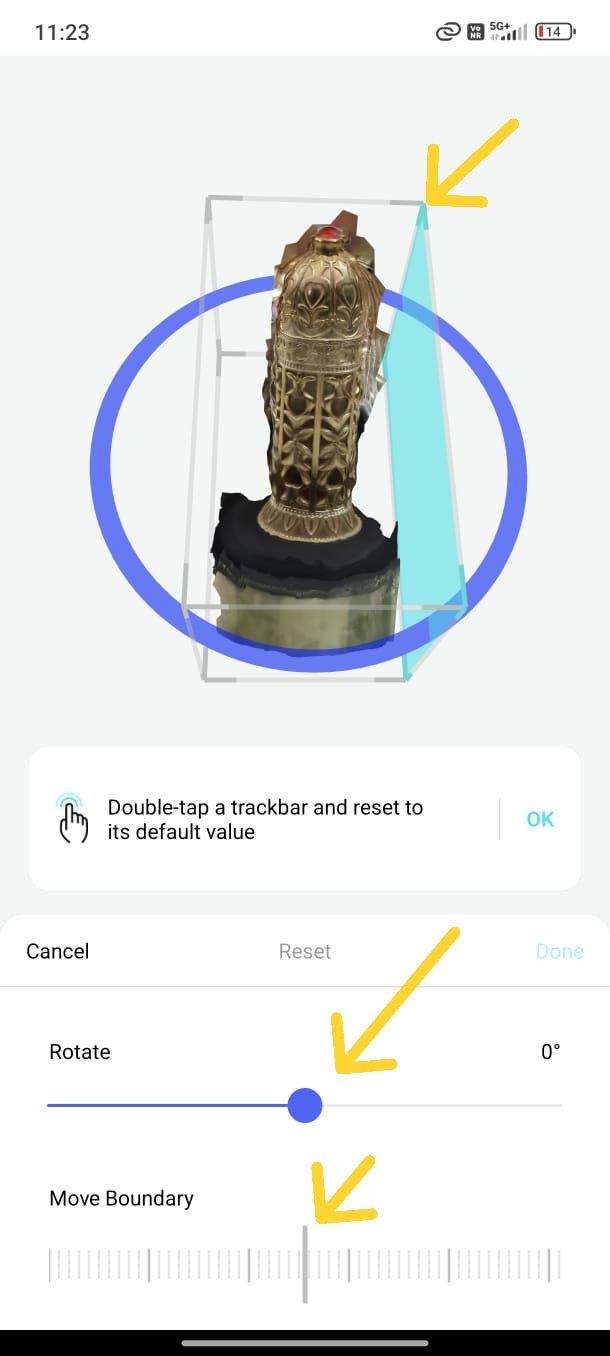
Model refining and modification
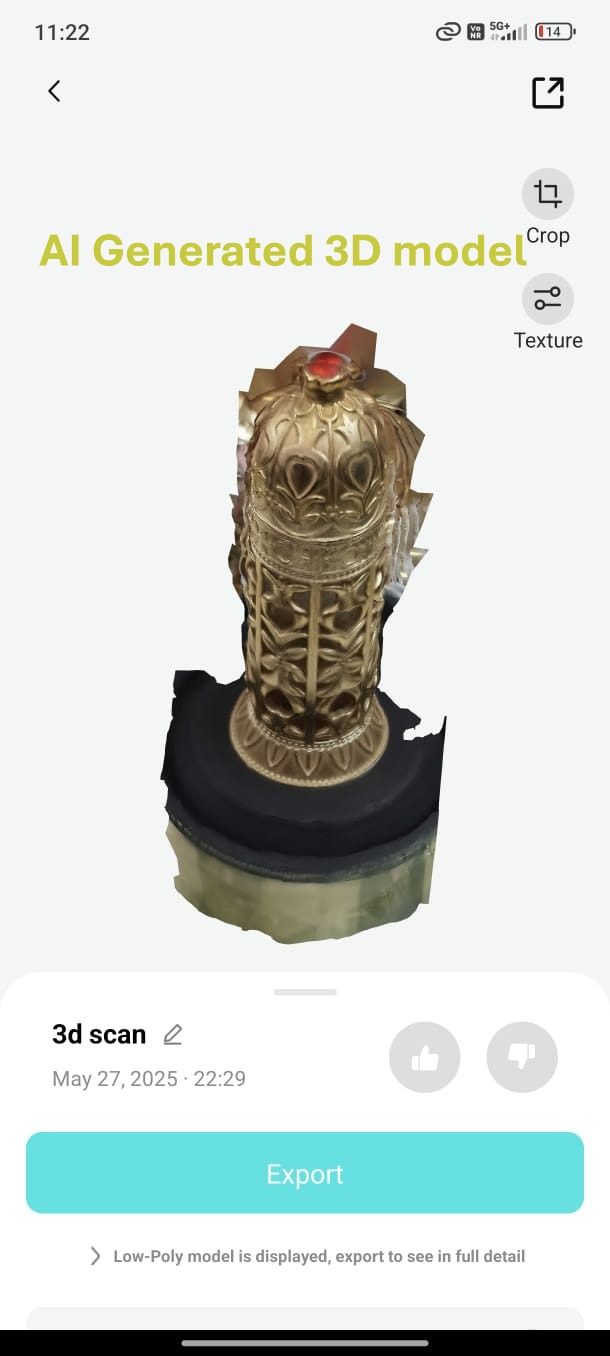 |
 |
 |
Exporting model and downloading STL File
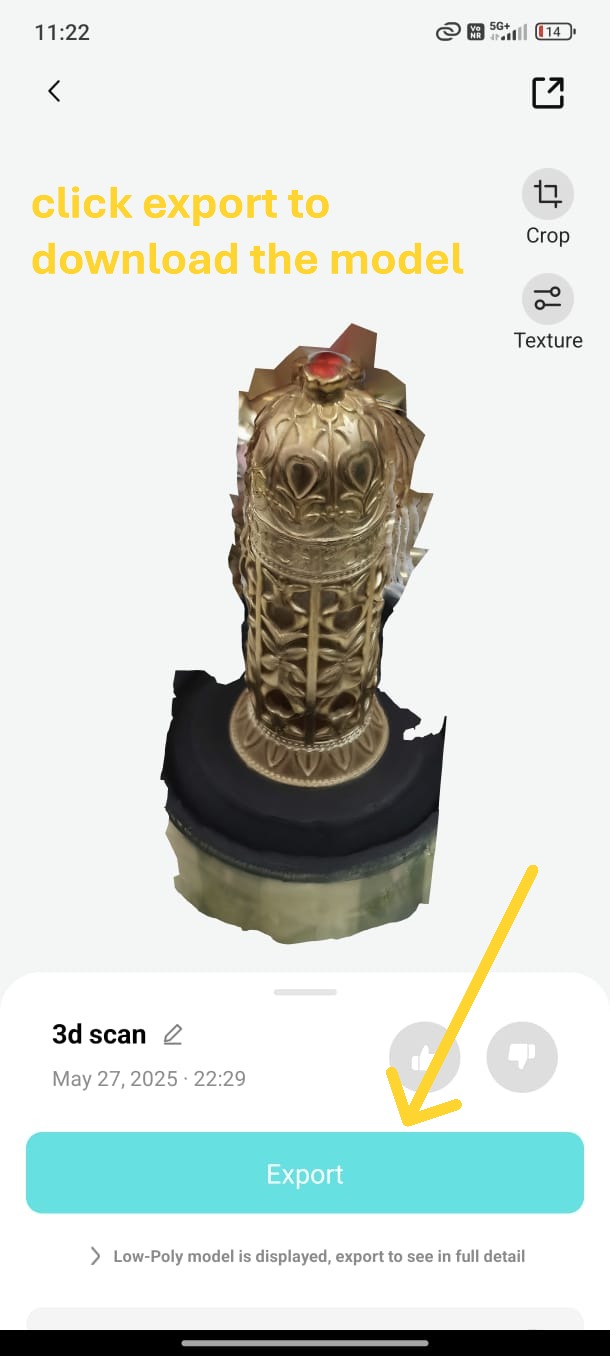 |
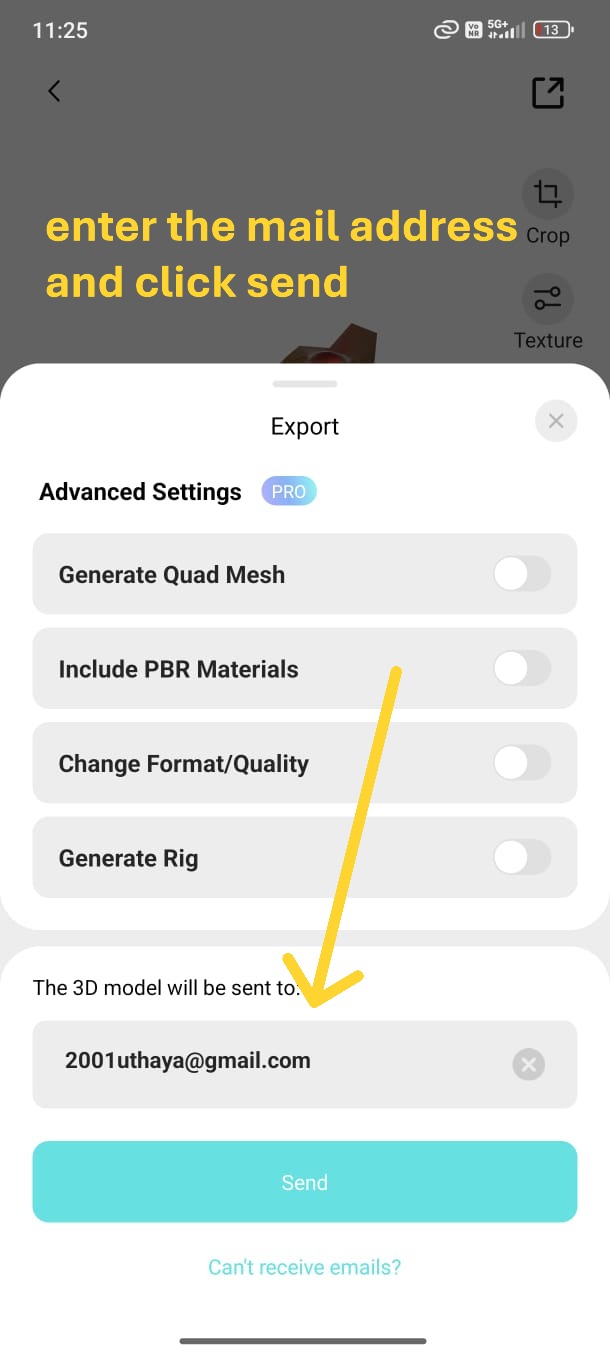 |
 |
I downloaded the STL file, and it appears to be in good condition.
Reference Files:-
The end of week 5

Fab Academy is an intensive five-month program that teaches students to envision, design and prototype projects using digital fabrication tools and machines. It is a multi-disciplinary and hands-on learning experience that empowers students to learn-by-doing and inspires them to make stuff locally to become active participants in sustainable cities and communities.
Get In Touch
Rathinam nagar,Theni(Dt)-625531, Tamil Nadu, INDIA
+91 8122997014
uthayavelraj@gmail.com
Start a project
Copyright @2025 © Uthaya Velraj. All Rights Reserved.
Designed by Myself