Group Assignment
Visit Our Group Assignment HereFor this group assignment, we explored different materials used in the molding and casting process to understand their properties, mixing ratios, and applications. We worked with Epoxy Resin and Moldsil 15 Plus and studied their material datasheets to learn the correct mixing procedures and curing requirements. Through this exercise, we learned how to estimate the required quantity of material based on the mold size, accurately measure and mix the two-part systems (Part A and Part B), and achieve quality casting results. This assignment provided valuable knowledge about material selection, safe handling practices, and the importance of following manufacturer specifications to obtain successful molds and casted parts..
Individual Assignment
- Design a mold around the process you'll be using
- Produce the mold with a smooth surface finish that does not show the production process
- Use the mold to cast parts
Hero Shot
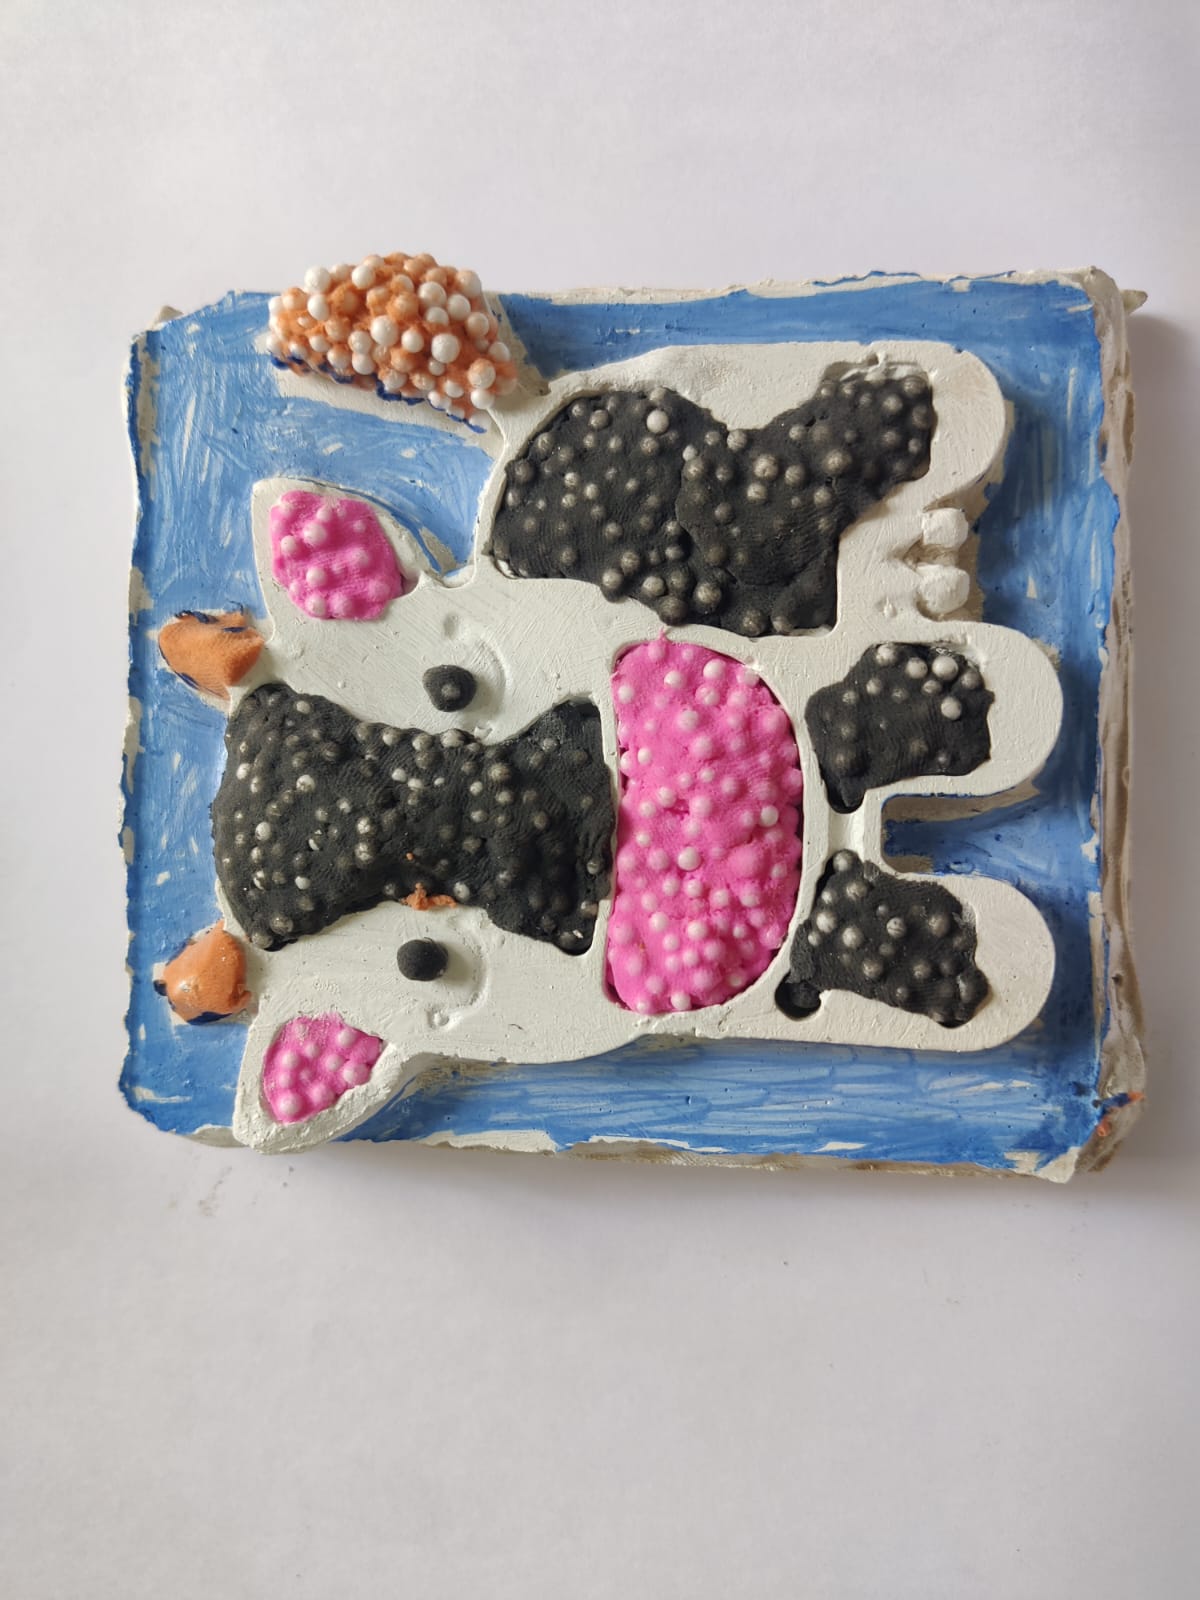
Cute Cartoon Cow 3D Model foam clay Filled.
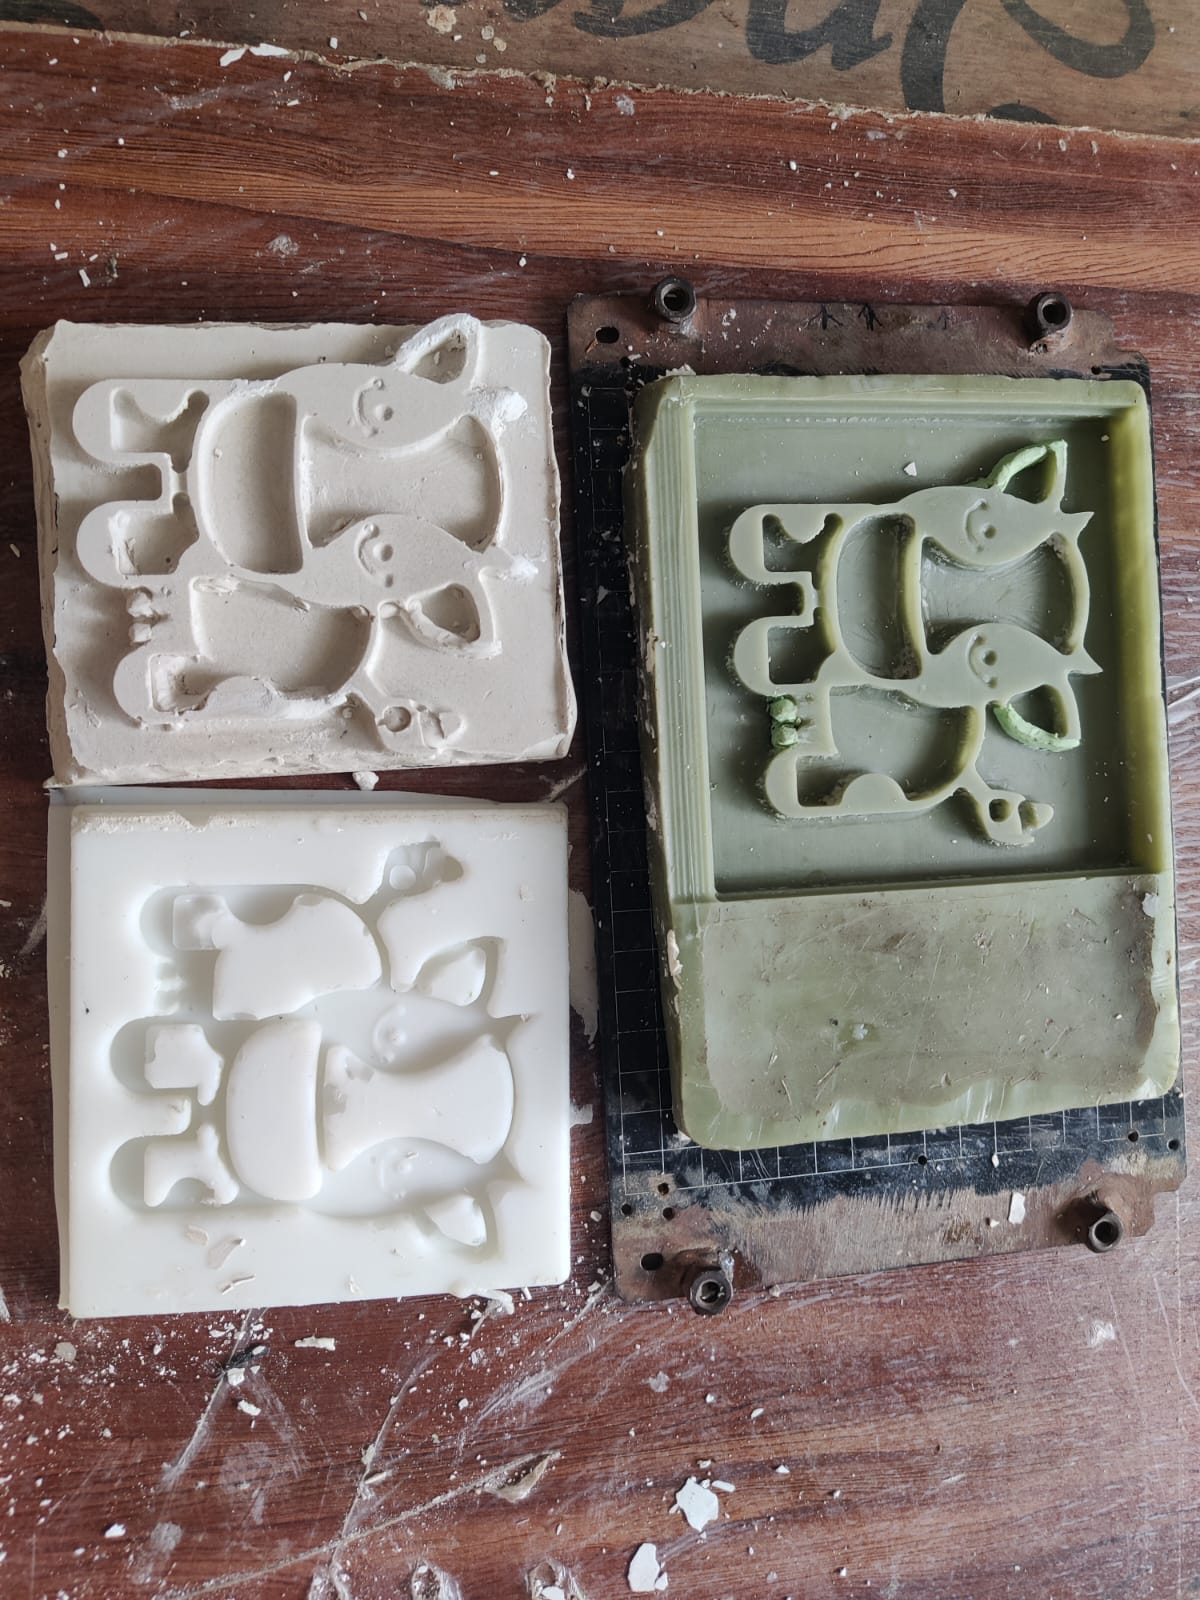
The Above Image Contains
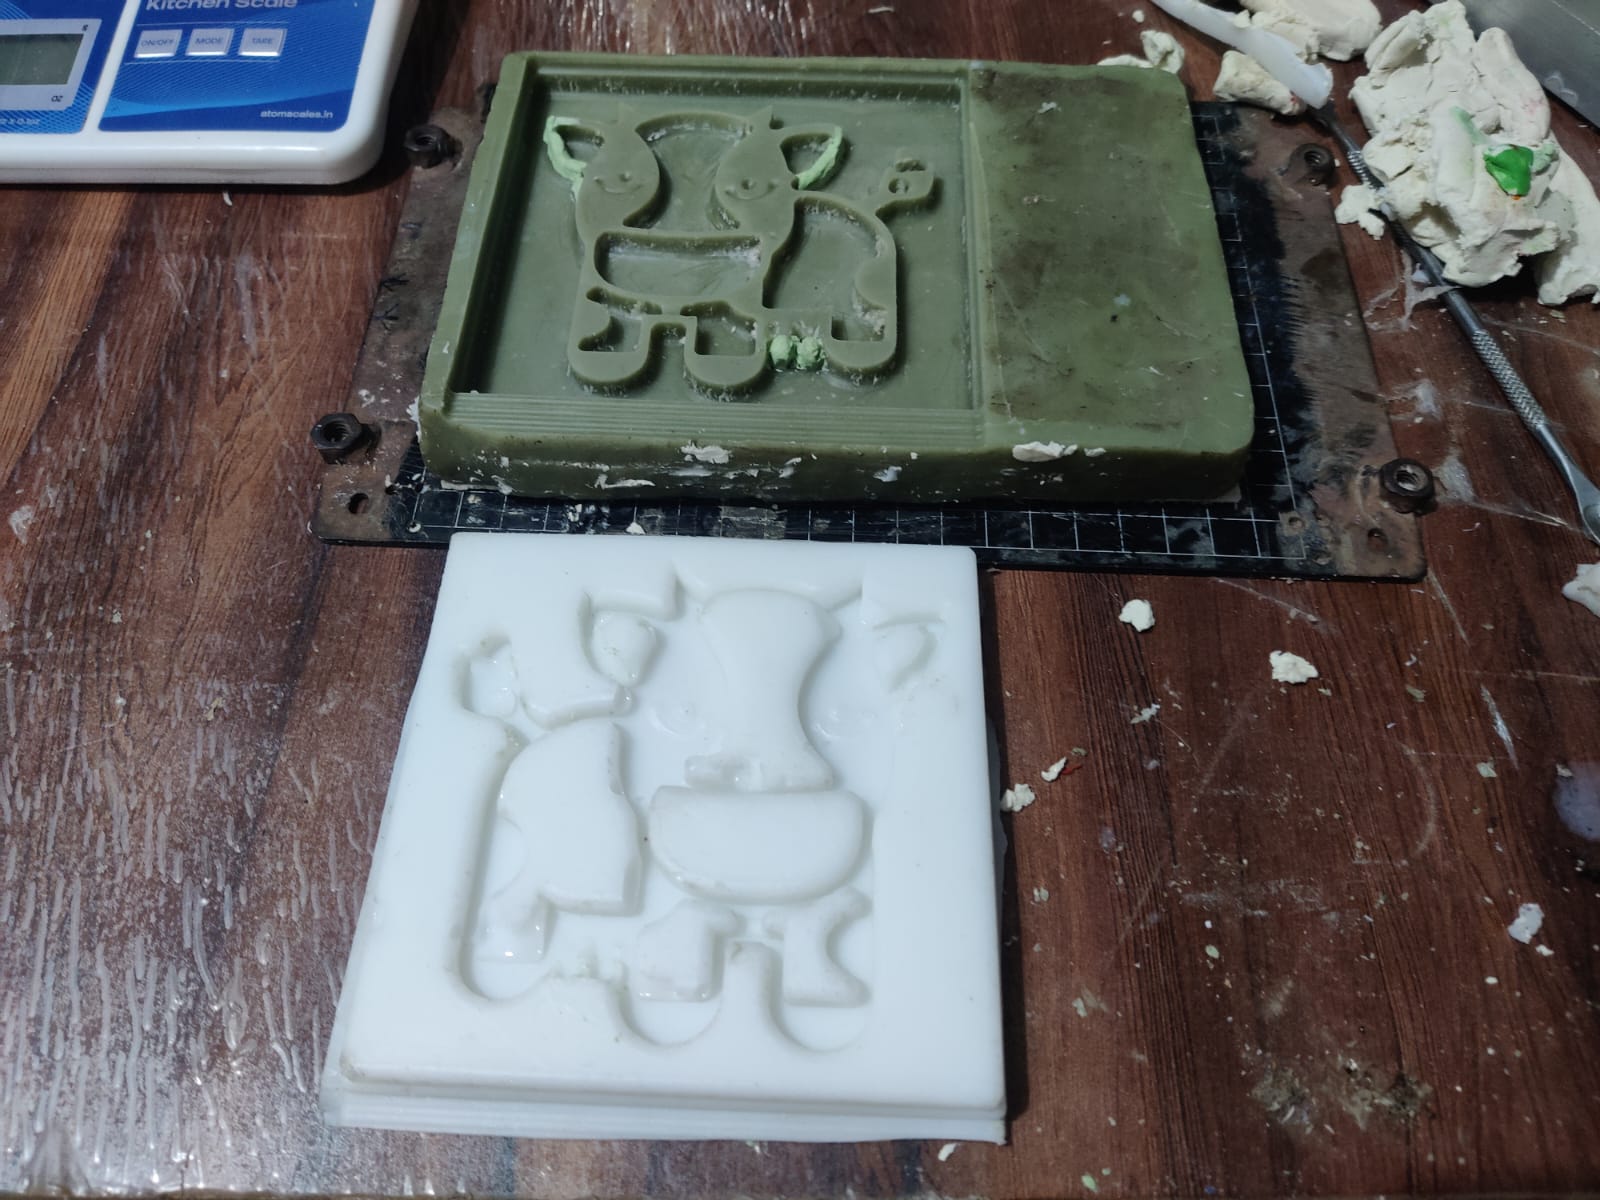
- CNC Milled Wax Pattern produced using the Roland MDX-20.
- RTV Silicone Rubber Mold prepared from the wax pattern.
- Plaster of Paris (POP) Casting made from the RTV Silicone Rubber Mold.
Molding and Casting
Project Plan
Creating a Cute Cartoon Cow 3D Model
For my Molding and Casting assignment, Iam going to create a Creating a Cute Cartoon Cow 3D Model that can be used as a creative art activity for children. The final model will be cast in Plaster of Paris (POP) and will contain recessed areas that can be filled and decorated with foam clay, allowing children to create colorful artwork while developing their creativity and fine motor skills.
To begin the project, I will design the Cute Cartoon Cow 3D Model in Blender. The design will include suitable contours and depth features to hold foam clay effectively. After completing the 3D design, I will export the model as an STL file and prepare it for CNC machining.
The master pattern will be machined from a wax block using the Roland MDX-20 CNC milling machine. Once the wax master pattern is completed, I will use it to create a flexible RTV silicone rubber mold capable of accurately reproducing the model details.
After the silicone mold has fully cured, I will use it to cast the final model in Plaster of Paris (POP). The cast part will then be removed from the mold, cleaned, and inspected for quality. The completed POP Cute Cartoon Cow 3D Modelmodel will serve as a reusable educational and artistic activity piece, where the recessed sections can be filled with foam clay and decorated by children.
This project will demonstrate the complete digital fabrication workflow, including 3D modeling, CNC machining, mold making with RTV silicone rubber, and casting with Plaster of Paris.
3D Mold Design and CNC Machining Process
1. Downloading the SVG Design
I downloaded a free SVG (Scalable Vector Graphics) file from an online source and selected a simple Cute Cartoon Cow 3D ModelD Model design for creating the mold pattern.
2. Importing SVG into Blender
The SVG file was imported into Blender using:
File → Import → Scalable Vector Graphics (.SVG)After importing, the design appeared in the Blender workspace.
- Blender Import menu.
- SVG file visible in Blender viewport.
- Select the SVG object.
- Move it to the center of the scene.
- Verify alignment in the Collection panel.
- Design before centering.
- Design after centering.
- Select all curves.
- Hold Shift and select all curve objects.
- Press Ctrl + J to join them into one object.
- Multiple curves before joining.
- Single combined curve after Ctrl + J.
- Select the curve.
- Open Curve Properties.
- Locate Geometry settings.
- Apply an Extrude value.
3. Positioning and Centering the Design
The imported SVG was moved to the center of the workspace.
4. Combining Curves
The imported SVG contained multiple curves. To create a single object:
This created one complete curve object for easier editing.
5. Converting Curve Geometry
The curve was converted into a 3D shape using the Geometry settings.
Extrude = 0.01 mThis generated thickness for the model.
- Curve Geometry settings.
- Extruded model.
6. Exporting the STL File
After creating the 3D model, it was exported as an STL file.
File → Export → STLThe STL file was saved for CNC machining.
Required Images7. Resizing the STL Model
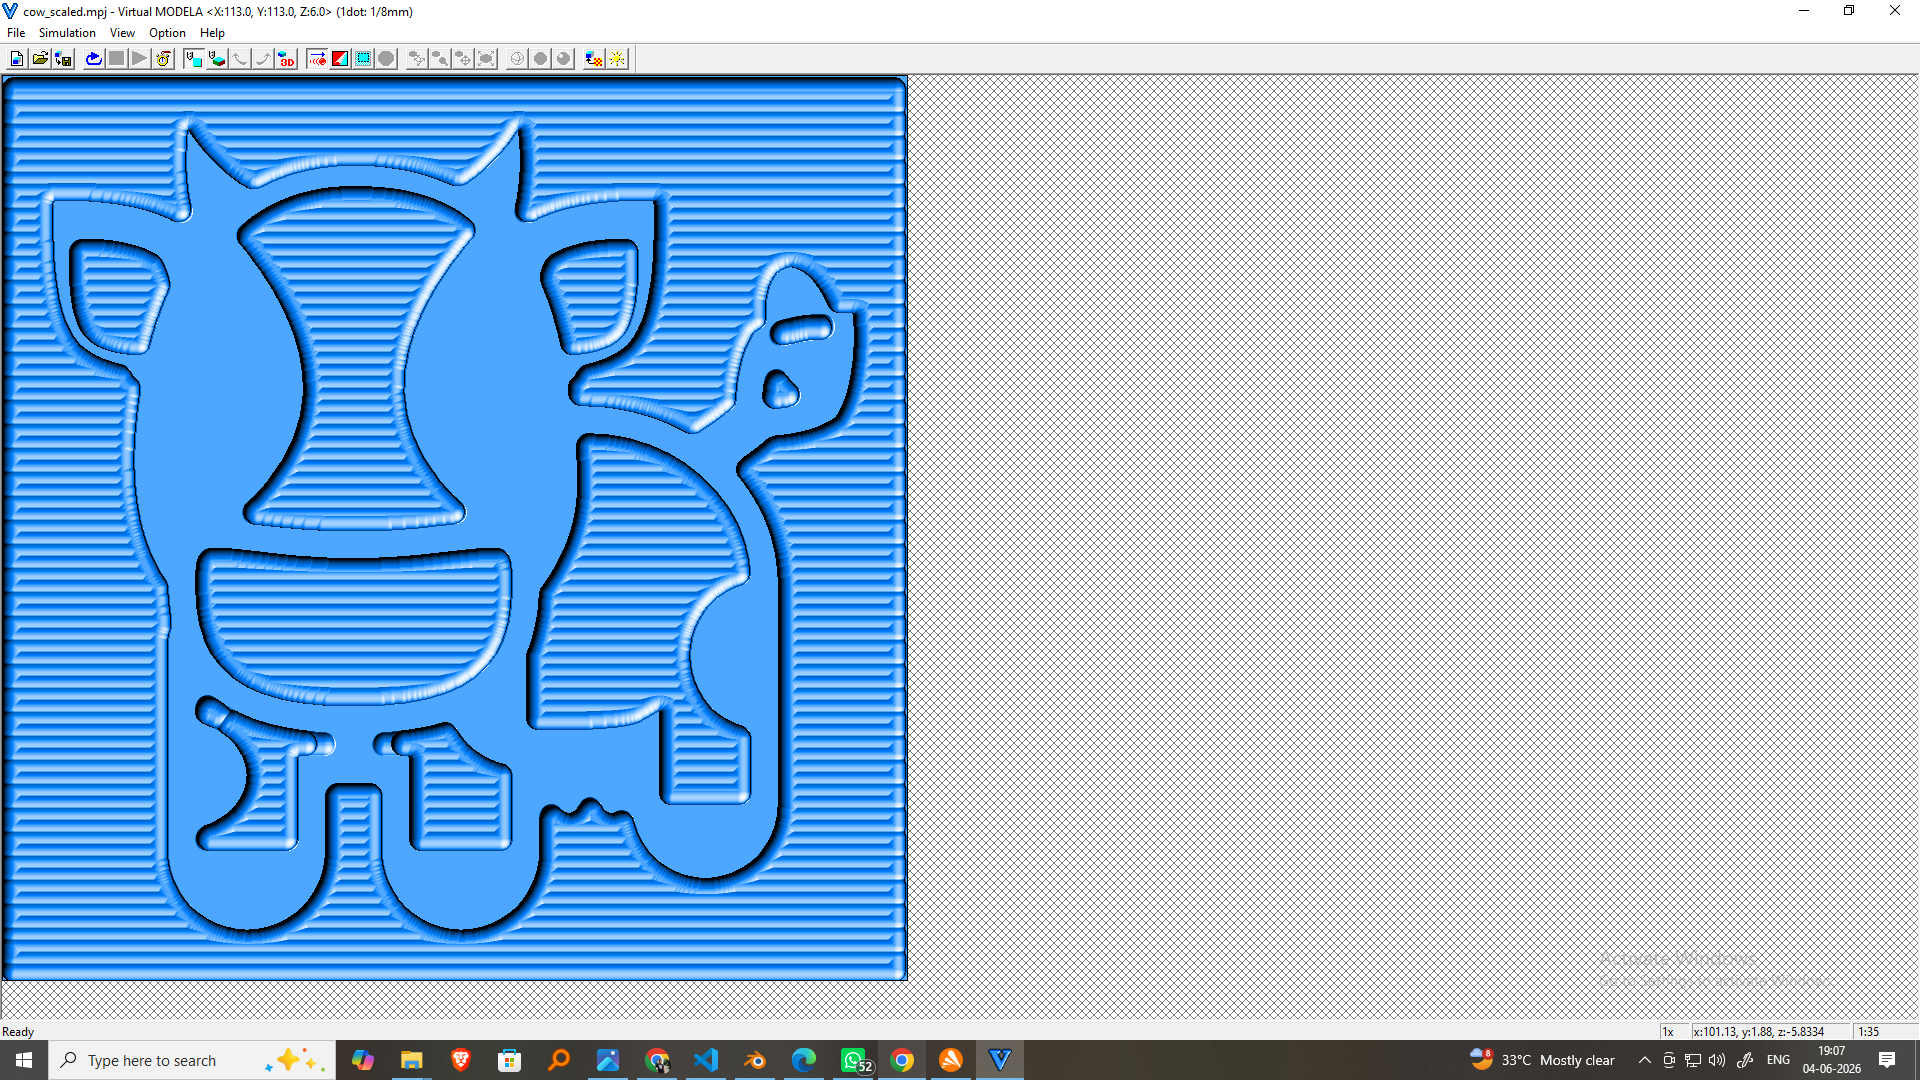
The STL file was resized using ChatGPT to the required dimensions of 100 mm × 100 mm × 6 mm. The corrected file was then used to generate toolpaths for machining on the Roland MDX-20.

The STL file dimensions were corrected before machining.
Target Dimensions:
- Length = 100 mm
- Width = 100 mm
- Height = 6 mm
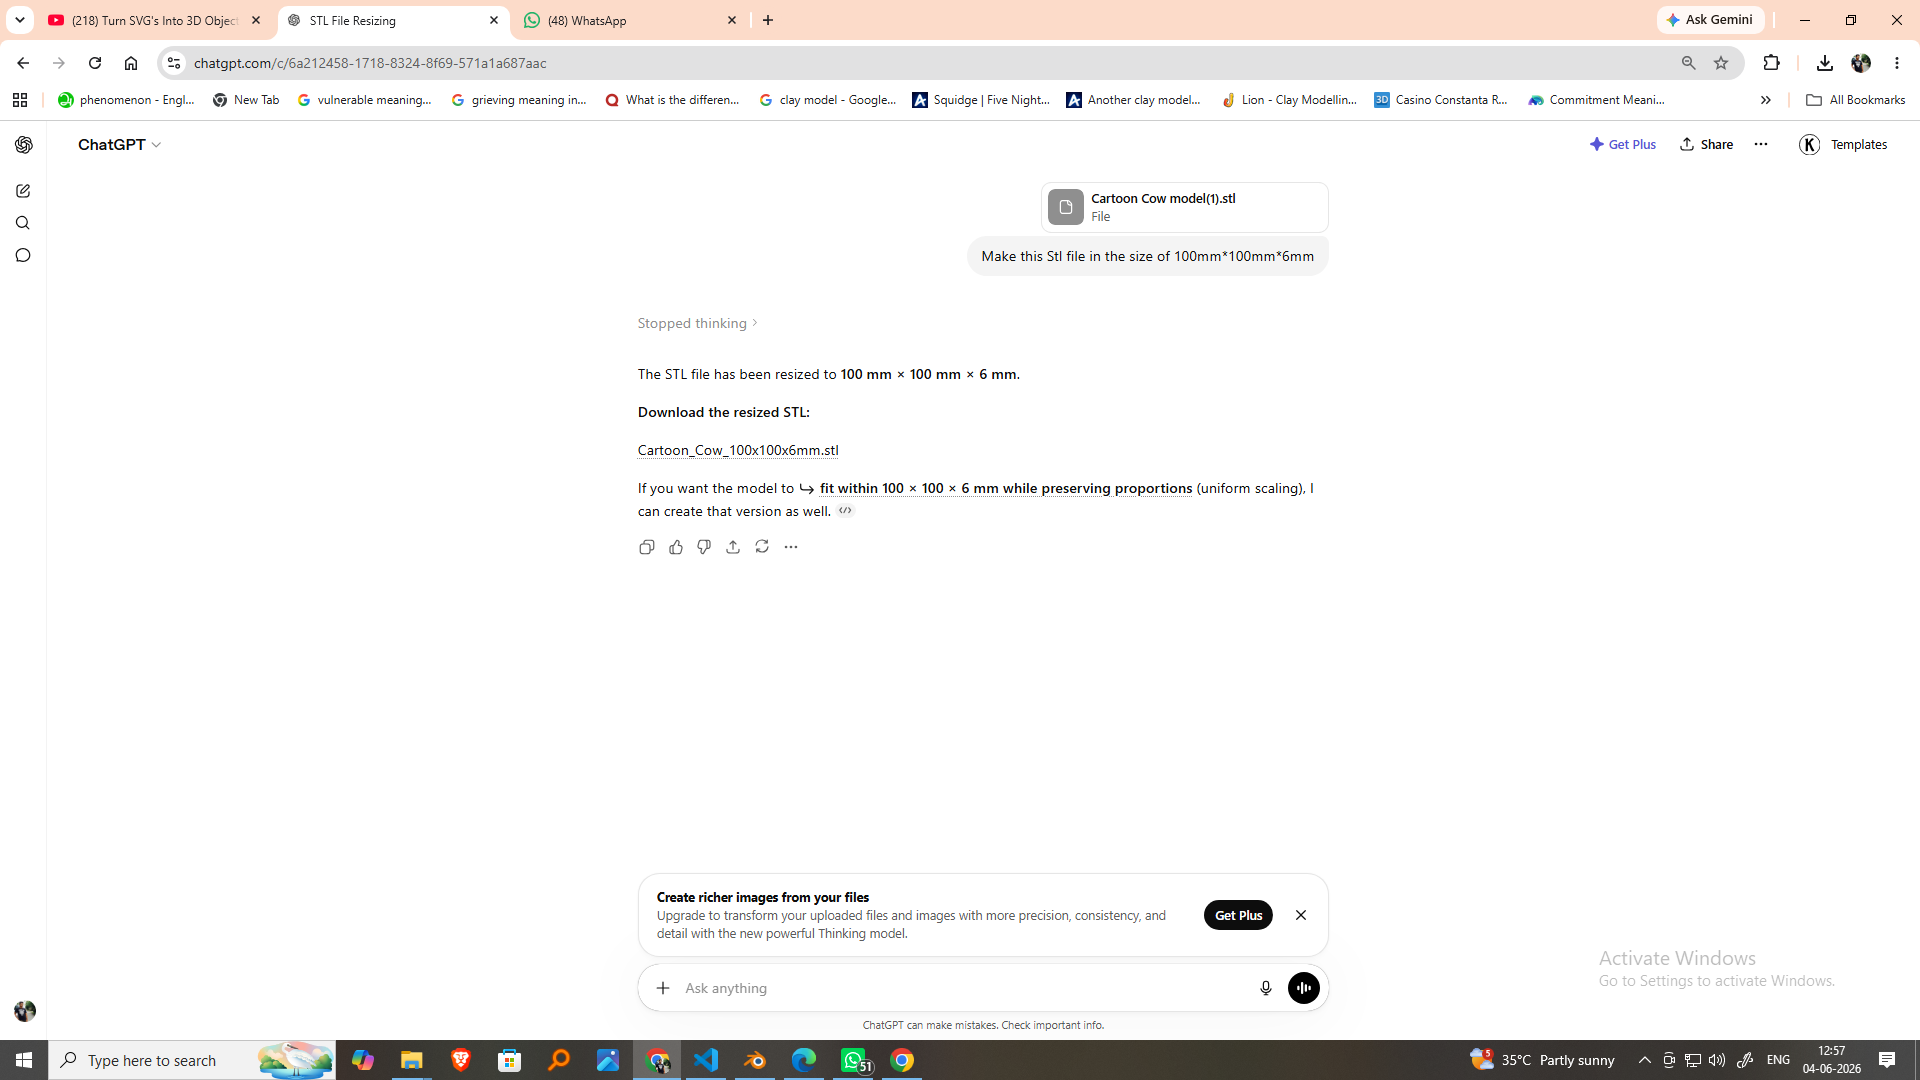
The resized STL file was downloaded from Chatgpt and used for machining.
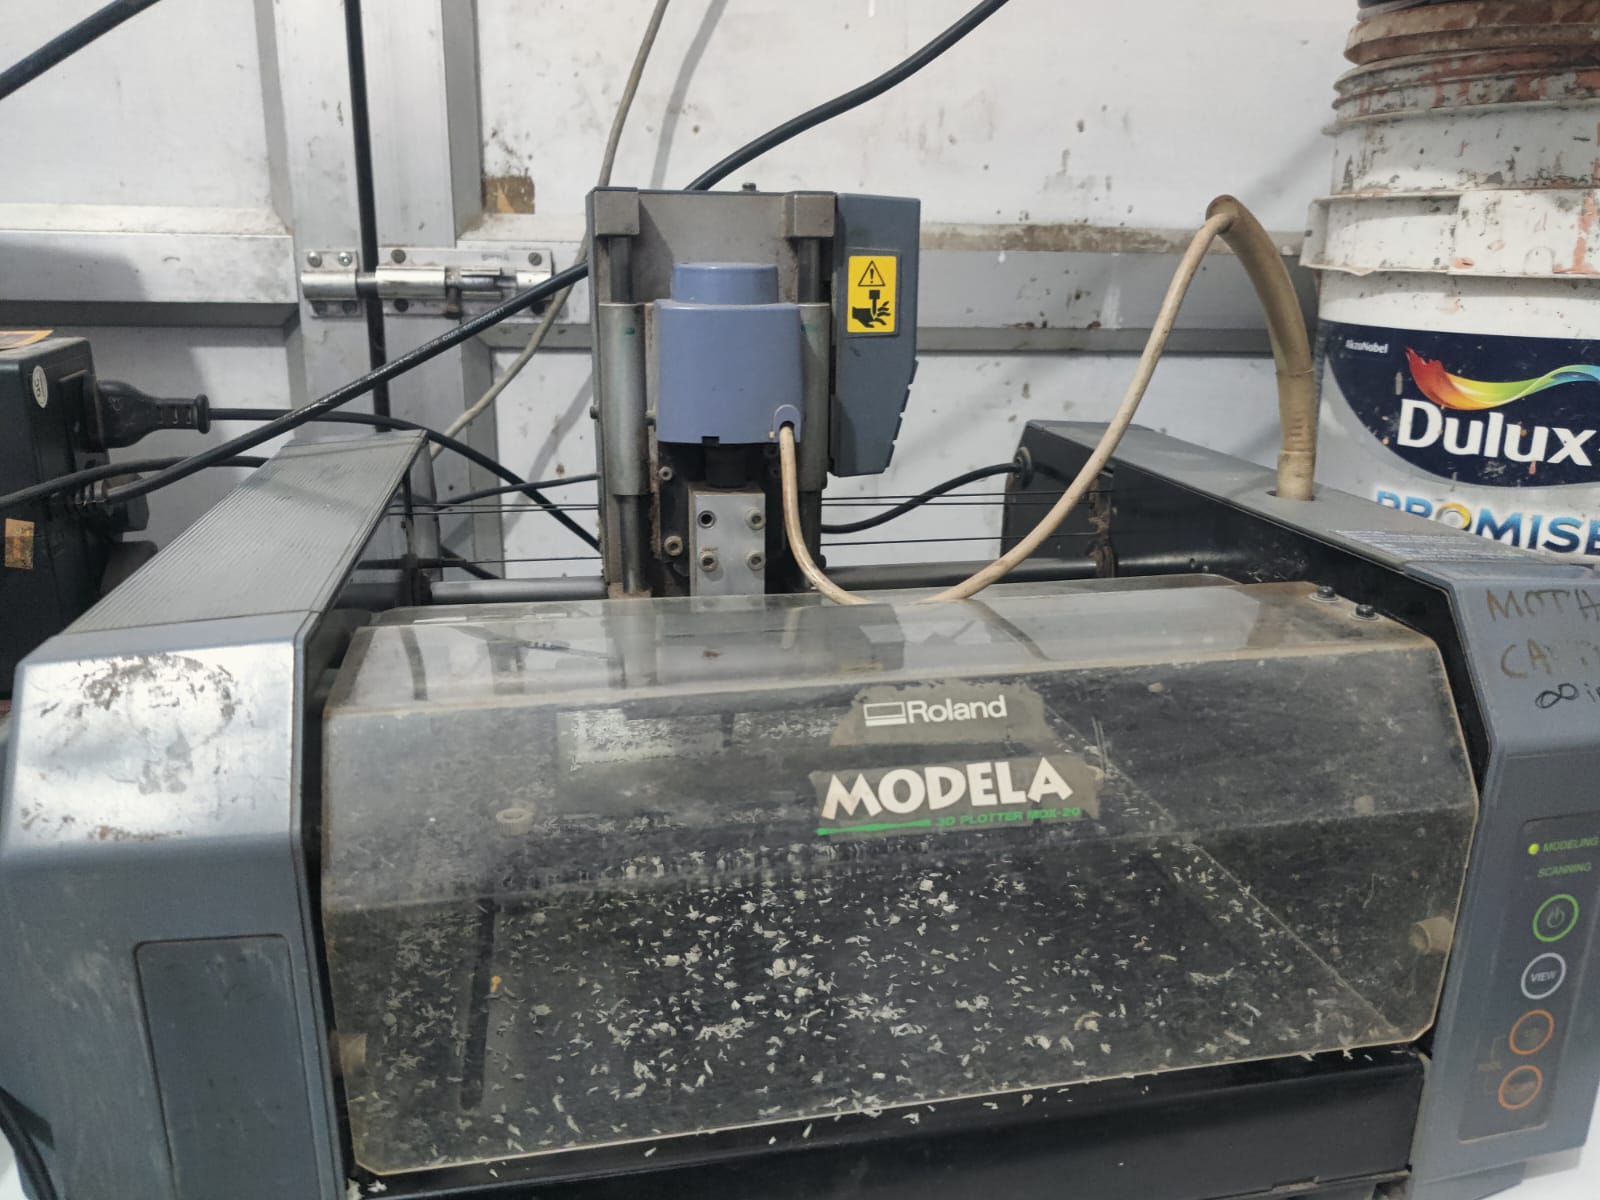
8.Machine for Milling Wax Model-Modula Mdx_20
The Roland MDX-20 is a compact desktop CNC milling machine widely used for precision machining, rapid prototyping, PCB fabrication, and mold making. In this project, it was used to machine the wax mold accurately using surfacing, roughing, and finishing operations. The machine offers high precision, reliable performance, and is well-suited for creating detailed molds from machinable wax.
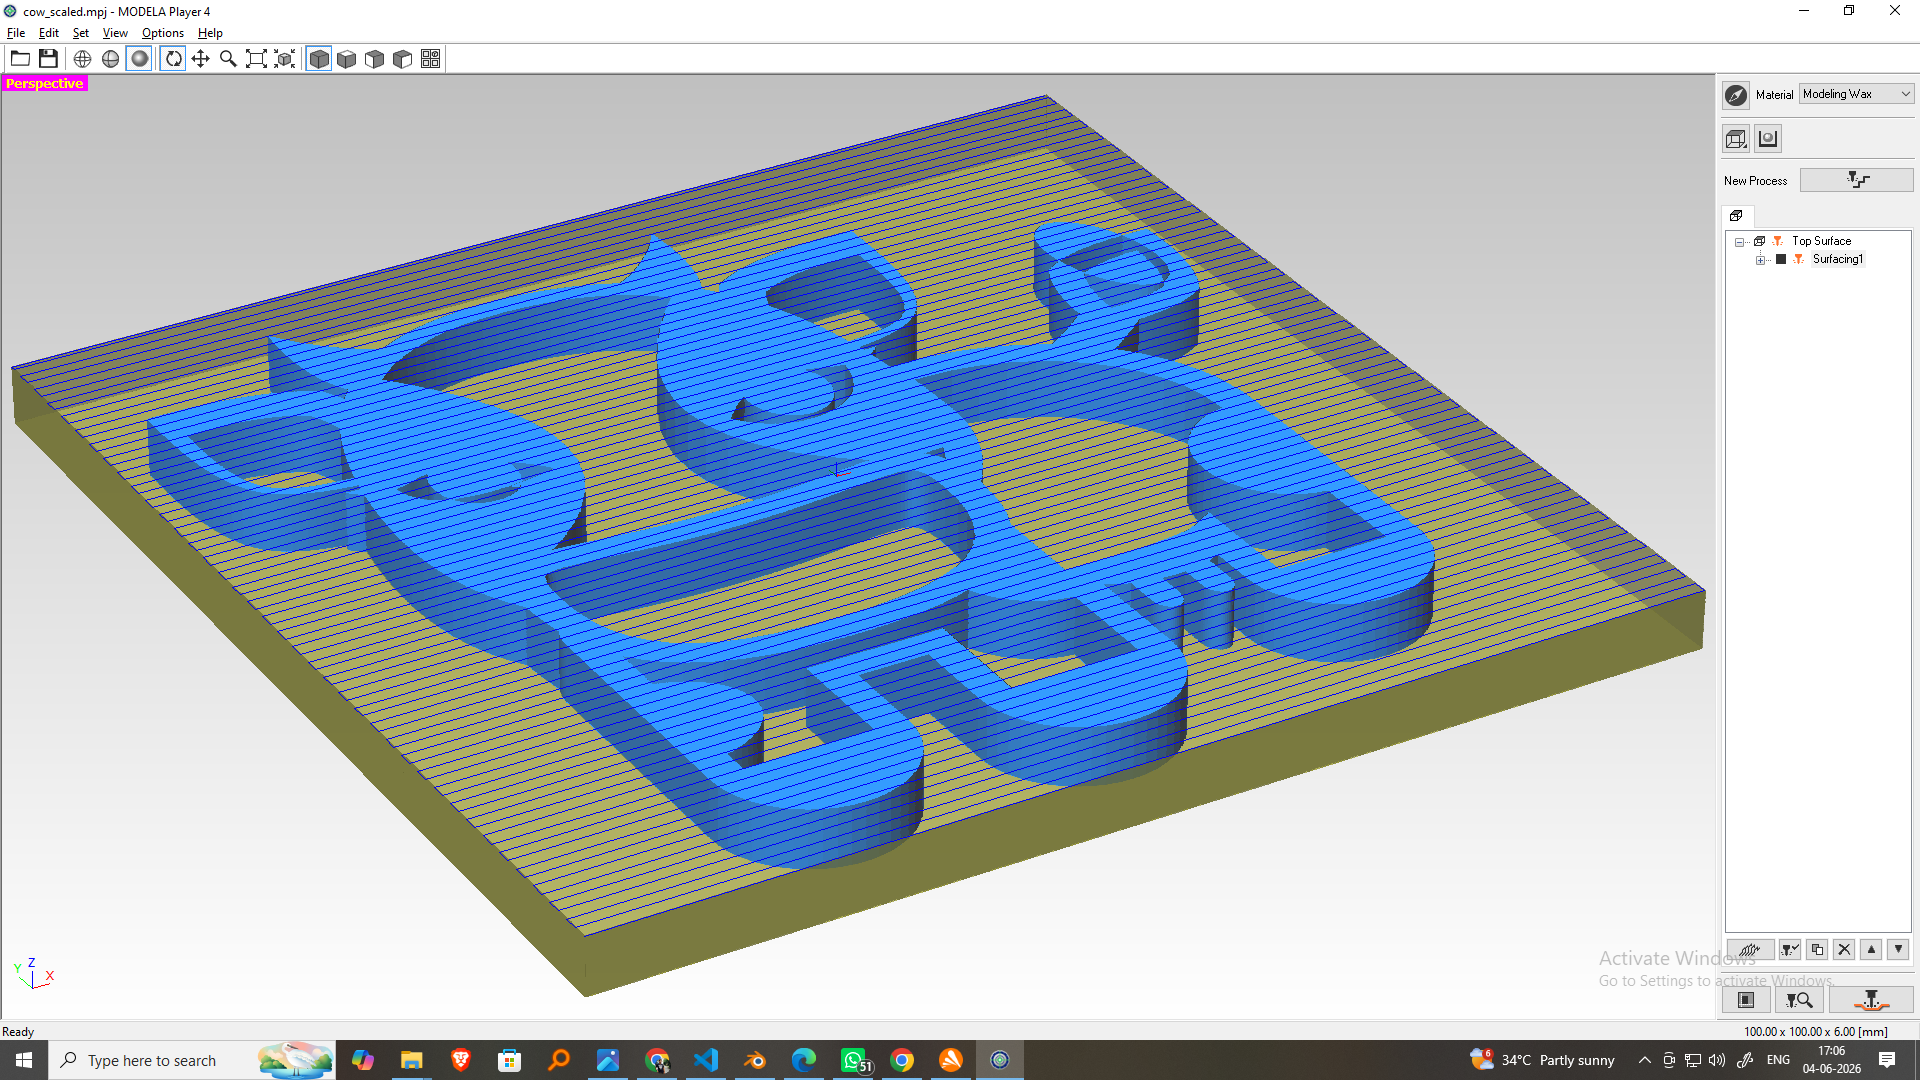
The STL file was imported into Modella Player 4 for toolpath generation.
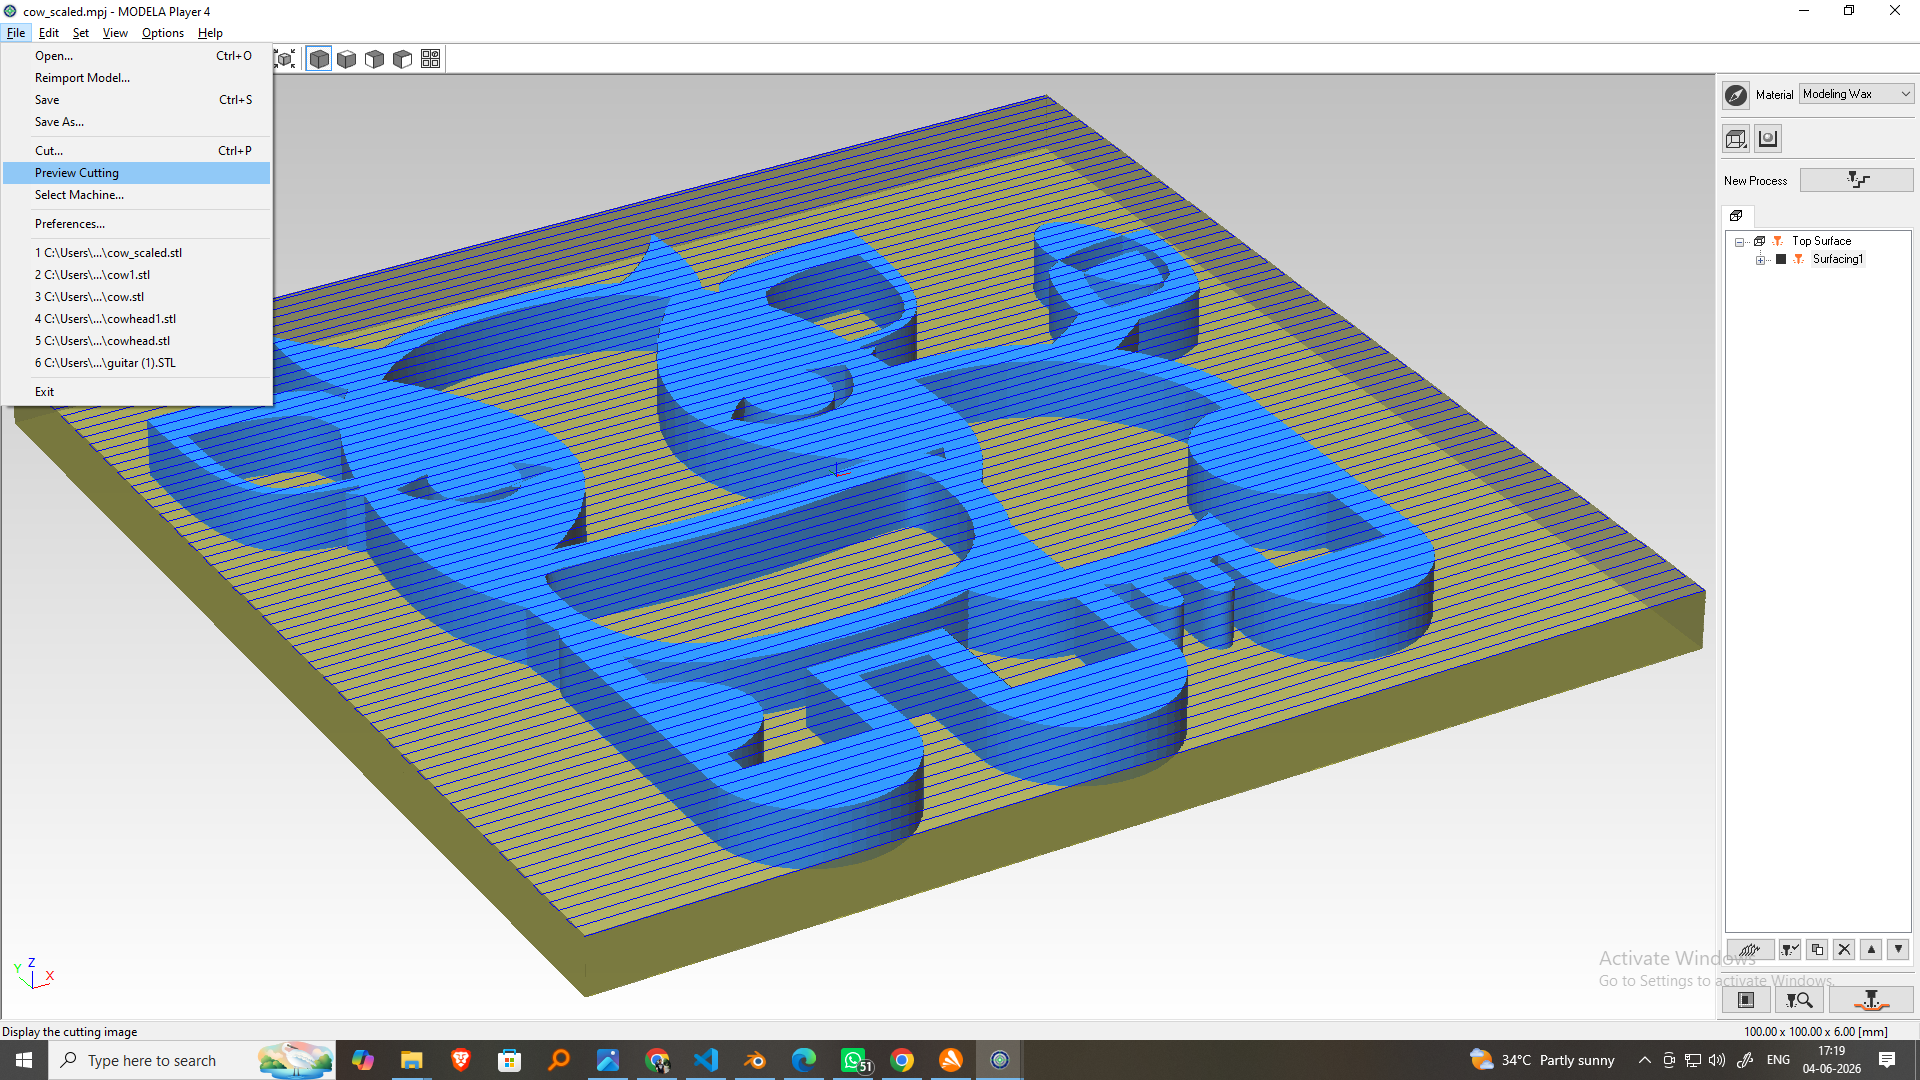
Open Modella Player 4
Import STL File
Importing the STL File into Modella Player 4
The STL file was imported into Modella Player 4 for toolpath generation and CNC machining preparation.
Step 1: Open Modella Player 4The software was launched and a new project was created.
Step 2: Import the STL FileThe STL model was loaded using File → Open. The imported model appeared in the workspace for further processing.
Step 3: Check Model OrientationThe orientation of the model was verified to ensure the correct surface faced upward for machining. Proper orientation helps achieve accurate machining results and reduces machining time.
Step 4: Verify the Machining AreaThe model position and size were checked against the available stock material and machine workspace. The model was placed within the machining boundary to avoid errors during machining.
Step 5: Preview the ModelThe imported model was viewed from different angles to confirm that the geometry, scale, and placement were correct before generating toolpaths.
Result The STL model was successfully imported into Modella Player 4, and the model orientation and machining area were verified before proceeding with toolpath generation.Figure: Imported STL model displayed in Modella Player 4.
The model orientation and machining area were checked.
9. Wax Block Setup
A machinable wax block was securely fixed on the Roland MDX-20 machine bed. The wax dimensions were entered in Modella Player 4 according to the stock size.
Fixing the wax to milling.
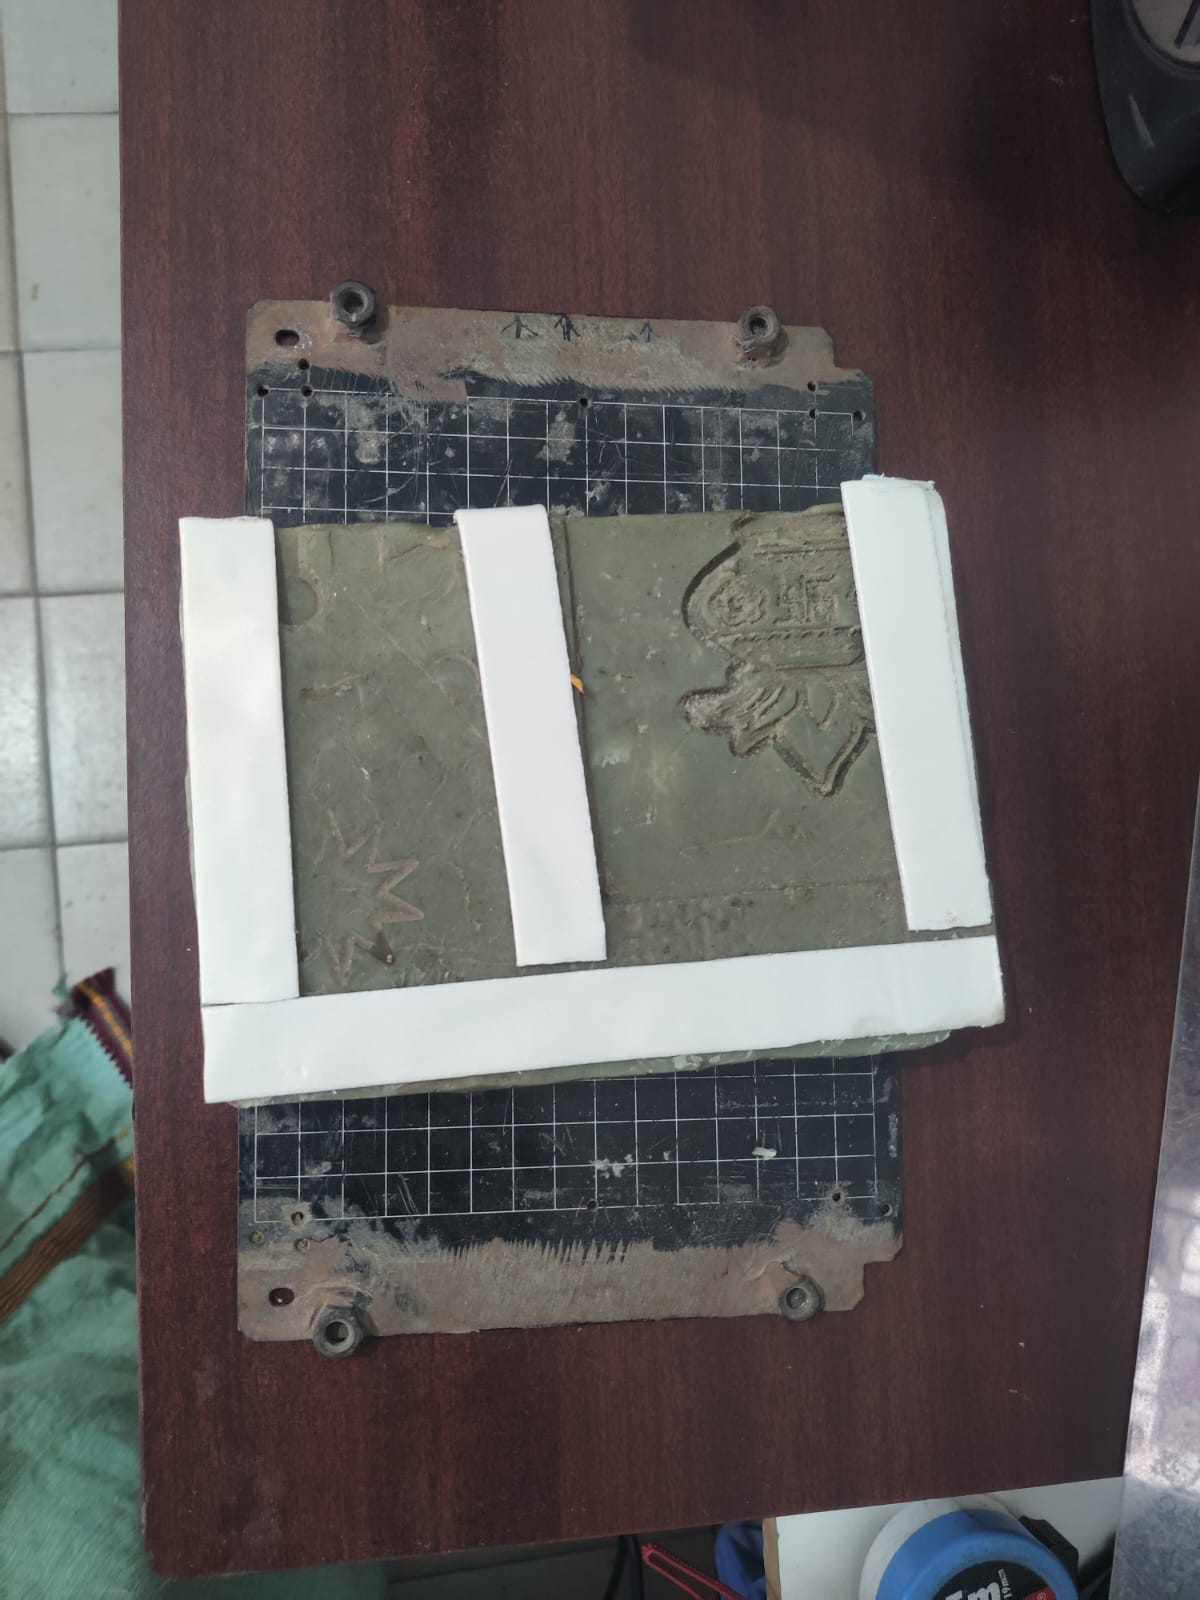
- Wax block.
- Wax mounted on MDX-20 bed.
- Stock setup window.
Roland MDX-20 Modela Player 4
10 Surfacing Process for Cute Cartoon Cow 3D Model in Modeling Wax
Step !: Open the STL File
- Launch Modela Player 4.
- Click File → Open.
- Select the Cartoon Cow STL file.
- Verify the model orientation.
- Position the model at the center of the wax block.
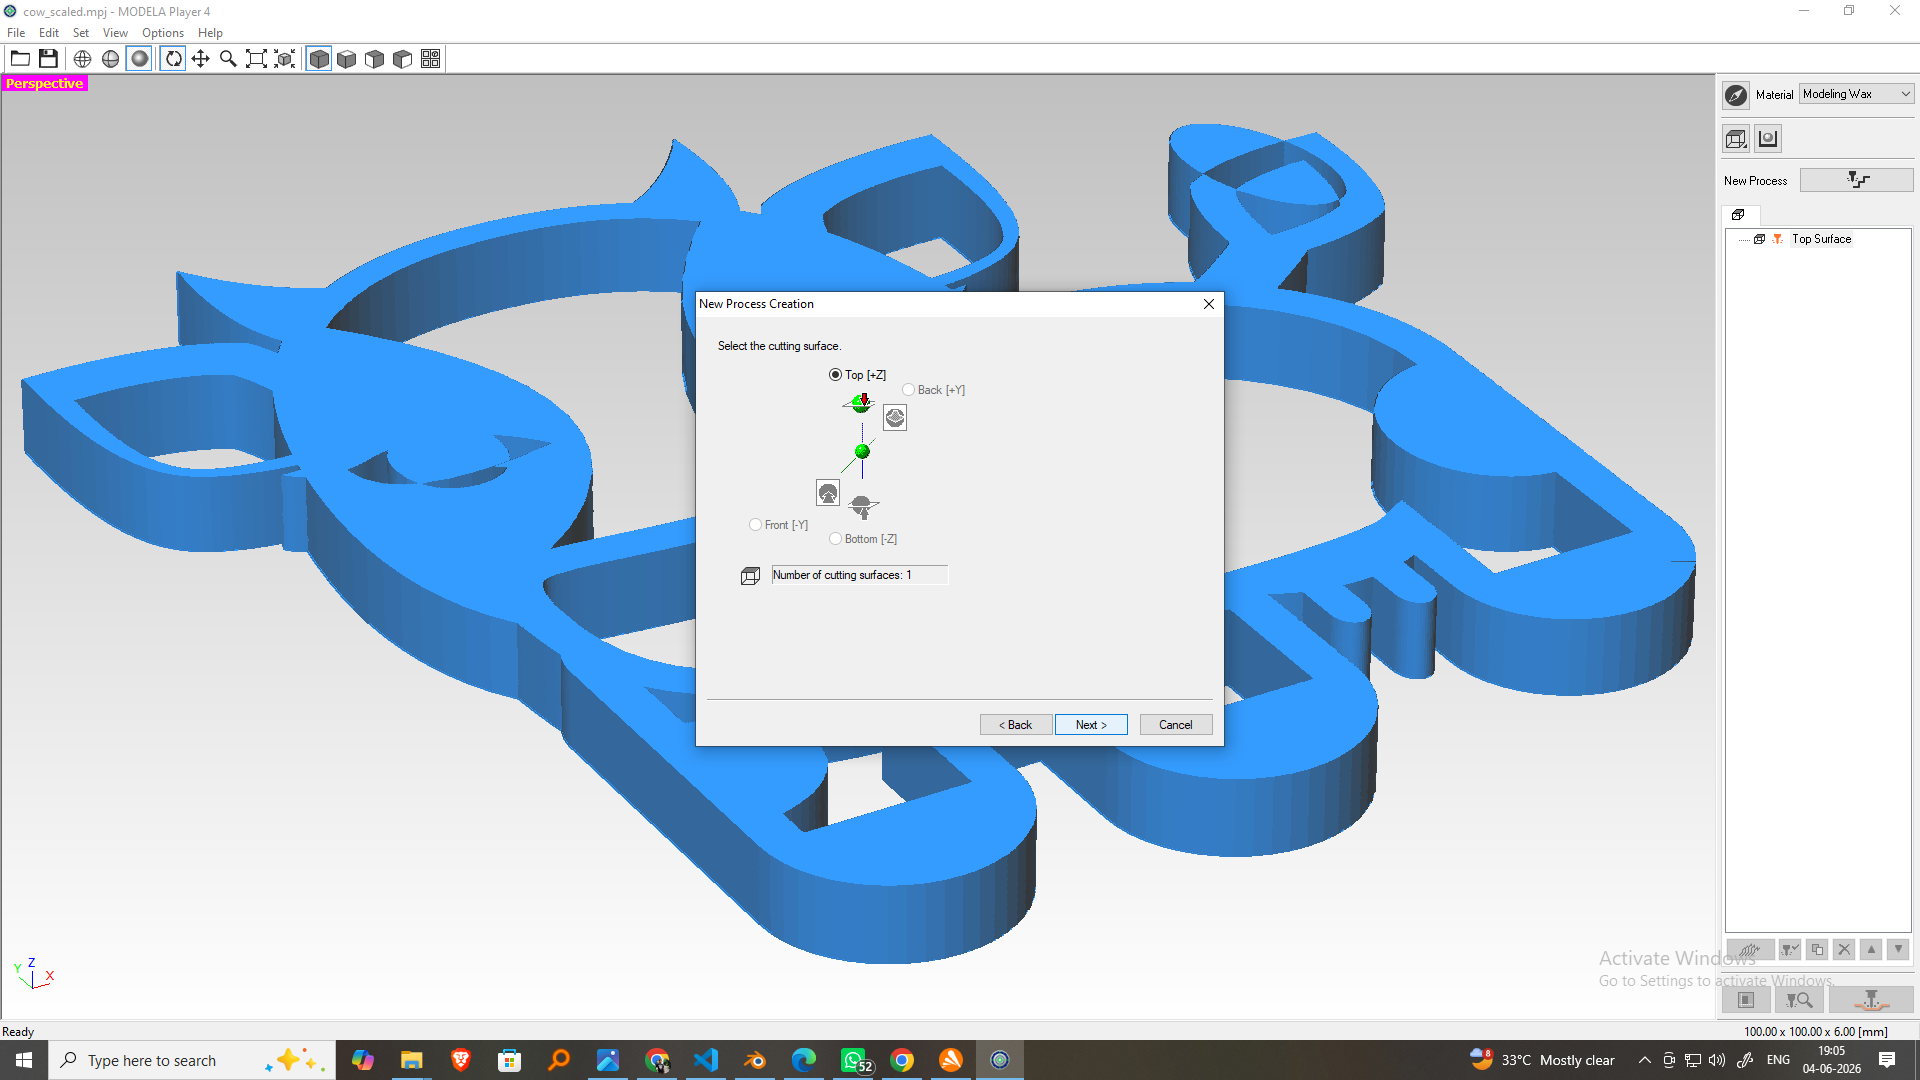
Step 2: Create Surfacing Toolpath

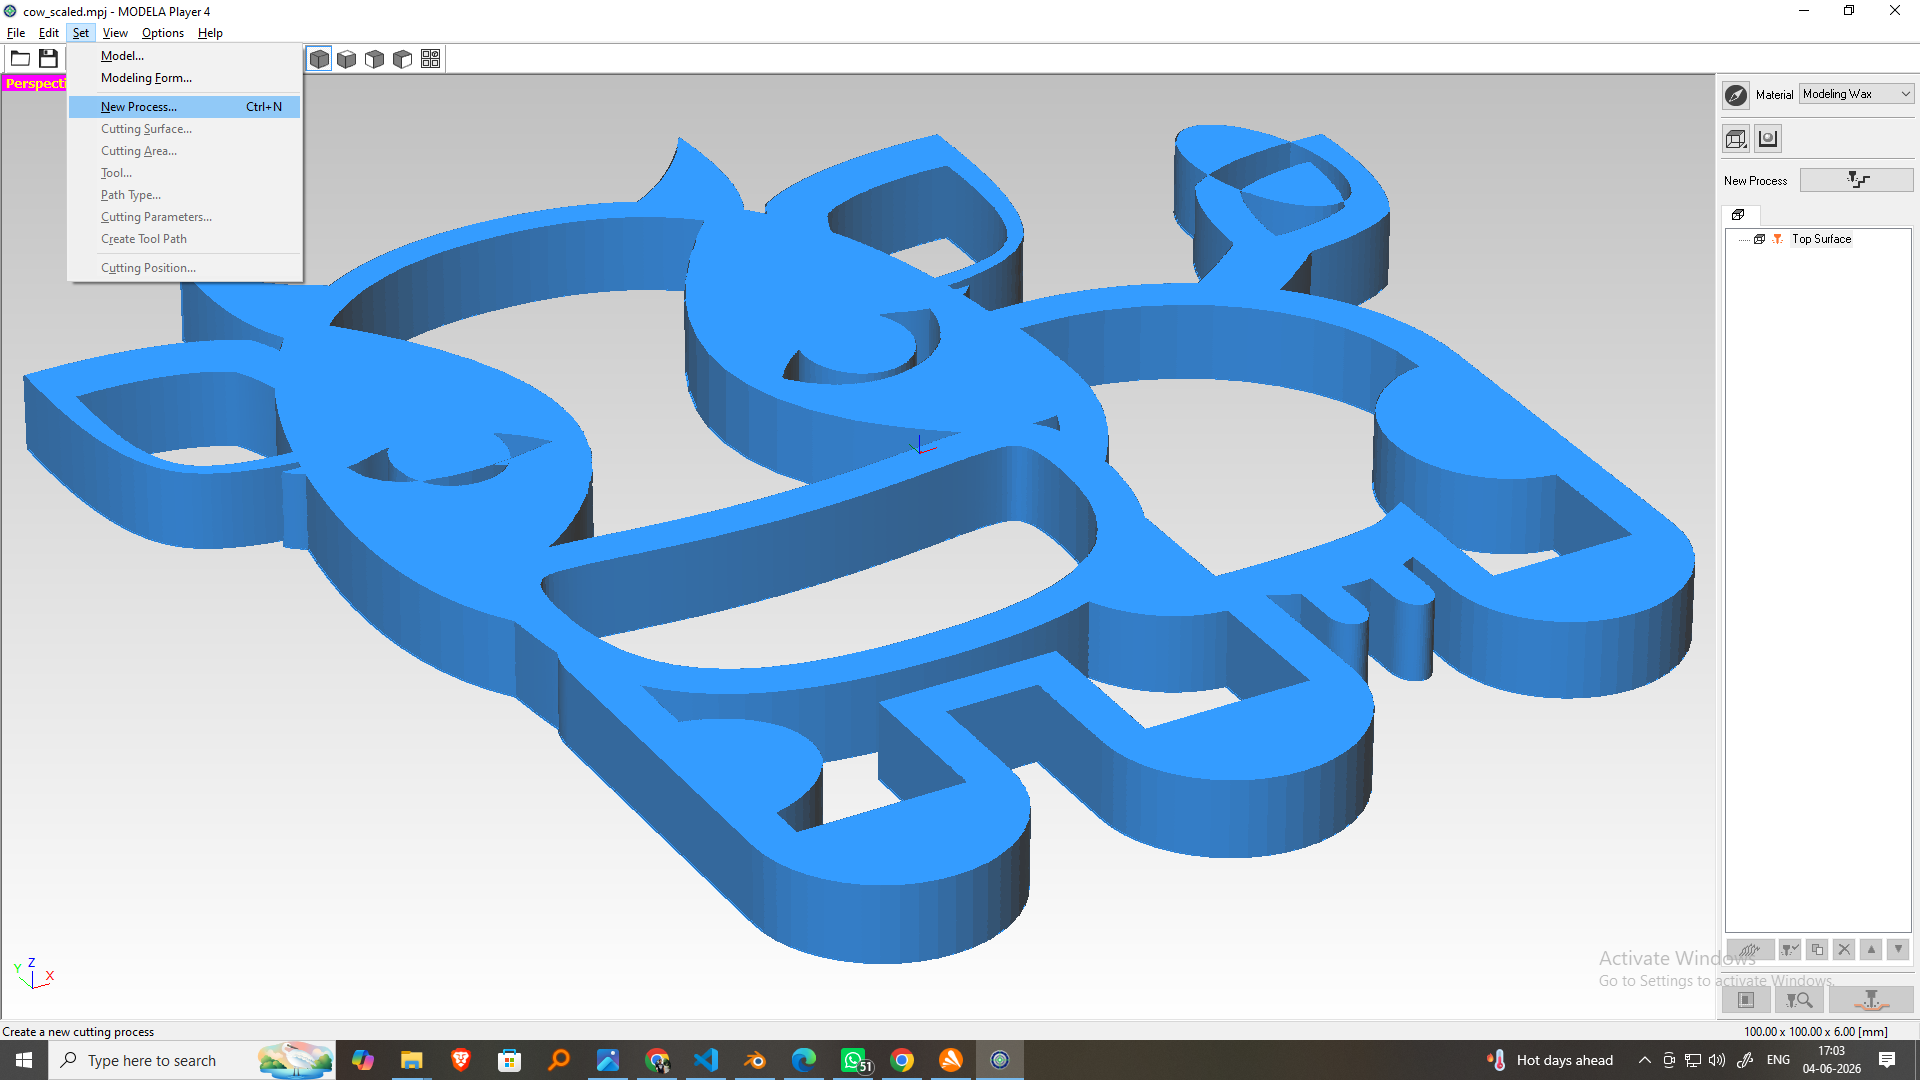
- Click New Process.
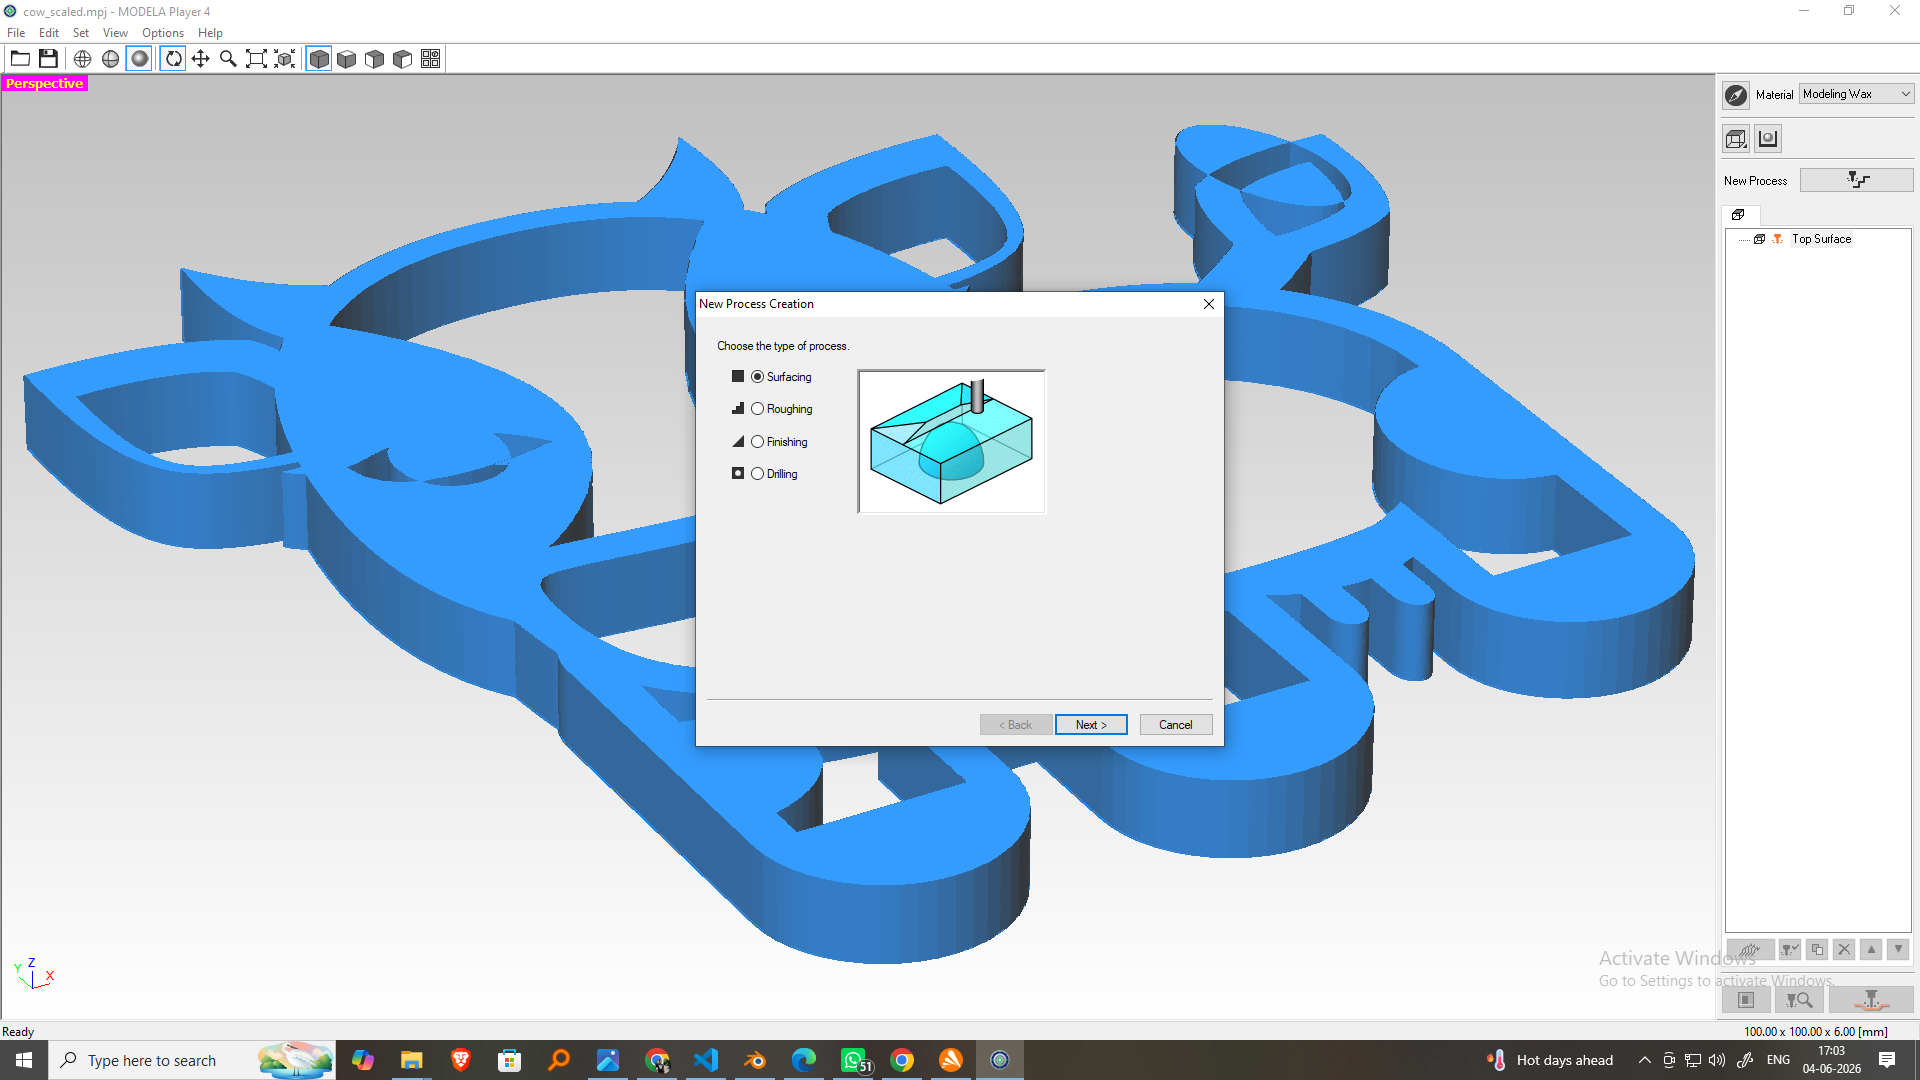
- Select Surfacing.
- Click Next.
Step 3: Select Milling Direction
- Choose Top Surface (Z+).
- This will machine the model from the top downward.

Step 4: Install the Tool
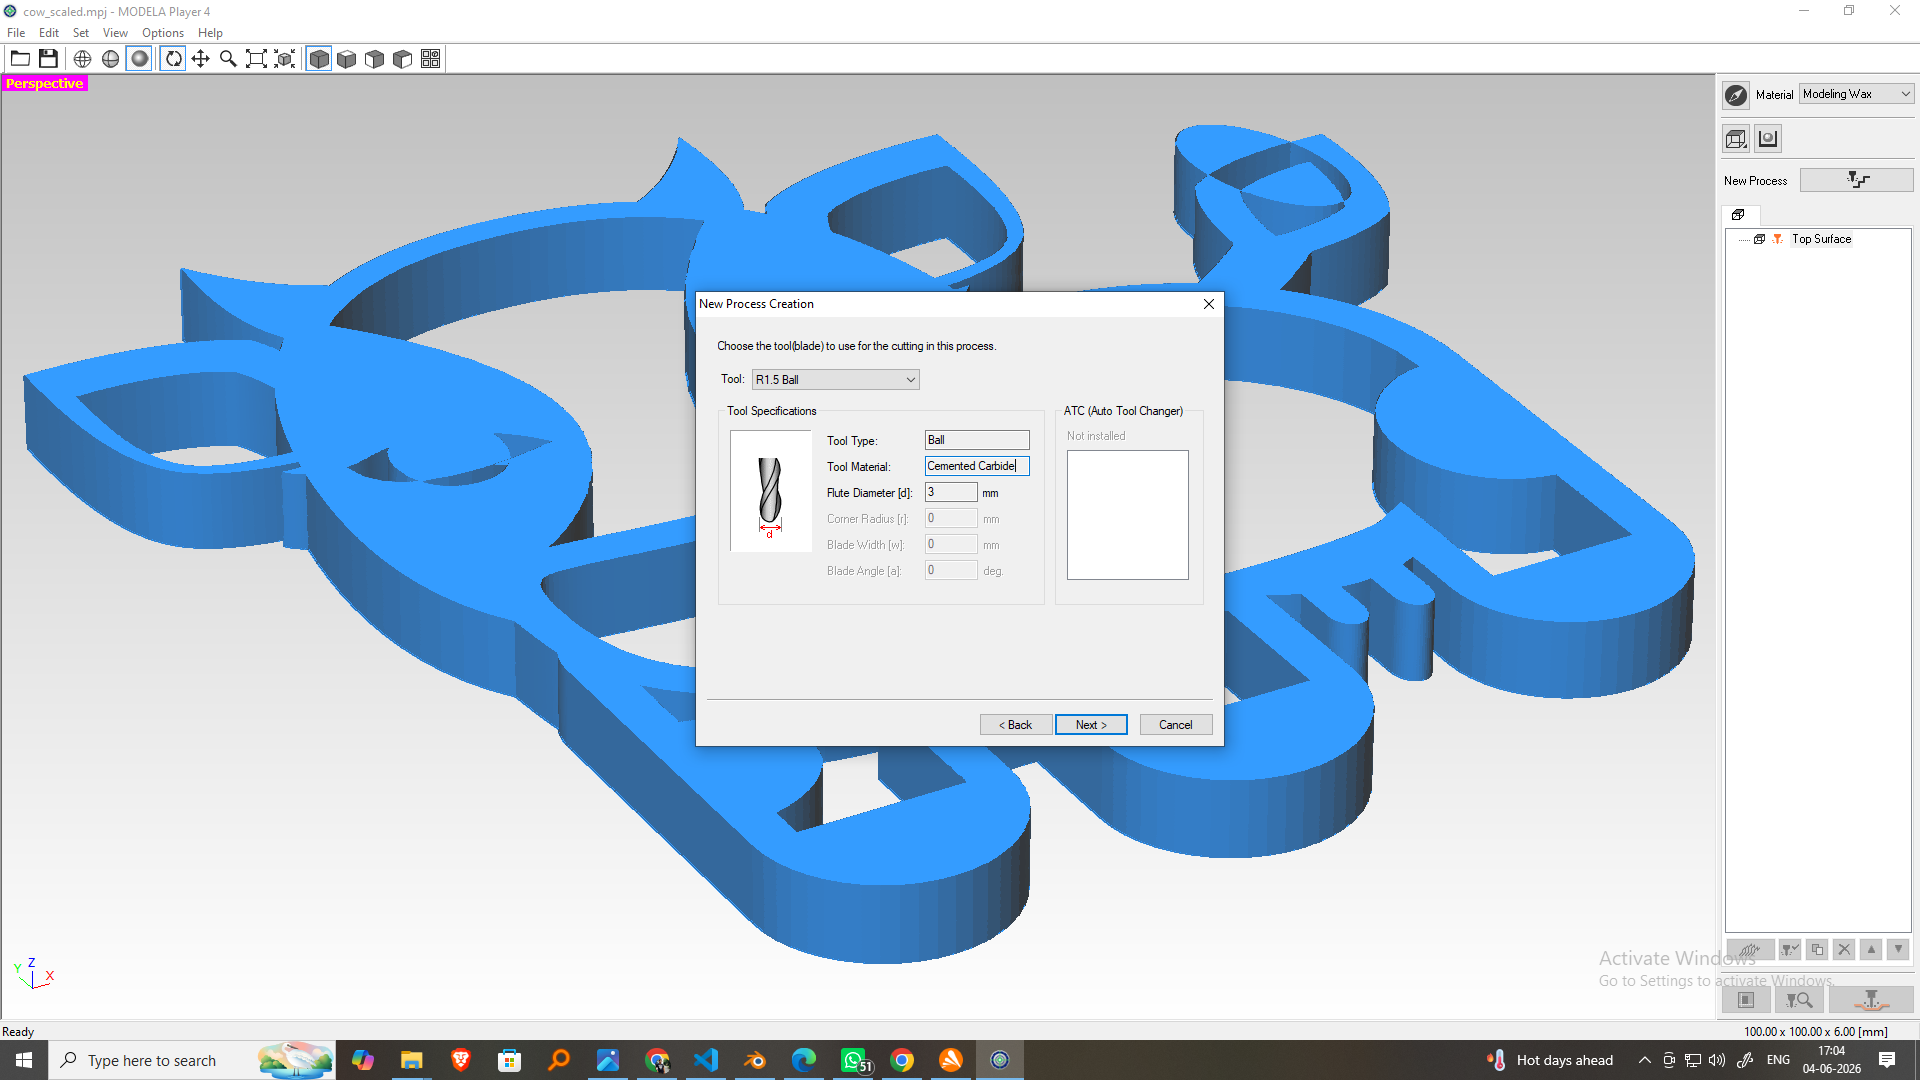
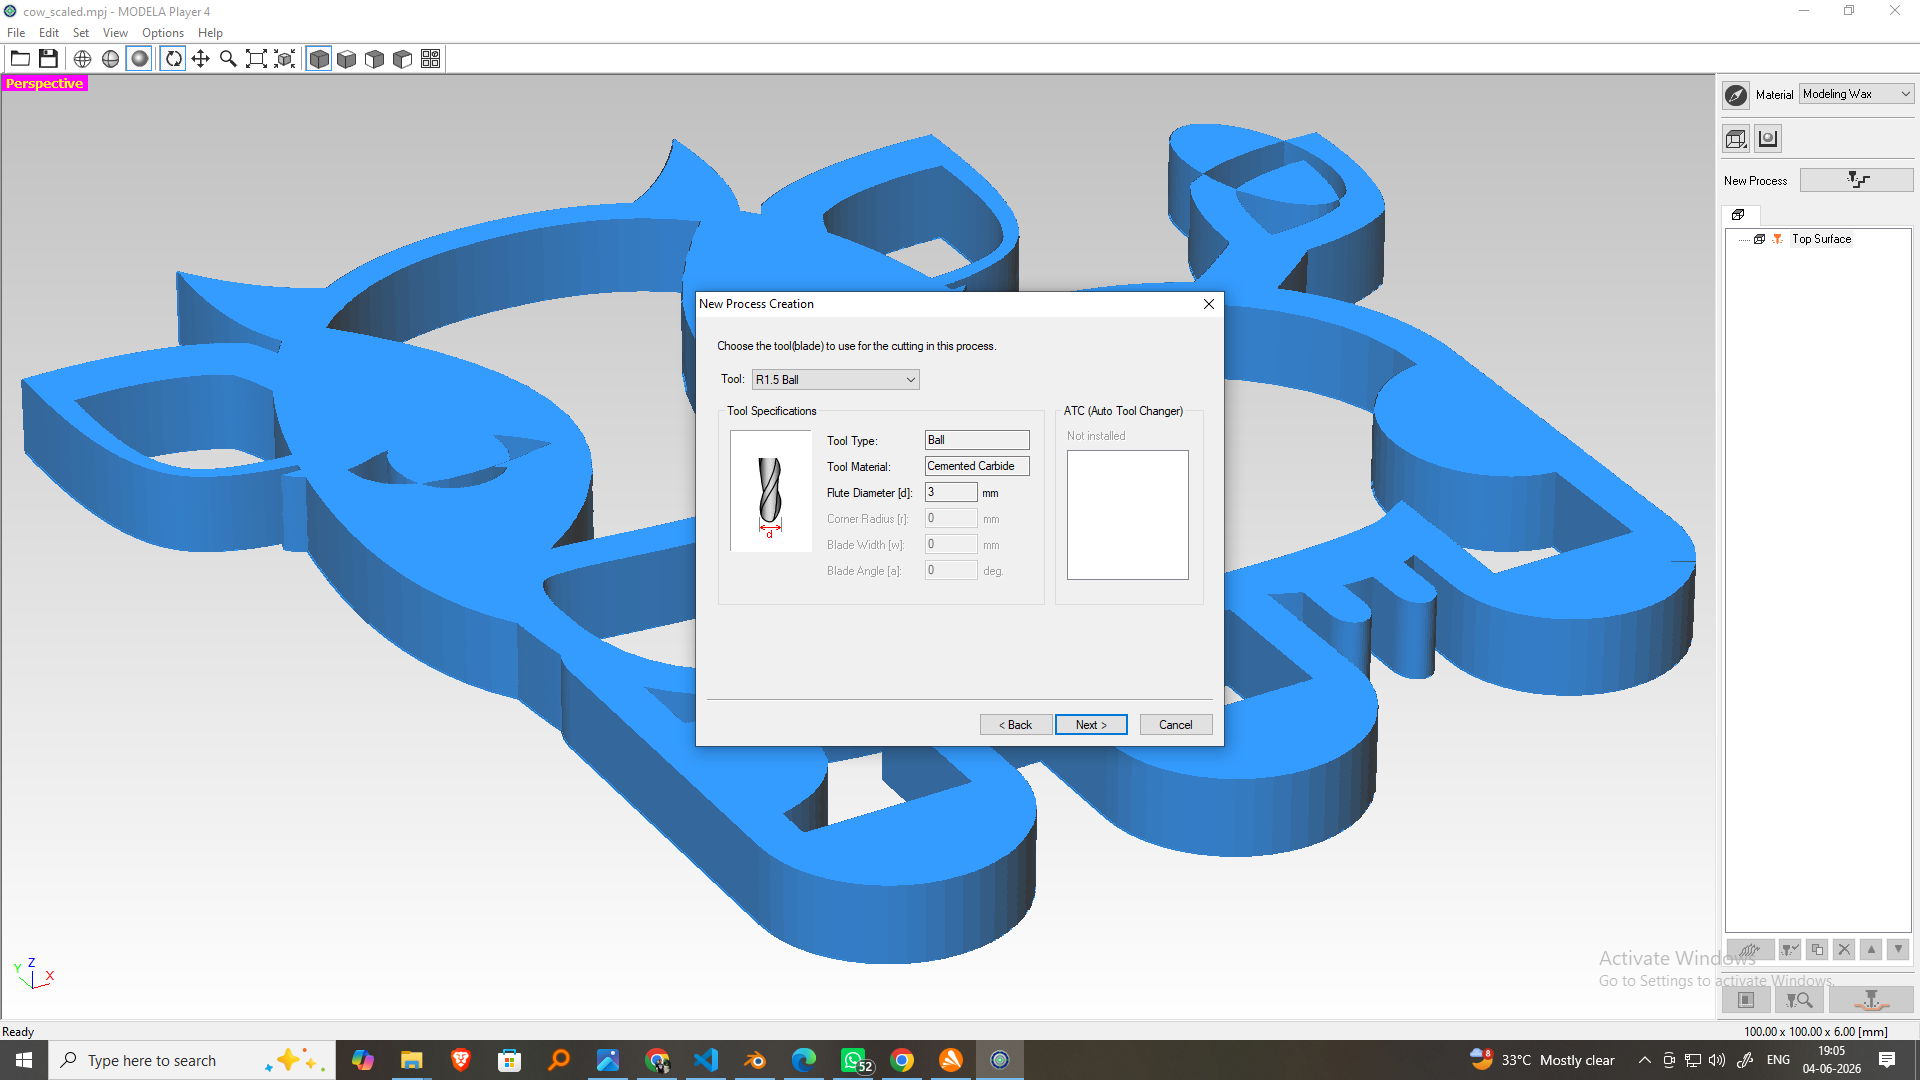
- Insert the 3 mm Ball Nose End Mill into the spindle.
- Tighten the collet using the Allen key.
- Check that the tool is securely mounted.
Step 5: Set Material
- Select Modeling Wax as the material.
- Confirm that the machining area matches the wax dimensions.
Step 6: Select Tool
| Parameter | Value |
|---|---|
| Tool Type | Ball Nose |
| Diameter | 3 mm |
| Radius | 1.5 mm |
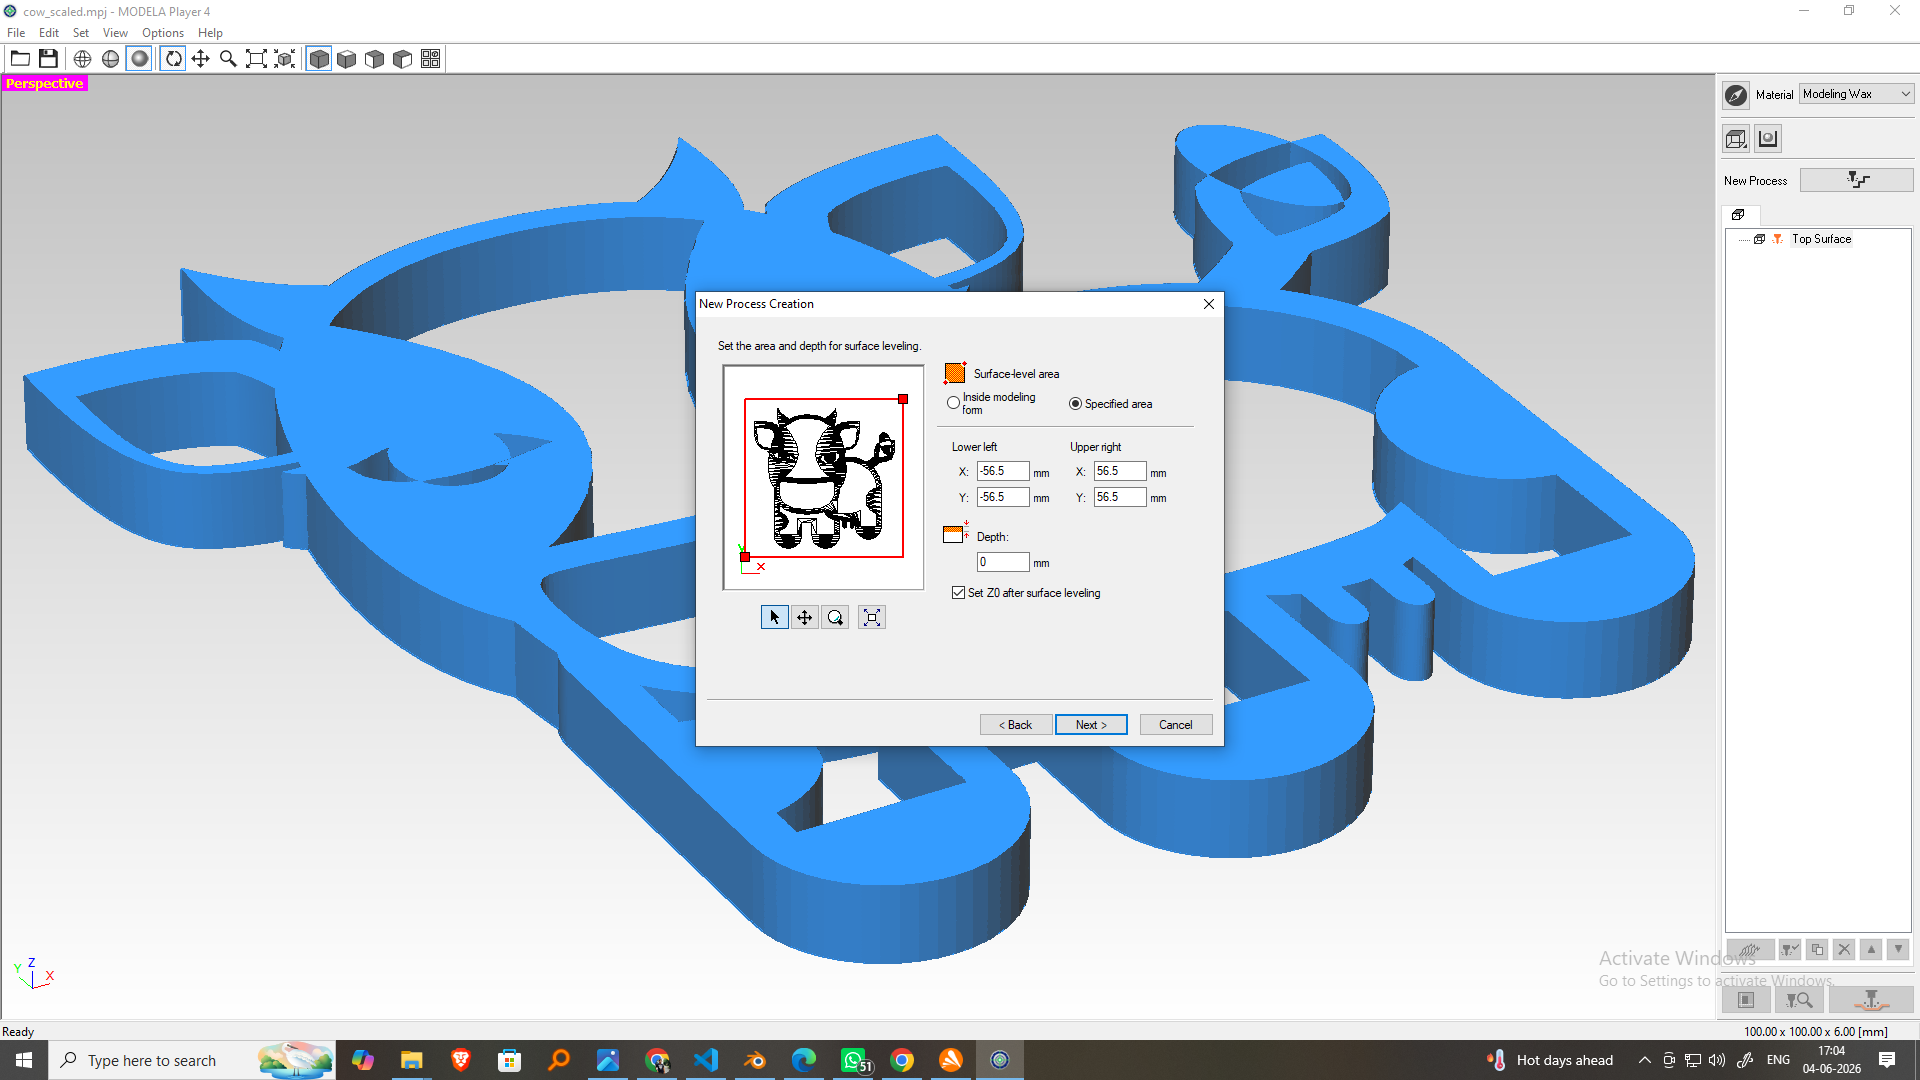
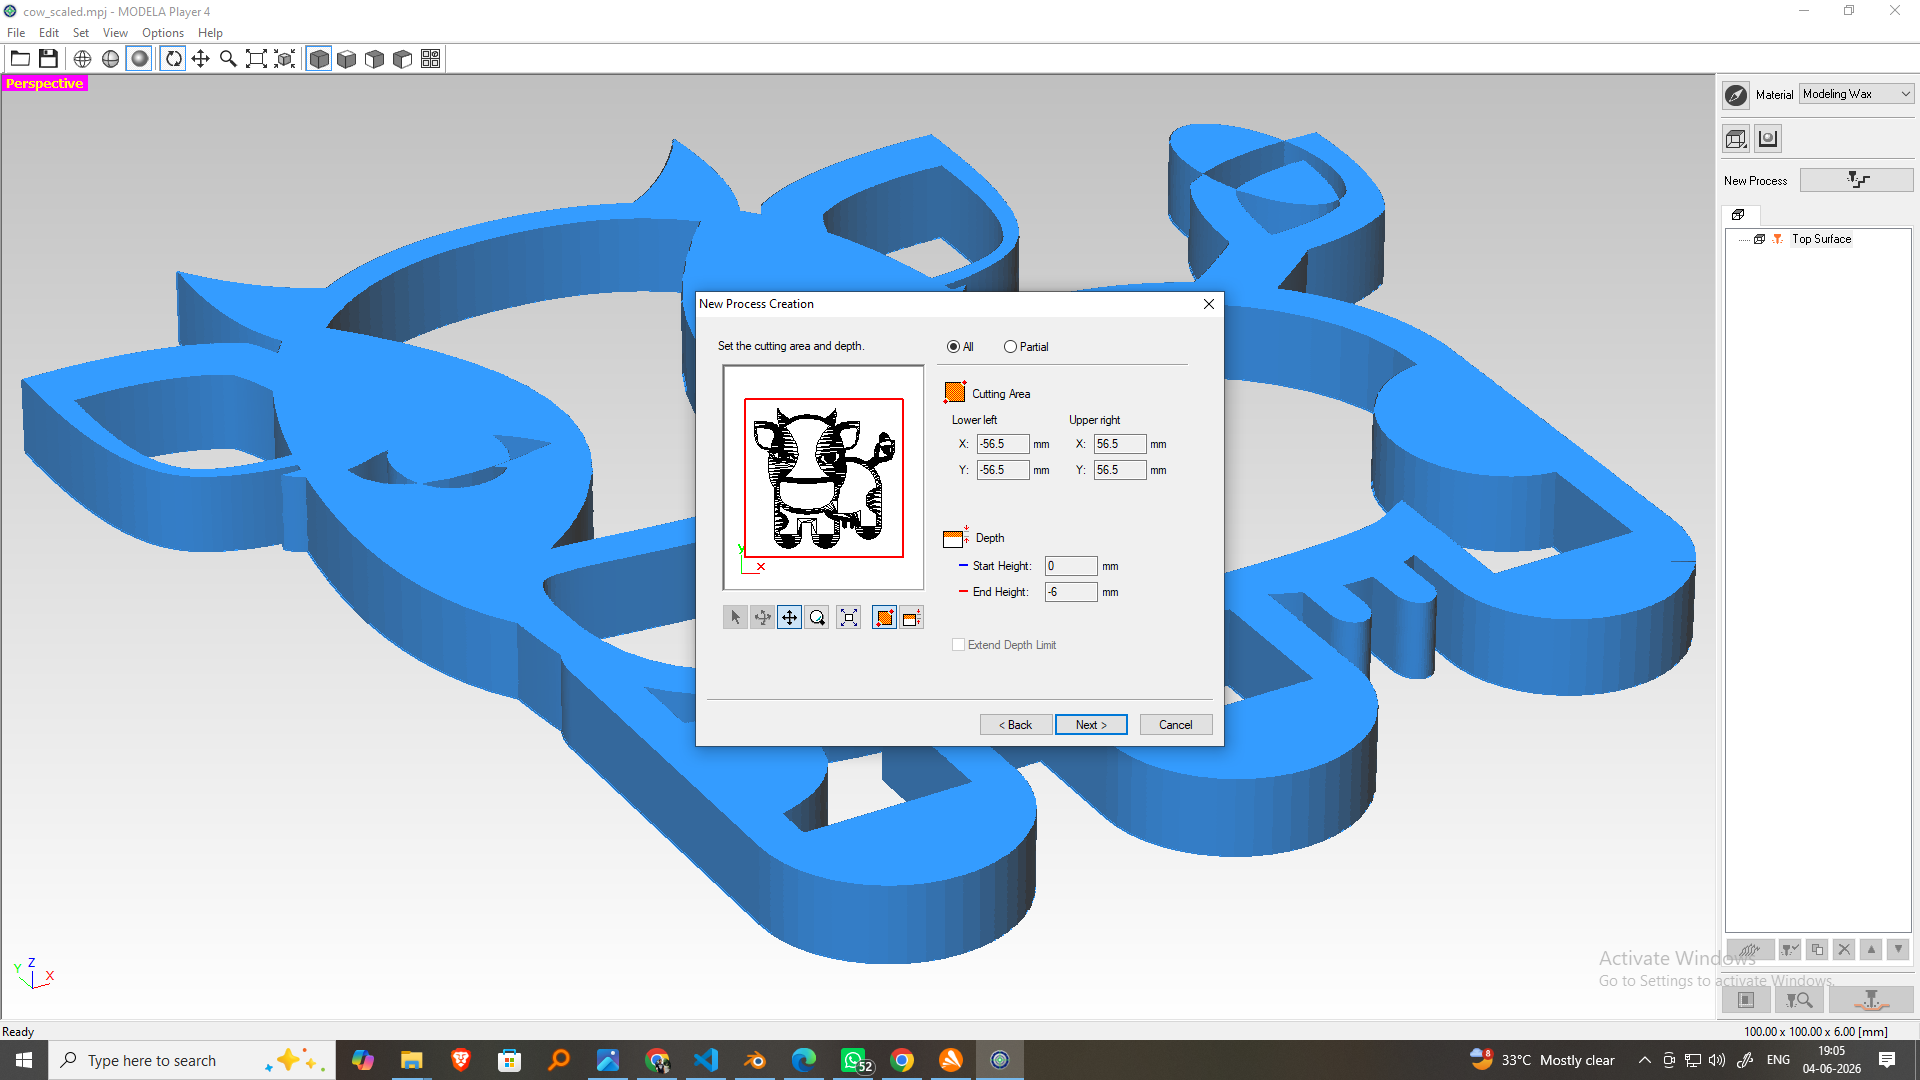
Step 7: Set Cutting Area
- Select All Area to machine the complete model.
- Alternatively, choose Specified Area for faster machining.
Step 8: Configure Surfacing Parameters

| Setting | Value |
|---|---|
| Feed Rate | 15 mm/sec |
| Spindle Speed | 7000 rpm |
| Depth per Pass | 1.0 mm |
| Stepover | 1.5 mm (50%) |
| Leave Stock | 0.5 mm |
| Tool Up Height | 5 mm |
The stock allowance of 0.5 mm leaves extra material for the finishing operation.

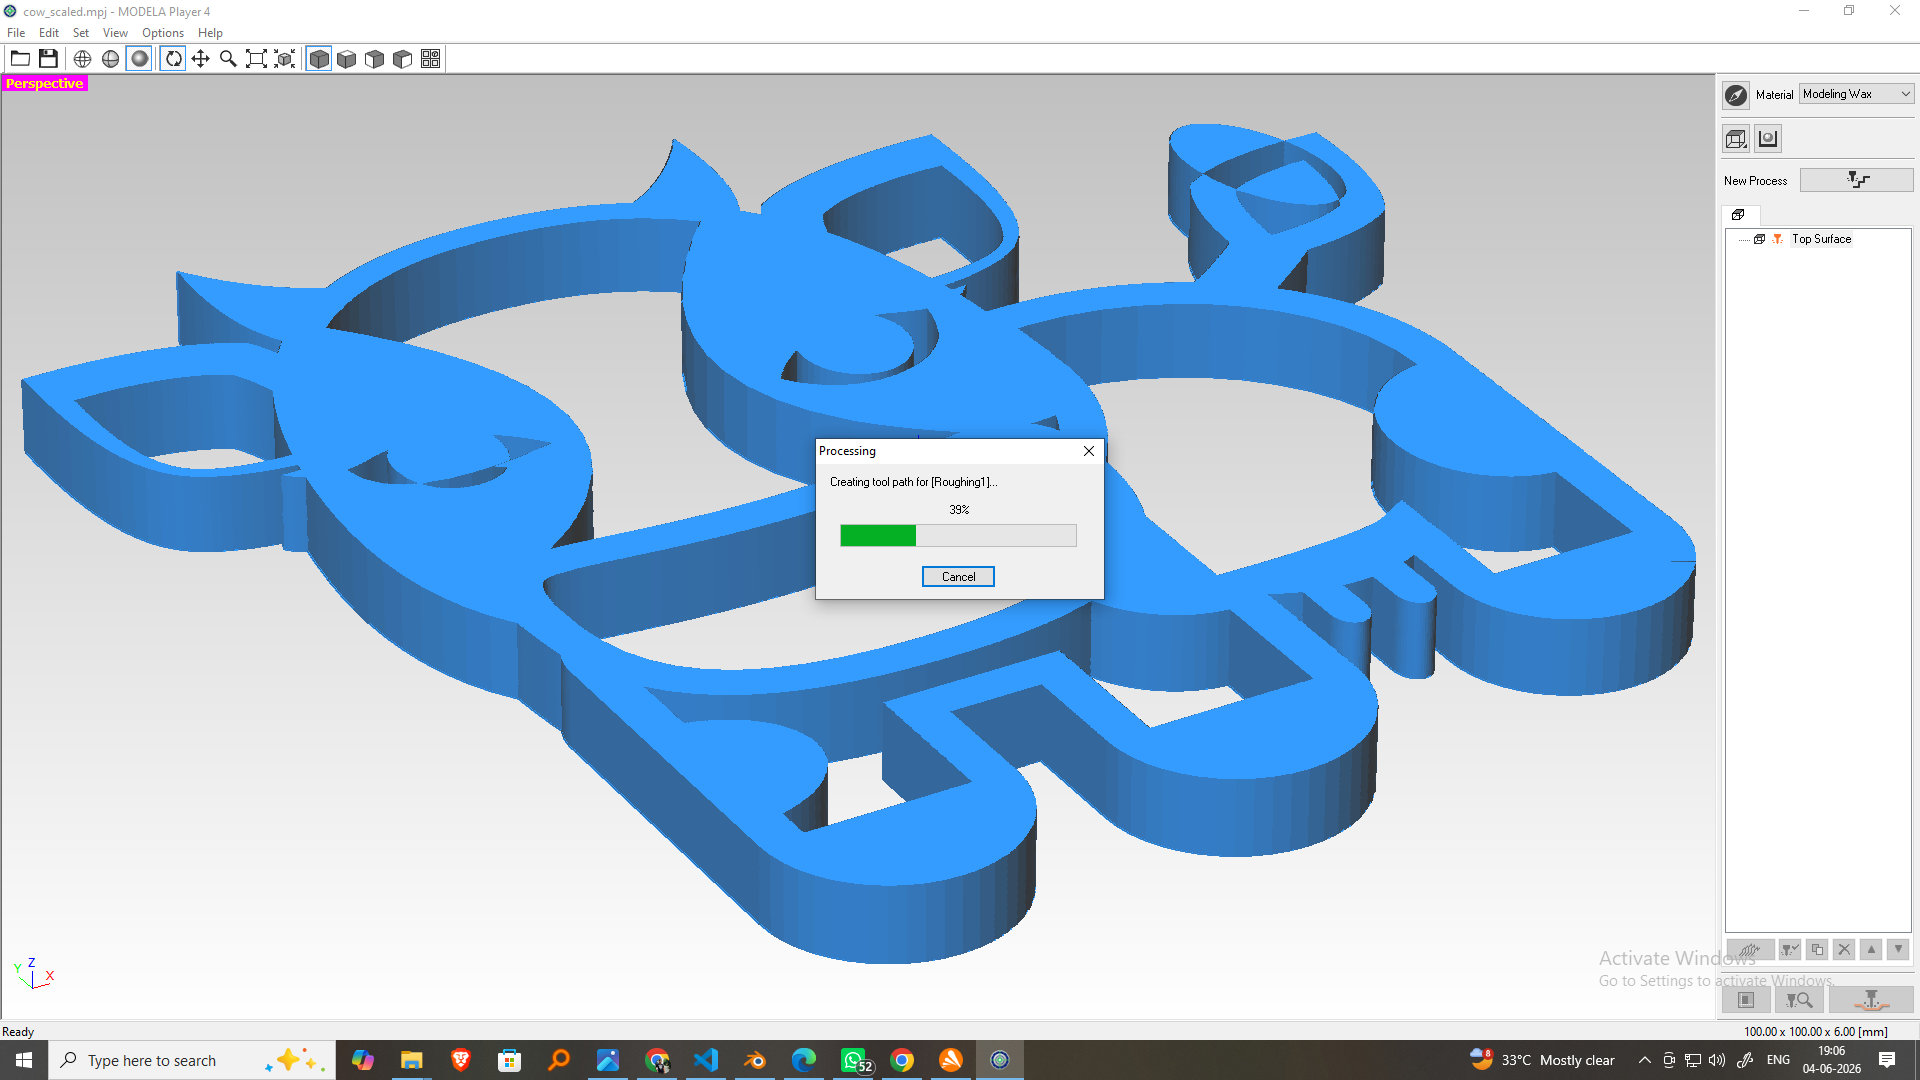
Step 9: Generate the Toolpath
- Click Next.
- Select Create Toolpath Now.
- Click Finish.
- Review the generated roughing toolpath.
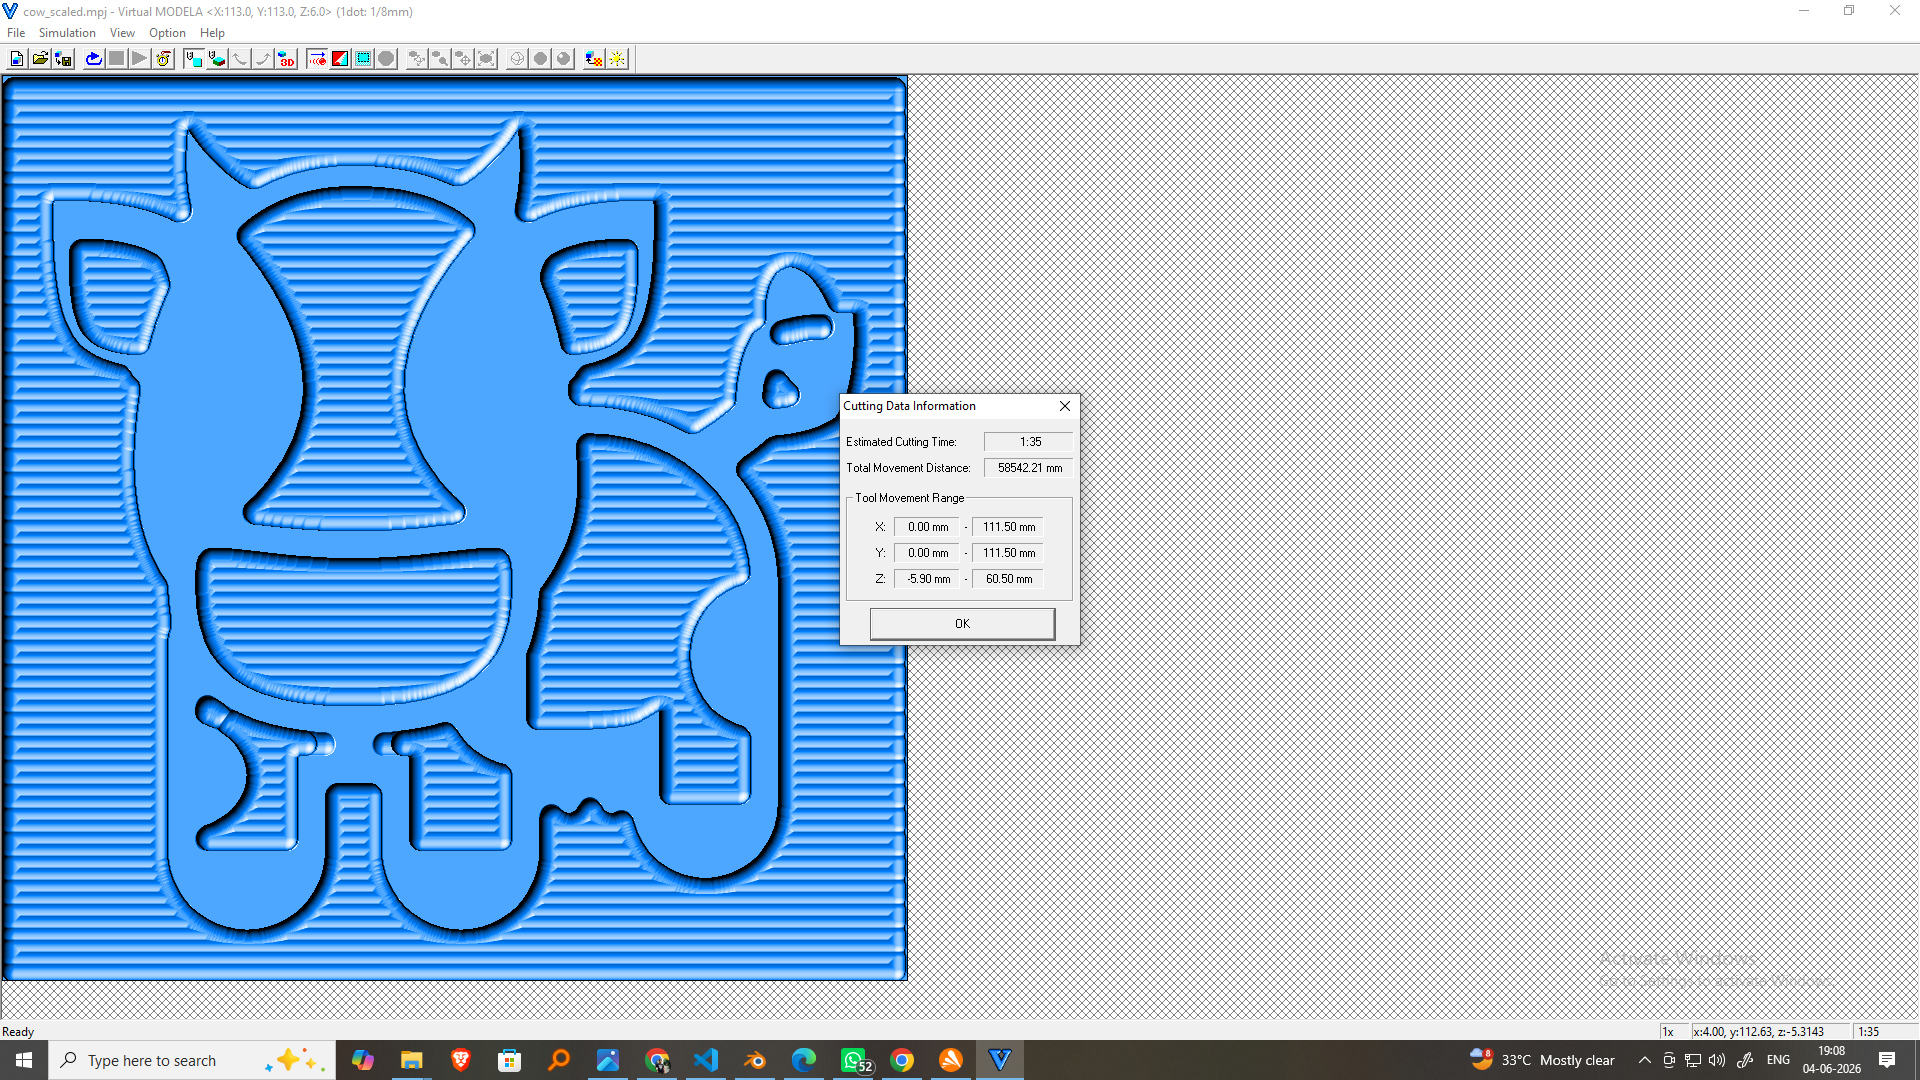
Step 10: Preview the Machining Process
- Open the simulation or preview window.
- Verify that all model areas will be machined.
- Check for possible collisions.
- Review the estimated machining time.
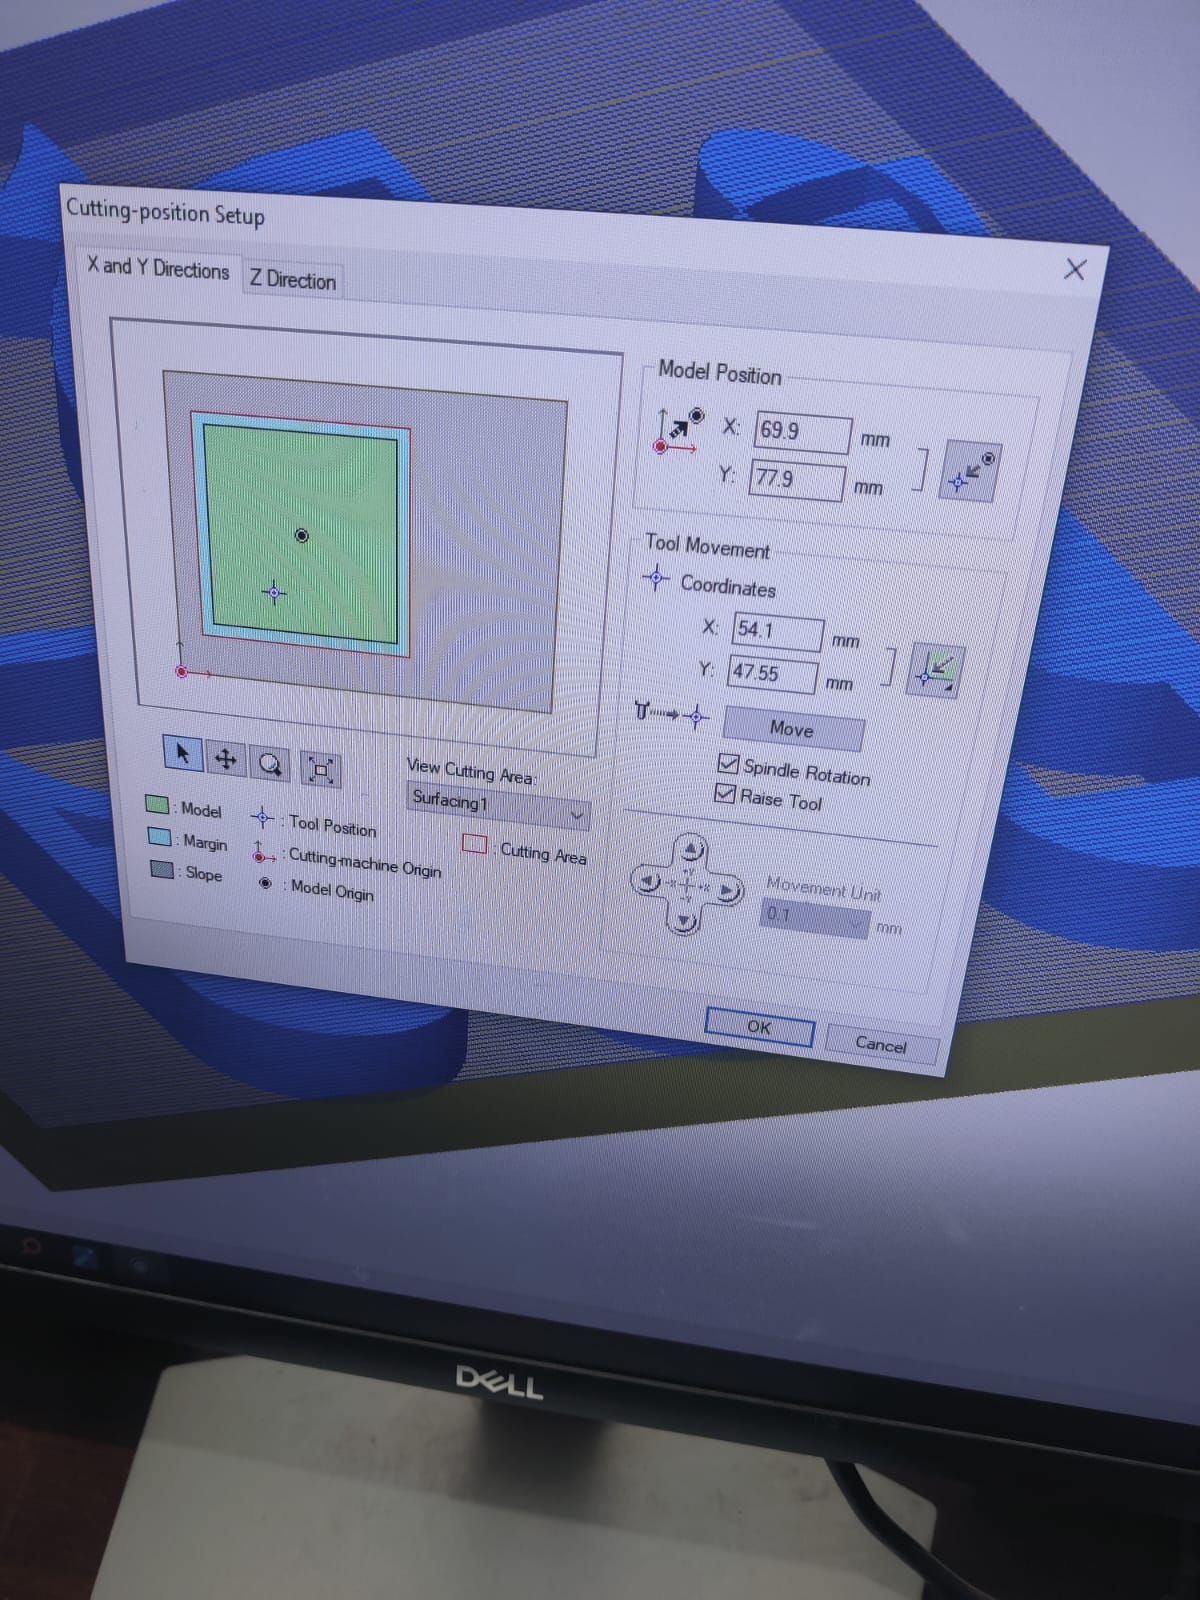
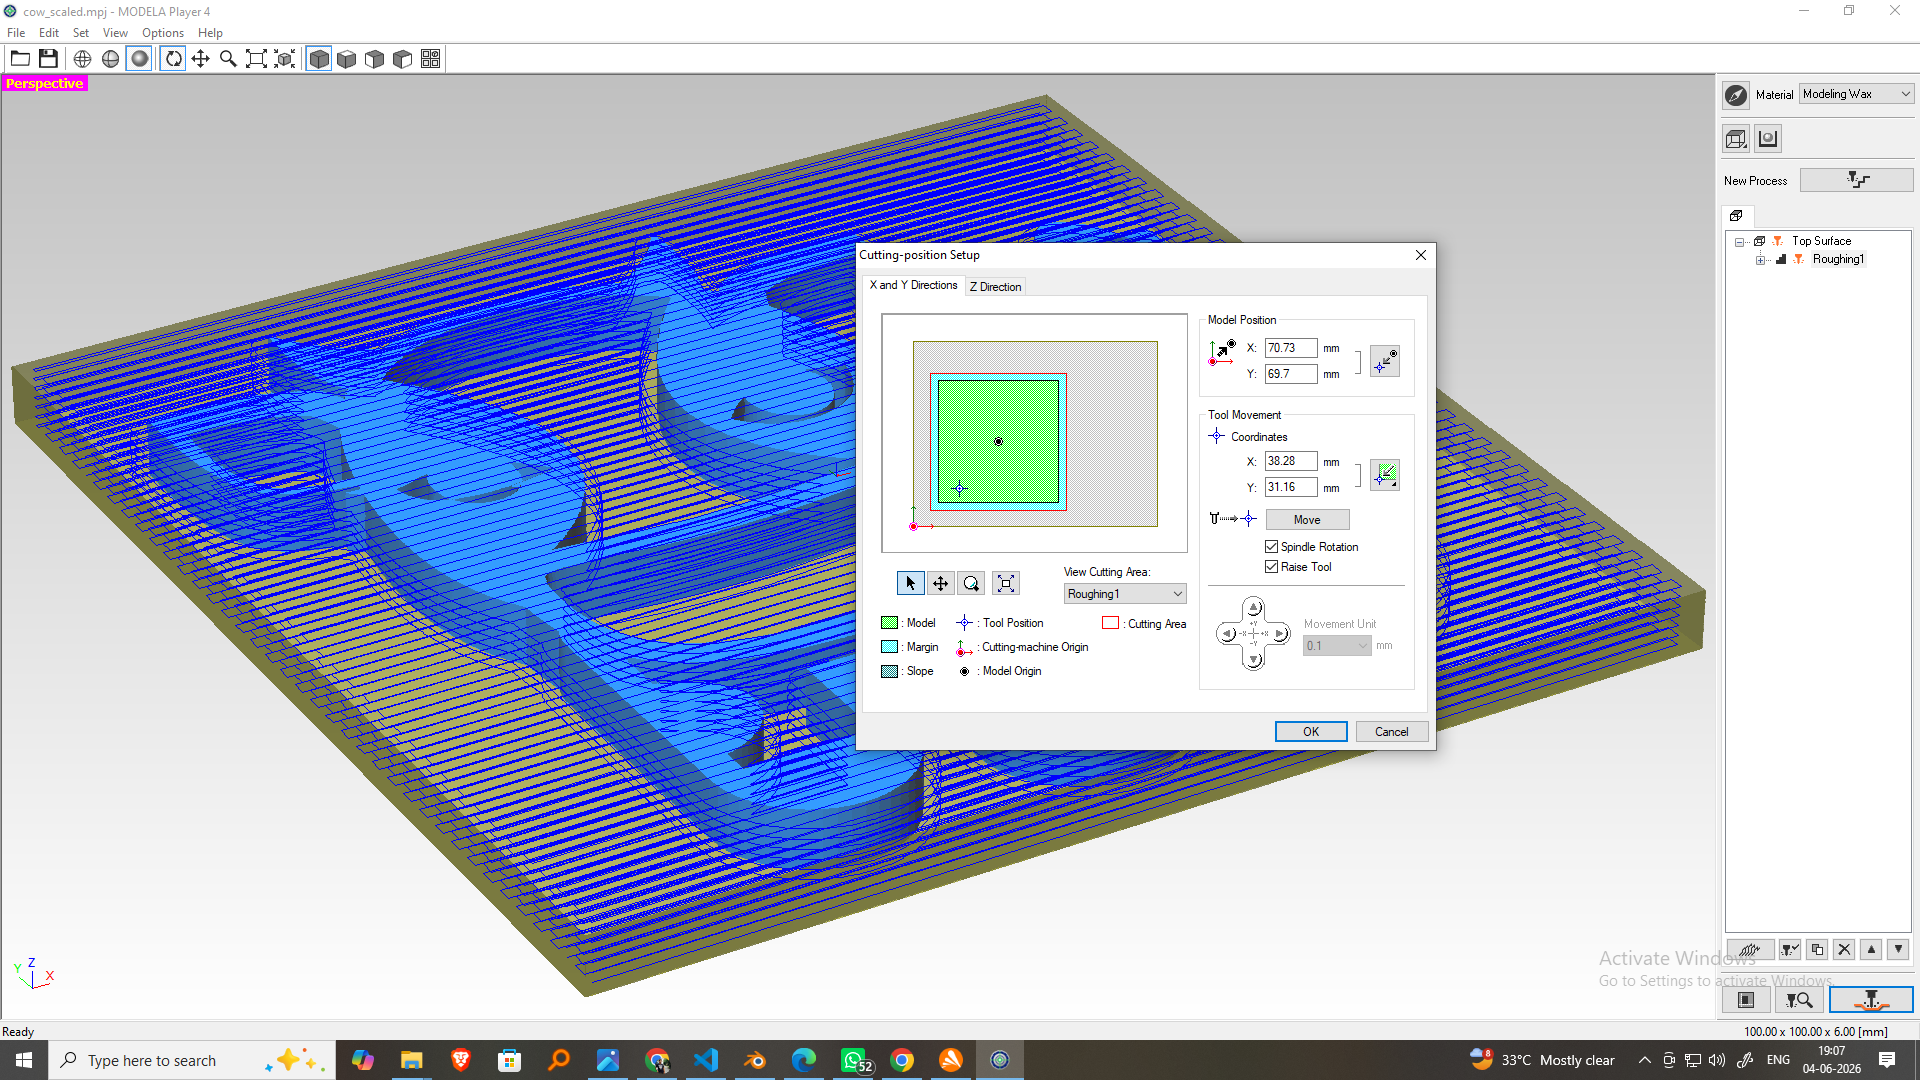
Step 11: Set the Machine Origin
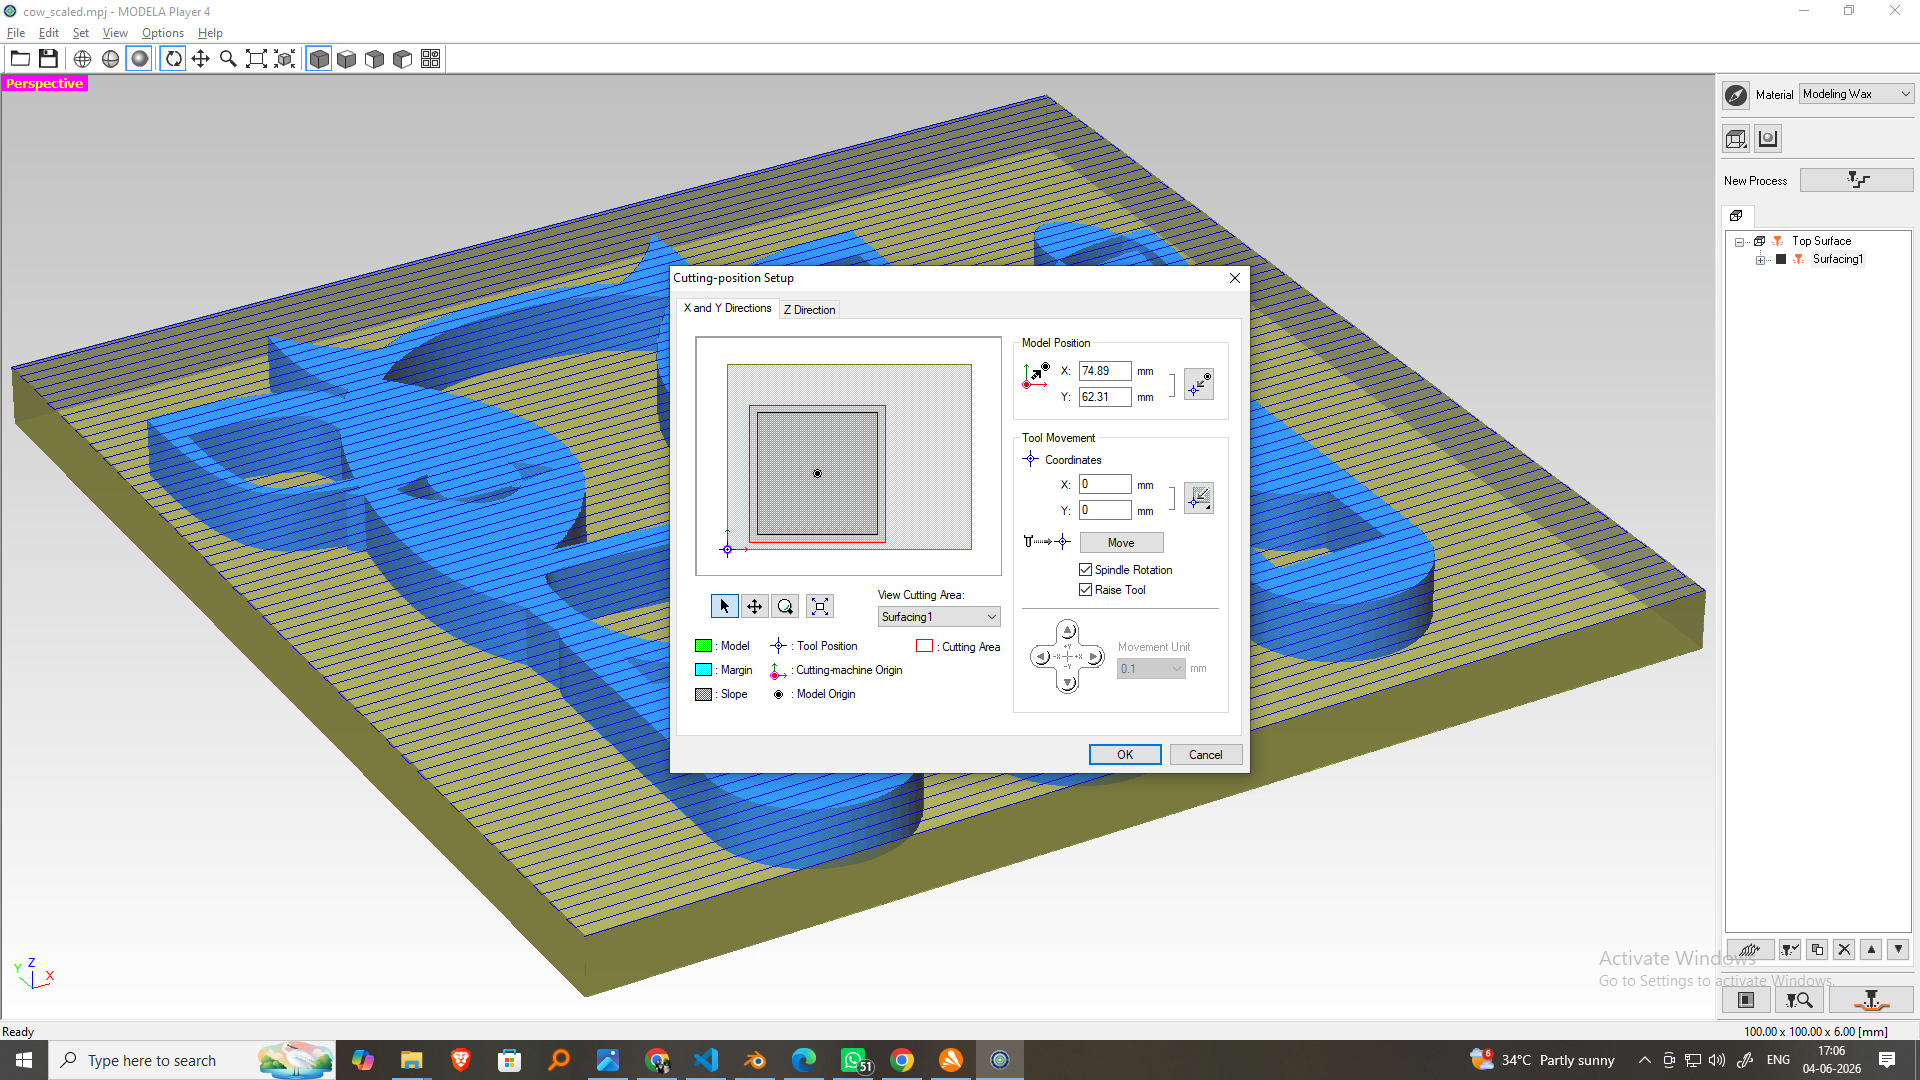
- Move the spindle to the front-left corner of the wax block.
- Lower the tool until it gently touches the wax surface.
- Set the X, Y, and Z origins.
Step 12: Start Surfacing
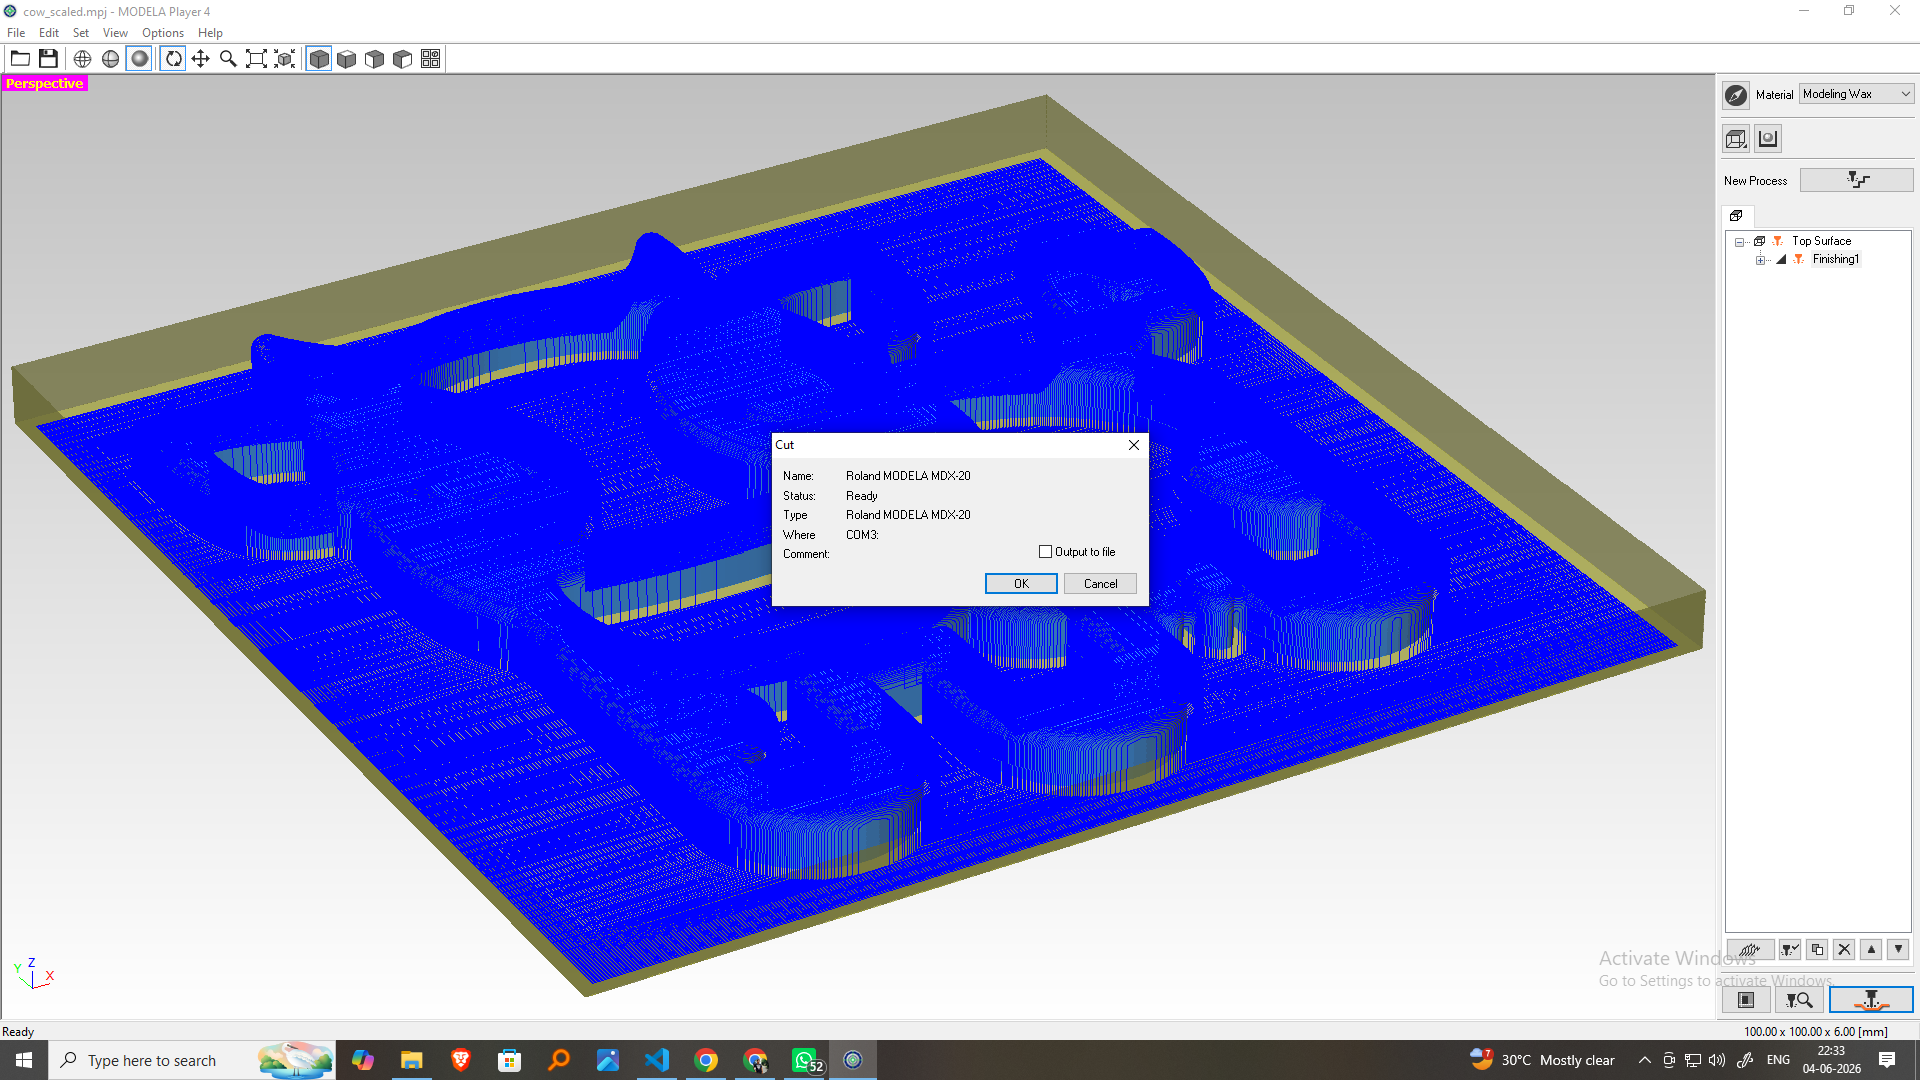
- Connect Modela Player 4 to the Roland MDX-20.
- Click Cut.
- Verify the origin and machining settings.
- Start the roughing operation.
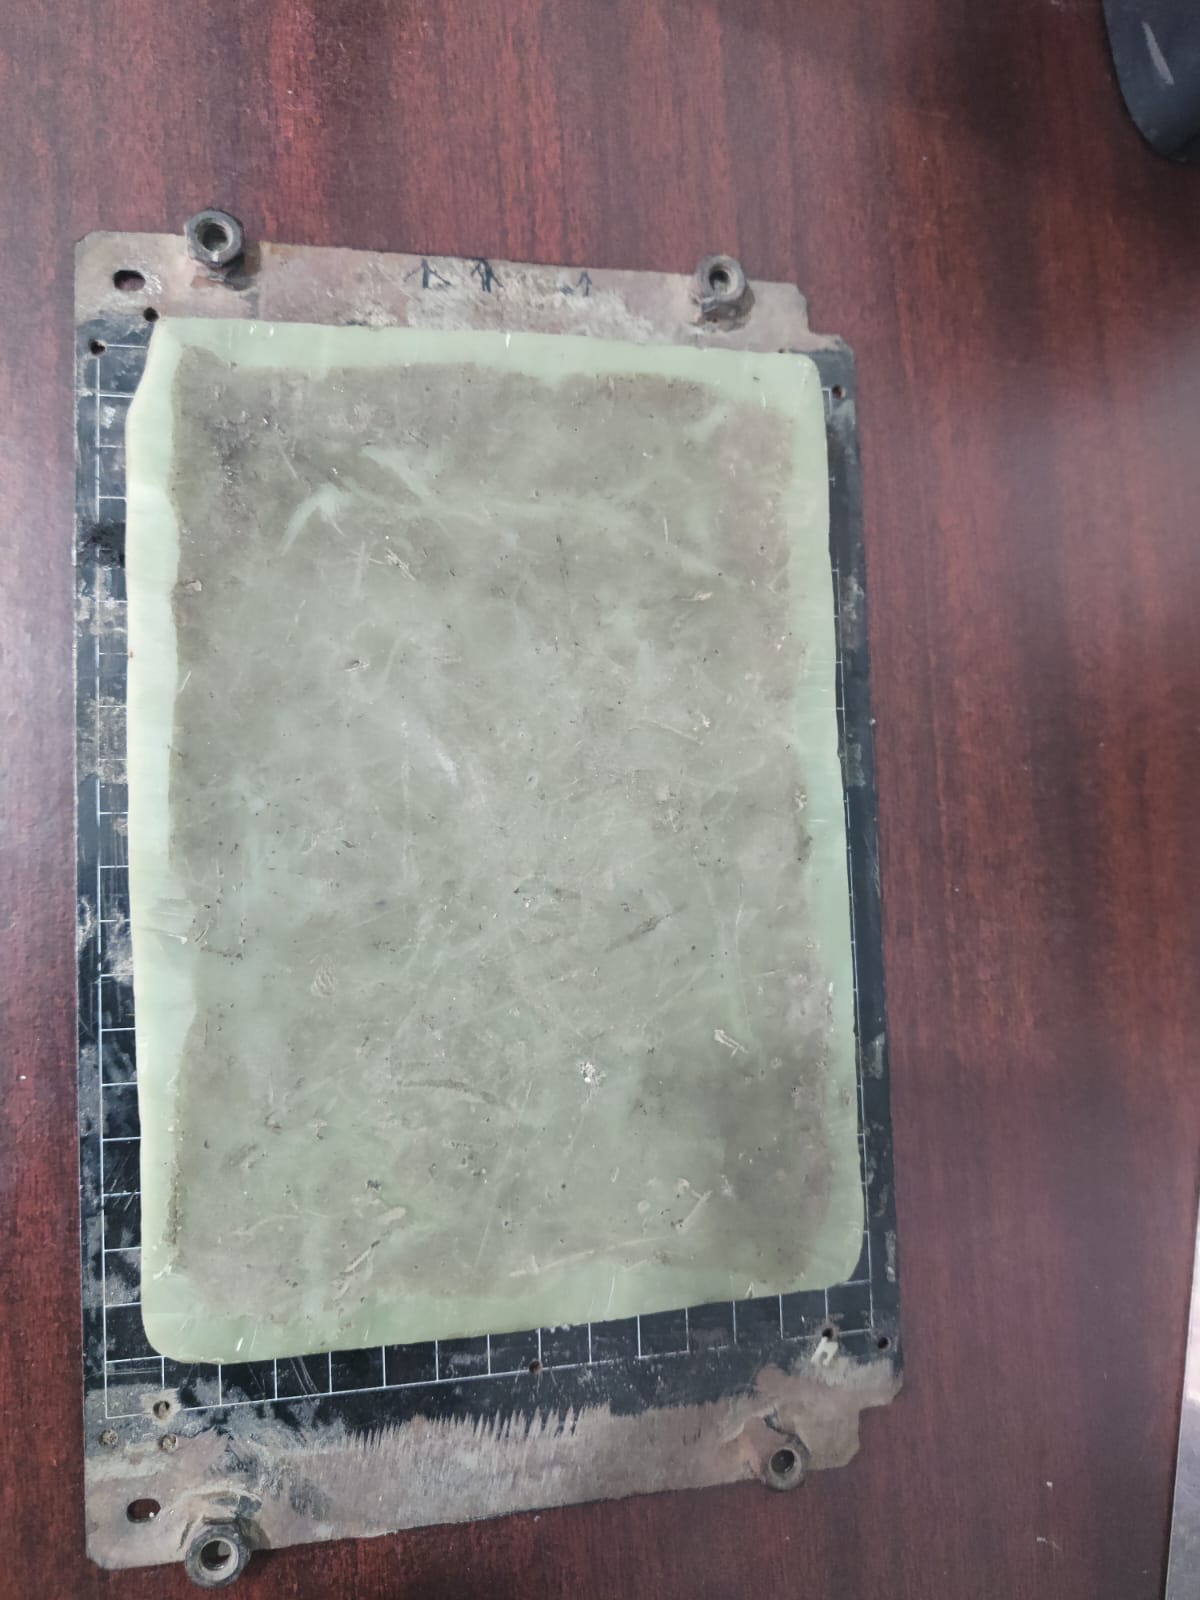
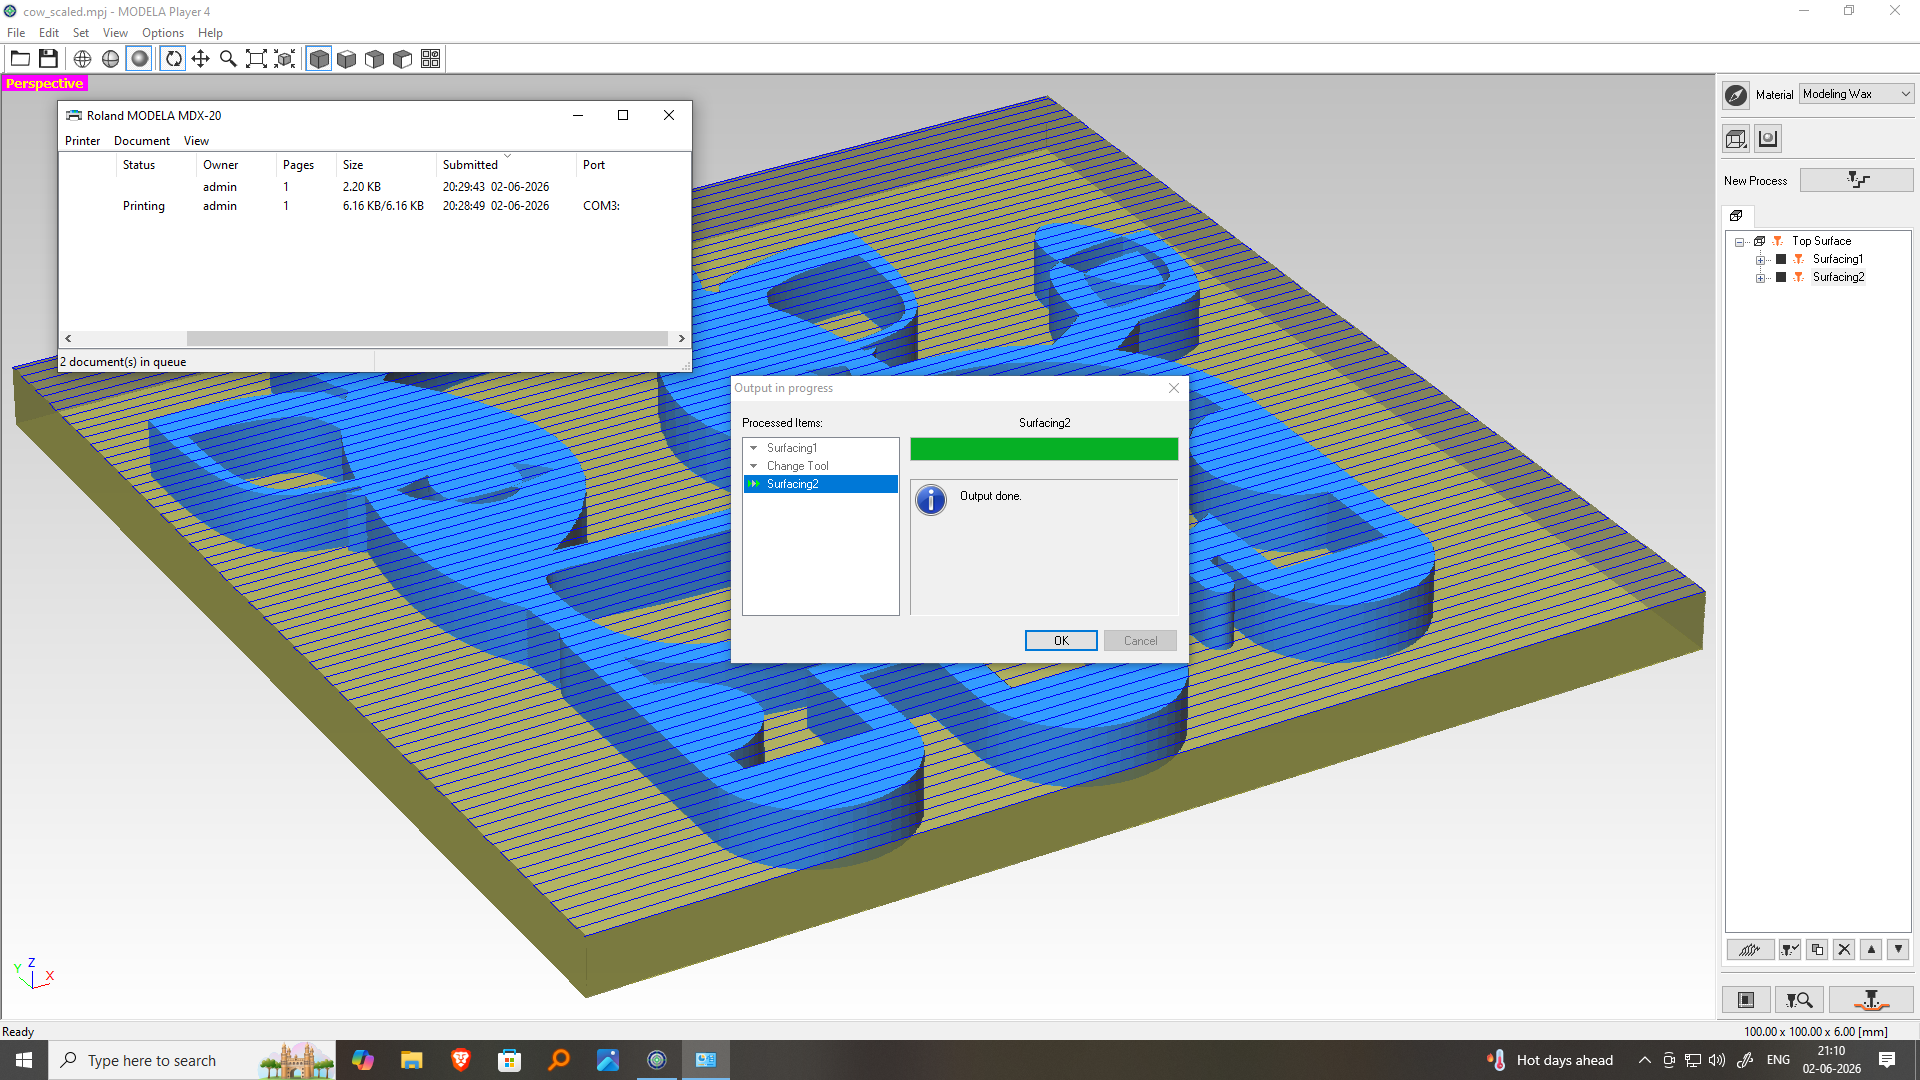
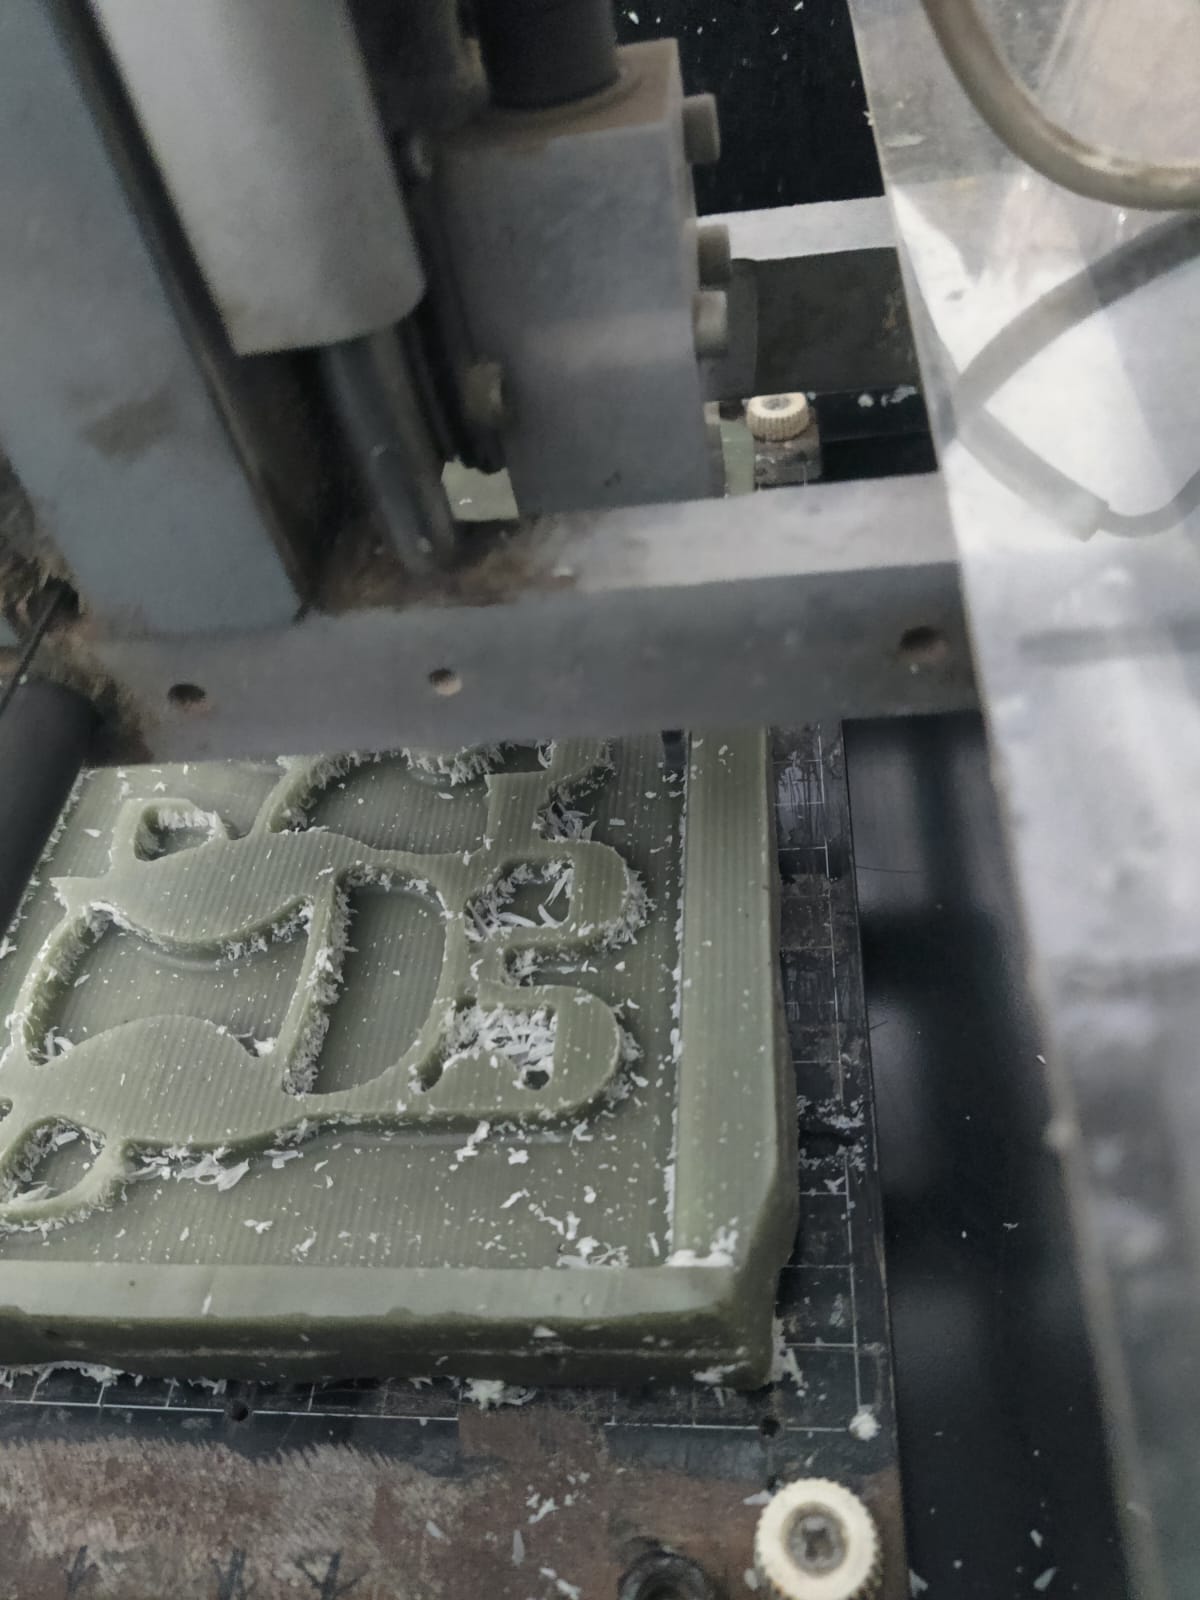
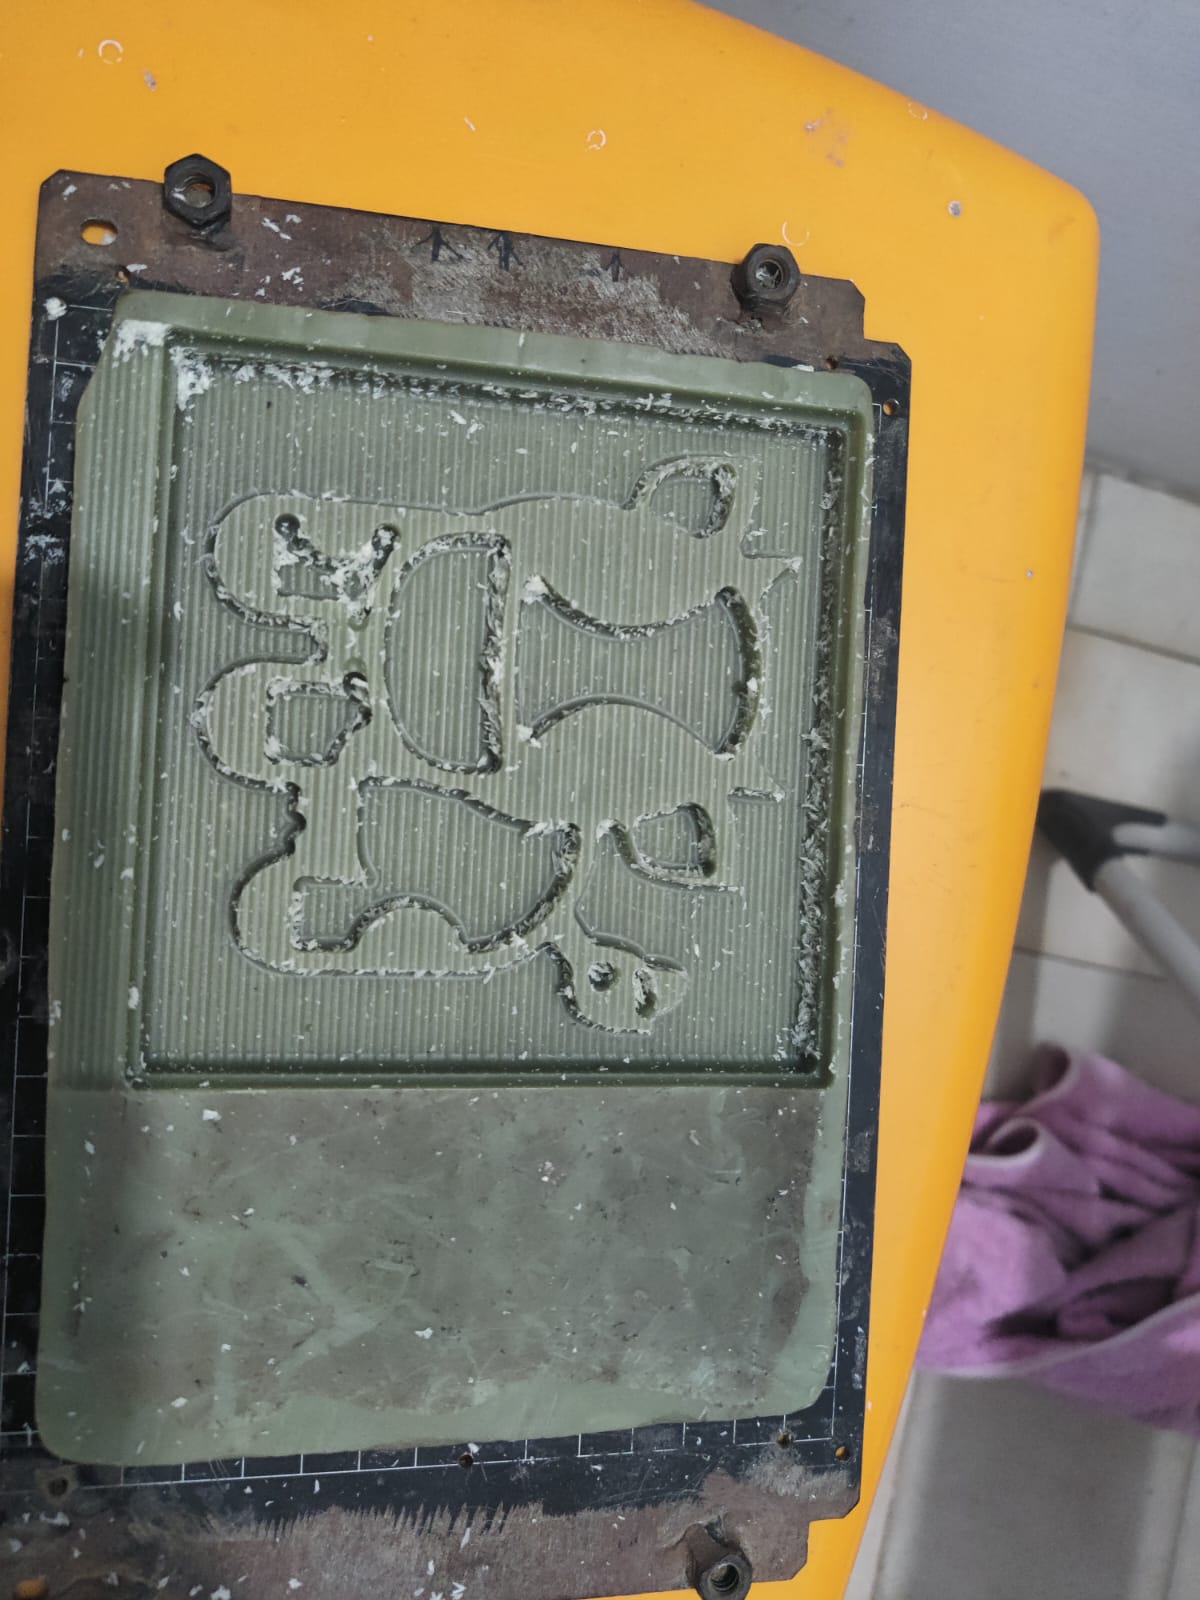
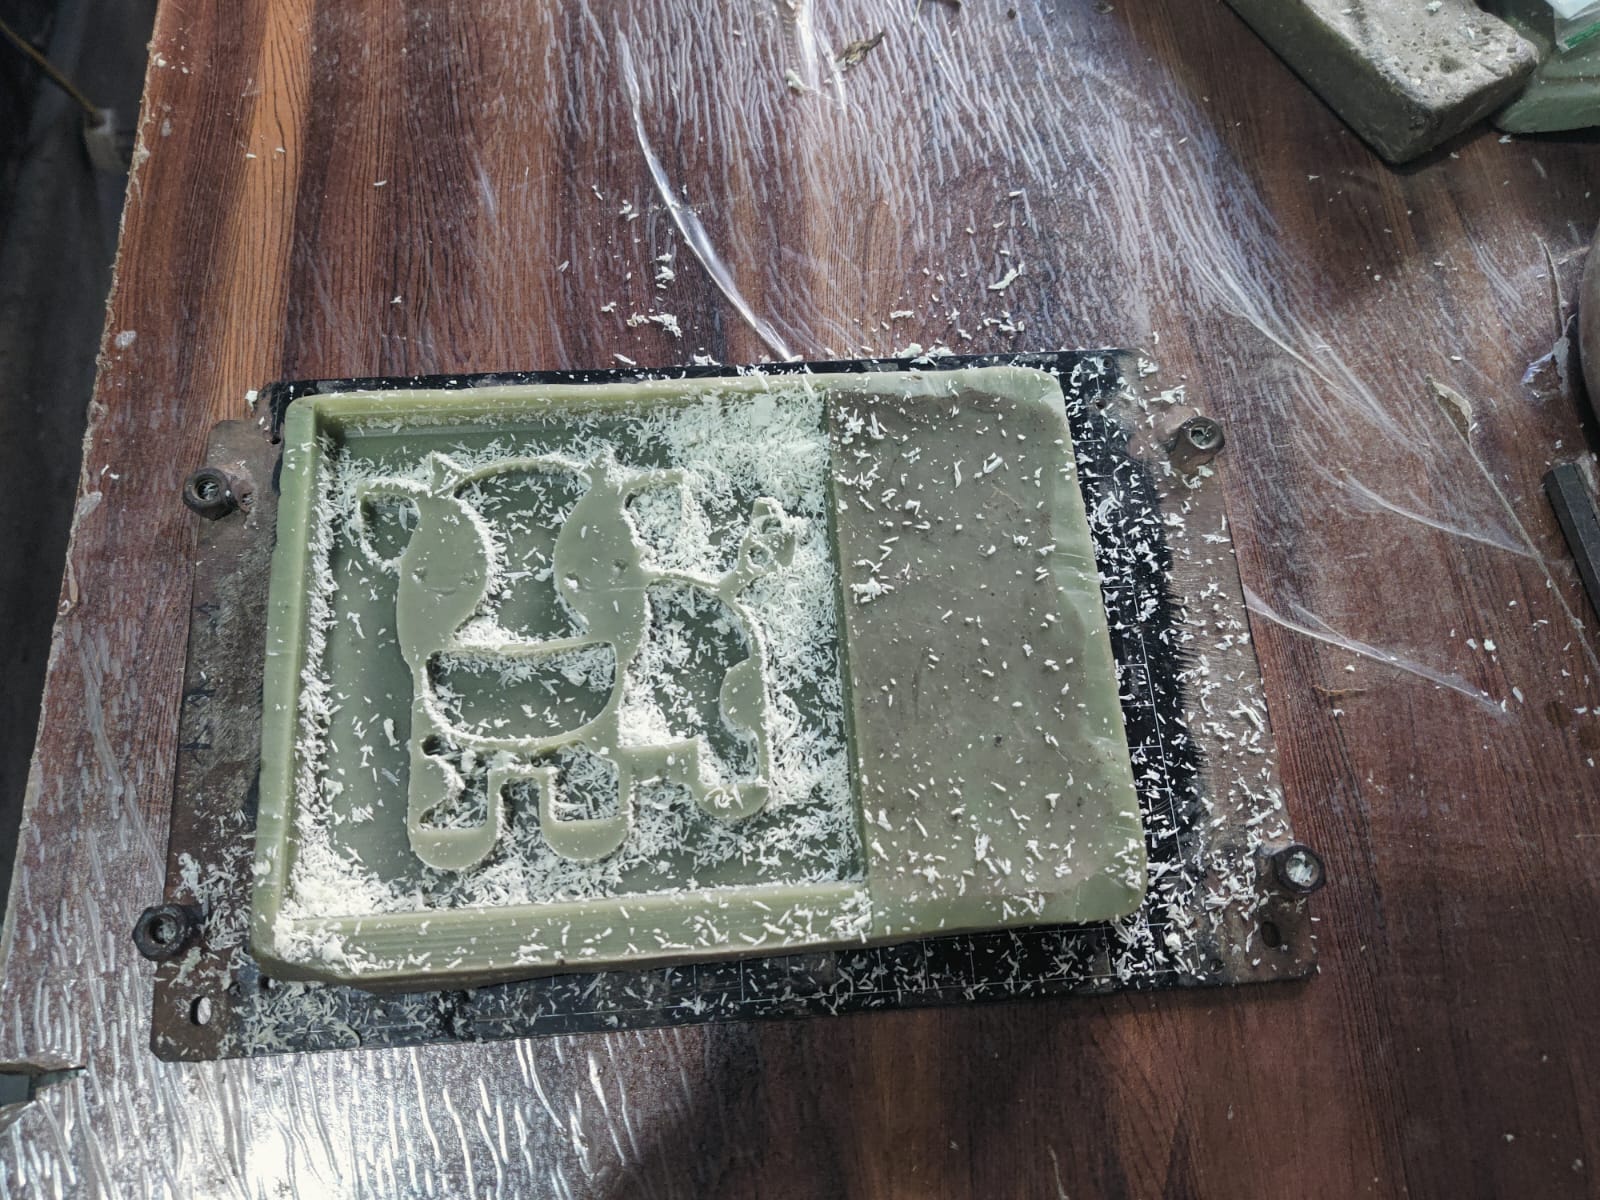
Step 13:Surfacing Result
The first machining operation was surfacing to create a flat machining area.
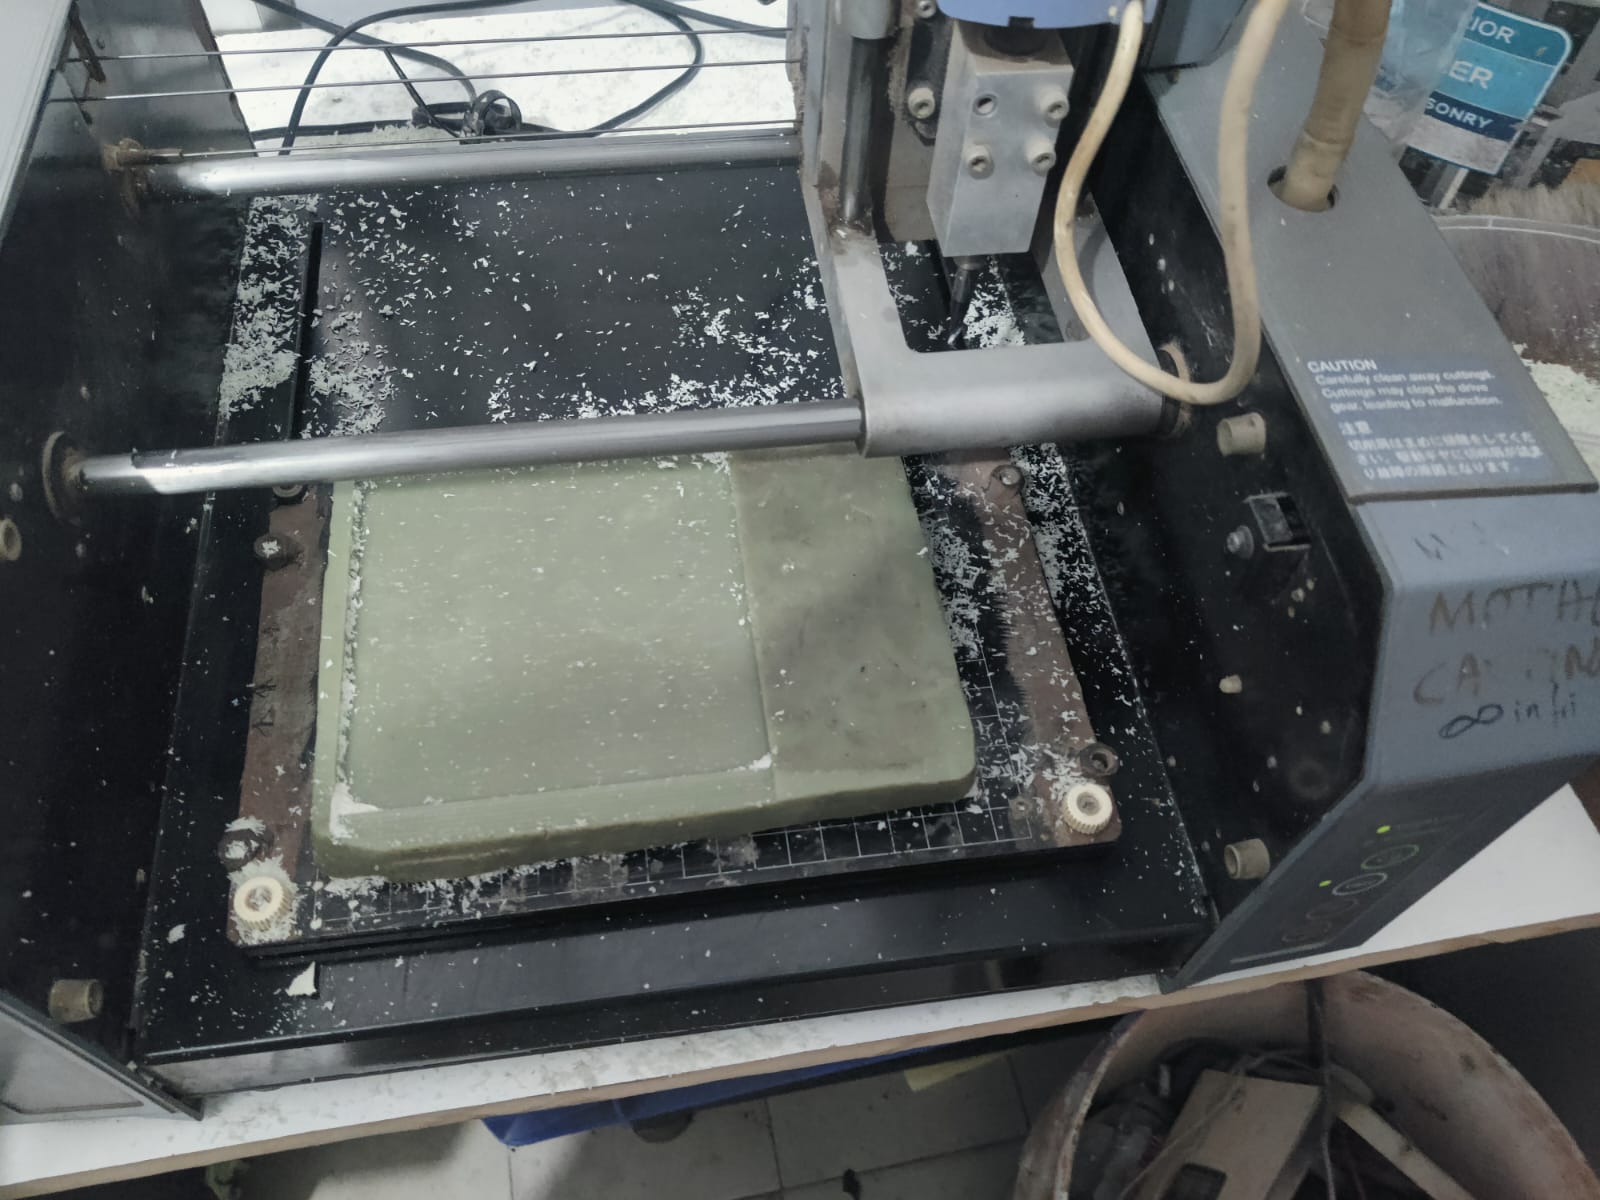
- A smooth and accurate wax model was obtained, ready for mold making and casting.
- Wax block is ready for next step Roughing .
Roughing Process

-
Create a New Process
Open Modela Player 4 and create a new machining process. Select the top cutting surface (Z+) for machining the Cute Cartoon Cow 3D Model model.
-
Select the Cutting Tool
Choose a 3 mm Ball Nose End Mill (1.5 mm radius) from the tool library for rough machining of the wax block.
-
Define the Cutting Area and Depth
Set the machining area according to the model size and specify the cutting depth based on the model dimensions.
-
Choose the Toolpath Type
Select the Roughing toolpath strategy and enable the Up-Cut machining method to efficiently remove excess wax material.

-
Configure Cutting Parameters
Set the feed rate, spindle speed, cutting depth per pass, stepover, and stock allowance suitable for wax machining.

-
Name the Machining Process
Assign a descriptive name such as "Roughing" to identify the operation.

-
Generate the Toolpath
Create the roughing toolpath and verify that the machining paths cover the entire model area.
 Set the Cutting Position
Define the X, Y, and Z origin positions on the wax block and confirm the workpiece alignment.

-
Send the Job to the Machine
Click Cut and transfer the roughing toolpath to the Roland MDX-20 for machining.
-
Preview the Machining Simulation
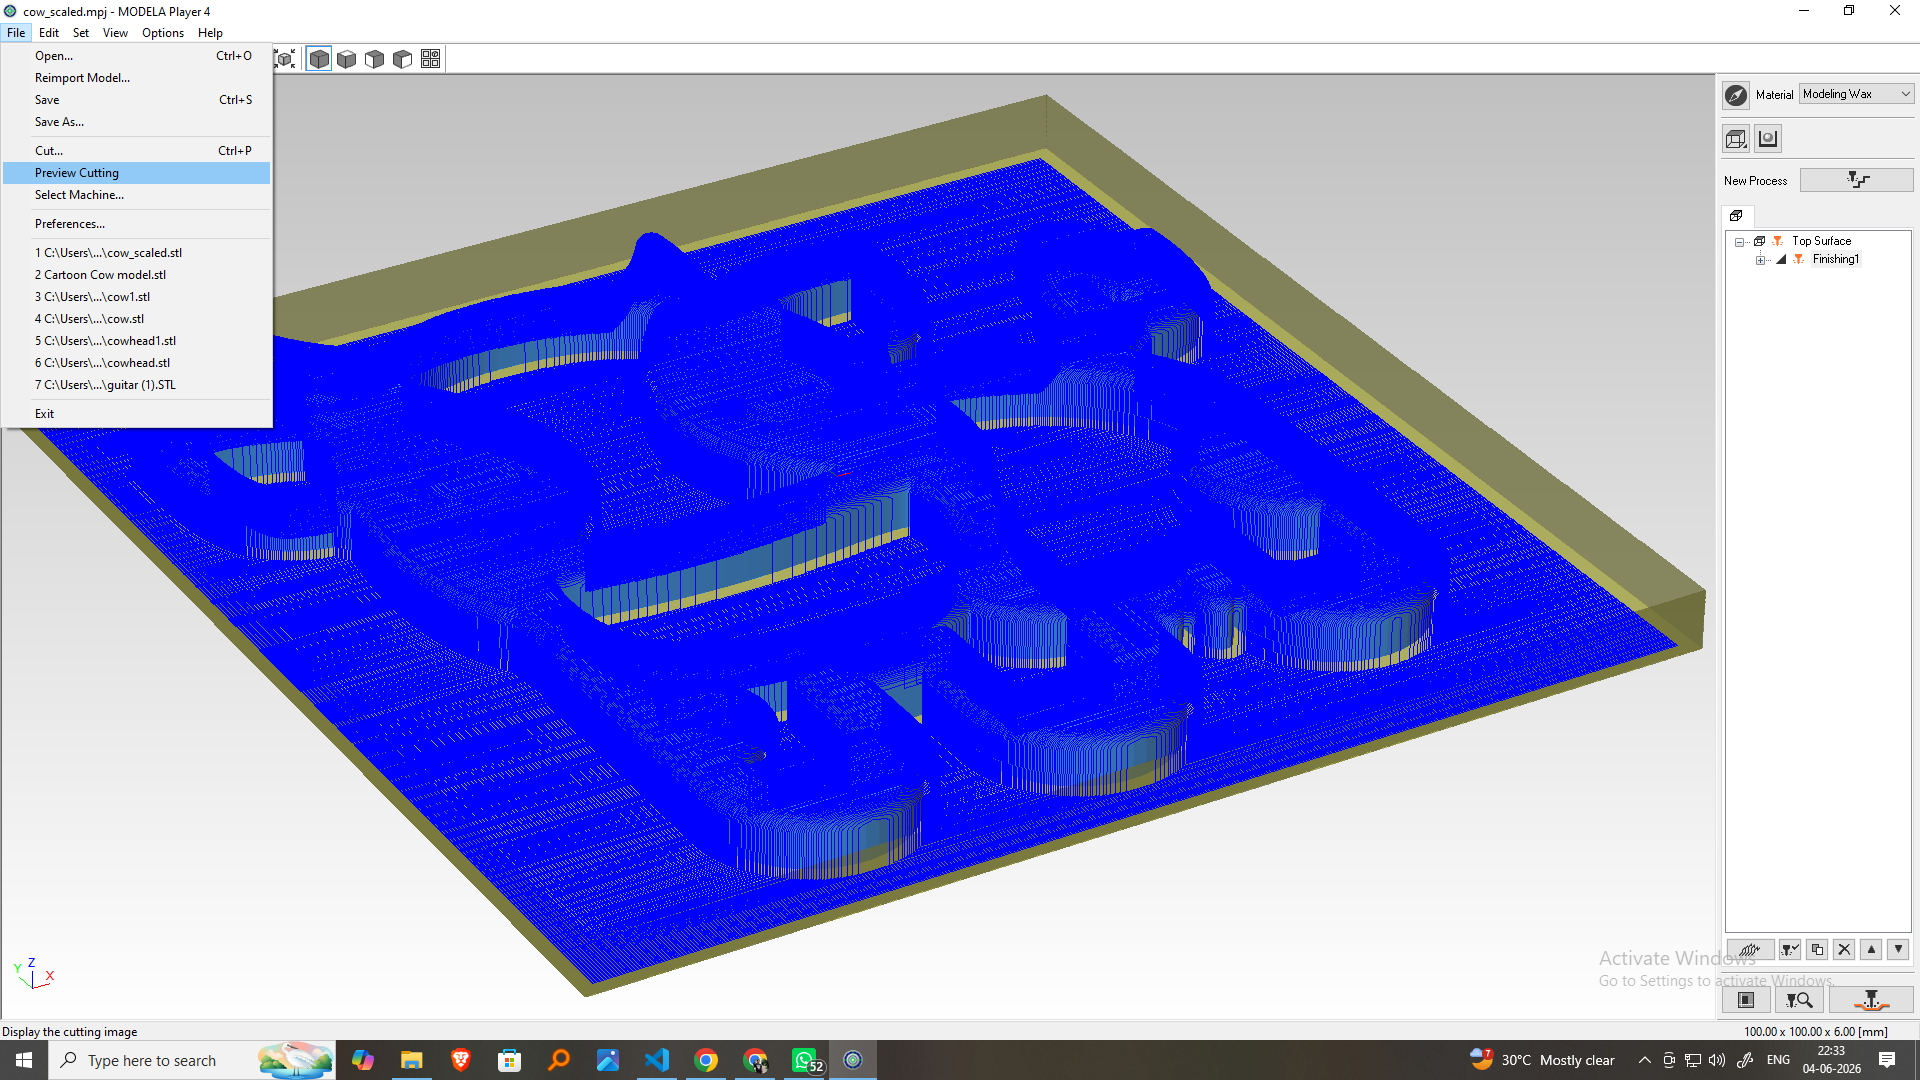
Use Virtual MODELA to simulate the machining process and verify the tool movement before actual cutting.
-
Check the Estimated Machining Time
Review the machining duration displayed in Virtual MODELA and confirm the settings before starting the operation.
-
Perform the Roughing Operation
Start the machining process and monitor the MDX-20 as it removes the bulk wax material from the workpiece.
-
Inspect the Roughing Output
After machining is complete, examine the wax model. The basic Cute Cartoon Cow 3D Model shape should be visible, with excess material removed and a small stock allowance left for the finishing pass.
Finishing Operation
Step 1: Create a New Finishing Process

Open Modela Player 4 and create a new machining process. Select the top cutting surface (Z+) to perform the finishing operation on the Cute Cartoon Cow 3D model.
Step 2: Select the Finishing Tool

Choose a smaller Ball Nose End Mill suitable for fine-detail machining. The smaller tool size helps produce a smoother surface finish and captures intricate features of the model.
Step 3: Define the Cutting Area and Depth
 Verify the machining area and confirm the cutting depth based on the roughing result and the final dimensions of the model.
Step 4: Choose the Toolpath Strategy

Select the Finishing toolpath option and choose the appropriate scanning direction to accurately machine the model surface and fine details.
Step 5: Configure the Cutting Parameters

Set a smaller stepover, appropriate feed rate, spindle speed, and other machining parameters to achieve a high-quality surface finish on the wax model.
Step 6: Name the Machining Process

Assign a descriptive name such as Cartoon Cow Finishing to clearly distinguish it from the Finishing operation.
Step 7: Generate the Toolpath

Create the finishing toolpath and verify that all visible surfaces and detailed features of the model are included in the machining path.
Step 8: Set the Cutting Position
Confirm the X, Y, and Z origin positions used during the finishing process to ensure accurate alignment between roughing and finishing operations.
Step 9: Send the Job to the Machine
Click Cut and transfer the finishing toolpath to the Roland MDX-20 for machining.
Step 10: Preview the Machining Simulation
Open Modela Player 4 and create a new machining process. Select the top cutting surface (Z+) for machining the Cute Cartoon Cow 3D Model model.
Choose a 3 mm Ball Nose End Mill (1.5 mm radius) from the tool library for rough machining of the wax block.
Set the machining area according to the model size and specify the cutting depth based on the model dimensions.
Select the Roughing toolpath strategy and enable the Up-Cut machining method to efficiently remove excess wax material.
Set the feed rate, spindle speed, cutting depth per pass, stepover, and stock allowance suitable for wax machining.
Assign a descriptive name such as "Roughing" to identify the operation.
Create the roughing toolpath and verify that the machining paths cover the entire model area.
Define the X, Y, and Z origin positions on the wax block and confirm the workpiece alignment.
Click Cut and transfer the roughing toolpath to the Roland MDX-20 for machining.
Use Virtual MODELA to simulate the machining process and verify the tool movement before actual cutting.
Review the machining duration displayed in Virtual MODELA and confirm the settings before starting the operation.
Start the machining process and monitor the MDX-20 as it removes the bulk wax material from the workpiece.
After machining is complete, examine the wax model. The basic Cute Cartoon Cow 3D Model shape should be visible, with excess material removed and a small stock allowance left for the finishing pass.
Finishing Operation
Step 1: Create a New Finishing Process
Open Modela Player 4 and create a new machining process. Select the top cutting surface (Z+) to perform the finishing operation on the Cute Cartoon Cow 3D model.
Step 2: Select the Finishing Tool
Choose a smaller Ball Nose End Mill suitable for fine-detail machining. The smaller tool size helps produce a smoother surface finish and captures intricate features of the model.
Step 3: Define the Cutting Area and Depth
Step 4: Choose the Toolpath Strategy
Select the Finishing toolpath option and choose the appropriate scanning direction to accurately machine the model surface and fine details.
Step 5: Configure the Cutting Parameters
Set a smaller stepover, appropriate feed rate, spindle speed, and other machining parameters to achieve a high-quality surface finish on the wax model.
Step 6: Name the Machining Process
Assign a descriptive name such as Cartoon Cow Finishing to clearly distinguish it from the Finishing operation.
Step 7: Generate the Toolpath
Create the finishing toolpath and verify that all visible surfaces and detailed features of the model are included in the machining path.
Step 8: Set the Cutting Position
Confirm the X, Y, and Z origin positions used during the finishing process to ensure accurate alignment between roughing and finishing operations.
Step 9: Send the Job to the Machine
Click Cut and transfer the finishing toolpath to the Roland MDX-20 for machining.
Step 10: Preview the Machining Simulation
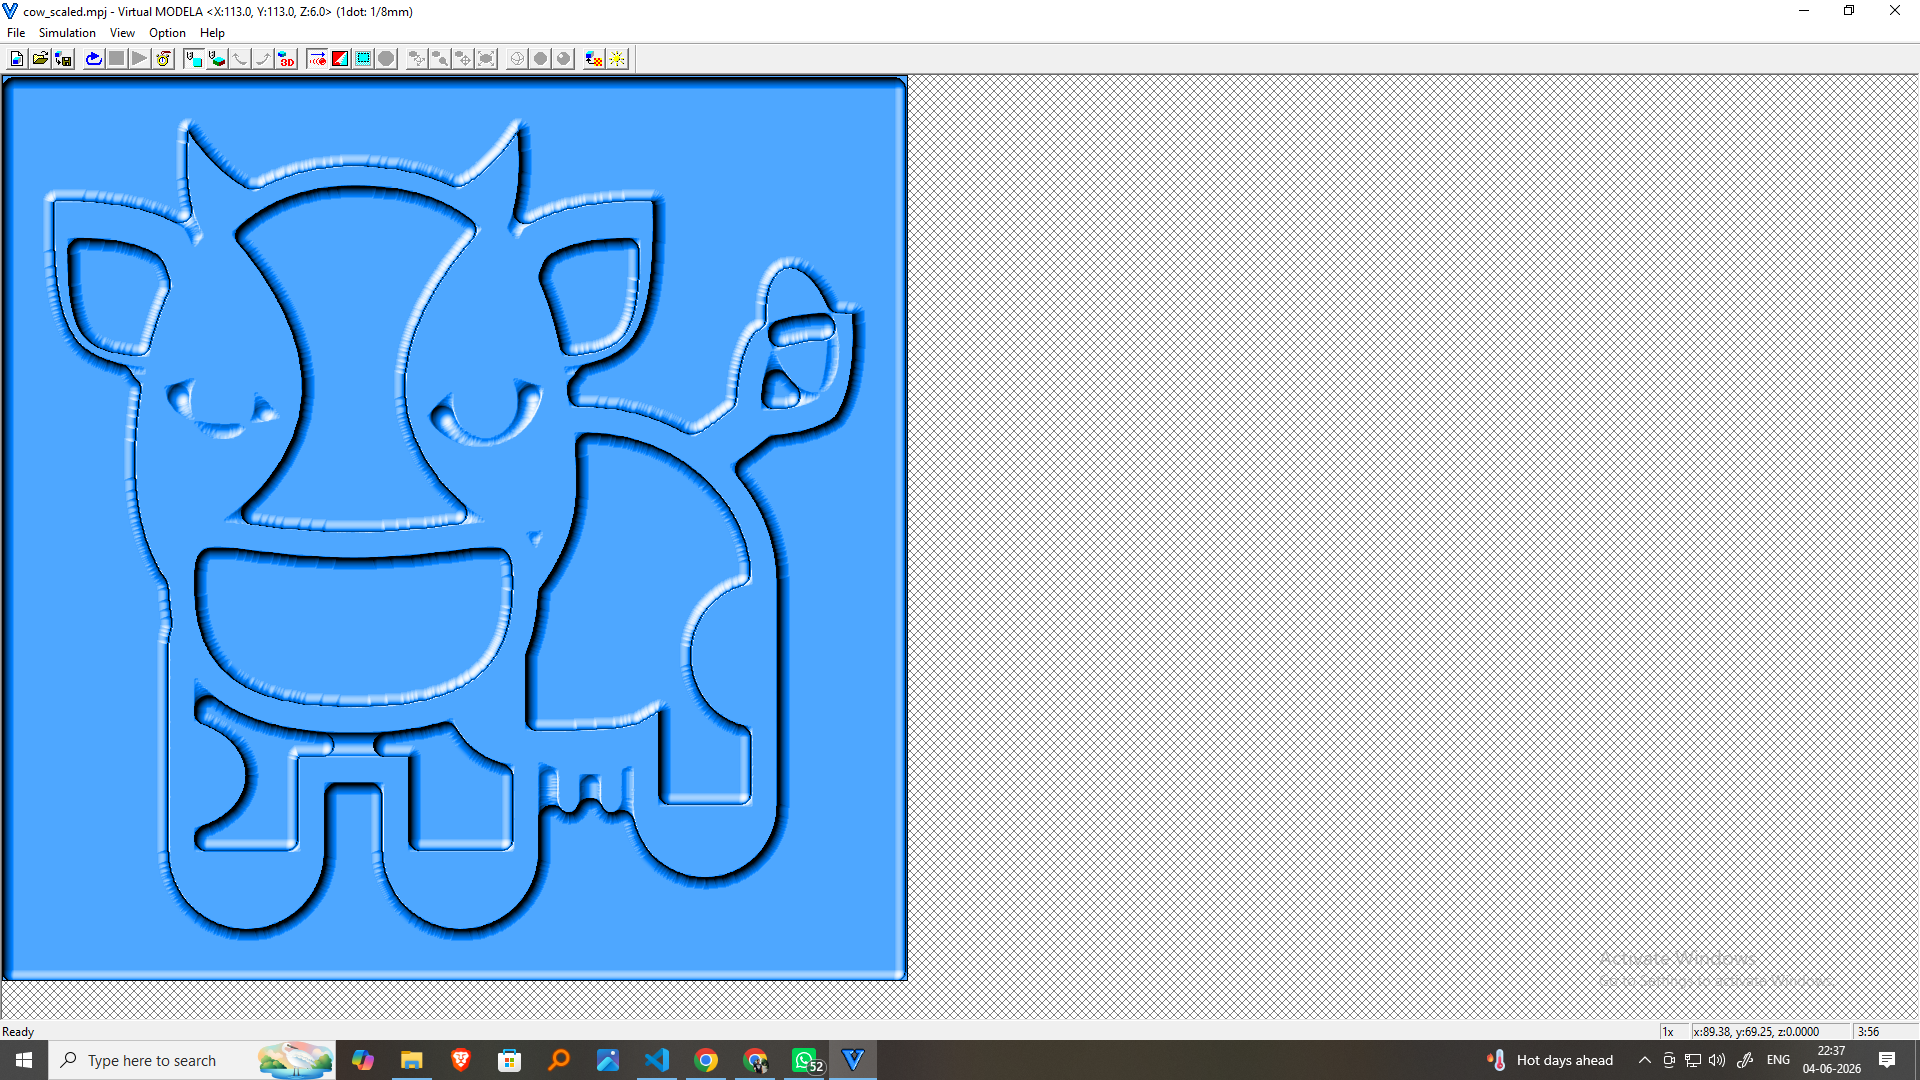
Use Virtual MODELA to simulate the finishing operation and verify the tool movement, surface coverage, and machining accuracy before cutting.
Step 11: Check the Estimated Machining Time
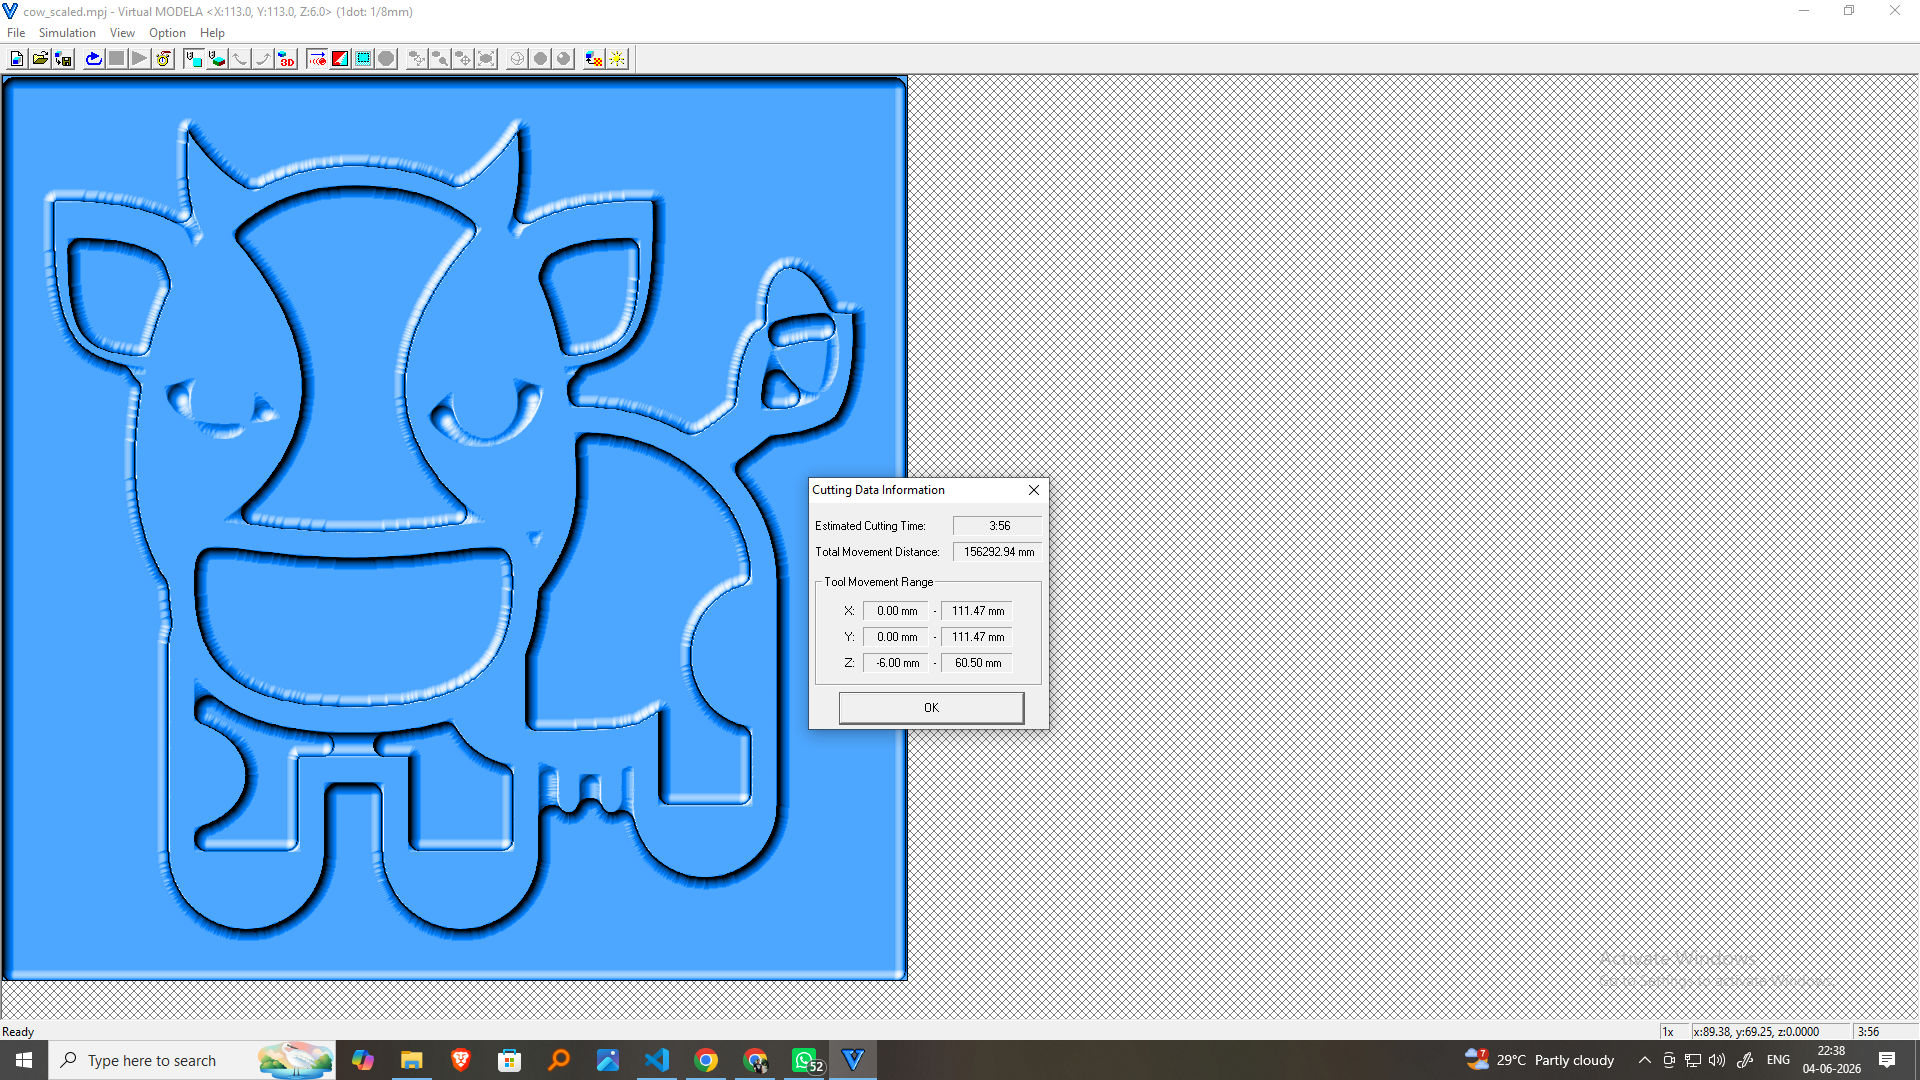
Review the estimated machining duration displayed in Virtual MODELA and confirm all settings before starting the operation.
Step 12: Perform the Finishing Operation
Start the machining process and allow the Roland MDX-20 to remove the remaining material and refine the surface details of the model.
Step 13: Inspect the Final Output
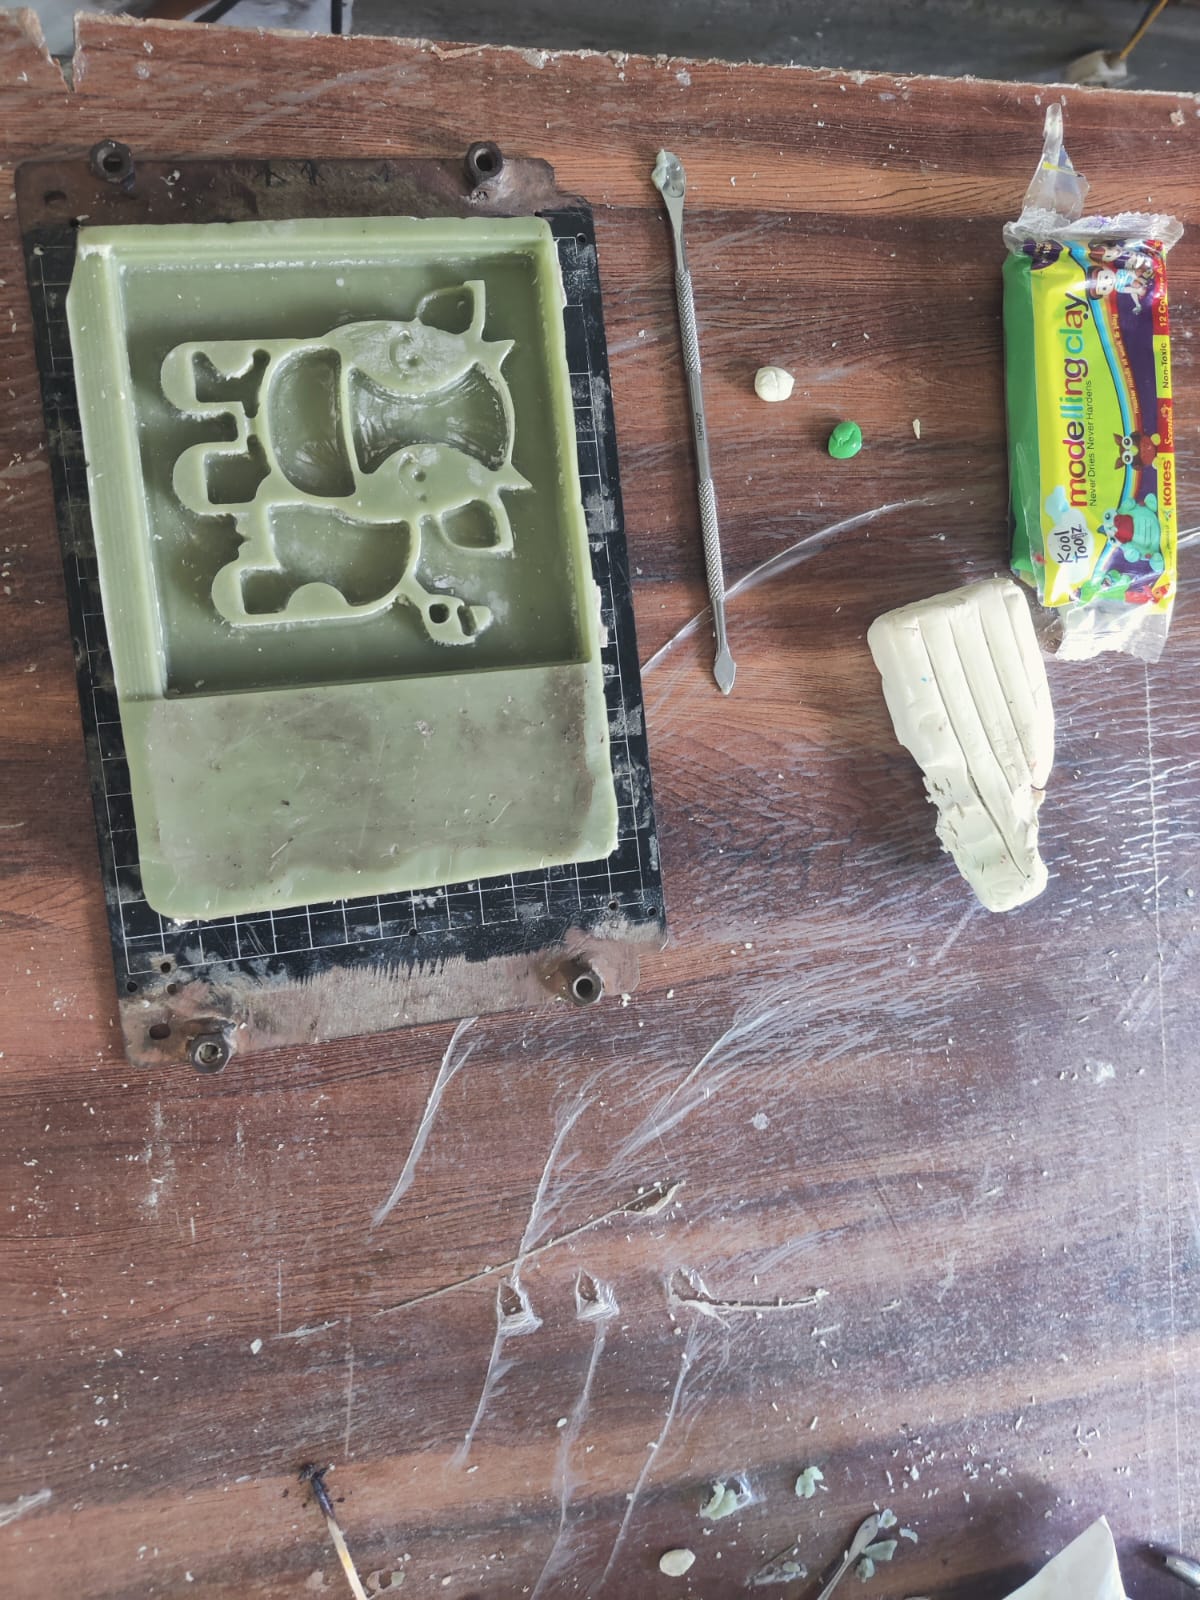
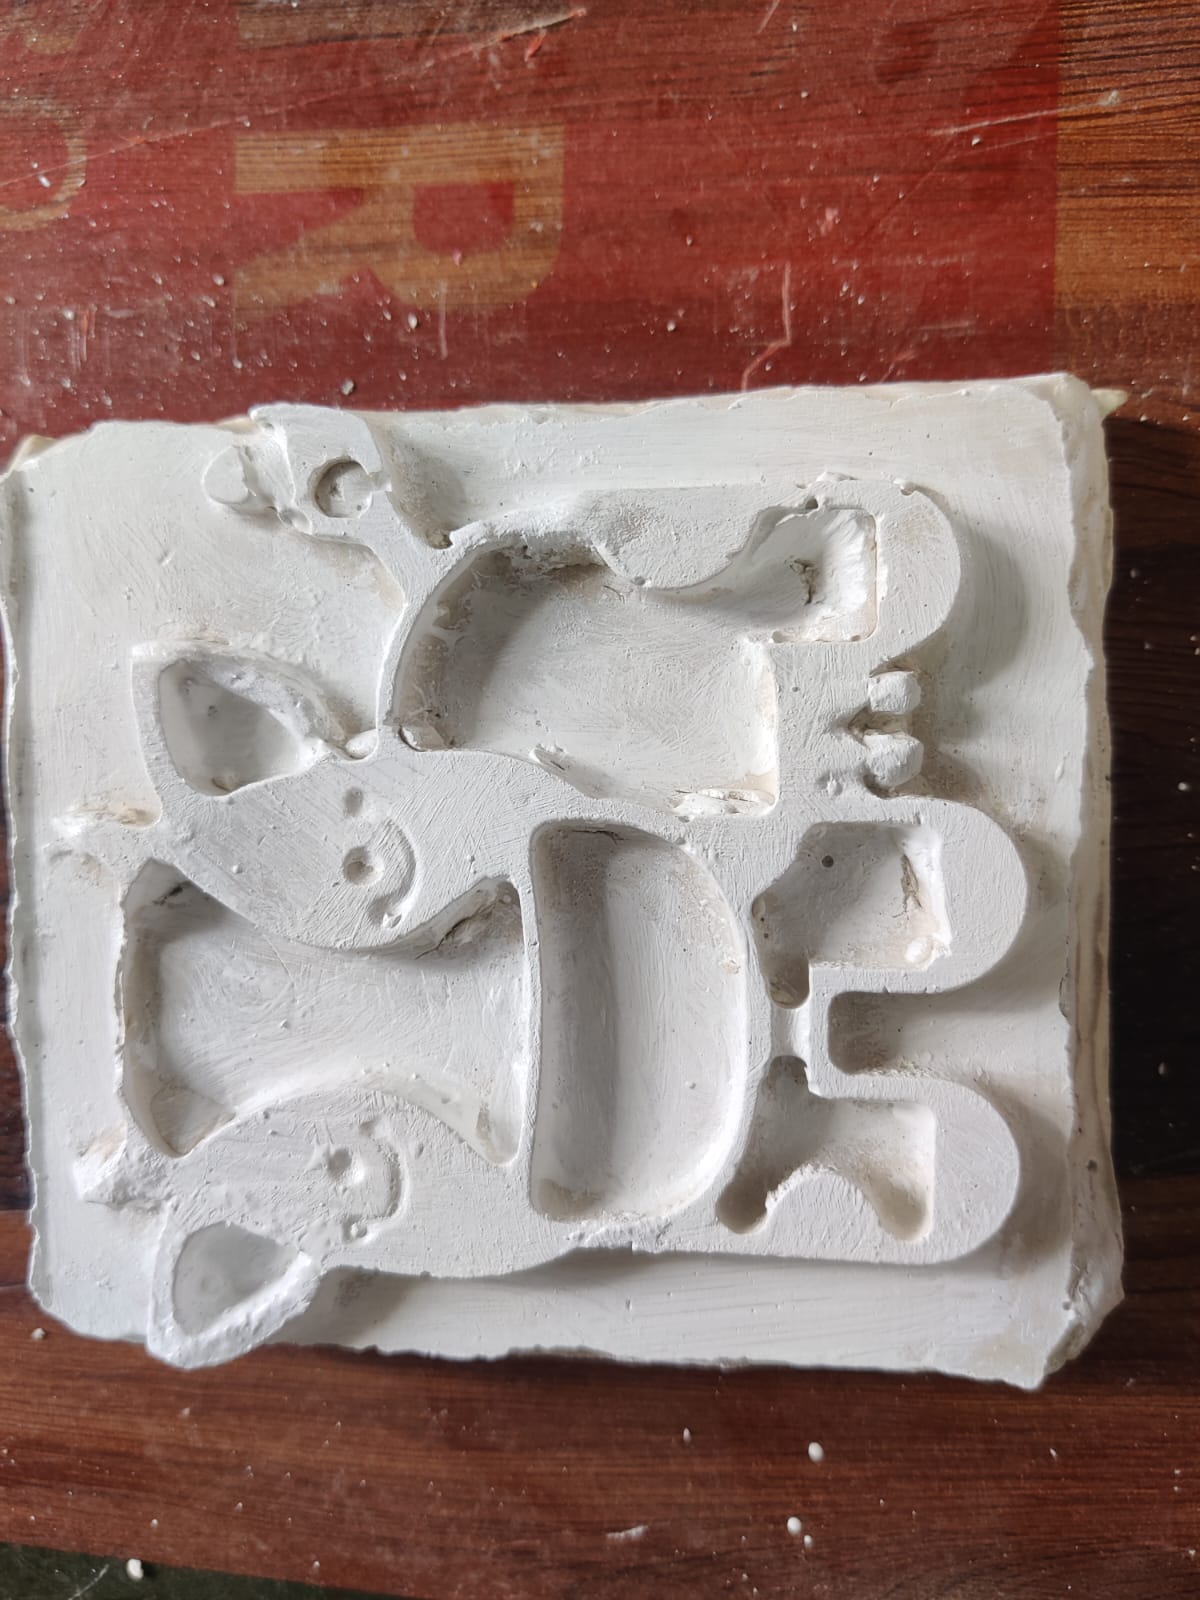
After machining is complete, inspect the finished wax model. The Cute Cartoon Cow 3D Model should exhibit smooth surfaces, refined contours, and detailed features, making it ready for mold making and casting.
Types of Molding and Casting and Their Benefits
| Type | Description | Benefits |
|---|---|---|
| 3D CNC Milling | Using 3D cnc parts directly as molds or masters for casting. | Rapid prototyping, customizable, low-cost tooling, ideal for short runs. |
| Silicone Molding | Liquid silicone poured over a master (e.g., 3D print) to create a flexible mold. | Captures fine details, reusable, easy demolding, suits complex geometries. |
| Resin Casting | Pouring resin into molds (often silicone) to form solid parts. | Smooth finish, accurate, ideal for decorative or functional parts. |
| Injection Molding | Molten plastic injected into a metal mold under pressure. | High-speed production, durable parts, excellent surface finish. |
| Compression Molding | Material is placed in a heated mold and compressed into shape. | Strong parts, good for composites, lower tooling cost than injection molding. |
| Blow Molding | Air blown into heated plastic in a mold to form hollow shapes. | High-volume production of bottles and containers, cost-effective. |
| Thermoforming | Heated plastic sheets are vacuum-formed over a mold. | Fast, inexpensive, ideal for packaging and enclosures. |
| Plaster Molding | Plaster is used as the mold material, often for ceramics or metal prototypes. | Cheap, good detail, suitable for low-volume or artistic parts. |
| Lost-Wax Casting | Wax model is encased in ceramic, melted out, then filled with molten material. | High detail, great for jewelry, precise metal casting. |
As part of our group assignment, we carefully reviewed the Safety Data Sheets (SDS) for each of the molding and casting materials we planned to use. The primary materials included:
- RTV Silicone Rubber: Safe to use with proper ventilation; avoid skin and eye contact.
- Epoxy Resin: Requires gloves and mask; can cause skin irritation and respiratory issues if inhaled.
- Polyurethane Resin: Must be handled with care; reacts with moisture and requires use in a dry, well-ventilated area.
- Plaster of Paris: Safe in dry form, but can generate heat when curing; use gloves to prevent skin burns.
Test Casting and Comparison
We created small test casts using each material to compare their properties and casting quality. Below are our observations:
| Material | Surface Finish | Cure Time | Flexibility | Detail Reproduction |
|---|---|---|---|---|
| RTV Silicone | Smooth and flexible | 4–6 hours | High | Excellent |
| Epoxy Resin | Glossy and hard | 12–24 hours | Low | Very Good |
| Polyurethane | Matte finish | 15–30 minutes | Medium | Good |
| Plaster of Paris | Chalky, brittle | 30–60 minutes | Very Low | Moderate |
These tests helped us determine which materials are most suitable for different use cases—epoxy for rigid, clear parts; silicone for molds; and plaster for quick, low-cost prototyping.
Safe Molding and Casting Process
Safety was a top priority throughout the molding and casting process. Before starting, I reviewed the Safety Data Sheets (SDS) of all materials used, including RTV silicone rubber for mold making and epoxy resin for casting. Proper ventilation, personal protective equipment (PPE), and workspace cleanliness were strictly followed.
Safety Measures Followed:
- Gloves: Nitrile gloves were used to prevent direct skin contact with chemicals.
- Face Mask: A protective mask was worn to avoid inhalation of any fumes during resin mixing and pouring.
- Ventilation: Work was done in a well-ventilated area with windows open and a fan running
- Protective Clothing: An apron was used to avoid spills on clothes.
- Labeling and Storage: All chemical containers were clearly labeled and stored safely after use.
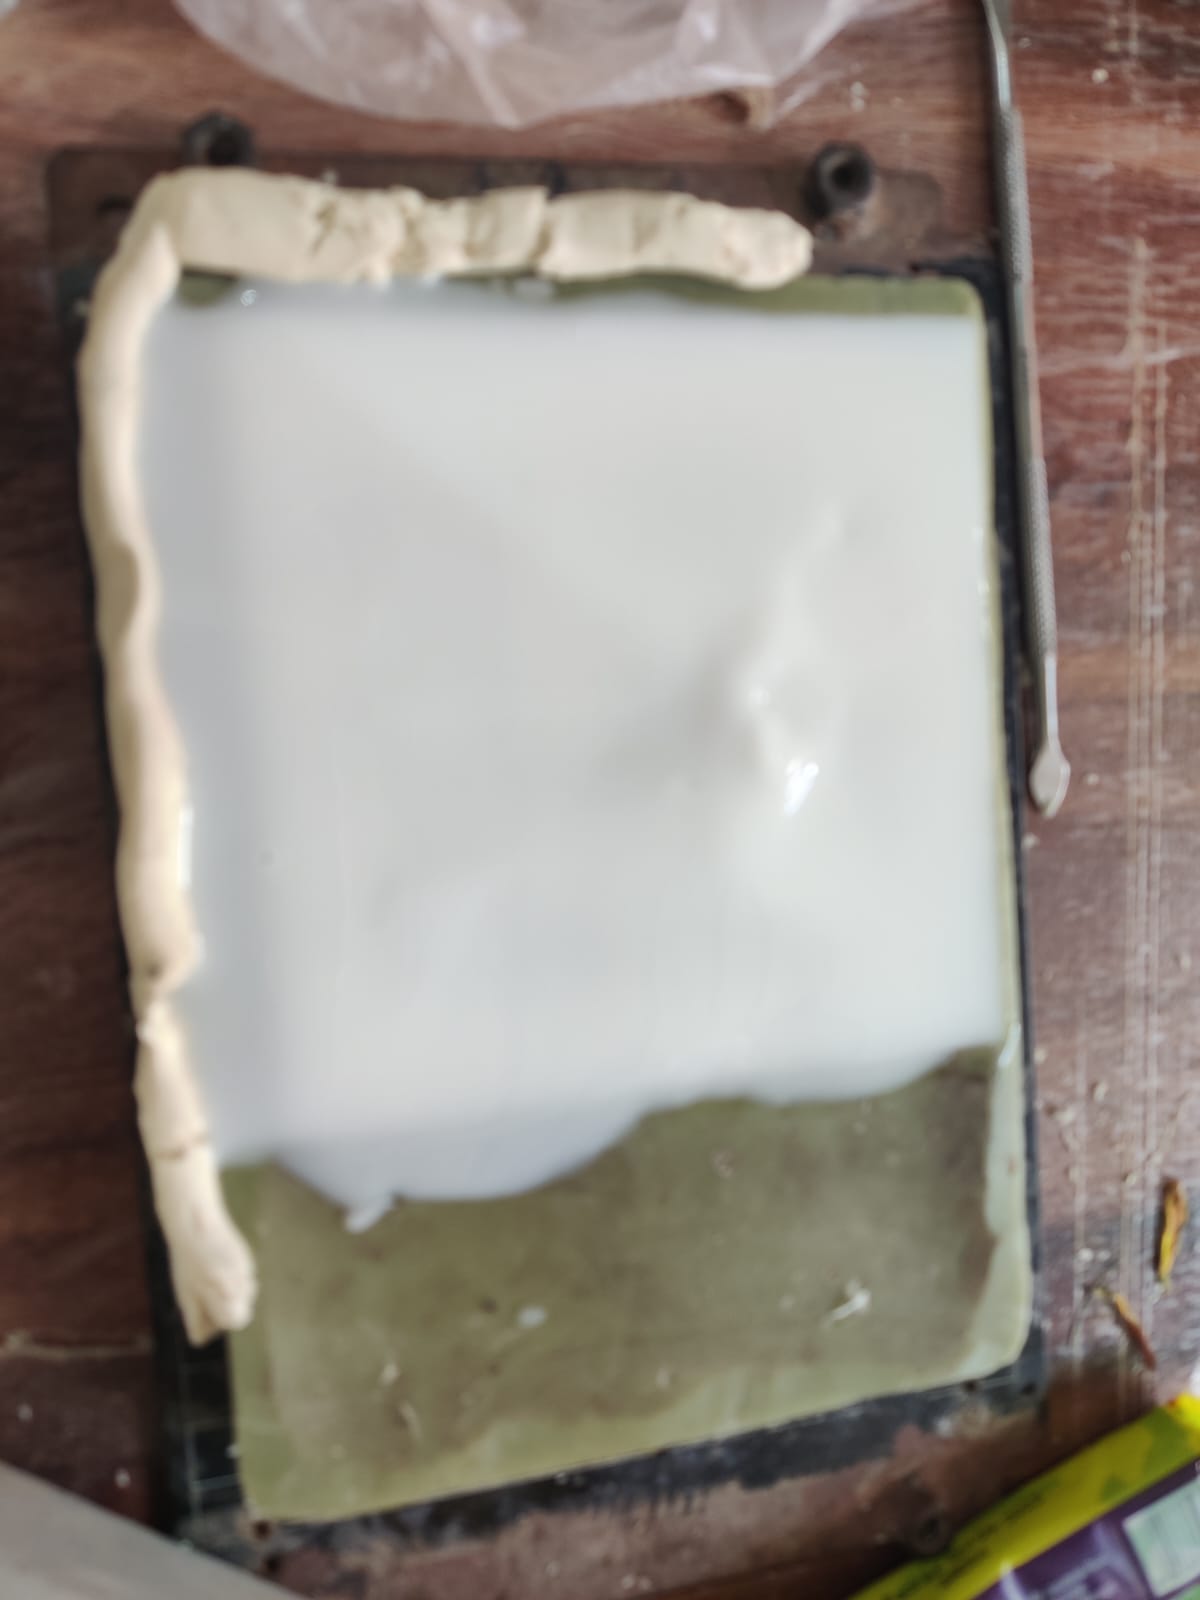
Preparing the First RTV Silicone Mold Layer
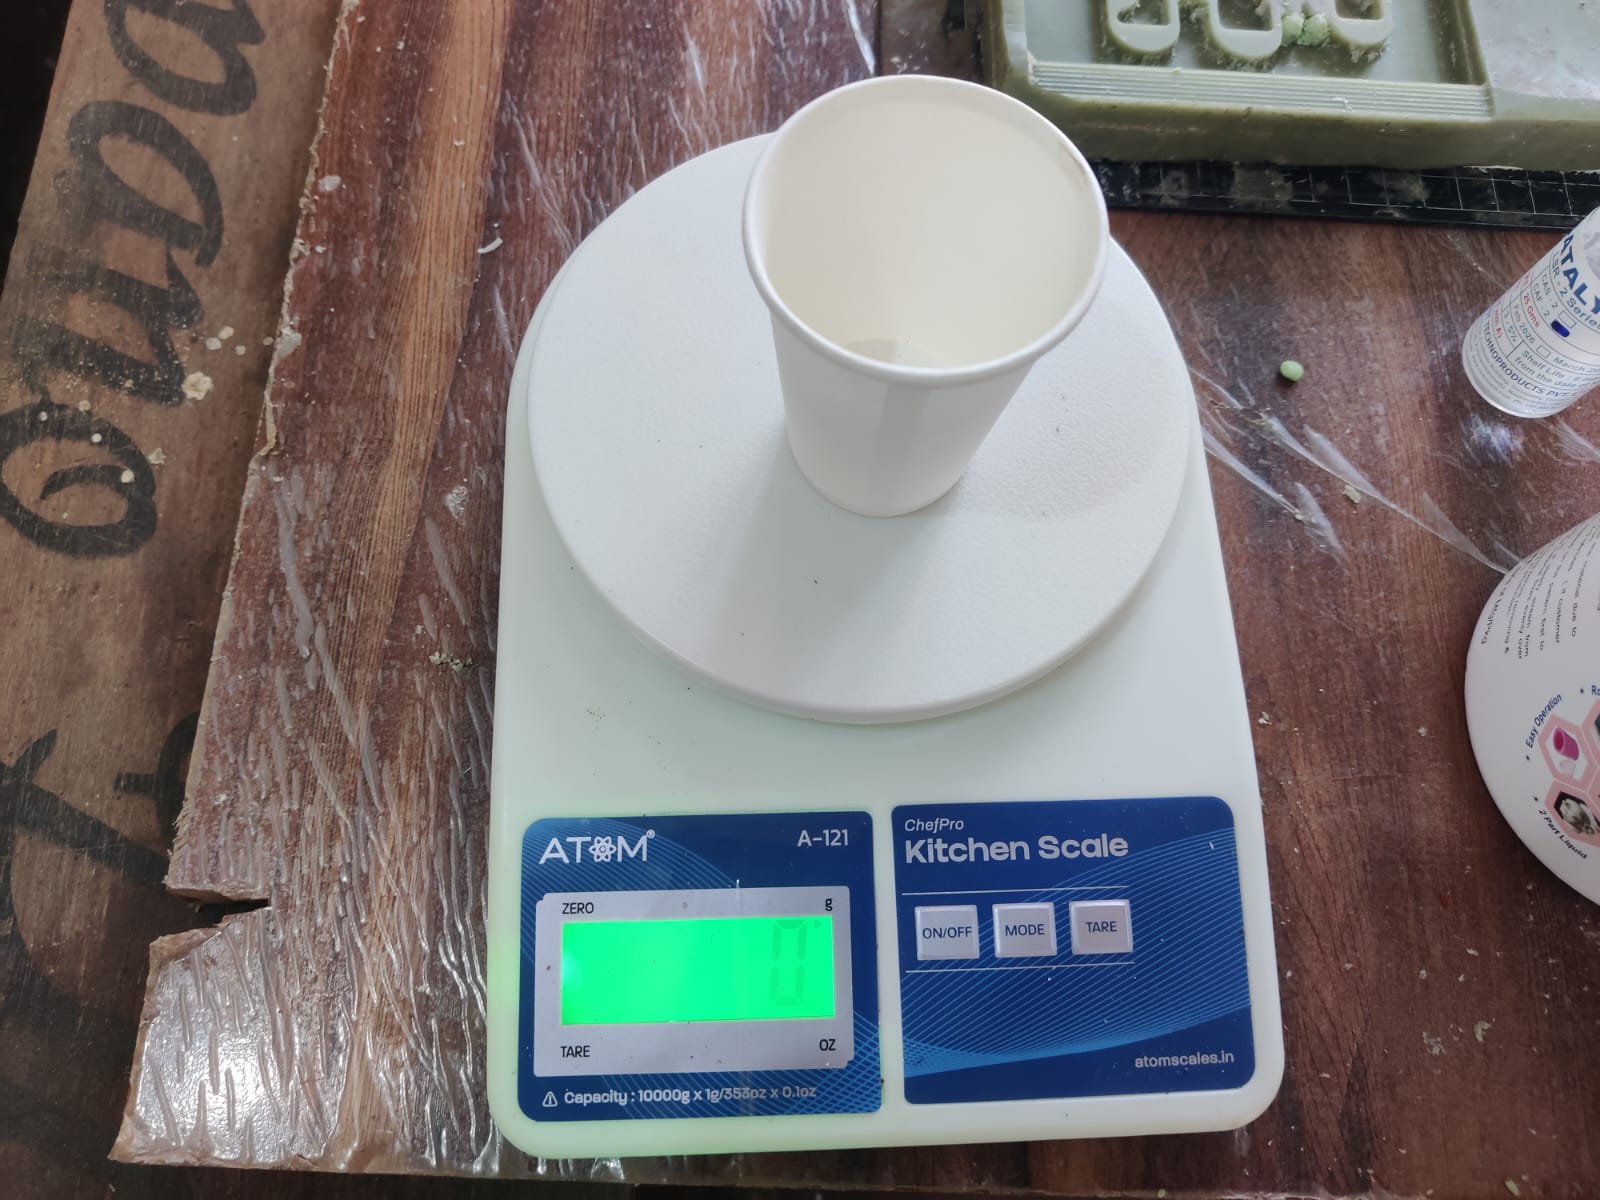
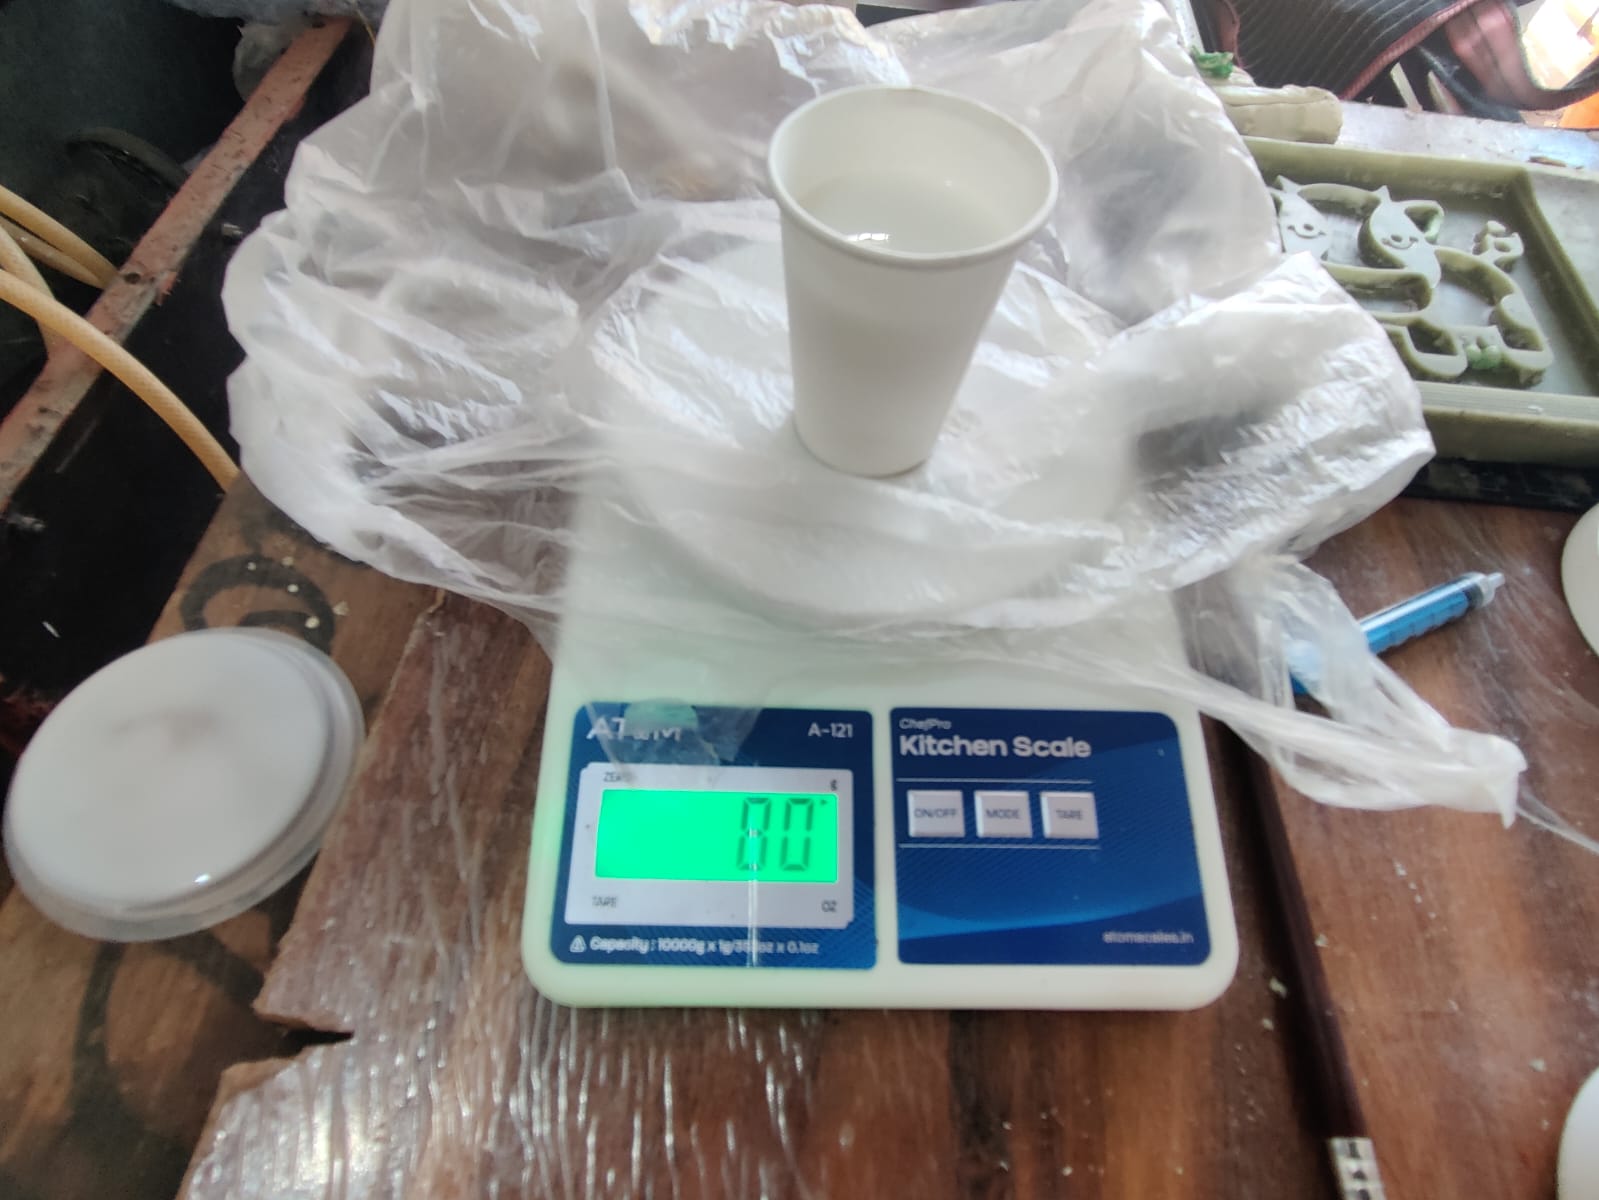
- Based on the size of my wax master pattern, I estimated that approximately 50 grams of RTV silicone rubber would be sufficient for the first coating layer. However, to ensure complete coverage of all surface details, I prepared 80 grams of RTV silicone.
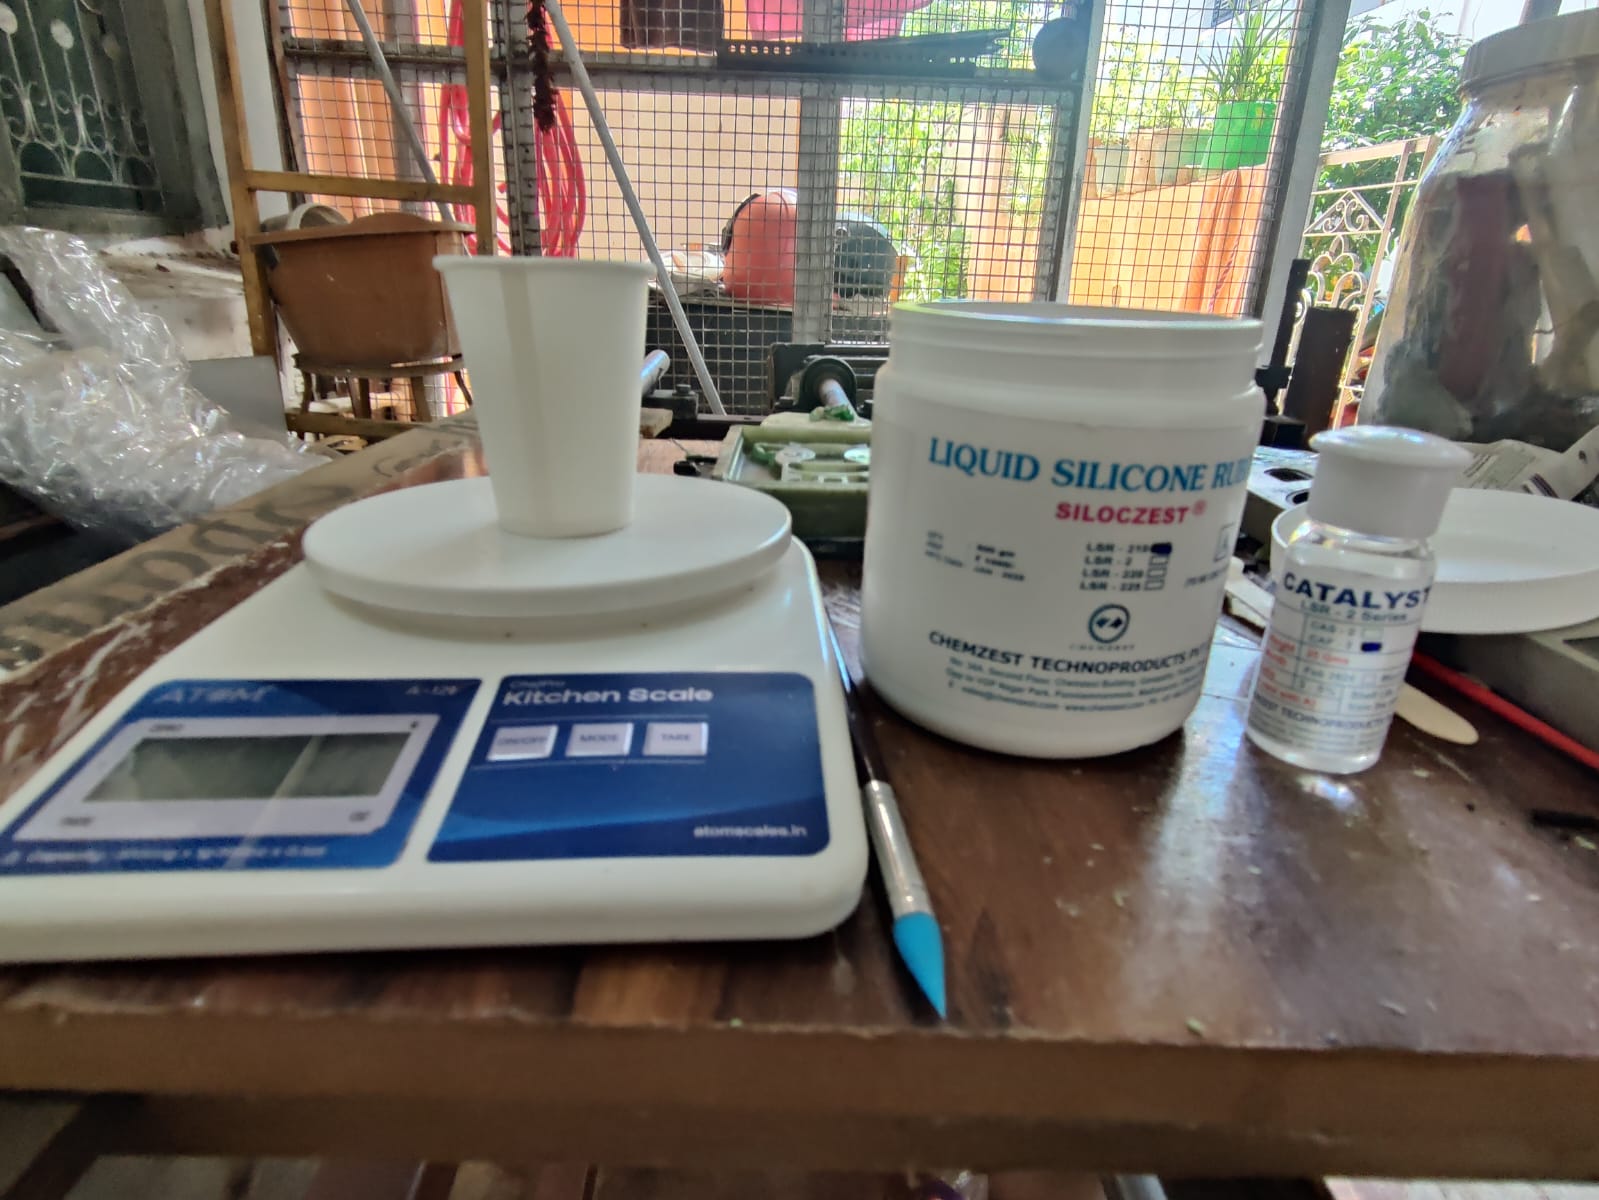
- I used a digital weighing machine to accurately measure the required quantity of RTV silicone. The silicone was poured into a disposable plastic cup for easy mixing.
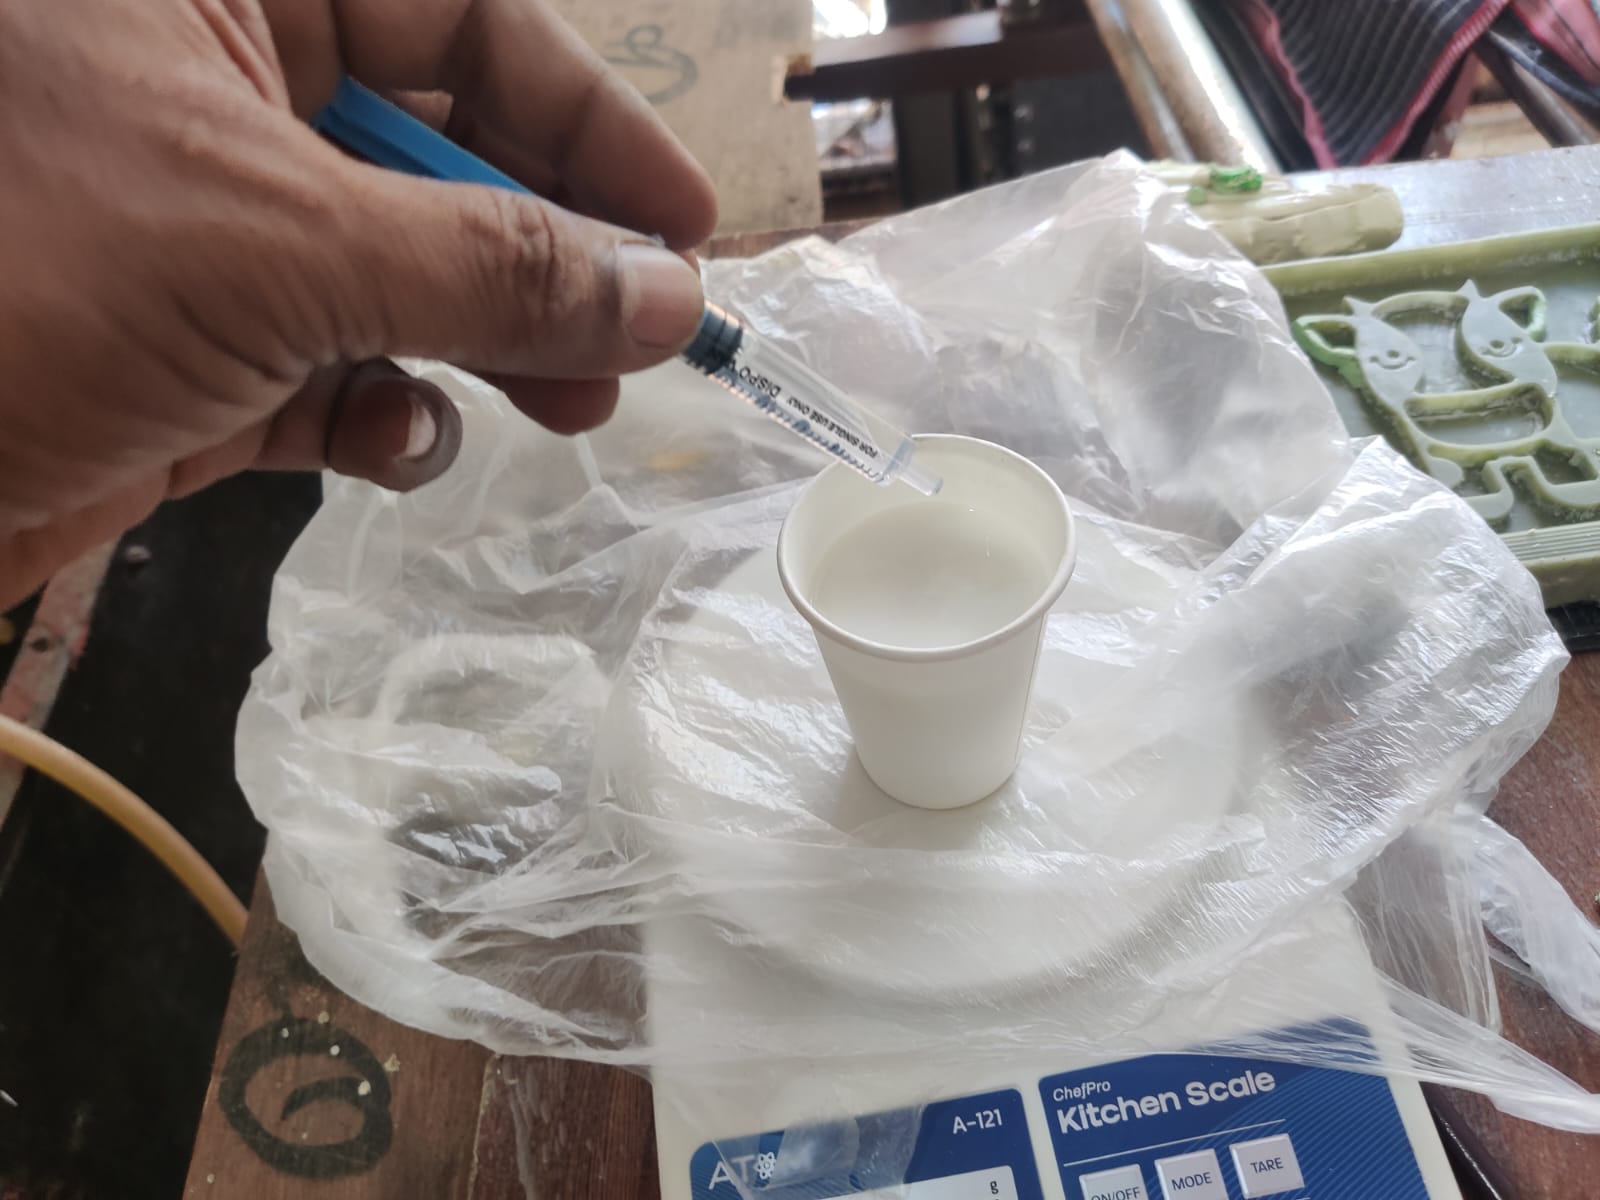
- According to the recommended mixing ratio, I measured 3 grams of hardener (catalyst) using a syringe to achieve accurate proportioning.
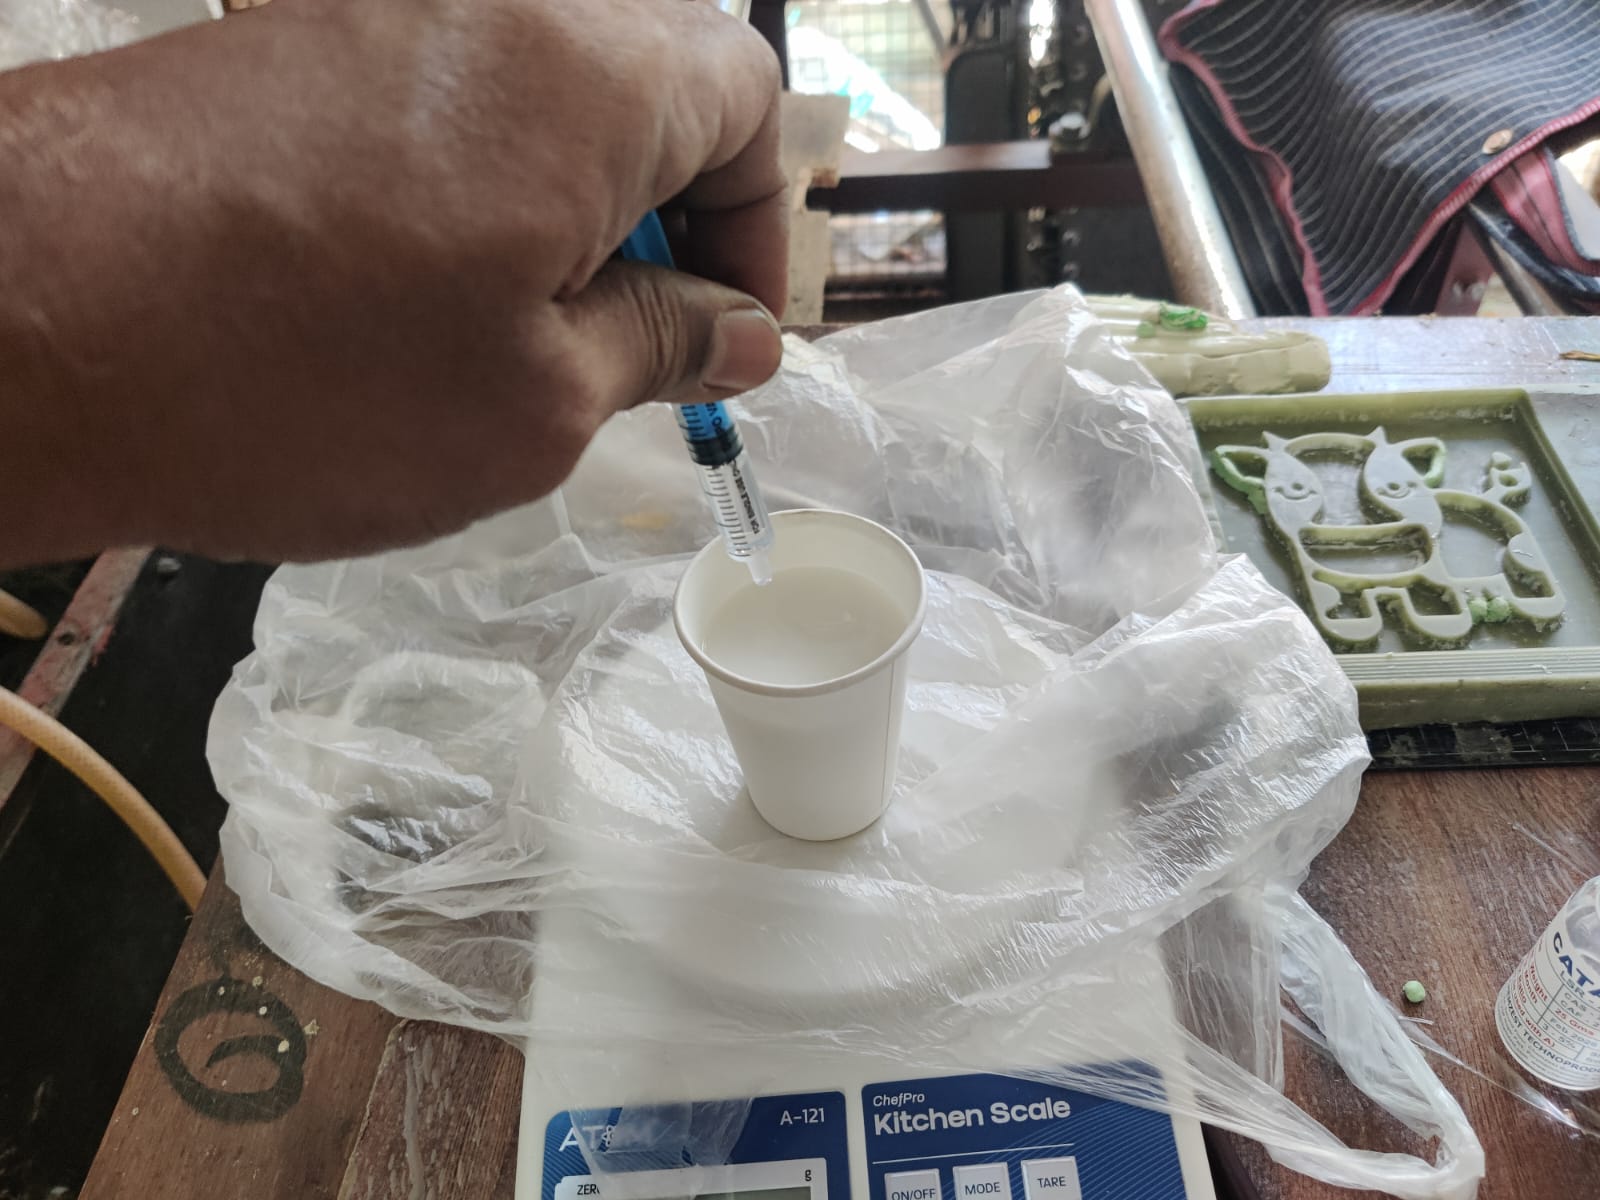
- The RTV silicone and hardener were carefully combined in the mixing cup.
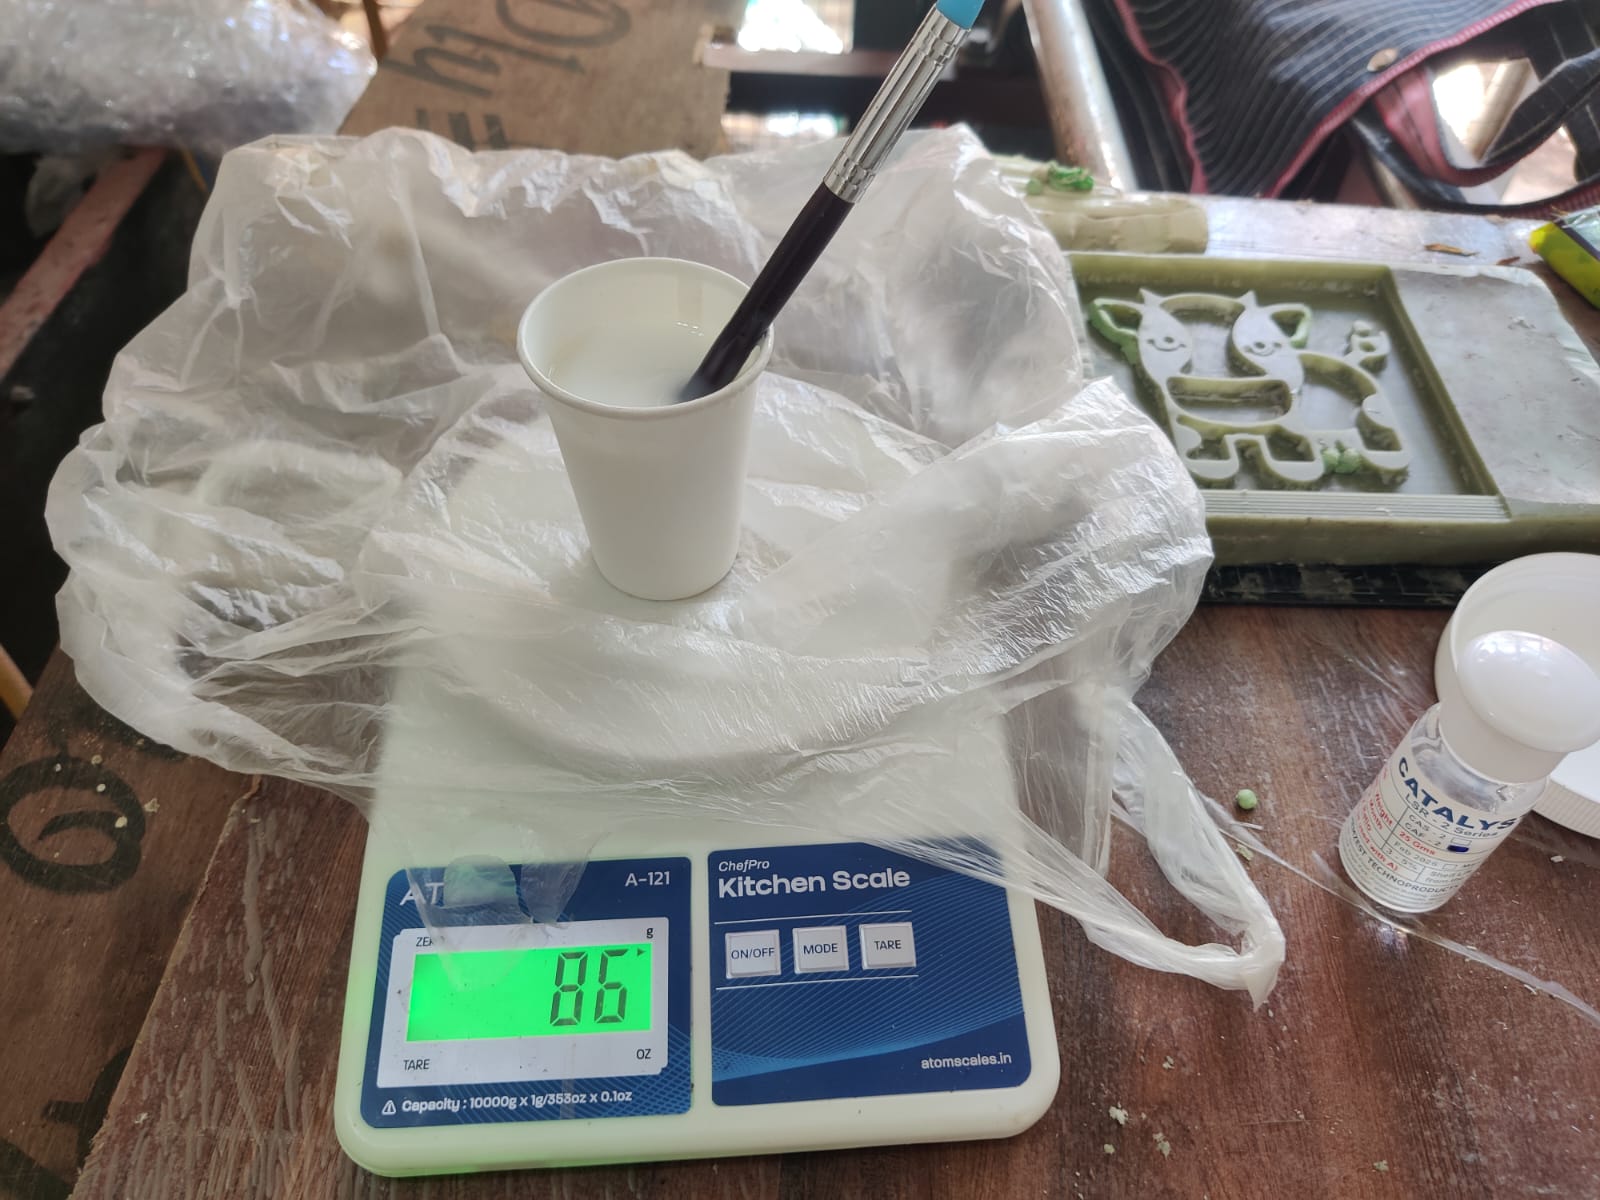
- I mixed the materials thoroughly for several minutes, ensuring that the hardener was evenly distributed throughout the silicone. Proper mixing is important to achieve uniform curing and avoid soft or uncured areas in the mold.
- Since I did not have access to a vacuum degassing machine, I mixed the silicone slowly to minimize the formation of air bubbles. The silicone mixture was then poured gently and continuously over the wax pattern from one side, allowing it to flow naturally across the surface. This technique helps reduce trapped air and captures fine details of the master pattern.
- After pouring, the mold was left undisturbed to cure completely. Once cured, the first silicone layer formed a flexible skin that accurately reproduced the surface details of the wax master pattern, providing a strong foundation for the subsequent mold-making steps.
- Mold is ready to Cast
- To produce a thicker and stronger casting, I prepared a wooden frame around the RTV silicone mold. The frame was sized to completely enclose the mold. I used plasticine clay along the sides and corners to reduce excess volume, seal any gaps, and prevent the wet plaster from leaking during the casting process.

- After completing the mold setup, both the RTV silicone mold and the supporting frame were ready for casting.
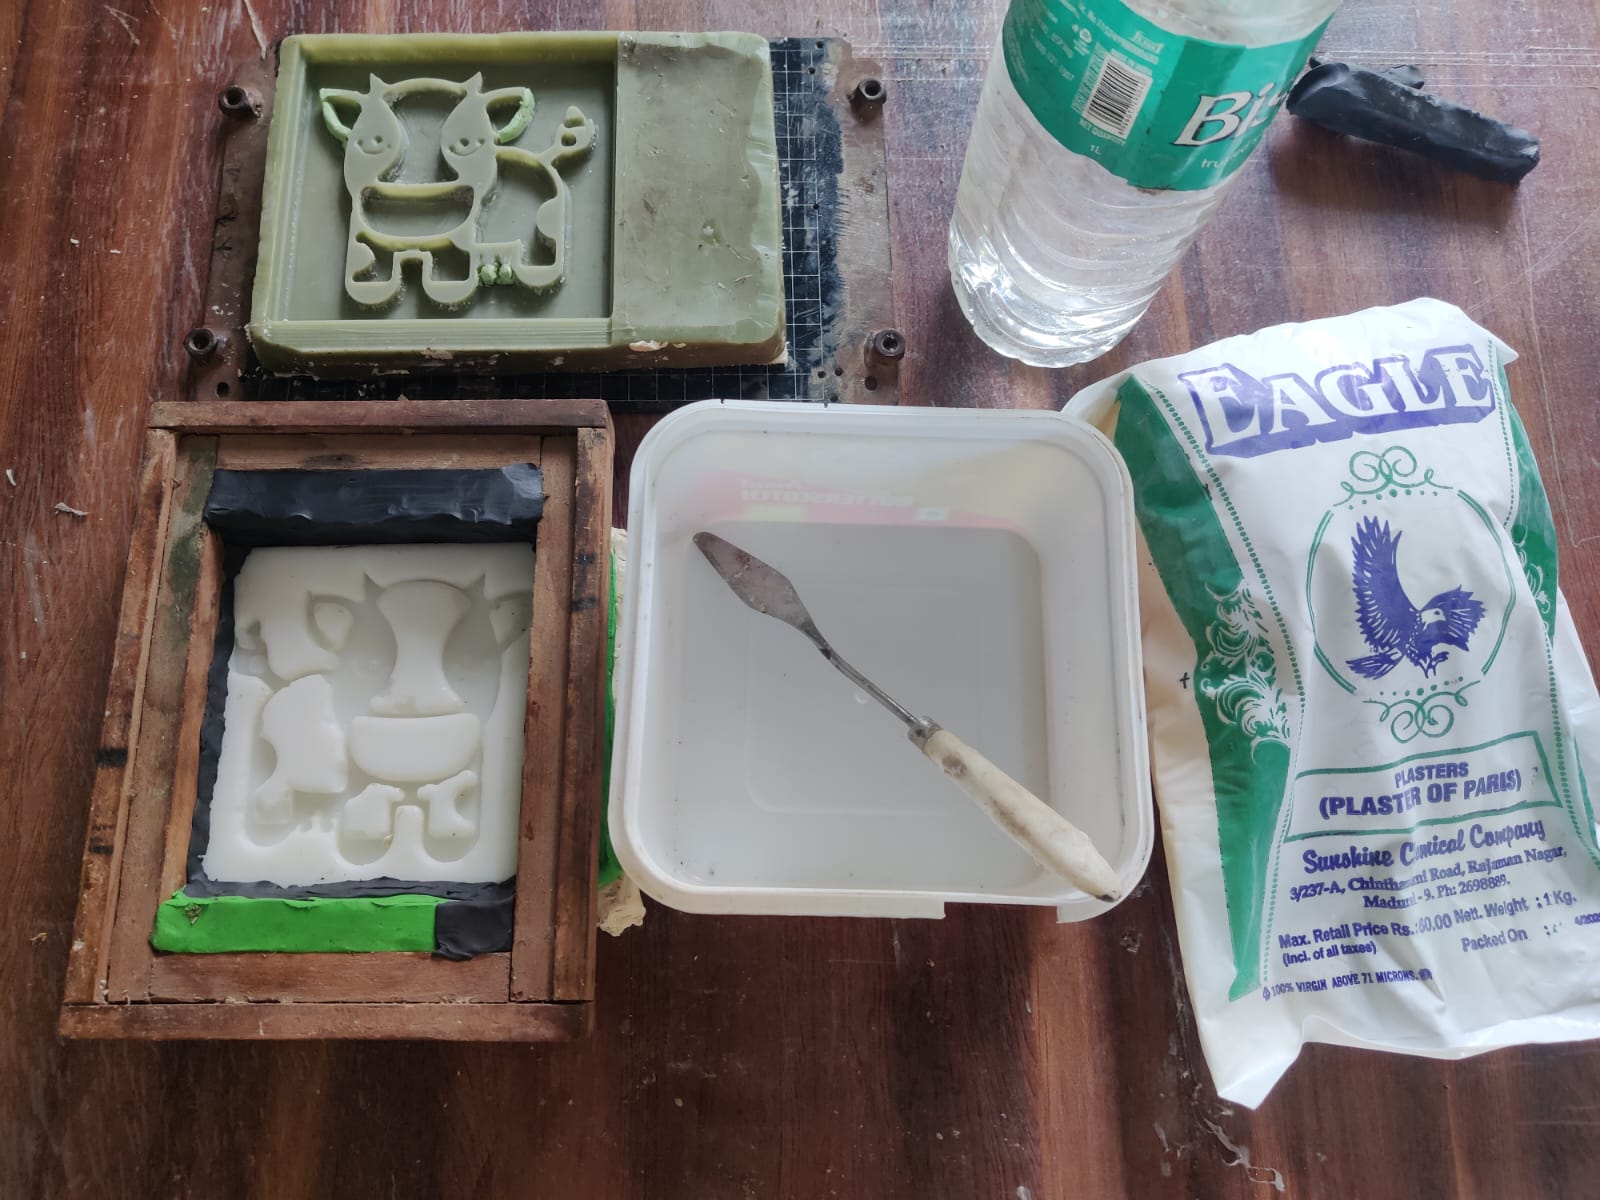
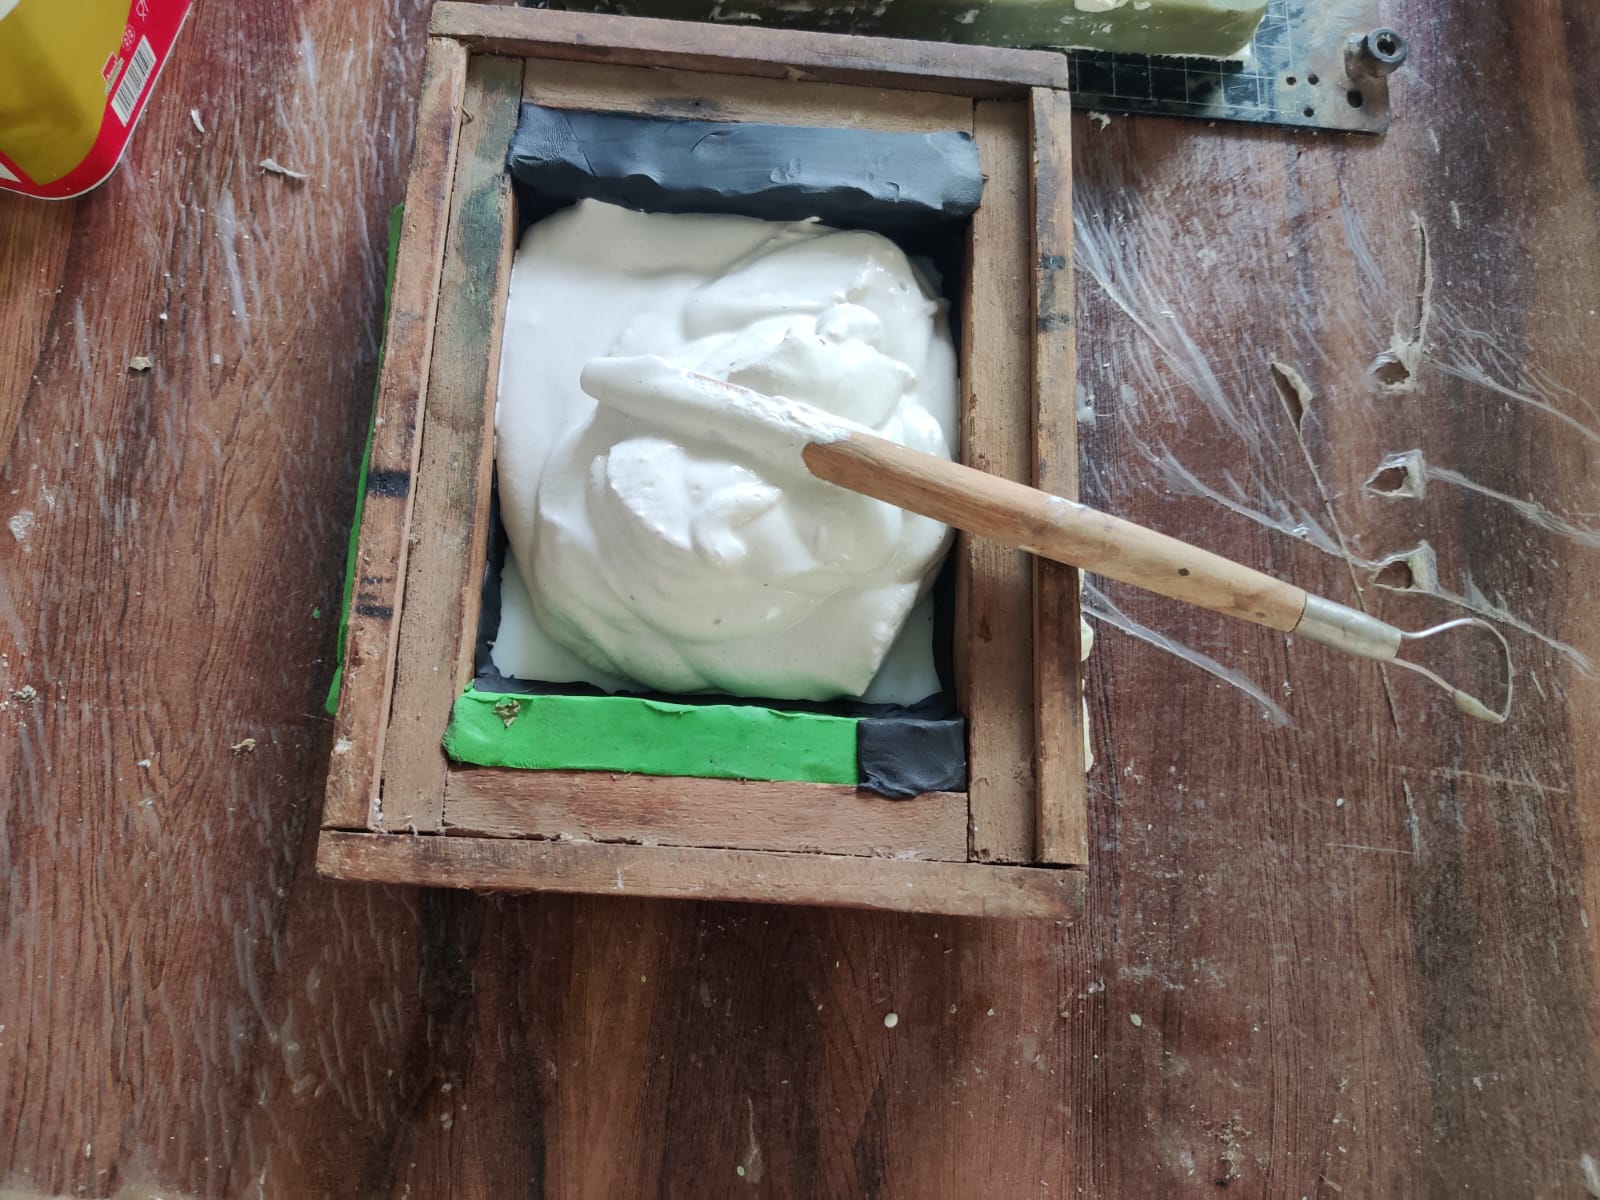
- The required amount of Plaster of Paris (POP) was measured based on the volume of the mold cavity.
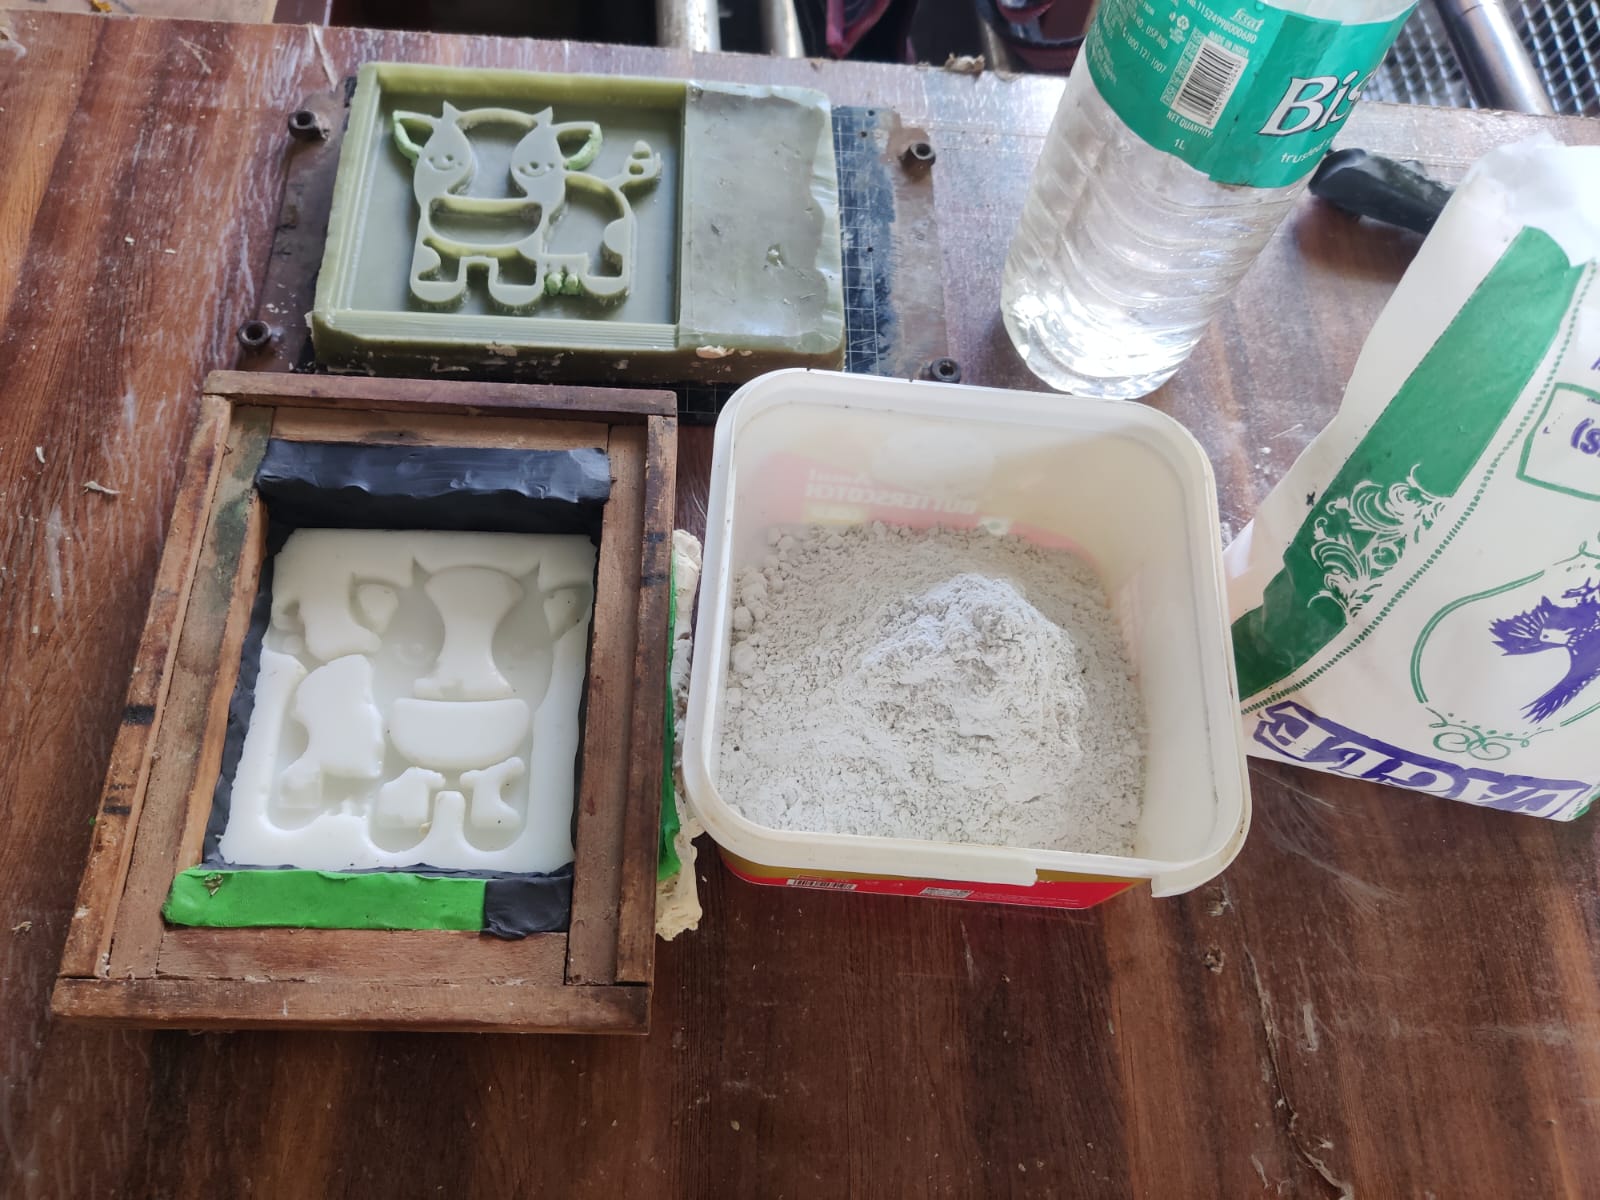
- The plaster powder was gradually mixed with water and stirred thoroughly until a smooth, lump-free consistency was achieved.
- The prepared plaster mixture was slowly poured into the RTV silicone mold, ensuring that all areas of the mold cavity were completely filled.
- Since a vacuum degassing system was not available, I gently tapped the plywood base and sides of the mold assembly to help trapped air bubbles rise to the surface.
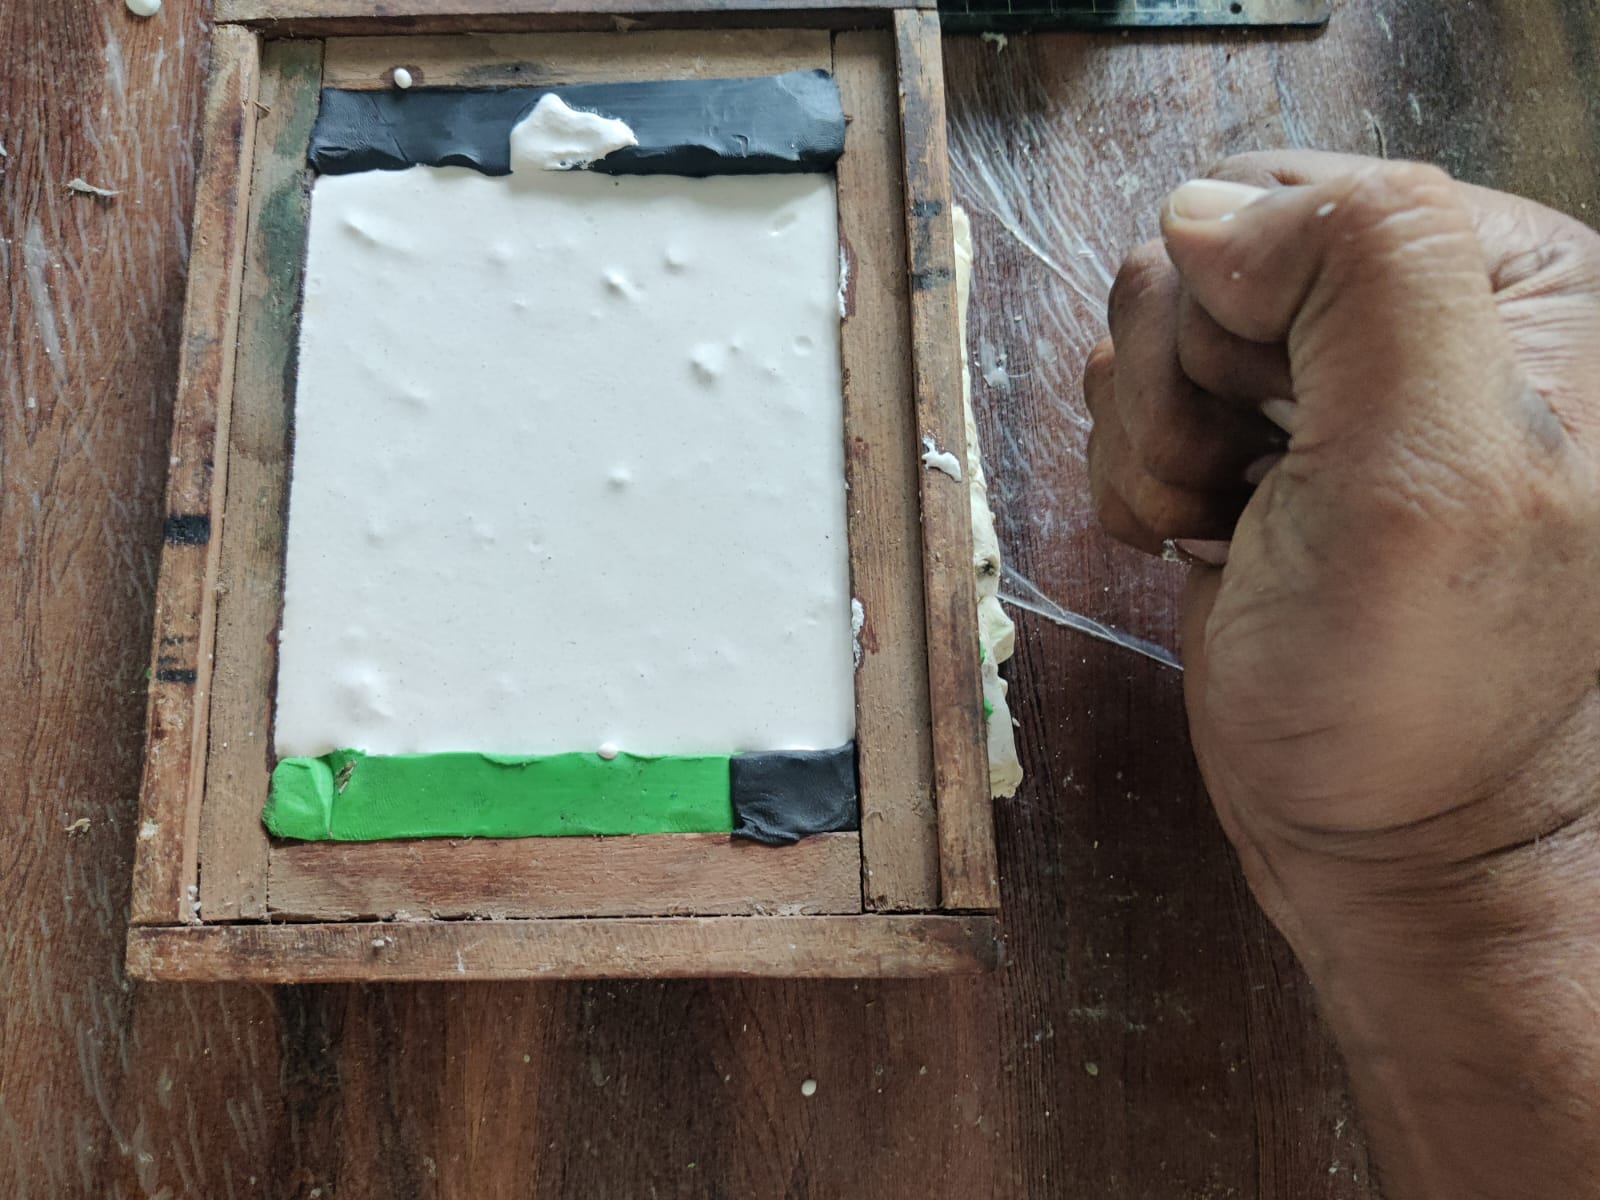
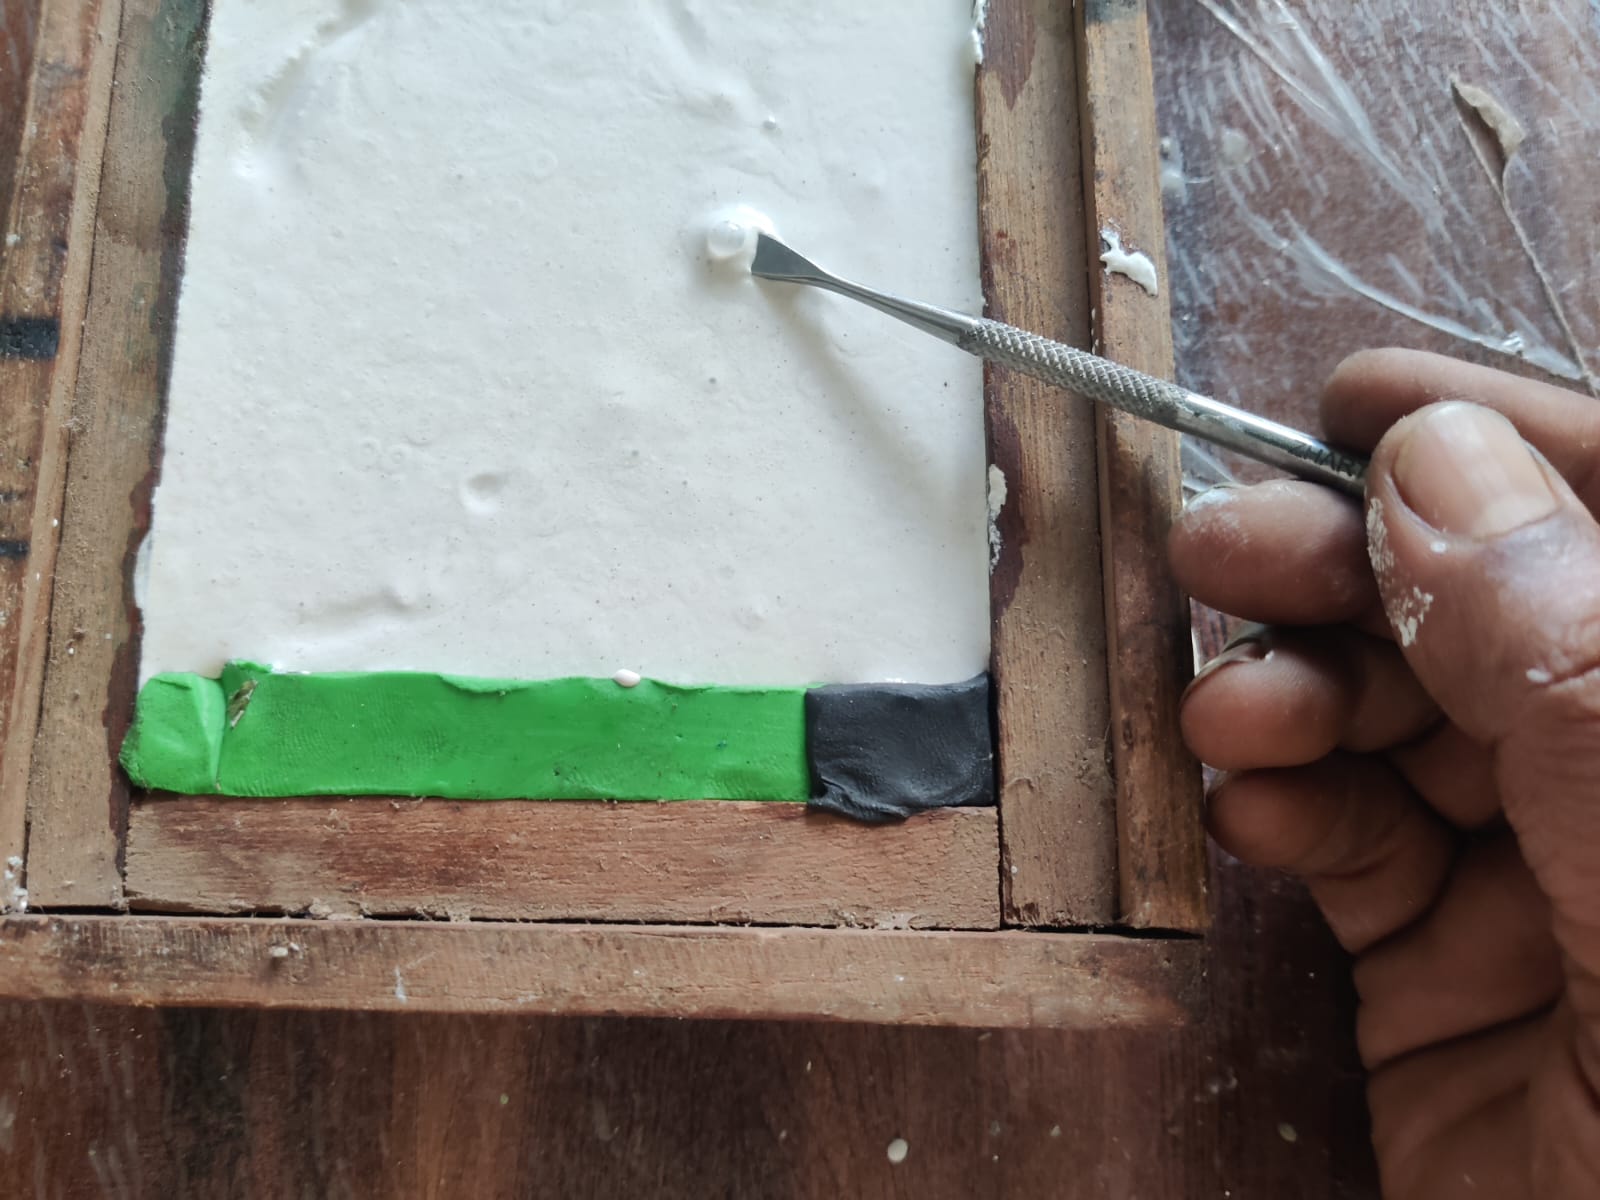
- As the mold was tapped, several air bubbles emerged from the plaster mixture, improving the quality of the final cast.
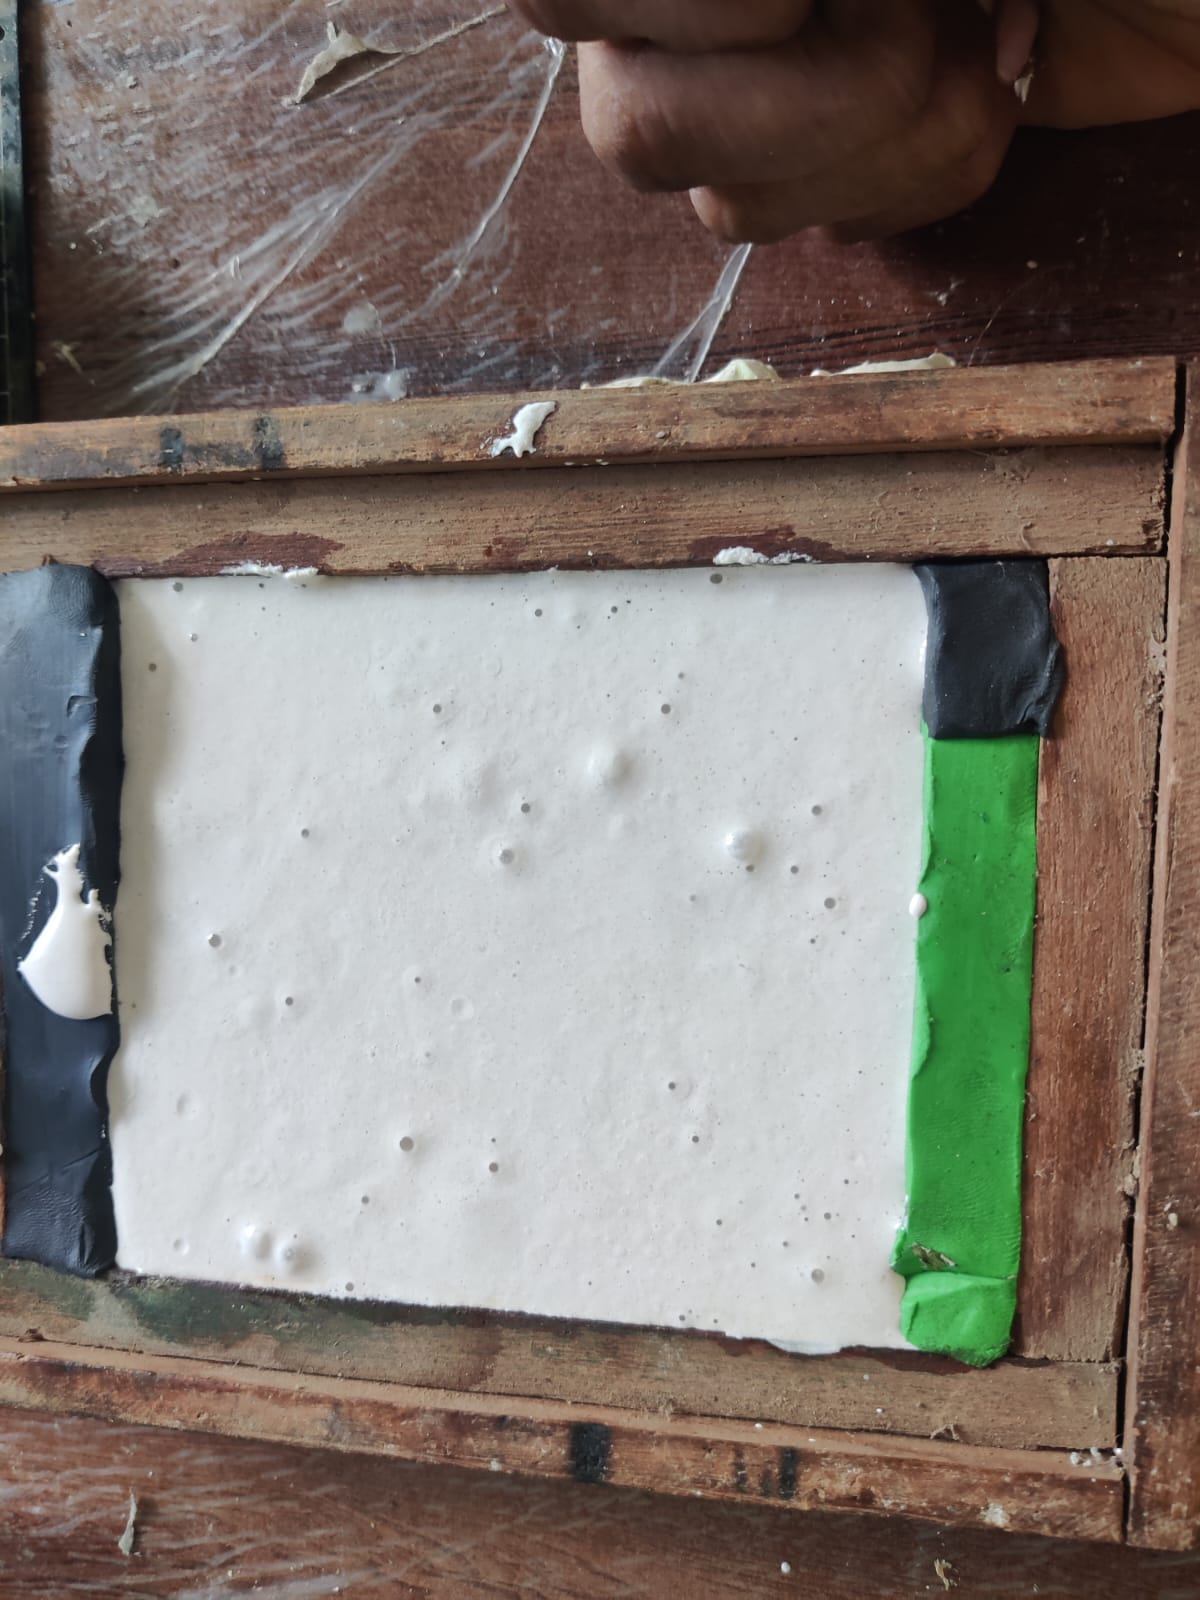
- Any visible surface bubbles were carefully removed using a sharp tool. This step helps reduce surface defects and minimizes the possibility of weak spots that could lead to breakage in the final cast.
 The plaster was left undisturbed for approximately one hour to allow it to
harden and cure properly.
The plaster was left undisturbed for approximately one hour to allow it to
harden and cure properly.
- After the plaster had fully set, the RTV silicone mold was carefully peeled away from the casting. The flexibility of the silicone mold made demolding easy and prevented damage to the cast part.
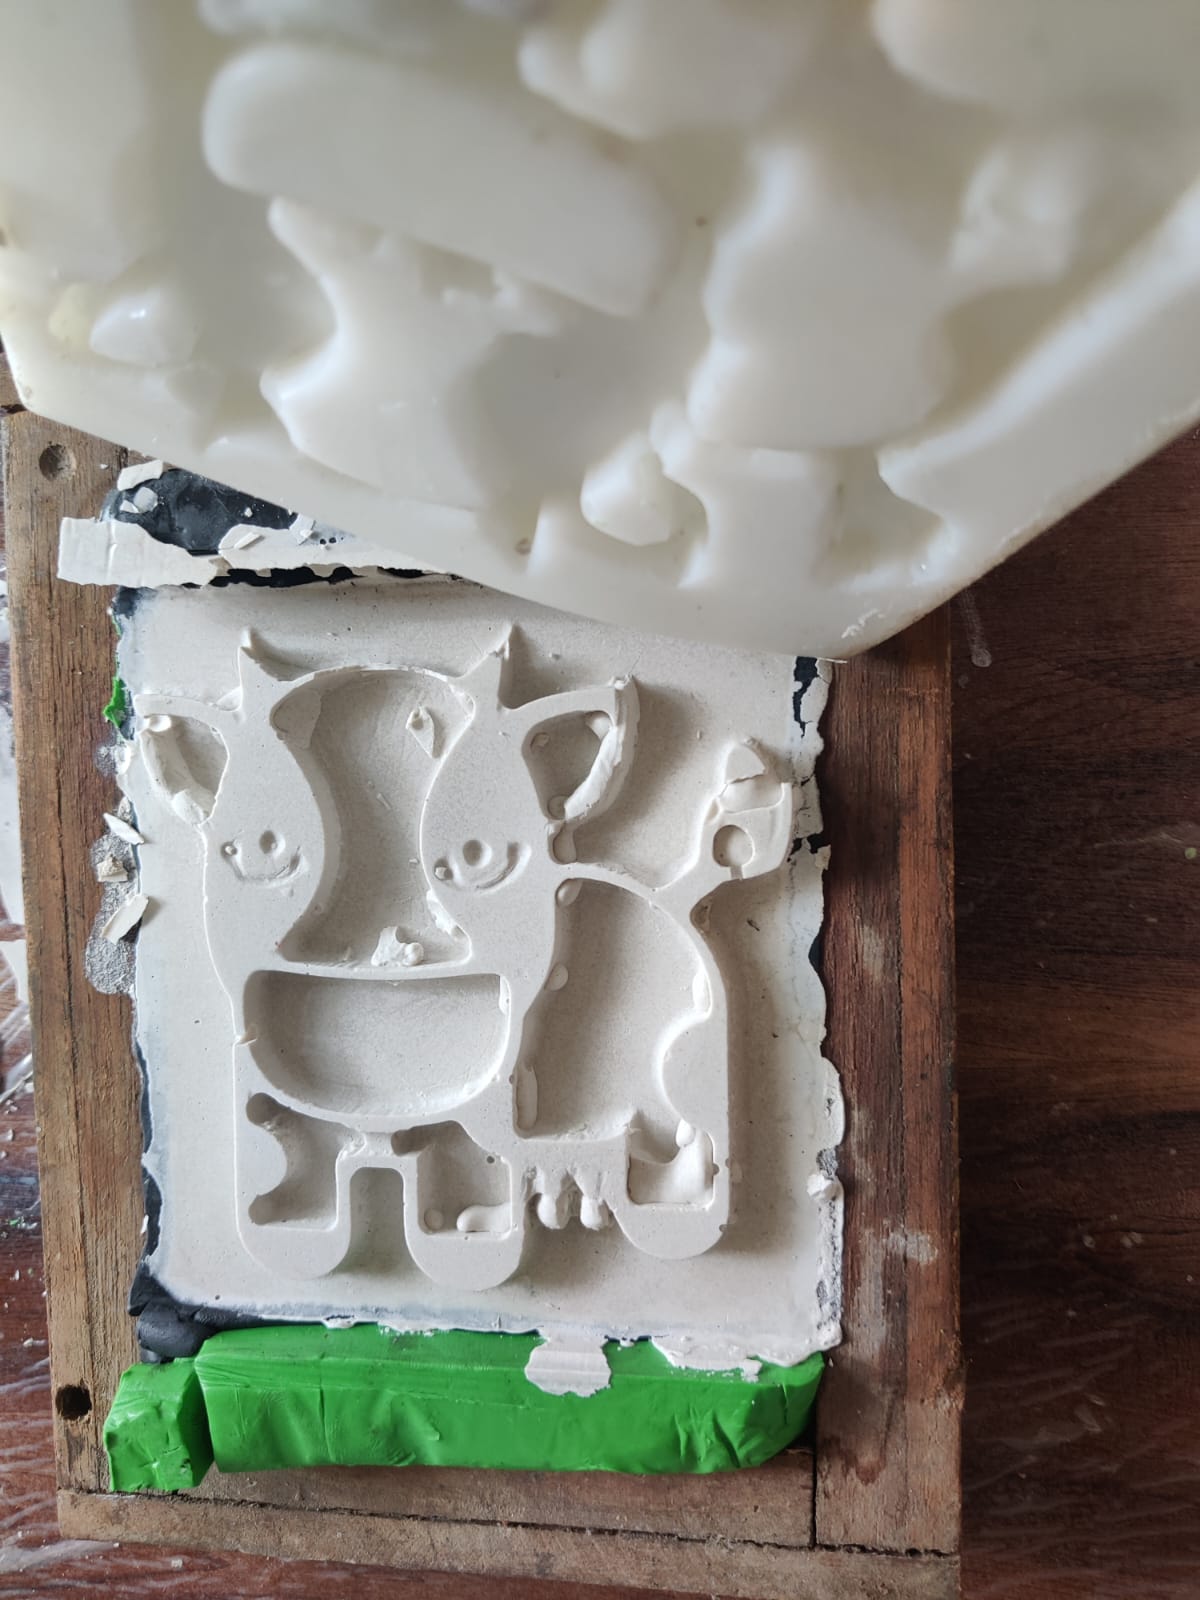
- The final plaster cast successfully reproduced the shape and details of the original master pattern. The RTV silicone mold can be reused multiple times to create identical copies until the mold eventually wears out or becomes damaged.
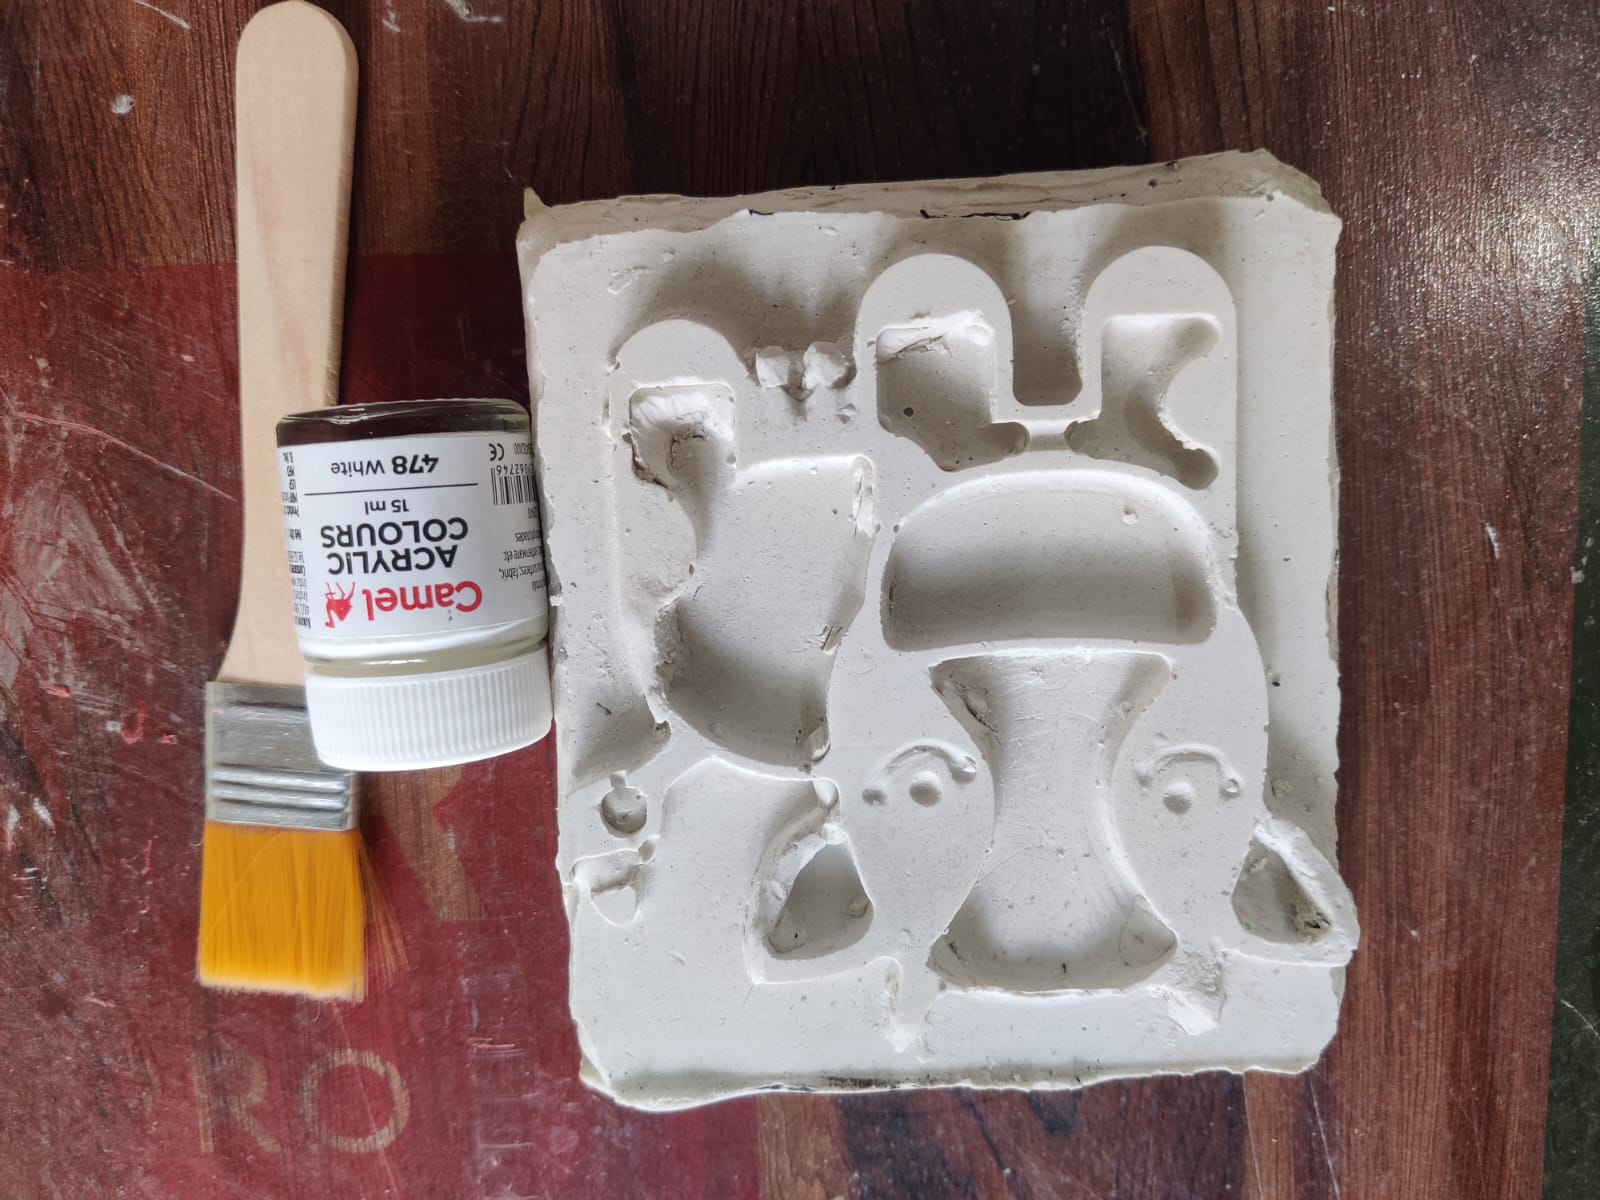
- After casting, I will carefully remove the CuteCute Cartoon Cow 3D Model 3D Model from the RTV silicone rubber mold and clean any excess material or surface imperfections.
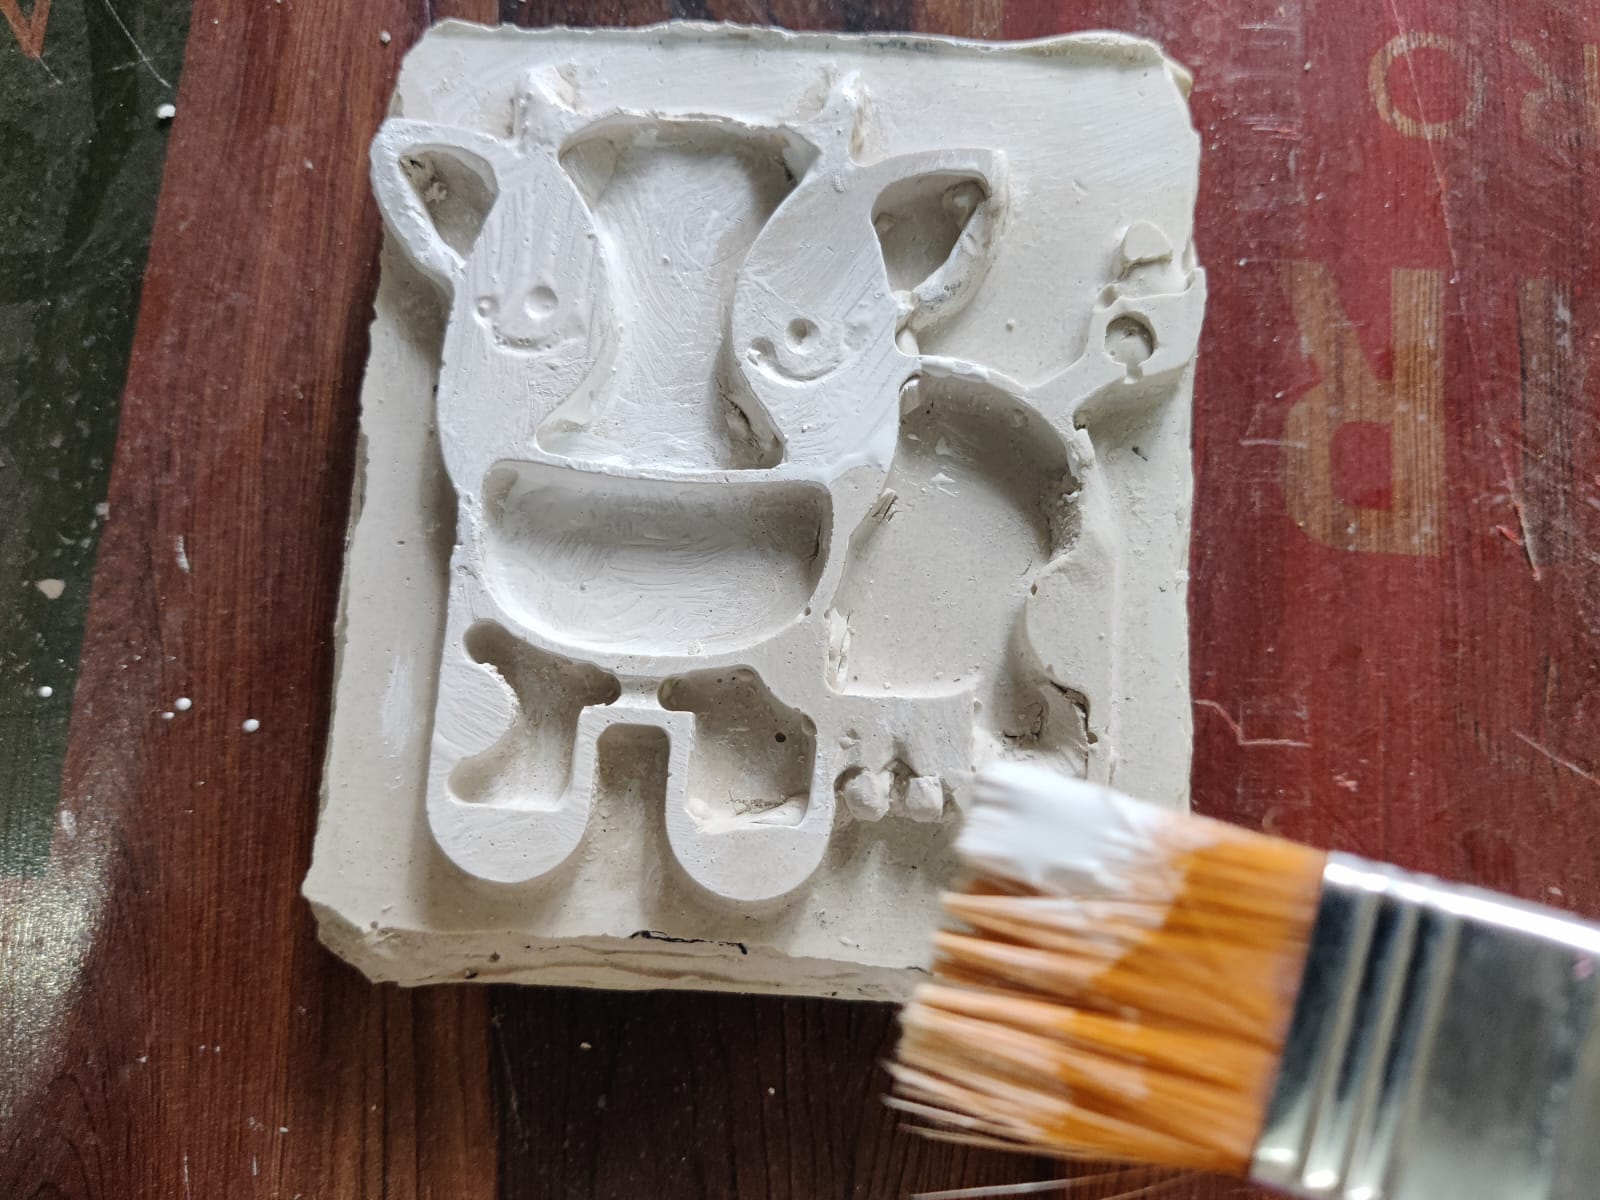
- I will apply a white base coat to the entire Plaster of Paris model to create a smooth and uniform surface for decoration.
- After painting, I will allow the model to dry completely for approximately 30 minutes.
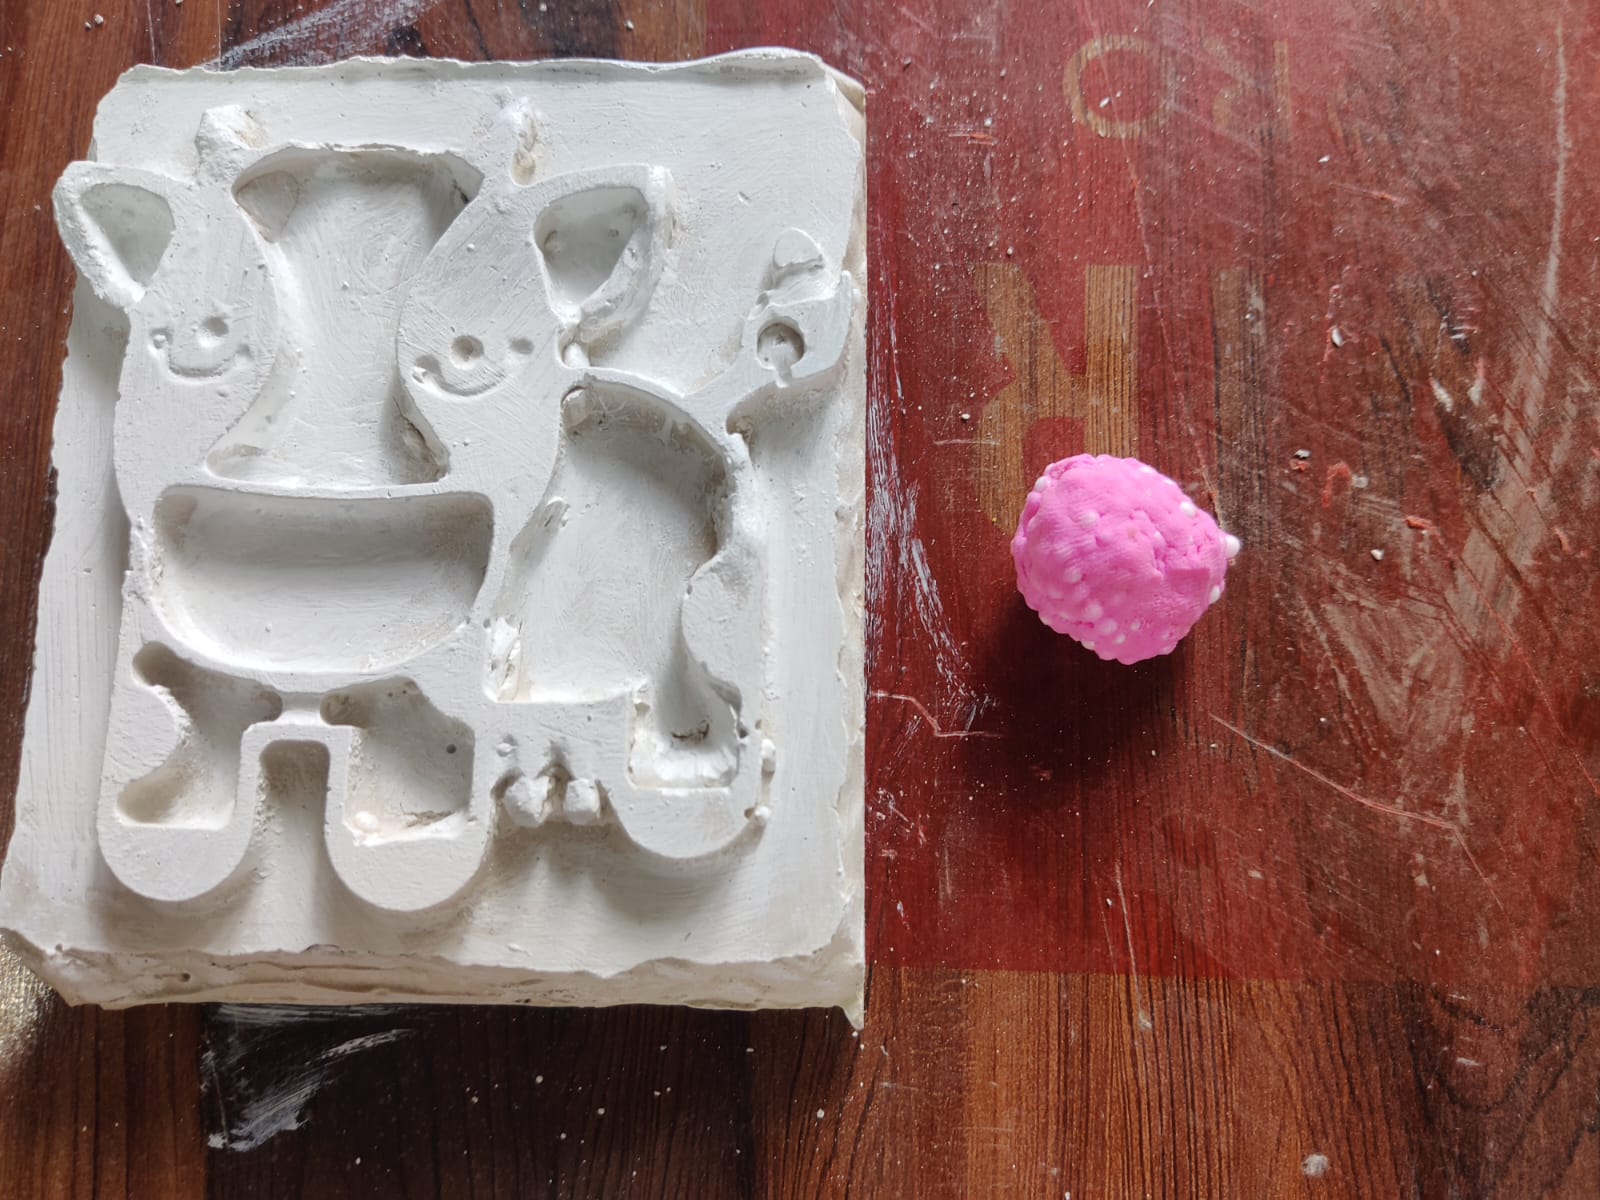
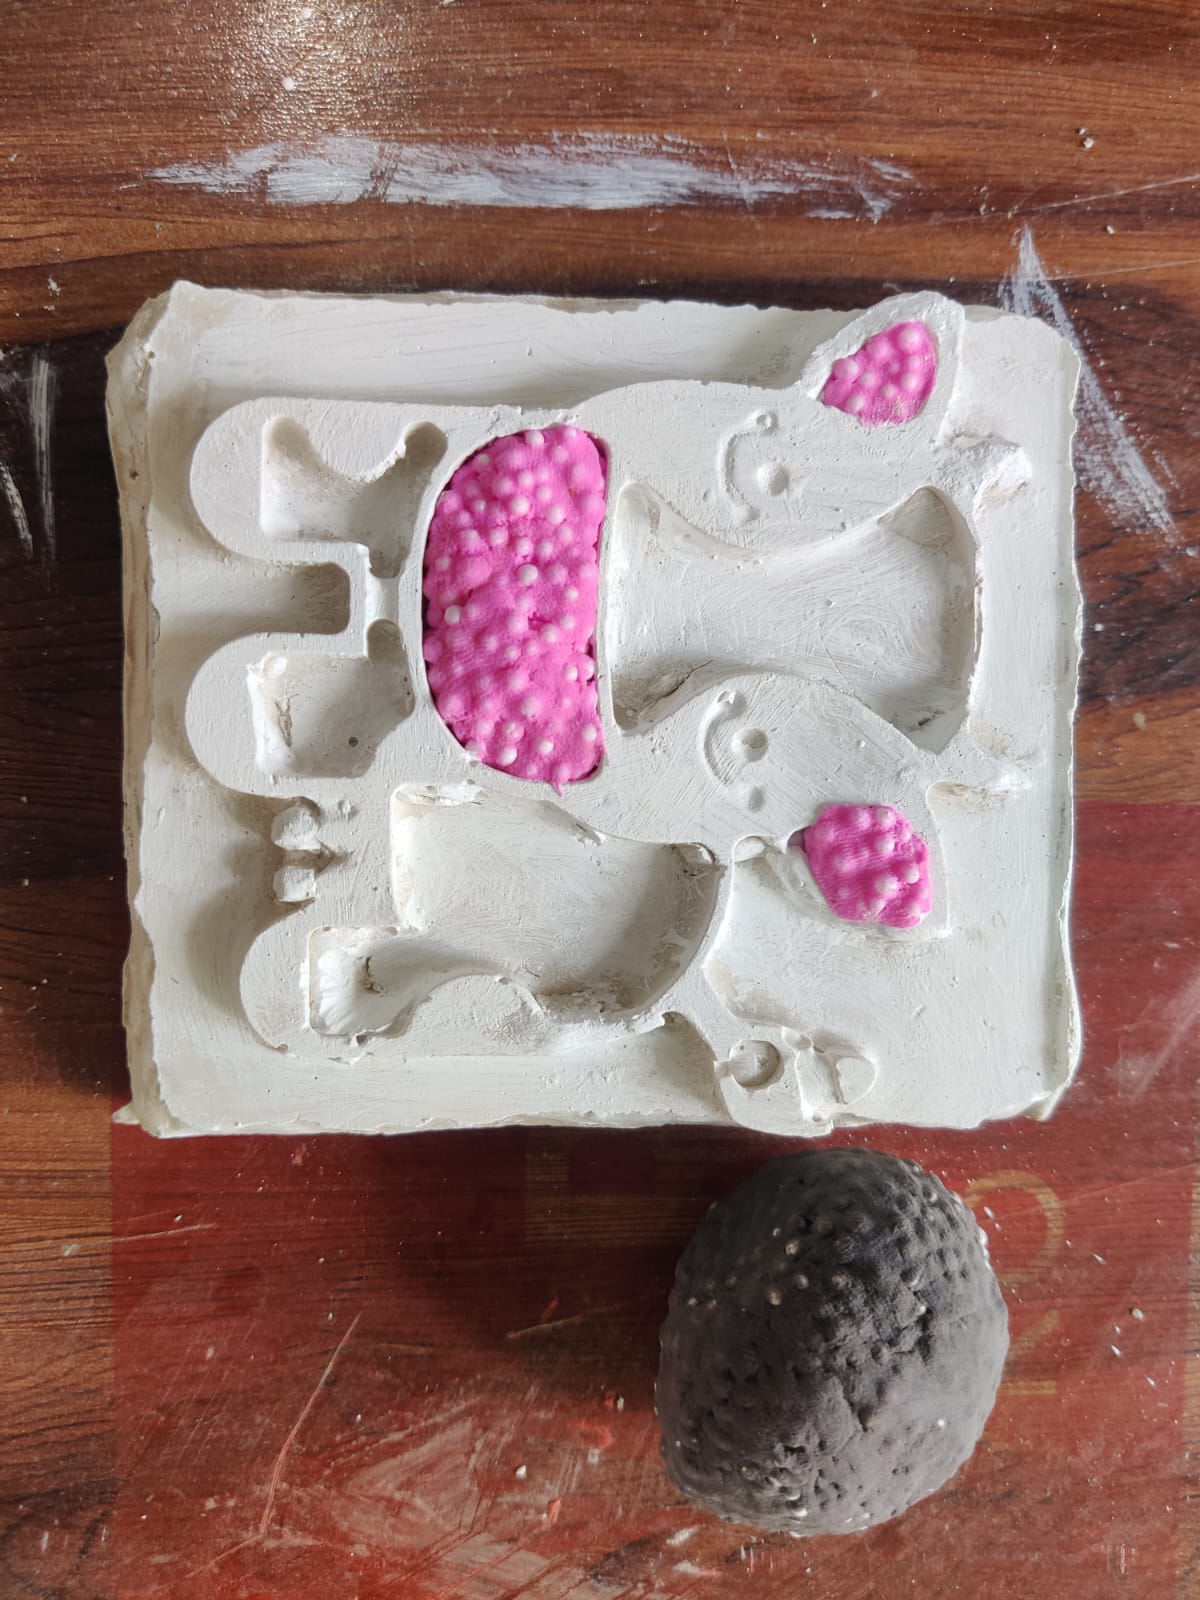
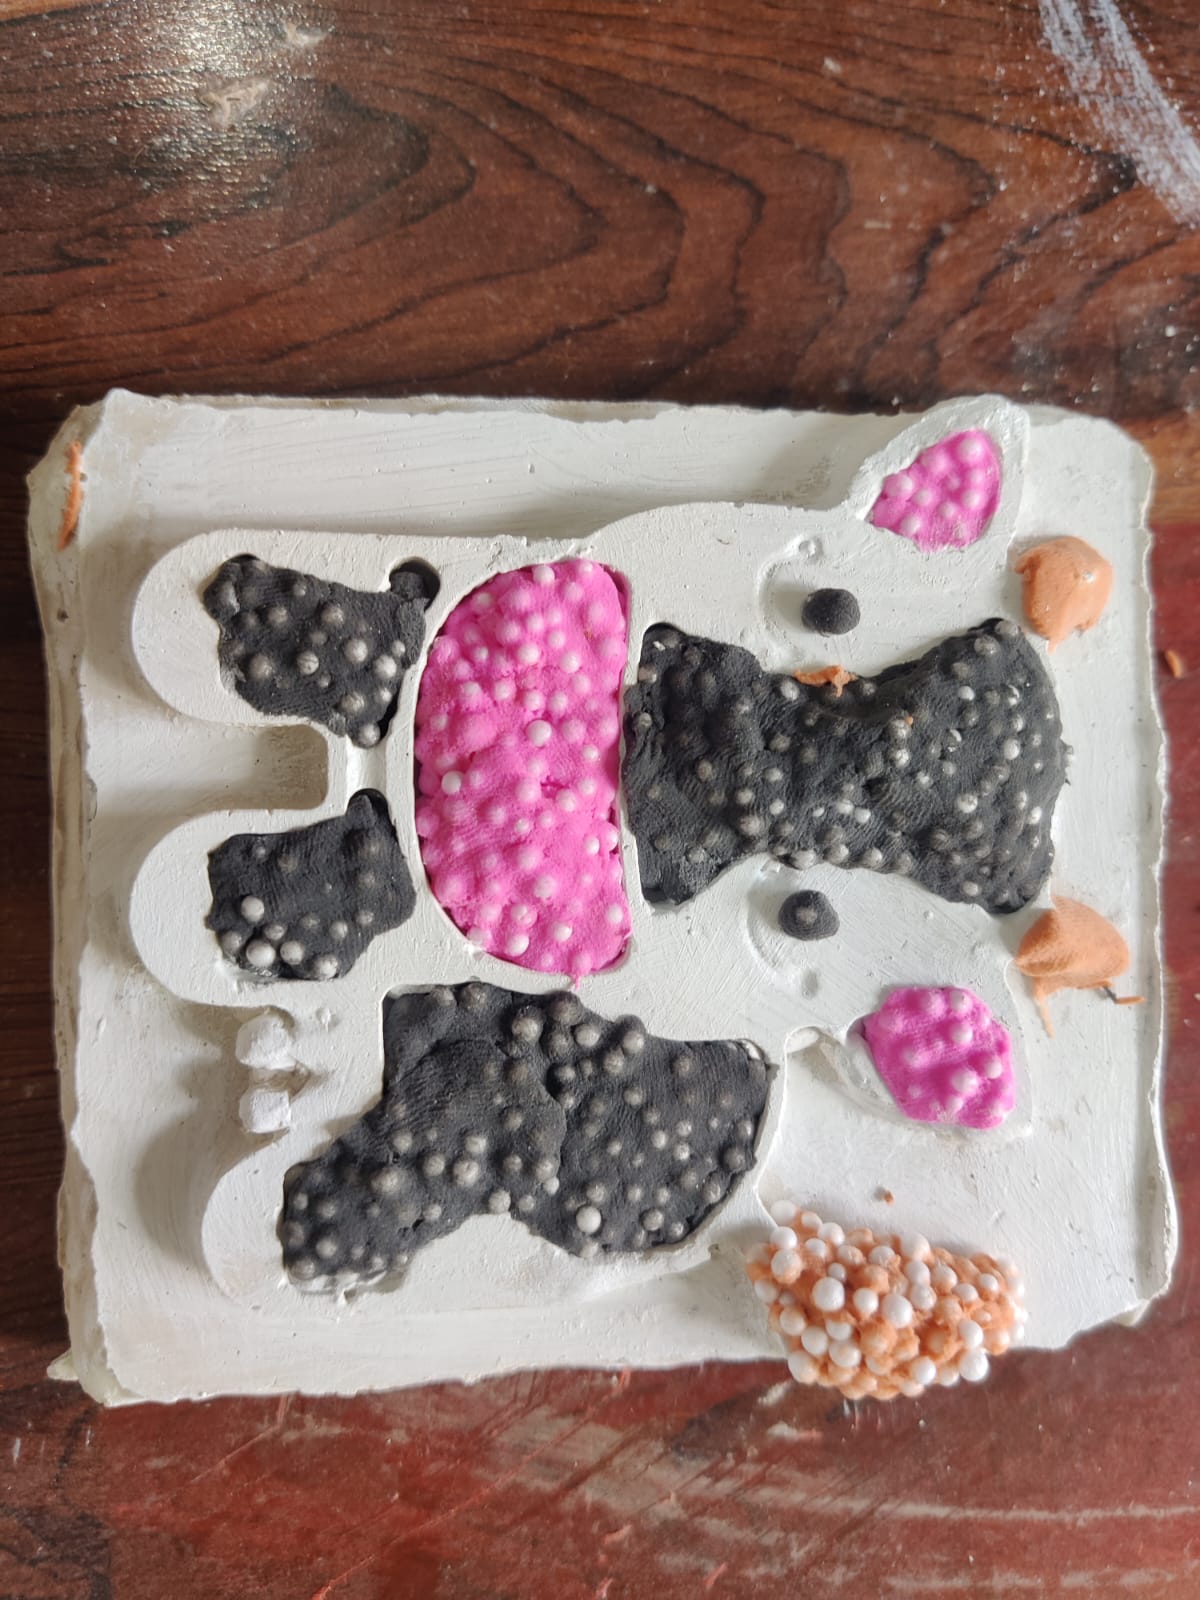
- Once the paint has dried, I will use pink-colored foam clay to fill and decorate the mouth and ear sections of the Cute Cartoon Cow 3D Model.
- I will then apply brown-colored foam clay to the tail and horns to enhance their appearance and provide realistic color contrast.
- Black-colored foam clay will be used to fill and decorate the body areas of the Cartoon Cow.
- Finally, I will apply blue paint to highlight the raised details and contours of the model, making the features more visible and visually appealing.
- The completed model will demonstrate how molding and casting techniques can be combined with creative finishing methods to produce an interactive foam-clay art activity for children.

Casting Plaster of Paris Using an RTV Silicone Mold
Problems Faced and How I Fixed Them
Air Bubbles in the Mold
While pouring the RTV silicone into the wax mold, I noticed the formation of air bubbles, especially around detailed areas. These bubbles caused defects in the mold surface.
Solution-Manual Technique to Avoid Air Bubbles Without Vacuum Degassing
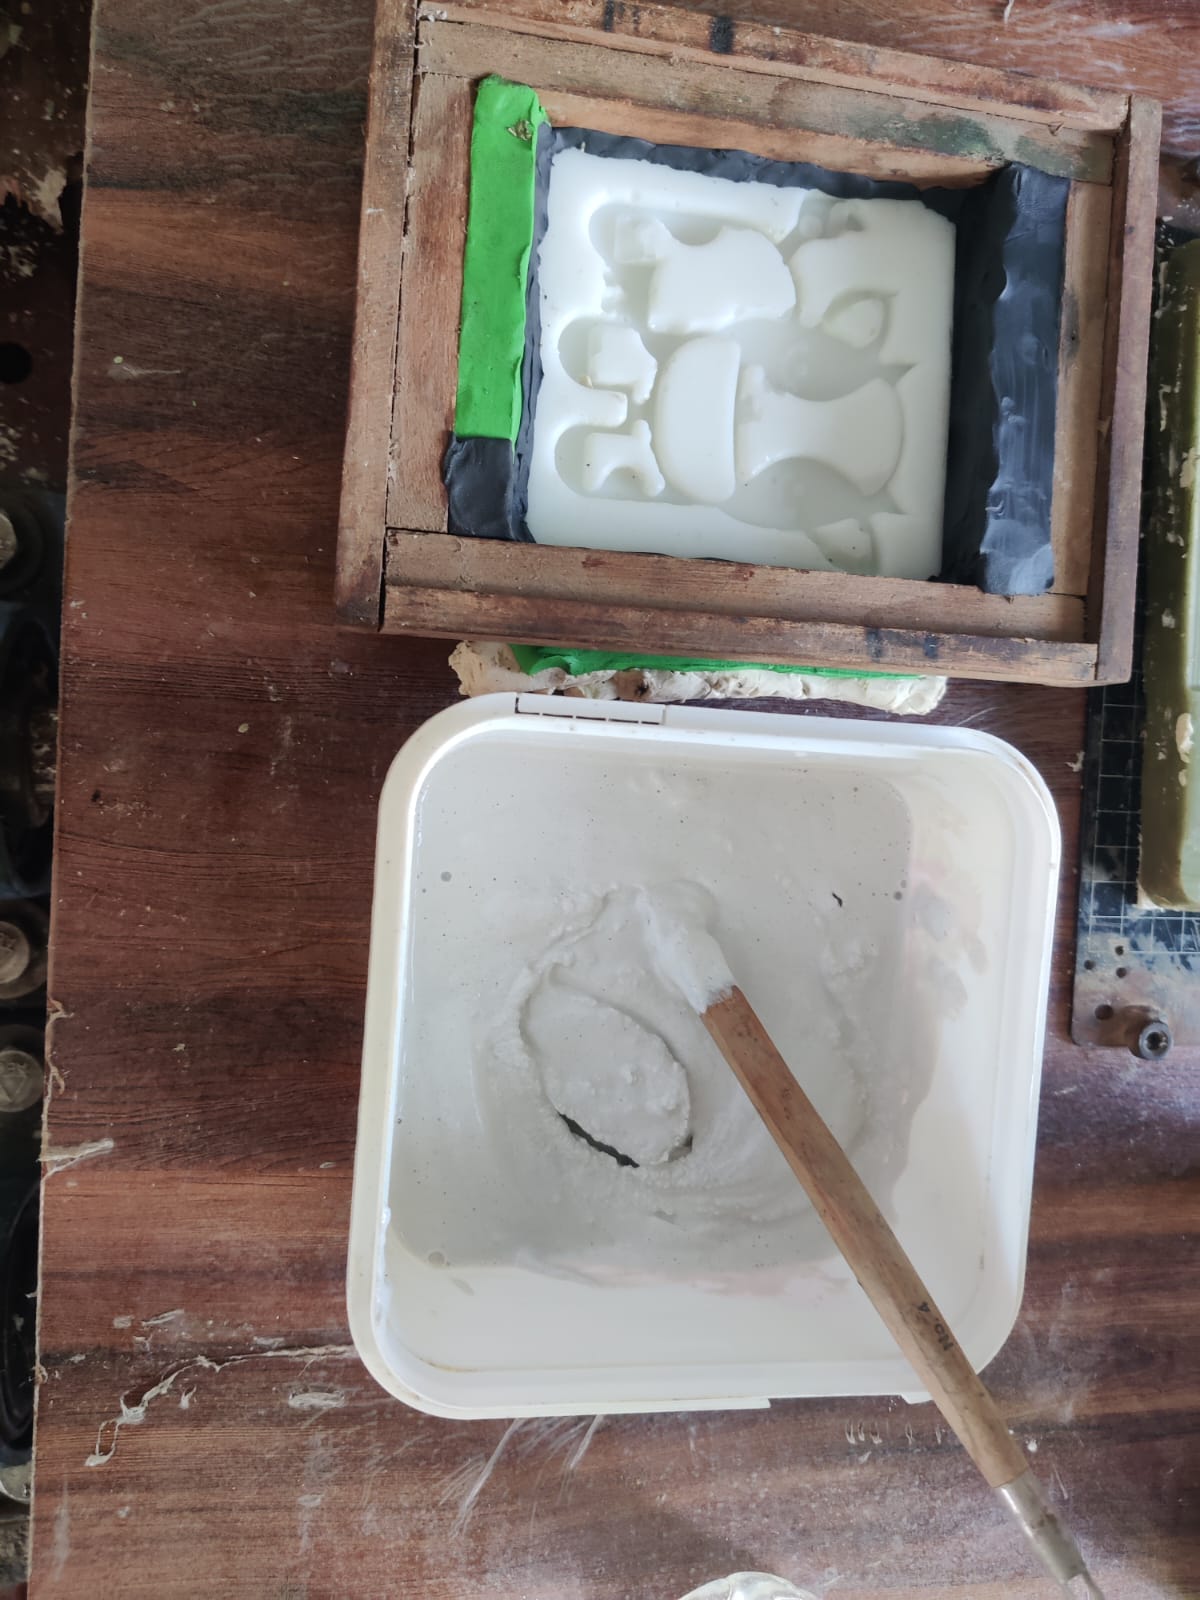
Since a vacuum degassing machine was not available, I followed a manual technique to minimize air bubbles during silicone mold making. I started by using a small round brush to gently paint a thin layer of silicone directly onto the surface of the mold. This helped push silicone into fine details and prevented air from being trapped in corners and small features.
I carefully ensured there were no gaps while brushing the first layer. Once the surface was fully coated, I slowly poured the remaining mixed silicone over the mold from a height in a thin stream. This method reduces air entrapment during pouring and allows bubbles to rise naturally before curing.
This brushing and pouring technique proved effective in capturing fine details and minimizing surface defects in the final mold, especially in the absence of a vacuum chamber.
While pouring the Plaster of Paris vacuum degassing system was not available I gently tapped the plywood base and sides of the mold assembly to help trapped air bubbles rise to the surface.
Post-Casting Finishing Process
Files download here
Cartoon_Cow_100x100x6mm.stl file