Brief Introduction
As part of this, I read and signed the student agreement, committing to the responsibilities of the course, and
pushed it to my
repository using Git. I also worked through a Git tutorial to become familiar with version control workflows. Additionally, I created
a
personal website in the
class archive that introduces who I am and presents an overview of my proposed final project idea, following the
lecture guidelines.
Articulated cosplay wings are an exciting and ambitious project that merges mechanical engineering, electronic
control, and visual design. Since I
already have hands-on experience in mechanical fabrication, electronics, and custom-built control systems, I am
well-equipped to develop an advanced wing
mechanism that offers both functionality and aesthetics. For the wing motion, I have chosen the scissor mechanism
due to its simplicity, reliability, and
precise linear expansion. The movement will be powered by a DC motor, providing controlled and smooth actuation of
the wings. I aim to use lightweight yet
strong materials to ensure both durability and comfortable wearability during cosplay.
Git is a free and open-source version control system developed by Linus Torvalds in 2005. Unlike older systems
(like SVN or CVS), Git is distributed—meaning
every user has a complete copy of the repository, including its full history, on their local machine. A version control protocol like Git is a system used to track changes in files and coordinate work among
multiple
people. Git is the most widely used modern
version control system and is especially popular for software development, but it's also useful for managing any
kind of digital project.
Tracks changes to files over time, allowing you to review history and revert to earlier versions. Facilitates collaboration by allowing multiple people to work on the same project without overwriting each
other's work. Creates branches for experimenting or developing features separately from the main project. Merges changes intelligently when different versions of a file are combined.
Documentation: In Fab Academy, documenting each weekly assignment and project is crucial. Git helps manage and
publish this documentation (usually through GitLab). Backup: All files are safely stored online, so you can restore work if something goes wrong locally. Version Tracking: You can go back and see how your work has evolved over time. Teamwork: For group projects, Git allows everyone to contribute efficiently without confusion. Web Deployment: GitLab Pages can automatically publish your documentation website directly from your repository
Build a personal website in the class archive describing yourself and your final project. Refer to the lecture
material for examples.
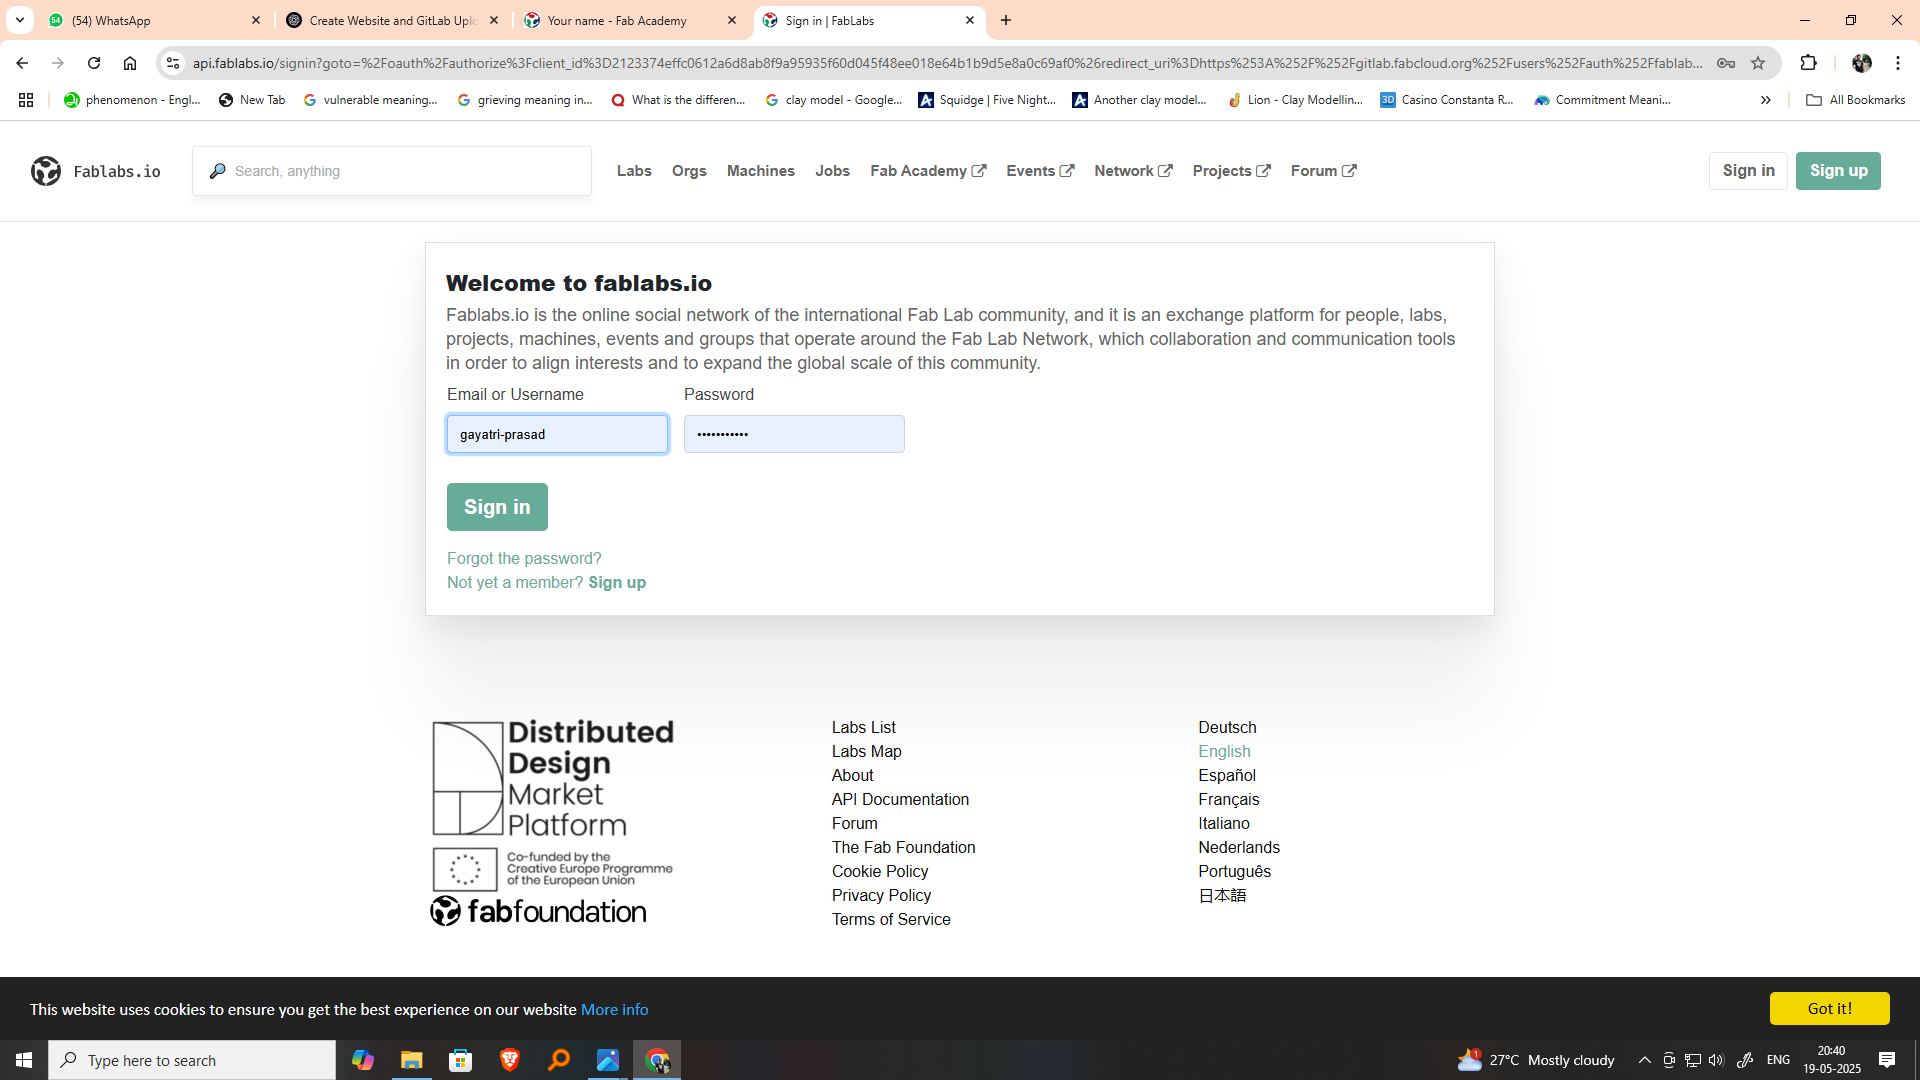
Upload parts 1 and 2, to the class archive. I received the student Git repository link through my email and used my own mail ID to access it. After logging
in, I started exploring the structure of the
repository and gradually began setting up my personal webpage. This marked the beginning of my journey into
understanding web development using GitHub. I
learned how to navigate the repository, organize files properly, and make changes using the web editor. I also
gained basic experience in editing HTML and
markdown files. Publishing the webpage gave me a practical understanding of version control and how content is
updated and managed in a cloud environment. I have successfully downloaded and installed Visual Studio Code (VS Code), a powerful and lightweight code
editor
widely used by developers. I opened the software and
explored its user-friendly interface, which supports multiple programming languages, extensions, and Git
integration. This marks the beginning of my journey in learning
web development and version control for my Fab Academy documentation. With VS Code, I can write, edit, and
preview
HTML, CSS, and JavaScript code efficiently. I plan to
use it for creating my weekly assignments, personal website, and project logs. This tool will be essential for
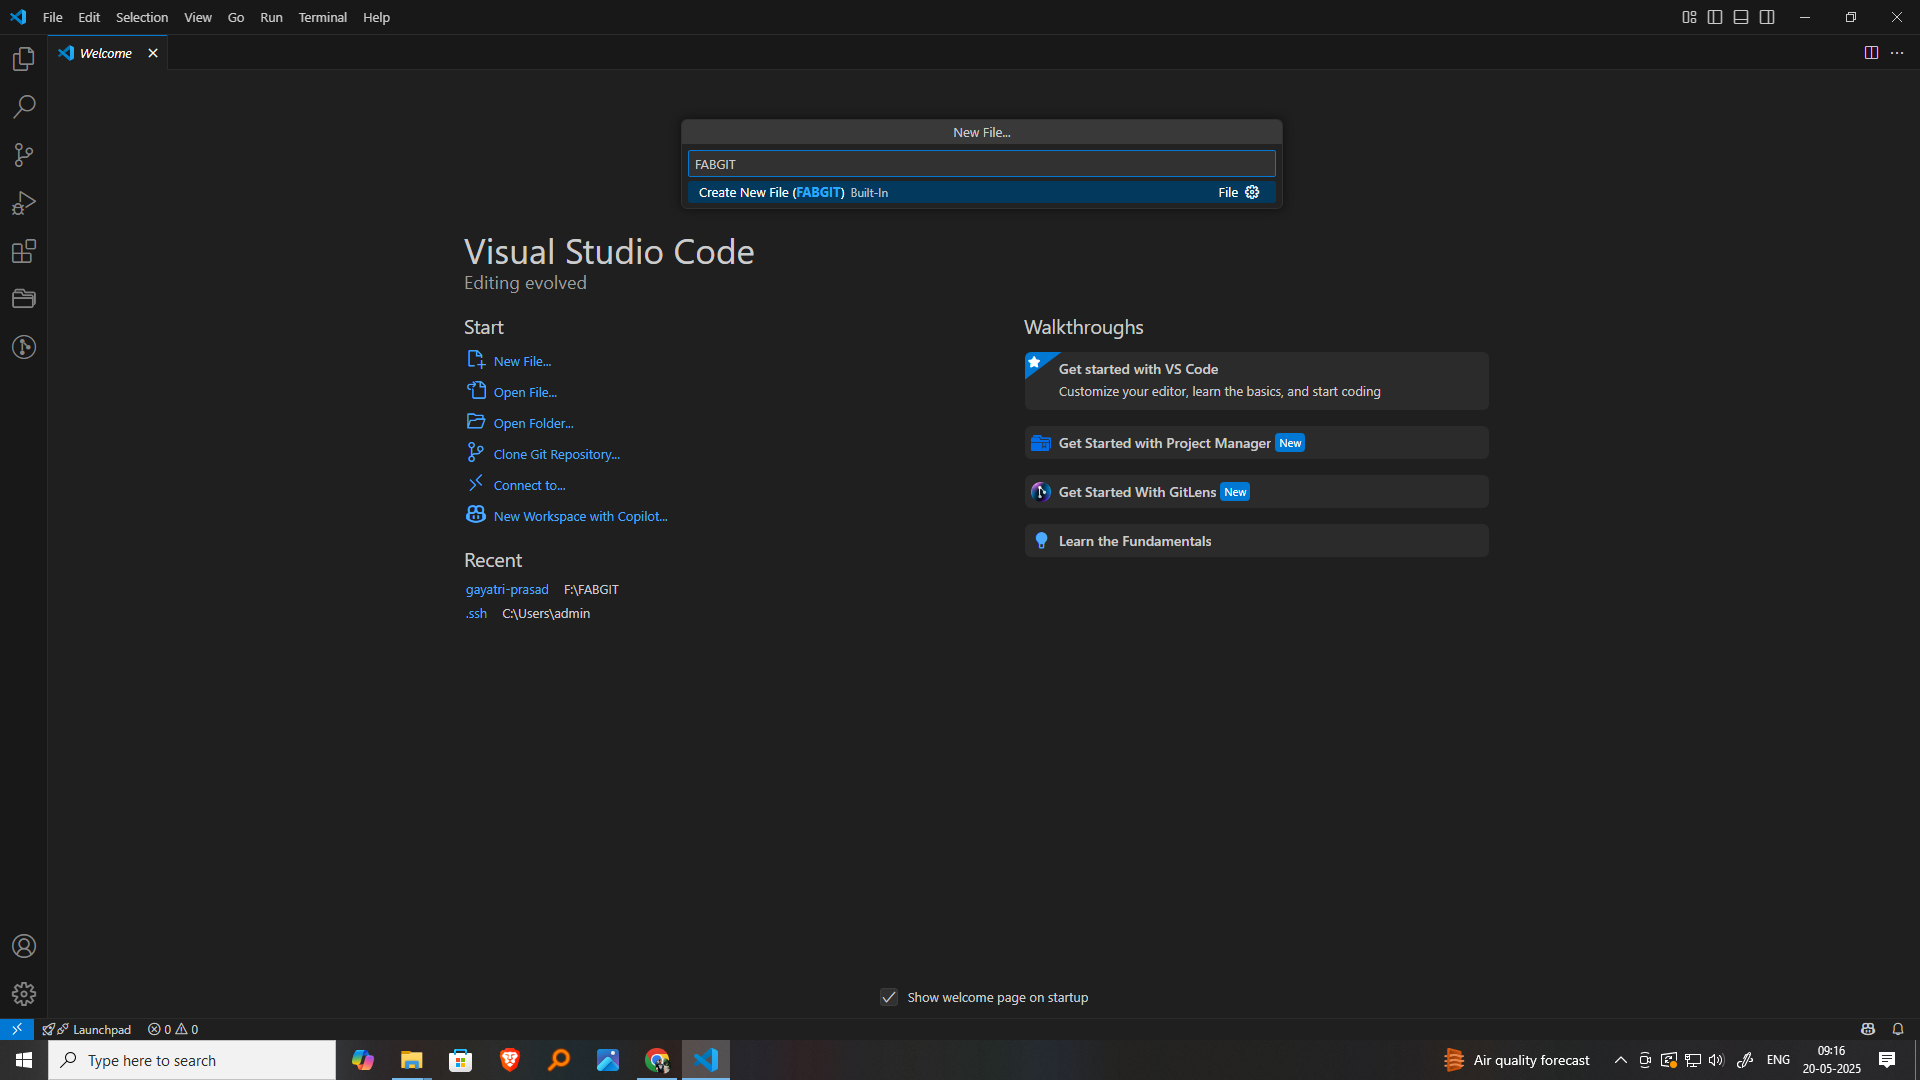
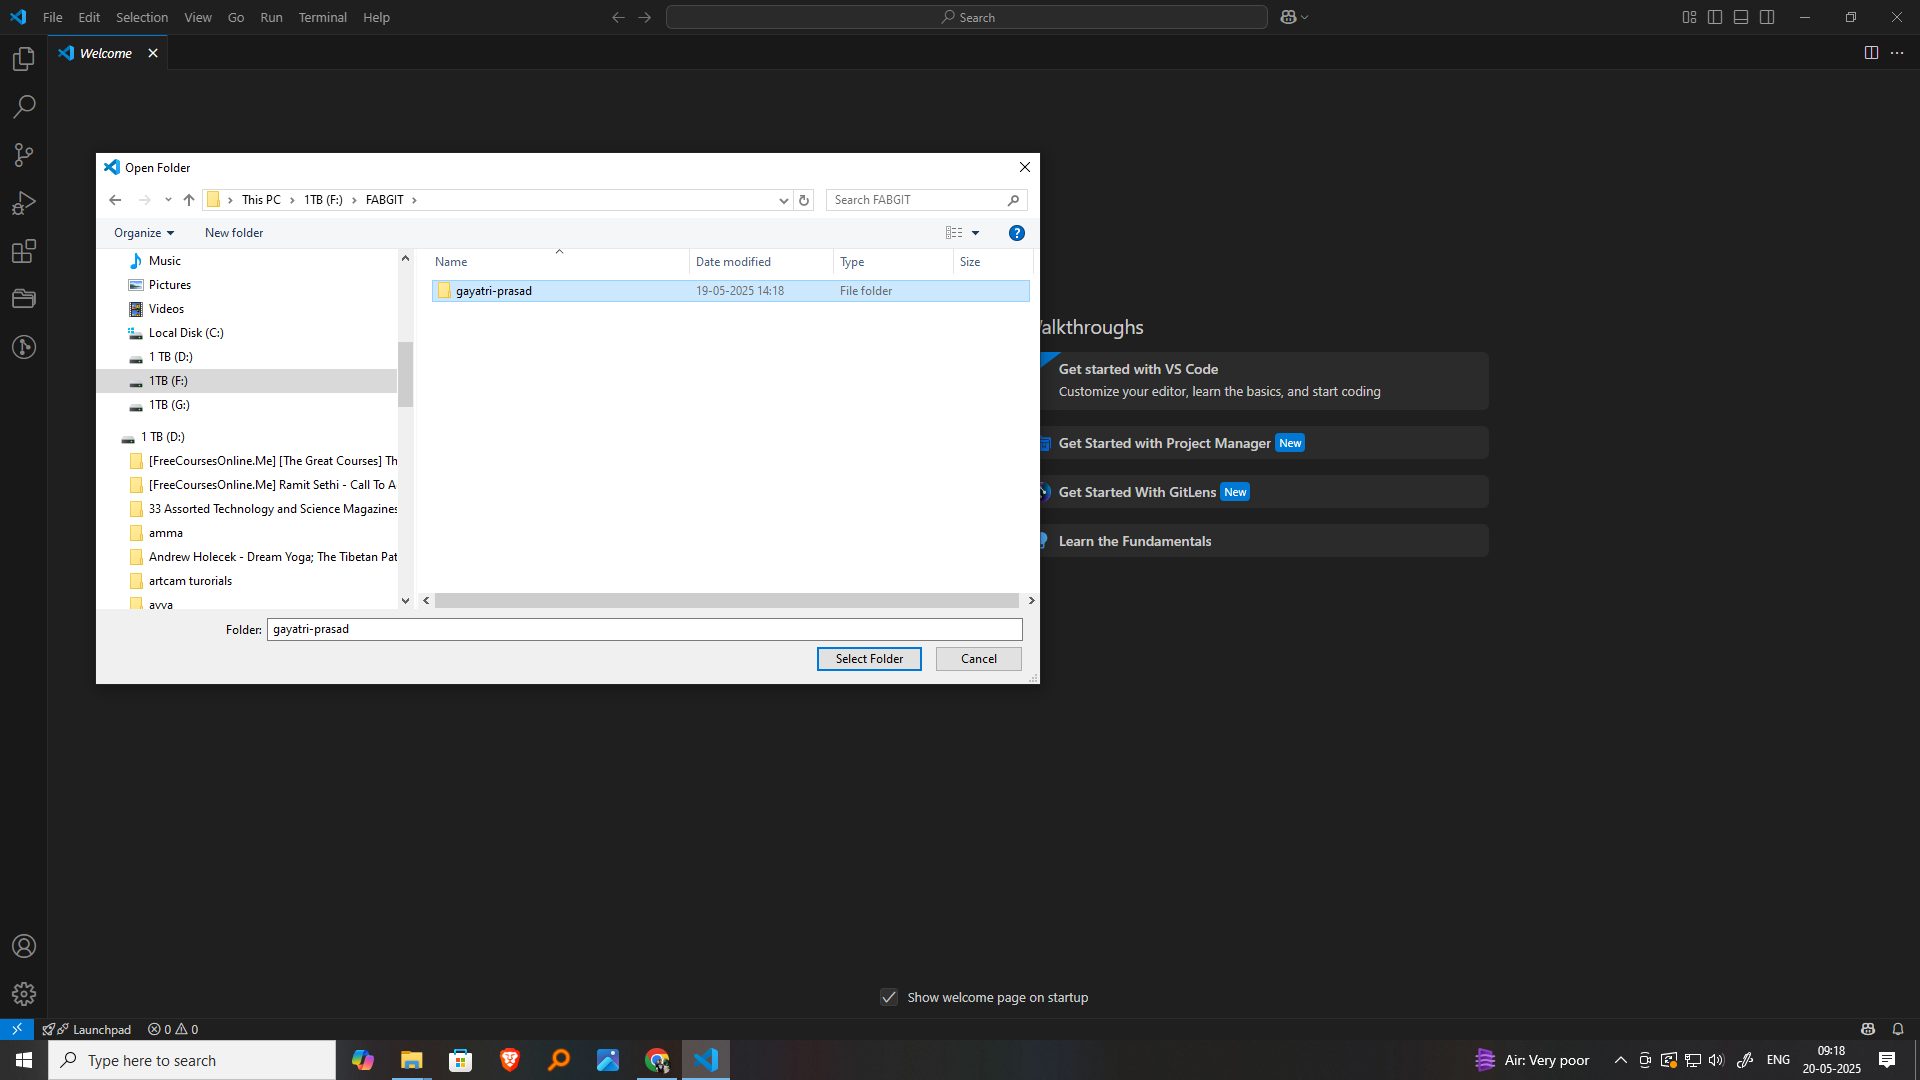
organizing and presenting my work clearly. I opened Visual Studio Code and selected the option to work with a new folder. I created a main folder named
FABGIT to organize my Fab Academy work. Inside FABGIT, I added a subfolder called Gayatri-Prasad
to keep my personal files and documentation separate. Within the Gayatri-Prasad folder, I created another folder
for my first web project. This folder structure will help me manage different assignments and
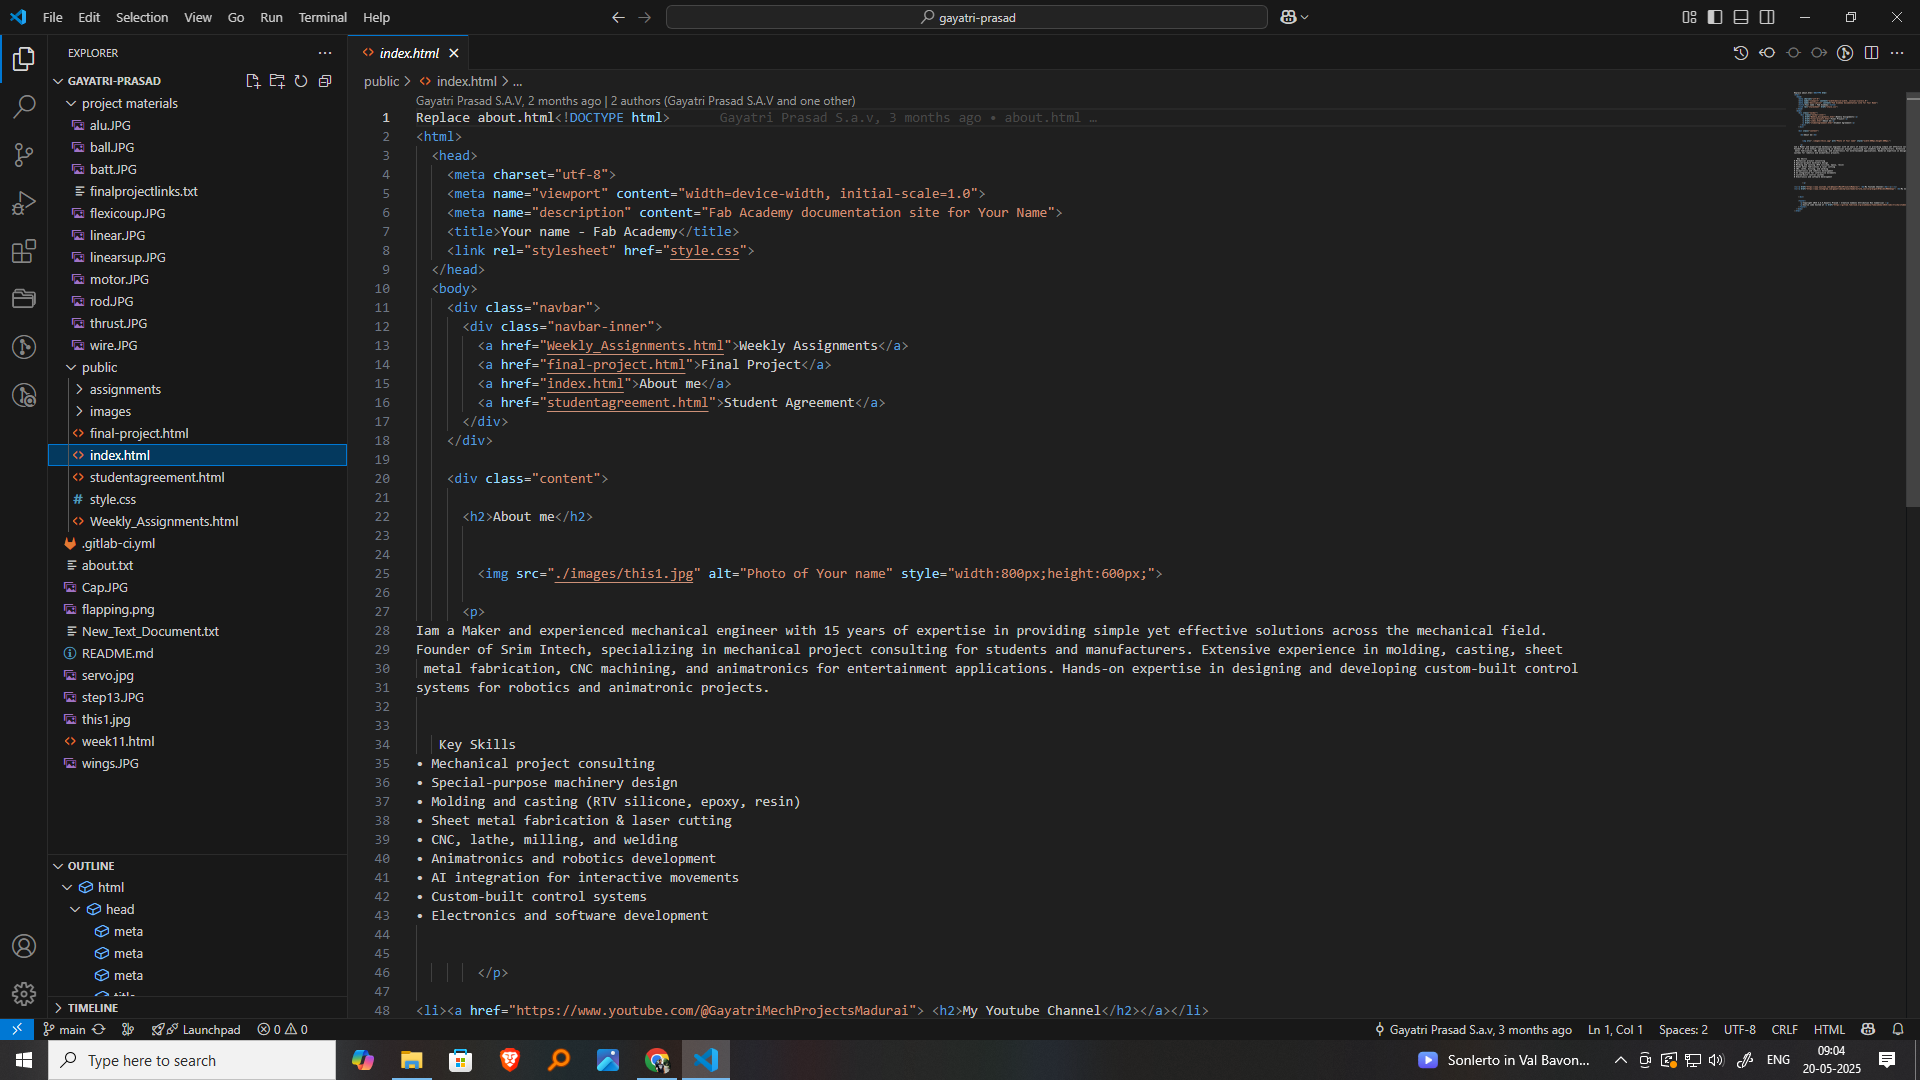
keep everything clean and accessible as I continue my learning journey. In the project folder, I created a simple index.html file, which serves as the main entry point for my website.
I
wrote the basic structure of an HTML document, including the ,
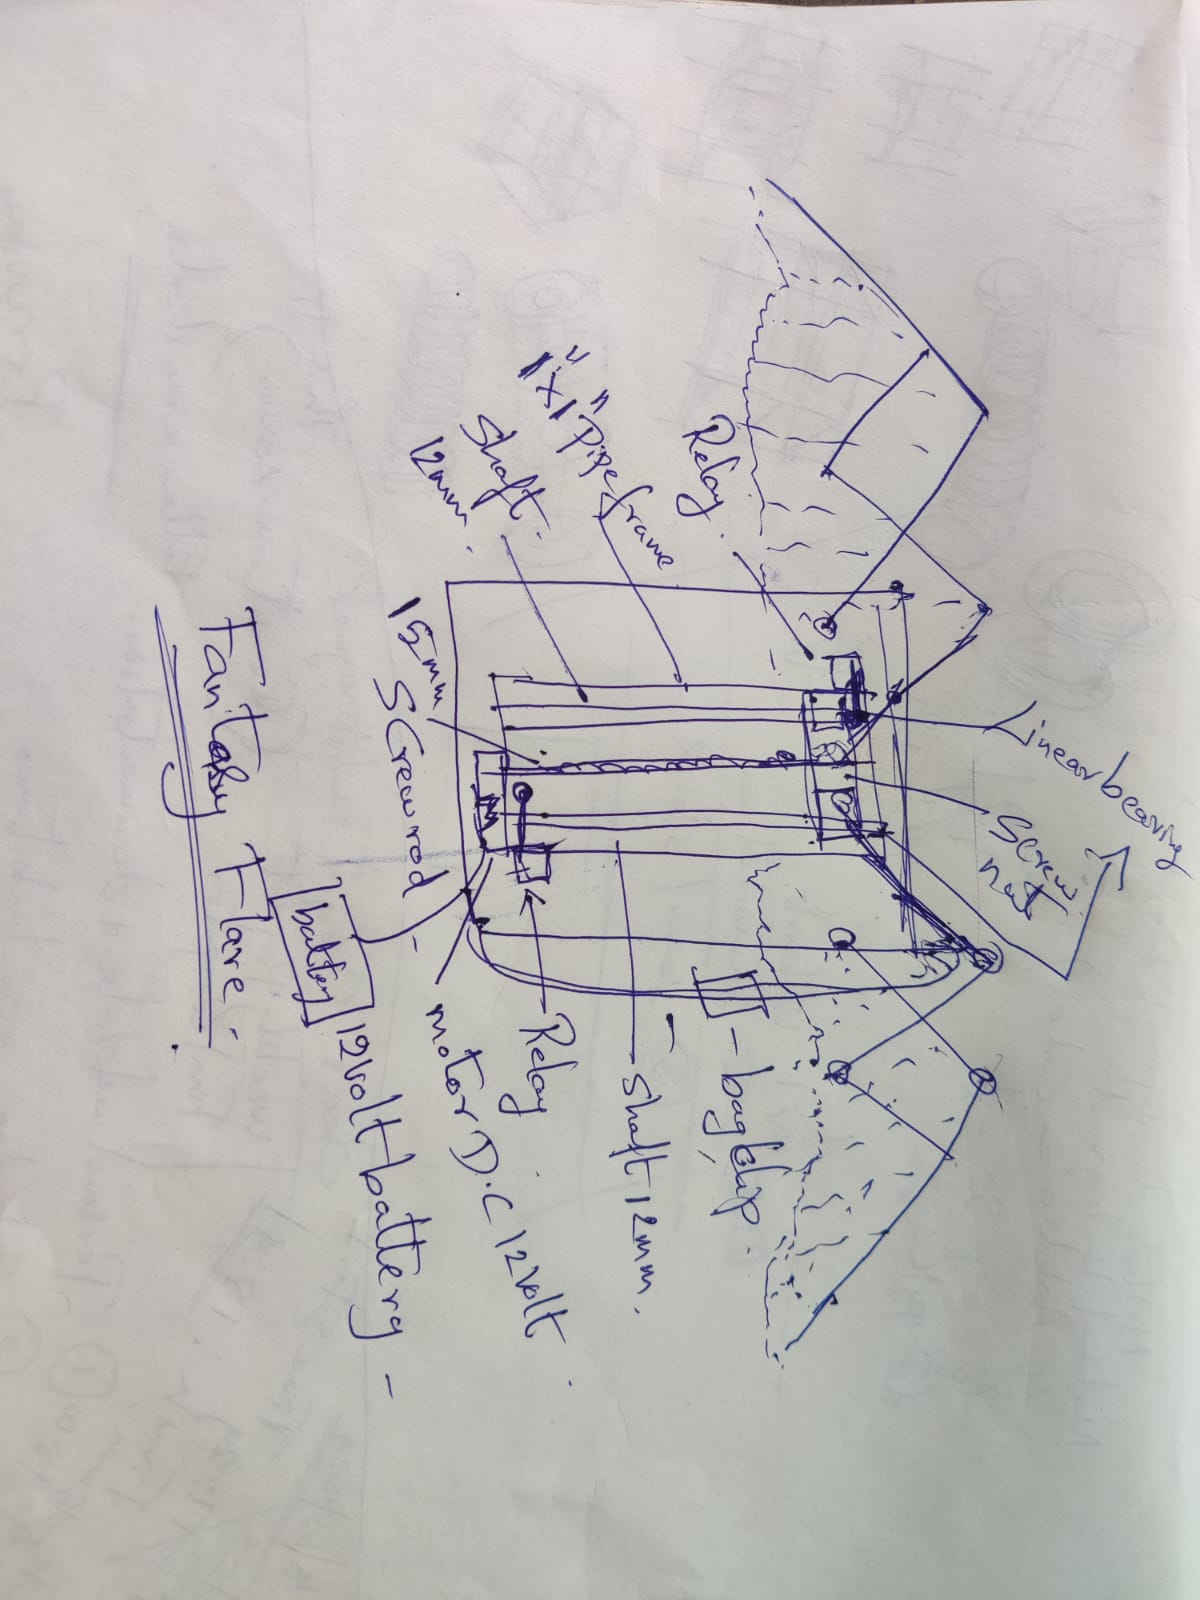
Fantesy Flair – Animatronic Cosplay Wings
Fab Academy Subsystem Layered Gantt
Phase 1 (Week 1–4) – Mechanical Concept
Task W1 W2 W3 W4 Concept Sketch ✔ 3D CAD Design ✔ Paper Wing Model ✔ Cardboard Prototype ✔
Task W5 W6 W7 W8 PCB Schematic ✔ PCB Layout ✔ PCB Milling ✔ Motor Driver Testing ✔
Task W9 W10 W11 W12 Motor Integration ✔ LED Testing ✔ Welding Frame ✔ Backpack Structure ✔
Task W13 W14 W15 W16 Feather Decoration ✔ Control Interface ✔ Subsystem Assembly ✔ Functional Testing ✔
Task W17 W18 W19 W20 Battery Enclosure ✔ Stress Testing ✔ Business Model ✔ Final Demo & Documentation ✔
Click for student Agreement
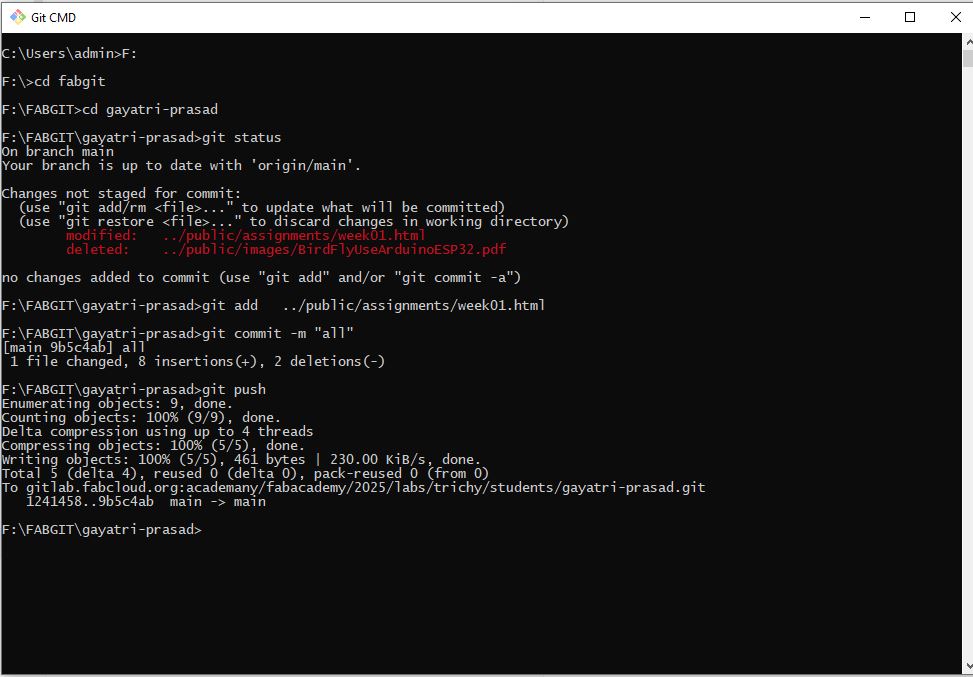
This is how iam Uploading Website Files Using Git CMD
Step 1: Open Git CMD
Open Git CMD. A command prompt window will appear.
C:\Users\Admin>Step 2: Change the Drive to F:
Type the following command:
F:Press Enter.
The prompt will change to
F:\>Step 3: Navigate to the FABGIT Folder
Type the following command:
cd FABGITPress Enter.
The prompt will change to:
F:\FABGIT>Step 4: Navigate to Your Repository Folder
Type the following command:
cd gayatri-prasadPress Enter.
The prompt will change to:
F:\FABGIT\gayatri-prasad>Step 5: Check Repository Status
Type the following command:
git status
F:\FABGIT\gayatri-prasad>git git status"Step 6: Add Files to the Staging Area
Type the following command:
git add .F:\FABGIT\gayatri-prasad>git add .Press Enter. After the command is completed, the prompt will return to:
F:\FABGIT\gayatri-prasad>Step 7: Commit the Changes
Type the following command:
git commit -m "all"F:\FABGIT\gayatri-prasad>git commit -m "all"Press Enter. Git will display a summary showing which files were changed, inserted, or deleted.
Step 8: Push Changes to the Online Repository
Type the following command:
git pushF:\FABGIT\gayatri-prasad>git push"Press Enter. Git will upload all committed changes to the remote repository. Once the upload is completed successfully, the updated files will be published on your Fab Academy webpage.
Complete Git CMD Commands
Thus, I created my Fab Academy webpage using GitLab and Visual Studio Code. These tools helped me manage my project files, version control, and organize my documentation efficiently. During the process, I learned HTML to structure my site, along with a little bit of CSS to improve its appearance. I also explored basic JavaScript to add some interactivity. This experience has given me confidence in web development and helped me present my work in a more optimized and professional way. My website now serves as a digital portfolio to showcase my Fab Academy journey and weekly assignments effectively.
This method is useful for single edit.(This method is used intially before i learn't about Git uploading Much better but this is also a way of Uploading.)
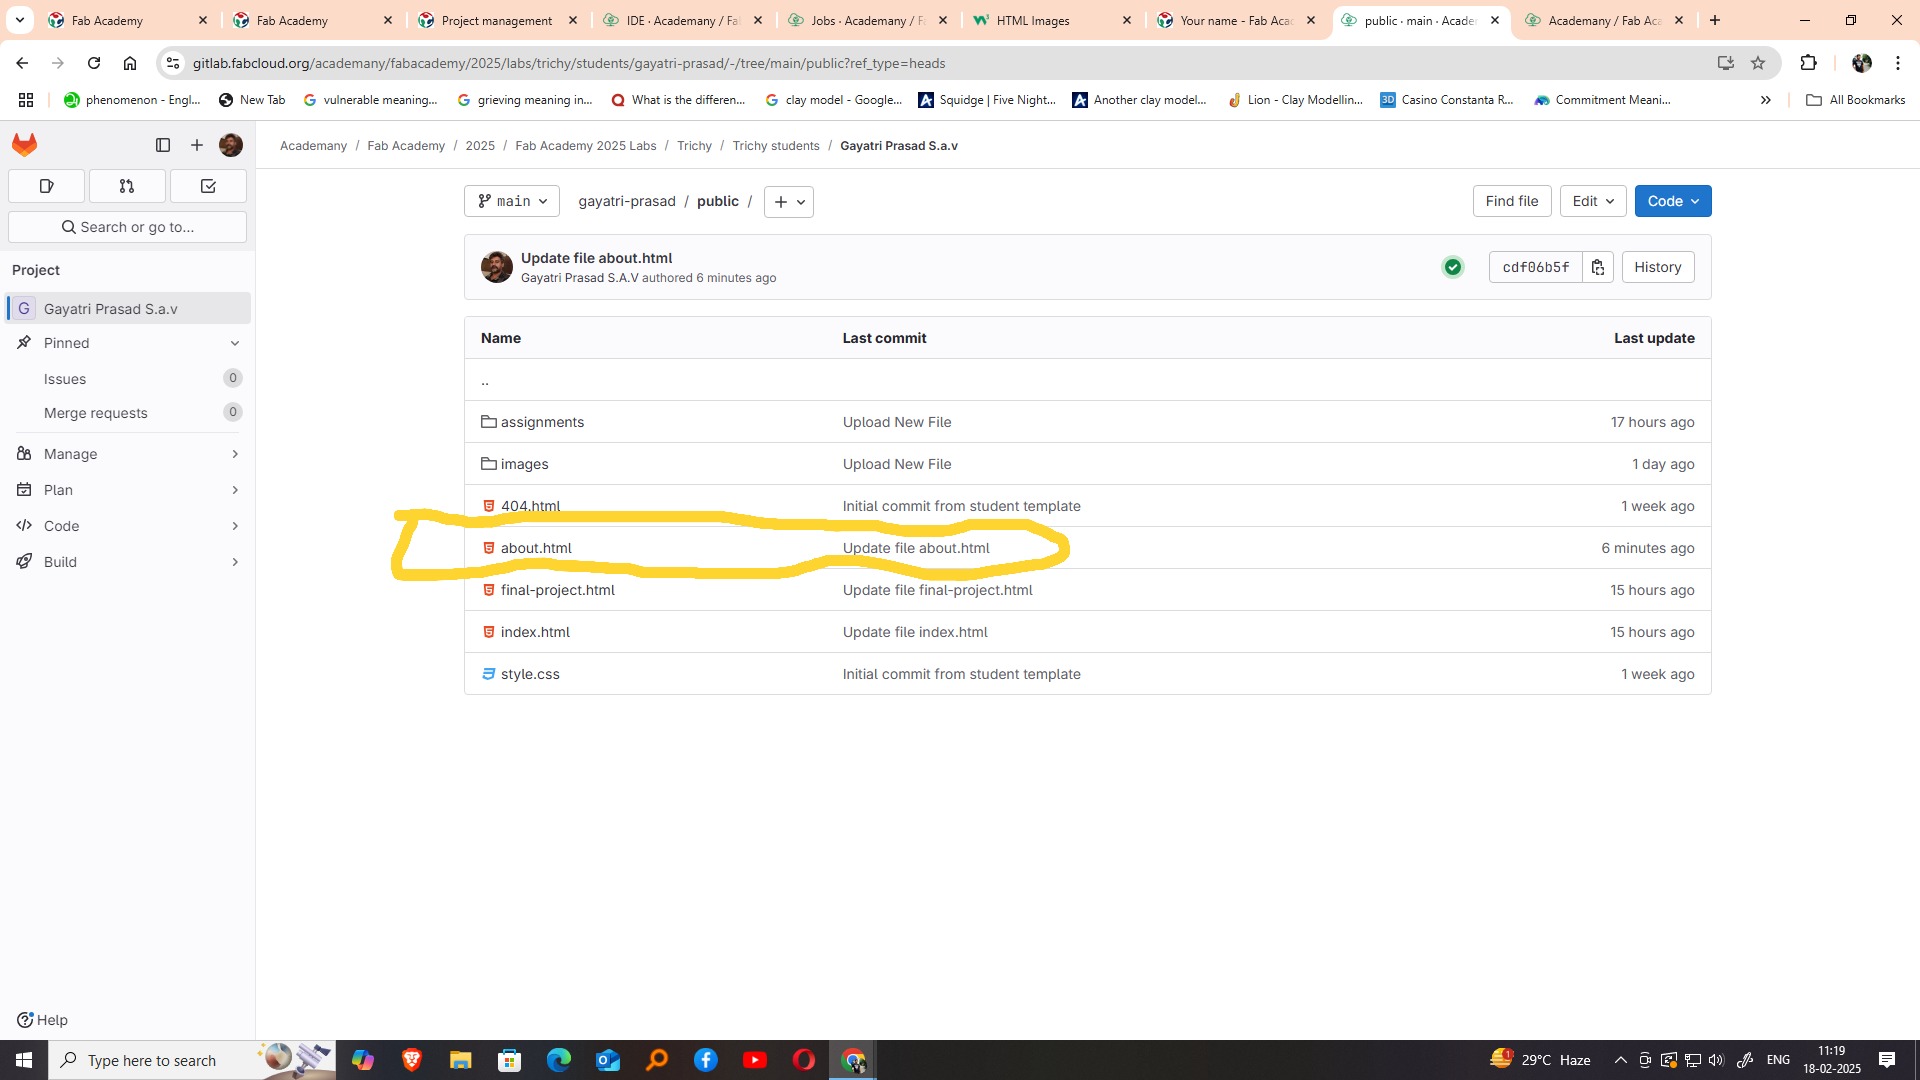
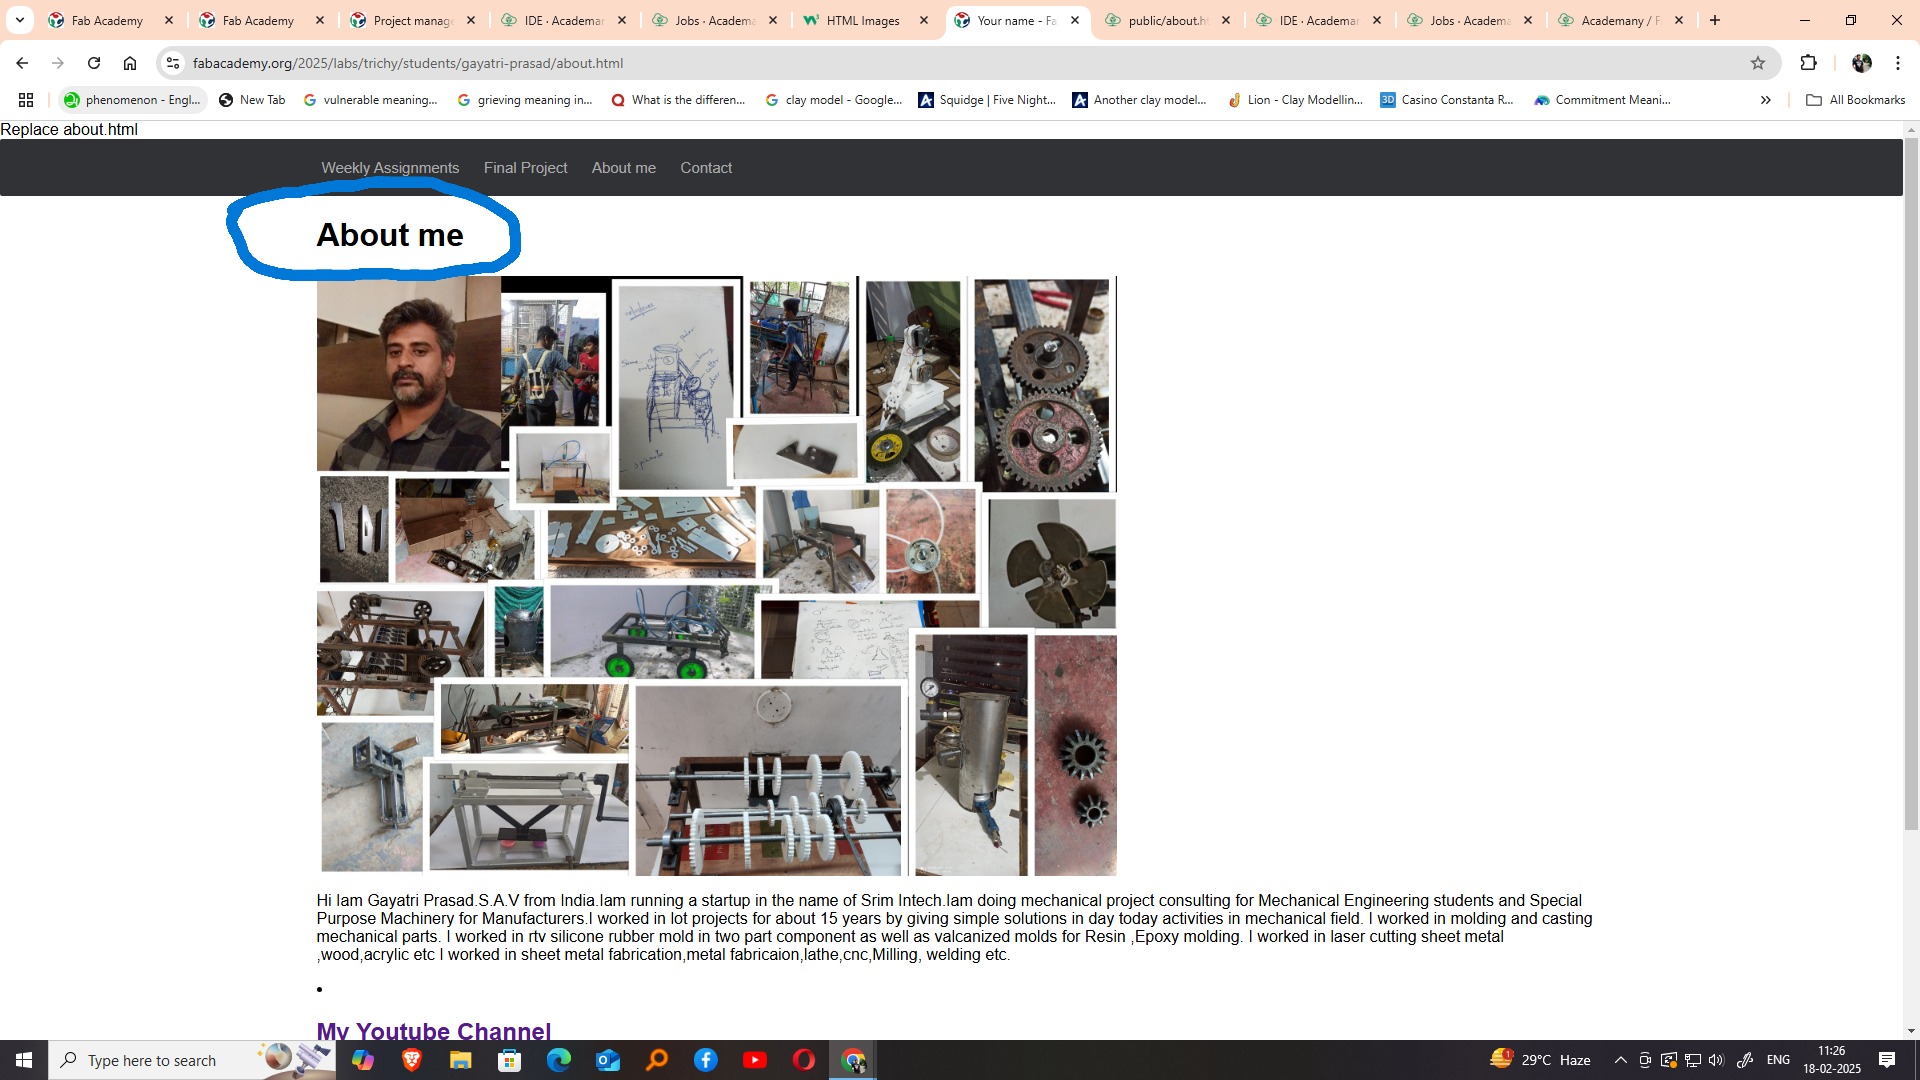
To begin edit my webpage content, I navigated through the file structure of the repository and located the about.html page, which is typically used to display personal or background information. I selected this file and opened it using the GitHub web editor. This allowed me to view and understand the HTML structure used to edit the page. By examining the existing code, I learned how different tags and elements were used to organize content. This gave me the opportunity to edit the page, add my own details, and start shaping it to reflect my personal profile and background.
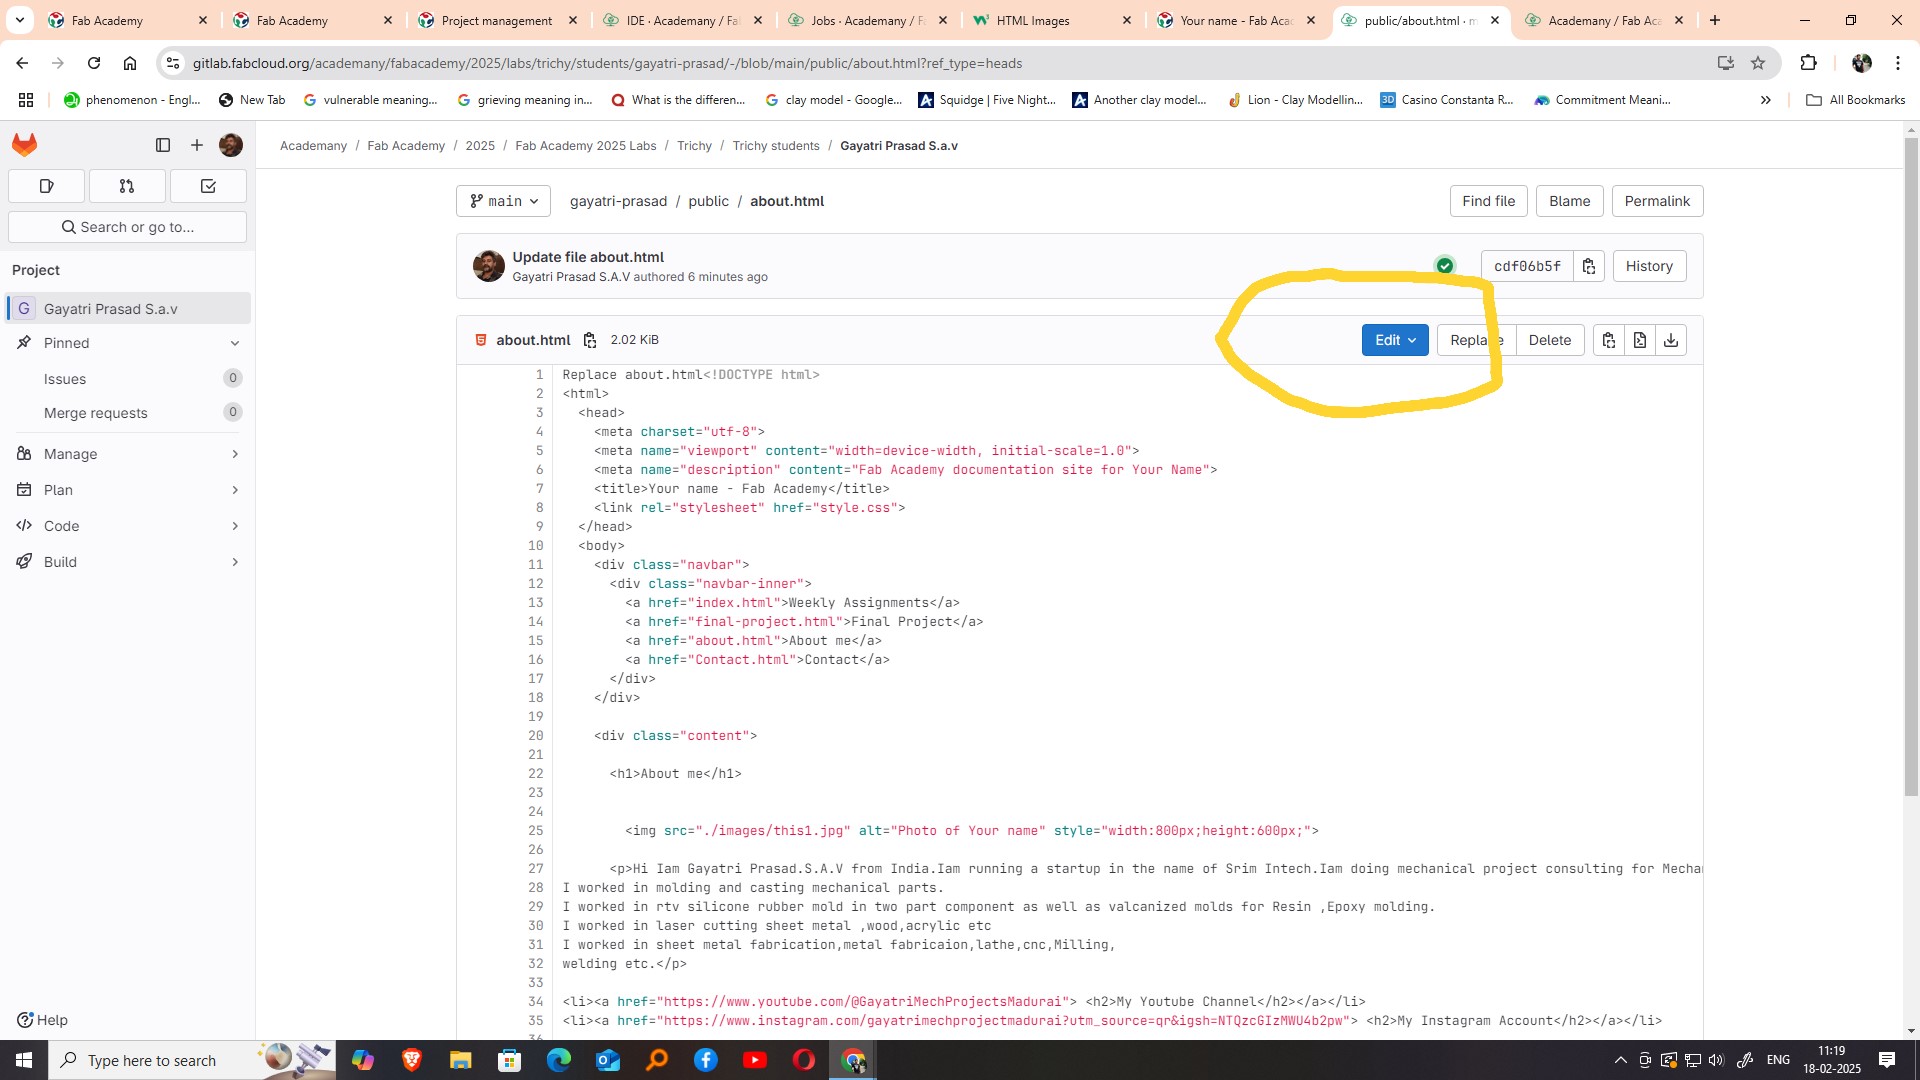
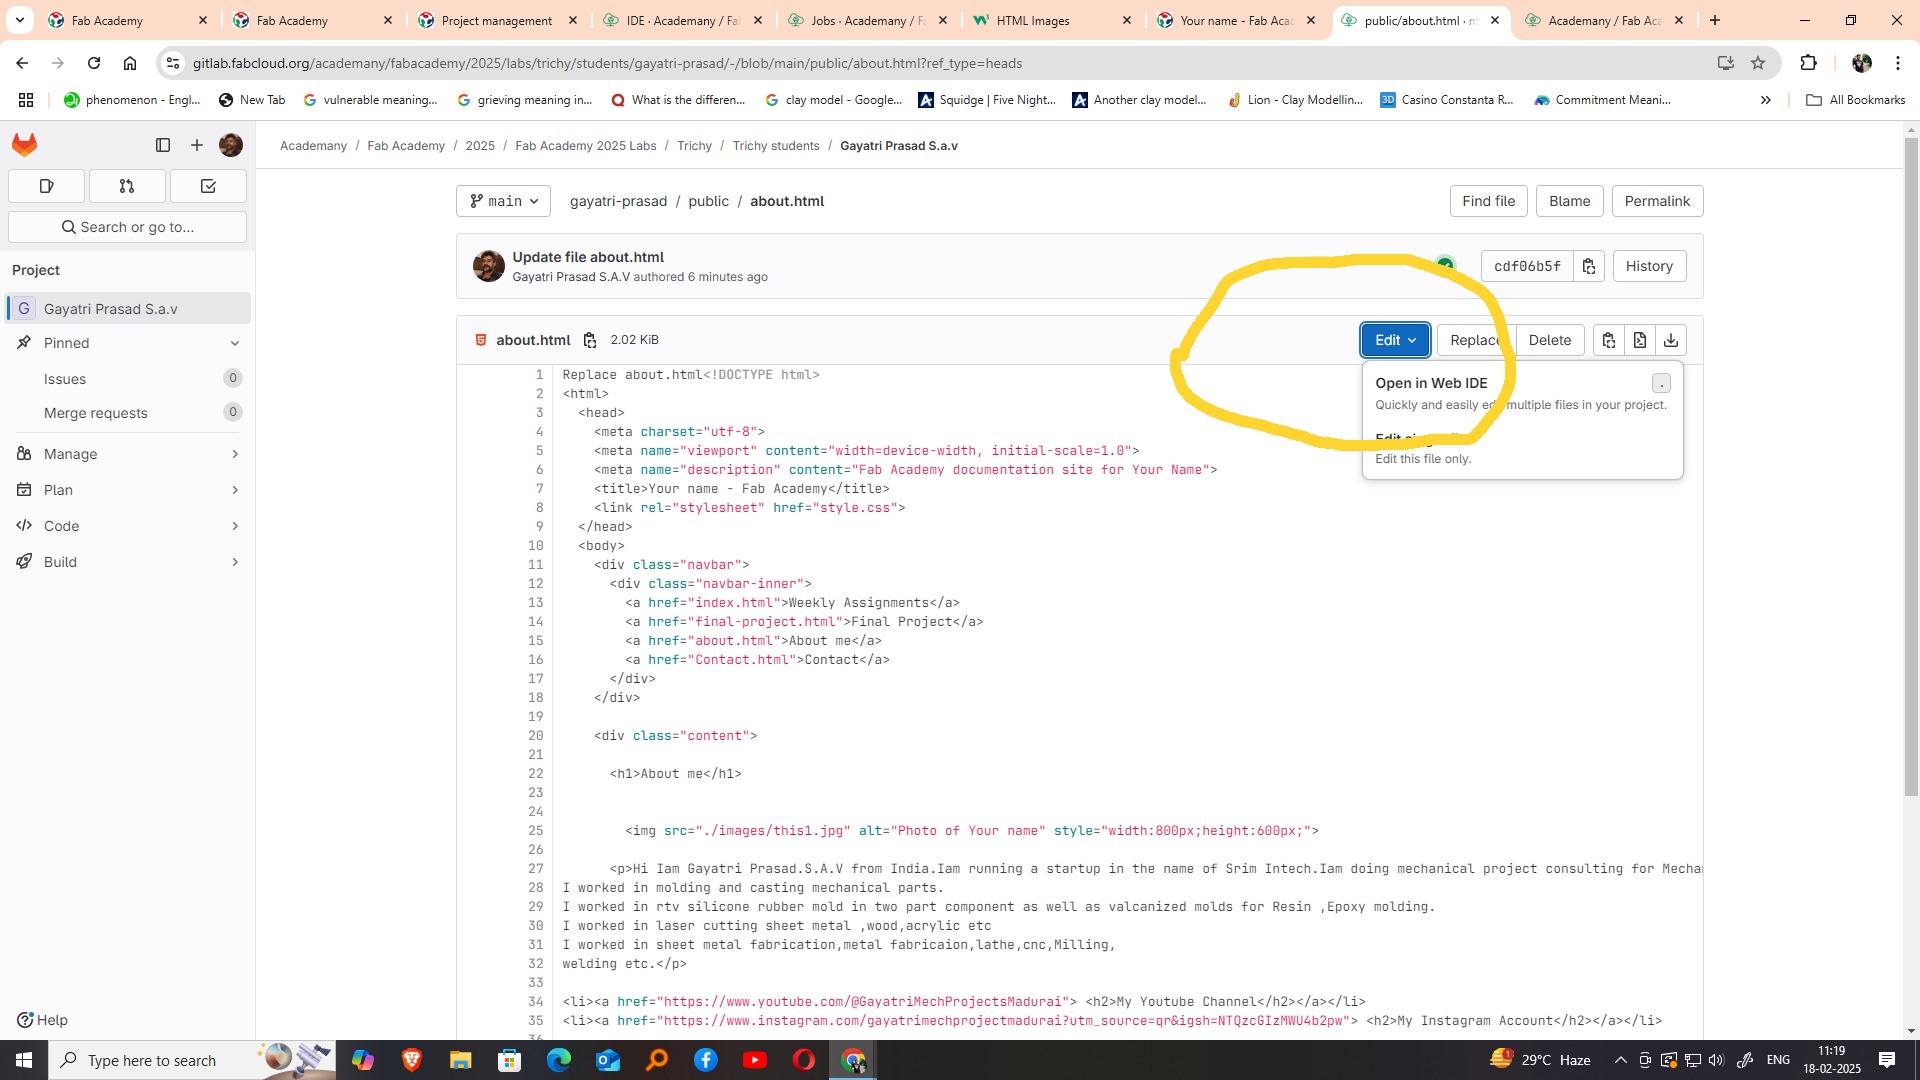
After locating the about.html file in the repository, I clicked on the Edit option, which opened the file in the GitHub Web IDE. This online integrated development environment made it easier for me to make real-time edits directly in the browser without needing any external software. The Web IDE provided a user-friendly interface where I could clearly see the structure of the HTML code and make necessary changes. This step helped me understand how small modifications in the code reflect on the webpage, and it was a hands-on way to learn basic web development and file handling through GitHub.
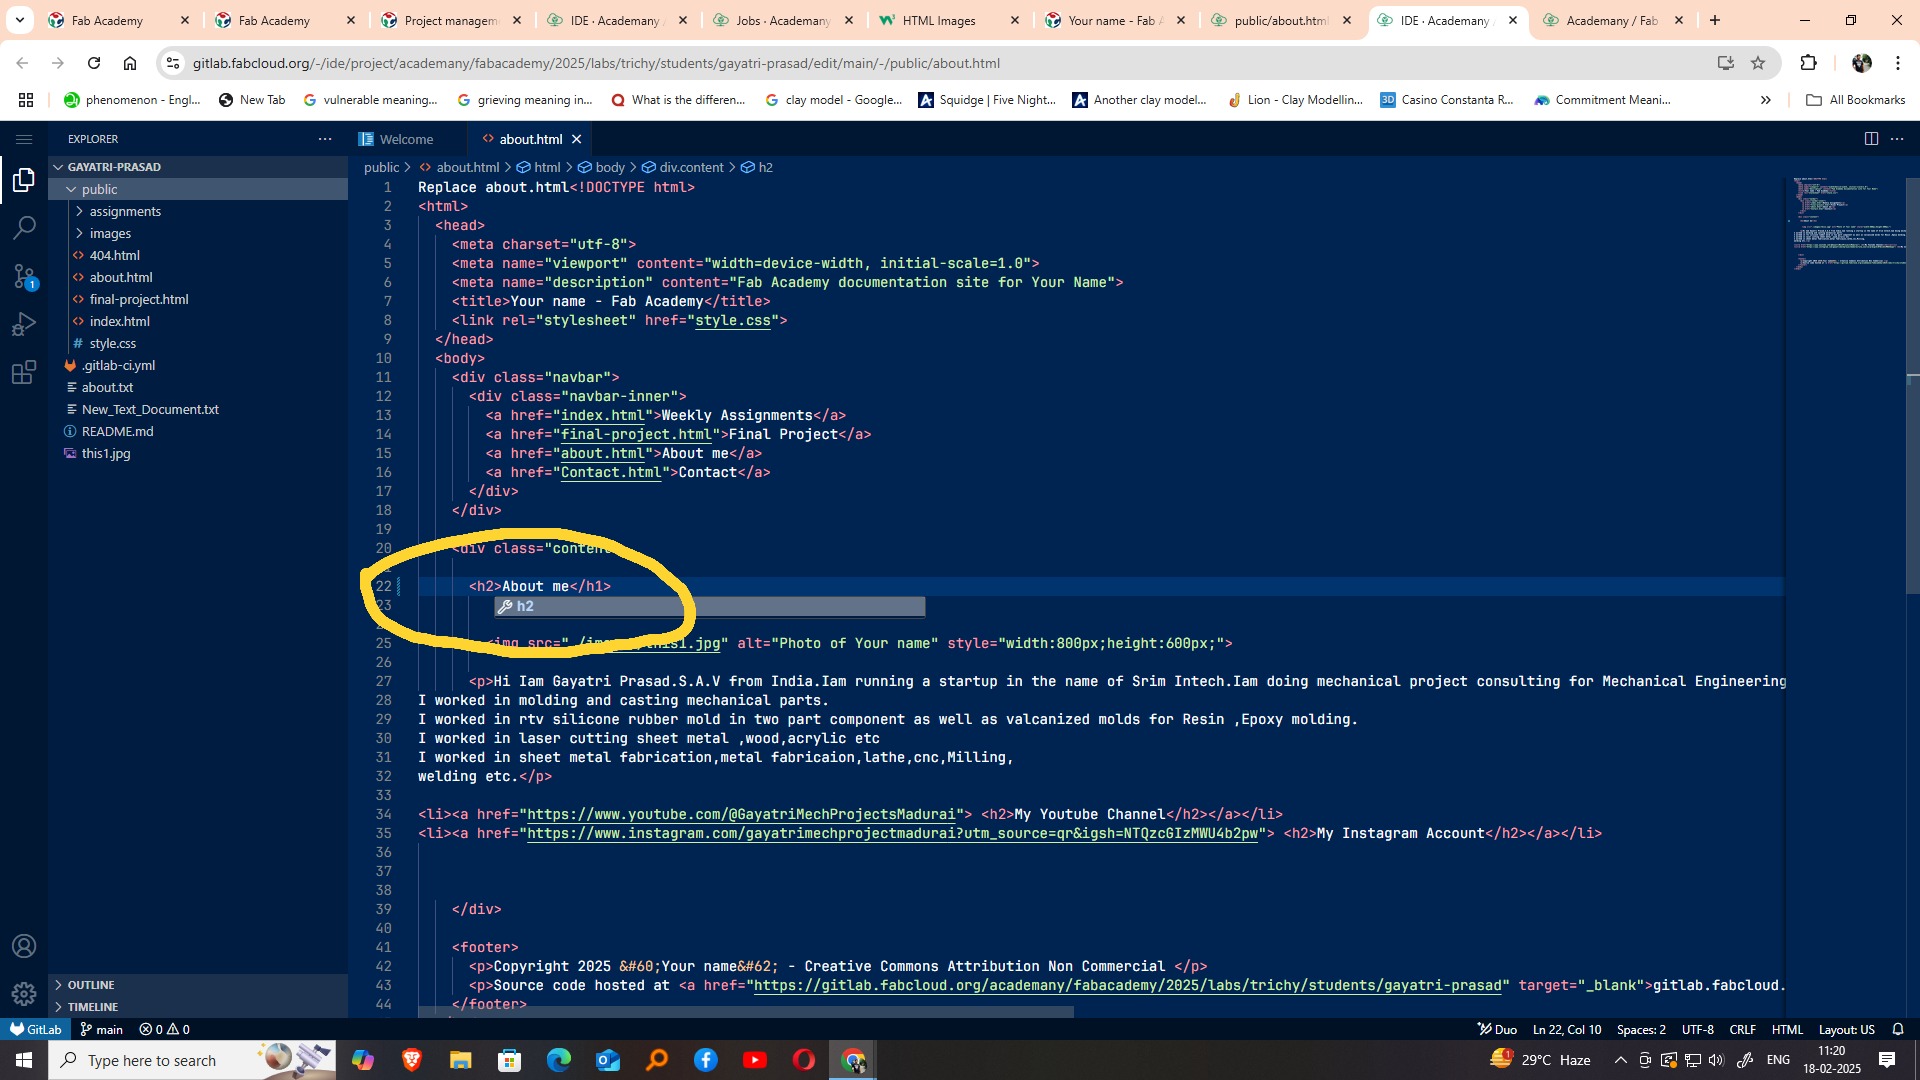
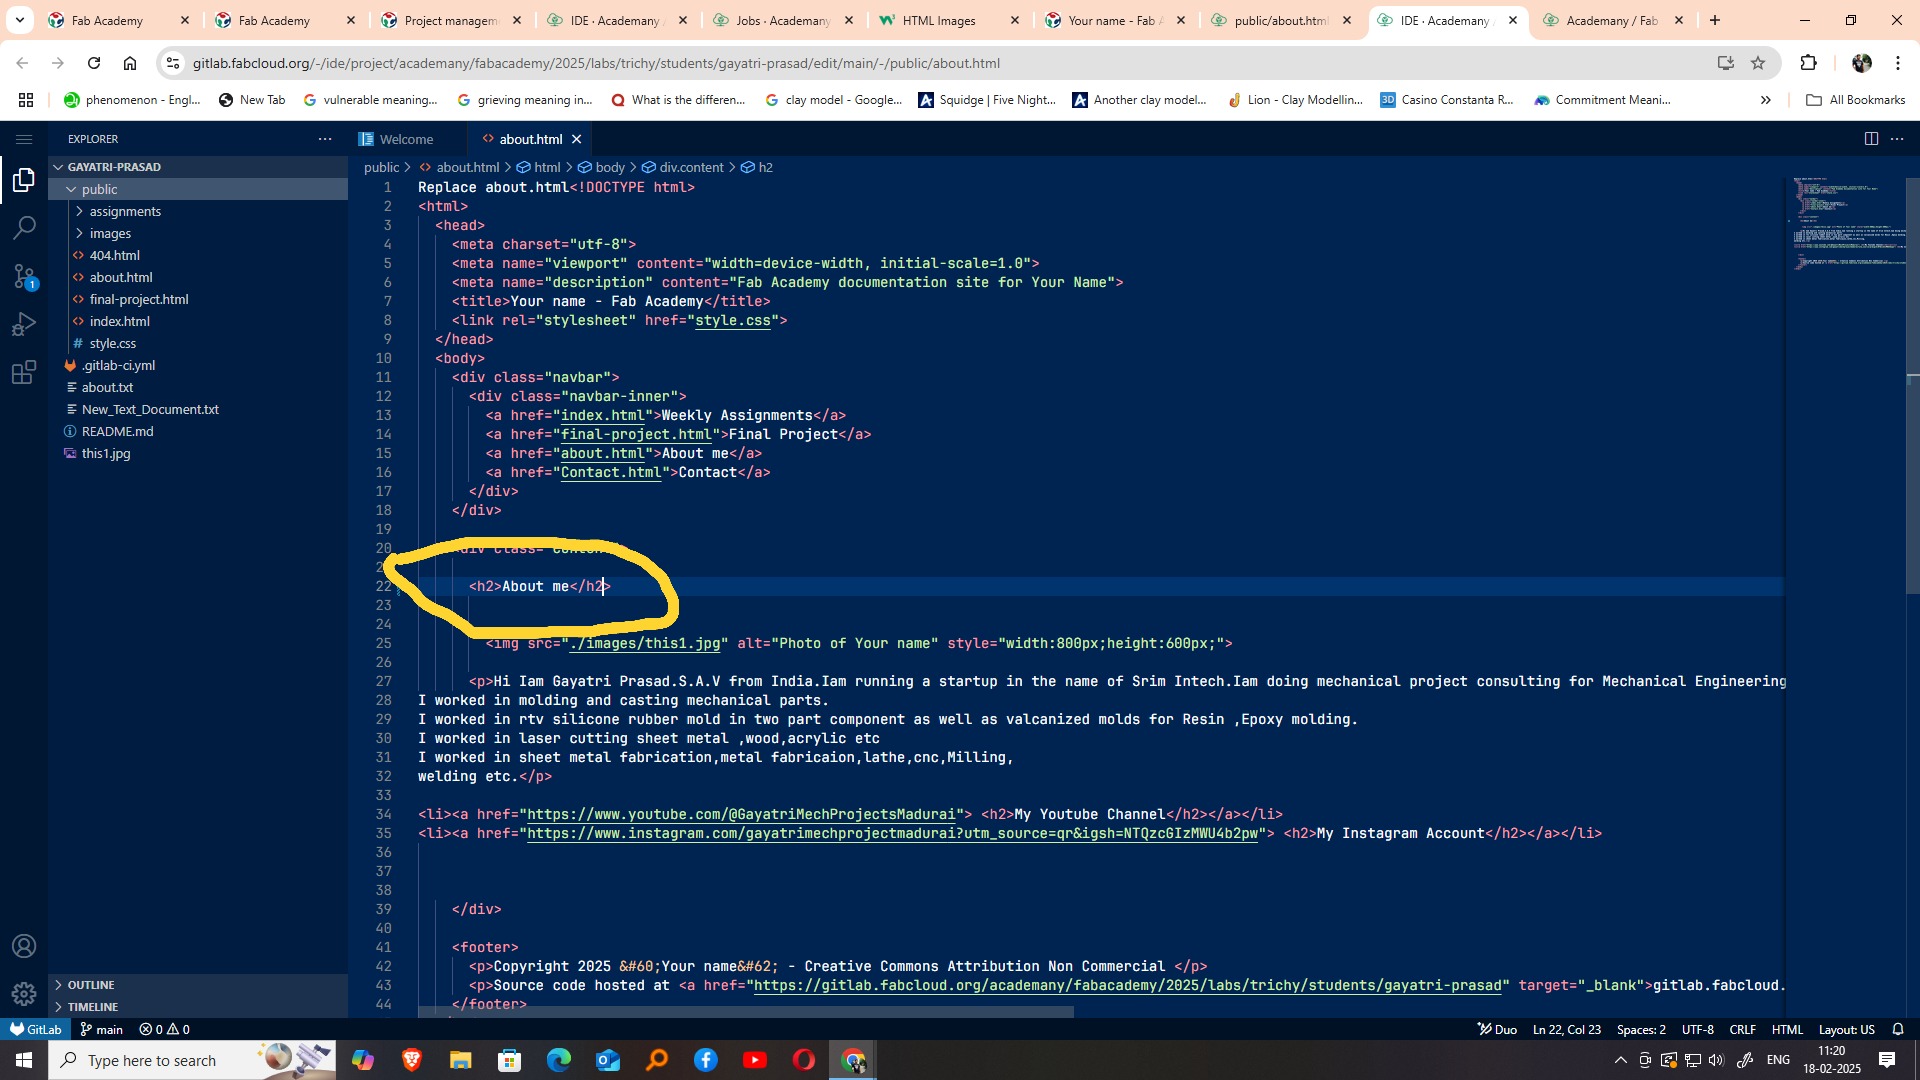
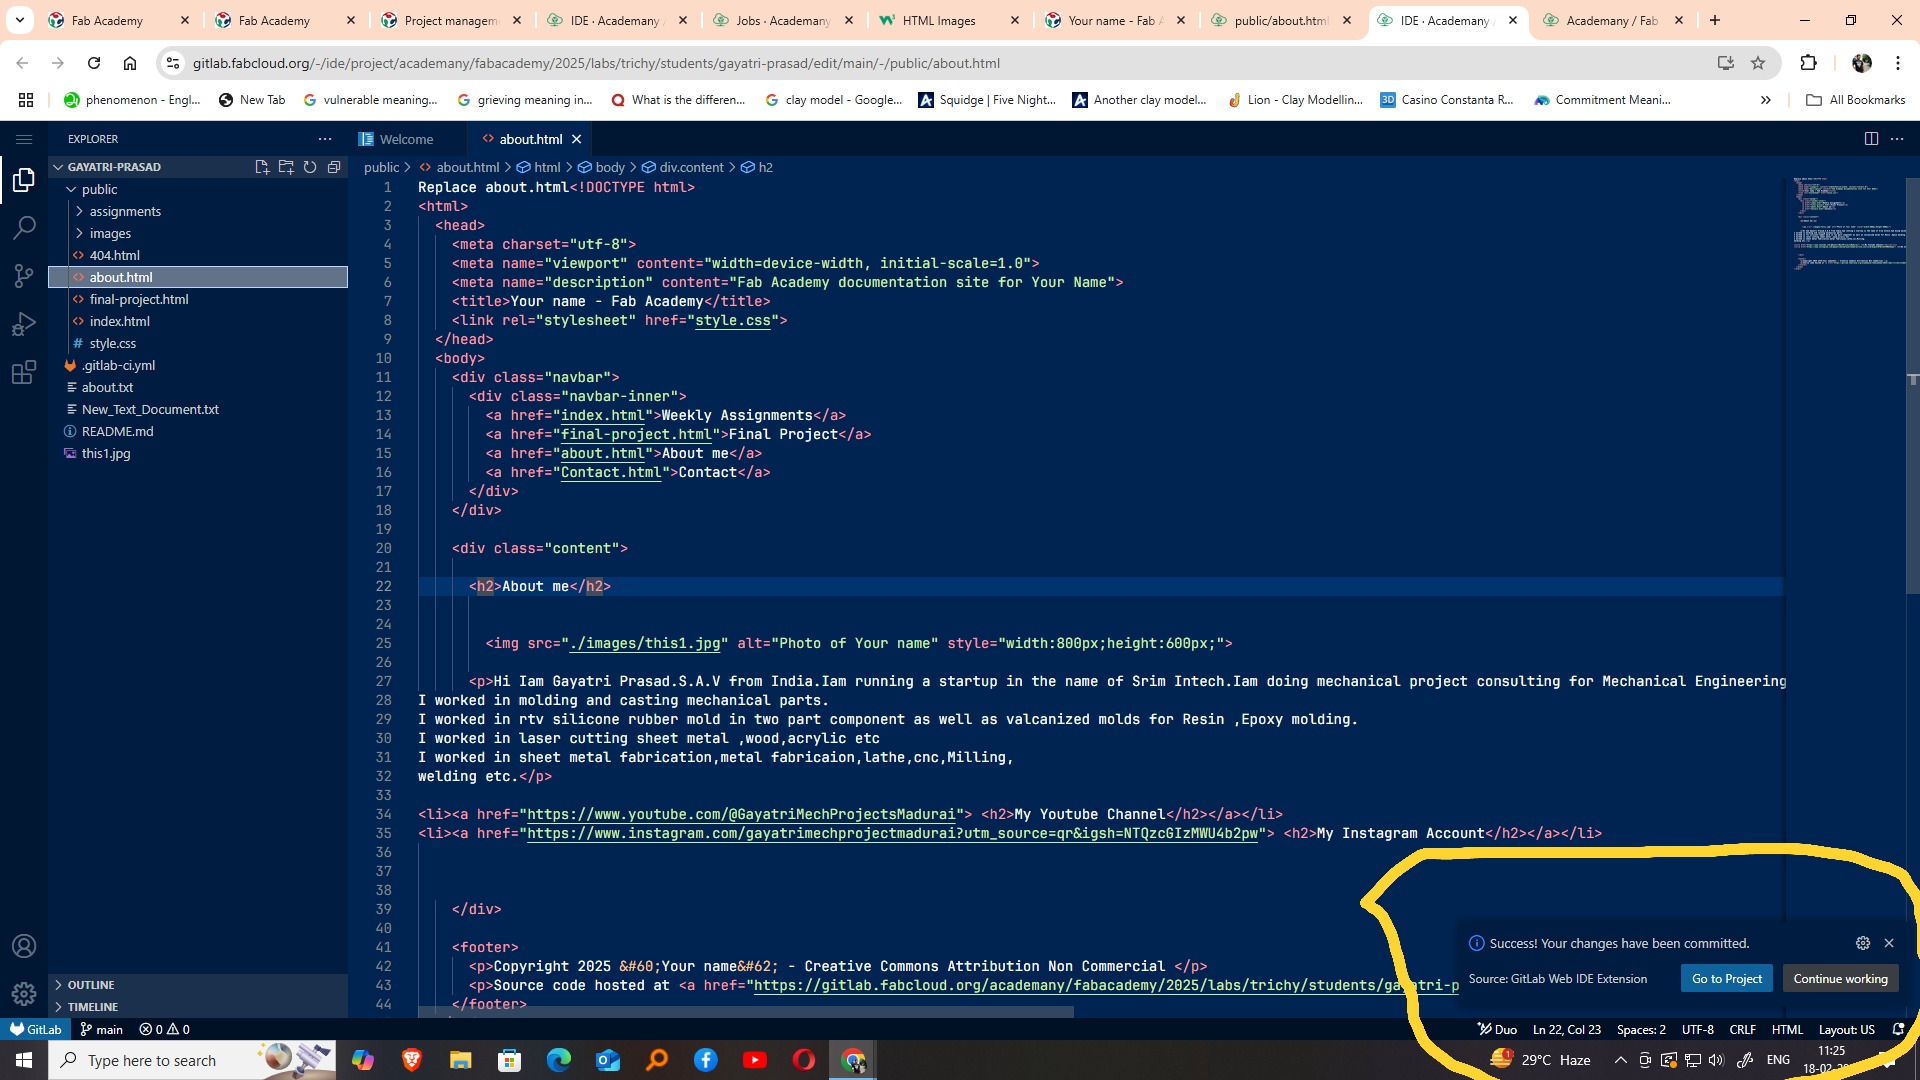
Once the about.html file was open in the Web IDE, I made the necessary edits by modifying the text and structure to include my own information, such as my background, interests, and goals. The Web IDE allowed me to see the changes clearly and understand how the HTML tags affected the layout. After completing the edits, I used the Source Control option—accessible from the sidebar or by pressing Ctrl + Shift + G—to stage the changes. This step is essential to prepare the updated file for committing, ensuring that my edits are tracked properly in the version control system

After staging the changes through the Source Control panel, the next step was to save and upload the modifications to the repository. I did this by clicking the Commit and Push to main button. This action commits the changes I made in the about.html file with a message (usually describing the update) and then pushes those changes to the main branch of the GitHub repository.
This ensures that my edits are not only saved locally in the Web IDE but also updated in the live version of the webpage, making the changes visible to anyone who visits my site.

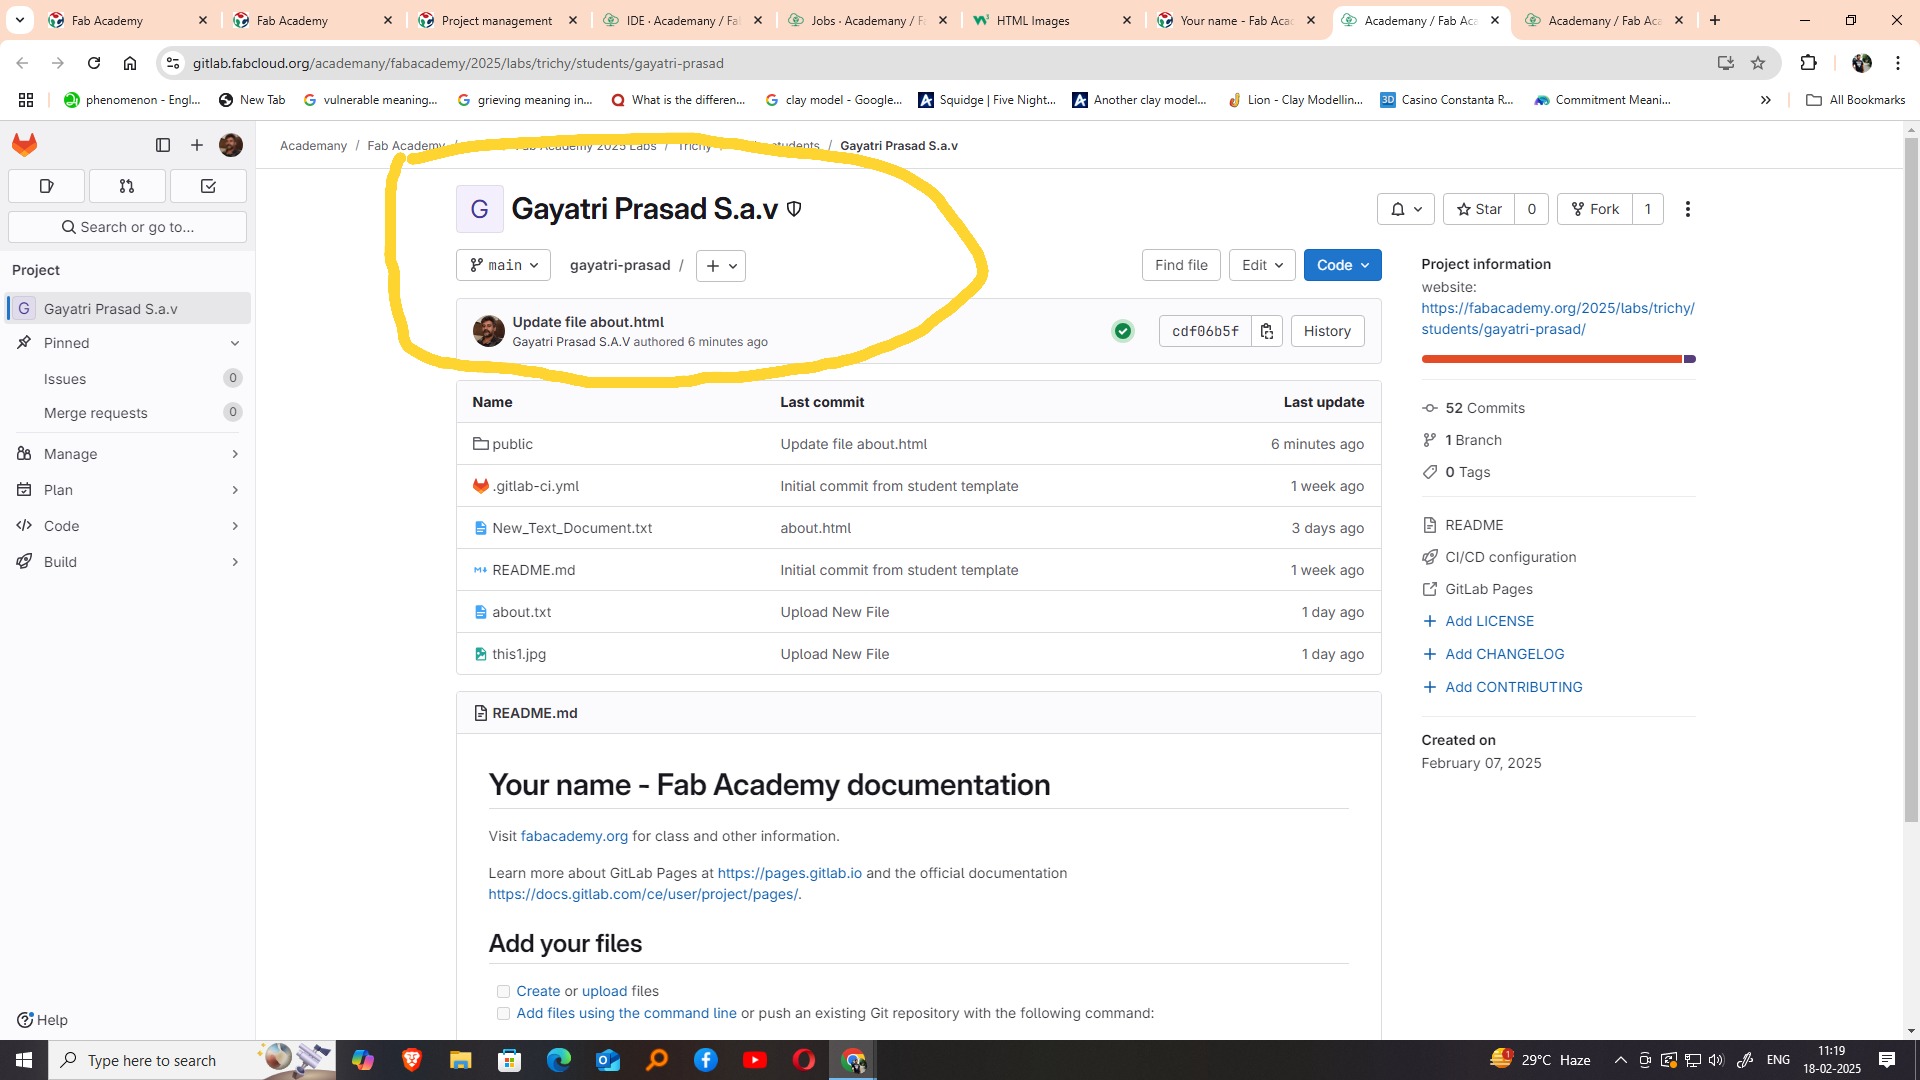
I Once I clicked the Commit and Push to main button, a success message appeared confirming that my changes had been committed successfully. This message reassured me that the updates I made to the about.html file were now saved and synchronized with the online repository. After seeing this confirmation, I proceeded by clicking on the Go to Project button.
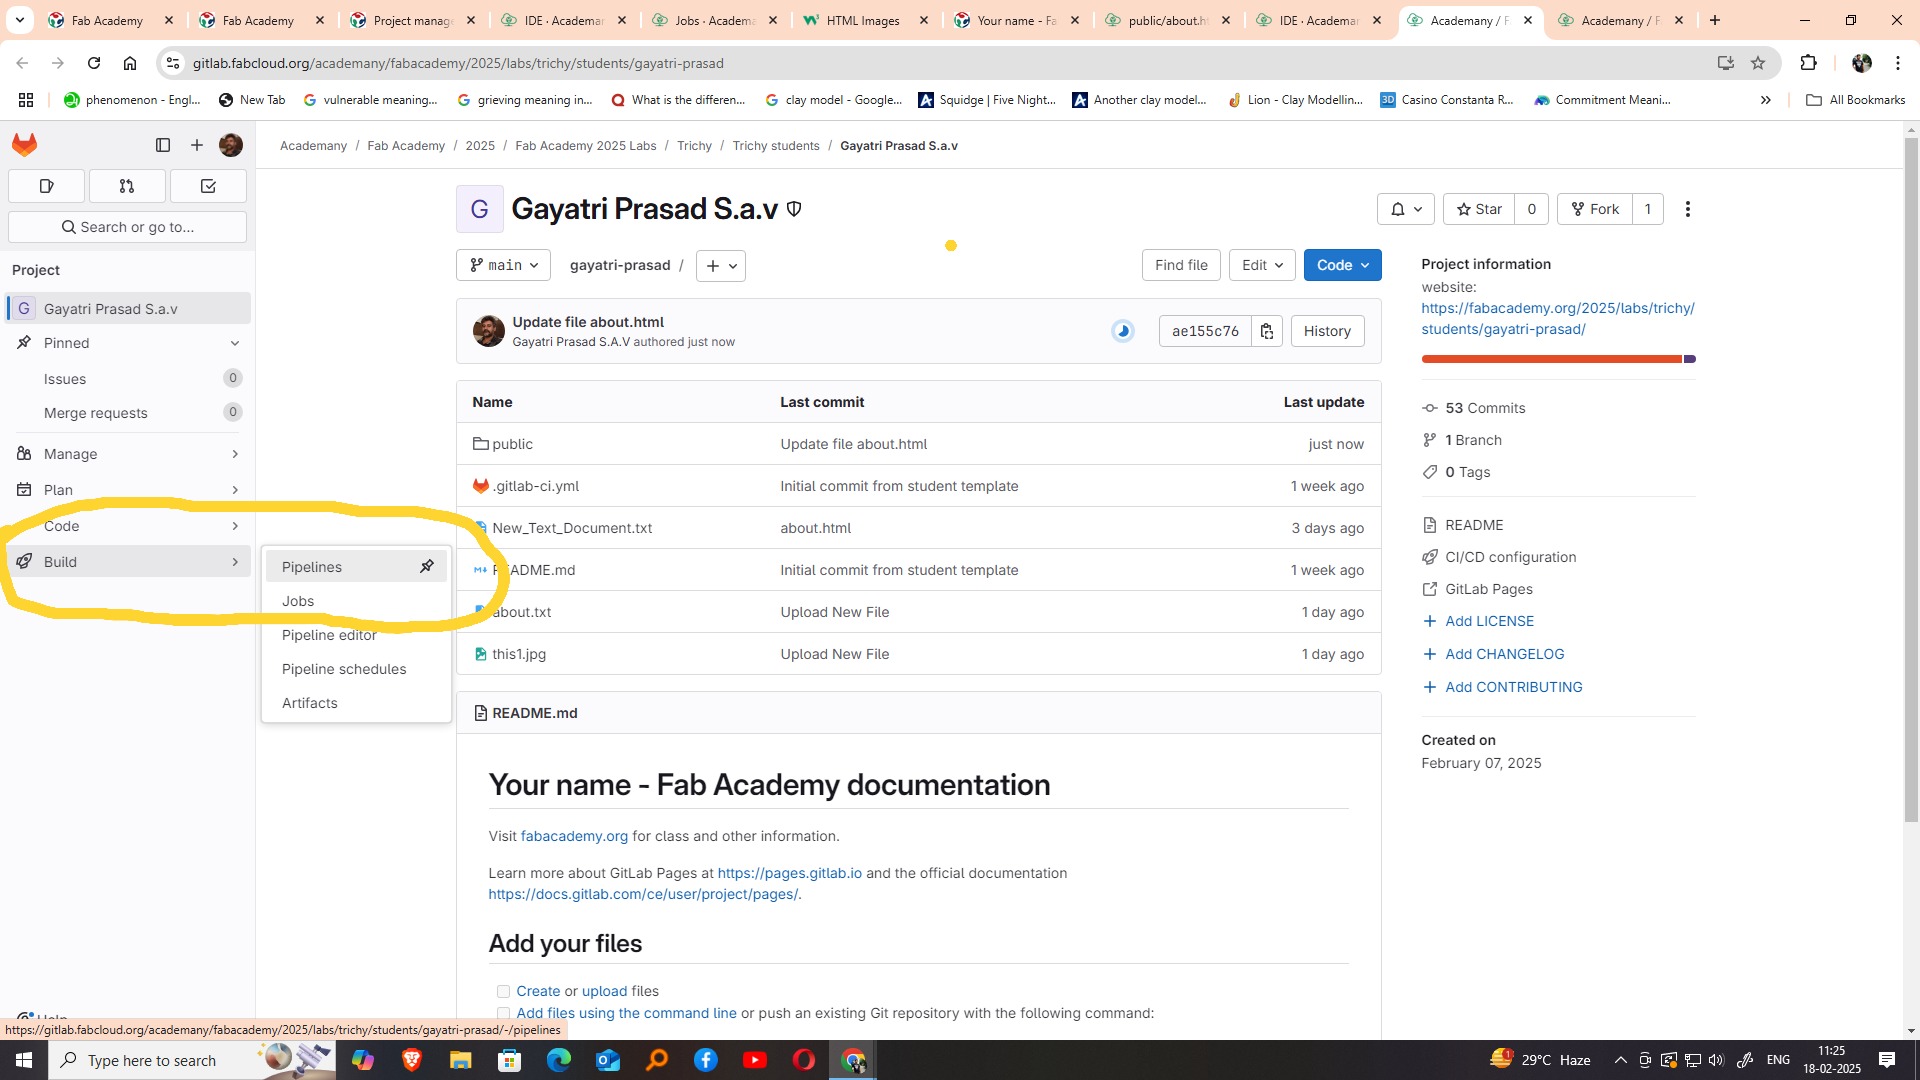
After confirming that my changes were successfully committed, the next step was to click on the Build Pipeline option. This action directs me to the pipeline view,where the system automatically builds and deploys the changes I’ve made. The build pipeline processes the latest updates to ensure everything functions properly, from code formatting to ensuring the webpage runs without errors. It is an essential step in the continuous integration and deployment (CI/CD) process, ensuring that all changes are properly tested and deployed to the live environment for public access.
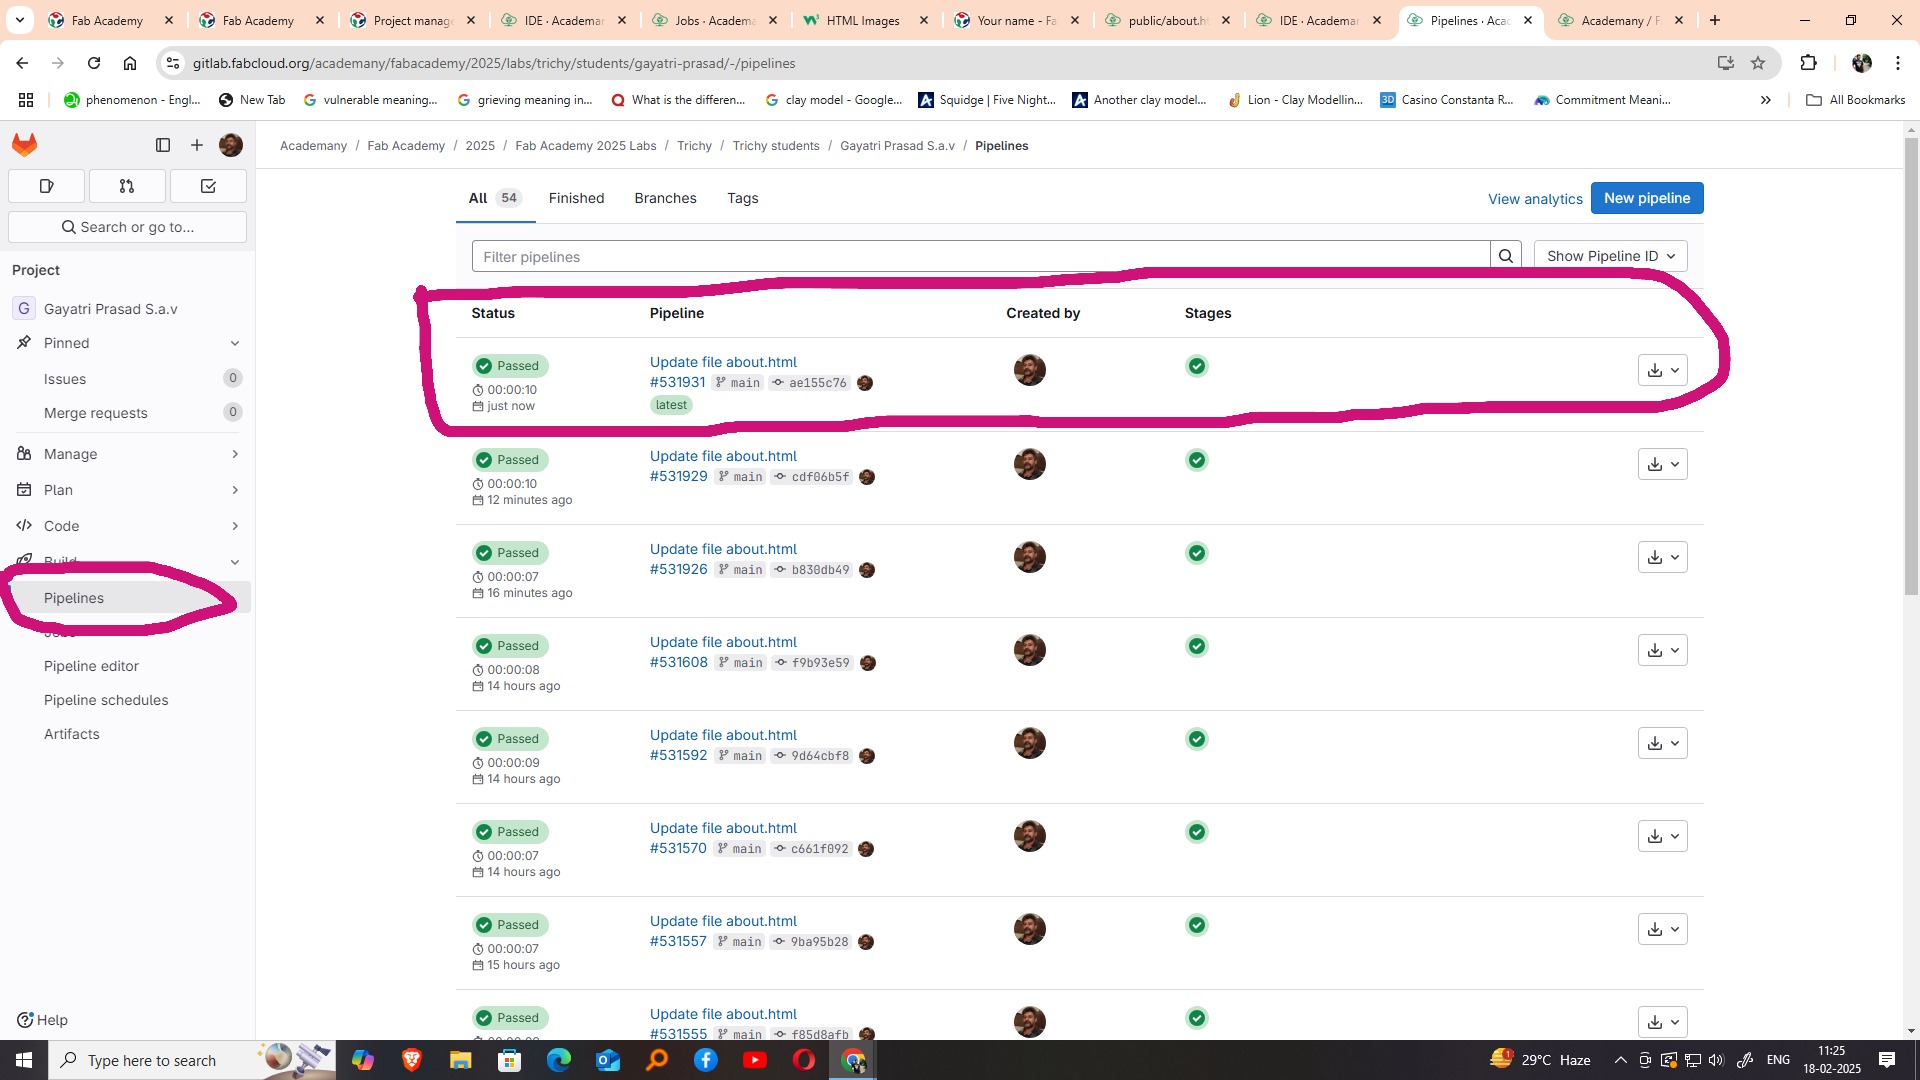
Once I clicked on the Build Pipeline, the system started processing the changes. After a short wait, the status displayed a green tick mark next to "Passed," indicating that the build process was successful. This green tick is a confirmation that the changes I made were tested and deployed without any issues, ensuring that the webpage was functioning as expected. It reassured me that there were no errors in the code or deployment process, and my updates were now live and accessible. This status is a key indicator that everything is running smoothly in the pipeline.
After seeing the green tick mark indicating a successful build, the next step was to click on the Jobs section. This option provides a detailed view of all the individual tasks or steps involved in the build pipeline. Clicking on Jobs allowed me to track the progress of each specific task, such as code compilation, testing, and deployment. It gave me a deeper insight into the entire process, allowing me to check whether each stage completed successfully or if there were any issues. This step is useful for monitoring the detailed execution of the pipeline and troubleshooting if necessary.
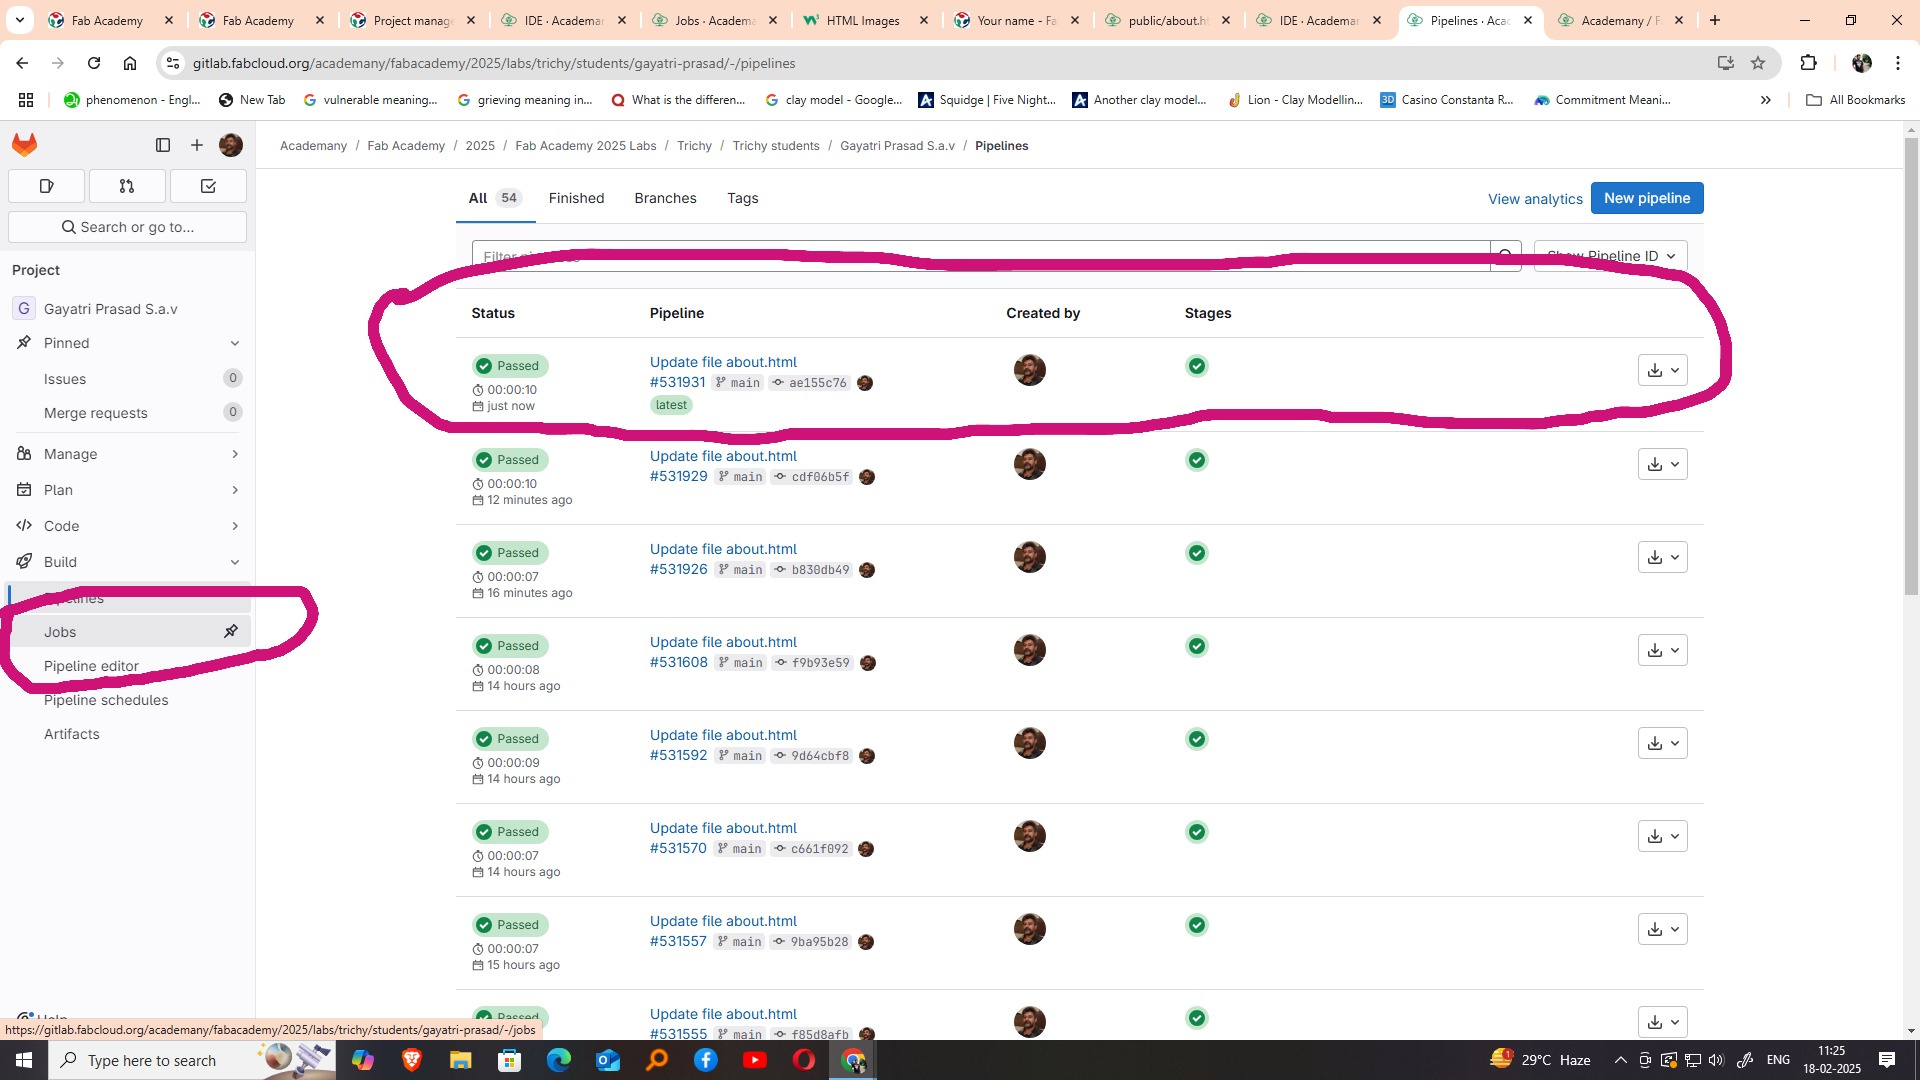
After the build pipeline successfully passes and all jobs complete, the changes I made to the about.html file will be reflected in the live version of the webpage. I can now open the webpage in a browser to verify that my updates, such as the new content and layout modifications, are visible. This step ensures that all changes have been properly deployed and are displayed correctly to users who visit the site. It’s an essential part of the process, confirming that the deployment was successful and the site is up-to-date with the latest edits.
While exploring various methods to upload a webpage, I found several options that seemed complicated, but this
particular method appeared to be the easiest for me
to follow and implement. Along the way, I also discovered different image and video compression software tools
to
minimize file sizes, ensuring faster load times
for the webpage. The entire design and layout of the page were created by me from scratch, without using any
templates. To achieve this, I learned HTML and CSS
as I went along, adapting them to my specific needs. It has been a very interesting and rewarding learning
experience.
Image & Videos Compression
Image Compression
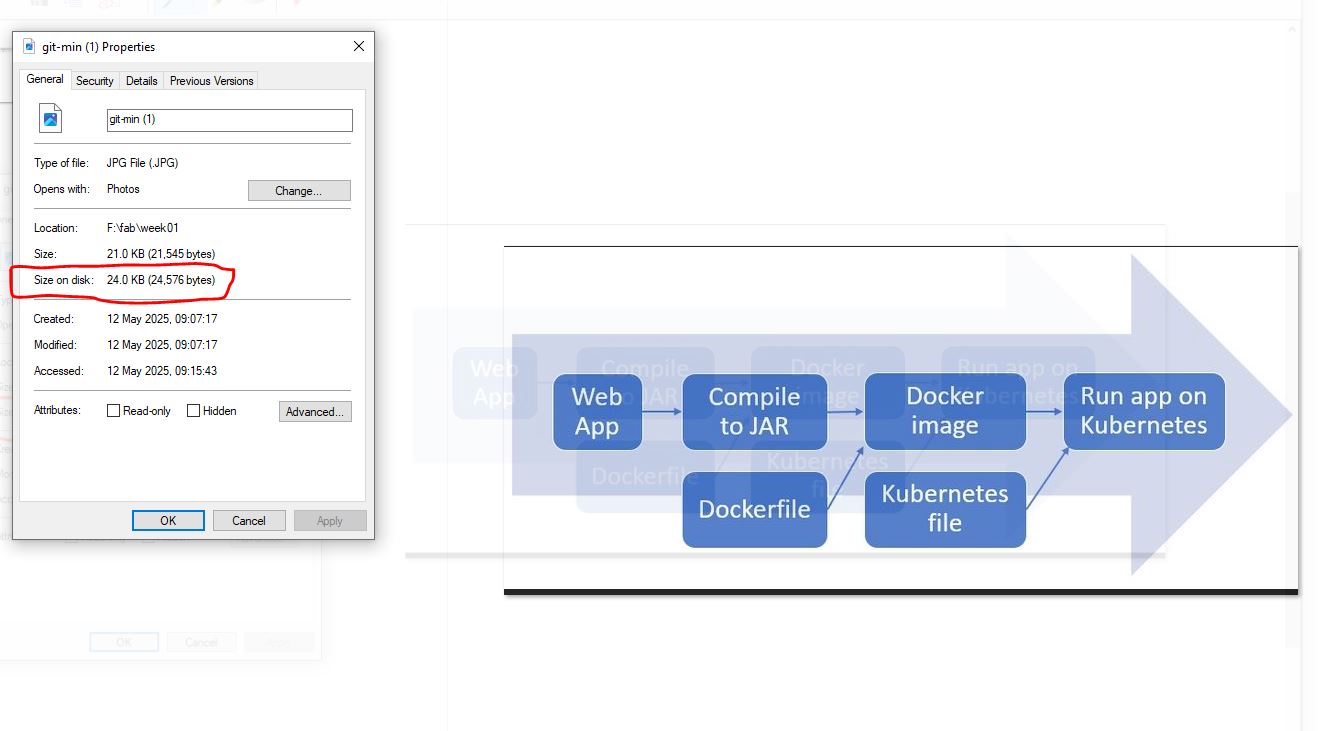
The purpose of image compression in GitLab—particularly in contexts like Fab Academy documentation—is to optimize repository size and improve website performance. Large image files can slow down website loading times, increase bandwidth usage, and make repositories harder to clone or manage. By compressing images, you reduce file sizes while maintaining acceptable visual quality. This helps pages load faster, enhances user experience, and ensures quicker access to content, especially on slower internet connections. Additionally, smaller file sizes reduce the overall size of the Git repository, making version control operations like cloning, pulling, and pushing more efficient. Image compression also supports better collaboration, as team members can navigate and update documentation more easily. Tools such as TinyPNG, ImageOptim, or command-line utilities can be used before committing images to GitLab. Overall, efficient image compression is a key practice in maintaining clean, fast, and accessible digital documentation for projects like those in Fab Academy.
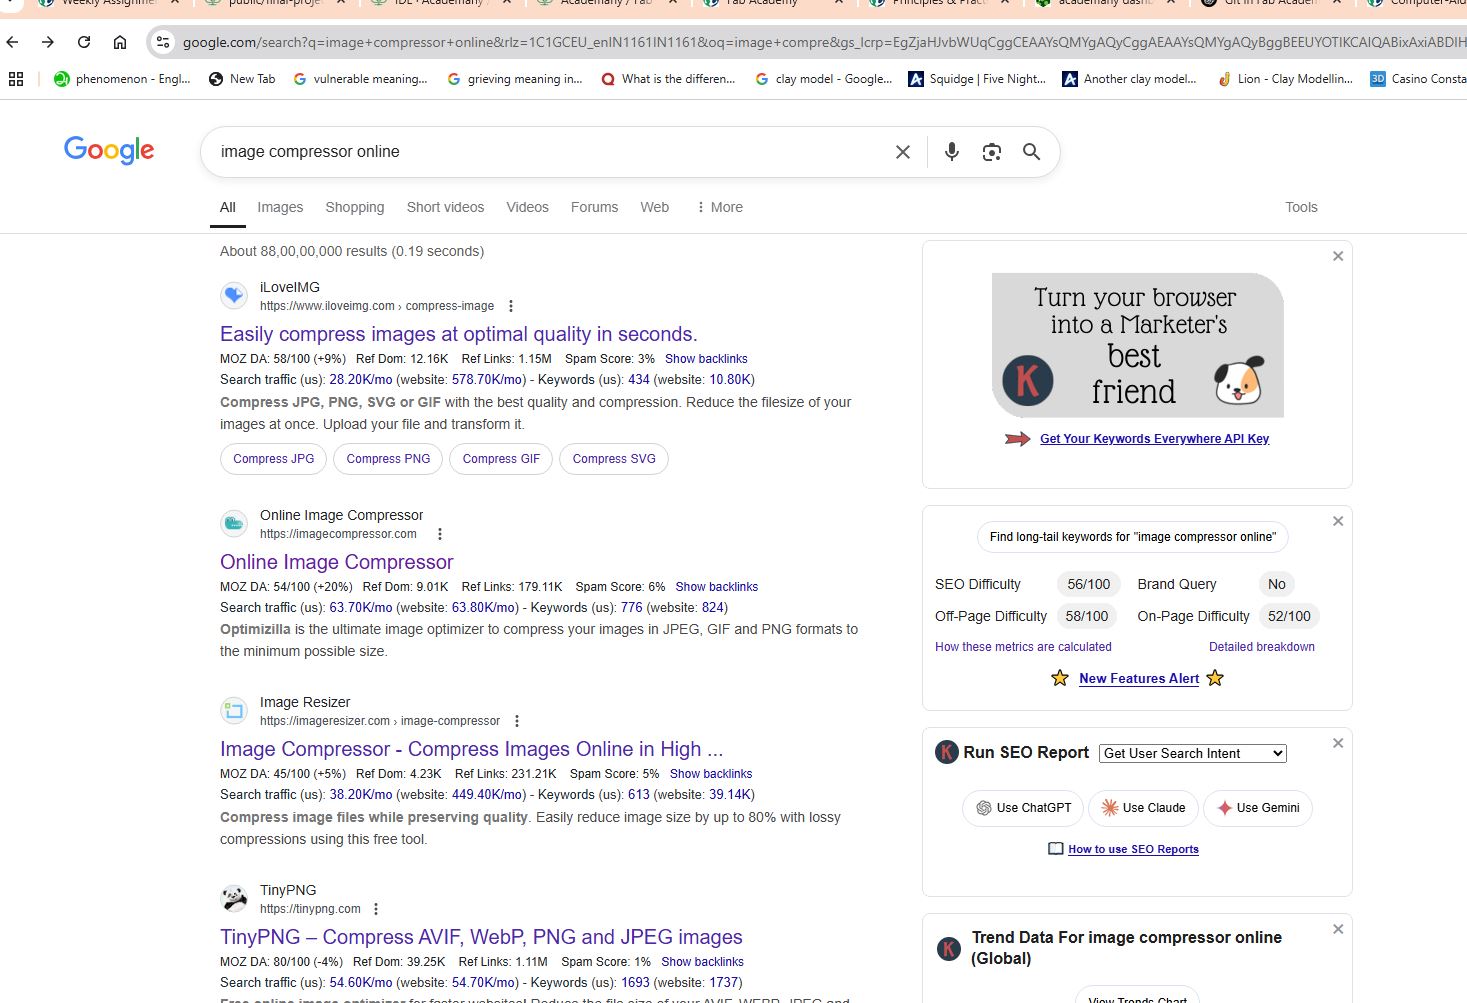
I searched on Google for online image compression tools and found several free and easy-to-use options. Tools like TinyPNG, CompressJPEG, and ILoveIMG allow quick compression of images without losing much quality. They support various formats and help reduce file sizes for faster web loading and optimized storage.
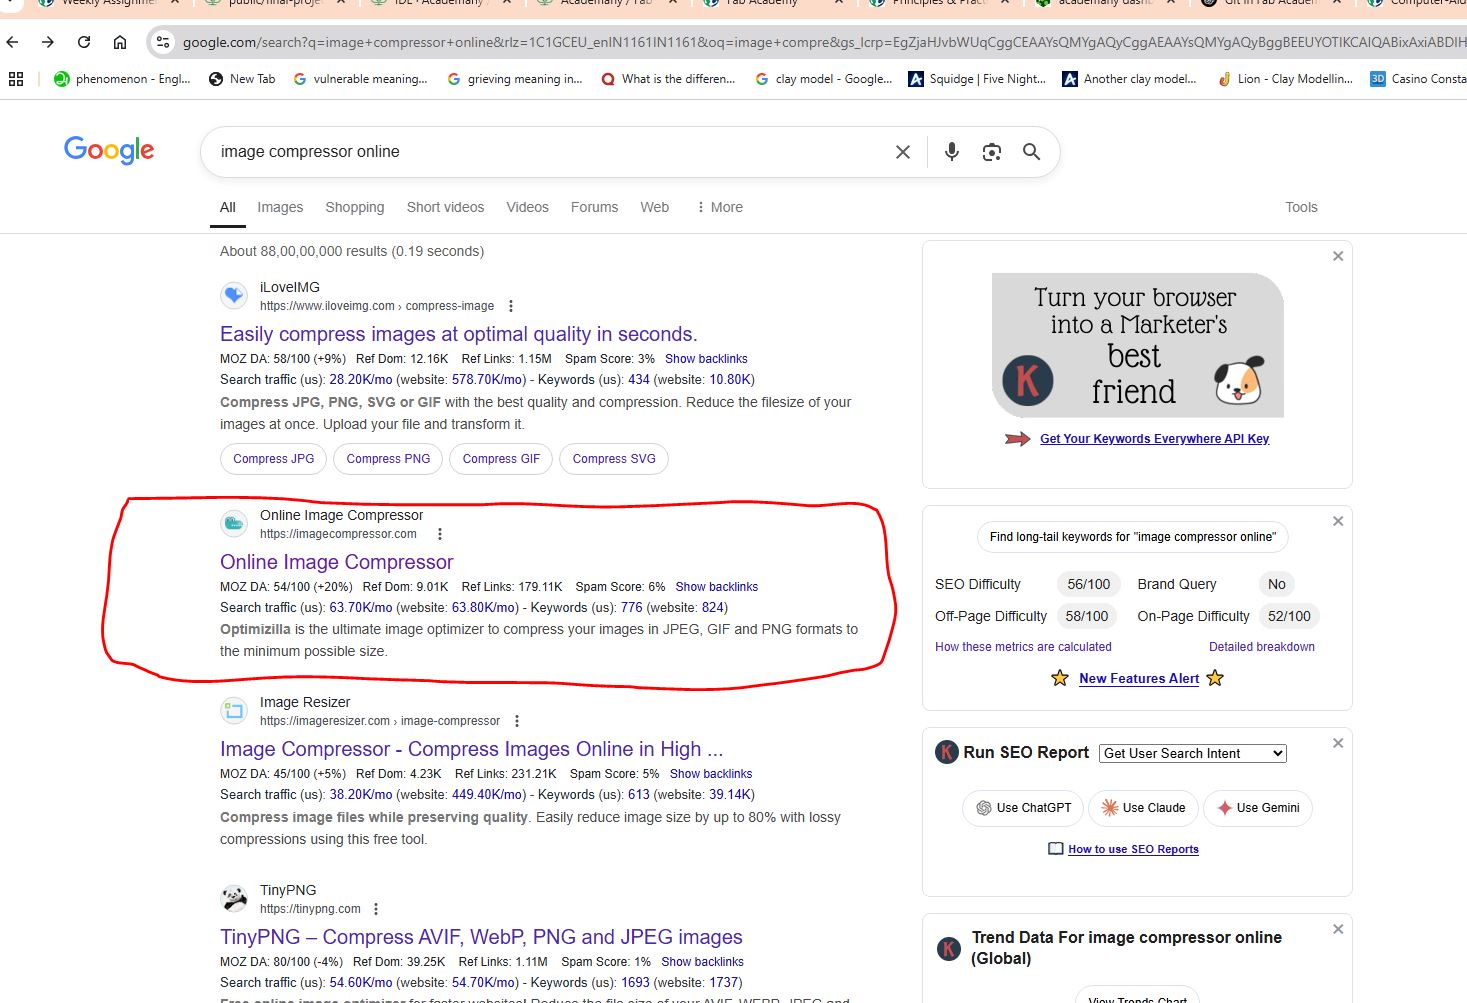
I discovered a website called Image Compressor Online, also known as Optimizilla, which offers a straightforward and effective solution for reducing image file sizes without significant quality loss. This free web-based tool supports formats like JPEG, PNG, and GIF, allowing users to upload up to 20 images simultaneously. It employs smart lossy compression algorithms to minimize file sizes while preserving essential image quality. Users can adjust the compression level using a slider and preview changes in real-time before downloading the optimized images. This makes it ideal for web developers, bloggers, and anyone needing to optimize images for faster website loading or efficient storage. Additionally, the platform ensures user privacy by deleting all uploaded files after one hour. Overall, Image Compressor Online is a reliable and user-friendly tool for quick and efficient image compression needs

Image Compressor Online helps reduce image file sizes quickly without losing much quality. It supports formats like JPEG and PNG and allows users to upload and compress multiple images at once. The tool uses smart compression techniques, making it ideal for optimizing images for websites, emails, and storage efficiency.
Key Reasons for Image Compression in GitLab:
>Faster Website Loading: Compressed images load faster on your GitLab Pages website, improving the user experience for mentors, evaluators, and visitors.
Smaller Repository Size: Large, uncompressed images make your Git repository heavy, which can slow down cloning, pushing, or pulling. Compression keeps the repo
lightweight and efficient.Quicker Commits and Uploads: Uploading or committing large images takes more time and bandwidth. Compressed images speed up this process.
Avoiding Quota Limits: GitLab has storage and bandwidth limits (especially for free tiers). Efficient image compression helps you stay within those limits.
Better Version Control: Every time you change a large image, Git stores a new version. Smaller images reduce the storage impact of versioned media.
In Fab Academy, optimizing images is part of maintaining clean, efficient, and accessible documentation—a core part of the evaluation criteria.
Videos Compression
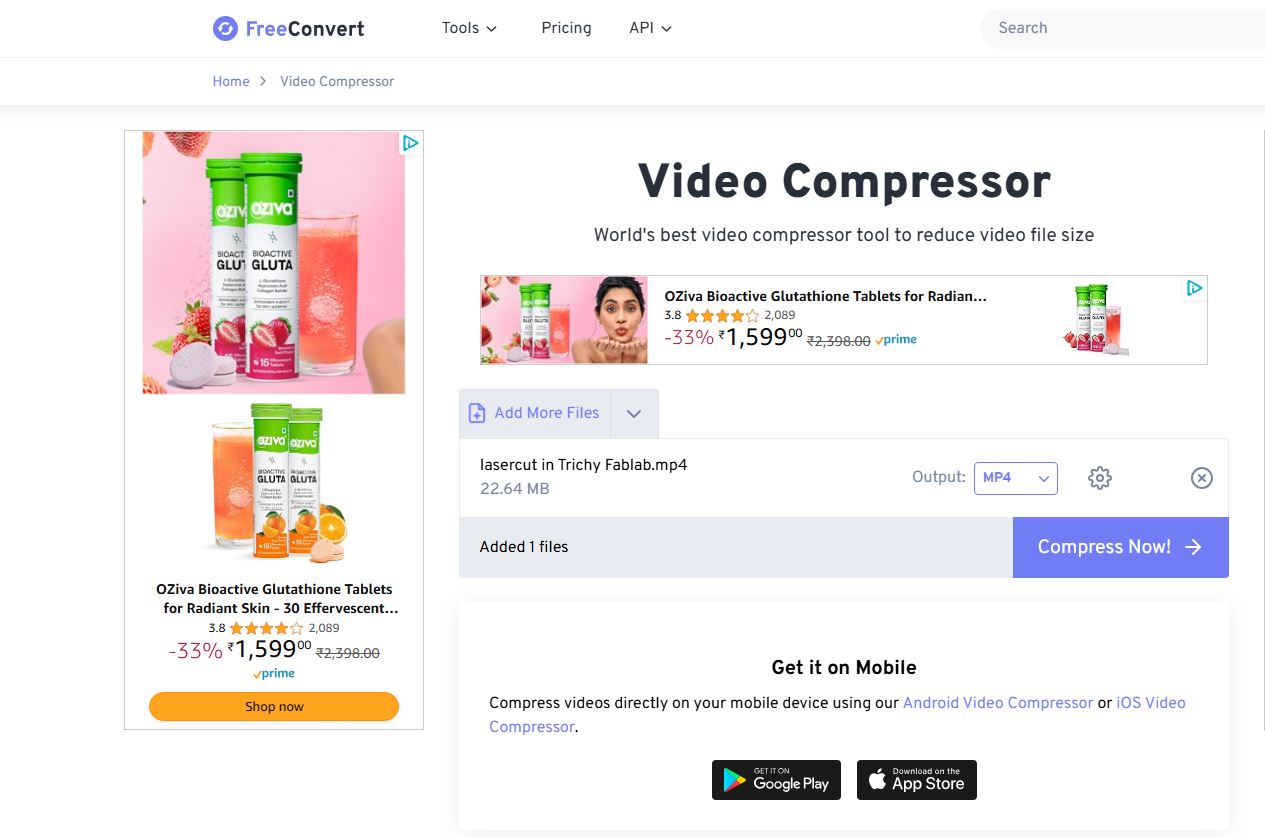
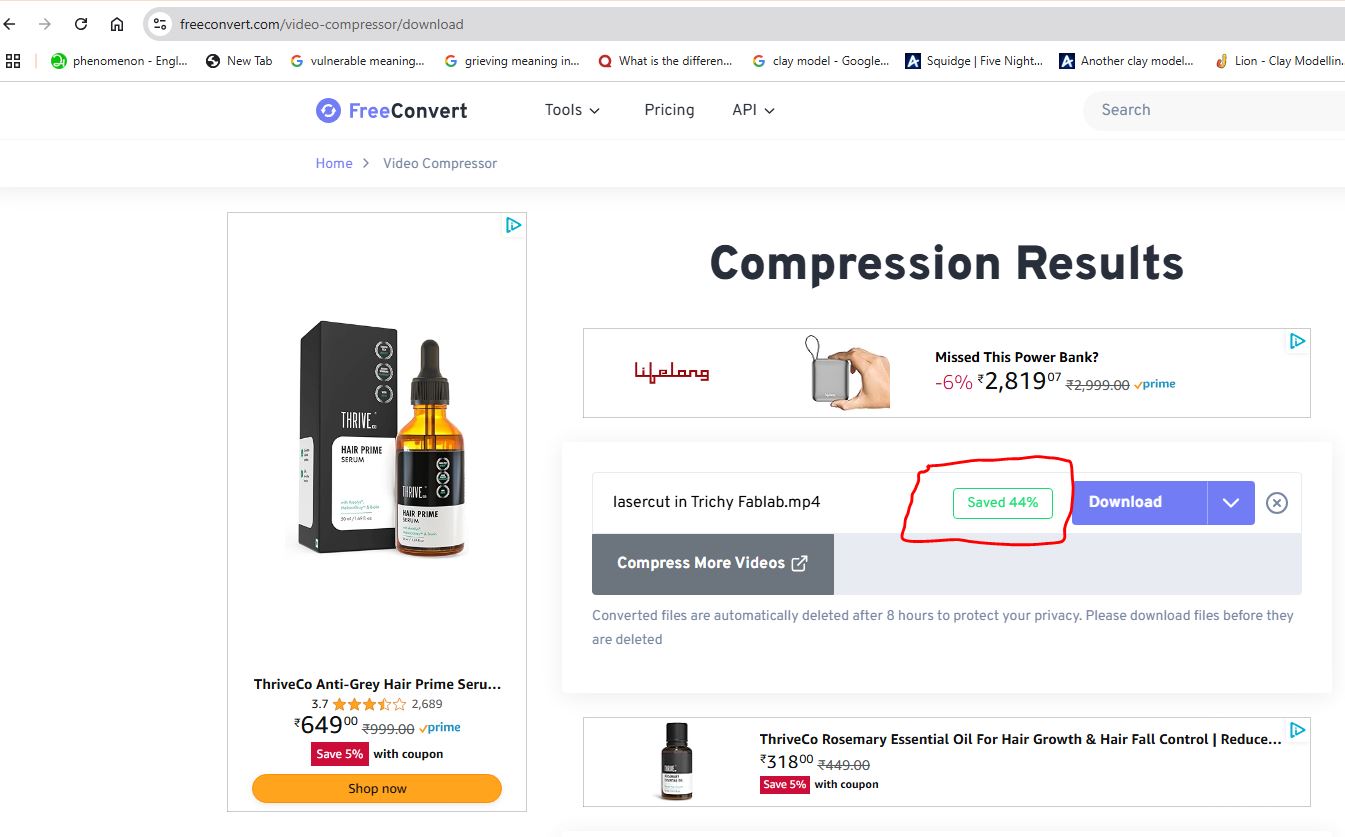
While searching online for video compression tools, I found FreeConvert to be one of the most user-friendly and effective platforms available. FreeConvert is a free web-based tool that allows users to compress videos without needing to install any software. It supports a wide range of video formats such as MP4, MOV, AVI, MKV, and more. The interface is simple: you just upload your video, choose your desired compression method—by target file size, video quality, or resolution—and click "Compress." Within minutes, the compressed video is ready to download.
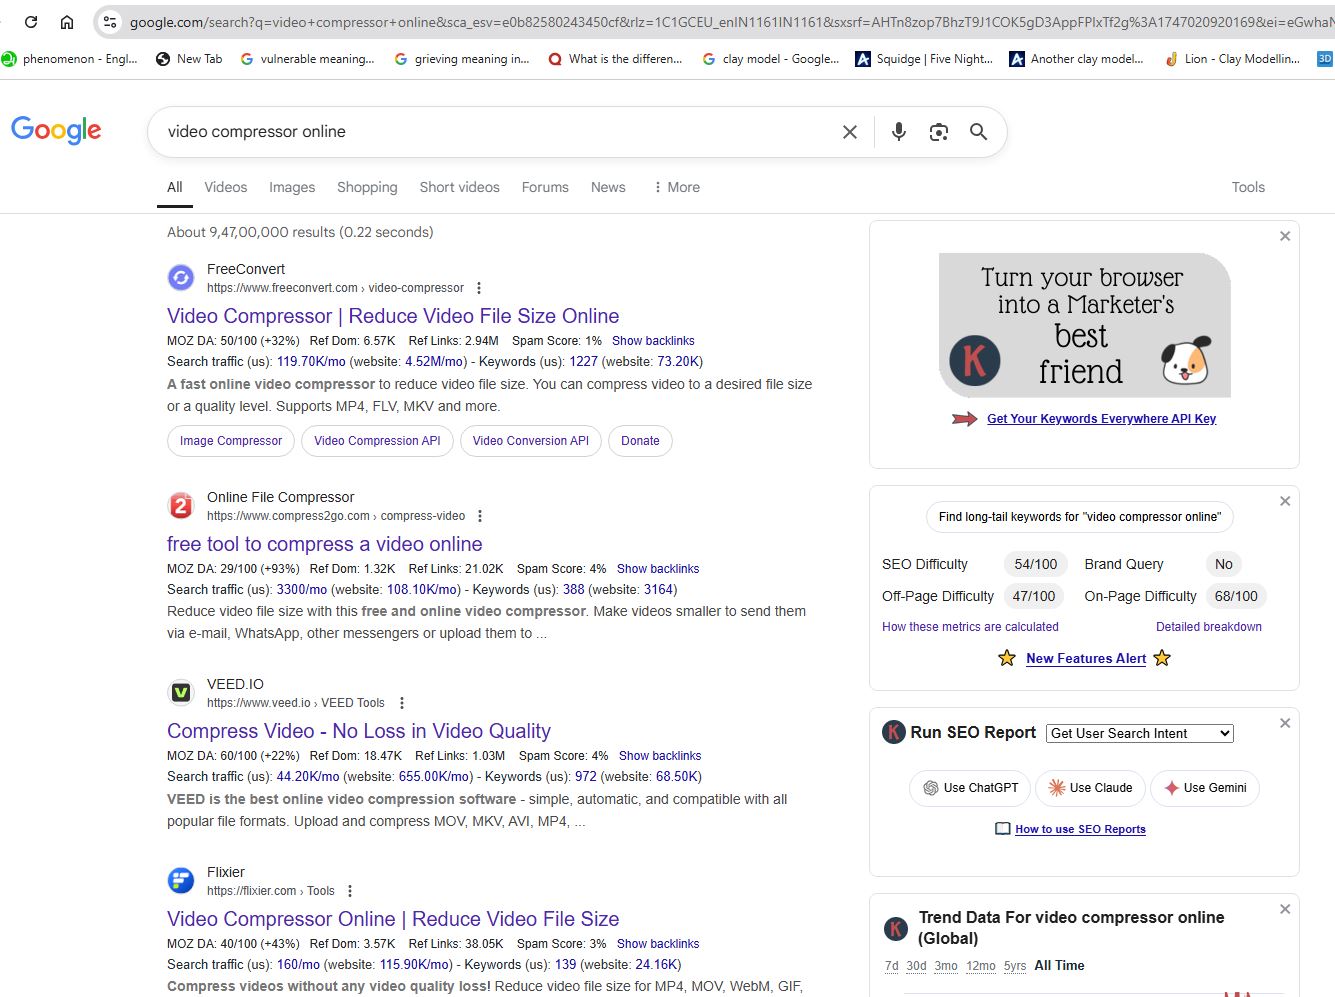
FreeConvert also gives users control over advanced settings like bitrate, frame rate, and codec selection. This helps in optimizing file size while maintaining video quality. It’s especially useful for reducing video file size for uploading to websites, emails, or messaging apps. The free plan allows decent functionality, but it has some file size limits and slower processing speeds. For larger videos and batch conversions, a paid upgrade is available.
Besides compression, FreeConvert also offers video conversion, trimming, and other editing tools. Since it’s a cloud-based service, it works across all devices and platforms. Overall, FreeConvert is a reliable and accessible option for quick and effective video compression online.
Purpose of Video Compression in GitLab : Video compression is crucial when uploading project documentation or tutorials to GitLab repositories. Here's why it's important:
1. Reduce File Size
Raw videos from phones or cameras can be hundreds of MBs or even GBs.
Compression reduces them to a more manageable size (often under 10–20 MB), saving storage space.
2. Faster Uploads and Clones
Git repositories are not designed for large media files.
Compressed videos upload faster and reduce the time needed to clone or pull the repository.
3. Stay Within GitLab Storage Limits
GitLab imposes file size and storage limits per project or group.
Keeping videos small helps you stay within the allowed quota.
4. Web Compatibility
Compressed videos (e.g., in MP4 format using H.264 codec) are more likely to be playable in web browsers,
especially when embedded
in GitLab Pages.
5. Easier Evaluation and Sharing
Best Practices for Fab Academy:
Convert videos to .mp4 (H.264) format.
Keep resolution around 720p unless higher clarity is essential.
Target video sizes under 10–30 MB, depending on duration.
Link to YouTube or Vimeo for large videos instead of hosting them in the Git repo.
Mentors and evaluators can view videos quickly without waiting for large files to buffer or download. Video Compressor refers to the process of reducing a video's file size while maintaining as much of its original quality as possible. It's essential for online sharing, storage, and email attachments, according to VEED.IO. Various online tools and software, like VEED.IO, Media.io, and Rotato, offer this functionality.