Wired Communication
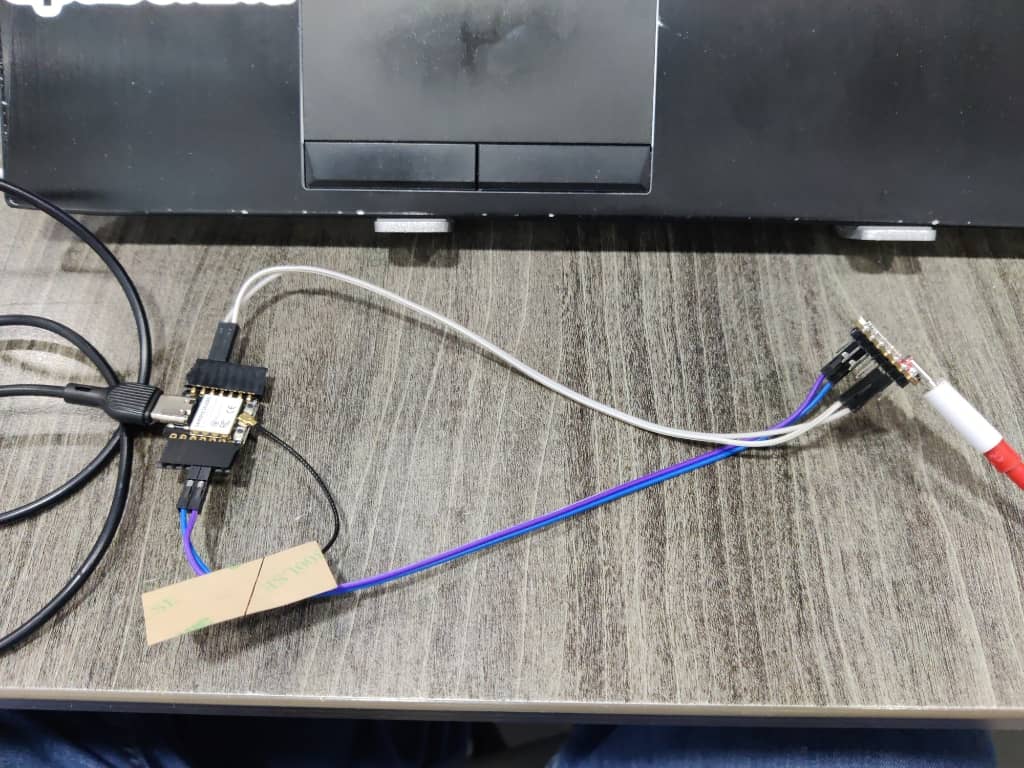
Hero Shot
Summary
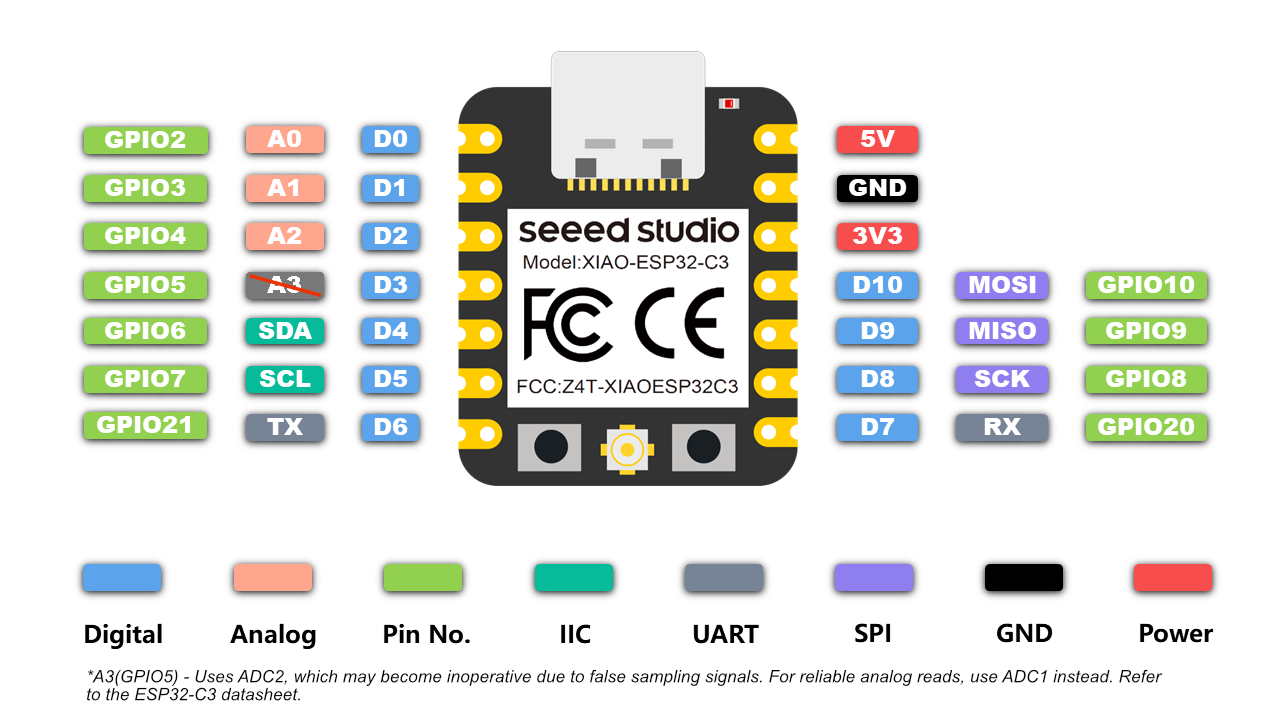
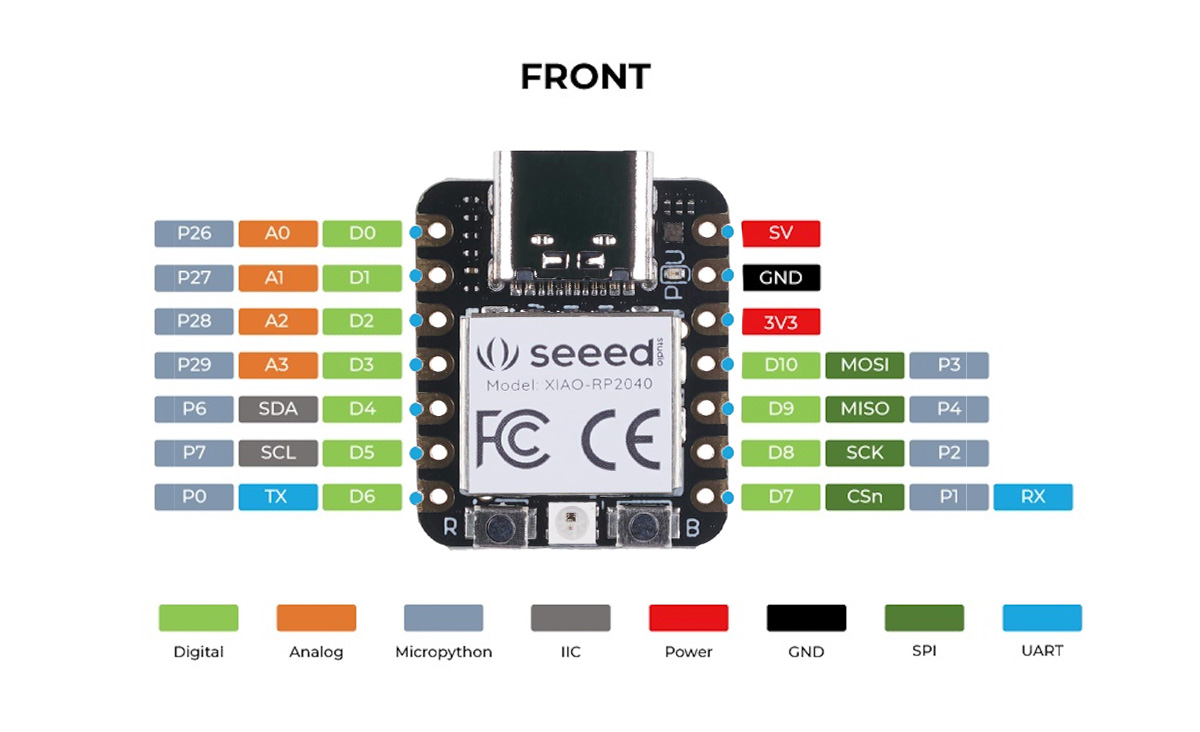
This week, I explored wired communication using I2C (Inter-Integrated Circuit), a widely used serial communication protocol ideal for connecting microcontrollers, sensors, and displays. I2C uses just two wires: SDA (data line) and SCL (clock line). My goal was to establish communication between two microcontrollers: the Seeed XIAO RP2040 (master) and the Seeed XIAO ESP32C3 (slave). Using the Wire library and following a standard master-slave configuration, I successfully sent and received data between the two boards, gaining valuable experience in low-level microcontroller communication.
Work Process Detail
1️⃣ Prepare the hardware
- Gather 1 XIAO RP2040 and 1 XIAO ESP32C3.
- Prepare 4 jumper wires: GND, VCC, SDA, and SCL.
2️⃣ Wiring the devices
- Connect GND → GND
- Connect VCC (3.3V) → VCC (3.3V)
- Connect SDA (RP2040 D4) → SDA (ESP32C3 D4)
- Connect SCL (RP2040 D5) → SCL (ESP32C3 D5)
(Or use the exact I2C pins based on your board reference.)
3️⃣ Install libraries
- In the Arduino IDE, install the Wire library (pre-installed with Arduino cores).
4️⃣ Code the master (XIAO RP2040)
- Initialize the Wire library.
- Use
Wire.beginTransmission(slave_address)to start communication.
- Send data with
Wire.write().
- End the transmission with
Wire.endTransmission().
#include <Wire.h>

#define SLAVE_ADDRESS 0x08  // Must match ESP32C3 slave address

void setup() {
Wire.begin();                               // Start I2C as master
Serial.begin(115200);
Serial.println("RP2040 I2C Master ready");
}

void loop() {
Wire.beginTransmission(SLAVE_ADDRESS);      // Begin transmission to slave
Wire.write("C");                            // Send a single character (example)
Wire.endTransmission();                     // End transmission
Serial.println("Sent: C");
delay(1000);                                // Wait for a second
}
5️⃣ Code the slave (XIAO ESP32C3)
- Initialize Wire with
Wire.begin(slave_address).
- Use
Wire.onReceive()to handle incoming data.
- Optionally, set
Wire.onRequest()to send data back when master requests.
#include <Wire.h>

#define SLAVE_ADDRESS 0x08  // You can choose any 7-bit address (not conflicting)

void setup() {
  Wire.begin(SLAVE_ADDRESS);                // Start I2C with address
  Wire.onReceive(receiveEvent);             // Register receive event
  Serial.begin(115200);
  Serial.println("ESP32C3 I2C Slave ready");
}

void loop() {
  // Nothing needed in loop
}

void receiveEvent(int howMany) {
  while (Wire.available()) {
    char c = Wire.read();                   // Read byte as character
    Serial.print("Received: ");
    Serial.println(c);
  }
}
6️⃣ Upload and test
- Upload master code to the XIAO RP2040.
- Upload slave code to the XIAO ESP32C3.
7️⃣ Troubleshoot
- Double-check wiring and pull-up resistors (optional).
- Ensure both devices use the same I2C speed (100 kHz by default).
- Confirm the slave address is unique and matches in the code.
Learning Outcome
Through this assignment, I learned how to:
- Understand and apply the I2C communication protocol between two microcontrollers.
- Use the Wire library to configure a device as either a master or slave.
- Implement and test real-time data exchange using I2C protocol.
- Troubleshoot basic I2C issues such as wiring mistakes, addressing, and clock speed mismatches.
This experience built a strong foundation for using I2C in more complex projects involving multiple devices.