
Wildcard week
Hero Shot

while working on my last board, the ICE40 FPGA, I started thinking about how the packaging for these chips was made. Curious, I asked my instructor, who explained that this type of packaging is created using a vacuum forming machine. Intrigued, I decided to explore it further. I gathered some raw materials and tested the process, considering how I could use it to create future product packaging for my own projects.
Summary
This week, I explore the Formech 508DT Vacuum Forming Machine. I started by reading the official documentation from the company and learning about its features, setup, and operating procedures. I then tested the machine to understand its functionality and workflow. This documentation outlines my experience with setup, operation, and key takeaways from working with the vacuum forming process.
In addition to vacuum forming, I also experimented with composite mold-making by using the formed plastic part as a base to create a rigid mold with epoxy and fiberglass. This process allowed me to convert a temporary plastic form into a durable and reusable mold, ideal for casting or repeated fabrication. The combination of vacuum forming and composite techniques provided valuable insights into hybrid manufacturing workflows.
Work Process Detail
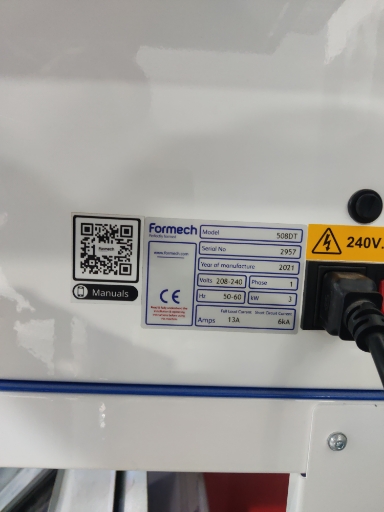
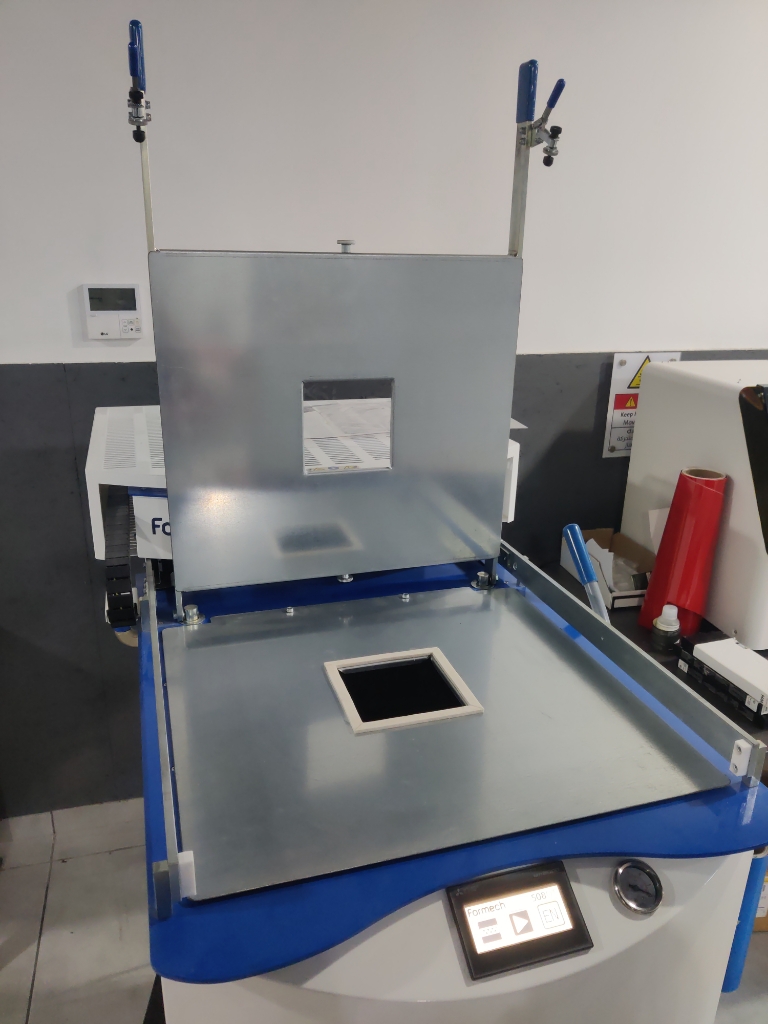
1. Understanding the Formech 508DT Machine
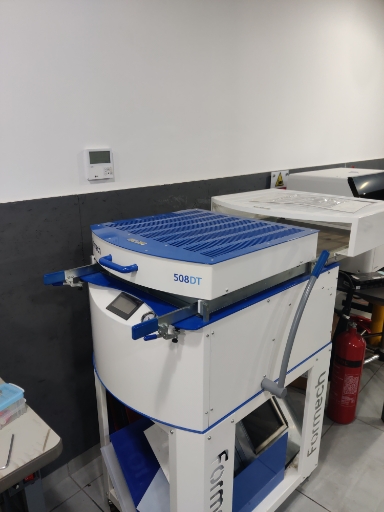
Before operating the Formech 508DT, I reviewed the official manual to understand its capabilities and specifications.
Key Features of the Formech 508DT:
✅ Forming Area: 482mm x 432mm (19" x 17")
✅ Max Depth of Draw: 185mm (7.3")
✅ Max Material Thickness: 6mm (0.25")
✅ Quartz Heating System: Provides fast and even heating.
✅ Four Heating Zones: Allows independent control for precise forming.
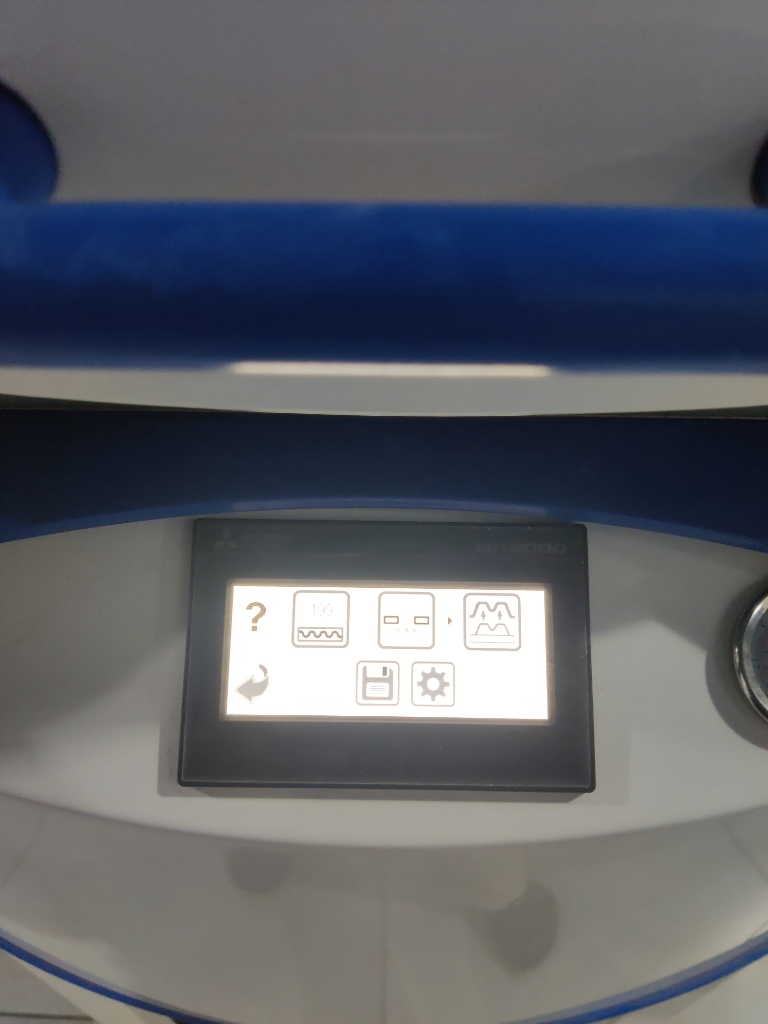
✅ HMI Touchscreen Interface: Offers easy operation and saved program functions.
✅ Vacuum System: Uses a dry-running diaphragm vacuum pump for forming plastic sheets.
This machine is designed for prototyping, small-scale production, and educational purposes, making it ideal for experimenting with different materials.
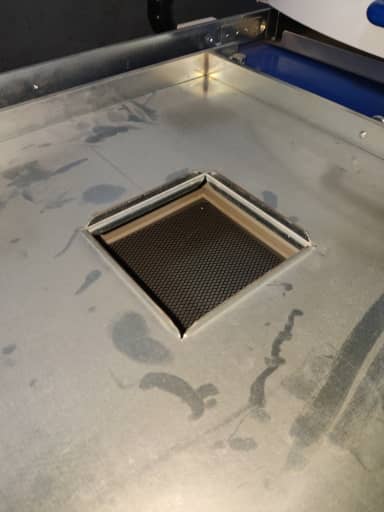
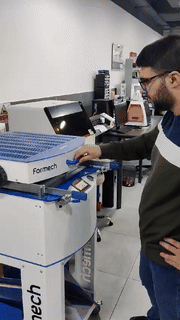
2. Setting Up and Operating the Machine
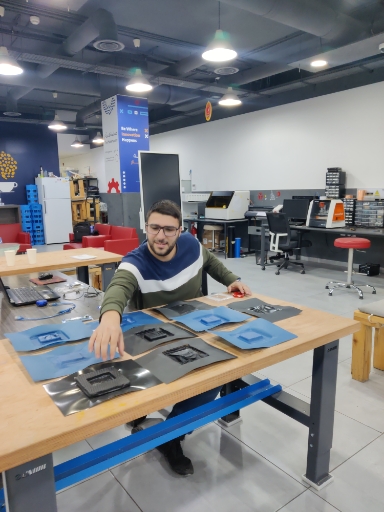
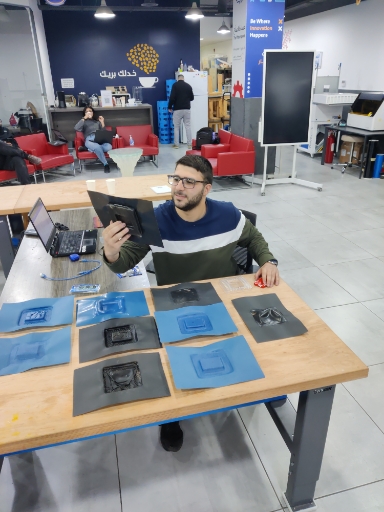
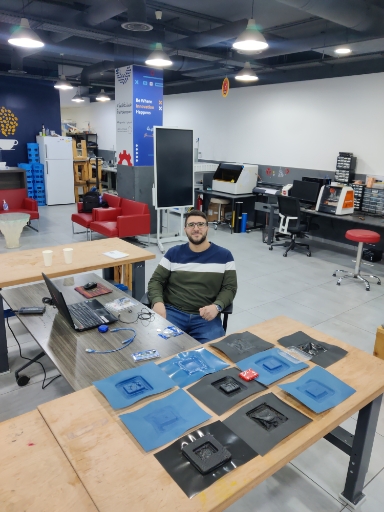
Following the company's documentation, I performed a general test of the vacuum forming process.
🛠️ Setup Process:
✅ Placed the machine on a stable surface with adequate ventilation.
✅ Connected the power supply and ensured proper earthing.
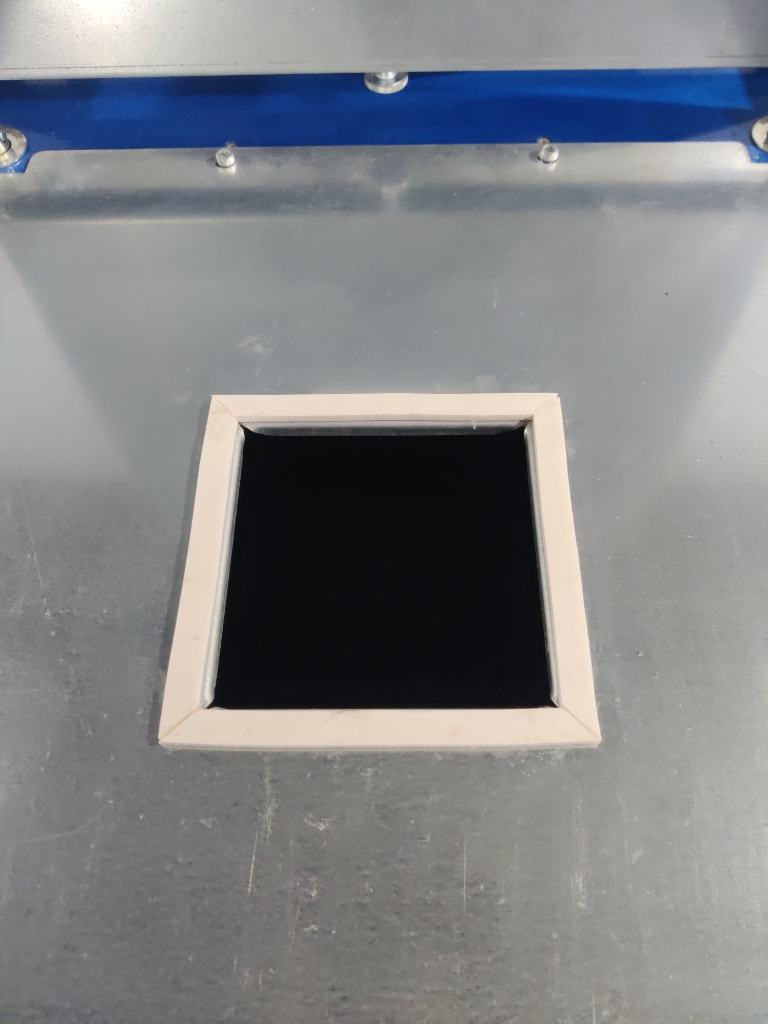
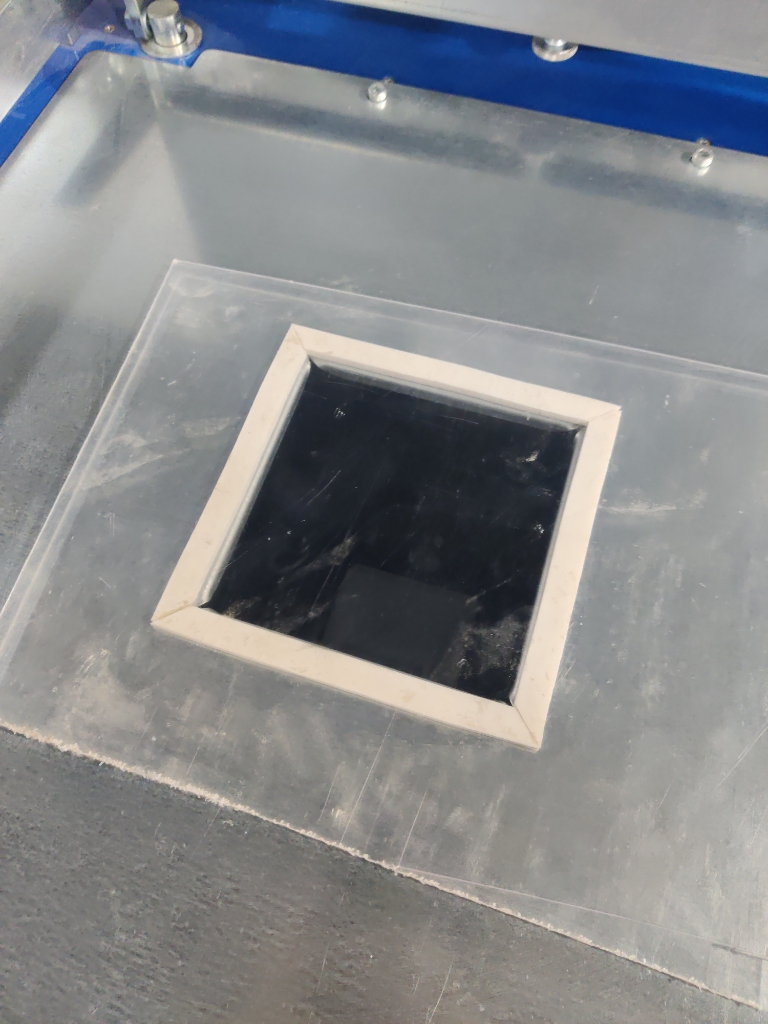
✅ Checked the clamping frame and vacuum seals for proper alignment.
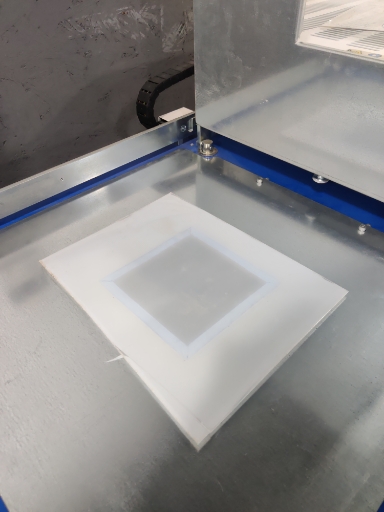
✅ Loaded a plastic sheet into the machine.
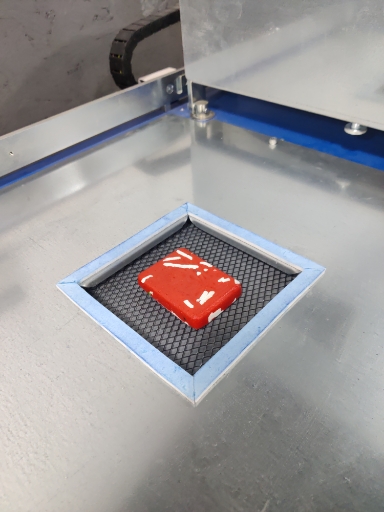
🔹 Operating the Vacuum Former:
1️⃣ Powered on the machine using the HMI touchscreen interface.
2️⃣ Preheated the quartz heating elements, adjusting heating zones based on material thickness.
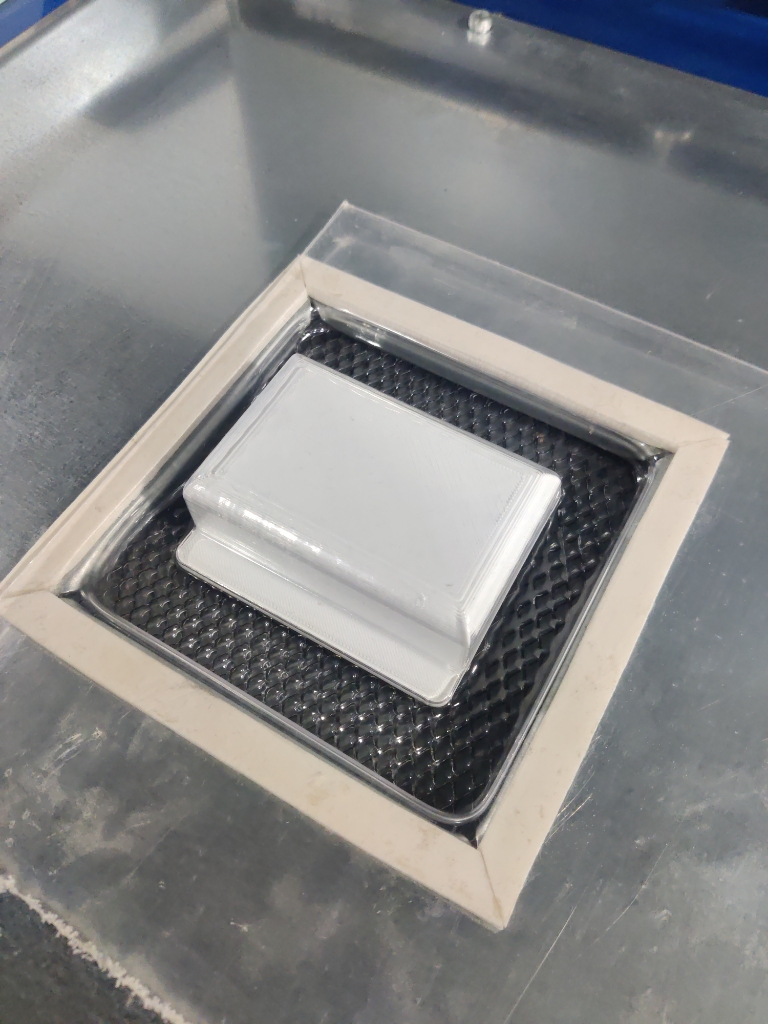
3️⃣ Moved the heater forward to soften the plastic sheet.
4️⃣ Monitored the plastic softening point (when it started sagging slightly).
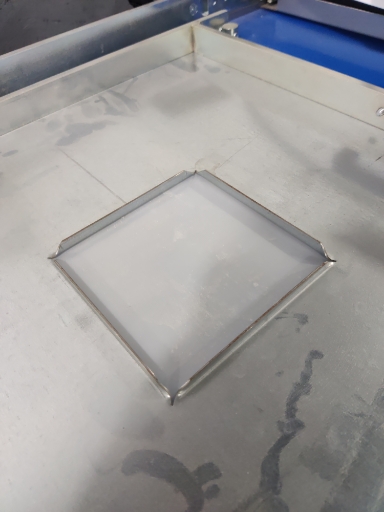
5️⃣ Engaged the vacuum system to form the plastic sheet over the mold.
6️⃣ Allowed the formed plastic to cool before releasing the vacuum.
7️⃣ Removed the final formed part for inspection.
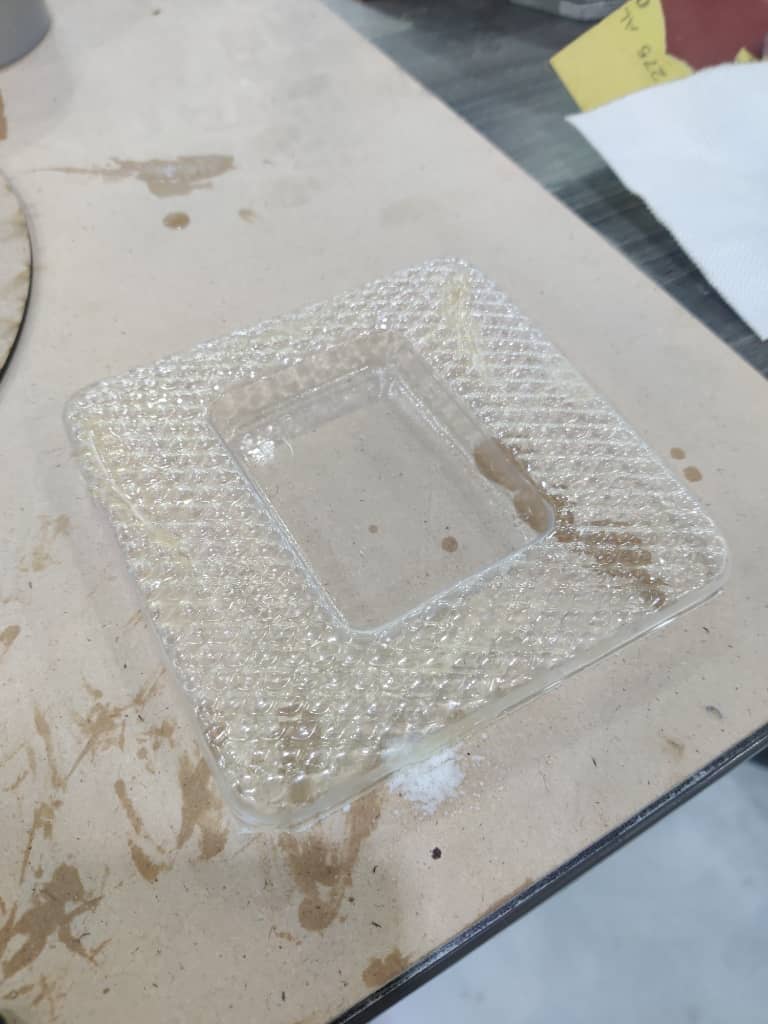
Problem:
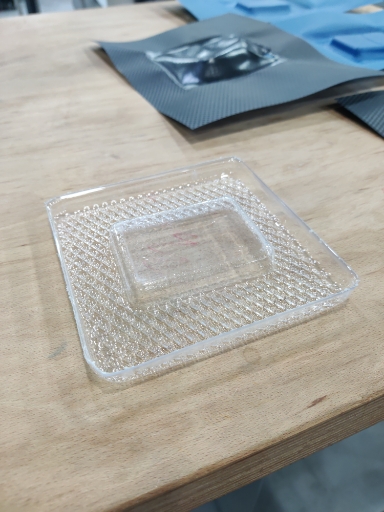
While testing materials for vacuum forming, I initially faced issues because the plastic sheet I used was too thin and didn’t form properly. After consulting with an instructor at the lab, I was advised to switch to a thicker ABS sheet. Once I made the change, the forming process worked perfectly and produced a proper mold.
✅ Tested different heat settings and forming times to observe variations in results.
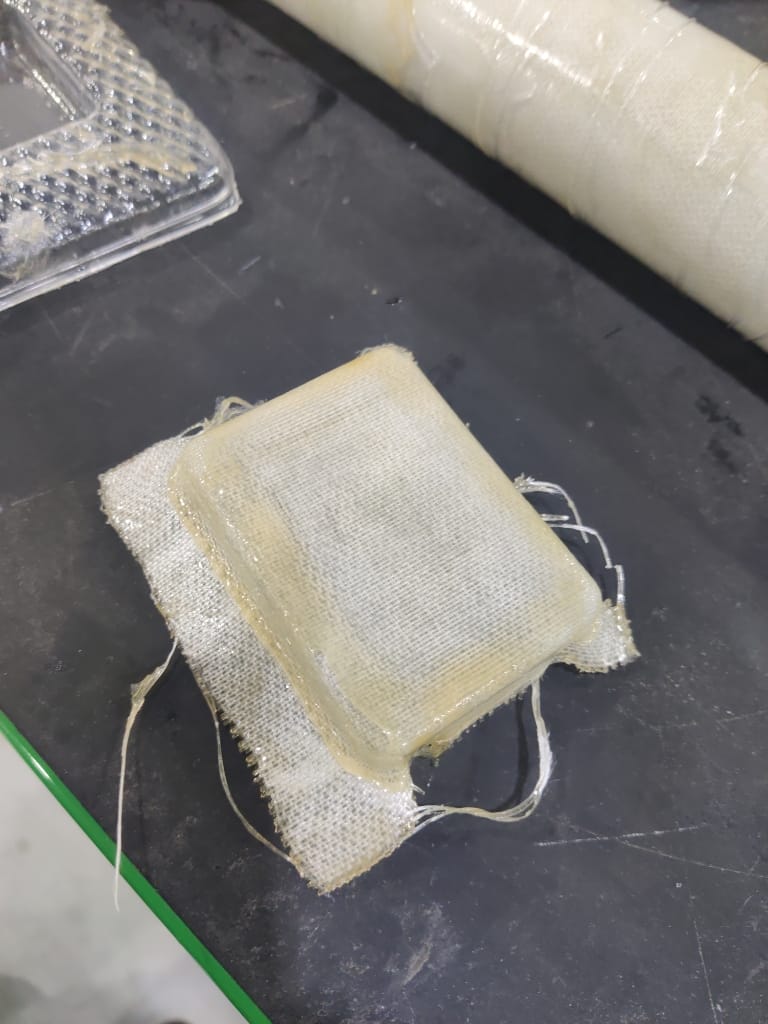
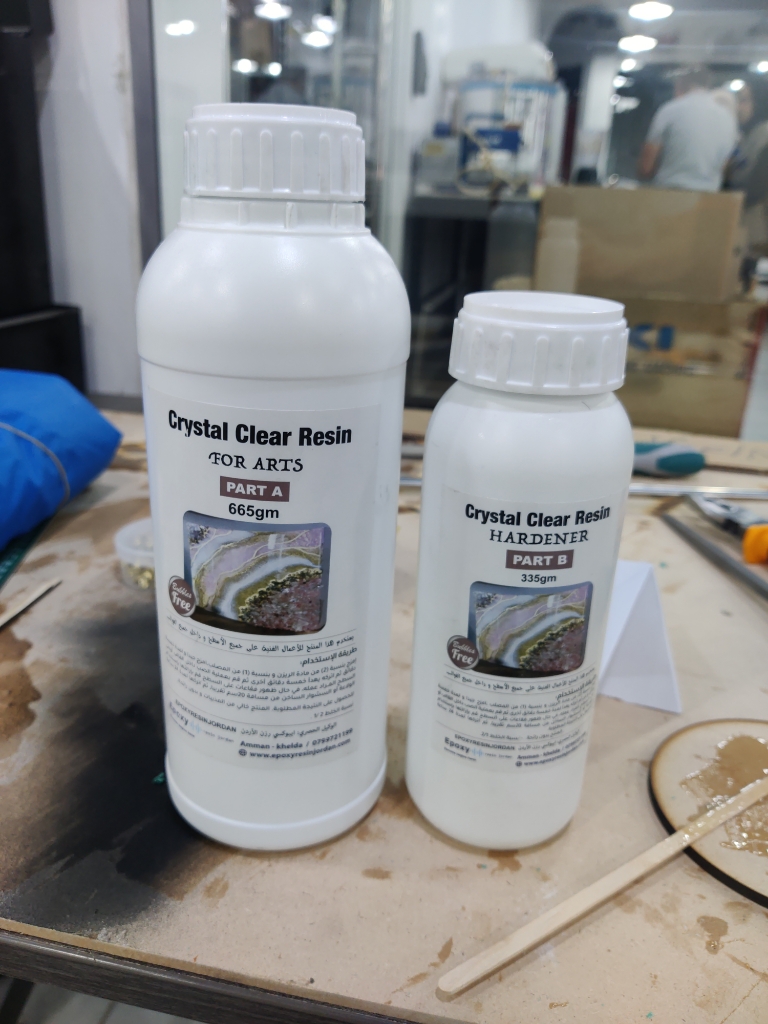
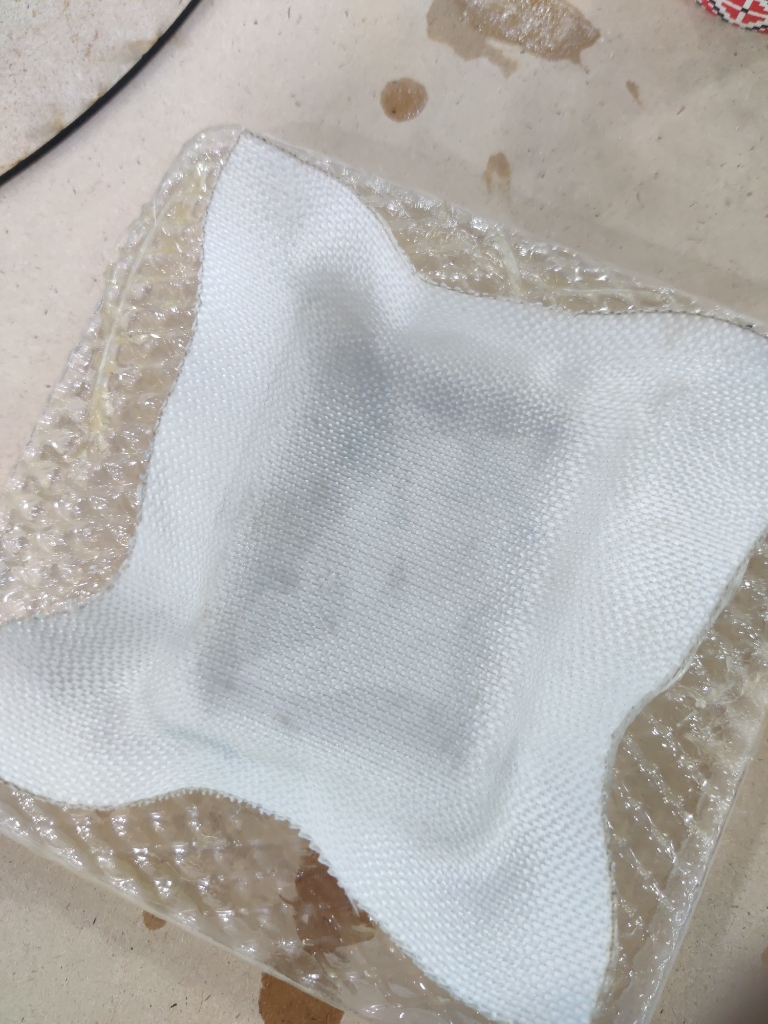
3. Creating a Rigid Mold with Epoxy and Fiberglass
After successfully forming a plastic sheet using the Formech 508DT, I wanted to produce a more durable and reusable mold. To do this, I used the vacuum-formed plastic piece as a base to create a rigid composite mold.
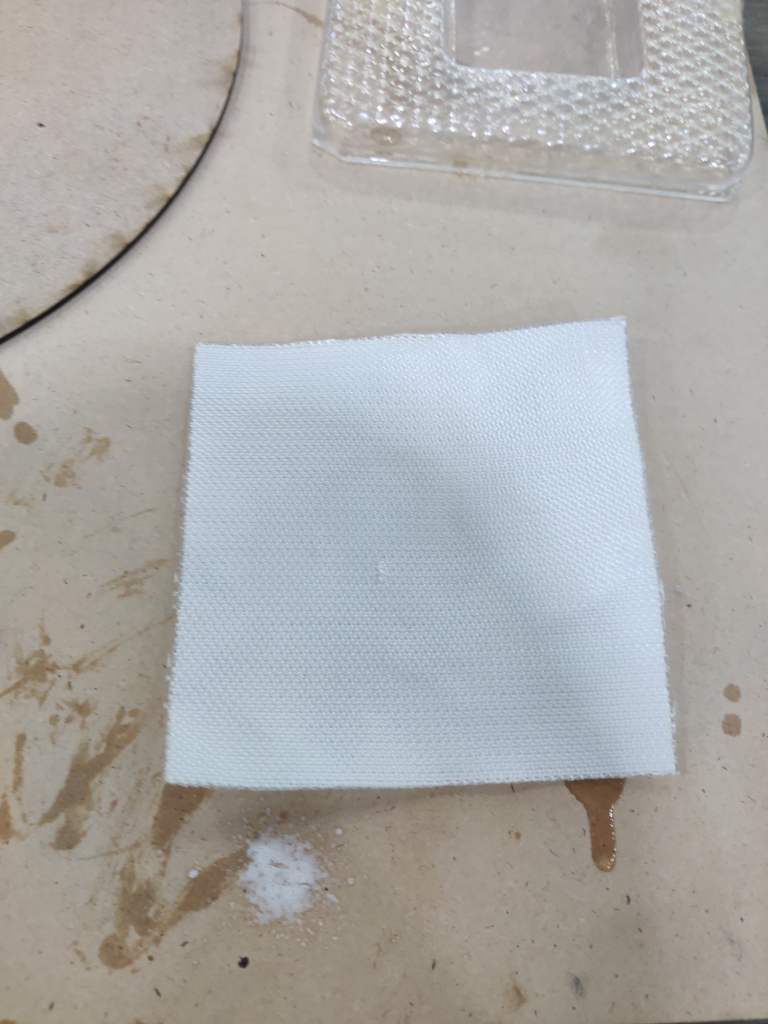
🔹 Materials Used:
- Epoxy resin
- Fiberglass sheets (woven)
- Mixing cups, gloves, and brushes
- Release agent (optional but recommended)
🧪 Process Overview:
1️⃣ Surface Preparation:
I cleaned the vacuum-formed plastic thoroughly and applied a release agent to prevent sticking. This step is crucial if the formed part is to be reused.
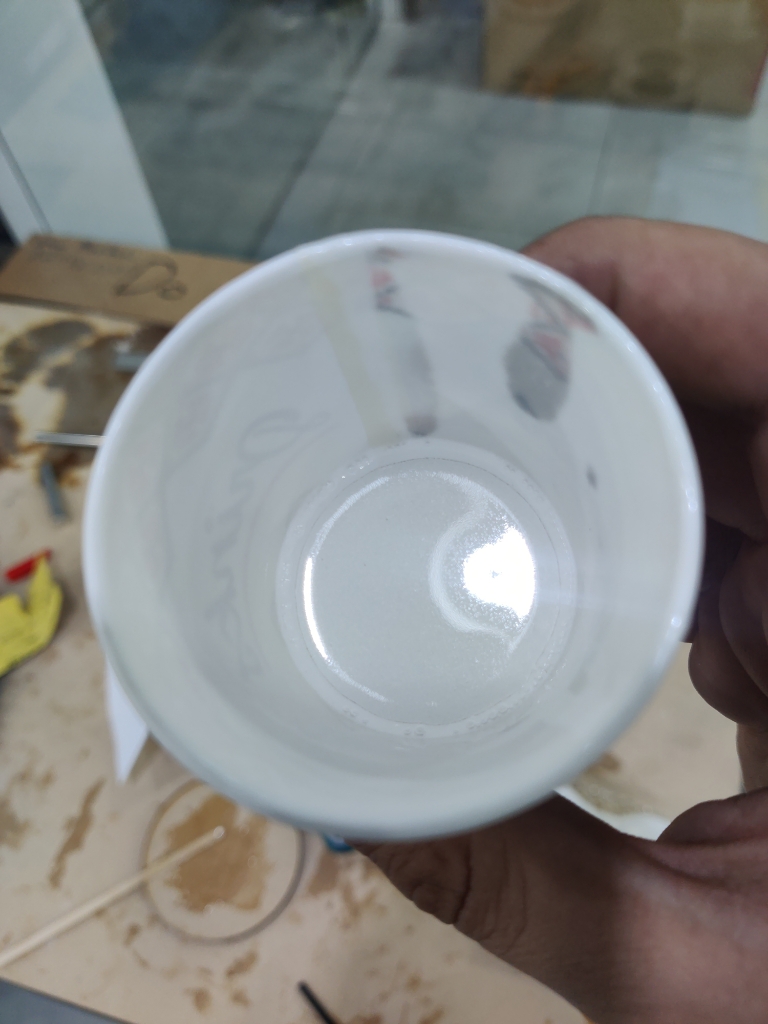
2️⃣ Mixing Epoxy:
Following manufacturer guidelines, I mixed the epoxy resin with its hardener in the correct ratio, ensuring thorough blending to avoid soft or uncured spots.

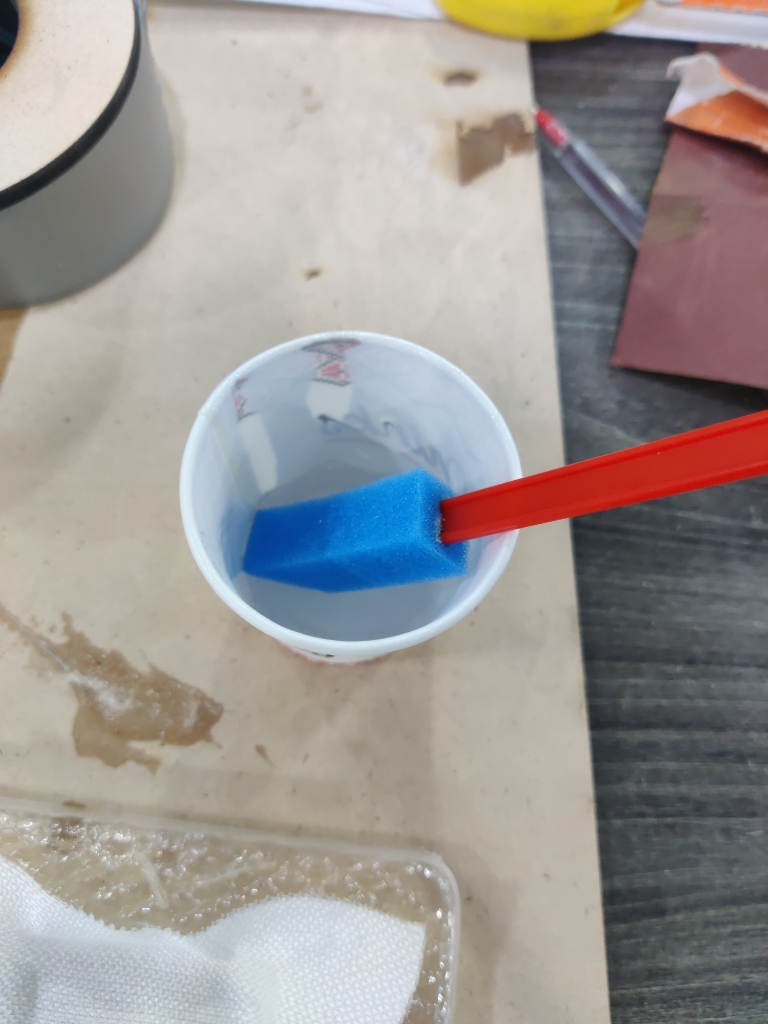
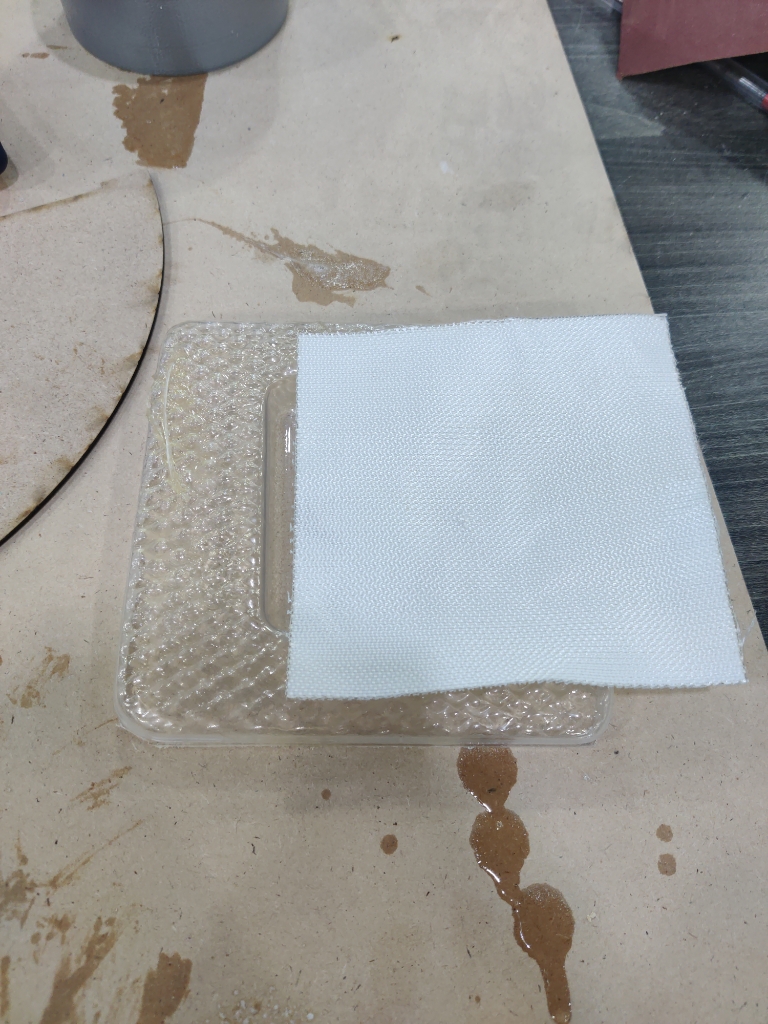
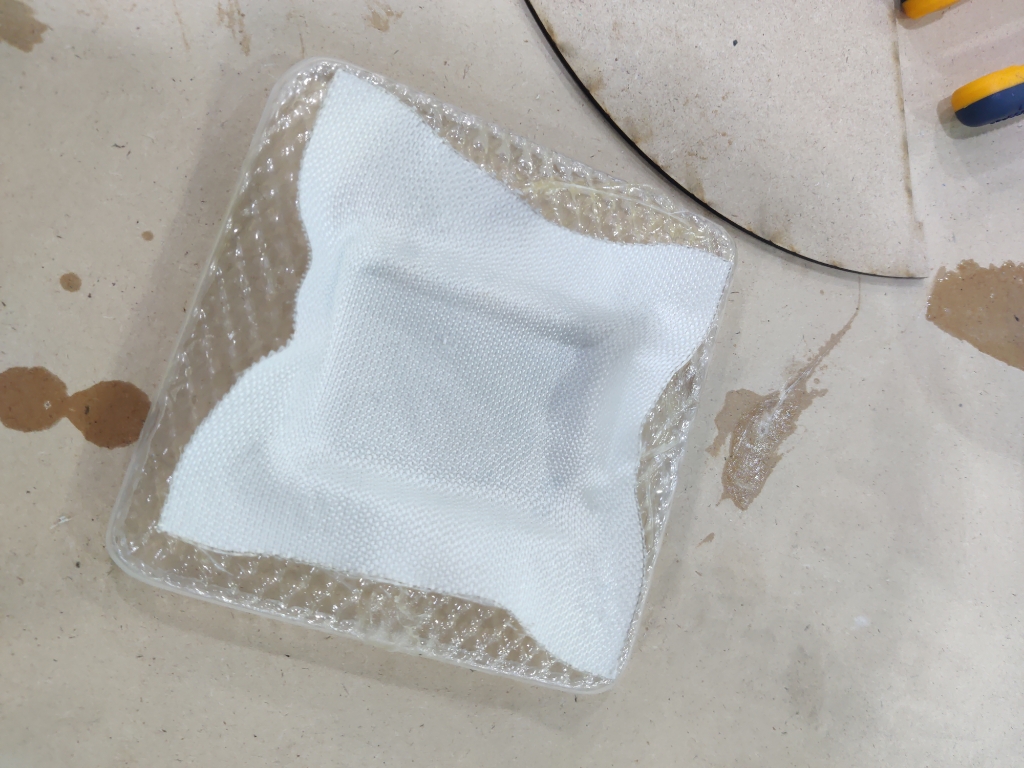
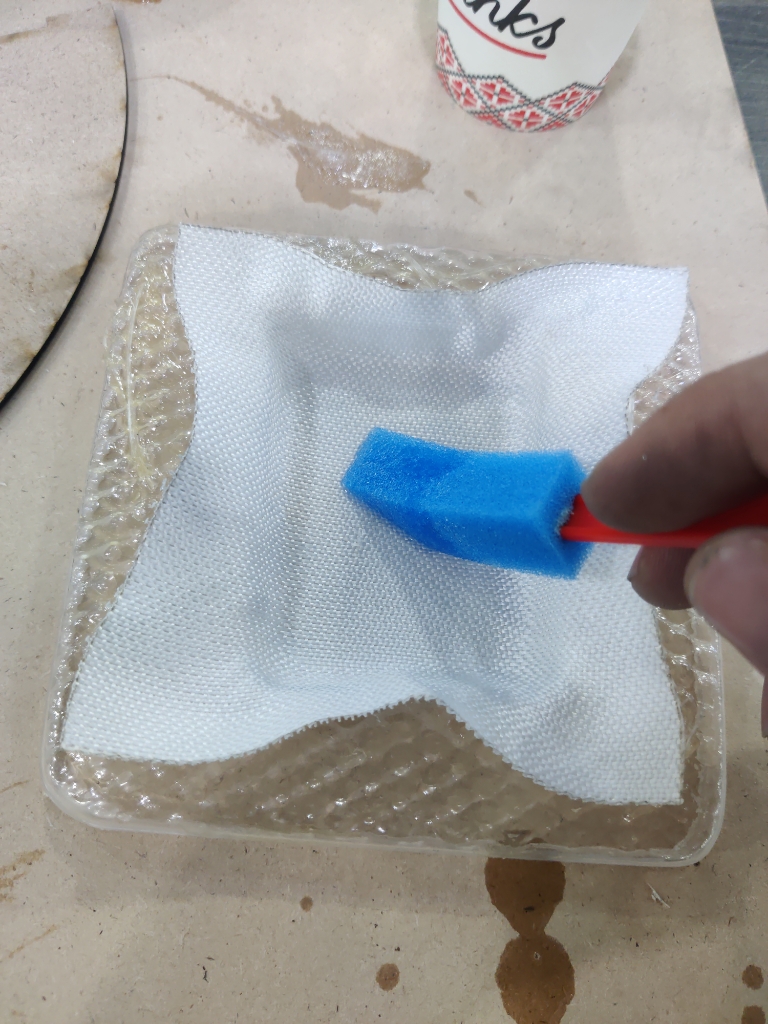
3️⃣ Layering Fiberglass:
I cut fiberglass cloth to size and applied the first layer over the plastic mold, using a Sponge brush to saturate it with epoxy. This was followed ensuring full coverage and strength.
4️⃣ Curing:
The mold was left to cure for 24 hours at room temperature. I checked for drips or resin pooling, adjusting as necessary.
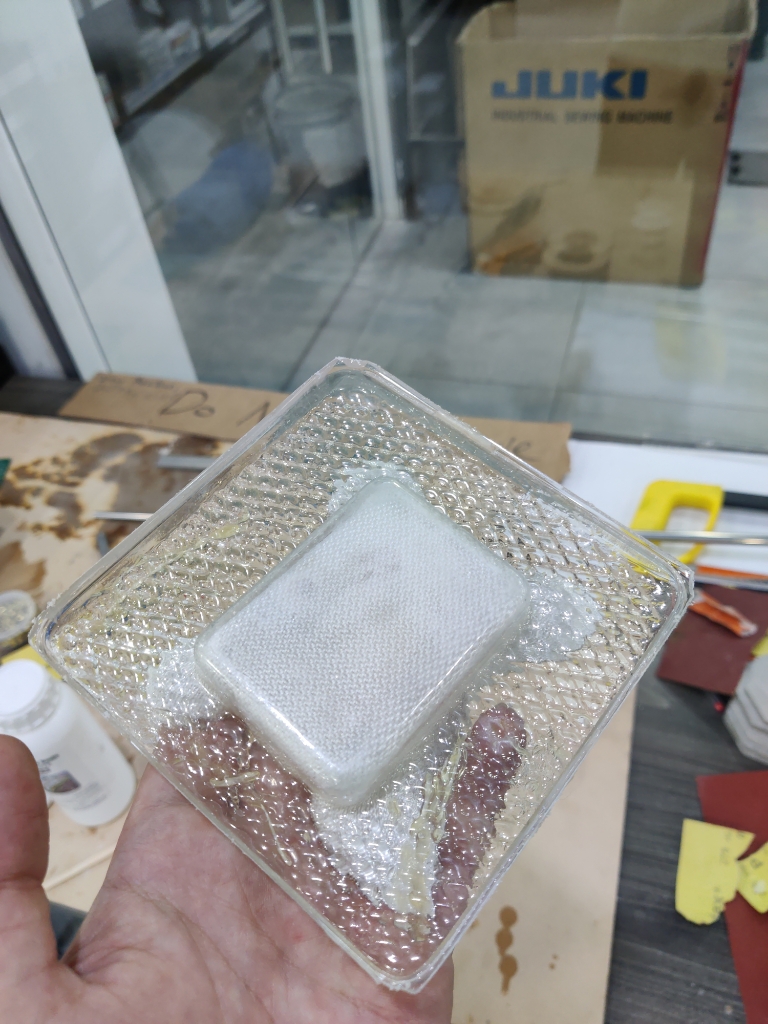
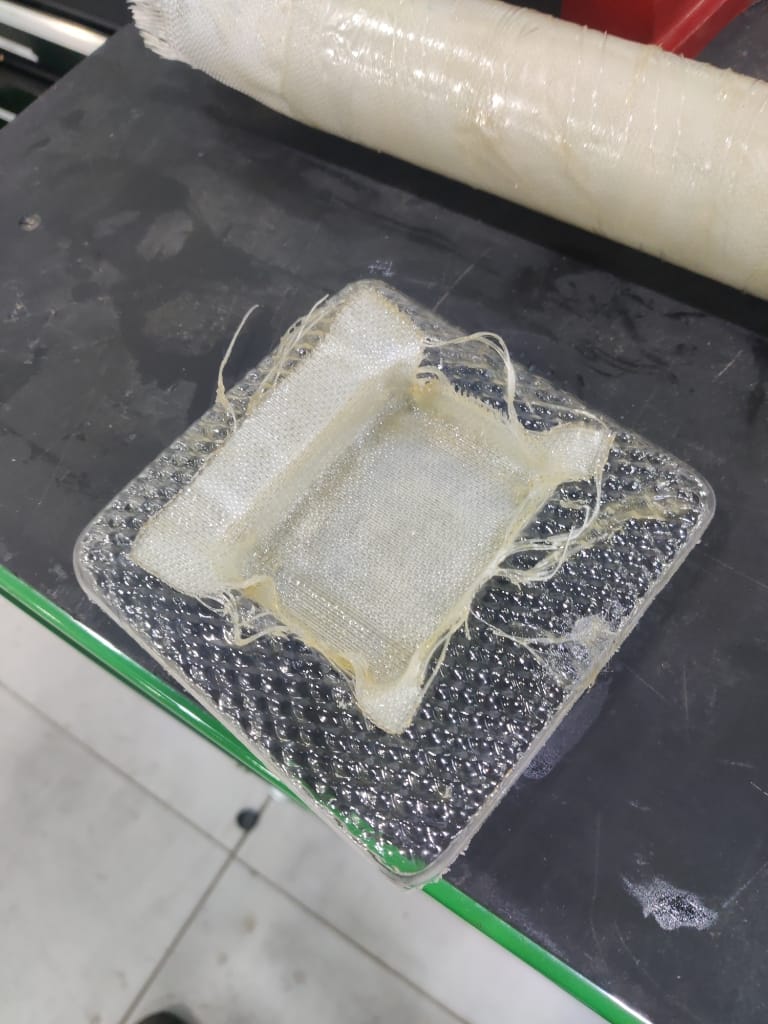
5️⃣ Demolding:
Once cured, I carefully separated the epoxy fiberglass shell from the plastic part. The result was a strong, reusable mold suitable for casting or further fabrication.
Final Project Flight Controller Protector :
After experimenting with fiberglass and epoxy for testing, I decided to create a component that would be genuinely useful for my final project: a protective cover for the rocket’s flight controller.
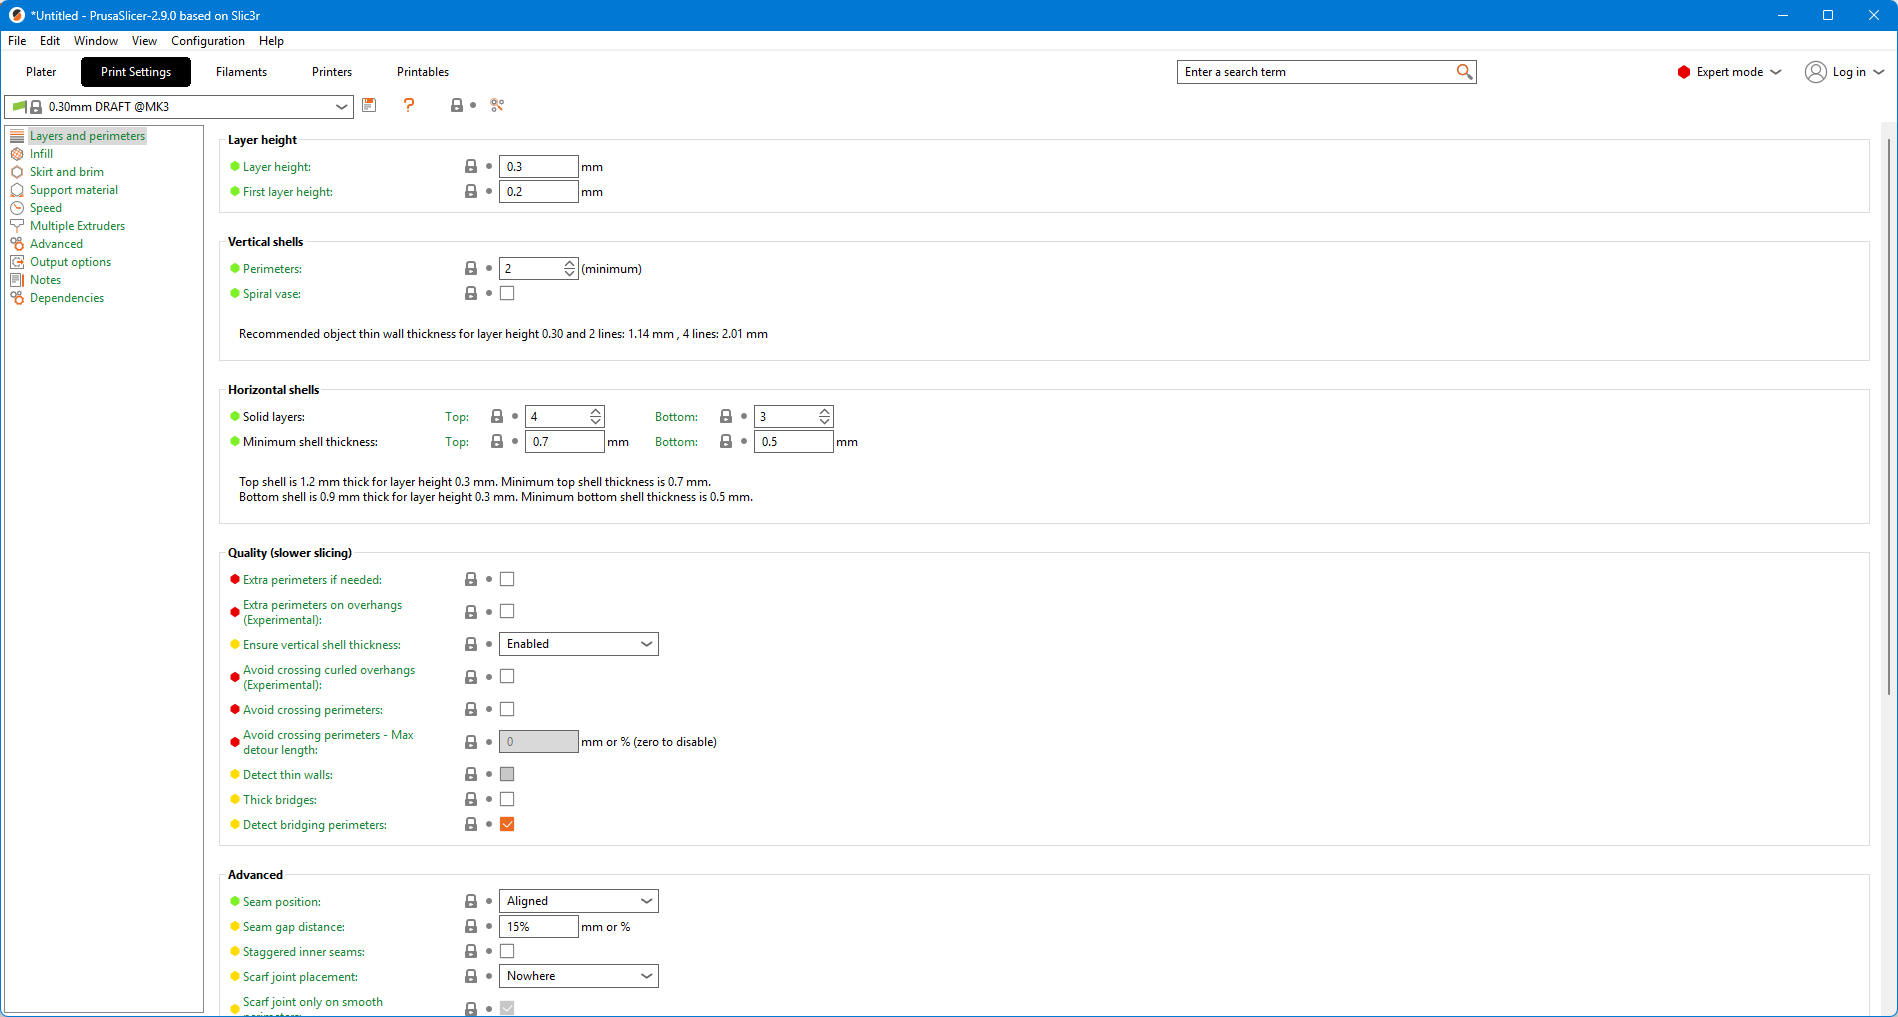
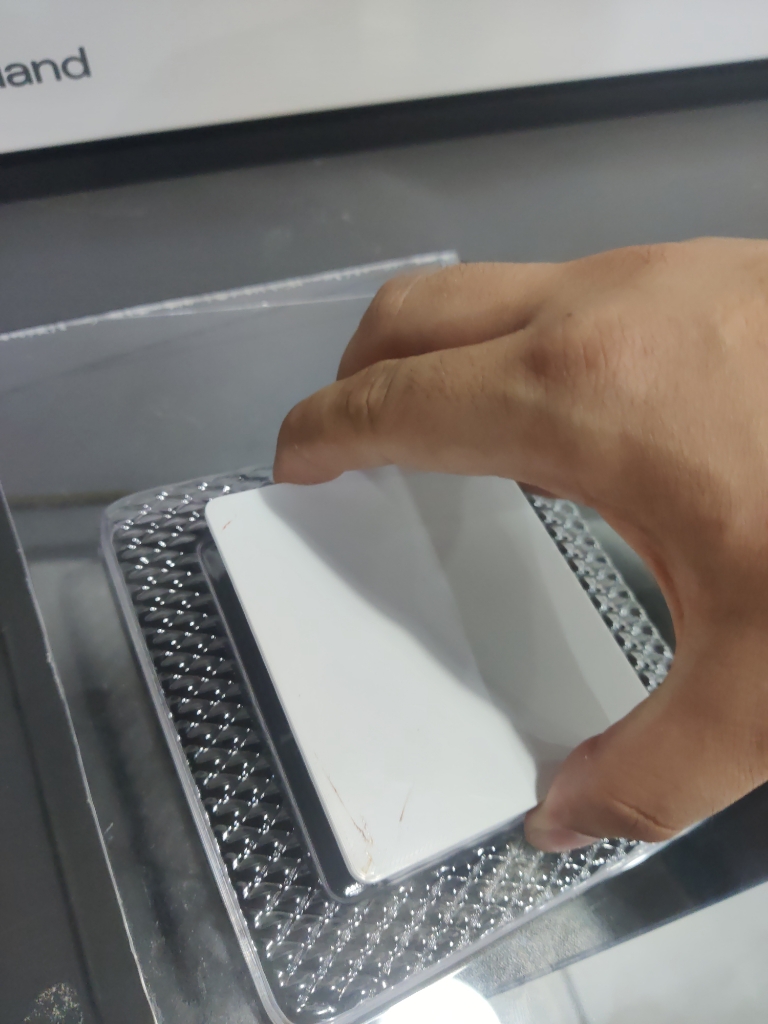
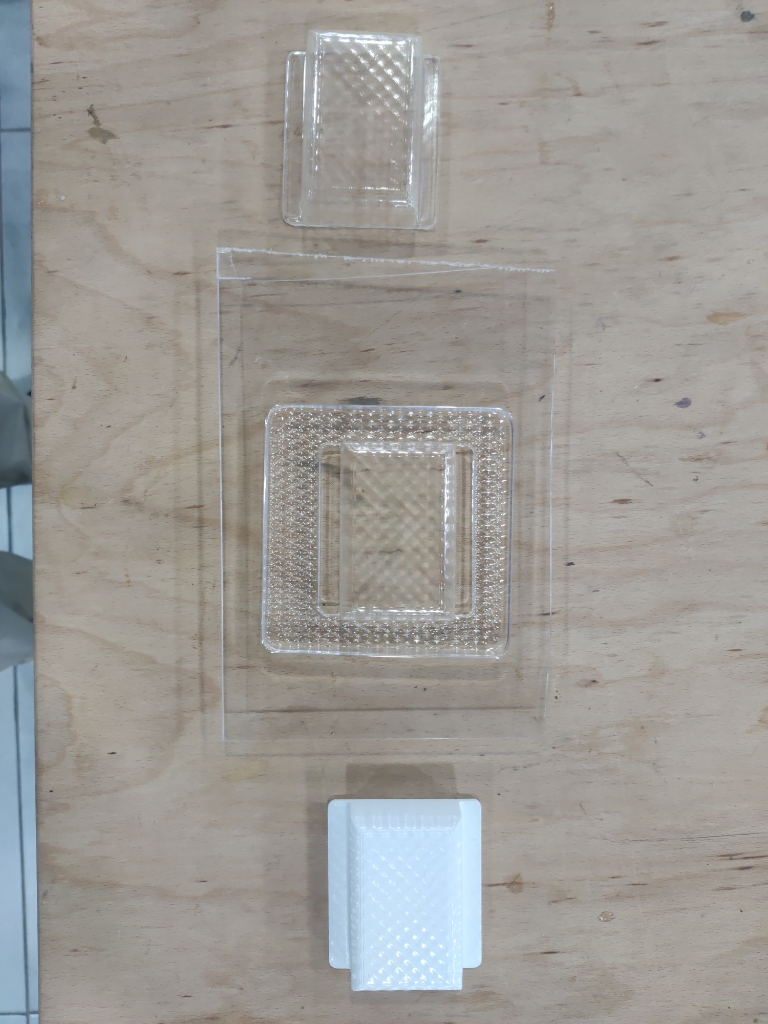
I started by designing a case in Fusion 360, matching the dimensions of the PCB and adding enough depth to safely enclose all components. I then exported the model to PrusaSlicer, using a 0.3 mm layer height and two vertical shells.
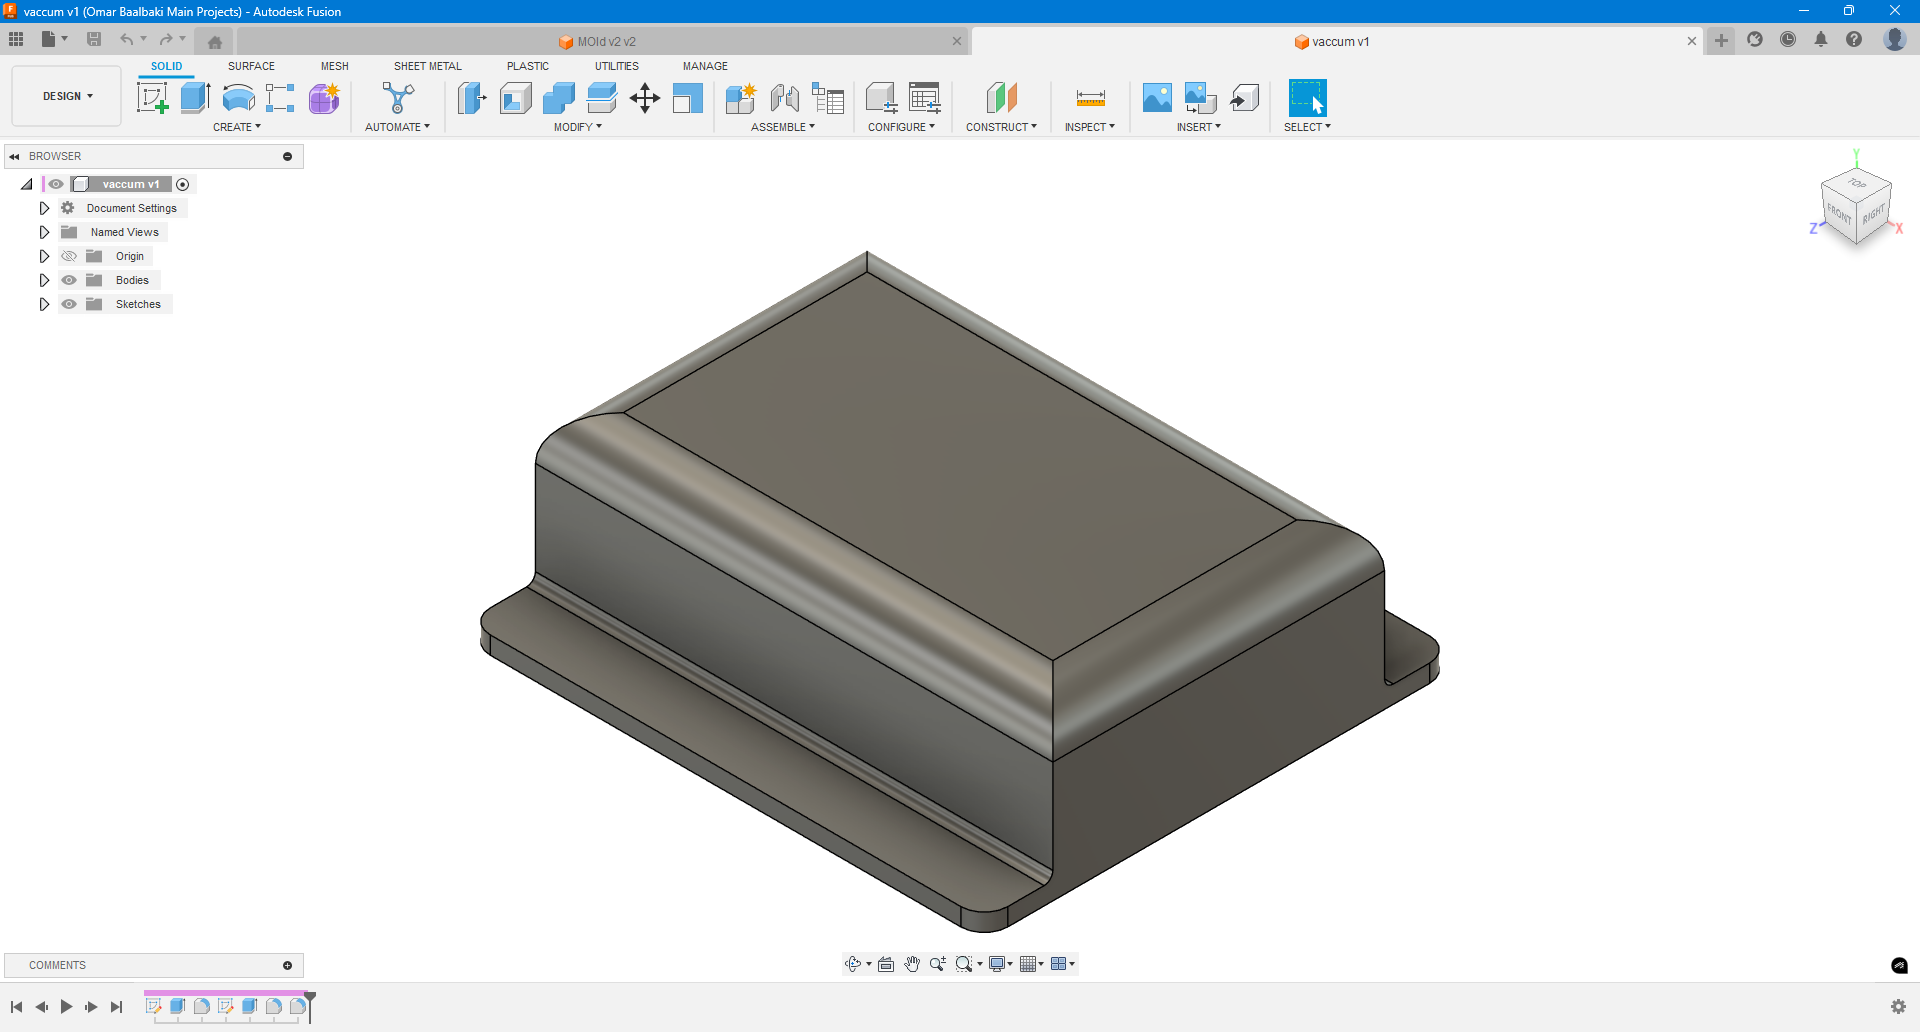
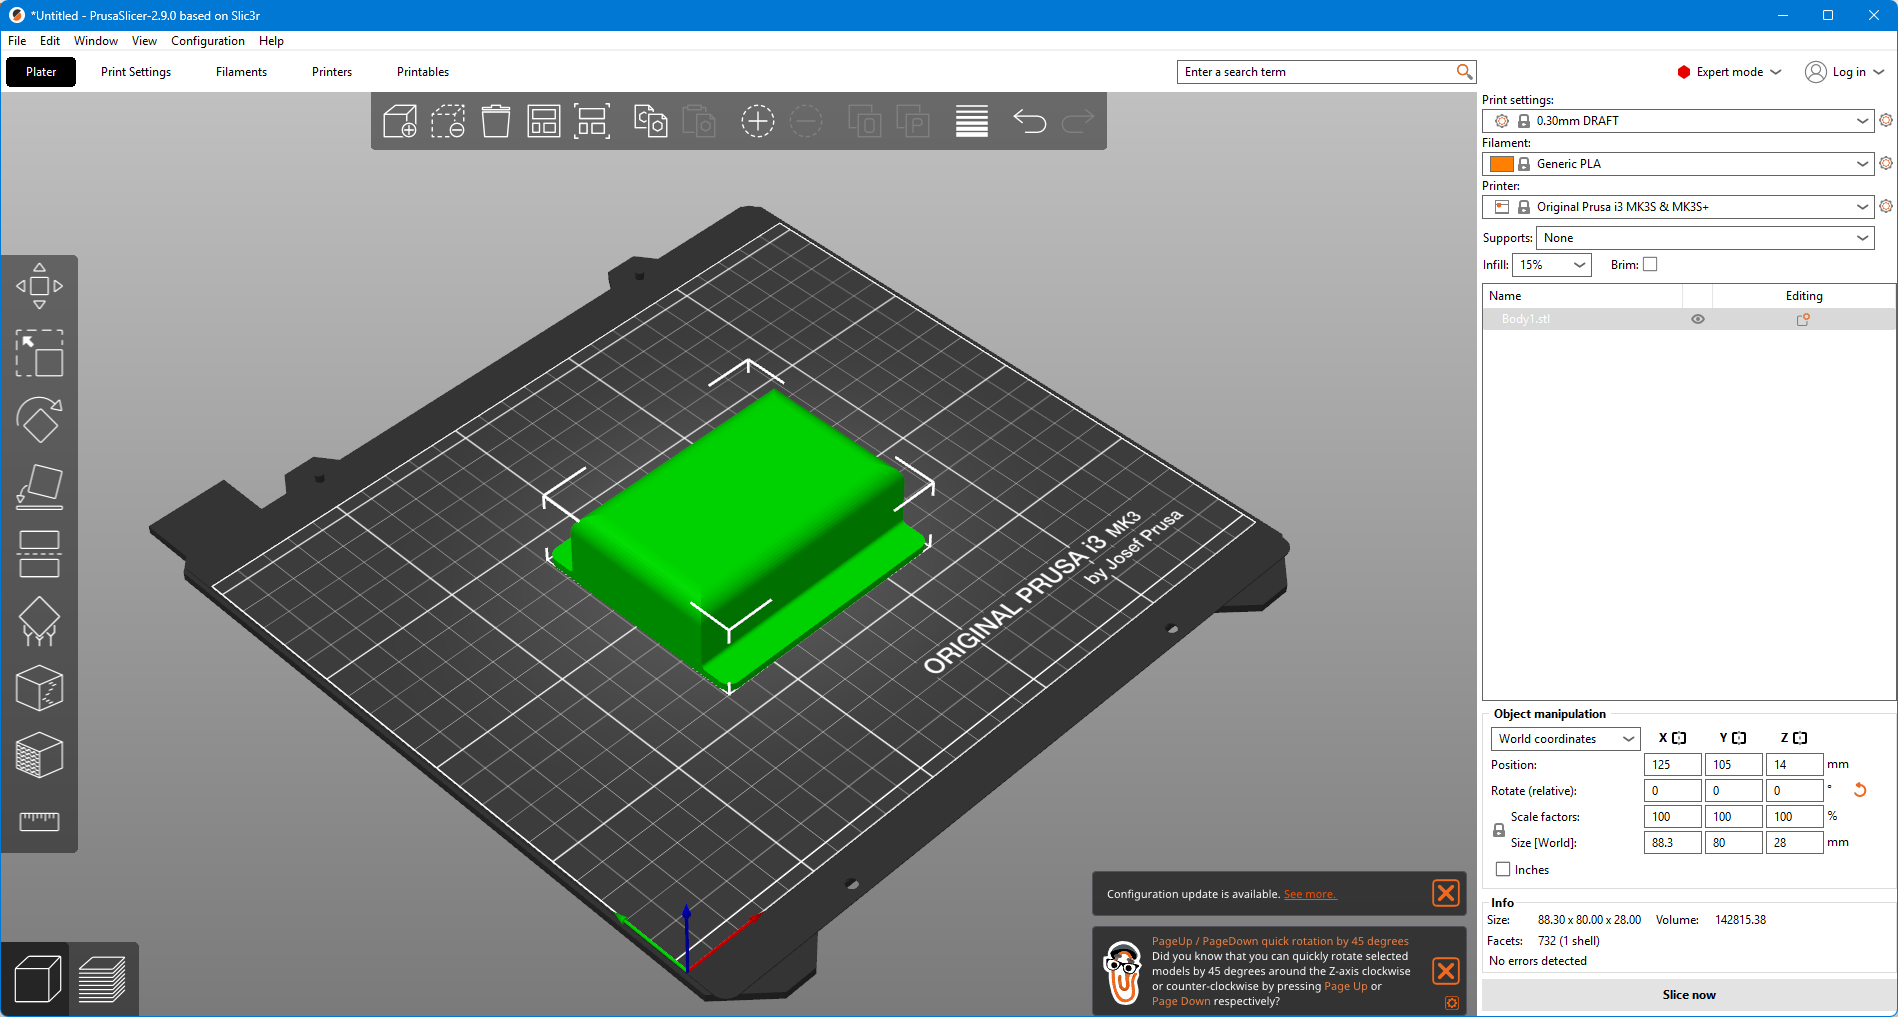
The part was printed on a Prusa MK3i.
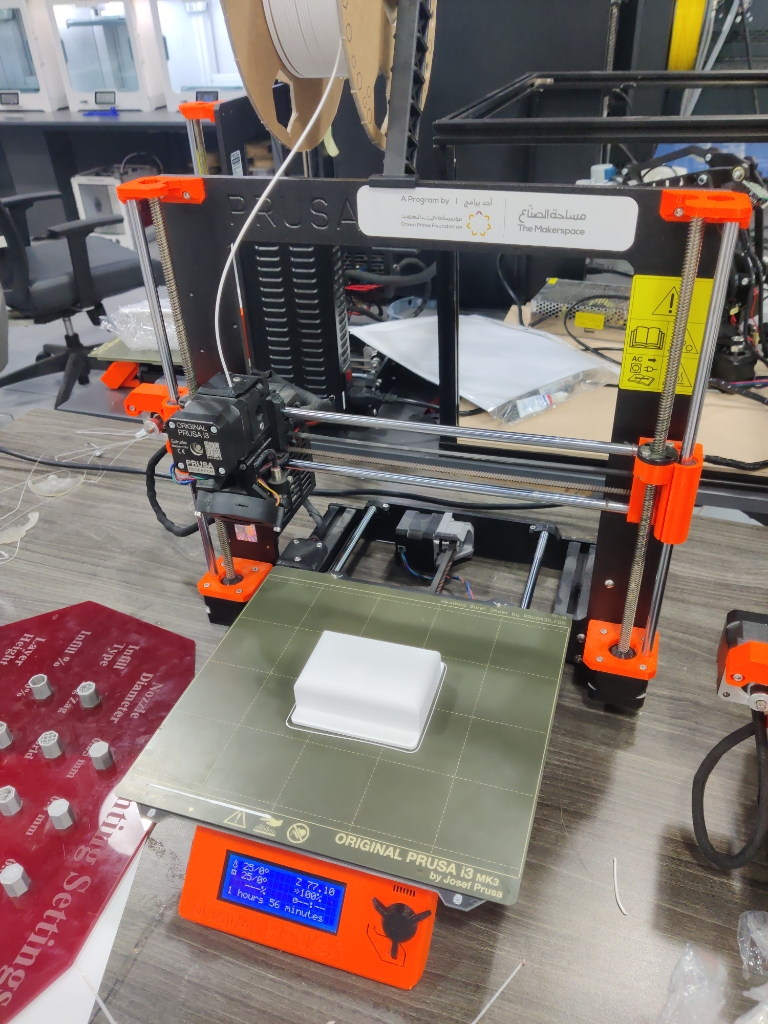
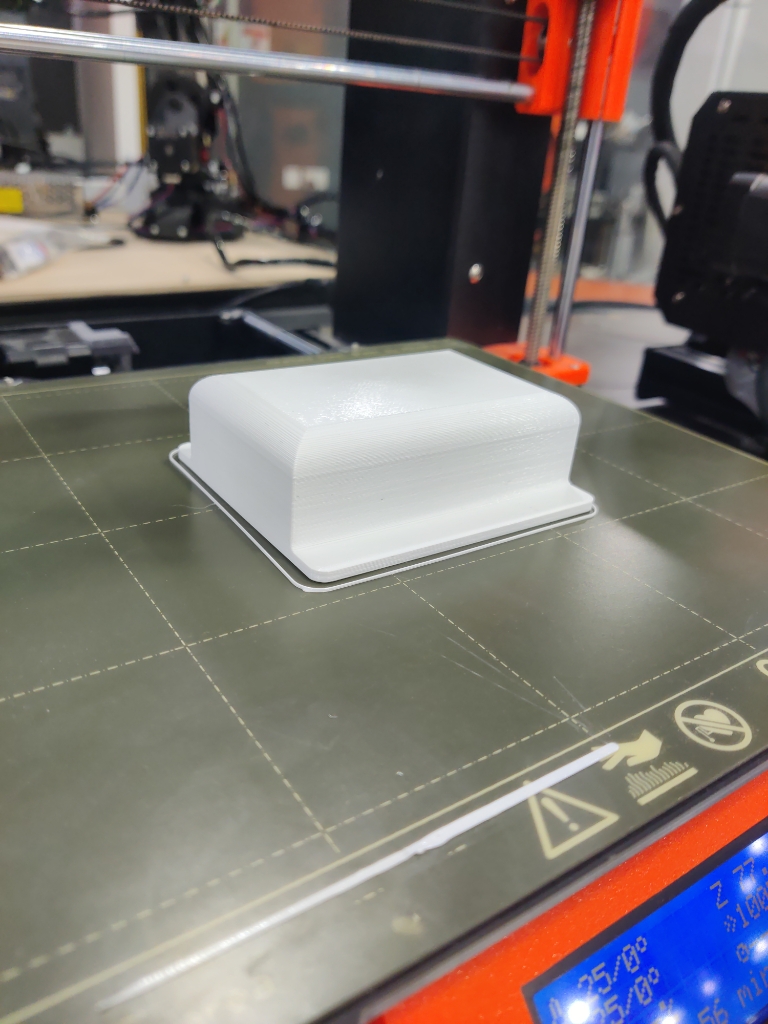
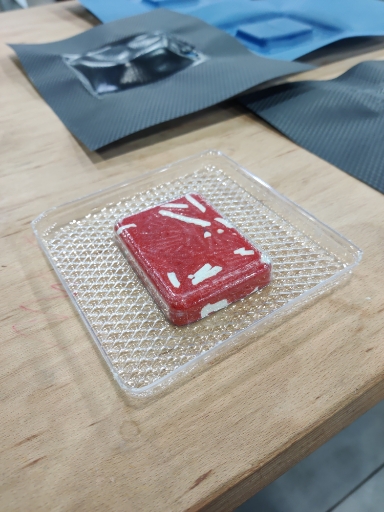
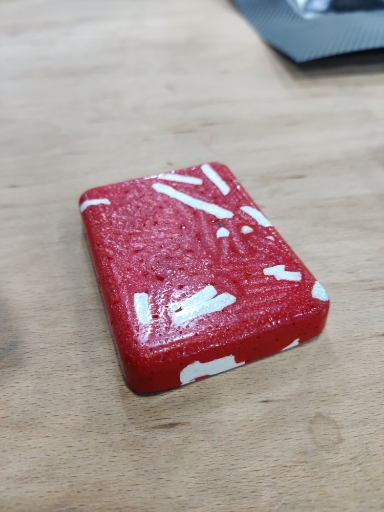
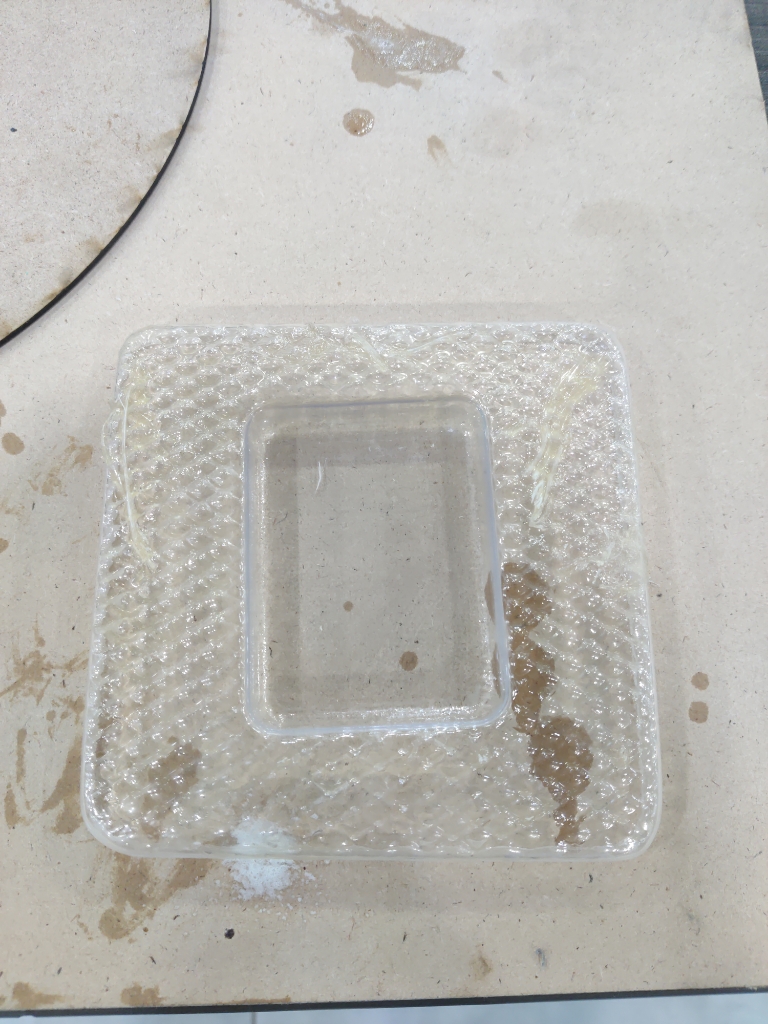
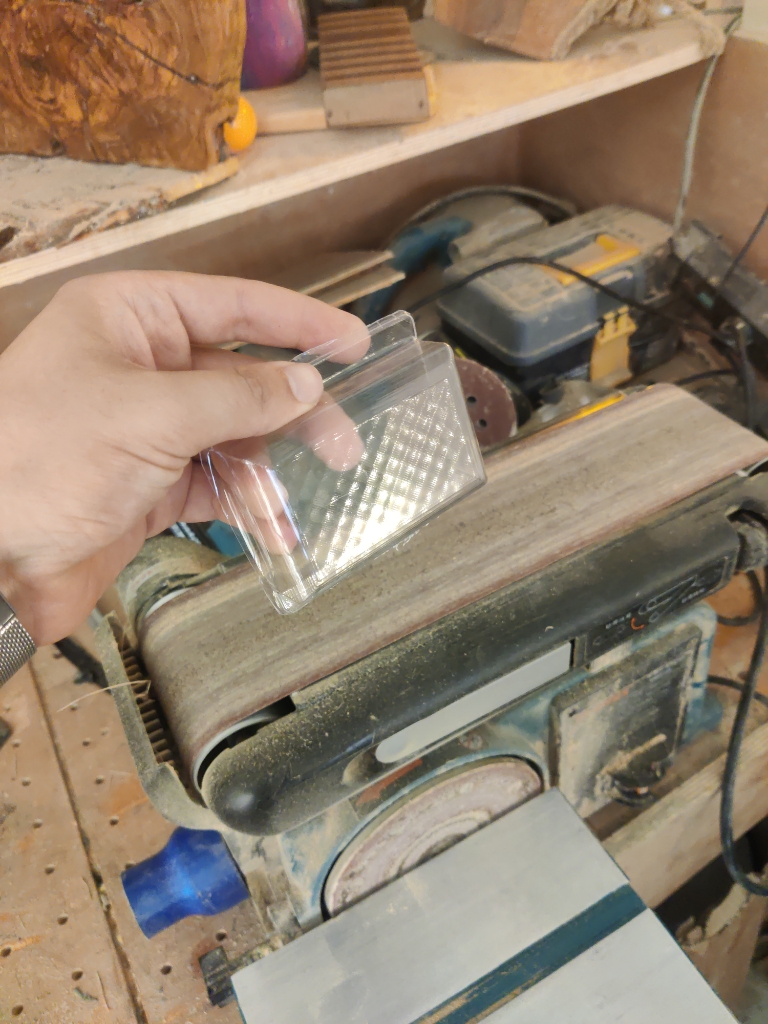
Once the print was complete, I moved on to the vacuum forming process. I preheated the plastic sheet to 250°C for about 220 seconds. After the sheet softened, I vacuum-formed it over the 3D-printed mold.
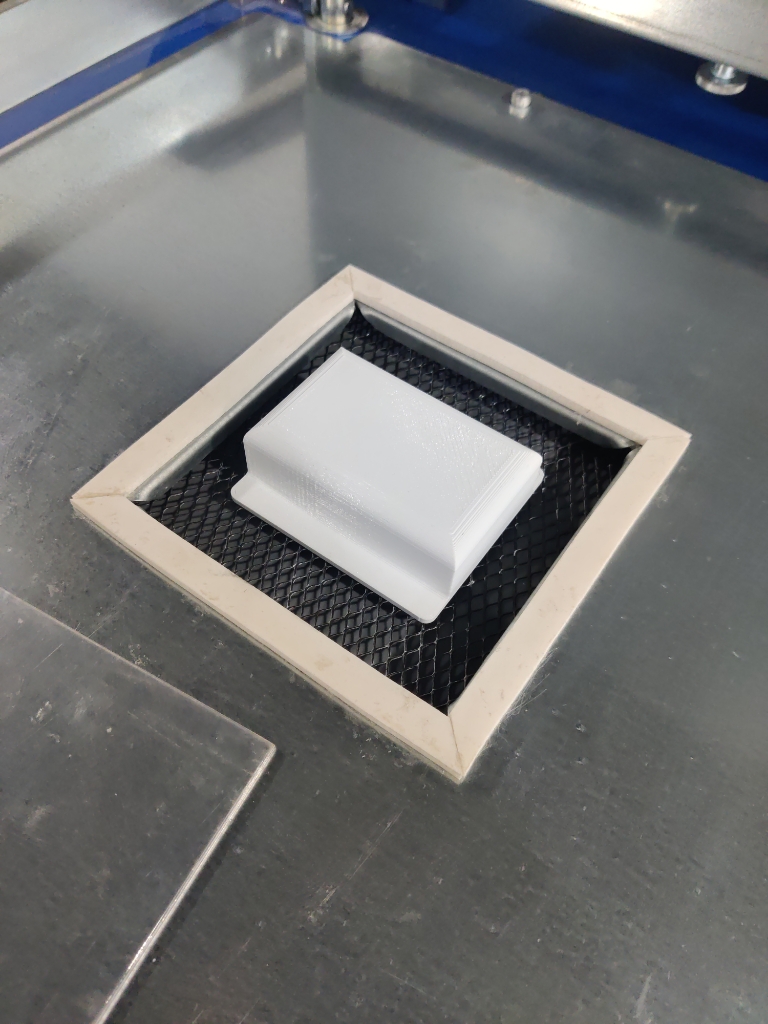
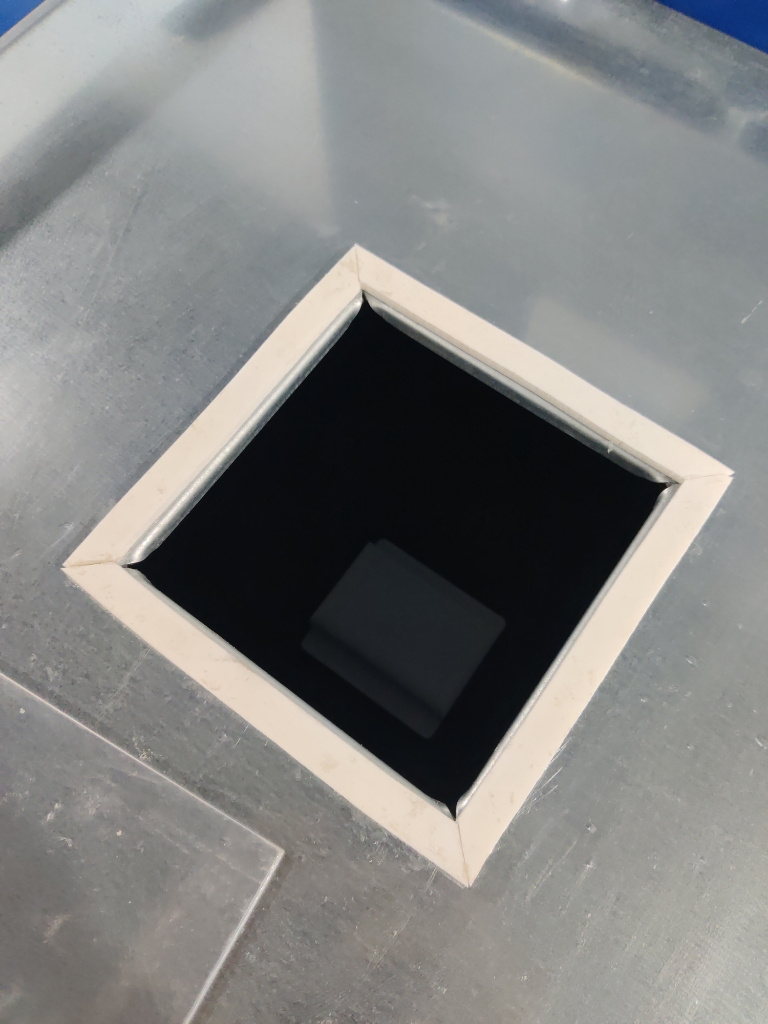
Once cooled, I removed the printed mold and trimmed the formed part using scissors. I then sanded the edges for a clean finish and mounted the vacuum-formed shell onto the flight controller.
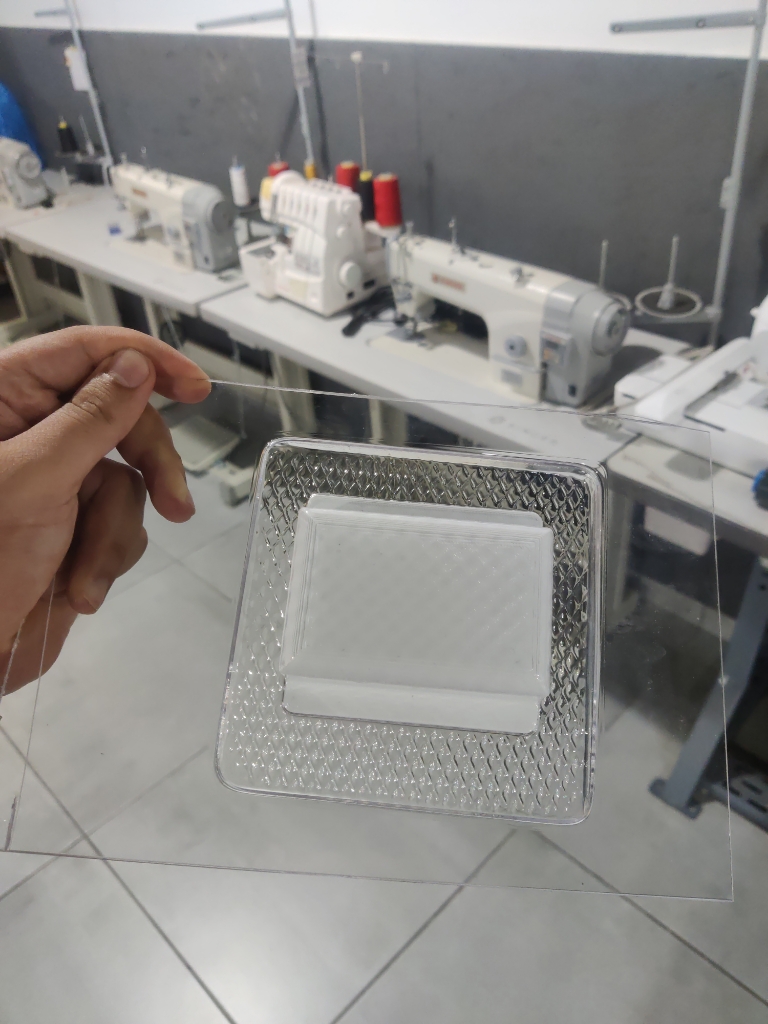
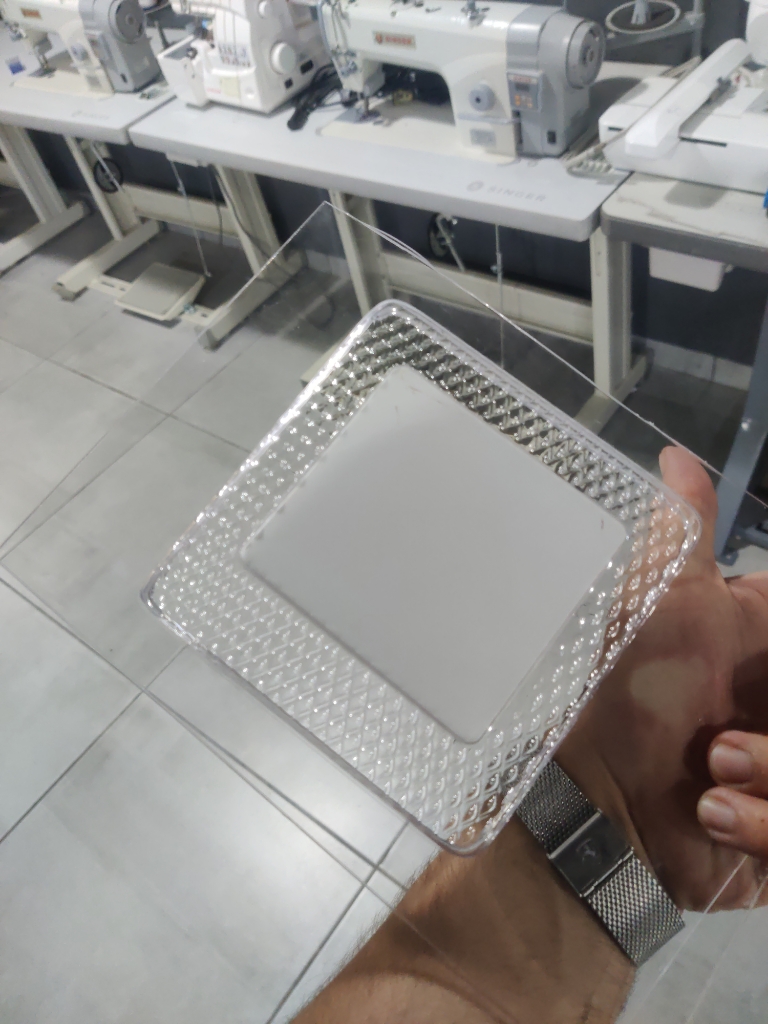
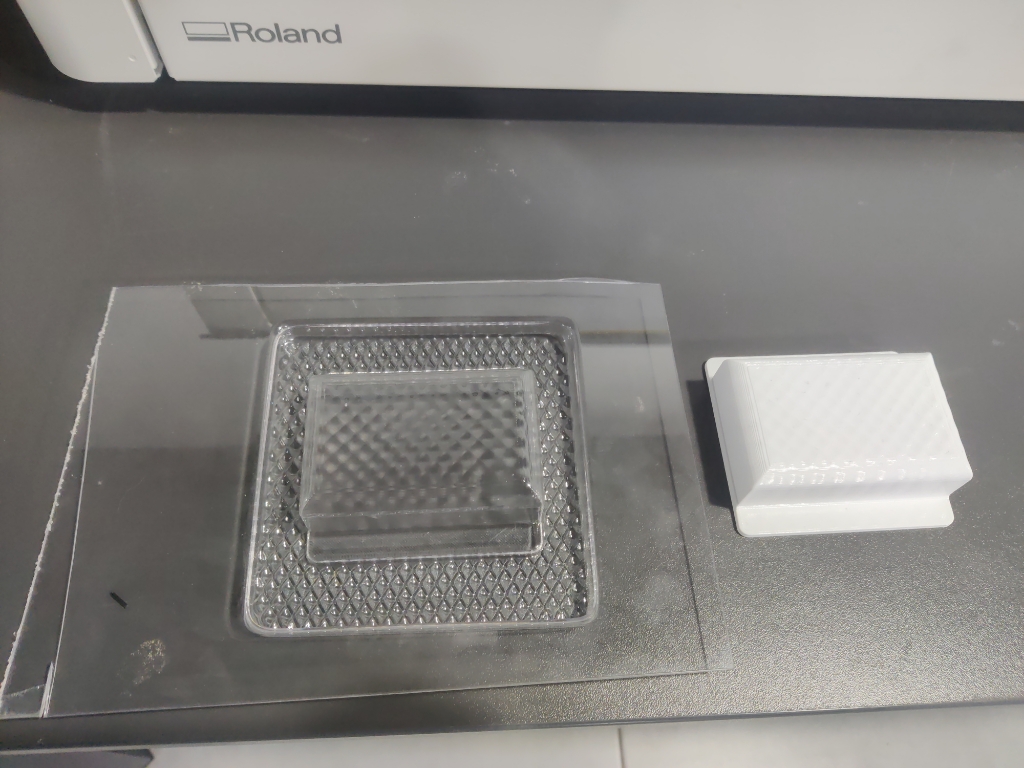
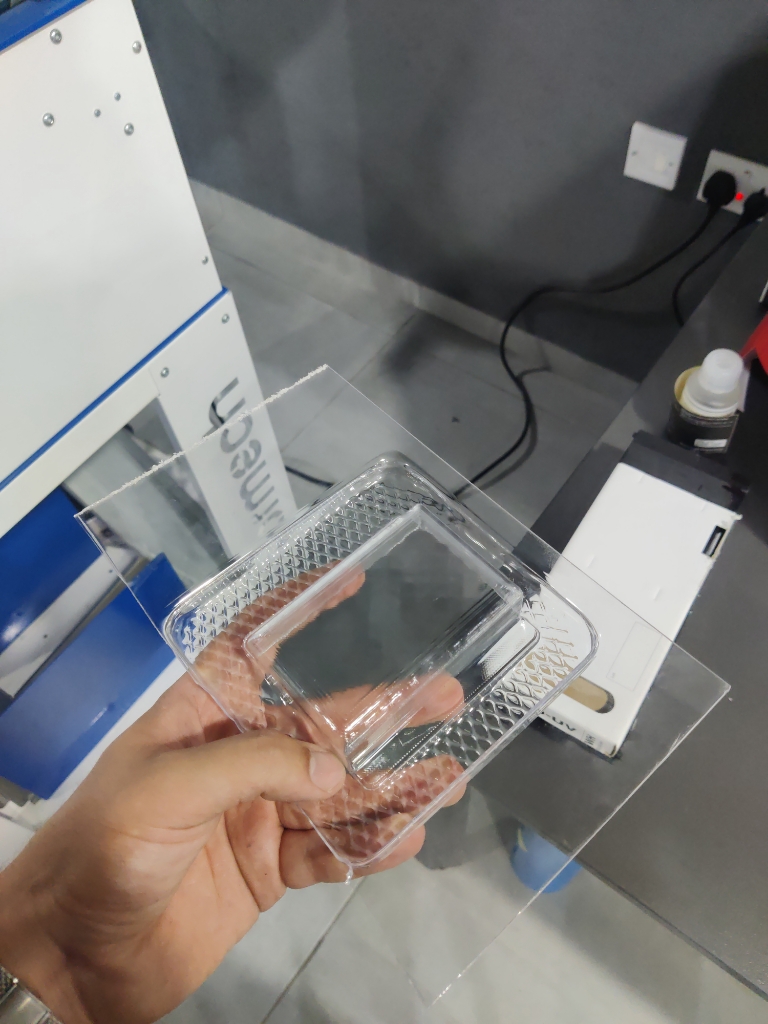
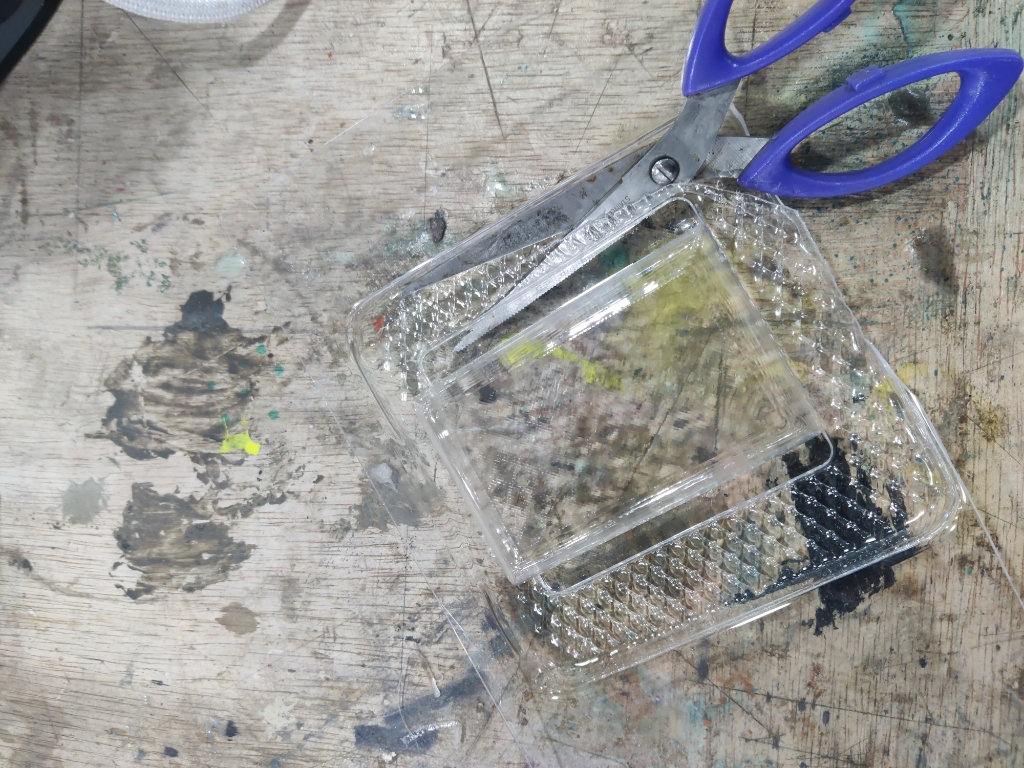
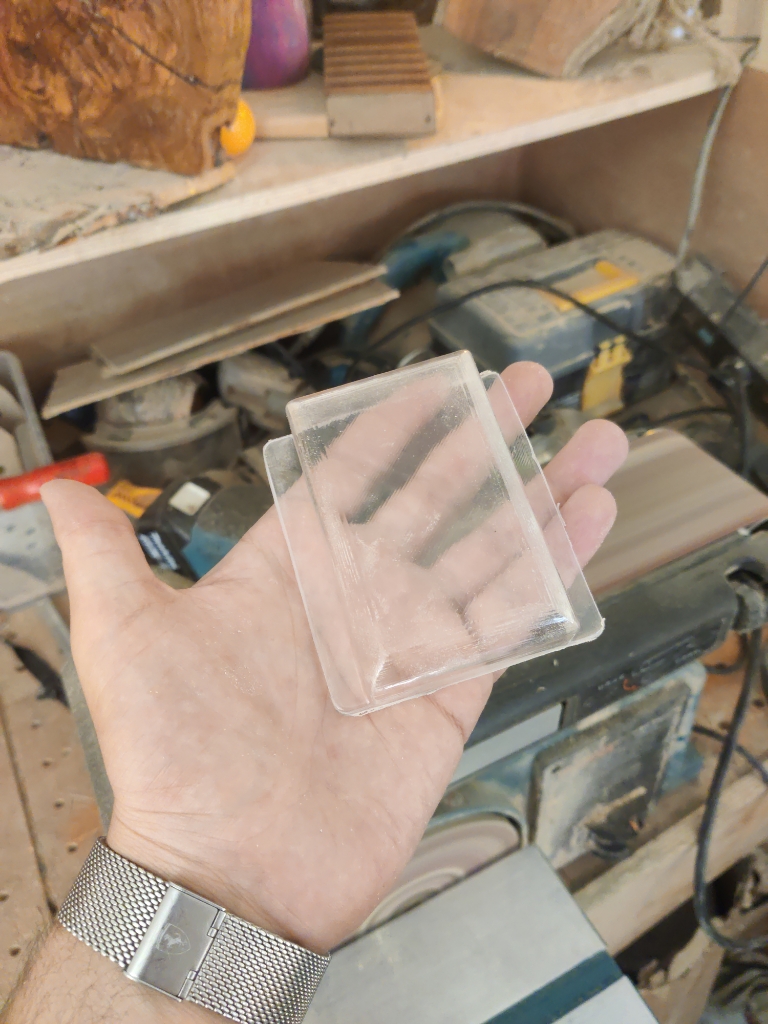
This protective housing helps ensure the safety of the electronics during the rocket’s flight and demonstrates a functional application of vacuum forming in my final project.
Learning Outcome
Using the Formech 508DT gave me hands-on experience in vacuum forming, an essential process in rapid prototyping and manufacturing. I learned how material thickness, heat distribution, and vacuum timing affect the final formed shape. Additionally, working with the HMI control system provided insight into automated machine control and preset configurations for repeatable results.
Beyond vacuum forming, I also gained experience in composite mold-making by applying epoxy and fiberglass over a formed plastic part. This taught me how to reinforce and extend the use of vacuum-formed components by converting them into durable, reusable molds—an important skill in low-volume production and mold fabrication.
This experience will help me apply vacuum forming and composite techniques to prototyping projects, custom enclosures, and product design, integrating them with my knowledge of CNC, laser cutting, and 3D printing for multi-process manufacturing workflows.