Laser Cutter Calibration
Hero Shot
Summary
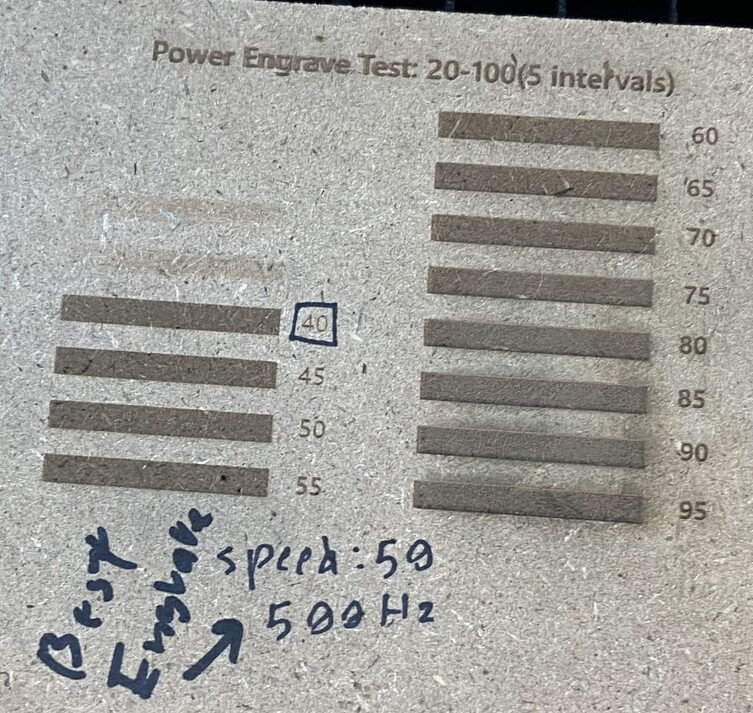
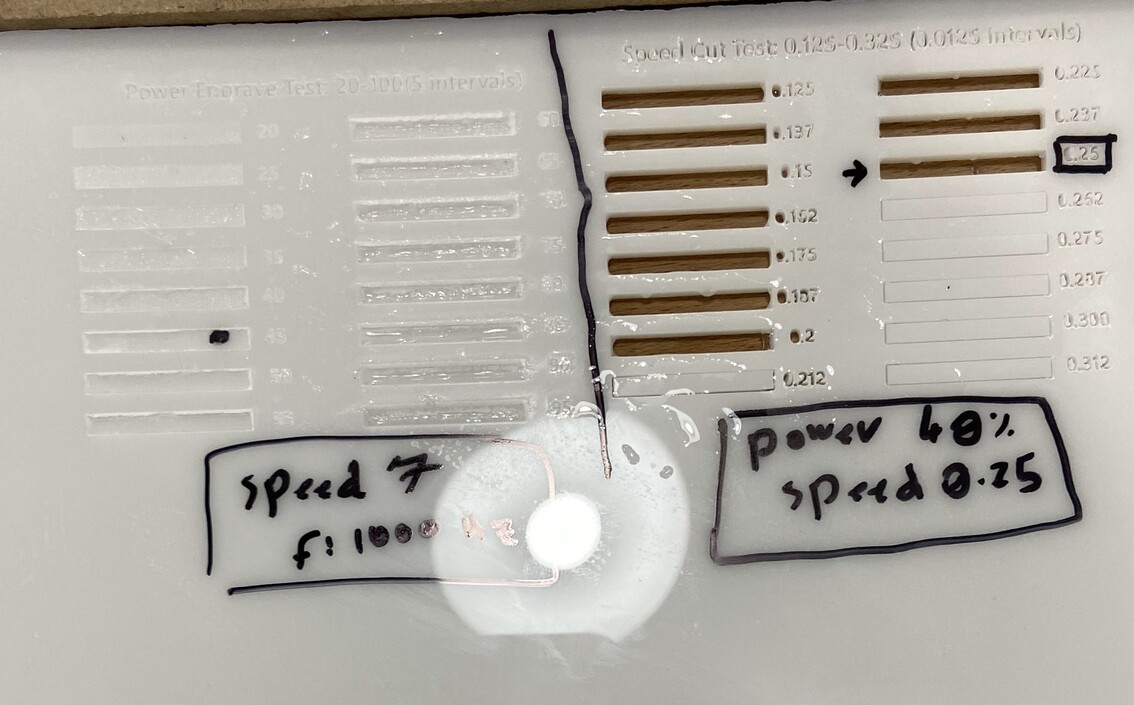
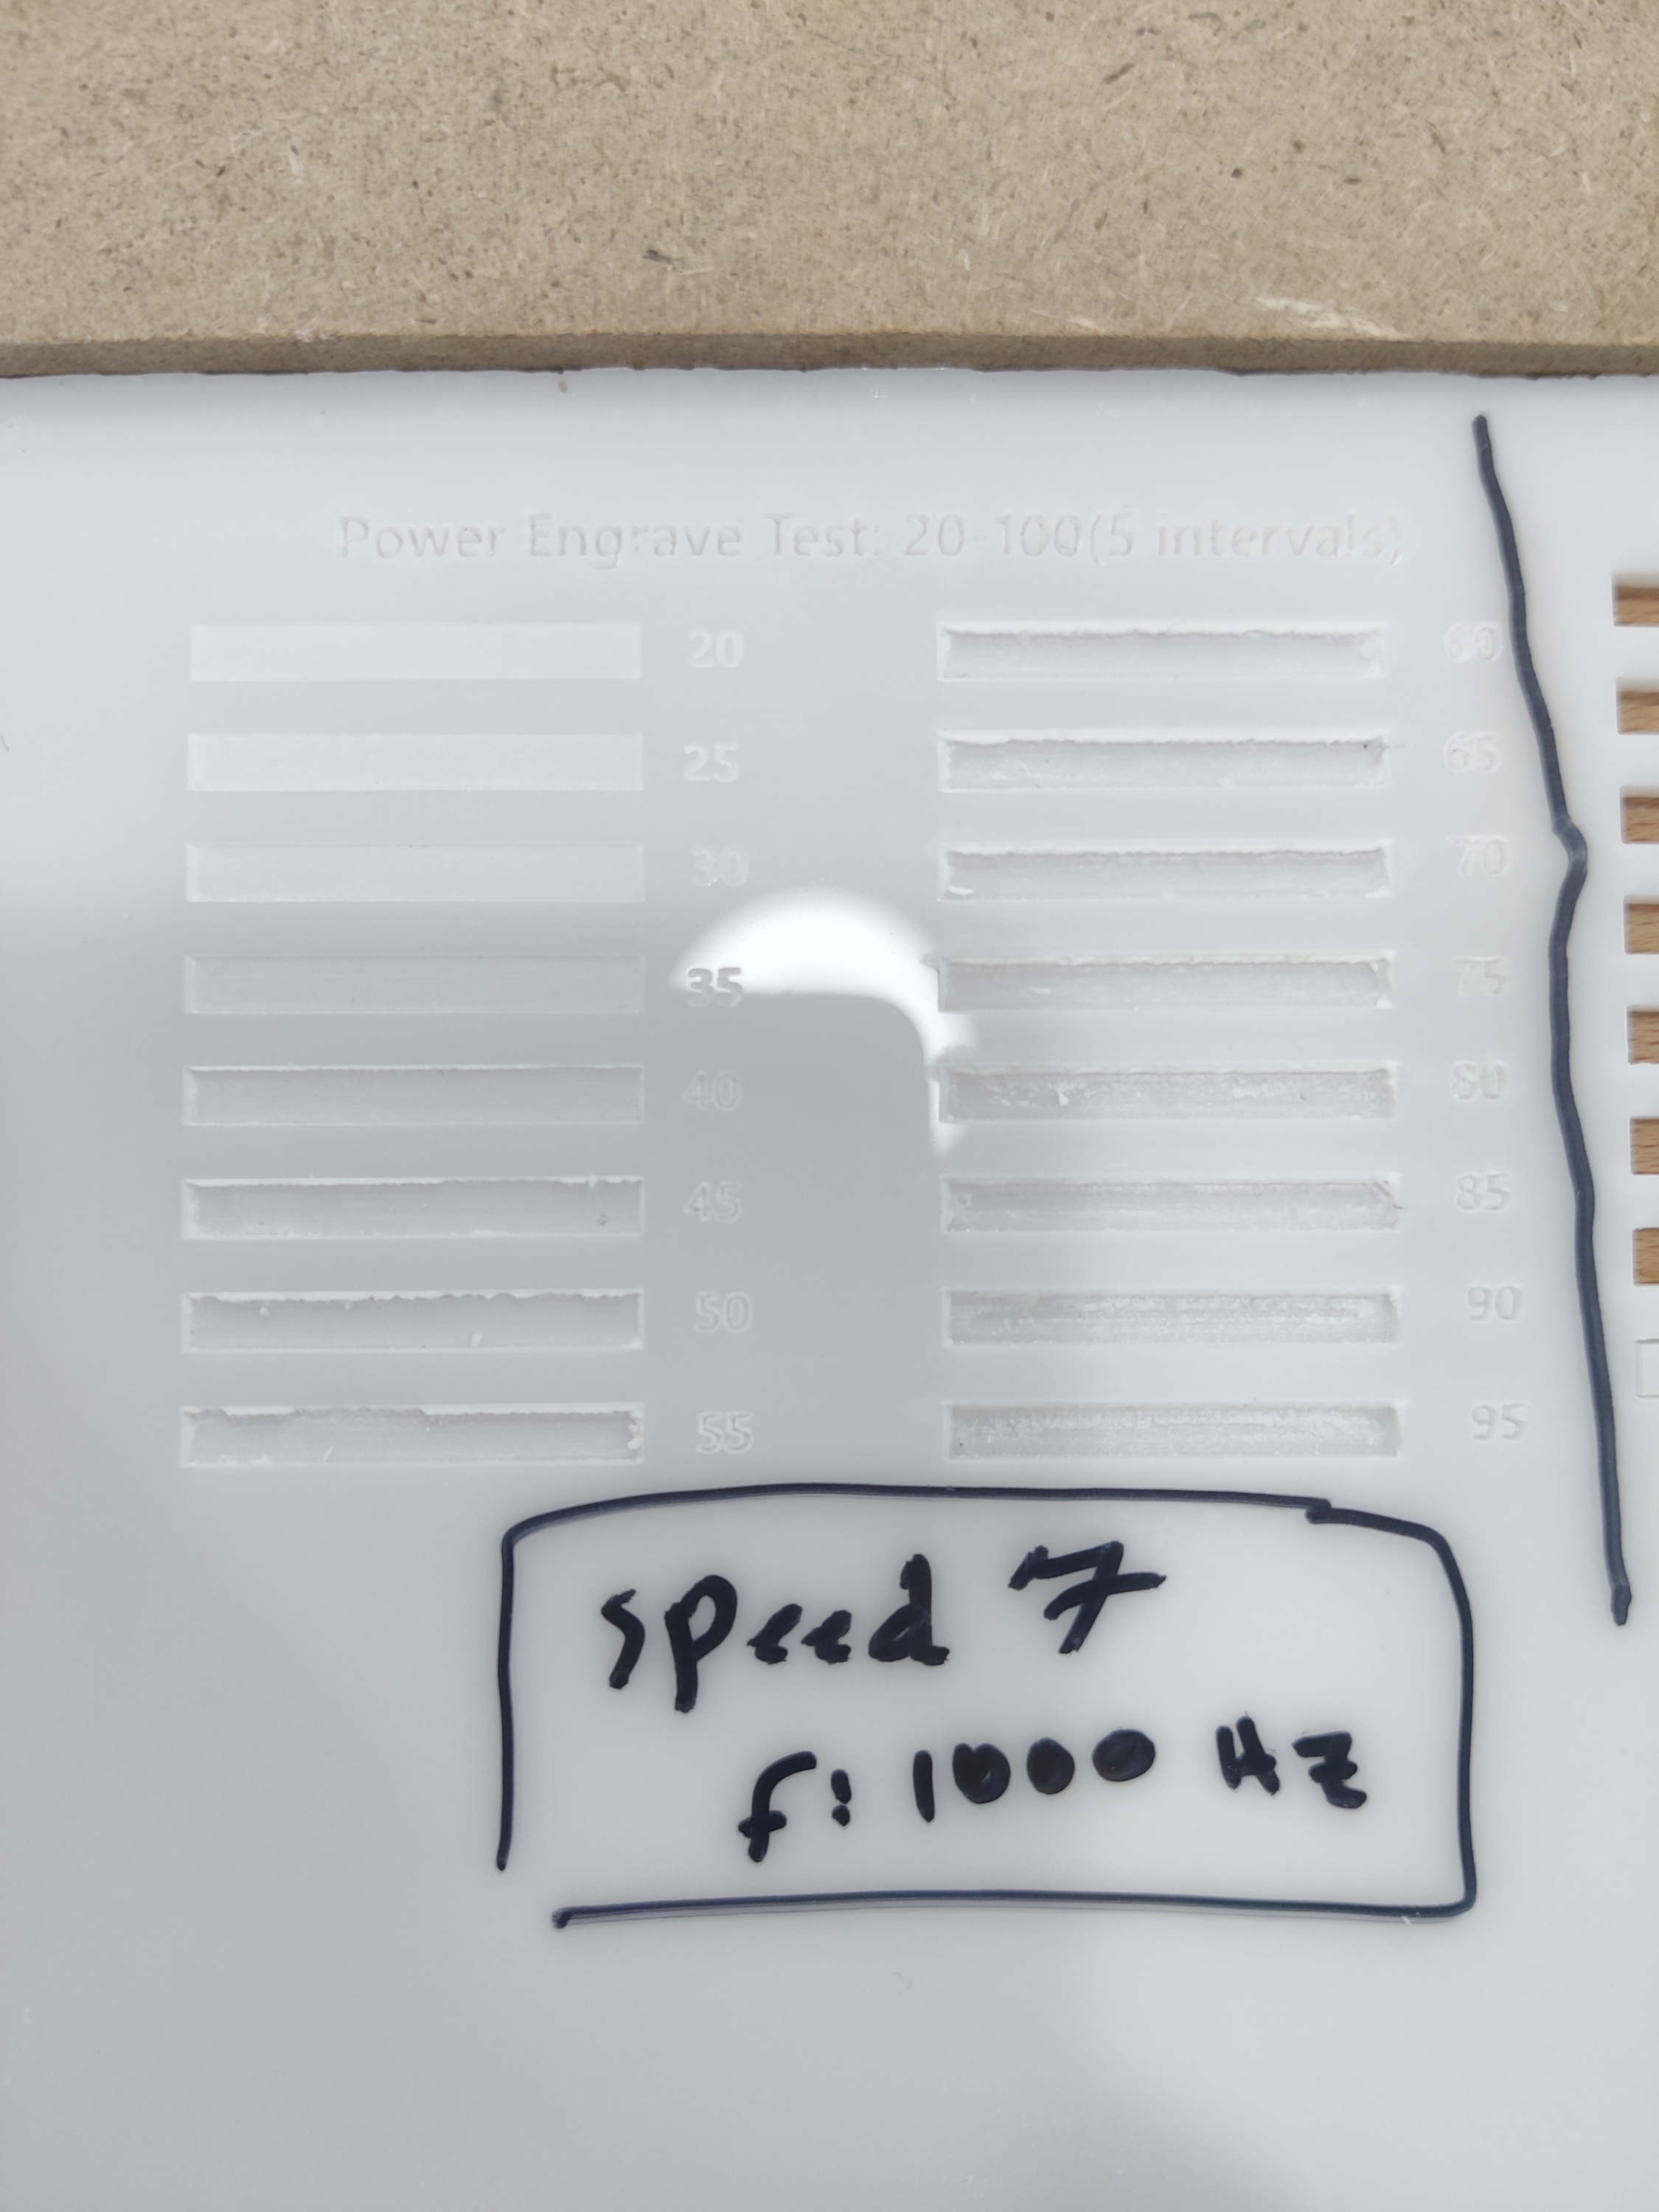
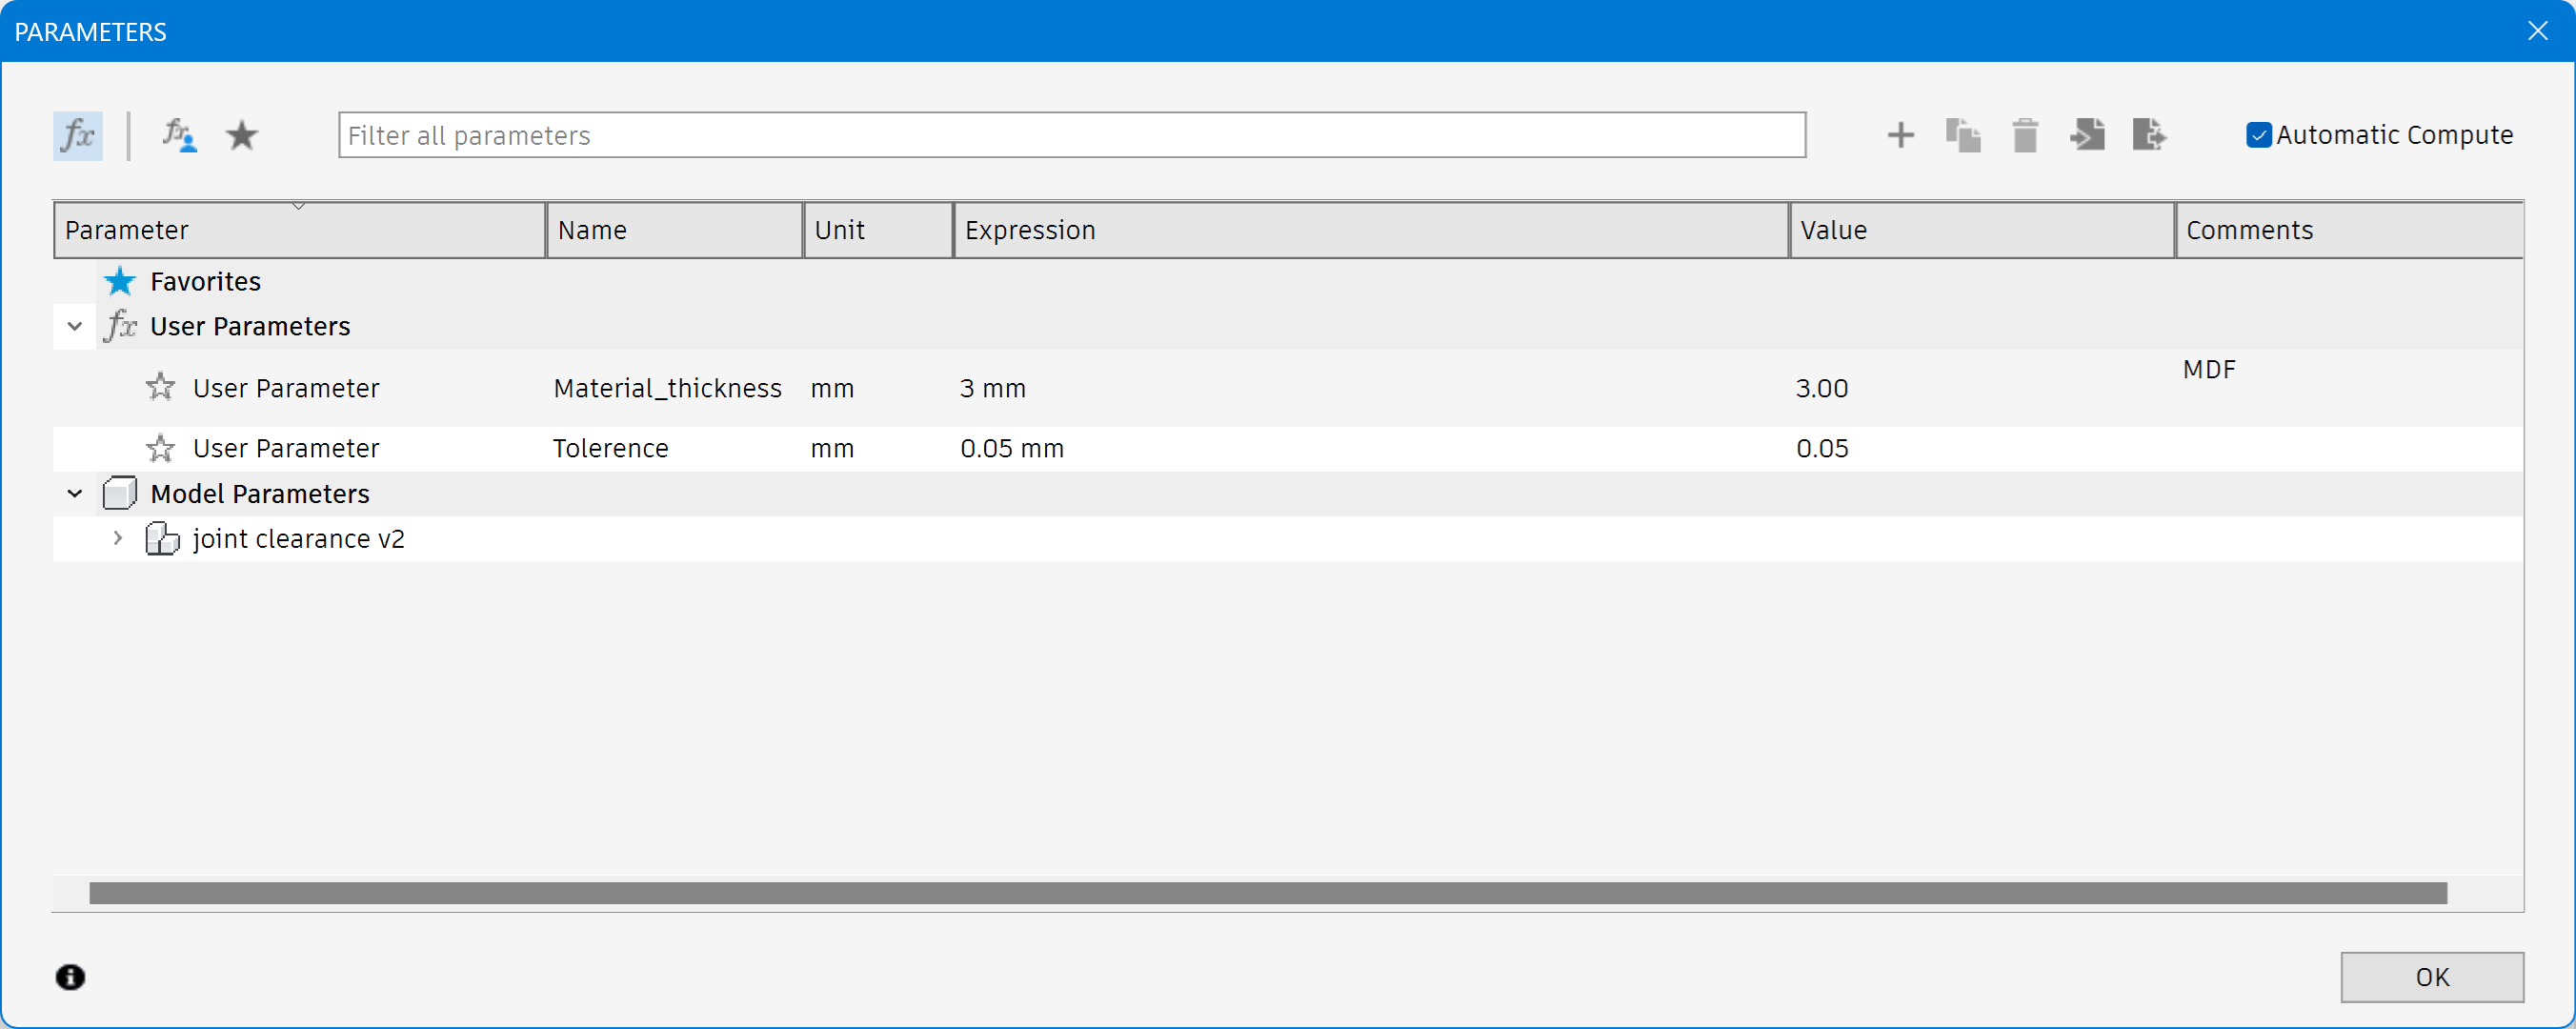
This documentation outlines the calibration process for the Trotec Speedy 400 laser cutter. The process began with understanding the machine, its software (Trotec JobControl), and the 16 predefined RGB color settings that determine power, speed, and frequency.
After researching and watching official tutorials, different materials such as MDF, balsa wood, acrylic, cardboard, and paper were tested.
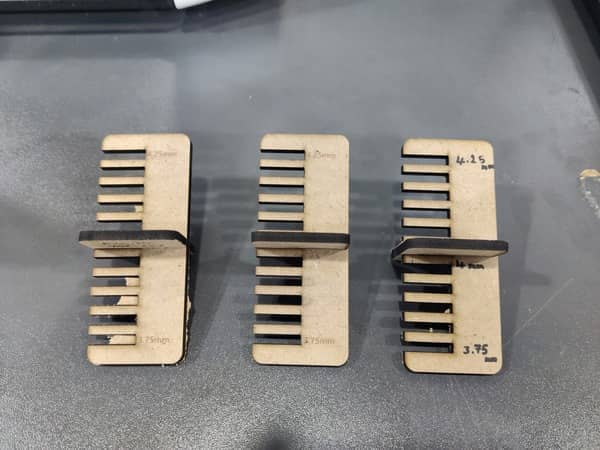
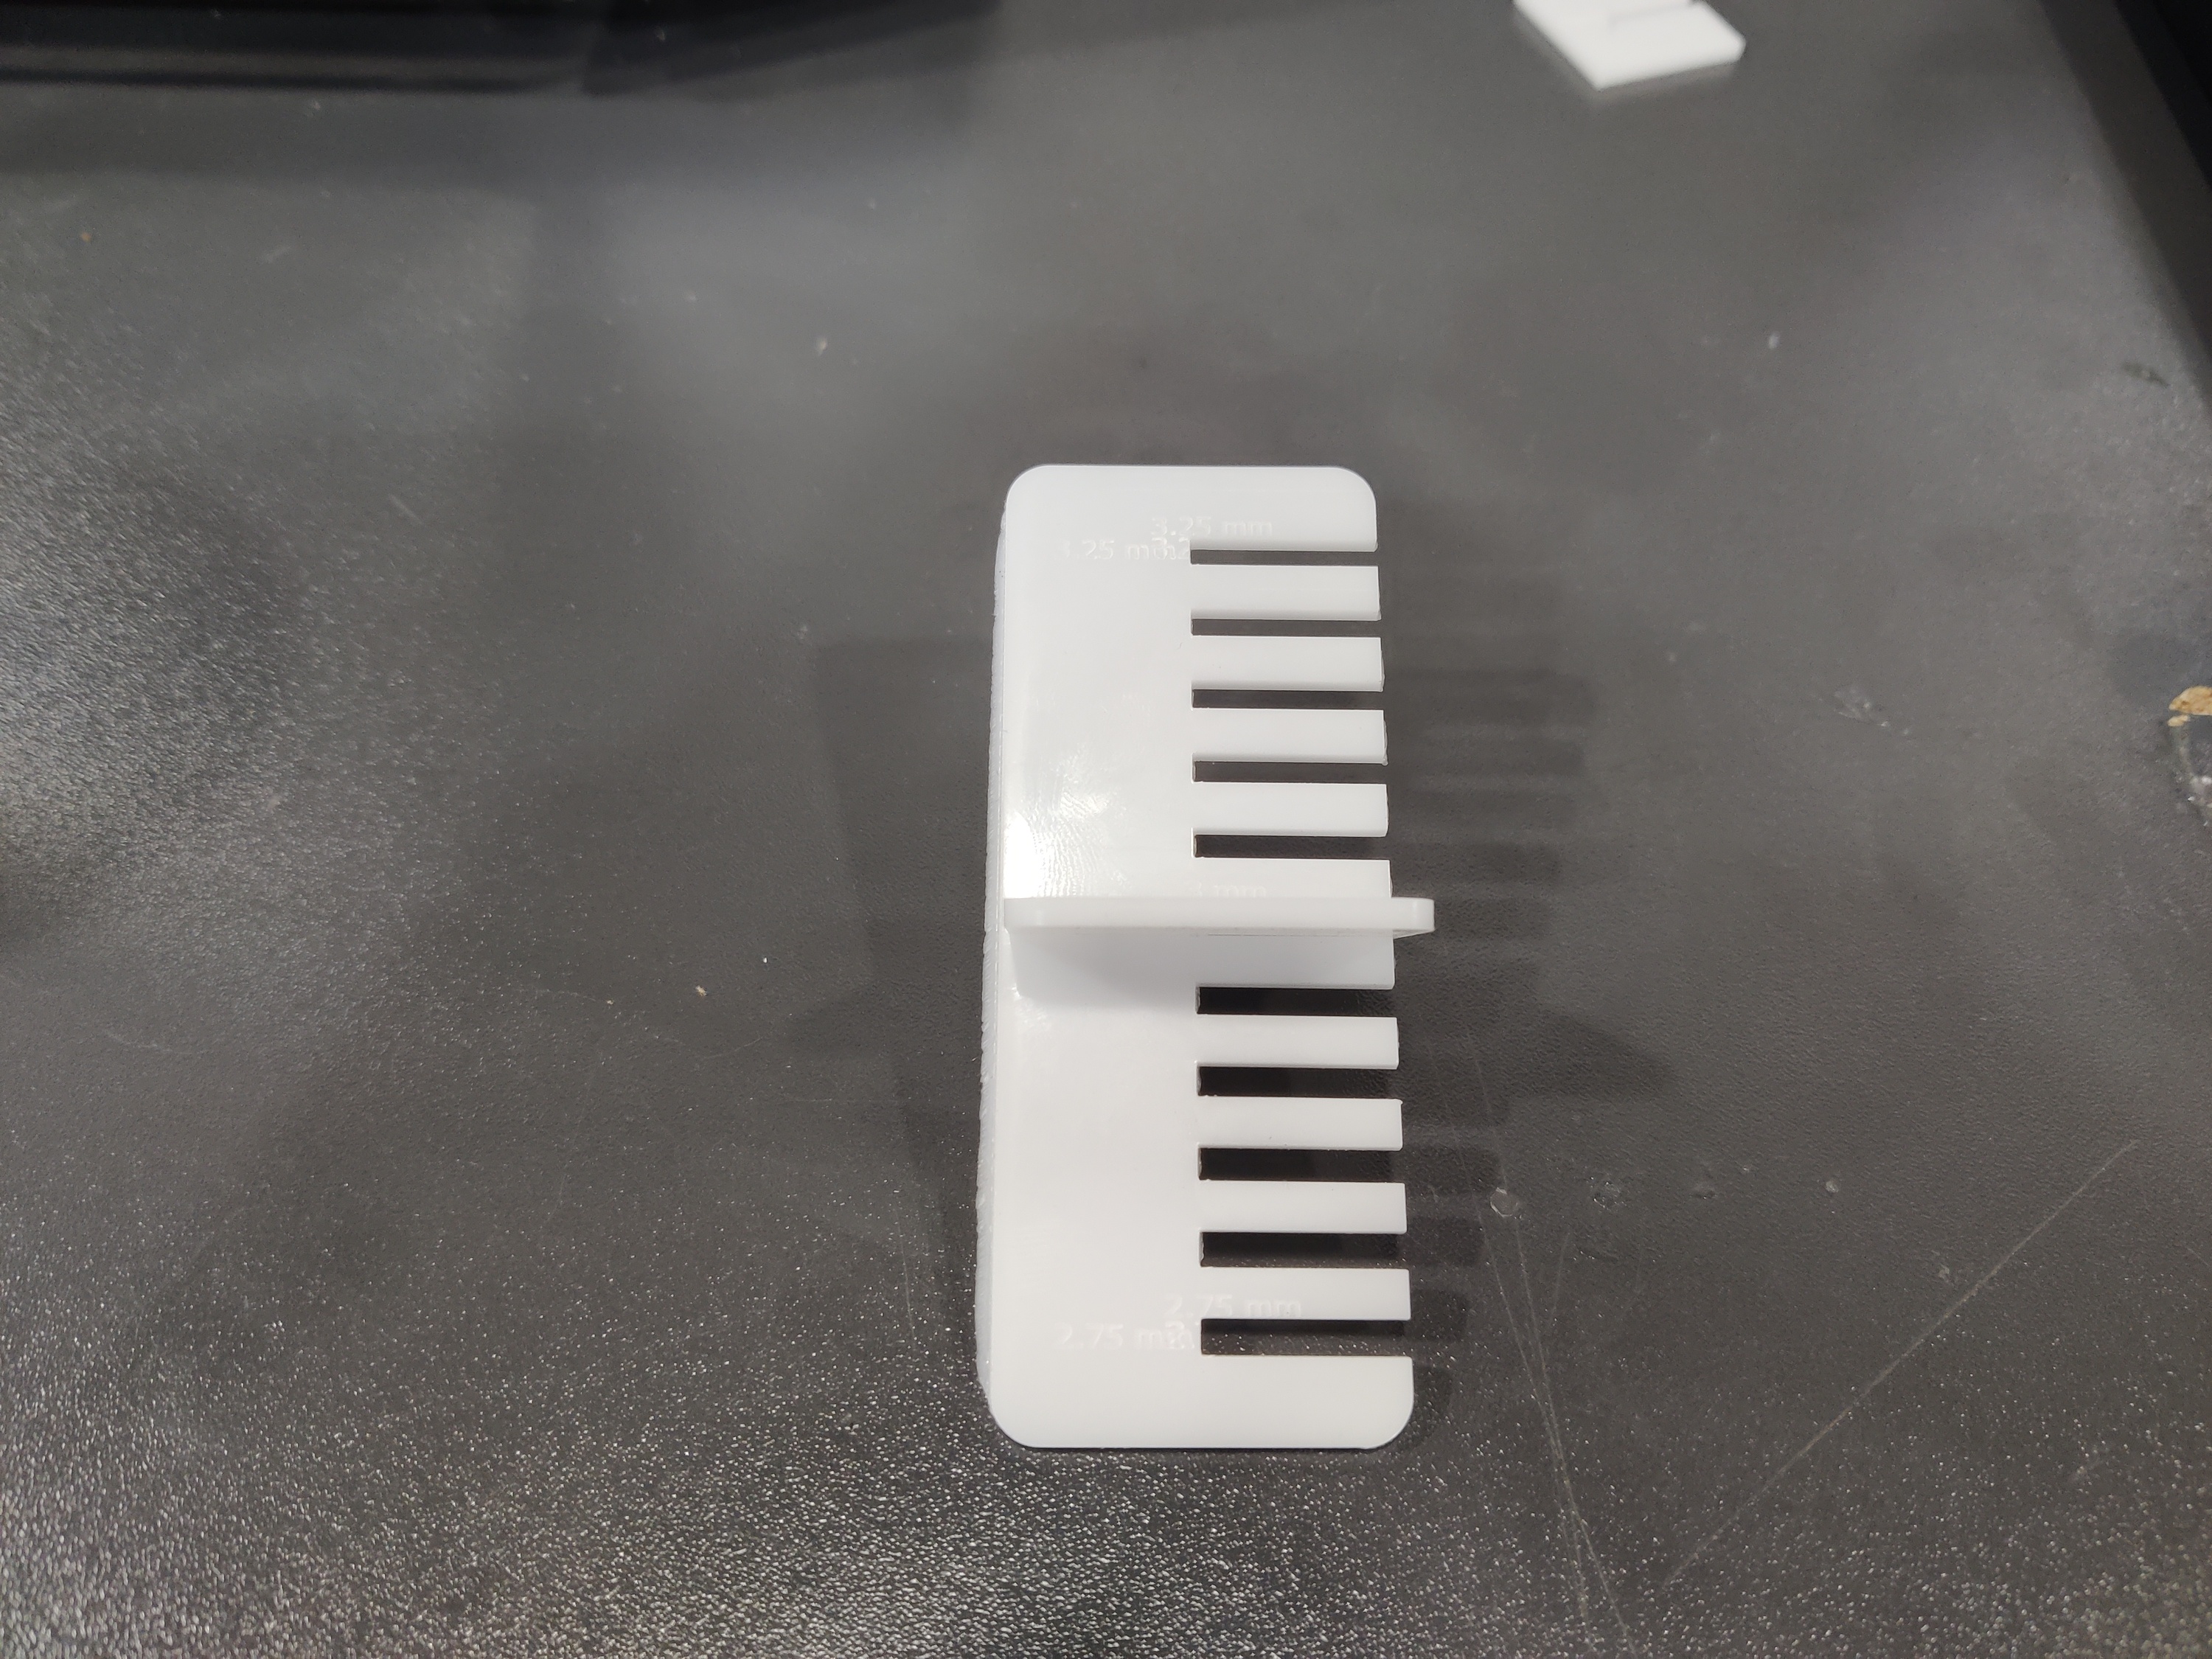
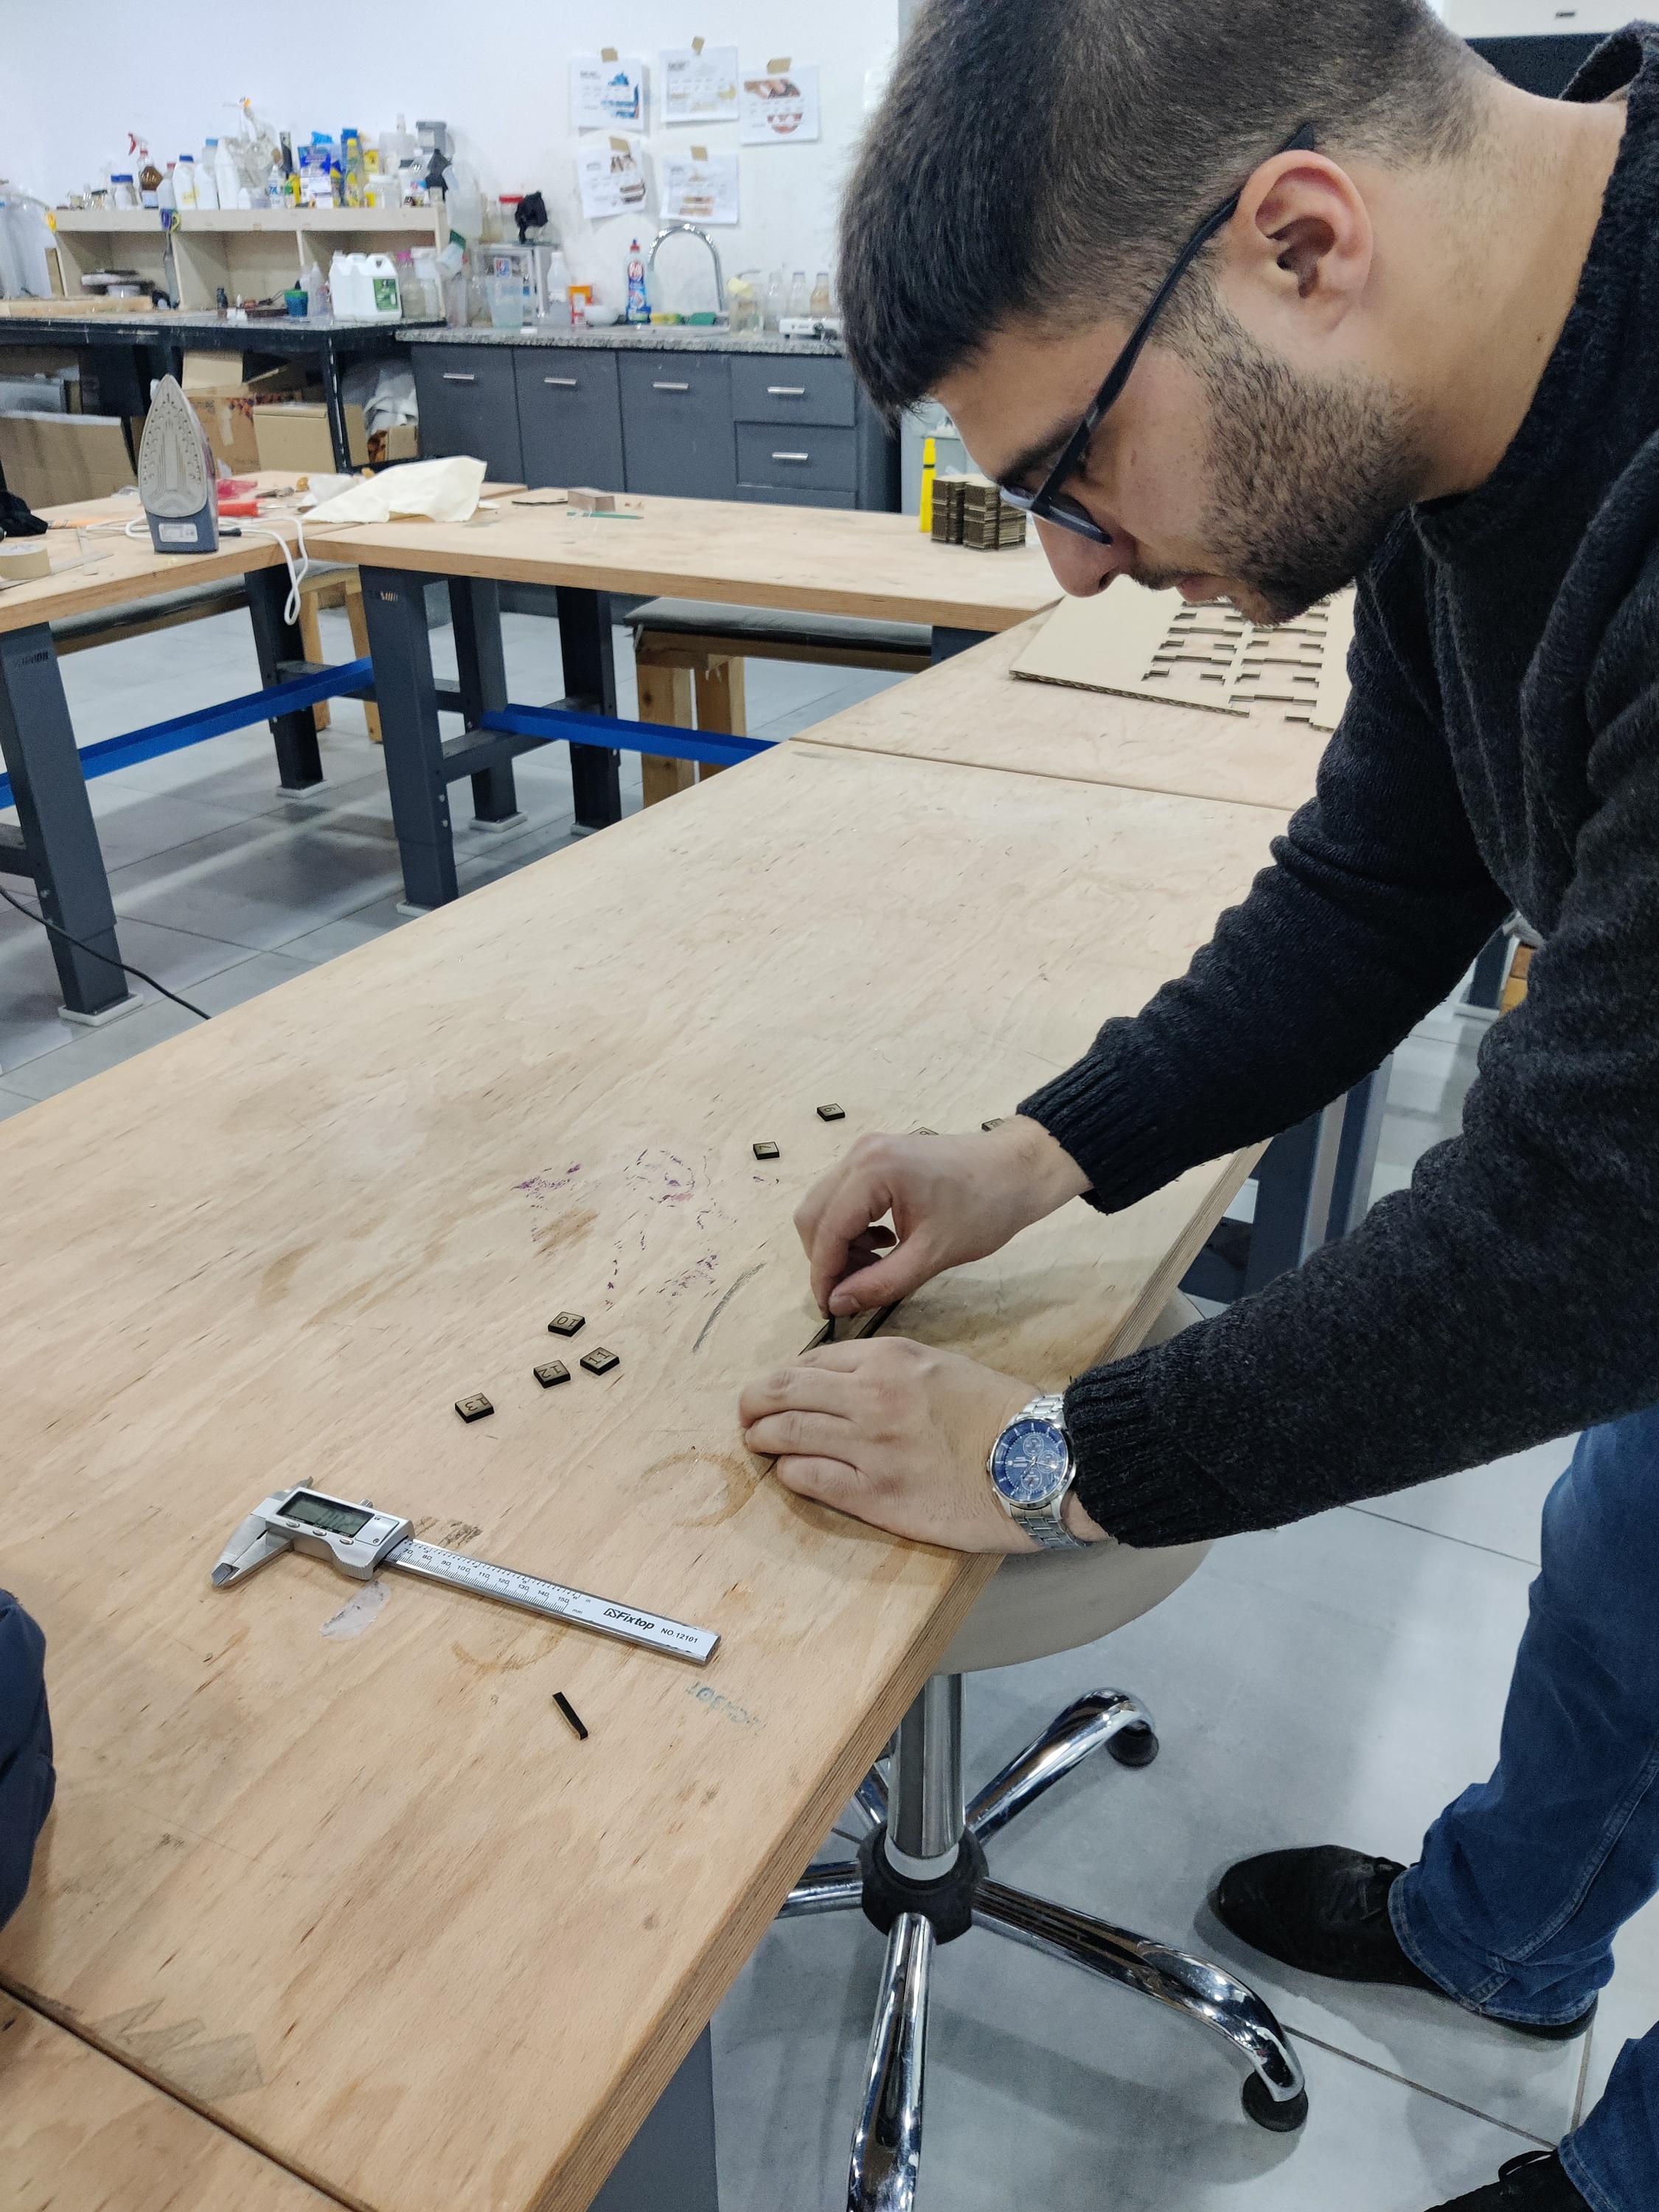
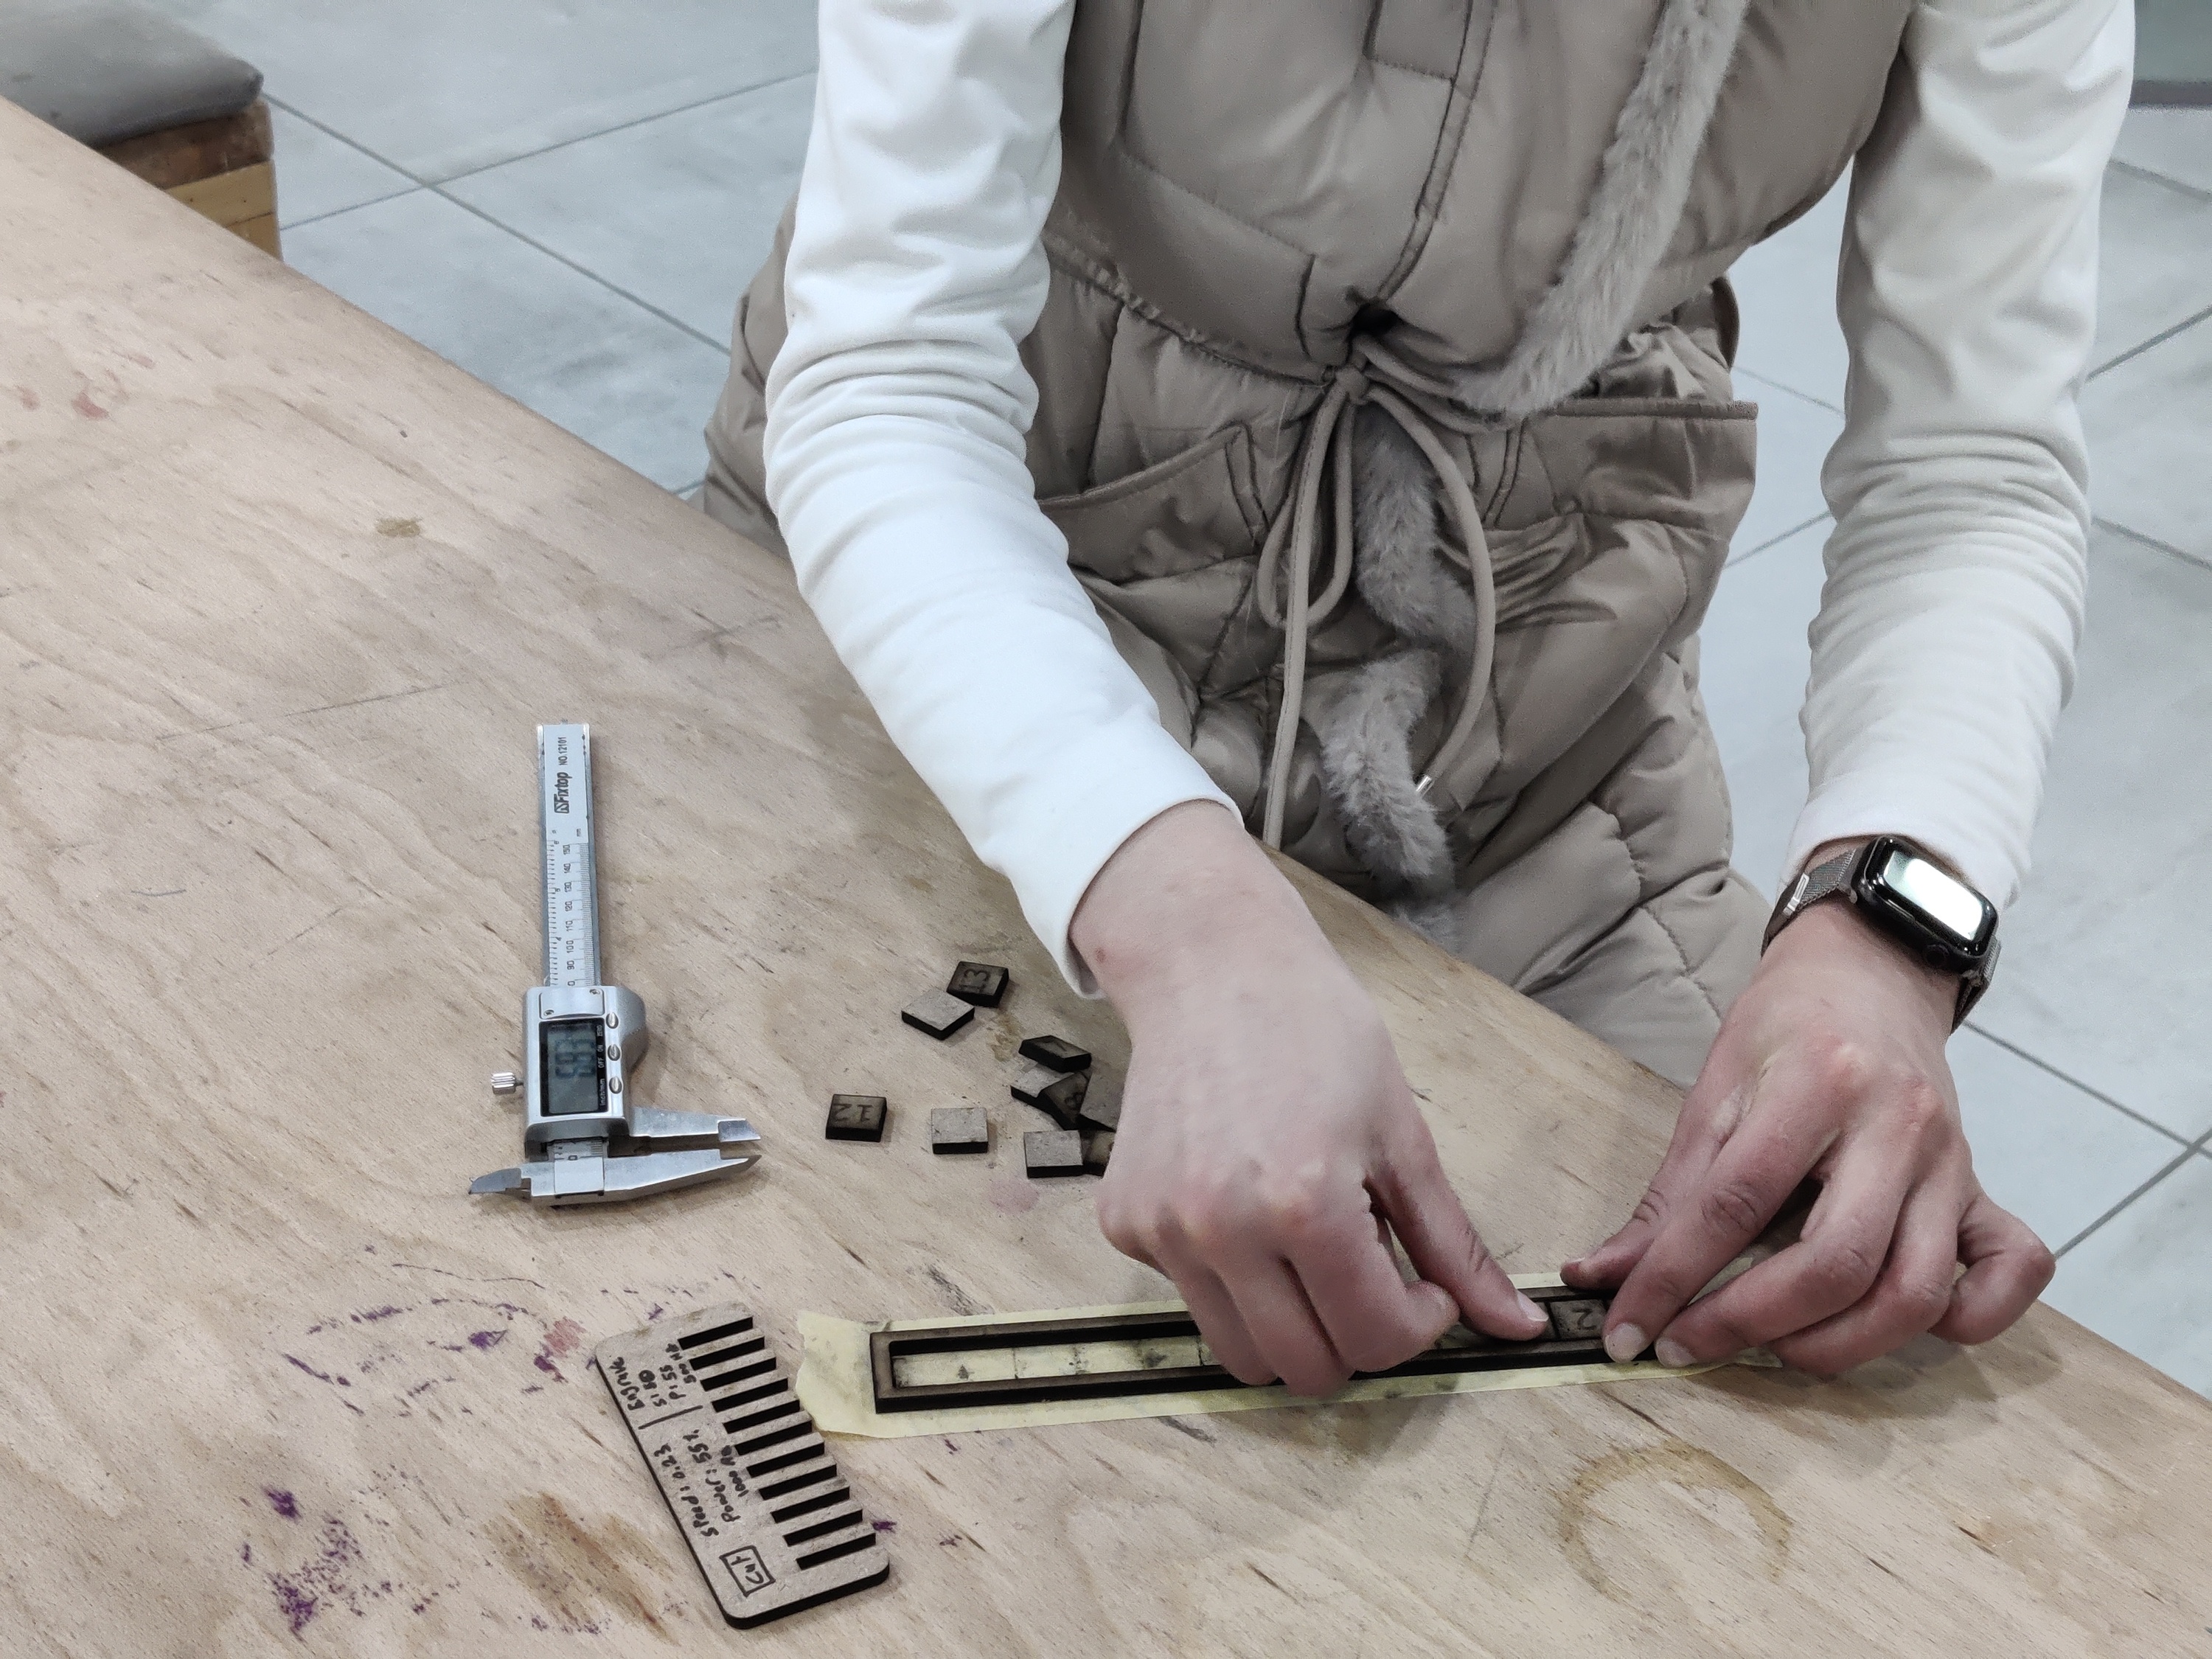
The calibration process included measuring material thickness, adjusting lens focus, and fine-tuning laser power and speed. Through parametric design testing, we determined the best joint fitment settings (-0.1 mm offset) for accurate assembly.
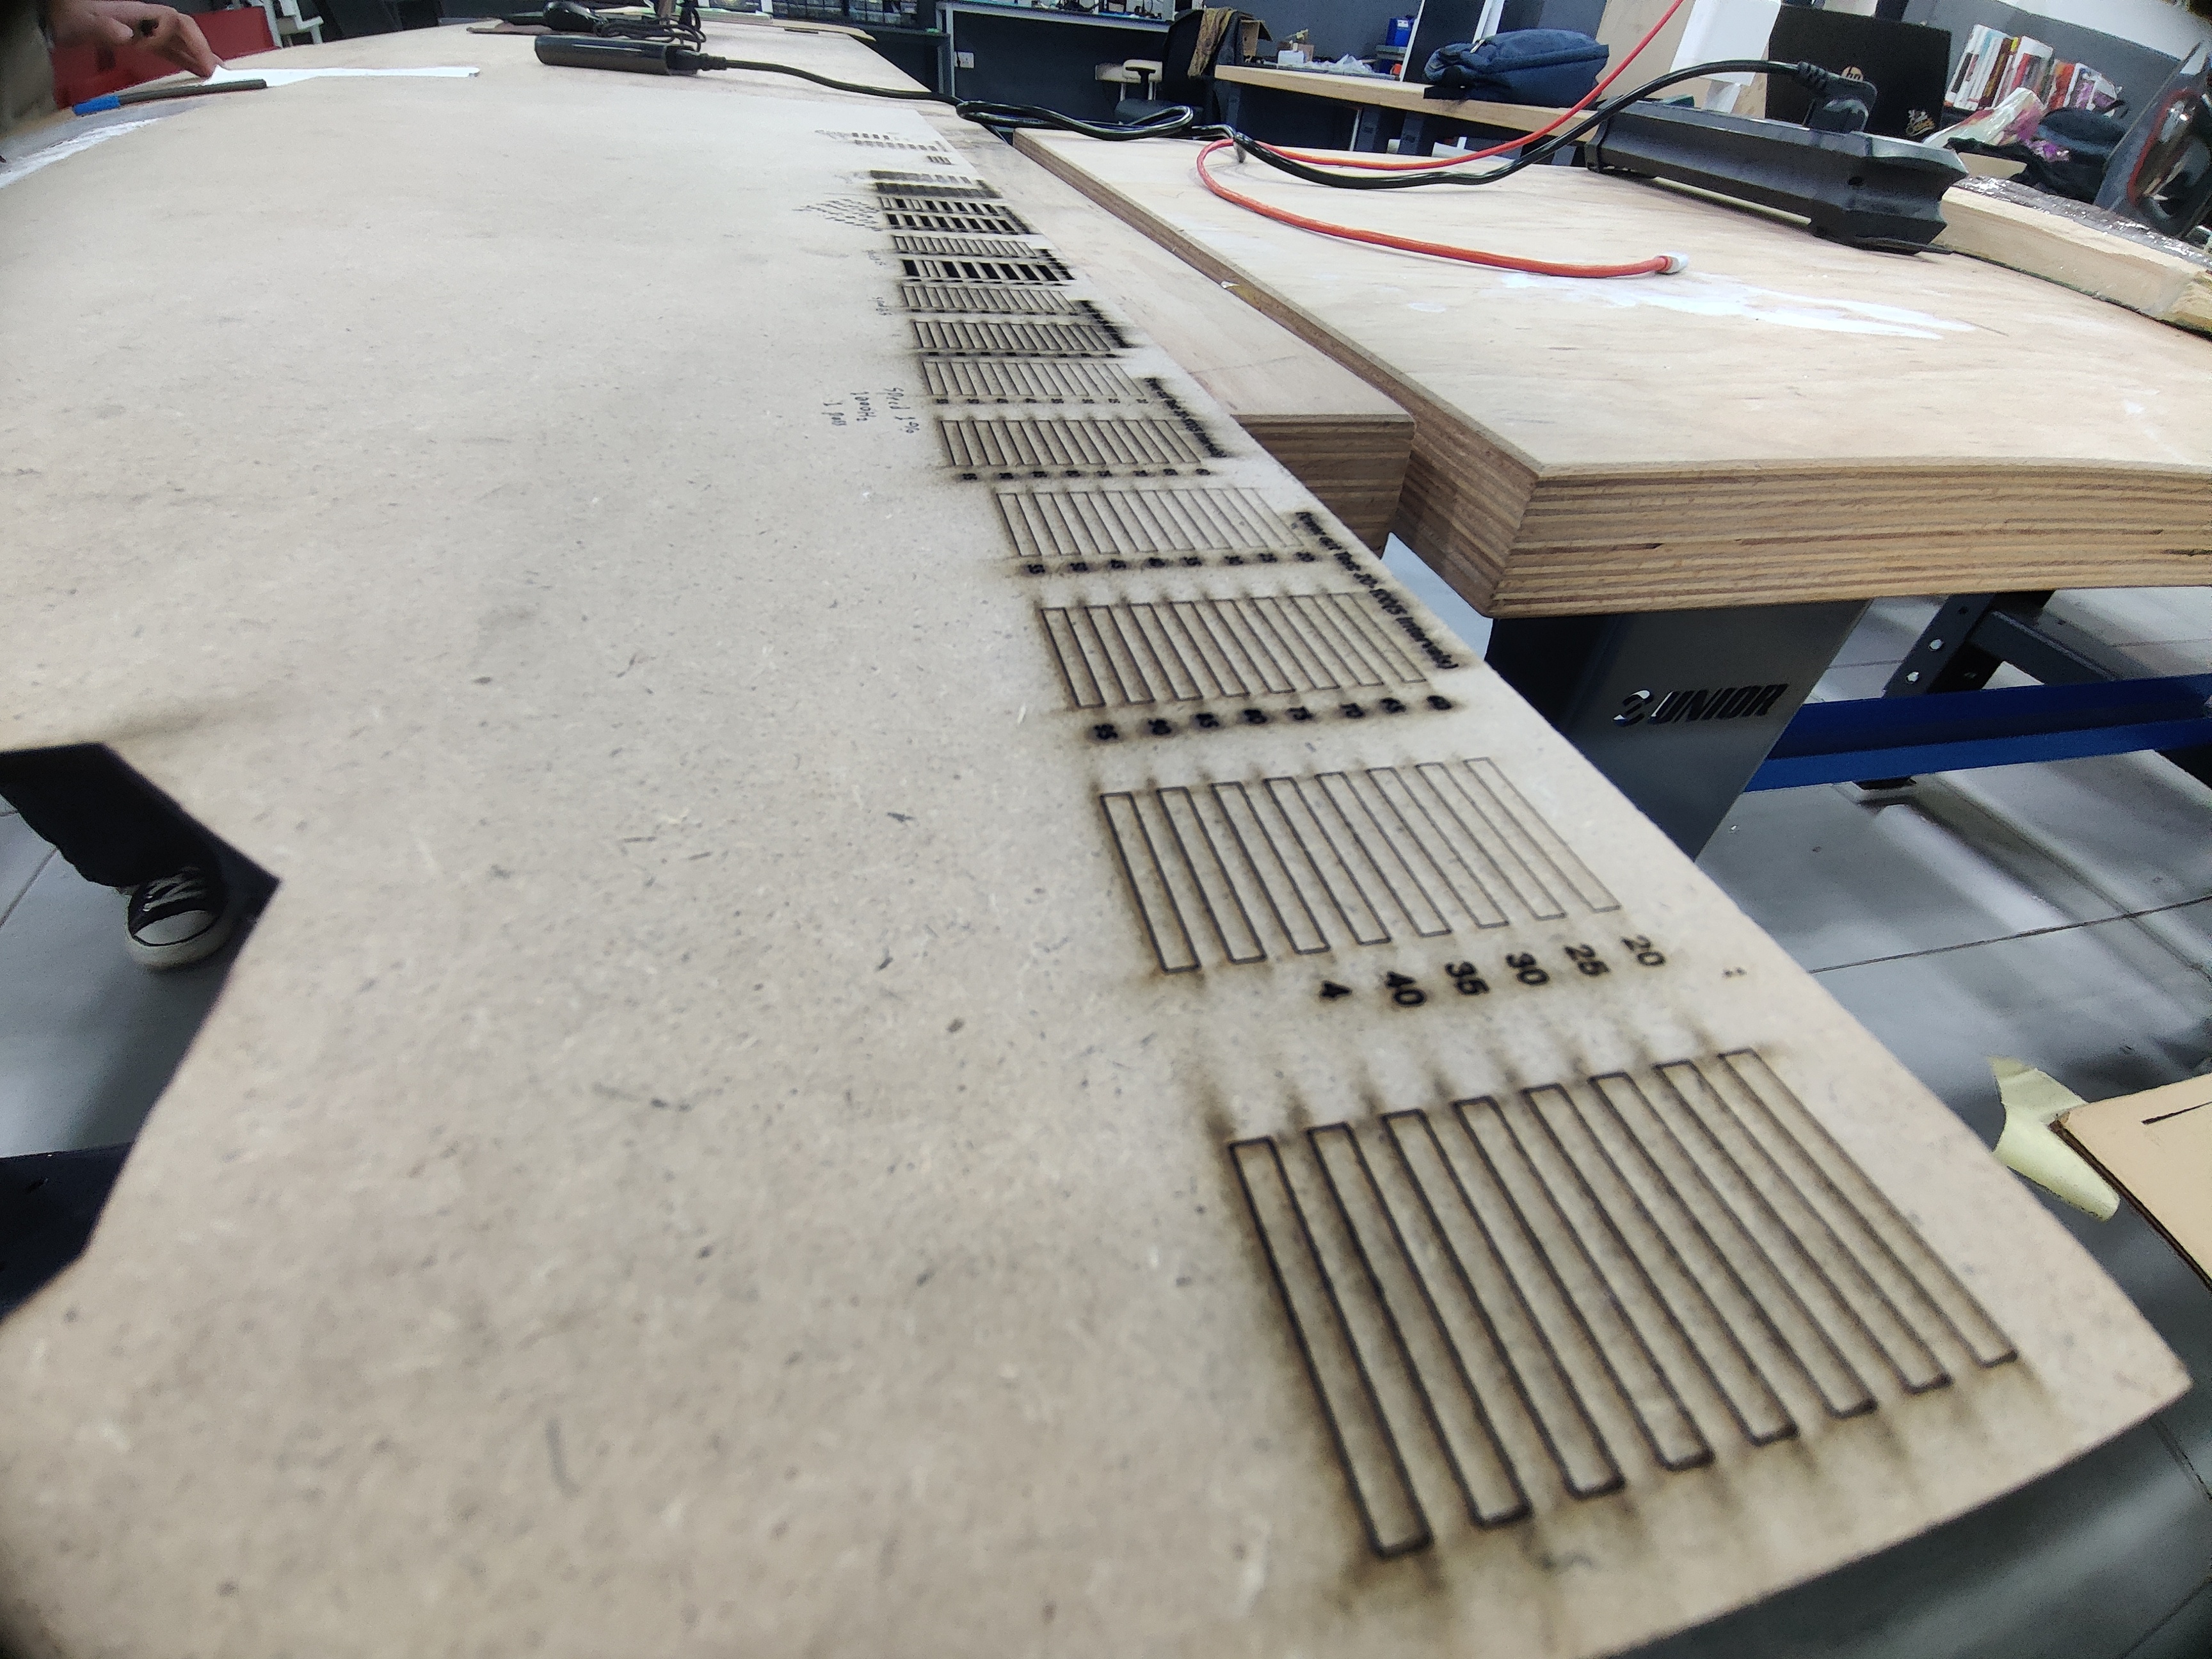
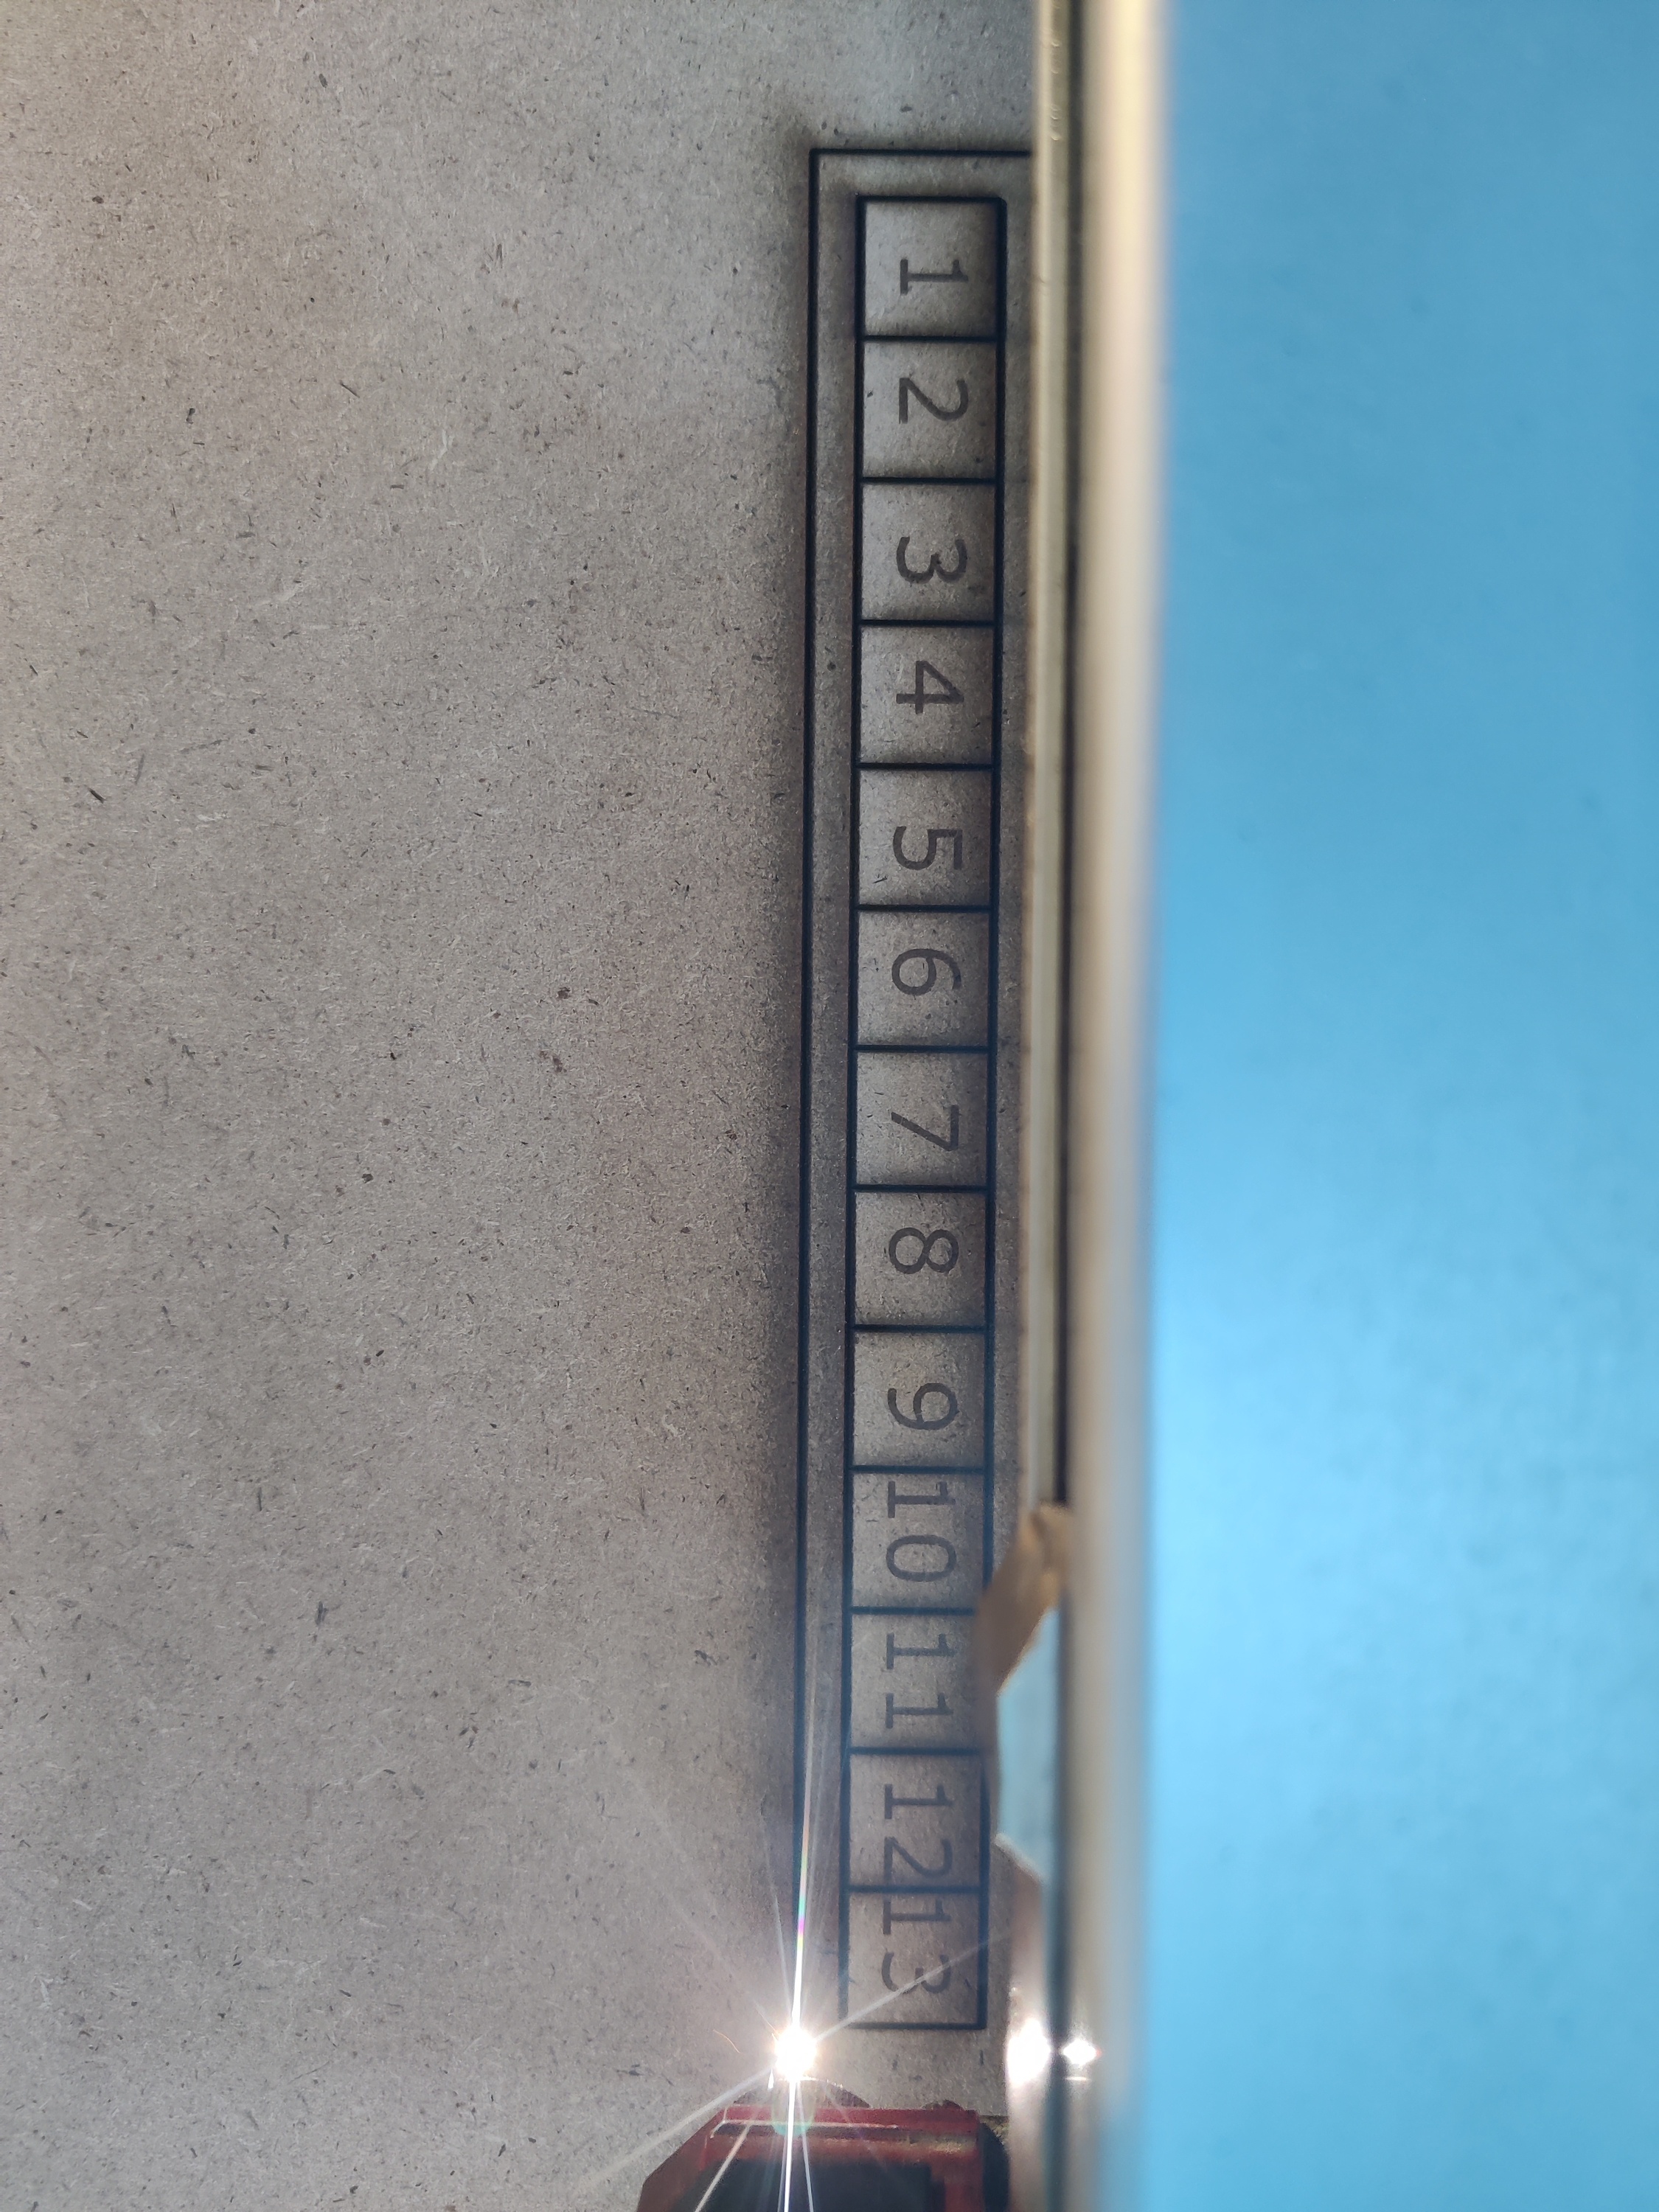
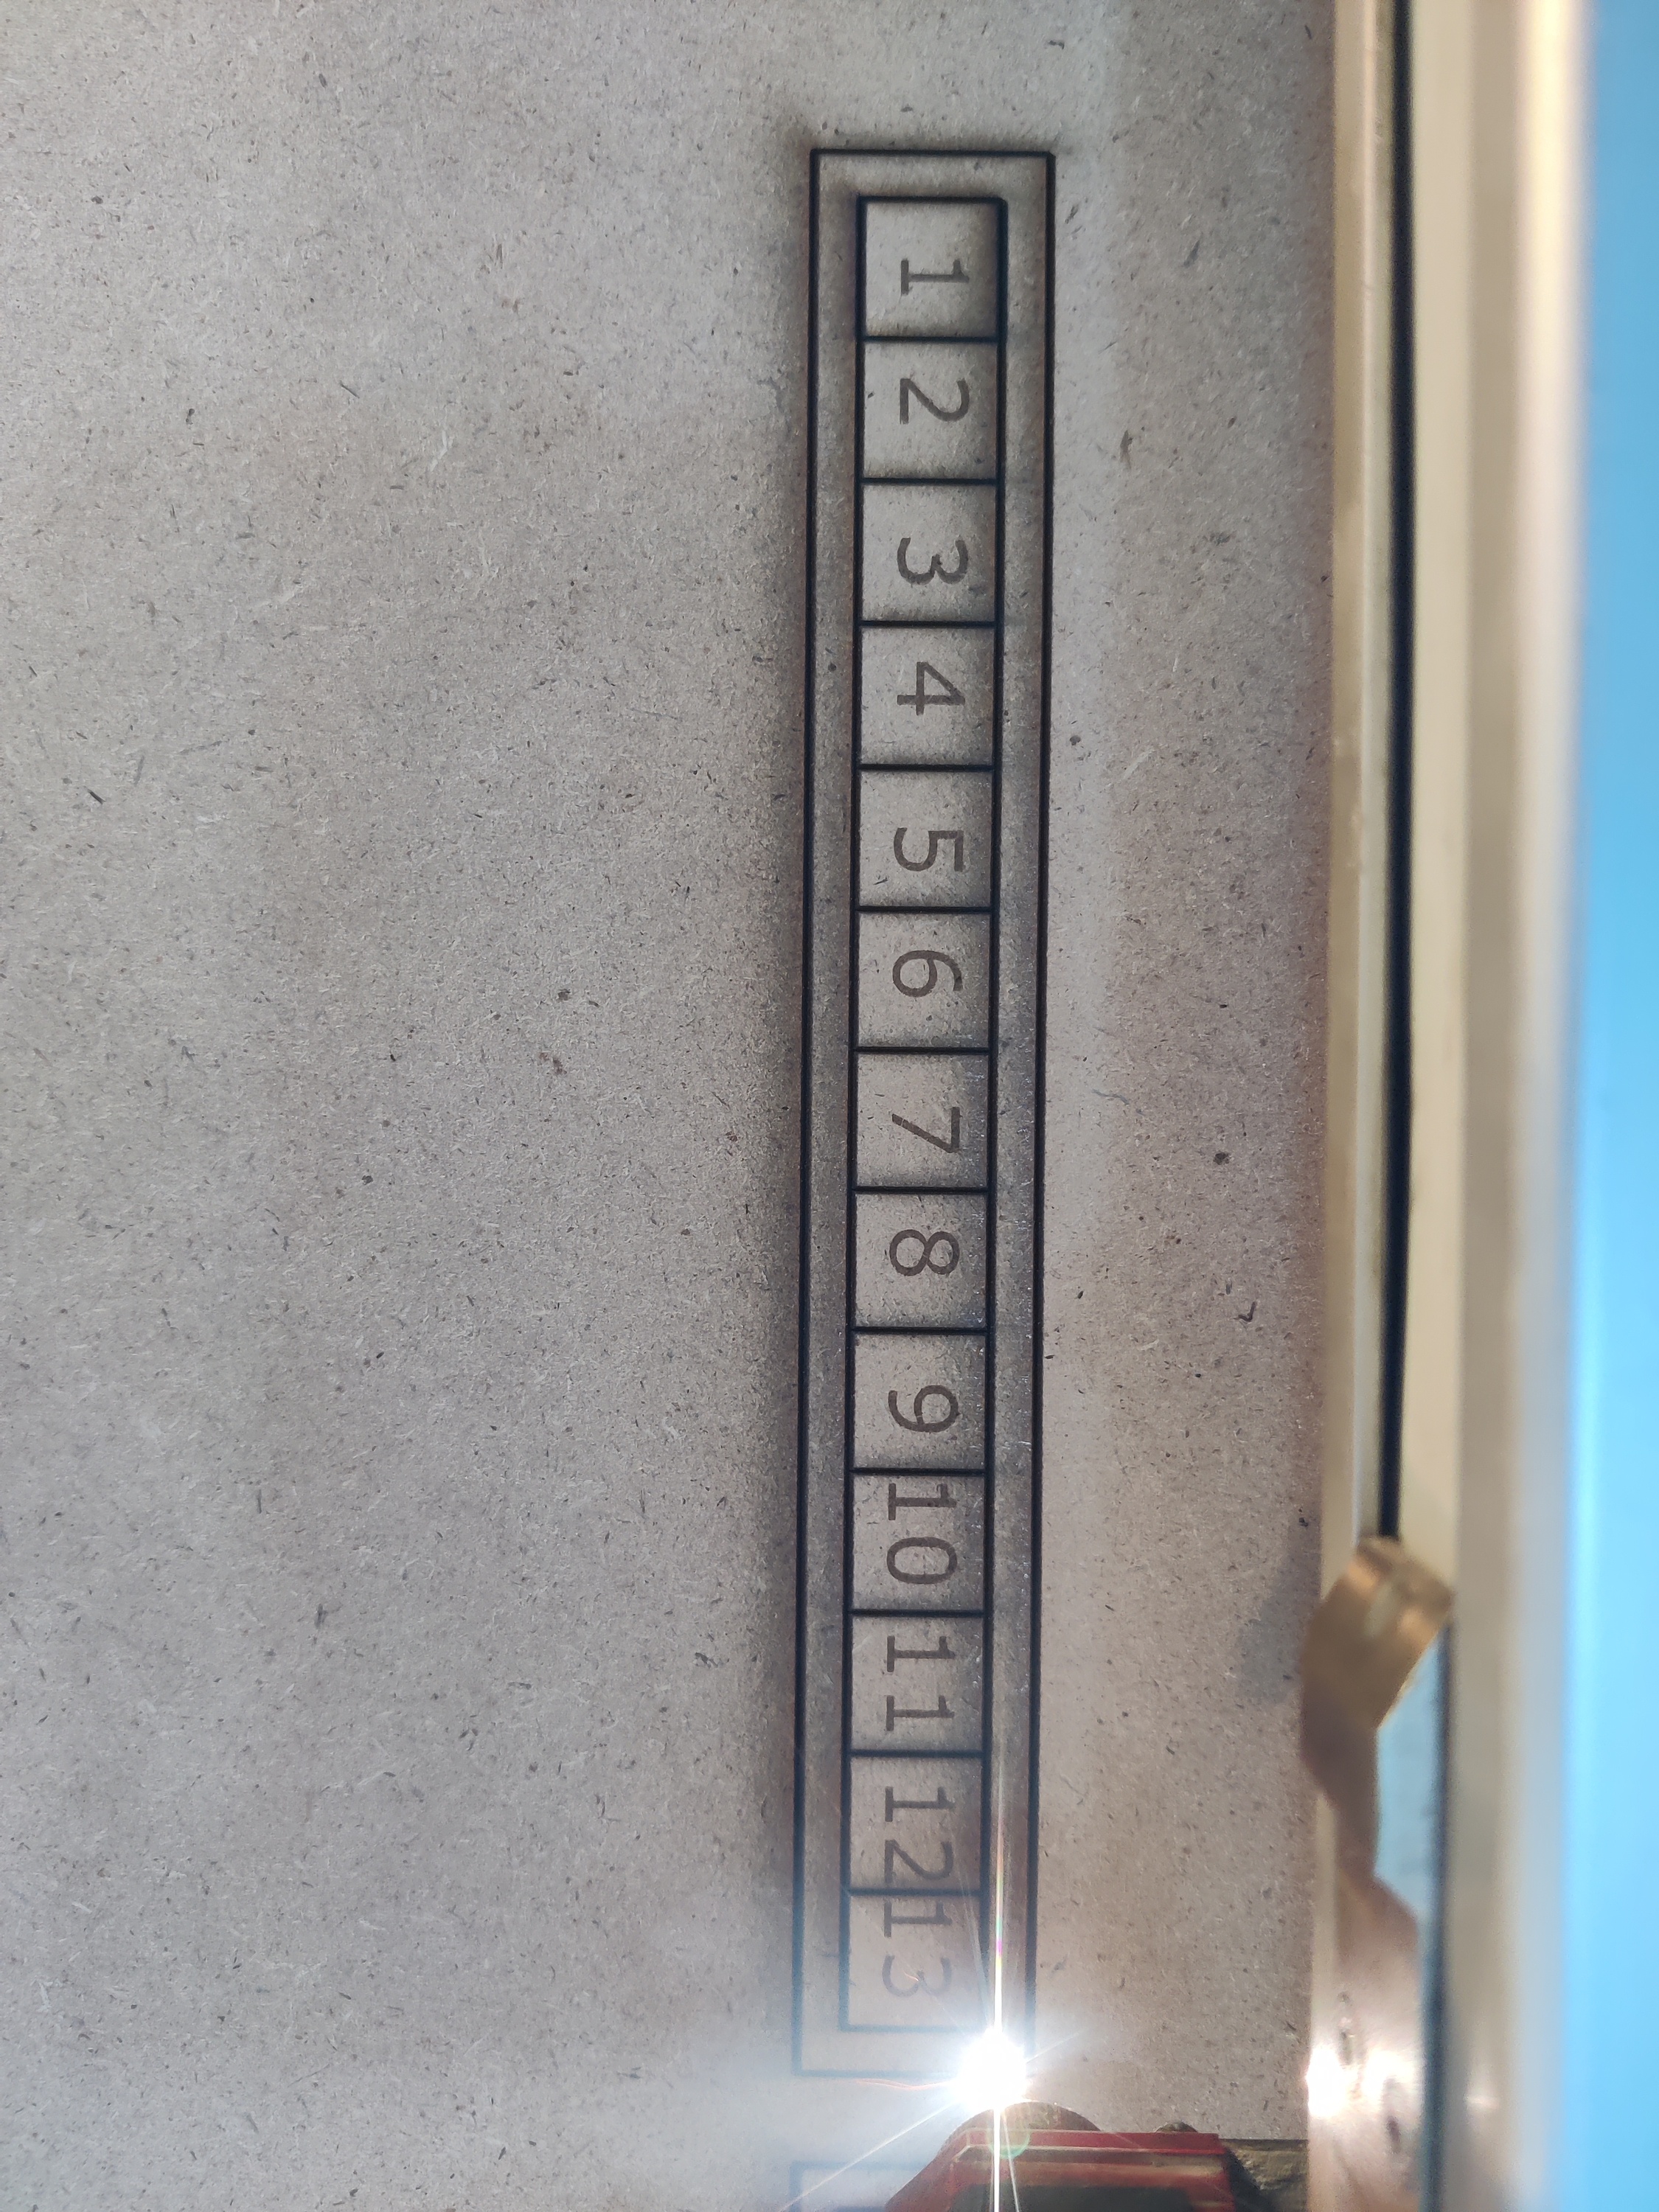
Additionally, kerf testing was performed using a test file with 13 squares, allowing us to calculate the precise kerf value and ensure accurate cuts.
This calibration ensures optimal laser cutting performance, enabling clean cuts, efficient material usage, and precise design execution. 🚀
The group assignment Page :
Work Process Detail
This guide provides a structured process for calibrating the
Trotec Speedy 400 laser laser cutter (CO2), ensuring precise cutting and engraving for different materials.
1. Understanding the Laser Cutter and Software
- Researched the machine via the Trotec YouTube channel to understand laser calibration.
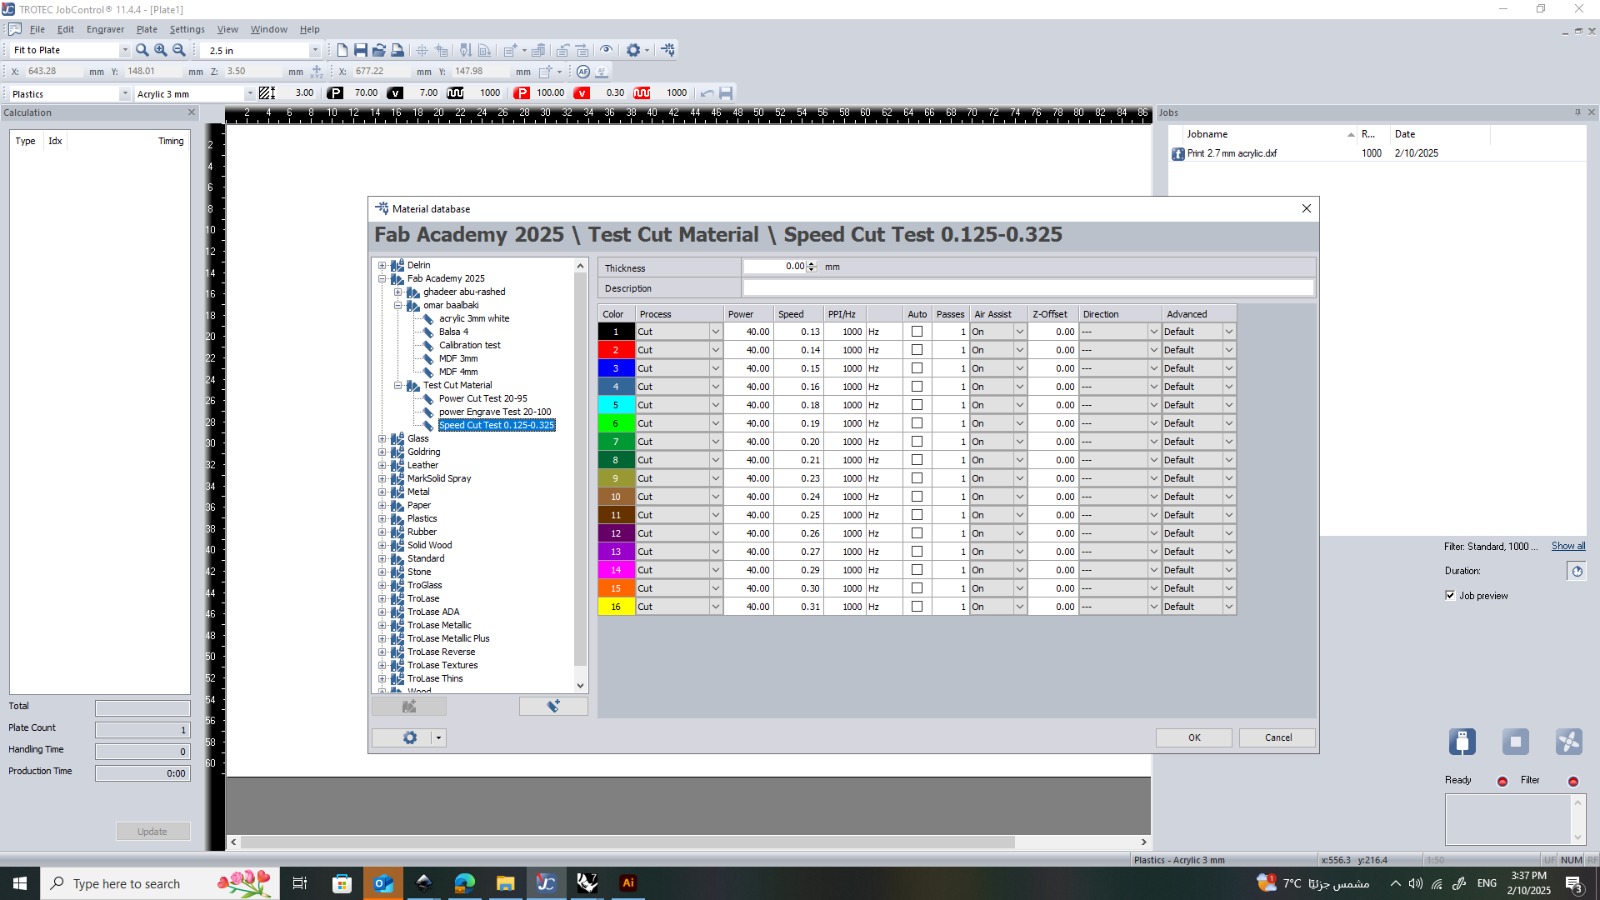
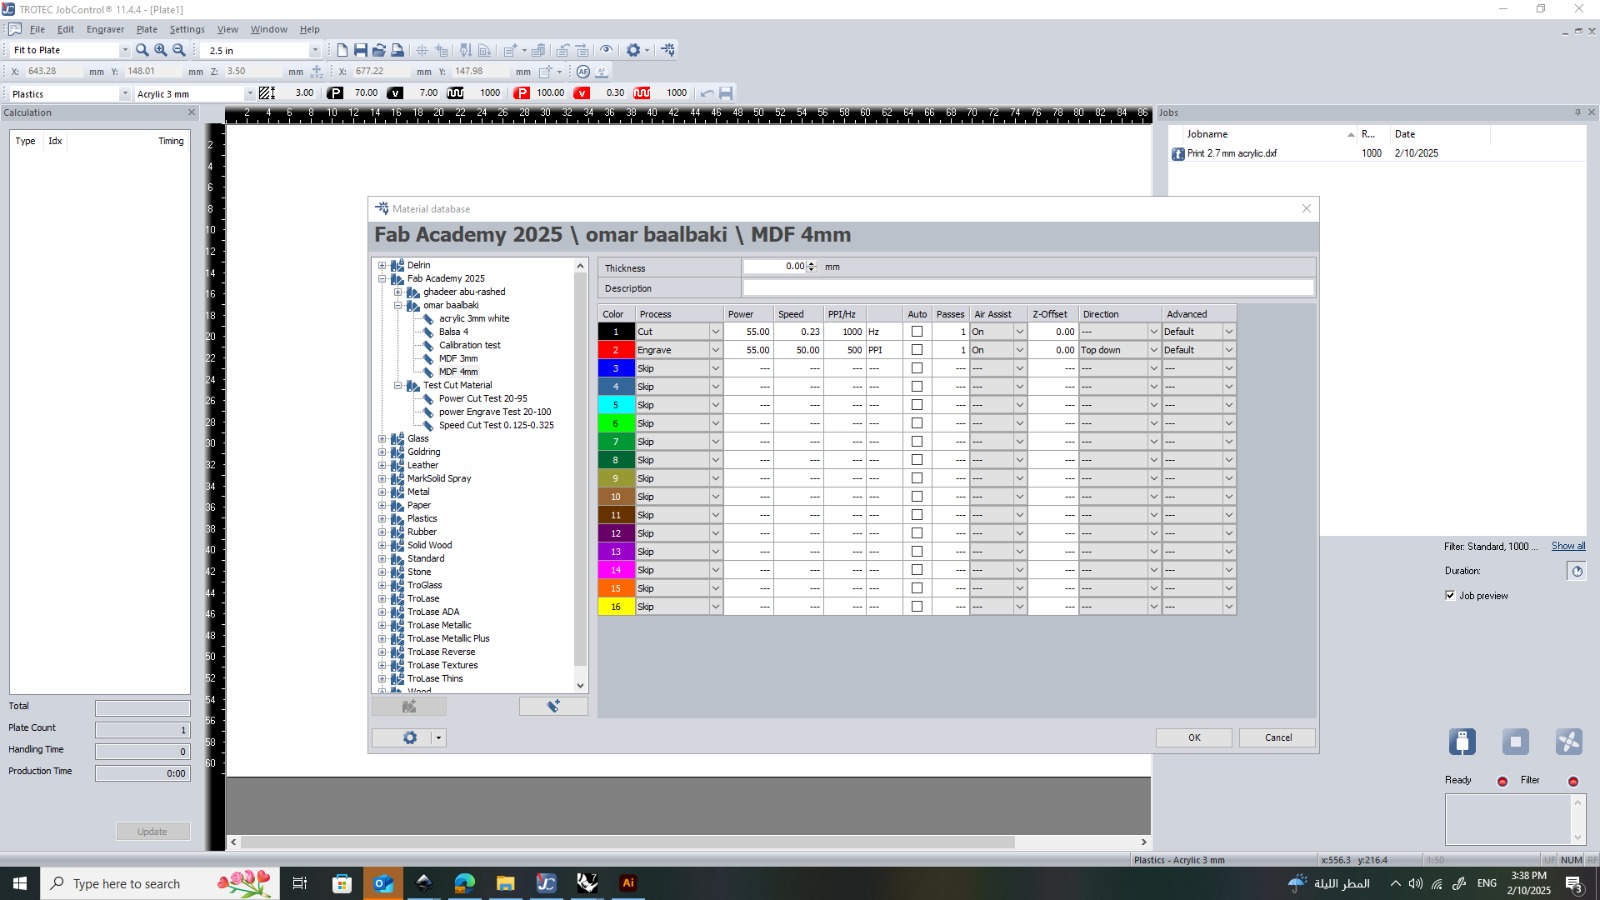
- The software used for controlling the machine is Trotec JobControl.
- JobControl supports 16 predefined colors in RGB values, where each color corresponds to specific:
- Power (%)
- Speed (%)
- Frequency (Hz)
- Passes
- Offset settings
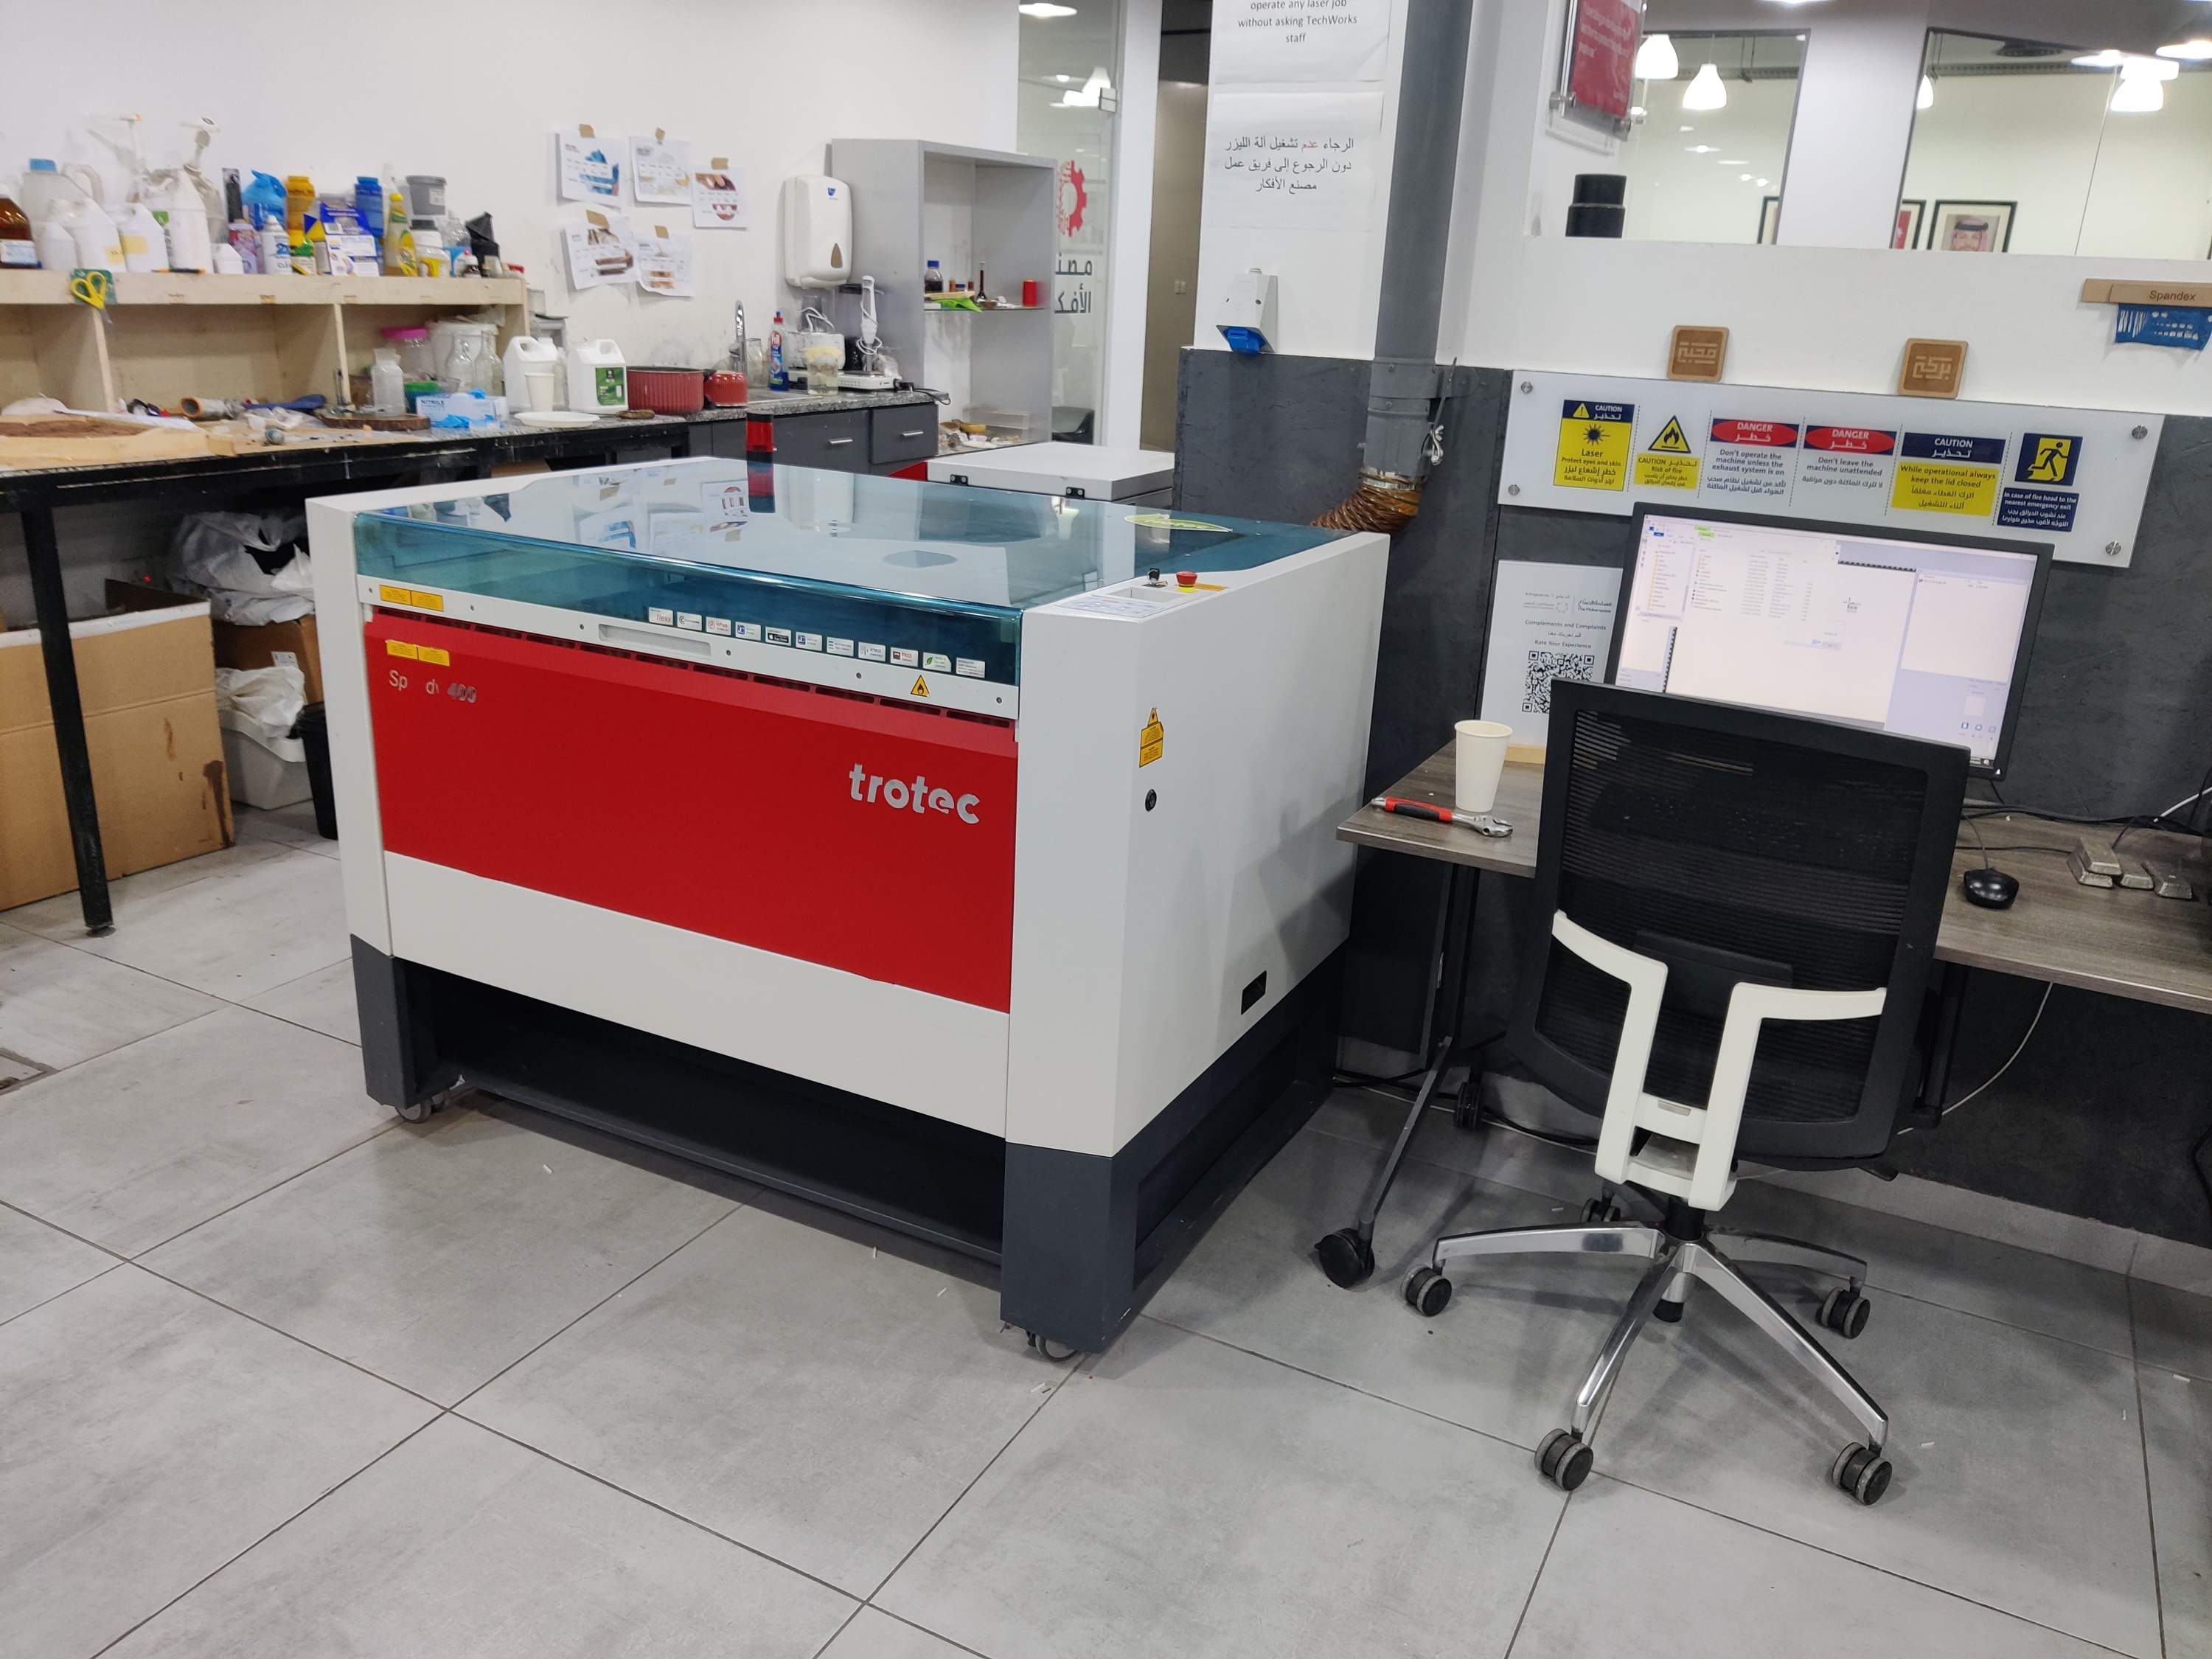
The laser cutter used in the lab is the
Trotec Speedy 400.
2. Selecting and Measuring Materials
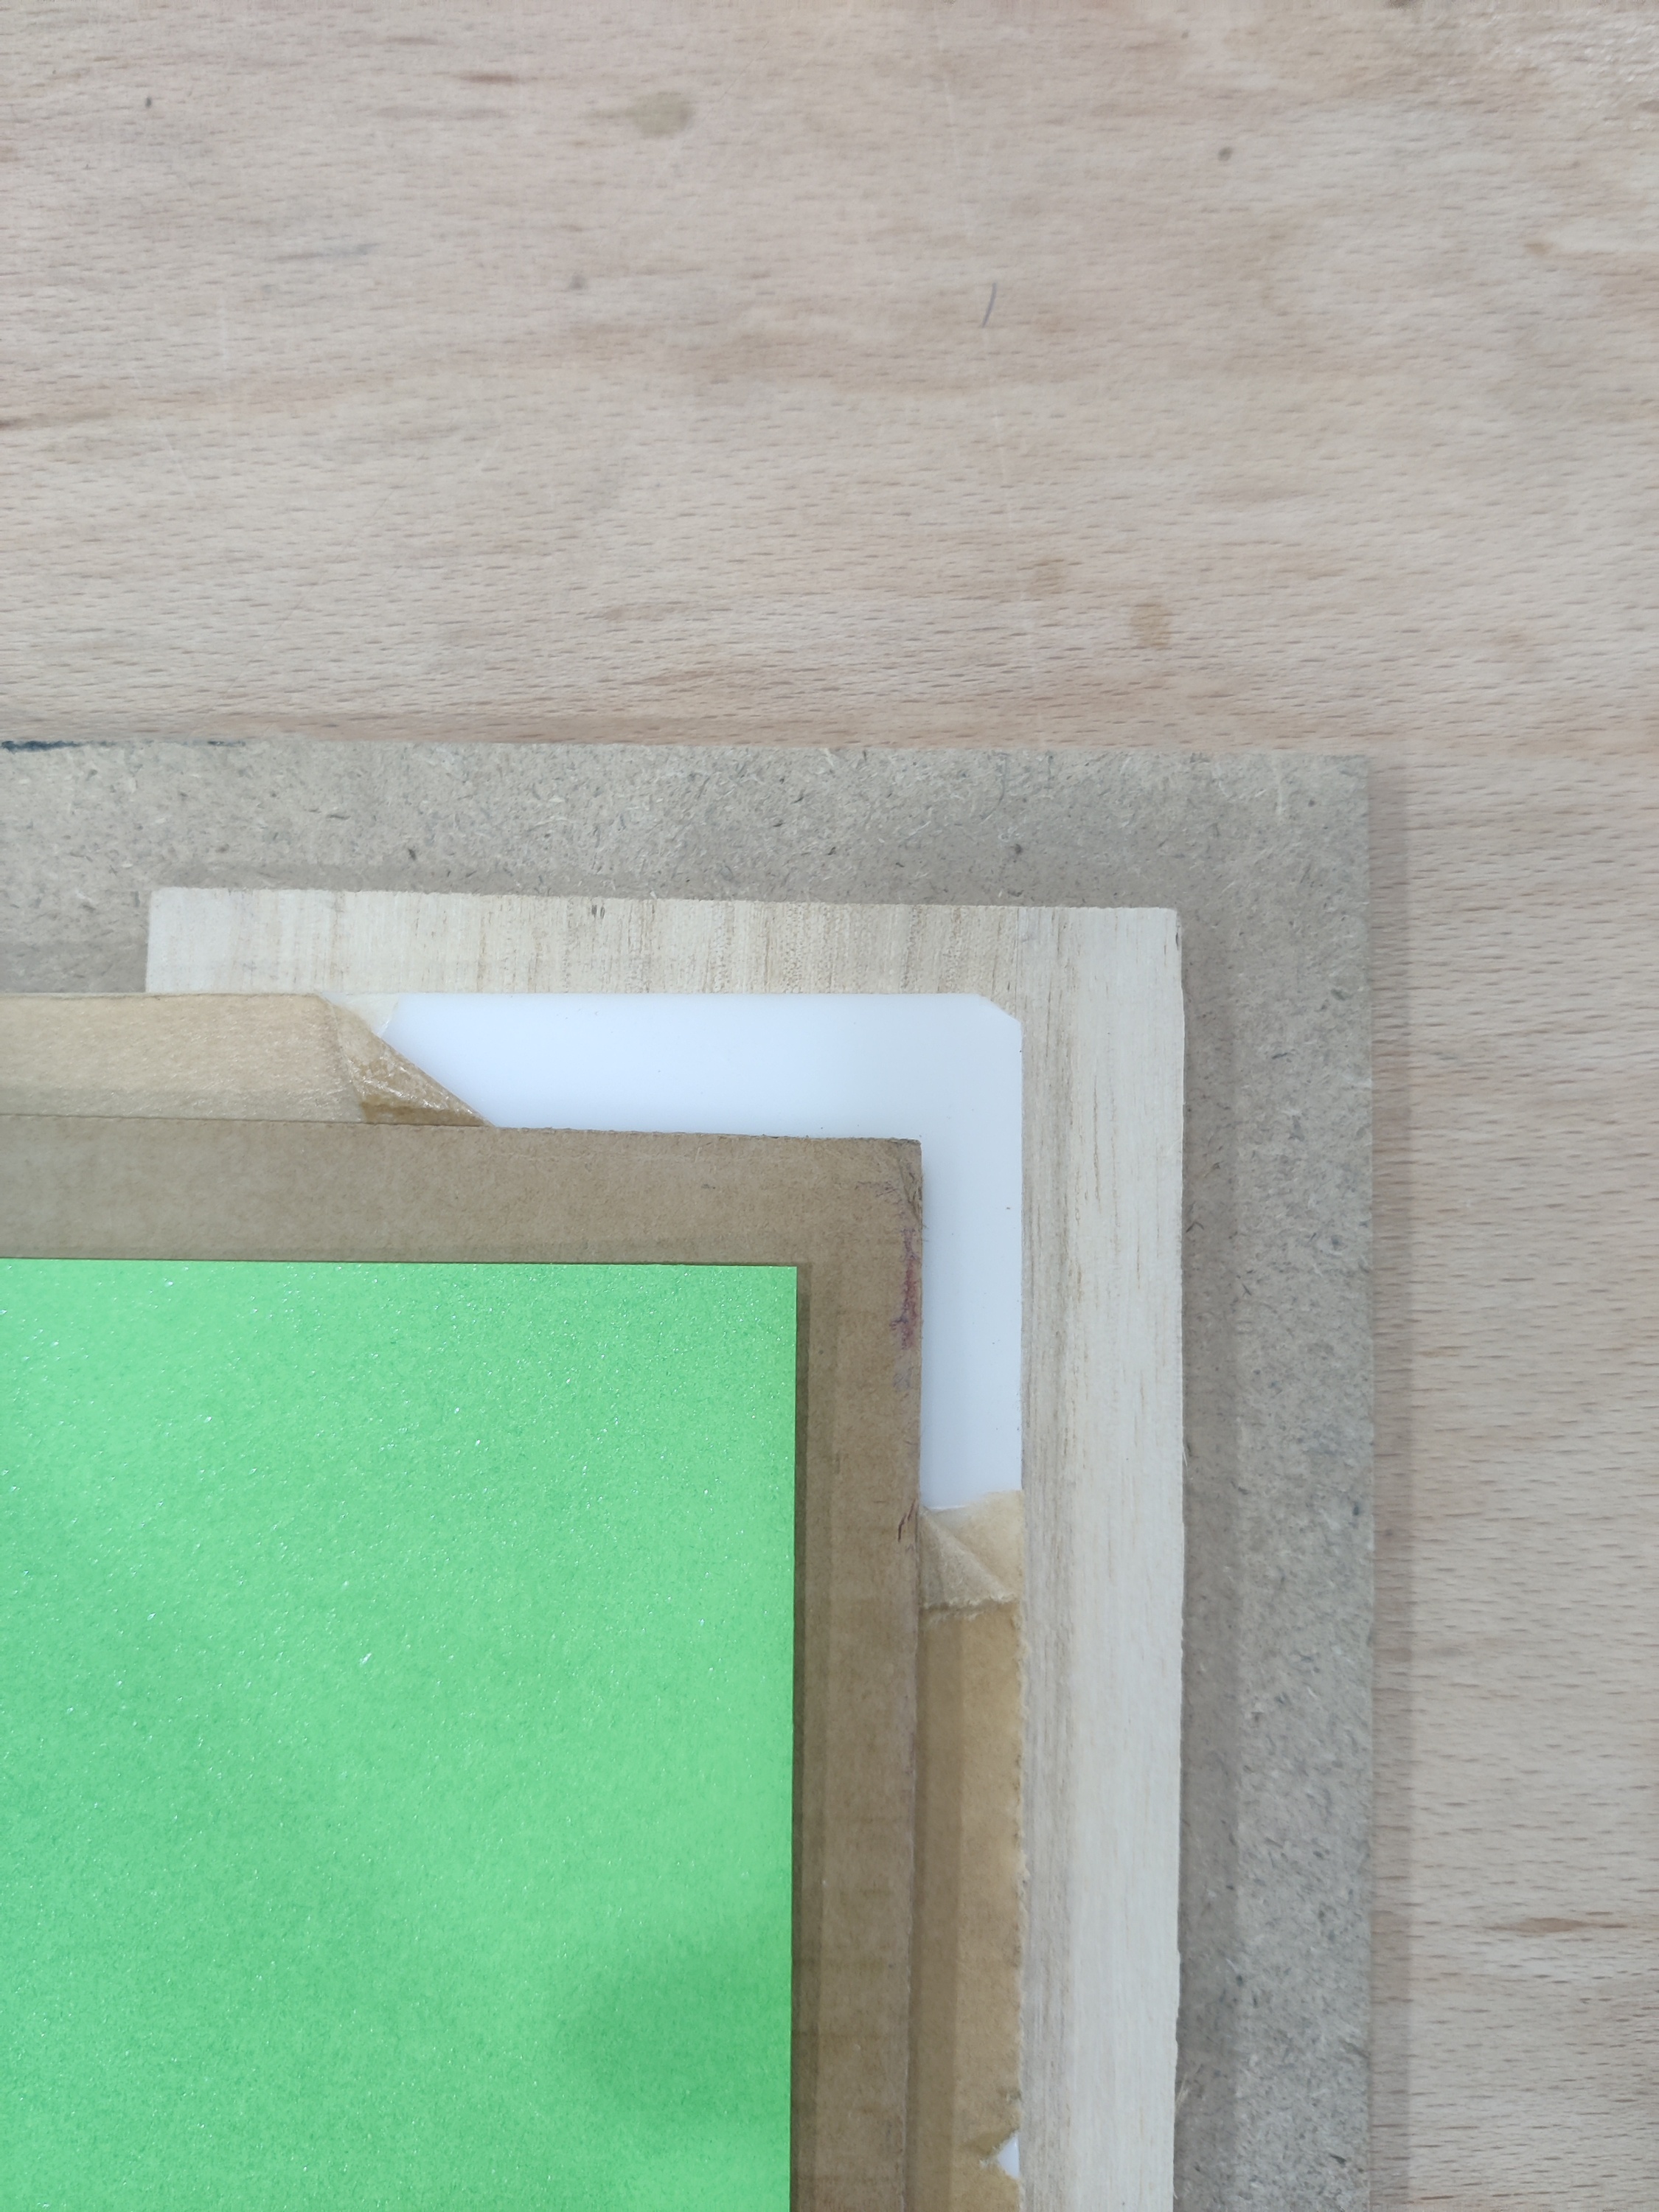
- Purchased different materials for testing:✅ MDF
- ✅ MDF
- ✅ Balsa Wood
- ✅ Acrylic
- ✅ Cardboard
- ✅ Regular Paper
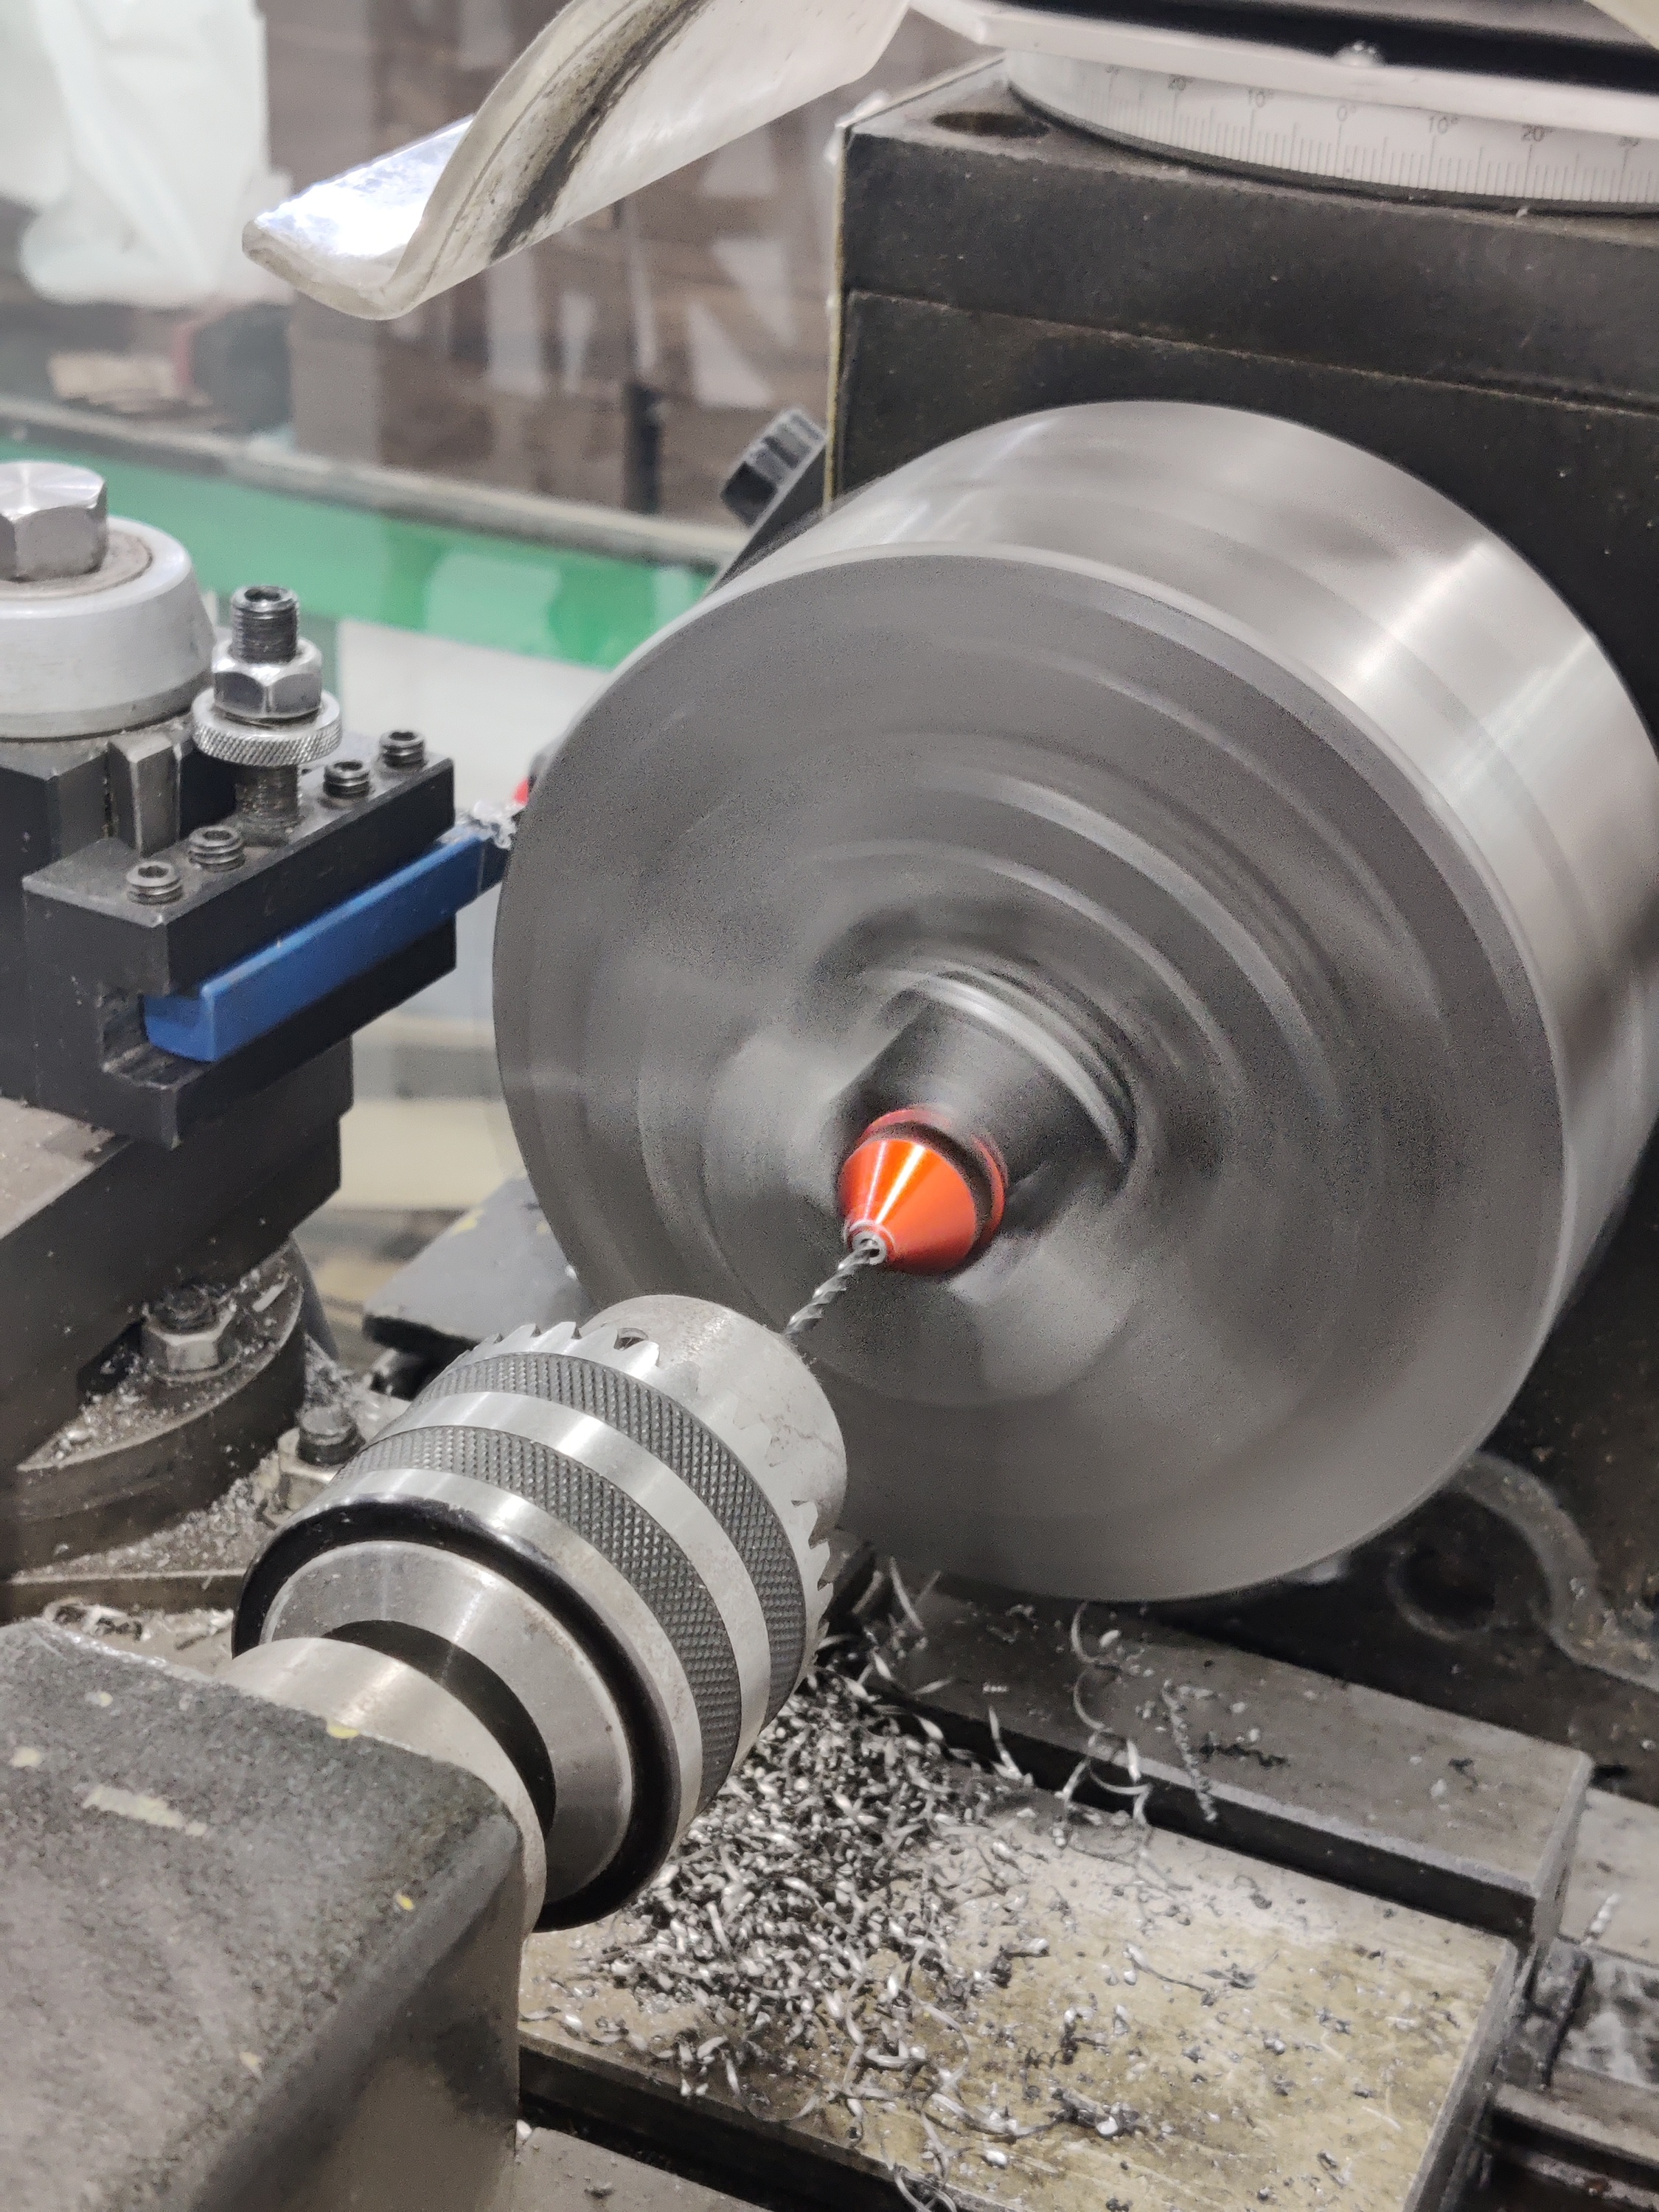
- Measured the thickness of each material using a caliper to set correct cutting profiles in the software.

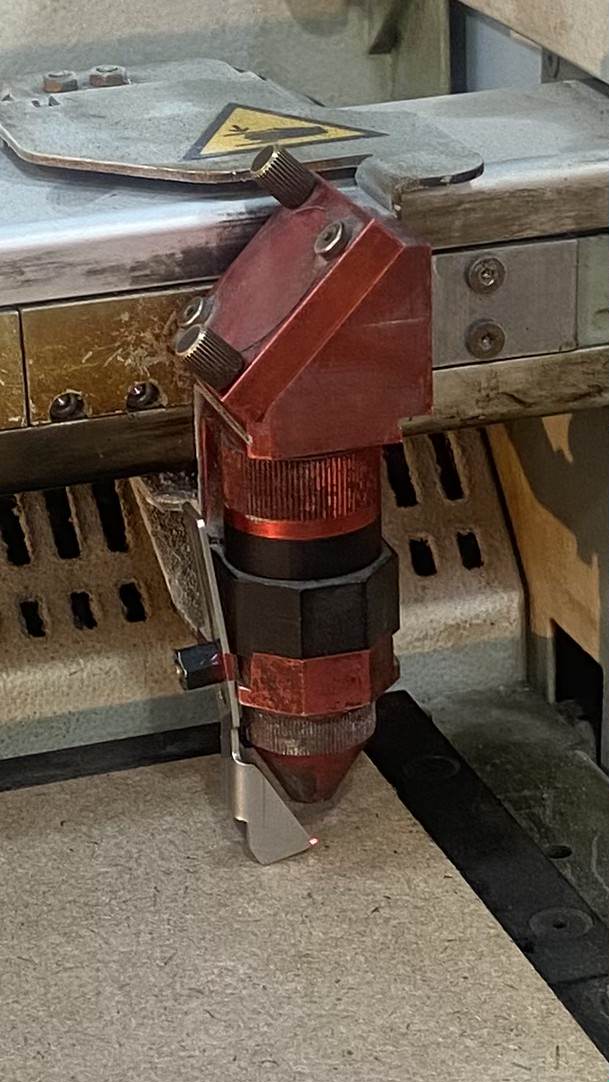
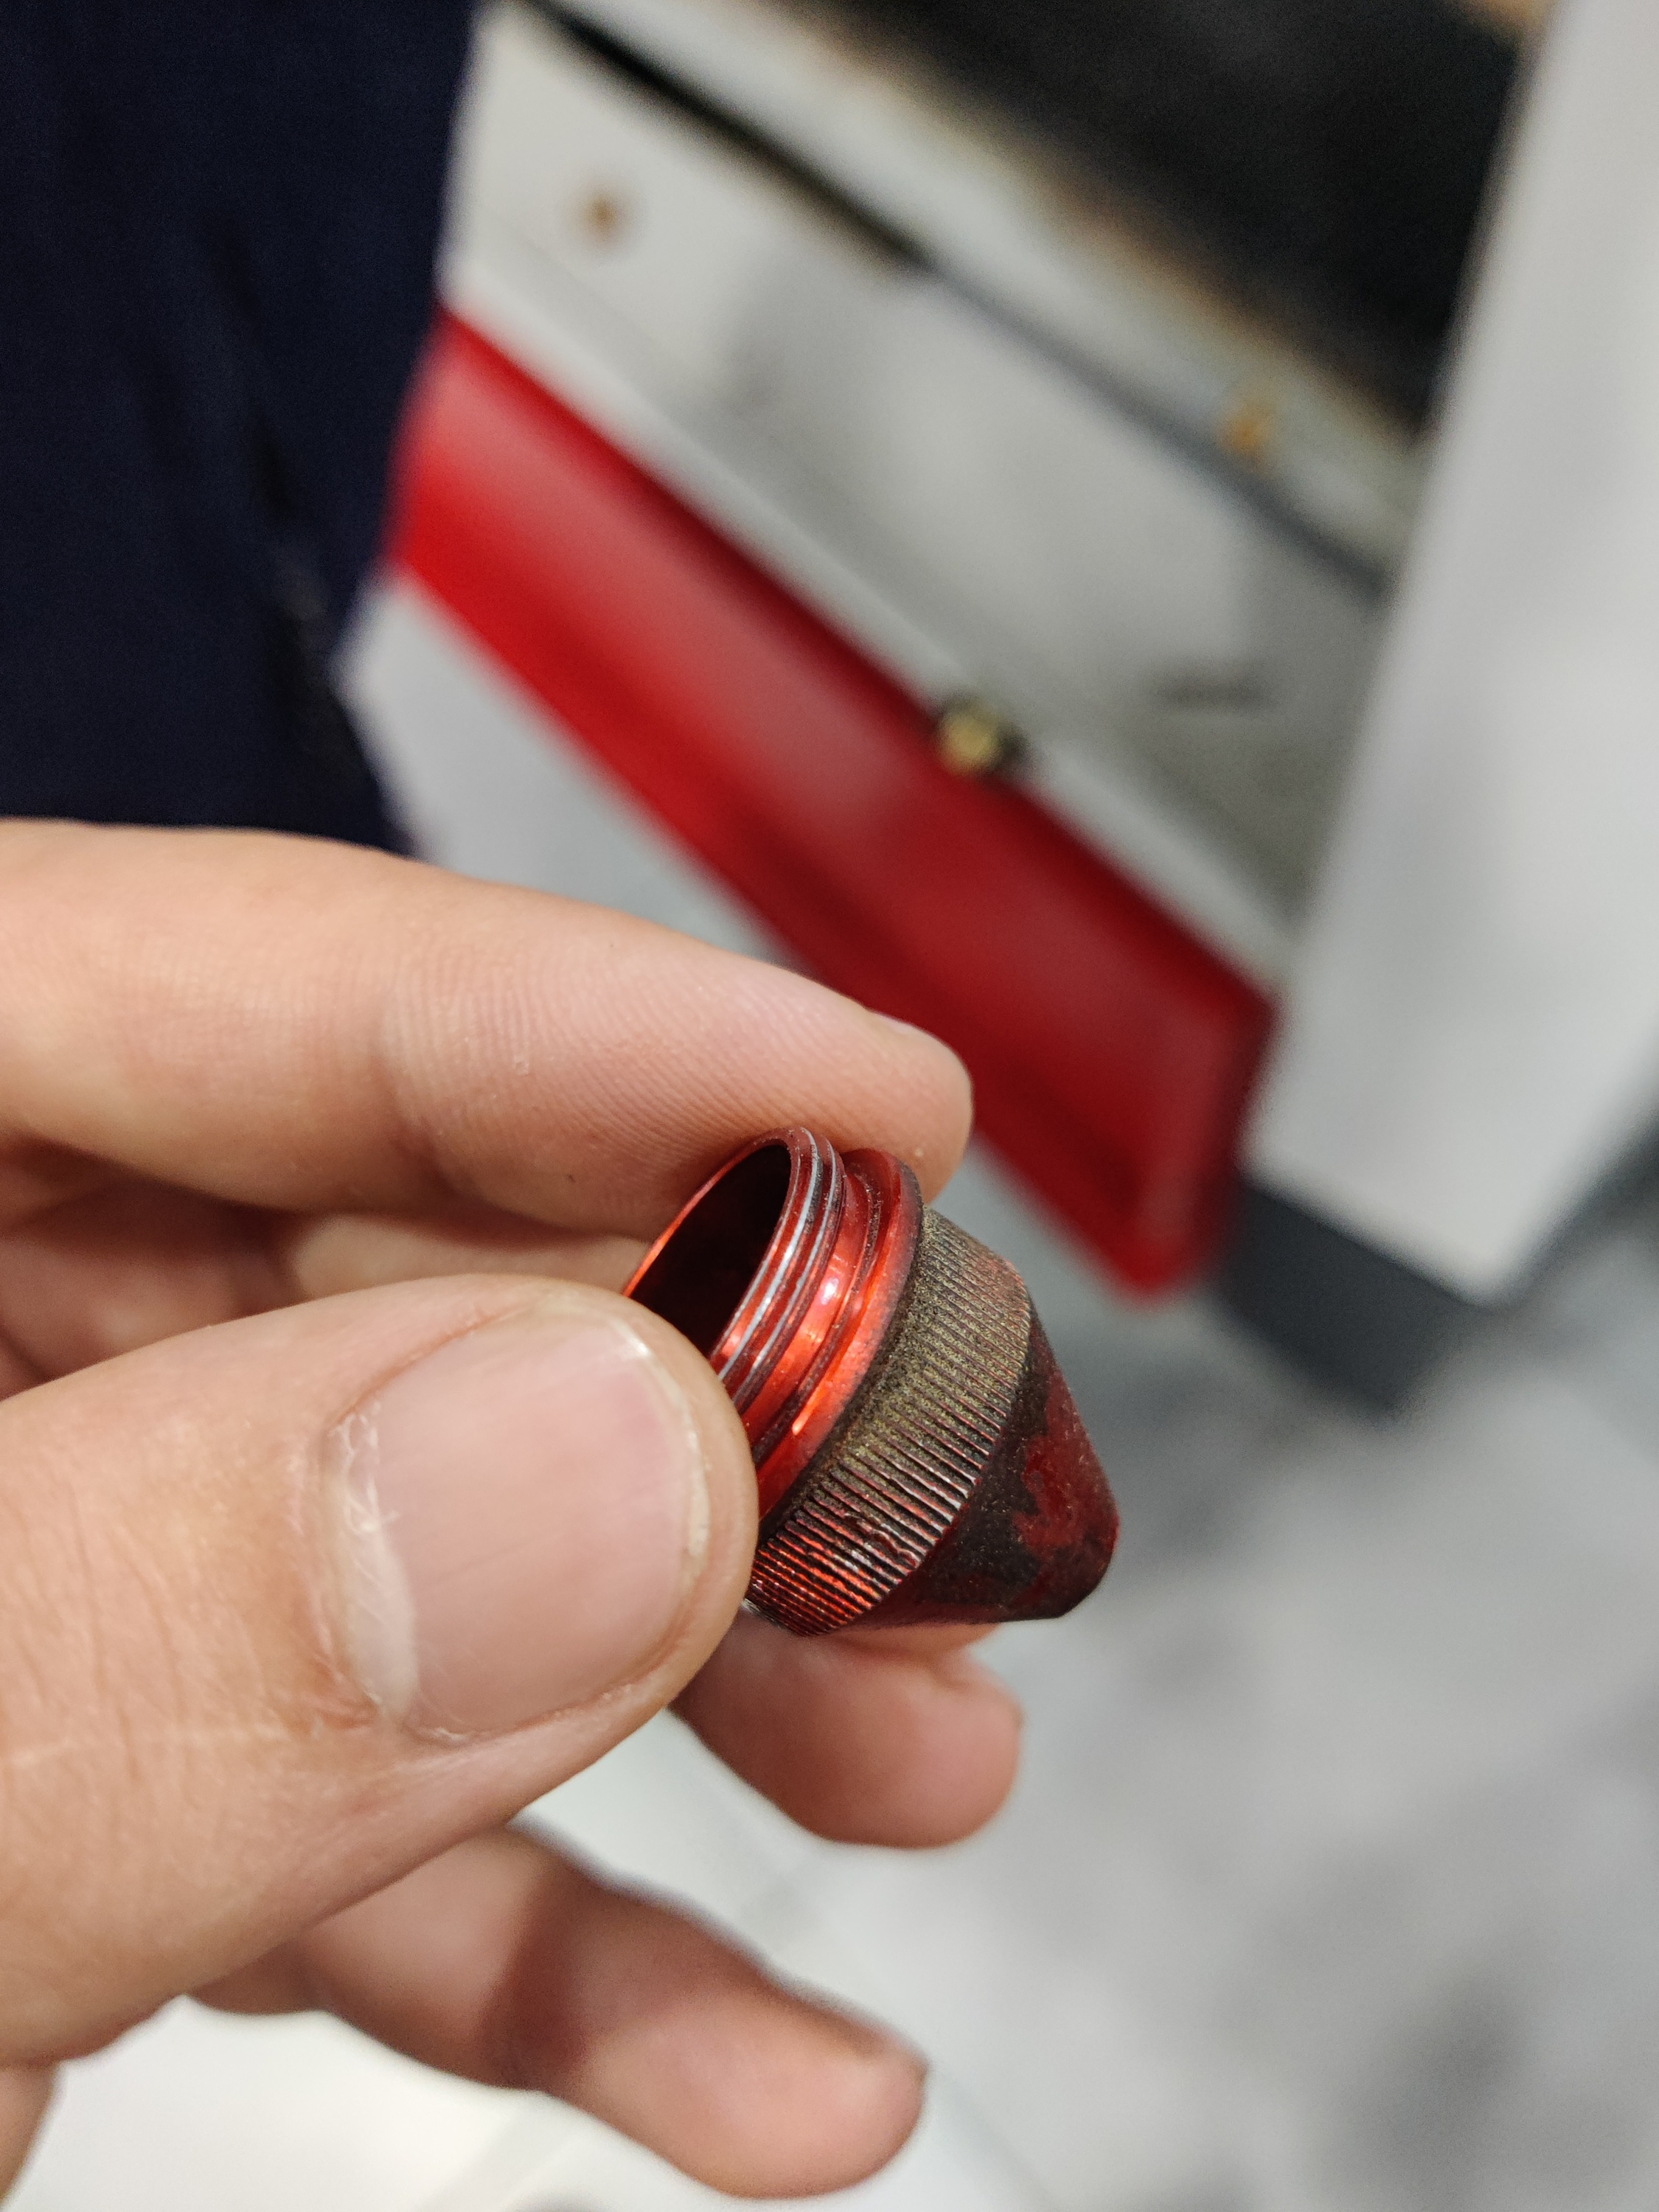
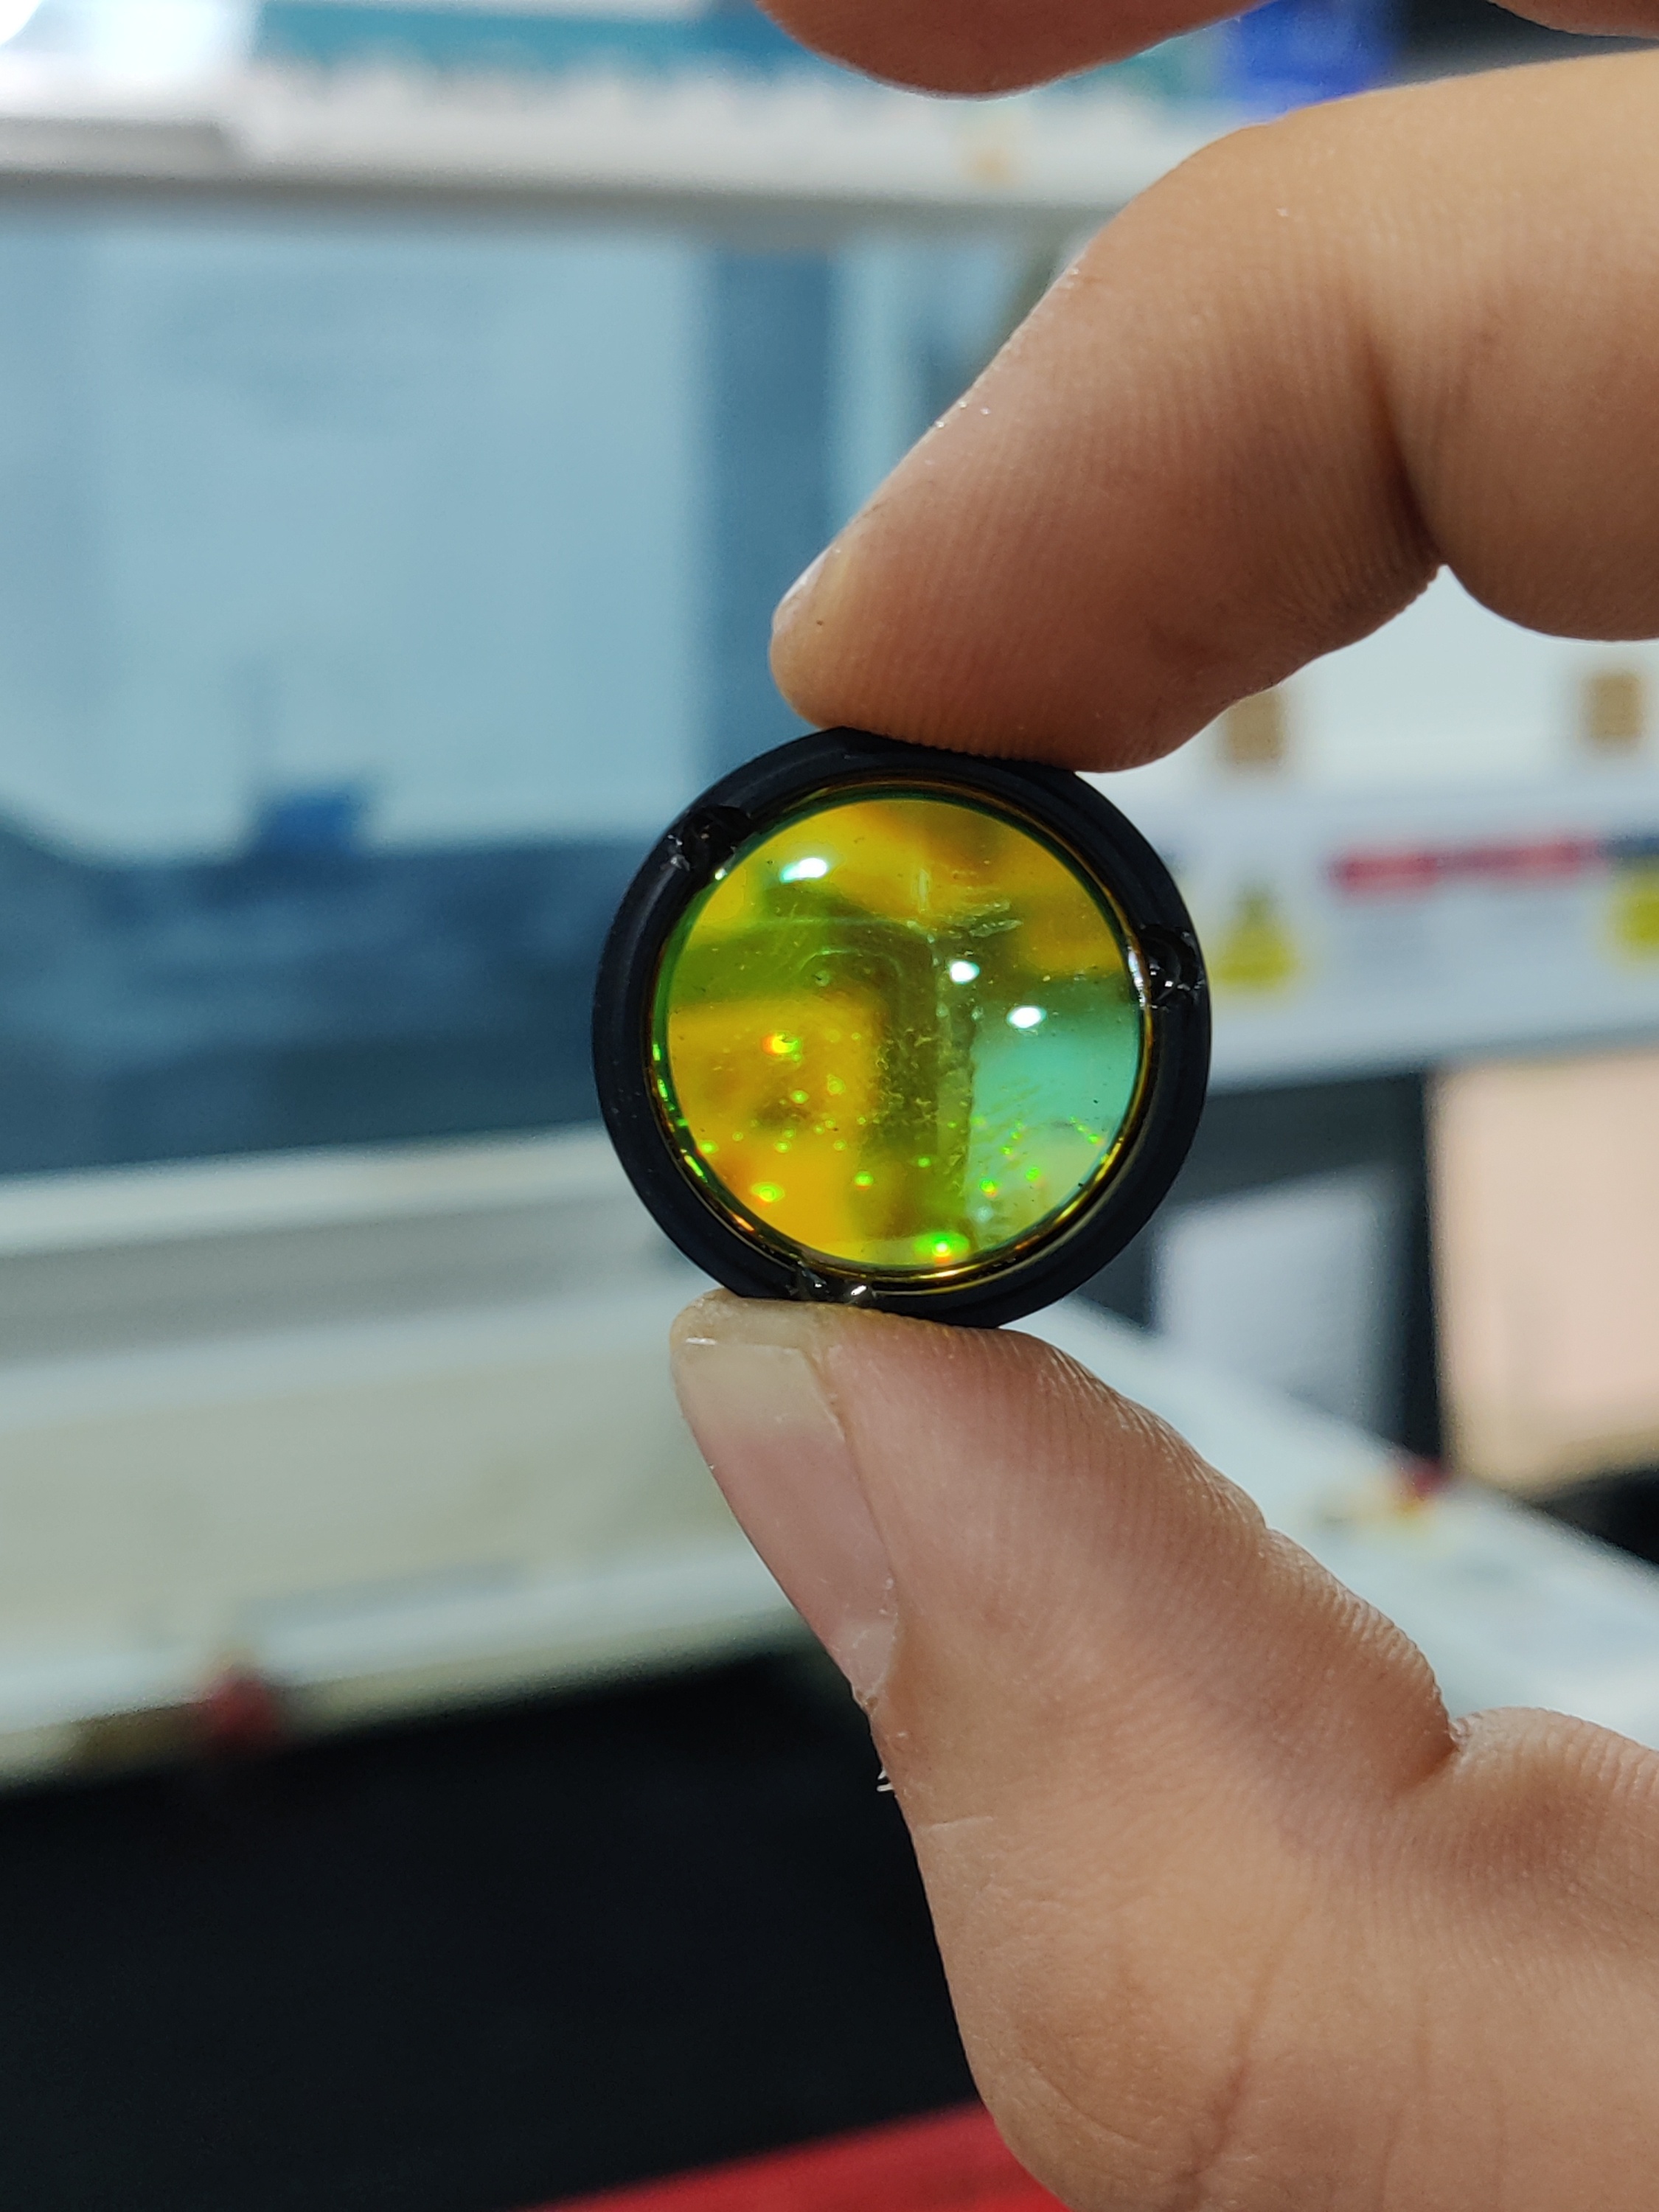
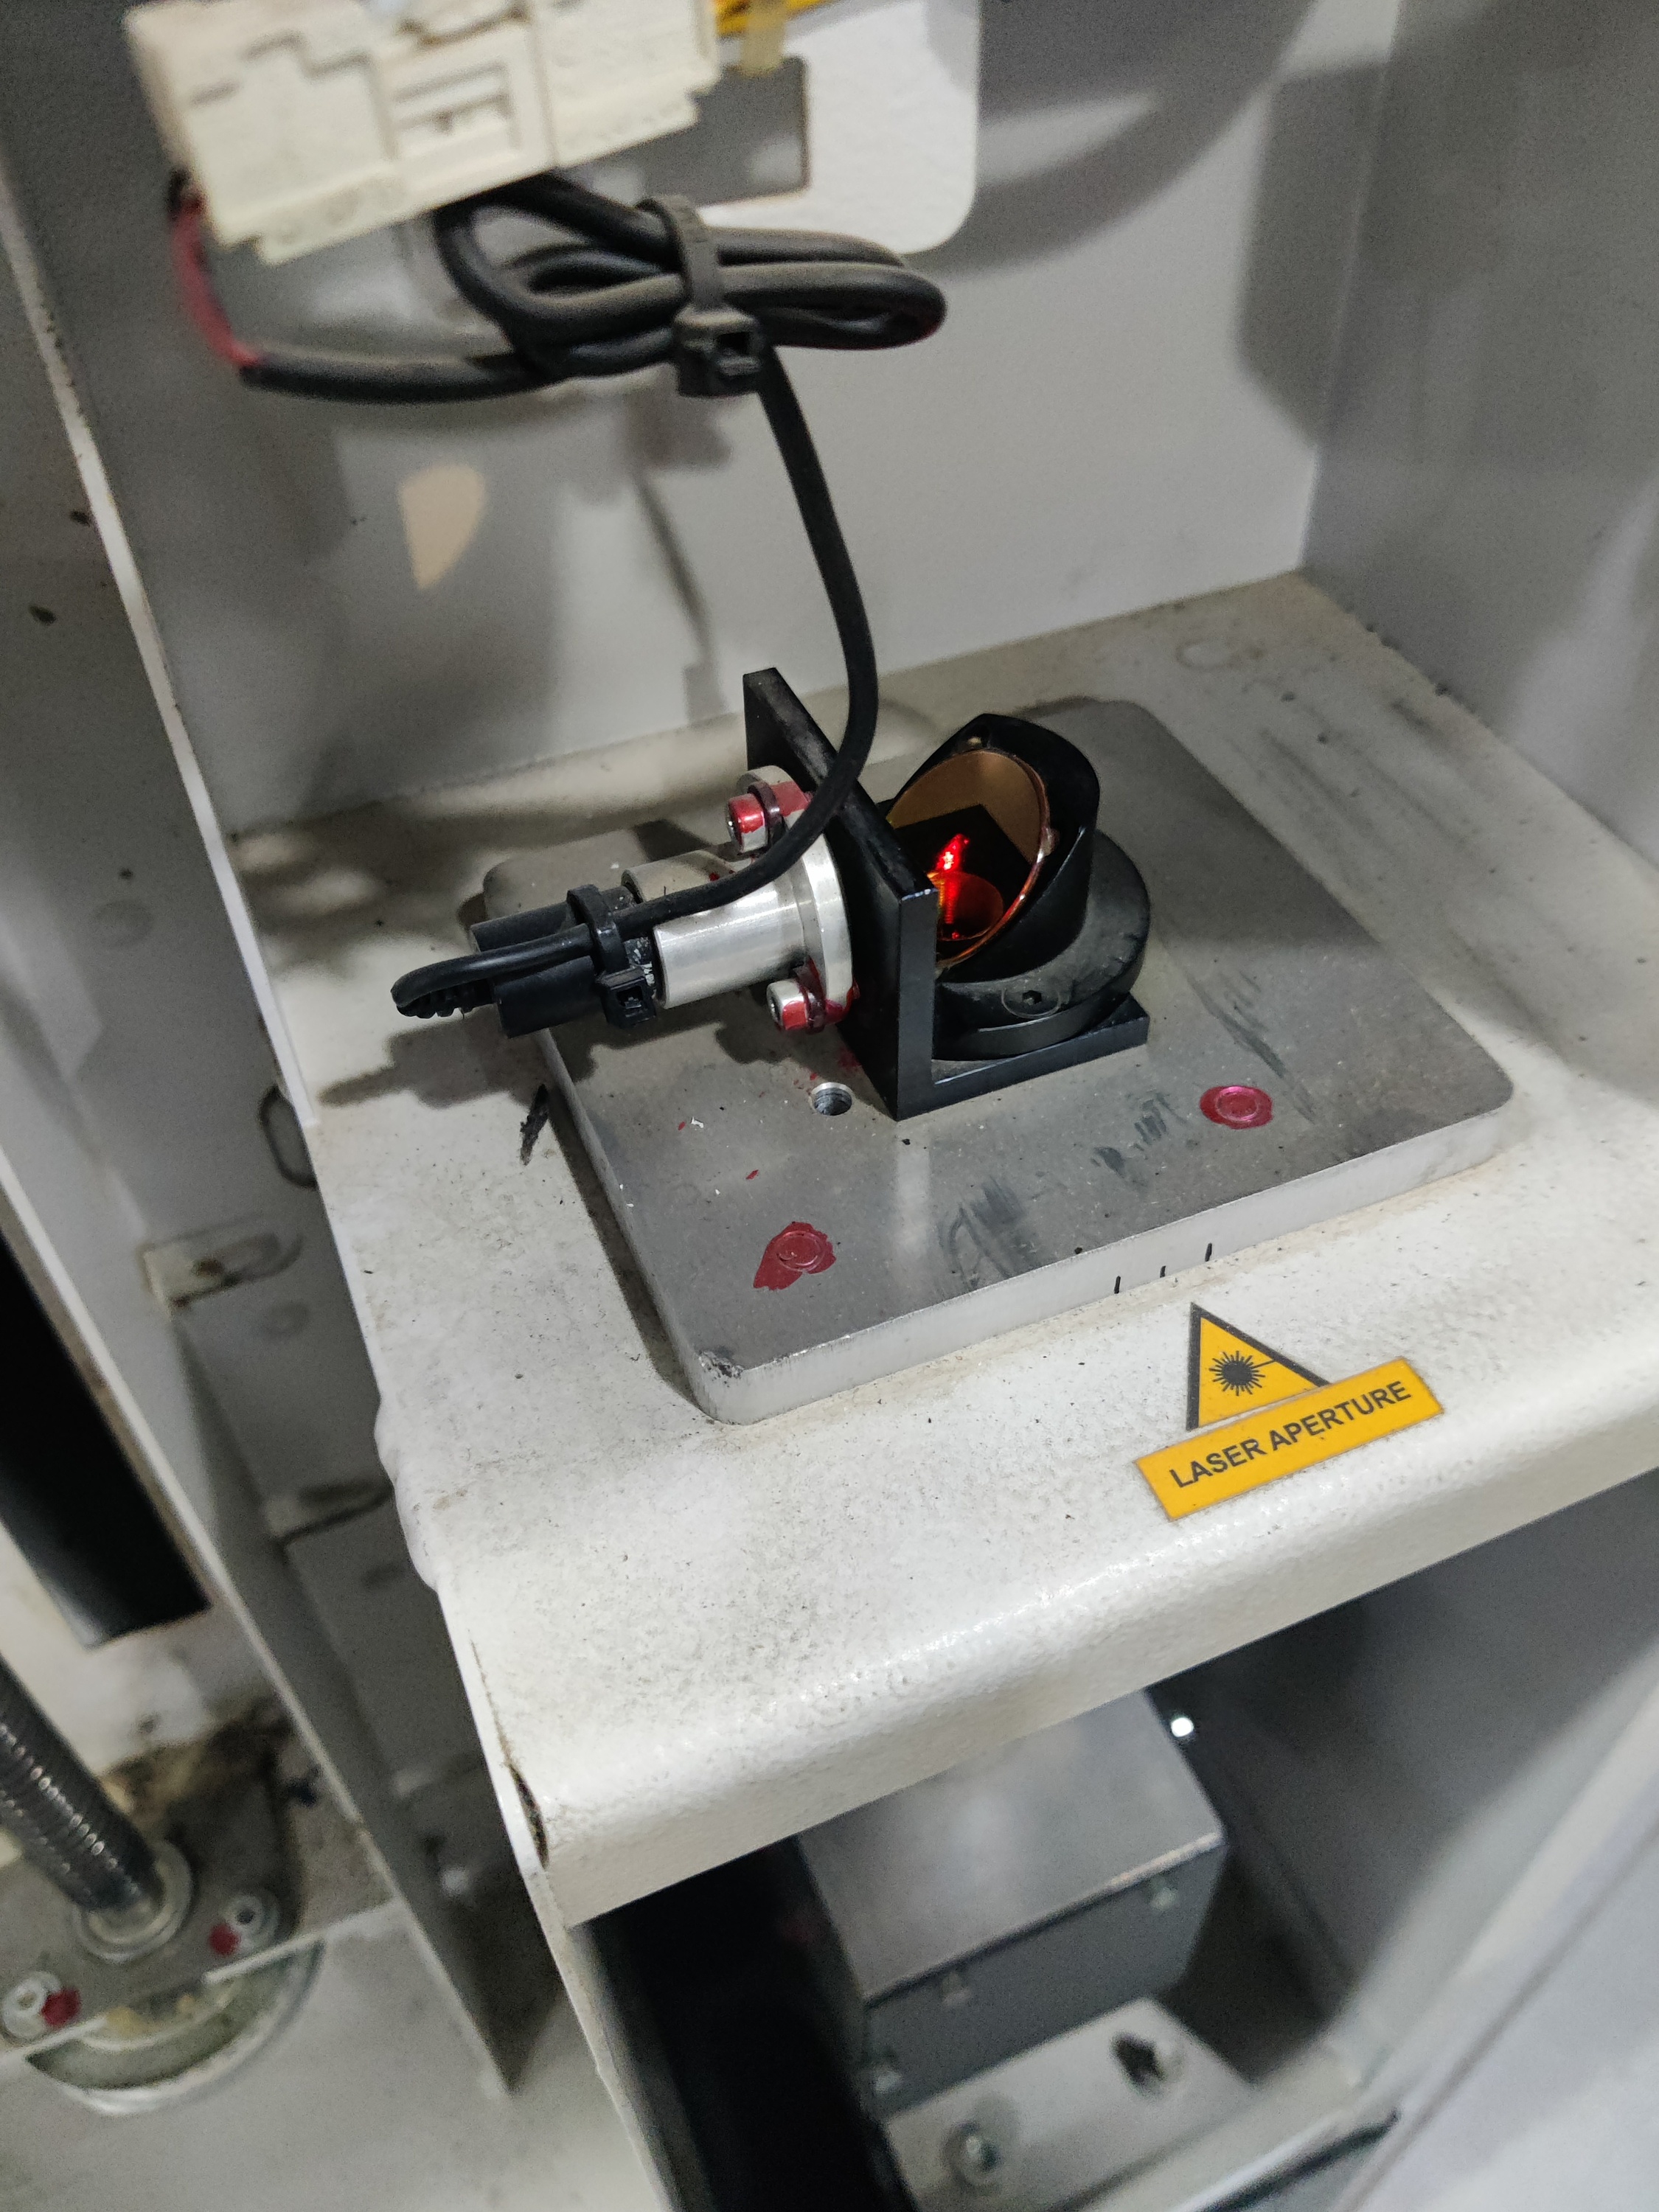
3. Understanding the Laser Lens and Power Source
- Learned that different lenses affect the laser cutting process.
- Our machine uses a 2-inch lens, which impacts focal distance and cutting depth.
- Understood the role of the red laser marker for positioning before cutting.
- Calibrated the lens focus to ensure accurate beam convergence for optimal cutting performance.
4. Setting Up the Laser for Cutting
- Imported the design into JobControl and assigned proper laser settings based on material thickness.
- Adjusted laser power, speed, and offset settings through multiple test runs.
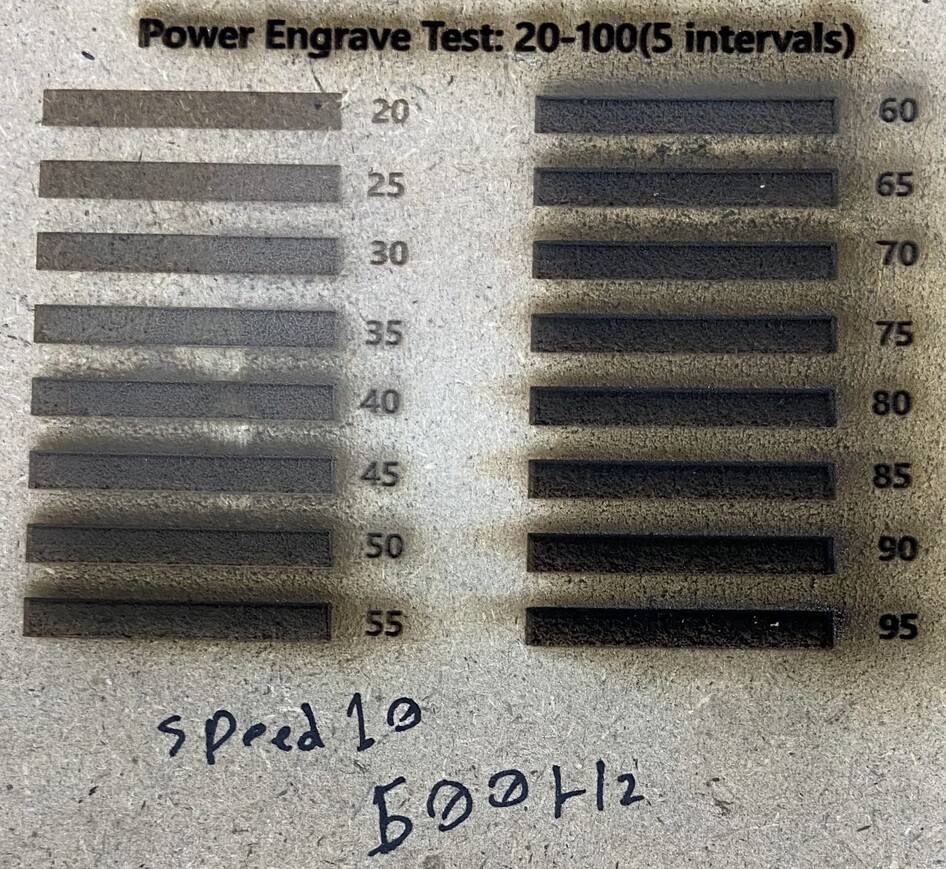
- After several test cuts, we found the best cutting settings for MDF and acrylic.

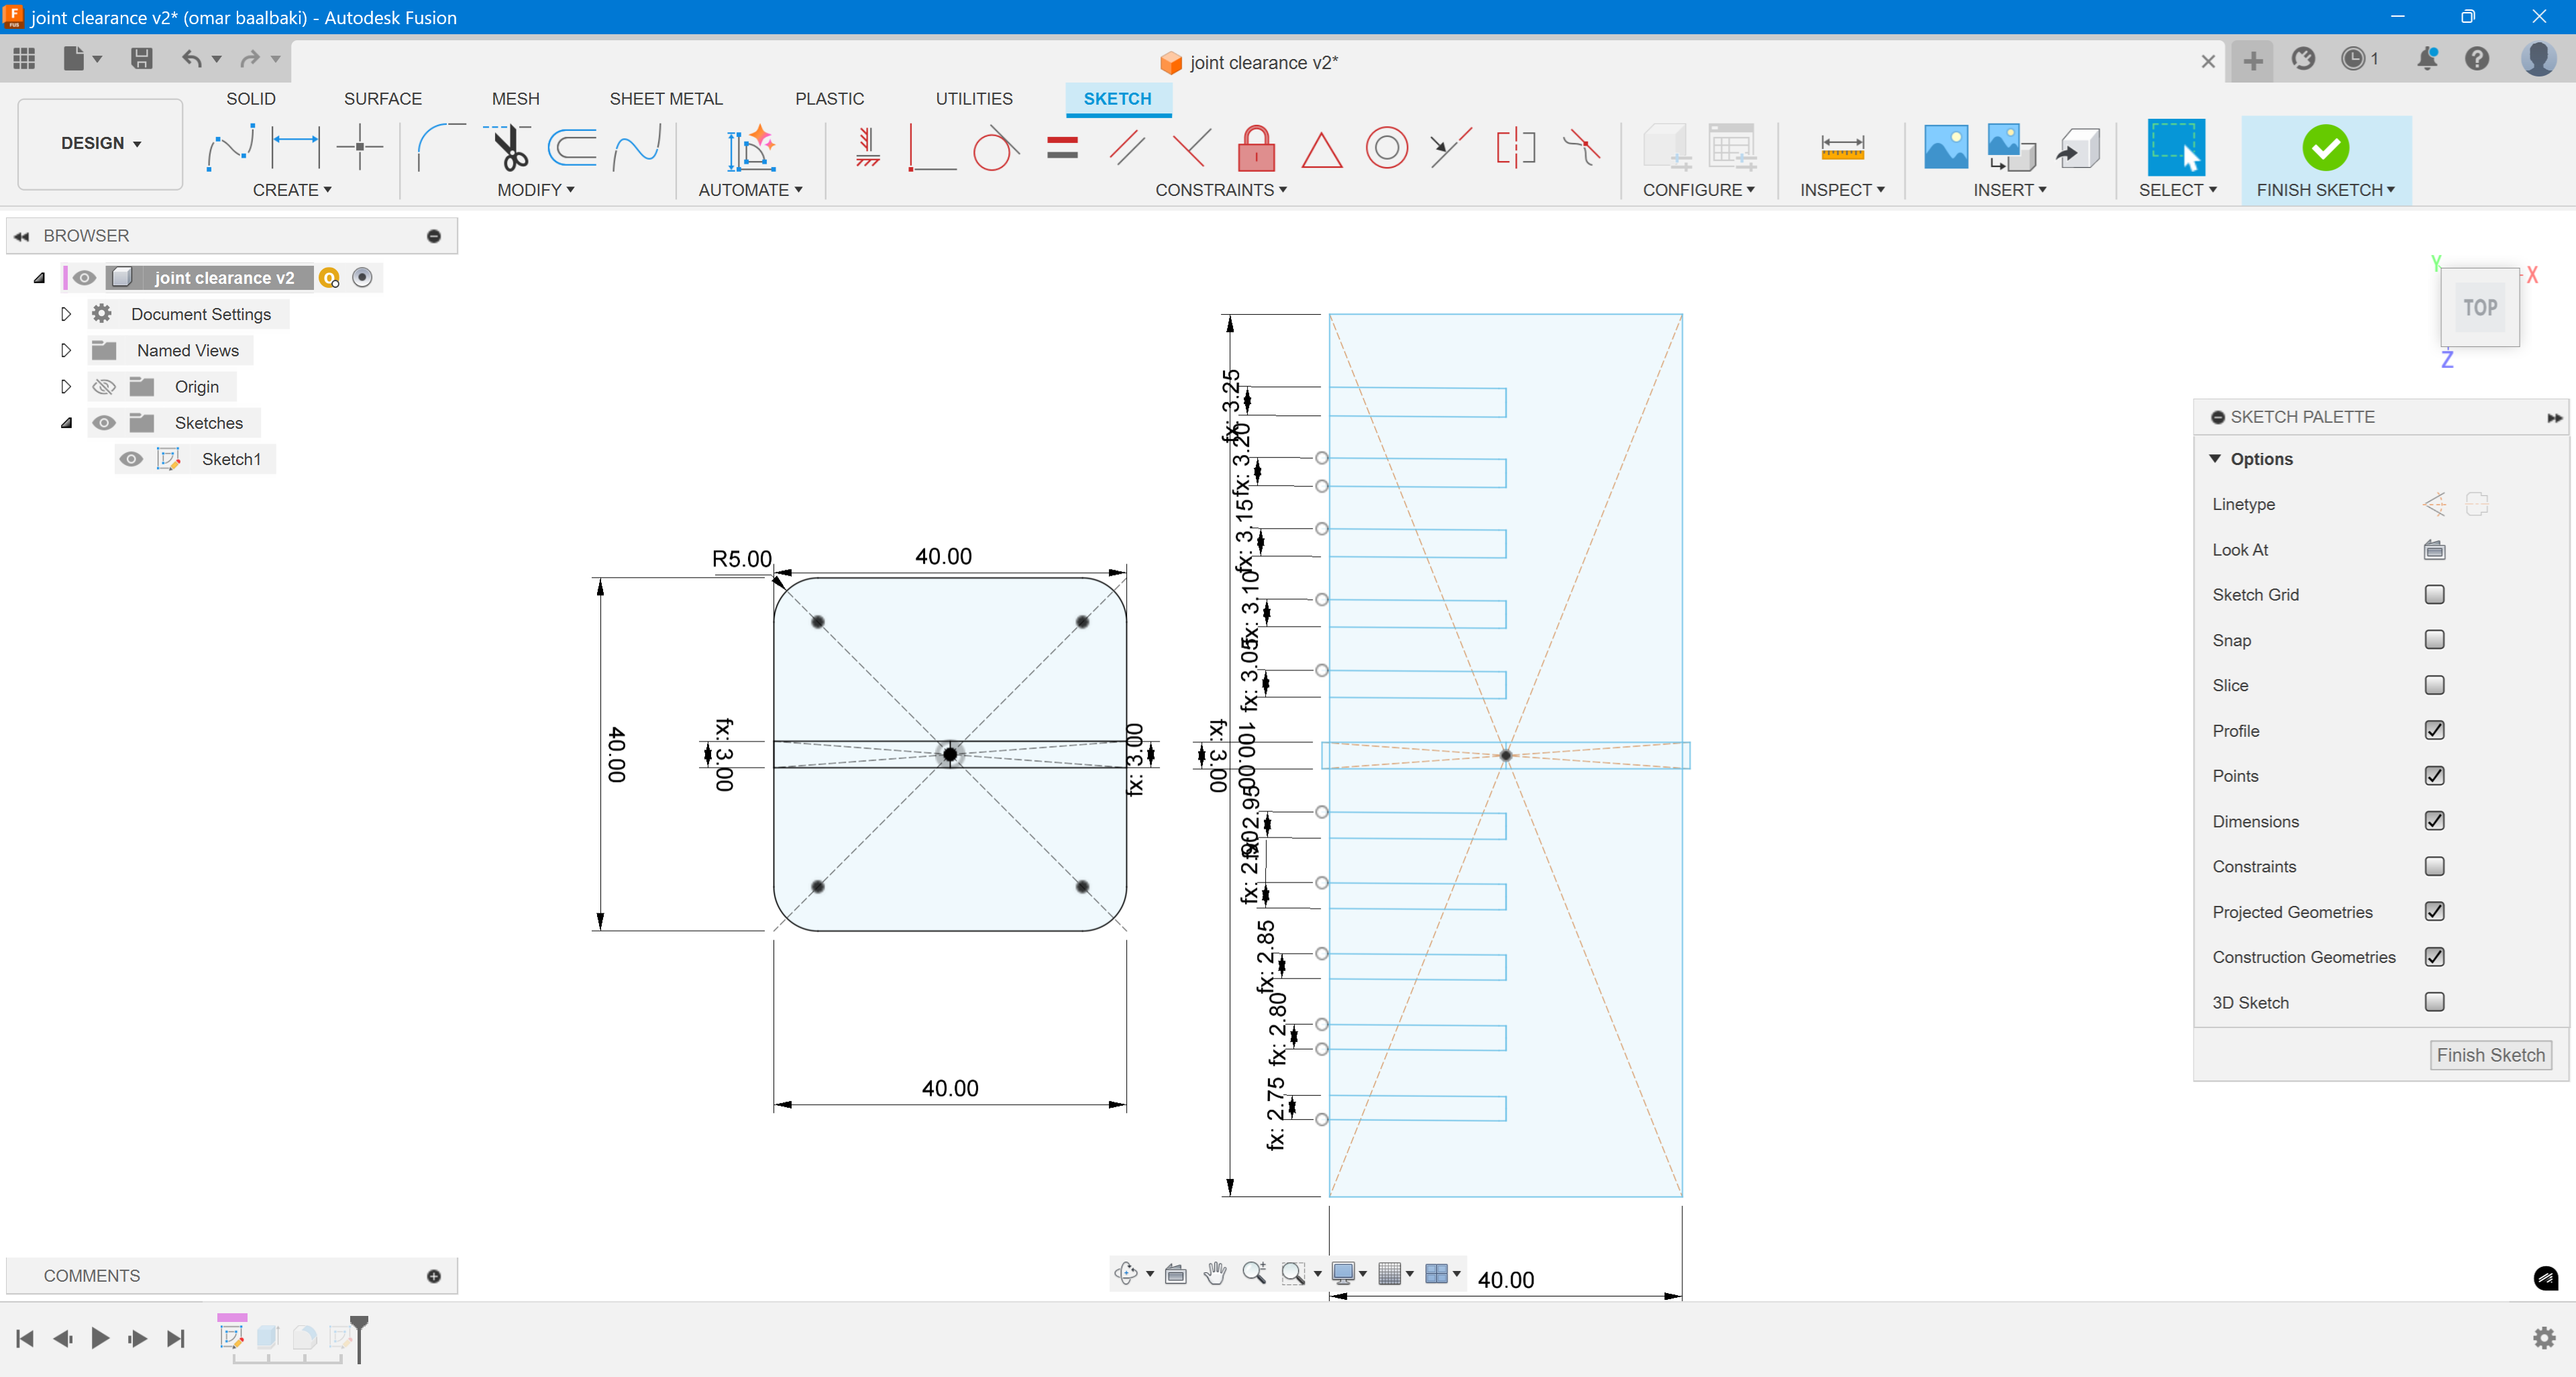
5. Testing Joint Fitment for Parametric Design
- Designed a parametric test piece in Fusion 360 to test material joint fitment.
- Used an initial kerf offset of 0.05 mm, then refined the setting after testing.
- Found that the best kerf offset value was 0.1 mm for both MDF and acrylic, ensuring a snug fit.

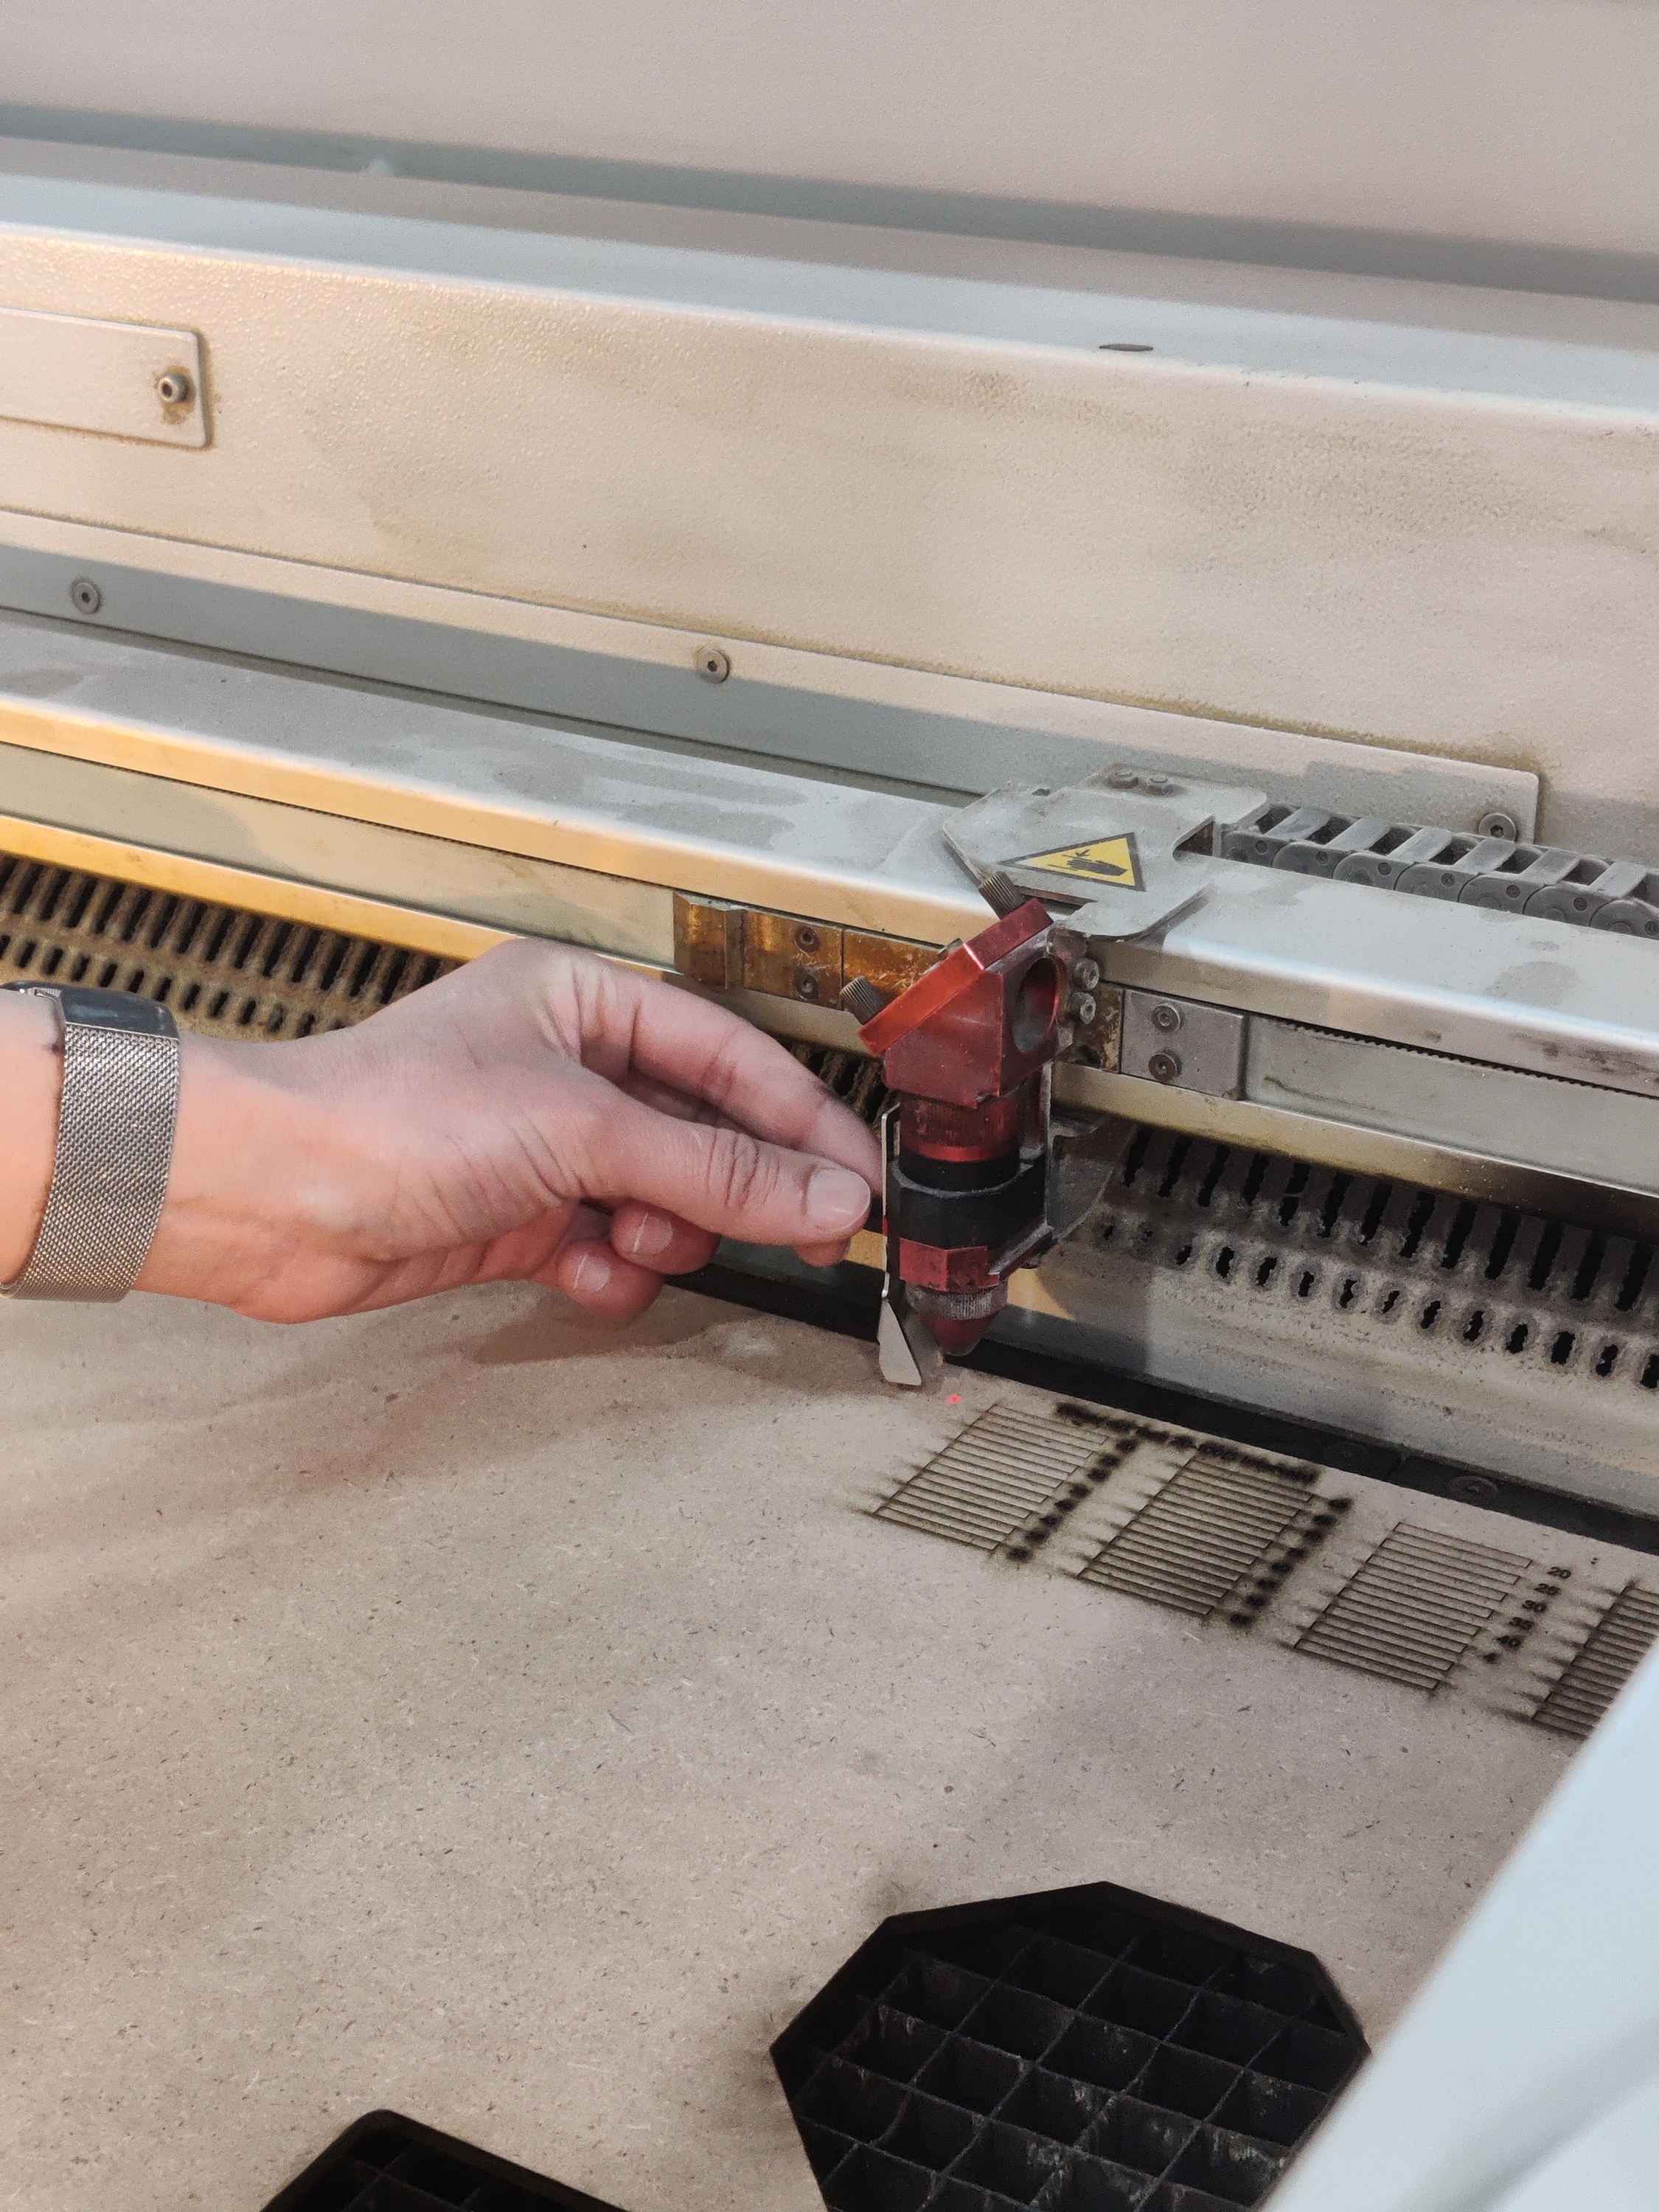
6. Performing Kerf Testing for Precision Cutting
- Designed a kerf test file with 13 squares (each 15x15 mm).
- After cutting, measured the actual cutout size, which resulted in 14.14 mm total width.
- Divided the material loss by the number of squares to determine the kerf per cut.
- Ensured that the final kerf value was accurately set for the machine to maintain precision.

Learning Outcome
Throughout this week, I learned that the laser cutter is a highly powerful and versatile machine capable of producing precise and intricate cuts. However, achieving the best results depends on proper UI settings and correctly configuring the laser source for each material. I also realized that every machine differs, not just based on its model but also due to the age and condition of the laser source, which affects performance. While the process may seem straightforward, calibrating the laser for each material before starting a job is essential to ensure accuracy and achieve the desired output. Additionally, I gained a deeper appreciation for the importance of safety measures, as working with high-powered lasers requires careful handling and strict adherence to safety protocols.