Design/Produce Hall/Barometer Sensor
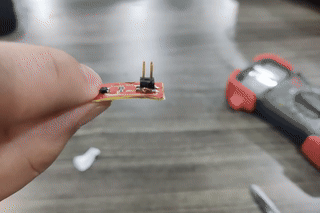
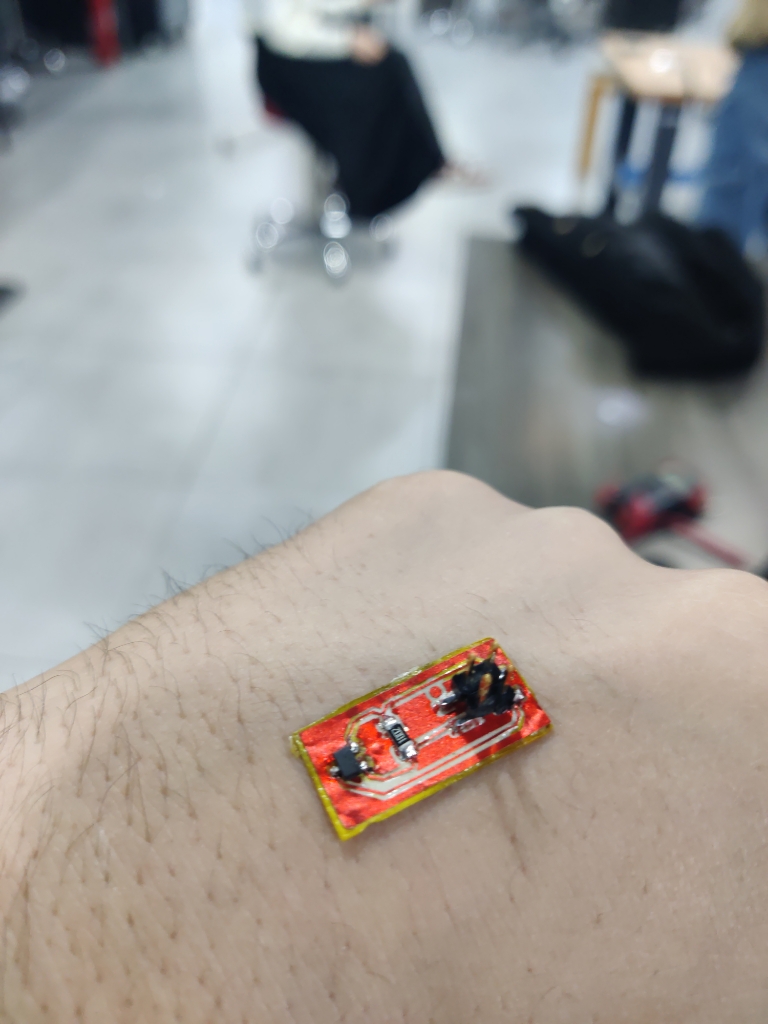
Hero Shot
Summary
For the input device assignment, I designed and fabricated a flexible Hall Effect sensor circuit using KiCad for schematic and PCB design, a UV printer for flexible PCB fabrication, and etching methods for removing excess copper. The result was a lightweight, flexible circuit sticker capable of sensing magnetic fields efficiently, as demonstrated in the final test video.
Work Process Detail
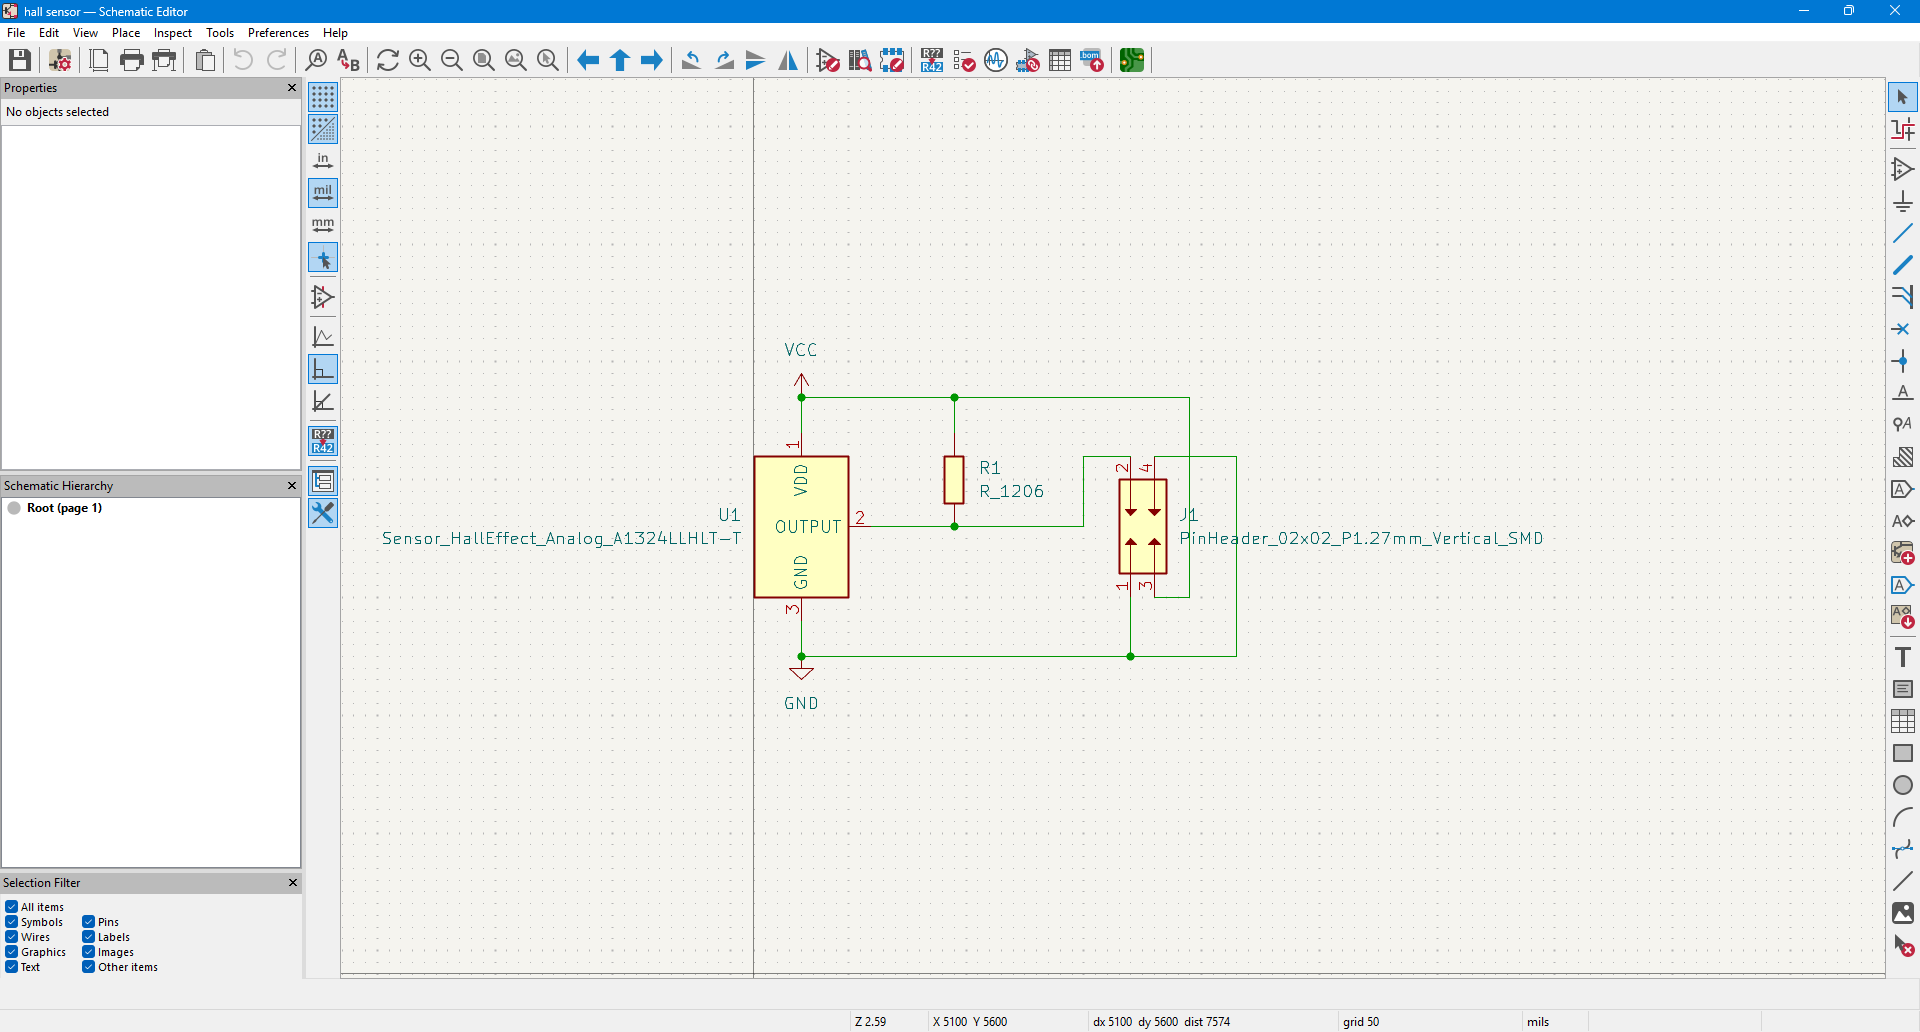
1.Schematic Design in KiCad
- Opened KiCad and designed the schematic for the Hall Effect sensor circuit.
- Ensured the schematic aligned perfectly with the available Fab Lab inventory components (using correct footprints and symbol libraries).
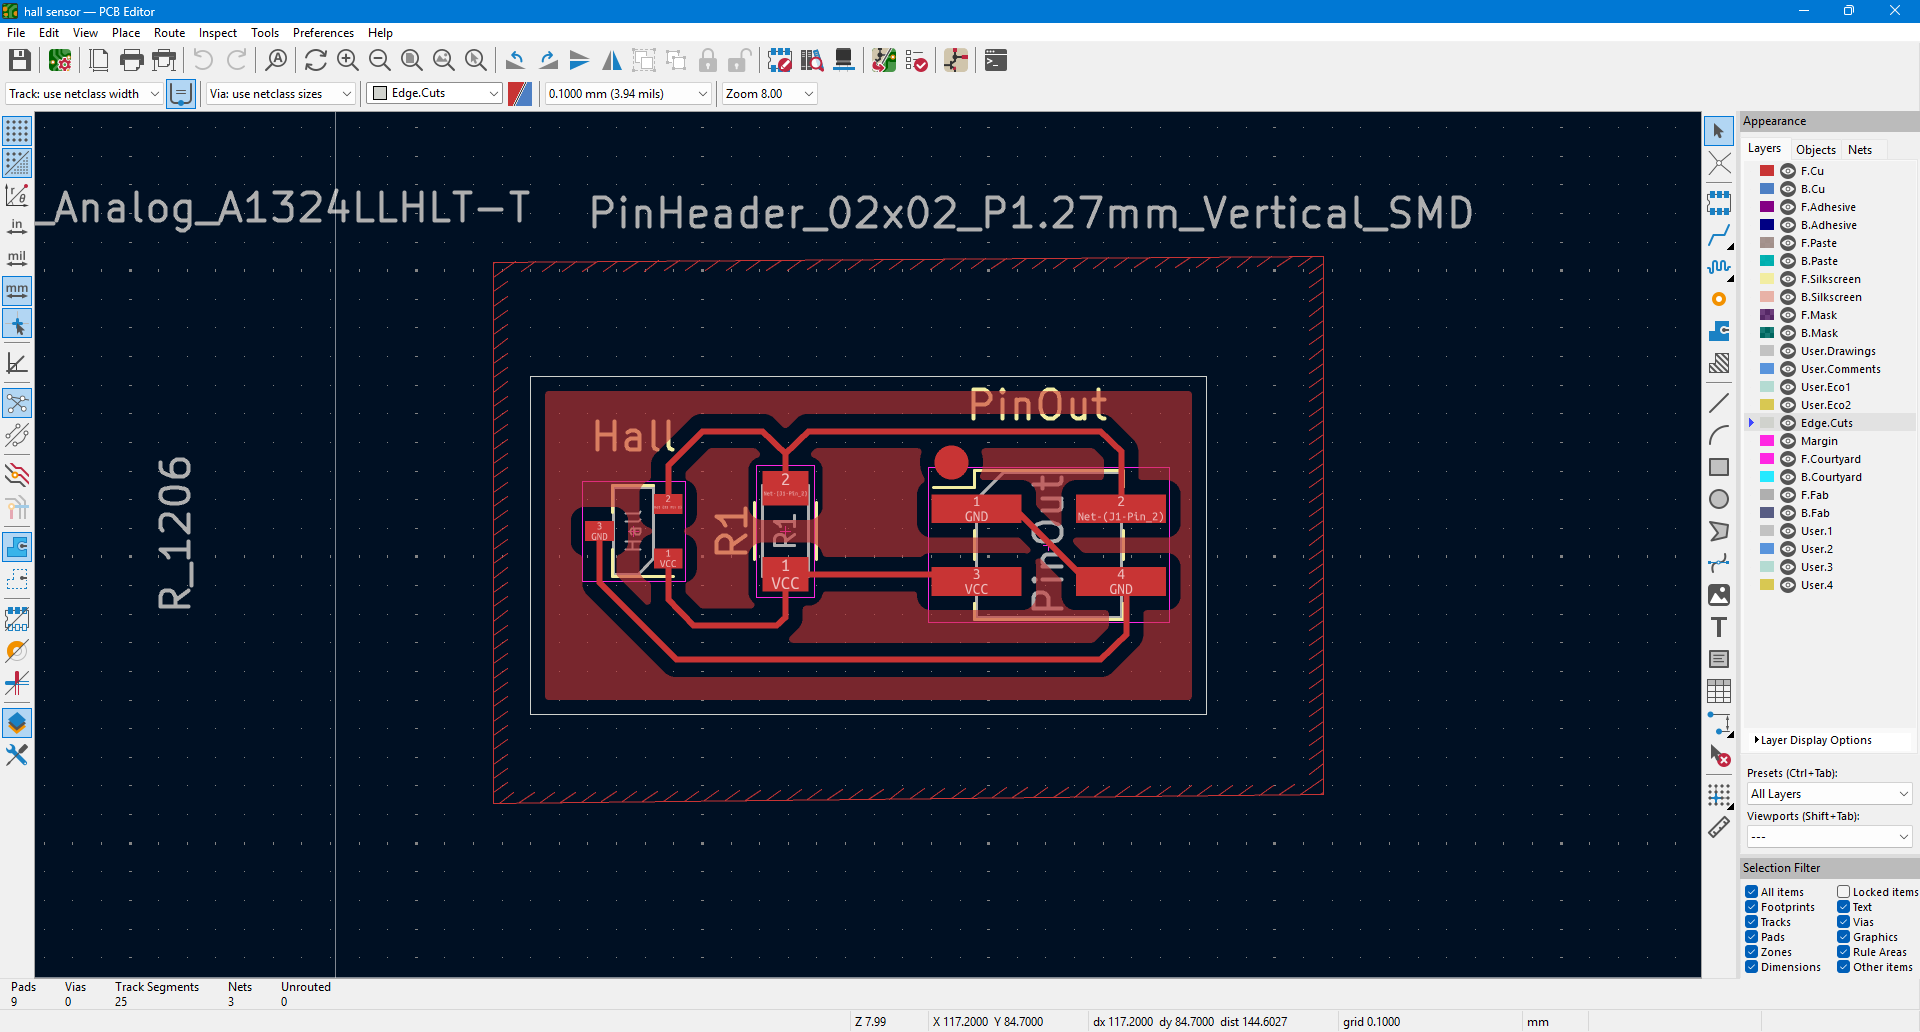
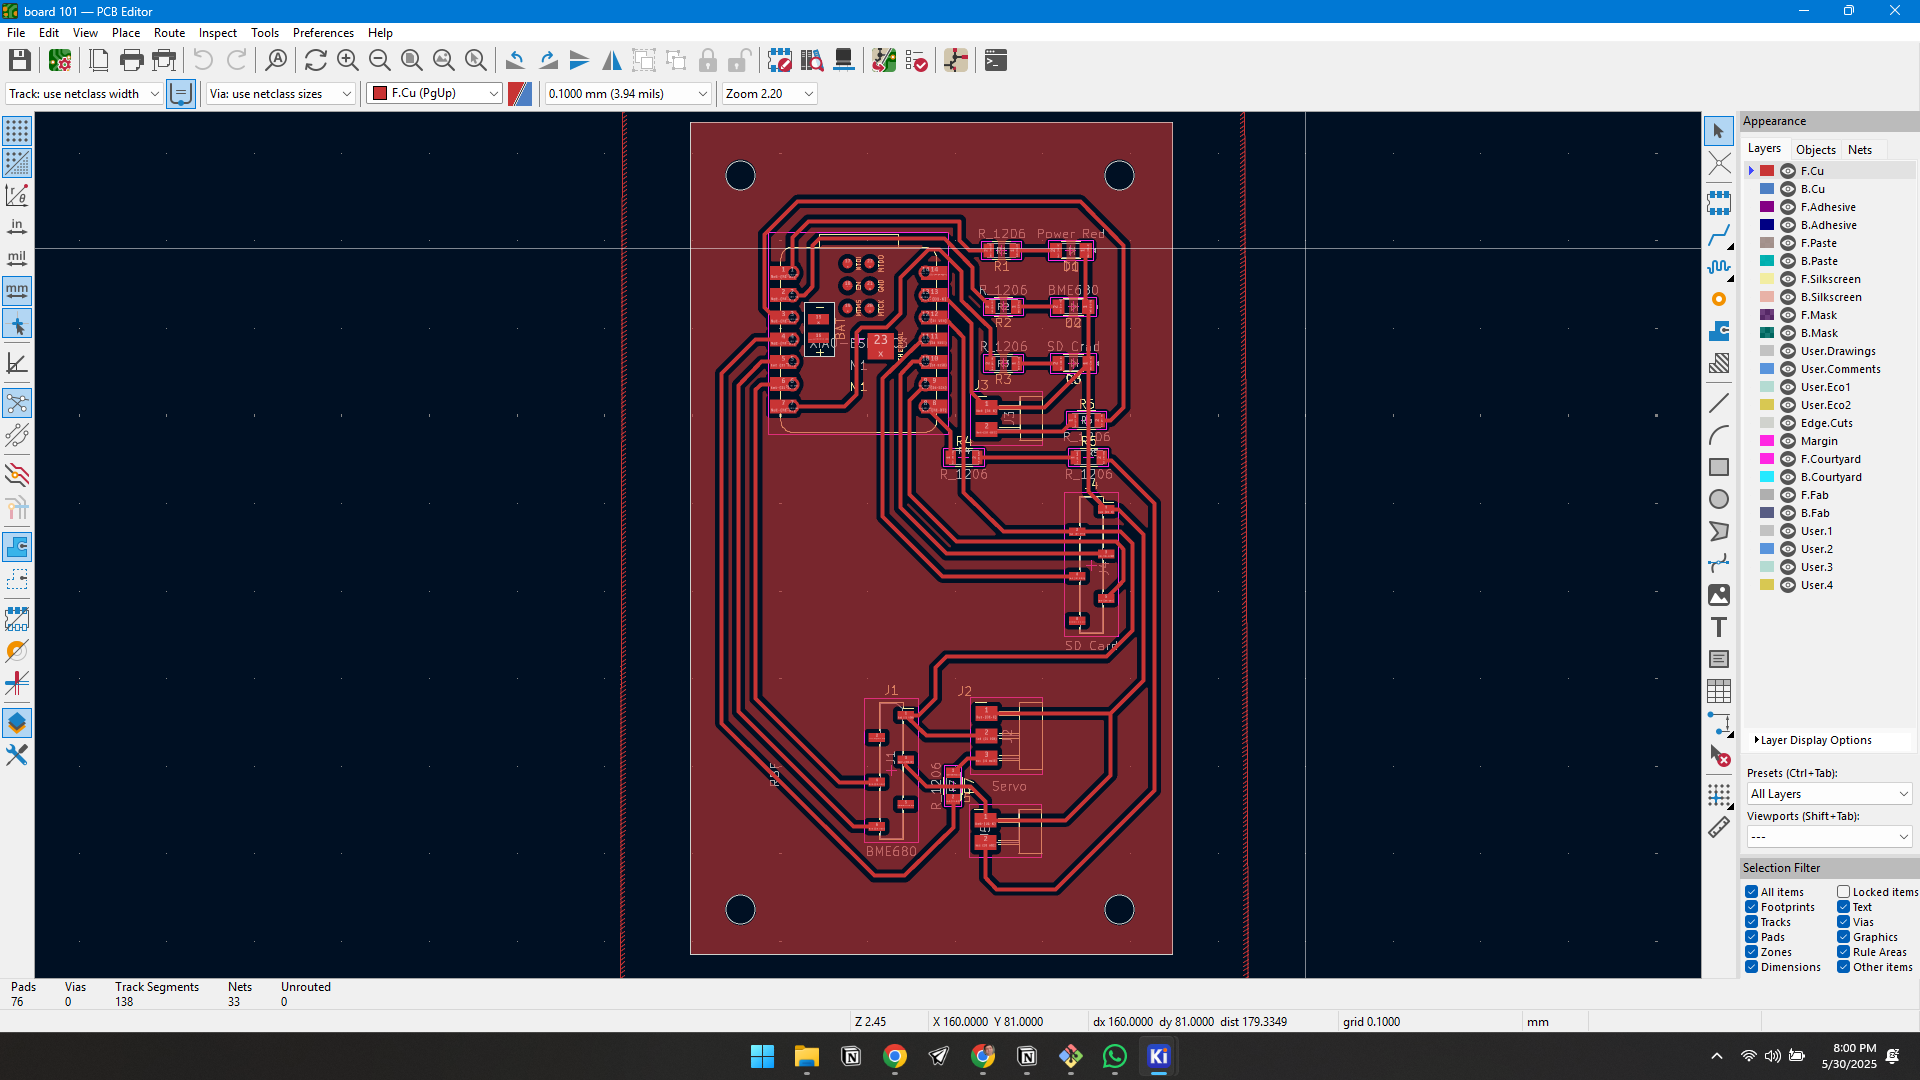
2. PCB Layout
- Moved to the PCB Editor in KiCad.
- Placed and routed components carefully, optimizing for small size and flexibility.
- Verified footprint alignment and proper net connections.

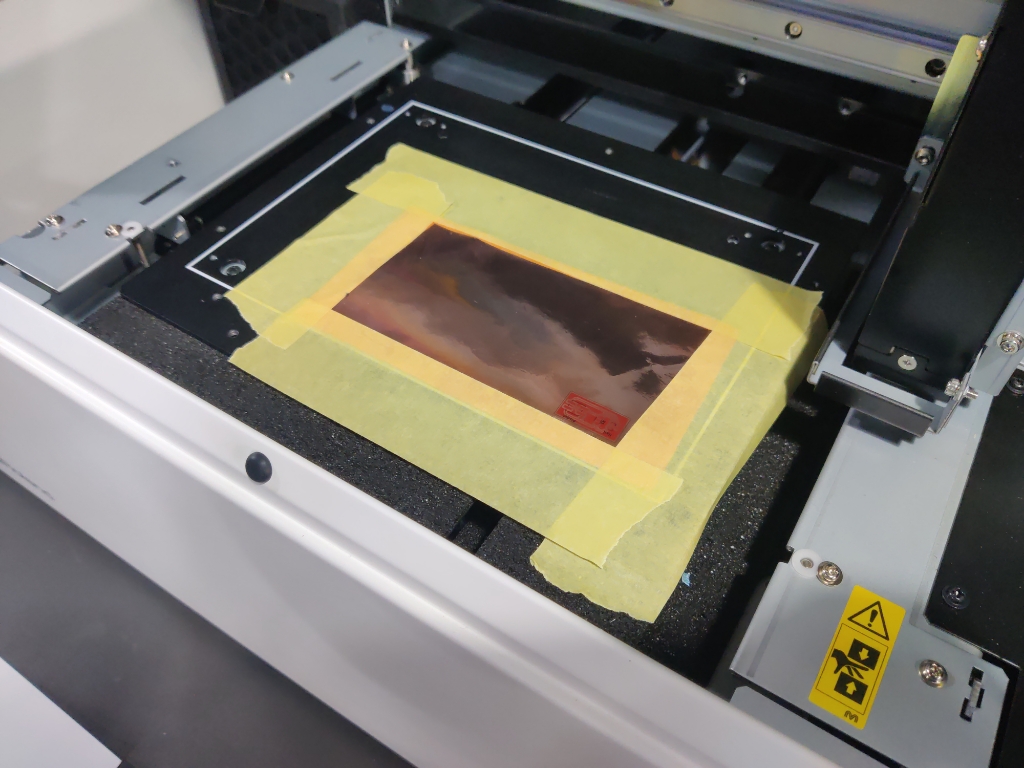
3. Printing the Flexible PCB
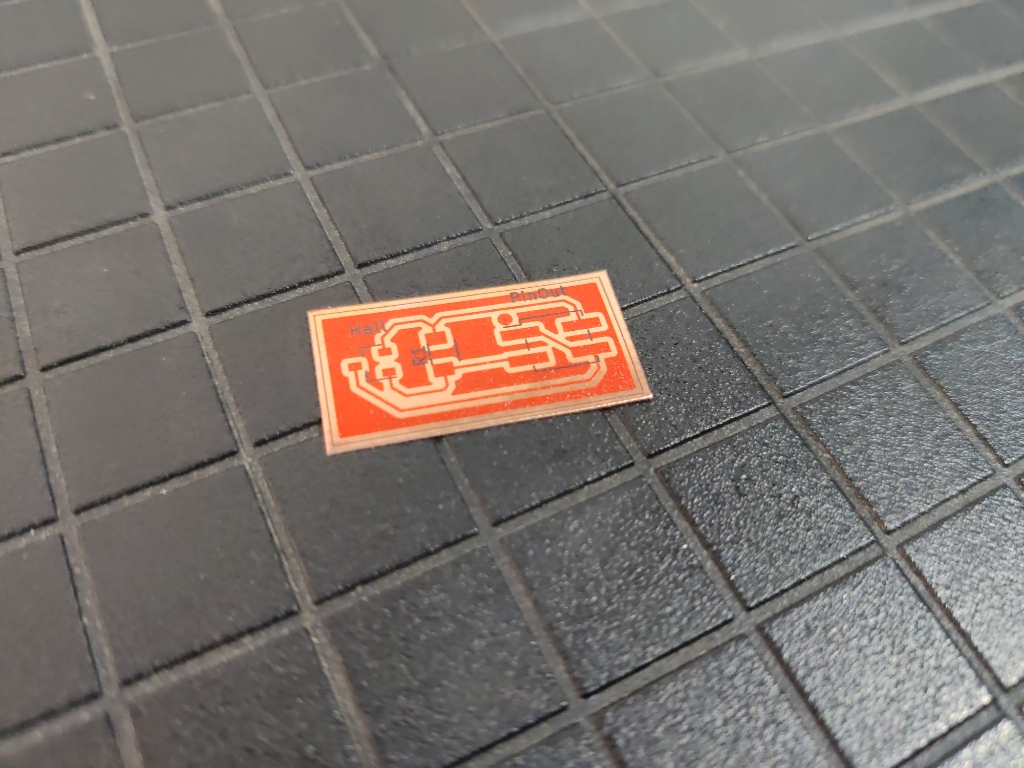
- Exported the PCB design and printed it using a UV printer onto copper tape.
- This method allowed the board to be flexible and lightweight, perfect for compact or curved applications.

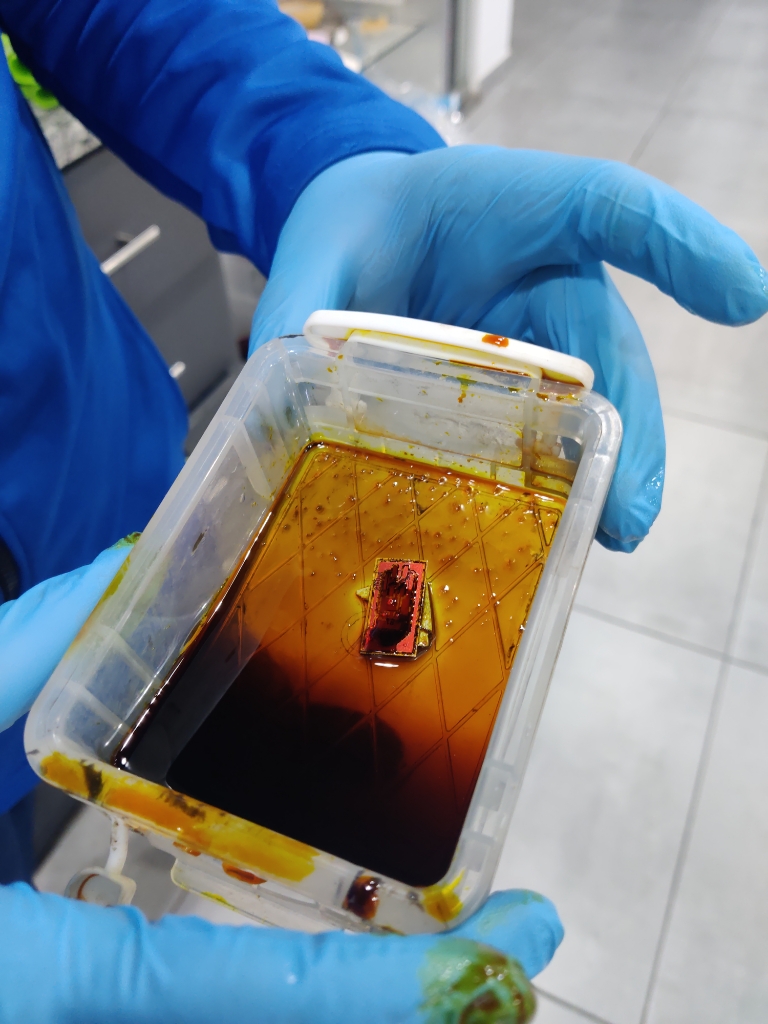
4. Etching Process
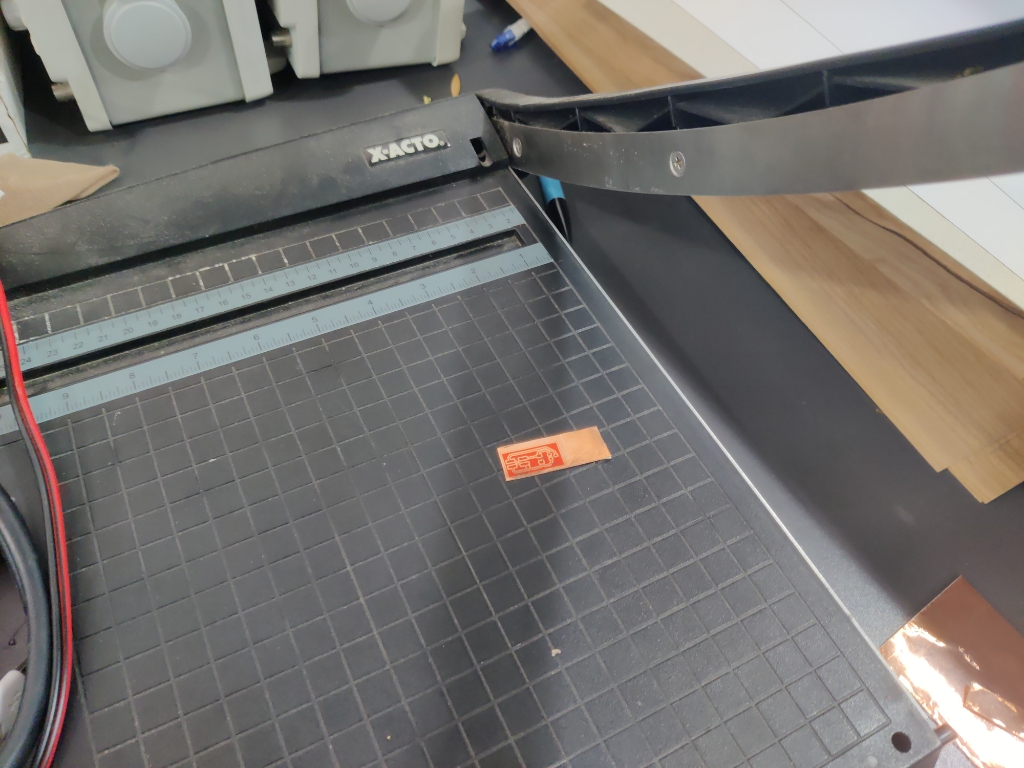
- Cut the printed copper tape to the exact required size.
- Performed chemical etching to remove the unwanted copper, leaving only the circuit traces.
- Carefully cleaned and prepared the etched flexible board for soldering.

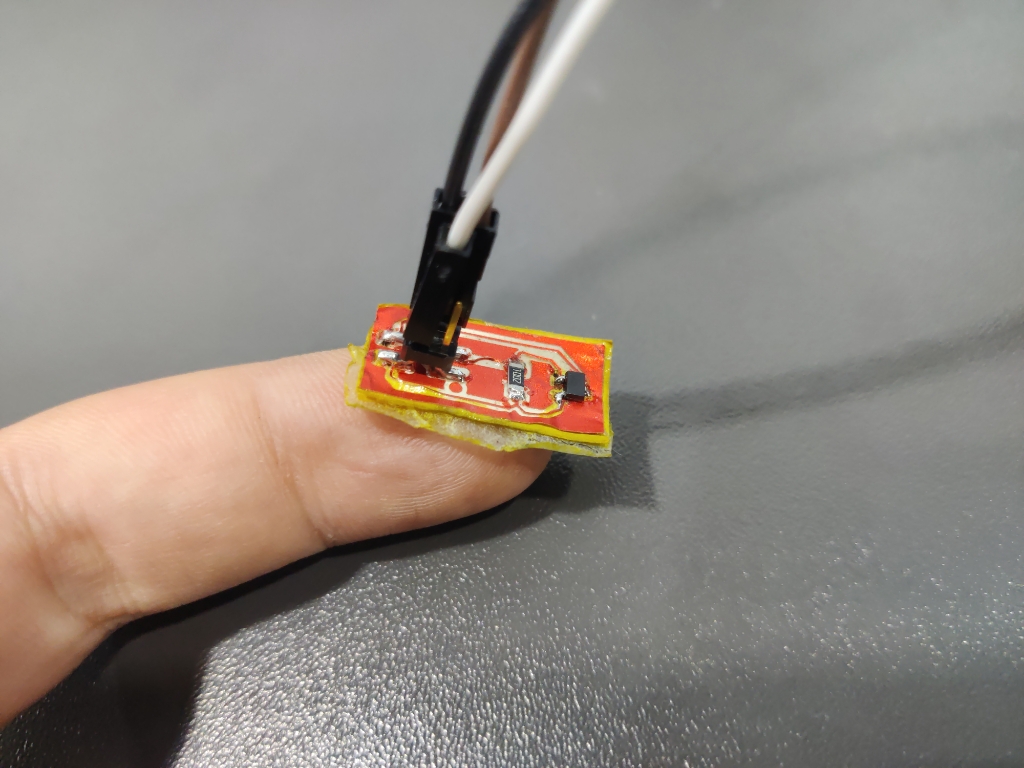
5. Component Assembly
- Soldered the Hall Effect sensor and supporting components directly onto the flexible PCB.
- Ensured connections were solid despite the flexible substrate by using proper soldering techniques.


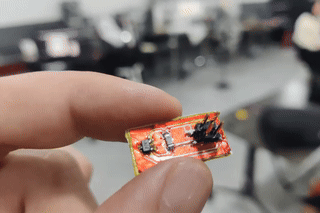
6. Testing
- Verified circuit functionality using basic magnetic field tests.
- As shown in the video, the flexible PCB performed well, withstanding bending and mechanical stress without impacting performance.
7.Final Project Input Sensor Integration with a Microcontroller:
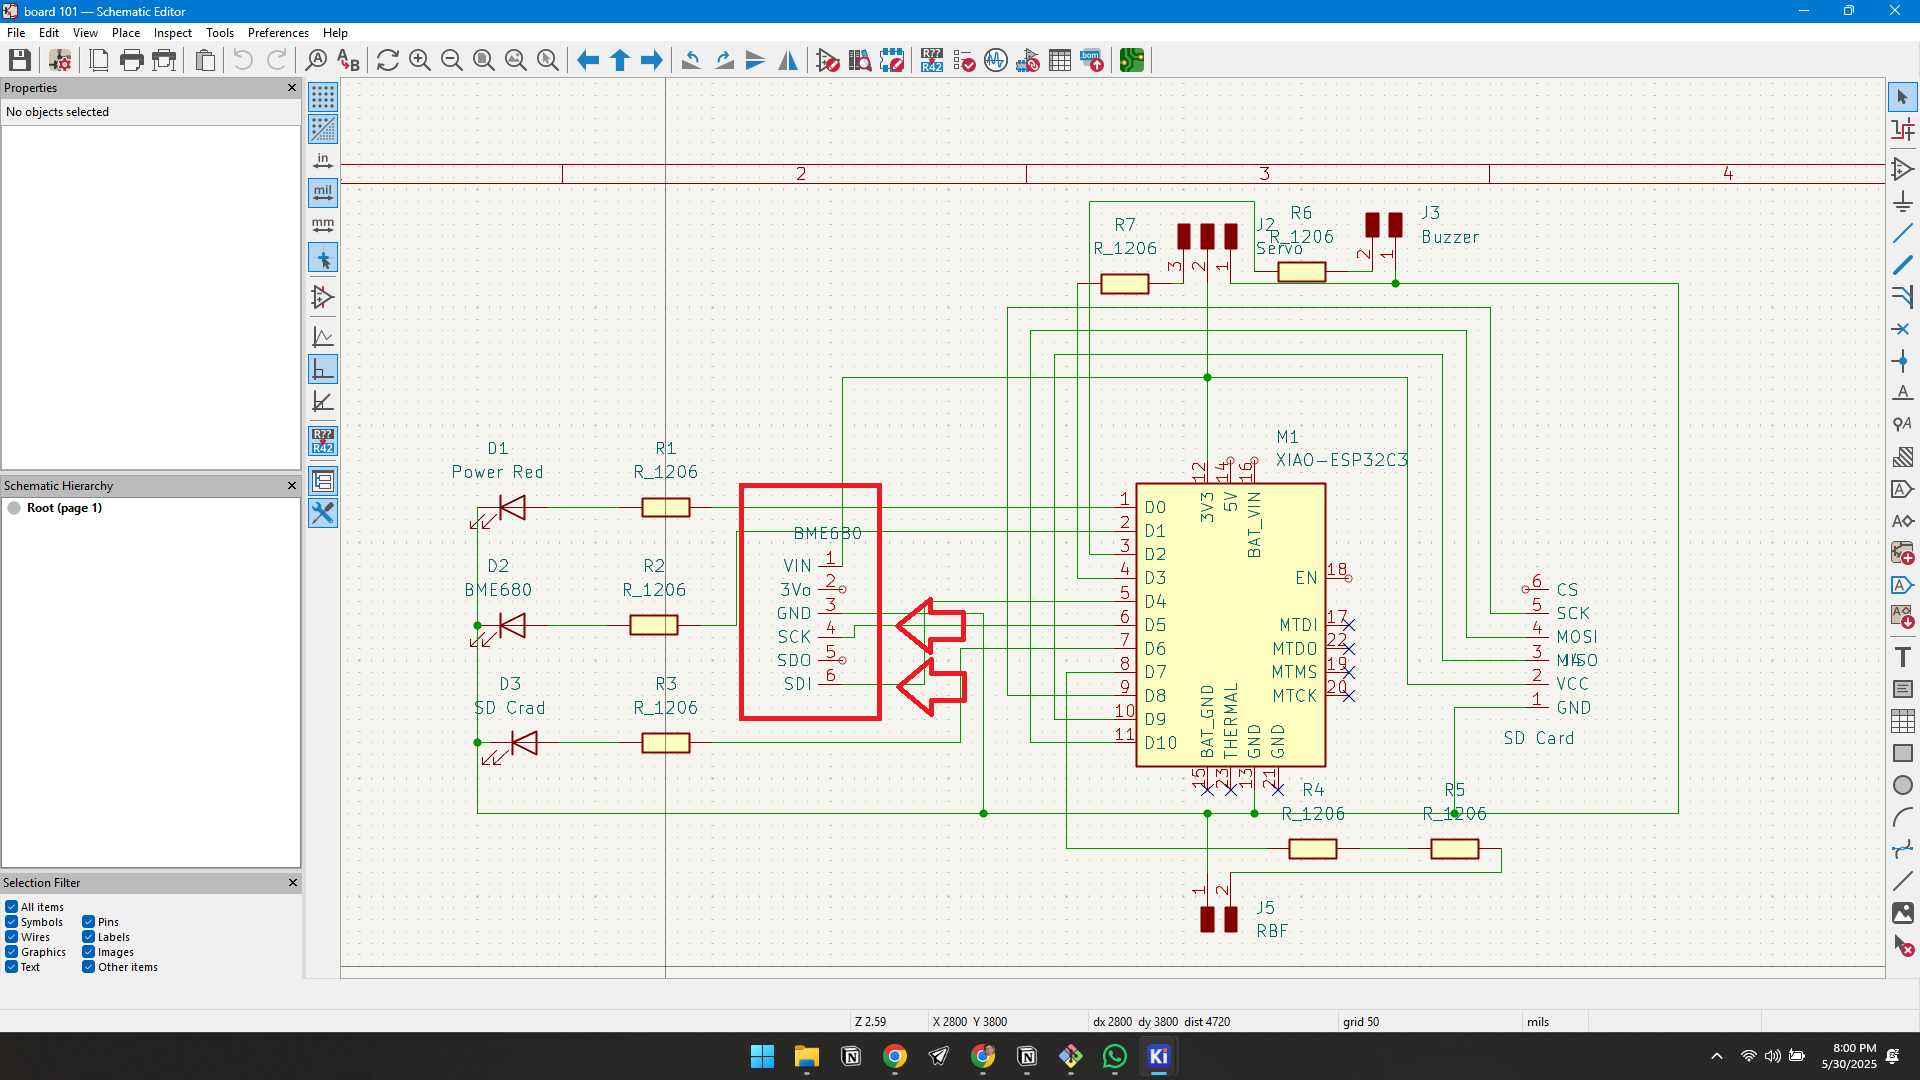
To expand this week’s work, I integrated a barometric pressure sensor (BME680) with the XIAO ESP32-C3 microcontroller. The goal was to measure altitude and air pressure in real-time, which will be a core part of my final project’s parachute deployment logic.
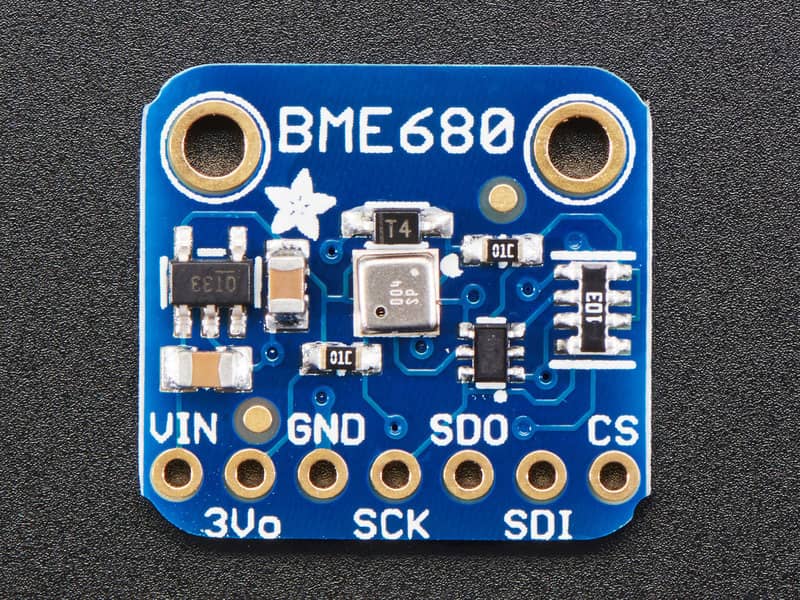
- Designed a custom PCB that accommodates the BME680 sensor and pin headers compatible with the XIAO ESP32-C3.
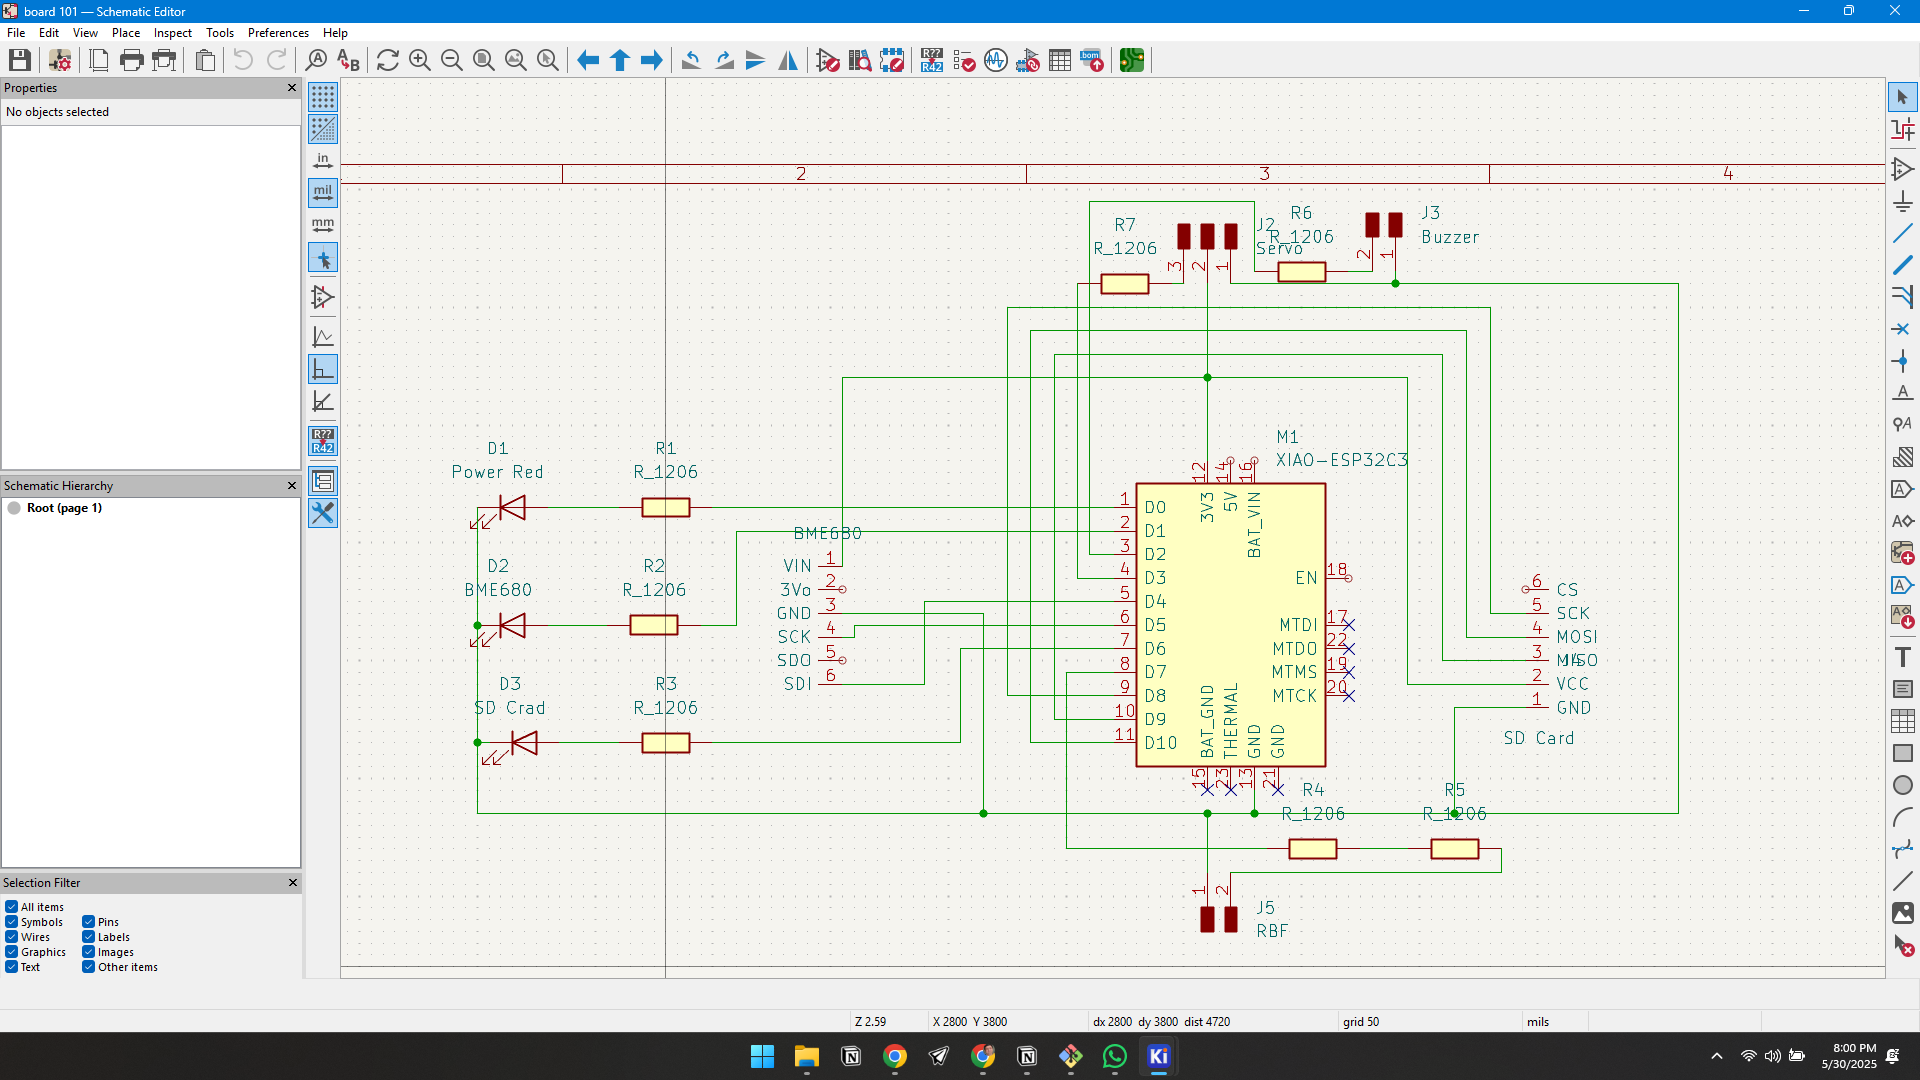
- Used the Adafruit BME680 Arduino Library to simplify sensor communication via I2C.
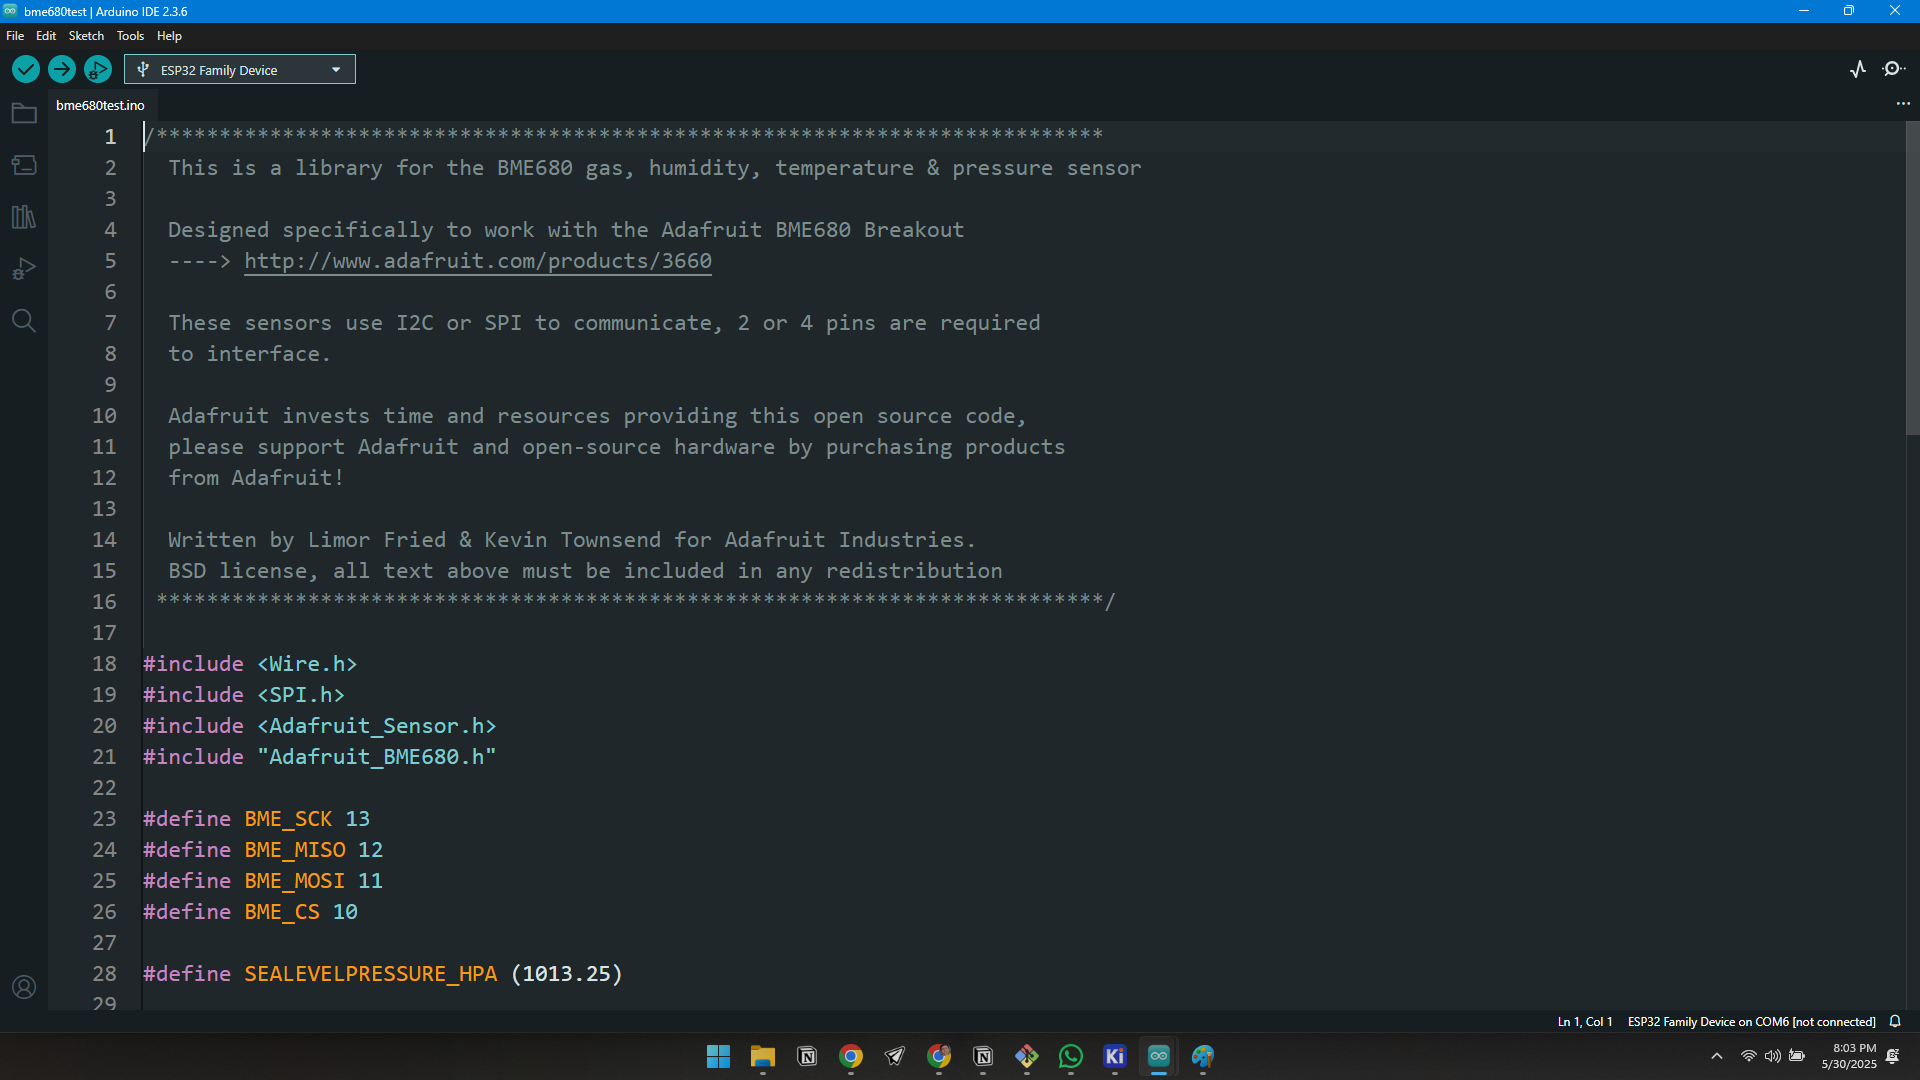
/***************************************************************************
  This is a library for the BME680 gas, humidity, temperature & pressure sensor

  Designed specifically to work with the Adafruit BME680 Breakout
  ----> http://www.adafruit.com/products/3660

  These sensors use I2C or SPI to communicate, 2 or 4 pins are required
  to interface.

  Adafruit invests time and resources providing this open source code,
  please support Adafruit and open-source hardware by purchasing products
  from Adafruit!

  Written by Limor Fried & Kevin Townsend for Adafruit Industries.
  BSD license, all text above must be included in any redistribution
 ***************************************************************************/

#include <Wire.h>
#include <SPI.h>
#include <Adafruit_Sensor.h>
#include "Adafruit_BME680.h"

#define BME_SCK 13
#define BME_MISO 12
#define BME_MOSI 11
#define BME_CS 10

#define SEALEVELPRESSURE_HPA (1013.25)

Adafruit_BME680 bme(&Wire); // I2C
//Adafruit_BME680 bme(&Wire1); // example of I2C on another bus
//Adafruit_BME680 bme(BME_CS); // hardware SPI
//Adafruit_BME680 bme(BME_CS, BME_MOSI, BME_MISO,  BME_SCK);

void setup() {
  Serial.begin(9600);
  while (!Serial);
  Serial.println(F("BME680 test"));

  if (!bme.begin()) {
    Serial.println("Could not find a valid BME680 sensor, check wiring!");
    while (1);
  }

  // Set up oversampling and filter initialization
  bme.setTemperatureOversampling(BME680_OS_8X);
  bme.setHumidityOversampling(BME680_OS_2X);
  bme.setPressureOversampling(BME680_OS_4X);
  bme.setIIRFilterSize(BME680_FILTER_SIZE_3);
  bme.setGasHeater(320, 150); // 320*C for 150 ms
}

void loop() {
  if (! bme.performReading()) {
    Serial.println("Failed to perform reading :(");
    return;
  }
  Serial.print("Temperature = ");
  Serial.print(bme.temperature);
  Serial.println(" *C");

  Serial.print("Pressure = ");
  Serial.print(bme.pressure / 100.0);
  Serial.println(" hPa");

  Serial.print("Humidity = ");
  Serial.print(bme.humidity);
  Serial.println(" %");

  Serial.print("Gas = ");
  Serial.print(bme.gas_resistance / 1000.0);
  Serial.println(" KOhms");

  Serial.print("Approx. Altitude = ");
  Serial.print(bme.readAltitude(SEALEVELPRESSURE_HPA));
  Serial.println(" m");

  Serial.println();
  delay(2000);
}- Connected the SCL, SDA, GND, and VCC lines properly between the sensor and the microcontroller.
Official Adafruit Tutorial :
https://learn.adafruit.com/adafruit-bme680-humidity-temperature-barometic-pressure-voc-gas/overview
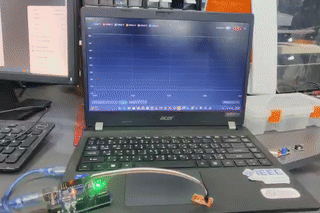
- Verified communication using Serial Monitor and confirmed live readings of temperature, pressure, altitude, and gas resistance.
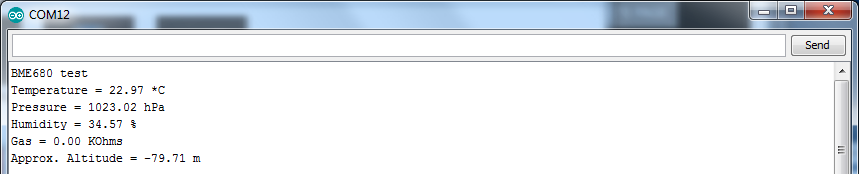
- Programmed the ESP32-C3 to log data at 1-second intervals for real-time monitoring.
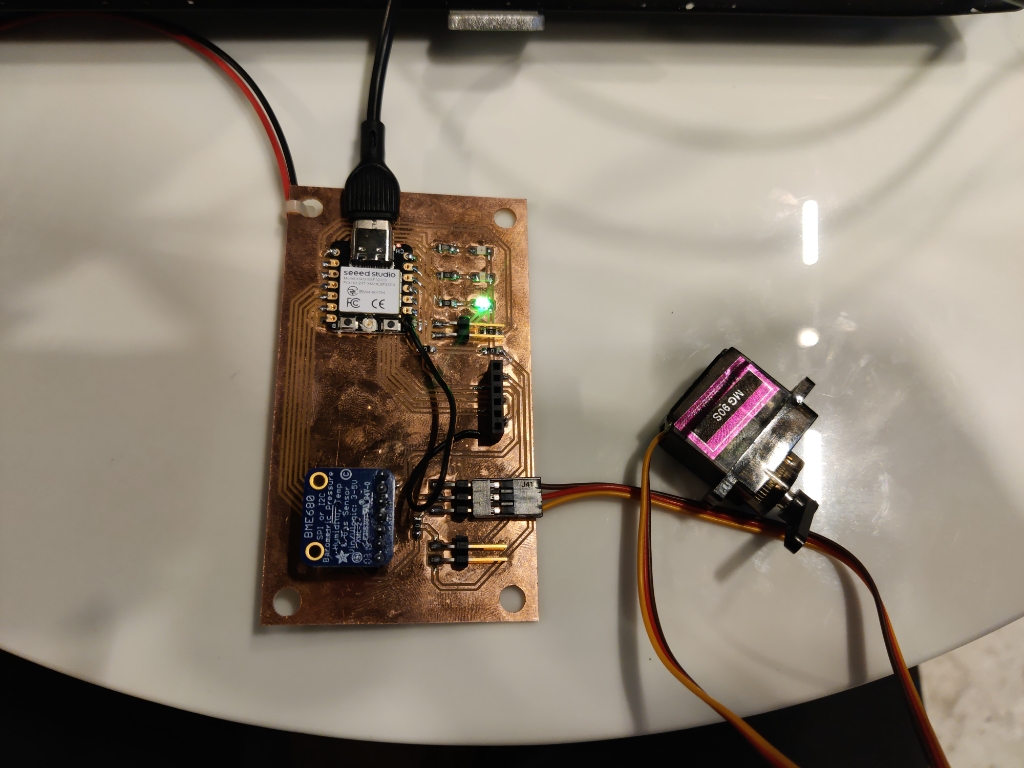
- This integration will serve as the main sensing unit in my rocket’s data acquisition and parachute deployment system.
Learning Outcome
Through this project, I enhanced my skills in:
- KiCad schematic and PCB design workflows.
- Flexible electronics fabrication using UV printing and etching techniques.
- Precision soldering on flexible materials.
- Understanding the practical integration of Hall Effect sensors for magnetic field sensing in lightweight, flexible applications.
Additionally, I learned how to adapt the manufacturing process to produce innovative, durable designs suitable for real-world dynamic environments.
