* Compare as many tool options as possible.. * Document your work to the group work page and reflect on your individual page what you learned.
Individual Assignment
* Write an application for the embedded board that you made that interfaces a user with an input and/or output device(s).
checklist
☑ Linked to the group assignment page. ☑ Documented your process. ☑ Explained the UI that you made and how you did it. ☑ Explained how your application communicates with your embedded microcontroller board. ☑ Explained any problems you encountered and how you fixed them. ☑ Included original source code (or a screenshot of the app code if that's not possible). ☑ Included a ‘hero shot’ of your application running and communicating with your board.
Write an application for the embedded board that you made that interfaces a user with an input and/or output device(s).
At the beginning, as I am doing my group assignment using PROCESSING software, I am actually planned to complete my individual assignment using back Processing. Unfortunately, the plan never go well, as I am running out of time to complete my tasks on both working and studying, I have decided to accept my Fab Academy partner - Florimond Chu's advice on using BLYNK IOT APP to complete my this week assignment. The BLYNK IOT APP is a platform that allows users to easily create mobile applications for controlling and monitoring microcontrollers like the SEEED Xiao ESP32C3 using a drag-and-drop interface. It offers a library of customizable widgets, including buttons, sliders, graphs, and gauges, to suit various project needs. To get started with Blynk, you need to create an account, download the Blynk app on your mobile device, and set up a new project. Each project includes a mobile interface and a hardware component. Blynk offers various libraries and APIs that enable your hardware to connect to the Blynk Cloud, establishing two-way communication between your device and the app. Through the app's widgets, you can control hardware, view sensor data, and receive alerts or notifications. Additionally, Blynk supports project sharing, allowing collaboration on IoT solutions with others.
Quickstart - Set up Arduino IDE to work with Blynk
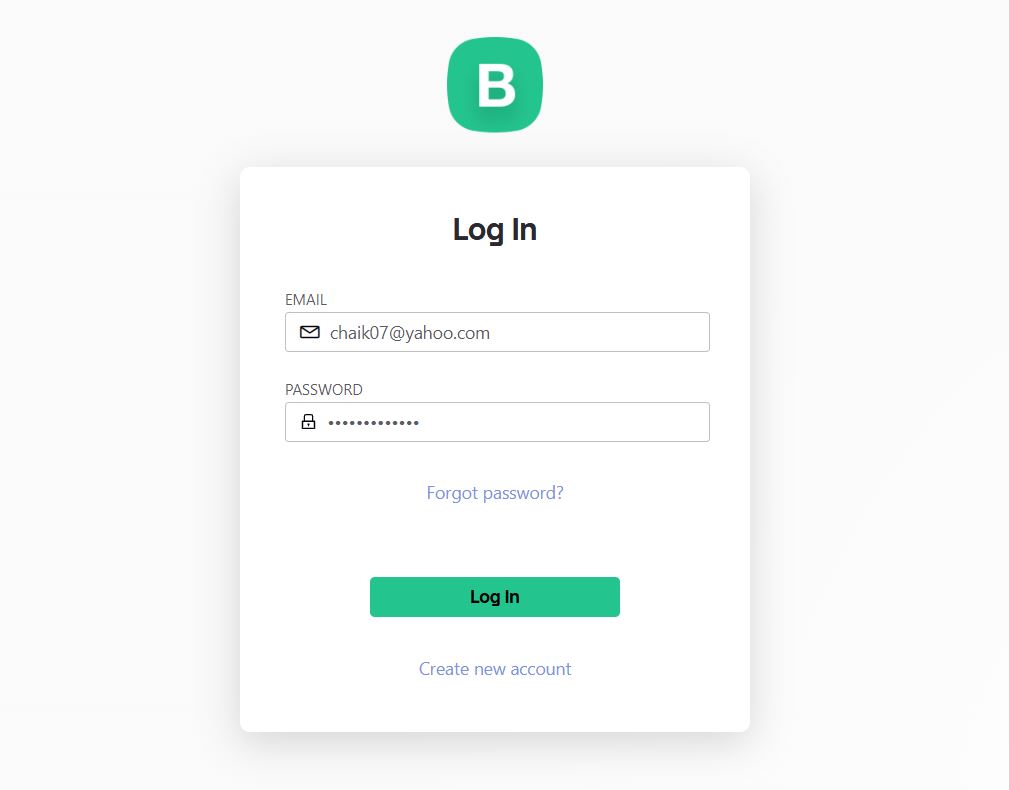
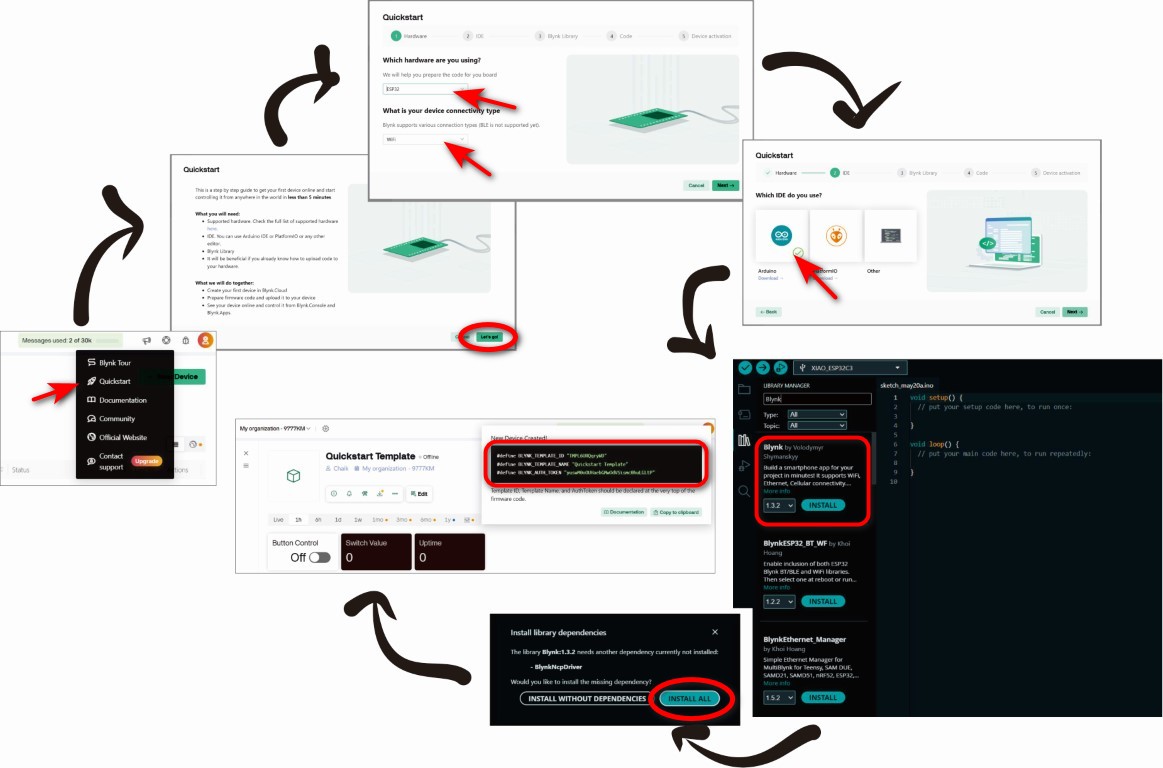
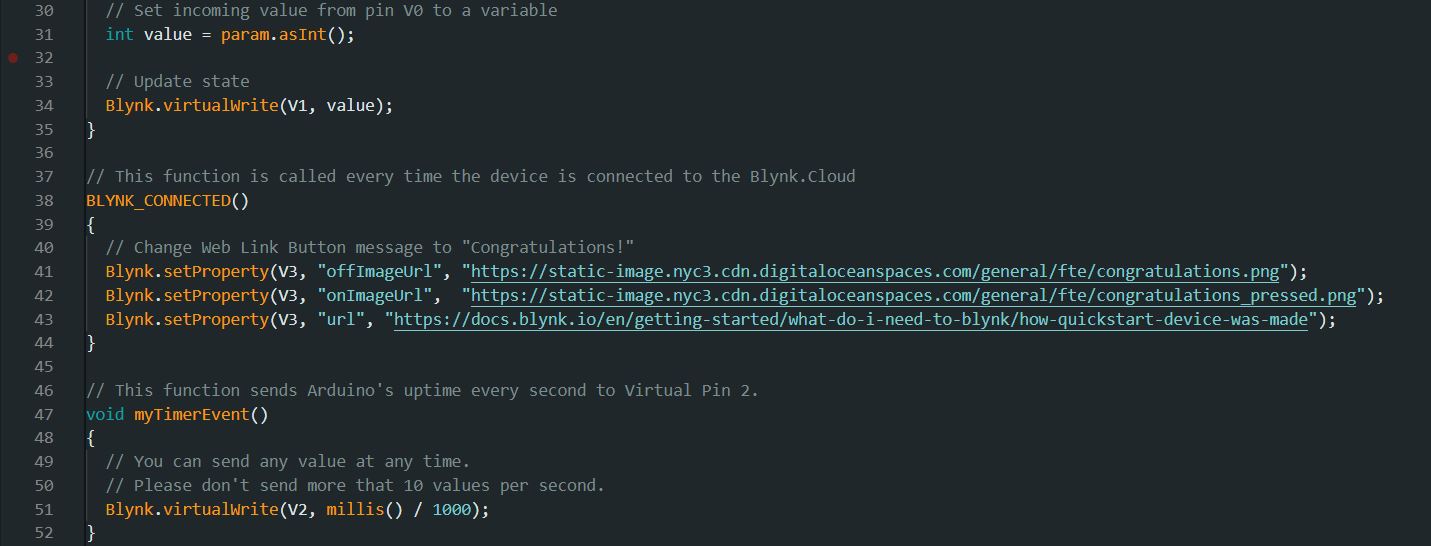
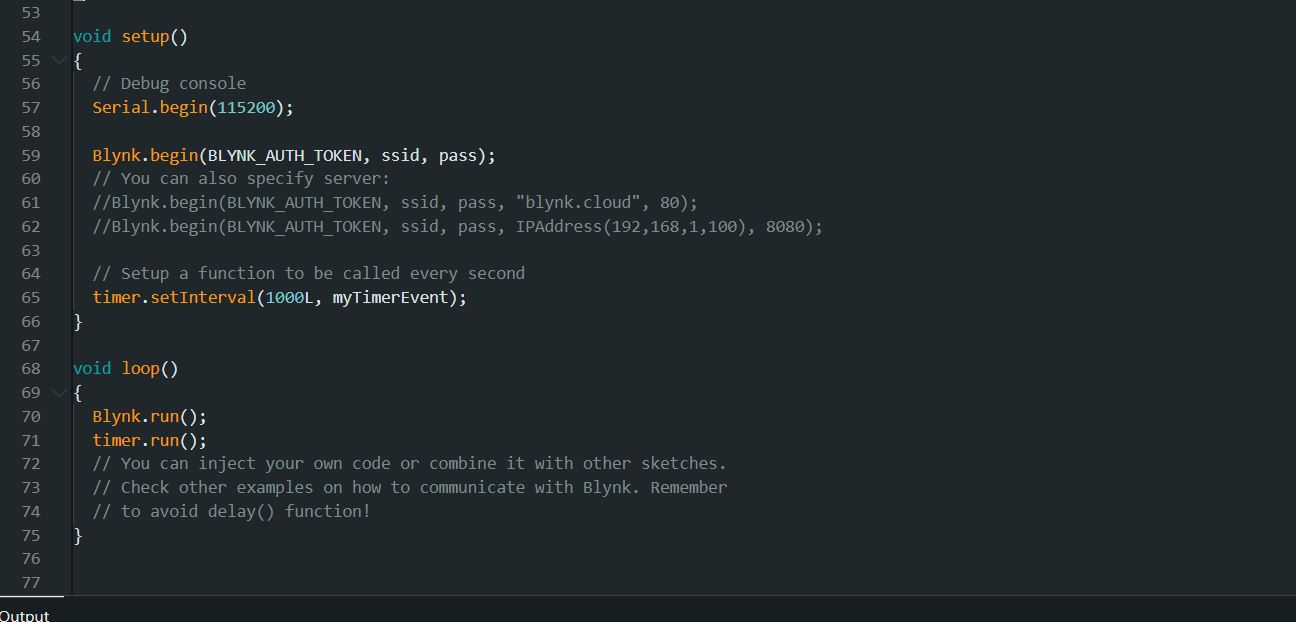
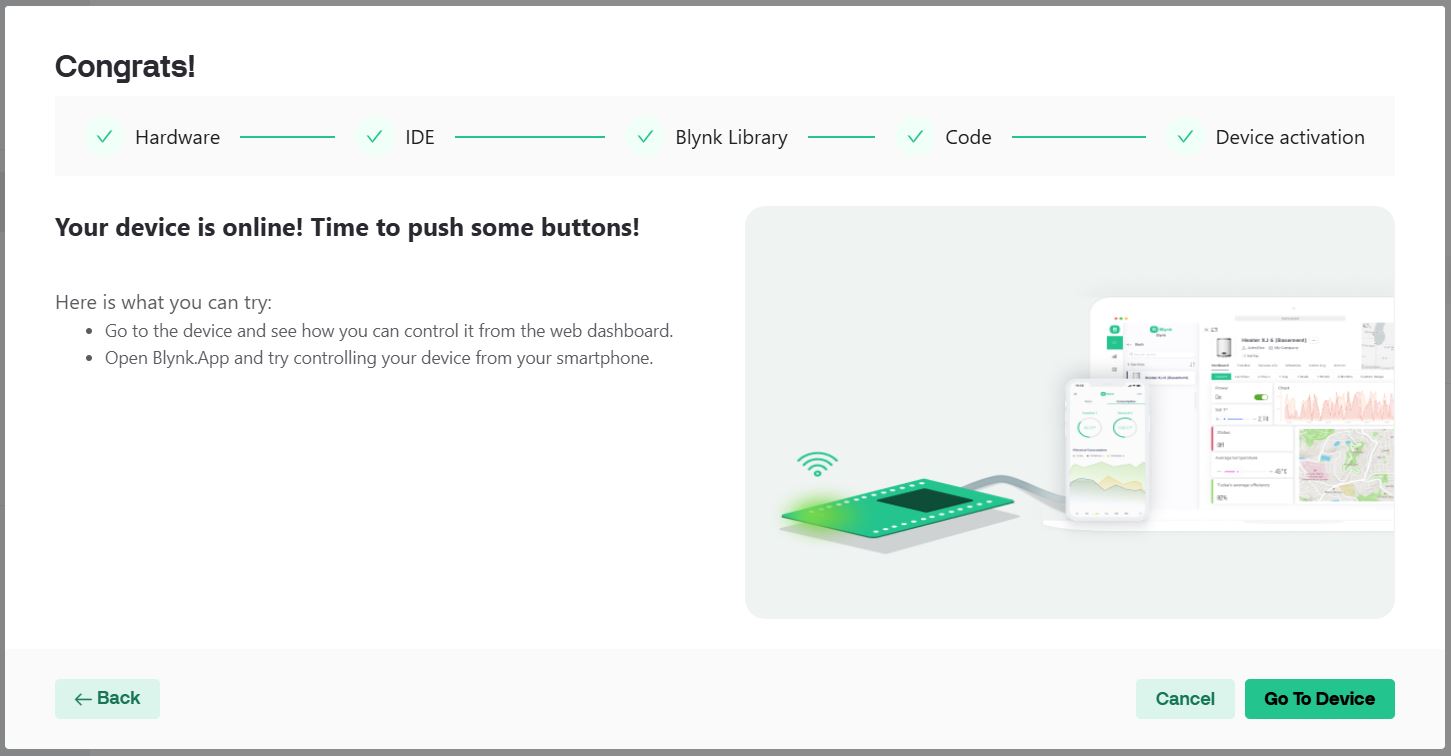
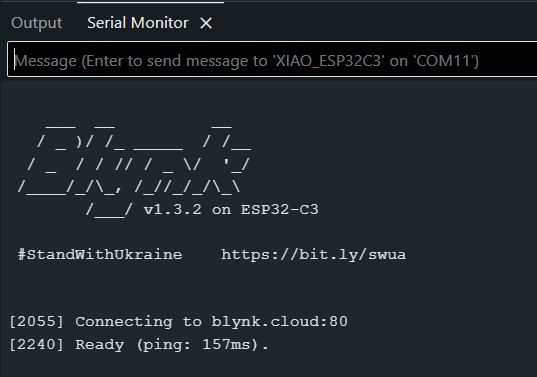
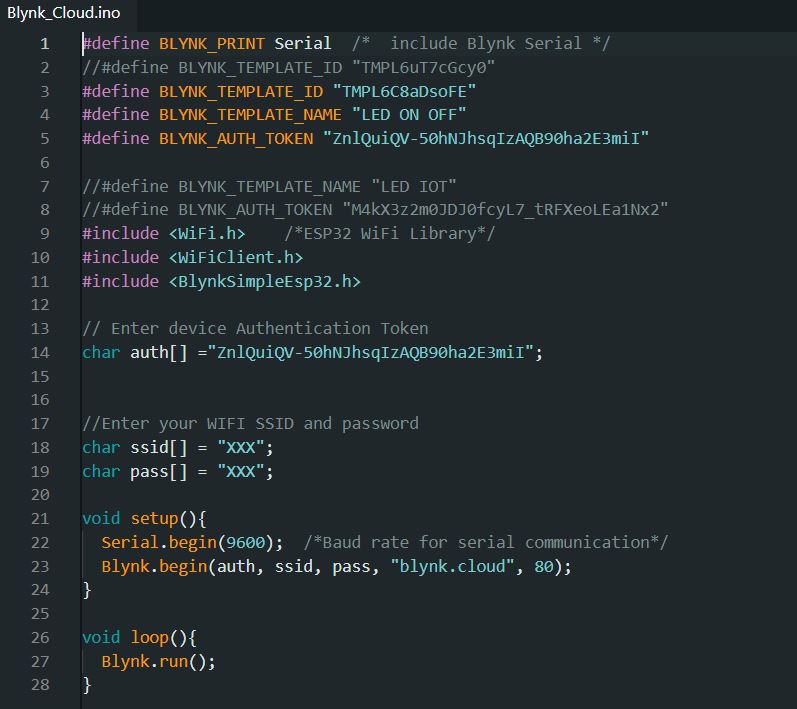
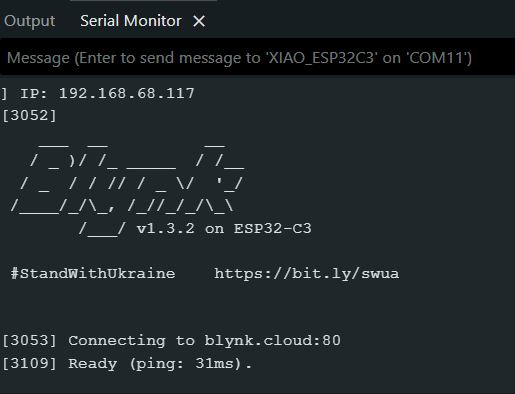
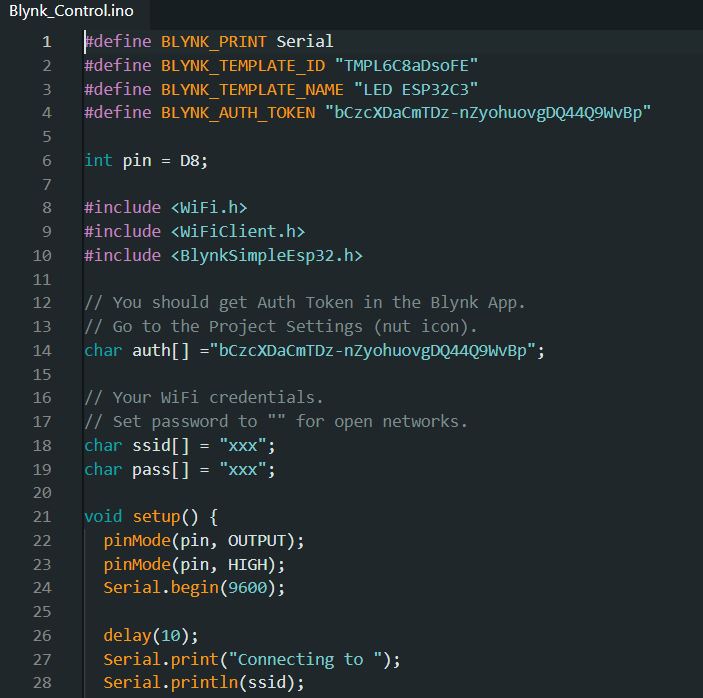
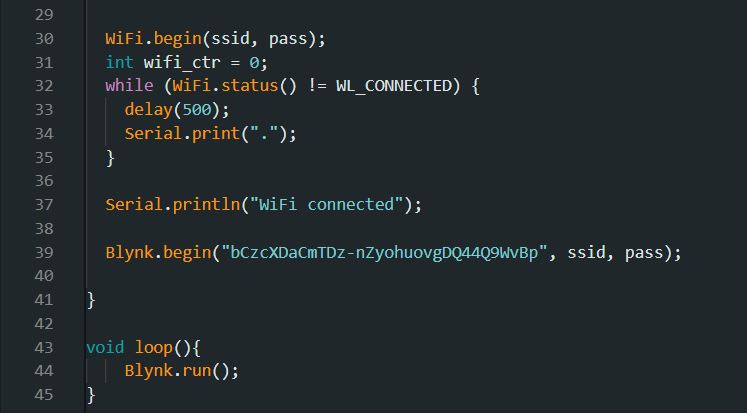
1) To get started, I go straight into Blynk (Desktop App) and create my account. Once done, I sign into Blynk and I see the dashboard. 2) Cursor move to the top right --> HELP tab --> QUICKSTART. 3) Clicking on 'Quickstart' opens a window that outlines the necessary components for the setup and provides a brief overview of the steps involved. Click 'Let’s go' to continue. 4) Choose the device and connectivity type. for my case is ESP32 and WiFi respectively. 5) Choose Arduino IDE, as I ONLY know this IDE, then press NEXT. 6) Open Arduino IDE desktop app and install BLYNK libraries. 7) When it prompted to choose to install library dependencies, I chose INSTALL ALL. 8) Once done, return to the Blynk (Desktop App) and click Next to proceed. The next window provides some code for me to copy into my Arduino sketch. 9) Copy the provided code over to a new sketch in Arduino IDE as shown below by replacing the "BLYNK_TEMPLATE_NAME" and "BLYNK_AUTH_TOKEN". 10) Once done, upload the code to the SEEED Xiao ESP32C3 PCB board that I have newly made for WiFi / Bluetooth connection. Yay!!! It shows that the board has been connected to BLYNK and is now online. A list of details and information under the serial monitor that shows the WiFi connection, IP address, connection to Blynk Cloud as well as the logo design will be shown as below:
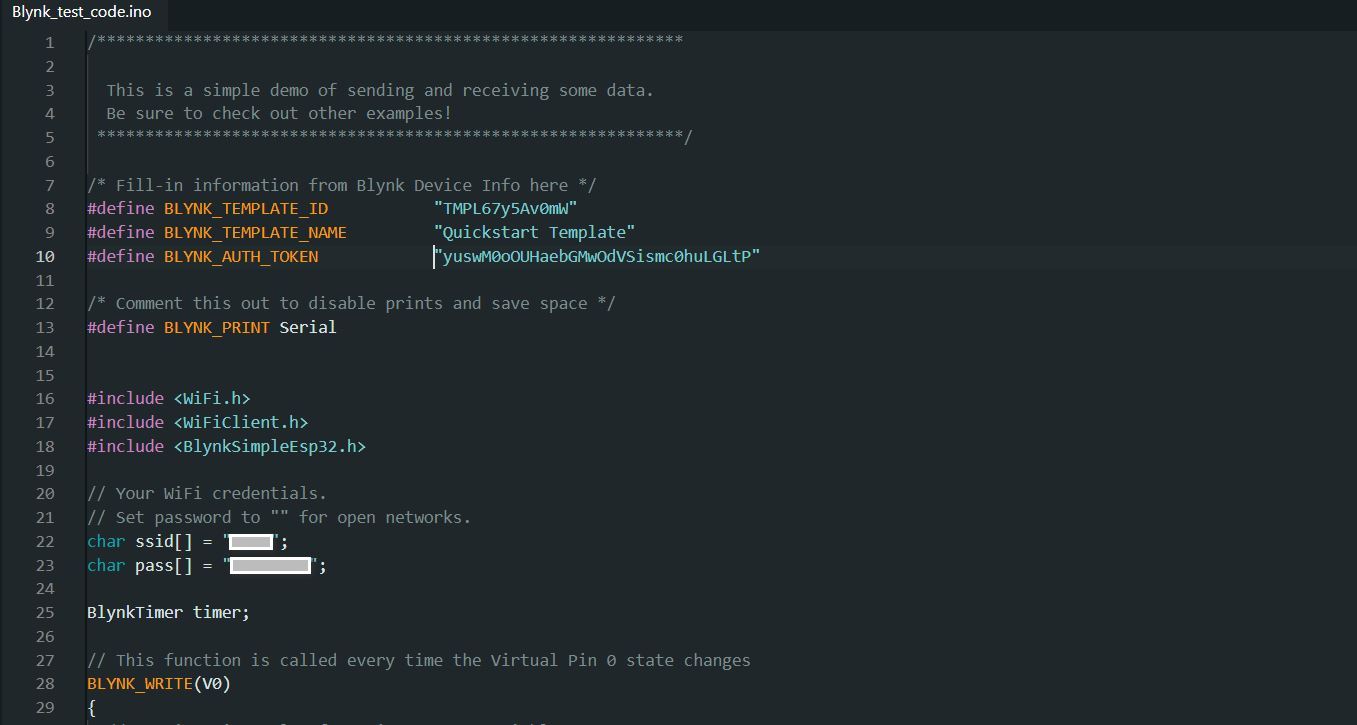
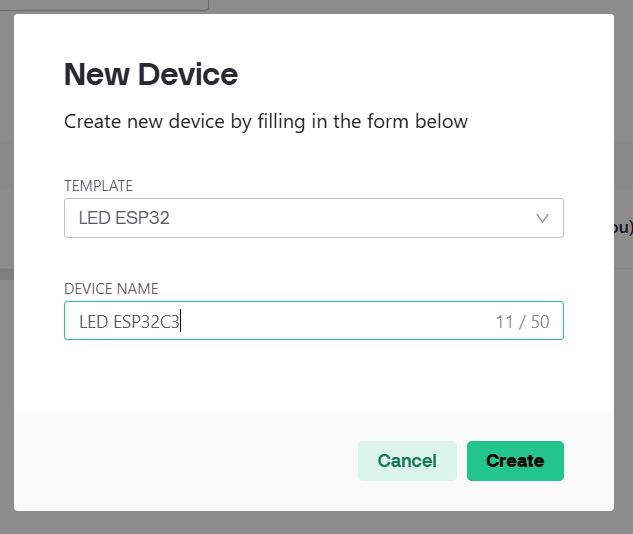
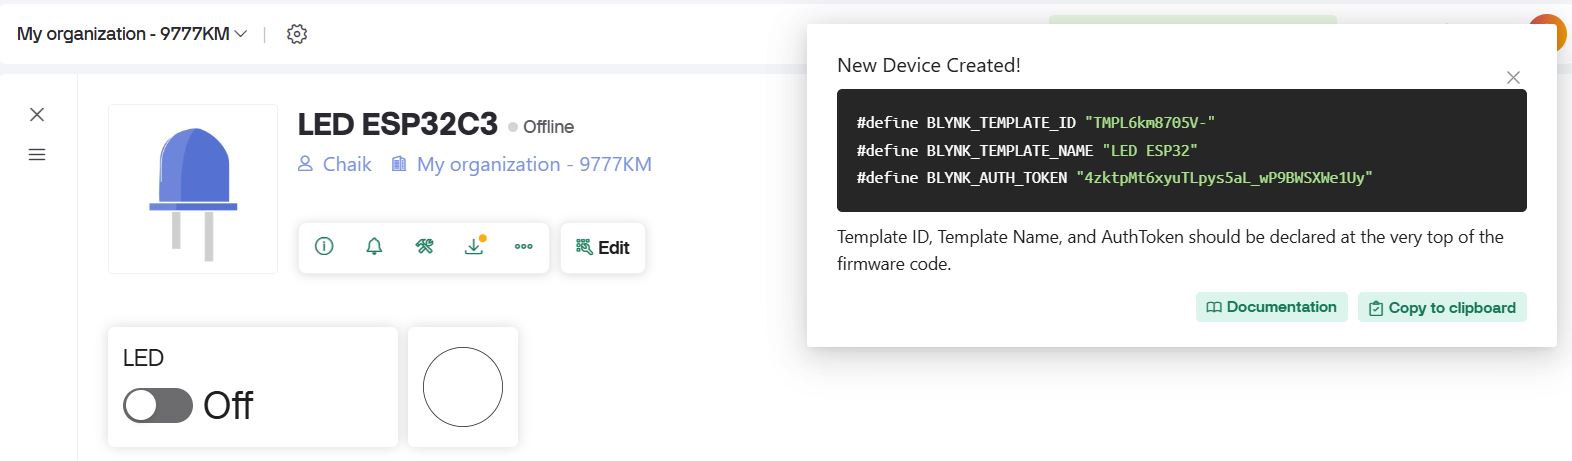
Creating a new Device in Blynk (Desktop App)
Refer back to the previous steps, there are 2 major changes compared to the previous setup: 1) Redefine the template to use and the device name. 2) Copy the new "BLYNK_TEMPLATE_NAME" and "BLYNK_AUTH_TOKEN" on the code provided. Yay!!! It connects well also.
Creating a Simple Control and Interface for the APP
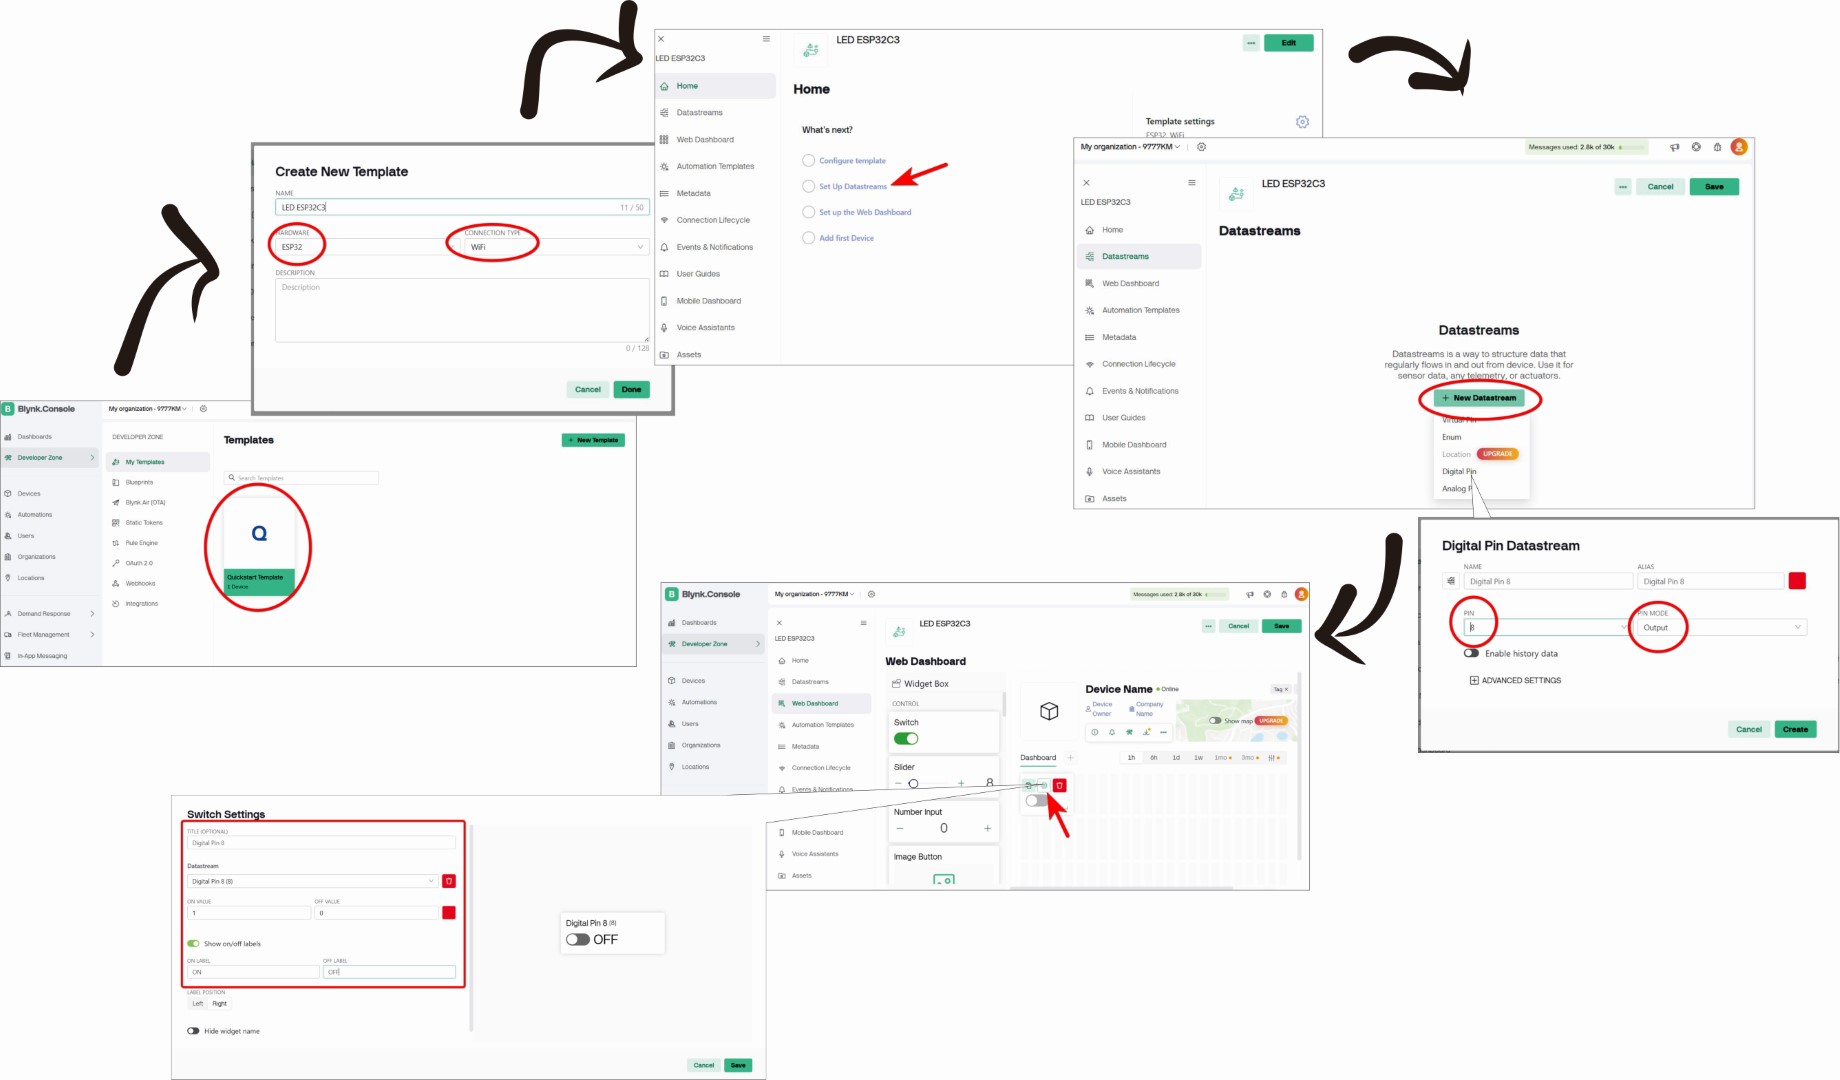
Next step is to create a simple control code for BLYNK IOT APP to control the LED. 1) Click Developer Zone on the Left Side bar --> My Templates --> Click + New Templates. 2) Create a new name for the new template. Select ESP32 and WiFi for hardware and connectivity type respectively. Once complete press DONE. 3) Select Set Up Datastream. 4) Click + New Datastream and select Digital Pin. Under "Digital Pin Datastream" window, select the correspondant PIN NUMBER as the pinout to connect LED. Once done, press CREATE and SAVE the details. 5) Under Web Dashboard, drag the SWITCH control to the dashboard and click the Switch Setting button. There should be another pop-up page occurs. Simply just follow the settings based on the above attachment and SAVE it.
Once a new template has been created, REPEAT the steps that shows in Creating a new Device in Blynk (Desktop App) to create a new BLYNK control on LED switching on-and-off with the code shown below (Note: Do remember to copy the "BLYNK_TEMPLATE_NAME" and "BLYNK_AUTH_TOKEN" (occurs in multiple lines) to the new control code) Thanks to the help from my Fab Academy partner - Florimond Chu, it connected and able to toggle the LED light on D8 on my PCB.
Go To BLYNK (MOBILE APP)
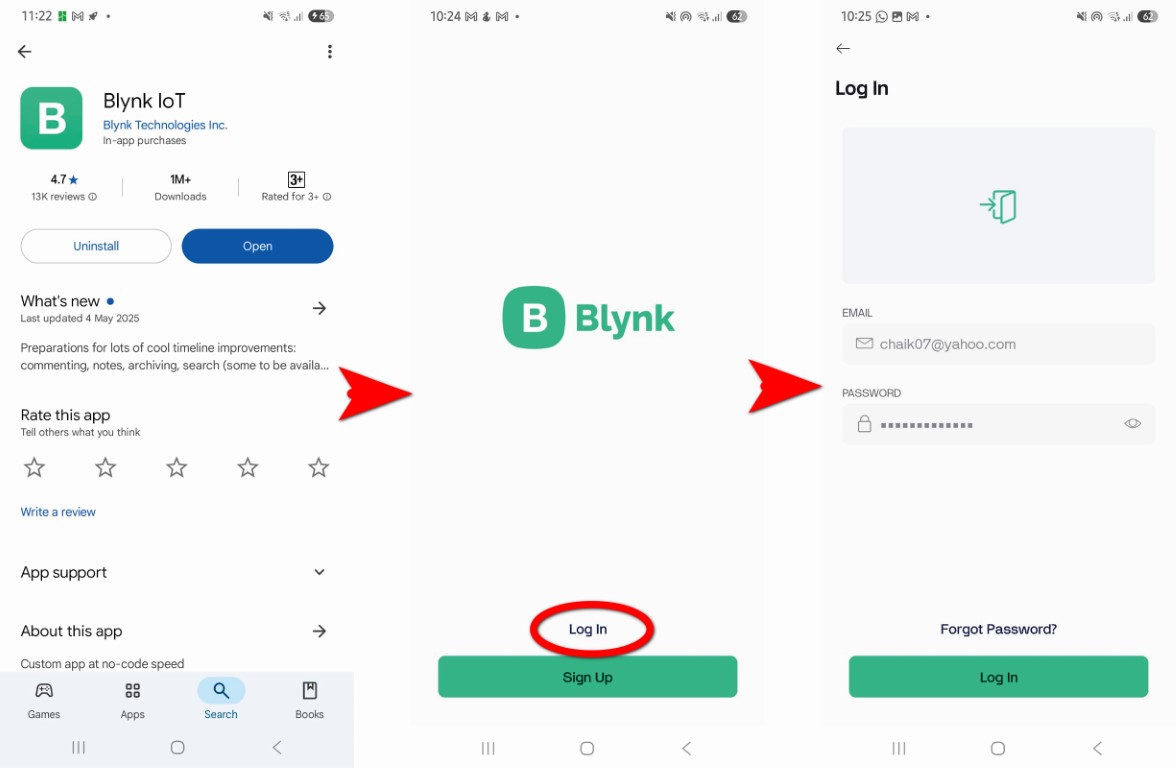
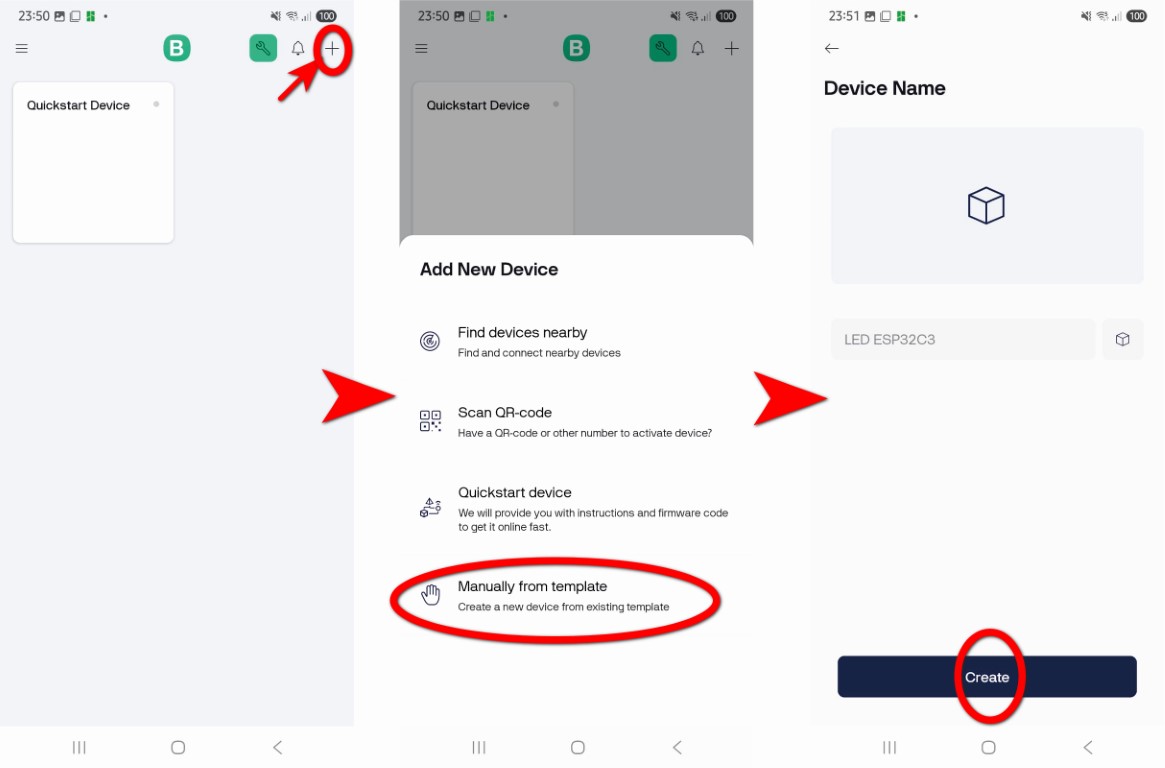
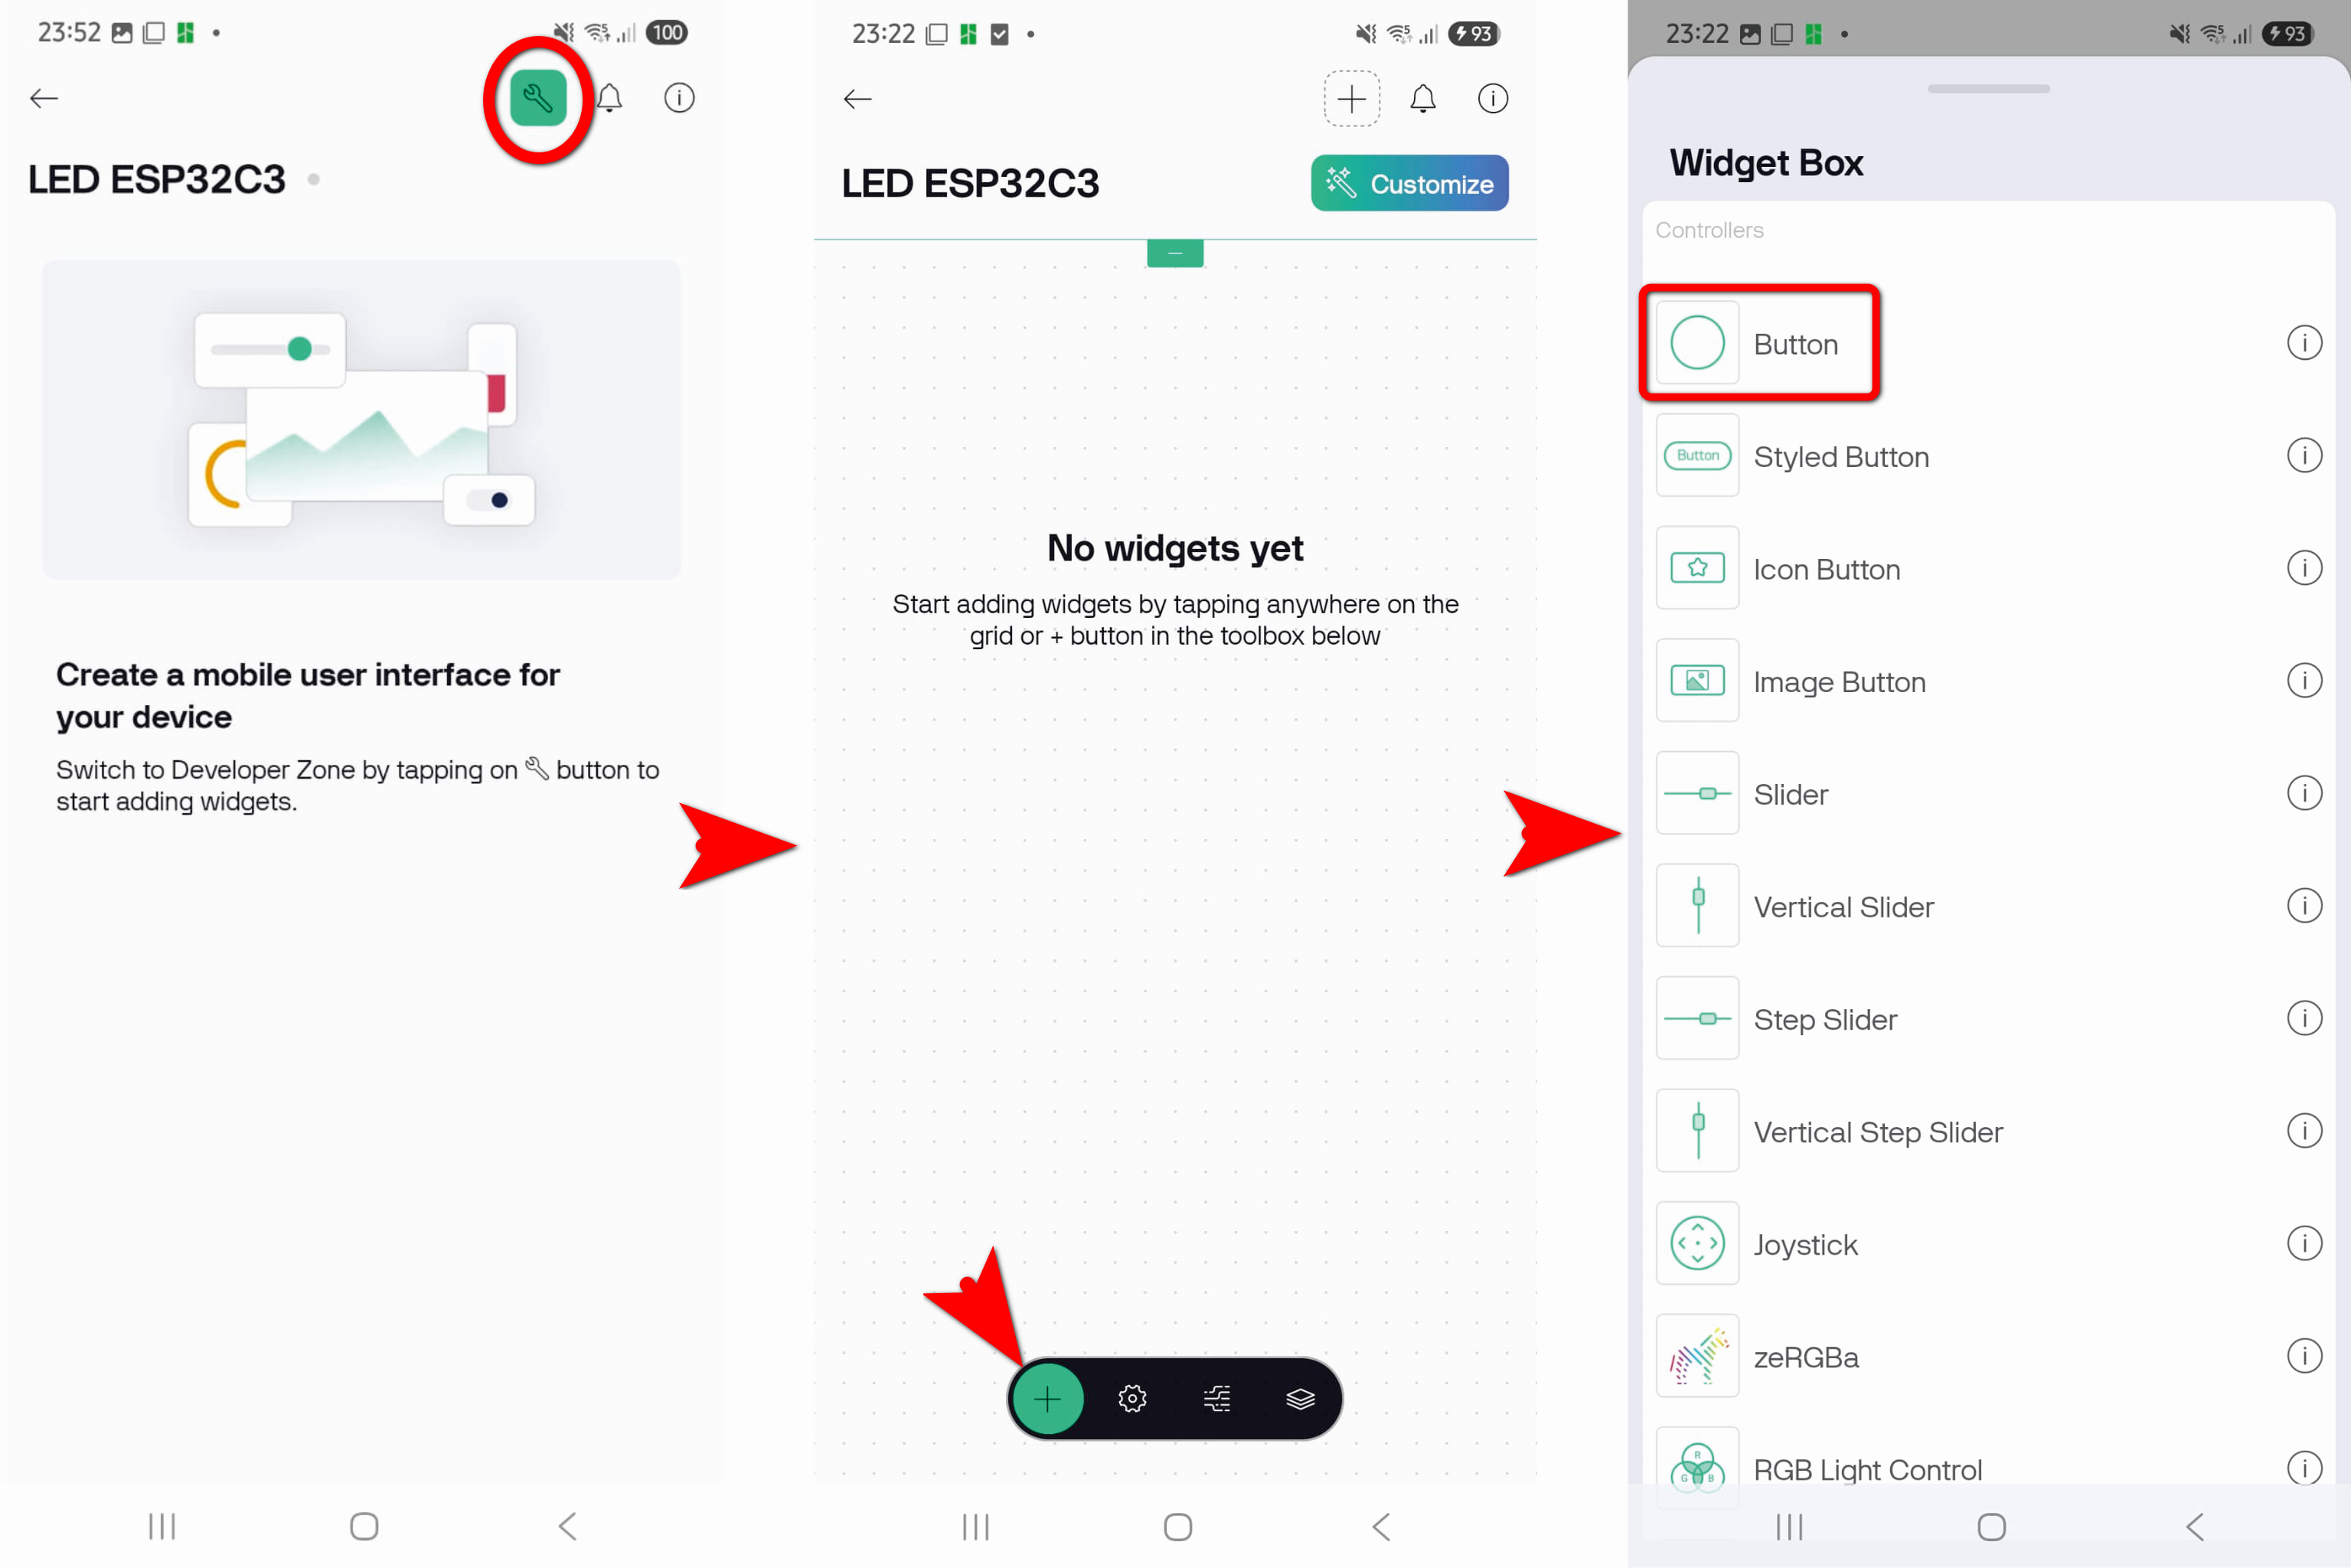
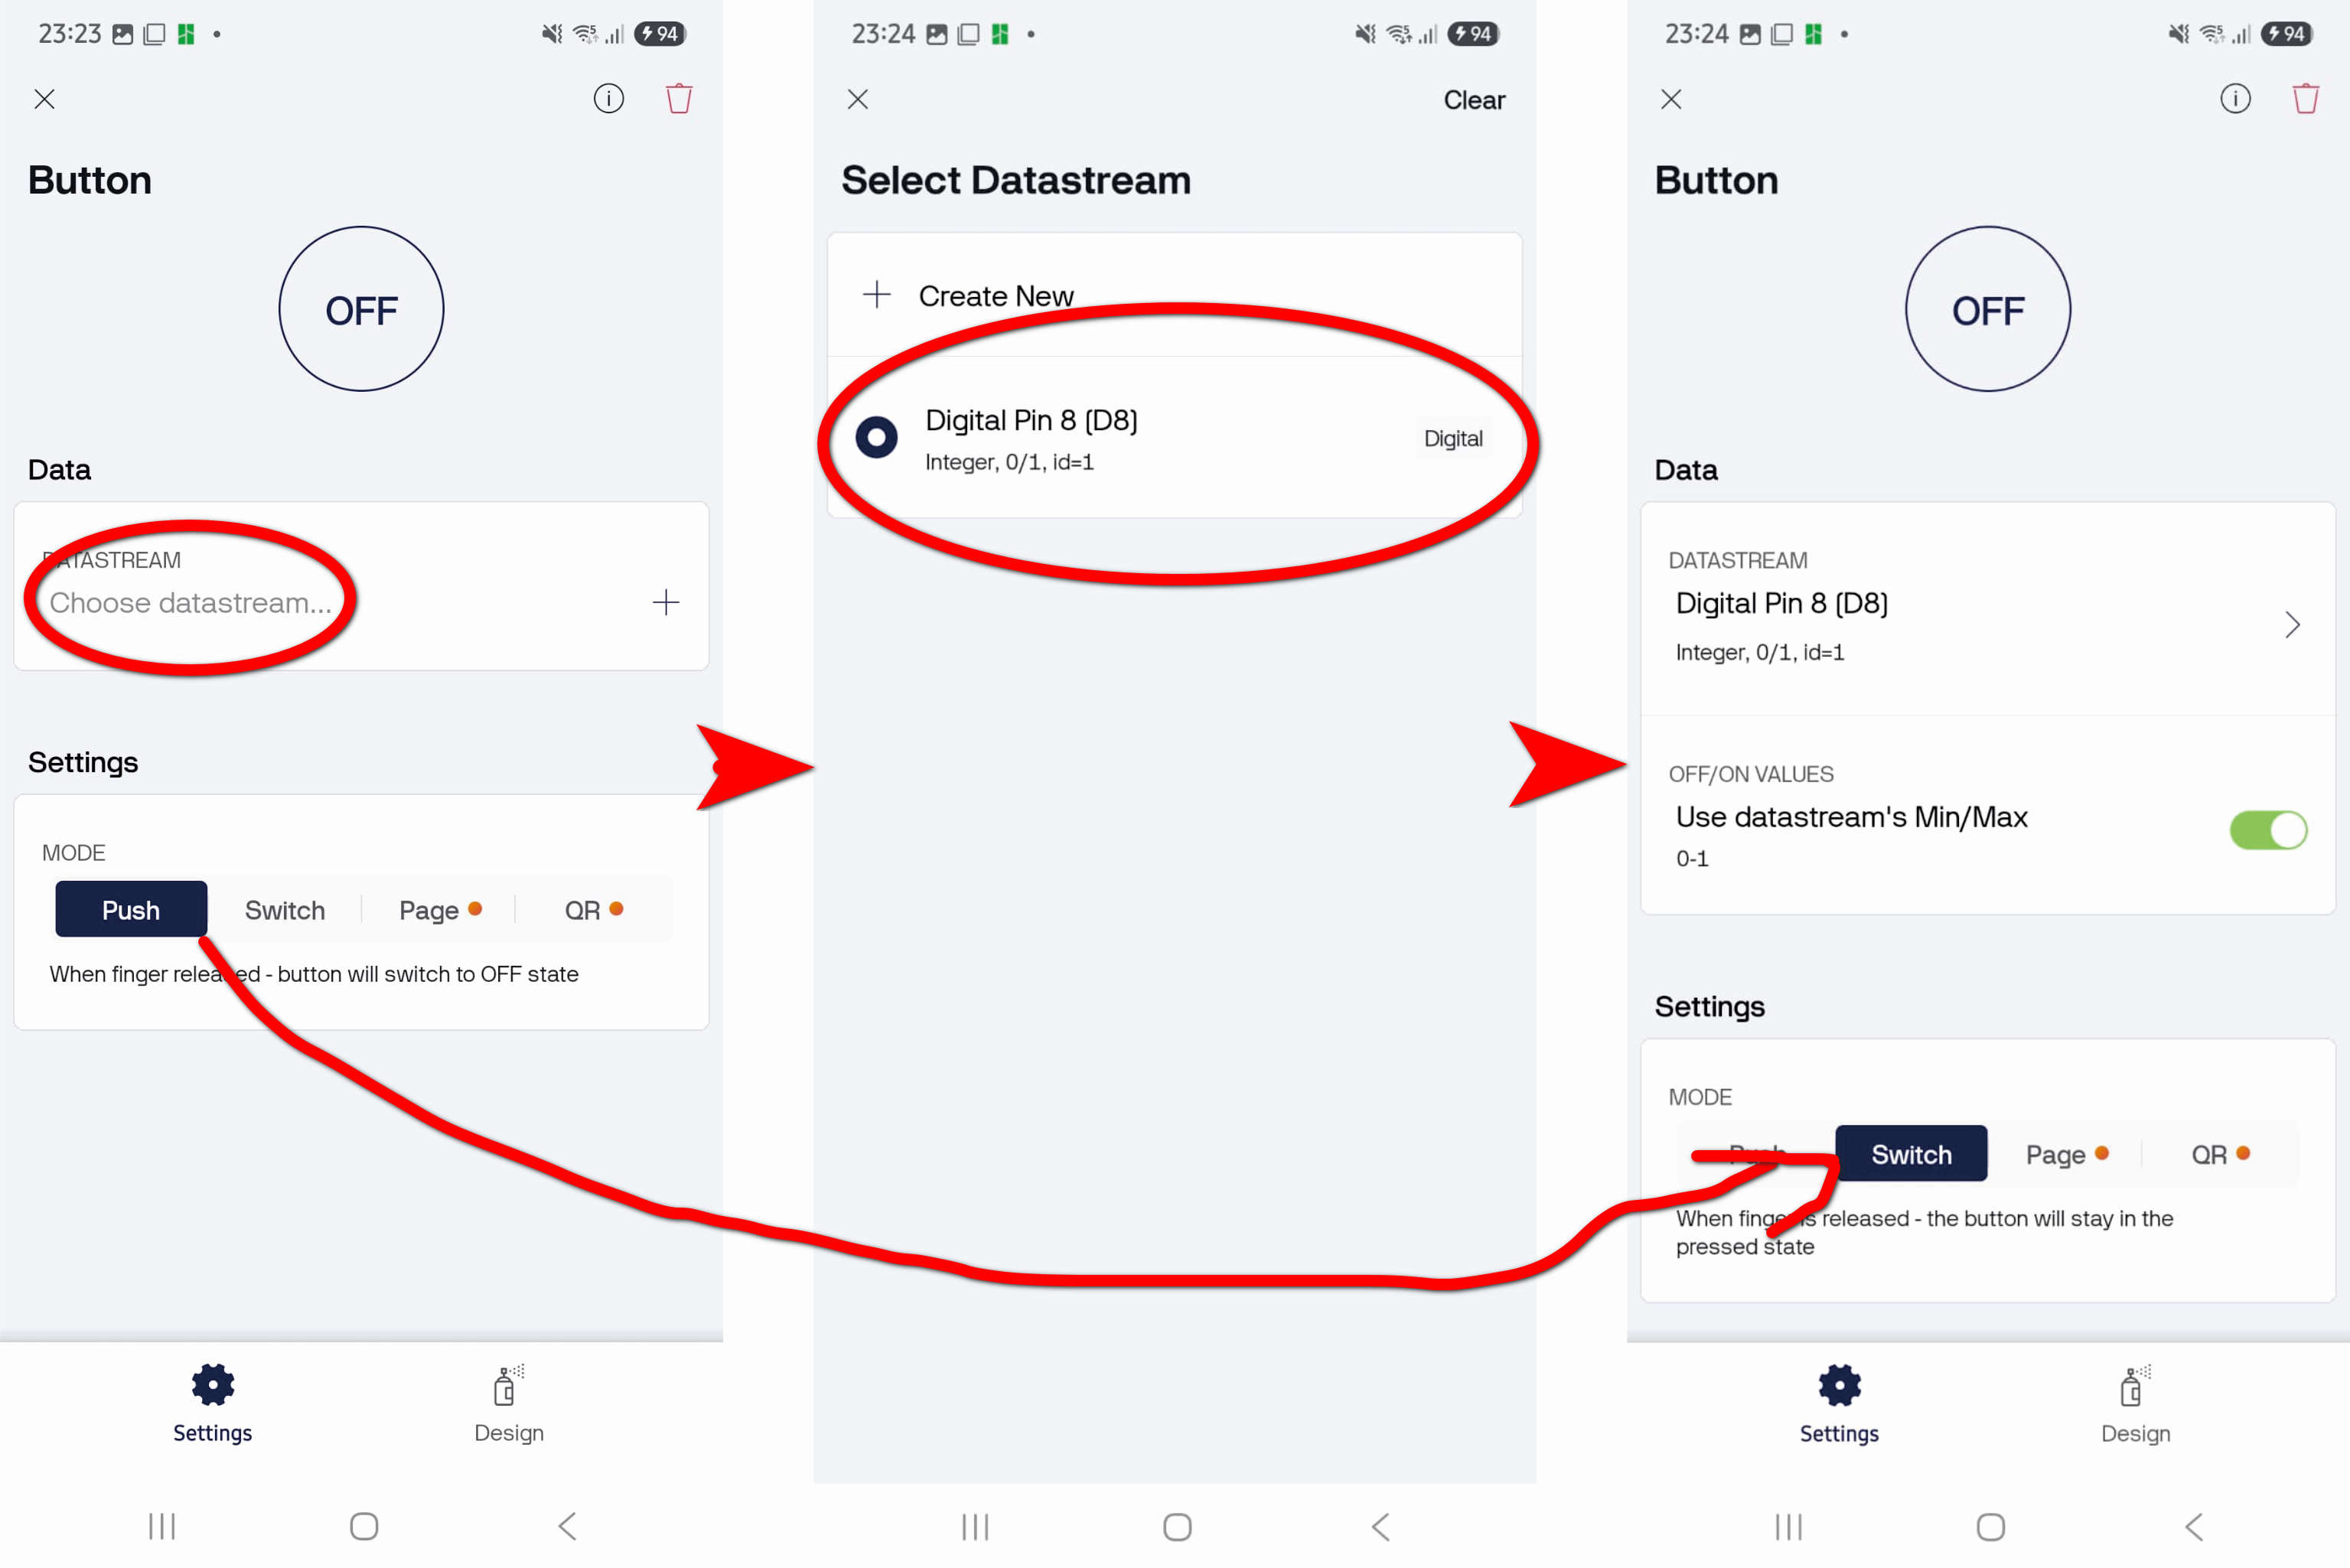
Next thing is to bring it into mobile phone, which required to install the Blynk App by downloading from Apple Store or Play Store for free. After installing just login using the same account that have been used for desktop app. Once enter the main page, click Add New Device (the "+" at the top right corner) and select Manually from Templates, then create a Device name. Click on the Developer Zone (the "spannar" icon at the top right corner) and press the "+" button at the bottom of the screen to open the Widget Box. Search for BUTTON and select it to proceed to the device setup page. Choose the Datastream and select the ONLY option in the screen (Since login with the same account, thus the datastream details will share between the desktop and mobile apps). Choose the Output Mode between PUSH or Switch. Once done with the Digital Pin assignment, exit the Developer Mode and can start to test the application now as shown in the second test video below: IT WORKS!!! When toggle the button switch on the mobile phone, the desktop apps toggle together and the PIN 8 LED on the PCV blinks.
Reflection
It is been a tough week for me, as I have ZERO knowledge in this week's topic. It was really hard for me to understand how this system works. Just alone reading on Blynk IOT took me 2 days to understand how it work. But still it was fun to learn "NEW SKILLS" and this may be helpful for my personal projects after this course are done.