Week 13 - Molding and Casting
Group Assignment:
• Review the safety data sheets for each of your molding and casting materials
• Make and compare test casts with each of them
• Compare printing vs milling molds
Overview
For this week’s Group Assignment, we:
1. Reviewed the safety data sheets for different molding and casting materials in our Fab Lab and created test casts with these materials
2. Explored molding and casting a toy maul hammer
Review the safety data sheets for different molding and casting materials in our Fab Lab
The following molding and casting materials were reviewed for this Group Assignment:
1. Smooth-on Smooth-Cast 300
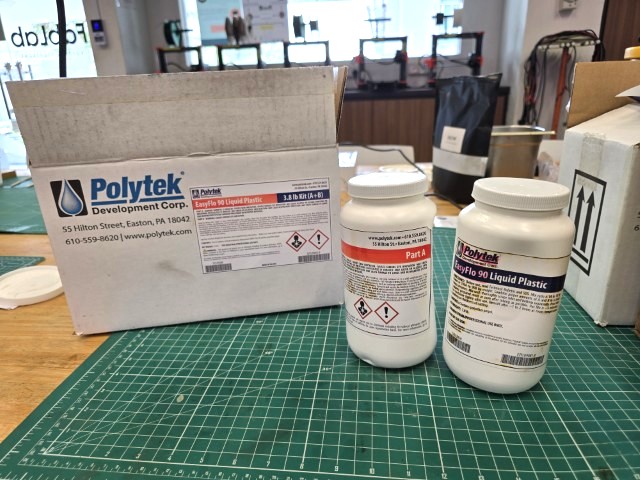
2. Polytek EasyFlo 90 Liquid Plastic
3. Snow Water-activated Gypsum Powder
4. BBDino Super Elastic Platinum Silicone Rubber
Datasheet Review - Smooth-on Smooth-Cast 300
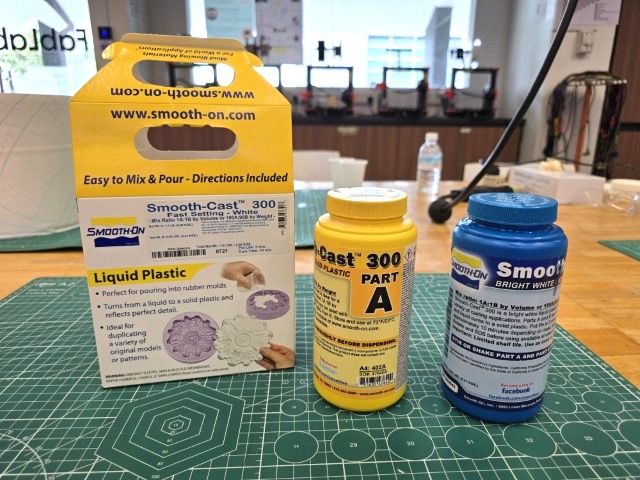
SMOOTH-ON SMOOTH-CAST 300 Datasheet - CLICK TO VIEW
The 19-page Datasheet for Smooth-on Smooth-Cast 300 is very detailed and is organized into the following sections:
| Sections | Information Provided in section |
|---|---|
| Identification | Product Name, Product Codes, Contact information of the Manufacturer |
| Hazard(s) identification | Covers the hazards that the chemical may cause (e.g. skin irritation, eye irritation, breathing difficulties), as well as the safety precautions and responses, including safe handling instructions. To note: • Wear PPE (gloves, eyes & face protection • Use only outdoors or in a well-ventilated area • If exposed or concerned, wash with water and get medical advice/attention |
| Composition/information on ingredients | Description of the chemicals. |
| First-aid measures | Covers first-aid measures in situations such as Inhalation, Eye contact, Skin contact and Ingestion. To note: • Show this safety data sheet to the doctor in attendance. If exposed or concerned, seek medical advice/attention |
| Fire-fighting measures | Advice on Fire-fighting measures. To note: • For Large Fires - CAUTION: Use of water spray when fighting fire may be inefficient. |
| Accidental release measures | Covers Personal precautions, containment and clean up measures. To note: • Avoid contact with skin, eyes or clothing. Ensure adequate ventilation. Use personal protective equipment as required. Evacuate personnel to safe areas. Keep people away from and upwind of spill/leak. Avoid breathing vapors or mists. |
| Handling and storage | Safe handling and storage advice. To note: • Handle in accordance with good industrial hygiene and safety practice. Avoid contact with skin, eyes or clothing. Ensure adequate ventilation. In case of insufficient ventilation, wear suitable respiratory equipment. Do not eat, drink or smoke when using this product. Take off contaminated clothing and wash before reuse. Avoid breathing vapors or mists • Keep containers tightly closed in a dry, cool and well-ventilated place. Store locked up. • Keep out of the reach of children. |
| Exposure controls/personal protection | Information such as exposure limits can be found here. Also some elaboration on protection measures such as what PPE to use. |
| Physical and chemical properties | Description of appearance and properties of the chemicals To note: For A Physical state: Liquid Appearance: Amber Liquid Color: Amber Odor: Musty For B Physical state: Liquid Appearance: Translucent viscous liquid Color: No information available Odor: Mild to sweet |
| Stability and reactivity | To note: • Stable under normal conditions • Avoid Strong acids. Strong bases. Strong oxidizing agents. |
| Toxicological information | Describes what can happen if one suffers adverse exposure to the chemicals. |
| Ecological information | Some information about the ecological effects of the chemicals. To note: • Toxic to aquatic life with long lasting effects. |
| Disposal considerations | How to dispose of the chemicals properly |
| Transportation information | Not regulated |
| Regulatory information | Regulatory information specific to certain countries |
| Other Information | Other information such as Health hazard ratings, revision history, and disclaimers |
Datasheet Review - Polytek EasyFlo 90 Liquid Plastic
POLYTEK EASYFLO 90 LIQUID PLASTIC Datasheet - CLICK TO VIEW
This is a 2-page Datasheet in the form of a Technical Bulletin covering the EasyFlo series of liquid plastics for Polytek. We read through the information and noted the following:
• DESCRIPTION - EasyFlo Series Liquid Plastics are ideal for casting decorative objects, sculpture reproductions, production parts, tools, models, and duplicate masters. These mercury-free systems consist of two parts (A and B) that mix easily and cure quickly to form tough polyurethane plastics. Their low viscosity ensures easy mixing, excellent detail penetration, and bubble-free castings without the need for vacuum degassing or pressure casting.
• EASYFLO 90 - The liquid plastic that we are using allows for a longer working time of 5 minutes. For thin parts, extend the demold time and preheat molds to 100-120°F to reduce bubbles and speed up demolding.
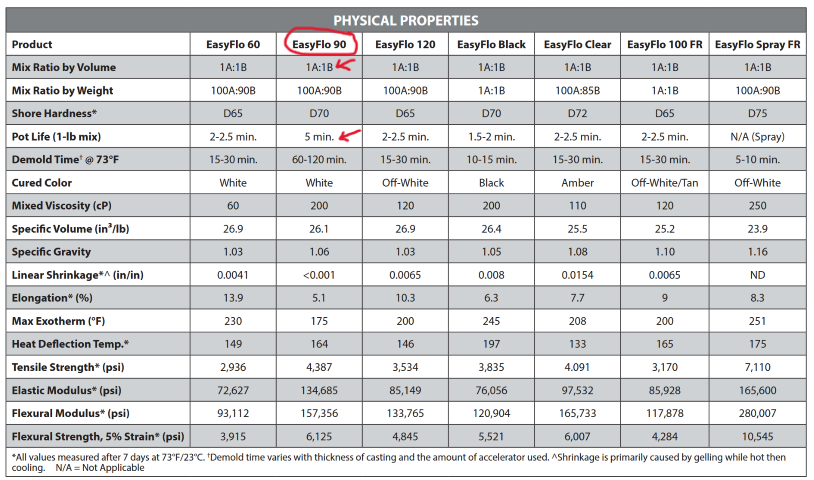
• TABLE OF PROPERTIES - There is a table of Physical properties. The properties that we felt were most important were Mix Ratio by Volume, which tells you to mix Parts A and B 1:1 and Pot Life which tells you how much time you have to work with the mixture before it hardens.
• SAFETY - Before using the product, carefully read the Safety Data Sheets and product labels. Adhere to all safety precautions and instructions.
Part A: Ensure this product is kept out of reach of children. Avoid inhaling fumes, vapors, or mists. Use only in outdoor settings or well-ventilated areas. If necessary, use a NIOSH-approved respirator with an organic vapor cartridge. If inhaled, move the individual to fresh air and keep them comfortable for breathing. Seek medical assistance if respiratory irritation occurs. In case of ingestion, obtain immediate medical help and do not induce vomiting. Wear impervious gloves, such as butyl rubber or nitrile rubber. Remove contaminated clothing and wash it before reuse. Thoroughly cleanse the body with soap and water after handling. Seek medical help if skin irritation occurs. Use eye protection, such as chemical safety glasses or goggles. In case of contact with eyes, rinse cautiously with water for several minutes, removing contact lenses if present and easy to do. Consult a medical professional if eye irritation persists.
Part B: Ensure this product is kept out of reach of children and away from flames and hot surfaces. Do not eat, drink, or smoke while using this product. Use general or local exhaust ventilation to minimize exposure levels. If necessary, use a NIOSH-approved respirator with an organic vapor cartridge. Wear impervious gloves, such as butyl rubber or nitrile rubber. Wash thoroughly with soap and water after handling. Use eye protection, such as safety glasses or goggles. In case of contact with eyes, rinse with water for several minutes, removing contact lenses if present and easy to do. Seek medical help if eye irritation occurs.
• STORAGE - Store at room temperature
Datasheet Review - Snow Water-activated Gypsum Powder
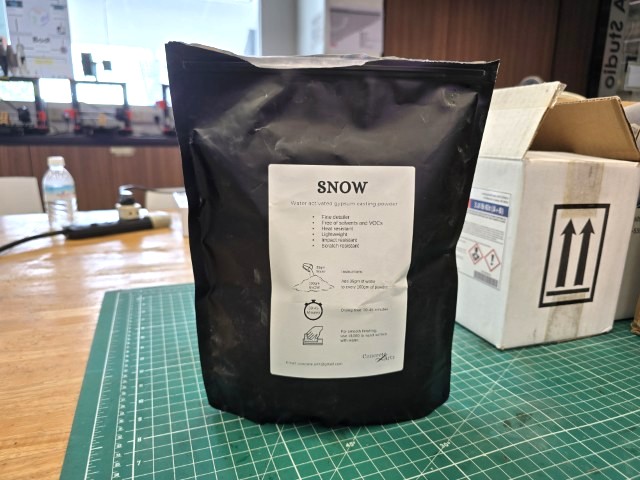
SNOW WATER-ACTIVATED GYPSUM POWDER Datasheet - CLICK TO VIEW
The Datasheet for this product is clear and easy to read. We found the following information noteworthy:
Hazards Identification
• Inhalation: Dust may cause mild respiratory irritation.
• Skin Contact: Prolonged exposure may cause dryness.
• Eye Contact: Dust particles can cause mechanical irritation.
• Ingestion: Low toxicity but not intended for consumption.
First-Aid Measures
• Inhalation: Seek medical attention if breathing difficulties occur.
• Skin Contact: Wash with soap and water.
• Eye Contact: Flush with water for 15 minutes. See a doctor if irritation persists.
• Ingestion: Rinse mouth and drink water to dilute.
Basic Instructions:
• Standard ratio: 100gm of powder to 35gm of water
• Add powder to water to prevent clumping
• Mix until smooth and lump-free, ready for pouring Setting time:
• Initial set: 5 - 7 minutes (mix starts to harden)
• Full cure: 24 hours for complete drying
• Check readiness: Feel warm to touch
Datasheet Review – BBDino Super Elastic Platinum Silicone Rubber
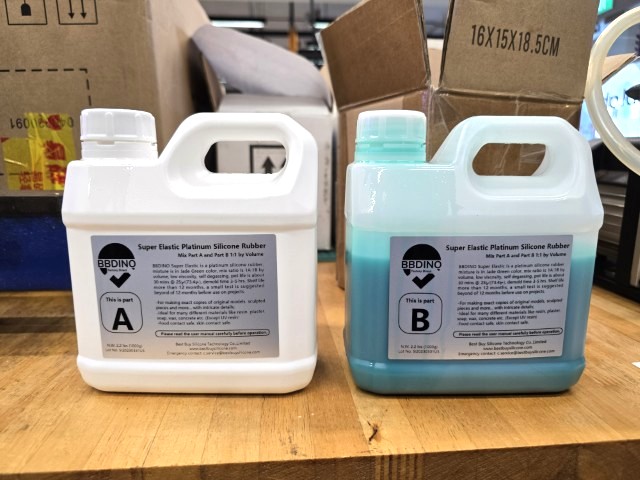
BBDINO SUPER ELASTIC PLATINUM SILICONE RUBBER Datasheet - CLICK TO VIEW
The Datasheet for this product is organized in sections like that of the Smooth-on Smooth-Cast 300, albeit less detailed. Scanning through the datasheet, it seems like the product is relatively safe to use, with the following advice found in the second section (Hazards Identification):
Response:
If on skin: wash with plenty of water.
If in eyes: rinse cautiously with water for several minutes, remove contact lenses, if present and easy to do, continue rinsing. If eye irritation persists, get medical advice/attention.
If skin irritation occurs, get medical advice/attention. Take off contaminated clothing and wash it before reuse. In case of fire: use dry sand, dry chemical or alcohol-resistance foam for extinction.
Storage: Store in well-ventilated place, keep container well sealed.
Disposal: Dispose of contents/container to an appropriate treatment and disposal facility in accordance with applicable laws and regulations, and product characteristics at time of disposal.
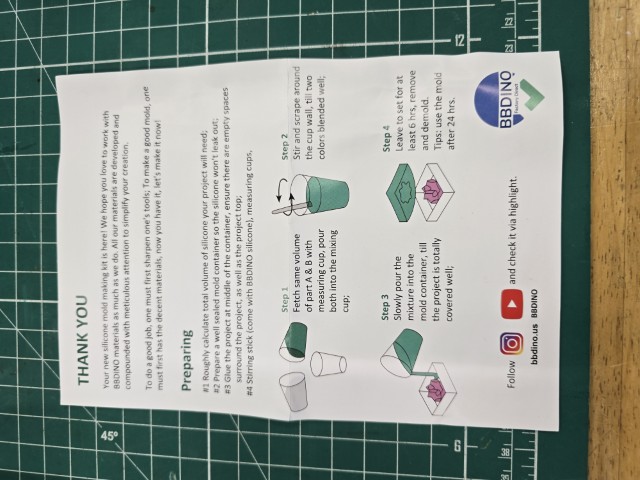
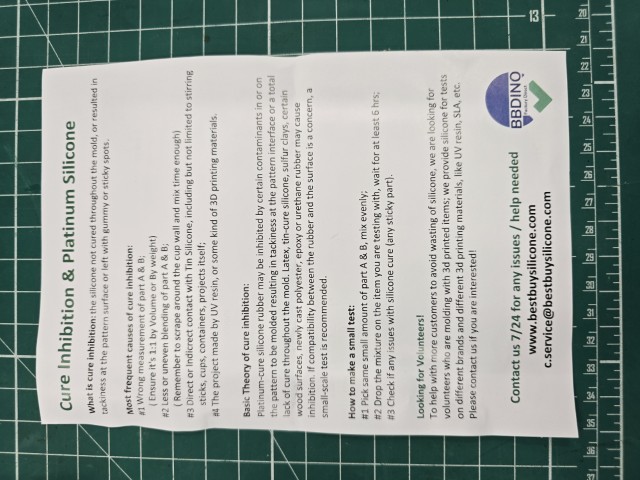
The datasheet does not cover the use of the product itself; that is covered in a separate leaflet as shown below.
There is useful information here such as why cure inhibition occurs.
Creating Test Casts
Now that we have reviewed the safety data sheets of the different molding and casting materials, we proceed to create some casts with them.
First Try – Coasters
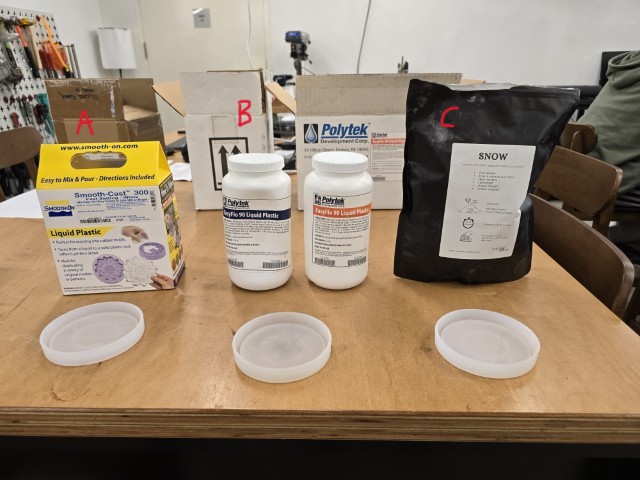
We start our tests with some silicone coaster molds that we already have in our Fab Lab using the materials shown in the table below.
| A. Smooth-on Smooth-Cast 300 | B. Polytek EasyFlo 90 Liquid Plastic | C. Snow Water-activated Gypsum Powder | |
|---|---|---|---|
| Mix Ratio | 1A:1B by Volume 100A:90B by Weight | 1A:1B by Volume 100A:90B by Weight | 100gm: 35gm (Powder: Water) |
| Pot Life (Minutes) | 3 | 5 | 5 |
| Cure Time (Minutes) | 10 | 60-120 | 35-45 |
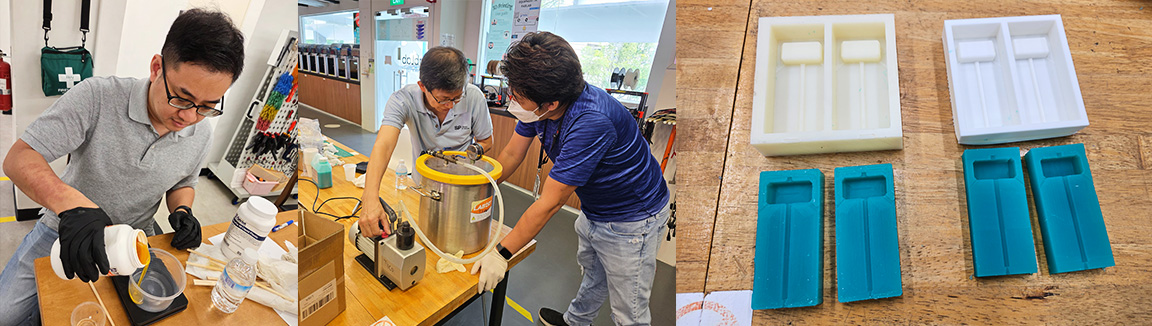
The process for all the materials is similar:
1. Measure out the required quantity of the unmixed material using a weighing scale.
2. Pour the two parts together and mix them together thoroughly. Note the pot life so that the mixture does not harden before it is poured into the mold. A rule of thumb is that when the mixture starts to feel warm, then it is time to pour into the mold.
3. Once the mixture is in the mold, leave the mixture to cure. Below is the result of our tests.
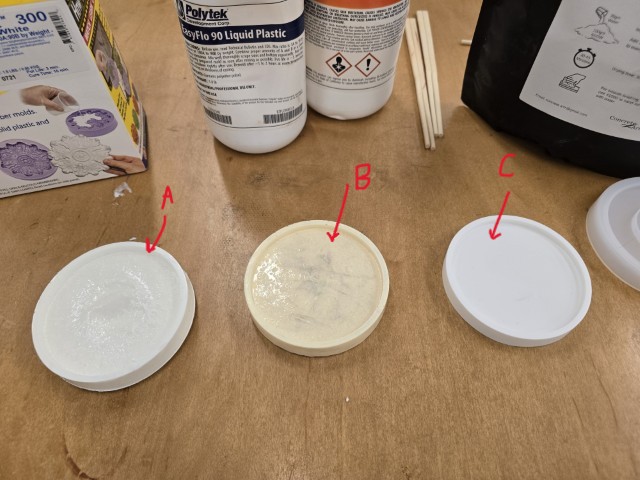
Of the 3 materials, we got the best finish with the Snow Water-activated Gypsum Powder. It was smooth to the touch and did not have a lot of imperfections. The liquid plastics (Smooth-on Smooth-Cast 300 & Polytek EasyFlo 90 Liquid Plastic) produced more bumps, which we thought were due to the presence of trapped air bubbles.
Second Try – Maul Hammers
For our second molding and casting trial, we wanted to try to make our own silicone molds and try to cast some tiny maul hammers. Our first step is to get a silicone mold done. We can do it by either milling/machining it or 3D printing it. Since we need to compare between milling and printing molds for this week’s Group Assignment, we do both.
Milling/Machining – Toolpath Generation in Fusion 360
We start by modelling out the mold in Fusion 360.
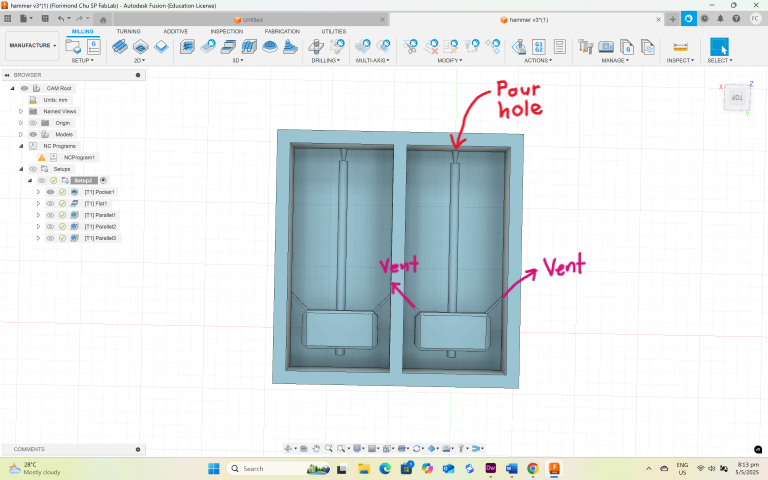
We are thinking of pouring the material through the handle, with some vents at the head of the maul hammer to allow excess material to escape.
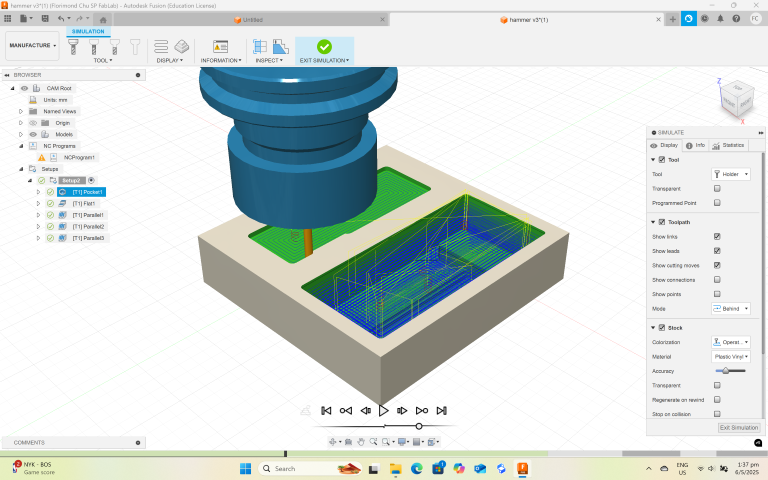
Next, as we are new to Fusion 360’s Manufacture workspace, we sought the help of our Fab Lab alumni, Zhi Hon to help us to configure the milling paths for the CNC machine in Fusion 360’s Manufacture workspace. The milling paths were configured as follows:
1. Rough pass - Mill out the pockets
2. Rough pass – Mill out the flat areas around the maul hammer’s outline
3. Detail pass – Refine along handle
4. Detail pass – Detail the chamfers on the maul hammer’s head
To preview what the milling process will look like, you can simulate the process in Fusion 360.
We also referred to Marius CAD’s YouTube video Fusion360 | Generate TOOLPATH and export G CODE | Quick and Simple. It is a great video that covers and clarifies the toolpath generation process in Fusion 360.
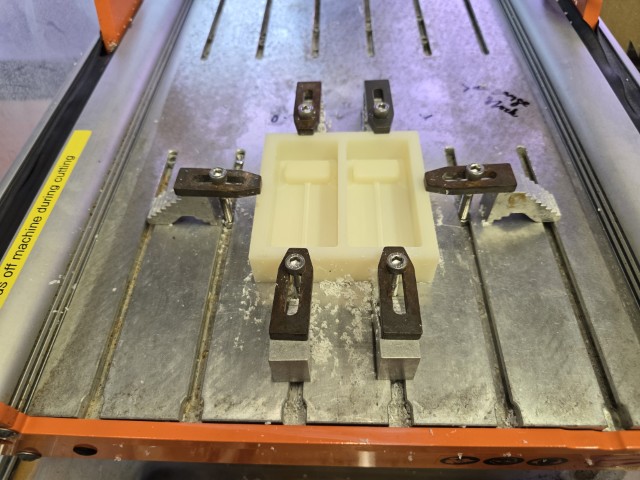
Milling/Machining – Mold milling on the Stepcraft 420
Once done, we can generate the NC file and proceed to the actual milling on our desktop CNC machine (Stepcraft 420). We have previously used the Stepcraft 420 on Week 8 for Electronics Production so a lot of the process is familiar.
There are some differences that we observed (different from electronics production milling):
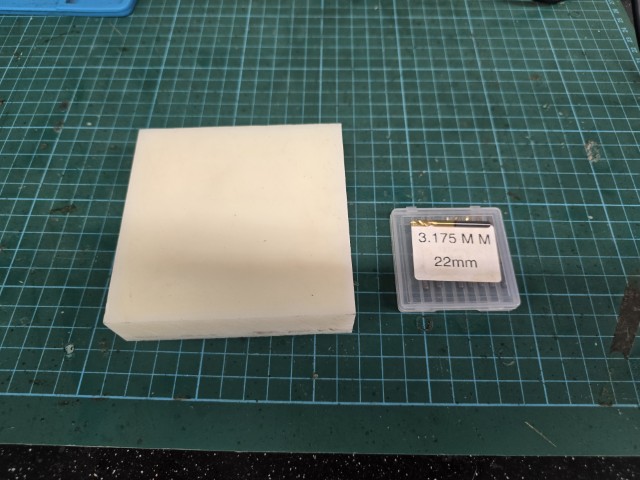
1. We used a different type of stock (polyurethane instead of FR1/FR4).
2. We used a different endmill (3.175mm flat endmill).
3. We clamped the stock down instead of taping it down.
4. We used water to flush the chips out when we got to milling the detail passes.
You can see a video of the mold milling in progress here.
After 1 hour and 30 minutes of milling, we completed machining our mold.
3D Printed Mold
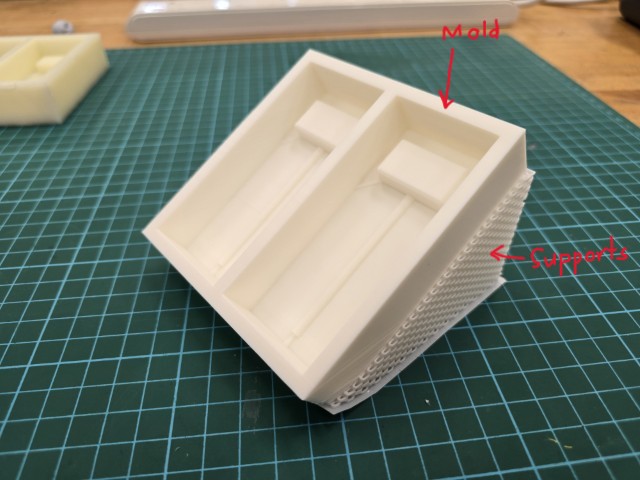
We exported the same mold model that we created in Fusion 360 to an STL format and 3D printed it out using our lab’s Bambu X1-C 3D printer.
To improve our chances of having a smooth finish, we printed our mold out using the best quality settings (0.08mm High Quality). We also printed it at a sloped angle as printing in this orientation can produce a smoother finish. The disadvantage of this printing method is that uses more filament when printing this way (due to the extra supports required).
After a few hours, we have our 3D printed mold.
Creating the Silicone molds
Now that we have both our milled and 3D printed molds, we move on to use them to cast our silicone rubber molds. The material we used was BBDino Super Elastic Platinum Silicone Rubber.
| BBDino Super Elastic Platinum Silicone Rubber | |
|---|---|
| Mix Ratio | 1A:1B by Volume Or by Weight |
| Pot Life (Minutes) | 30 |
| Cure Time (Hours) | 4 |
The process is:
1. Measure out the required quantity of the unmixed material using a weighing scale.
2. Pour the two parts together and mix them together thoroughly.
3. Pour the mixture into the mold
4. Once the mixture is in the mold, leave the mixture to cure.
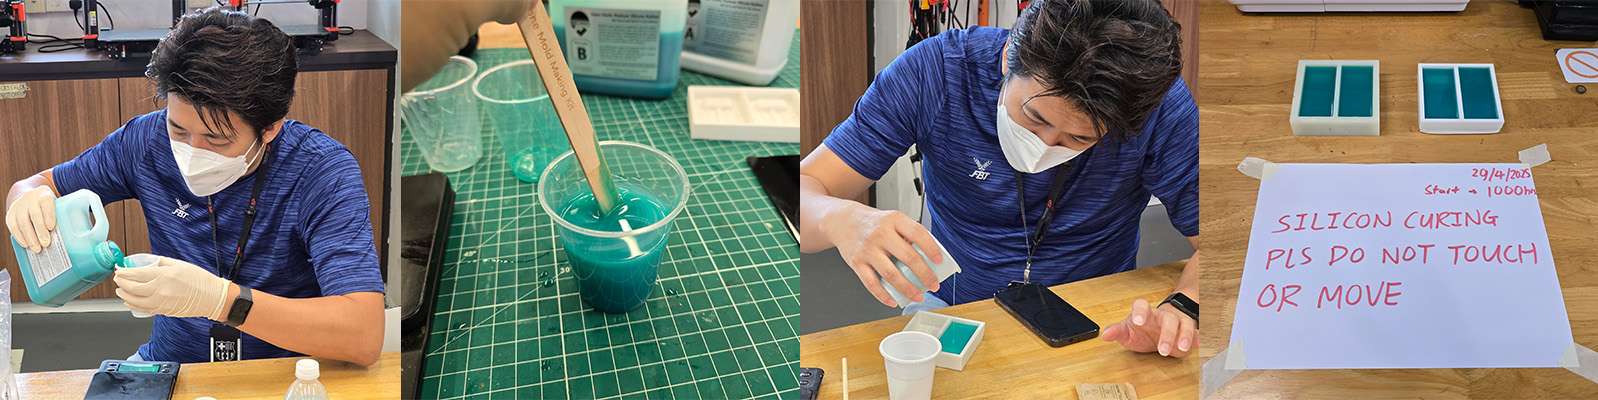
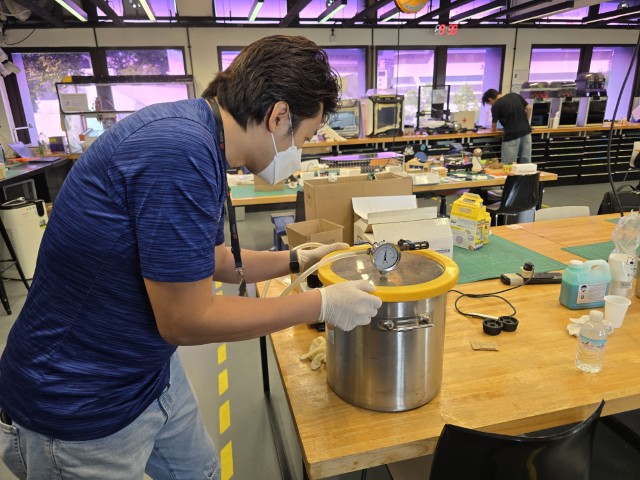
Optional: While this type of silicone rubber is advertised as self-degassing, we placed it into a vacuum pot to remove excess bubbles.
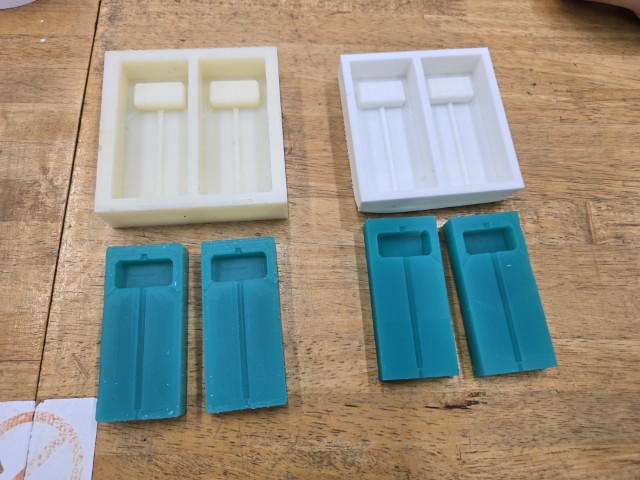
After curing the silicone rubber for a few hours, we got our two sets of silicone molds, one from the milled mold and one from the 3D printed mold.
Casting the Toy Maul Hammers
To cast our toy maul hammers, we will be using the following materials that we had previously used for our coasters. The process has also been explained in that section.
| Polytek EasyFlo 90 Liquid Plastic | Snow Water-activated Gypsum Powder | |
|---|---|---|
| Mix Ratio | 1A:1B by Volume 100A:90B by Weight | 100gm: 35gm (Powder: Water) |
| Pot Life (Minutes) | 5 | 5 |
| Cure Time (Minutes) | 60-120 | 35-45 |
Our initial thoughts when designing our mold was that it was meant to be a two-part mold where we put the two halves of the mold together and then pour the material into the mold. However, we had modelled the shaft (which is where we poured the material in) too thin and narrow, it was difficult for the material to flow through smoothly. As a result, the first maul hammer we cast was malformed.
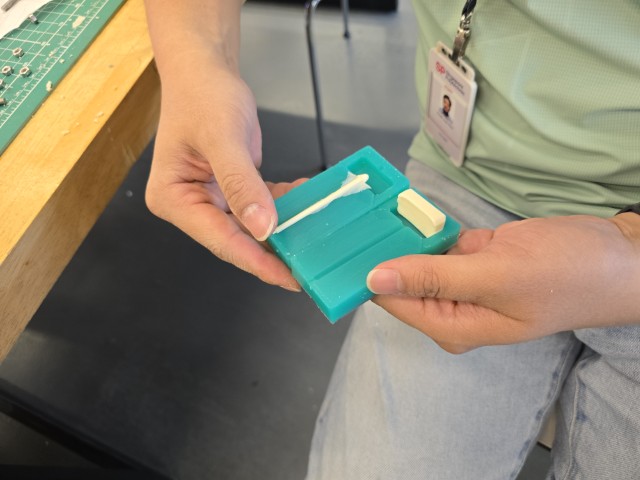
We realized that this issue cannot be addressed without changing the design in CAD and starting the mold design process all over again. However, we can still carry on casting, but as separate single molds.
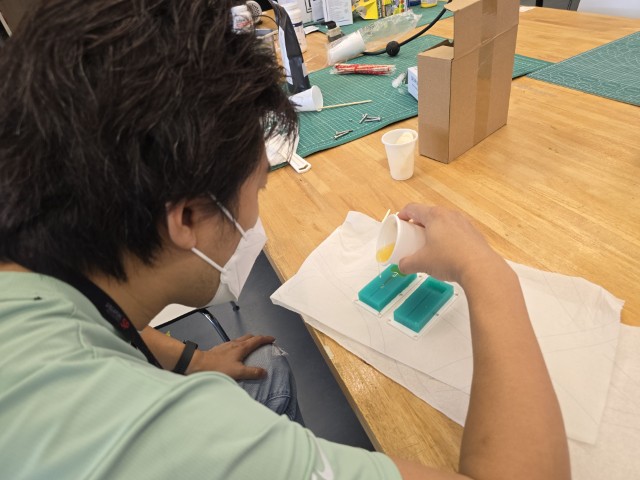
This time we laid out the molds flat and poured the mixture straight in.
Our cast results
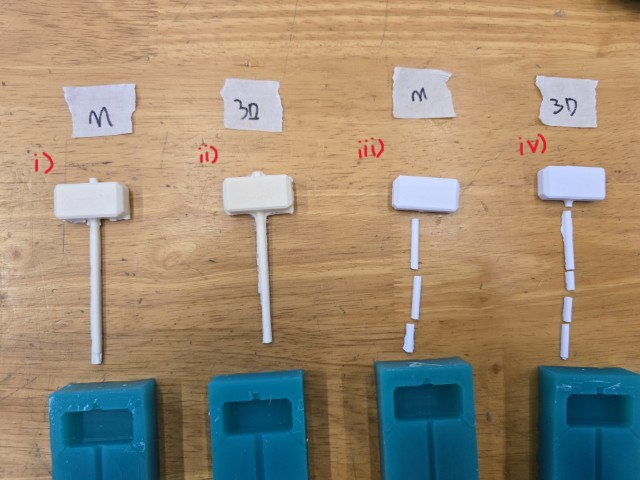
The casts turned out as follows:
| Polytek EasyFlo 90 Liquid Plastic | Snow Water-activated Gypsum Powder | |
|---|---|---|
| Milled Mold | i) Smooth finish on hammer head and handle is intact. While subtle, you can feel the machining lines on the hammer head and sides. |
iii) Smooth finish on hammer head but handle disintegrates. While subtle, you can feel the machining lines on the hammer head and sides. |
| 3D Printed Mold | ii) Smooth finish on hammer head and handle is intact. |
iv) Smooth finish on hammer head but handle disintegrates. |
Conclusions and Learning points
• Negligible difference in quality - We could not easily distinguish between a cast formed by milled mold and a 3D printed mold. It seems that there is little difference (if any) in quality between the milled mold and the 3D printed mold.
• Avoid thin channels - The liquid plastic is quite thick and viscous. This means that it may have difficulty passing through very thin channels when poured in the molds. Having a channel that is very long may also cause the liquid plastic to harden and stop flowing before it filled up the mold. Widening the “funnel” where the liquid plastic enters is also a good idea. Vents should also reach up to the level of where the entry pour hole is.
• Use registers for 2-part molds – We did not create registers for our molds. We should have to make it easier to align the two halves of the mold.
• Materials should match design – The handle of our maul hammer could not bond together properly when using Snow Water-activated Gypsum Powder. Our instructor Steven explained to us that such materials are stronger in compression than in tension, thus if the cross-section is too narrow and thin, it would just break apart easily because it cannot resist the tension. We noted that with the same material, the maul hammer head managed to form properly because it was not as thin as the handle. There were no issues with using the Polytek EasyFlo 90 Liquid Plastic and the entire cast was intact.
This concludes our Group Assignment for this week.