
Week 2
Computer Aided Design
assignment
- Understanding 2D and 3D concepts
- Learning about various software for 2D and 3D design
- Learning how to use this software to create objects
- Documenting the process using images and videos
- Including all relevant files
Explore 2D
"2D" stands for "two-dimensional" and refers to shapes or objects that have length and width but no depth, like a flat surface or a picture on a page.
when we deals with 2D, the main types are raster and vector. we need to understand this two concepts which is Pixel and Bitmap.
Pixel
A pixel is simply the smallest addressable element of a picture represented on a screen. An image is made up using a collection of pixels referred to as a bitmap.
Bitmap
A bitmap is a mapping from some domain to bits, that is, values which are zero or one. It is also called a bit array or bitmap index. The more general term pixmap refers to a map of pixels, where each one may store more than two colors, thus using more than one bit per pixel.
1.Raster
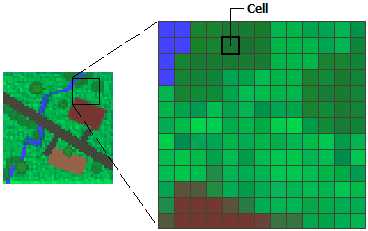
Raster is made up of pixels each pixels contains informations like colors in photographs. when we zoom in the quality of the image will reduce.
File extensions are .BMP, .TIF, .GIF, .JPG, etc...
2. Vector
Vector use mathematical paths making perfect for design need to be scaled without losing quality. Vector graphics are best for printing since it is composed of a series of mathematical curves.
File extensions: SVG, EPS, PDF, AI, DXF, etc...
3. 2D Raster Softwares
Raster graphics software is used to create and edit images composed of pixels, which are tiny squares of color arranged in a grid. Each pixel contains specific color information, making raster images ideal for complex visuals such as photographs, digital paintings, and detailed textures. Raster-based images are resolution-dependent, meaning their quality decreases when scaled up. These images are commonly used in digital art, photo editing, and web graphics.
Some popular raster software includes Adobe Photoshop, GIMP, Krita, Corel PHOTO-PAINT, Paint.NET and Pixlr. These programs are widely used for digital painting, photo editing, and creating pixel-based artwork.


GIMP (GNU Image Manipulation Program)
i would like to explore GIMP. GIMP is a free and open-source raster graphics editor designed for tasks such as photo retouching, image composition, and digital painting. It is a powerful alternative to Adobe Photoshop, offering extensive tools for image editing, filters, and plugins. GIMP supports multiple file formats, including PSD, JPEG, PNG, and TIFF, making it highly versatile.
4. GIMP
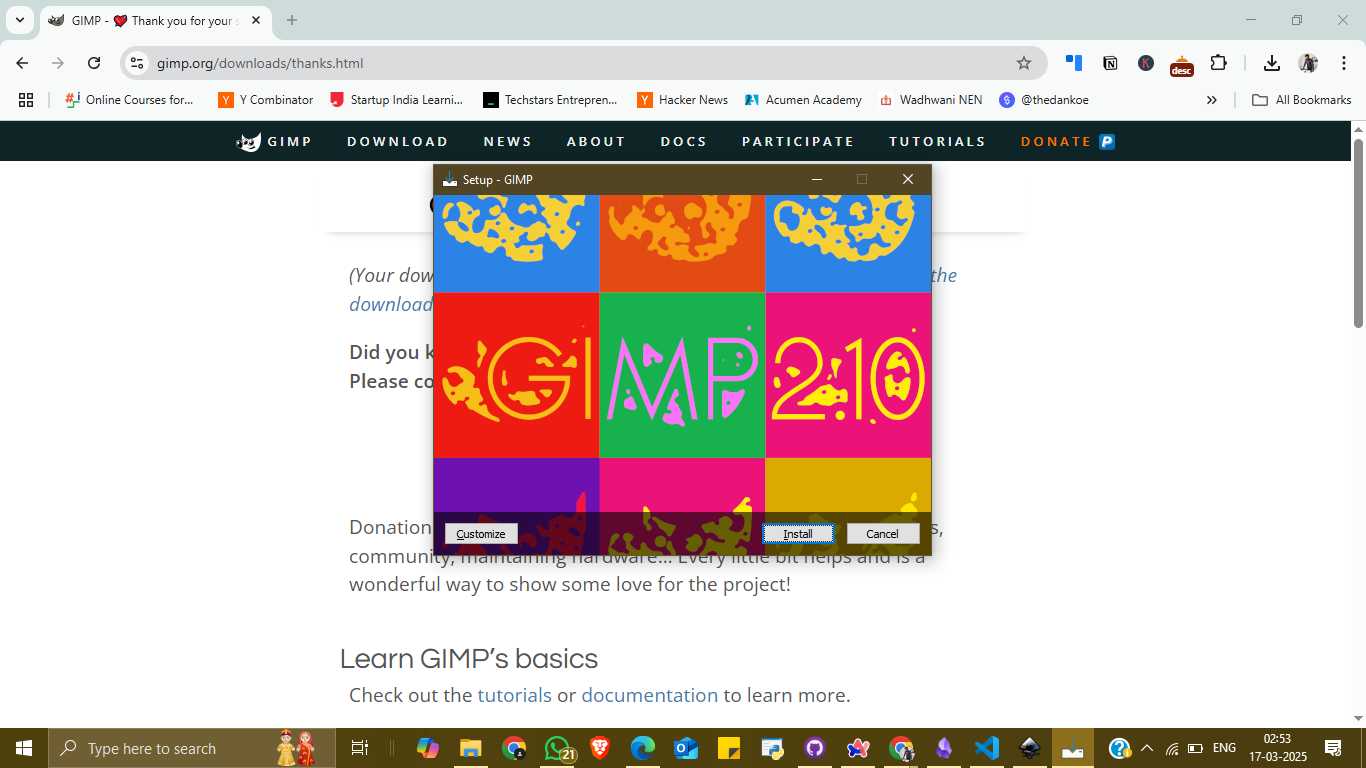
To begin, I visited the official GIMP website (https://gimp.org), where I downloaded the latest version, GIMP 2.10.38. The download page clearly provides a red button labeled "Download 2.10.38," making the process straightforward. Once the installer was downloaded, I launched the setup file. A colorful installation window appeared, and I proceeded by clicking the “Install” button to begin the default installation process.
Visit GIMP Official Website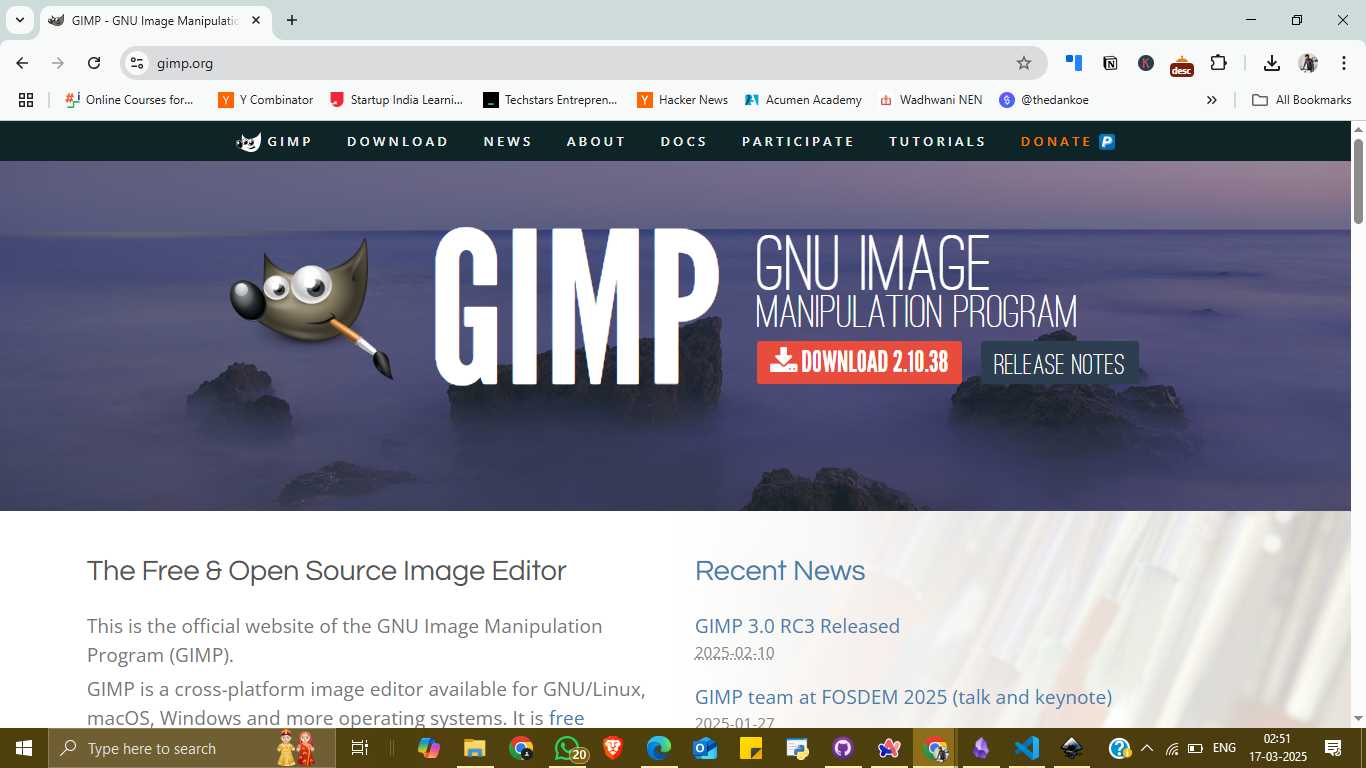
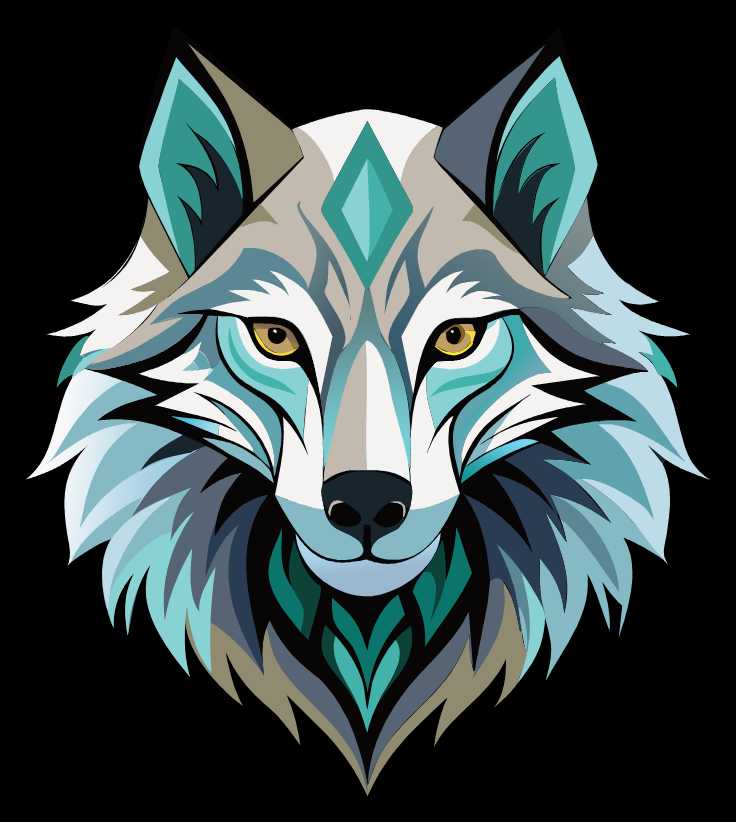
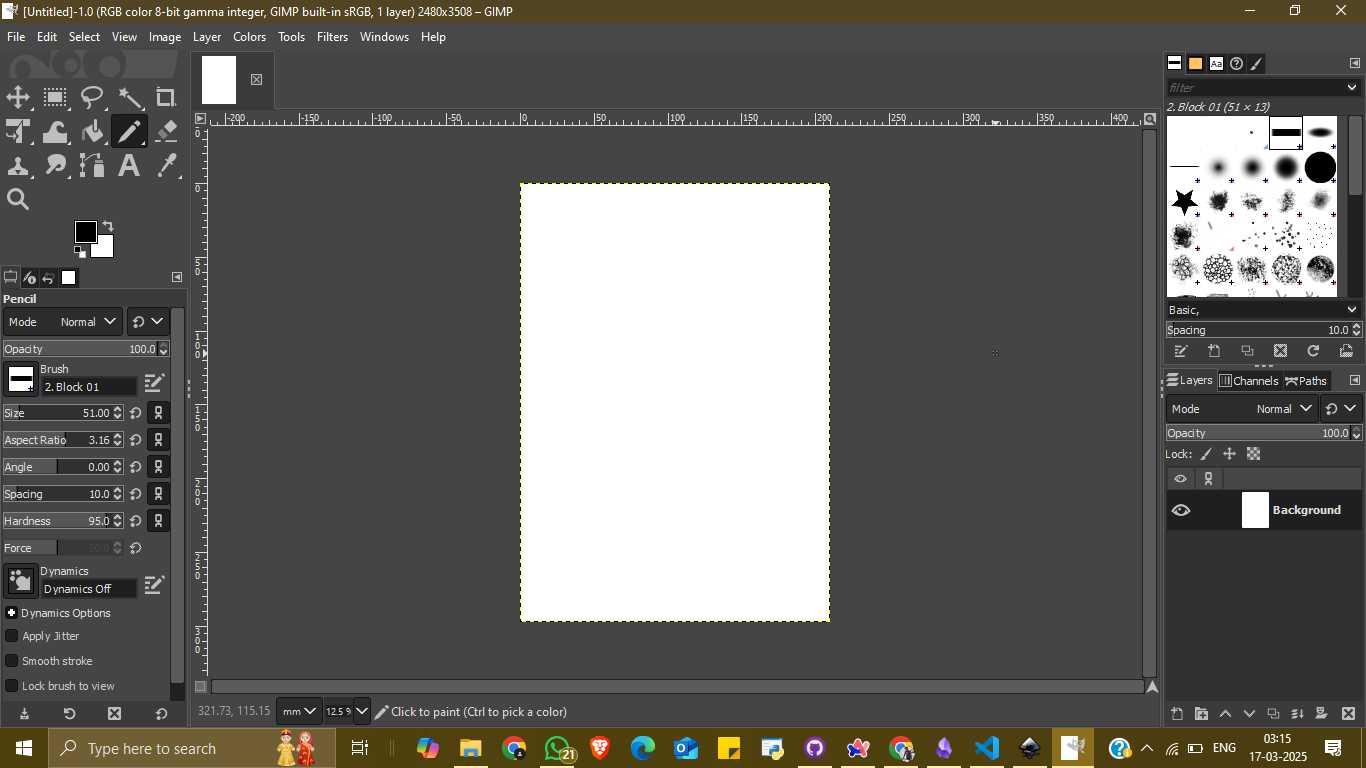
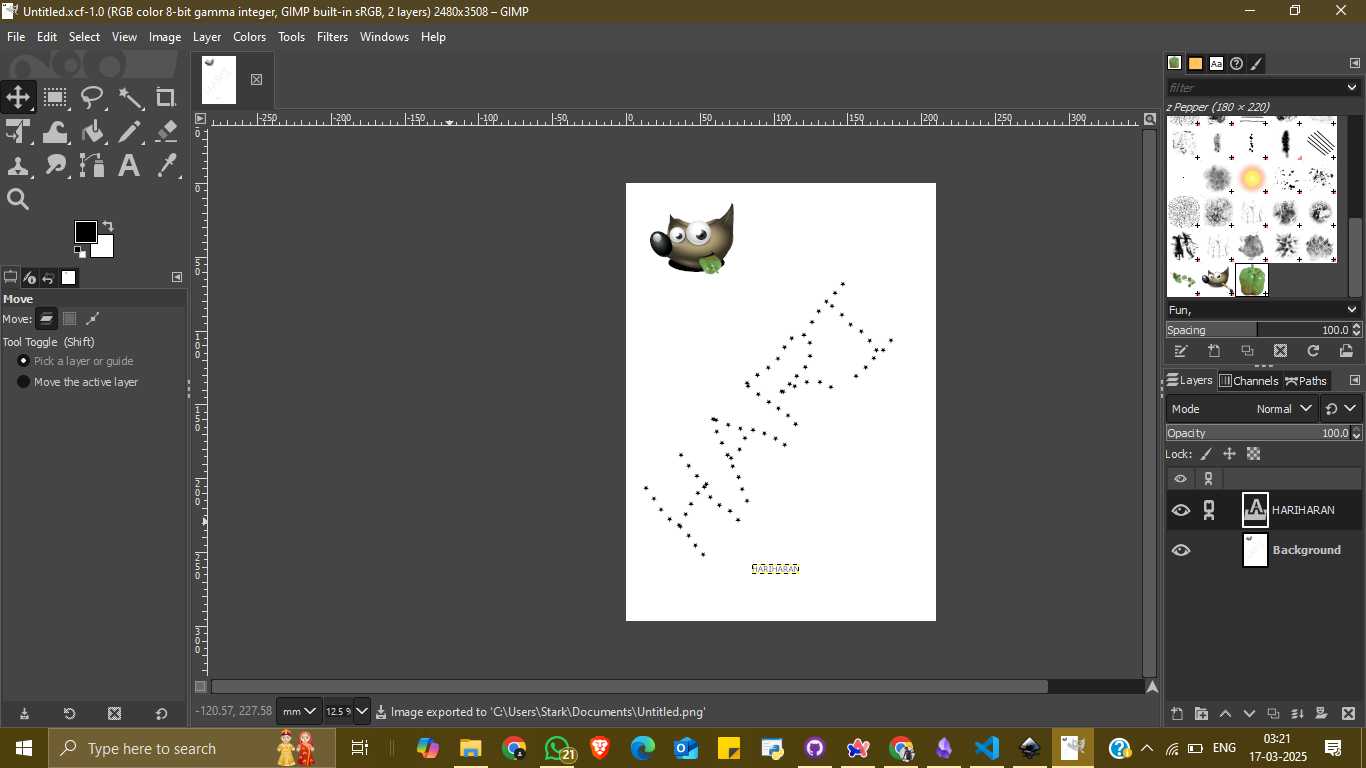
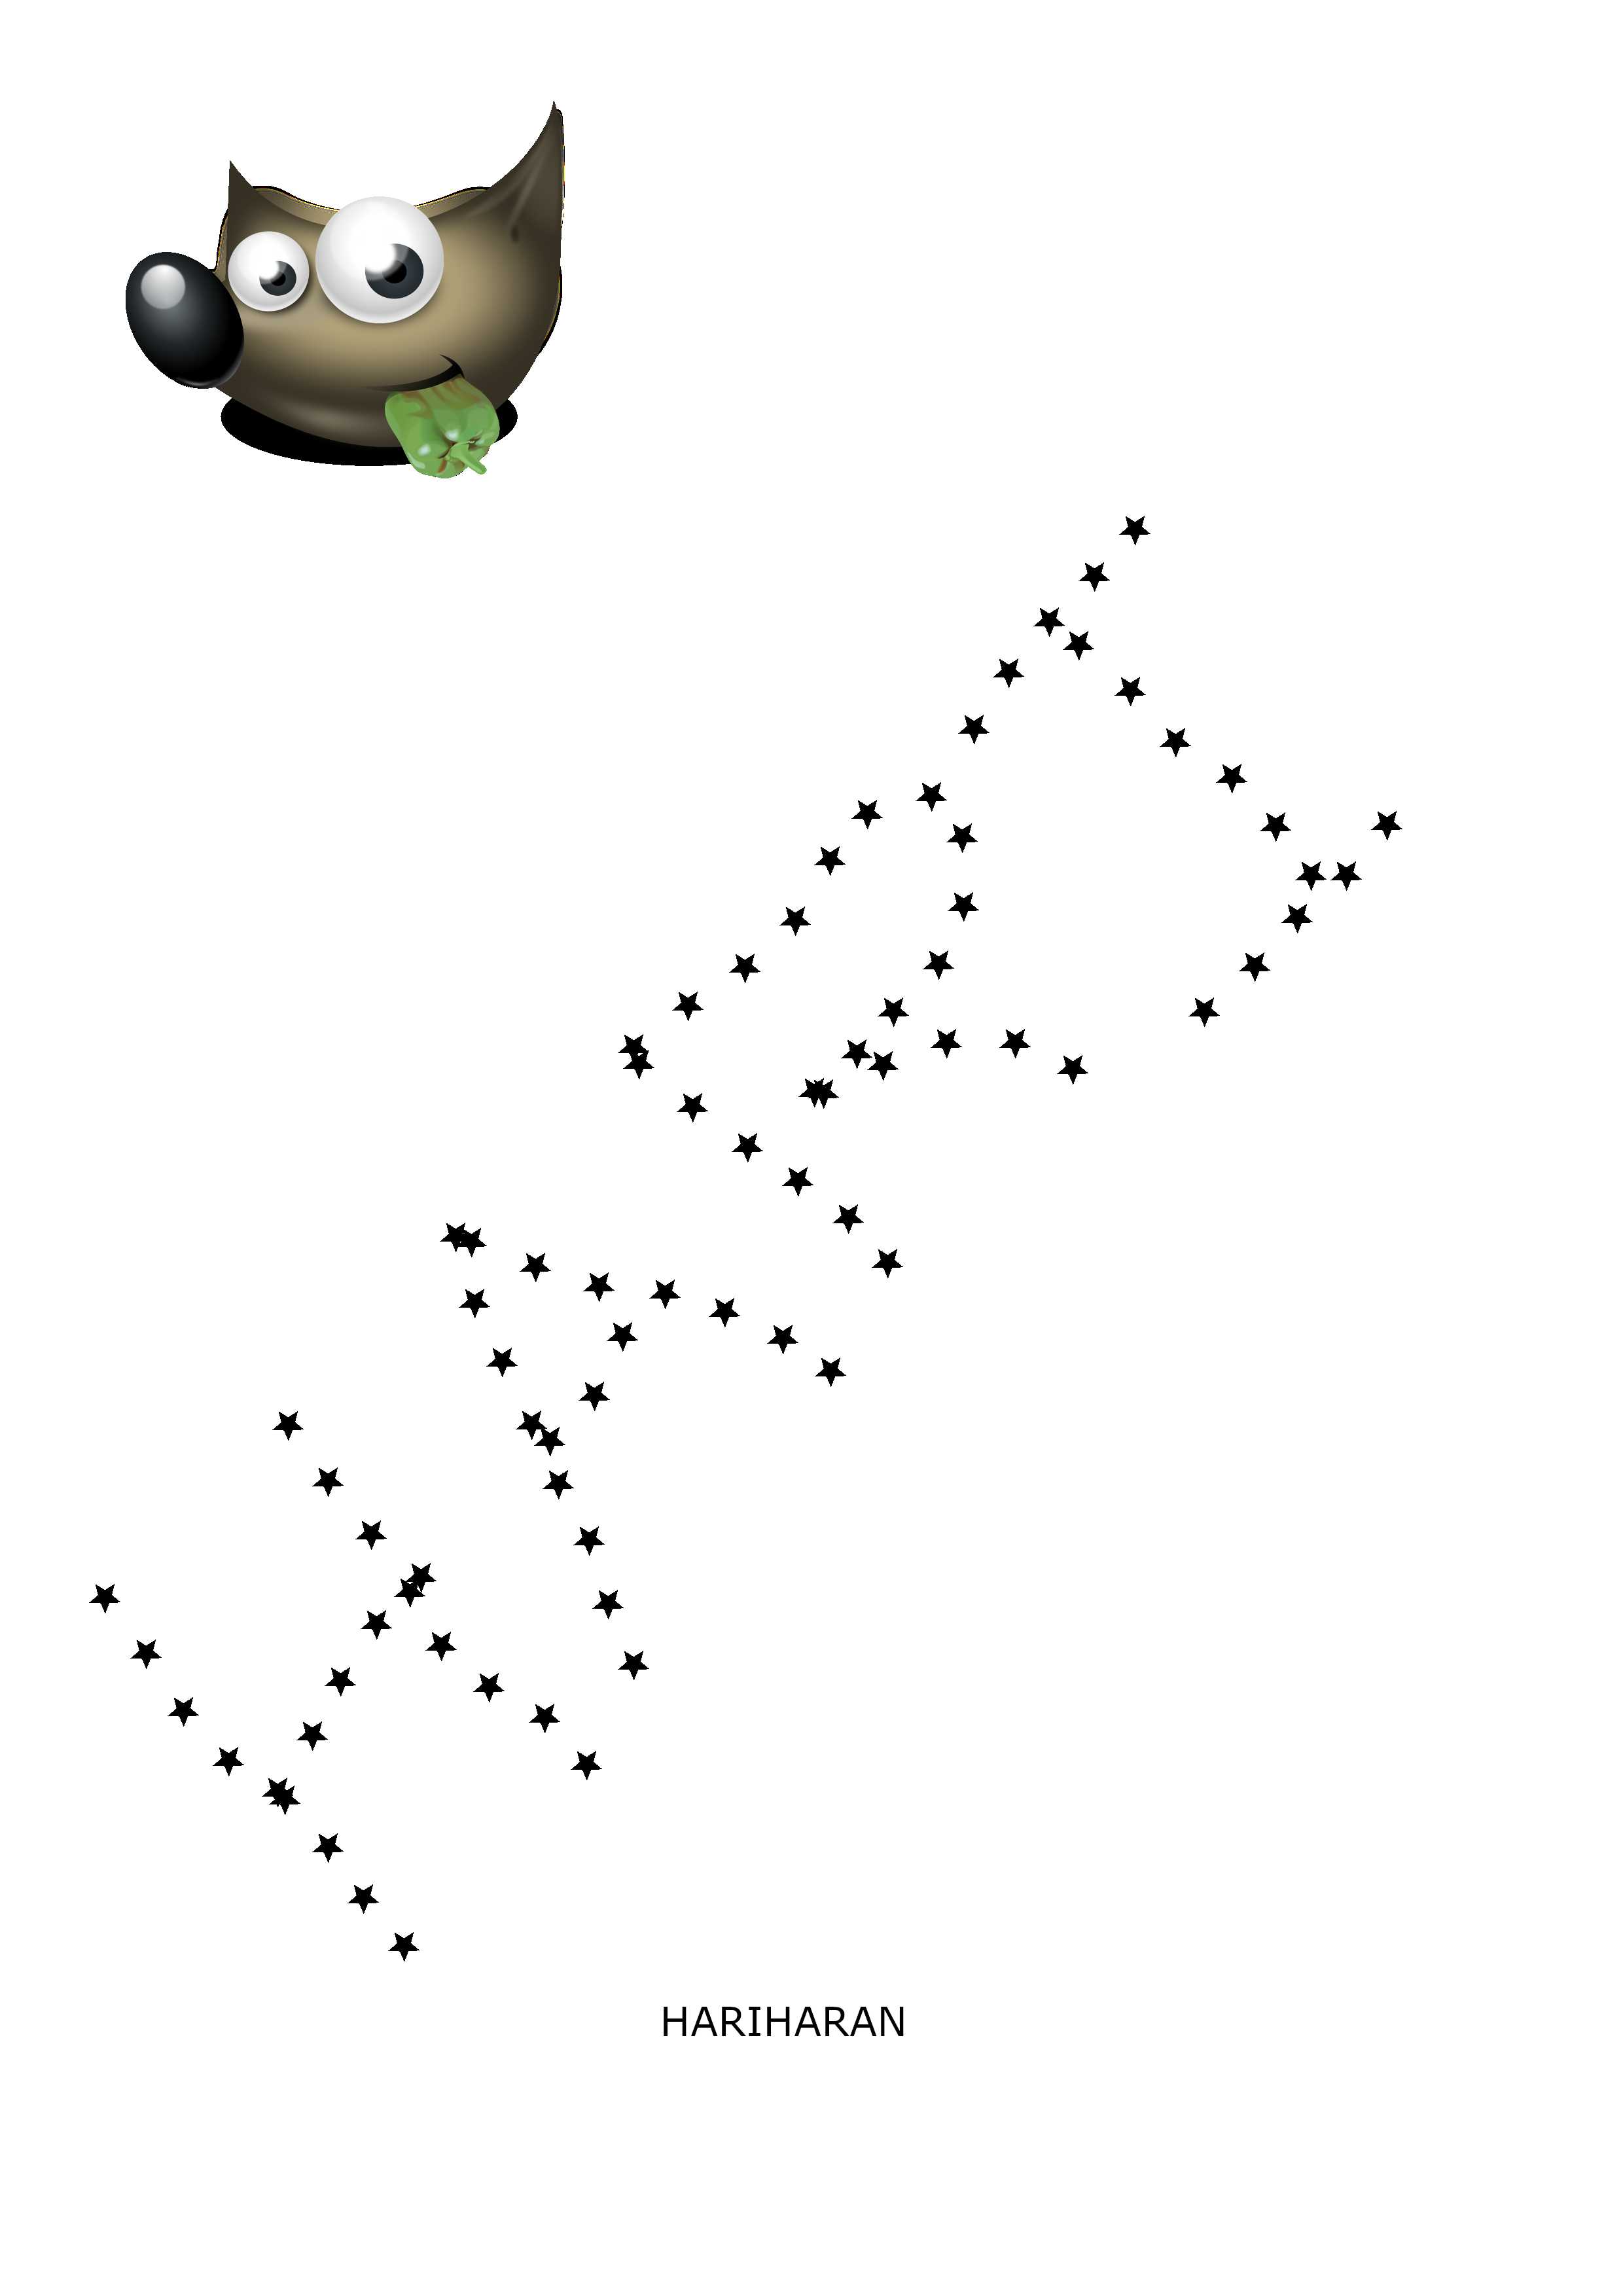
After installation, I opened the GIMP application. From the main menu, I selected File → New to create a blank canvas. I chose a high-resolution page size (2480 x 3508 pixels) suitable for detailed design work. The interface displayed various tools on the left panel, including brushes, pencil tools, and text insertion options. I started designing using the pencil tool and experimented with different brushes and shapes. I also used the text tool to write my name “HARIHARAN” in a creative format using star-like patterns and added a GIMP mascot image to enhance the design.
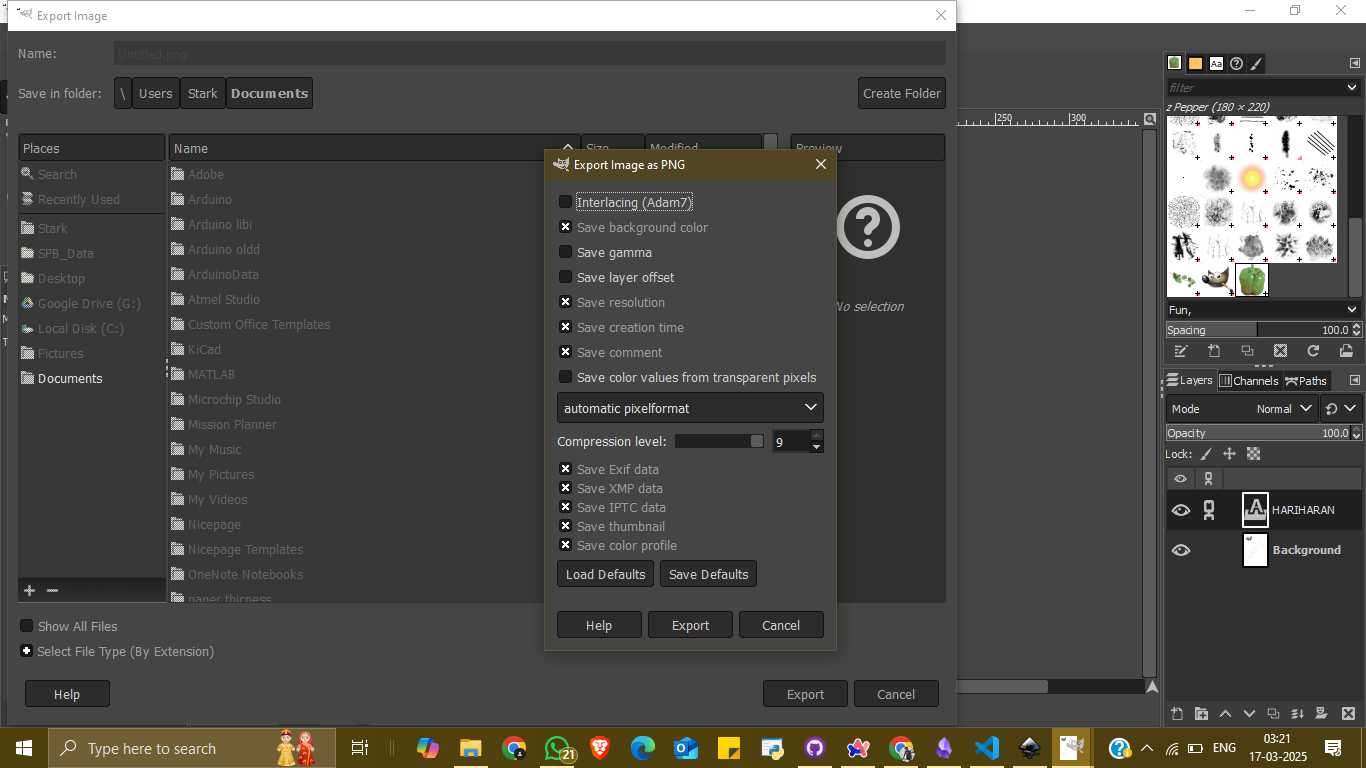
Once the image creation was completed, I exported the project as a PNG file. To do this, I went to File → Export As, selected the file location and format (.png), and adjusted the export settings such as compression level and metadata. I finalized the export by clicking the “Export” button, which saved the raster image to my computer.
Source Files
5. 2D Vector Software - Inkscape
I explored Inkscape, a free and open-source vector graphics editor, for creating digital illustrations. Inkscape is widely used for tasks such as designing logos, diagrams, icons, and complex artwork. It works across platforms like Windows, macOS, and Linux.
Visit Inkscape Official Website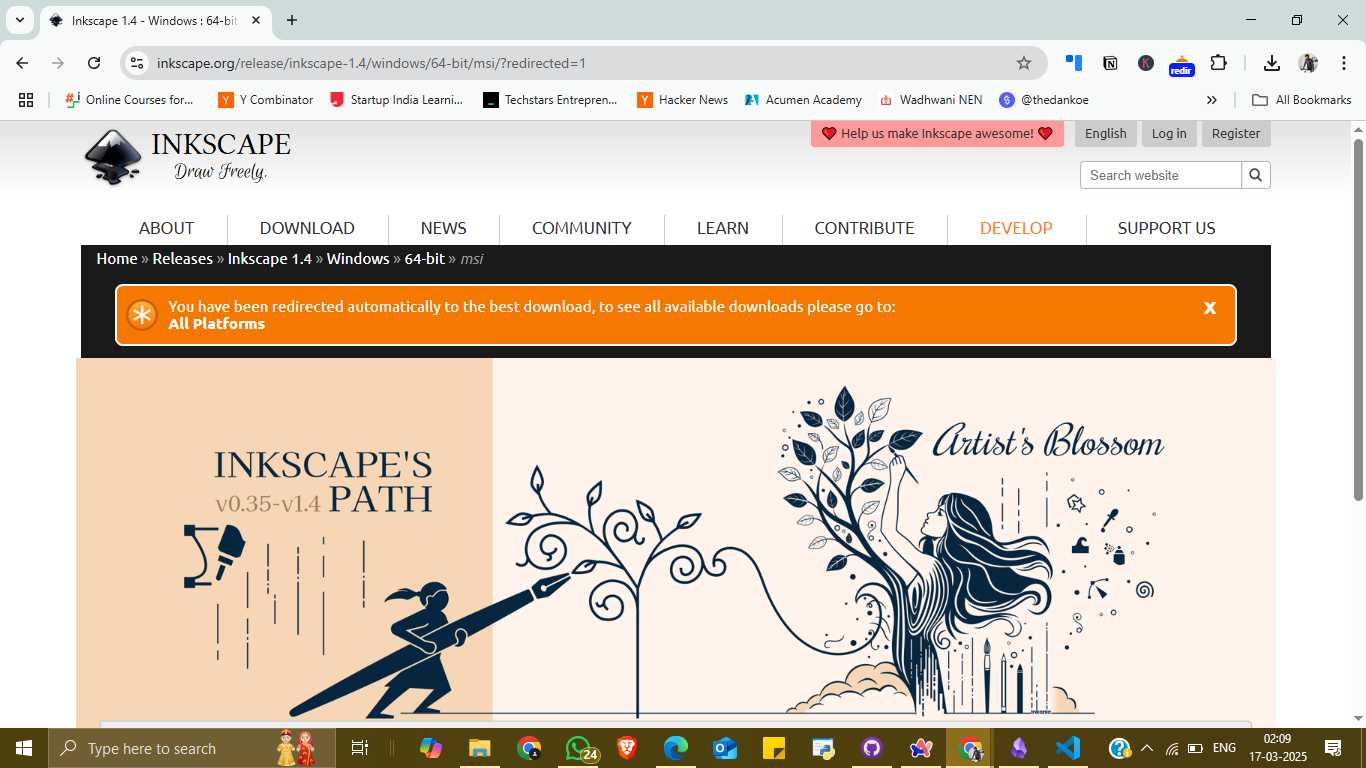
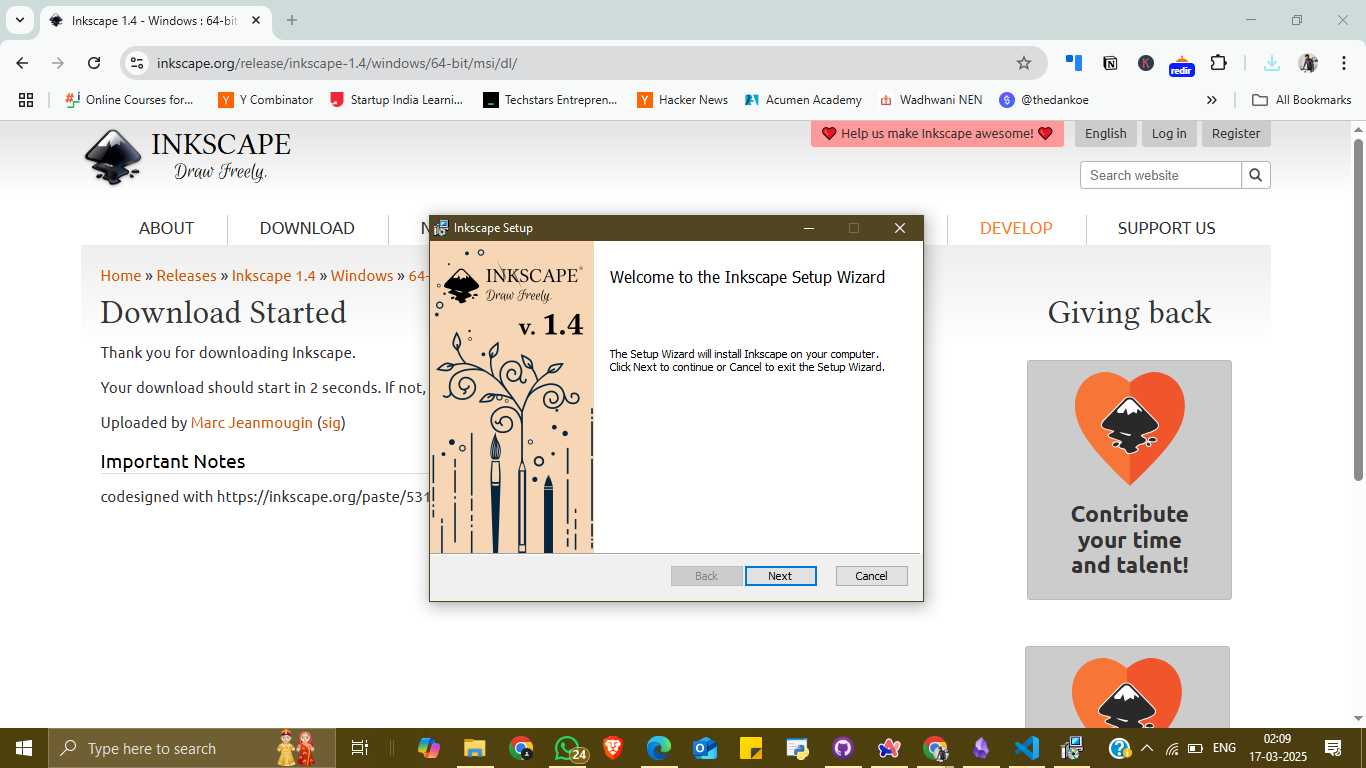
To begin the process, I visited the official Inkscape website and downloaded the version 1.4 for Windows 64-bit. The download page provided a clear link, and I was redirected to the appropriate installer automatically, as shown in the first screenshot. Once the file was downloaded, I launched the setup wizard. The installer welcomed me with the Inkscape logo and setup instructions. I clicked "Next" to continue the installation. After installation, I opened Inkscape and was greeted by a colorful and modern welcome screen (version 1.4) offering customization options. I selected the default canvas, keyboard layout, and appearance theme. I preferred the dark theme for better visual comfort while designing and saved these settings.
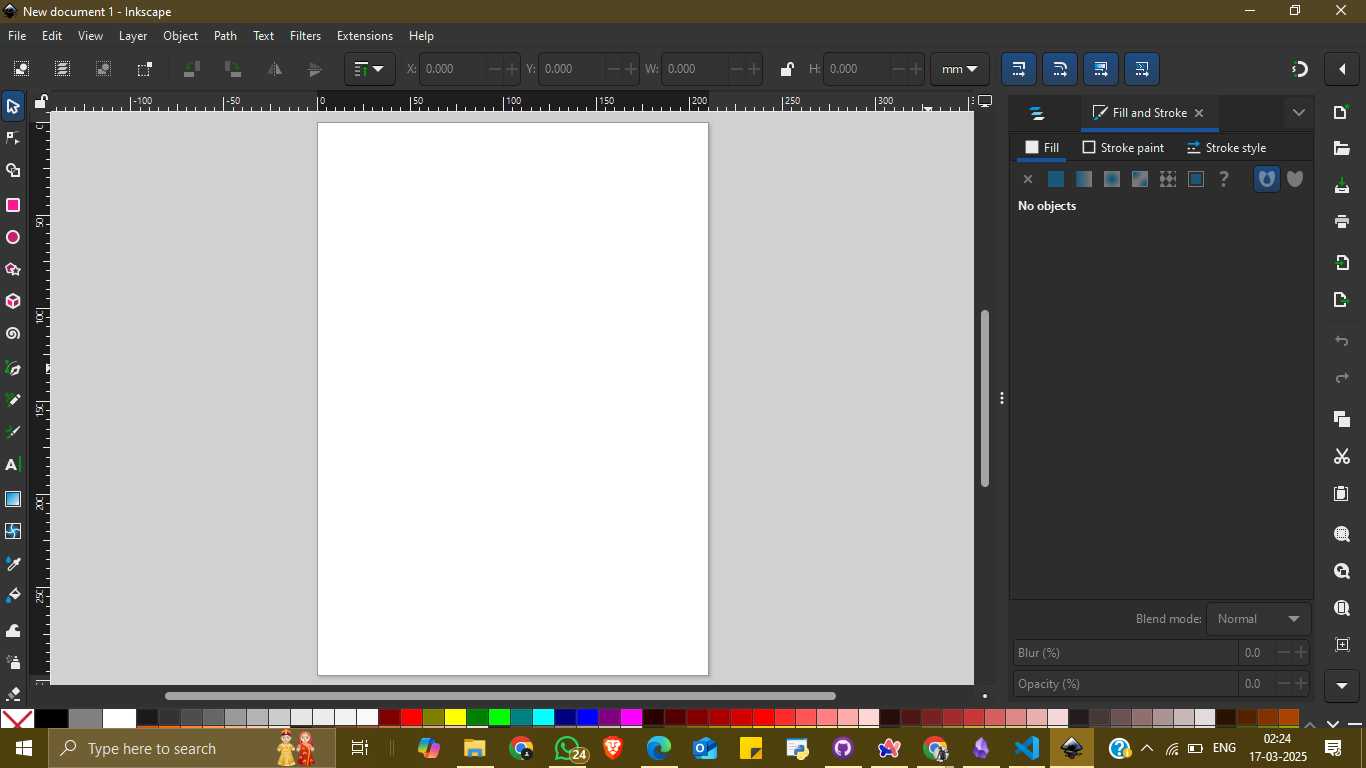
With Inkscape ready, I created a new document. A blank canvas appeared, and I used the toolbars on the left and top of the screen to begin drawing. Initially, I started with a simple black square and added a diagonal white line to divide the shape. Then, I duplicated and arranged multiple such blocks to create patterns. This allowed me to explore shape tools, alignment, and duplication features.
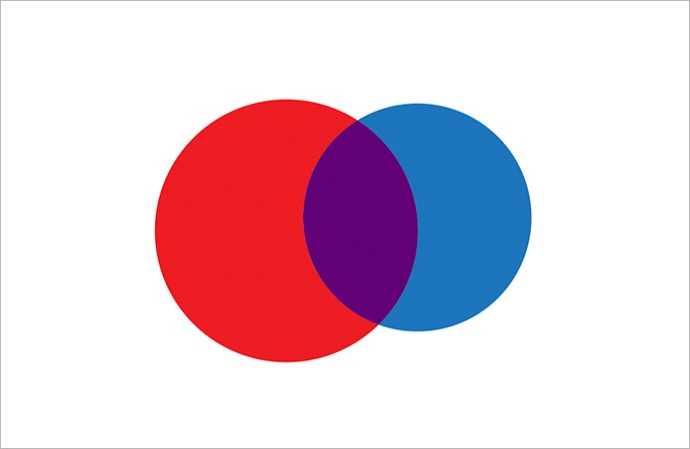
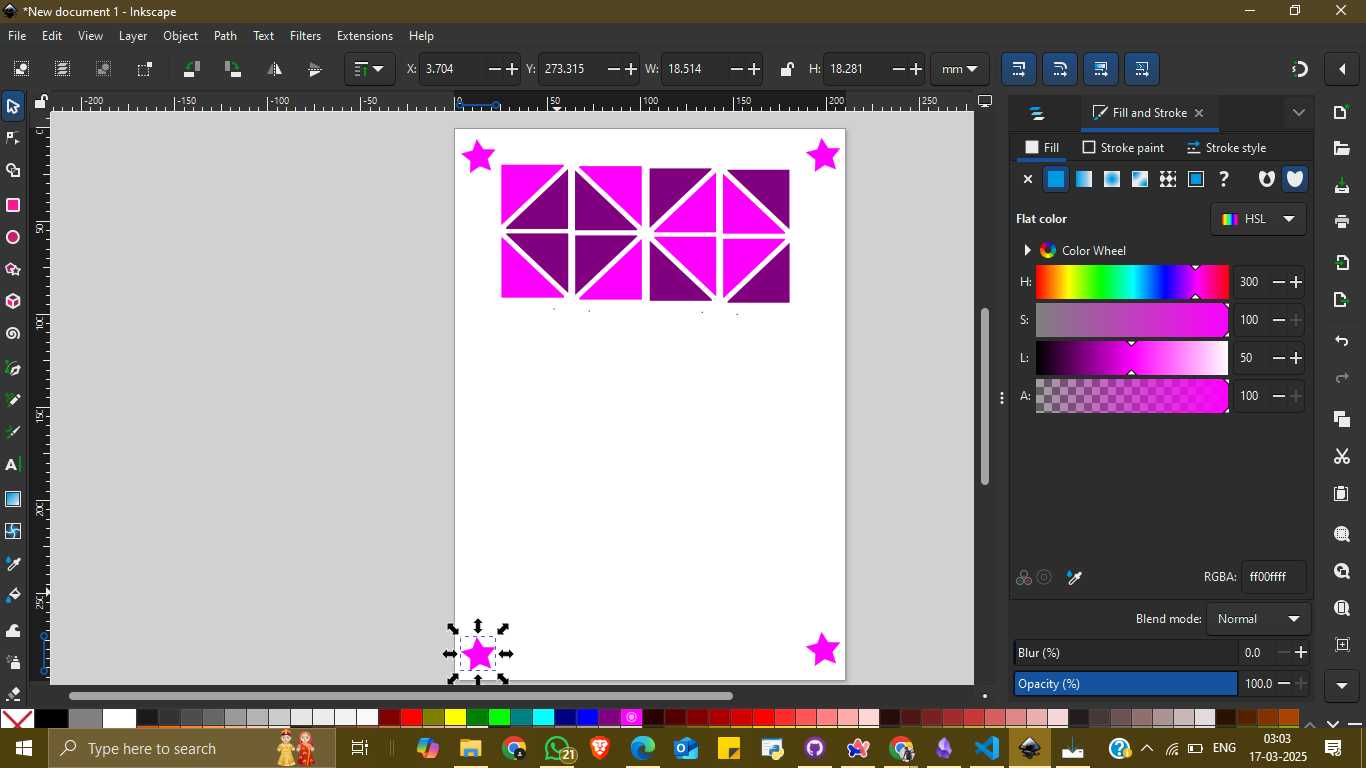
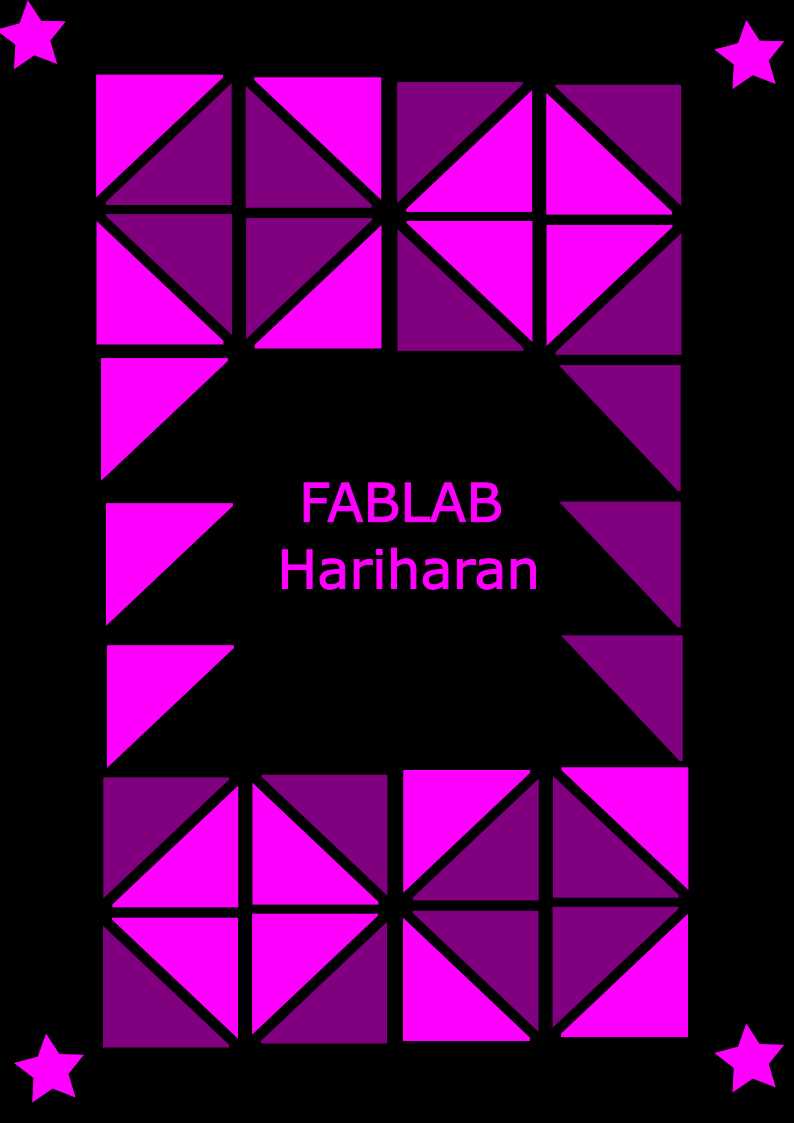
As I continued, I added colors using the fill and stroke settings. I selected various shades of purple and pink, giving the design a vibrant and modern aesthetic. These blocks were grouped and organized into symmetrical layouts, forming a geometric mosaic. I also used the star tool to add decorative elements to the corners of the canvas.

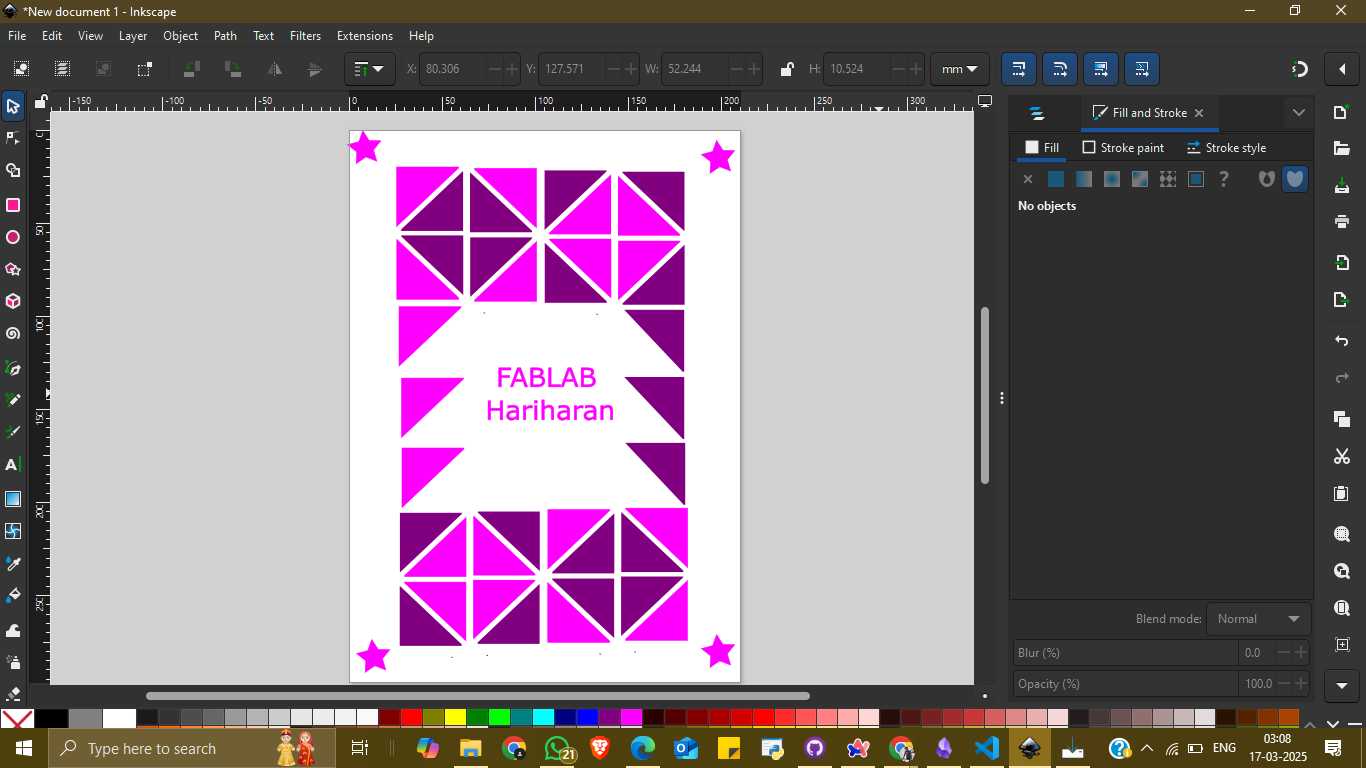
To finalize my design, I added text at the center that read "FABLAB Hariharan" using the text tool. This completed the artwork and gave it a personalized identity. The final composition was a clean, colorful vector image with creative symmetry and well-defined elements—showcasing my understanding of Inkscape’s tools and interface.
Source Files
Raster Hero Shot
Vector Hero Shot
3D design
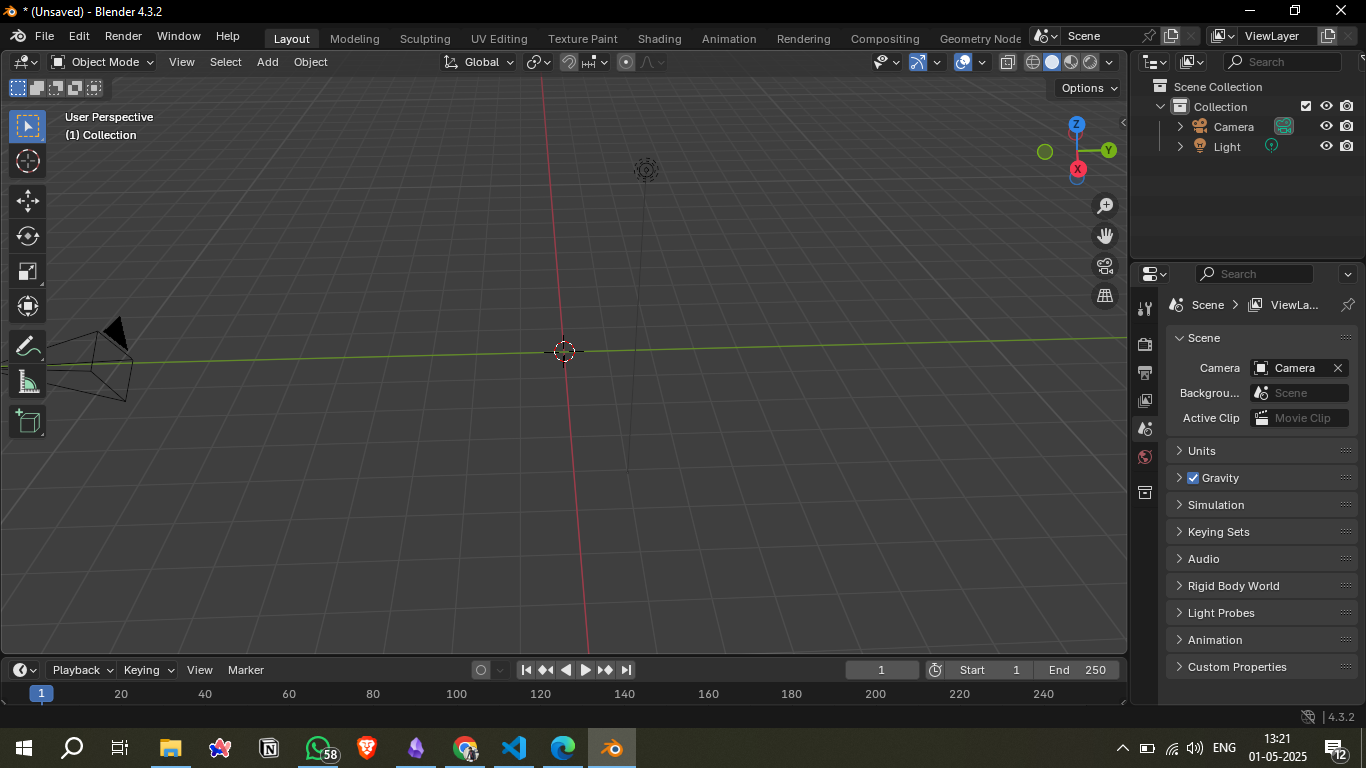
1. Opening Blender
Launched Blender and navigated to the default startup scene.
Interface overview explored briefly to identify key tools.
Visit Blender Official Website
2. Scene Preparation
Deleted the default cube.
Ensured a clean workspace by centering the 3D cursor and verifying the camera and light setup.
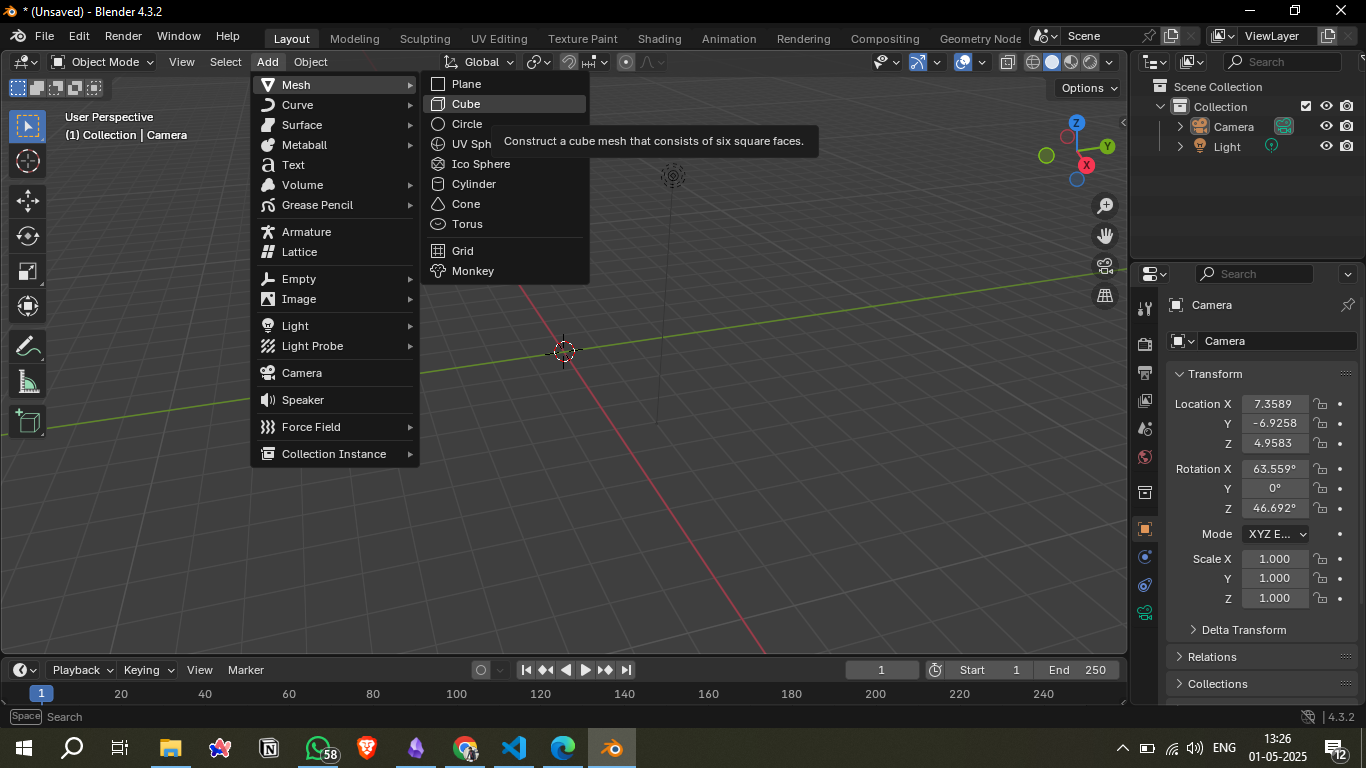
3. Adding Mesh Objects
Used `Shift + A` > Mesh > UV Sphere to start with a rounded shape (later replaced with metaballs for smoother look).
Also experimented with the basic cube to explore the add menu.
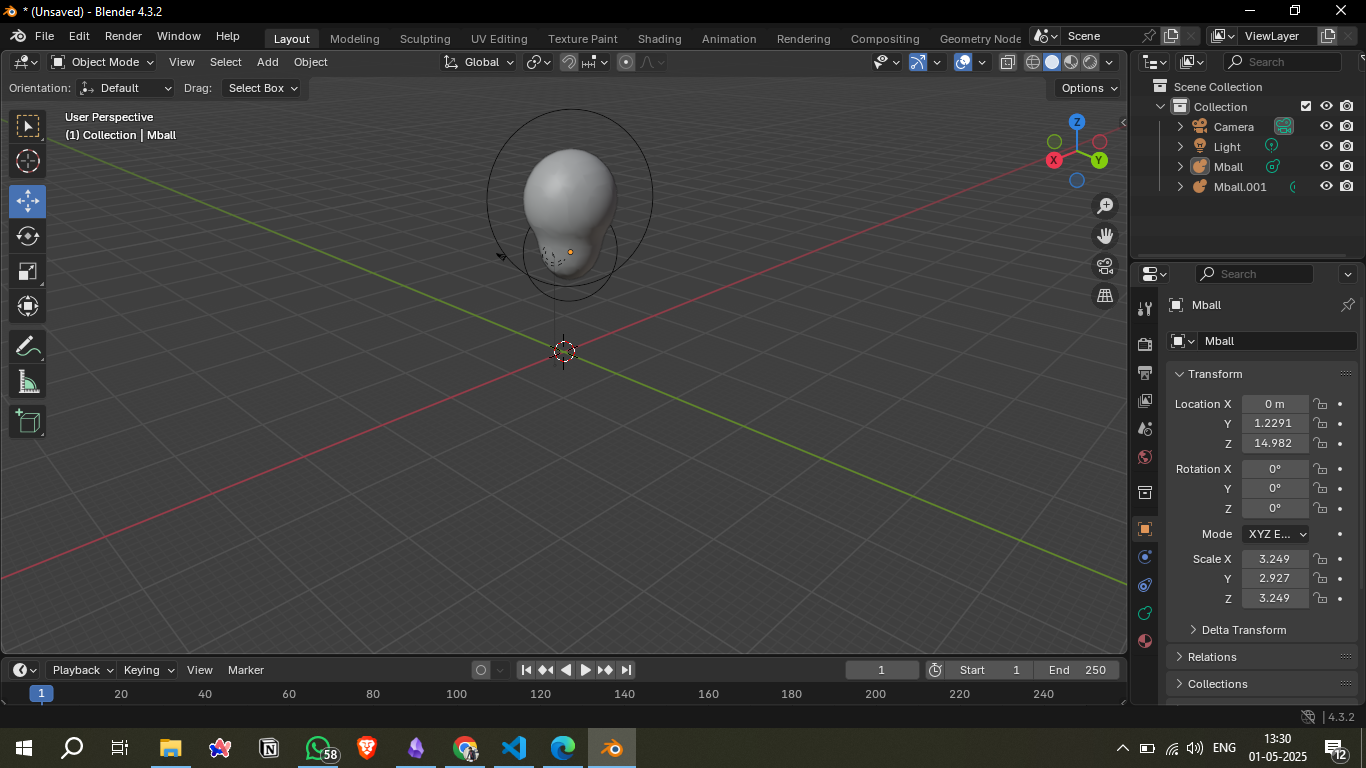
4. Creating Balloon Shape
Used Metaball > Ball objects to model the balloon.
Scaled and positioned the upper balloon and lower knot using two metaballs.
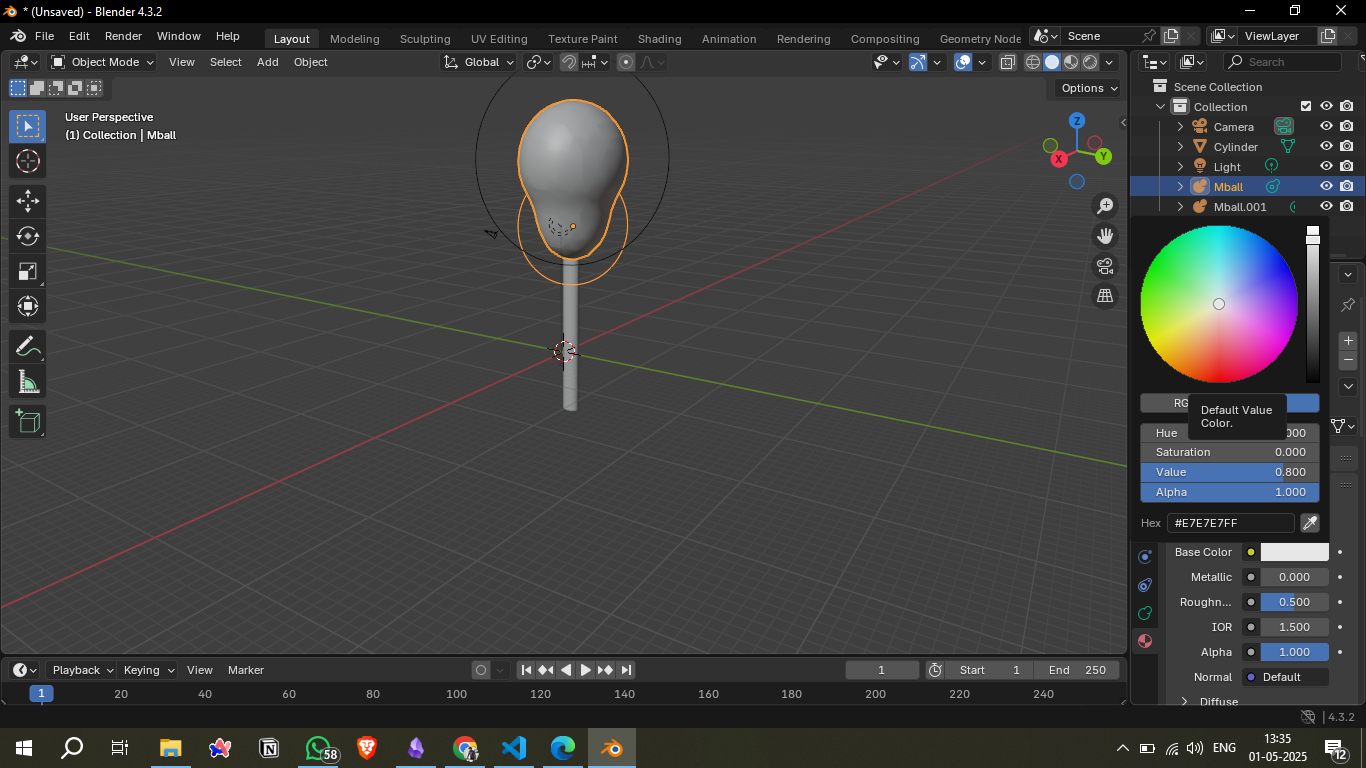
5. Adding a String
Inserted a cylinder for the balloon string.
Aligned it with the bottom part of the balloon.
Source Files
1. Launching SolidWorks
Opened SolidWorks Premium 2023.
Created a new part and selected the Front Plane for 2D sketching.
Visit SolidWorks Official Website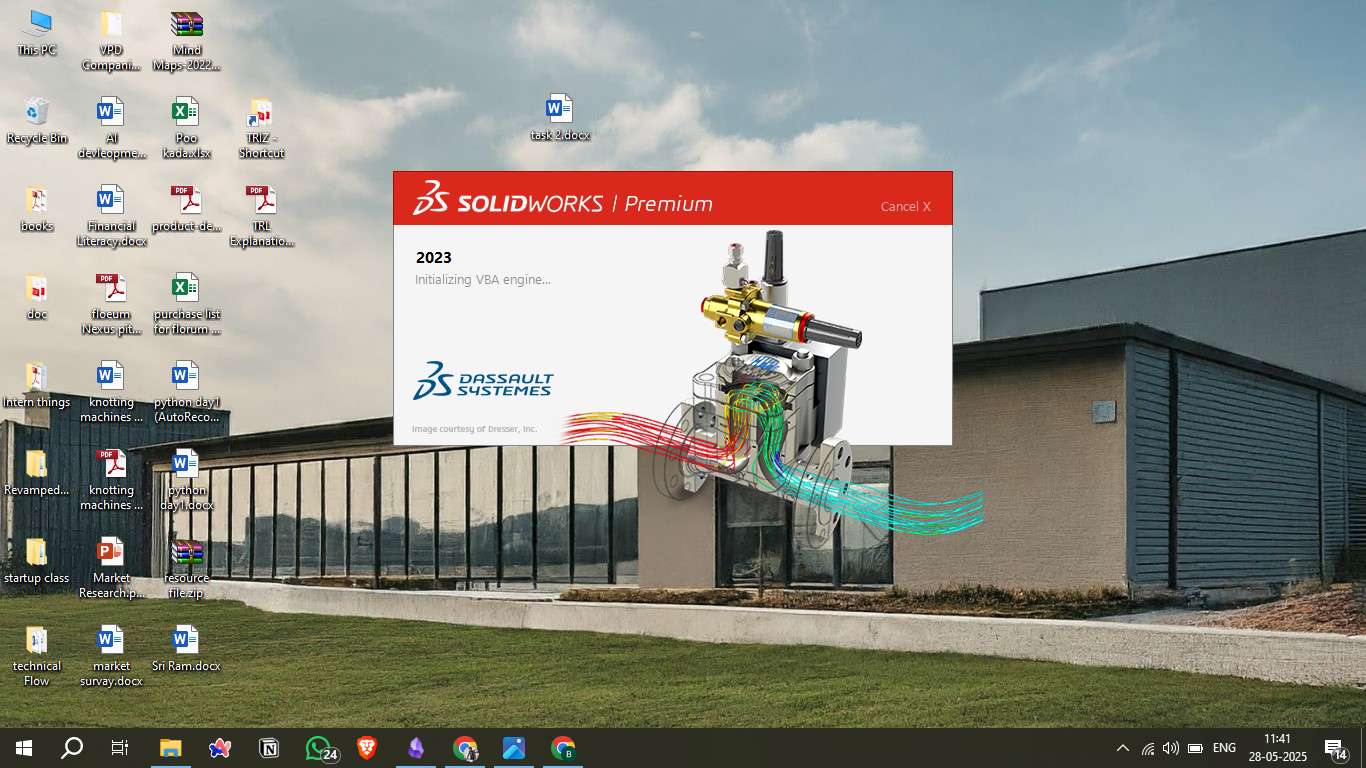
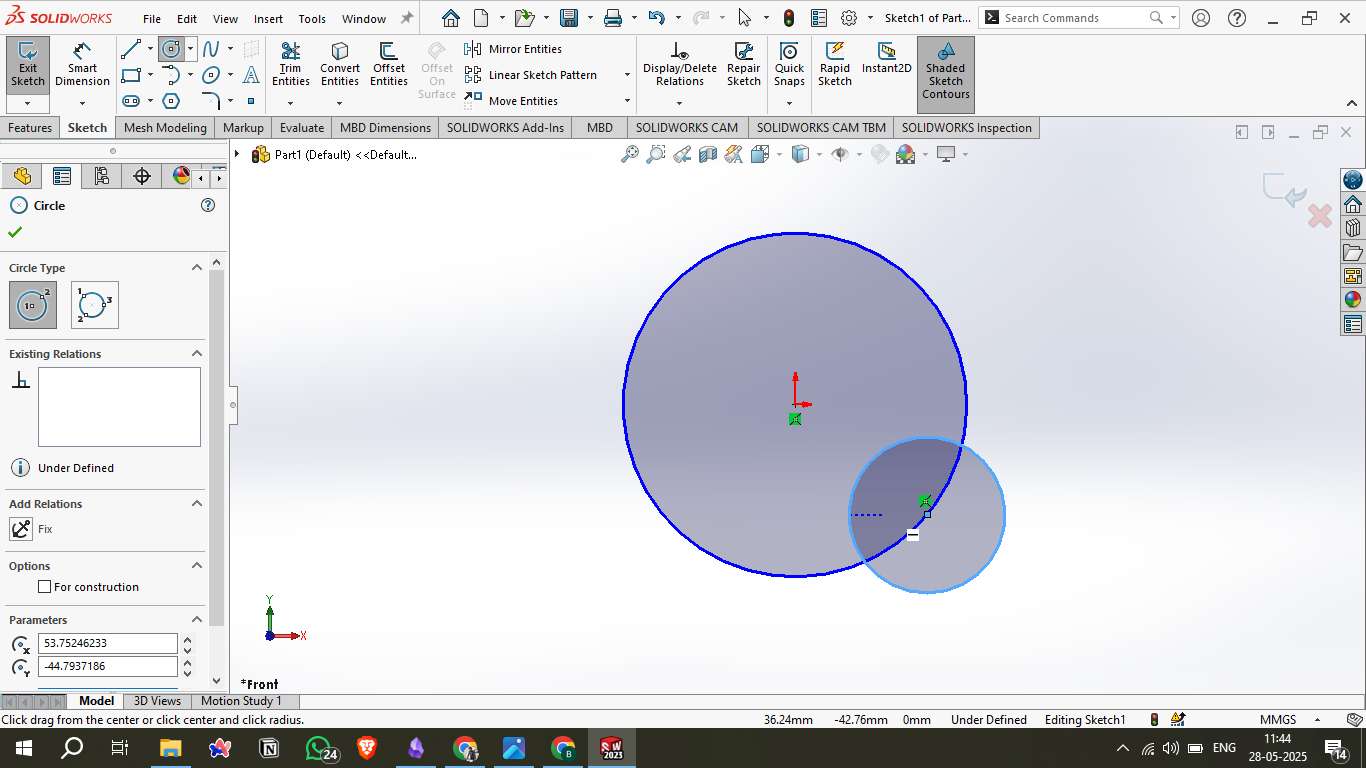
2. Drawing Circles
Used the Circle Tool to draw a large central circle.
Drew a smaller circle tangent to the edge of the larger one.
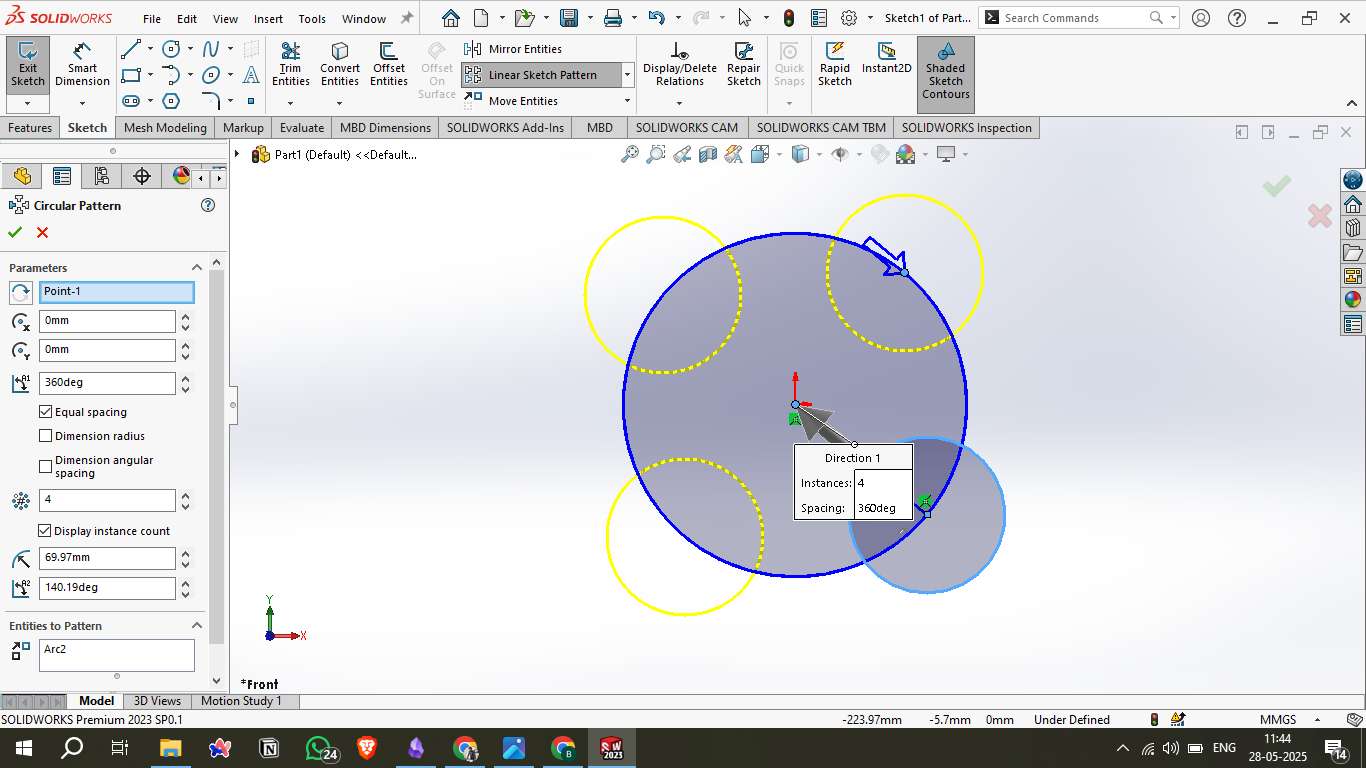
3. Applying Circular Pattern
Used the Circular Pattern tool to duplicate the small circle evenly around the large central one.
Set the number of instances to 4 and spaced them equally in 360°.
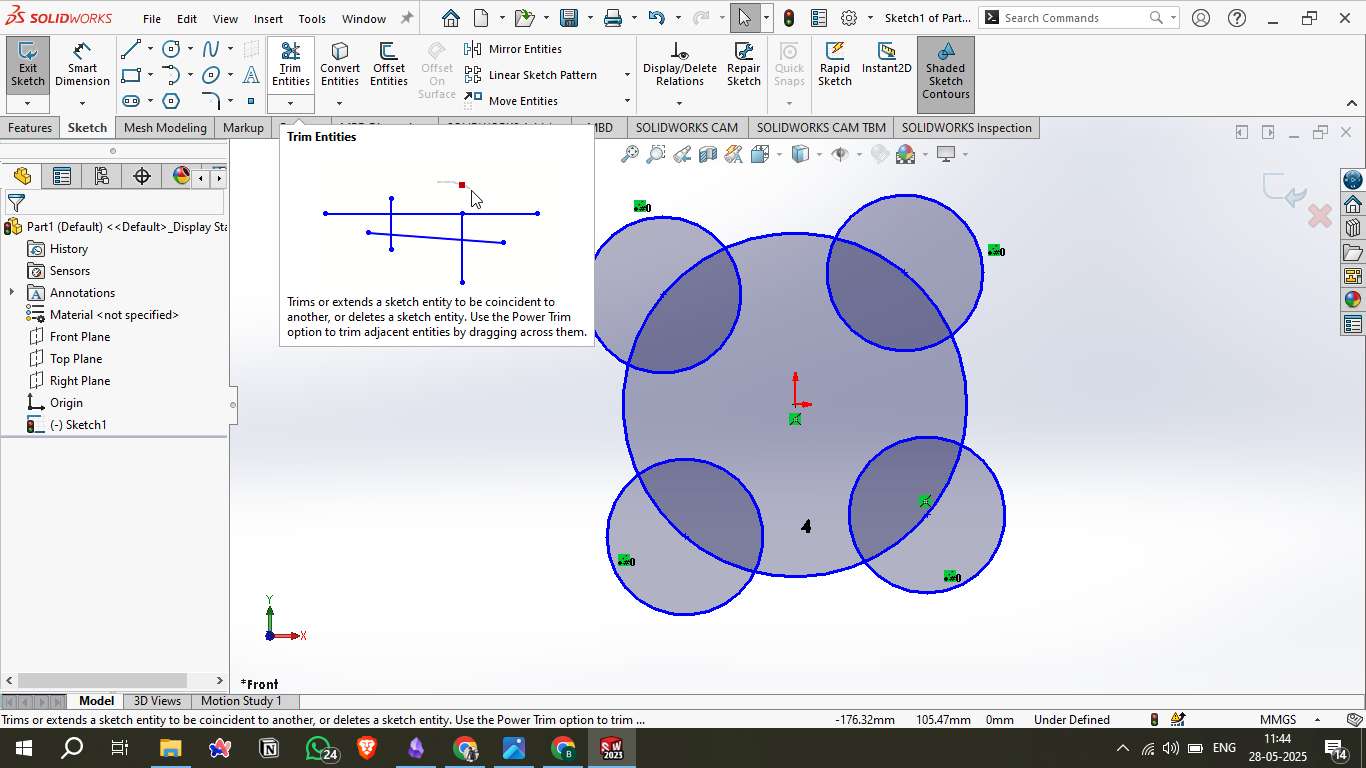
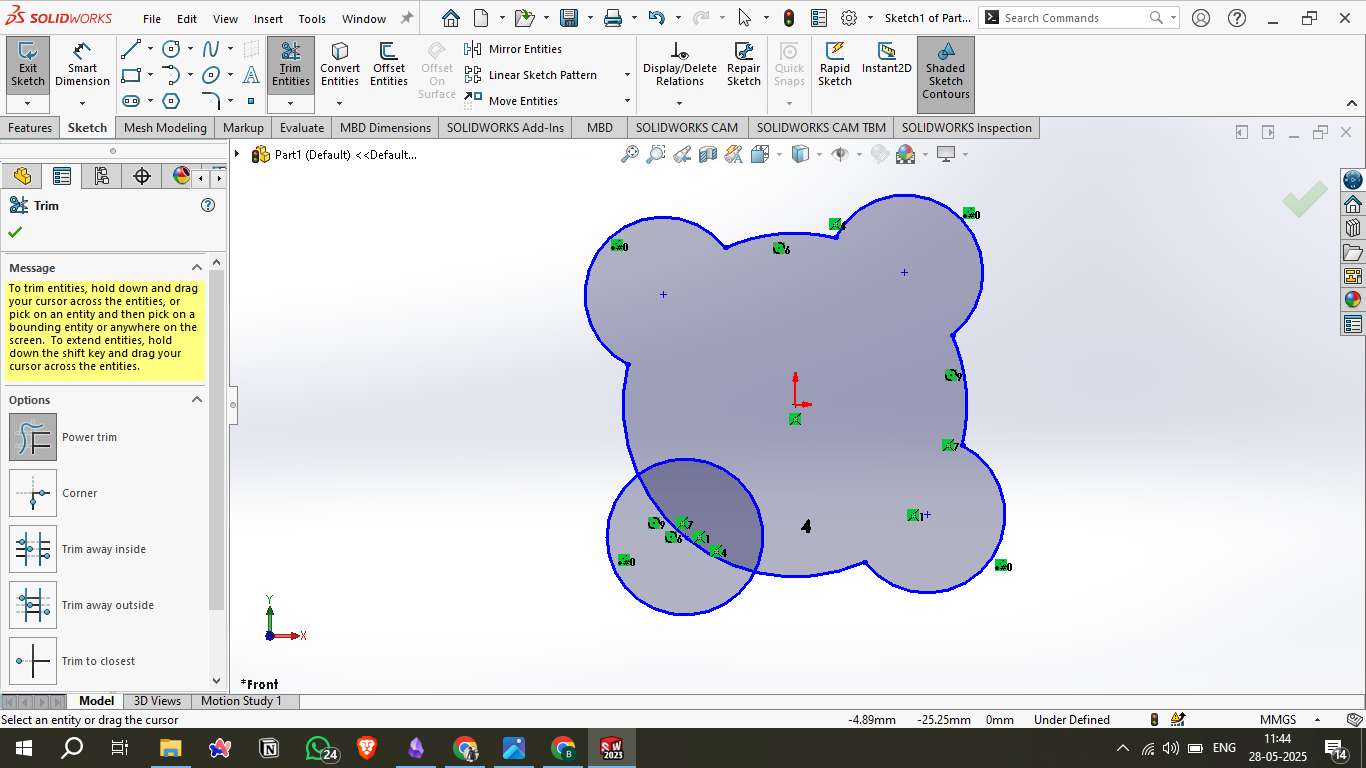
4. Trimming Entities
Used Trim Entities > Power Trim to clean up overlapping lines.
Created a smooth floral contour by trimming excess arcs between circles.
5. Final Sketch Shape
Refined the contour to create a flower-like closed loop.
Ensured the sketch was fully defined before moving to 3D.
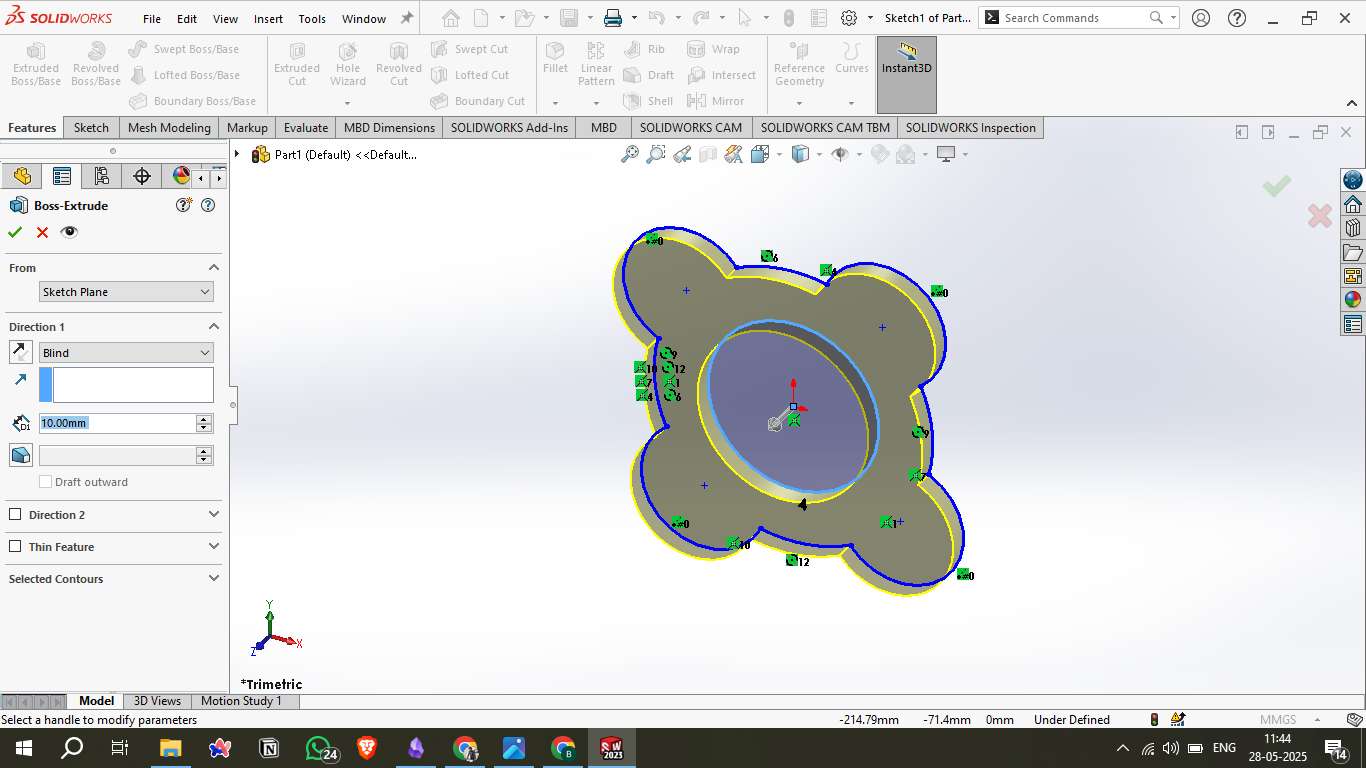
6. Extruding the Sketch
Selected the final profile and used Boss-Extrude to give it 10mm thickness.
The result was a flat flower-like 3D object with a central hole.
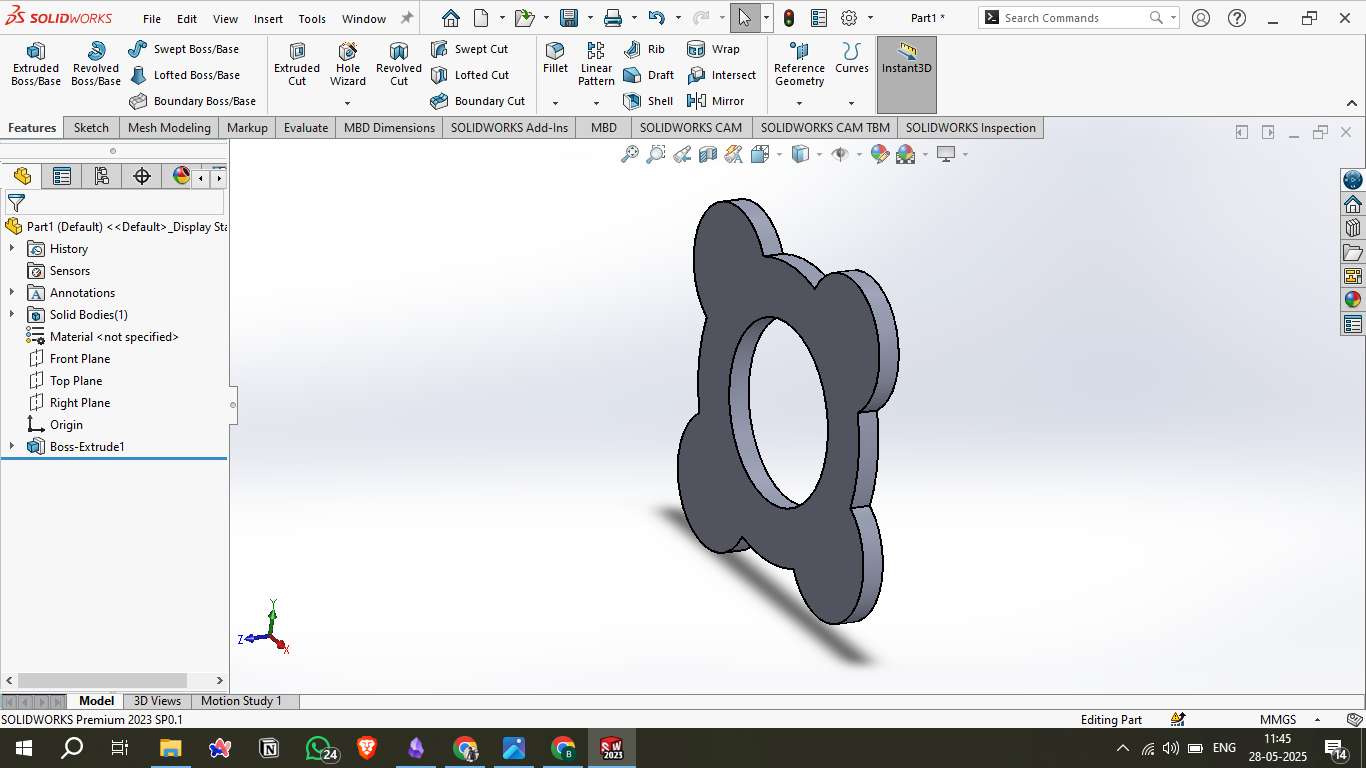
7. 3D View
Rotated to an isometric view to visualize the complete model.
This output can serve as a decorative or functional component for future designs.
Source Files
3D Design with AI
To explore AI-powered 3D model generation using Meshy.ai, a generative design tool, by converting a text-based prompt into a detailed 3D object. This helped in understanding how AI tools can accelerate conceptual visualization in digital fabrication and prototyping.
Visit Meshy_AI Official Website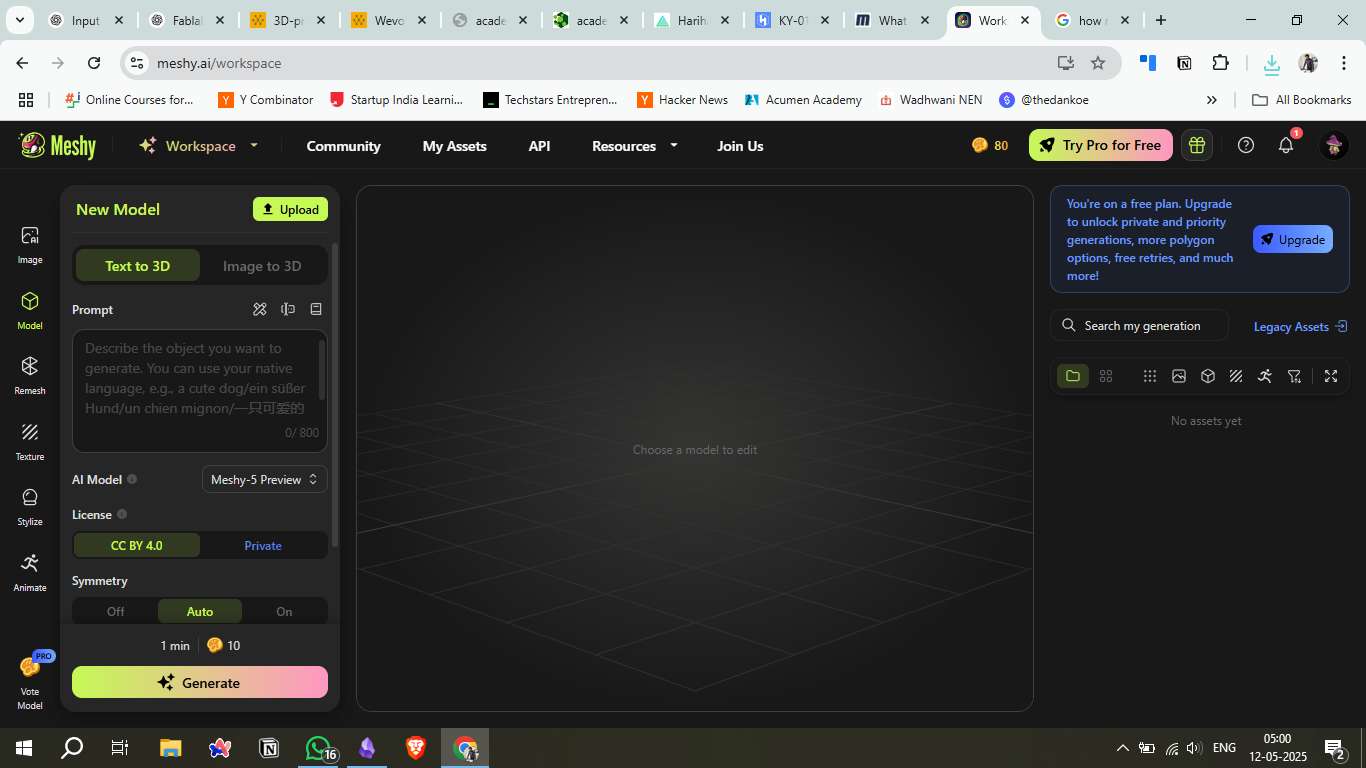
1. Login & Prompt Setup
Logged into the Meshy workspace.
Entered a detailed prompt describing the Iron Man-inspired helmet with blue glowing eyes, battle scratches, and fine mechanical details.
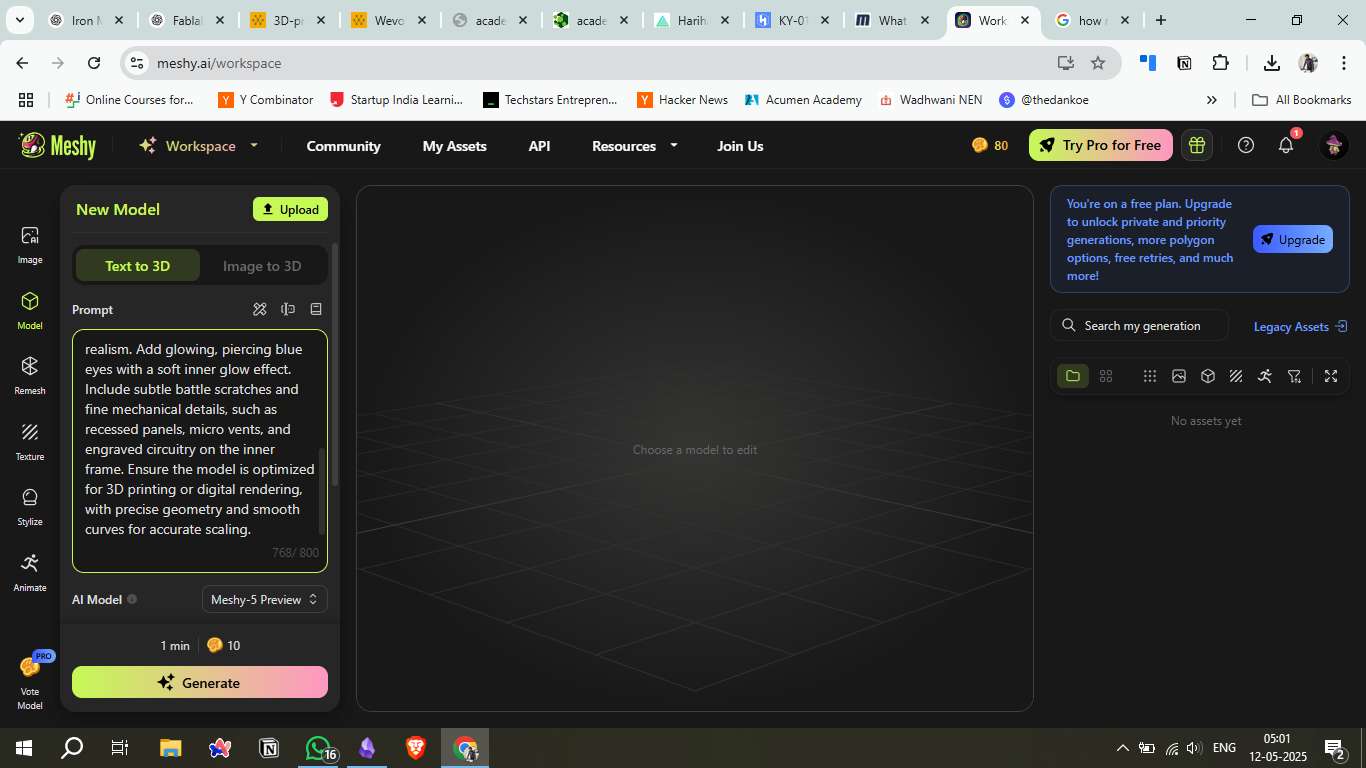
2. Prompt Generation
Used all 800 characters to guide the AI in producing accurate realism and geometric fidelity.
Selected Text-to-3D and clicked Generate using 10 tokens.
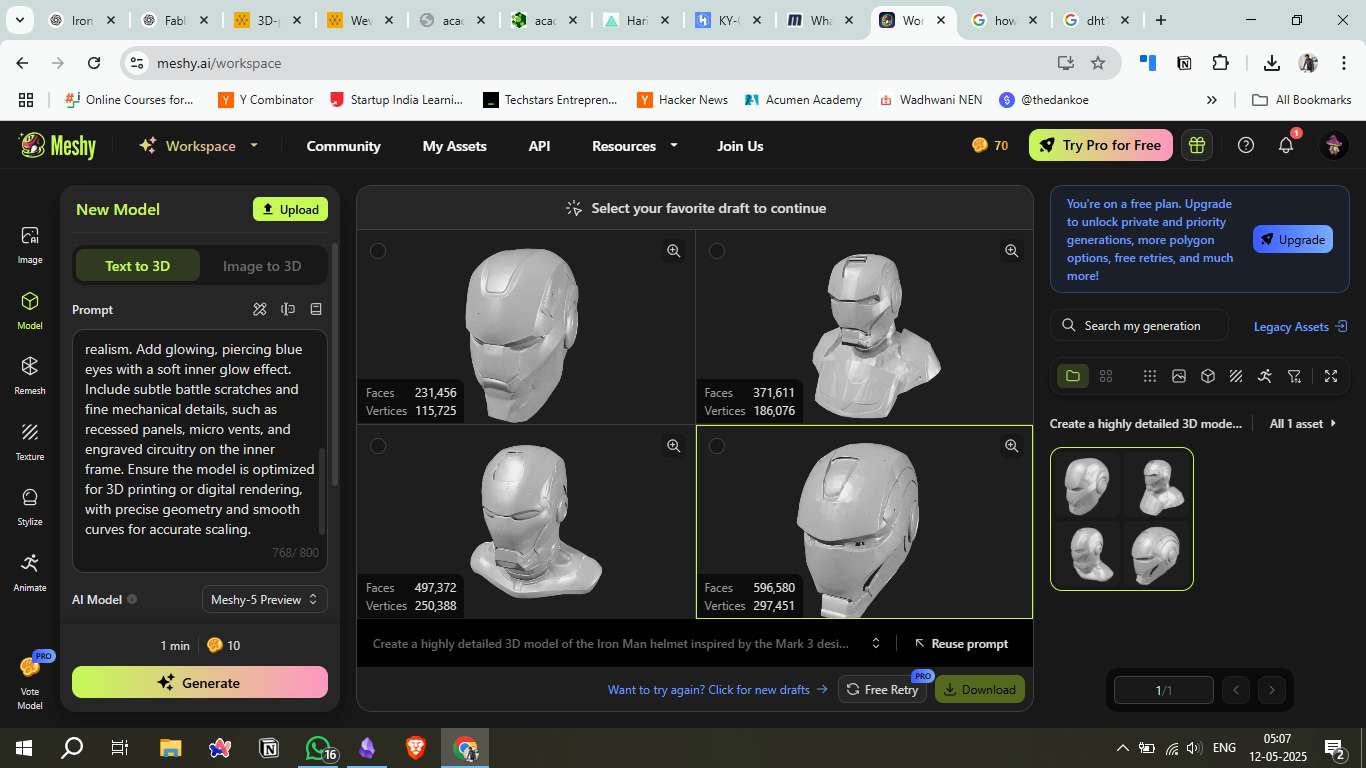
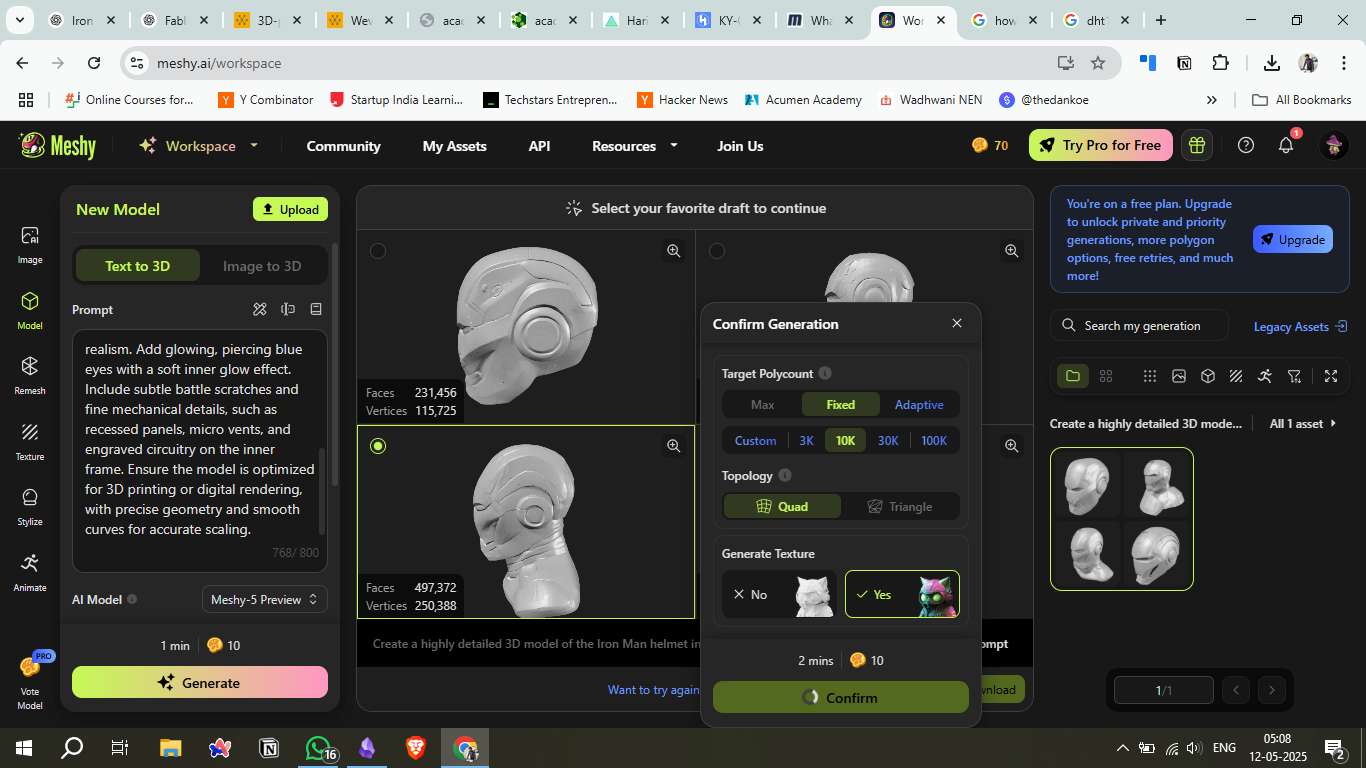
3. Model Selection
Meshy generated 4 different helmet drafts.
Chose the most detailed version (highest face and vertex count) based on visual accuracy.

4. Final Generation Settings
Selected Fixed Polycount: 10K with Quad topology for better mesh quality.
Enabled texture generation.
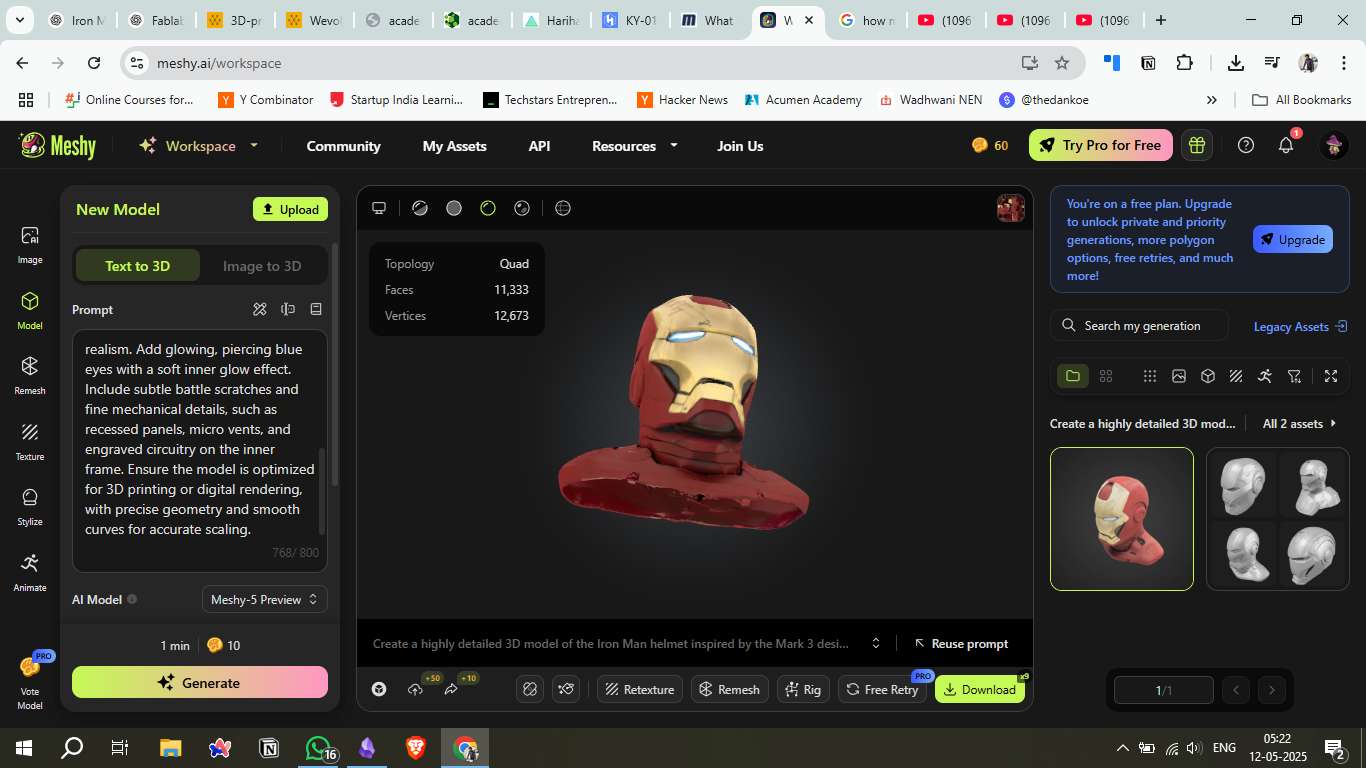
5. Model Preview
Generated the final textured 3D helmet model.
Visualized the realistic blue eyes, engraved circuits, and fine details on the surface.
6. Download & Assets
The final 3D model was available for download with optimized mesh and texture.
Could be exported in `.glb` or `.obj` format for further use in Blender, game engines, or printing.
Source Files
Image Compression
1. Upload Images
Opened the ImageCompressr website.
Dragged or selected multiple screenshots directly into the interface.
Visit image compressr Official Website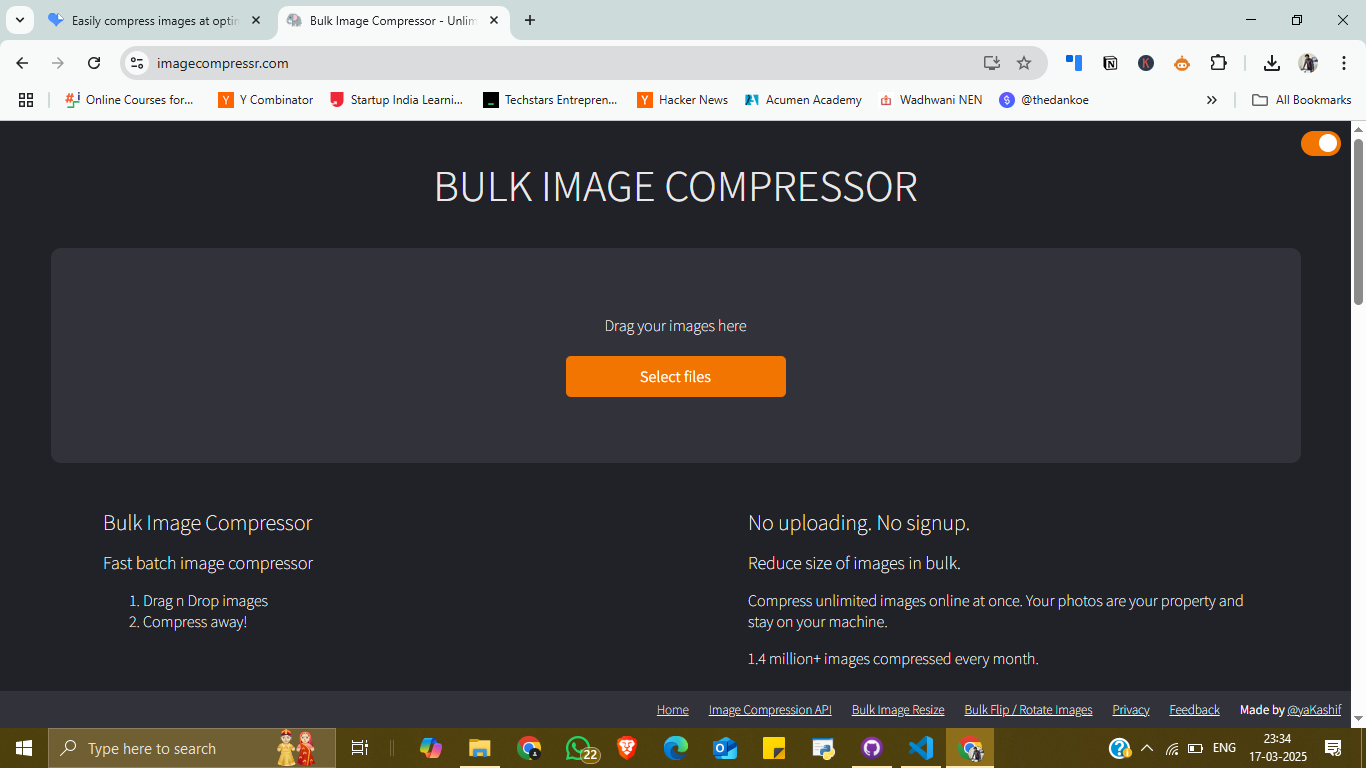
2. Set Compression Settings
Adjusted Quality to 60% and Max Size to 2 MB per image.
Allowed default max dimensions (4096 x 4096 pixels).
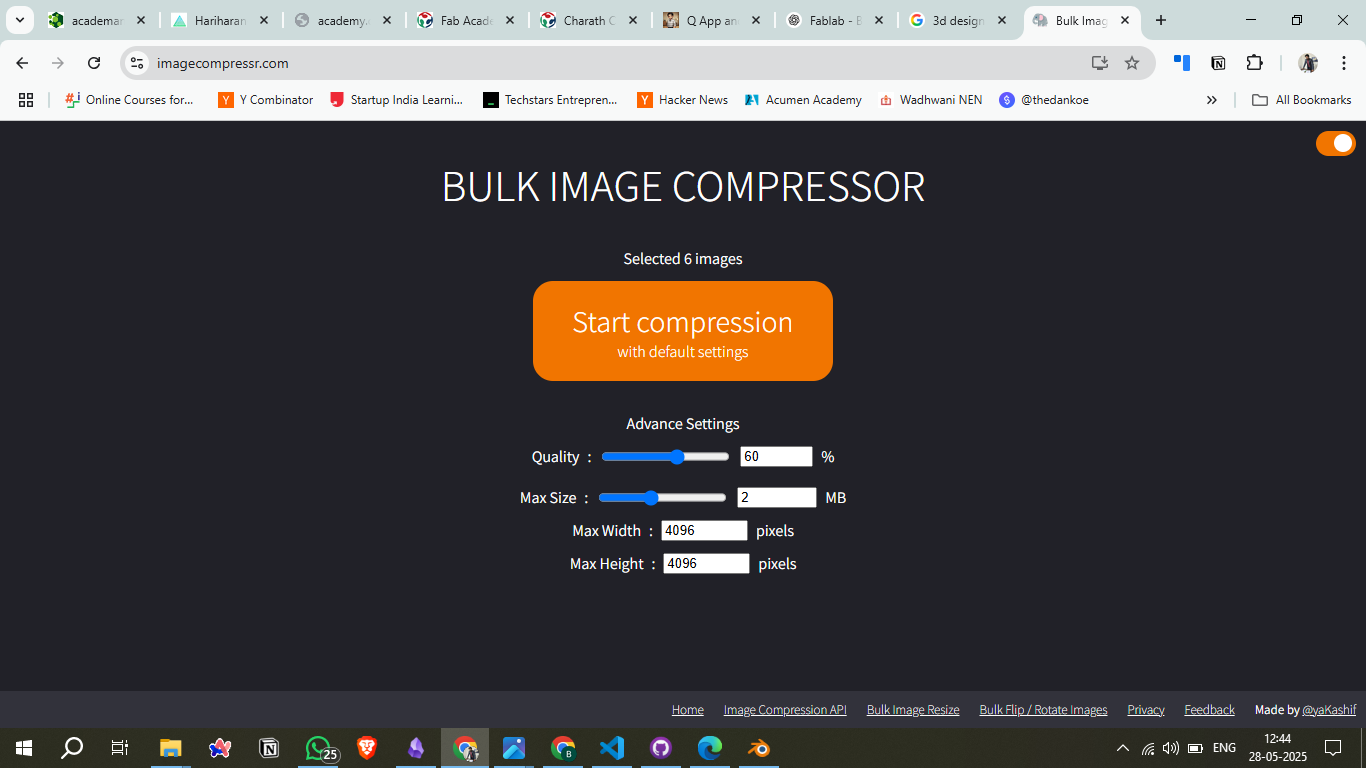
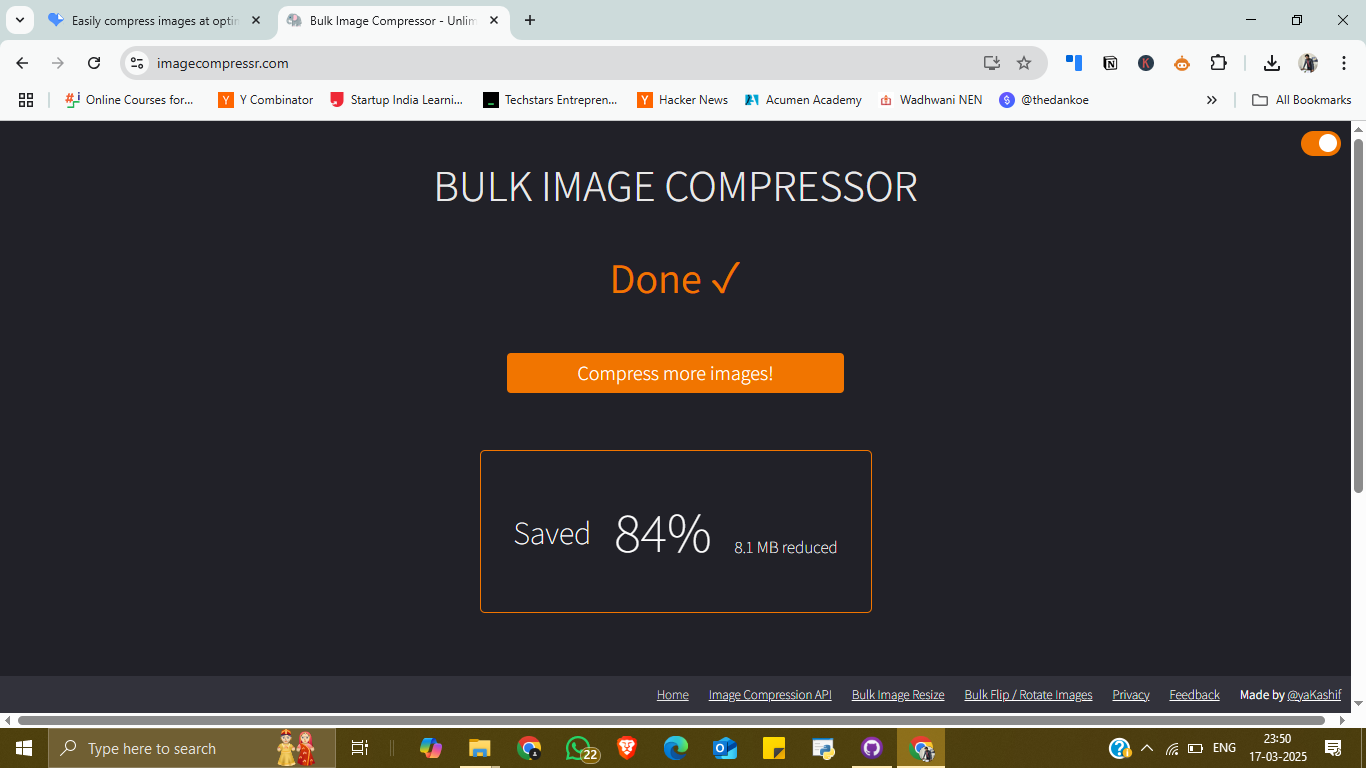
3. Compression Completed
Clicked Start Compression and waited a few seconds.
Achieved 84% size reduction, with 8.1 MB saved in total.
Video Compression
Using HandBrake for Video Compression
As part of the multimedia tools exploration, I also learned how to use HandBrake, an open-source video transcoder, to compress and convert videos effectively. Below is a step-by-step guide based on my hands-on usage:
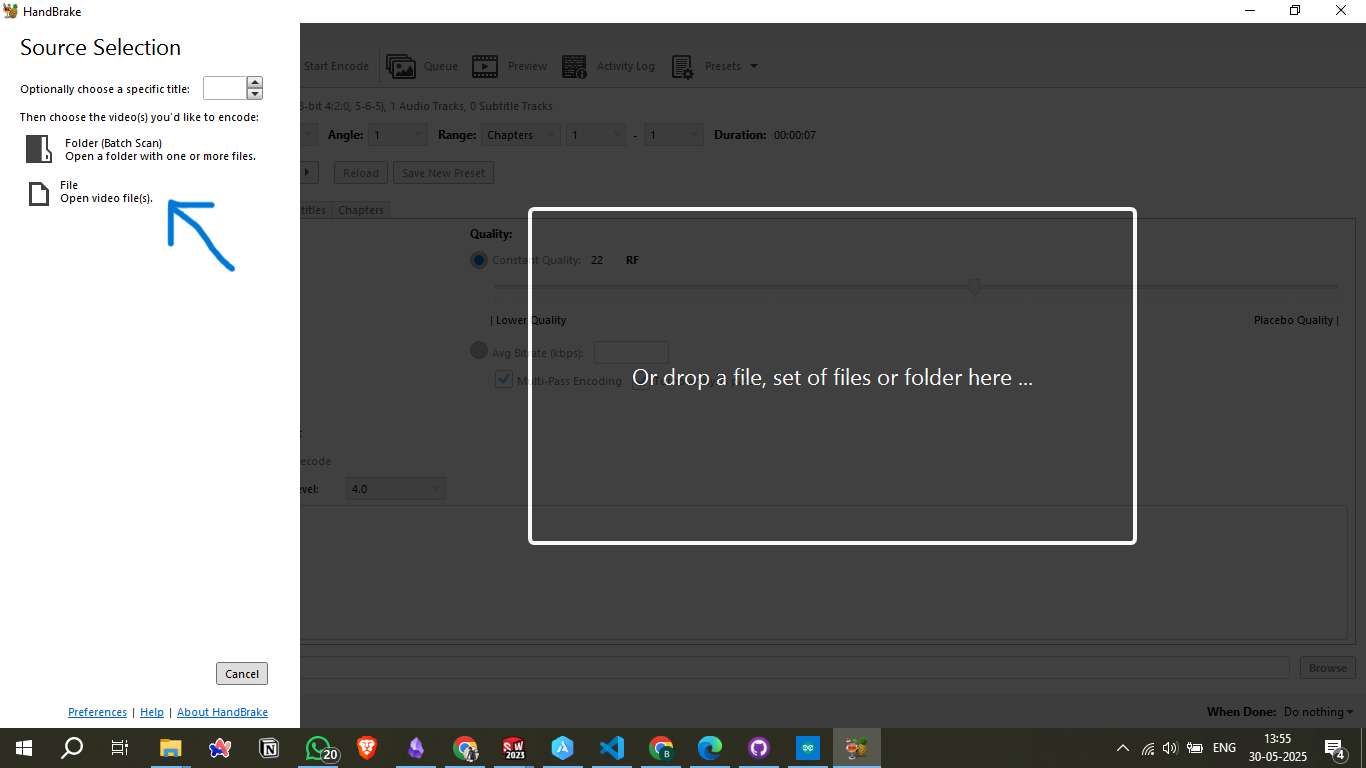
Visit HandBrake Official WebsiteStep 1: Open the Video File
Launch HandBrake and select your video source:
- You can choose "File" to load a single video.
- Alternatively, use "Folder (Batch Scan)" for processing multiple videos.
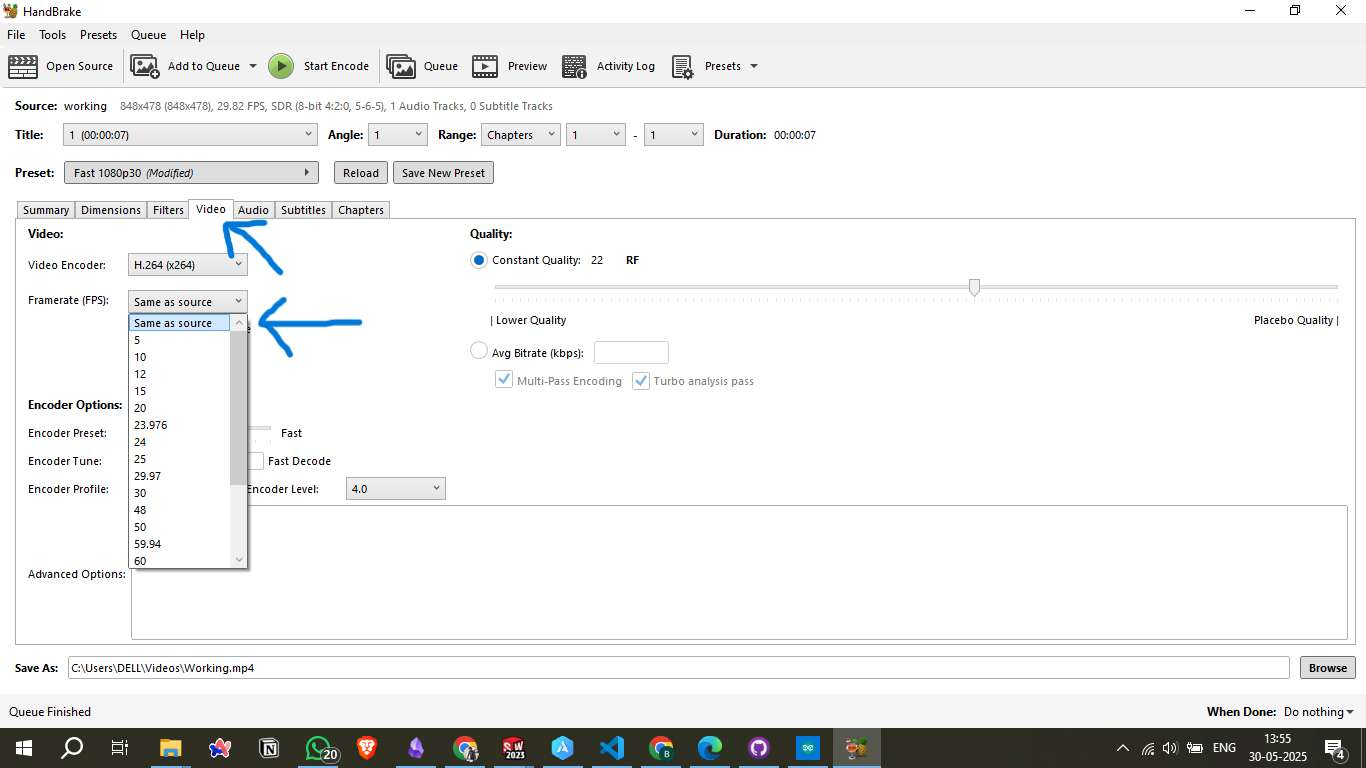
Step 2: Configure Video Settings
In the Video tab:
- Video Encoder: I used
H.264 (x264)for compatibility and compression. - Framerate (FPS): Set to Same as source to retain original timing.
- Quality: Set to Constant Quality 22 RF, which balances file size and visual clarity.
Step 3: Start Encoding
- After configuring, click "Start Encode" to begin the compression process.
- You can also choose what happens "When Done", such as shutting down the system or doing nothing.
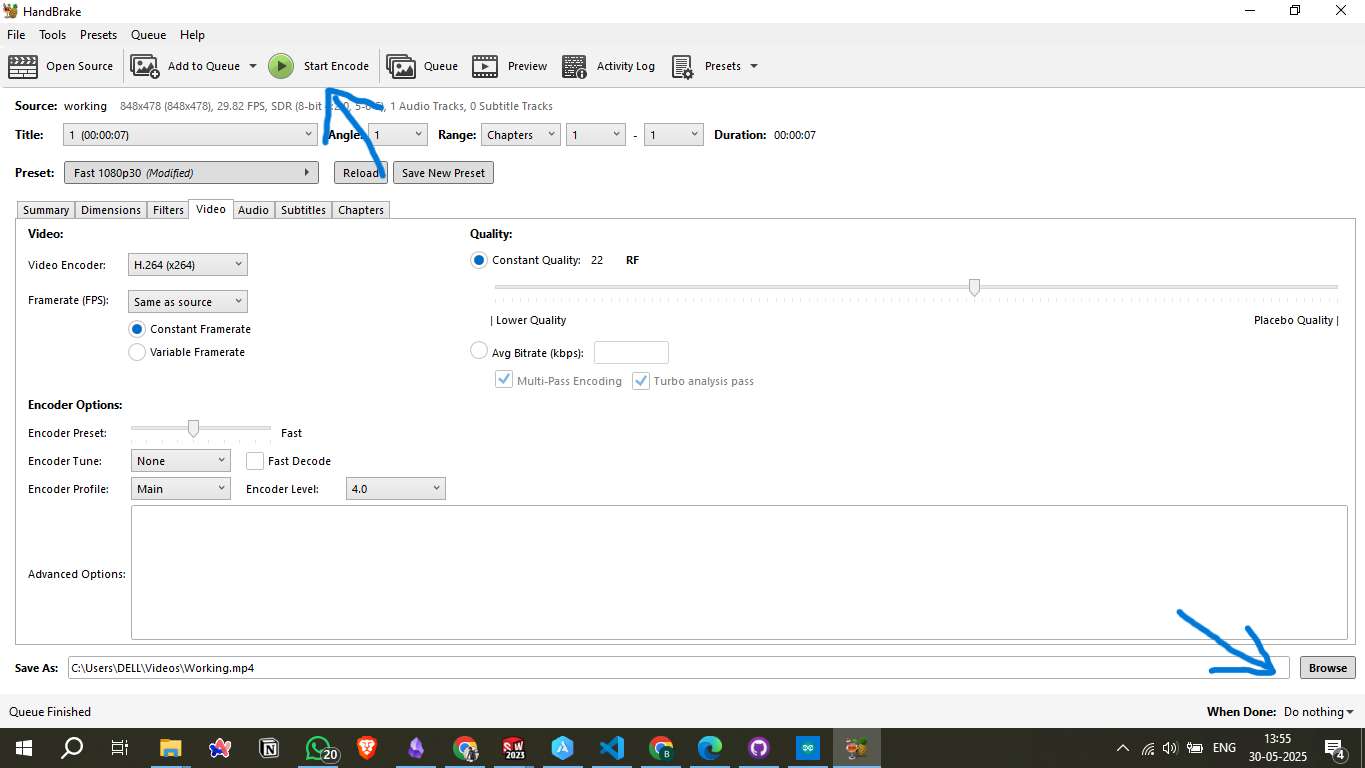
Table of Contents
- Computer Aided Design
- Explore 2D
- 1. Raster
- 2. Vector
- 3. 2D Raster Softwares
- 4. GIMP
- 5. 2D Vector Software - Inkscape
- Raster Hero Shot
- Vector Hero Shot
- 3D Design
- Blender Process:
- 1. Opening Blender
- 2. Scene Preparation
- 3. Adding Mesh Objects
- 4. Creating Balloon Shape
- 5. Adding a String
- SolidWorks Process:
- 1. Launching SolidWorks
- 2. Drawing Circles
- 3. Applying Circular Pattern
- 4. Trimming Entities
- 5. Final Sketch Shape
- 6. Extruding the Sketch
- 7. 3D View
- 3D Design with AI
- 1. Login & Prompt Setup
- 2. Prompt Generation
- 3. Model Selection
- 4. Final Generation Settings
- 5. Model Preview
- 6. Download & Assets
- Image Compression
- 1. Upload Images
- 2. Set Compression Settings
- 3. Compression Completed