Computer-Aided Design
Assignment No.2
- Objective: Explore various 2D and 3D design tools to create digital models.
- Use 2D (raster, vector) and 3D software to design a possible final project. evaluate and select the best tools for specific design tasks.
- Detail how to compress your images
Paint 3D
First I started to use a free tool called Paint 3D, which is software that primarily works with raster graphics, meaning images are made up of pixels rather than scalable vector shapes. Paint 3D is included in Windows 10 and 11, offering a simple way to create digital art and design simple 3D objects.
I wanted to remove the background of an image in Paint 3D, so I opened the image and used the Magic Select tool from the top toolbar. I adjusted the selection box around the subject I wanted to keep, then clicked Next. I refined the selection by removing parts of the image where needed.
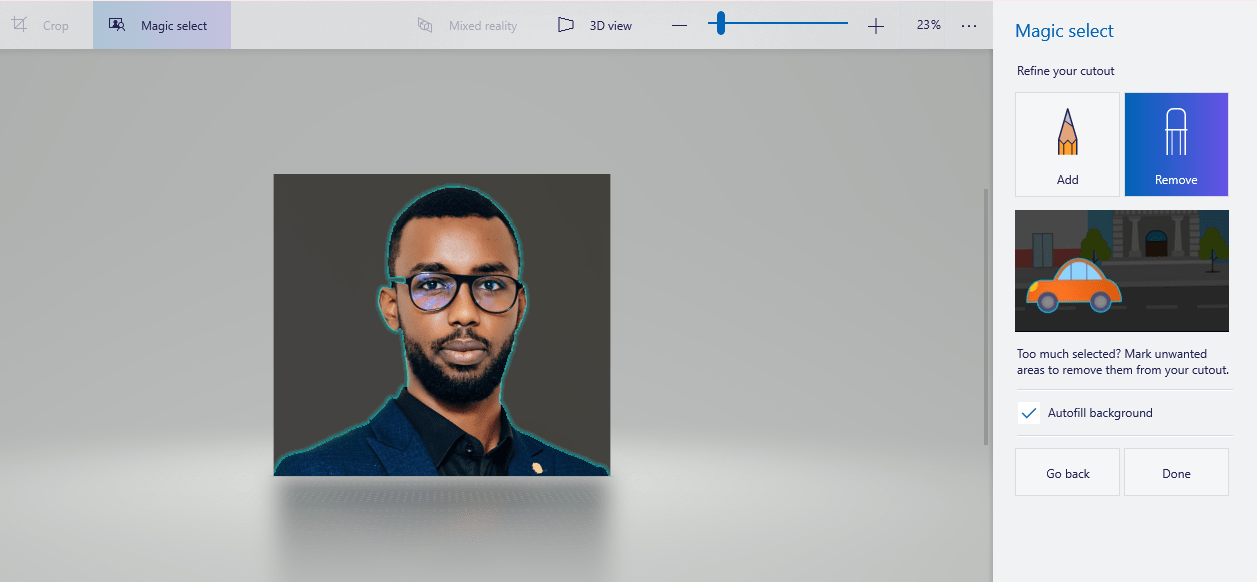
Once I was happy with the selection, I clicked Done, and the background was removed, leaving a transparent area around the subject.
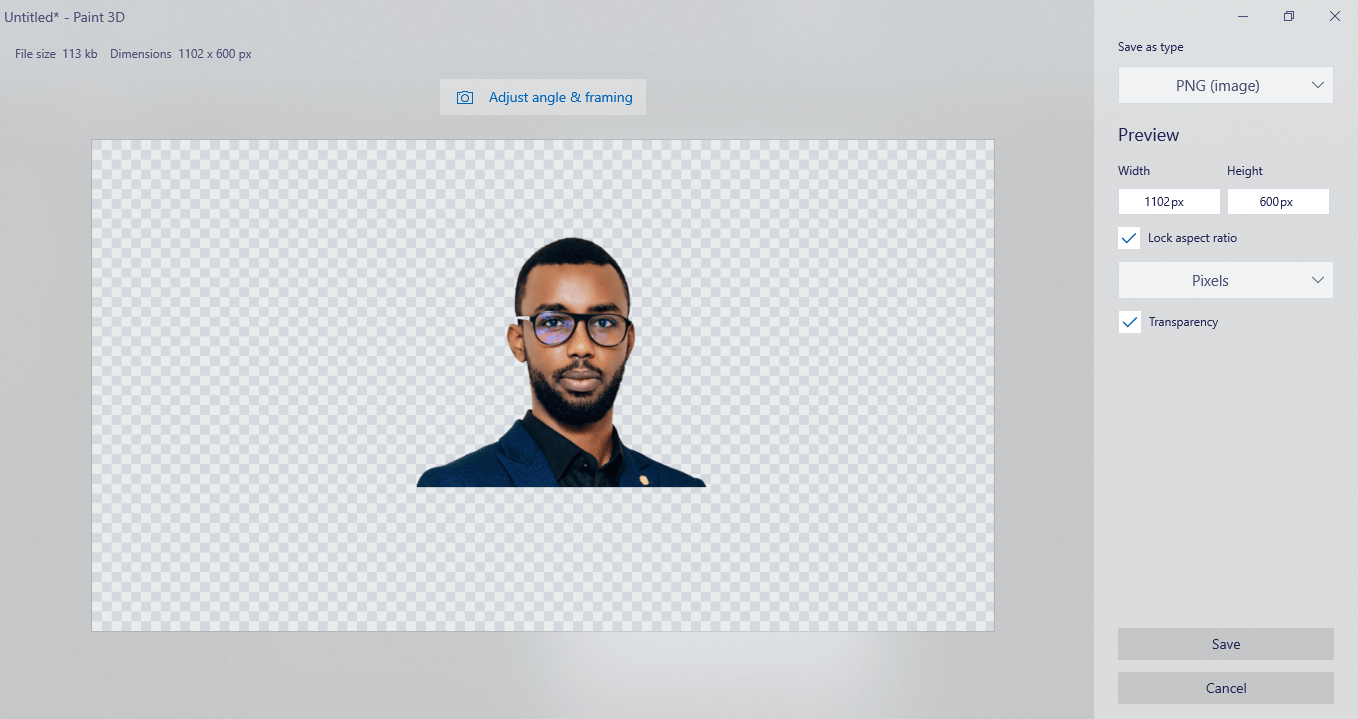
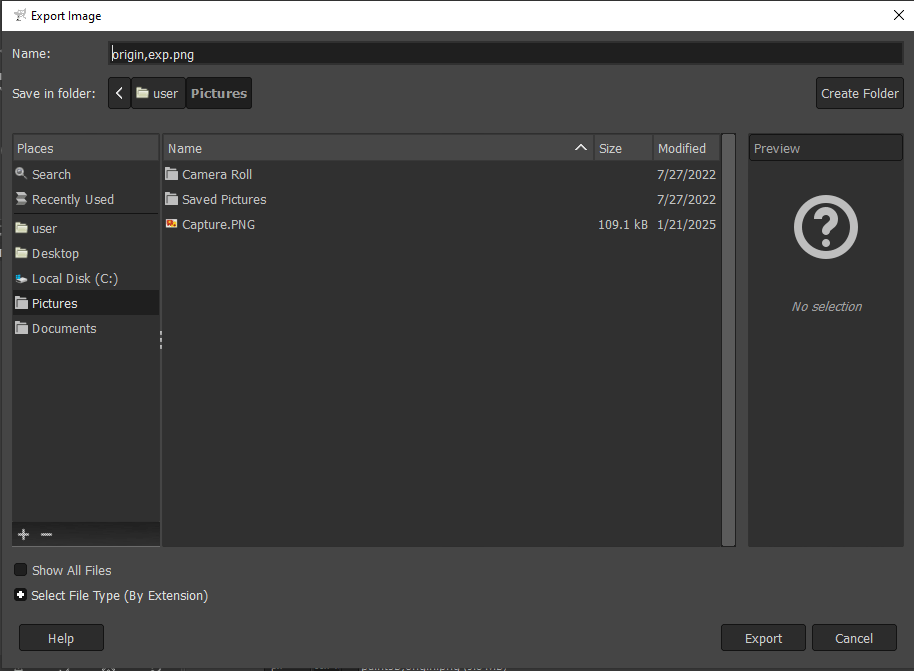
Finally, I saved the image as a PNG to keep the transparency.
GIMP
GIMP (GNU Image Manipulation Program) is a free, open-source raster graphics editor. It’s great for creating and editing pixel-based images, like for photo retouching or graphic design.
GIMP works on Windows, macOS, and Linux and offers tools like layer management, selection tools, and filters for enhancing images. It's a popular and affordable alternative to programs like Adobe Photoshop, especially for graphic designers and photographers.
I edited an image in GIMP by first using the threshold tool, which is used to convert an image into a high-contrast black-and-white version by setting a specific threshold level. Pixels with values above this threshold turn white, while those below it turn black.
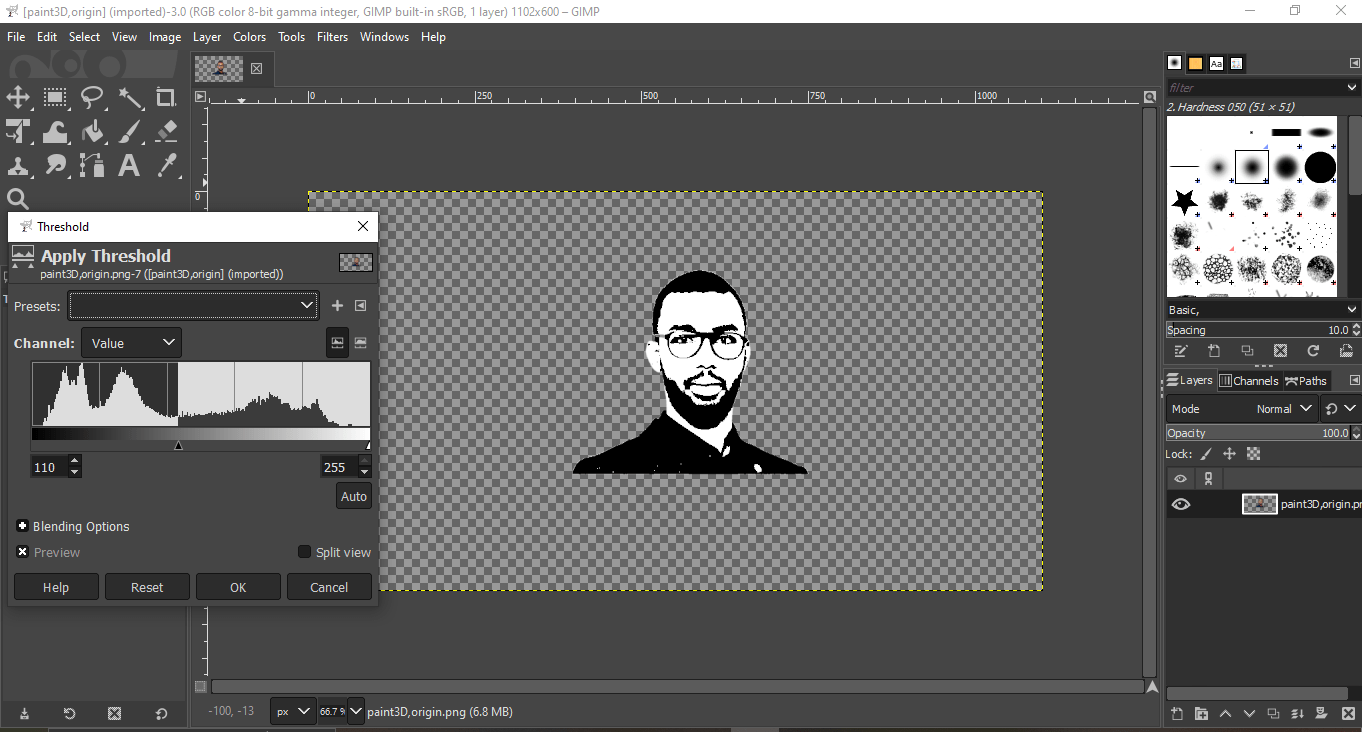
After applying the threshold effect, I made sure everything looked good, then I exported the image as a PNG to preserve the quality and transparency.
Inkscape
Inkscape is a free, open-source vector graphics editor used for creating scalable graphics like illustrations, logos, and artwork. It uses the SVG format, which keeps graphics sharp no matter how big or small. Its user-friendly interface and wide range of tools make it suitable for both beginners and professionals who want to create detailed vector art.
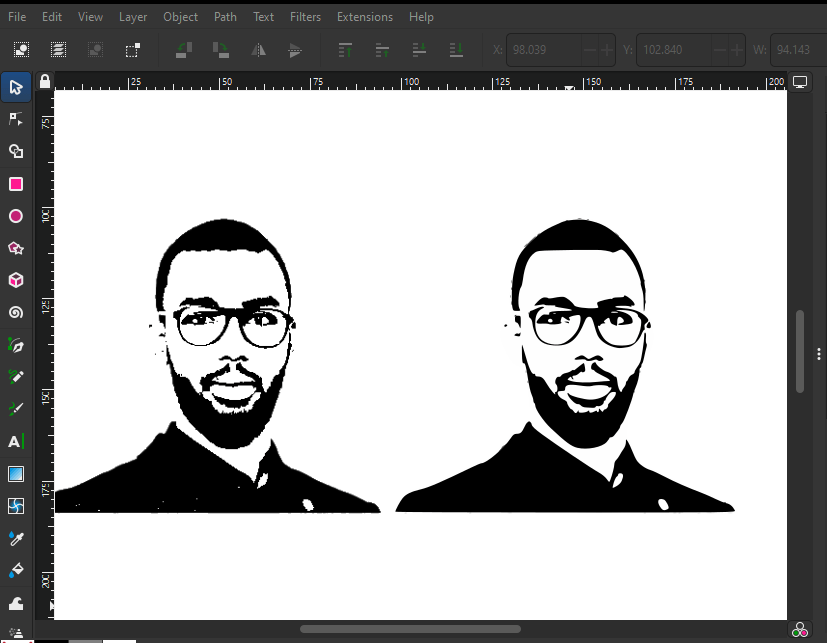
I edited an image in Inkscape using a PNG file that I had exported from GIMP. First, I used the Trace Bitmap tool to convert the raster image into a vector graphic (SVG). This tool works by detecting edges and shapes in the image and turning them into scalable paths, which makes the image resolution-independent. I adjusted the settings to get a clean vector version, then deleted the original PNG.
After that, I used the Text Tool to add some text to the design, adjusting the font and size to fit well with the image.
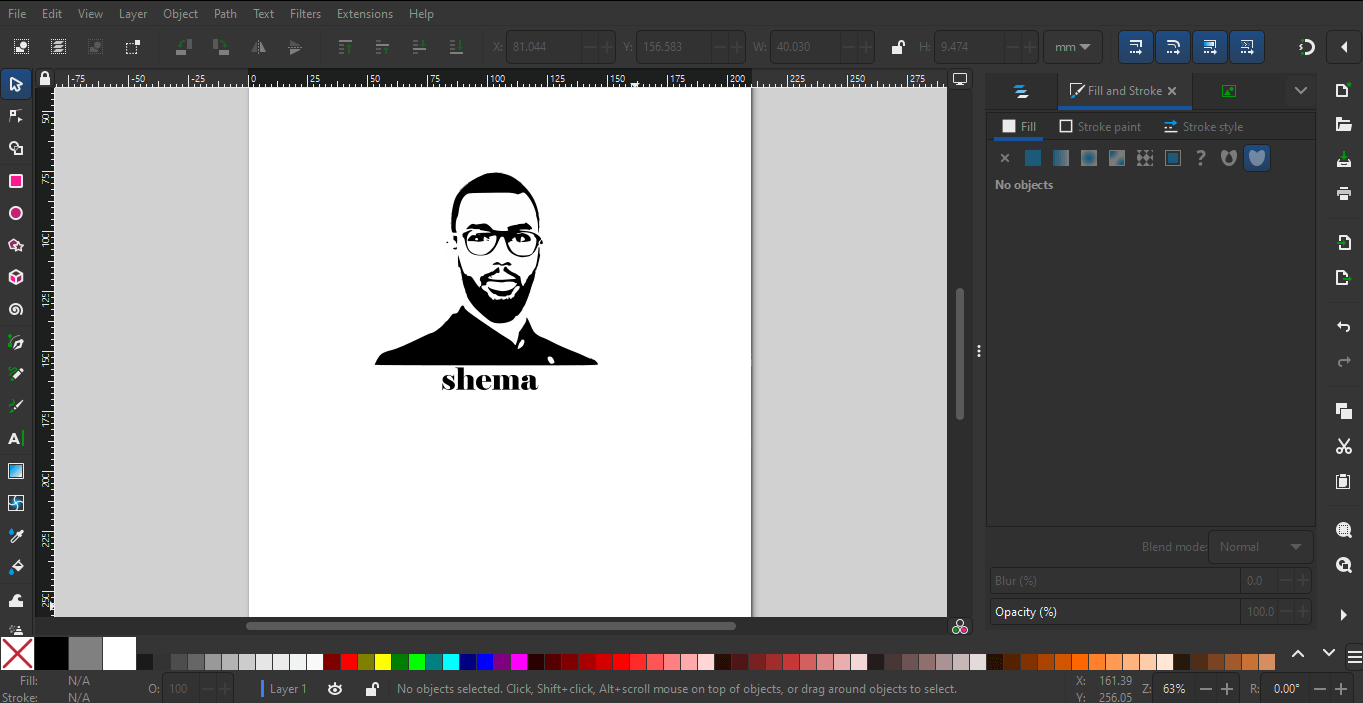
Once everything looked good, I saved the final work as an SVG to keep it scalable.
FreeCAD:
I start my 3D design with FreeCAD, a free and open-source CAD software that lets me create both 2D drawings and complex 3D models. FreeCAD also supports 2D drafting, which makes it great for technical drawings as well. With its modular design, I can customise the workflow to match my needs.
I started using FreeCAD by exploring the FreeCAD Wiki, which provides detailed information about the software and its features. The wiki helped me understand the basics, from installing the program to navigating the interface and using different workbenches.
I followed tutorials to learn how to create 2D sketches, turn them into 3D models, and modify them using parametric design. Whenever I needed help, I returned to the wiki to find solutions and improve my skills.
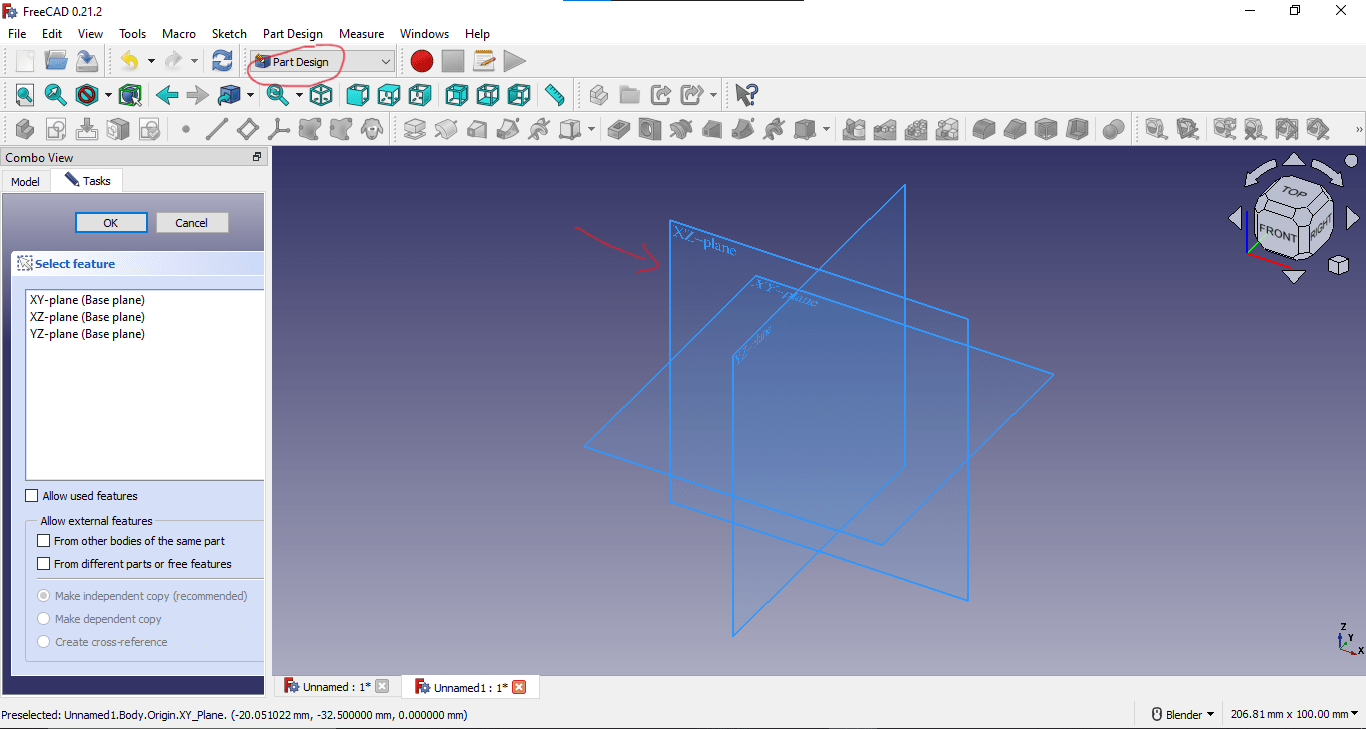
So I started by selecting the part design workbench and choosing the xy plane so that I could start my design.
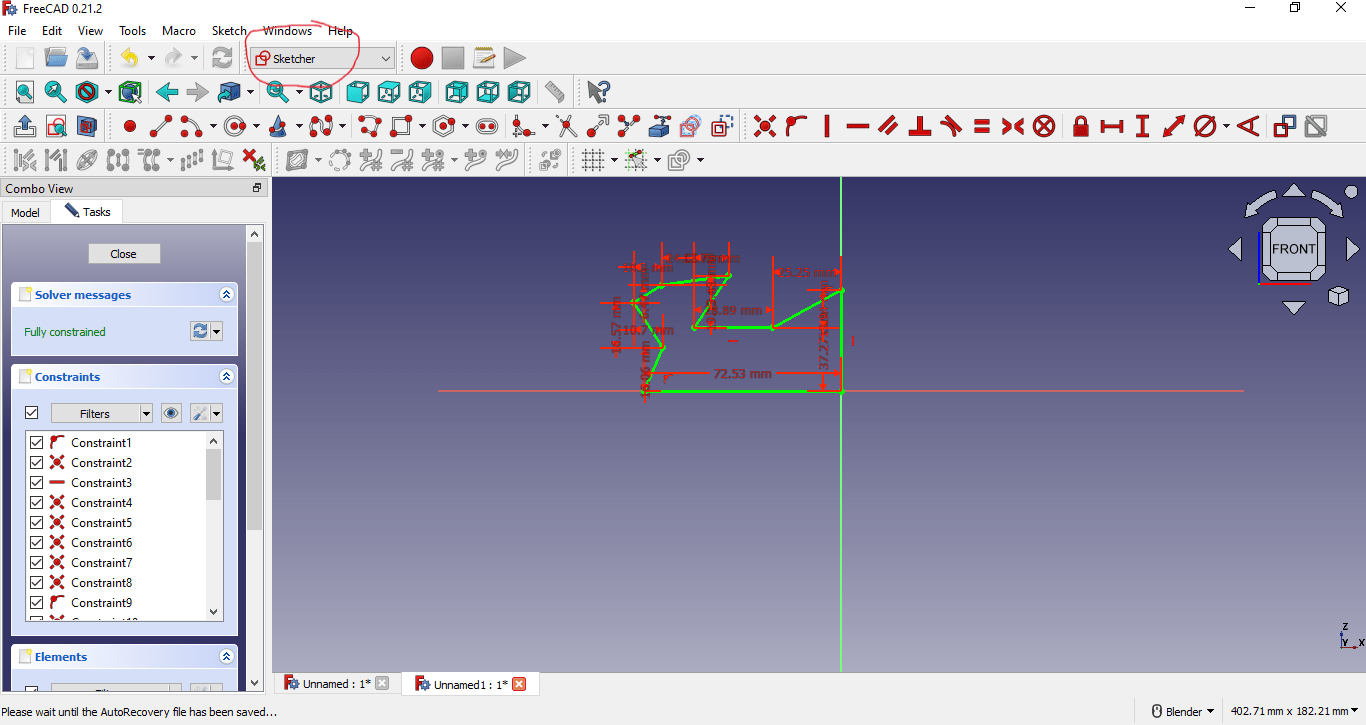
I create a sketch in part design and choose the line to make that design above. To make the design fully defined, i used both dimansion and geometric constraints.
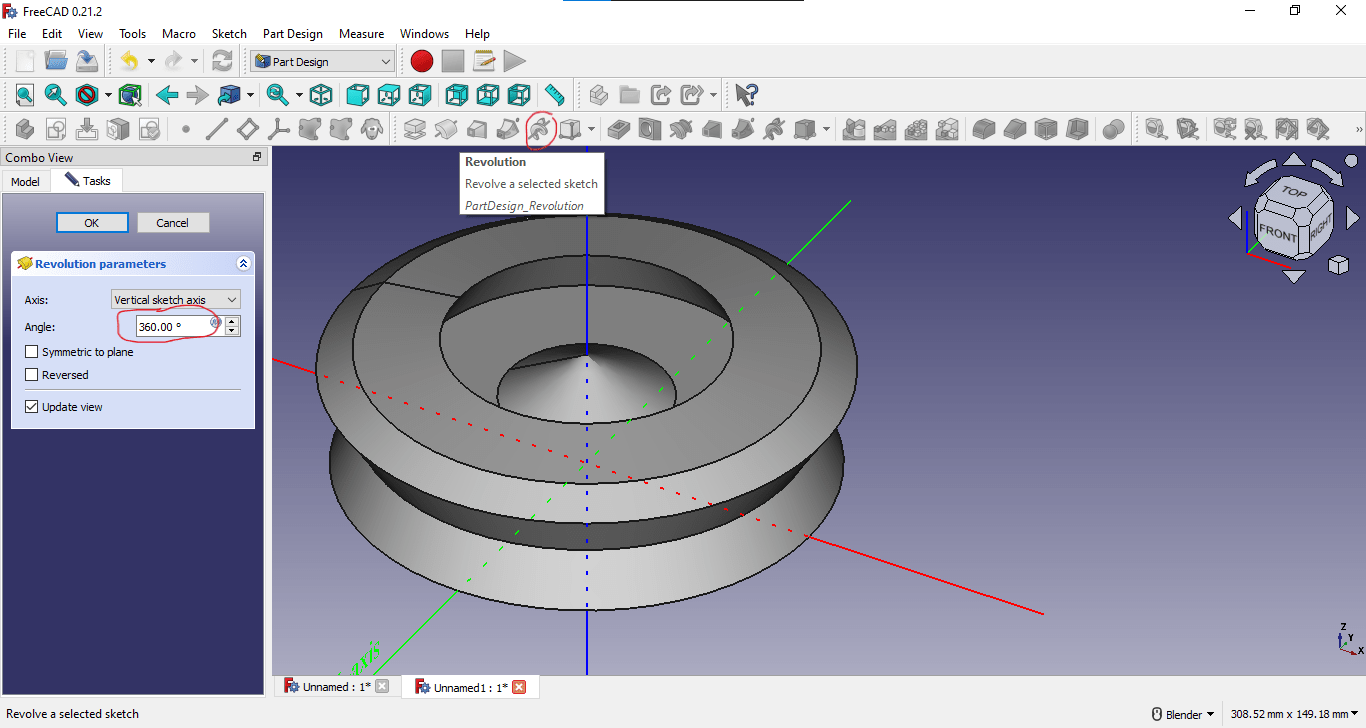
After the sketch was ready to my needs, I revolved my sketch on the y axis and made a body.
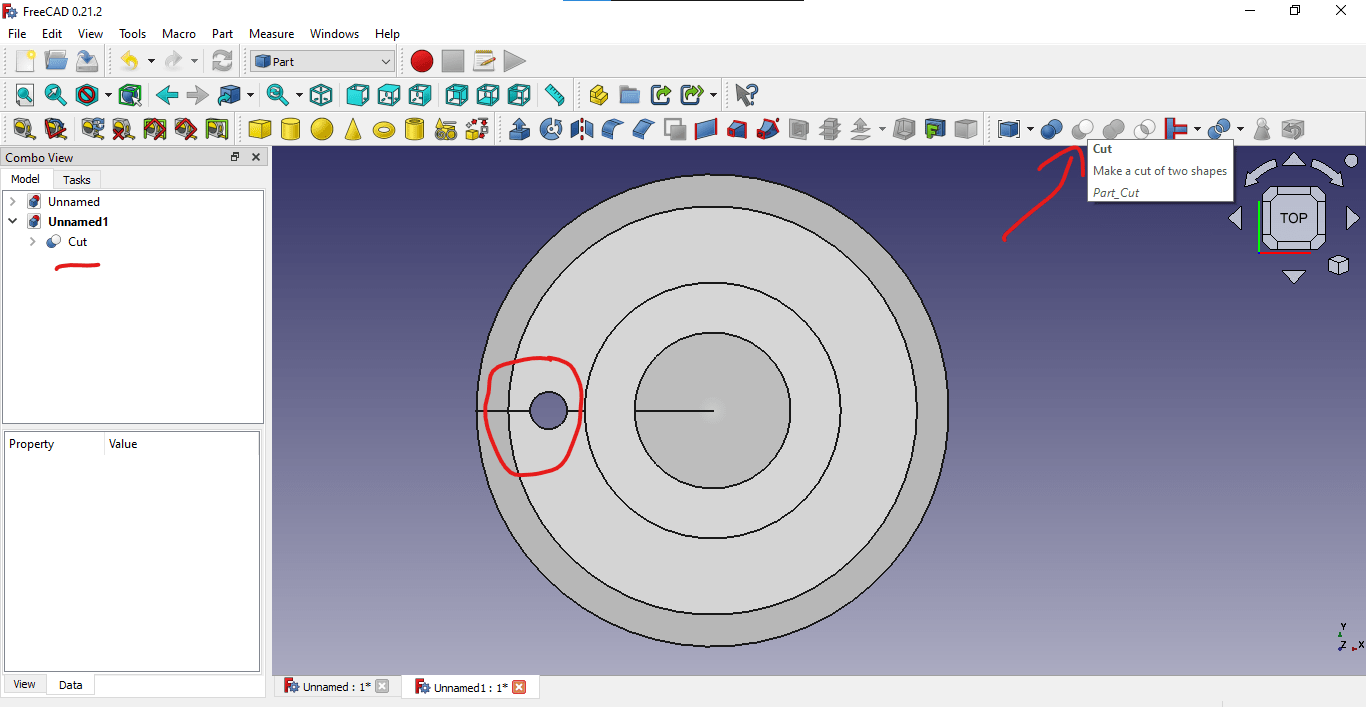
Trying to use the part workbench, I started by making a cylinder, then made a cut by combining both my part and the cylinder.
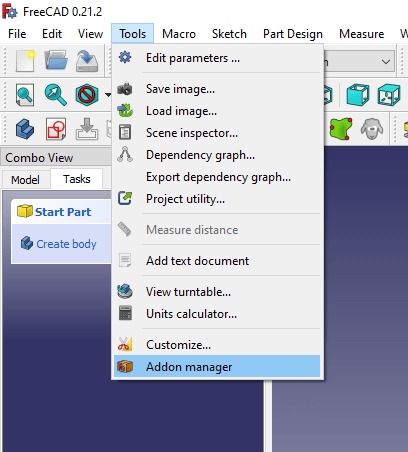
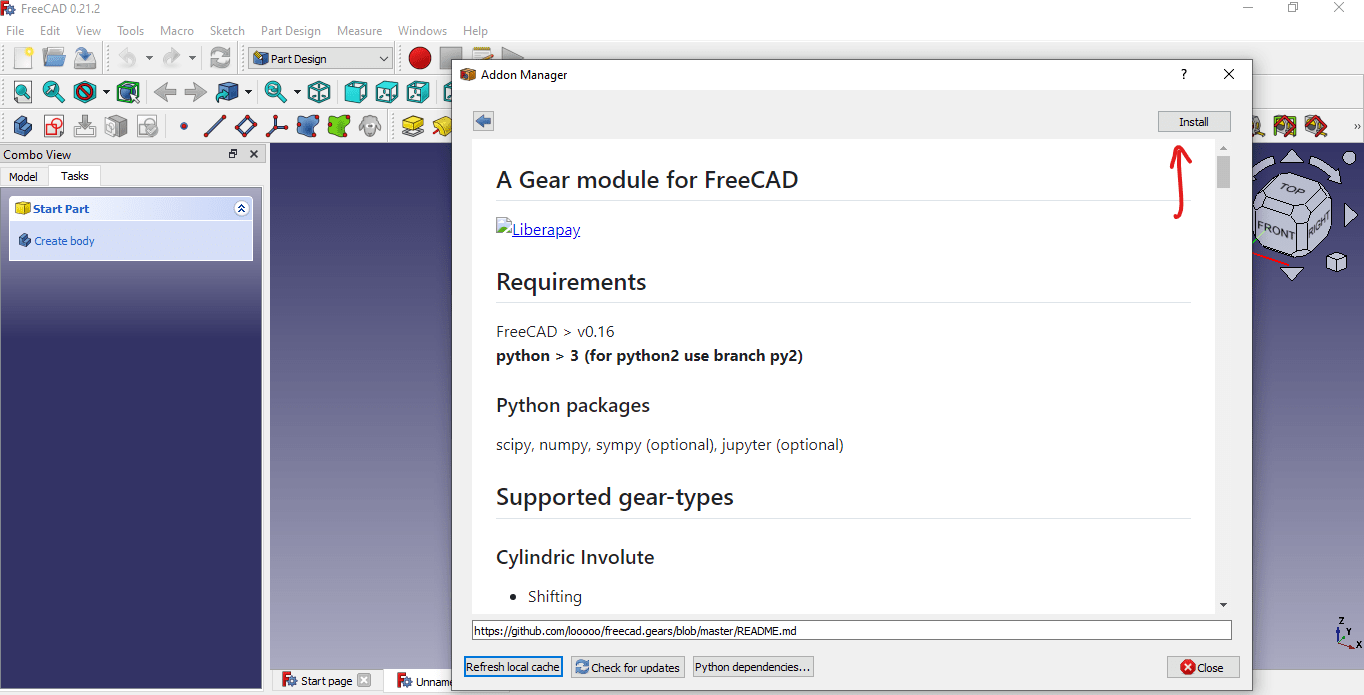
FreeCAD, like many modern design applications, is based on the concept of Workbench. A workbench can be considered a set of tools specially grouped for a certain task. So I wanted to add a workbench in FreeCAD. I went to the "Tools" menu, selected "Addon Manager," and installed the gear workbench. Once installed, restart FreeCAD, and the new workbench appeared in the drop-down menu.
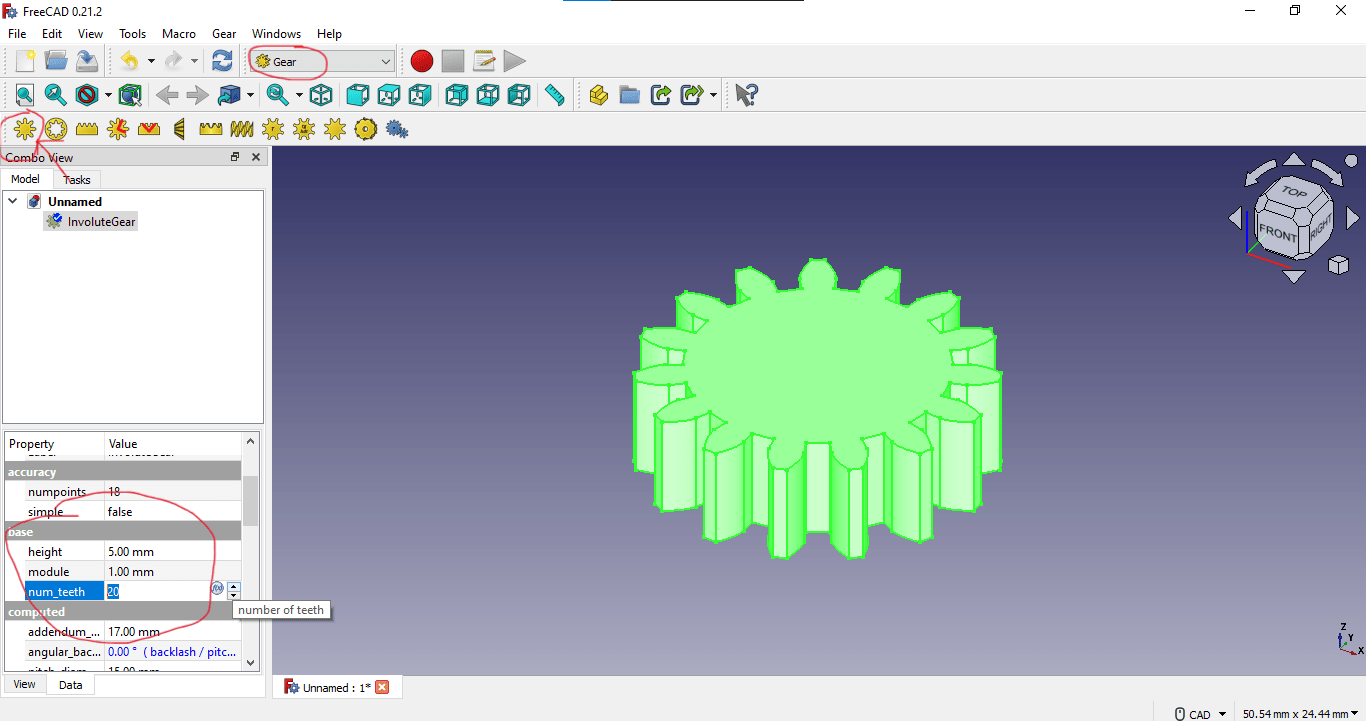
This is when I wanted to use the gear workbench, and I started by creating a gear, then edited it by increasing the number of teeth from 15 to 20.
SolidWorks
It’s not my first time using SolidWorks, as I previously used it during my university studies. It’s a great CAD software for mechanical engineers, offering powerful tools for 3D modeling, simulation, and assembly design. SolidWorks remains one of my go-to choices for mechanical design due to its efficiency and reliability.

Starting with SolidWorks, I started with the part design then in sketch I choose the plane i want to use then design my 2D my part.
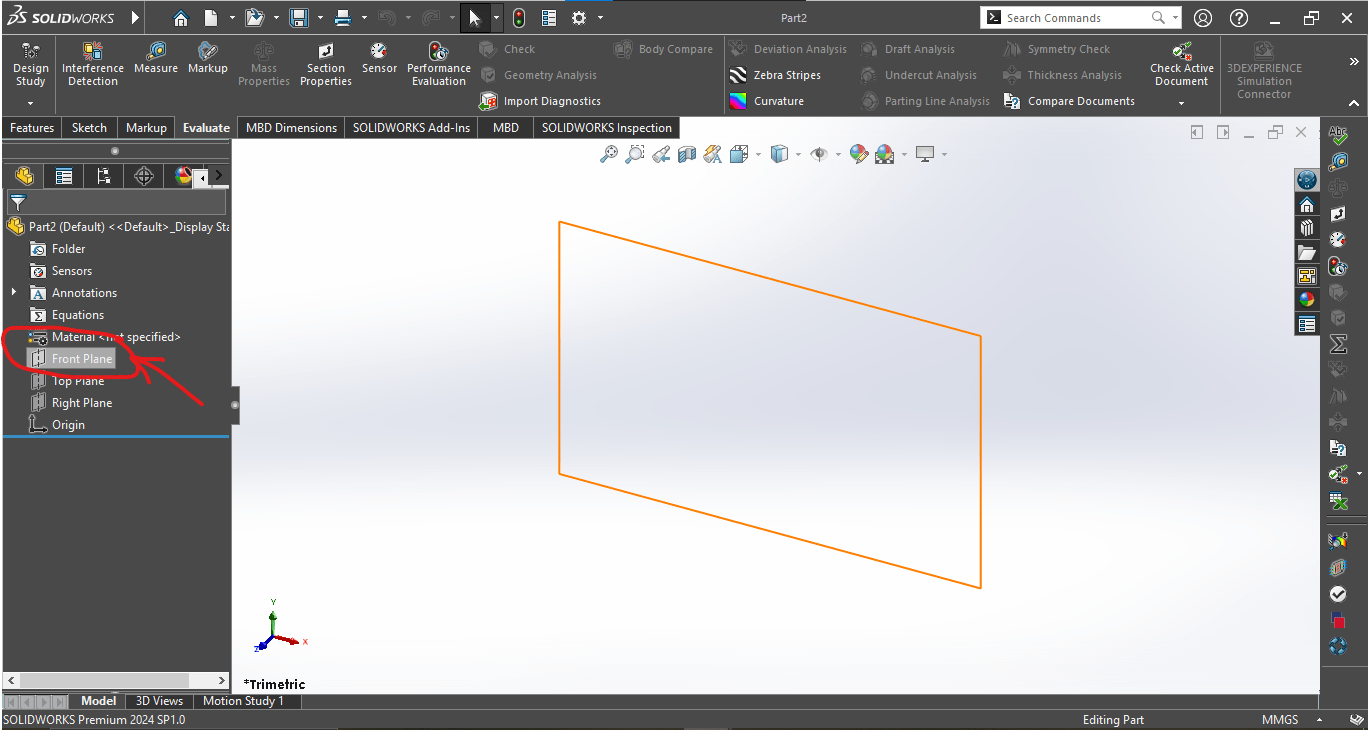
Here i was choosing the front plane to be used in my sketch.
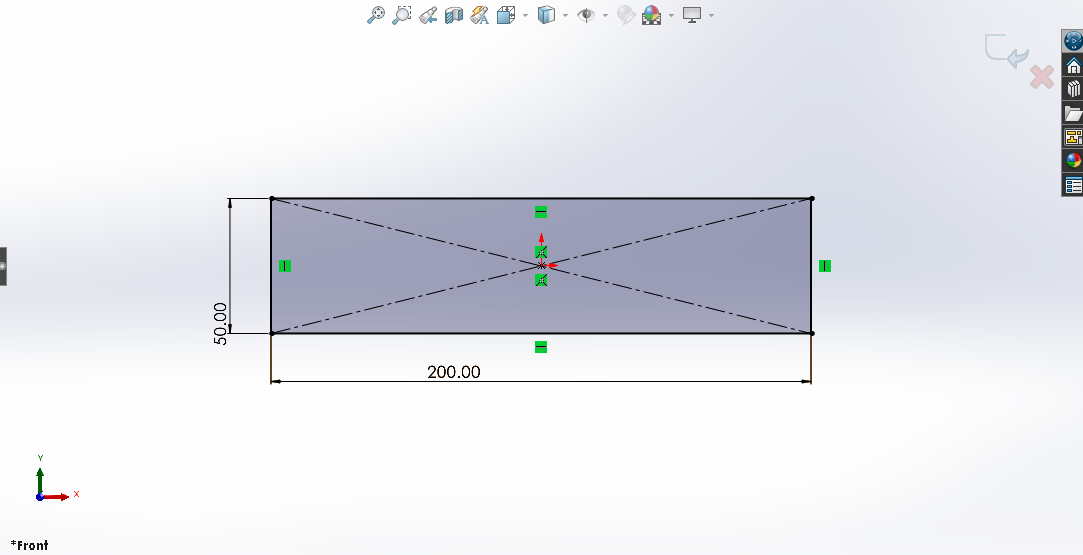
I skeched a triangle then used the dimension constraints to gove the dimensions.
After sketching the 2D design we need to exclude it so that it can have thickness then change into a 3D design.
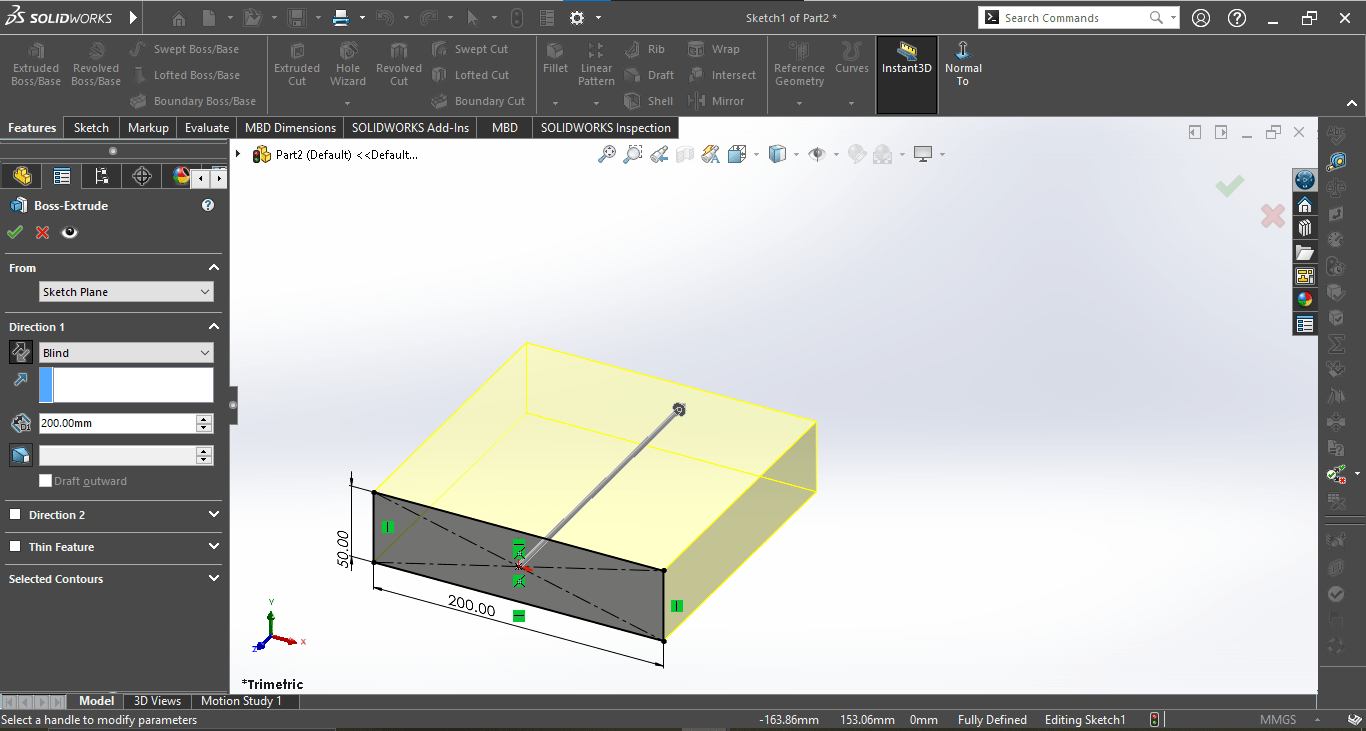
Here i used exclude boss to give thickness to my design, the the design changed from 2D to 3D.
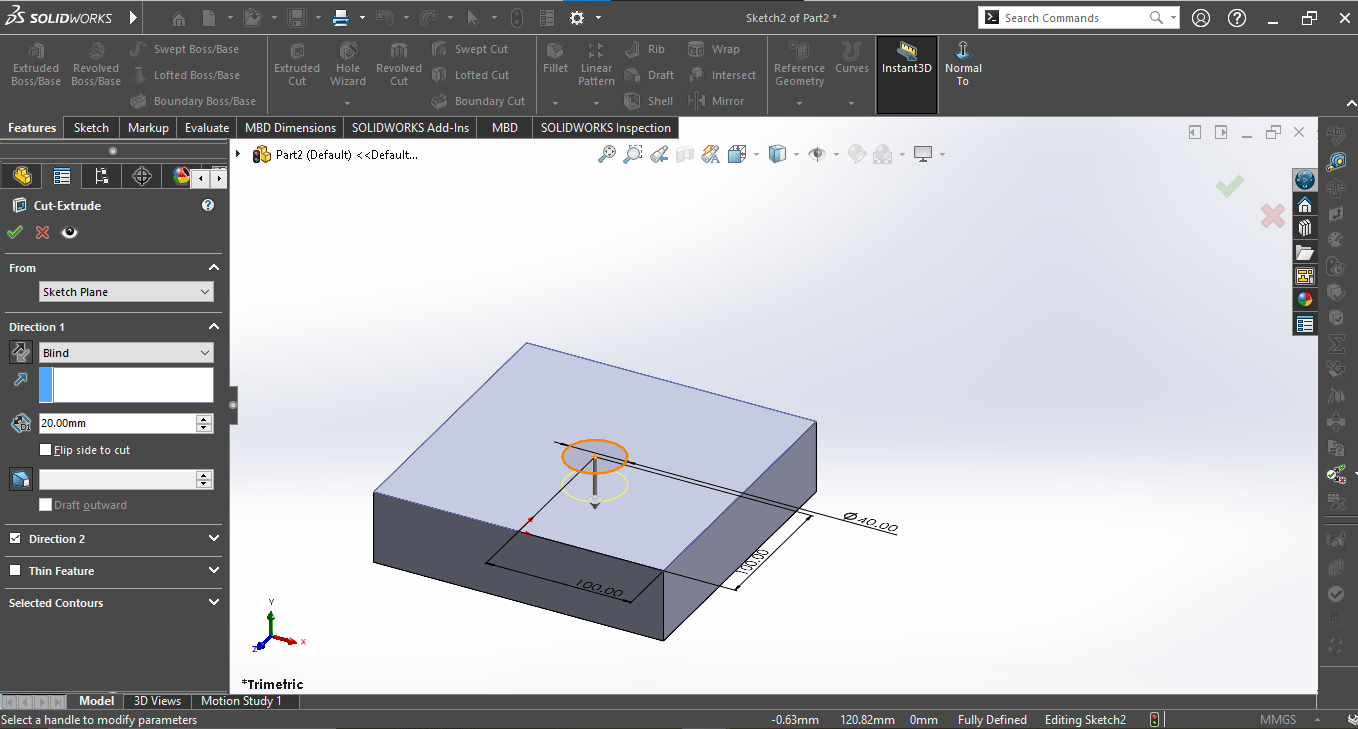
Here i used exclude cut to remove unwanted part, which was a circle at the mindle in this case.
In the designing you may need another plane to work on so in my case i needed a plane where i can sketch a display then write on it.
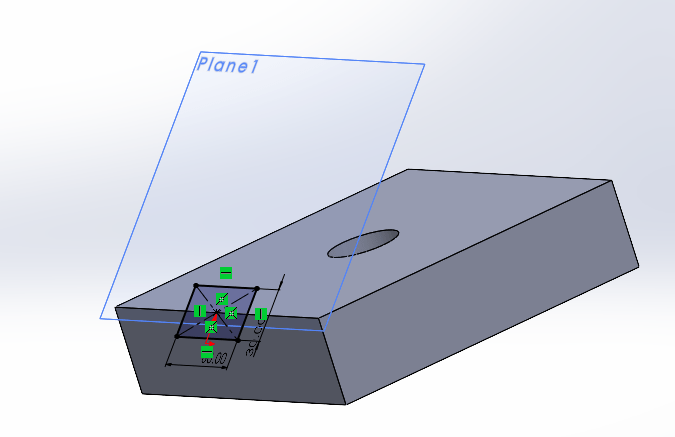
Here i used the front plane and the top of my design to have a new plane.
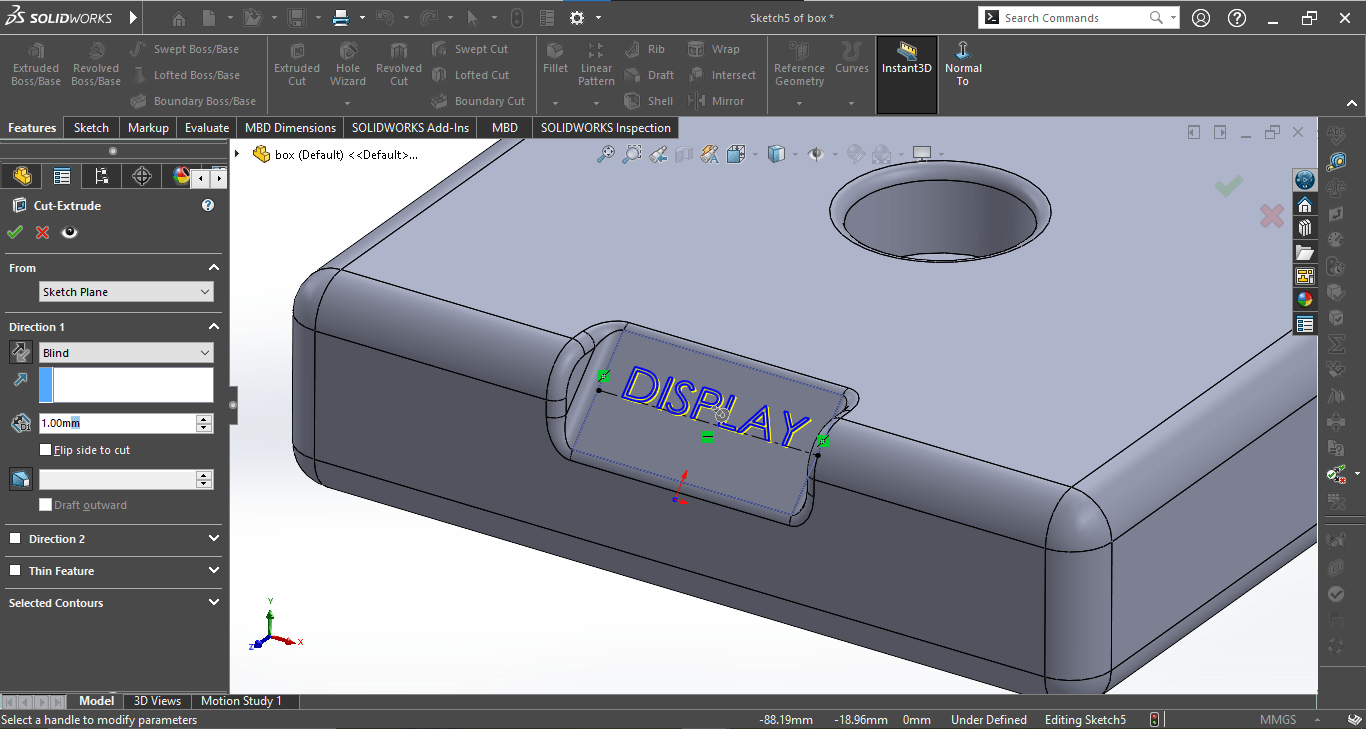
Then i wrote on the new sketch then use exclude cut so that the word can be more visable. then i saved my part.
For the second part, i wanted to design a part that will fit in the hole in the first part.
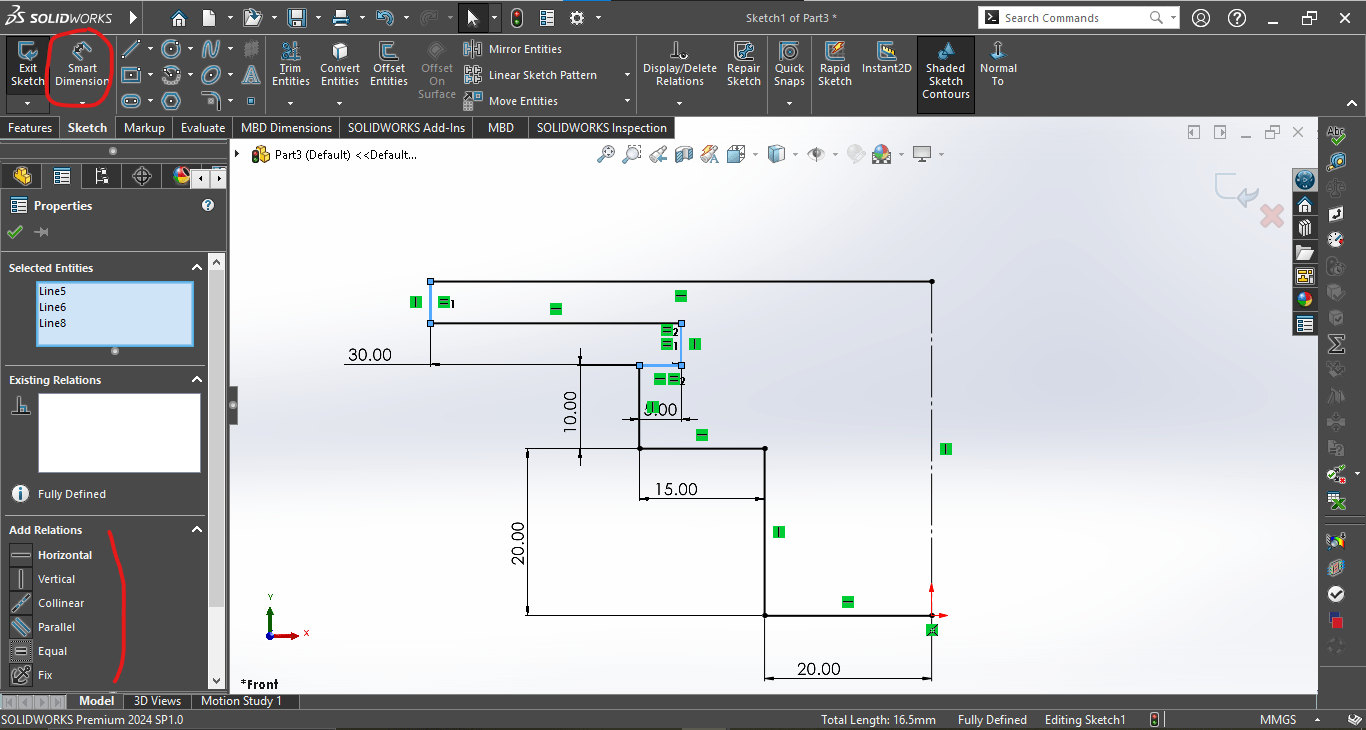
This is the 2D sketch i designed.

Then i used revolved boss then rotate my sketch to the y axis to have a 3D design.
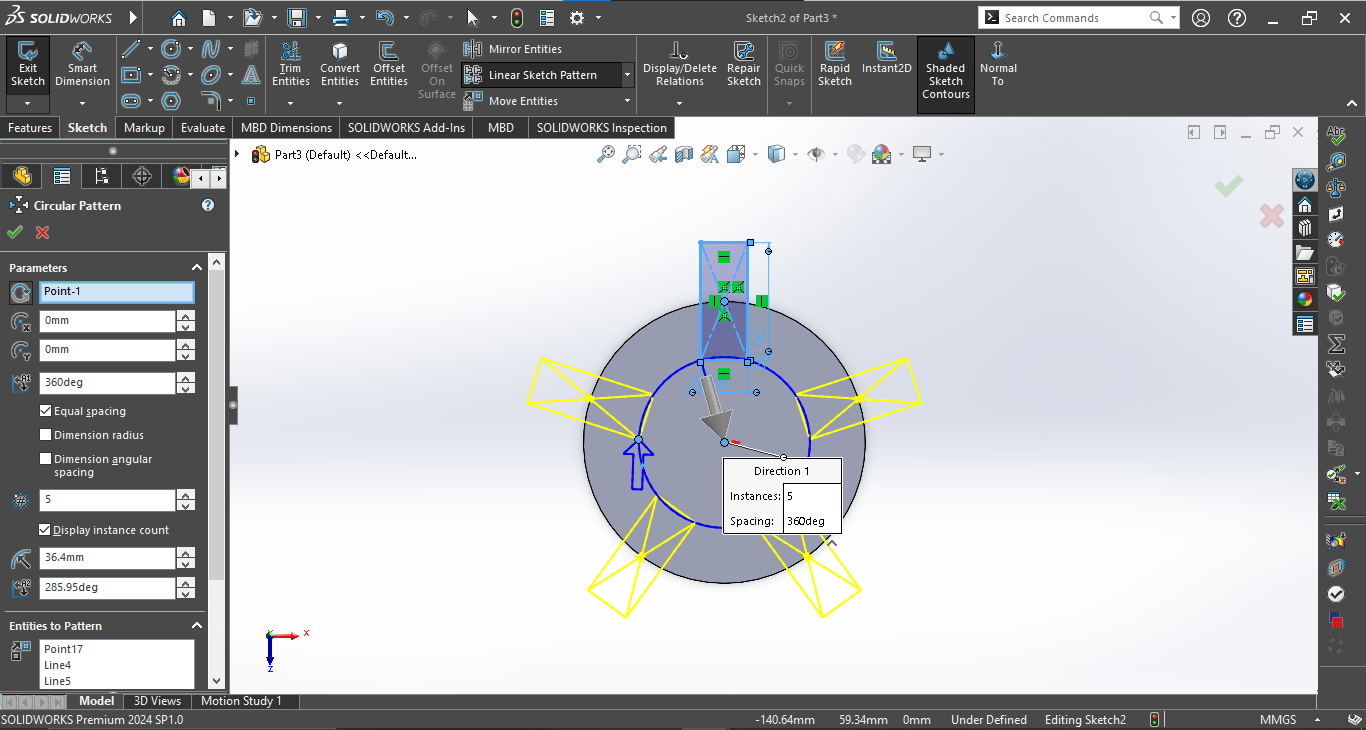
Here i used the circular partten so that my sketch can be dublicated in a circular partten.
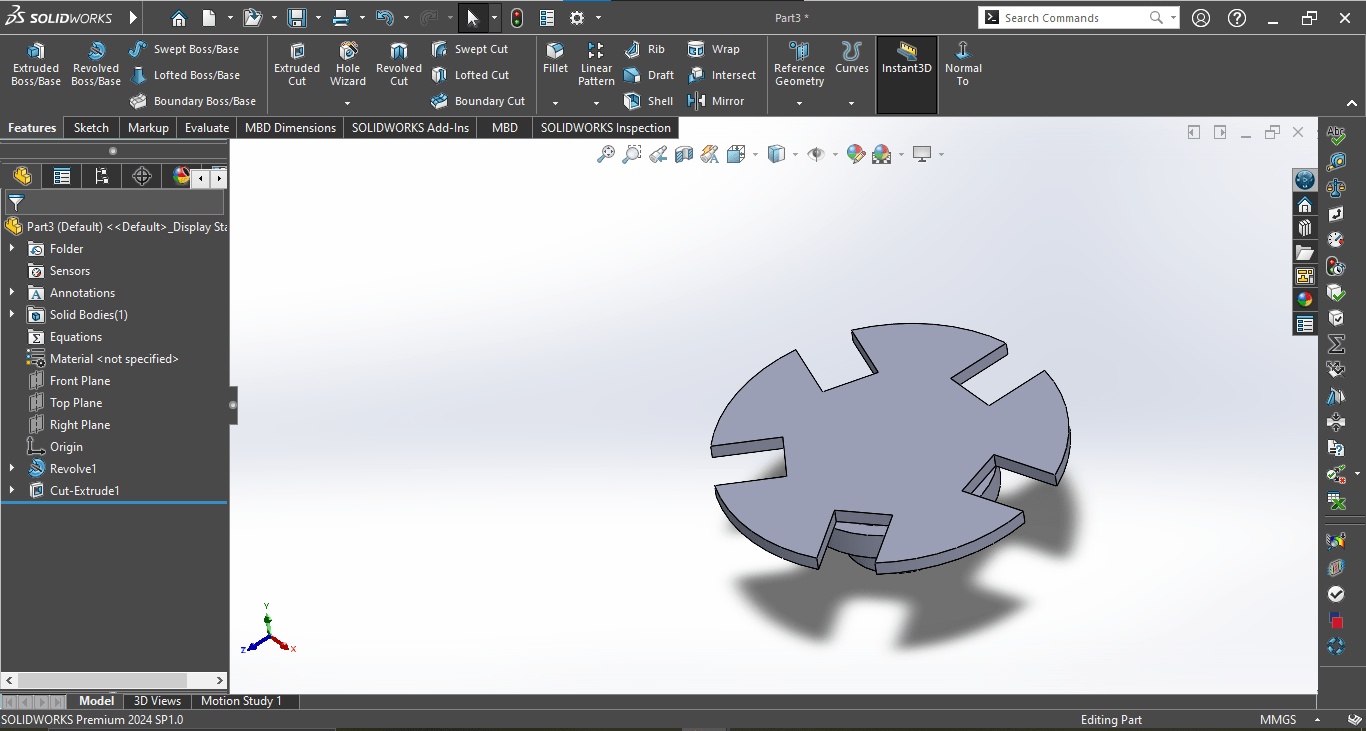
After i used the exclude cut to temove the sketched design.then i saved my part.
The two parts ware to my licking then i went to assembly so that i can joint my two 3D design.
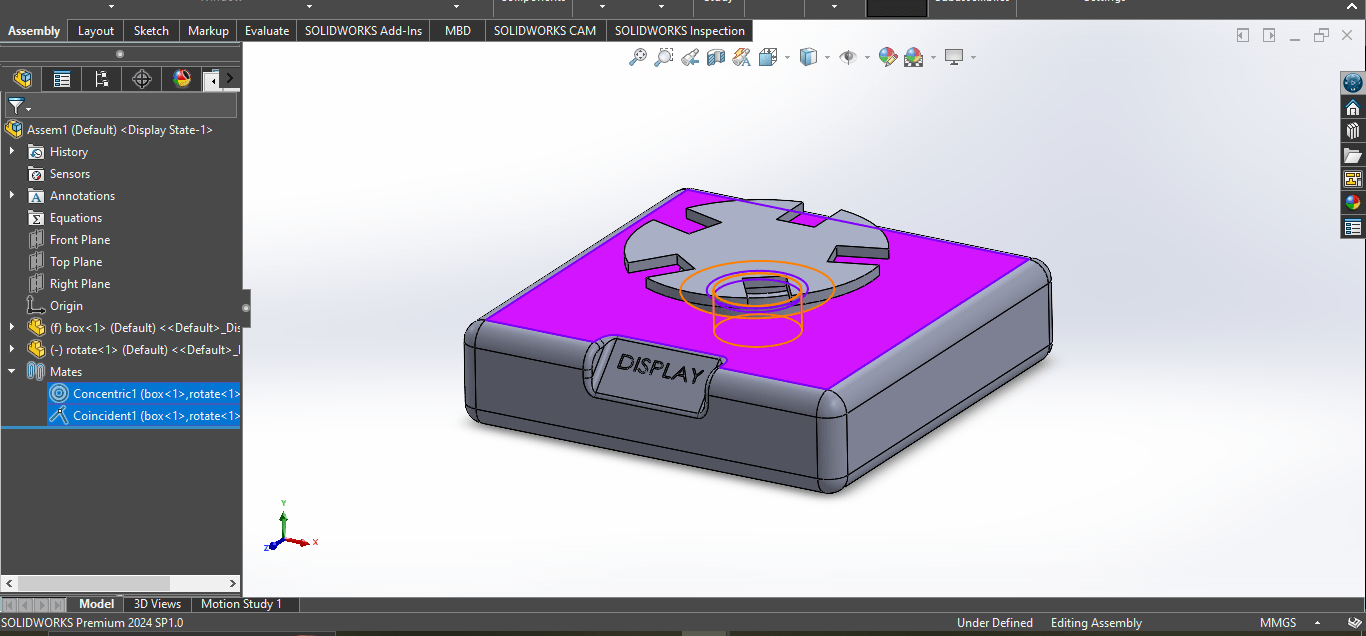
Here in assembly i brought my two saved parts in the canva. then used the mate to assemble them using the rod on the second part in the hole from the first part.
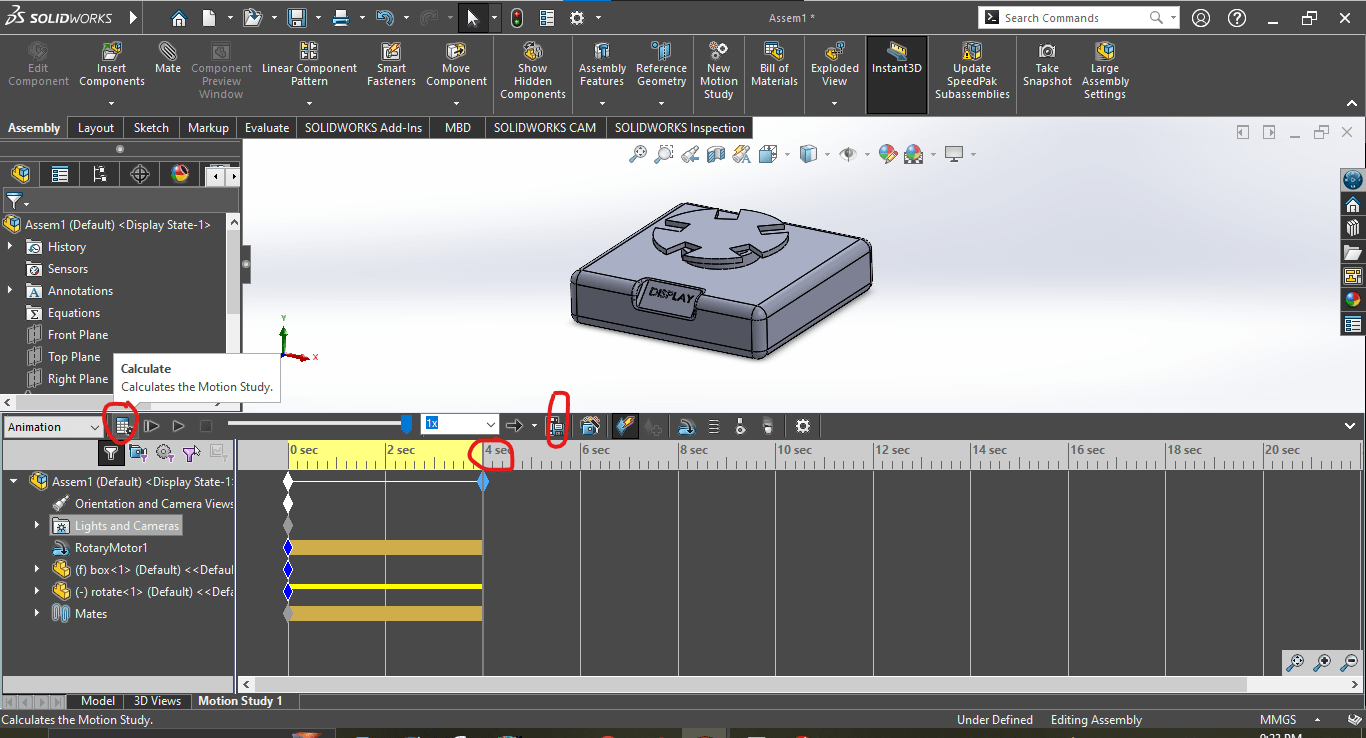
After the assembly was done i went to the motion study. here i choose the motor to rotate the rod of my second part then set the time to 4sec. after that i click on the calculate icon to animate the design the saved the video.
Here is the second part rotating
I used ImageCompressor to reduce my image file size so that I could upload it to GitLab more easily. After uploading the image to the website, the tool automatically applied smart compression, making the file smaller while keeping the quality intact.

This helped me stay within GitLab’s file size limits and ensured faster uploads. The compressed version looked almost the same as the original, so I downloaded it and successfully pushed it to GitLab without any issues.
I haven't used videos in this week, but i did find a good site called freeconvert that is used to compress video and i may used it in future weeks.
Design files
- download file (image)
- download file (part1)
- download file (part2)
- download file (assembly)