Interface and Application Programming
- Compare as many tool options as possible.
- Document your work on the group work page and reflect on your individual page what you learned.
- Write an application for the embedded board that you made. that interfaces a user with an input and/or output device(s)
#.Group assignment:
Here is the Group assignment(link)
#.Individual assignment
The goal of this individual assignment is to create an application that runs on or interacts with the embedded board you built, allowing a user to control or receive feedback from input and/or output devices, such as buttons, sensors, LEDs, or displays, through a user friendly interface.
1.My Approach
Having recently completed my own microcontroller board using the XIAO-RP2040, I was eager to put it to work. I imagined a simple but intuitive interface: a slider to control LED brightness via PWM and a text box to send messages to a connected I2C LCD. This wouldn’t just be a technical demo; it would be a small step toward the kinds of smart devices we use every day.
2. The Journey
One of my biggest hurdles was JavaScript, a language I hadn’t mastered yet. I was comfortable with Arduino but less so with building web UIs that interact with hardware. This challenge became an opportunity.
I dived into online tutorials, especially W3Schools, and sought help from ChatGPT to debug and better understand how to handle events, sliders, and serial communication in the browser. The process was humbling, but every small breakthrough was deeply rewarding.
HTML/JavaScript Code
The HTML and JavaScript code creates a simple web-based user interface that users interact with through a browser. The interface includes a slider to control the LED brightness, a text box to send messages to the LCD, and a button to connect to the microcontroller. When the slider is moved, JavaScript captures the brightness value and sends it via serial to the microcontroller. Similarly, when a user types a message and clicks "Send to LCD", the message is also sent through the serial connection. The "Connect" button initiates communication with the XIAO-RP2040 using the Web Serial API. JavaScript handles these user interactions, updates the displayed brightness in real-time, and manages the serial communication, effectively linking the user's browser to the embedded hardware.
XIAO-RP2040 Control Panel
XIAO-RP2040 Control Panel
LED Brightness Control
LCD Message Control
Arduino Code
The Arduino code is responsible for running on the XIAO-RP2040 microcontroller and handling communication with the connected devices—an LED and an I2C LCD display. It begins by initializing the serial communication, setting up the LED pin as an output, and preparing the LCD using the LiquidCrystal_I2C library. In the loop() function (which runs repeatedly), the board listens for incoming serial data, such as brightness values or text messages sent from the web interface. When data is received, the code interprets whether it's a command to adjust the LED's PWM signal (to control brightness) or a string to be displayed on the LCD screen. This enables real-time interaction between the user and the hardware via serial commands.
#include <Wire.h>
#include <LiquidCrystal_I2C.h>

// Set the LCD address to 0x27 for a 16 chars and 2 line display
LiquidCrystal_I2C lcd(0x27, 16, 2);

const int ledPin = D1;  // PWM-capable pin

void setup() {
  Serial.begin(115200);
  pinMode(ledPin, OUTPUT);

  // Initialize LCD
  lcd.init();
  lcd.backlight();
  lcd.clear();
  lcd.setCursor(0, 0);
  lcd.print("Web Control Ready");
}

void loop() {
  if (Serial.available() > 0) {
    char command = Serial.read();  // Read the command character

    // LED Control
    if (command == 'L') {
      int brightness = Serial.parseInt();  // Read the brightness value
      analogWrite(ledPin, brightness);
      Serial.print("LED set to: ");
      Serial.println(brightness);
    }

    // LCD Message
    else if (command == 'M') {
      String message = Serial.readStringUntil('\n');
      message.trim();
      lcd.clear();
      lcd.setCursor(0, 0);
      lcd.print(message);
      Serial.print("LCD message: ");
      Serial.println(message);
    }

    // Clear LCD
    else if (command == 'C') {
      lcd.clear();
      Serial.println("LCD cleared");
    }

    // Discard any remaining characters in the buffer
    while (Serial.available() > 0) {
      Serial.read();
    }
  }
}
Results
The interface allowed users to connect via serial, slide to adjust brightness, and type messages to send to the LCD. Seeing the LED fade and the LCD update in real time was a proud moment.
1. User Interface Overview
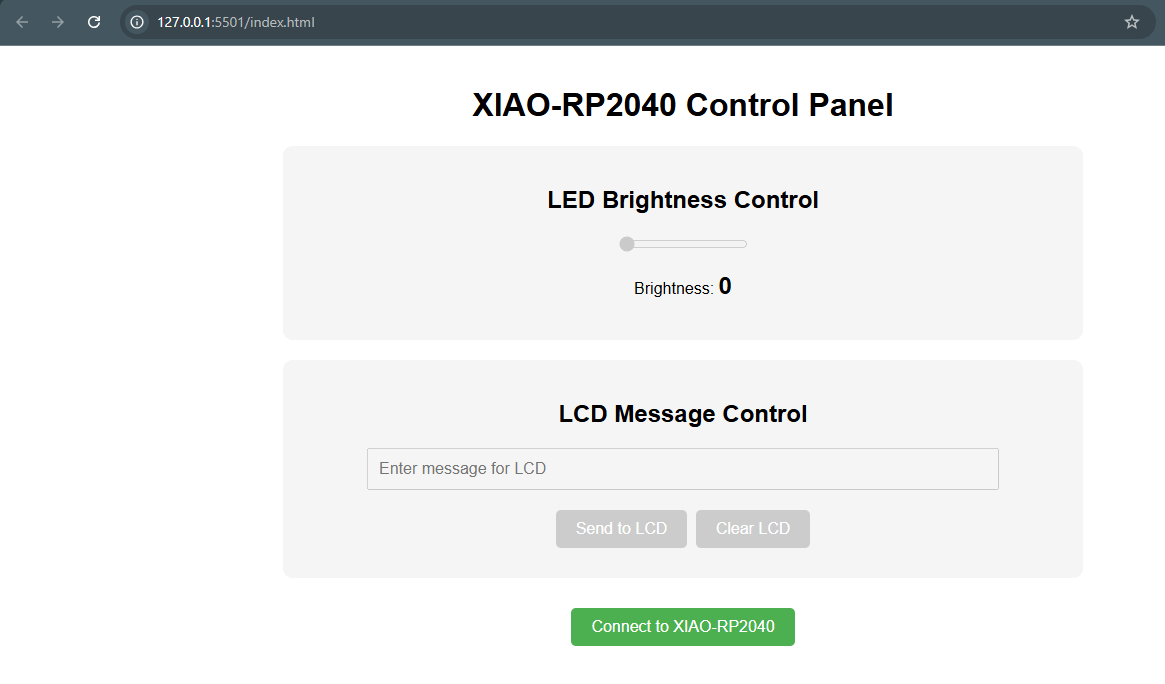
This image shows the user interface I created using HTML, CSS, and JavaScript. It includes a slider for adjusting the LED brightness and a text box with a button for sending messages to the LCD. The layout is simple and user friendly, allowing easy interaction with the microcontroller board.
2. Connecting the Board
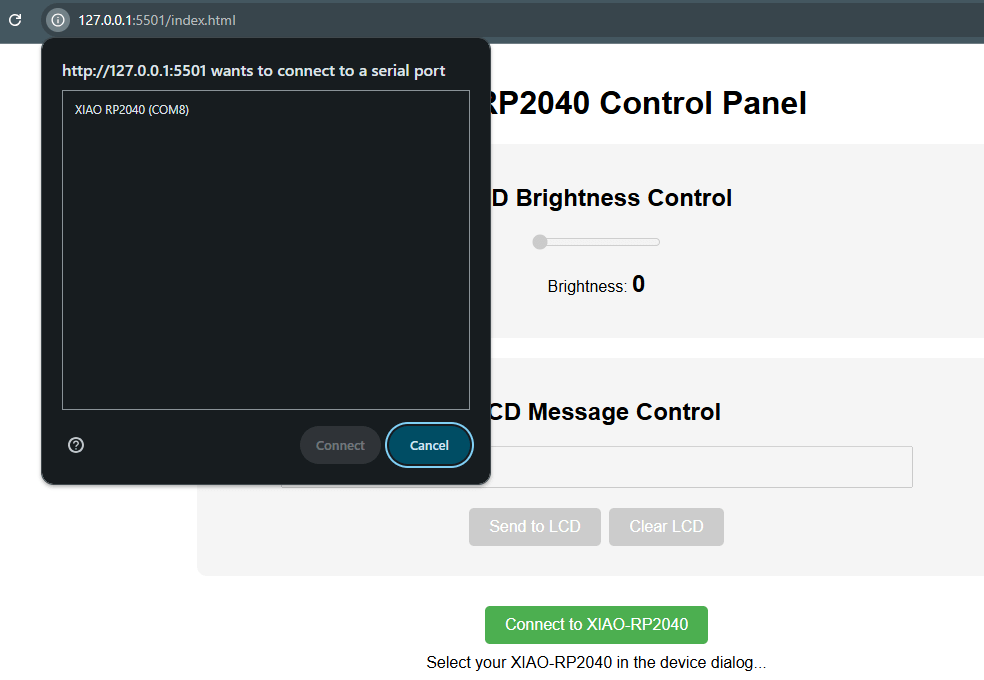
In this image, I connected my XIAO-RP2040 board to the web interface using the Web Serial API. This step is important because it allows the browser to communicate directly with the board. Once connected, the interface can send and receive data through the serial connection.
3. Preparing to Test
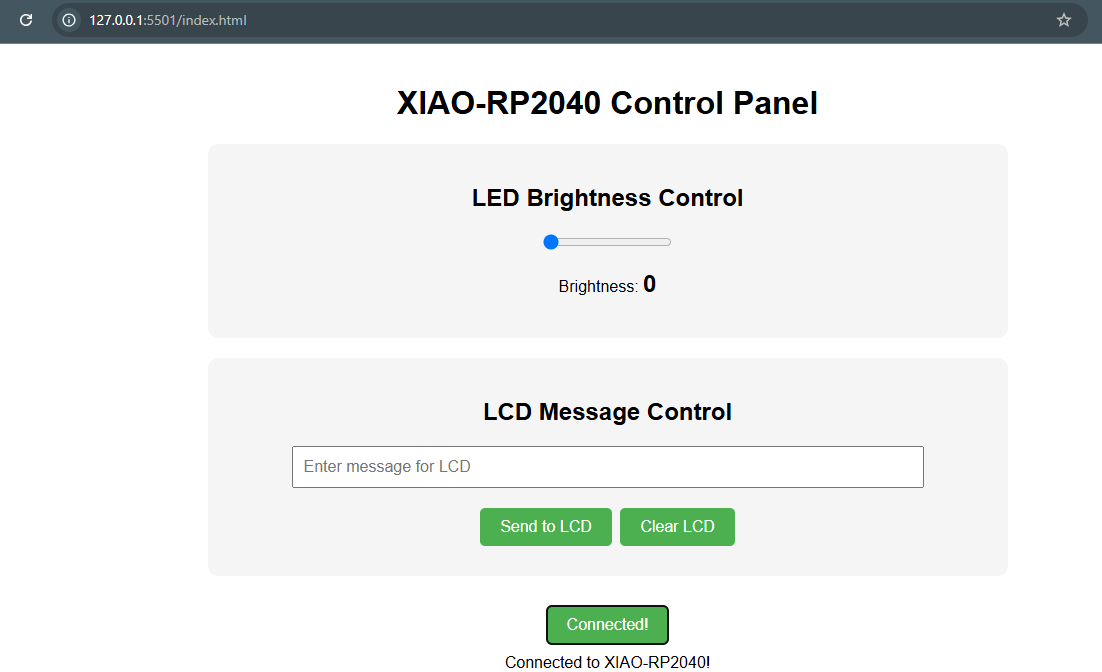
After confirming that the board was successfully connected, I made sure the Arduino code was already uploaded and running on the XIAO-RP2040. With the firmware ready and the UI set up, I began testing the communication between the interface and the board.
4. Testing the Interface
In this video, I demonstrate the working system. I use the slider on the web interface to control the brightness of the LED, and I also type a message to display on the LCD screen. This successful test confirmed that the interface and microcontroller were communicating properly, and the devices responded as expected.
3.Reflection and Takeaways
Beyond the technical aspects, this experience gave me a deeper, hands-on understanding of how software and hardware come together. It was rewarding to not only build something but also see it working in real time. I now feel more confident in my abilities to program and work with hardware. Most importantly, I saw how a simple user interface can make electronics more meaningful and interactive for users, turning raw components into a complete and usable system.