 ████   ████████        ██████   ██████  ███      █████  █████                                          ███████████                         ███
░░███  ███░░░░███      ░░██████ ██████  ░░░      ░░███  ░░███                                          ░░███░░░░░███                       ░░░
 ░███ ░░░    ░███       ░███░█████░███  ████   ███████  ███████    ██████  ████████  █████████████      ░███    ░███   ██████  █████ █████ ████   ██████  █████ ███ █████
 ░███    ██████░        ░███░░███ ░███ ░░███  ███░░███ ░░░███░    ███░░███░░███░░███░░███░░███░░███     ░██████████   ███░░███░░███ ░░███ ░░███  ███░░███░░███ ░███░░███
 ░███   ░░░░░░███       ░███ ░░░  ░███  ░███ ░███ ░███   ░███    ░███████  ░███ ░░░  ░███ ░███ ░███     ░███░░░░░███ ░███████  ░███  ░███  ░███ ░███████  ░███ ░███ ░███
 ░███  ███   ░███       ░███      ░███  ░███ ░███ ░███   ░███ ███░███░░░   ░███      ░███ ░███ ░███     ░███    ░███ ░███░░░   ░░███ ███   ░███ ░███░░░   ░░███████████
 █████░░████████  ██    █████     █████ █████░░████████  ░░█████ ░░██████  █████     █████░███ █████    █████   █████░░██████   ░░█████    █████░░██████   ░░████░████
░░░░░  ░░░░░░░░  ░░    ░░░░░     ░░░░░ ░░░░░  ░░░░░░░░    ░░░░░   ░░░░░░  ░░░░░     ░░░░░ ░░░ ░░░░░    ░░░░░   ░░░░░  ░░░░░░     ░░░░░    ░░░░░  ░░░░░░     ░░░░ ░░░░
Midterm Review – Final Project
Scorpion-Crab Hybrid Design
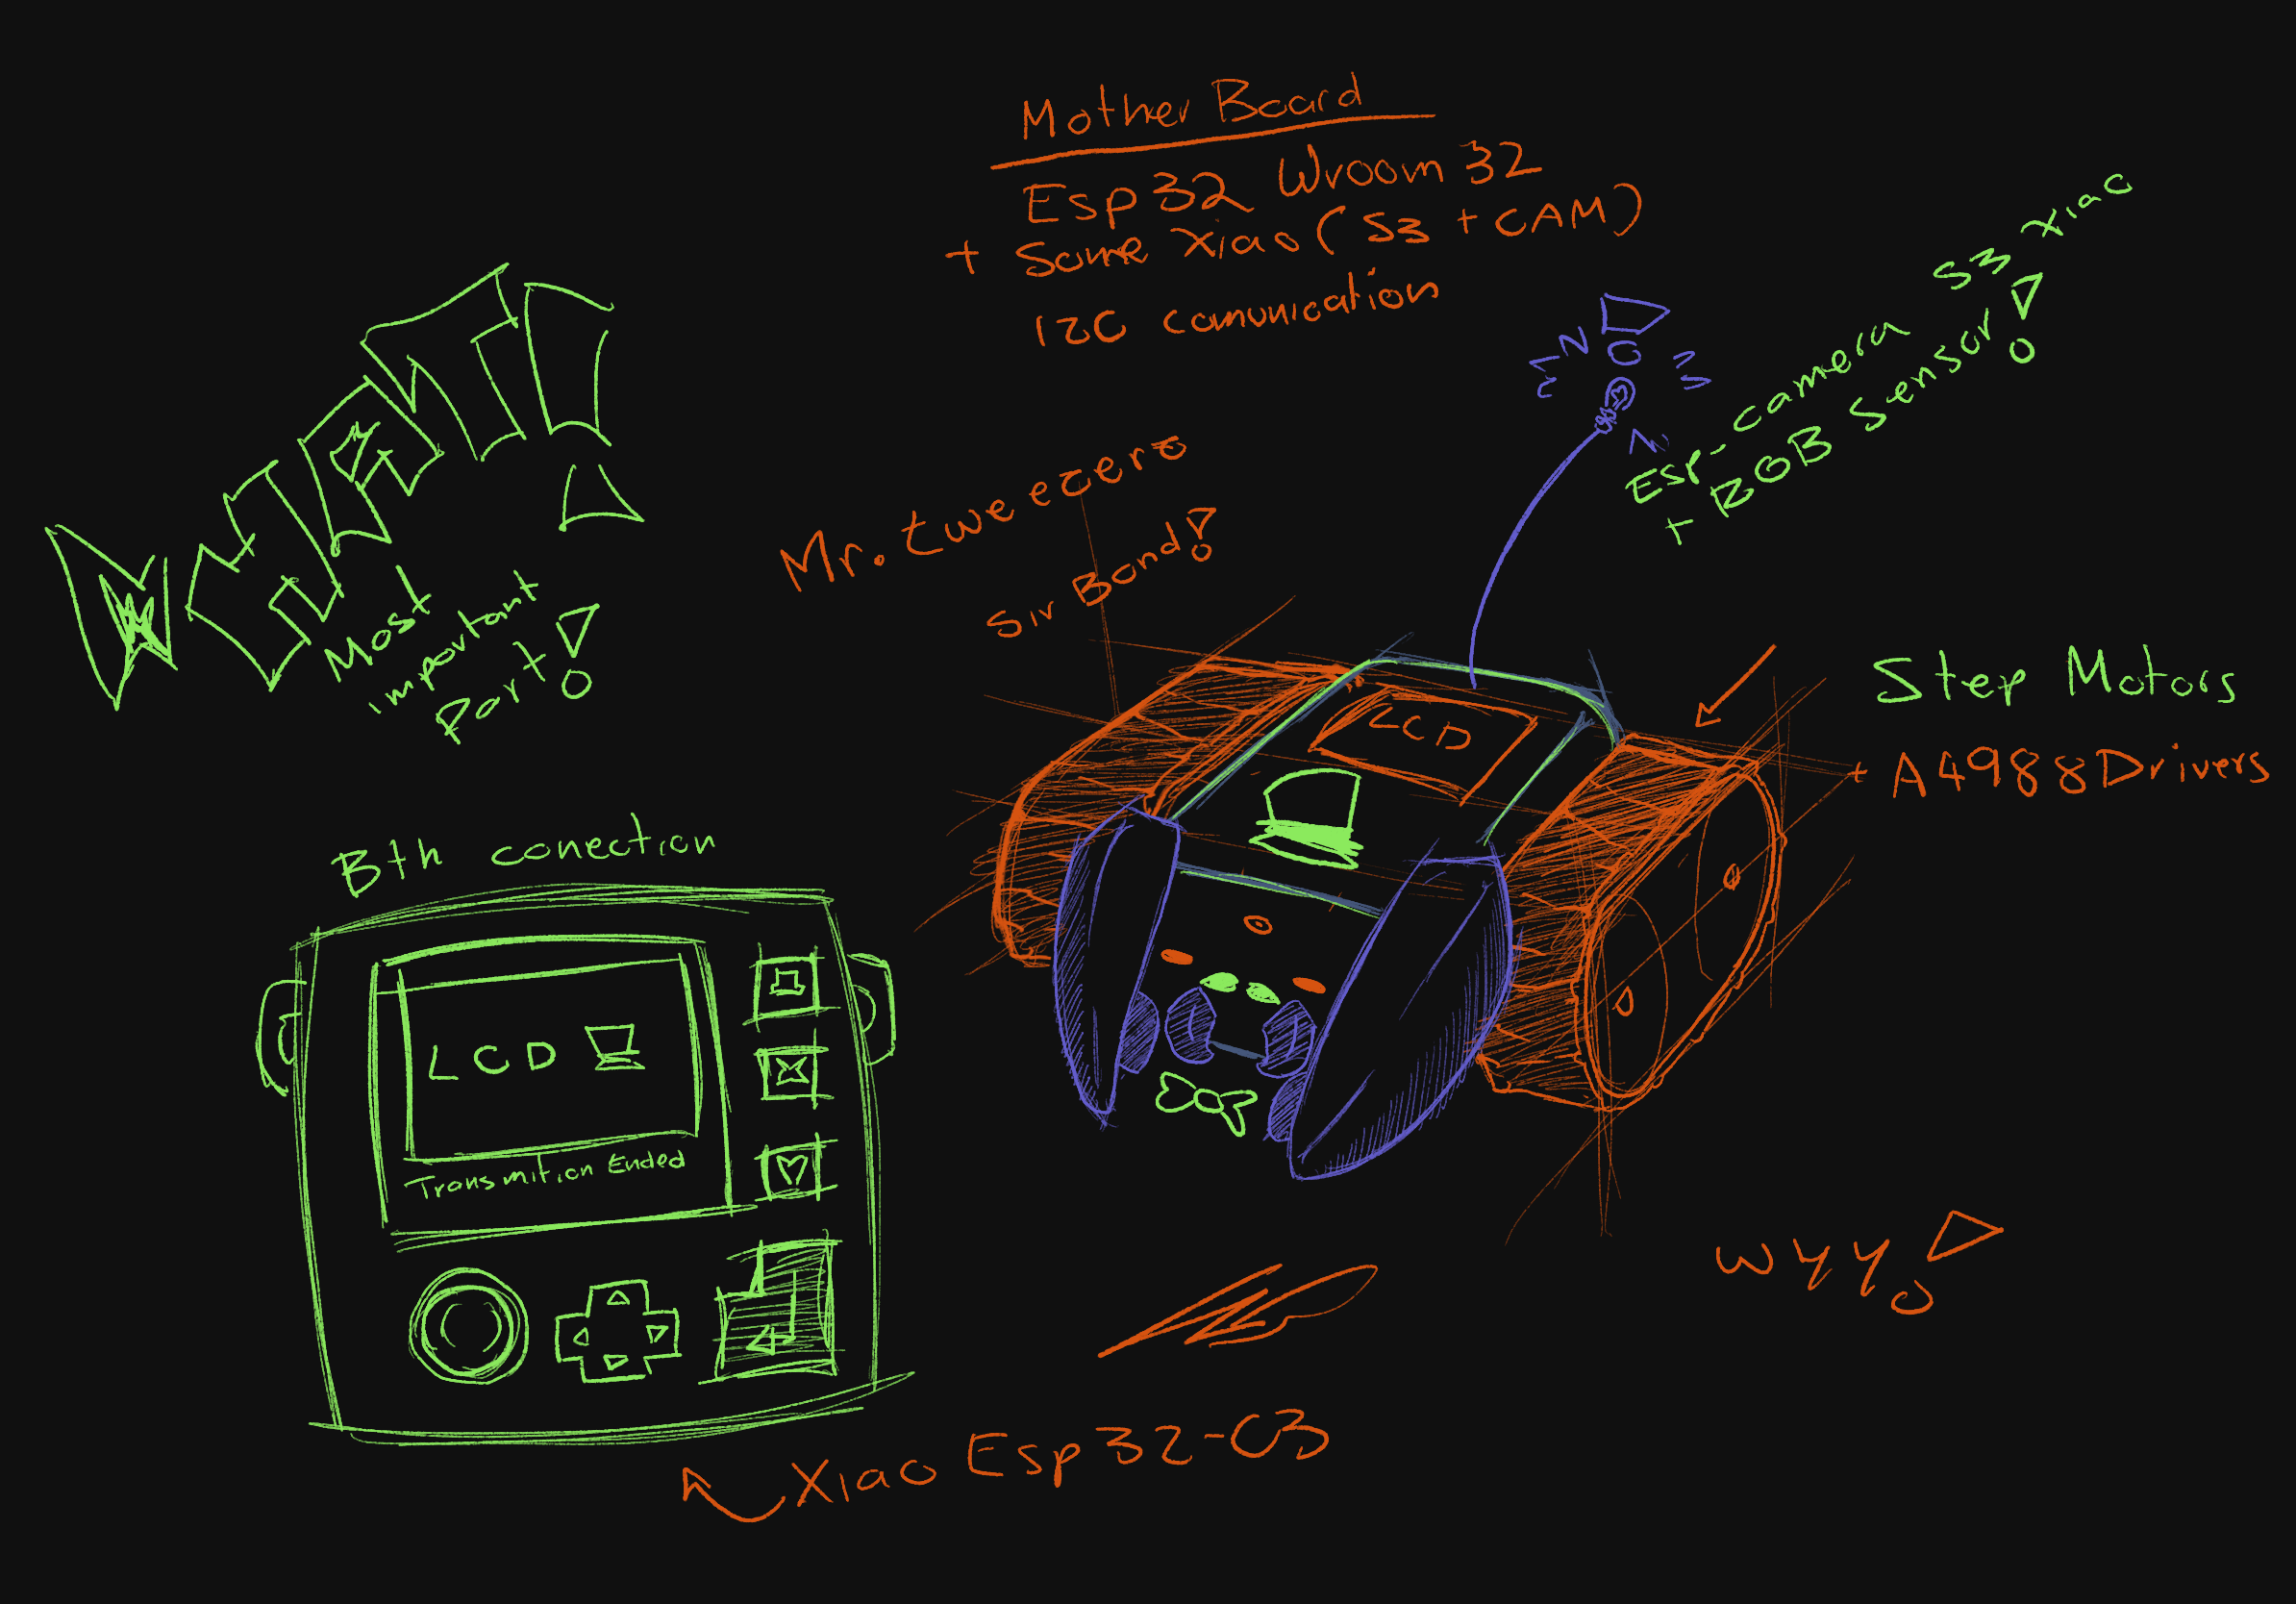
In the end I decided to mix the scorpion with the crab, it will be the scorpion but with the mechanics of the crab!
I think that the mother PCB has two microprocessors: an ESP32 WROOM 32 and some XIAO. Since the first has two cores while the XIAO only one, I want to divide tasks between those two while they are connected by I2C.
Then, there will be a control interface with a display to:
- See through the camera
- Show the values of the internal sensors
The sensors inside the scorpion will probably include:
- A sonic sensor
- A color sensor
- A camera
It will also have buttons to control the system.
That is where I will have to design the interface, so it will be perfect to focus on this part during the week.
As for the caterpillar tires, I will use two stepper motors per tire. I will print them in TPU, or else consider buying the band online.
And the most important thing will be the hat and his mustache!
| Product | Price (MXN) | Price (USD) |
|---|---|---|
| Display | $519 | $26.62 |
| Stepper motor | $150 | $7.69 |
| ESP32 WROOM | $136 | $6.97 |
| XIAO ESP32S3 | $324 | $16.62 |
| 5kg Servo motor | $116 | $5.95 |
| M3 Screws | $2 | $0.10 |
| Waterproof ultrasonic sensor | $199 | $10.21 |
| Female pin header | $5 | $0.26 |
Tasks To Be Completed
| Category | Task | Status |
|---|---|---|
| Design & Planning | Define overall robot architecture | |
| Sketch mechanical parts: arms, eyes, caterpillar wheels | ||
| Choose materials for chassis and molds | ||
| Create full 3D design of robot (chassis + parts) | ||
| Design STL models: arms, eyes, wheels, body mounts | ||
| Design mold shapes for external shell | ||
| Electronics & PCB | PCB schematic and layout: controller, motors, camera, WebSocket | |
| Fabricate PCBs | ||
| Assemble components (SMD/soldering) | ||
| Test each PCB independently | ||
| Connect and test full system integration | ||
| Finalize wiring and resistance layout | ||
| Mechanical Build | 3D print all mechanical parts | |
| Test motion system (tracks and wheels) | ||
| Attach arms and mechanical eyes | ||
| Secure PCBs to chassis | ||
| Route wires neatly | ||
| Final full body assembly | ||
| Testing & Debugging | Test motors with motor PCB | |
| Test sensors and camera | ||
| Test WebSocket connection and control | ||
| Check power supply, resistance and heat | ||
| Run full system test | ||
| Interface & Control | Develop WebSocket web interface | |
| Test commands from browser | ||
| Integrate UI with robot feedback |
| Week | Task | Status |
|---|---|---|
| Week 1 (Apr 21 – Apr 27) |
Define robot architecture Sketch arms, eyes, caterpillar tracks Start PCB designs: main board, motors, sensors, camera, WebSocket |
Completed |
| Week 2 (Apr 28 – May 4) |
Finish PCB schematics/layouts Full 3D design of robot (chassis, wheels, arms, eyes) Choose materials for molds and prints |
Completed |
| Week 3 (May 5 – May 11) |
PCB fabrication (all boards) 3D print prototypes: wheels, arms, eyes Plan electronic tests |
In Progress |
| Week 4 (May 12 – May 18) |
PCB testing Integrate motors and tracks Start firmware development for each board |
In progress |
| Week 5 (May 19 – May 25) |
Assemble electronics on chassis Mechanical test: movement and arms Design molds for external parts |
Pending |
| Week 6 (May 26 – Jun 1) |
Develop WebSocket interface Test server-client communication Finalize resistance and wiring layout |
In progress |
| Week 7 (Jun 2 – Jun 9) |
Final tests: sensors, motors, camera Finish assembly Submit complete project: Code, 3D files, PCB files, documentation Video and image assets |
Pending |