  ████████          █████████                                                 █████                            █████████    ███      █████              █████        █████                   ███
 ███░░░░███        ███░░░░░███                                               ░░███                            ███░░░░░███  ░░░      ░░███              ░░███        ░░███                   ░░░
░░░    ░███       ███     ░░░   ██████  █████████████   ████████  █████ ████ ███████    ██████  ████████     ░███    ░███  ████   ███████   ██████   ███████      ███████   ██████   █████  ████   ███████ ████████
   ███████       ░███          ███░░███░░███░░███░░███ ░░███░░███░░███ ░███ ░░░███░    ███░░███░░███░░███    ░███████████ ░░███  ███░░███  ███░░███ ███░░███     ███░░███  ███░░███ ███░░  ░░███  ███░░███░░███░░███
  ███░░░░        ░███         ░███ ░███ ░███ ░███ ░███  ░███ ░███ ░███ ░███   ░███    ░███████  ░███ ░░░     ░███░░░░░███  ░███ ░███ ░███ ░███████ ░███ ░███    ░███ ░███ ░███████ ░░█████  ░███ ░███ ░███ ░███ ░███
 ███      █      ░░███     ███░███ ░███ ░███ ░███ ░███  ░███ ░███ ░███ ░███   ░███ ███░███░░░   ░███         ░███    ░███  ░███ ░███ ░███ ░███░░░  ░███ ░███    ░███ ░███ ░███░░░   ░░░░███ ░███ ░███ ░███ ░███ ░███
░██████████ ██    ░░█████████ ░░██████  █████░███ █████ ░███████  ░░████████  ░░█████ ░░██████  █████        █████   █████ █████░░████████░░██████ ░░████████   ░░████████░░██████  ██████  █████░░███████ ████ █████
░░░░░░░░░░ ░░      ░░░░░░░░░   ░░░░░░  ░░░░░ ░░░ ░░░░░  ░███░░░    ░░░░░░░░    ░░░░░   ░░░░░░  ░░░░░        ░░░░░   ░░░░░ ░░░░░  ░░░░░░░░  ░░░░░░   ░░░░░░░░     ░░░░░░░░  ░░░░░░  ░░░░░░  ░░░░░  ░░░░░███░░░░ ░░░░░
                                                        ░███                                                                                                                                      ███ ░███
                                                        █████                                                                                                                                    ░░██████
                                                       ░░░░░                                                                                                                                      ░░░░░░
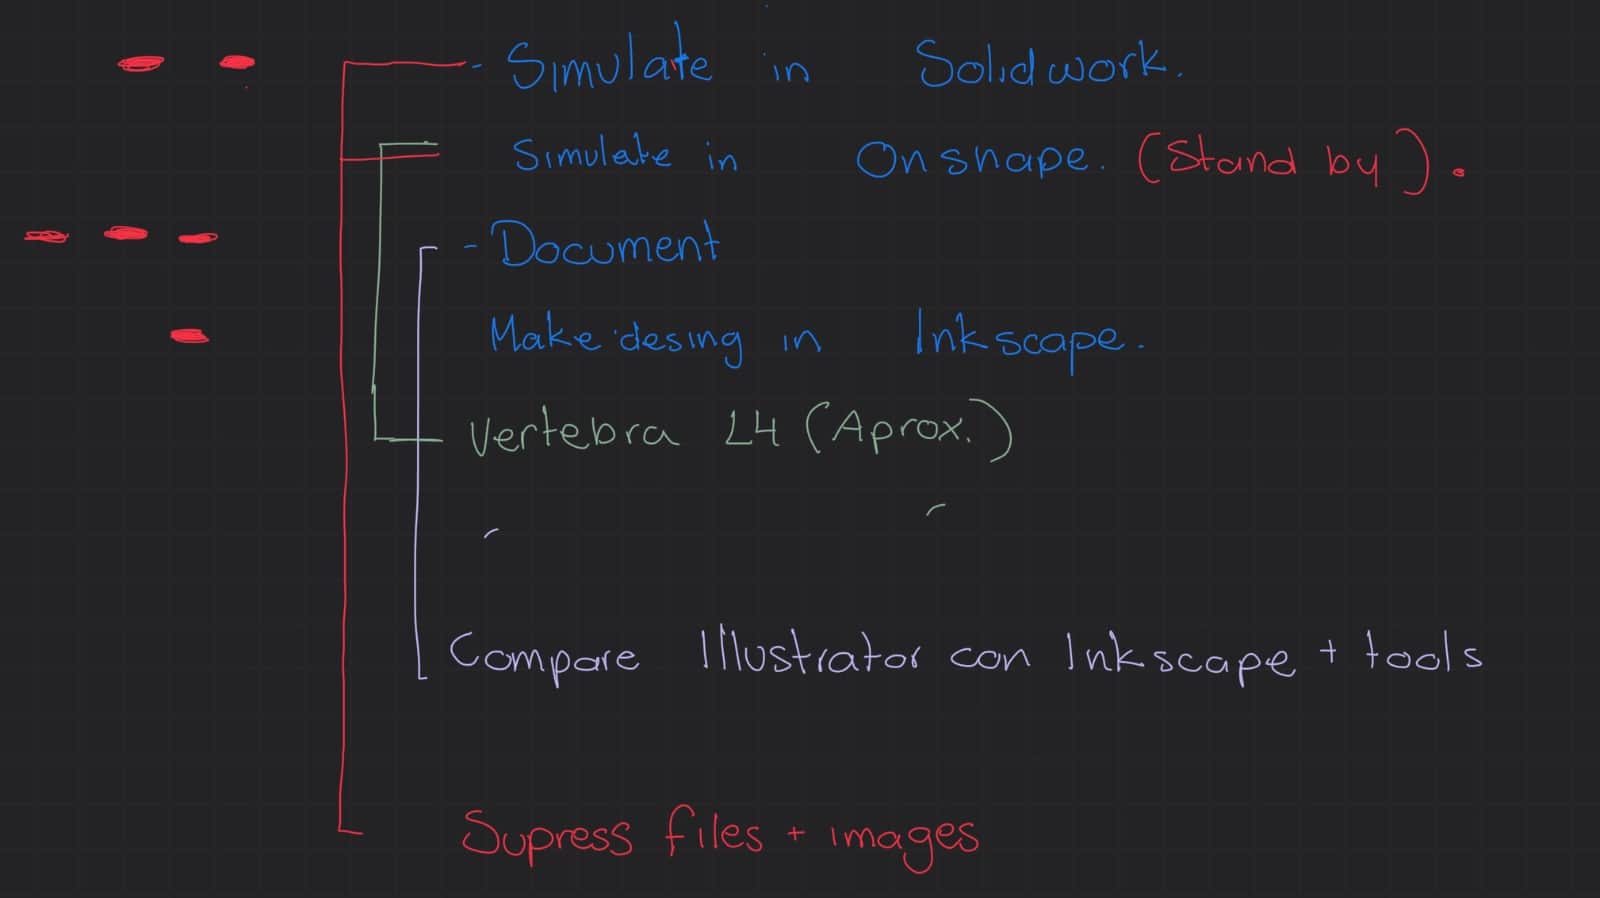
(First, prioritize my tasks; those with a larger line are the most important or the ones that I feel will take longer to learn how to do and do).
This week I touch on computer-aided design, but what is that? I would tell you that it is digital drawing, and that's it (be it vectors or pixels or anything like that), and in itself it is, but it has a more technical explanation.
“Computer-aided drafting (CAD) is the use of software to create, modify, analyze, and optimize 2D and 3D designs. It is used in various areas such as engineering, architecture, industrial design, and manufacturing, allowing greater precision, automation, and efficiency in the creation of plans, models, and prototypes.”
I decided to use procreate + adobe ilustrator for the 2D design.
But what is the difference between these two?
On the one hand, we have Illustrator and Inkscape (this last one is free), which is a vector editing and design program (paid application). Vector files use curves, lines, and mathematical equations to create pixel-free images. Mathematical formulas capture shape, edge, and color, allowing you to enlarge or reduce without losing quality.
On the other hand, we have Procreate, which is a raster graphics design program. Raster files are images made up of color pixels that determine the quality of the image according to their quantity, depending on the type of file used.
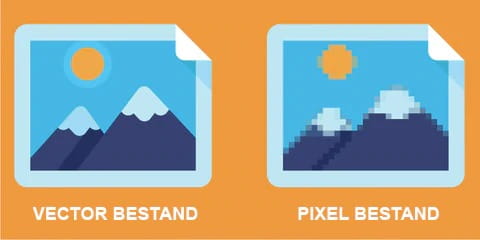
(Actually this is a pixel bestand image).
why did I want to use procreate with Adobe Illustrator?
Well, the simple fact of making a design in vectors stresses me out. I spent more than 3 hours trying to learn a little more about vectors, why they are like that, and how they work. And I transferred a drawing from Procreate to Illustrator to convert it into vectors. Inkscape also has this tool, but the latter adds too many unnecessary nodes thatI don't know how to fix without making a mess first, so I chose to use Illustrator in this case.
2D design
First of all, for a drawing that I want to transform into a vector, I have to use a firm, concise brush without irregularities, so I decided to use the “inked > fountain pen” brush. Then I transferred the PSD file, which is an Adobe file, to Illustrator (official software provided by my brother, who has it on his laptop).
By doing this, I selected my drawing, went to objects, image trace, and made and expanded.
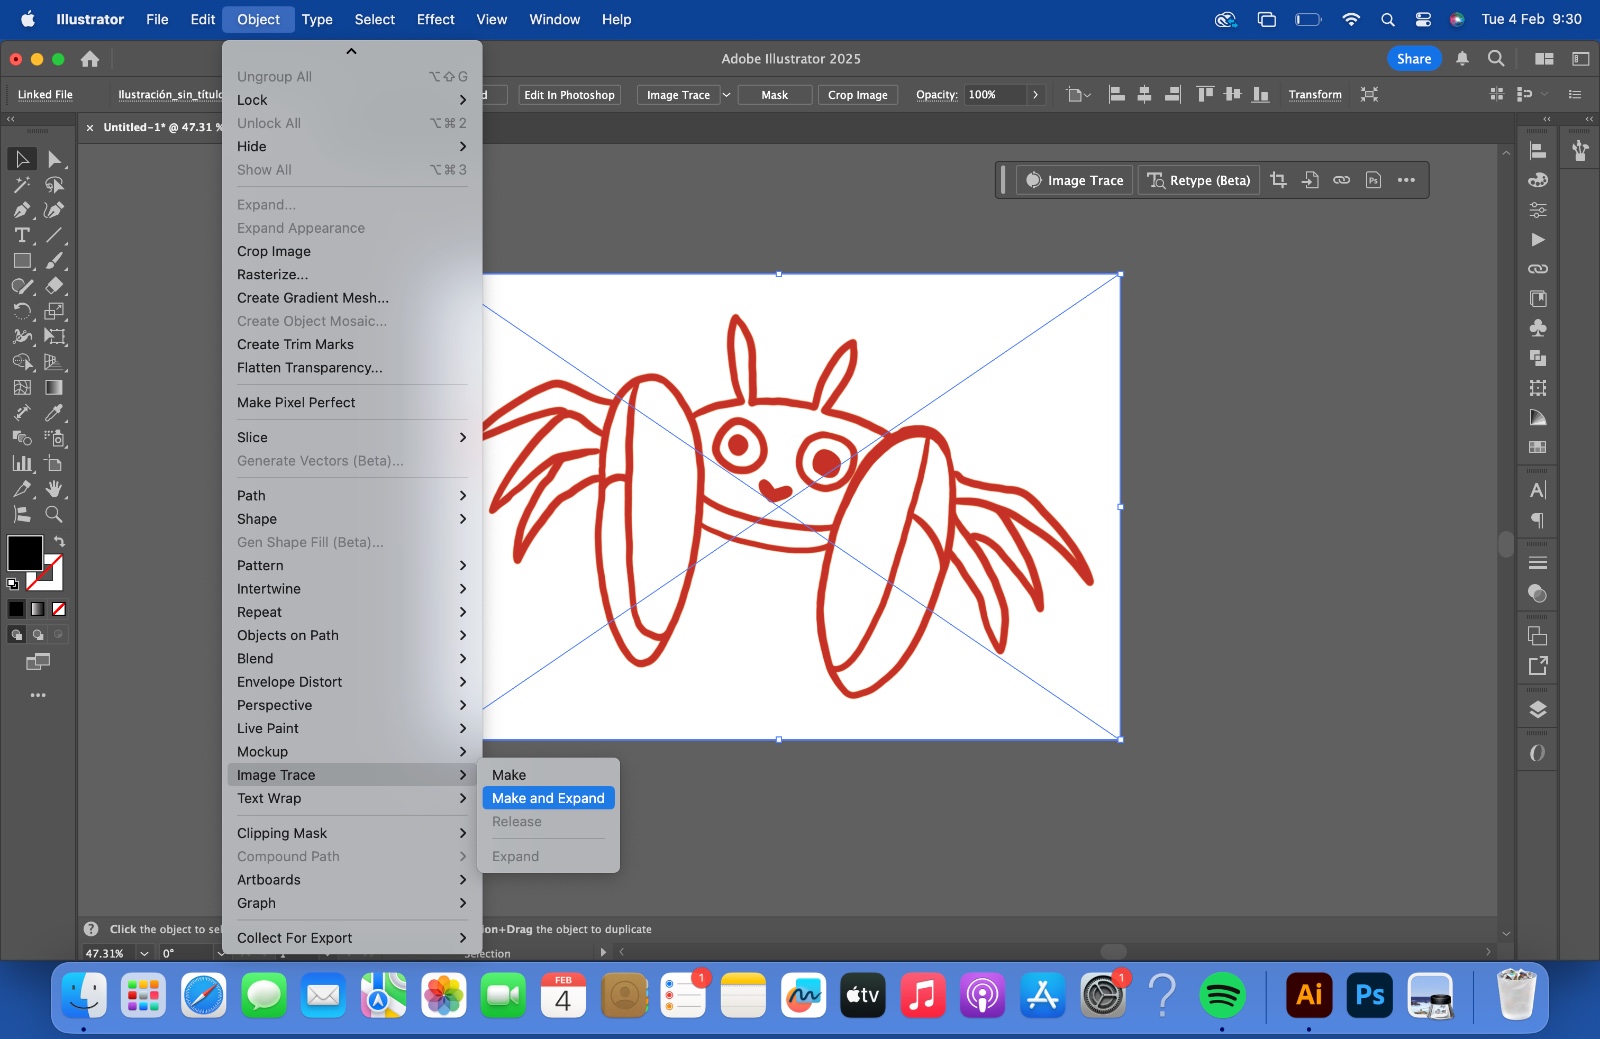
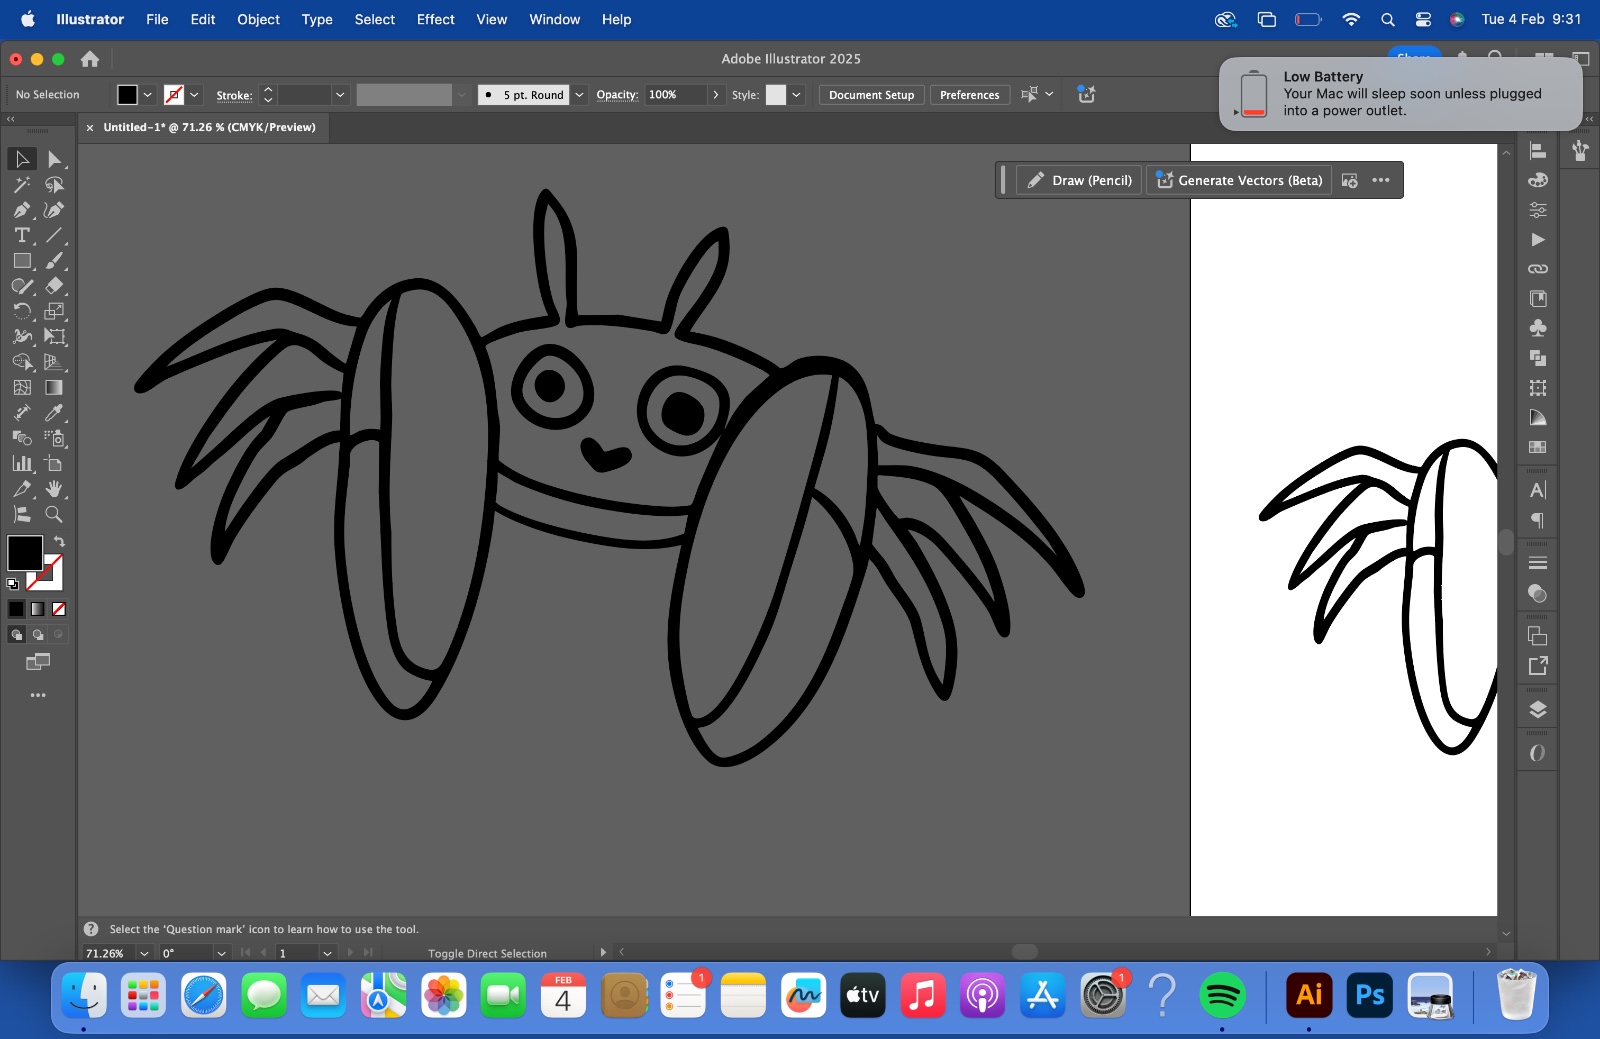
What this does is convert my drawing to a vector in black and white; the only thing I had to do after that was select every black stroke in my drawing and separate it from the white part, thus leaving my crab ready in vector.
procreate
Procreate is a digital illustration app exclusively for iOS. It is designed for digital artists, illustrators, and designers, offering an experience similar to traditional drawing with advanced and digital tools.
Procreate Key Features:
Inkscape
Inkscape is open-source graphic design software specifically for creating and editing vectors. It works similarly to Adobe Illustrator or CorelDRAW but is free and compatible with different platforms (Windows, macOS, and Linux). It is based on the SVG (Scalable Vector Graphics) format, which allows you to create scalable images without losing quality.
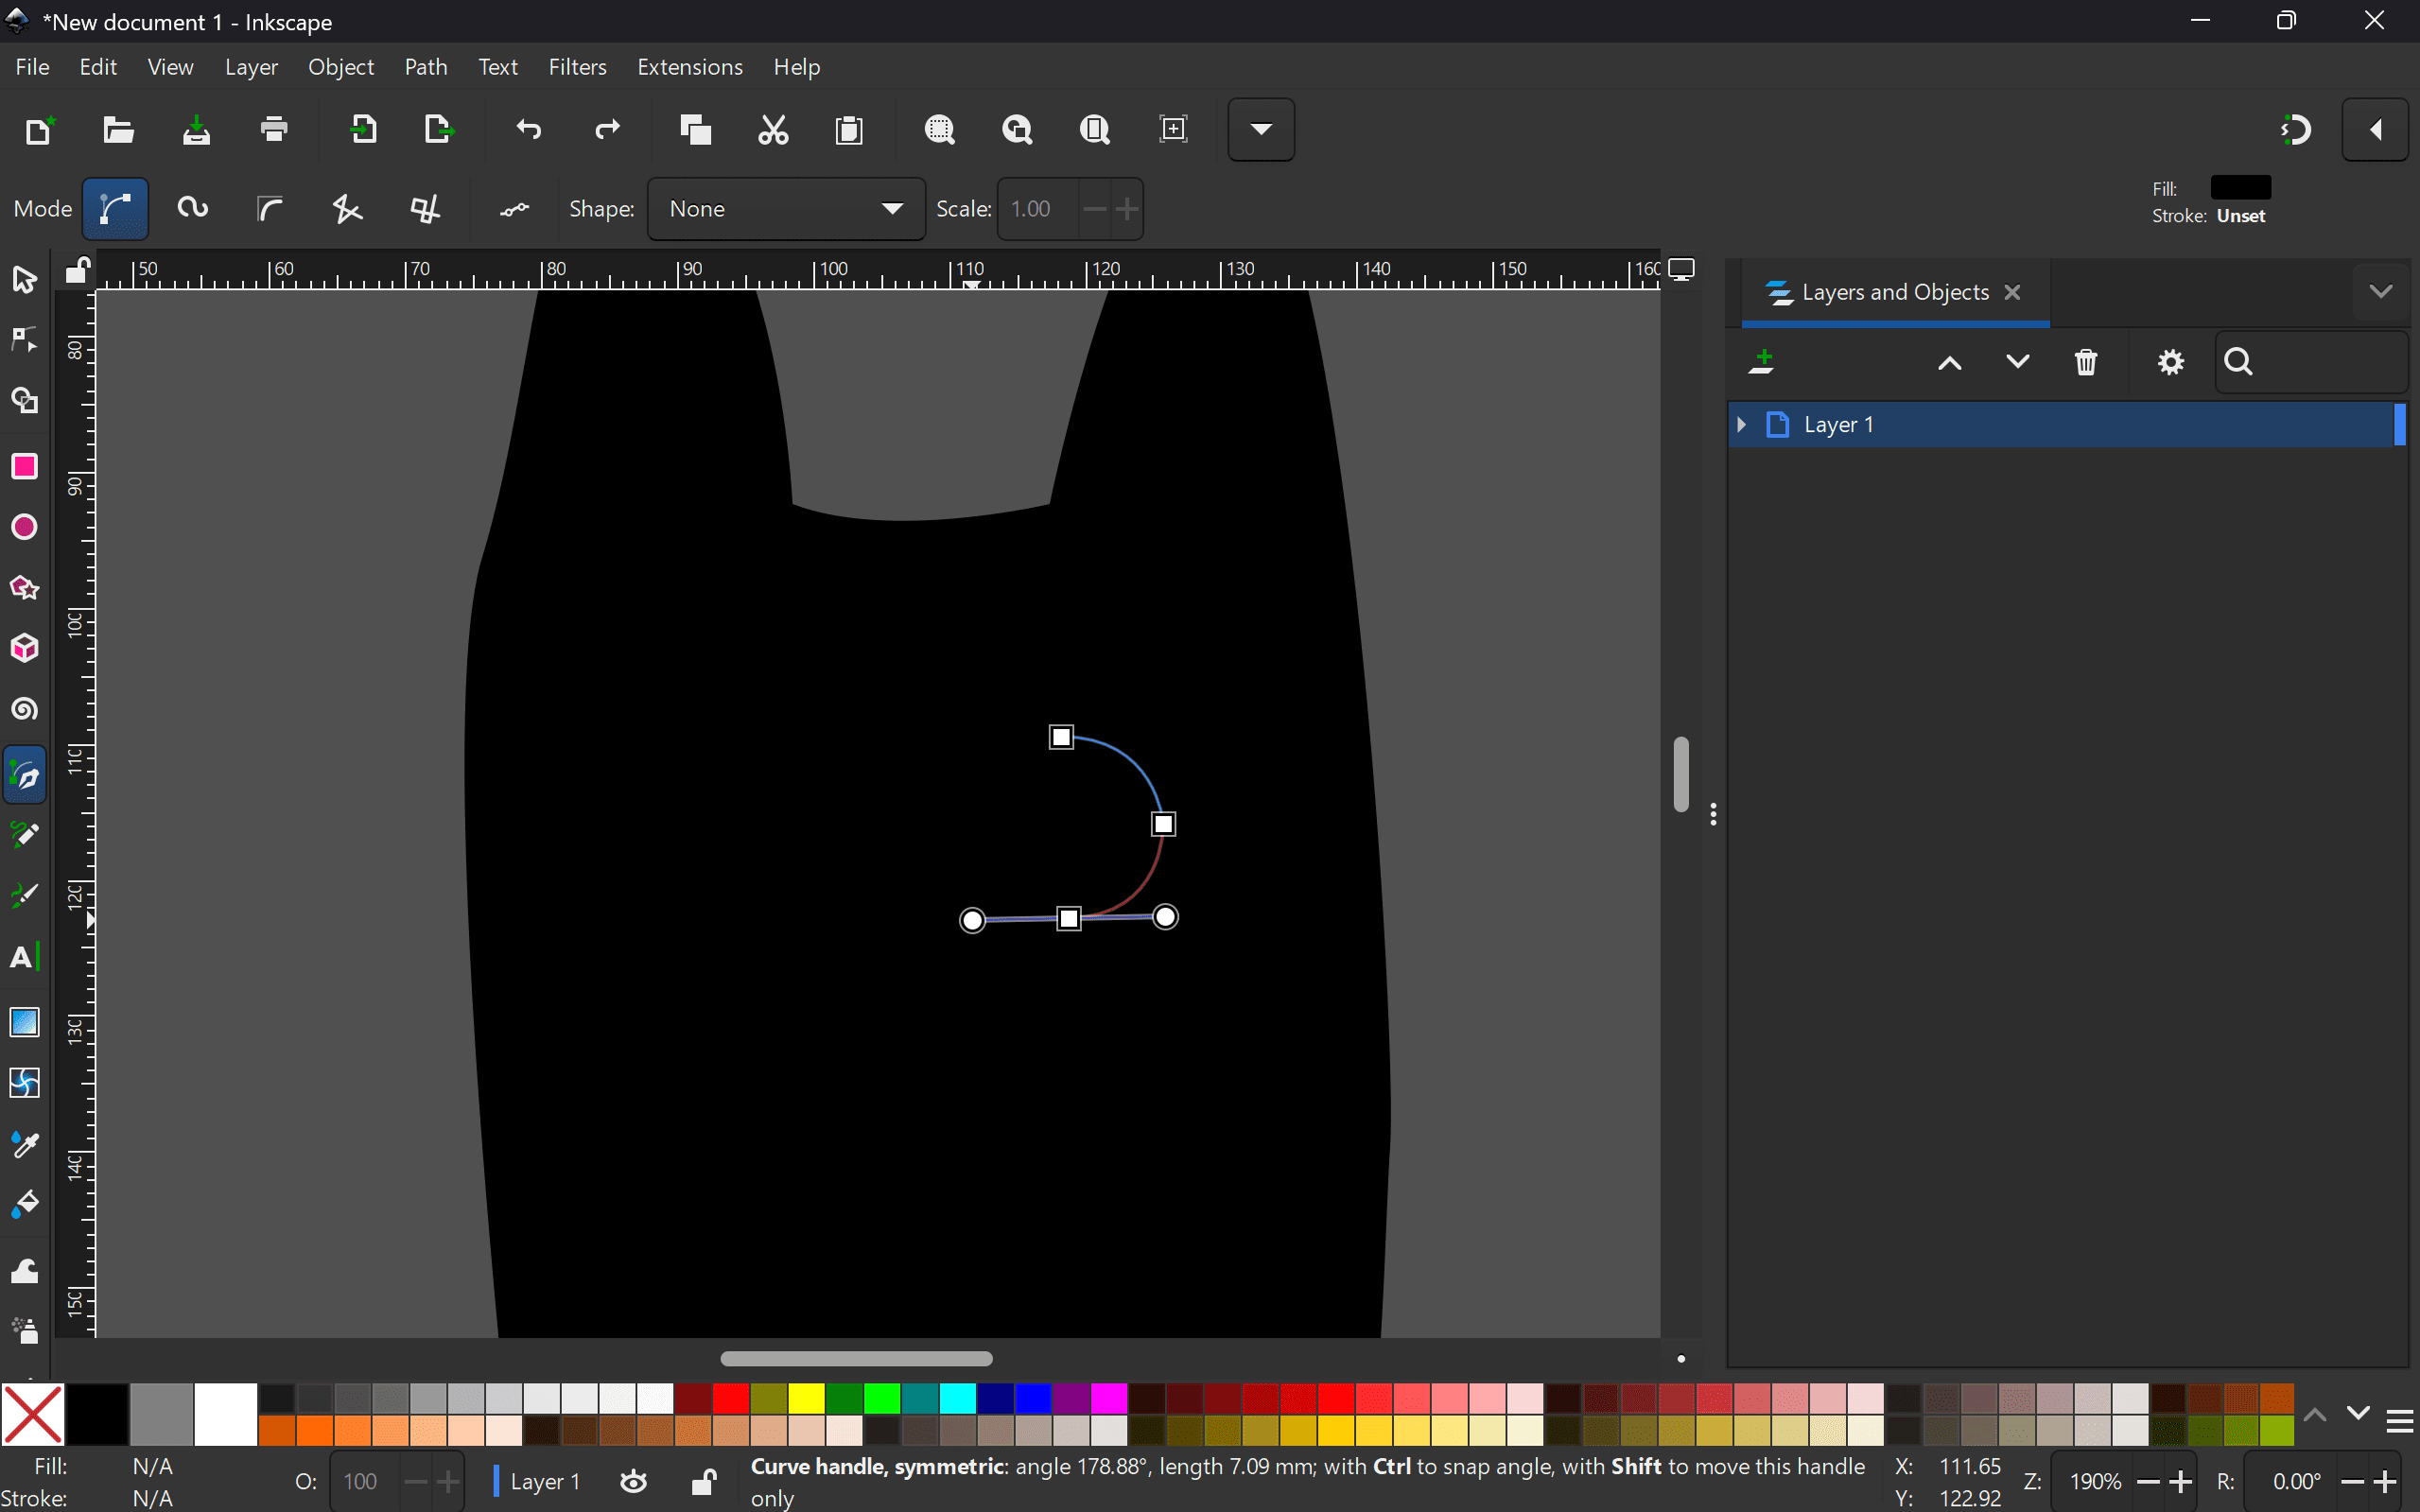
Unlike Illustrator, Inkscape is free, and I'm really bad at vectors. Initially I made a thing that looked like a weird and ugly homunculus. But oh, what a Bezier game helped me so much, and I managed to make a black kitten! All based on the vector pen!
By selecting a vector pen, I managed to make a cat with the previously selected color at the bottom that appears on the screen with the boxes of different colors. I could say that it only occupies the mouse in Inkscape, but really, if it had not been for the vector game, I would be finished here. The first thing I did was open a new file in Inkscape.
Select the vector pen tool

With the mouse, say where I want to start tracing.
To make a straight line just click at the beginning and then where you want it to end.
But for a curve you must keep the left click on the mouse and then release it,
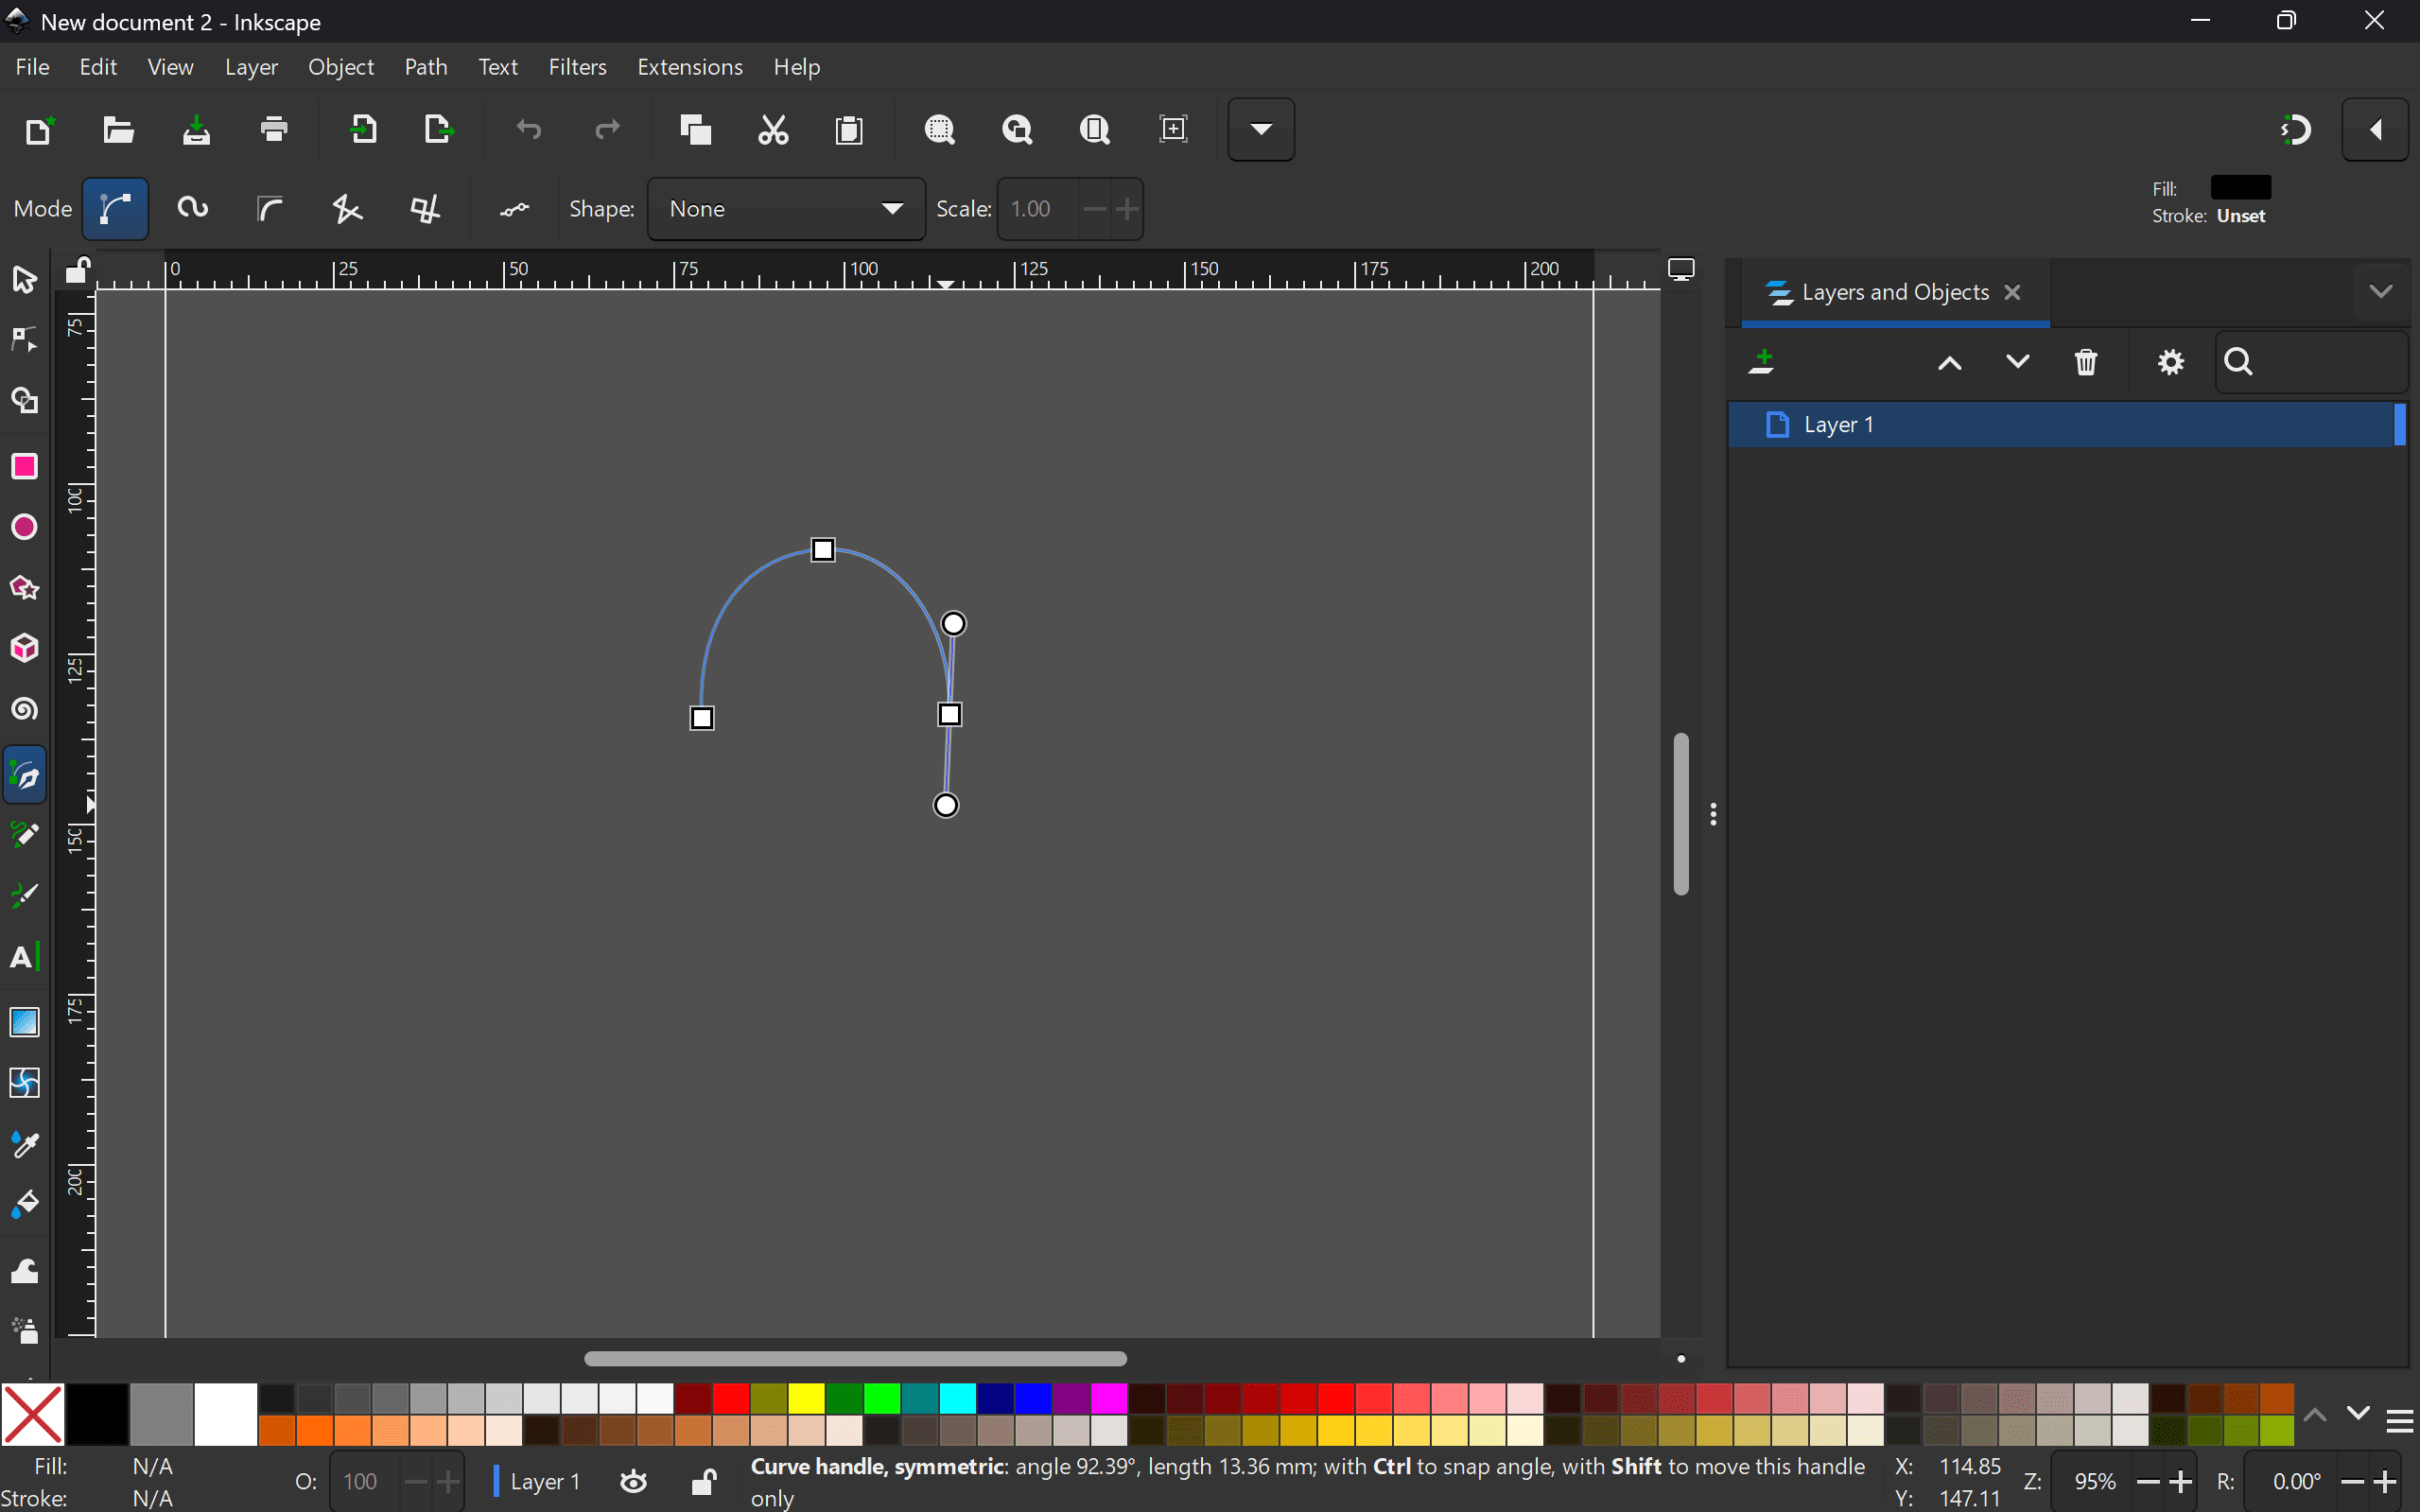
a straight line will appear (from there you created a reference for the curve), because moments later the real curve will appear!
Bezier
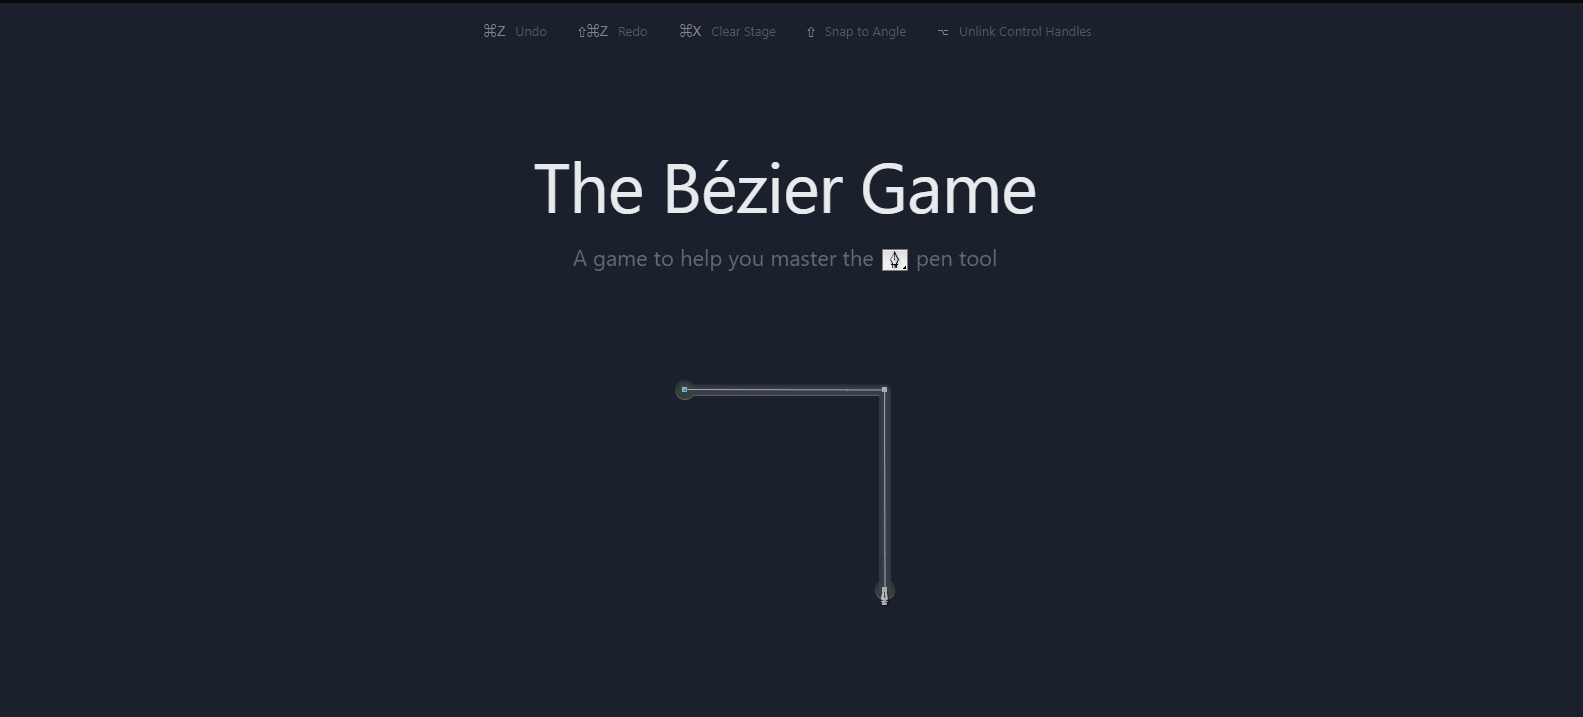
And it turns out that I am very bad with vectors, I may even hate them, apart from the fact that I have not taken any class or course on how they work and how to use them. But after searching a little on the internet I found something that could maybe help me "the bezier game" a game that teaches you from scratch to use vectors and starts with some general commands within any vector application.
3D design
| feature | solidworks | onshape |
|---|---|---|
| software type | Desktop application (Windows) | Cloud-based (web browser) |
| installation | Requires local installation | No installation needed, runs in the cloud |
| license | One-time purchase or subscription | Monthly/annual subscription |
| Accessibility | Only on the computer where it is installed | Accessible from any internet-connected device |
| collaboration | Manual file sharing | Real-time collaboration in the cloud |
| storage | Local or PDM servers | Cloud-based |
| offline work | Capability Yes, but requires license activation | No, requires internet connection |
| user interface | Comprehensive and feature-rich | Lighter, modern, web-based |
| performance | Depends on PC hardware | Depends on internet speed |
| rendering & simulation | Powerful built-in tools (Simulation, Visualize) | Limited, requires external integrationss |
| target industry | Industry Mechanical engineering, manufacturing, automotive | Collaborative design, education, startups |
| cost | High, especially for small businesses | More affordable subscription model |
I tried first with onshape and I felt frustrated because it simply ruined it, it came out wrong, I didn't understand it and I got even more frustrated because I couldn't remove the leftovers that are seen in the design, it looks horrible, and not only that it got stuck all the time and it was annoying. (I was only able to extrude a hollowed cylinder and add the ends without removing the excess inside.)
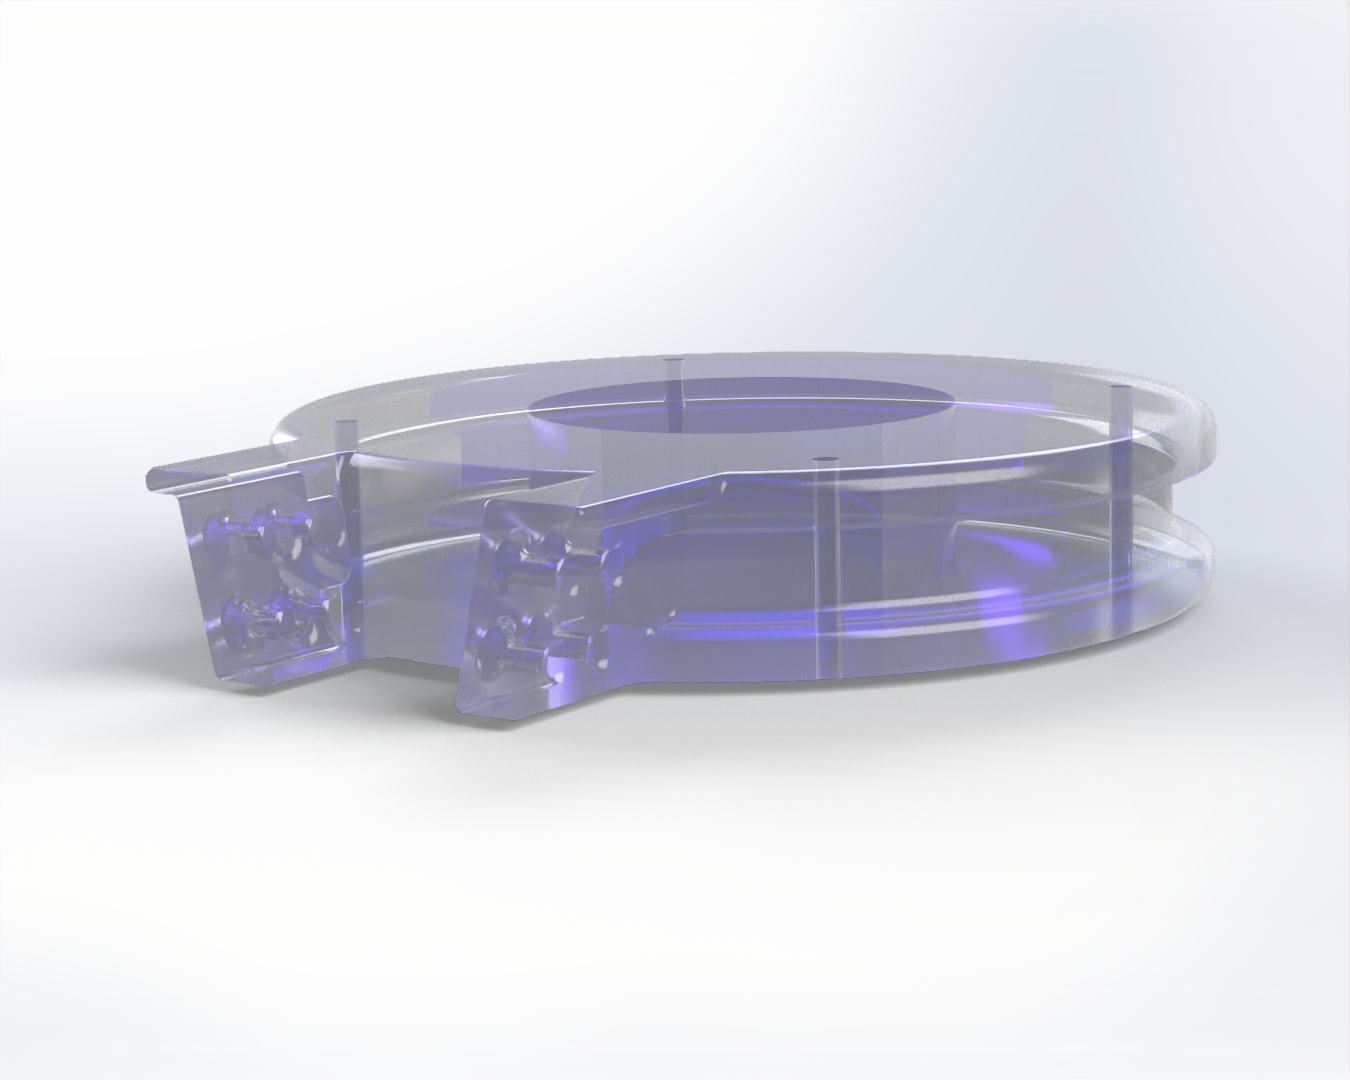
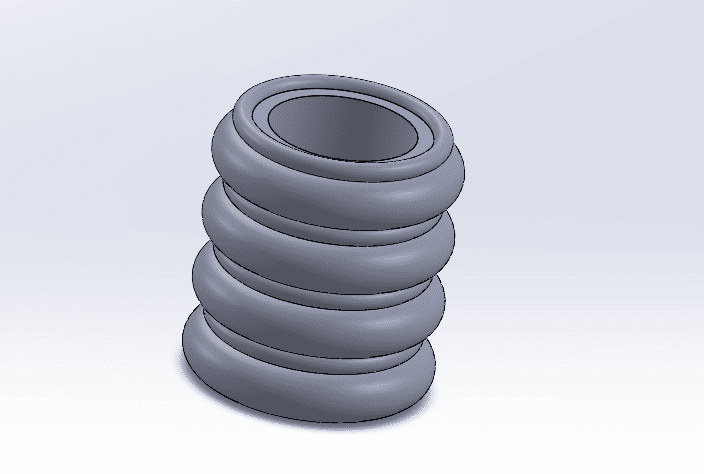
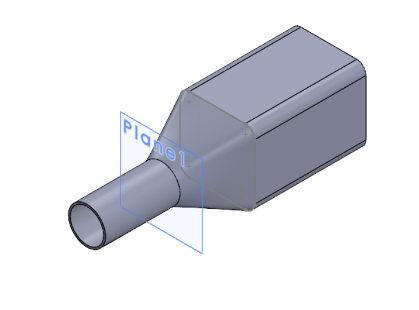
After I installed solidworks and activated my license, I remembered a little about an express mini class that they gave me on solid and something that I like about solid is that it is more intuitive (in my opinion) which made things easier for me. I created my file and started designing, I created my first sketch on the plane and if I remember, I put a circle that I then extruded. Already extruding it approximately 2-3 cm, I added two more sketches on each flat face of the now cylinder to do the same as the previous step with the difference that now the circle would be a little larger. Extruding it less than half a centimeter, I already had what looked like a reel.
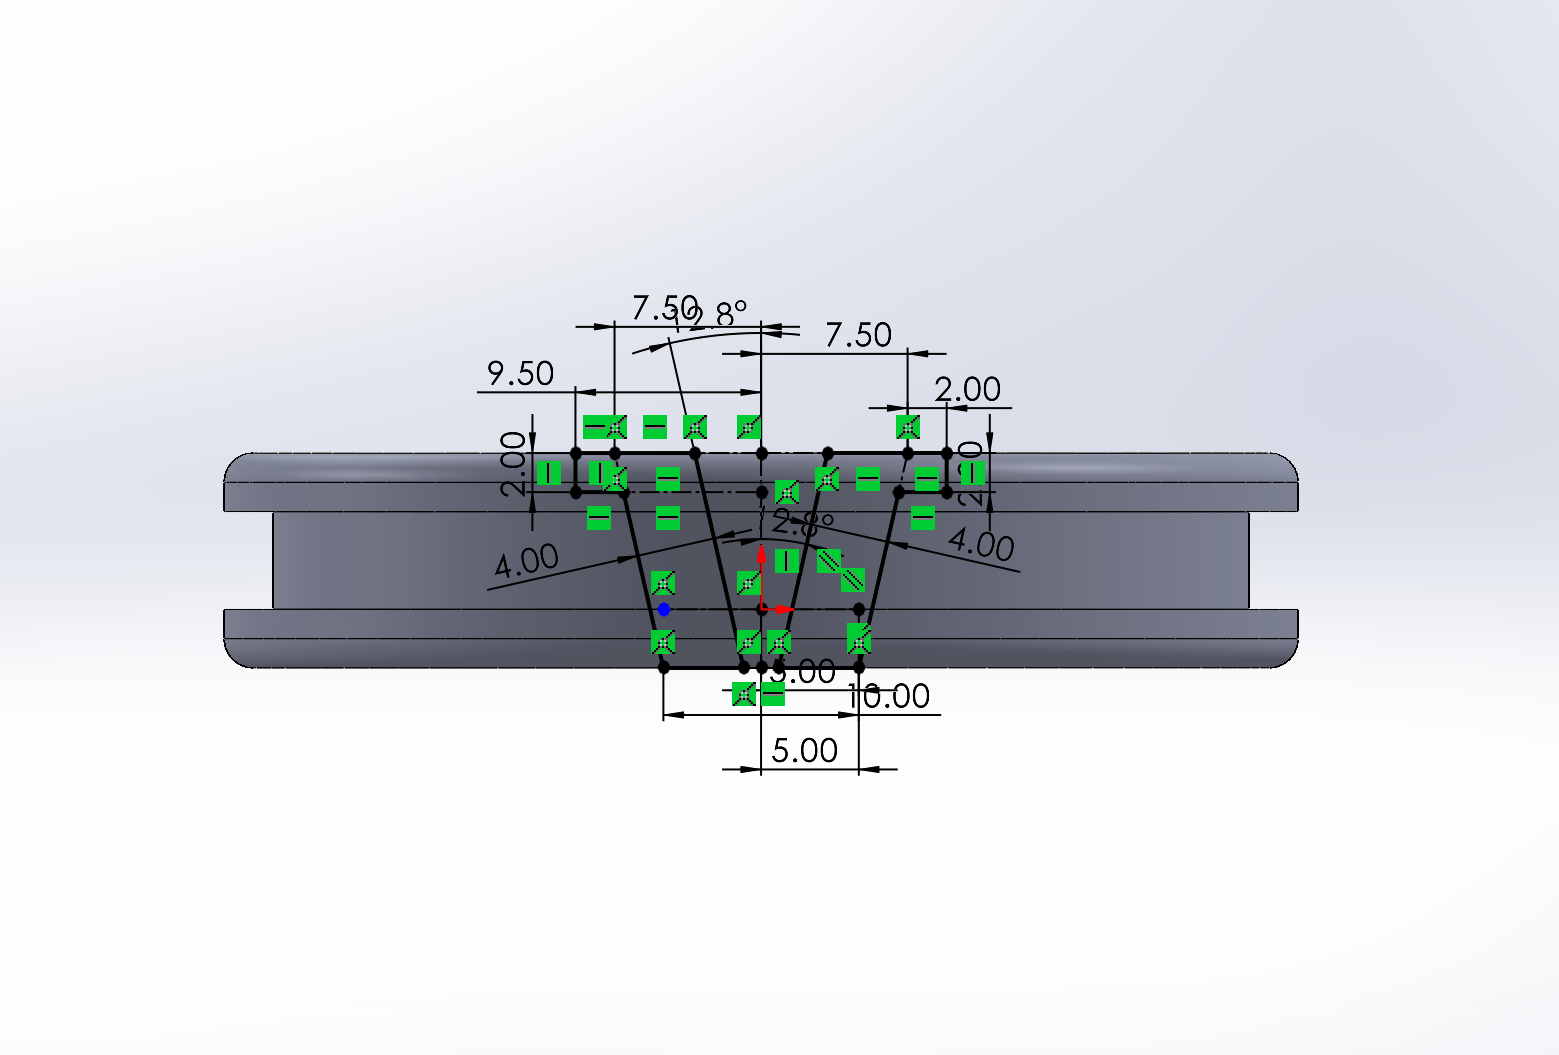
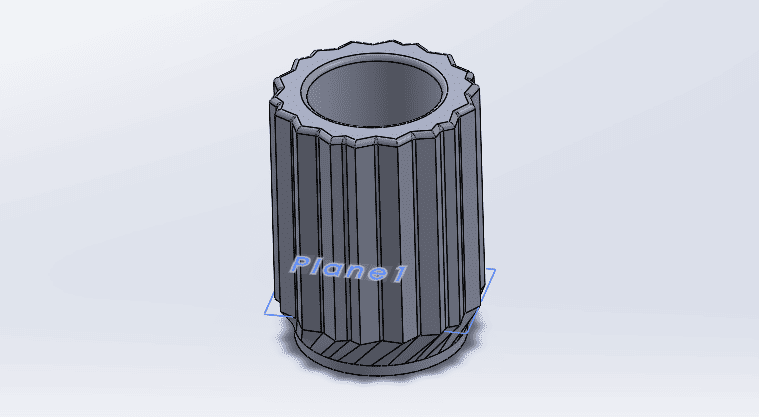
Adding another sketch on the upper face, I designed 5 circles that can be seen in the stl, to be able to make those holes where the possible ropes will pass. I did the same for the end of the vertebra which would serve for the joints but now with the free line tool and I also added some holes for the wire, but of course it occupies the intelligent quota.
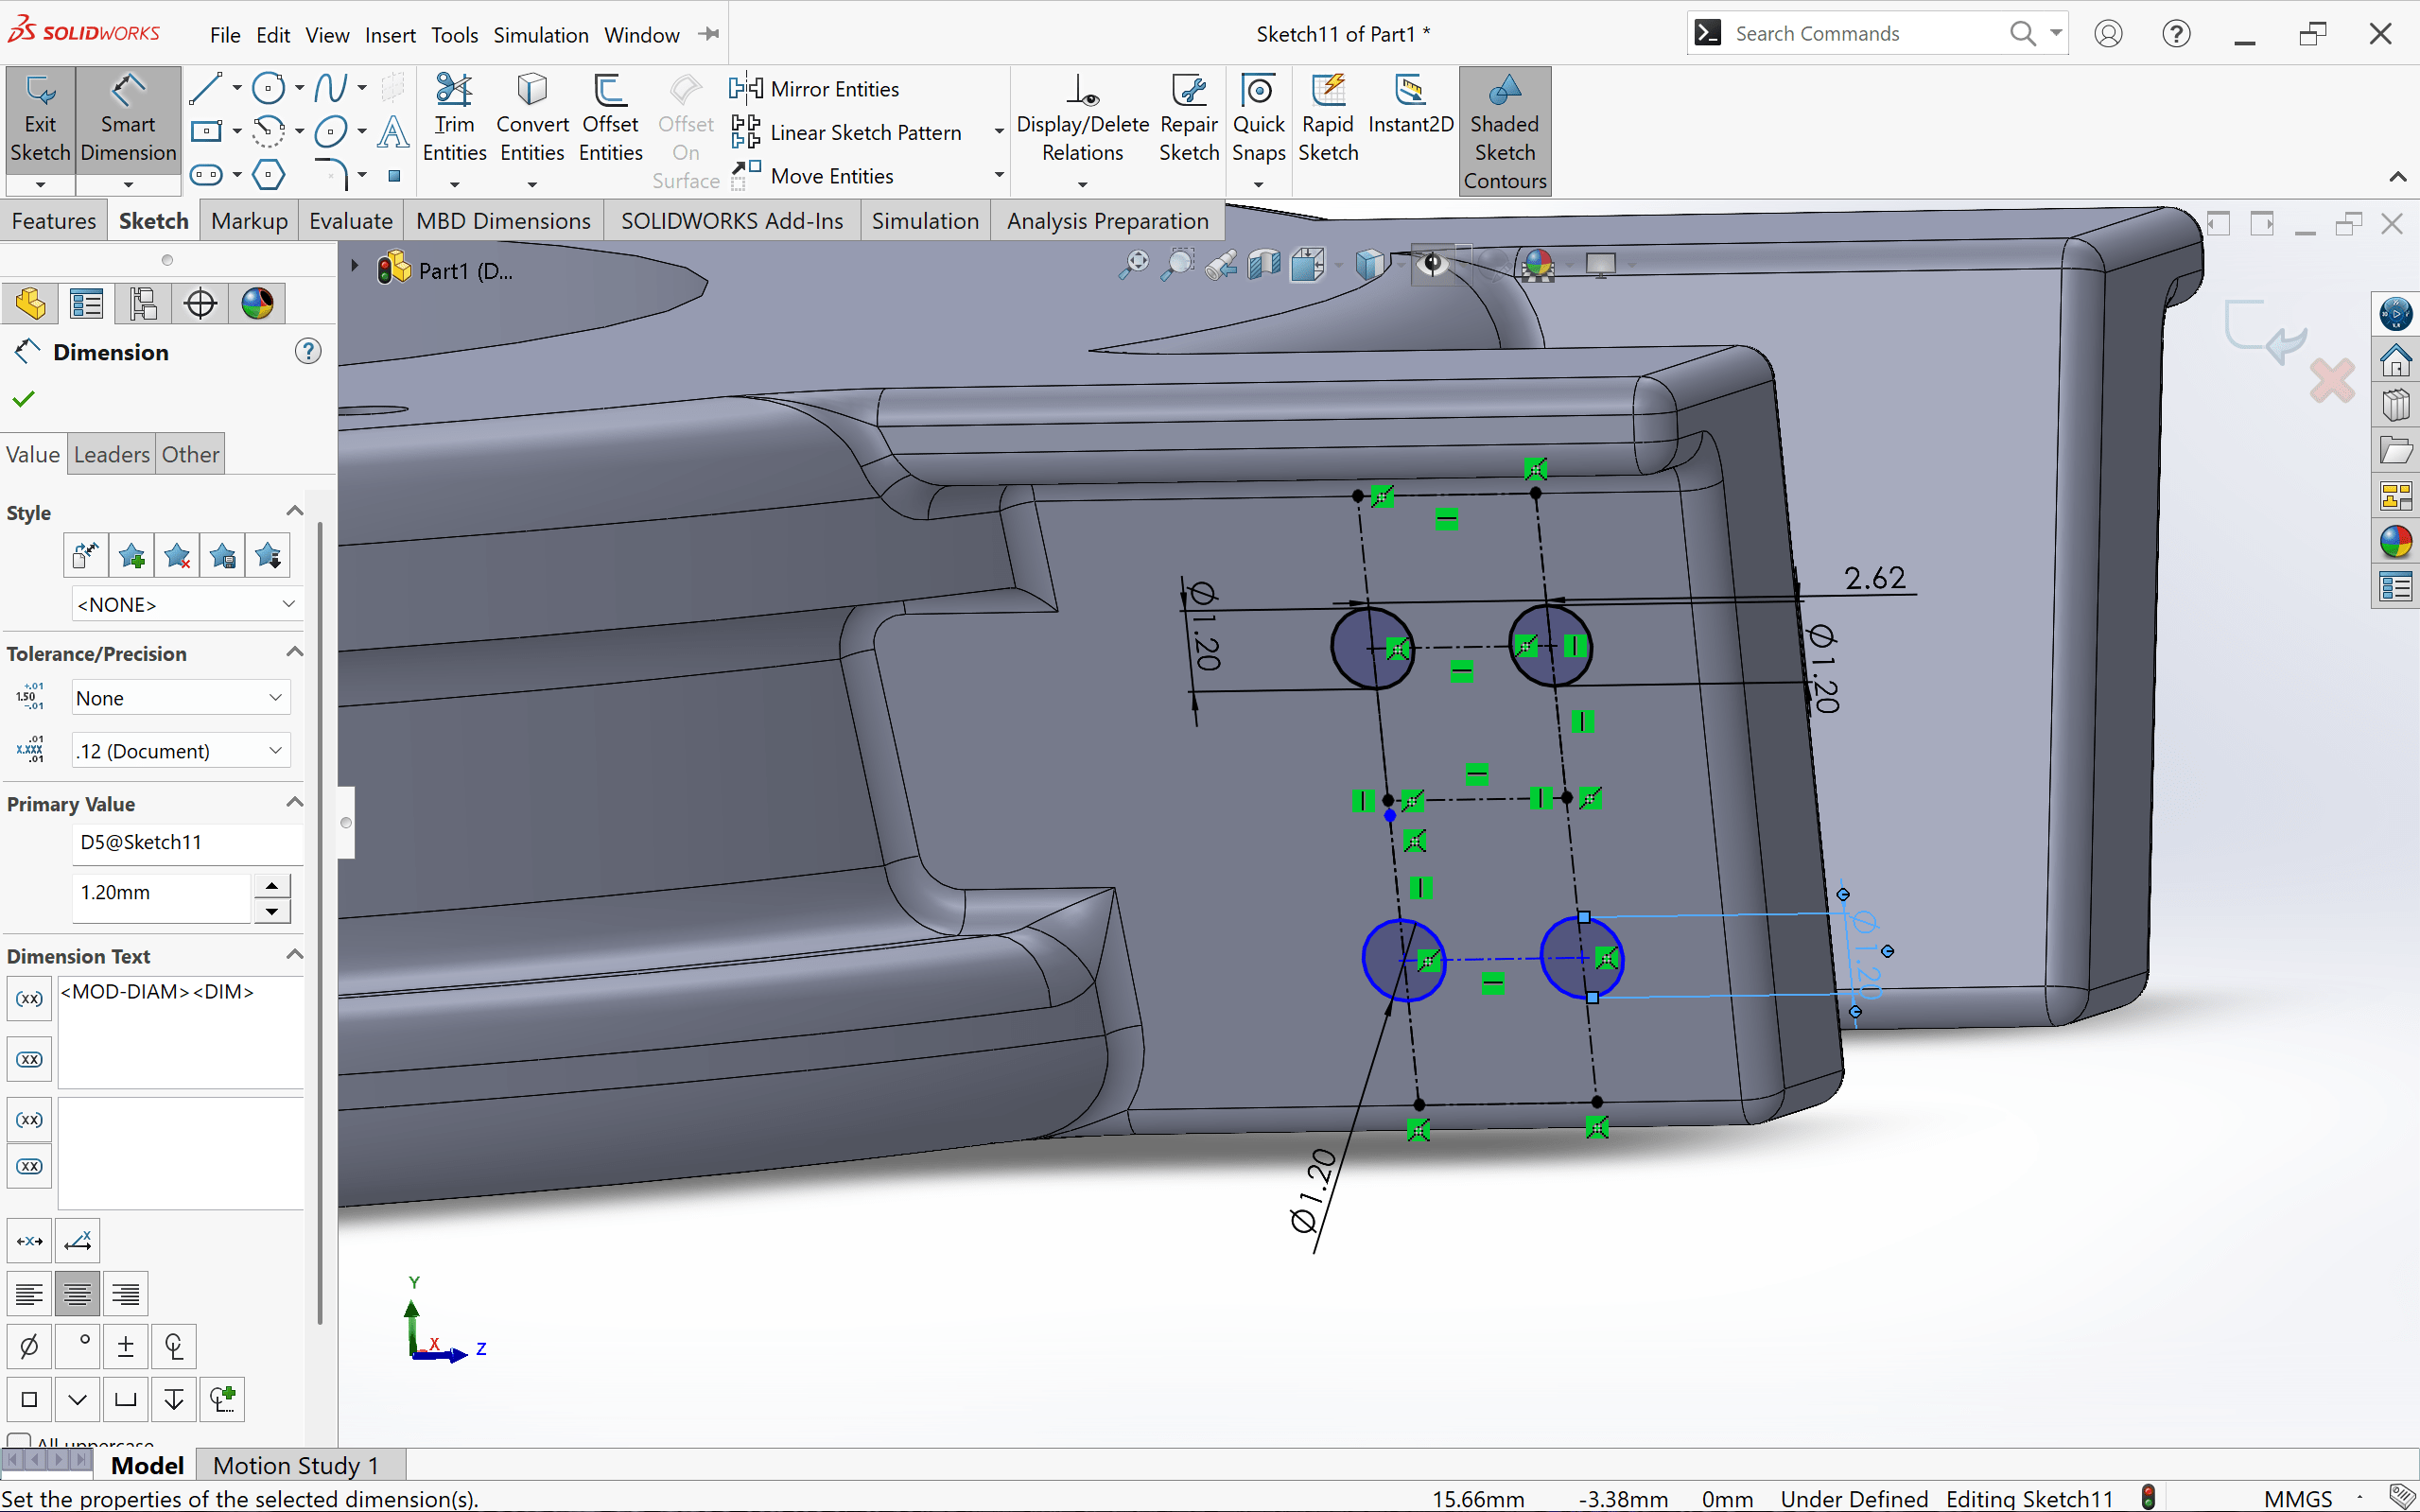
(this is basically the tool that takes the measurements you want and you can also edit it to your liking! as long as it does not interfere with others already set because it would make an error with that).
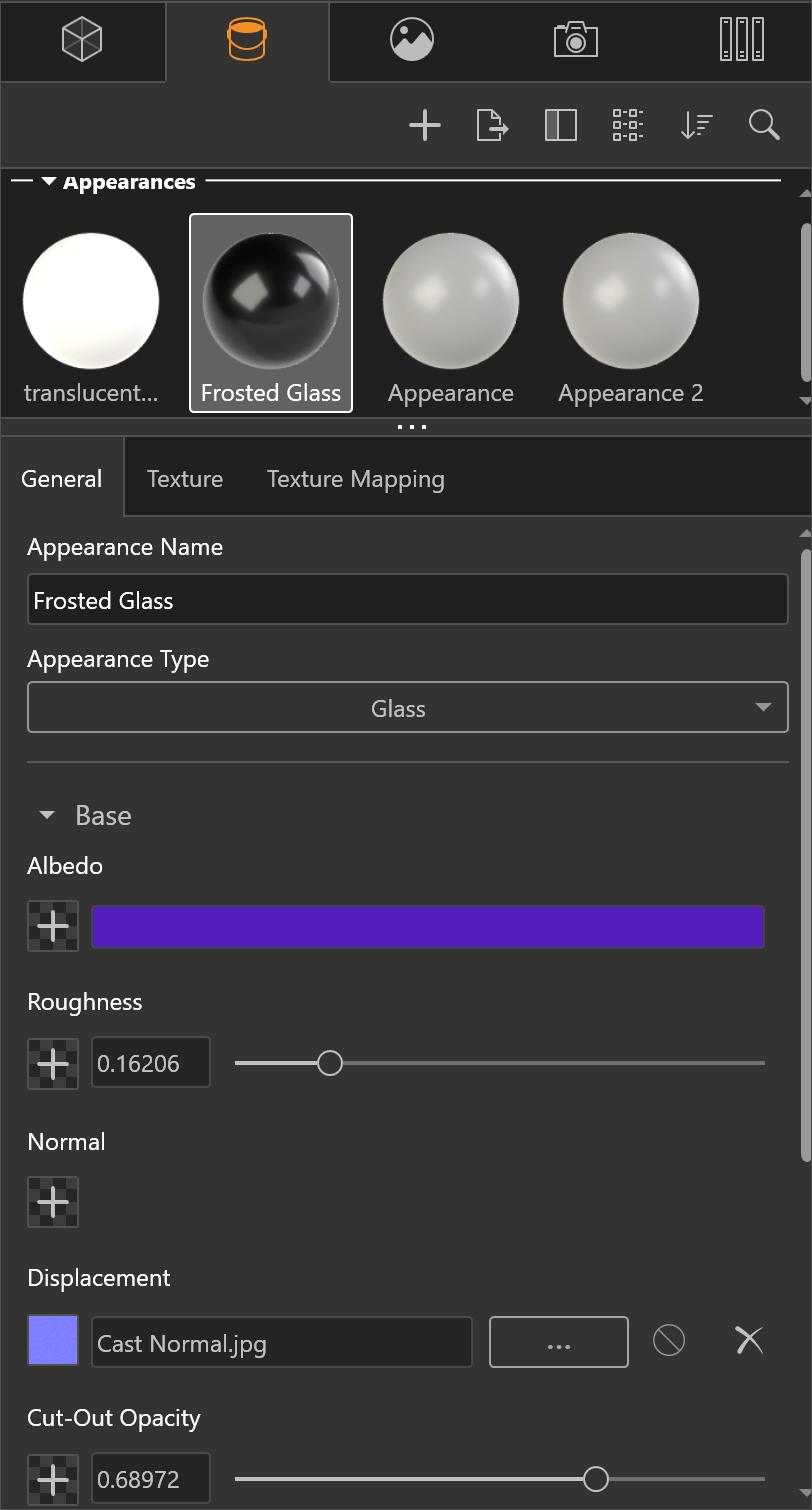
rendering
I used solid visualize to render my piece, I decided to use glass as the material for the simple fact that I like how it looks, although I plan to have it printed either in resin or PLA filament. In the bucket section seen in the image I can edit the type of materials, but not only that but also their opacity, transparency, etc. values.
Then I went to the camera lens section with the wand, that's where I downloaded my render in a .png file.
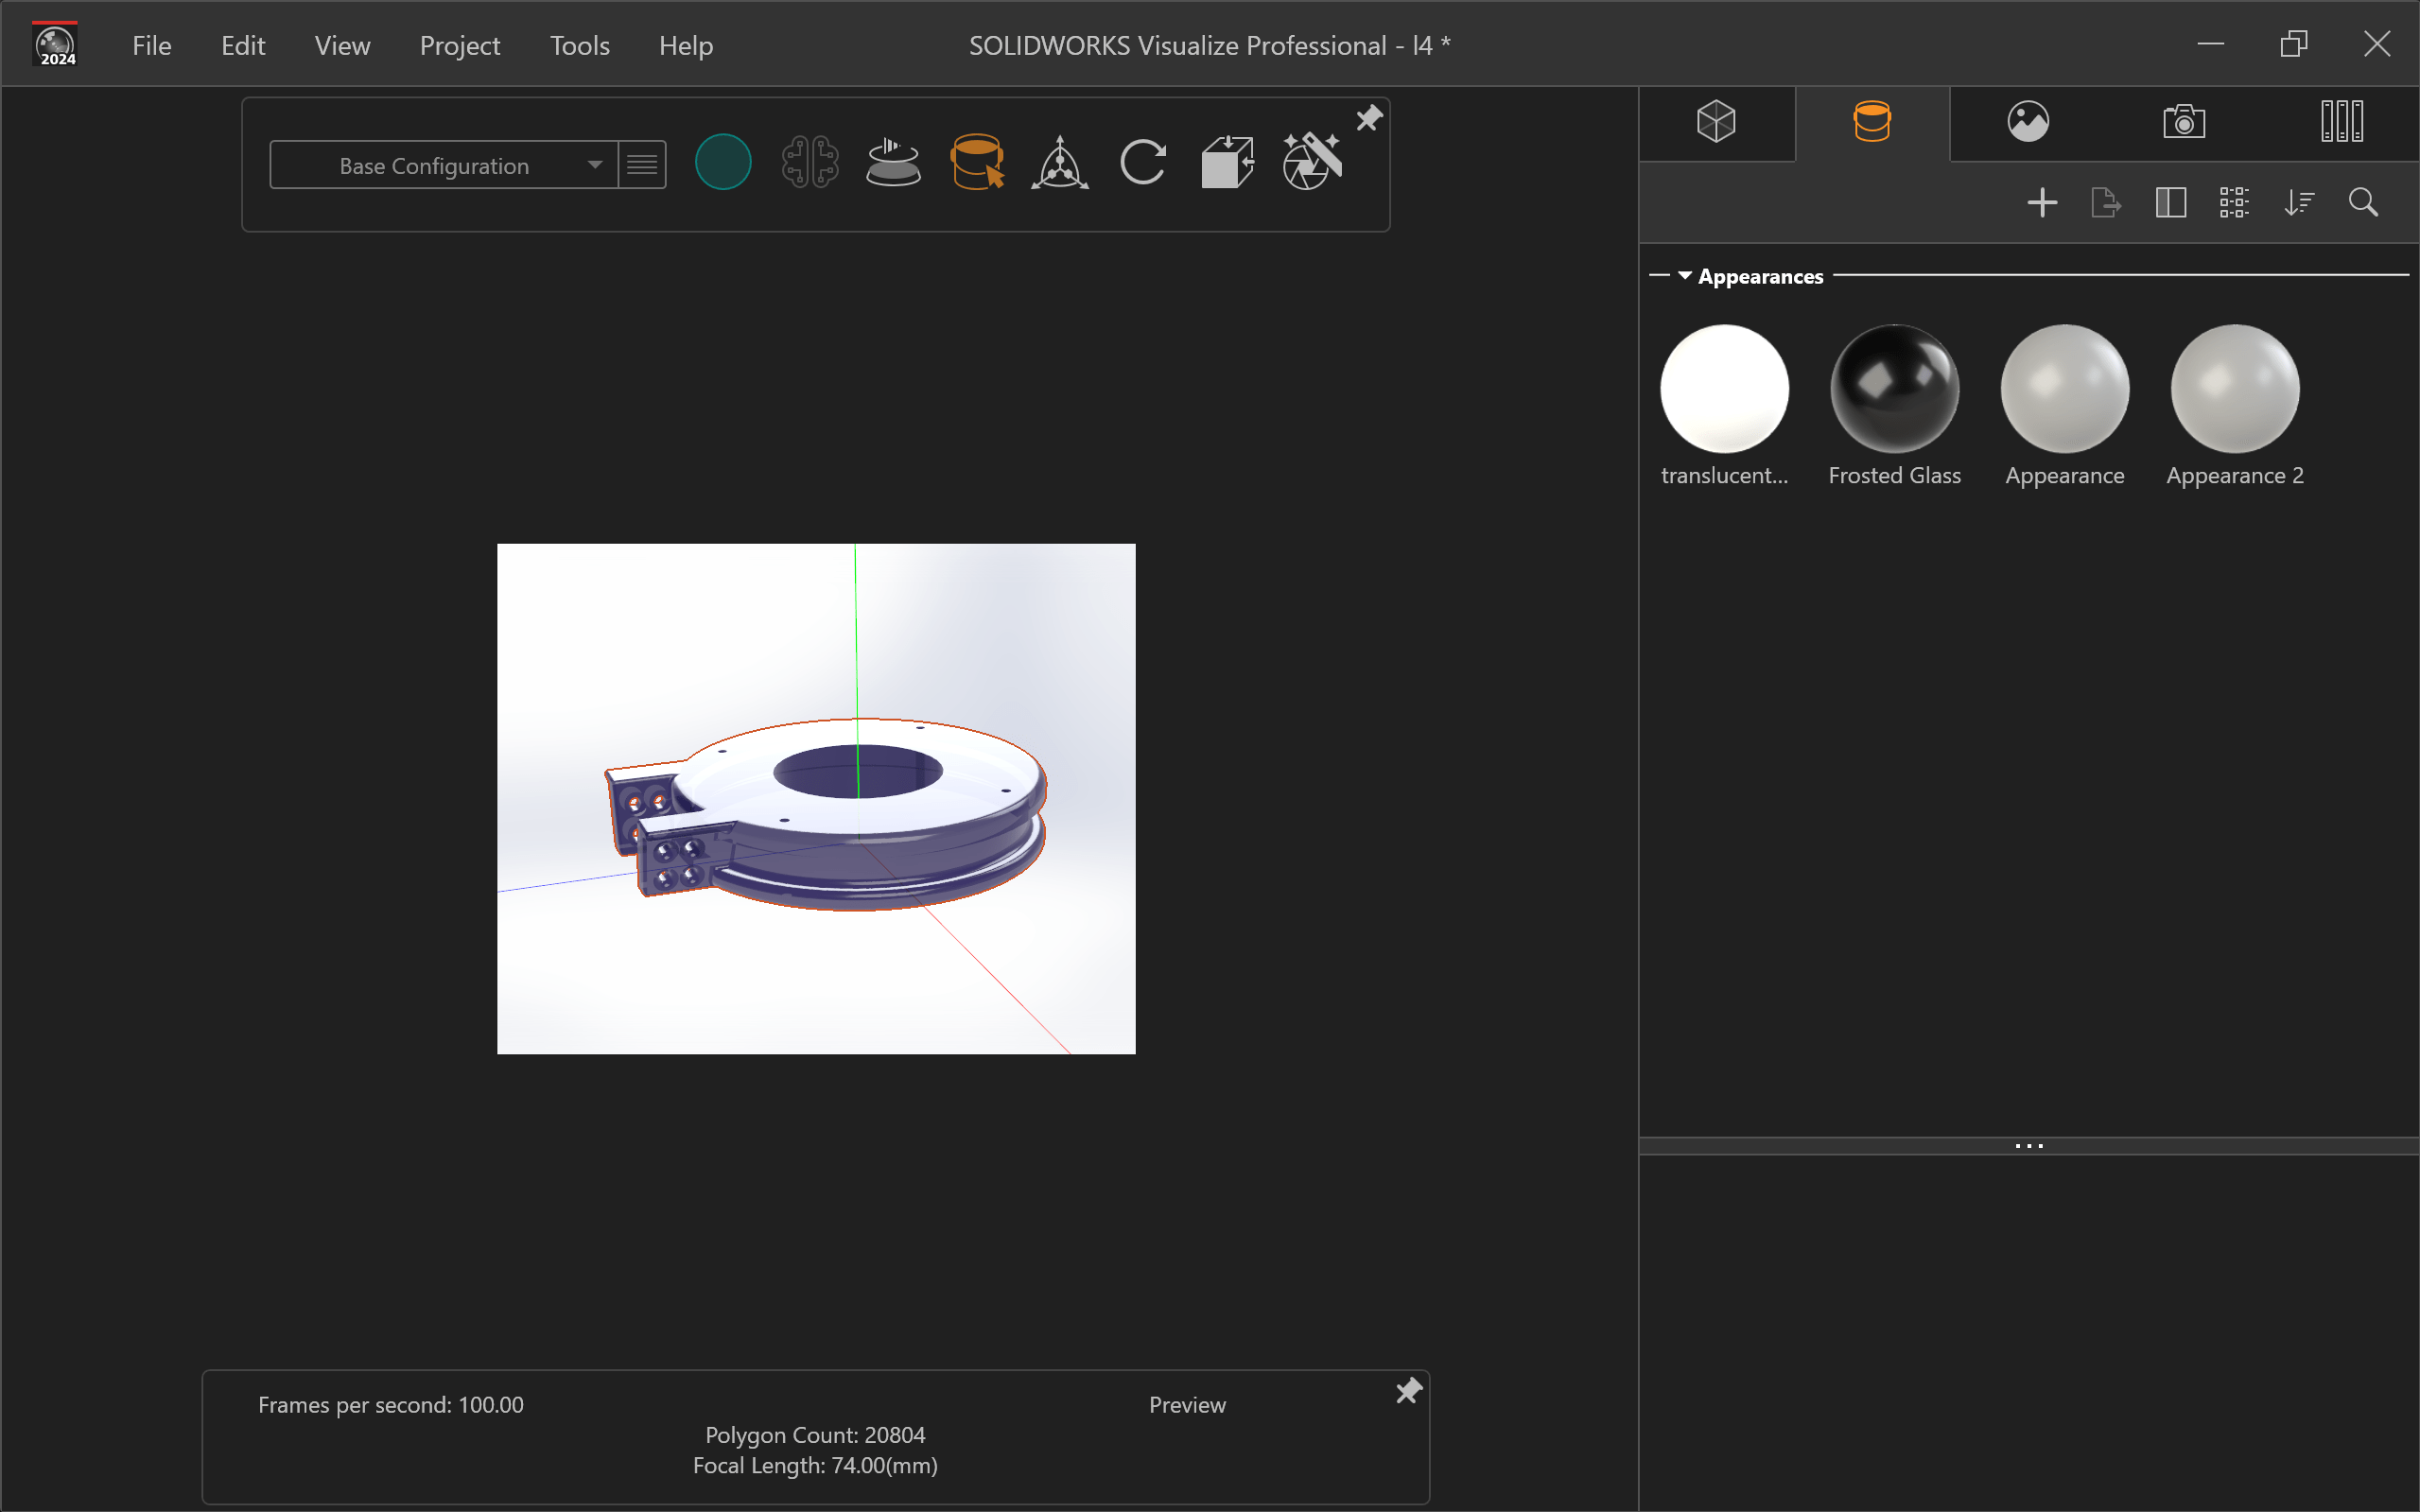
this is my render (in fact in Sketchlab it is almost the same where you can edit the color of your stl piece and change the material parameters!)
Solidworks stl
onshape desing
compress
I used compress png with the force of an elephant. But why did I choose this over other things?
Well, here it lets me change the parameters! From how many colors I leave and how much quality I want (obviously this is reflected in the size of the file that will be compressed). Then the only thing I have to do is select the type of file to compress.
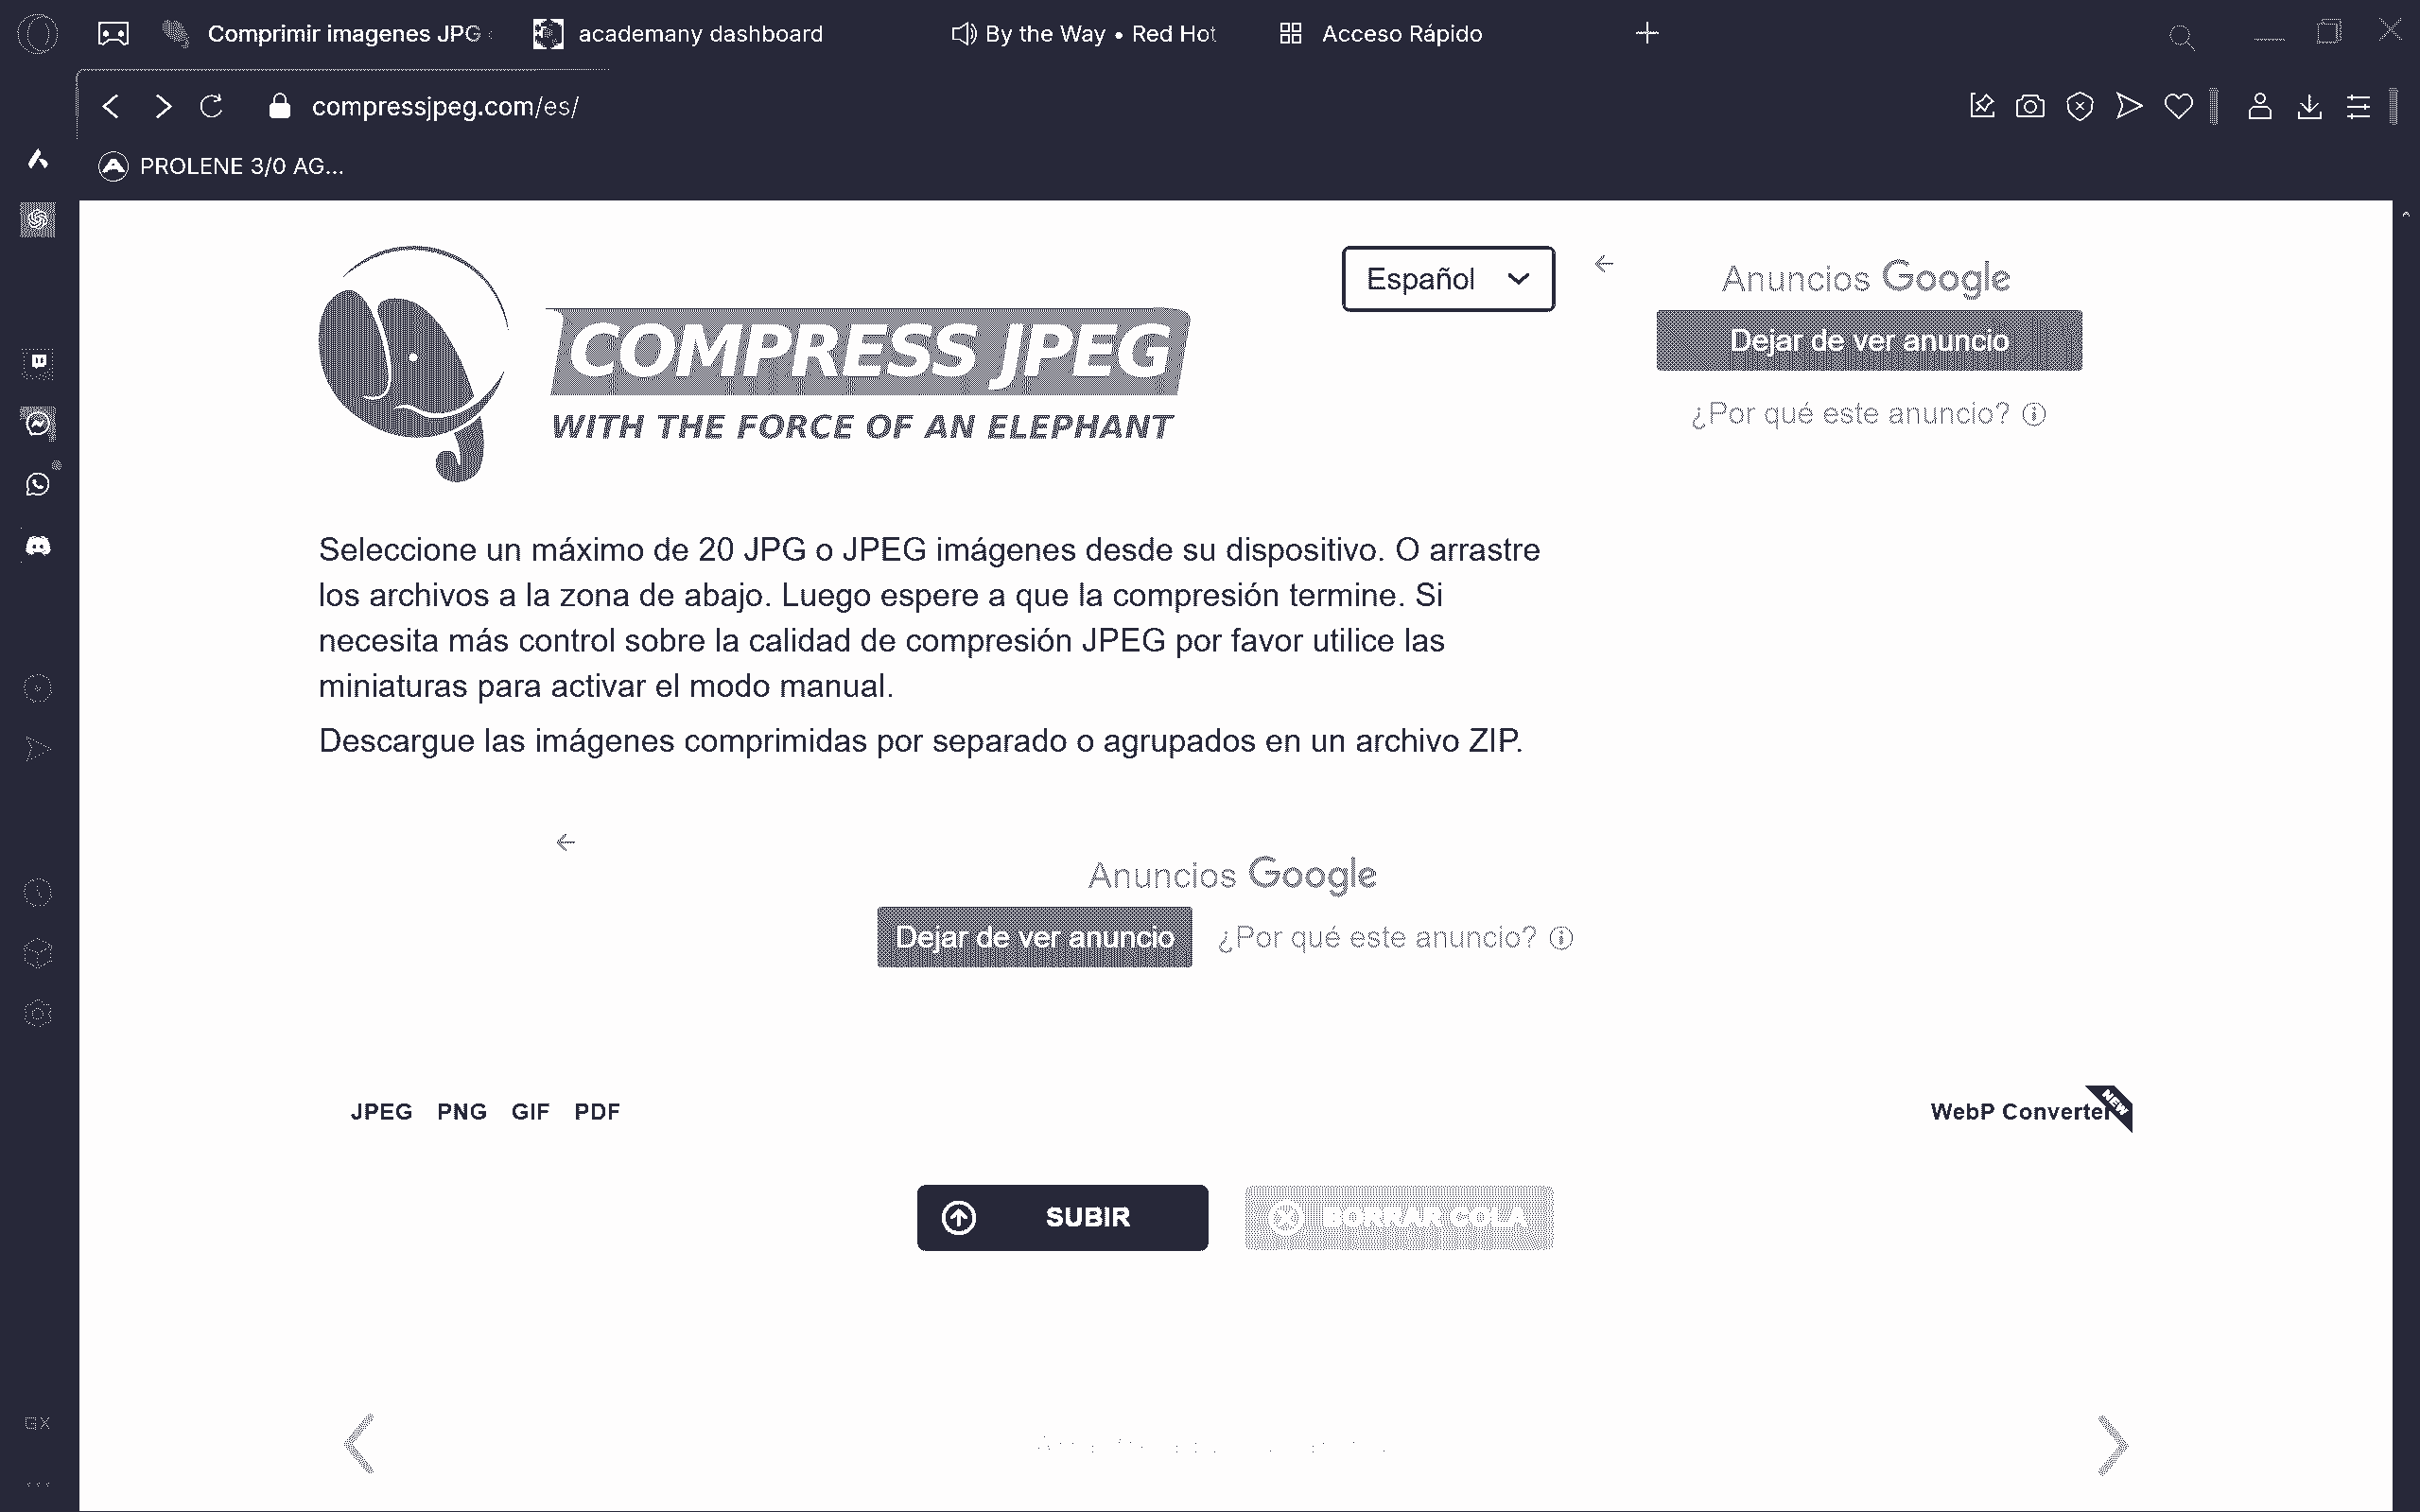
Steps
But it is not the most complete that I have seen in the area of different files I see webP converter as very complete as it was designed for images on the web. WebP is an image format developed by Google that allows you to create smaller, high-quality images for the web. (WebP files can be compressed with or without data loss.)
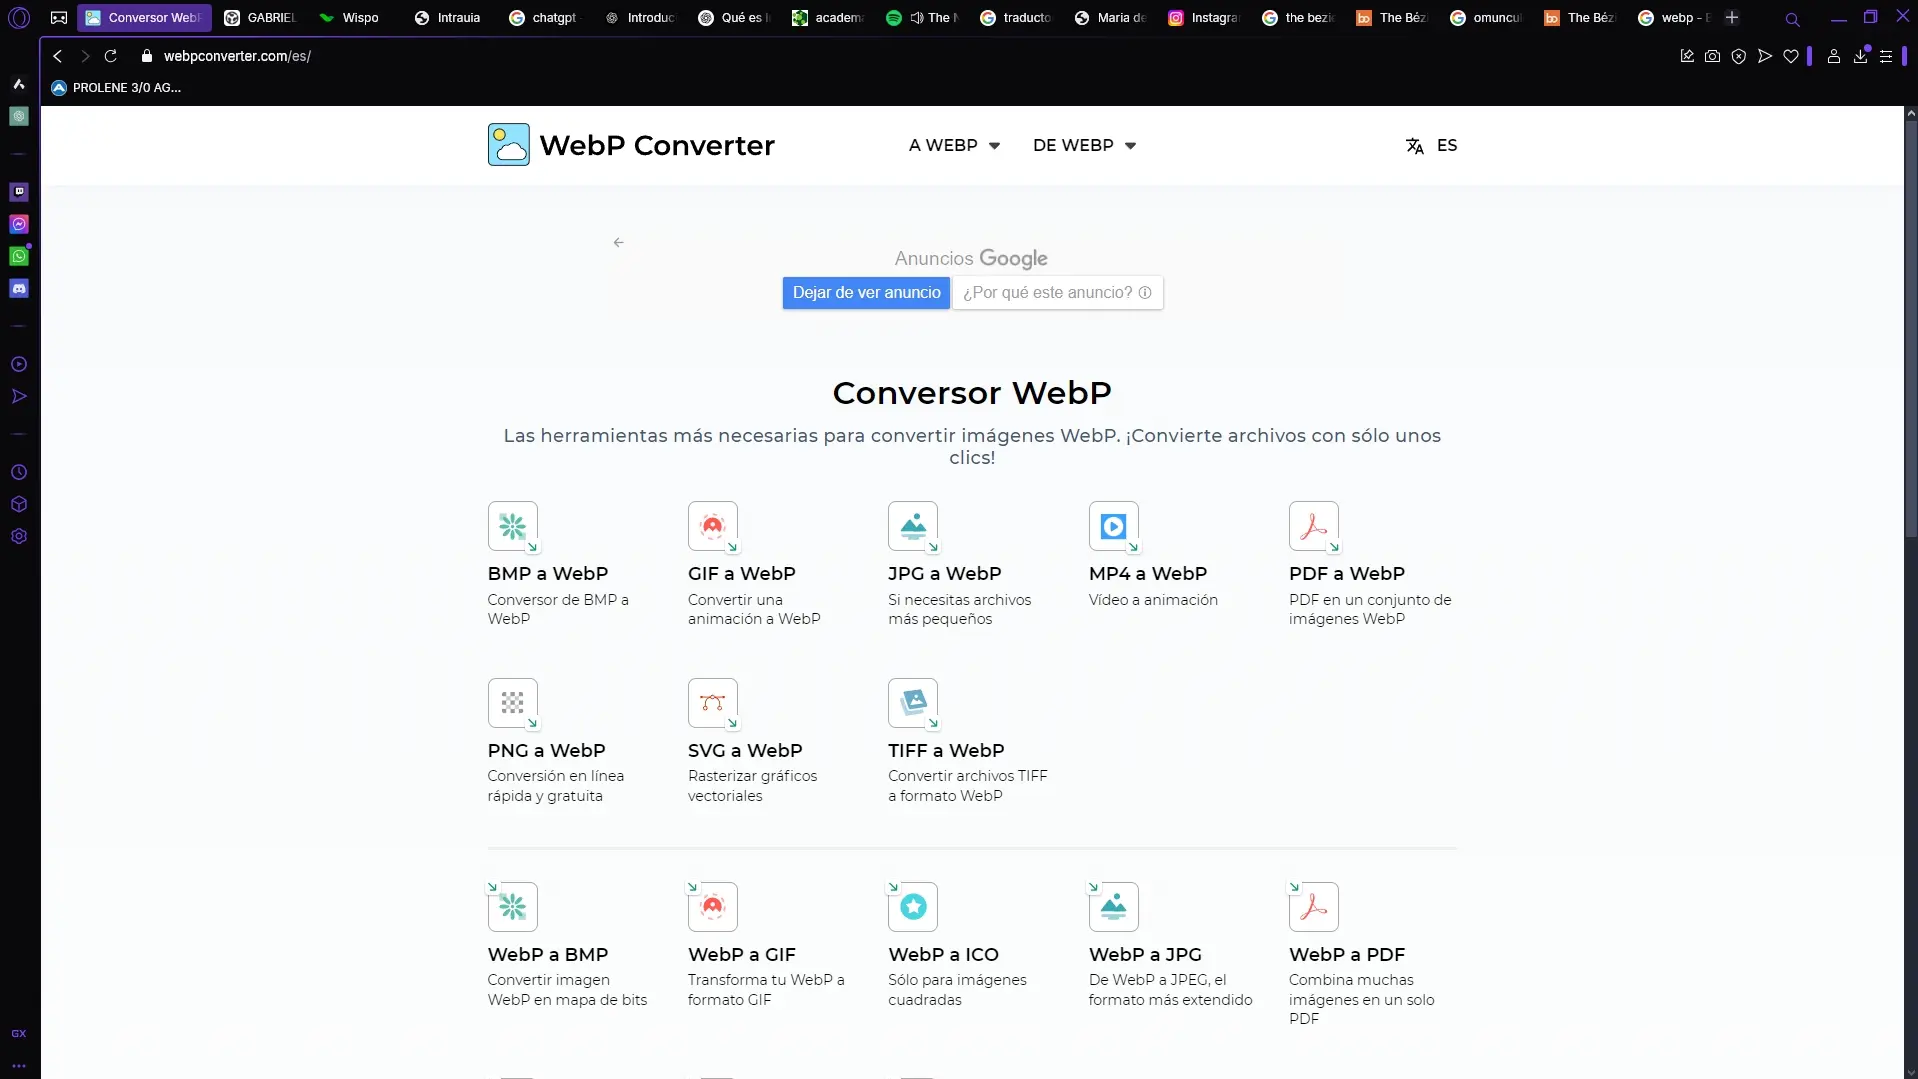
Steps
compressing with a 3DS old
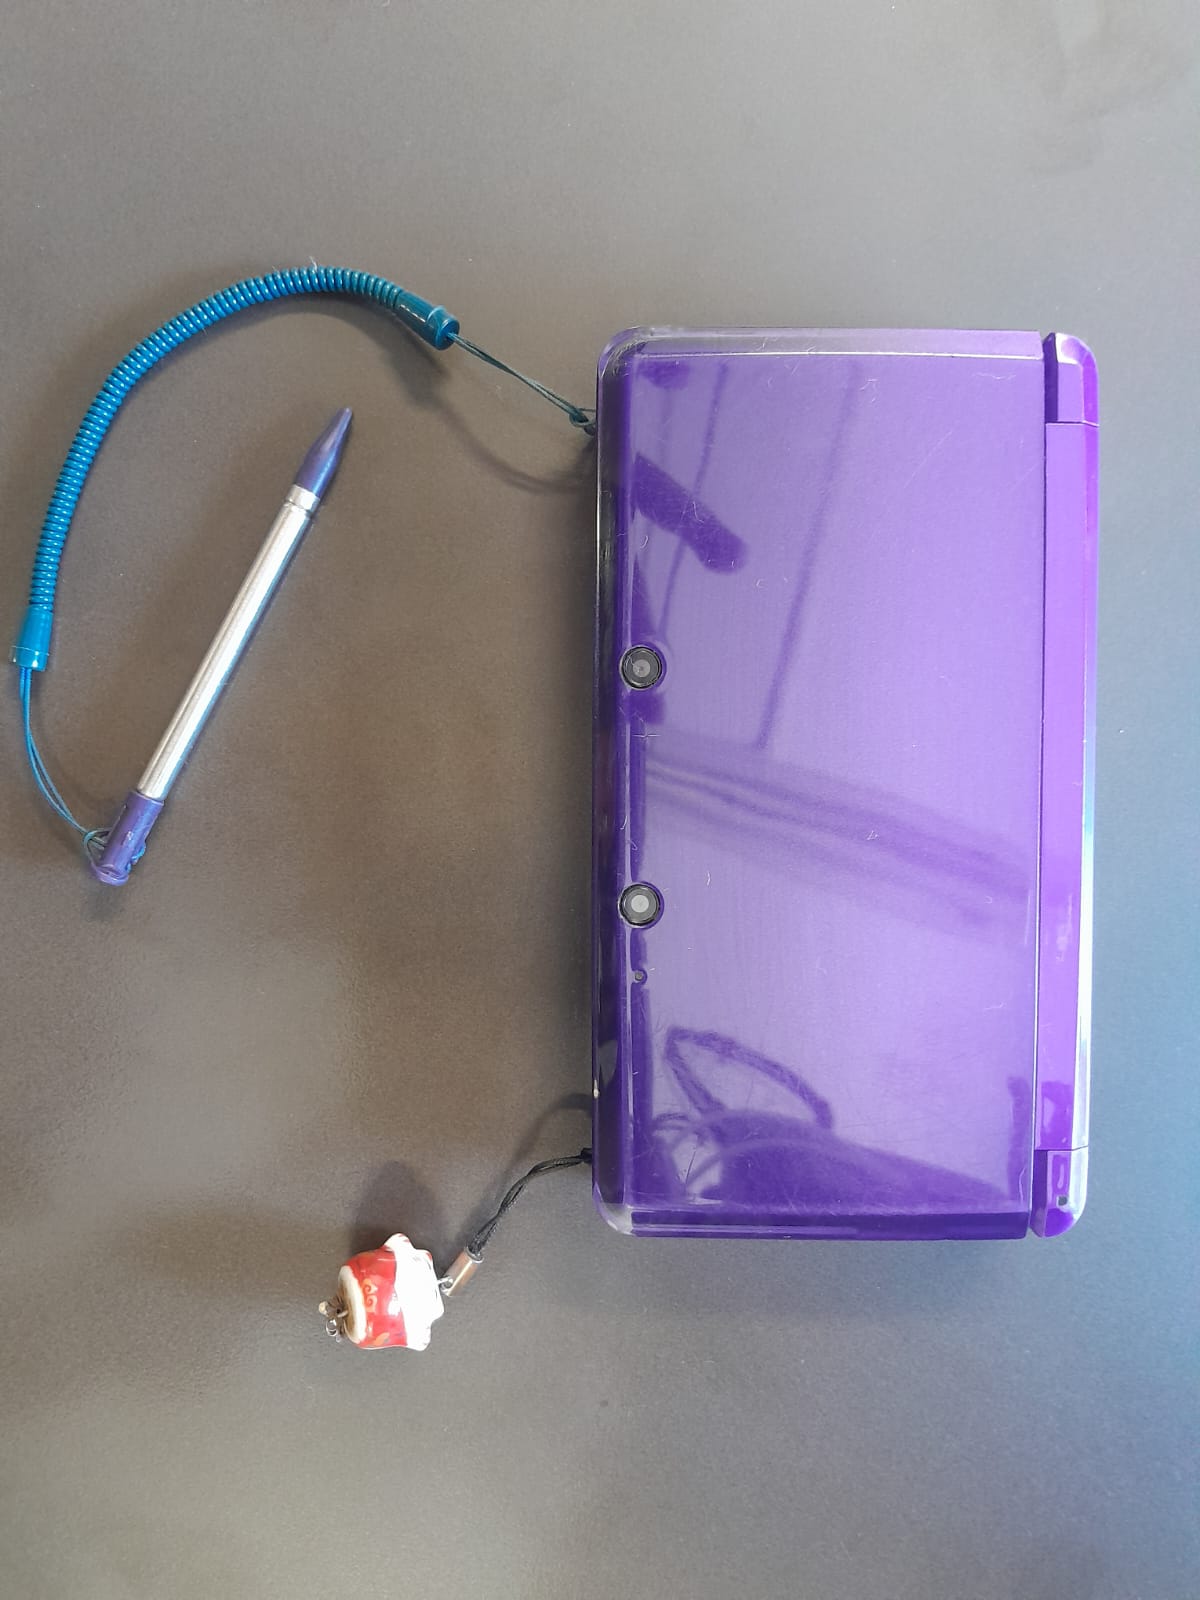
Now comes my favorite part to compress! (although the term is not entirely appropriate).
To be able to compress the photos I captured with my mobile when I can do it directly, taking the photo from an old Nintendo 3D!
The JPEG format is what the Nintendo 3DS uses to save images captured with its camera. This type of compression is lossy, which means that it reduces the size of the file by eliminating some visual information that the human eye has trouble distinguishing.
On the Nintendo 3DS, the image compression system is based on the modification of the color space, the reduction of chrominance information, the use of DCT, quantization, and entropy coding. Although this procedure saves space, it also incorporates visual elements typical of lossy compression. However, JPEG remains a practical choice for the 3DS, prioritizing efficiency over unmatched visual quality.
JPEG Compression Process on the 3DS
1. Color Conversion: From RGB to YCbCr
Images captured on the 3DS are generated in RGB, but before they are compressed, they are converted to a color space called YCbCr. This format separates the image information into:
This conversion allows color information to be reduced without affecting visual quality too much, since the human eye is more sensitive to changes in brightness than to color changes.
2. Chrominance Subsampling
To further optimize data reduction, the 3DS applies a chrominance subsampling, reducing the resolution of the Cb and Cr channels. It is likely to use the format 4:2:0, which removes some of the color information in both directions (horizontal and vertical) without a drastic loss of quality.
3. Discrete Cosine Transform (DCT)
The image is divided into 8x8 pixel blocks, and to each block the Discrete Cosine Transform (DCT). This operation converts spatial information (pixels) into a frequency-based representation, where:
4. Quantization: Elimination of Less Important Data
During this step, they apply quantization matrices which reduce the precision of the values obtained by the DCT. Less relevant values (usually fine details) are removed or rounded, significantly decreasing file size. The higher the compression level, the more details are lost, causing visual artifacts such as blocks and loss of sharpness at the edges.
5. Encoding and Storage
Finally, the processed data is subjected to two encoding techniques to optimize file size:
Effects of JPEG Compression on the 3DS
Because the 3DS camera has a maximum resolution of 640x480 pixels, JPEG compression optimizes storage but introduces certain imperfections:
Although using JPEG involves a loss in quality compared to lossless formats like PNG, its efficiency and speed make it ideal for the 3DS camera.
my ideas
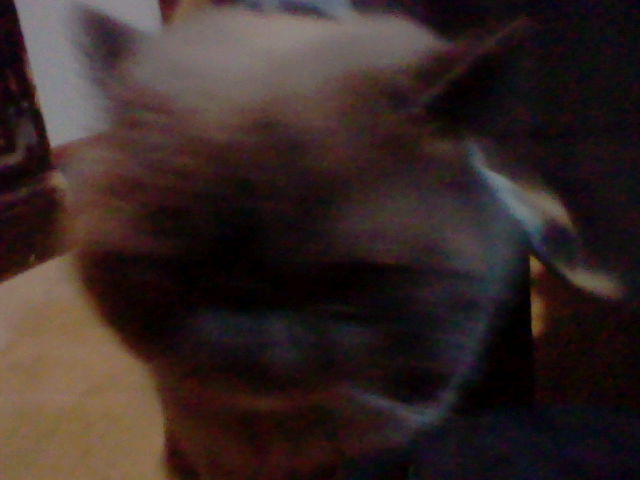
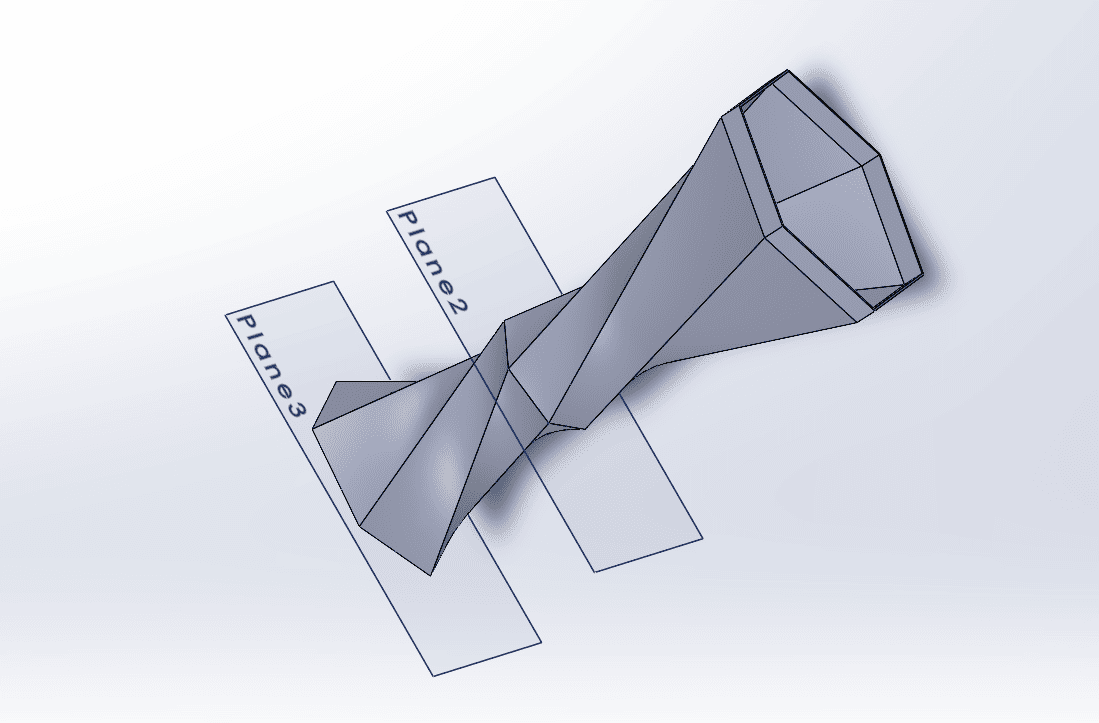
What I have focused on most this week was the design of my 3D piece, which looks simple, yes, but I have been investigating how what I want to implement in one of my projects could work since 3 of the 4 sketches have it implemented, which is a type flexible load arm inspitated in a spinal column. (Exactly I based it on the l3 and l4 vertebra).
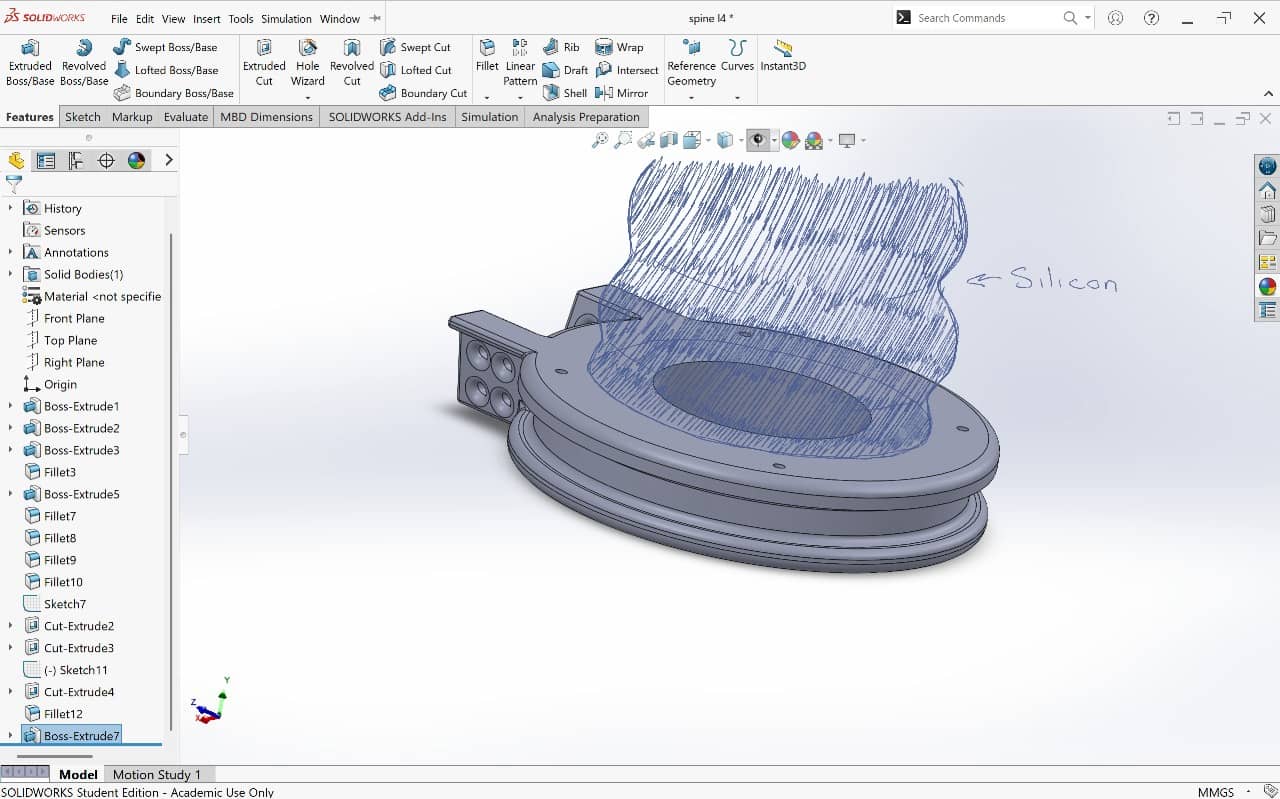
In several mechanical arms I have seen that threads are pulled, if not almost all of them, what I would like to add from that example is not only a couple of threads but a few more, stronger ones holding on to the extremities of the 3d piece, well. Those will be the threads with the greatest stress load, so it will have more simulating the muscles pulling on the vertebrae.
This will reduce the flexibility of the arm which does not bother me so much if my main intention is to be able to carry things without the arm going sideways (taking into account that what shares the axial load is the same body and weight of the animatronic).
I still think about the material between these "vertebrae" what in a spine would be the records.
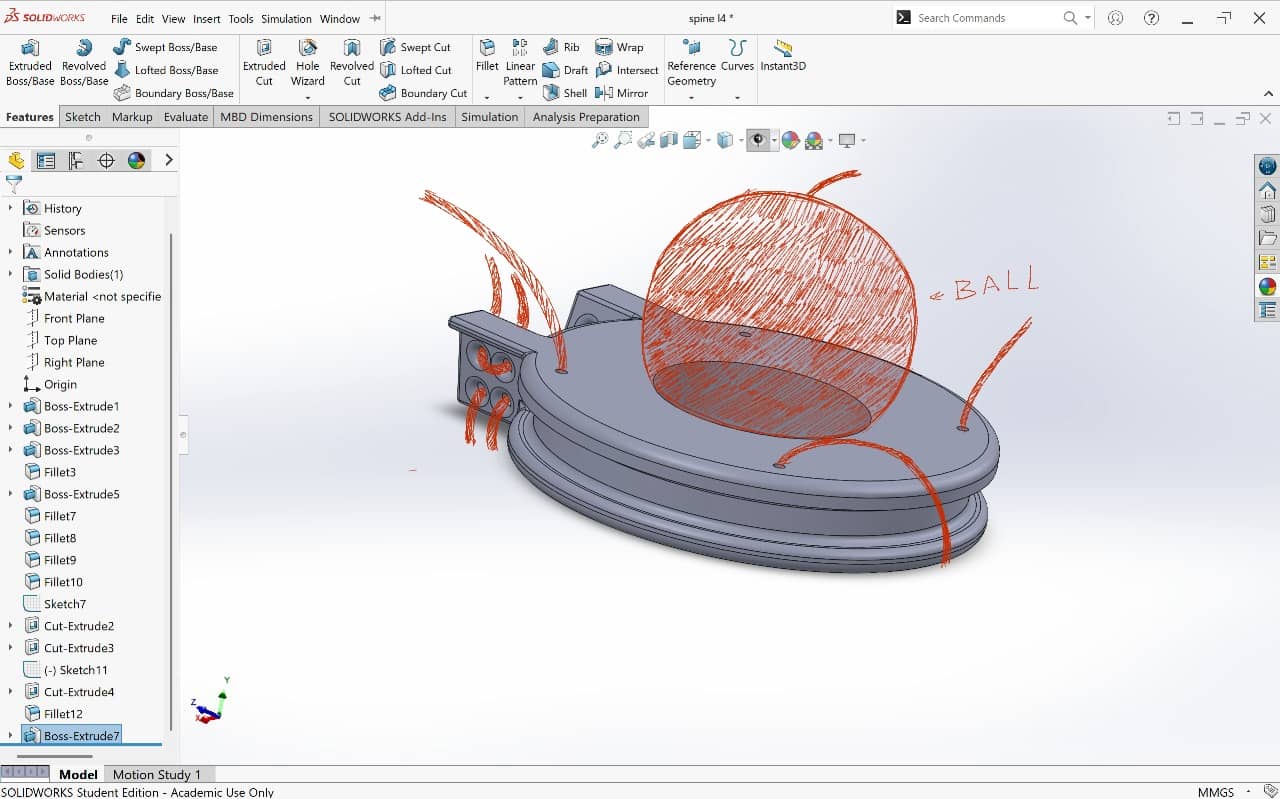
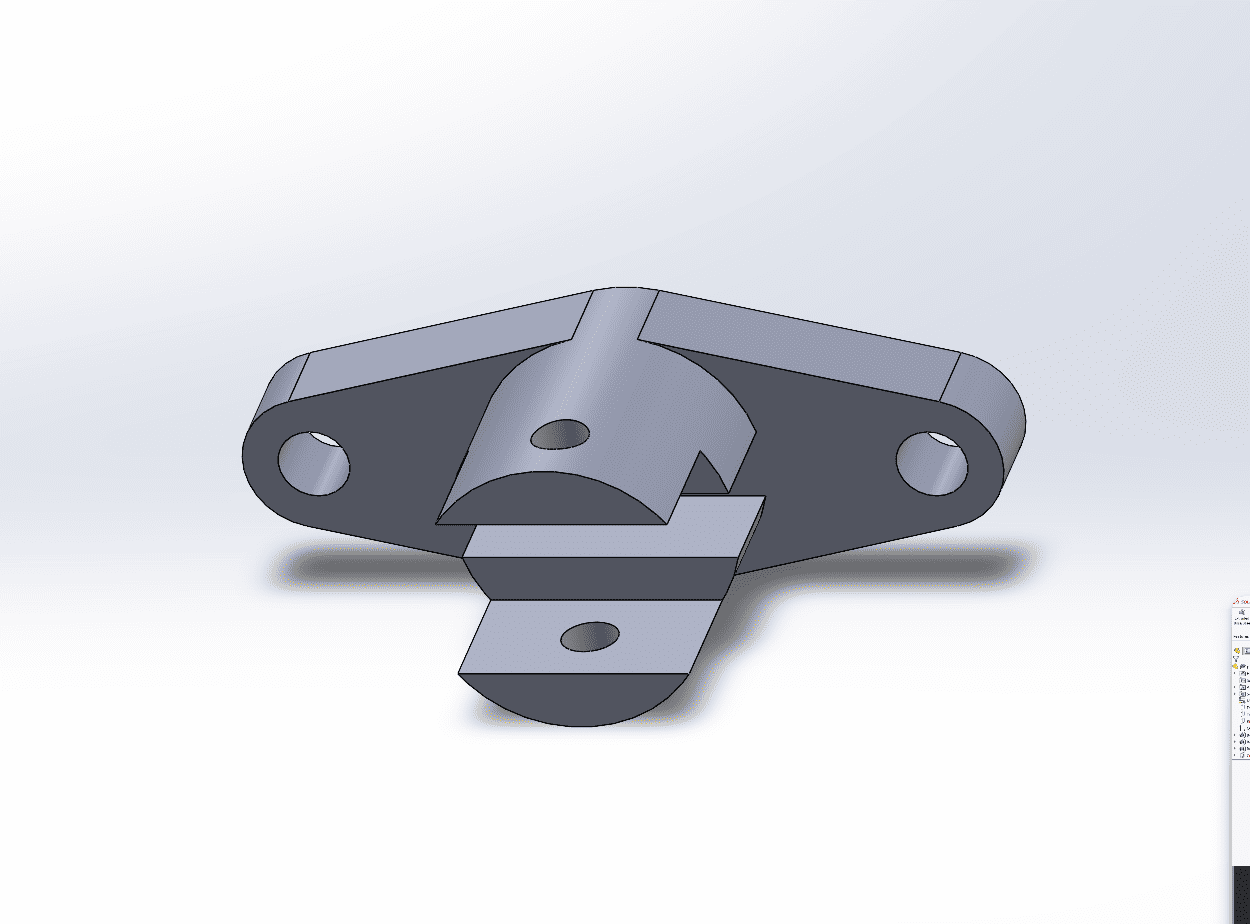
other cad drawings
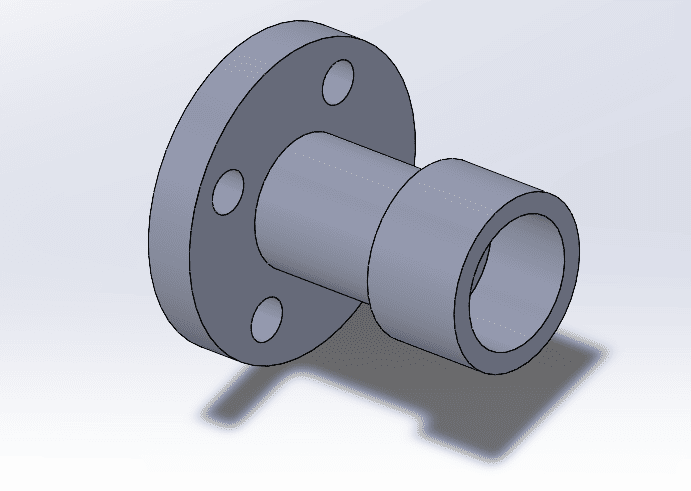
Here are some other designs I created or replicated from a blueprint as practice/homework.