17. Applications and Implications, Project Development
Charades is a classic game of silent acting and guessing that traces its roots to 18th-century France, where it began as a literary riddle game. It later evolved in 19th-century England into a familiar performance-based version, in which players mime words or phrases for others to guess. Over time, charades became a popular parlor game and party activity worldwide, known for encouraging creativity, teamwork, and quick thinking without speaking. “Charades – The Game" by John N. Hansen Co. is a boxed version created by The John N. Hansen Company, an American manufacturer and distributor of games, toys, and puzzles since 1952. The company's edition takes the traditional format and adds structure, like a custom die to determine categories (Movies, Songs, TV, etc.). Clue cards with curated titles. And a sand timer for the 60-second round.
My project is mainly based on this board game. But also inspired by a TV show that my little brother enjoys watching. The TV show has a slightly different use of the die. Instead of being used to select a category, it dictates a challenge or a special situation, like acting with their mouth filled with water.
The project will include a “smart die”, which was made from silicone during the molding and casting week, inside of it an XIAOnrf52840 sense will be used to send the accelerometer´s data into the “card dispenser”. The dispenser will have an ESP32 WROOM 32 soldered into a custom PCB, which will receive the data via Bluetooth and will control the mechanism. The mechanism will be 3D printed (additive fabrication). And it will be contained inside a Medium-Density Fiberboard box, the box will be made using a laser cutter (subtractive fabrication). I designed the custom PCB using KiCAD, and I made the 3D models of the dispenser using SOLIDWORKS. The box was designed using SOLIDWORKS as well.
Bill of Materials
| Custom PCB Components | Custom PCB Components | Custom PCB Components | Custom PCB Components | Custom PCB Components |
| Item | Details | Quantity | Unit Price | Source / Link |
| ESP32-wroom32 | - | 1 | $4 | link |
| 0.1uF capacitor | 1206 smd | 4 | - | - |
| 22uF capacitor | 6.3x6.1 mm smd | 5 | - | - |
| 2k resistor | 1206 smd | 2 | - | - |
| 10k resistor | 1206 smd | 1 | - | - |
| LED | 1206 smd | 3 | - | - |
| 0 resistor | 1206 smd | 4 | - | - |
| 6x3.5 mm button | - | 2 | - | - |
| Female pin | - | 10 | - | - |
| Male pin | - | 21 | - | - |
| AMSL117 3.3v regulator | - | 1 | - | - |
| AMSL117 5v regulator | - | 1 | - | - |
| Mechanical Components | ||||
| PLA filament | - | ~300g | $5 | link |
| 3M Screws | 10mm | 11 | - | - |
| Timing band | - | ~40cm | - | - |
| Pulley for Nema 17 | - | 2 | - | - |
| 3M hex nuts | - | 6 | - | - |
| Electronic Components | ||||
| Nema17HS4023 Steper motor | 12v | 1 | $10 | link |
| Lithium Polymer Batery | 3.7v 250mAh | 1 | $10 | link |
| DC motor with encoder | 6v | 1 | $12 | link |
| 3-cell 750 mAh LiPo batery | 11.1v | 1 | $17 | link |
| Multiple color wires | - | 6 | - | - |
| A4988 stepper driver | - | 1 | $3 | link |
| L298N motor driver | - | 1 | - | - |
What was worked? What hasn´t
On the last few weeks I´ve been making the remaining task to finish my final project. I´ve been working on the design and construction of the card dispenser. I based the design on the following image:
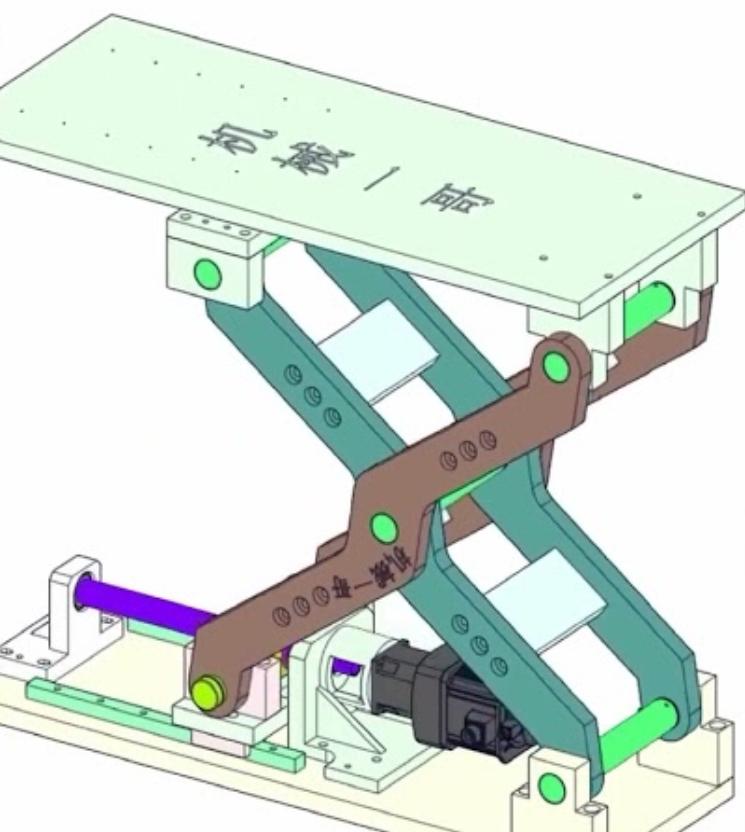
This mechanism will be the one that pushes the cards up for the user to take. I design my own version on SOLIDWORKS, and I 3D printed it using PLA filament. I laser cut the MDF box that will hold the mechanism and the electronics. I made some tests to see if the mechanism would work, and it did work but it was not as smooth as I wanted it to be:
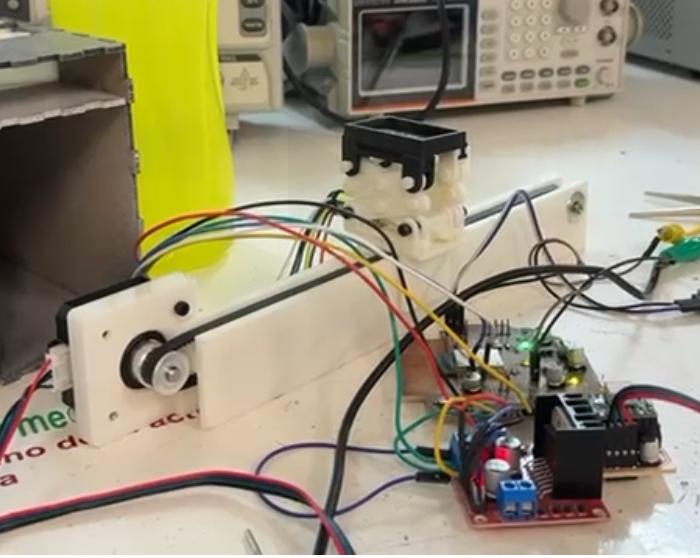
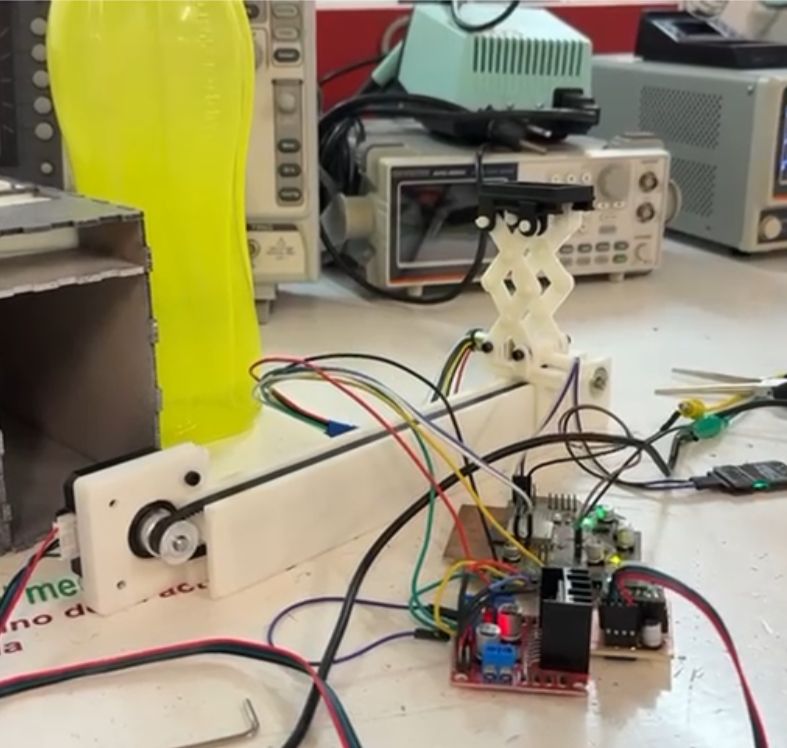
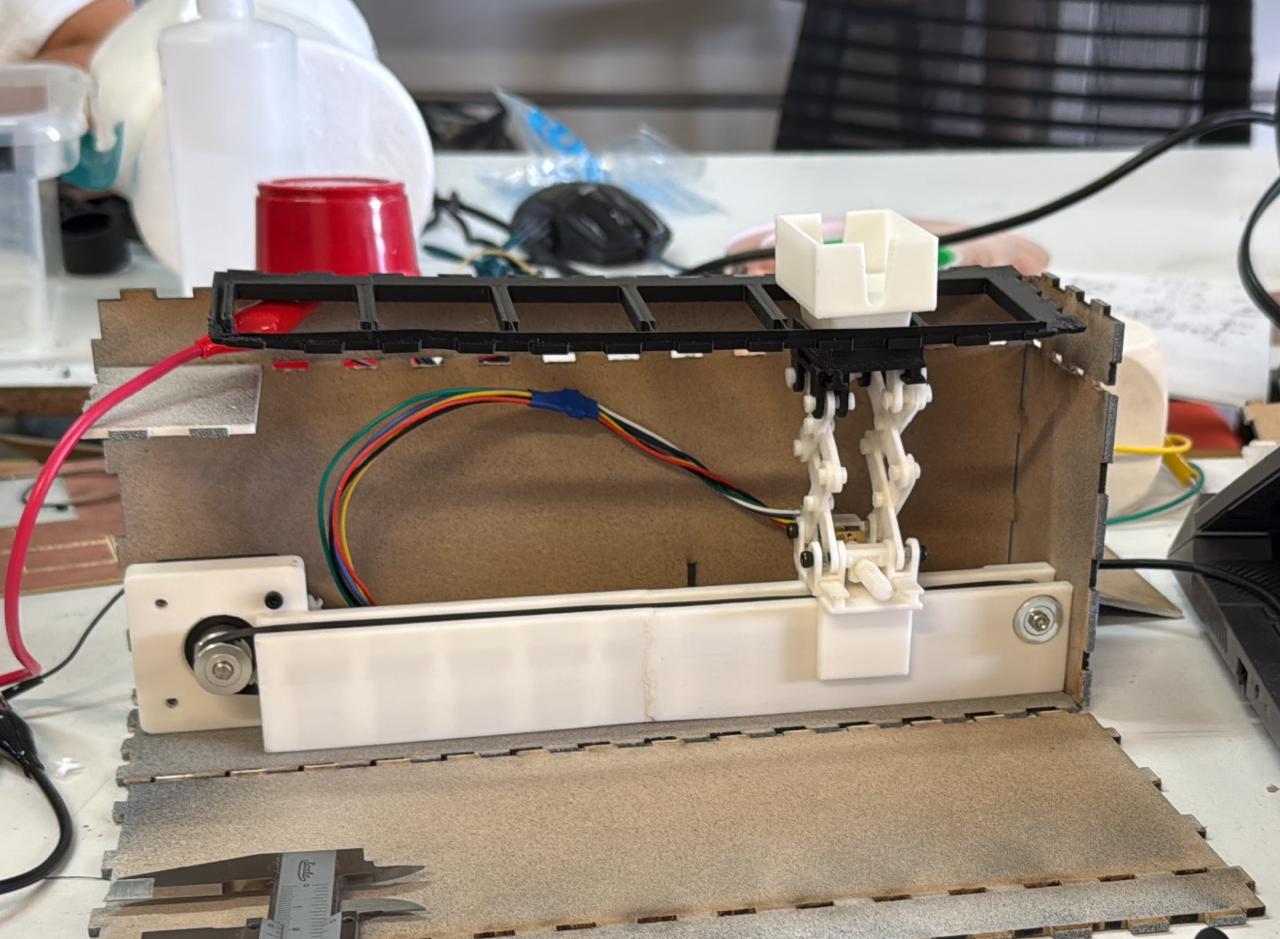
The problem was when I put everything together and the elevator got stuck where the boxes containing the cards were hold. I had to make some adjustments to the design, I changed how the boxes were hold, I added some rails to its sides, so i didn´t hold the boxes from all sides and only two of them.
This i how the boxes where hold before.
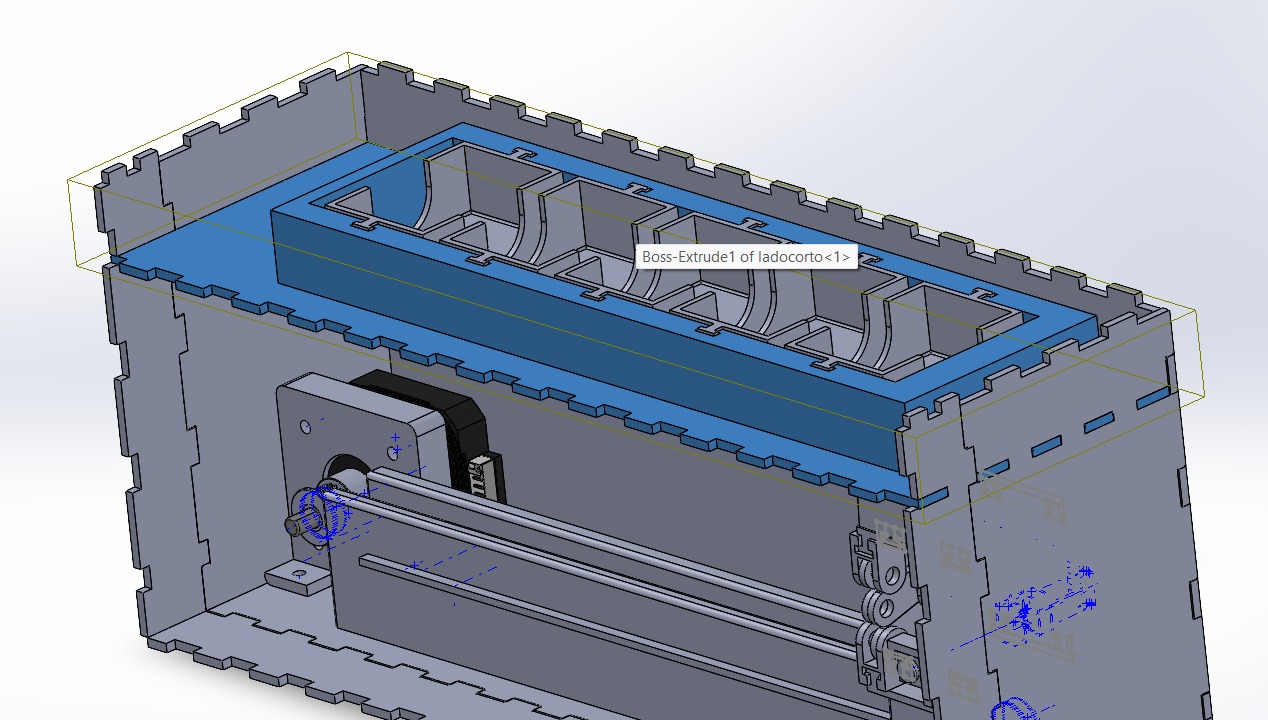
This is how the boxes are hold now.
I also had some problems with the sideways mechanism, since the DC motor´s cables where too rigid and made the elevator to unbalance. So I changed the cables for more flexible ones, and I added a small rail on the mechanism where the elevator moves so it can´t tilt:
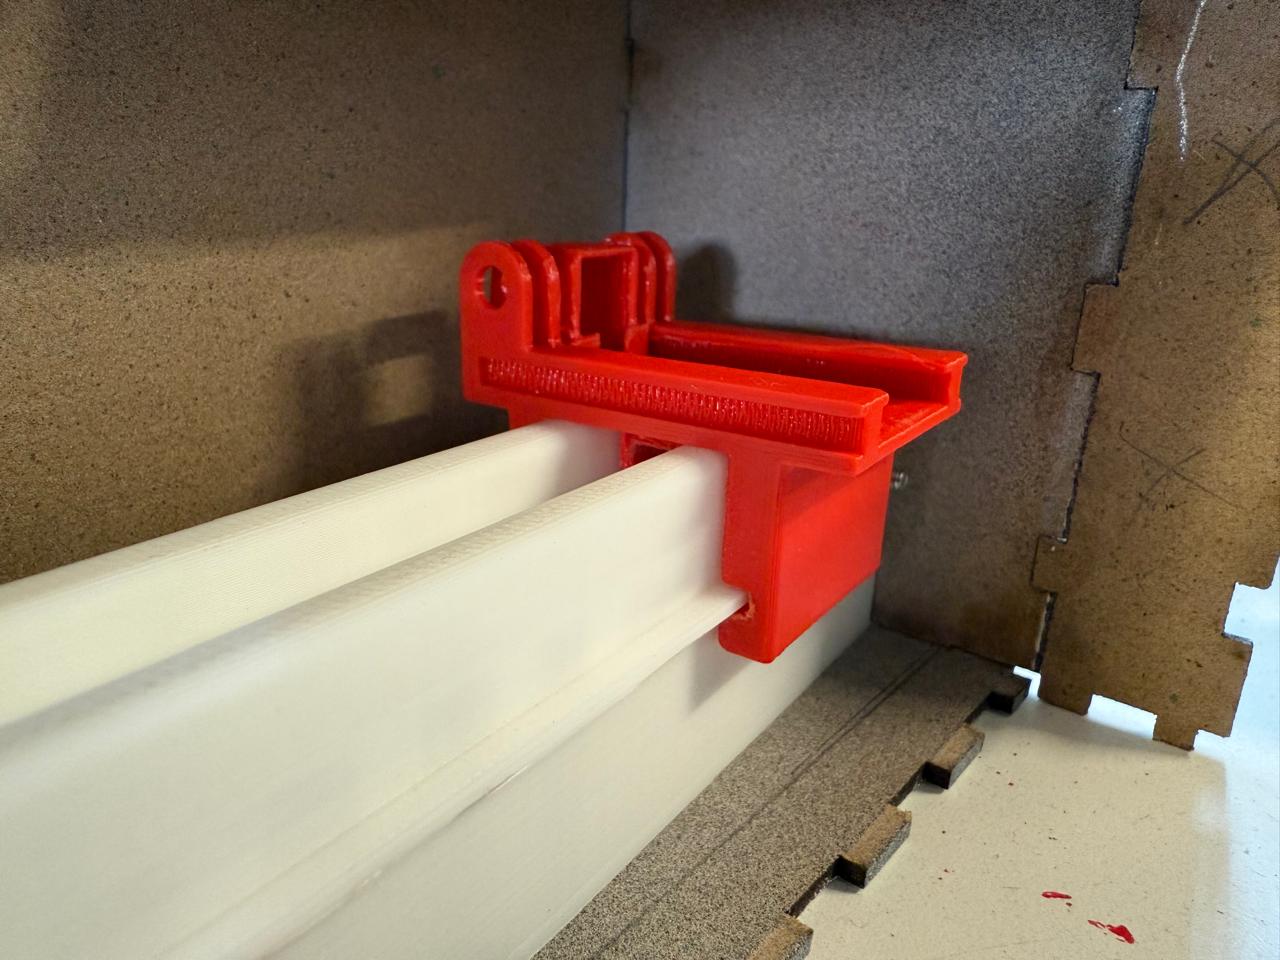
I´ve tested the new mechanism and it works perfectly but I need to reassemble everything.
Remaining tasks
I´m also missing the final code where I can control the mechanism according to the die´s data. I will be finishing the code this week as well as the video and presentation for the final project.Things to be resolved
I´m still figuring out when I will start sending the accelerometer data so the card dispenser gives the correct card once the die lands on one of its faces. I will be using the accelerometer data to determine when the die has stopped moving, and then I will send the data to the card dispenser.
What will happen when?
- Finish the assembly of the card dispenser.-June 2nd
- Finish the code for the card dispenser.-Before June 7th
- Finish the video and presentation for the final project.- Before June 5th
What have you learned
I´ve learned how to design a mechanism that can move a platform up and down, and left and right. I´ve also learned how to make creative solutions to problems that arise during the design and assembly of a mechanism.