16. Wildcard week
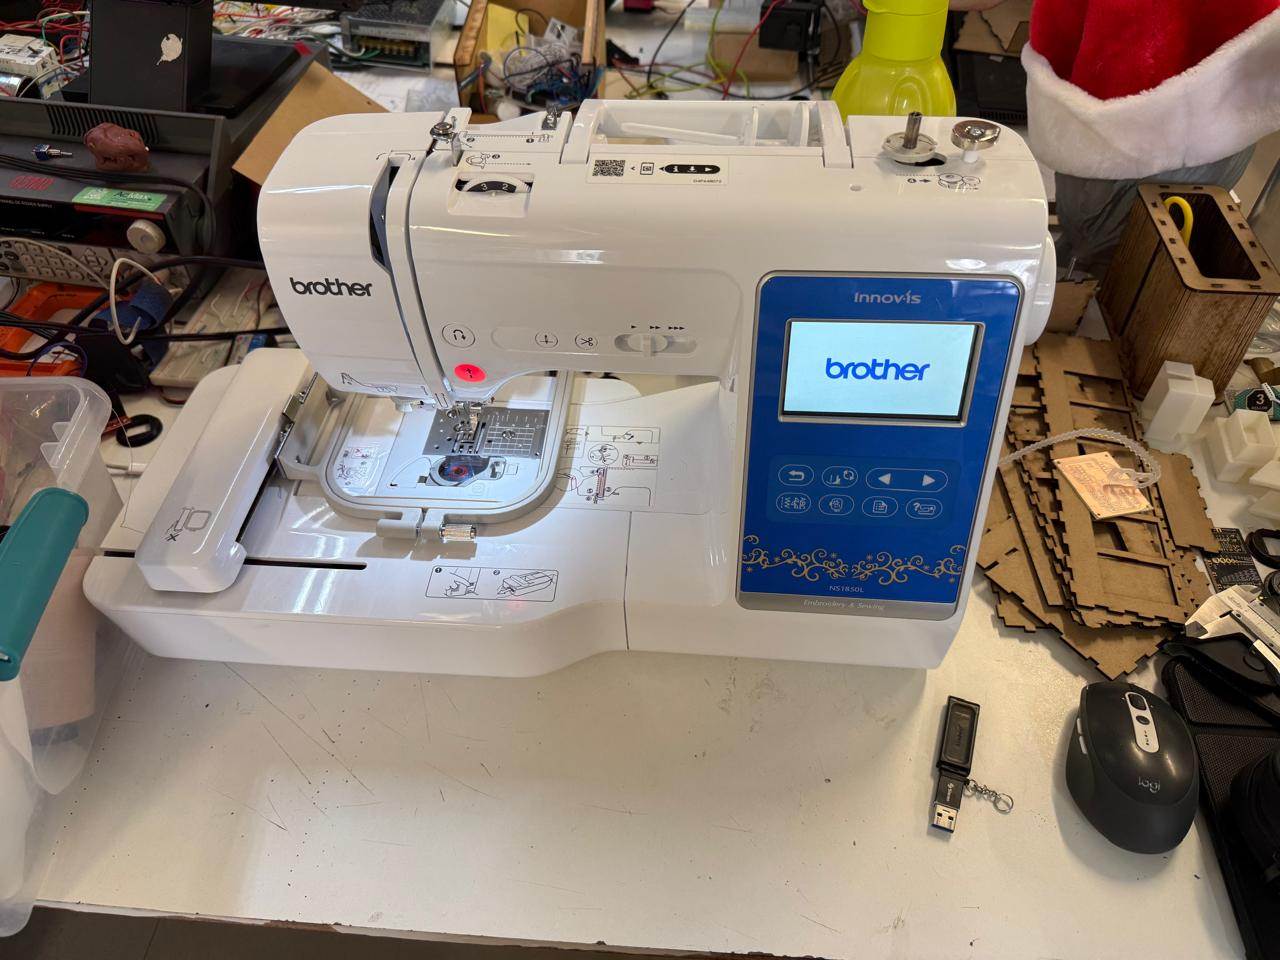
For wildcard week , I chose to learn how to use an embroidery machine. The one at my local Fab is a Brother NS1850L Embroidery and sewing machine. I chose it because I´ve always wanted to make an embroidery design, and I thought it would be a fun way to learn how to use the machine. This was a different machine from what we´ve learned to use in the Fab Academy, so I had to learn how to use it from scratch.
The first thing I did was to find out what type of file I needed to make the design I wanted . I found that .pes and .pec files are compatible, but .pes files contain both design information for specific software. The PEC file c ontains machine-readable embroidery commands, colors, and a design nam e. In the end , this file is more convenient to work with.
I found some designs on the web, but I wanted to make one of my own . After some research , I discovered that I could make a design using Inkscape by downloading an extension that allows me to save the file as .pes . You can get the extension here : ( https://inkstitch.org/docs/install-windows/ )
I designed my own Stitch (from Lilo & Stitch) , quite literally a stitched Stitch ." I knew I had to put the colors in different layers so I could get the design right. I was learning to use the machine with a friend, and we asked Chat GPT to make a Python script to separate an image into different files depending on the most prominent colors , so we could turn any design into layers and be transformed into embroidery.
Here´s the prompt we used:
Can you create a Python code where if I insert a JPG or PNG image, it returns several PNGs that segment the original image into color layers? That is, each generated PNG should return the hues that are most predominant in the image. For example, for the following image of Miles Morales' Spider-Man logo, it should return only a red layer. Now, for the Green Goblin image, while it could return the entire vast range of colors, the truth is that it's impossible, so it should instead return the layers of the most dominant colors—in this case, green, purple, black, and maybe yellow. Before you give me the code, do you understand?
I want it to be as good as possible—I honestly don’t know the methods, but what I do know is that I want it in Python, with a transparent or white background, a maximum of 5 layers, a minimum of 1 layer, and for the color detection to automatically detect colors based on relevance.
And here´s the code:
import cv2
import numpy as np
from sklearn.cluster import KMeans
from PIL import Image
import os

def extract_dominant_colors(image, num_colors=5):
    # Convert to RGB and reshape for clustering
    img_rgb = cv2.cvtColor(image, cv2.COLOR_BGR2RGB)
    reshaped = img_rgb.reshape((-1, 3))

    # Apply KMeans clustering
    kmeans = KMeans(n_clusters=num_colors, random_state=42, n_init='auto')
    kmeans.fit(reshaped)

    # Get dominant colors and labels
    colors = kmeans.cluster_centers_.astype(int)
    labels = kmeans.labels_
    return colors, labels.reshape(image.shape[:2])

def create_color_mask(label_mask, cluster_idx):
    # Create binary mask for the specified cluster
    return (label_mask == cluster_idx).astype(np.uint8) * 255

def create_solid_color_layer(mask, color, size):
    # Create transparent RGBA image
    layer = np.zeros((size[1], size[0], 4), dtype=np.uint8)

    # Apply the solid color where mask is 255
    for y in range(size[1]):
        for x in range(size[0]):
            if mask[y, x] == 255:
                layer[y, x] = [color[0], color[1], color[2], 255]  # R,G,B,A

    return layer

def extract_color_layers(image_path, output_dir="output_layers", max_layers=10):
    # Load original image
    image_bgr = cv2.imread(image_path)
    image_rgb = cv2.cvtColor(image_bgr, cv2.COLOR_BGR2RGB)
    height, width = image_rgb.shape[:2]

    # Create output directory
    os.makedirs(output_dir, exist_ok=True)

    # Detect dominant colors
    colors, label_mask = extract_dominant_colors(image_bgr, num_colors=max_layers)

    # Generate each color layer with a solid color fill
    for i, color in enumerate(colors):
        mask = create_color_mask(label_mask, i)
        layer = create_solid_color_layer(mask, color, (width, height))

        output_path = os.path.join(output_dir, f"layer_{i+1}_solid_{color.tolist()}.png")
        Image.fromarray(layer).save(output_path)

    print(f"Generated {len(colors)} solid-color layers in '{output_dir}'.")

# USO
extract_color_layers("stitch.png")

After running the code, I got 8 layer s, but I excluded the ba ckground from the layers I add ed in Inkscape .
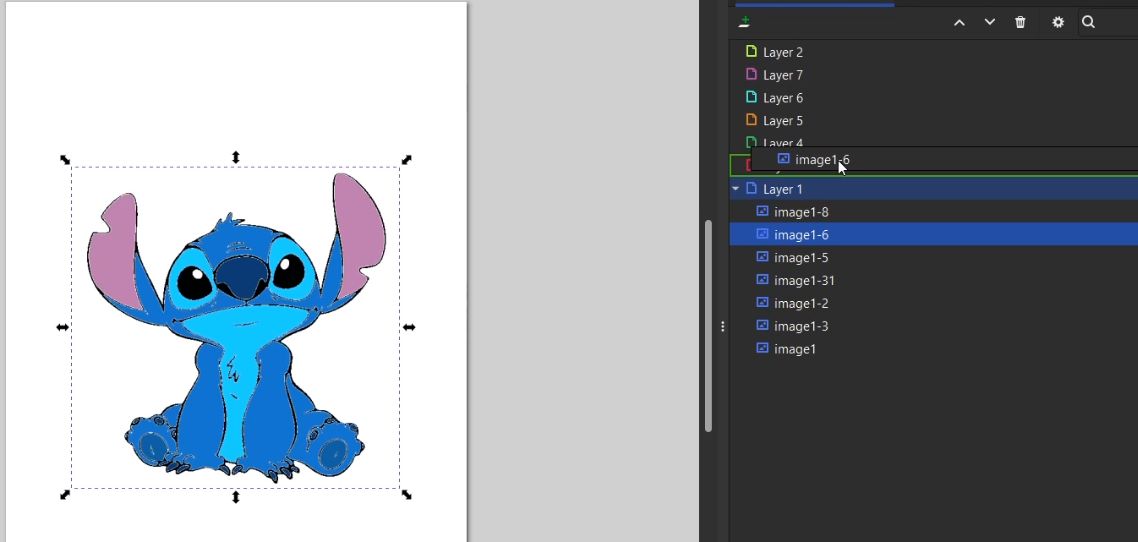
I pasted the files in Inkscape:
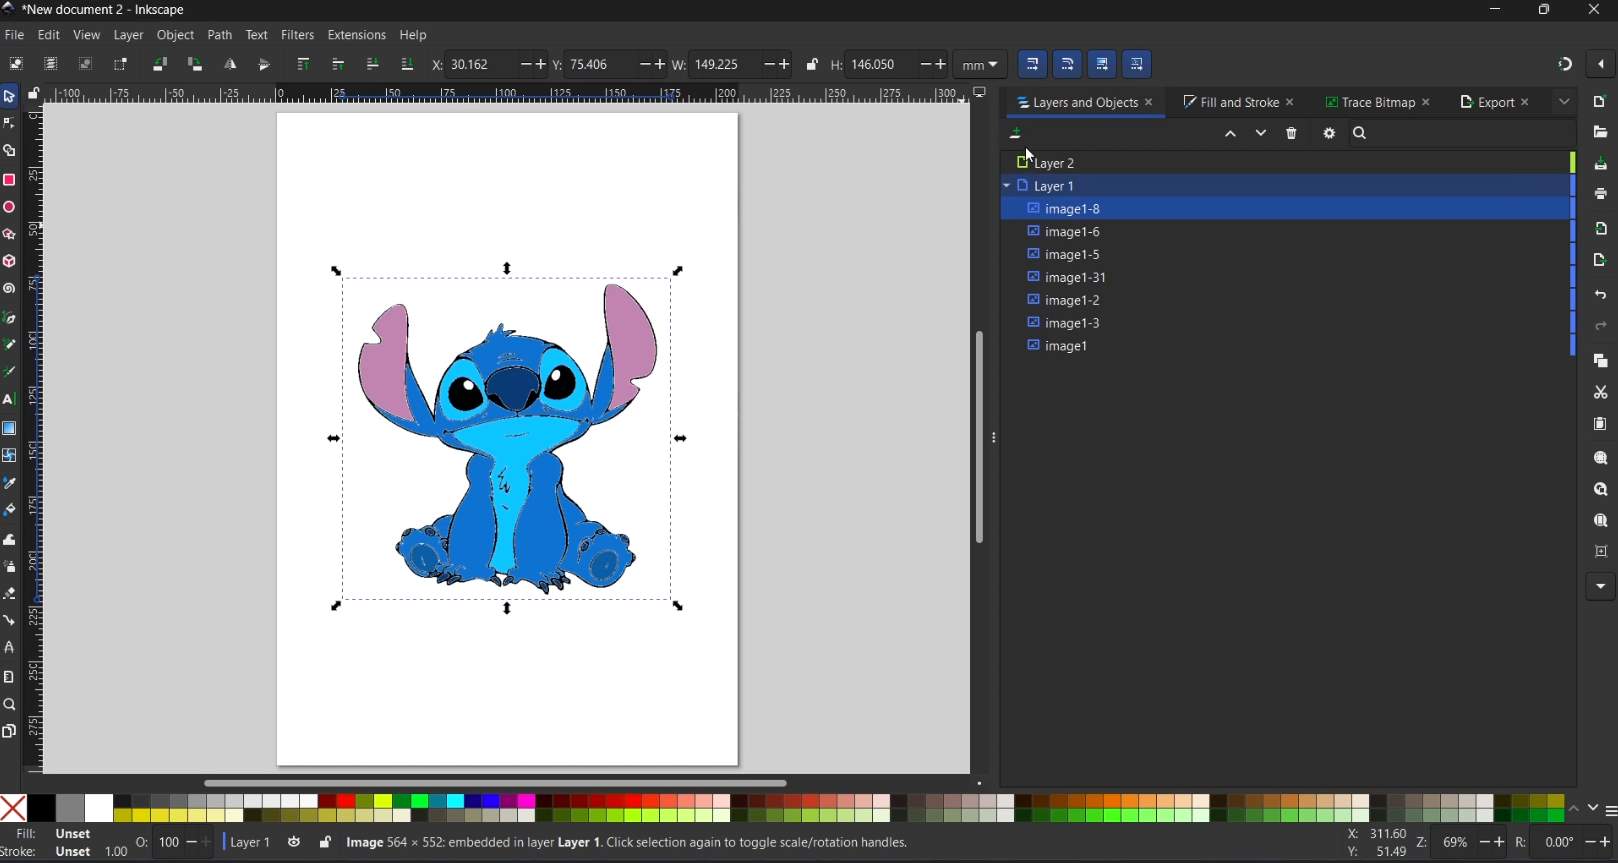
I created a layer for each color :
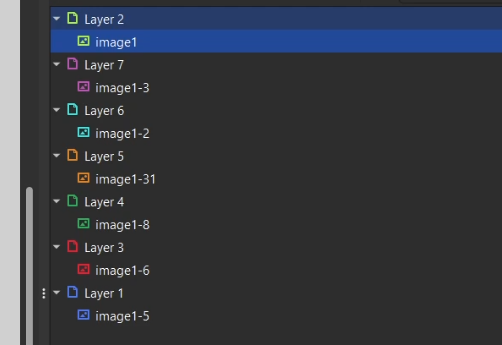
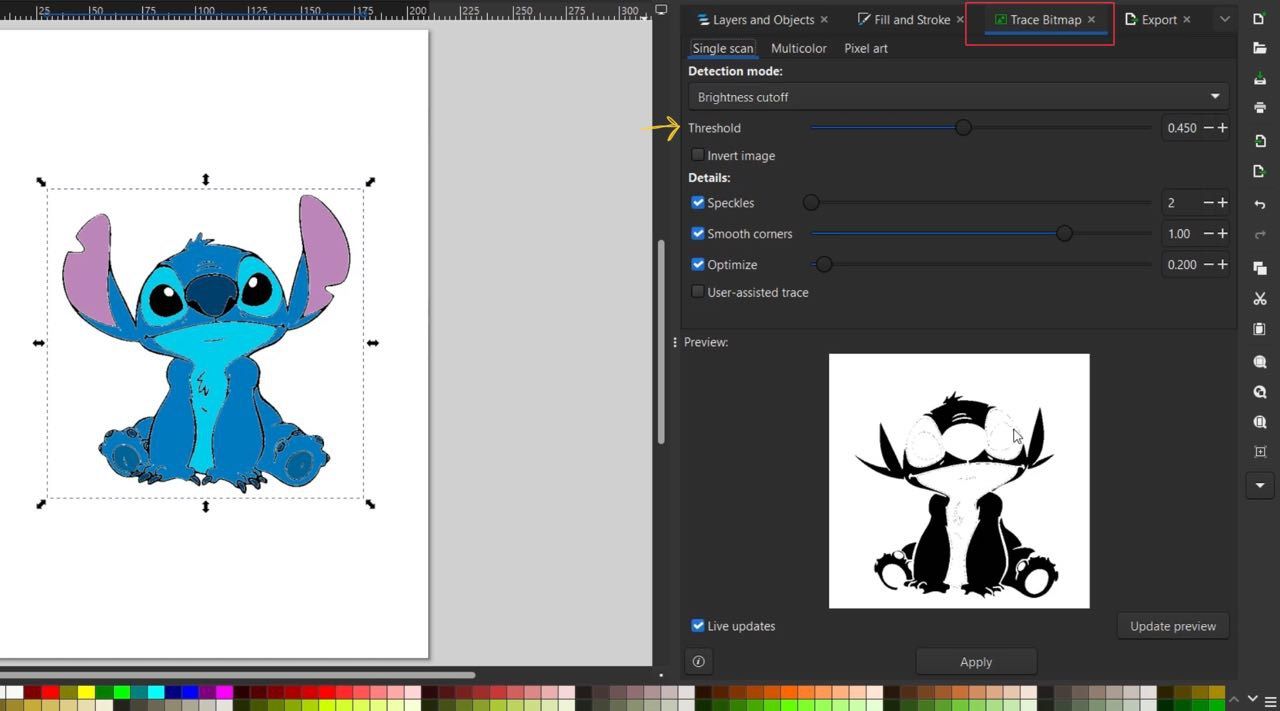
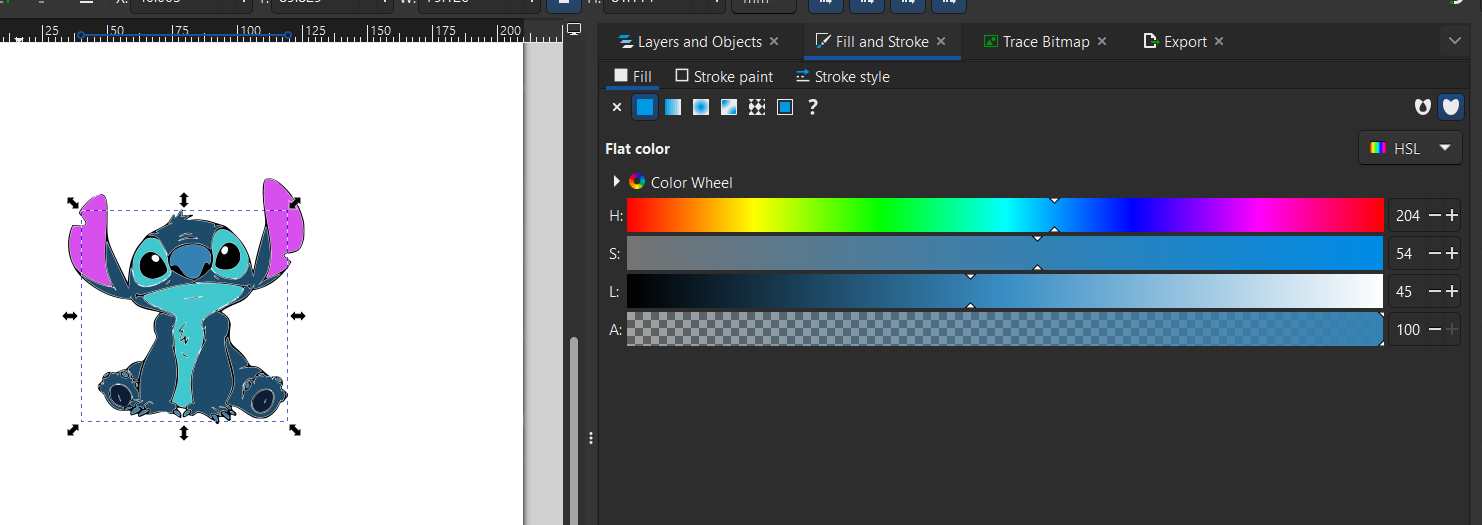
Before using the extension, I created a bitmap (red) from each layer . For some layers , I had to adjust the threshold ( yellow) since some colors weren’t recognized . I knew if the bitmap was created correctly if a preview appea red on the bottom part of the window.
After getting the bitmap from each layer is important to change the colors from black to a different color ; it´s okay if it´s not the exact color from the image , but they ne ed to be different from each other, so the Inkstitch extension works properly and detects every layer.
To use Ink stitch , I clicked on Extensions (red), Ink/Stitch (green) , and then Params (yellow) .
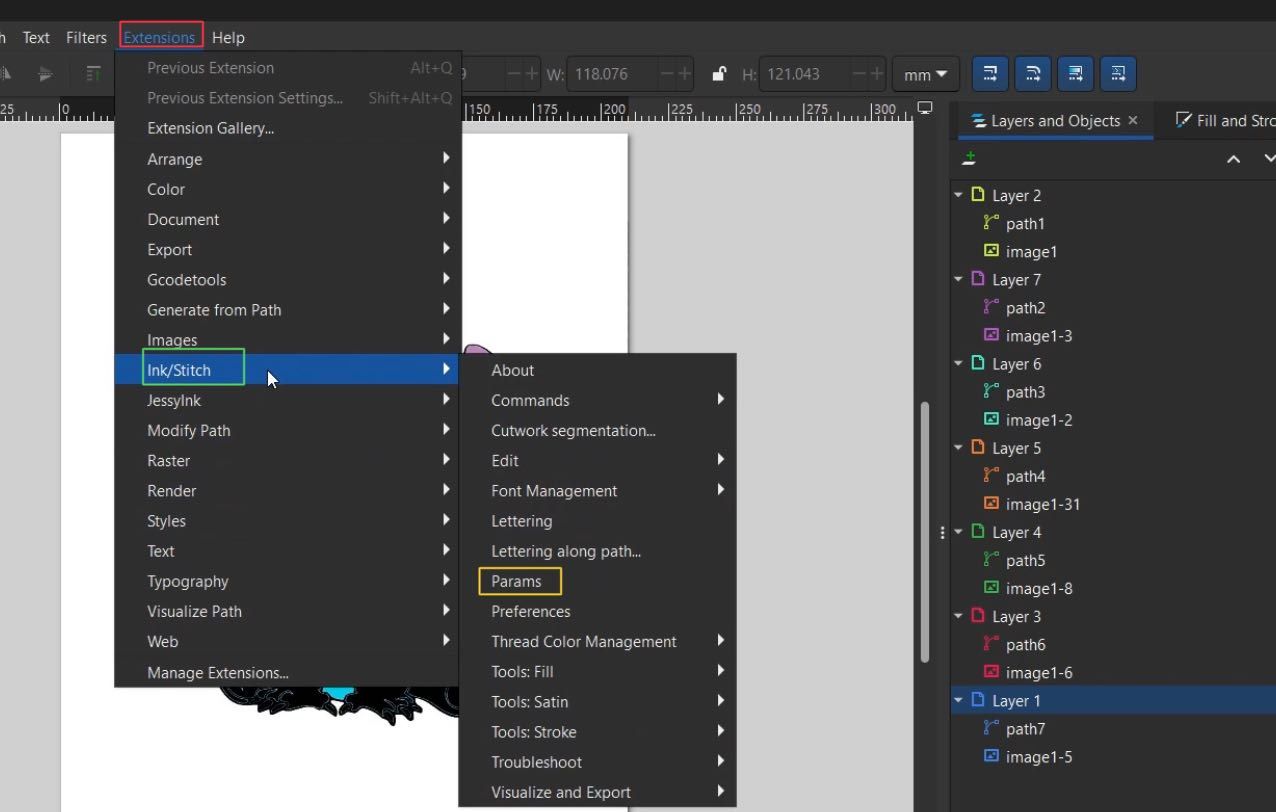
Before opening the extension , make sure not to have a layer selected , since th at would cause it to only get the path for that single layer. To apply it to all layers, select none of them or select all of them and open the extension.
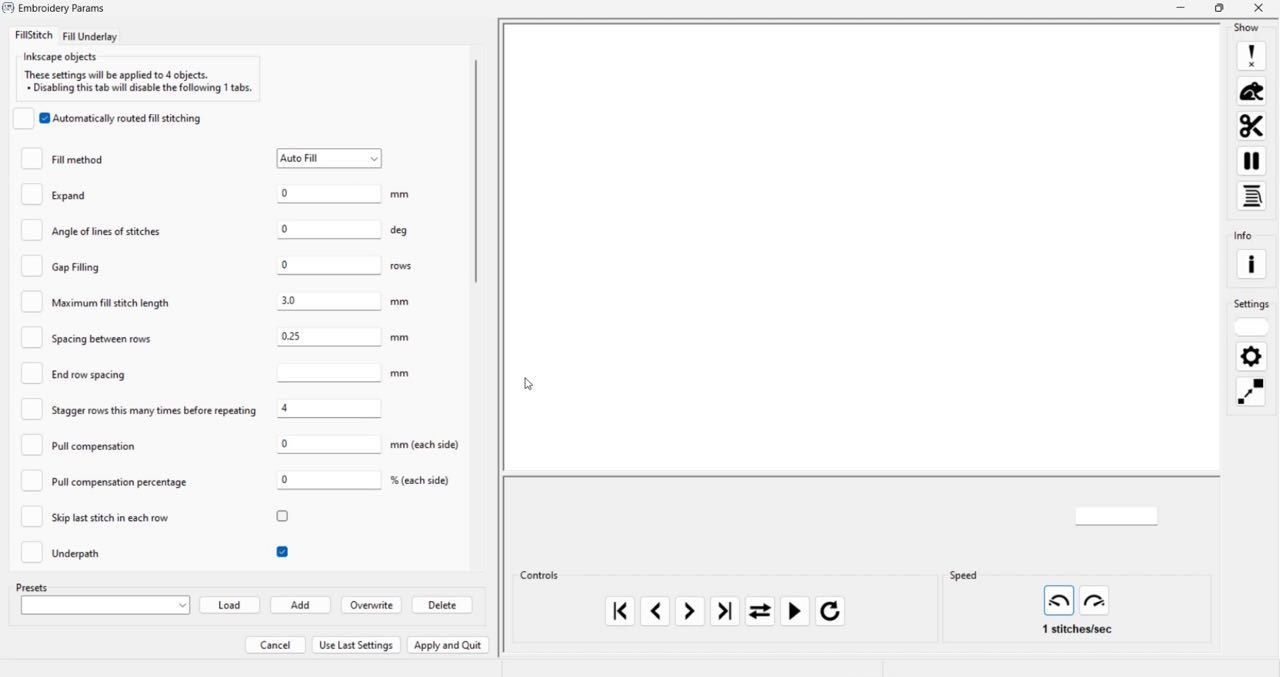
I took a few seconds to load a new window . A t first , there wasn´t anything showing up, but after about a min ute , I got a preview of the whole Stitch .
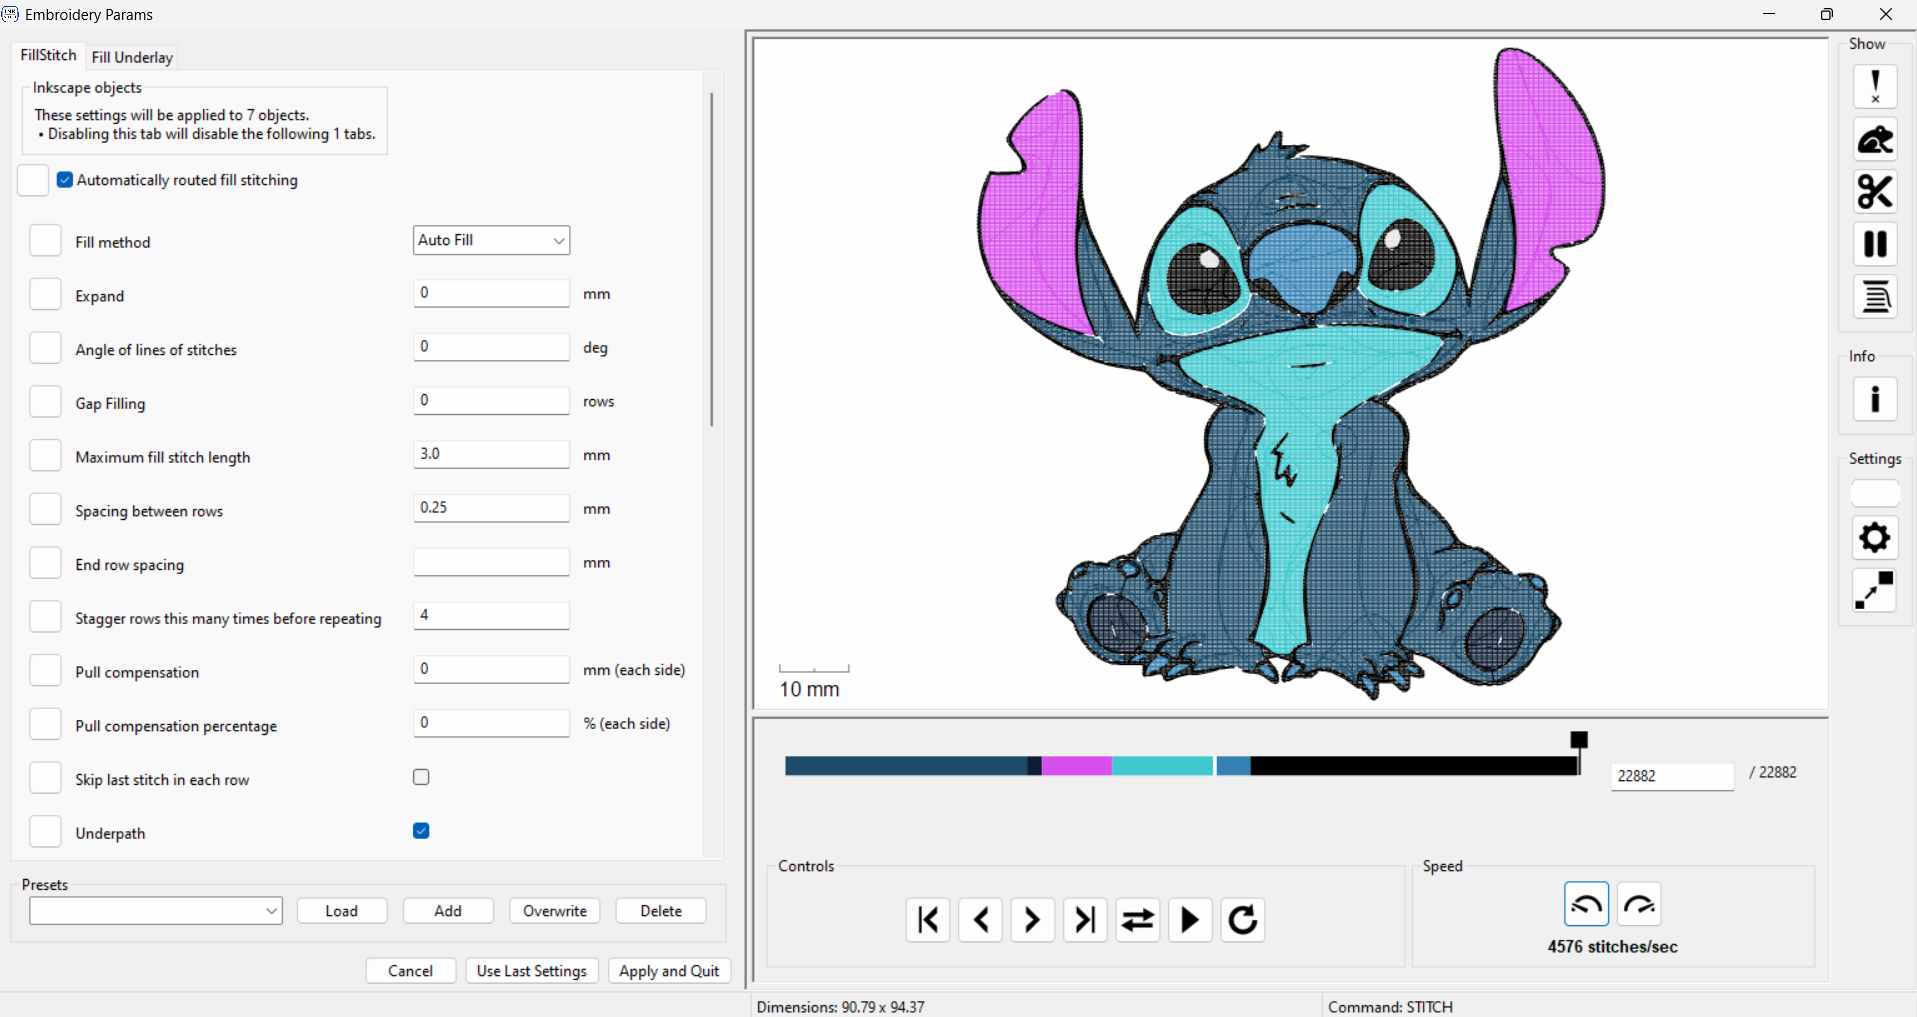
I clicked on Apply and Quit once I got the full preview.
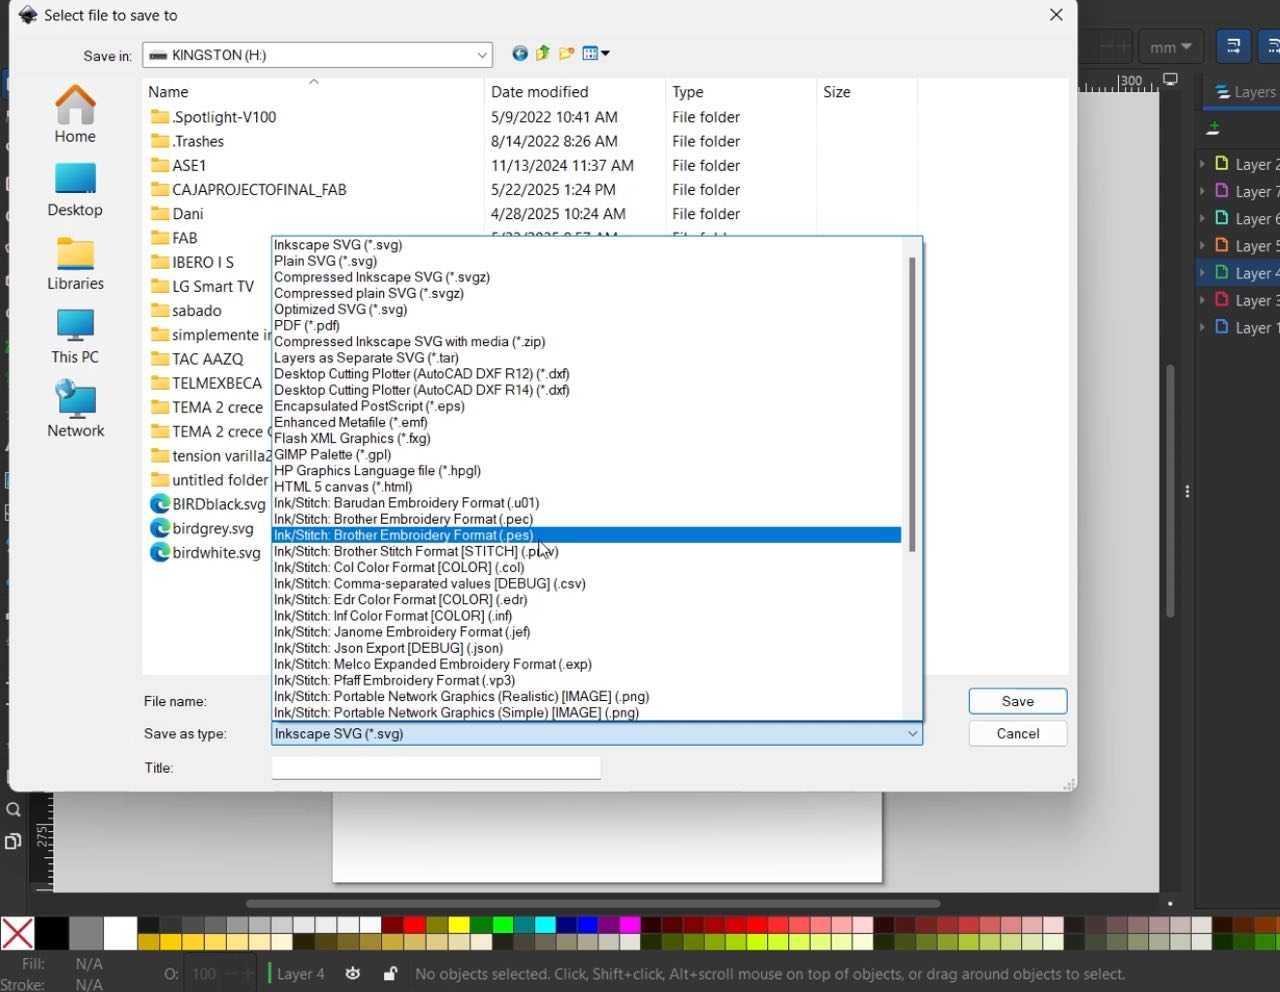
To save the file I clicked on “Save as” and selected the .pes file , and I saved it into a USB drive .
Now it was time to use the ma chine . The b rother NS1850L Embroidery and sewing machine is easy to use ; the whole machine has instructions on how to load the thread properly .
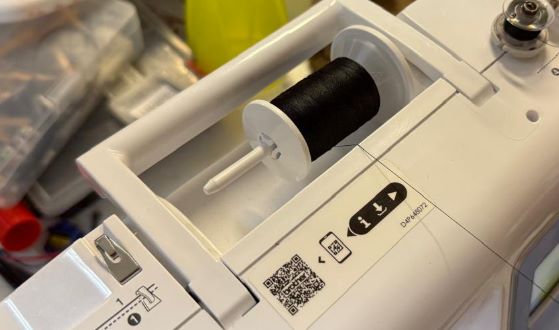
First , I load ed the Spool of thread into the Spool pin and looked it in place :
Then I followed the path indicated:
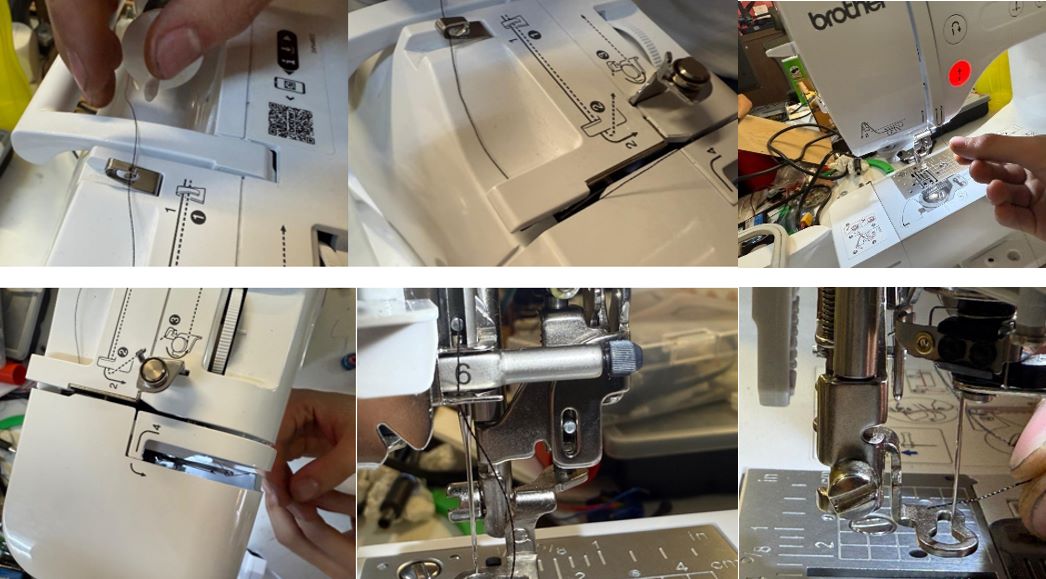
The s tep number 3 , which is on the top of the machine , can be followed to wind the bobbin thread once it runs out:
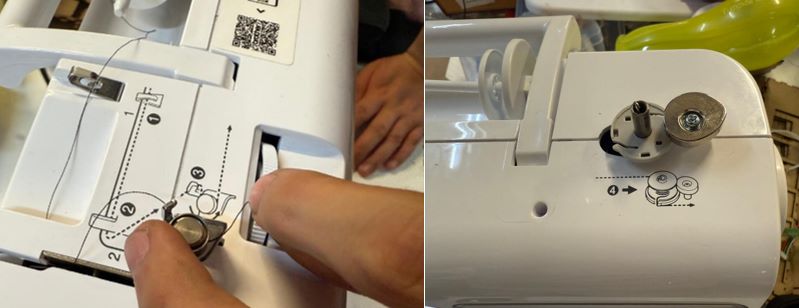
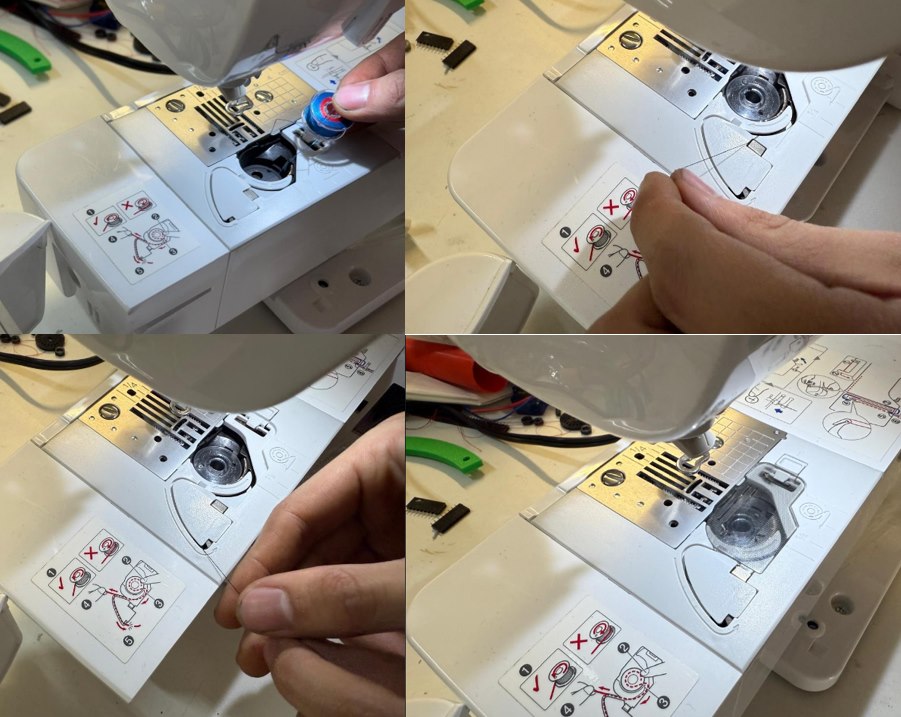
The bobbin thread is the thread used in the bottom spool of a sewing machine. It's generally thinner and finer than the thread used on the top spool. Bobbin thread is essential for forming stitches in sewing, working with the top thread to create a loop and catch it .
The bobbin thread also has instructions on the machine indicating where to place it:
Then I put the fabric I was going to use into the frame and secured it into the machine :
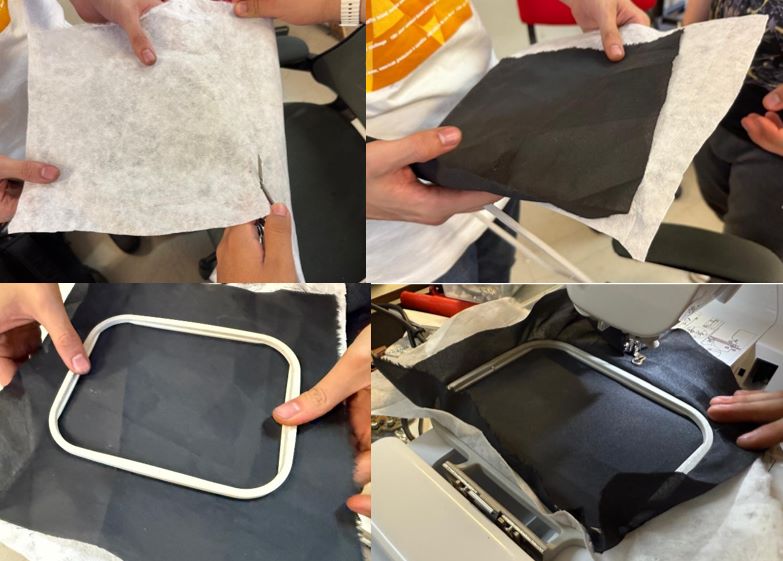
I used a layer of white cotton fabric for the design, and a stabilizer underneath it to keep the stitches tight and the fabric stable during embroidery. (I k now that on the images abo ve there is a black cotton fabric , but those were the same steps I followed for my Stitch , for which I used a white cotton fabric ).
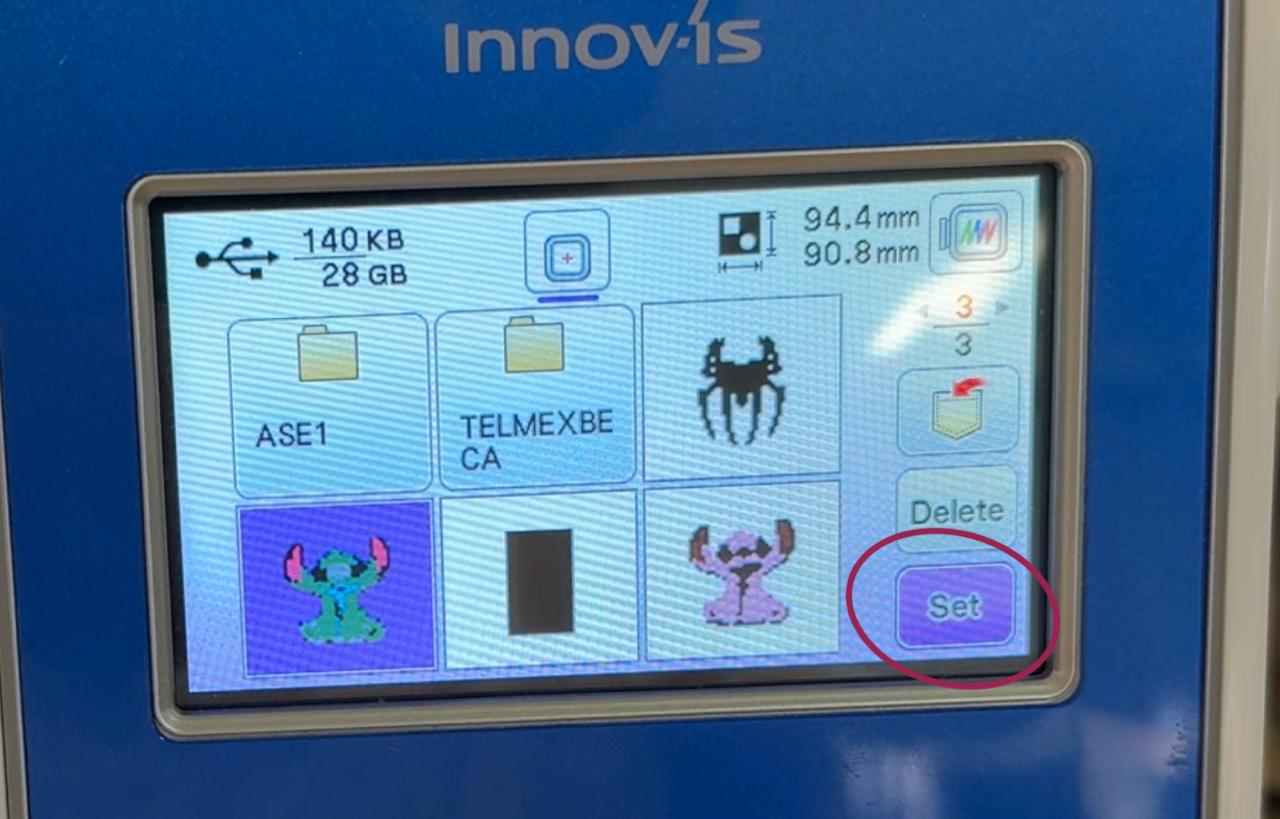
Once that was ready, I connected the USB Drive to the right side of the machine and selected the file:
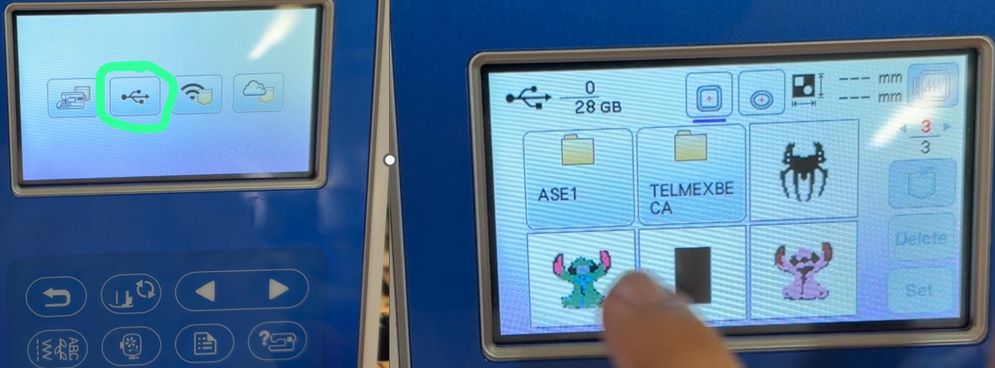
Then I clicked on set :
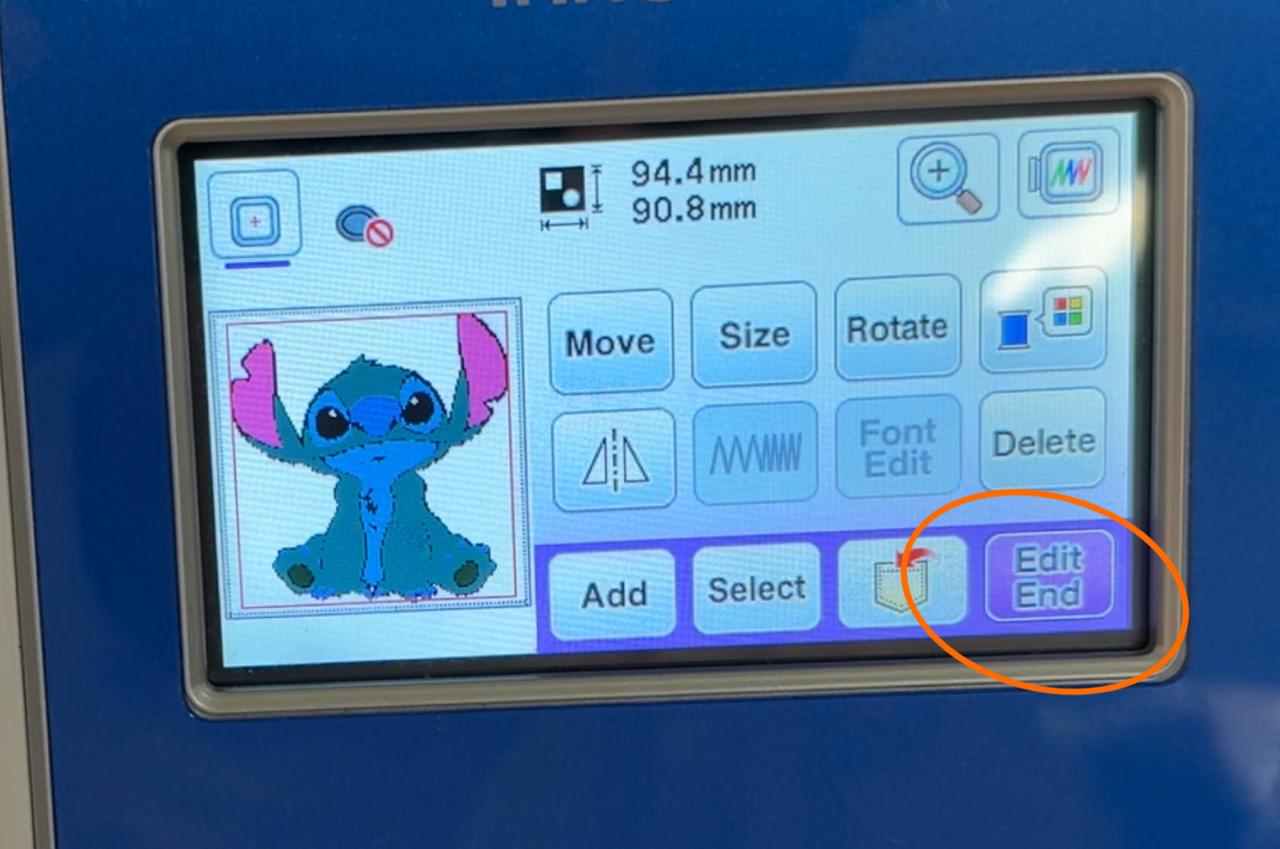
I wanted to make sure that the layers were configured correctly , so I clicked on Edit end :
And then Embroidery:
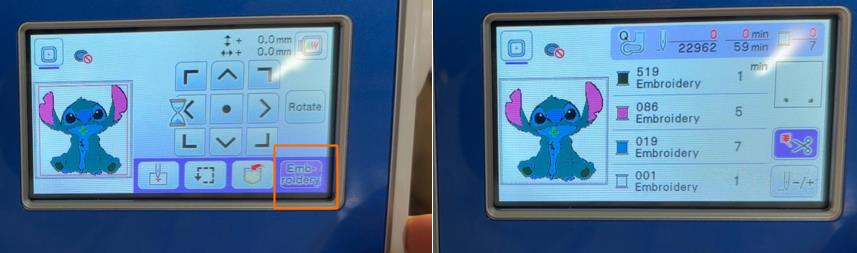
I was able to confirm that the machine would stop after completing each path , so I could change the thread color.
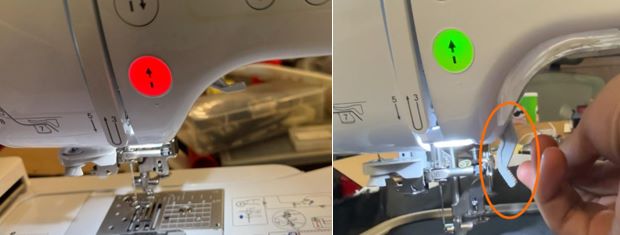
To start embroidering , I had to pull down this lever , and once the red button turned green, I press it:
I took way longer than I expected . A lthough the machine was fast, I wasn’t changing each thread , so it took me around 2.5 hours to complete.
When it was done, I removed it from the machine and cut the extra thread.
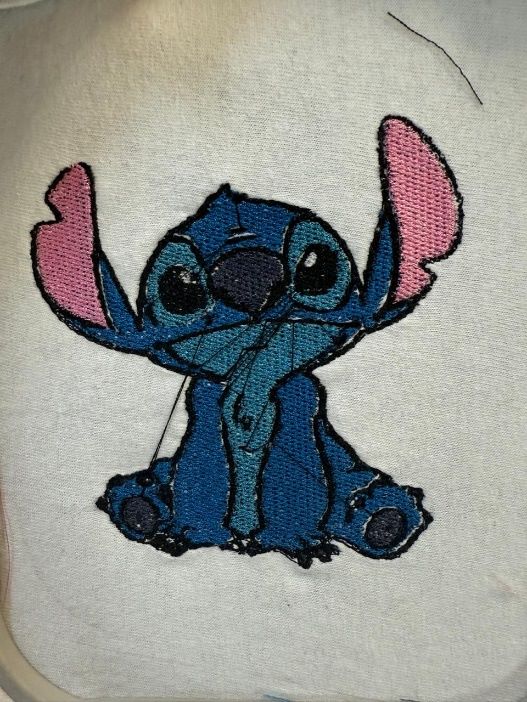
And here´s the result:
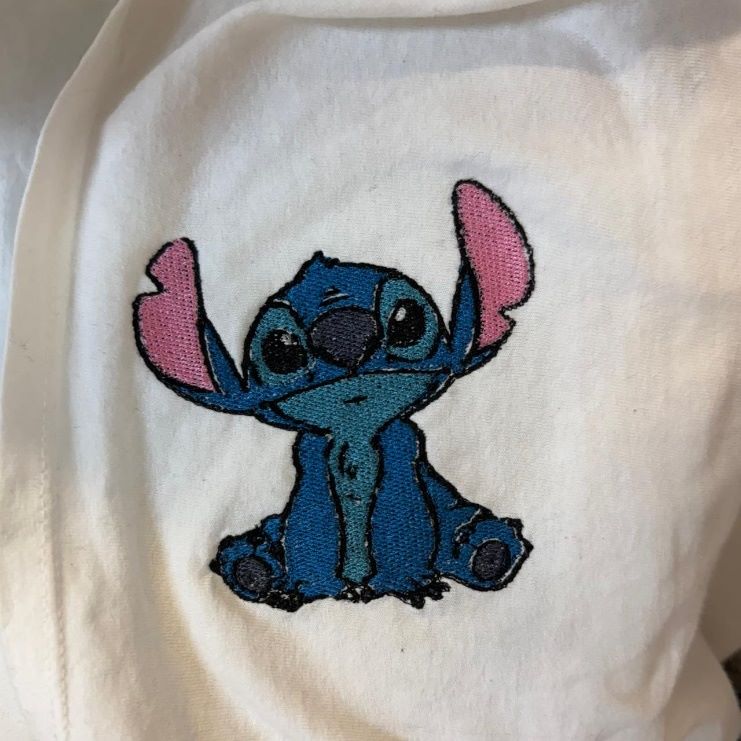
Summary
This machine was really fun and easy to use; I keep learning new ways to use Inkscape . I liked the result , but I noticed that maybe I was too excited to get all the details , and some parts , like the nails, were too small, and the fabric got stretched, so there are some white gaps here and there. I also g o t to experience and understand why we get printed logos and images on clothes more often than embroideries , since it took me well over 2 hours to make a single Stitch.