5. 3D Scanning and Printing
3D printing is the process of creating a physical object from a digital model. The digital model is sliced into thin layers and then printed layer by layer. 3D scanning is the process of capturing the shape of an object using a 3D scanner, it uses a laser or structured light to calculate the distance between the scanner and the objects surface and then create a 3D representation of the object. This week I learned how to use a 3D scanner and make a 3D model of my own and then print it. I also did a group assignment to test the 3D printer and some research for this week you can find it here.
3D scanning
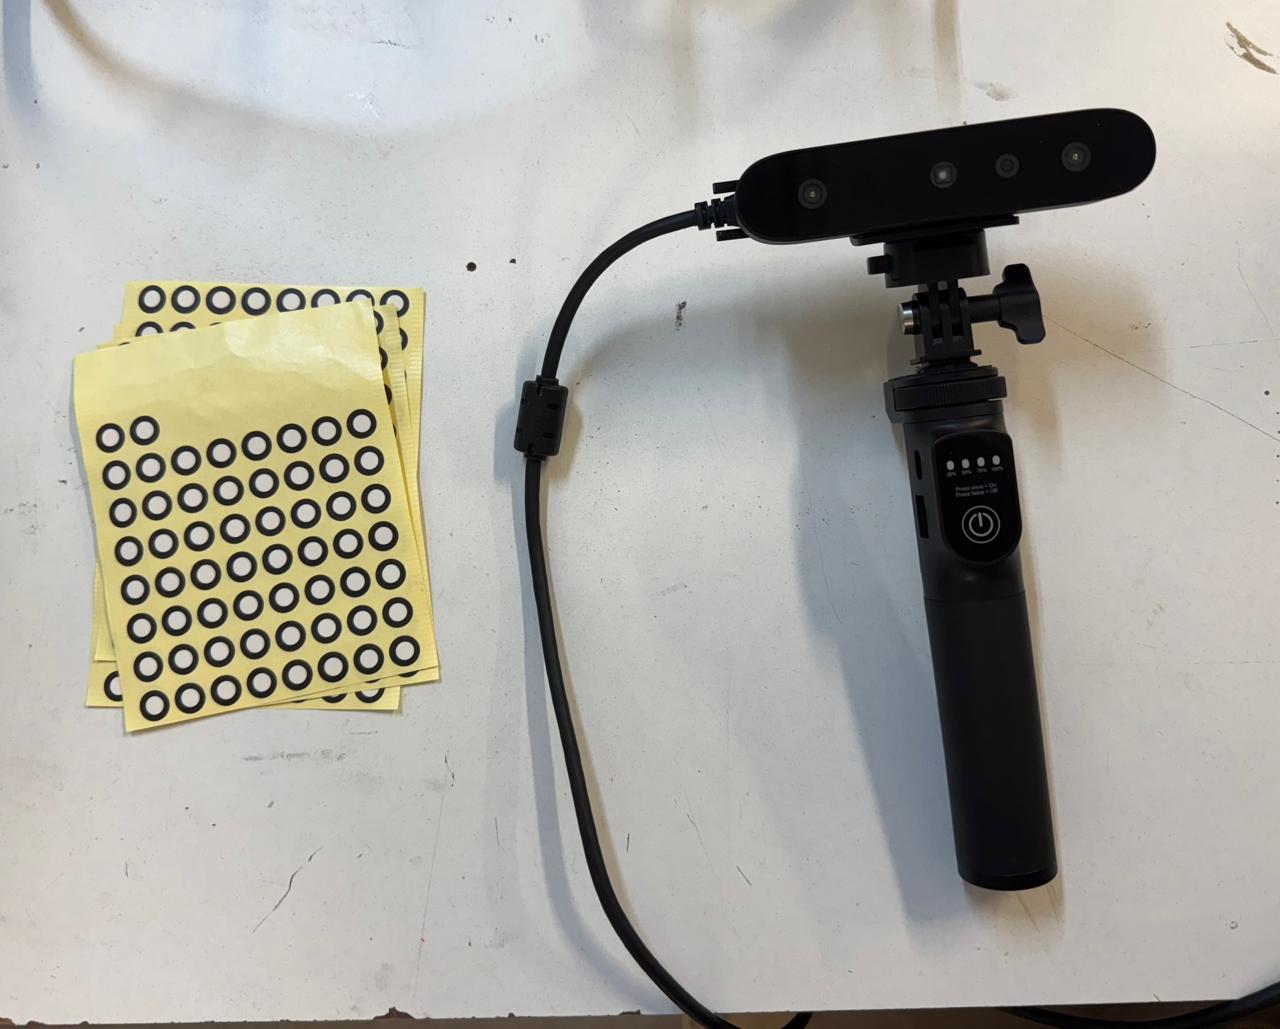
3D scanning is useful to create a digital model of an object, you can use the digital model to make modifications, create a copy or use it as a reference for a new design. The 3D scanner I´ll be using is the CR-Scan Ferret Pro from Creality 3D, it has a resolution of 0.1 mm. The scanner is easy to use, you just need to connect it to a computer, install the CrealityScan software and follow the instructions to scan the object.
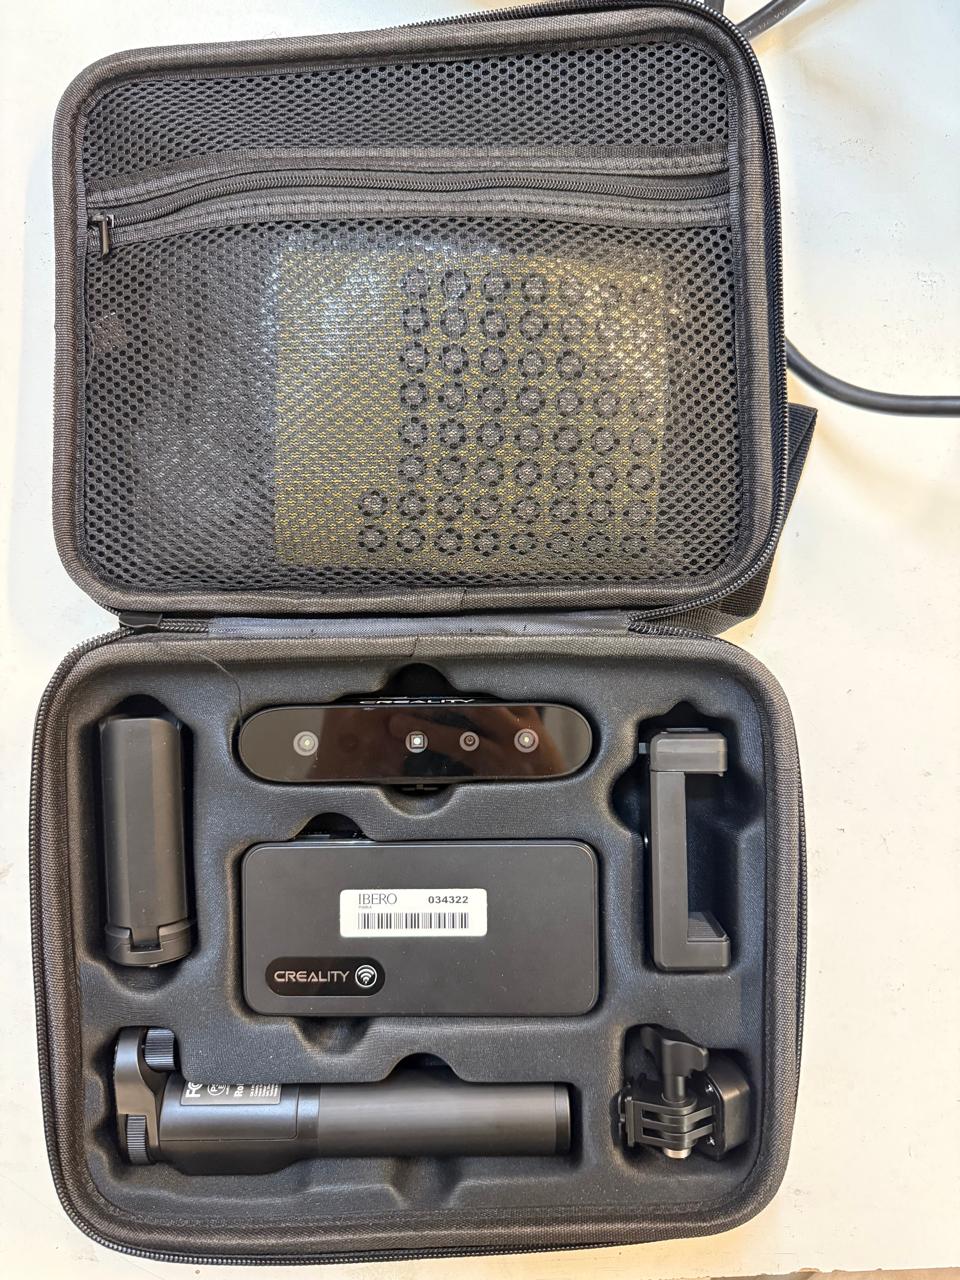
CR-Scan Ferret Pro
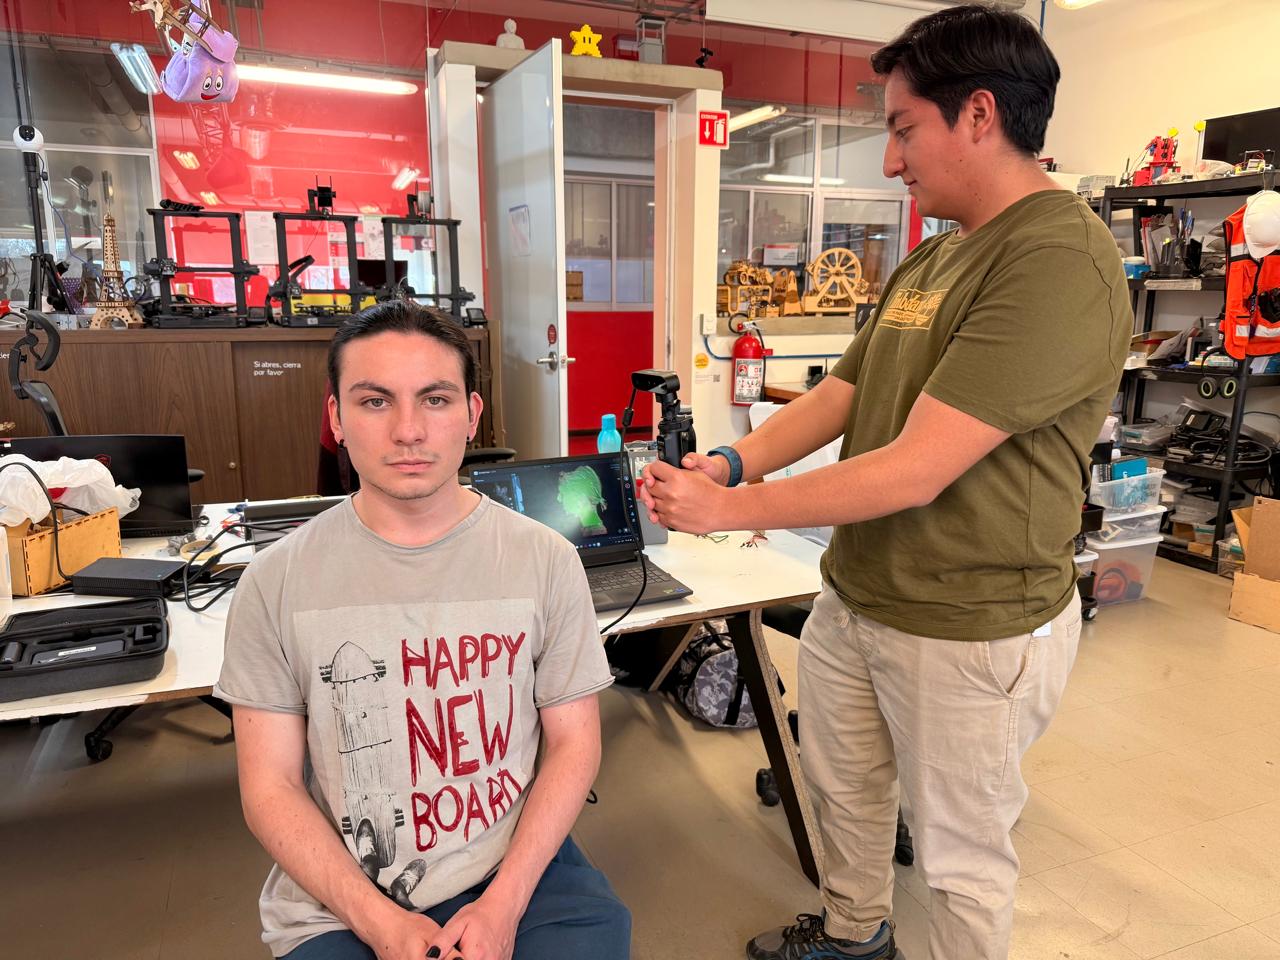
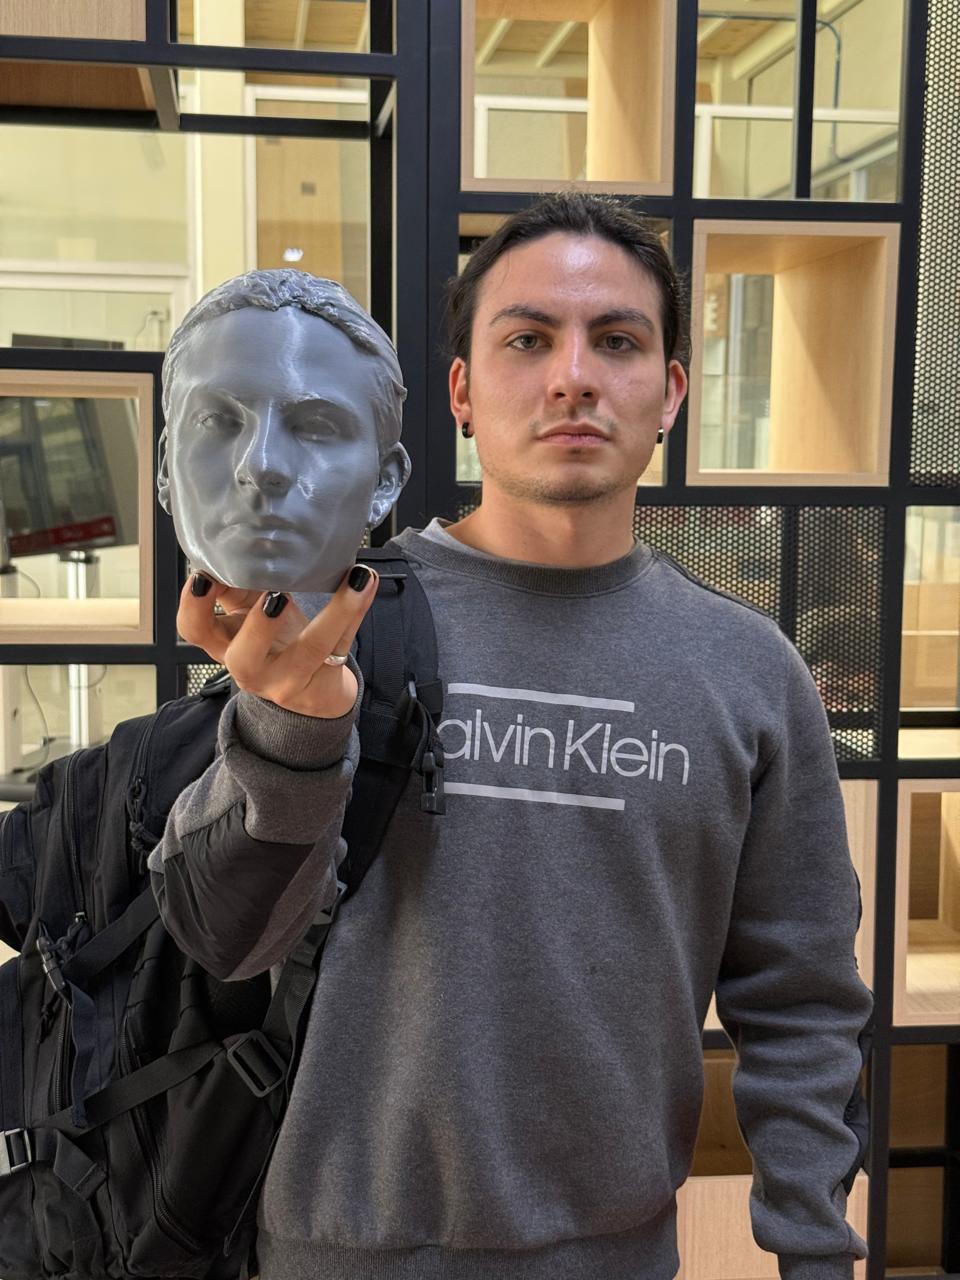
I decided to scan a friends head so I installed the CrealityScan software, opened it and connected the scanner to my computer. On the home page click on start new project, then the following window will appear:
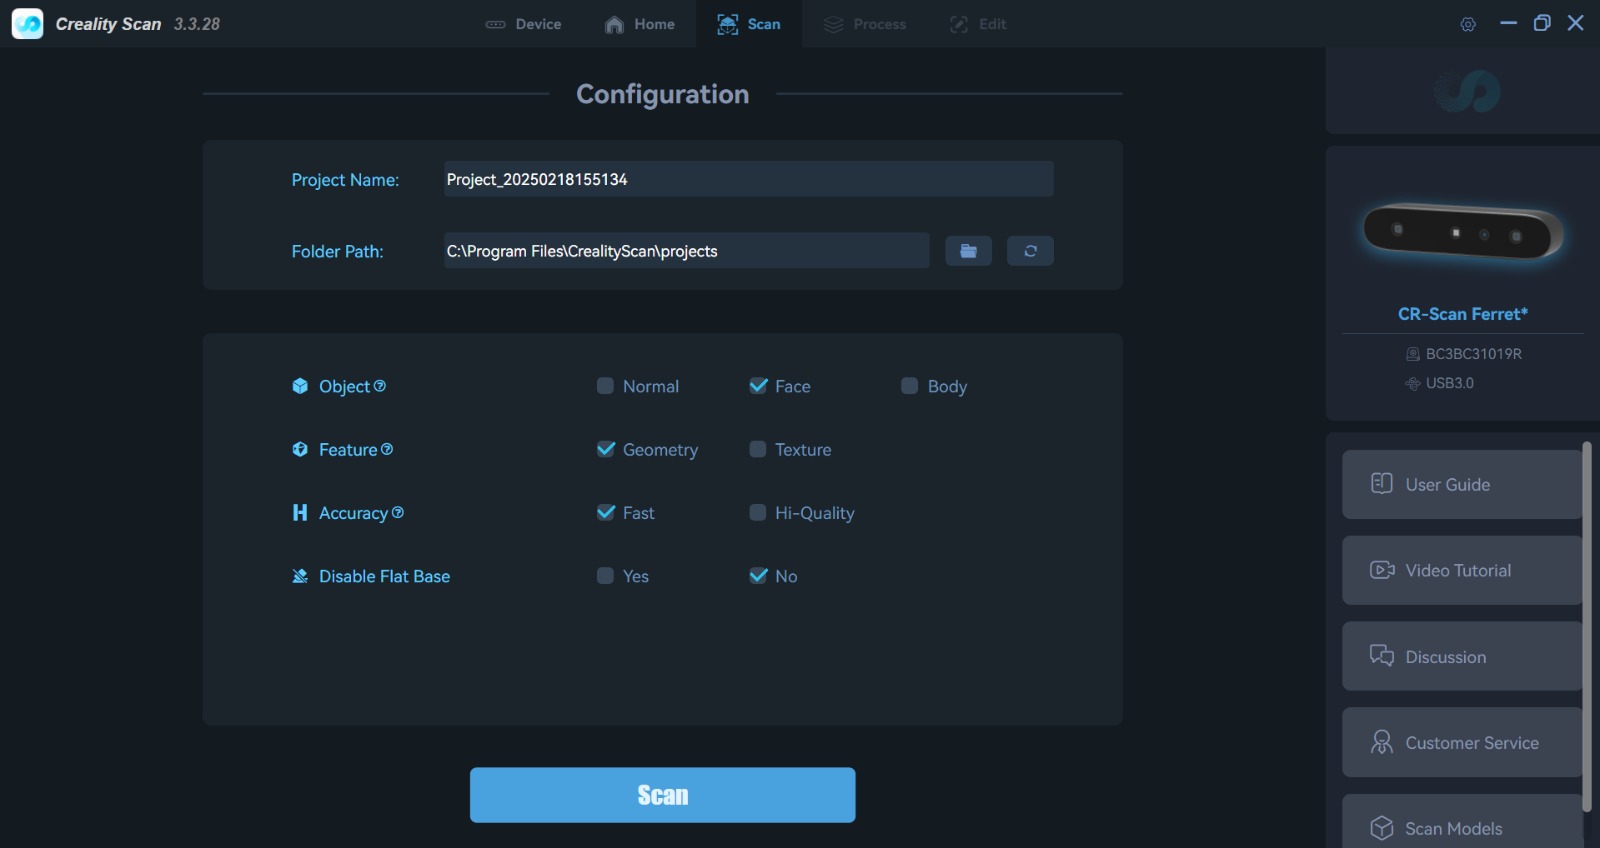
Here you can select the project´s name and configure the scanner. For object you can select to a face, a body o normal to scan a small object. Depending on the object you are scanning in "Feature" you can select if the scanner should be looking for geometry or texture. Then on accuracy you can select the resolution, the higher the resolution the more detailed the scan will be. I selected the parameters shown in the image above and clicked on "Scan".
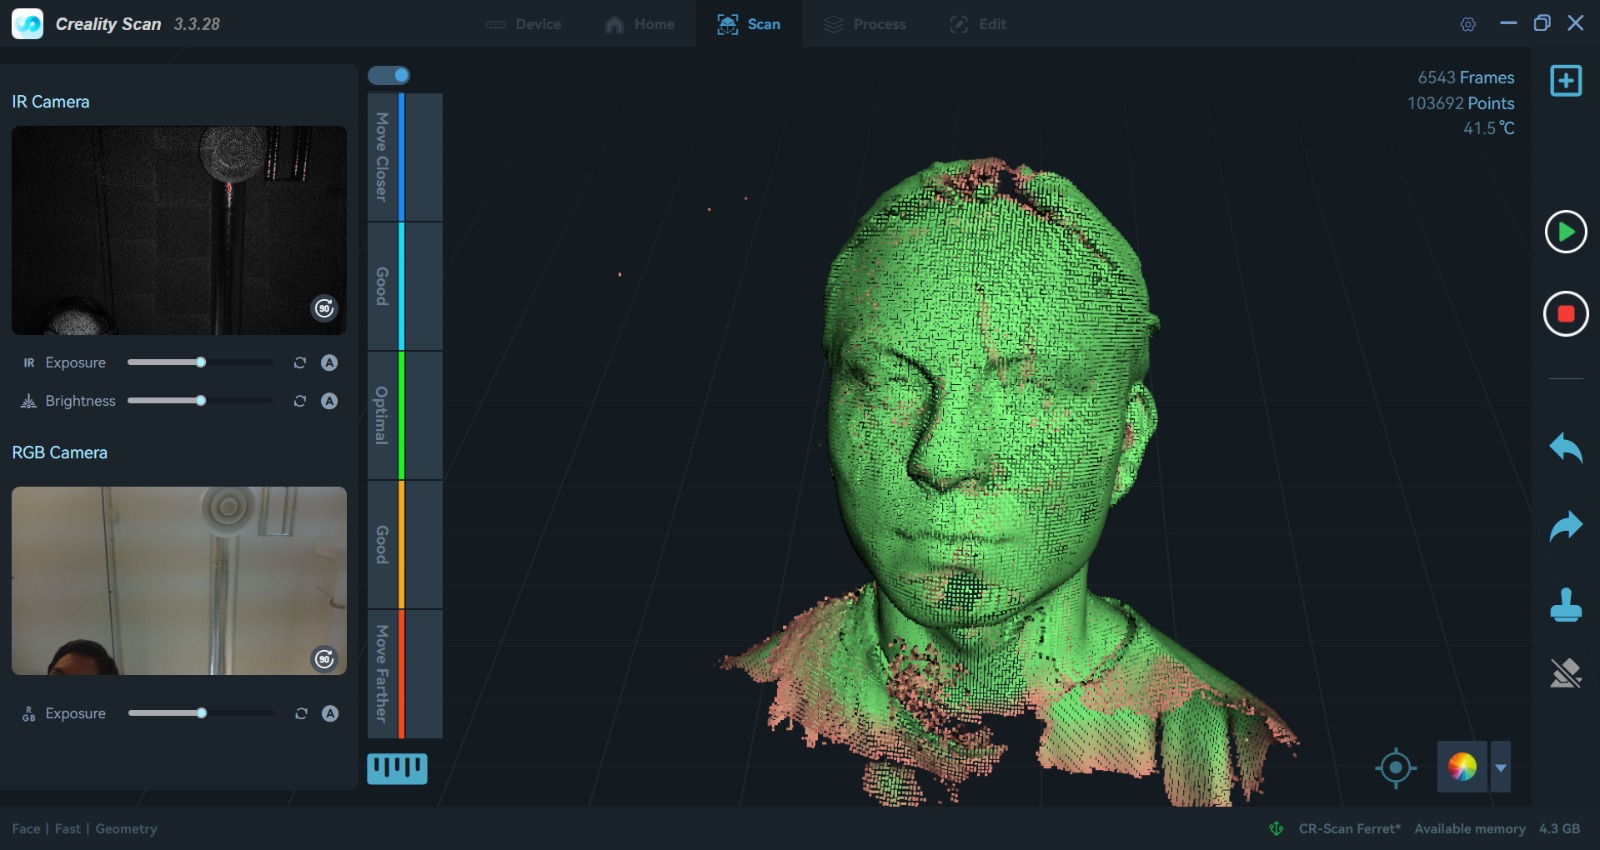
The following interface will appear, on the right you will see what the scanner is seeing and if the distance between the object and the scanner is optimal. In the middle you will see how the scanning is going. On the left you can hit the play button to start scanning , bellow there´s the stop button.
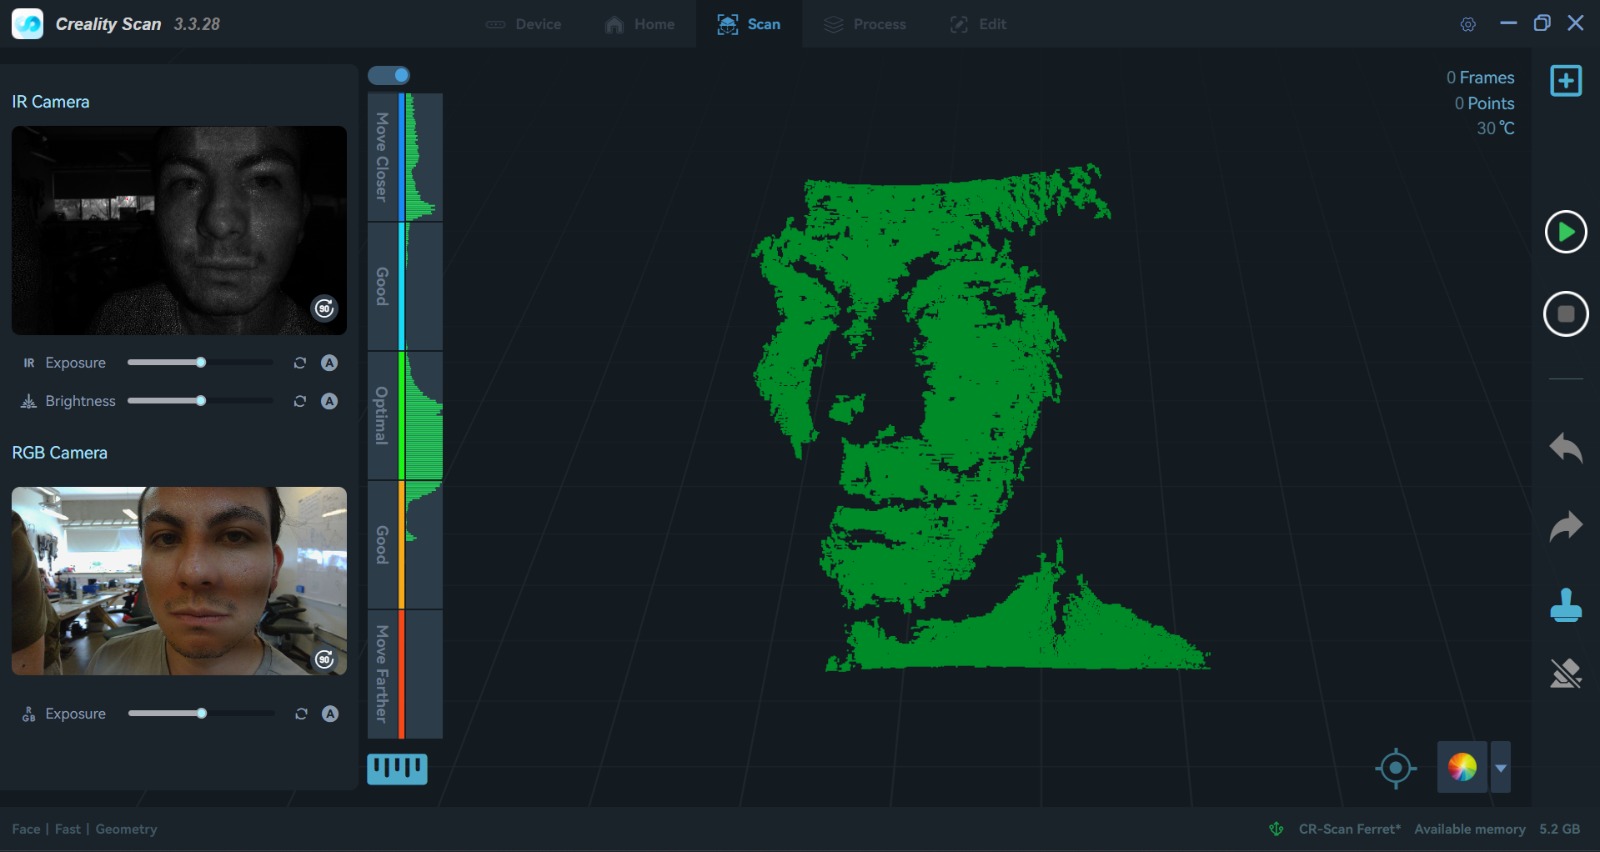
Move around the object/face to scan, make sure you move the scanner at the right distance.
Once you have scanned the object, click on stop and then on the next window click on "One-Click Porcess" to process the scan on the default settings.
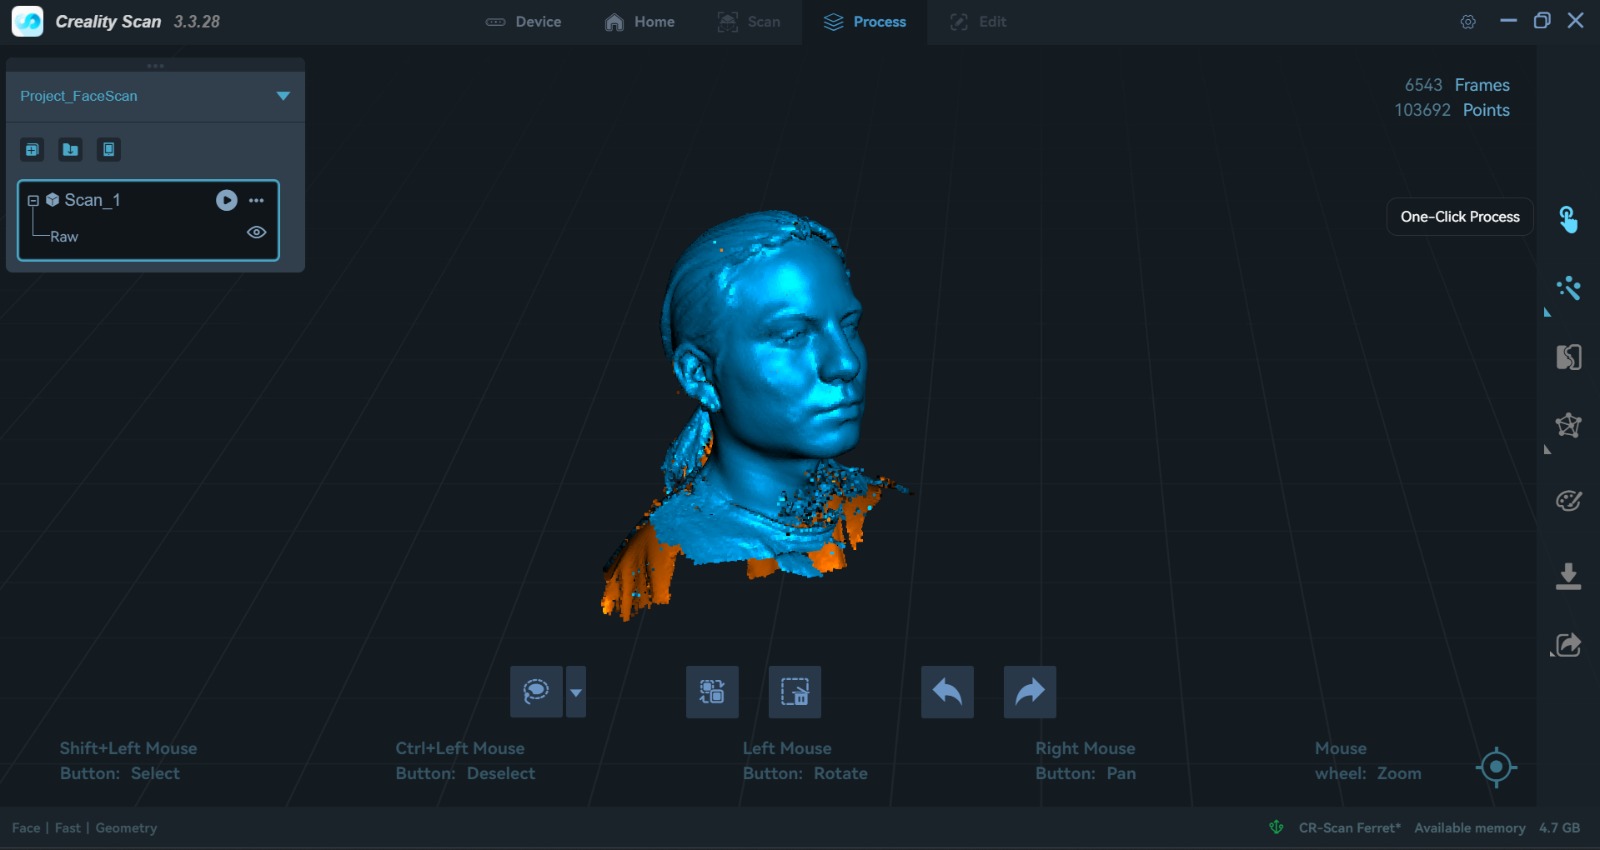
The software will process the scan and show you the result (I recommend plugging in your computer in this step since it is a high power consumption process and thus this will help finish the process faster). You can rotate the model to see it from different angles. If you are happy with the result click on "Save" and then on "Export". You can export the model in different formats, I exported it as an .stl because my friend wanted to print it.
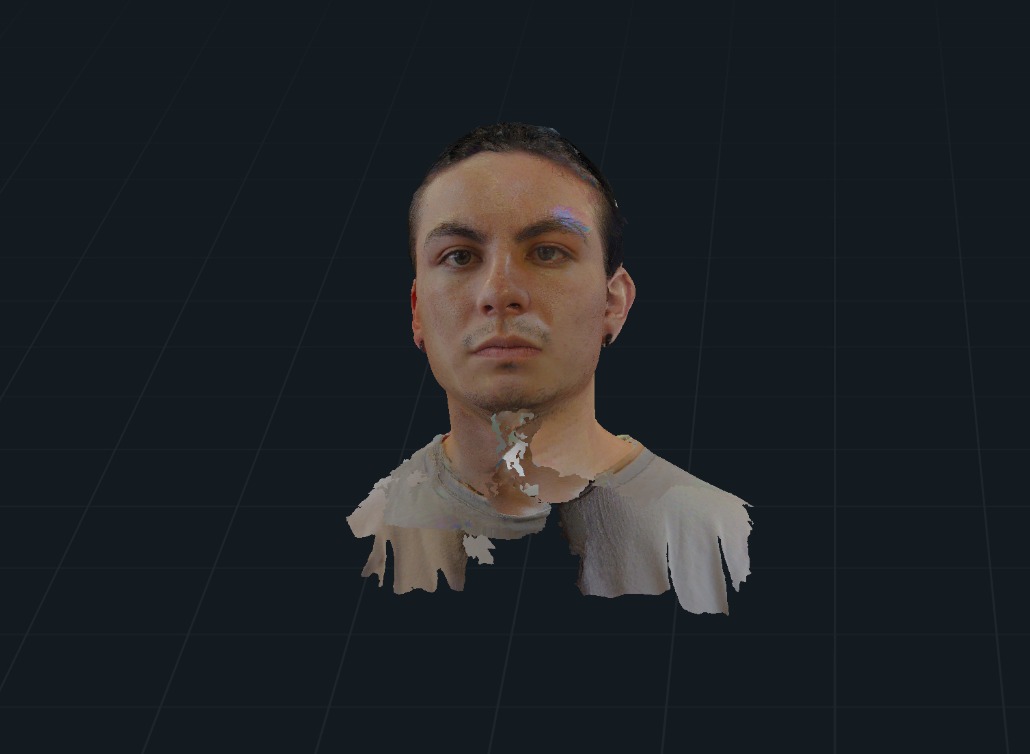
You can import the scan as an .stl or .obj depending on the modifications you want to make and the software you´ll be using. My friend, for example, used PrusaSlicer to edit this head to close any gaps and directly generate the g-code to print it.
3D printing
You can use the 3D printer to make prototypes, parts, tools, toys, etc. I wanted to print a collapsable sword since I have seen a bunch of designs on YouTube. The sword is made of different parts that can be inserted into each other to make the sword collapsable. I used the 3D printing capabilities to make the sword as a single part and avoid making the parts separately and then assembling them. I used SOLIDWORKS to design the sword. I used this image as a reference:
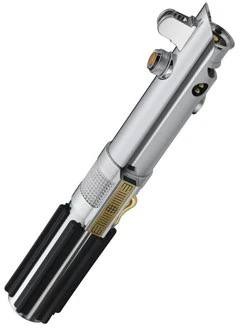
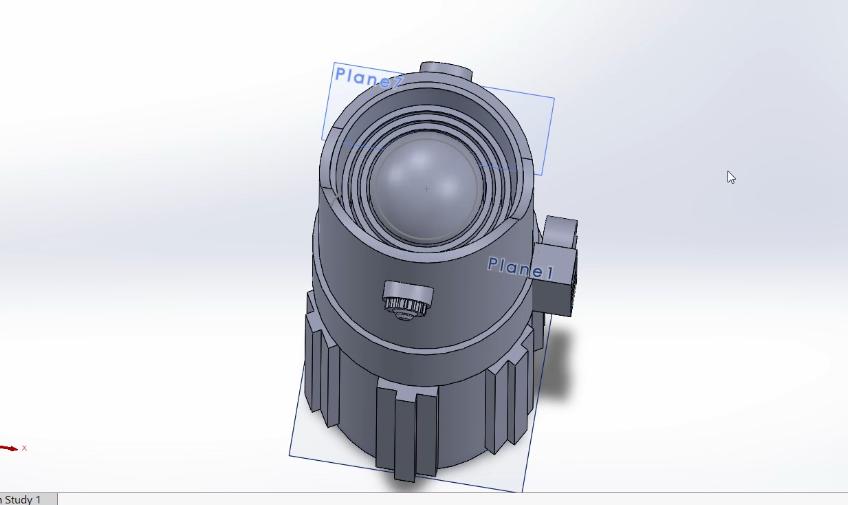
Anakin Skywalker lightsaber
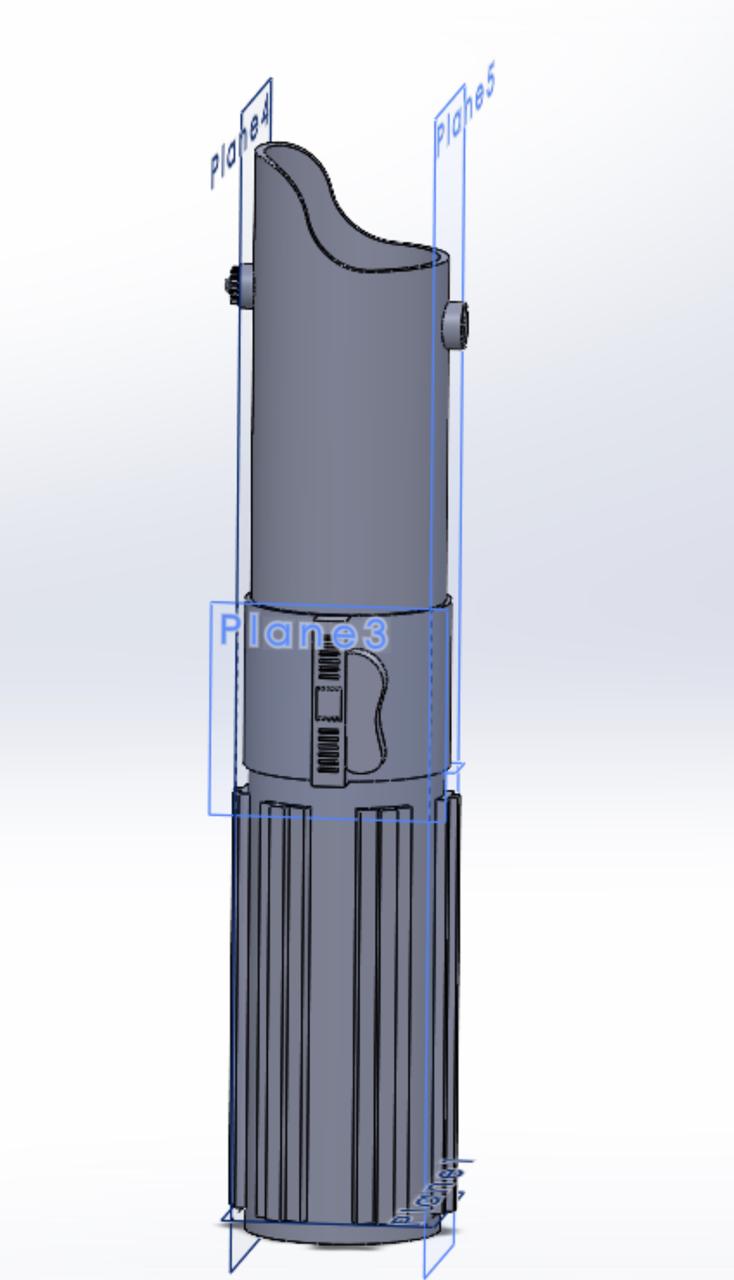
To take advantage of the 3D printing capabilities I made the hole sword as a single part on SOLIDWORKS.
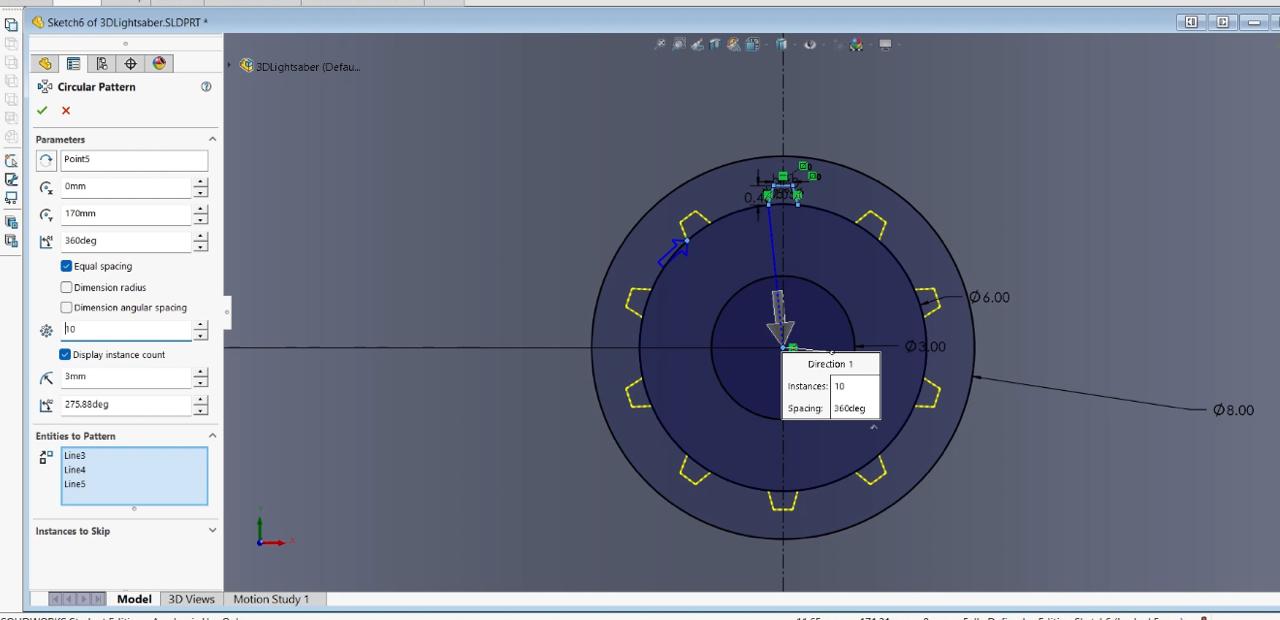
I used different tools to make the sword´s hilt:
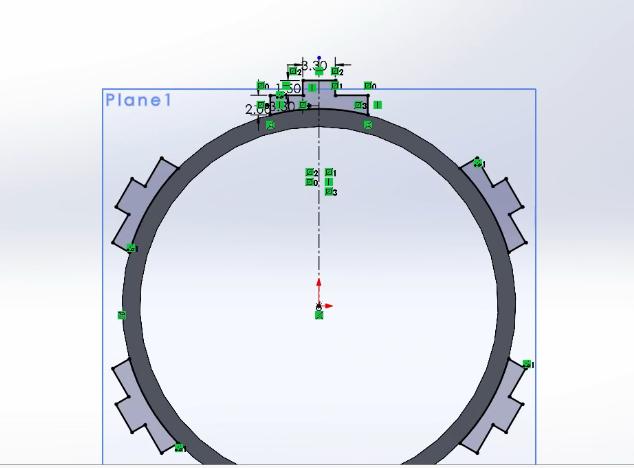
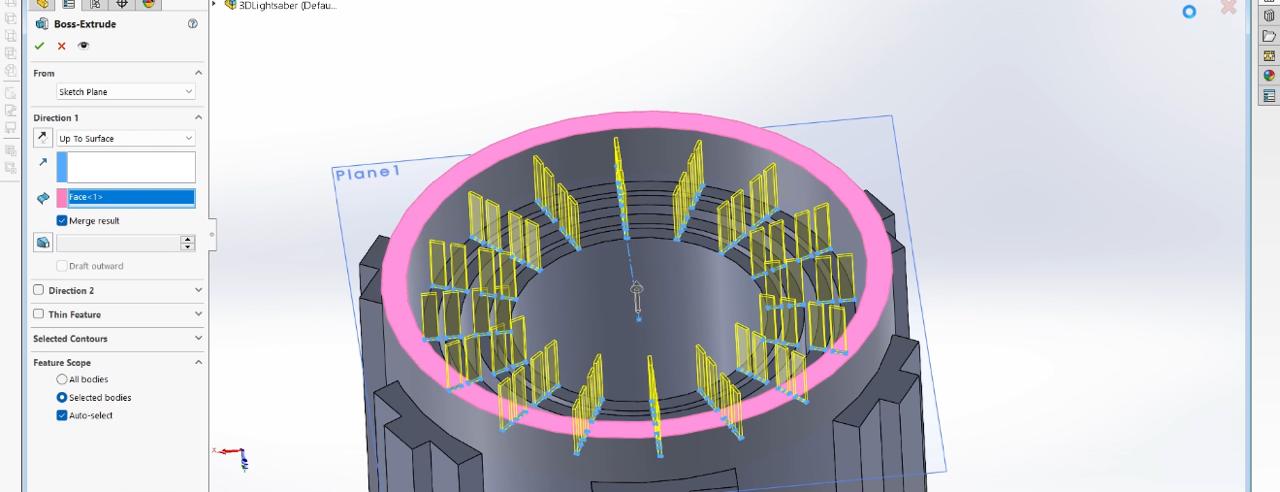
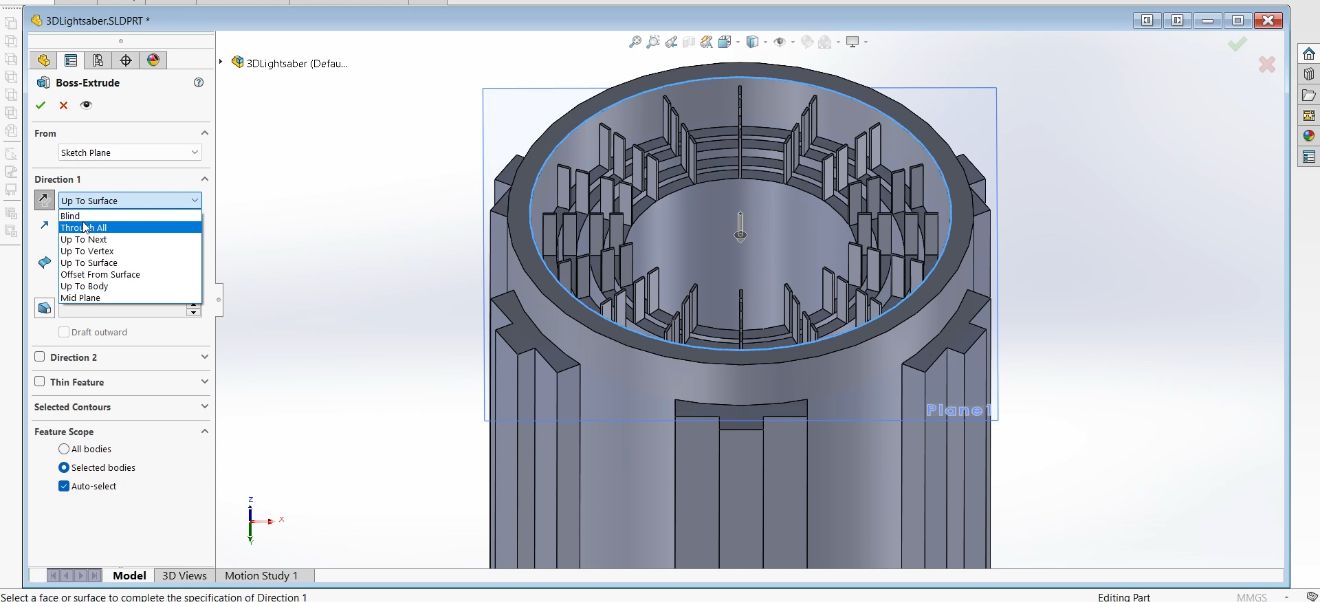
For the grip I used a circular pattern.
As well as for a button.
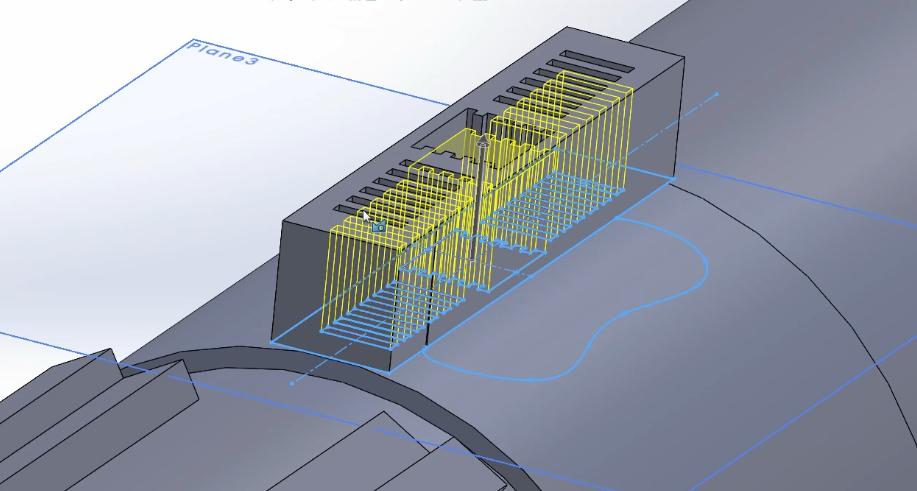
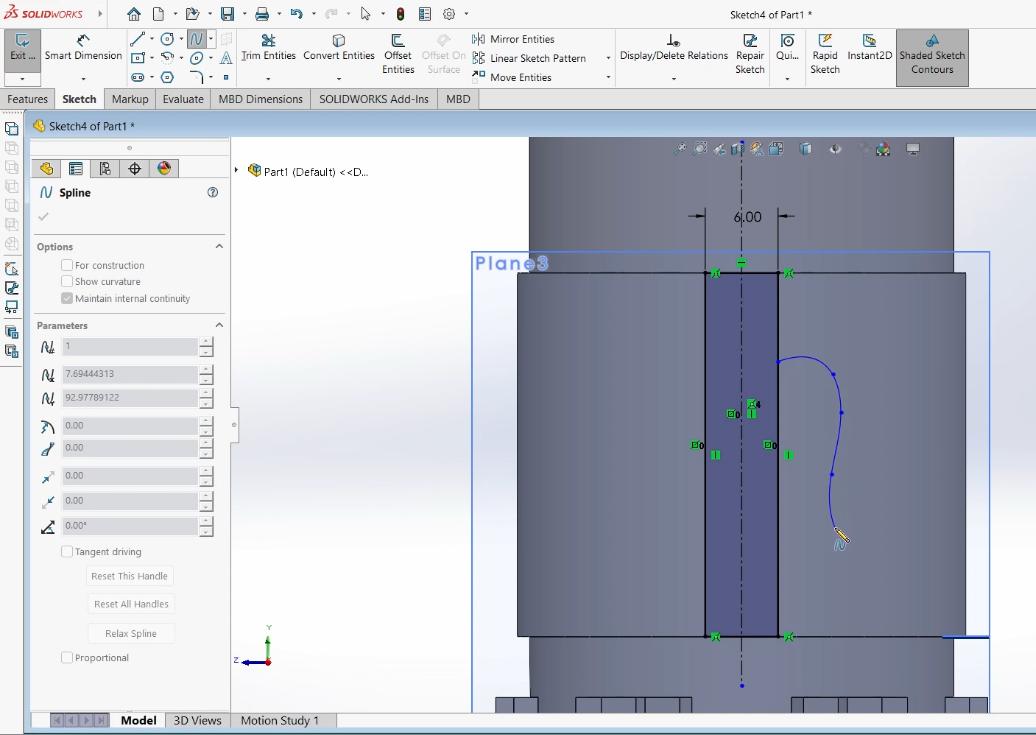
For some details I used the linear pattern and the Spline.
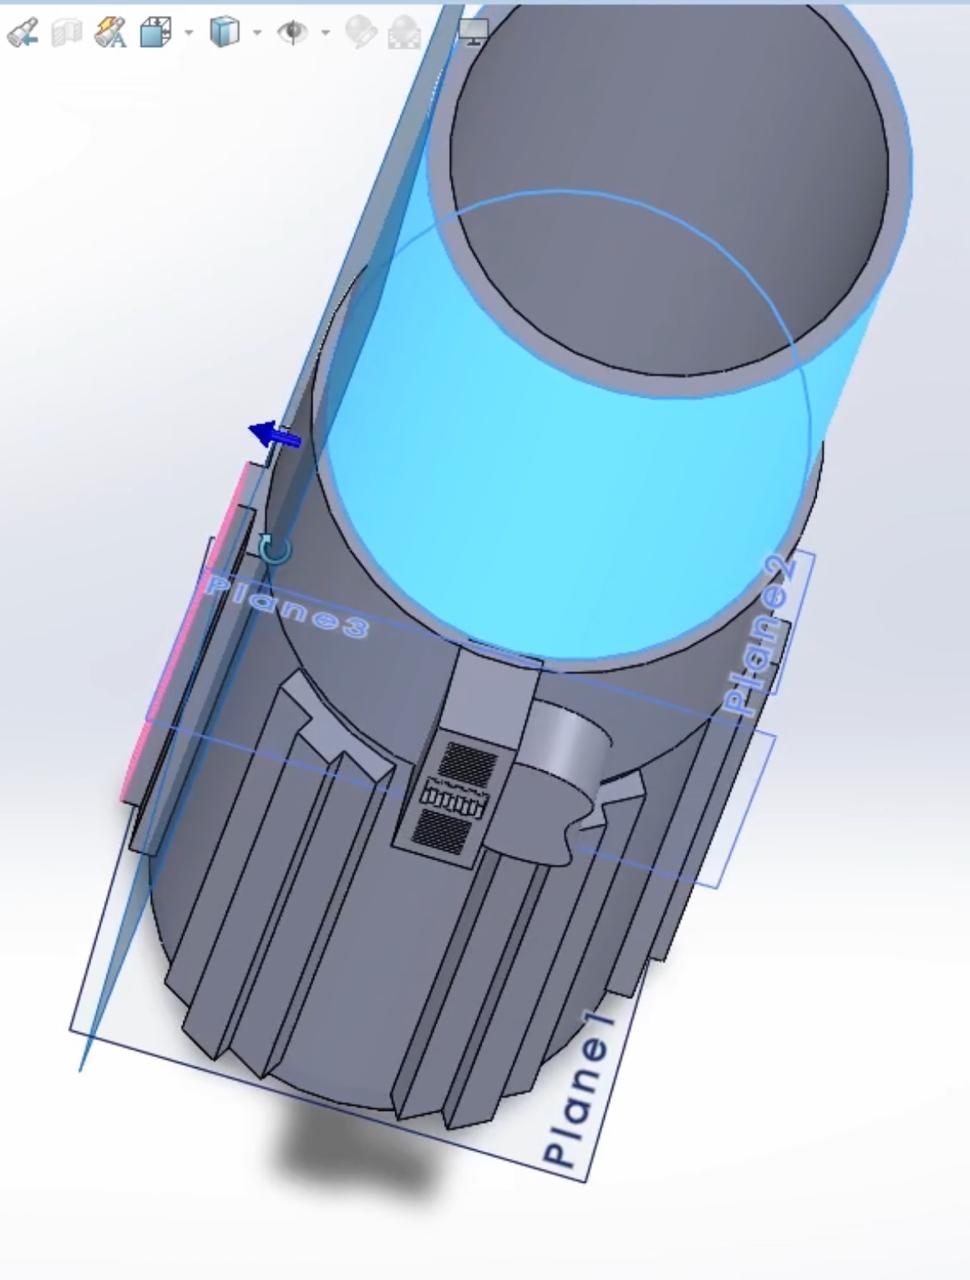
I used a lot of planes:
For the blade I used a lofted boss/base feature to make it collapsable.
Collapsable parts
Here is a small explanation on how I made the collapsable parts:
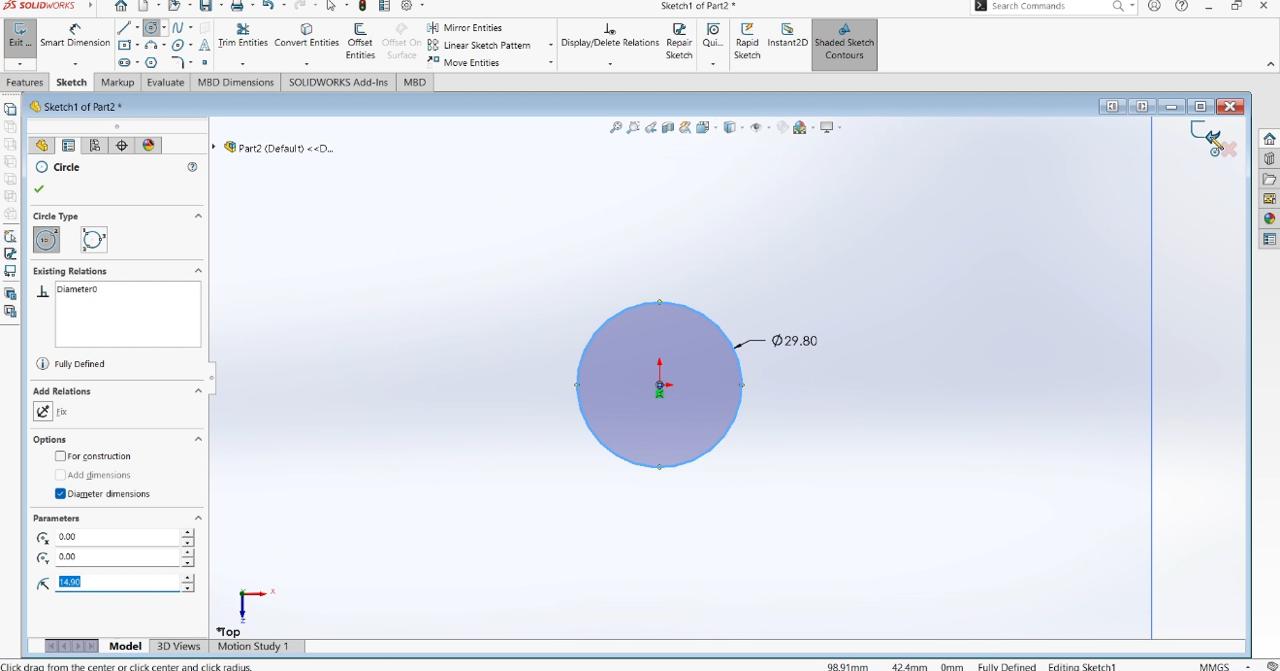
First select the "Top plane" to make a new sketch and make a circle.
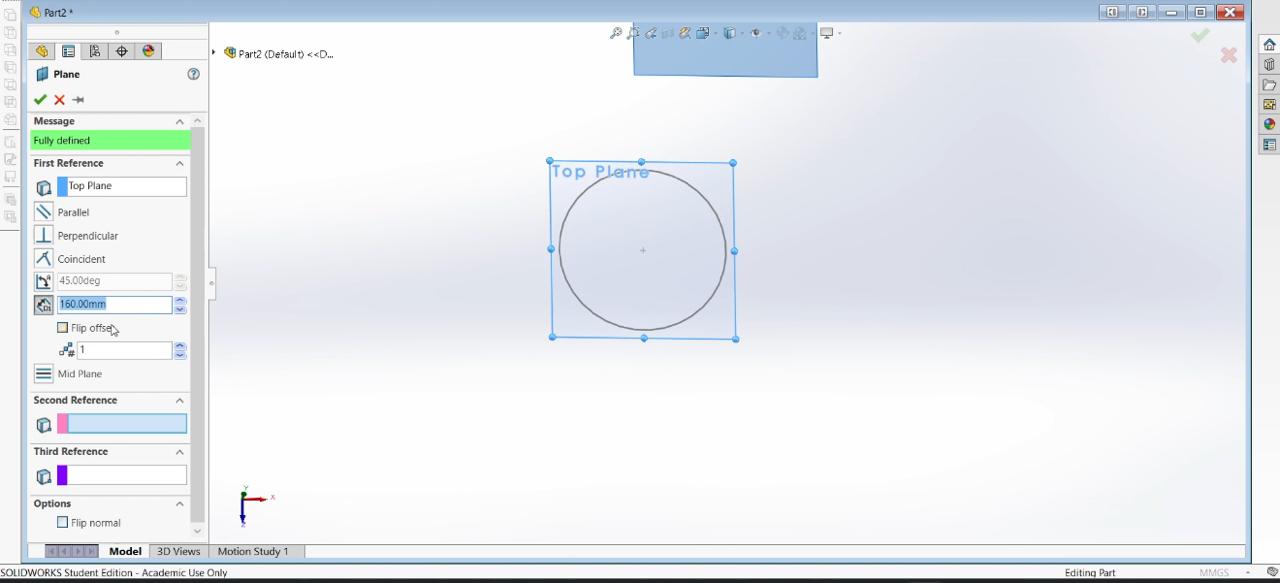
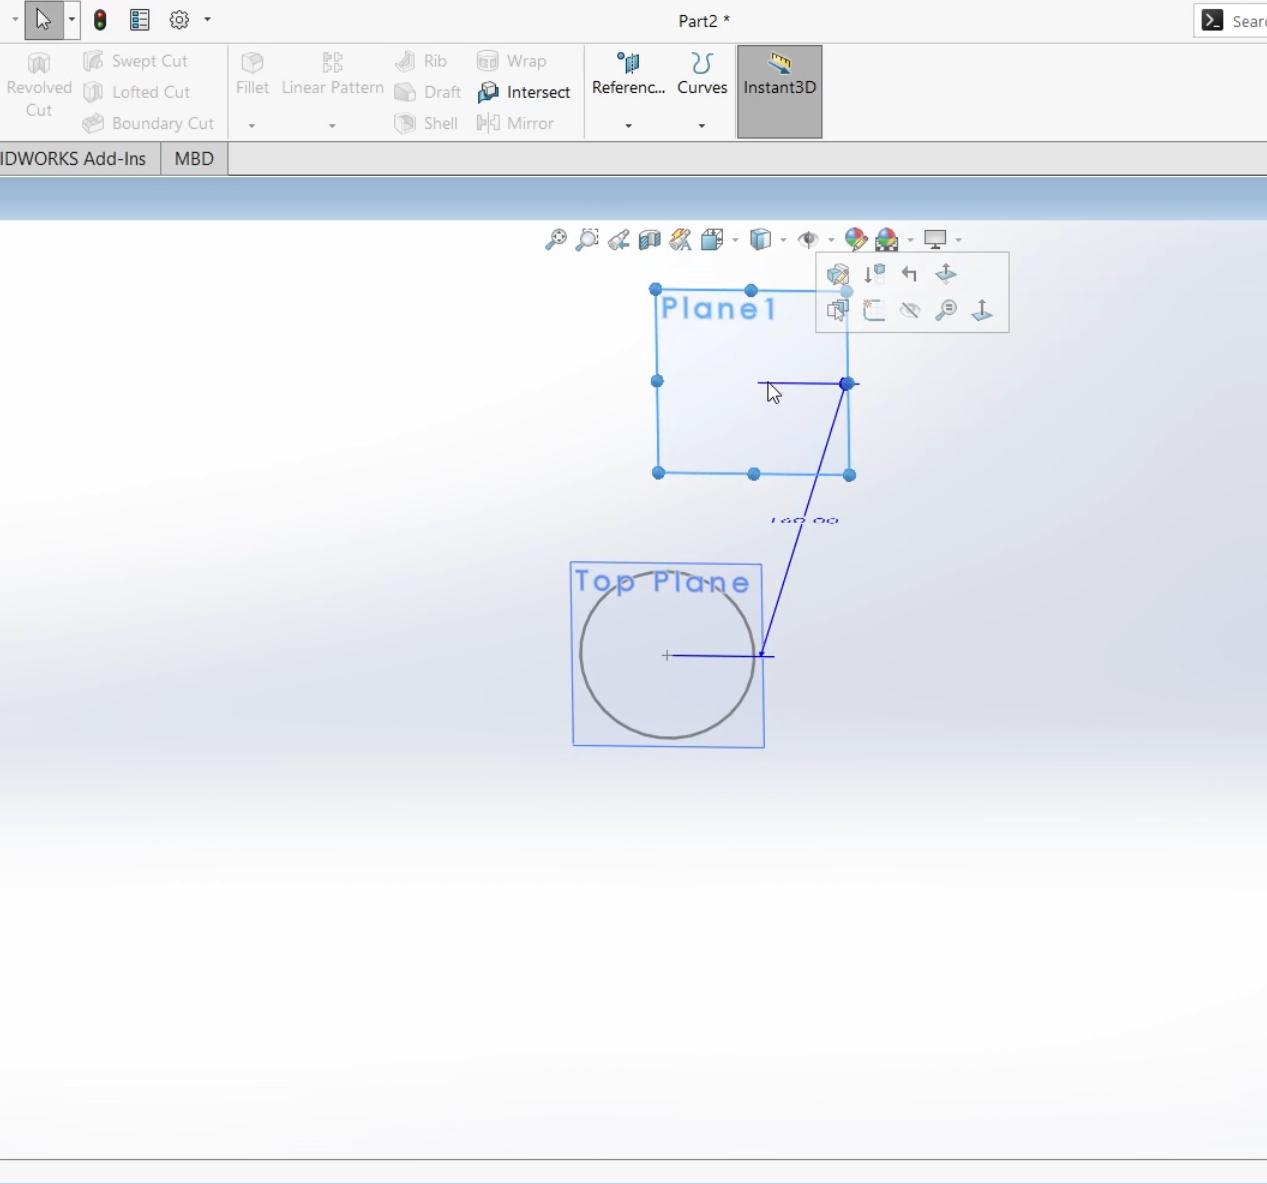
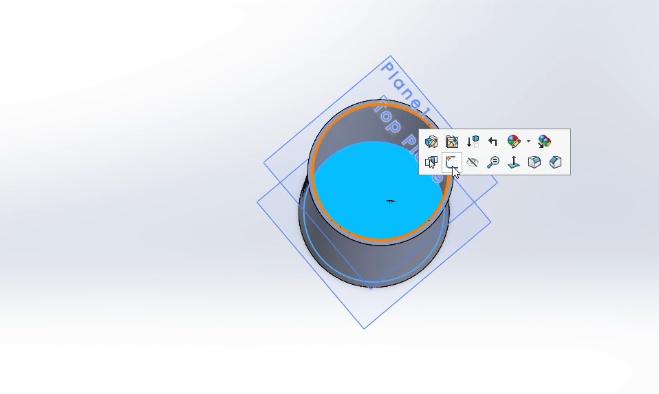
Then make a reference plane with an offset to the Top Plane.
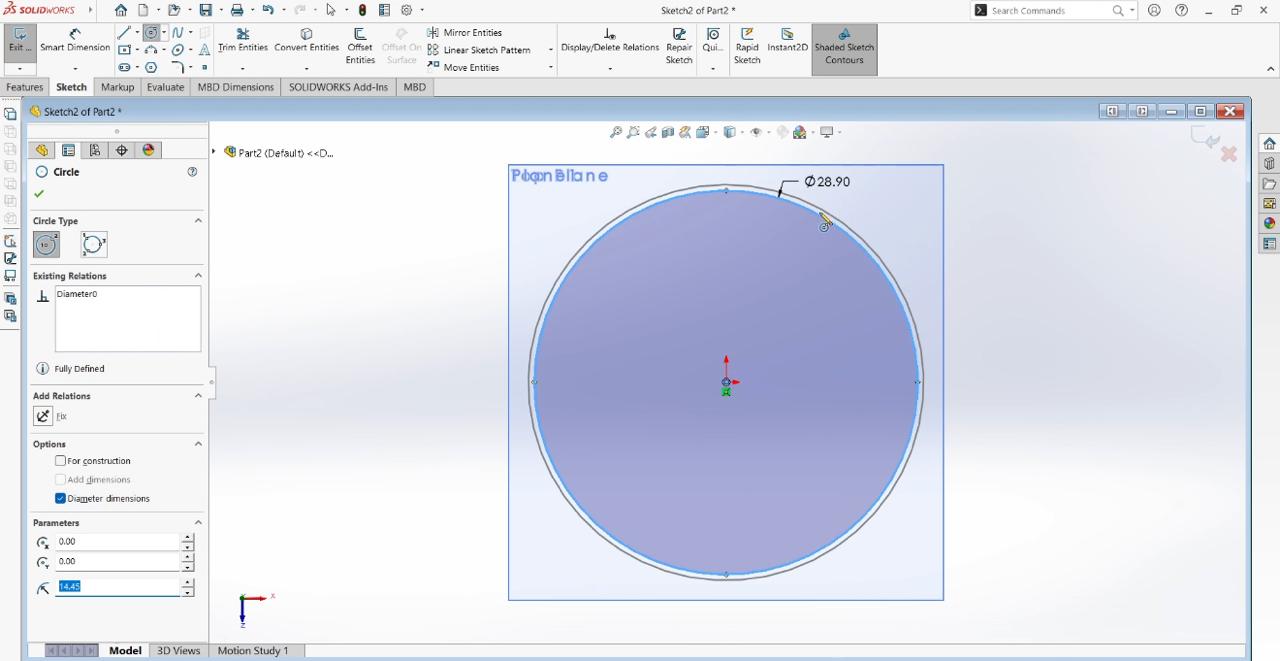
Make a sketch on the reference plane and draw a smaller circle, I made it 1mm smaller.
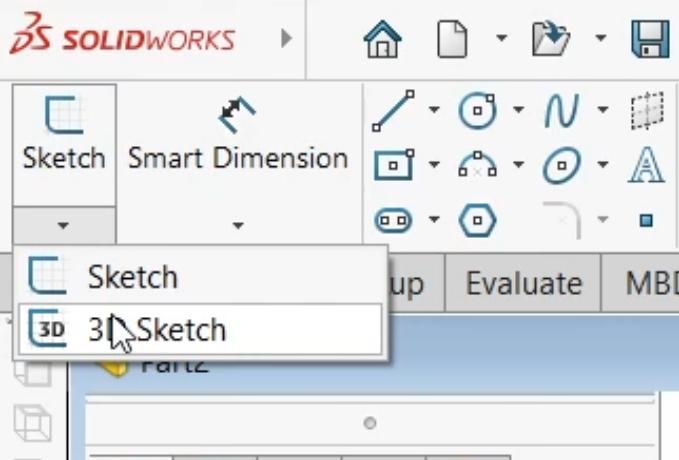
Then select 3D sketch to make a line which is going to serve as a give to the next feature.
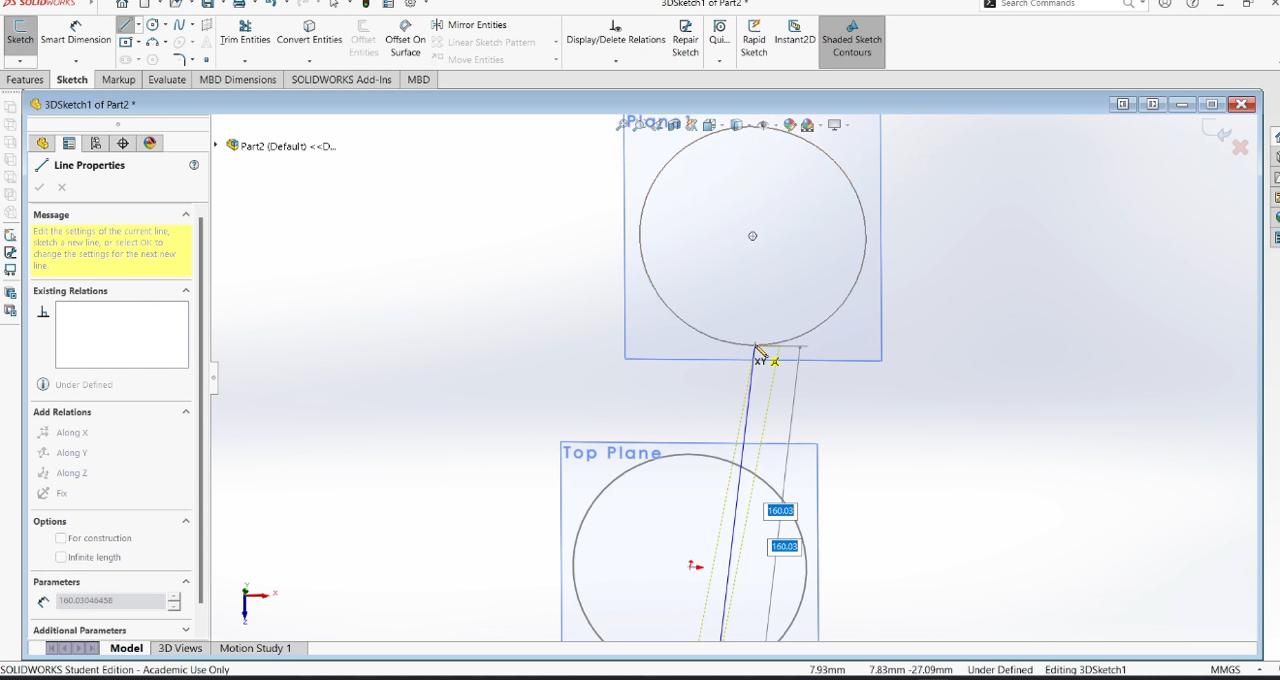
Then select the "Lofted Boss" feature and select both circles as the profiles and the line as the path.
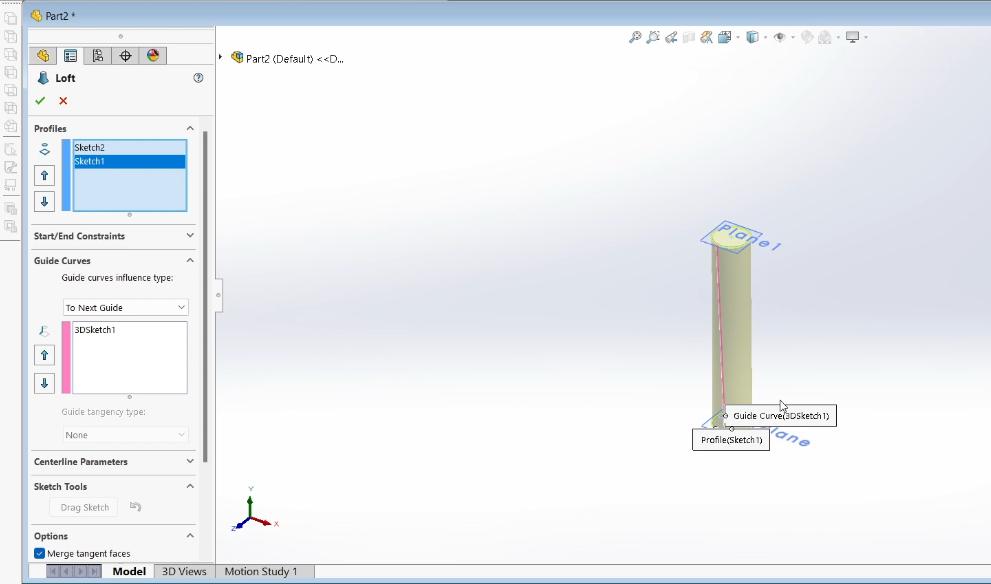
Select one of the faces to use the shell feature.
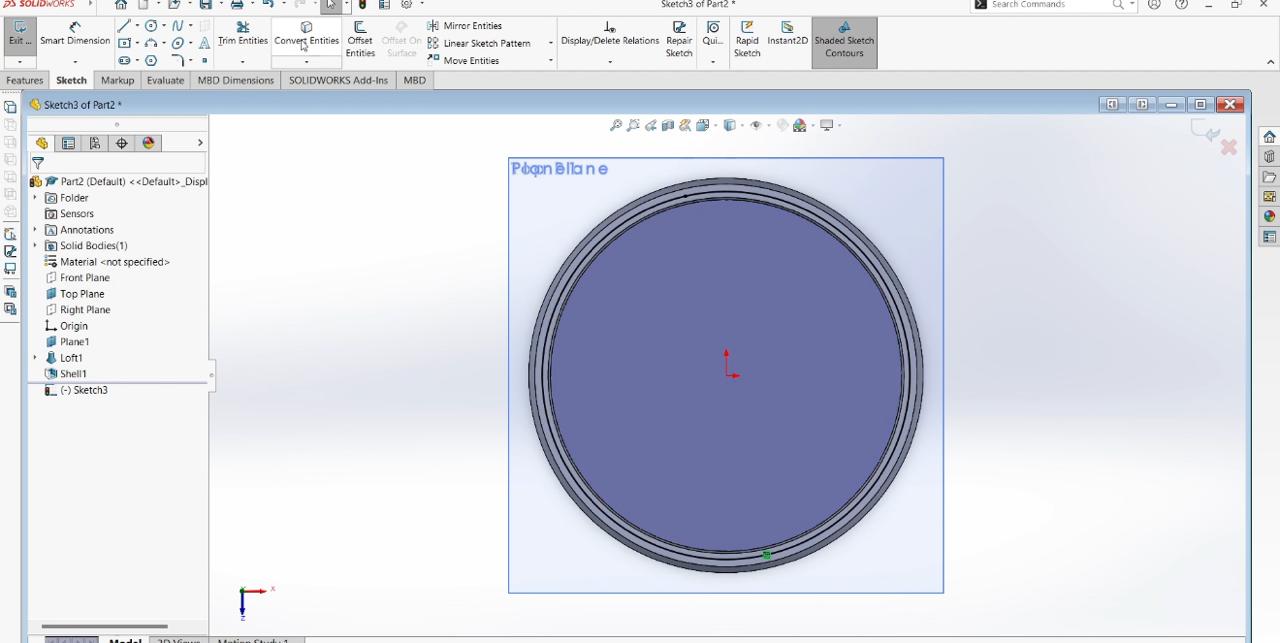
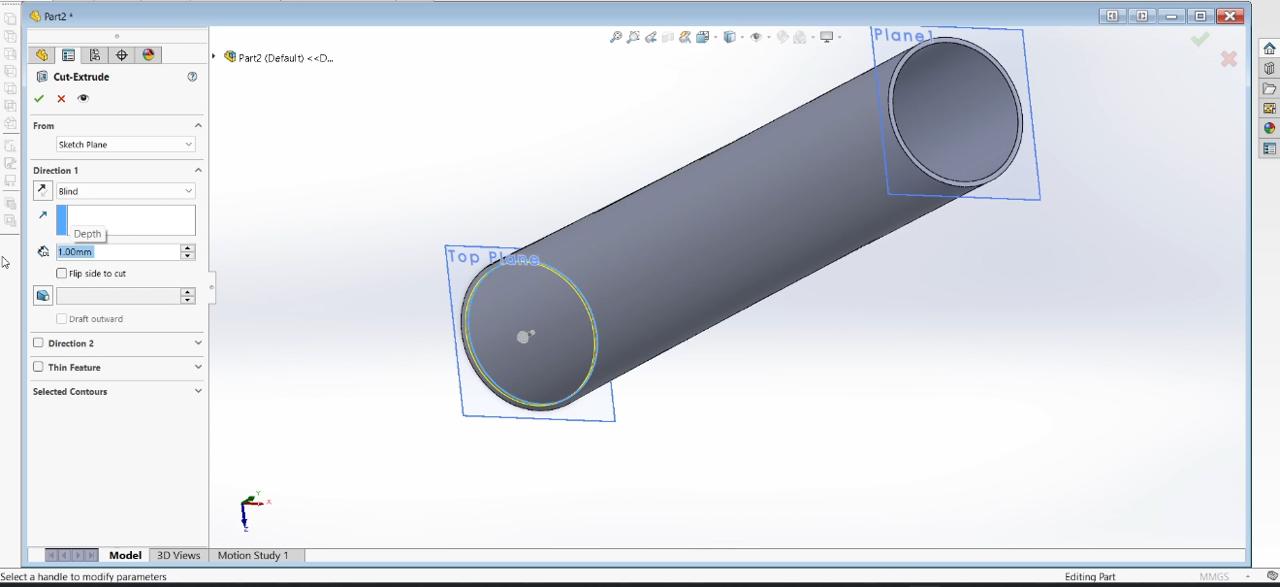
Then select the left face to make a sketch.
Use the convert entities toll to make a circle and extrude it to make the hole.
Now you have one part of the collapsable sword:
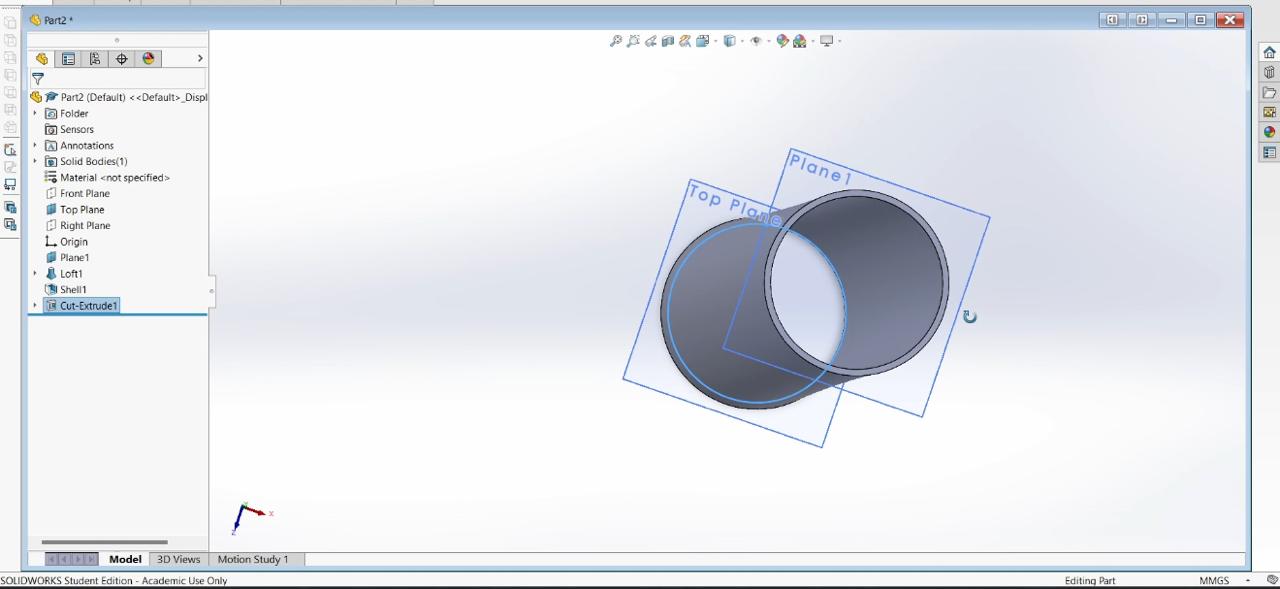
You can make as many of these as you like, I made 4 of the for the first design. Make sure the biggest circle of the next part has the same diameter as the hole of the previous part.
Here is the final result:
3D printing
Since I was going to print the whole model, I had to make sure the collapsable parts didn´t get stuck while printing. If they touched the hilt´s base, they might merge with it, so I made some extruded squares to keep them separated.
Once you have the model ready, save it as an .stl file and open it on the slicer software. I used PrusaSlicer to slice the model and generate the g-code, I used a Prusa MK4S printer. You can select the printer you are using, the material, the layer height, the infill, the supports, etc. I used a 0.2 mm layer height, 20% infill and organic supports. Once you have the g-code, save it on the removable drive and insert it on the printer. Make sure the bed is leveled and the nozzle is clean. Start the print and wait for the magic to happen. Once the print is done, remove the part from the bed and clean it.
Here is the result:
unfortunately the small squares I made on the inside where to small and tall, so it caused the collapsable parts during printing and due to the small gap there was between them at the top the ended up merging.

I printed the collapsable parts separately to see if the same thing happened, maybe also because their height.
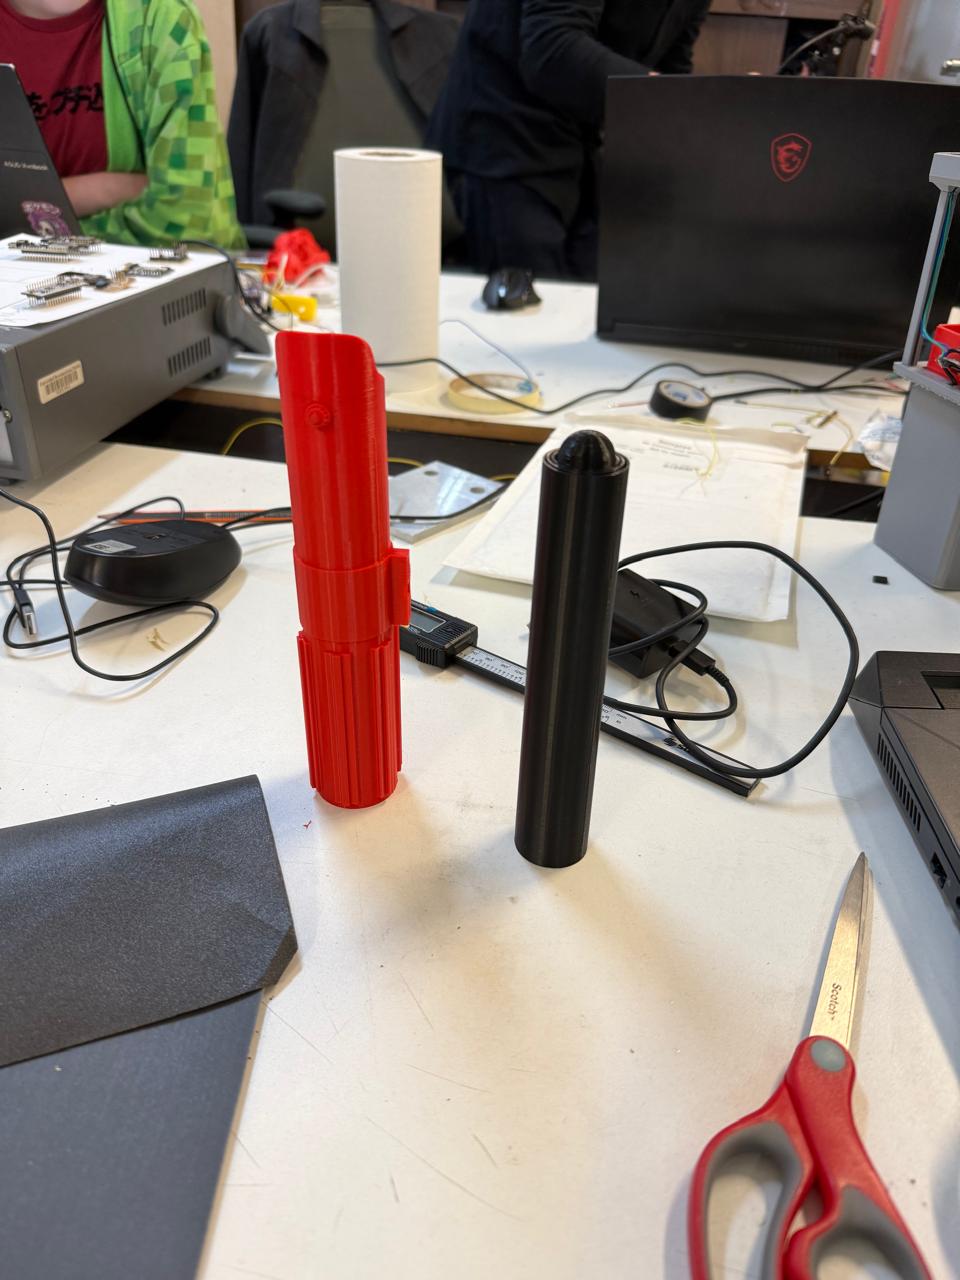
The parts where printed successfully, but I wast hard to separate them and I used sandpaper to eliminate imperfections and heated the biggest part to insert it into the hilt.
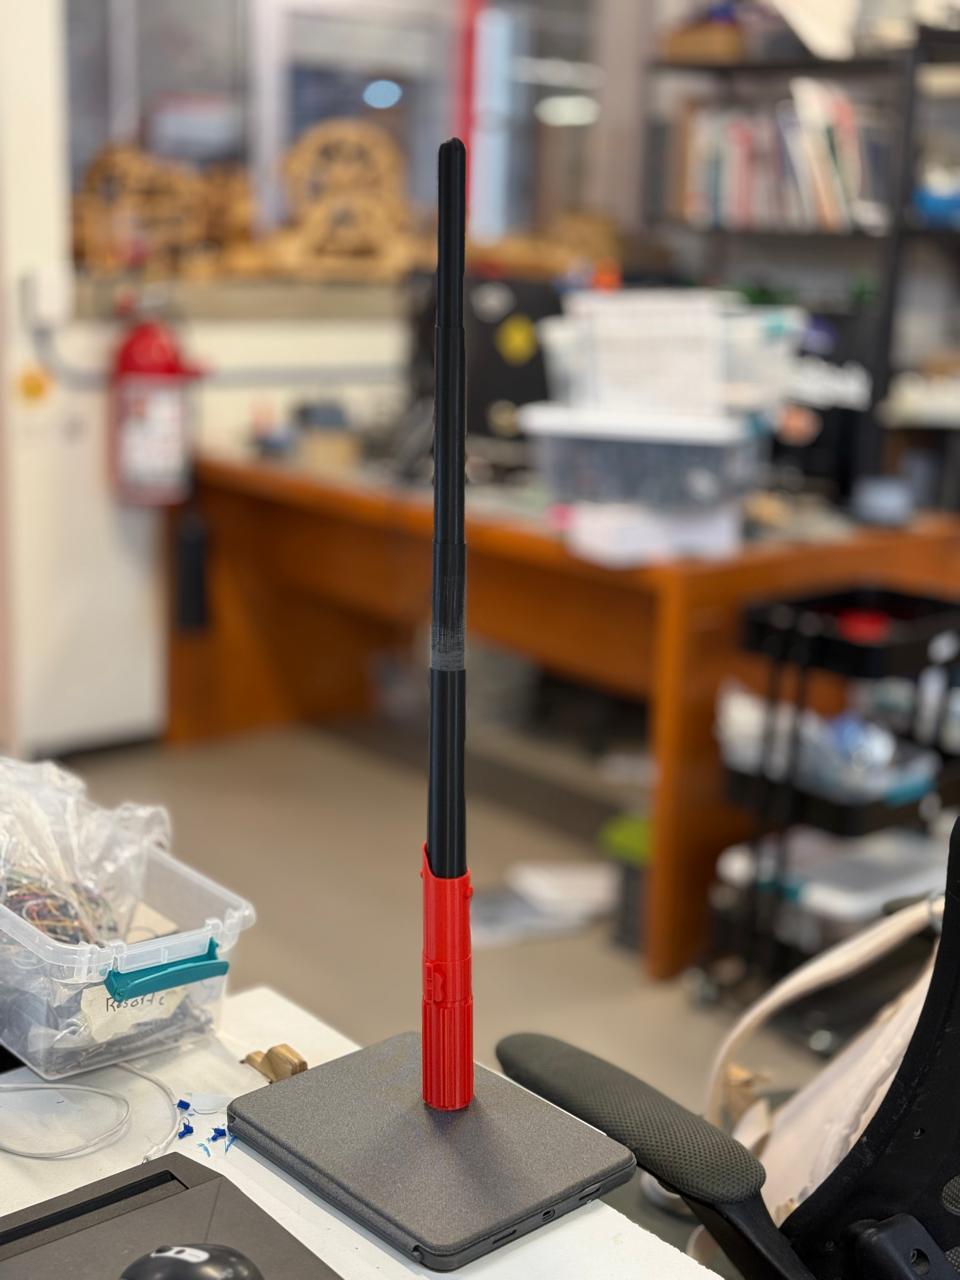
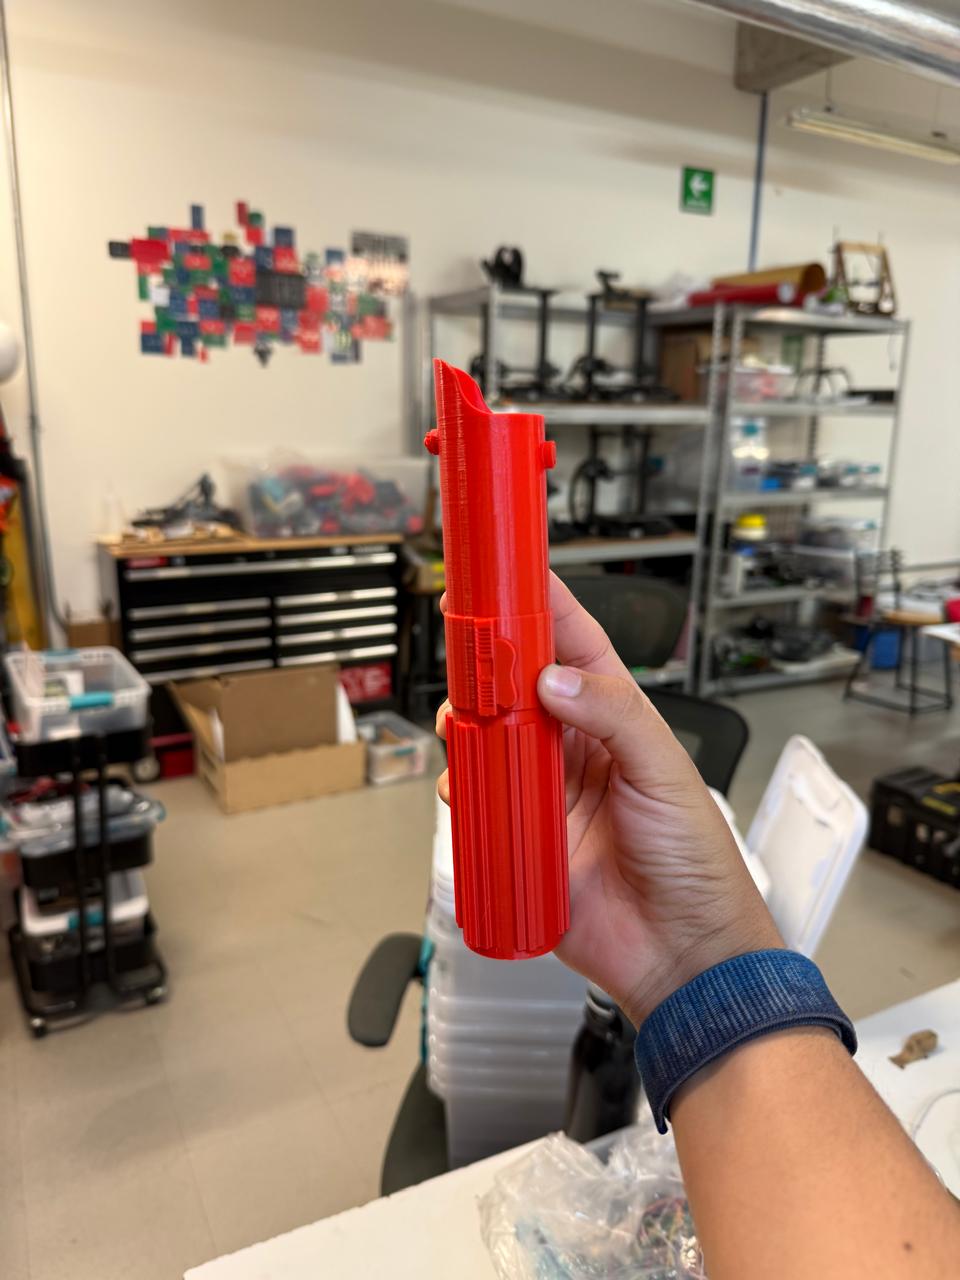
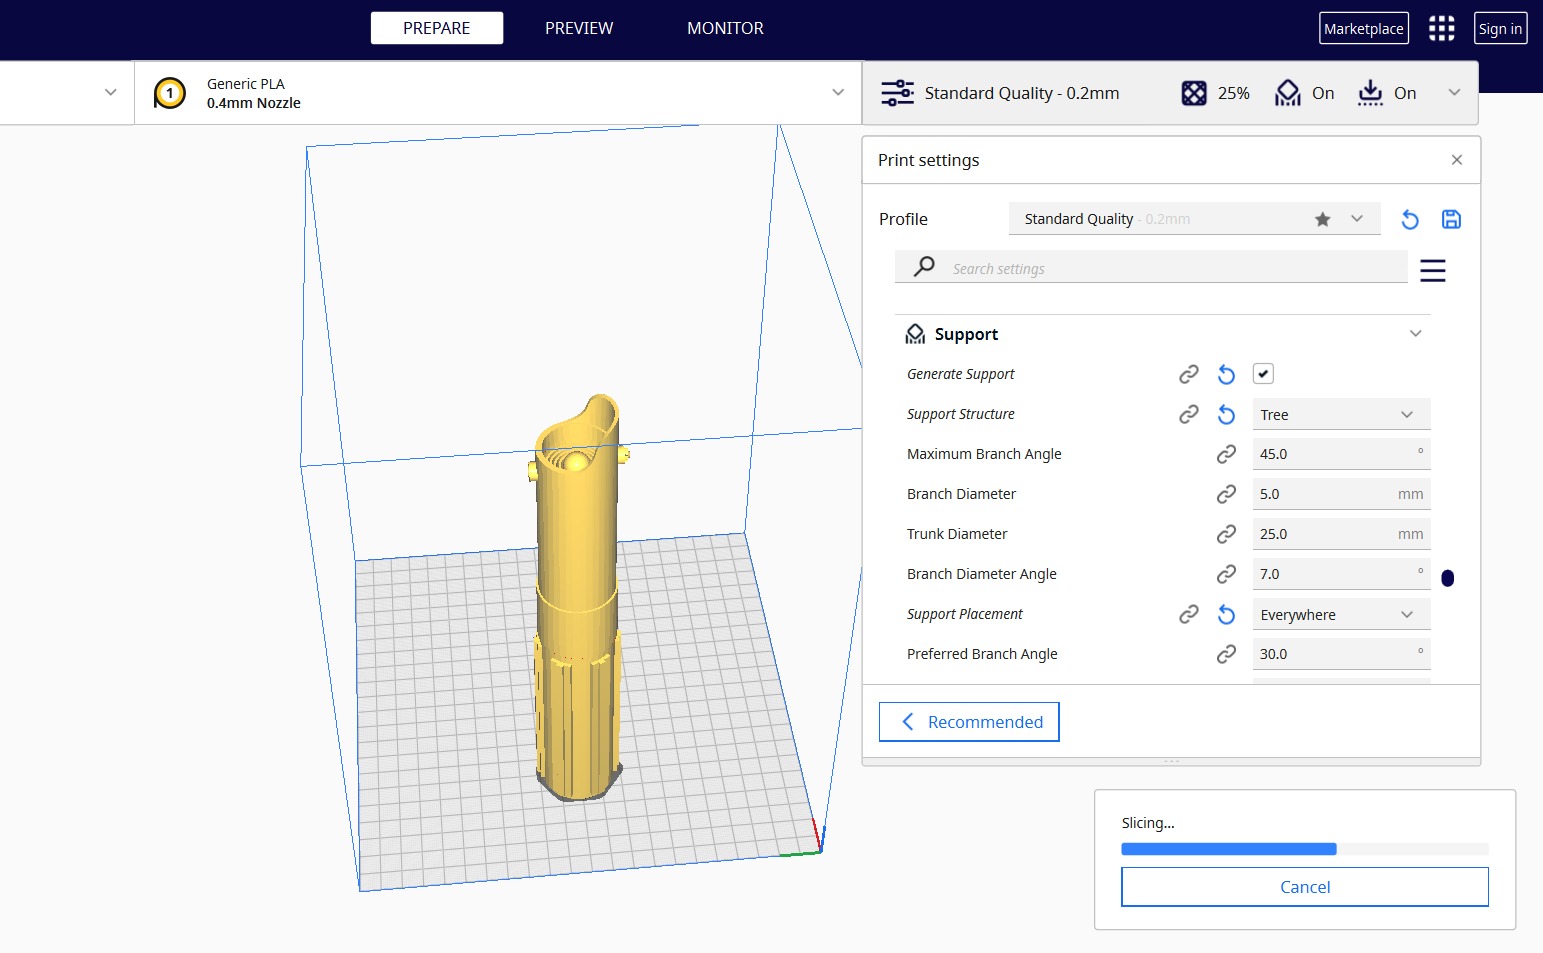
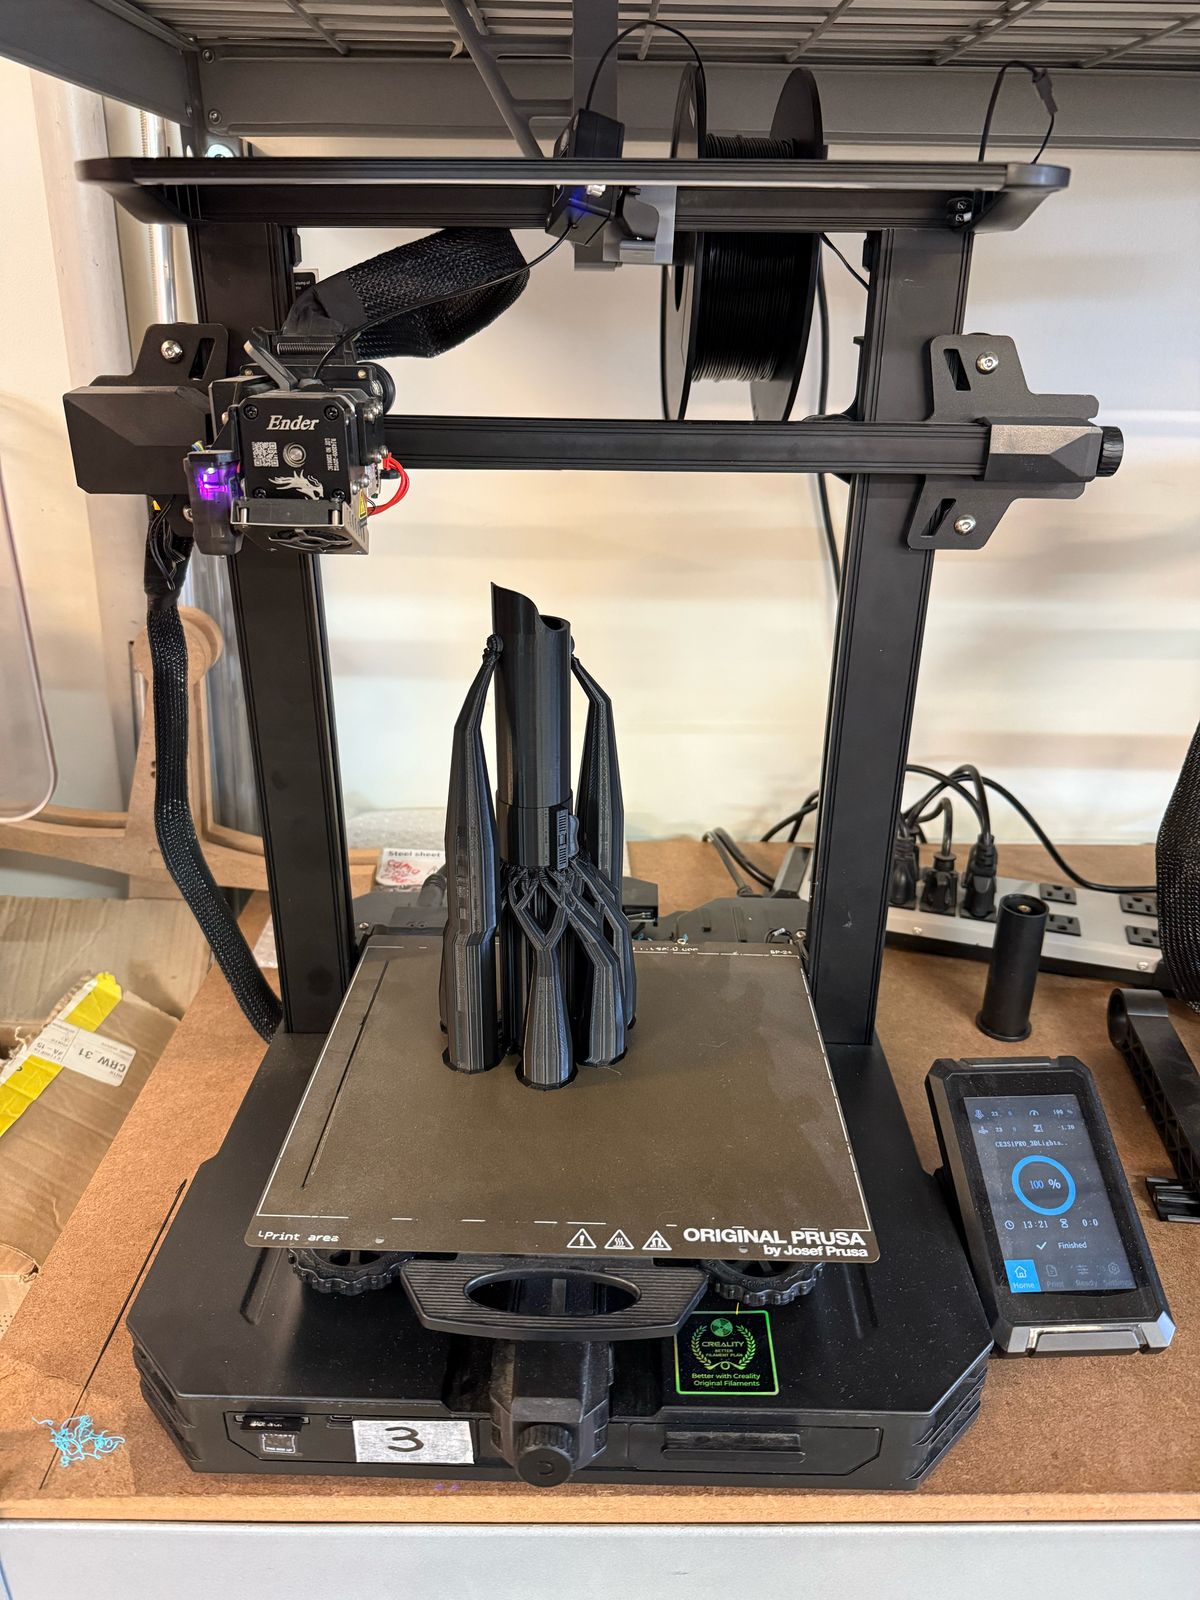
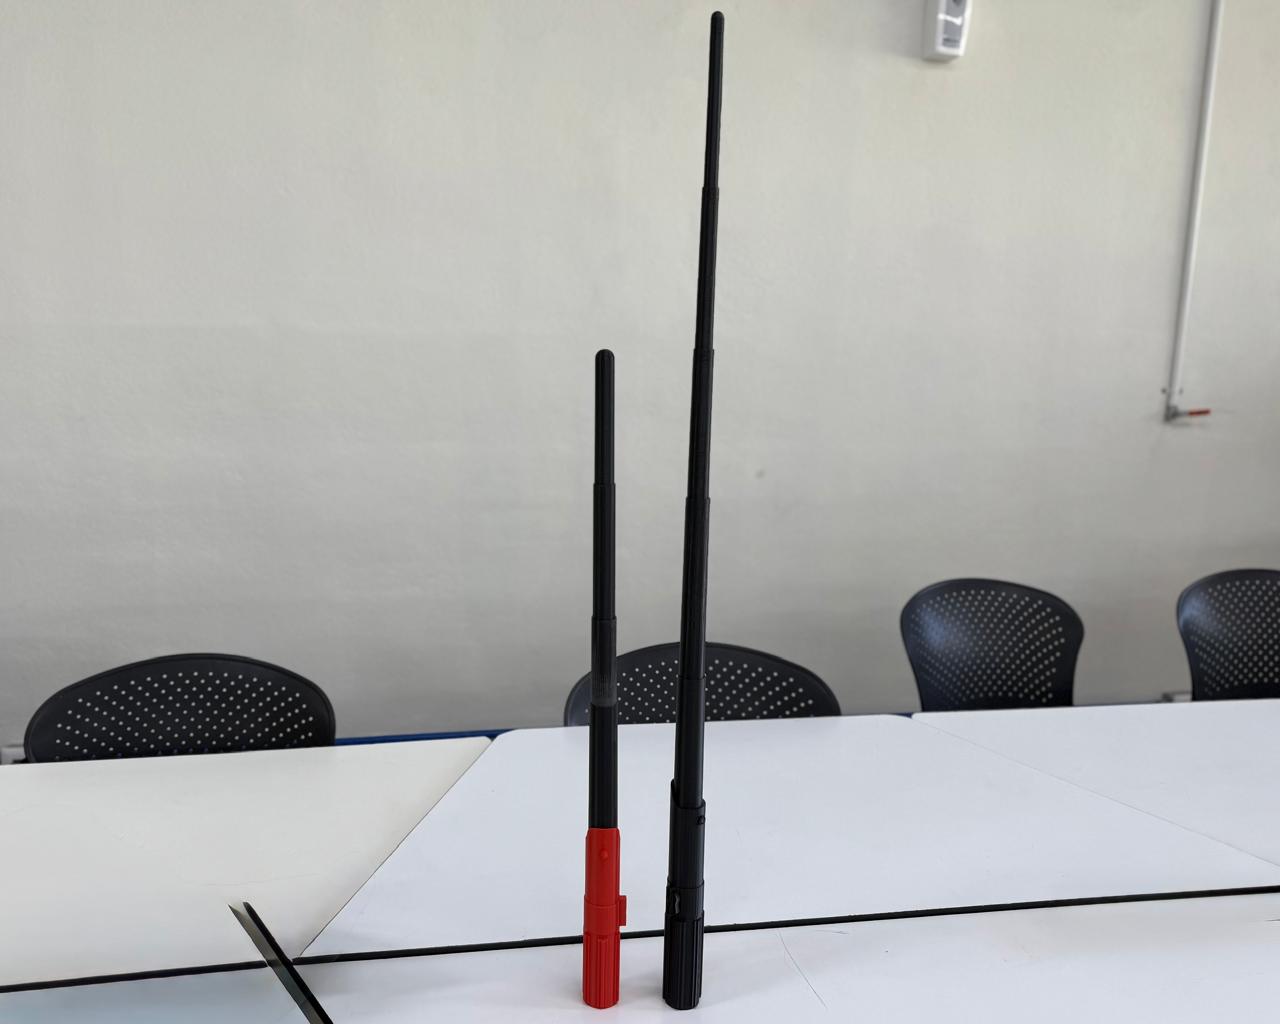
I decided to eliminate the extruded squares and let the slicer generate the supports for me. I also wanted to make the hilt and the overall saber a bit taller, instead of leaving a space of 0.4mm between each part I changed the part´s diameter to leave a bigger gap of 1mm and I added a fifth part. The first printer I used only allowed a print height of around 20cm, so I used a different printer with a print height of 25cm. Since I was going to use the Ender S3 printer, I had to use Ultimaker Cura slicer to generate a new g-code, I used 25% infill, 65 degrees for the bed temperature, and 200 for the nozzle, and I used tree supports. I changed these and left the rest of the settings as default. These are settings I had previously used for the Ender S3 printer and have worked well for me in the past, giving me consistent results.
Here is the result:

Summary
3D scanning was a really fun tool to use and create digital models, I was pretty cool to see a 3D printed version of a face. 3D printing is a great tool to make prototypes, parts, tools, toys, etc. In this week I learned how to design a collapsable sword on SOLIDWORKS and print it. I had some issues with the first print. But I learned that stronger supports are needed when you are printing a tall design like my collapsable parts. Even though for my first sword I printed the collapsable part separately, I had to use sandpaper and heat the parts to insert them into the hilt which was a bit of a hassle. For the second print I didn´t had to make extra steps, I just had to clean the supports and the print was ready. During the group assignment we learned that the printed model dimensions are different from the digital model, so it is important to take that into account when designing a part, even with the tolerances in mind I also had to separate the collapsable parts 1mm to avoid them merging during printing since 0.4mm wasn´t enough. I decided to eliminate the extruded squares and let the slicer generate the supports for me, I wanted to make the hilt and the overall saber a bit taller so I used a different printer. In the end, I was able to print a collapsable sword and really enjoyed the whole process. Although 3D printing is a great tool to make prototypes, but I think it is important to take into account it has some limitations, for example, the time it takes to print a part, the size of the printer, and the materials you can use aren´t as strong as other materials so you can´t always use it to make a final product.