3. Computer-controlled cutting
Computer-controlled cutting is a manufacturing process that uses a computer to control a tool to cut materials. for this week I used a laser cutter and a vinyl cutter to make different things.
Laser cutter
I´ll be using a CFL-CMA1390T C02 laser cutter, with a work area of 1.30 x 0.90 meters, cutting speed of 0-36,000 (mm/min) and cutting thickness of 0-25 mm. The cutting speed is the speed at which the laser beam moves across the material. The cutting thickness is the maximum thickness of the material that the laser cutter can cut. The laser is located behind the machine, not on the cutting head, which means that the laser beam is redirected towards the nozzle using mirrors. The laser path is not covered, so anything that may interfere with its path can get burnt. Avoid any contact with the laser at anytime. We also did a group assignment to test the machine and some research for this week you can find it here
I focused the laser nozzle with a USB drive, since it is 5mm thick and the manufacturer recommends a distance of 5 mm between tne nozzle and the material.
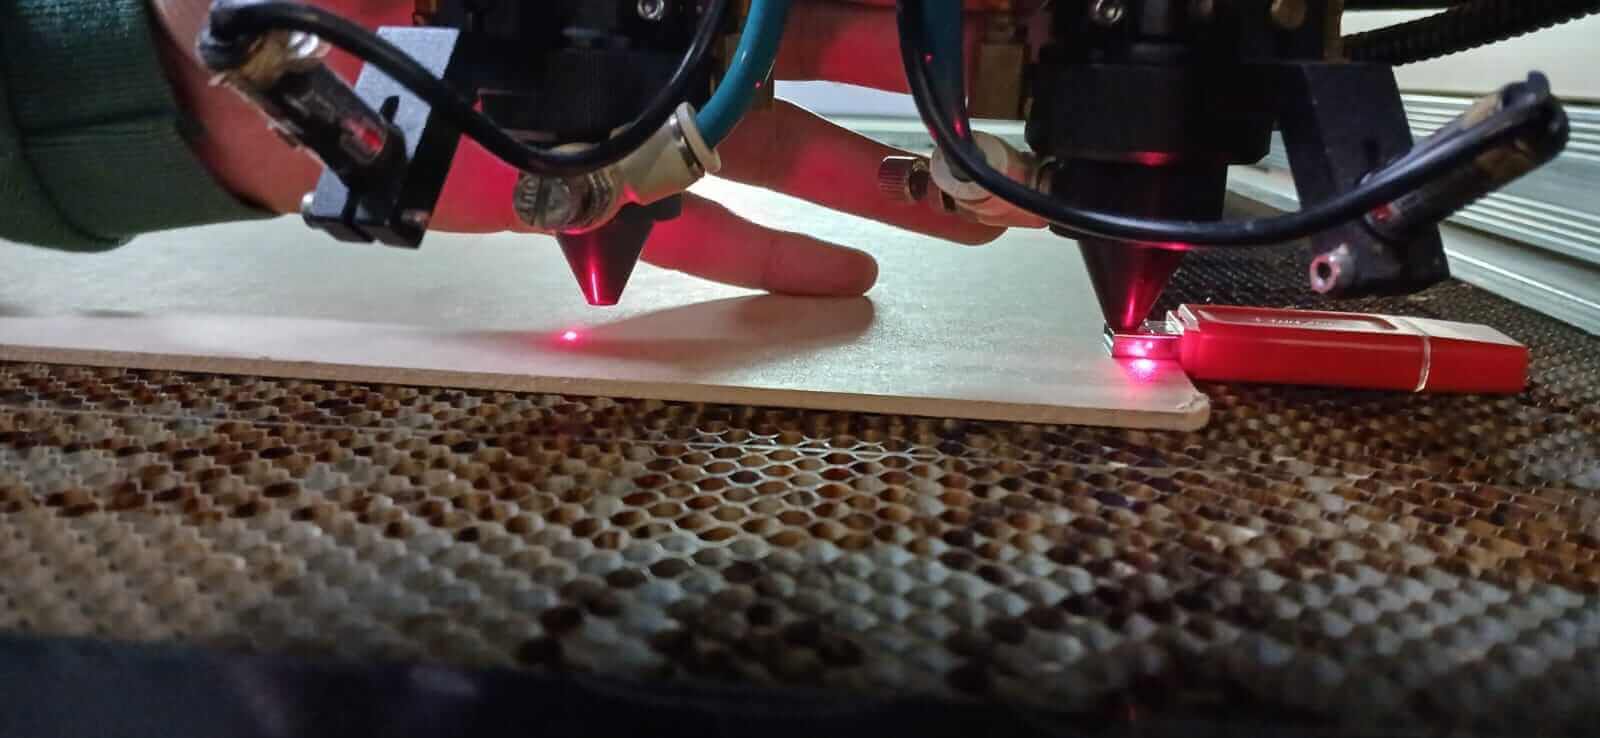
Make sure the laser is if when inserting the material.
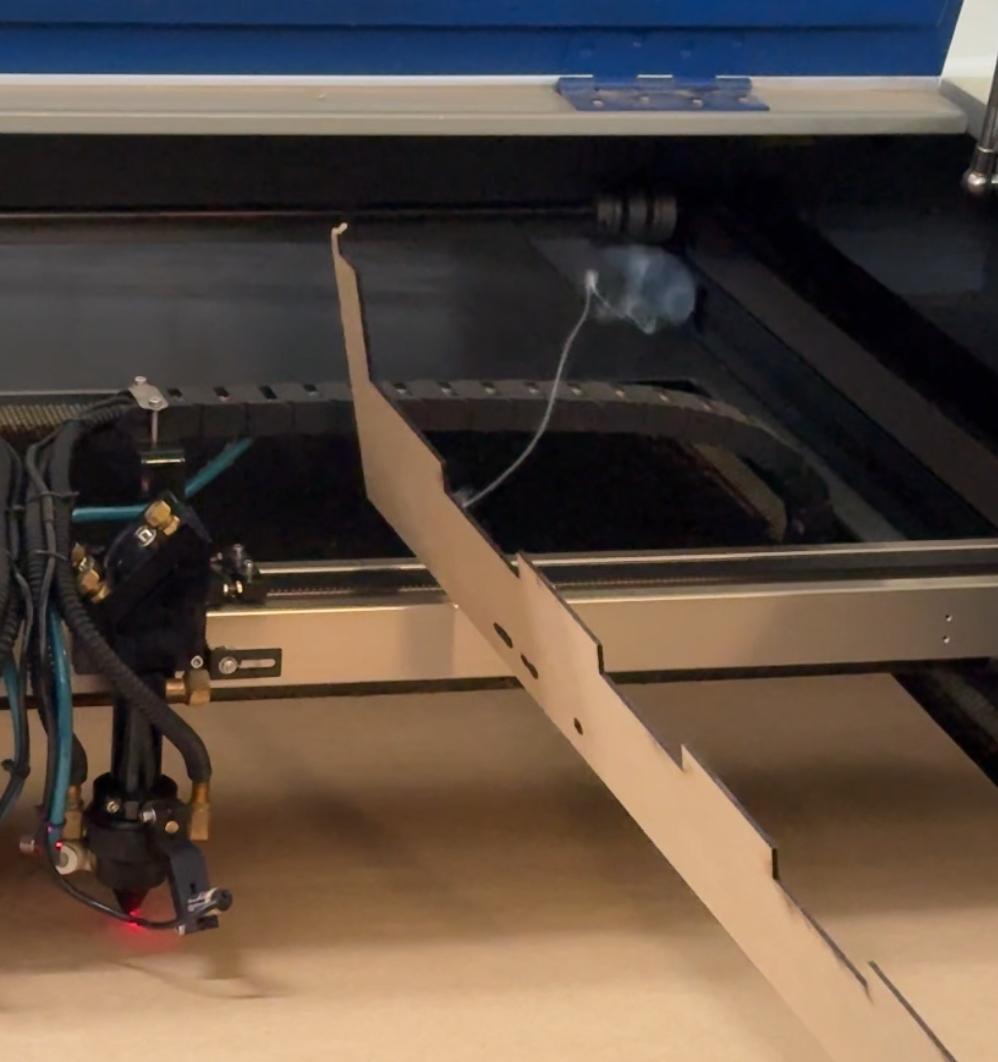
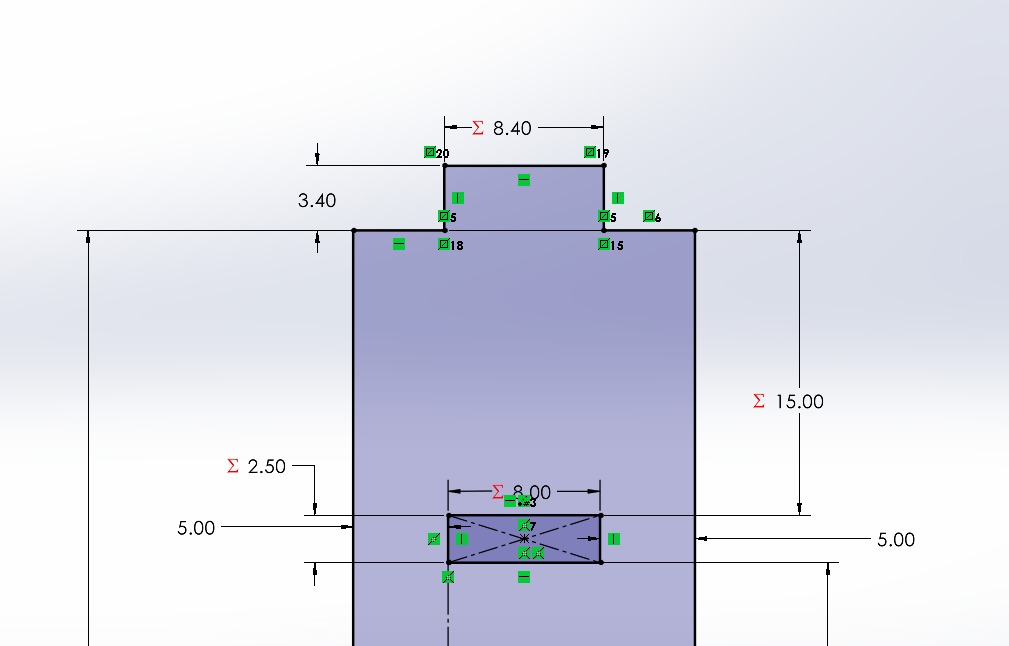
For the first test I used a 2.5mm MDF board, I used the following settings: 60% power and 40 mm/s. I made a fit test with some pieces, I used SOLIDWORKS to make them and exported the files as .dxf
The fit test was successful, and helped me to select the best dimensions for each piece:
| Component | Thickness | Width | Length |
|---|---|---|---|
| Plug | 2.5mm (MDF thickness) | 8.4mm | 3.4mm |
| Socket | 2.5mm (MDF thickness) | 8.4mm | N/A |
Laser cut Roller coaster
I decided to try and make a roller coaster using MDF cut pieces. I used Procreate to make a sketch of the pieces I would use:

I made a sketch of the different parts in SOLIDWORKS, then I exported each piece as a .dxf file.
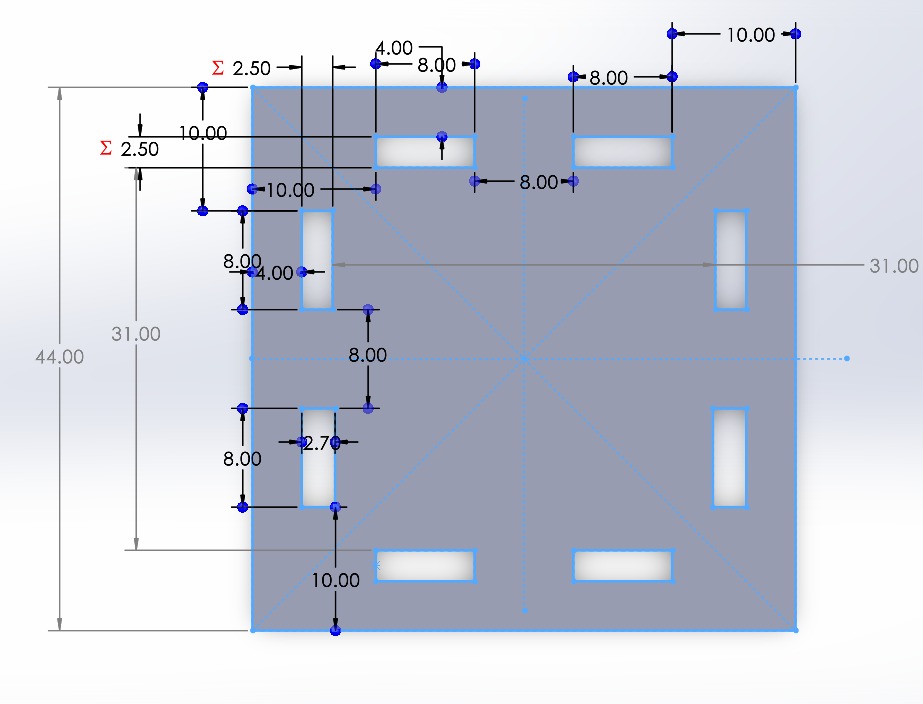
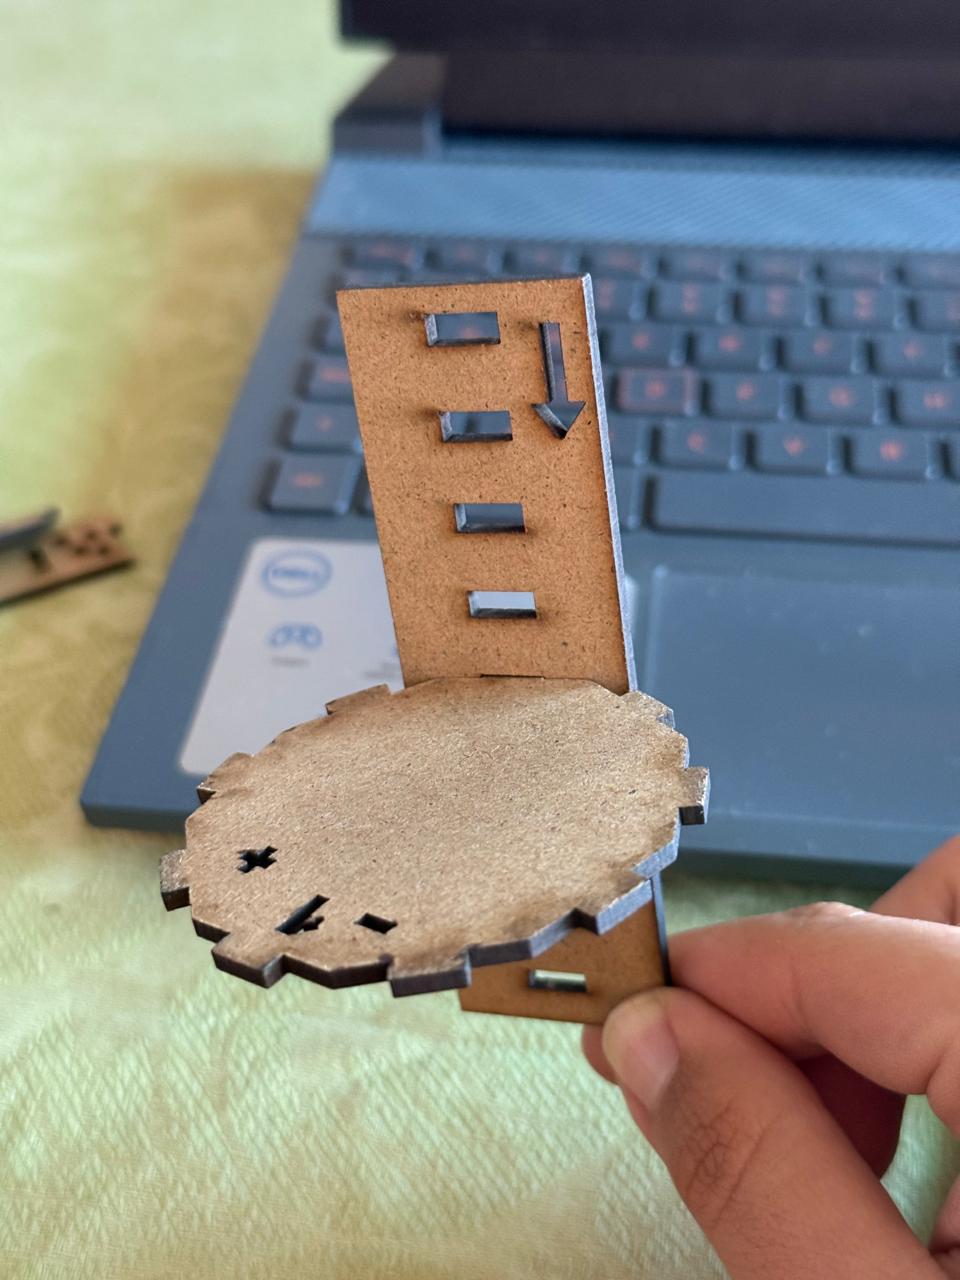
After making the fit test I made a square with two holes in each side. These part will serve to fix the columns in place.
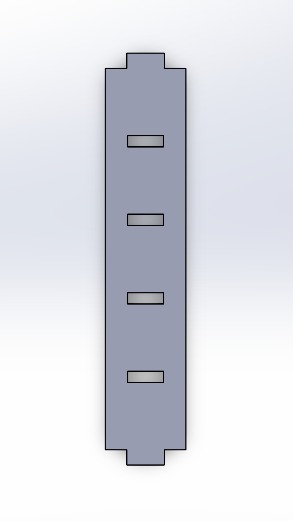
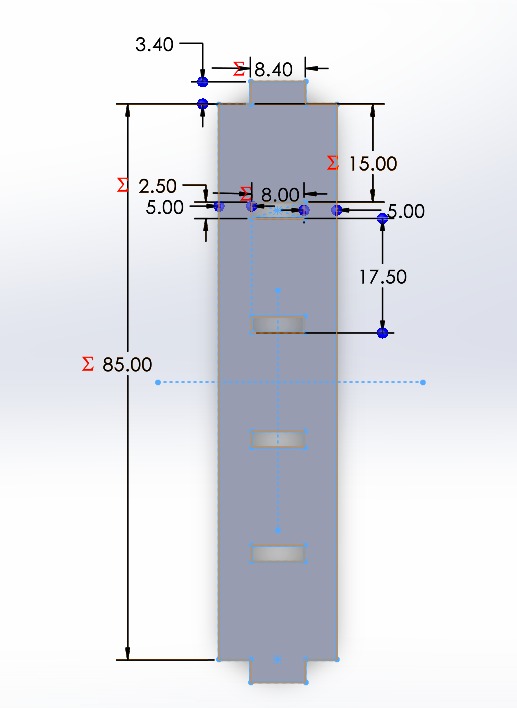
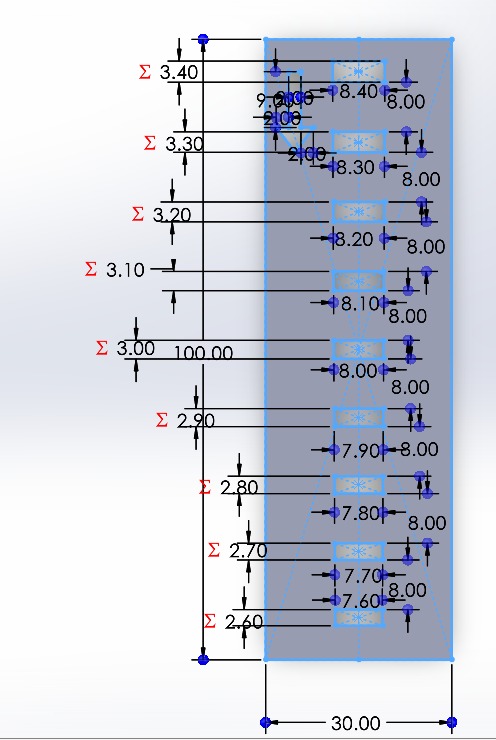
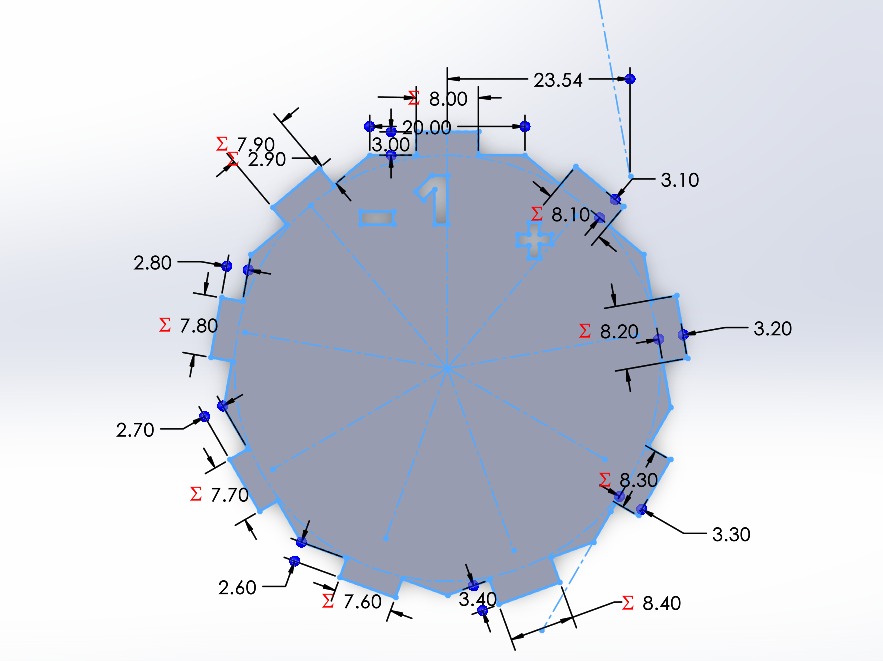
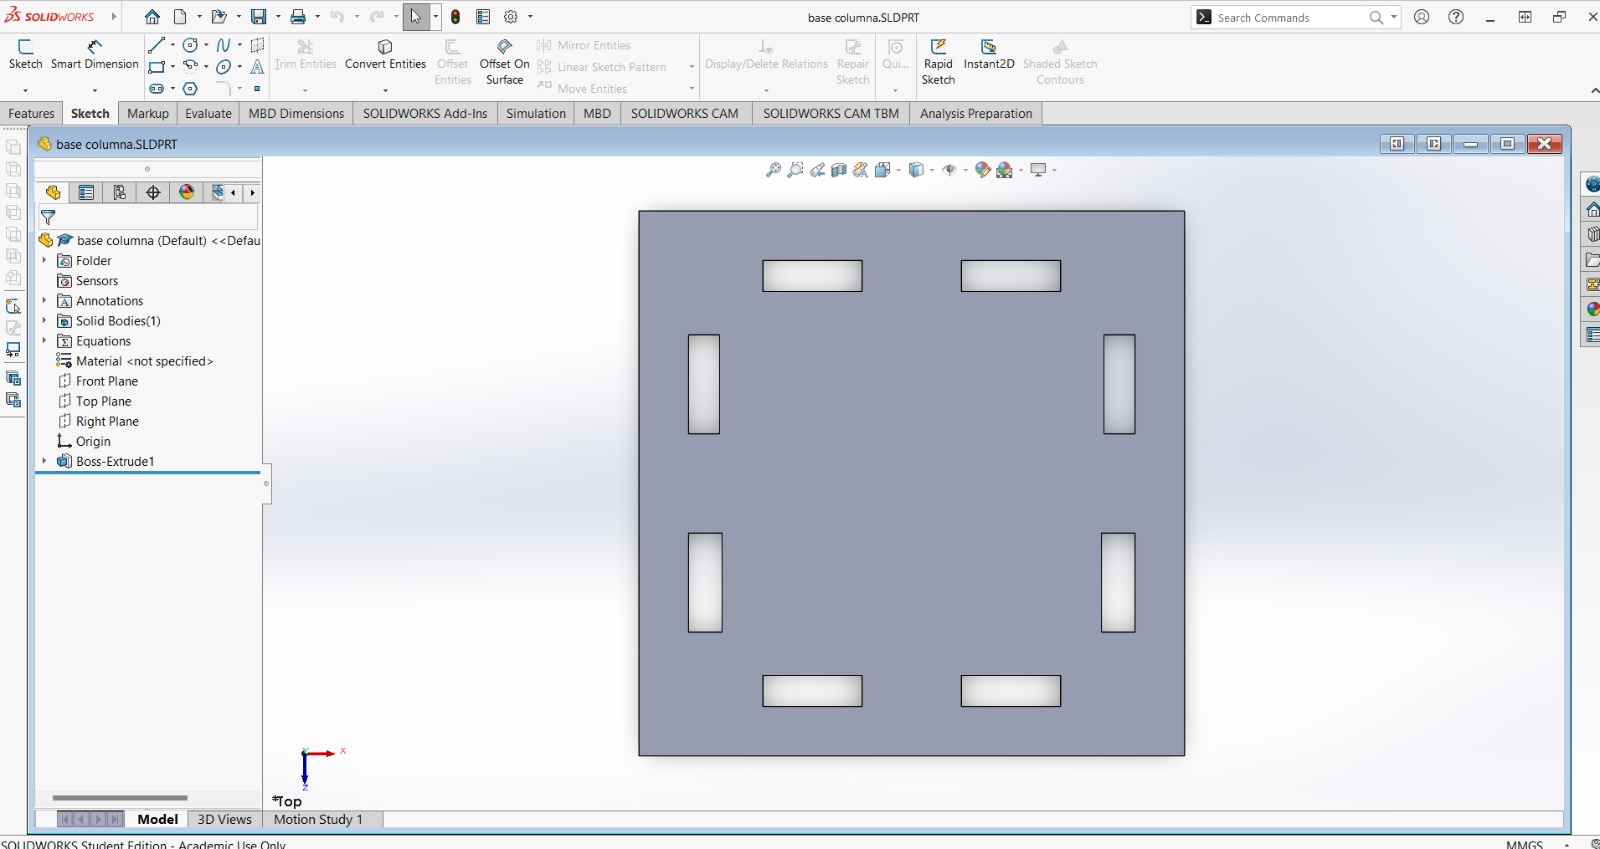
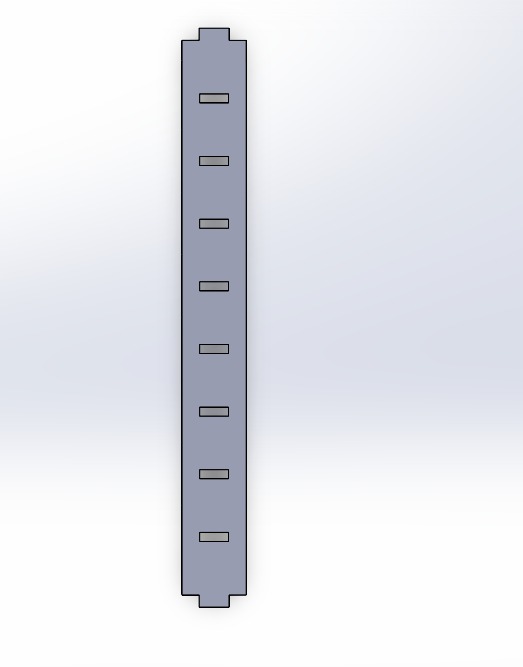
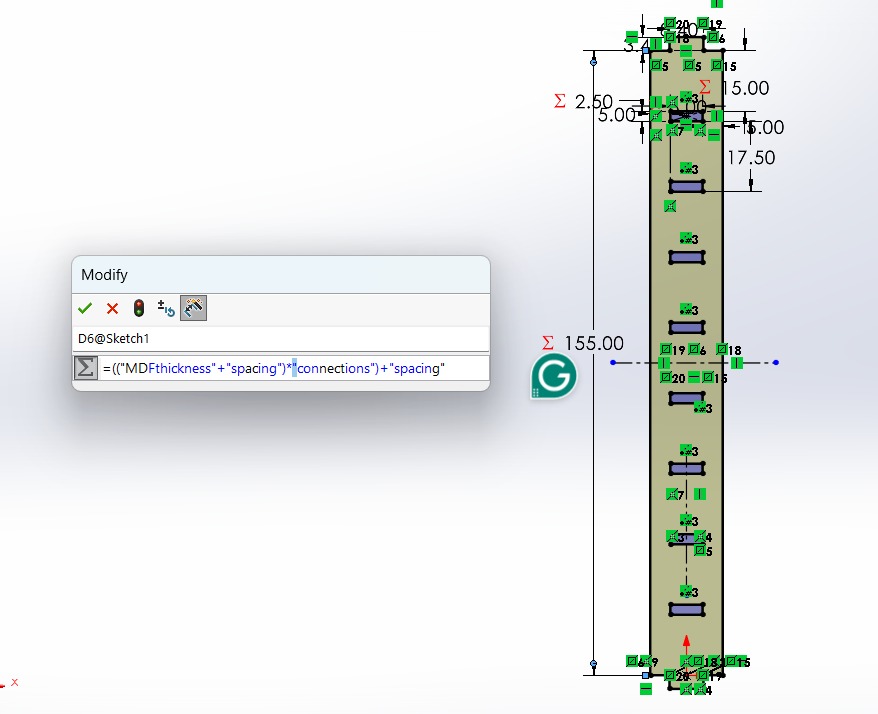
For the columns I made the sketch using the SOLIDWORKS equations feature to make the columns with different heights and holes.
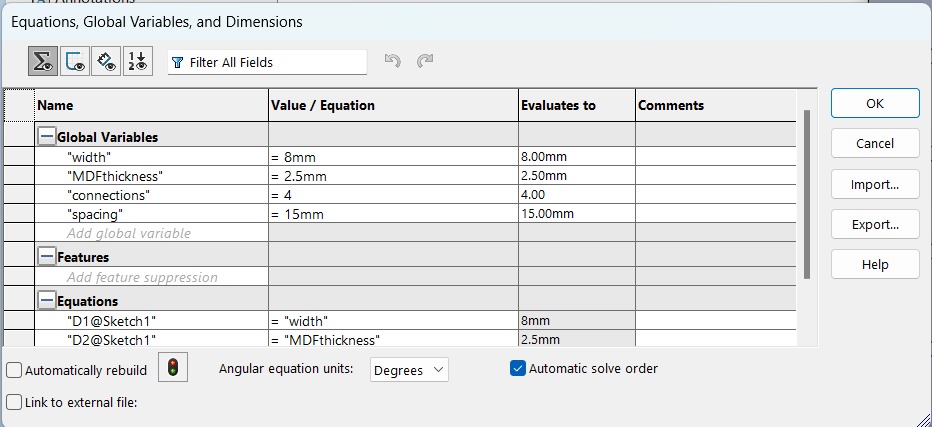
You can modify the hole thickness according to the material, give a different spacing between the holes and the number of holes to automatically adjust the column height.
I used different values to define the sketch and make it easy to modify.
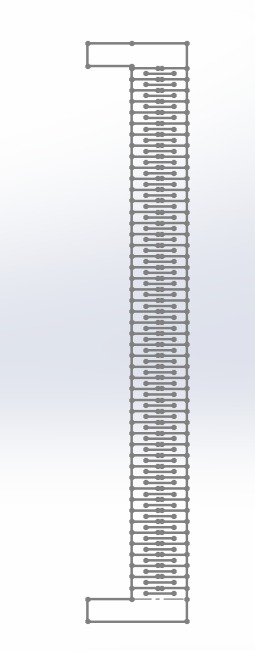
You can modify the number of holes by right clicking on one of the lines making the hole and editing the linear pattern:

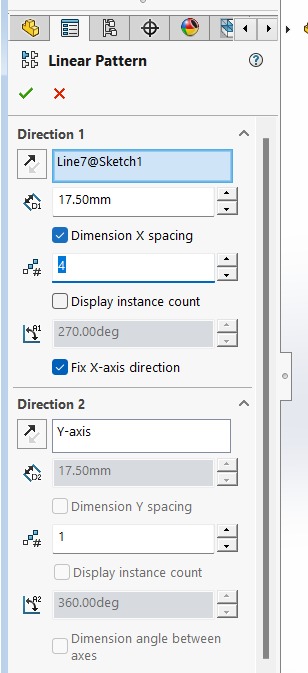
I used the equations to change the height automatically by only changing the number of holes (you can also change the thickness and spacing).
After making the sketch I extruded the part and exported it as a .dxf file.
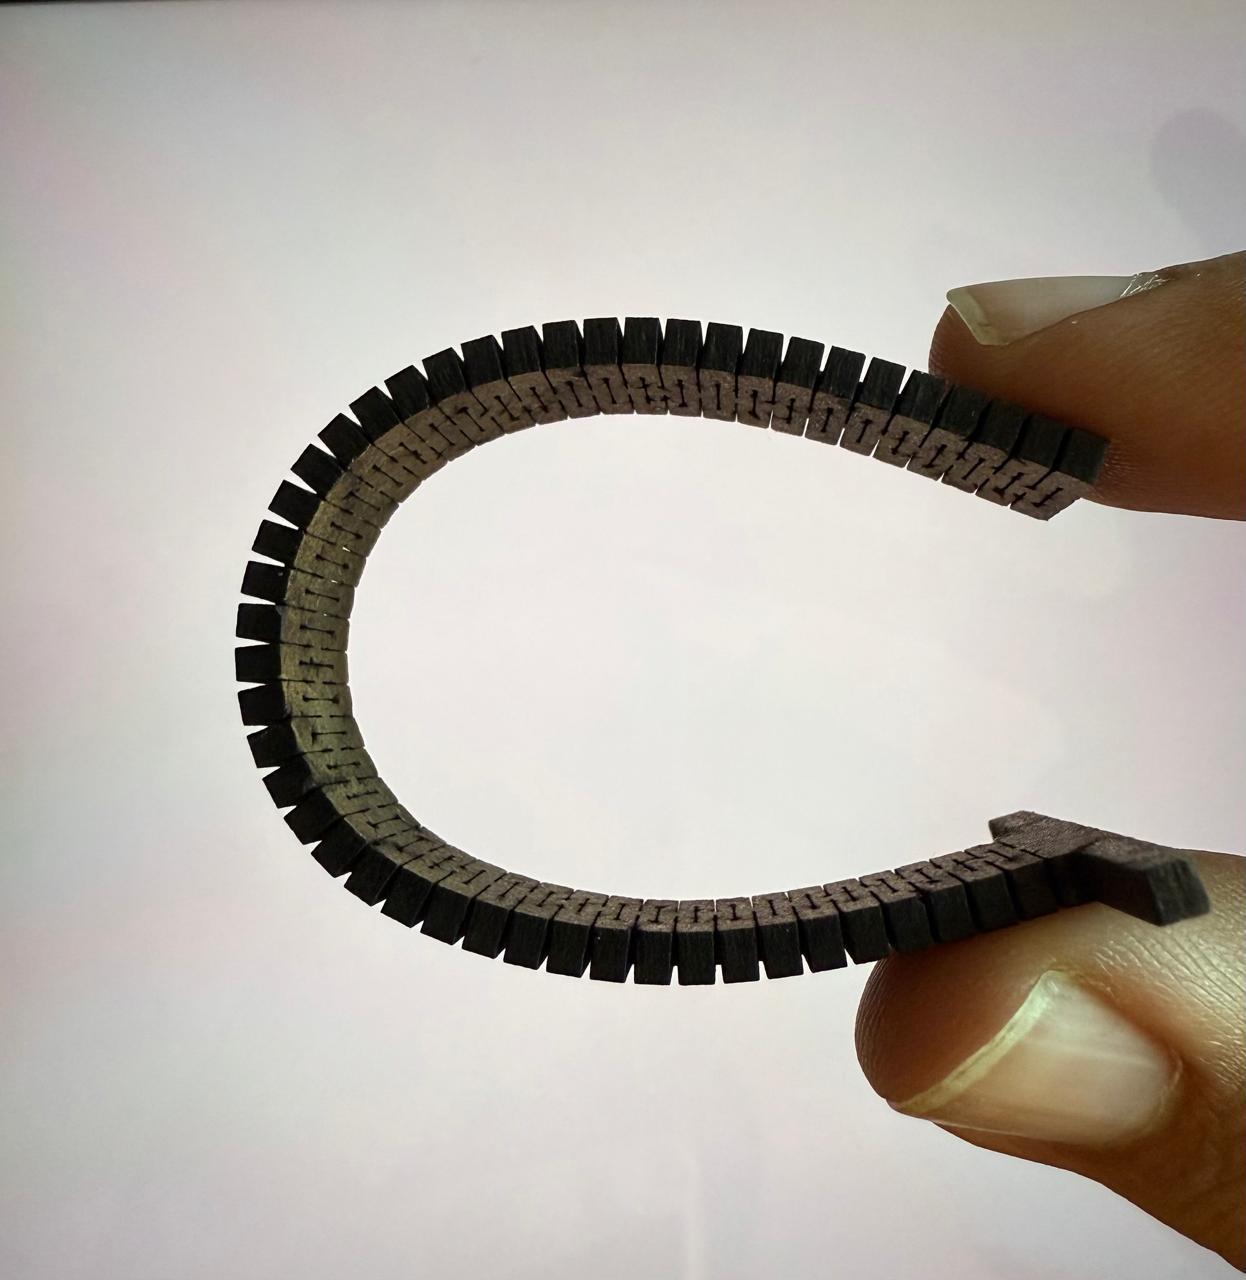
For the railways I designed a flexible piece so it could be bend or twist when needed. I made two test pieces to see which one was more flexible:

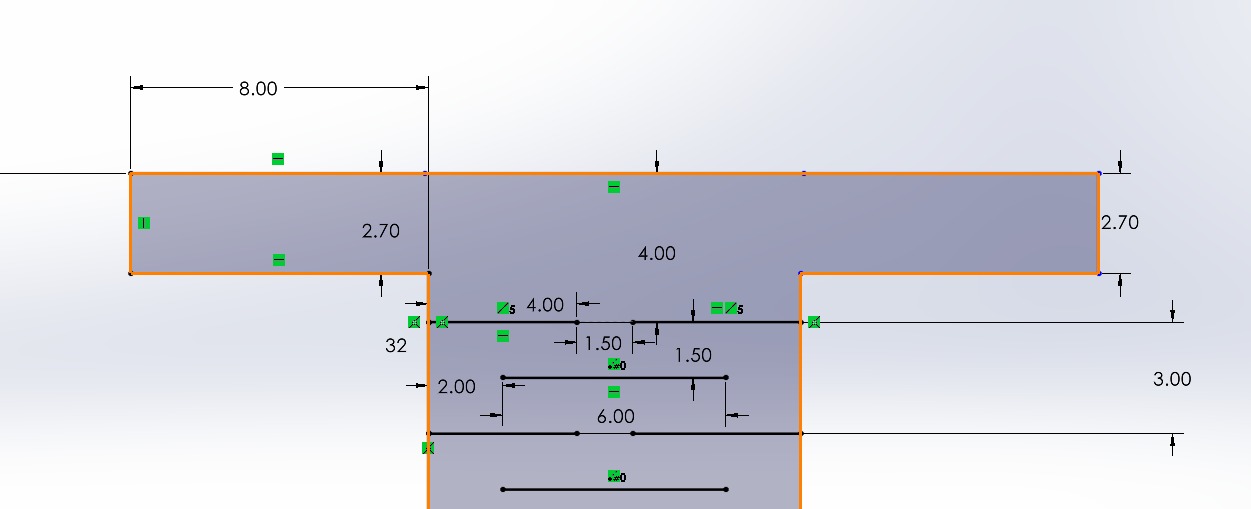
I laser cut both pieces and the first one was more flexible, so I decided to use it for the roller coaster.
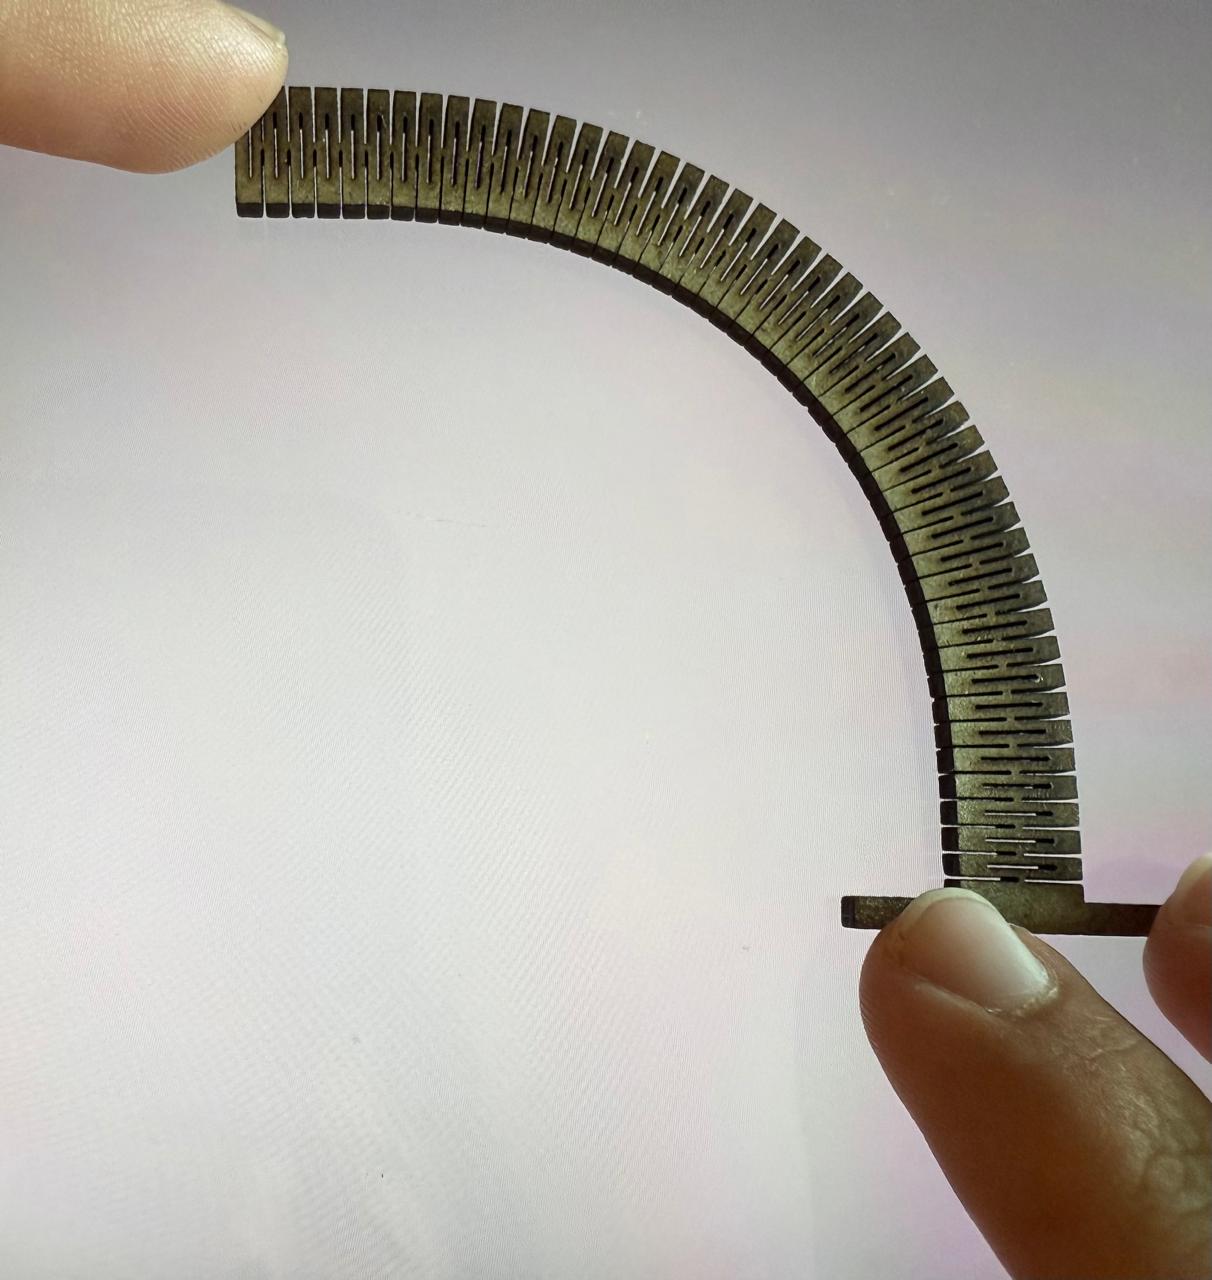
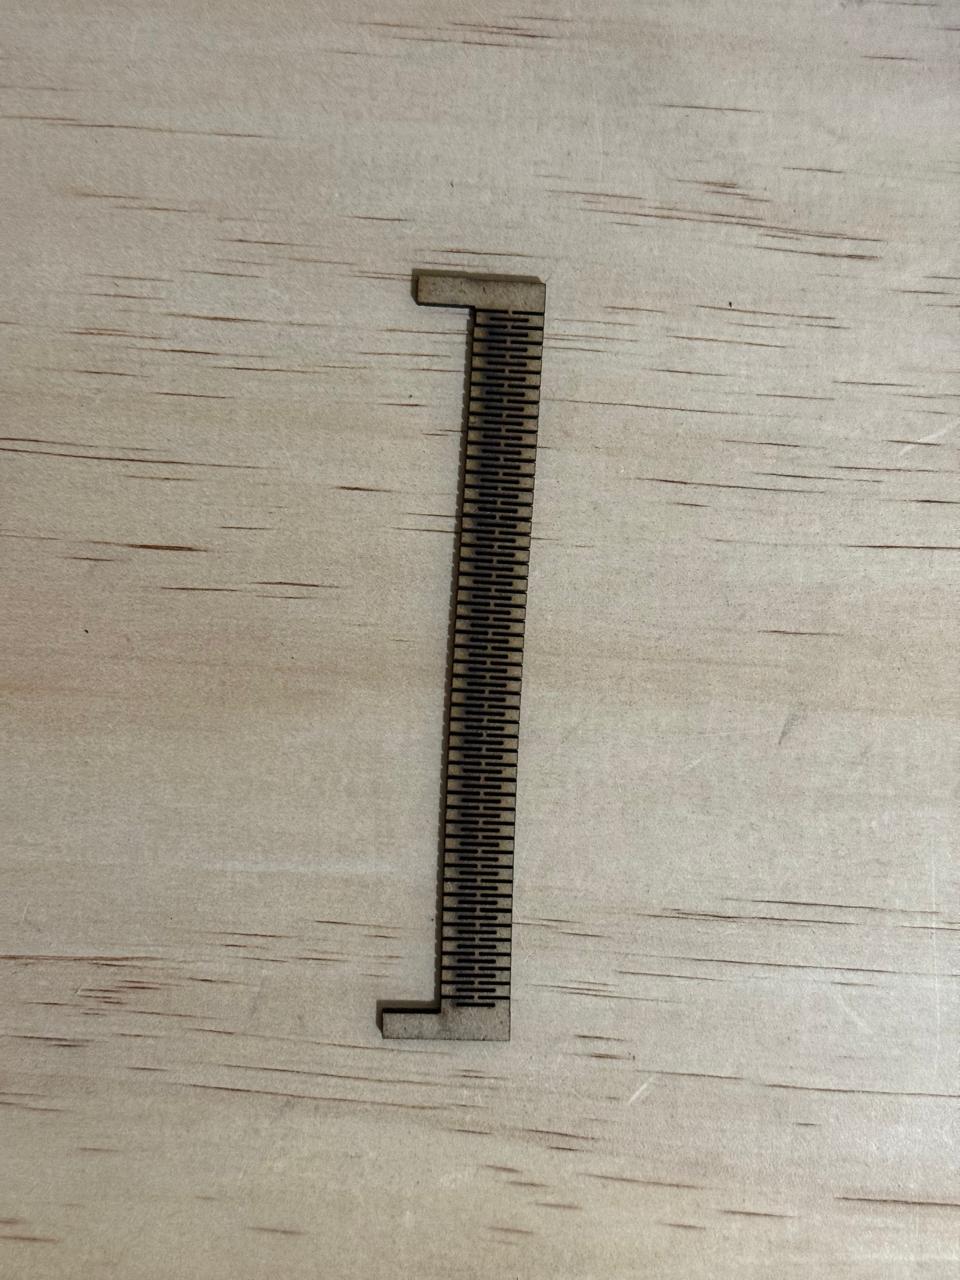
I made the final sketch in SOLIDWORKS and exported it as a .dxf file.

Here is the final piece:
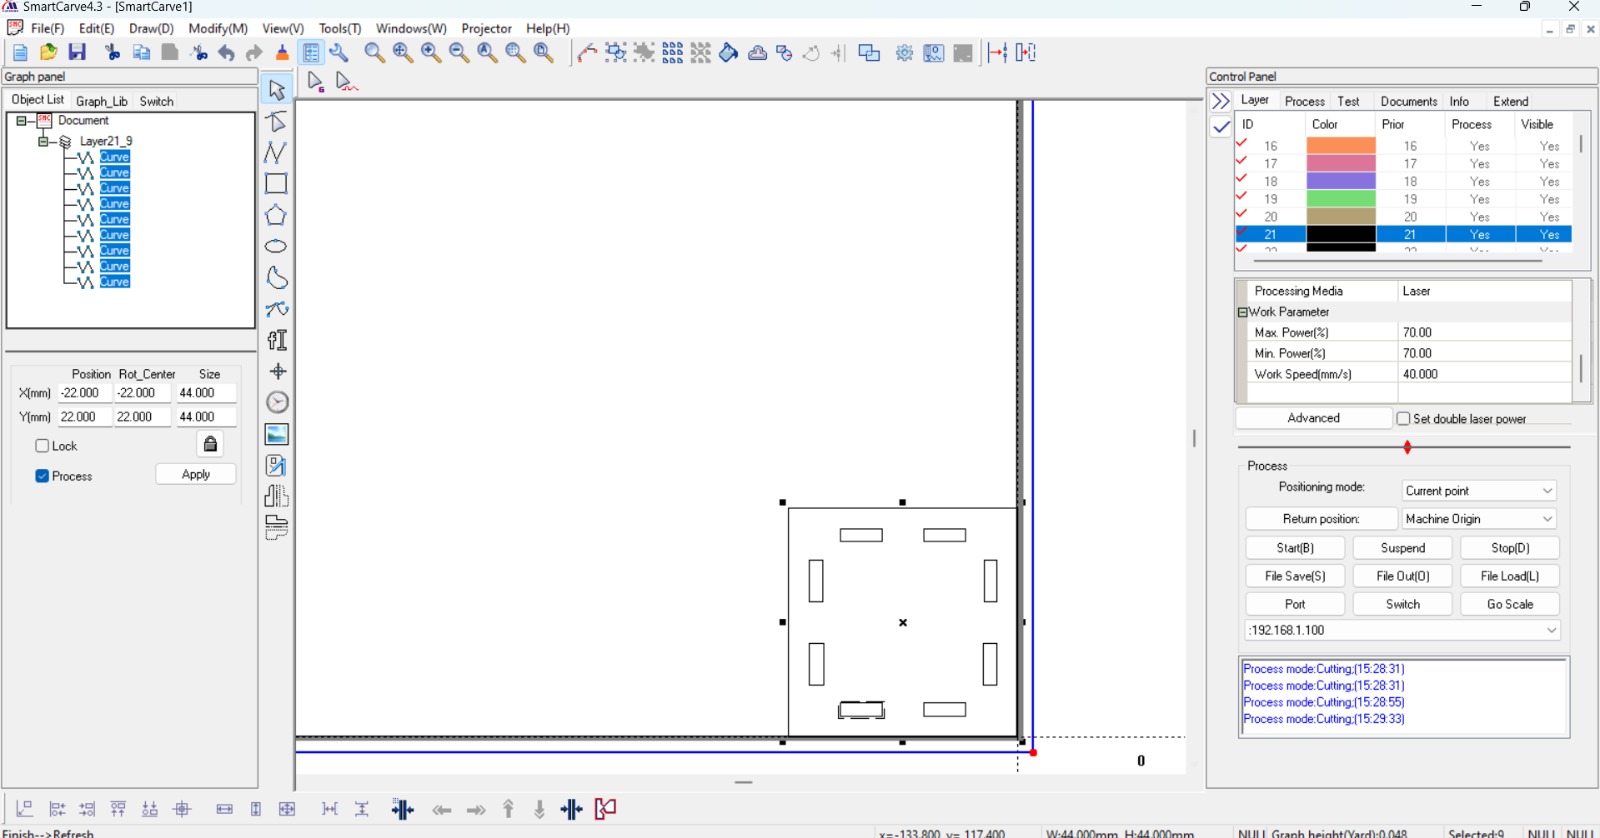
I used SmartCarve to import the .dxf files and prepare all the pieces to use the laser cutter.
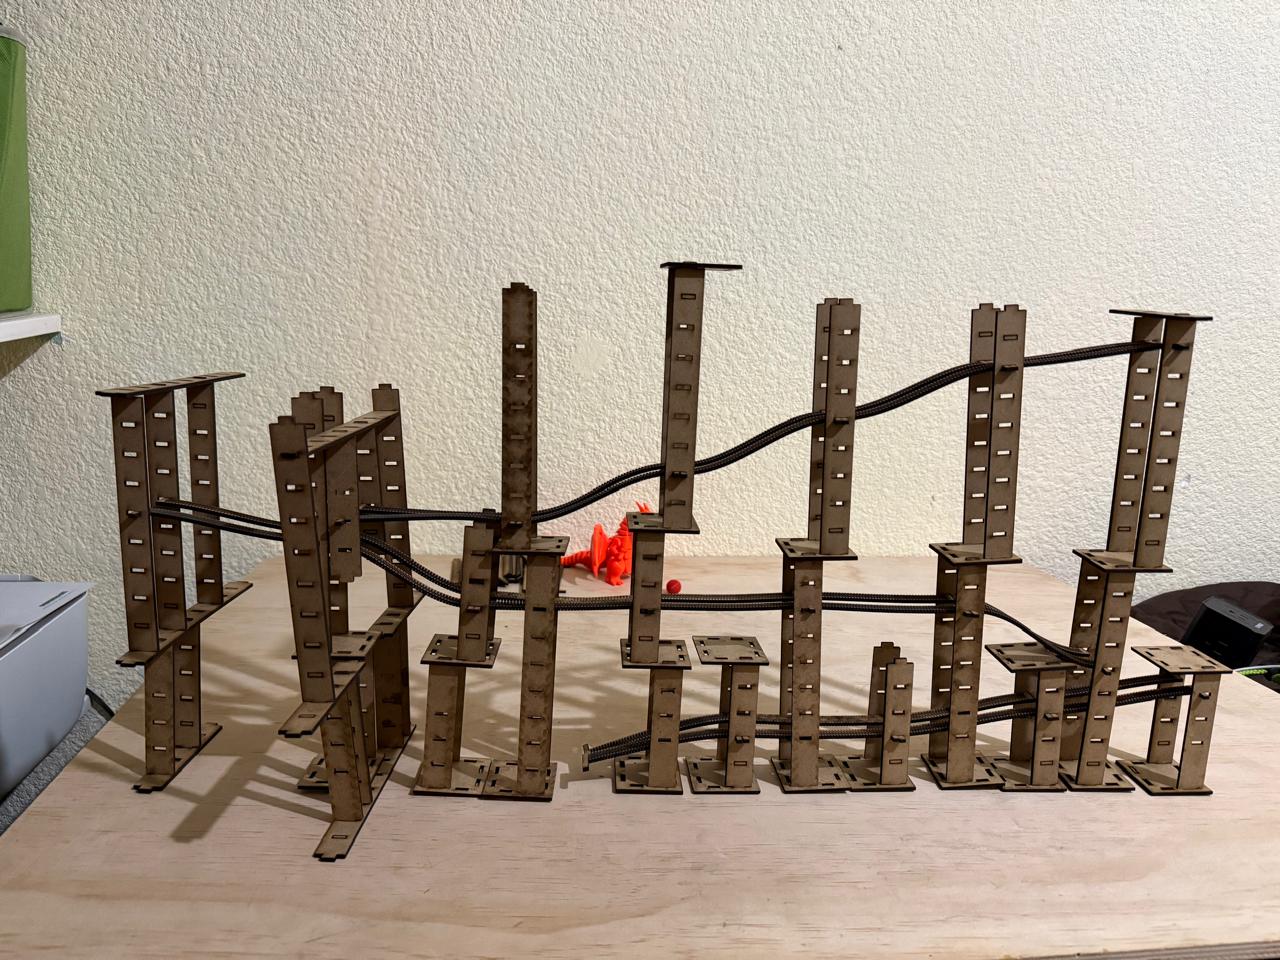
After cutting all the pieces I assembled the roller coaster:
After assembling all of the pieces here is the first version I made:
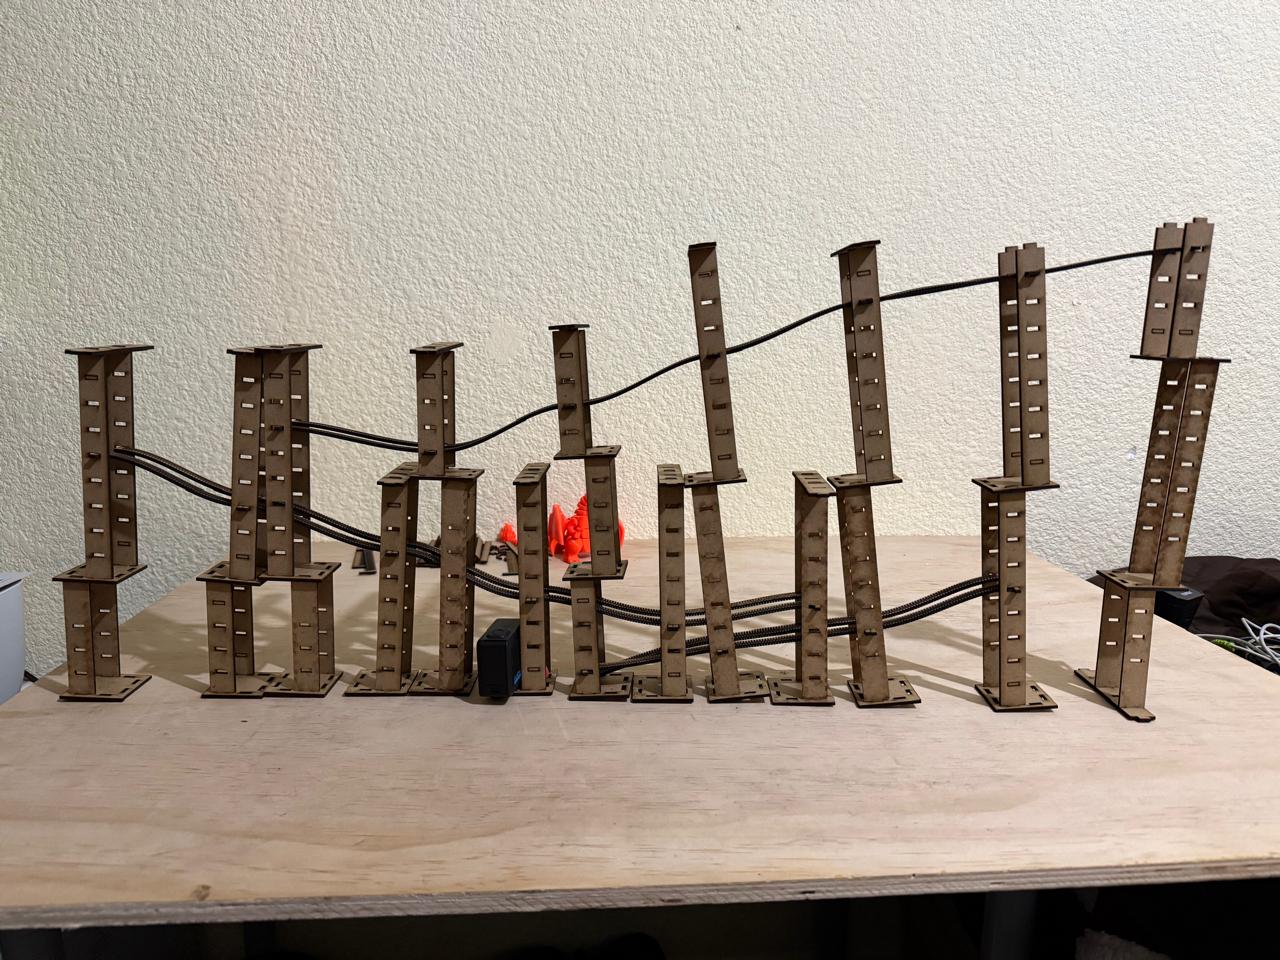
After testing the roller coaster I decided to make some changes, here is the second version:
Vinyl cutter Laptop pattern
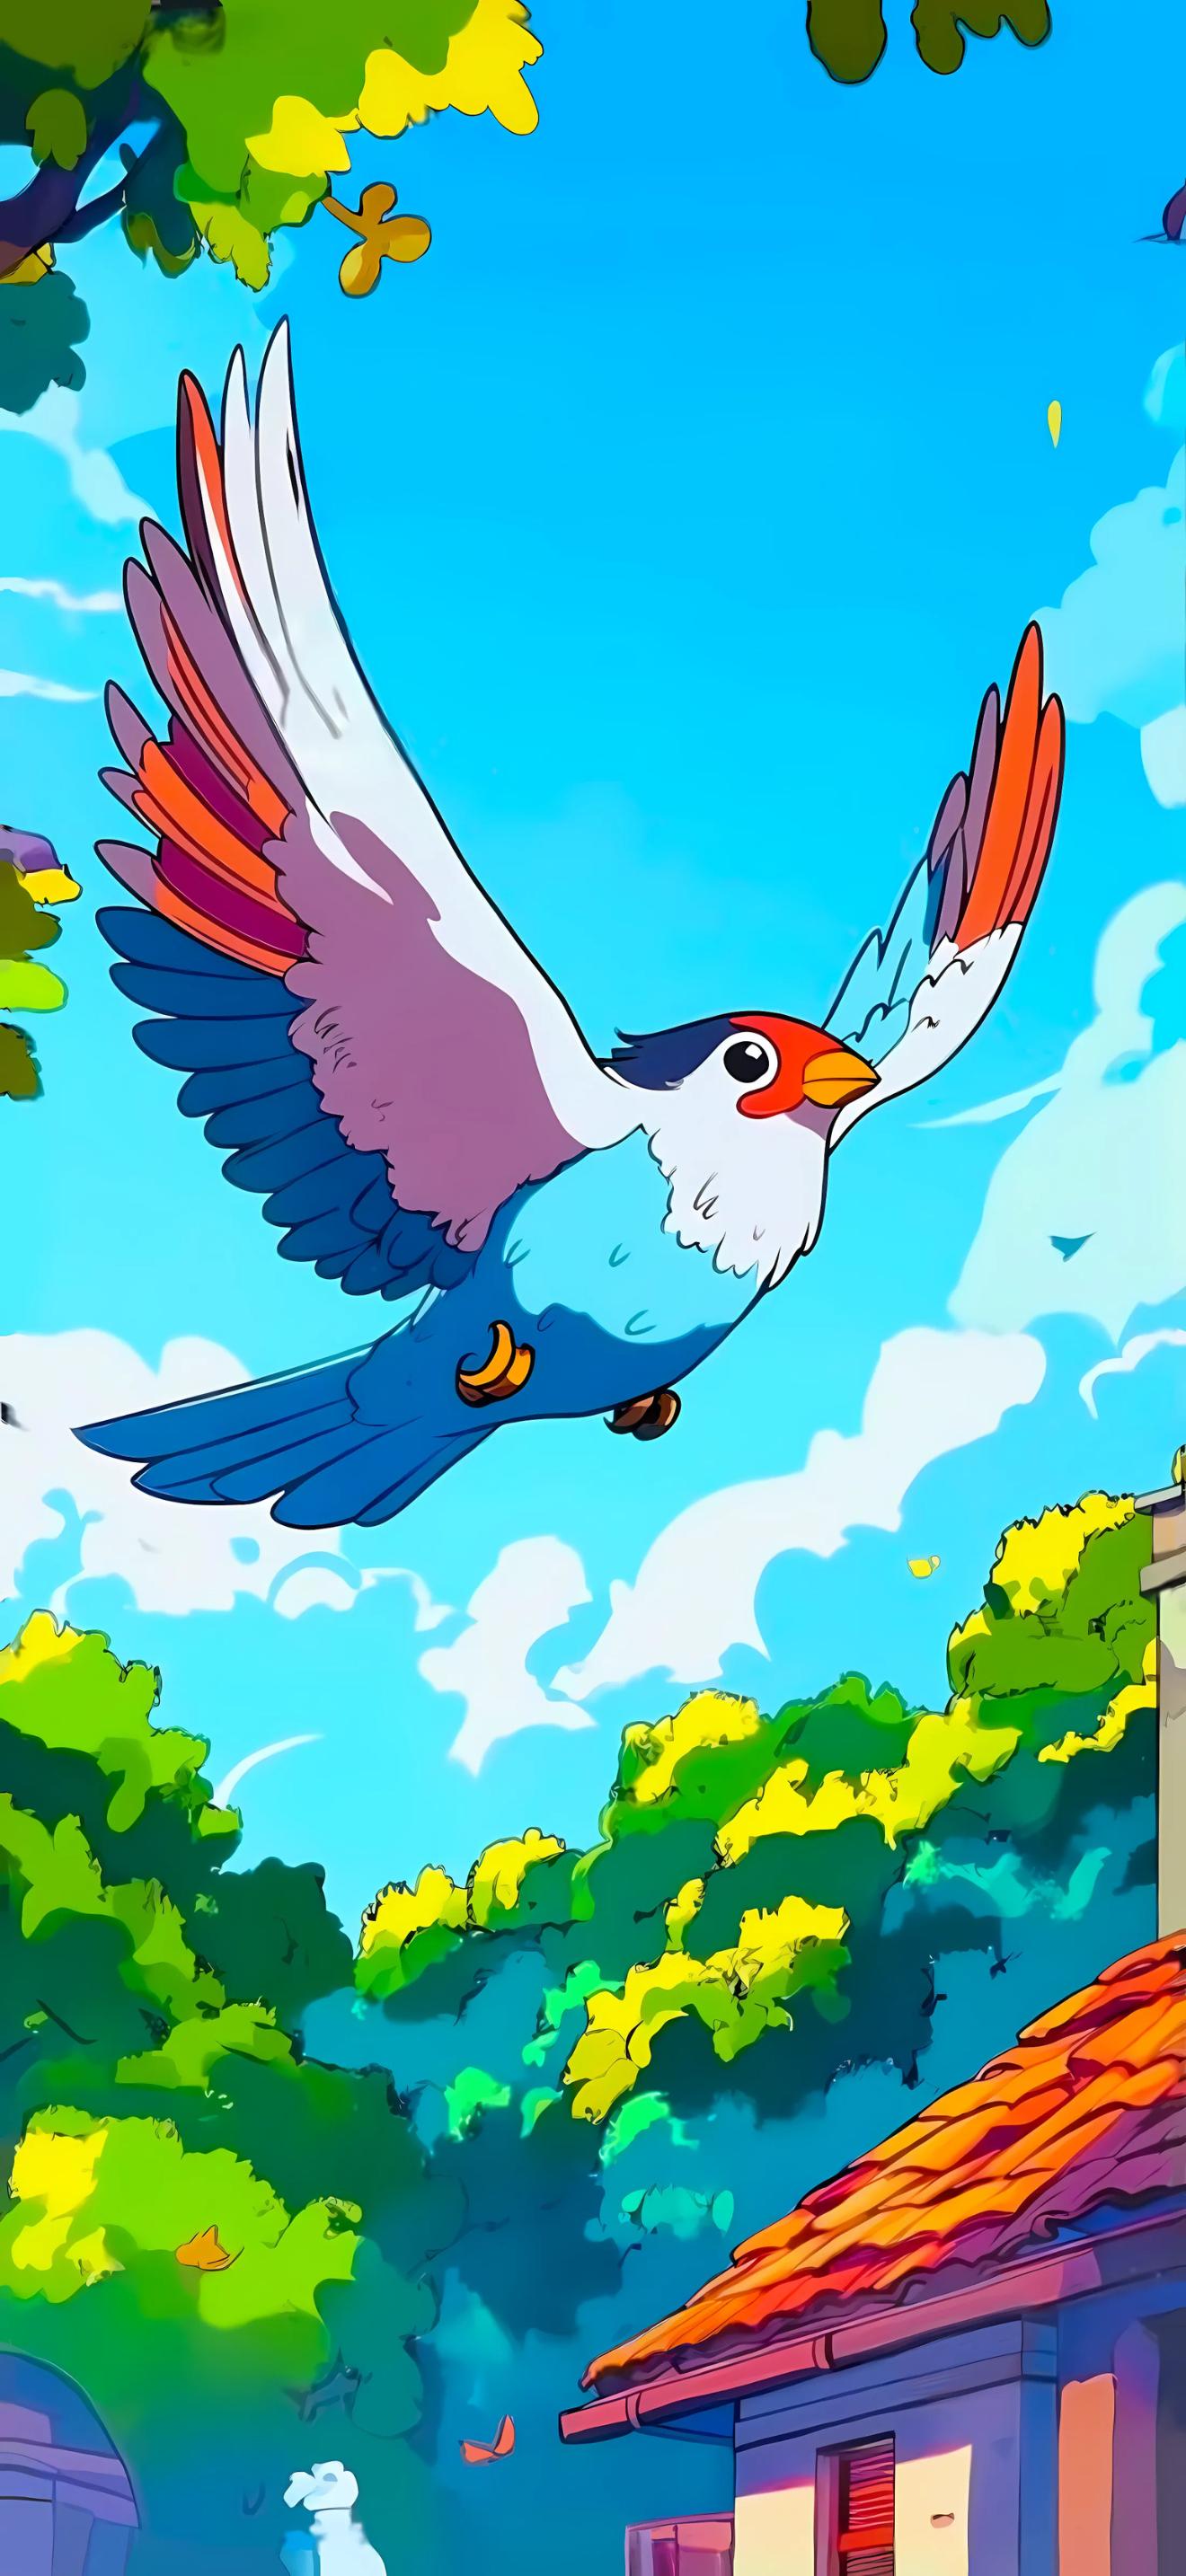
My Laptop´s top part got a little bit scratched after one year of taking it out every day from my backpack, so I decided to make a sticker to cover some of it.
I used Inkscape to make the drawing, I measured the top part of the laptop to get the workspace.
I used a wallpaper as a reference to design the sticker.
I made the drawing using different layers so I could cut the parts in different colors.
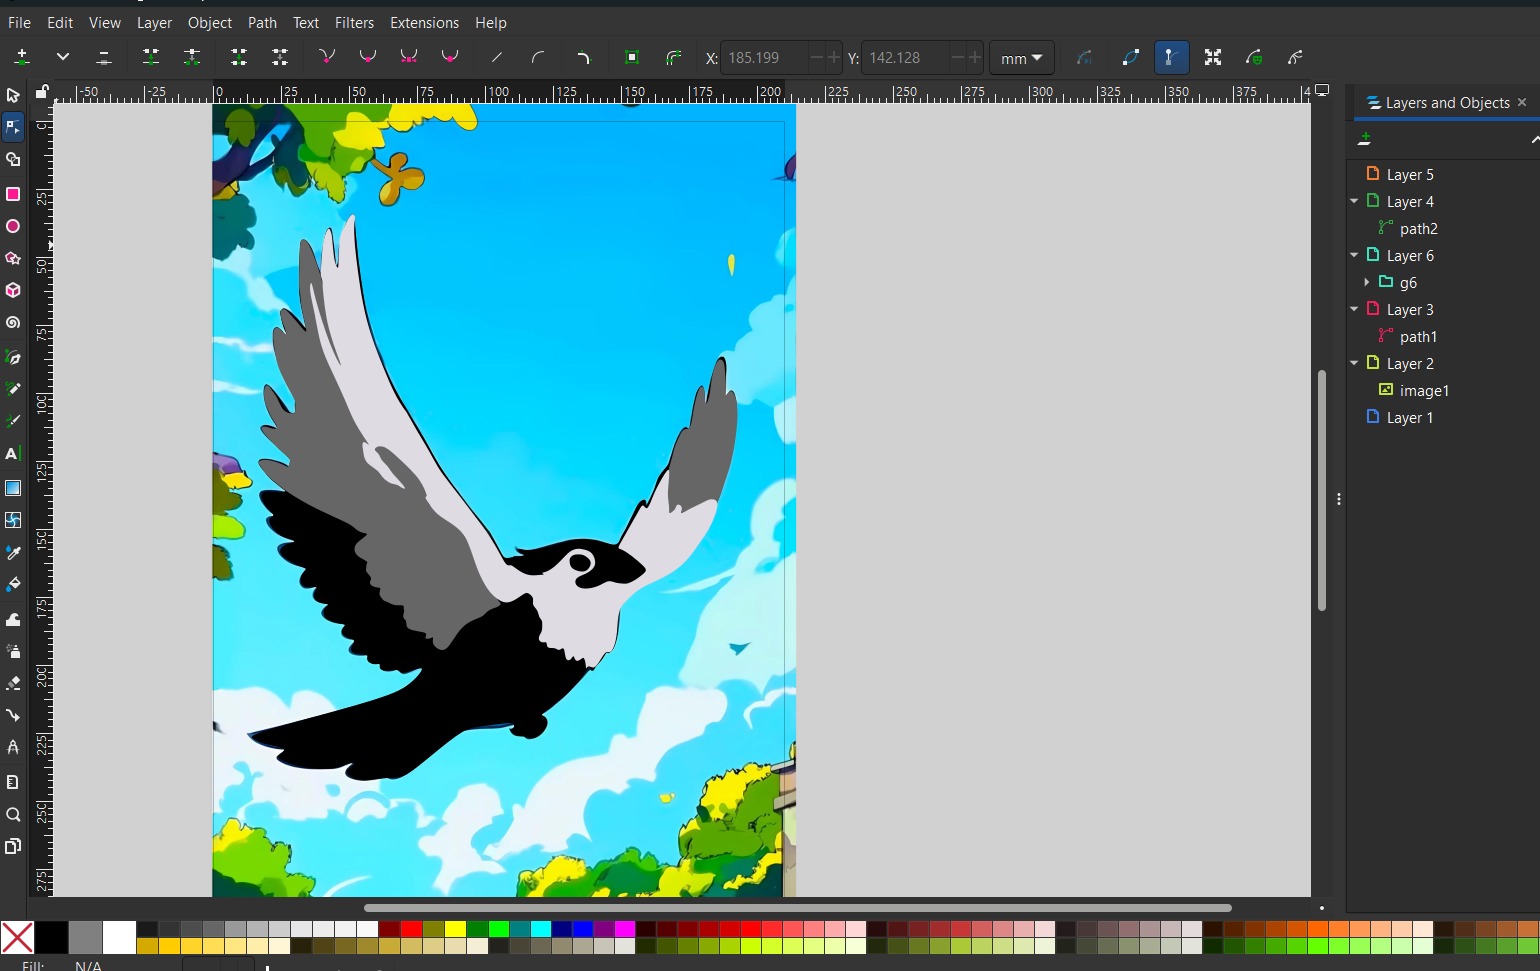
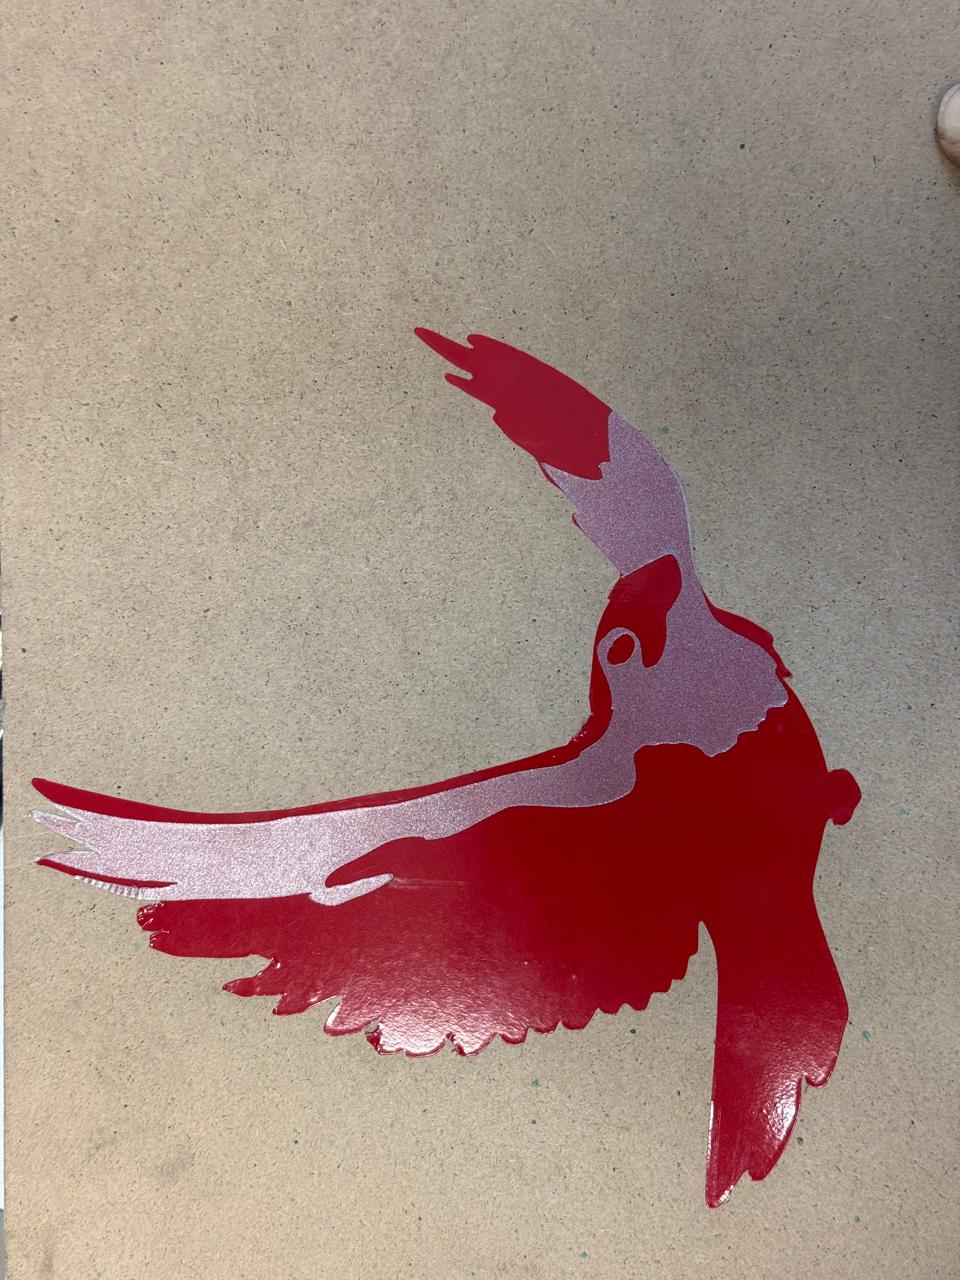
I exported each layer as a .svg file and imported them to a usb drive and prepared the vinyl cutter. I used the vinyl cutter to cut the sticker, I used the following settings: 3 for pressure and 1 for speed.

After cutting all the pieces I assembled the sticker:
Summary
SOLIDWORKS was useful to make the pieces easy to scale by using equations on the sketch. The tests I made helped me select the best settings for each piece I designed. I enjoyed assembling the roller coaster and it turned out pretty good. Inkscape was easy to use to make the drawing for the sticker, unfortunately the vinyl cutter I used did not cut the bird perfectly the last layer I was going to use and I was afraid that removing the sticker would be hard, so I decided not to paste it on my computer. In the end, with the laser cutter, I can design and cut pieces that fit together just like Legos. The vinyl cutter can be used to make costume stickers but be sure to have different colors to cut.