7. Computer-Controlled Machining
This week, I have to work on a CNC router. I’m excited to make some furniture. I started searching for ideas, and I decided to create a shelf to organize tools that I use constantly.
Group Task:
Group taskDoing my pieces
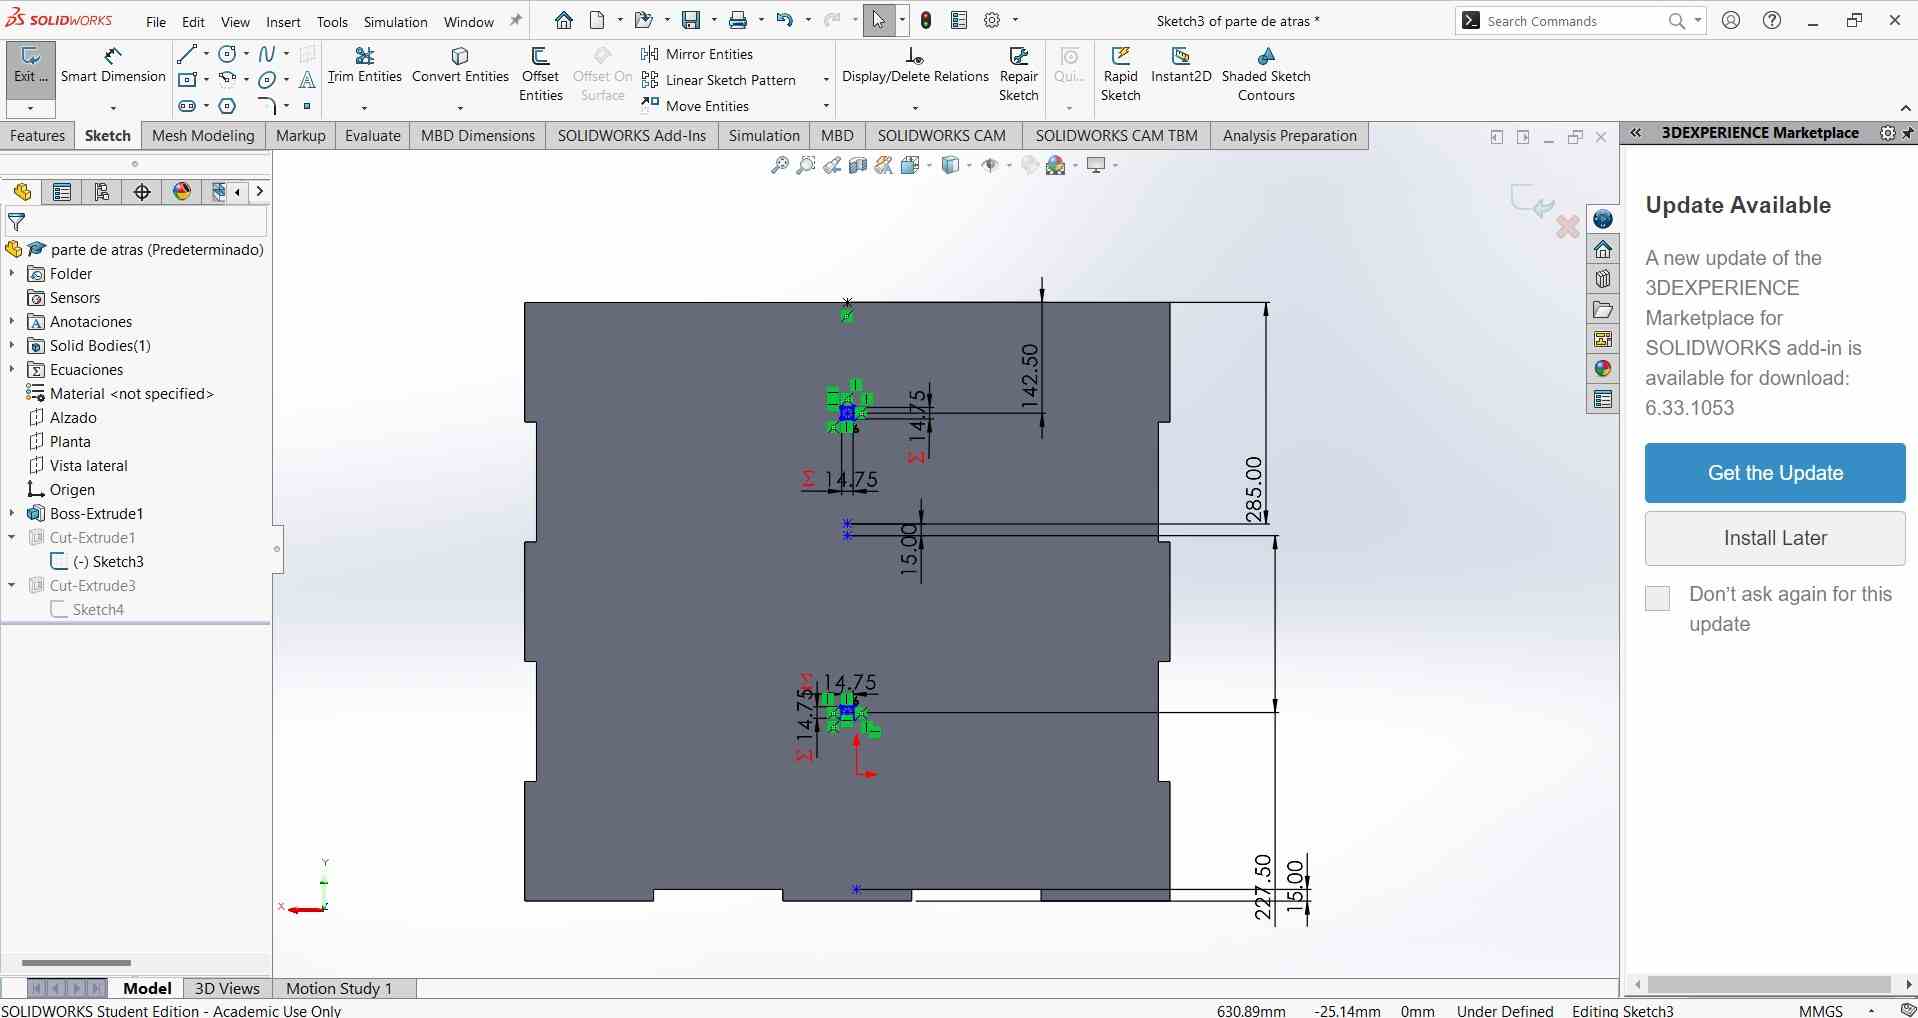
I use SolidWorks
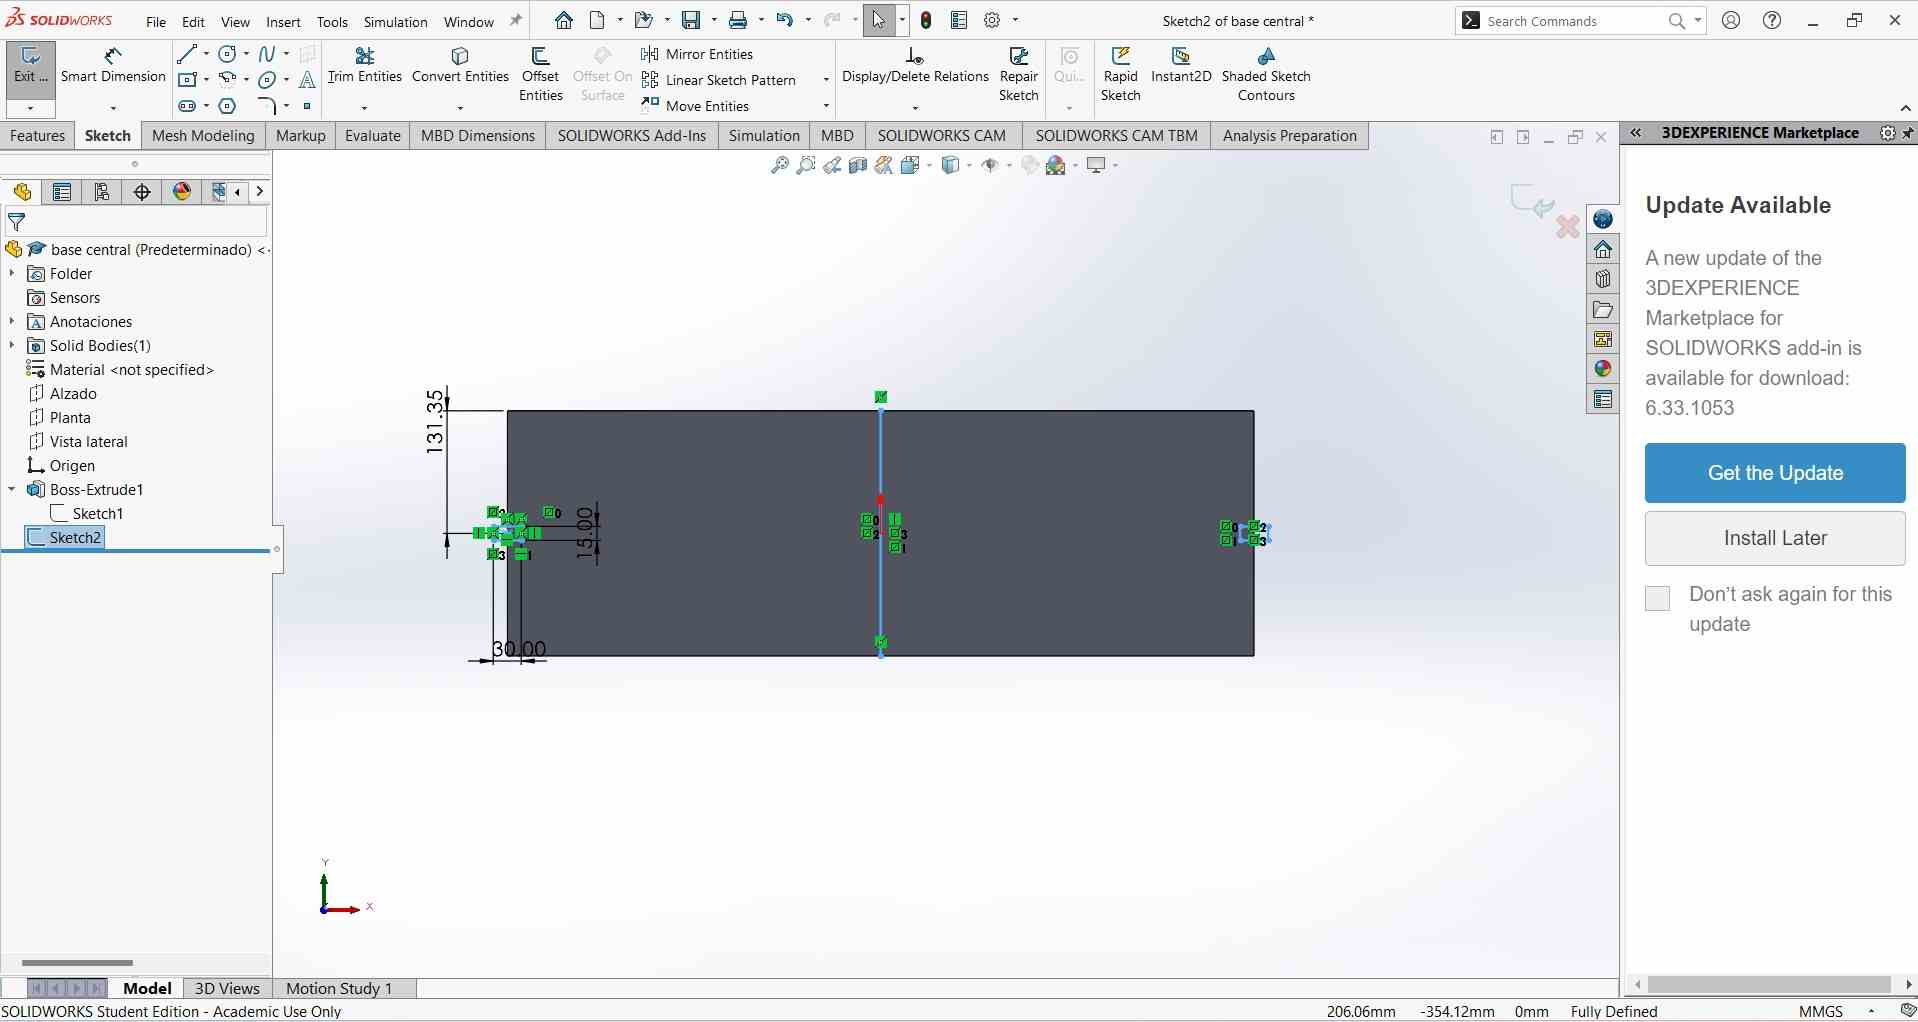
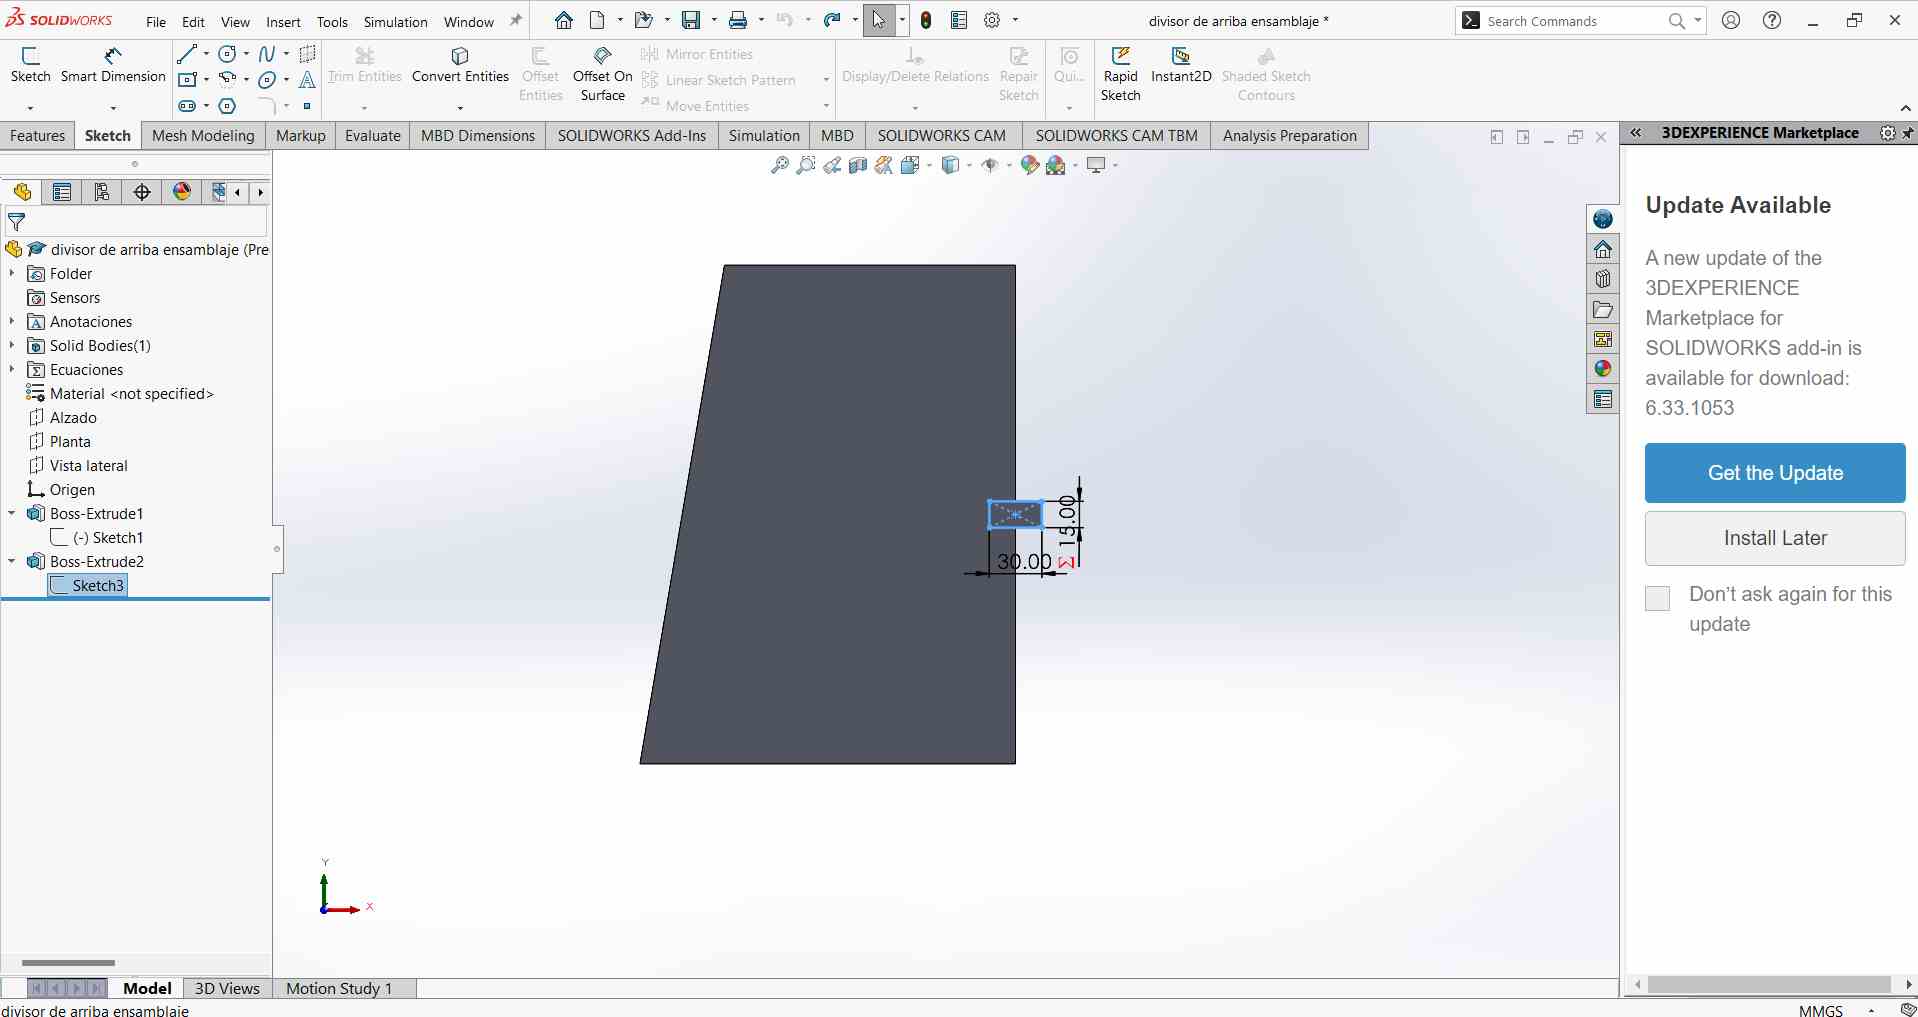
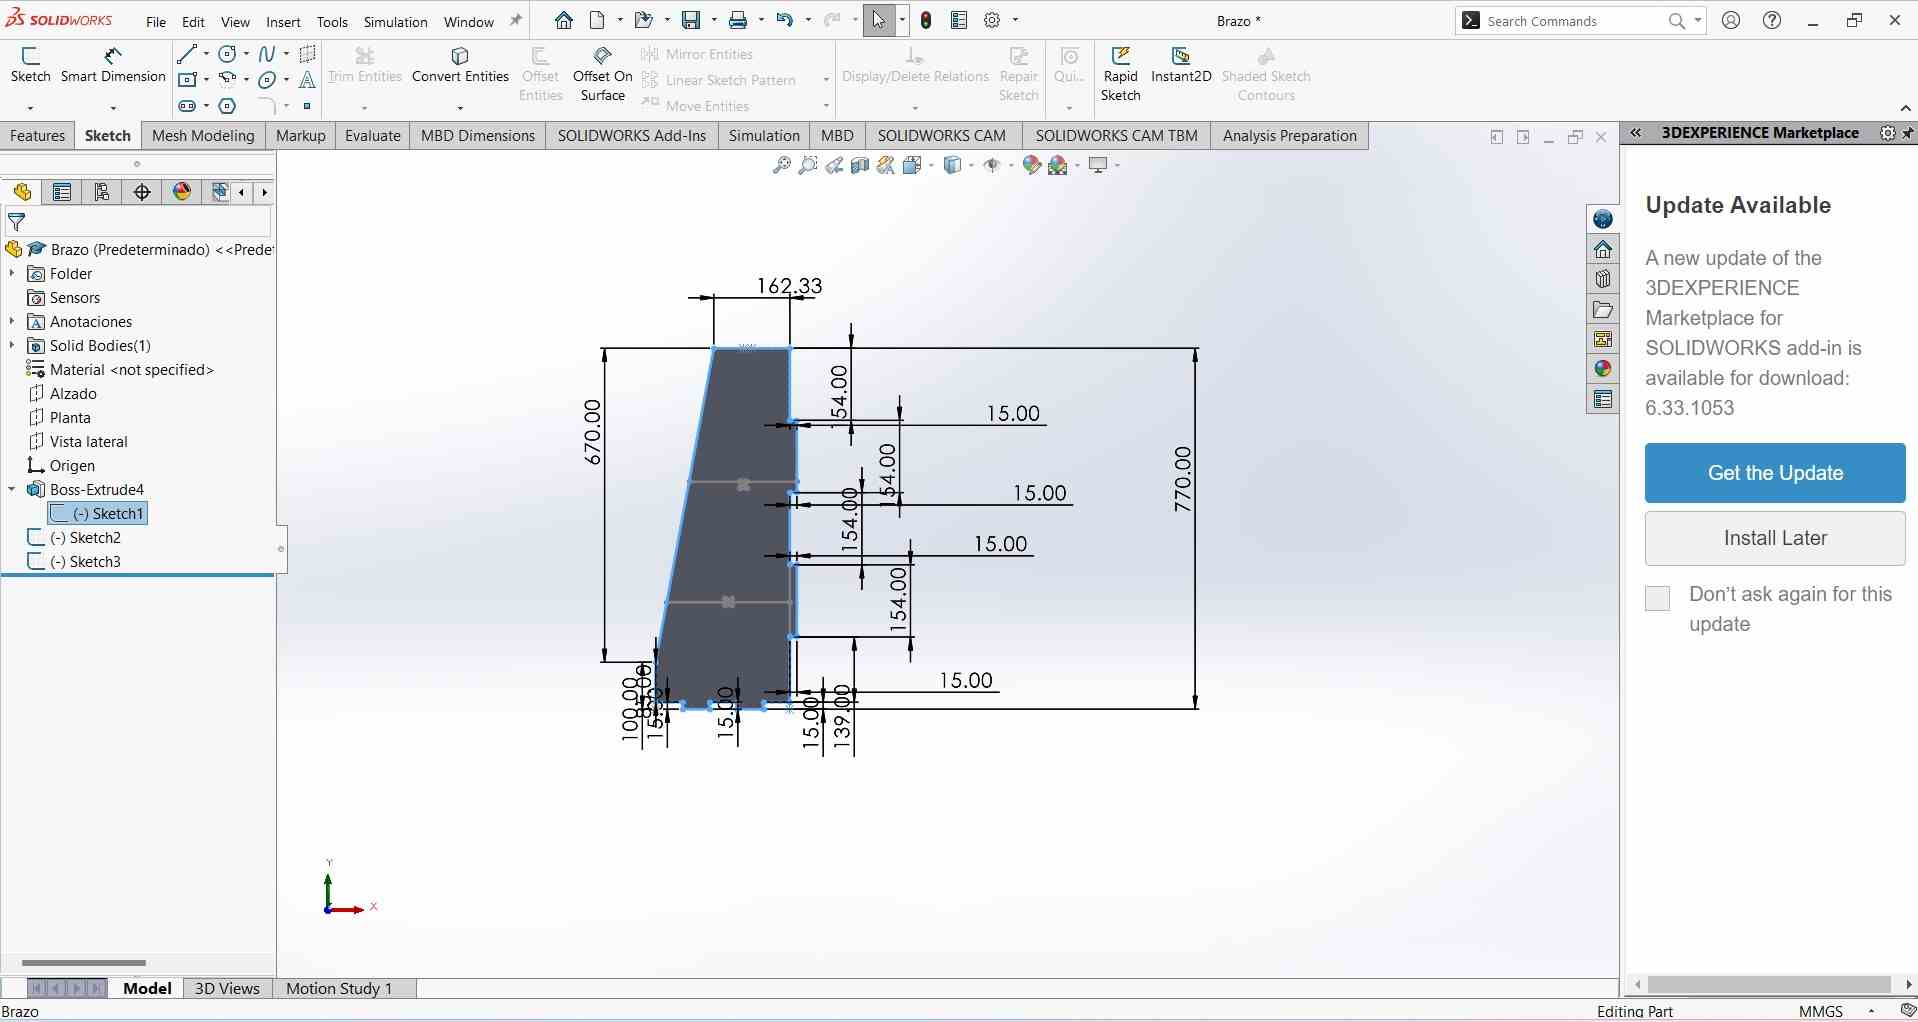
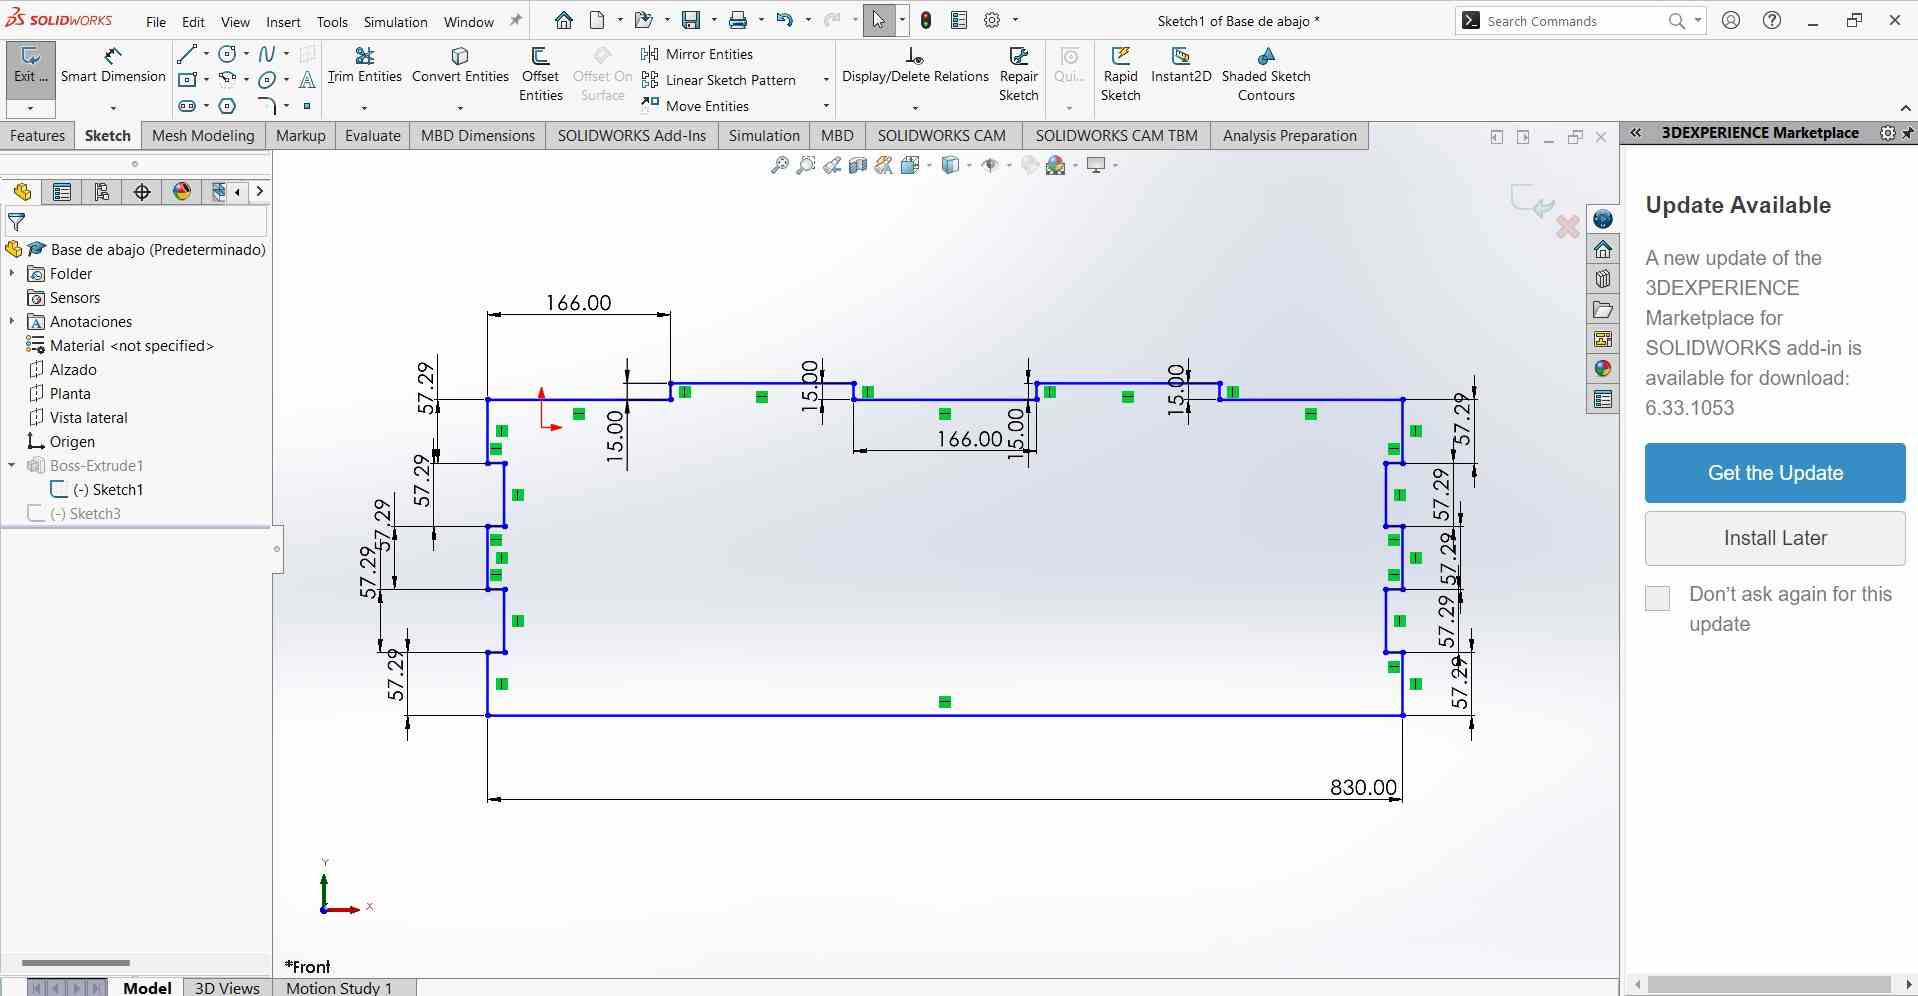
These are the shapes in solid works and the assembly of my organizer.






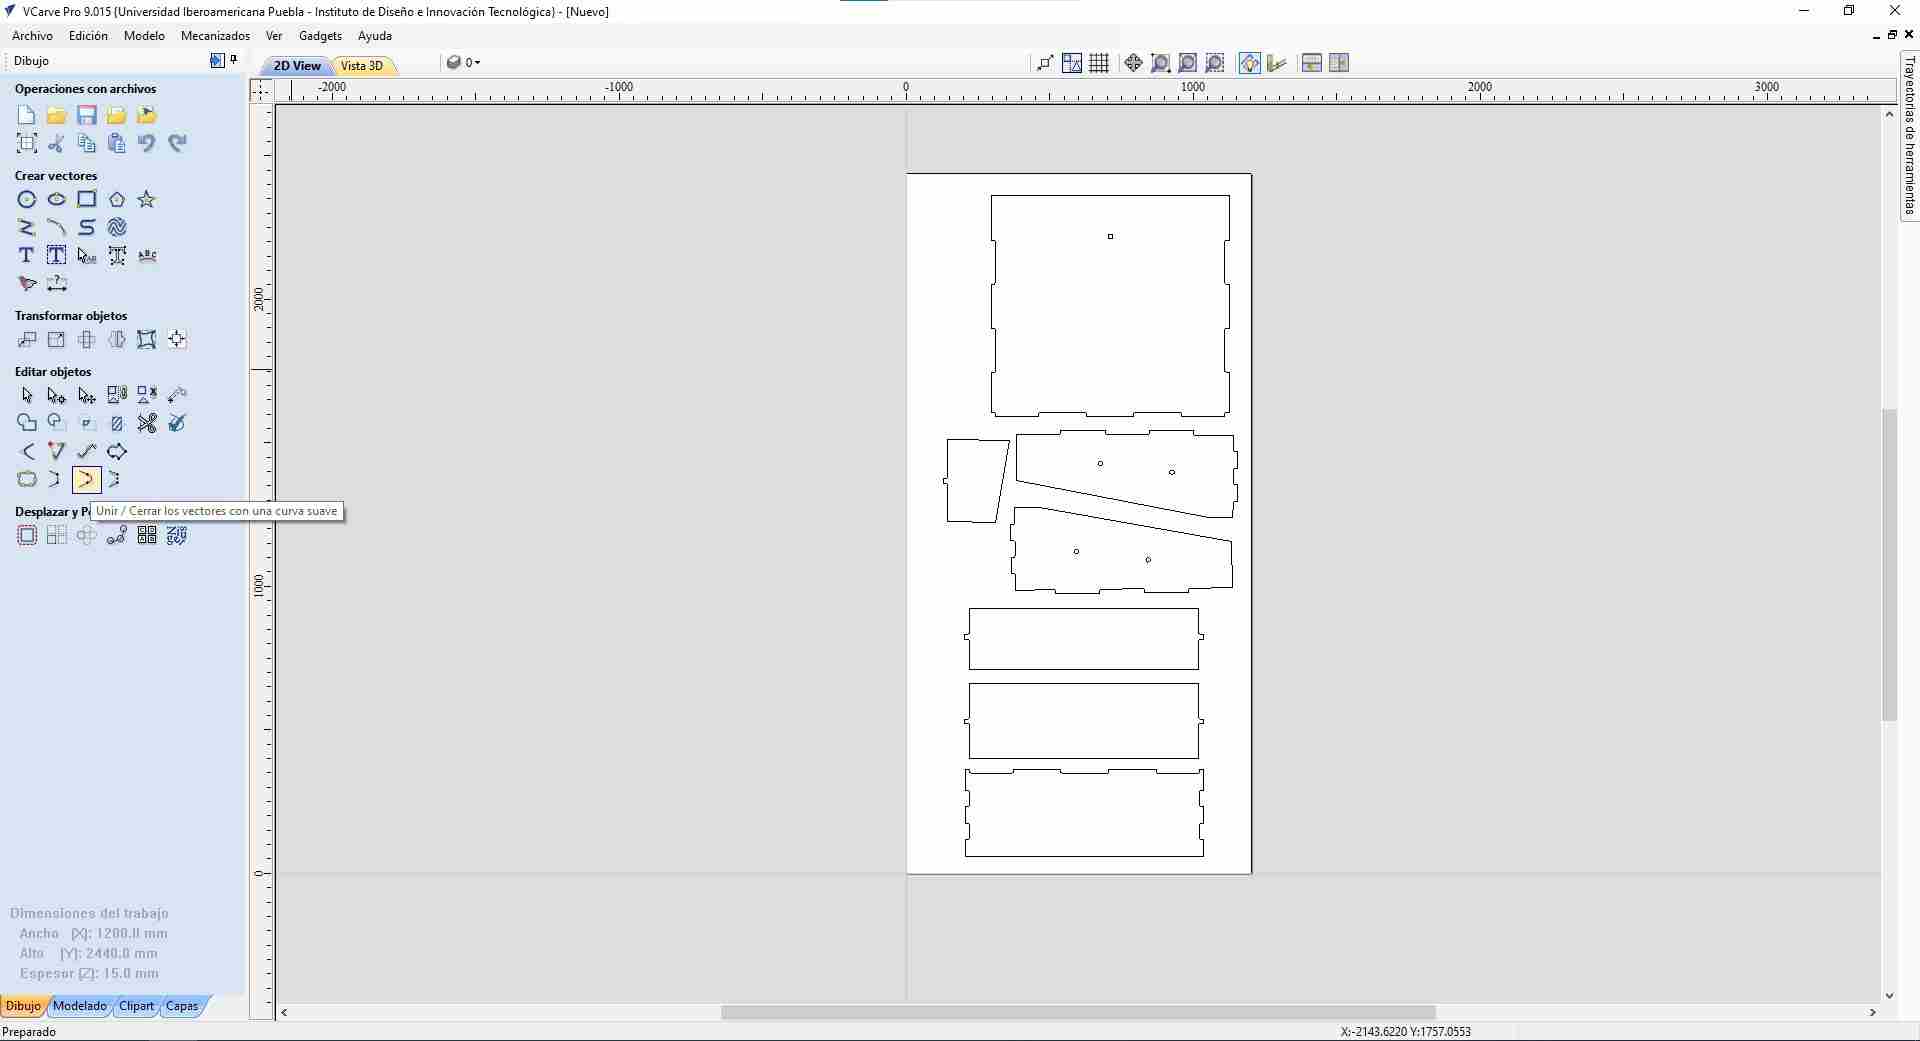
VCarve Cut Configuration
I used VCarve to configure the cut of my piece.
-
First, I opened VCarve and created a new project.
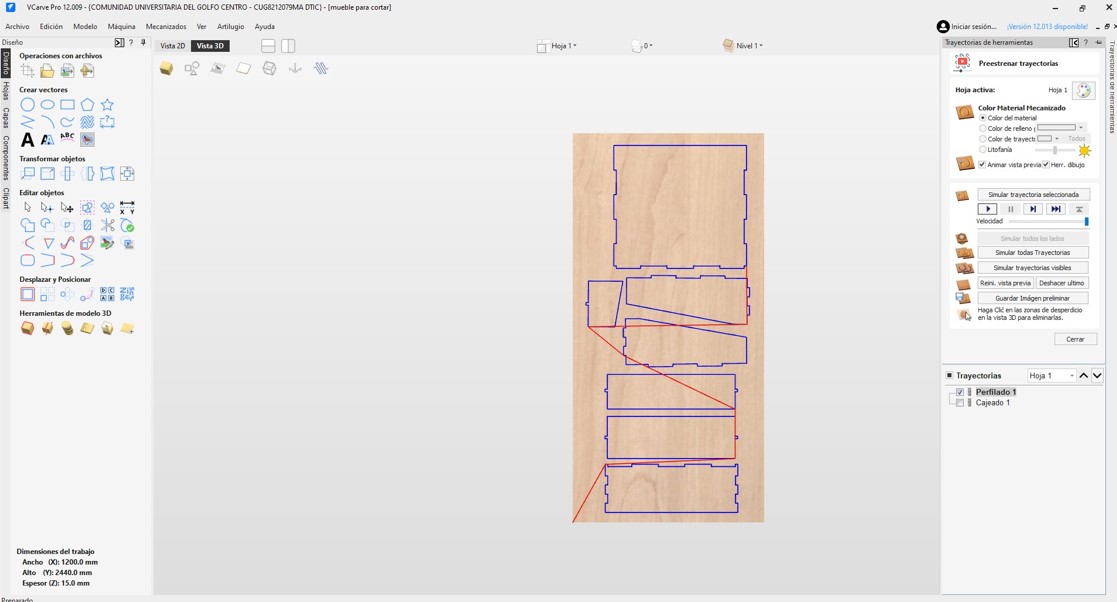
- Width (X): 1200 mm
- Height (Y): 2440 mm
- Thickness (Z): 15 mm (This is the material thickness).
- I also set the machine origin at 0.
Steps
- I imported my pieces in .DXF format using the “import vectors” option.
- I placed each vector in the work area. It’s important to leave a margin or space on the border to avoid the machine cutting the clamps.
- To close the vector of each part, it’s important to use the tool to join them.
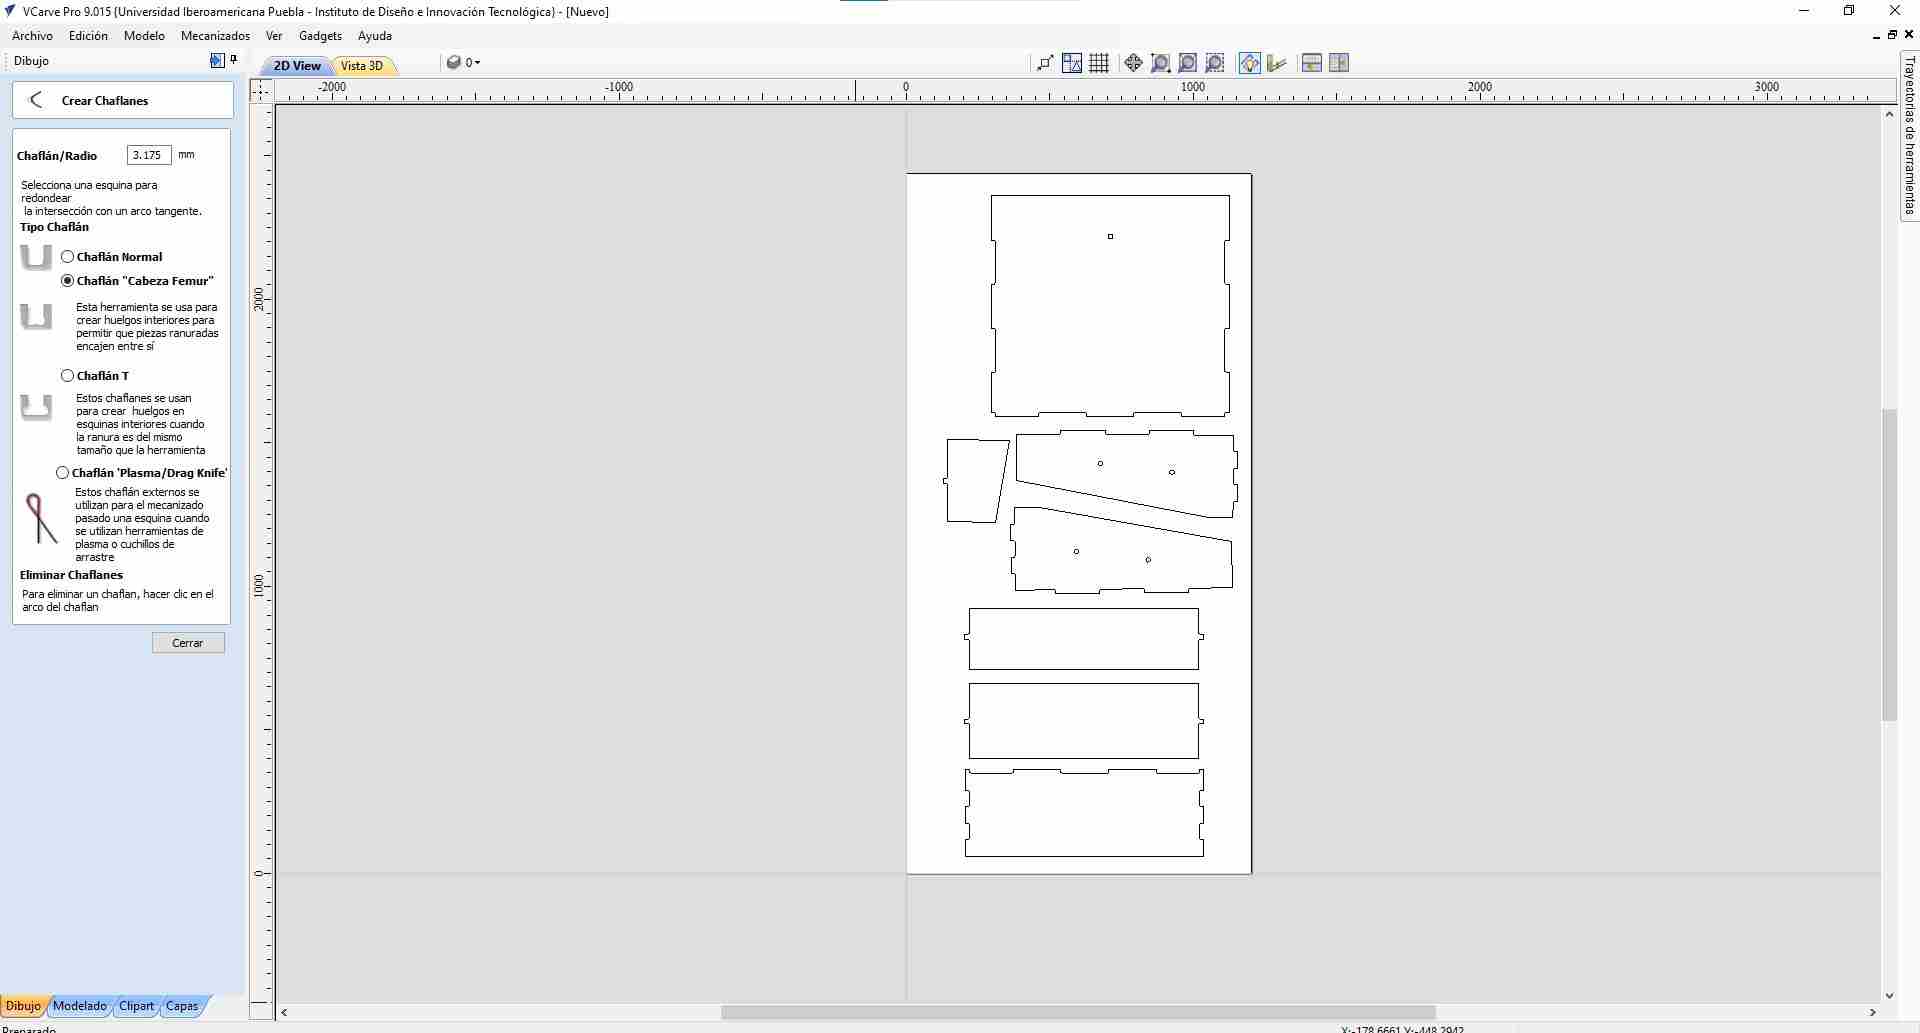
Chamfer
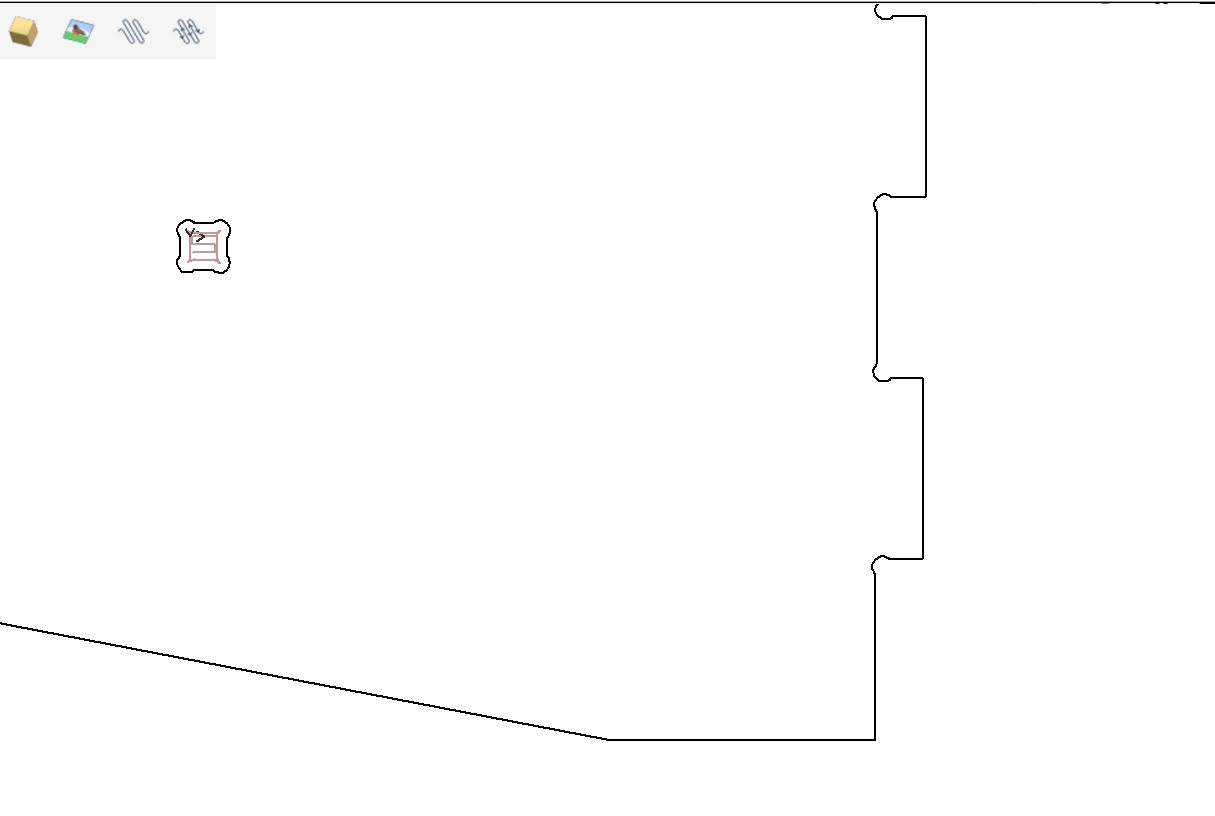
- I added dogbones. I used a femur bone shape to put in each piece (it's important that you only place it in the internal corners).I clicked on the internal corners and added the dogbone with a radius of 3.175 mm.
- I selected the pieces that I wanted to cut. I started with the external part and then with the internal cuts.
Types of Cuts
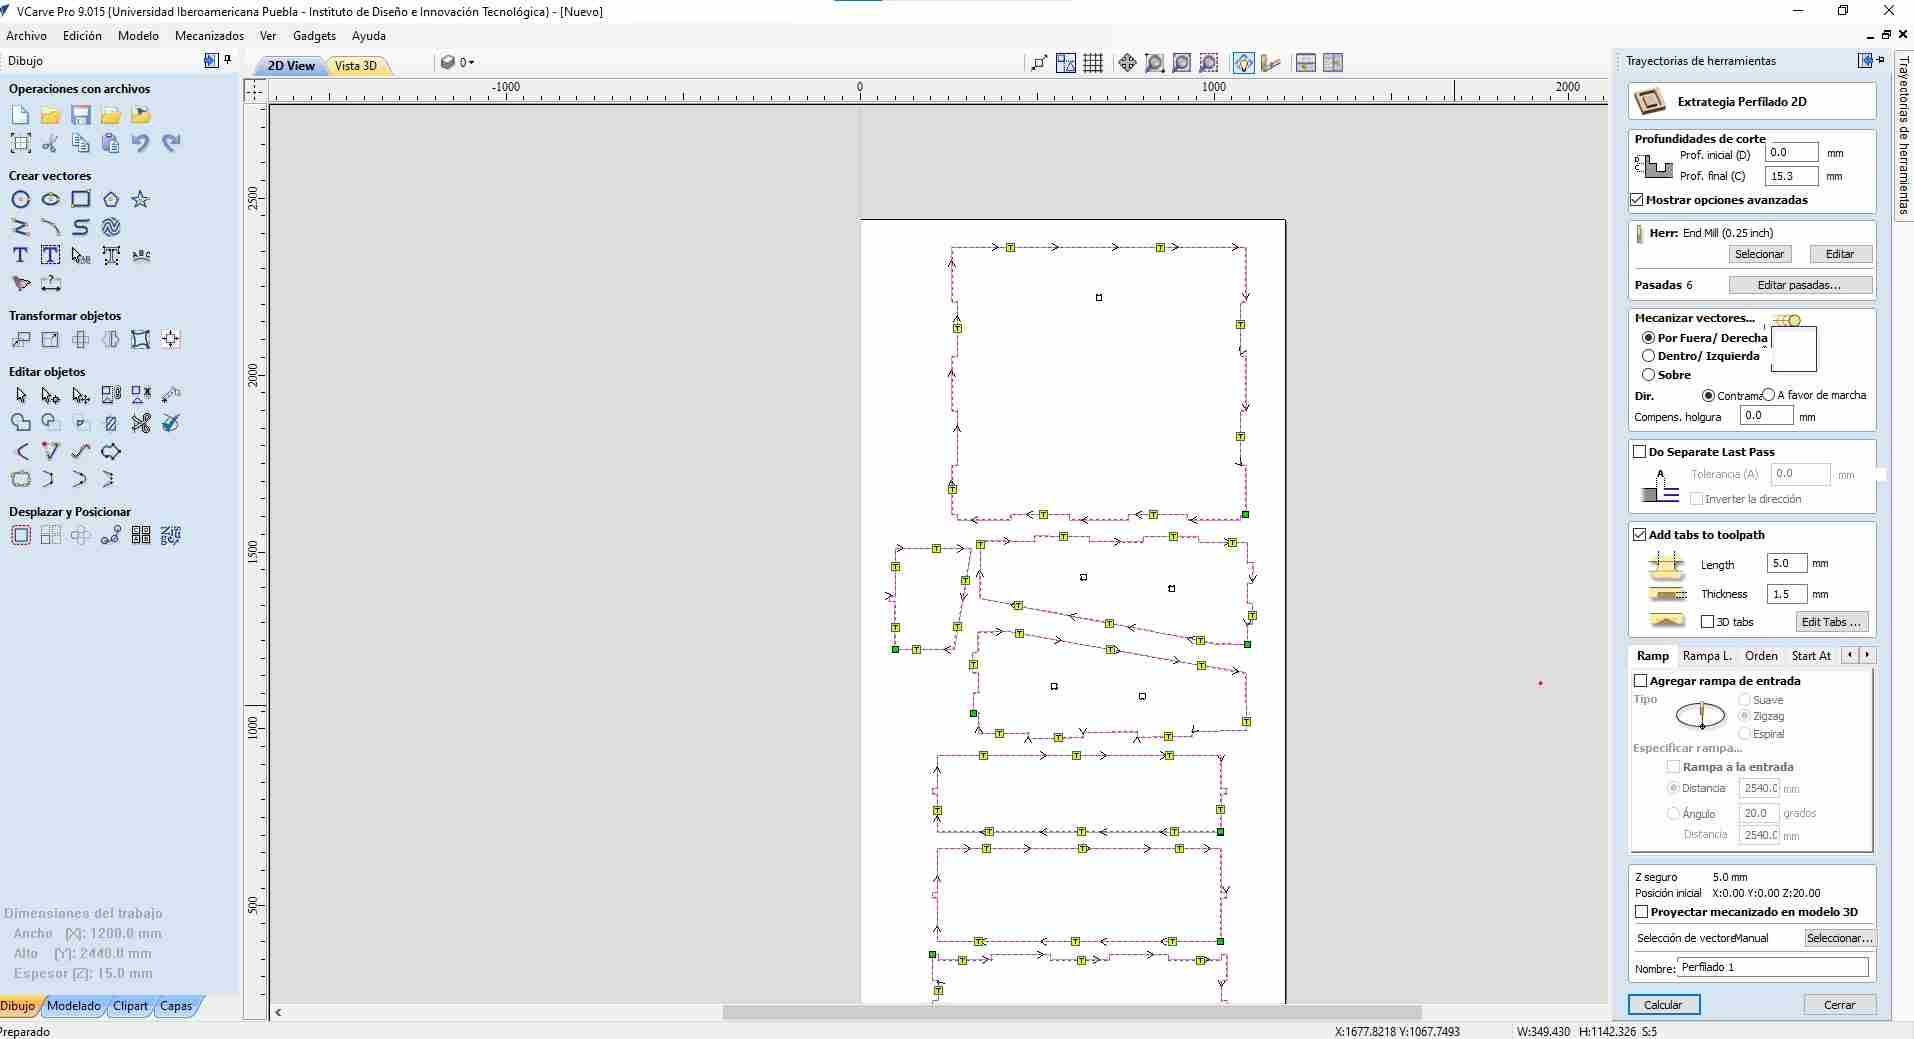
- Profile Cut: To cut the outer contour of the pieces.
- Pocket Cut: For internal cutouts.
Cutting Parameters
- Material thickness: 15.3 mm (to ensure the tool will cut the material properly).
Feeds and speed of my tool
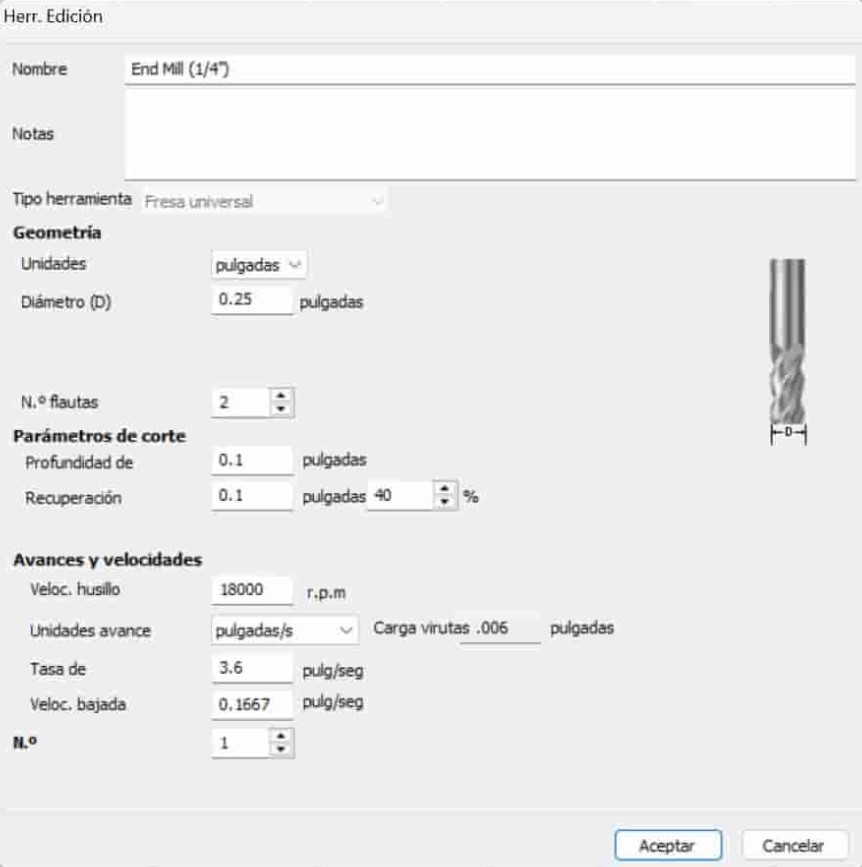

- I set the cutting tool (end mill 1/4") and adjusted parameters such as feed rate and spindle speed.
- I placed tabs on the pieces to prevent them from detaching during cutting.
- I configured 6 passes in the software
I put these calculations in thinking about safe milling for a 1/4 in. diameter tool with 2 flutes. I defined a pass depth of 0.1 in. and a recovery of 40% to avoid overloading the tool. I set the spindle speed at 18,000 rpm, based on the recommended table for this type of cutter and material. I set the feed rate at 3.6 inches per second, following the recommended parameters. In addition, I set the down speed at 25% of the feed rate (1.56 in/sec), because the cutter is not designed to cut aggressively downward, so it's best to go slow and safe on the downstroke.
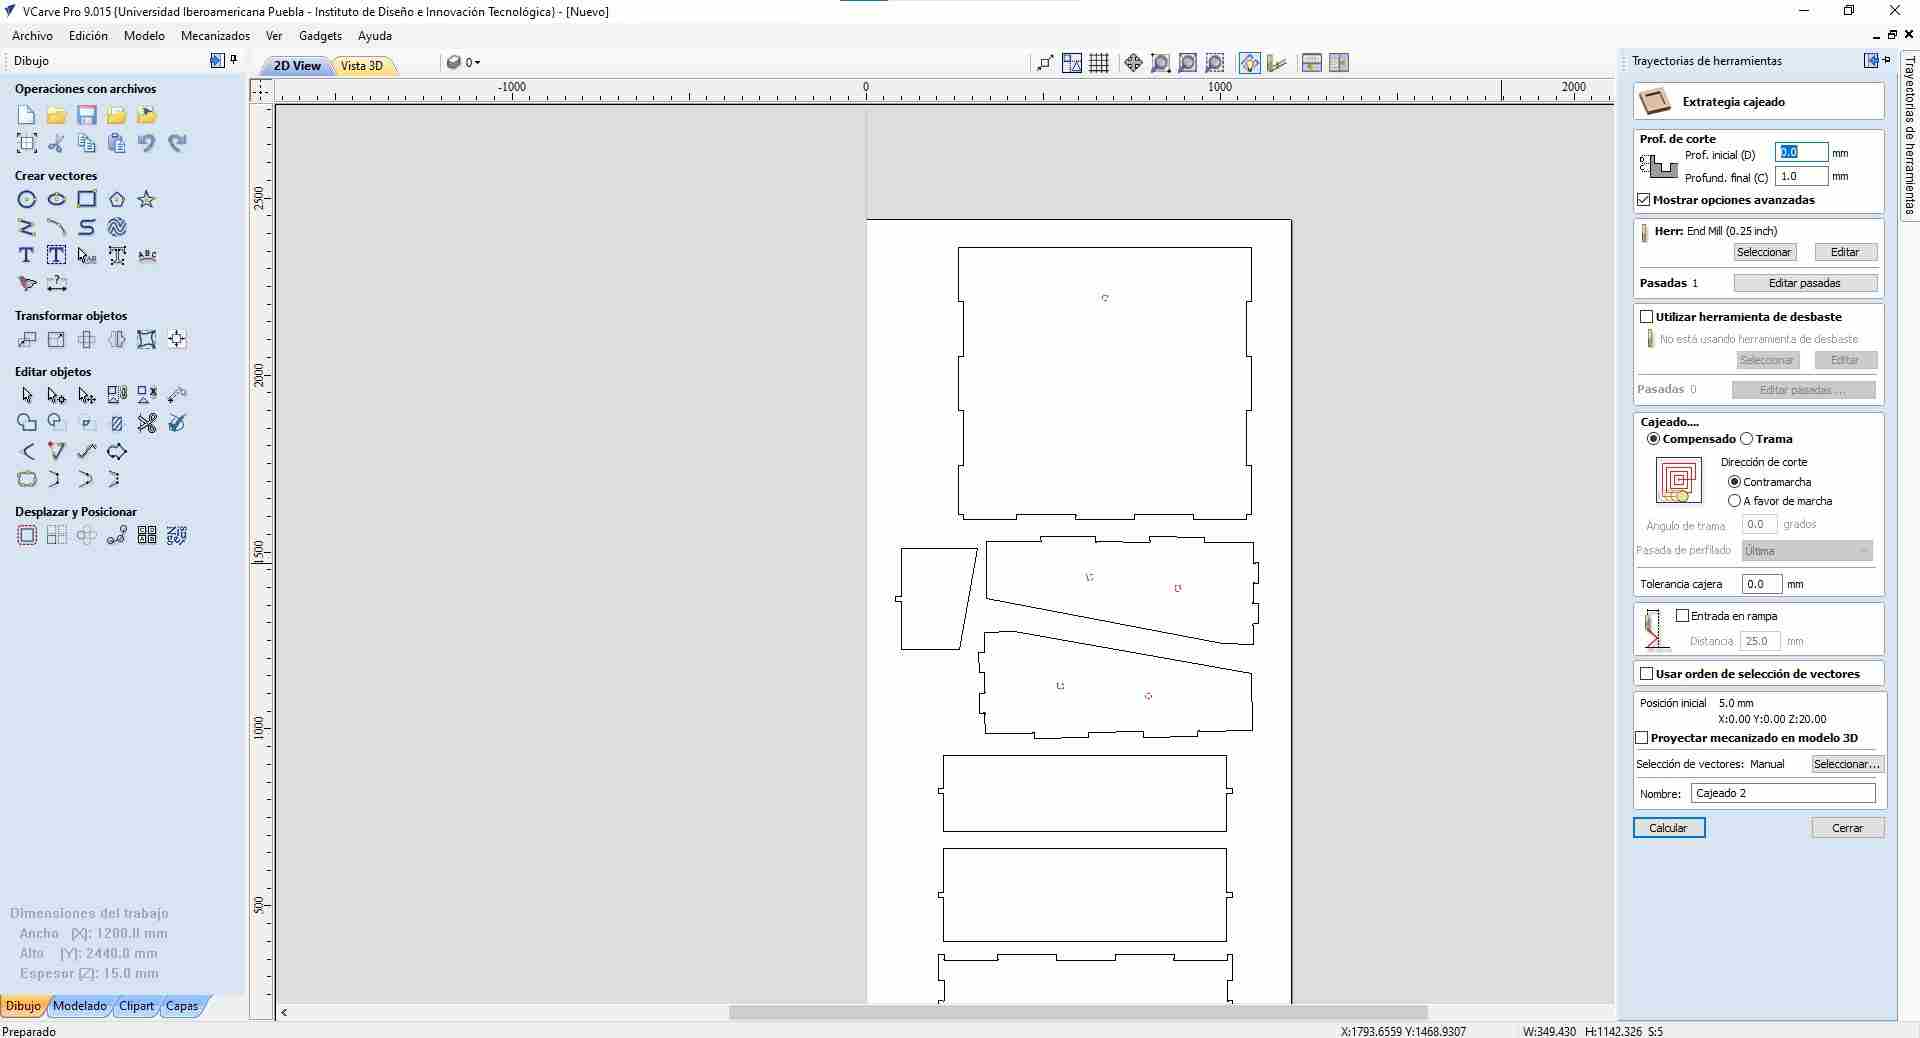
Final Steps
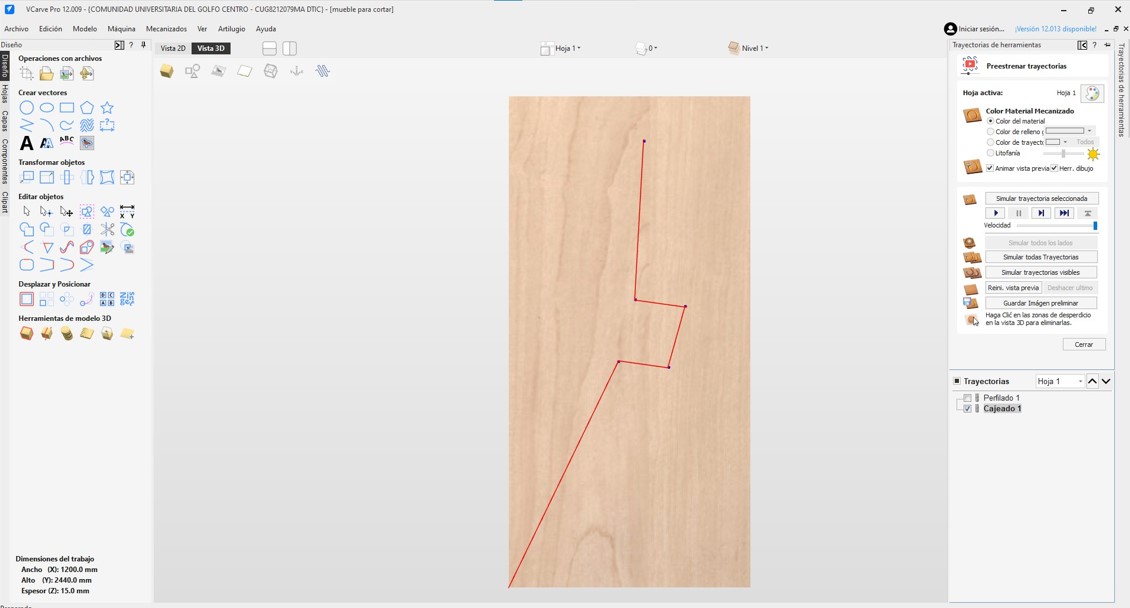
- I used the simulation tool to check that the toolpaths were correct and there were no errors.
- Finally, I saved the file in the machine's format.
Machine Setup
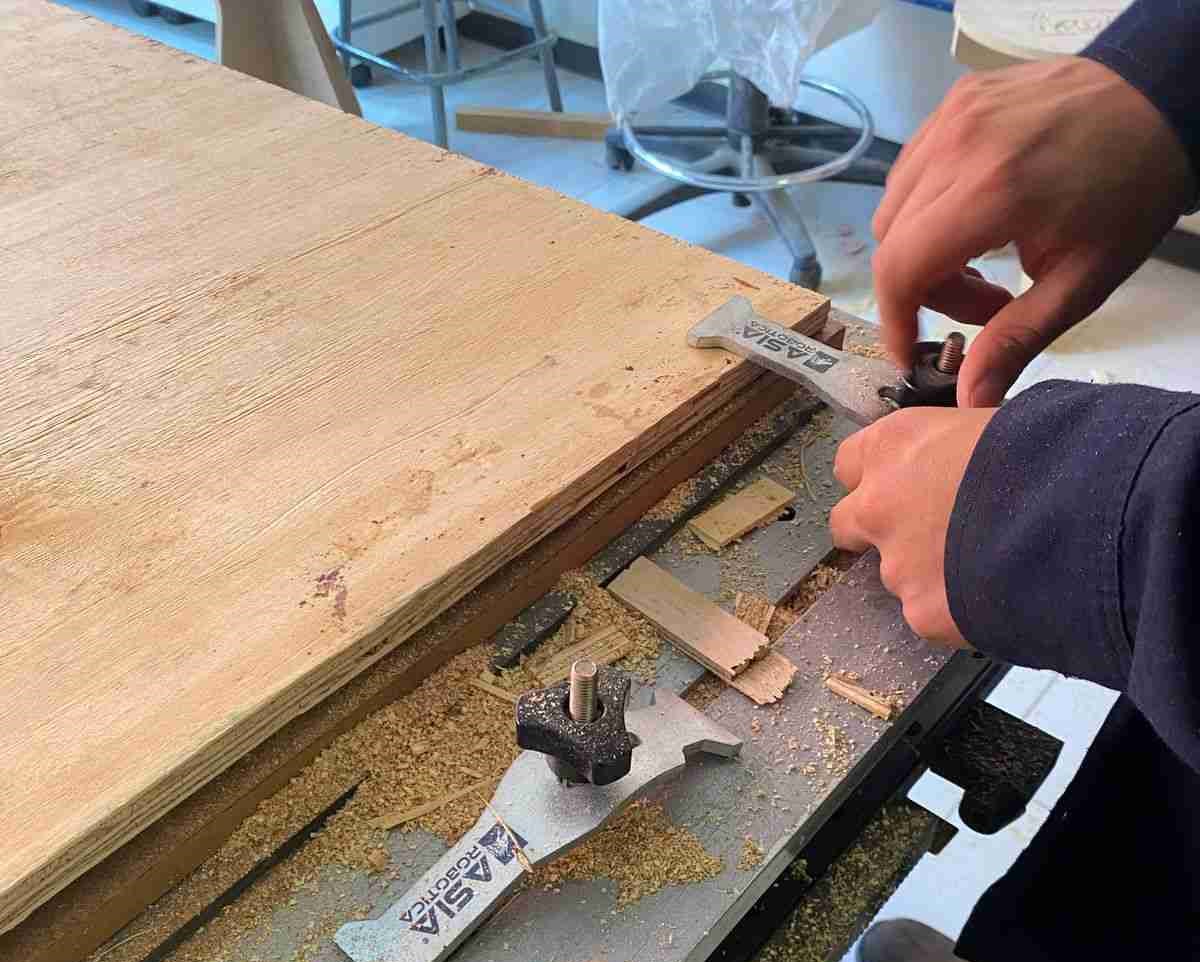
- I placed my material on the sacrificial bed and secured the board properly.
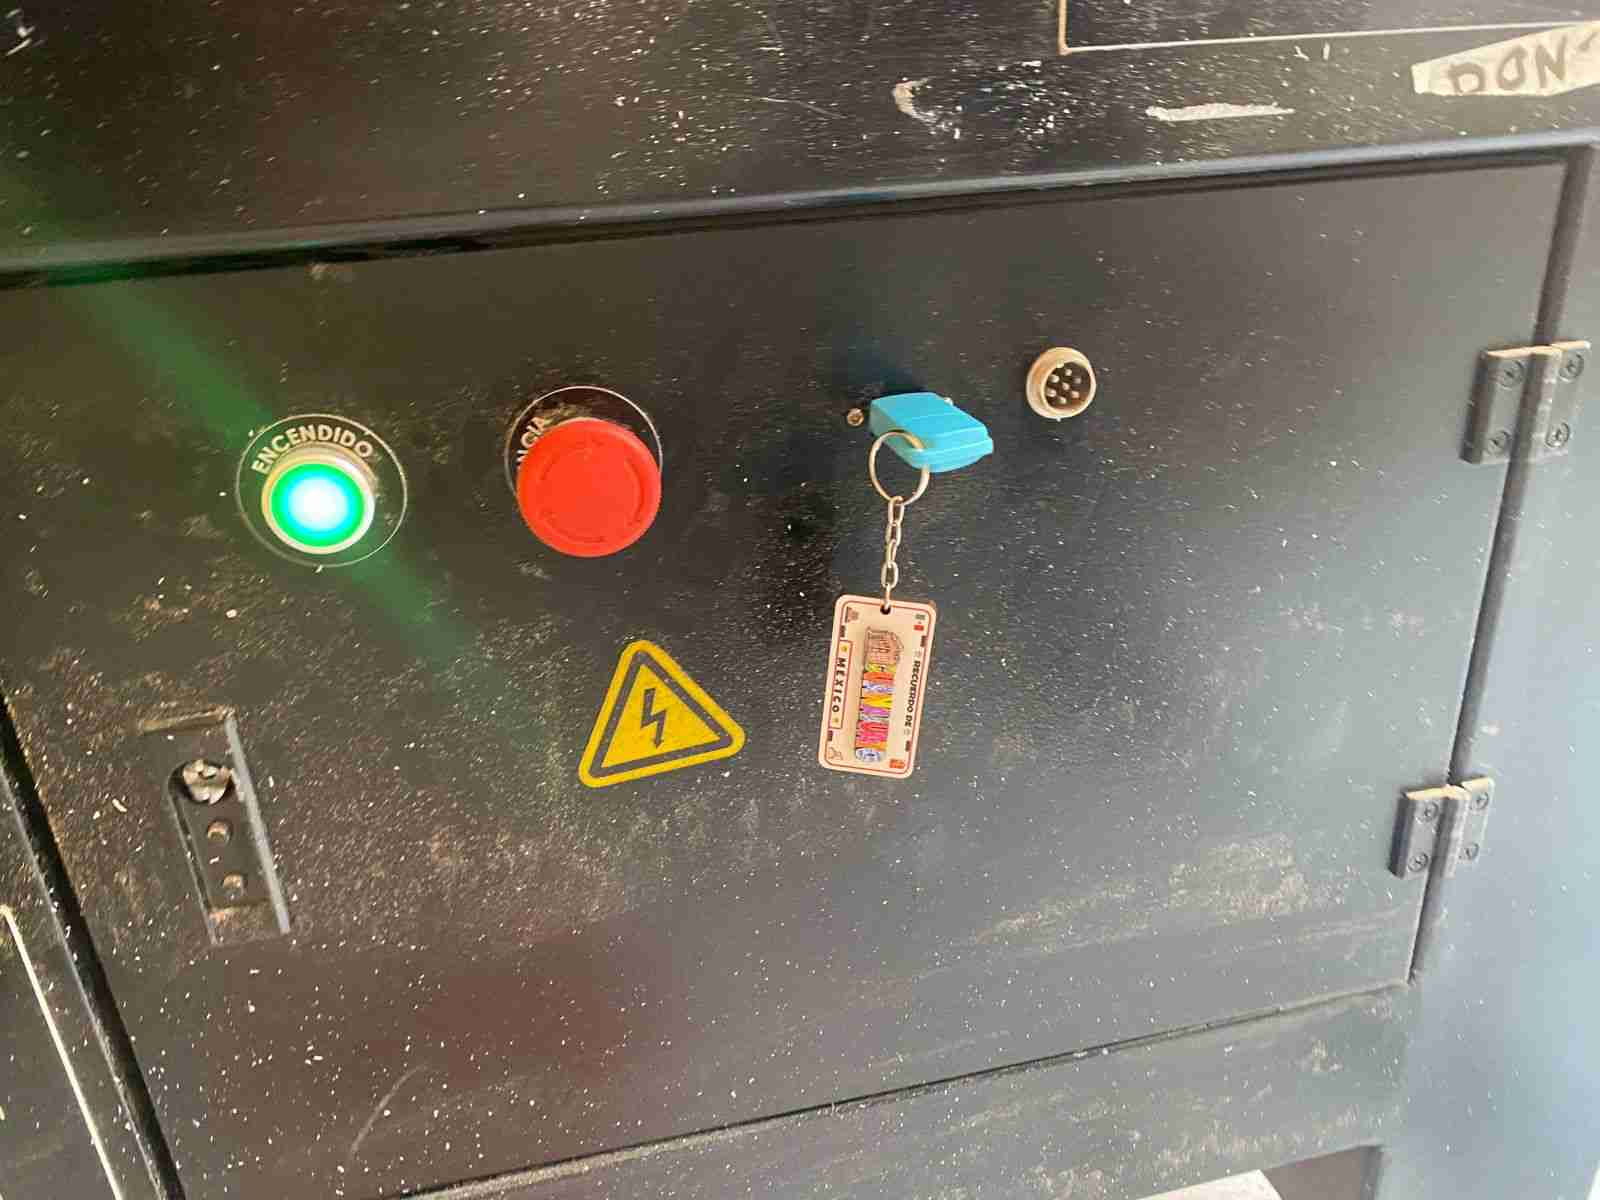
- I deactivated the emergency button and pressed the green button.
- I let the machine return to the origin.
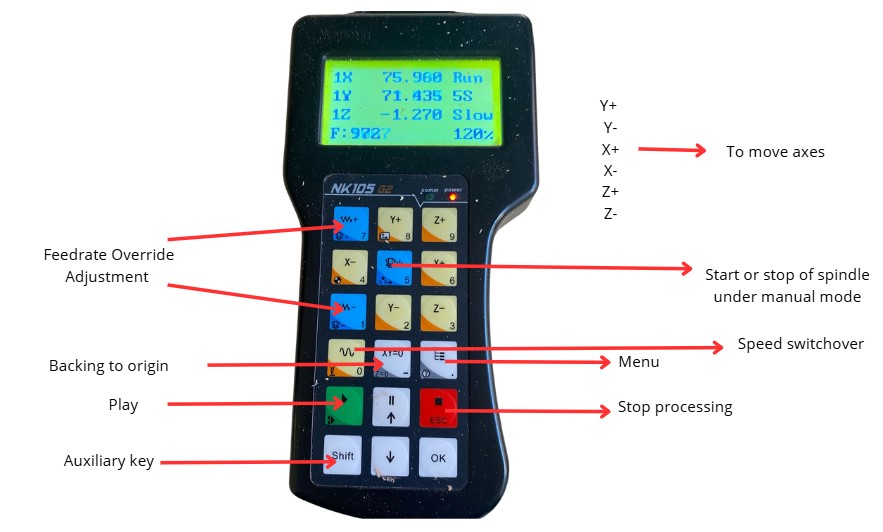
- I set the starting point to 0 for the X and Y axes first, and then I did the same for the Z axis (I adjusted the Z origin and turned the tool until the drill bit started to scratch the material).
- To load the file, I inserted the USB, went to the "Files" button, selected the USB, chose the file, and pressed play.
Assembling and Finishes
- First, I sanded each piece with a sander.
- Then, I used a hammer to join my pieces.
- My pieces fit well.
- To give my shelving a good finish, I varnished it.
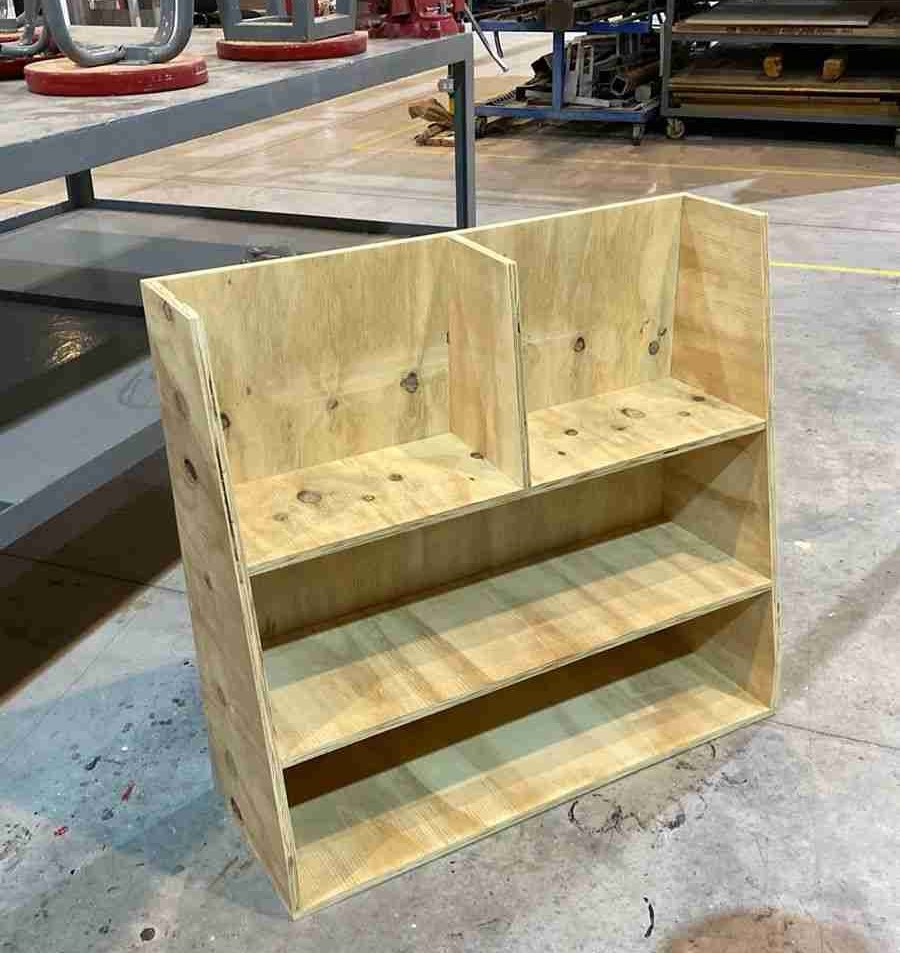
This is the result:

Files
Conclusion
I liked this week very much, at first I was afraid to use the machine, but by making the right adjustments I was able to make my furniture. Now I understand better how to make press-fit pieces and the importance of testing to make sure your pieces fit well.
