Input Devices
Assignment: Measure something: add a sensor to a microcontroller board that you have designed and read it.
Input Devices Week: Water Sensor with RP2040
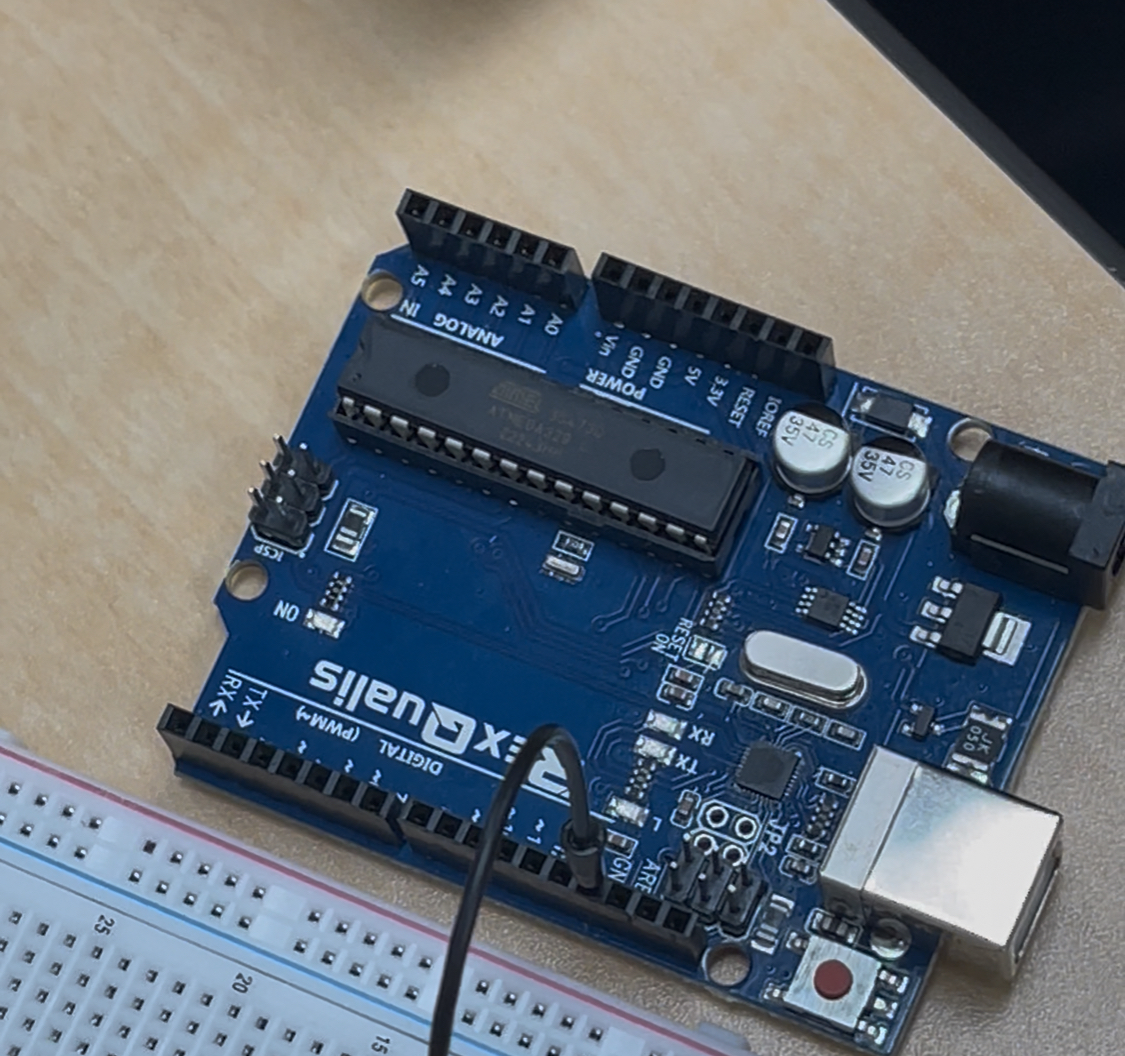
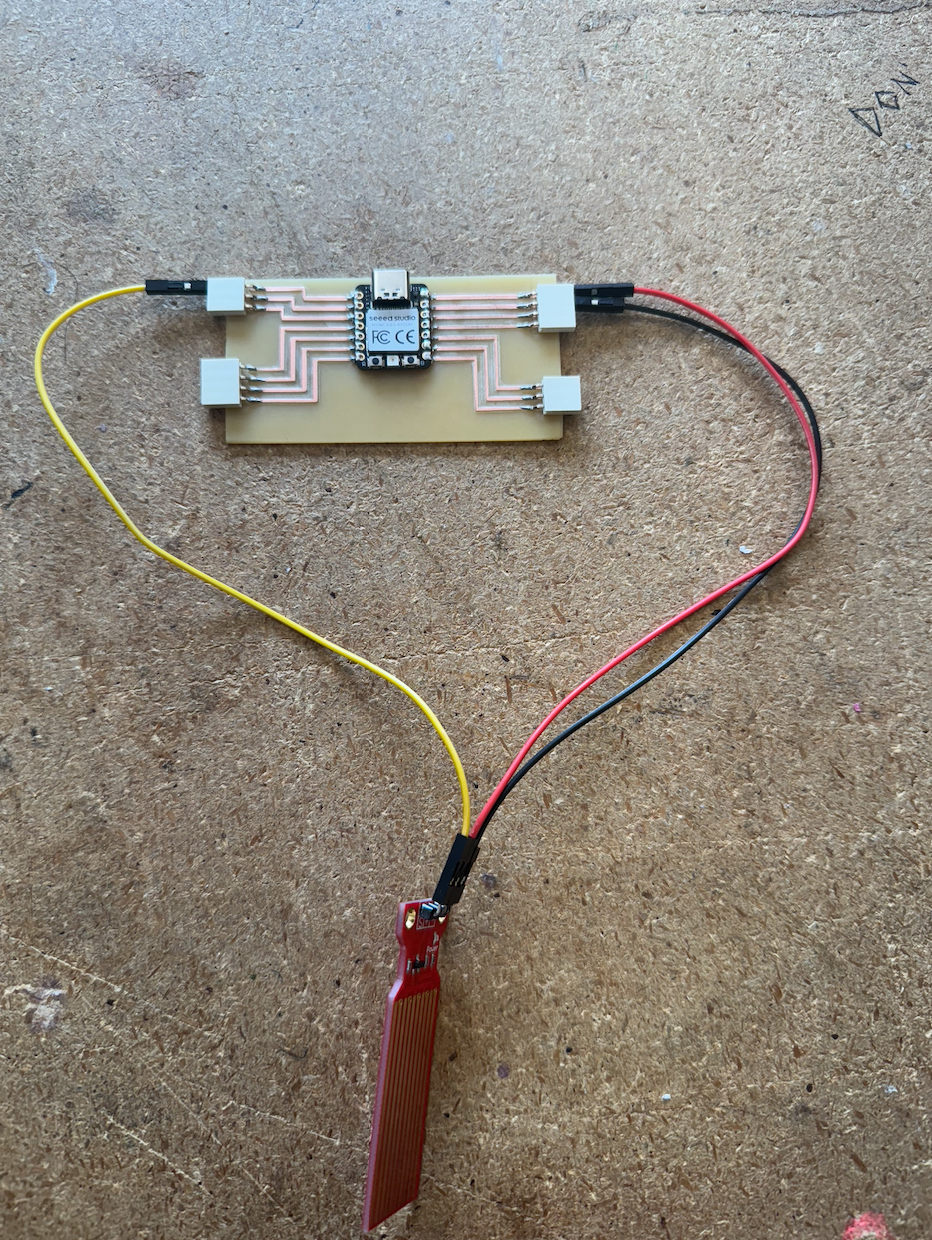
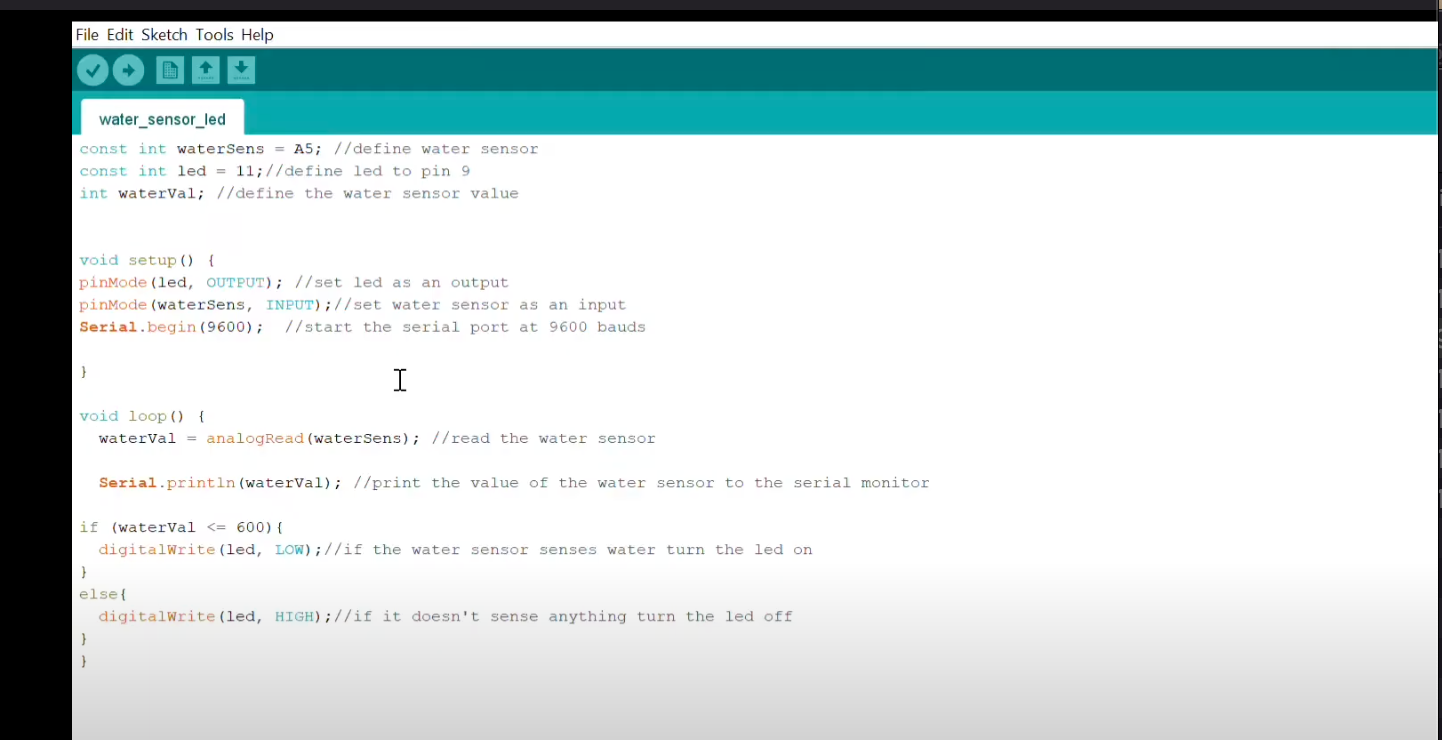
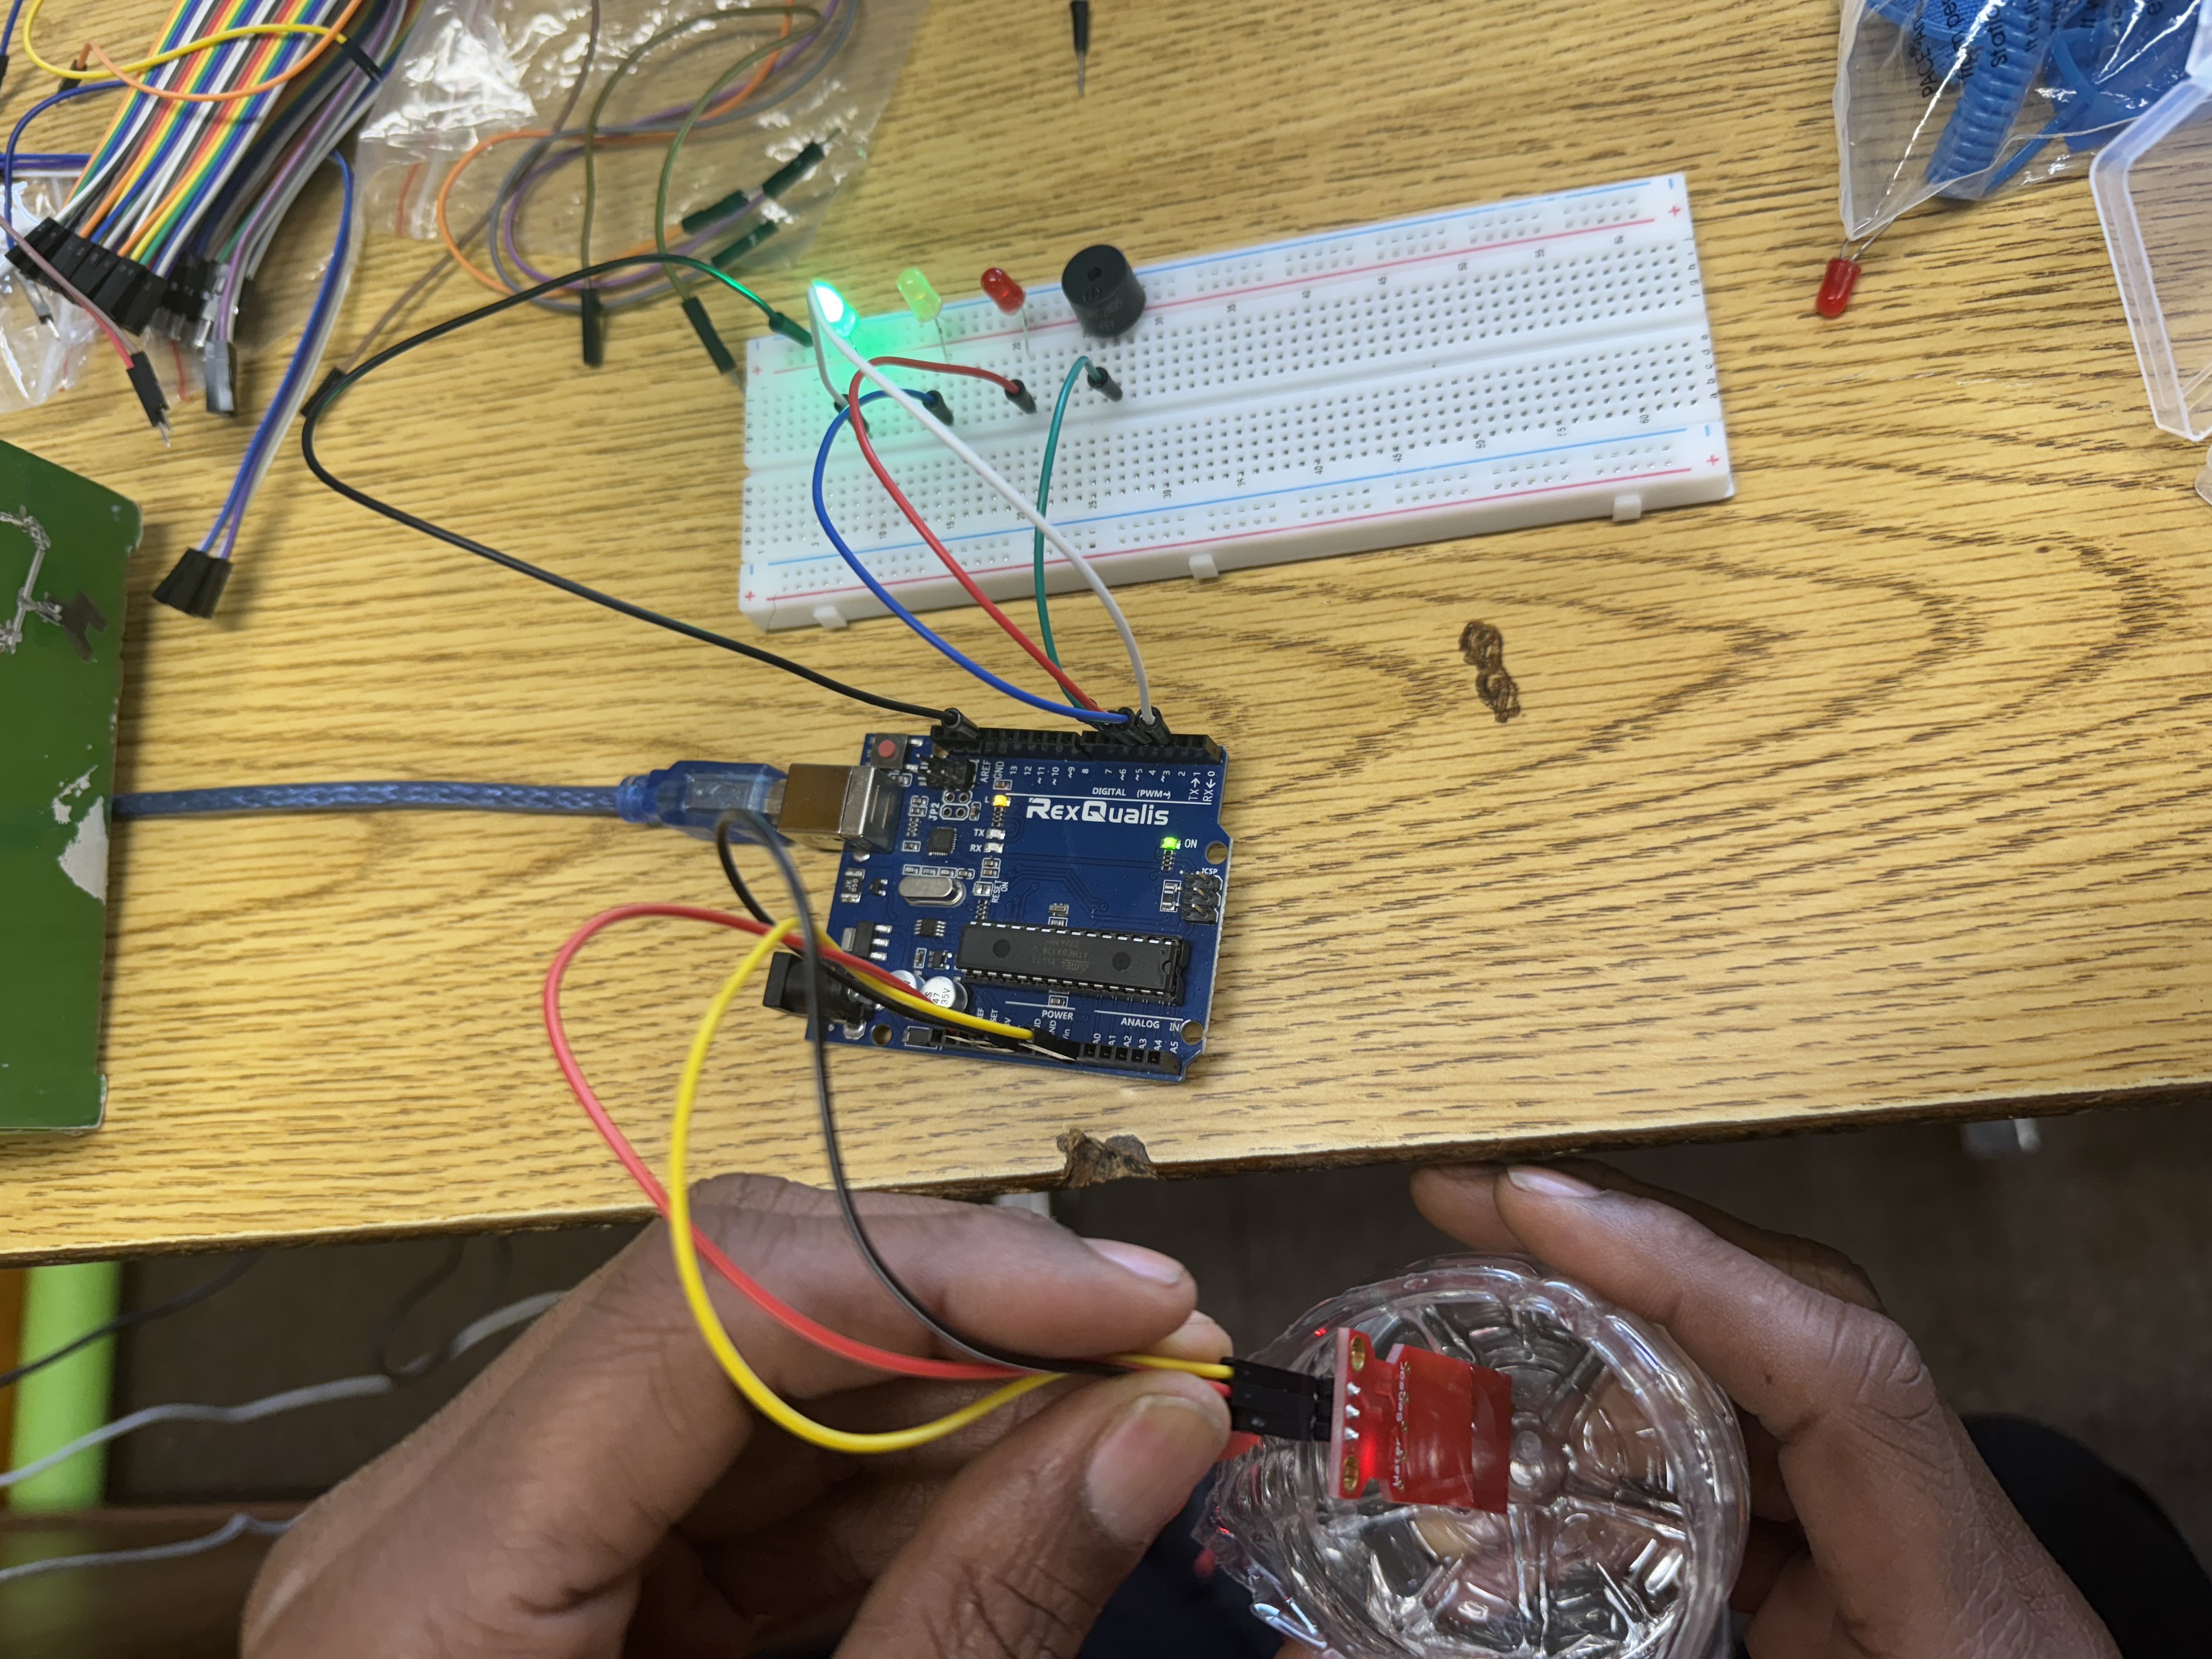
For this week’s assignment, I used the custom microcontroller I designed during Week 8 and integrated a water (moisture) sensor. I experienced minor turbulence when trying to integrate the water sensor with the RP2040, but eventually found another way to accomplish the goal by using the Arduino Uno. Moreover, when testing inputs using the Arduino Uno microcontroller i made significant progress with little to no errors. I began by wiring the sensor. Next, I connected it to analog pin A5 and read the moisture level using analogRead(). If the reading was below 600 (indicating water presence), I turned on an LED as visual feedback. This helped me learn how to interface analog sensors and visualize data through both Serial Monitor and physical outputs. After uploading the sensor code, I gradually dipped the sensor into a glass of water. The serial monitor successfully displayed real-time moisture readings, confirming that the input device was functioning as expected.
Testing Procedure:
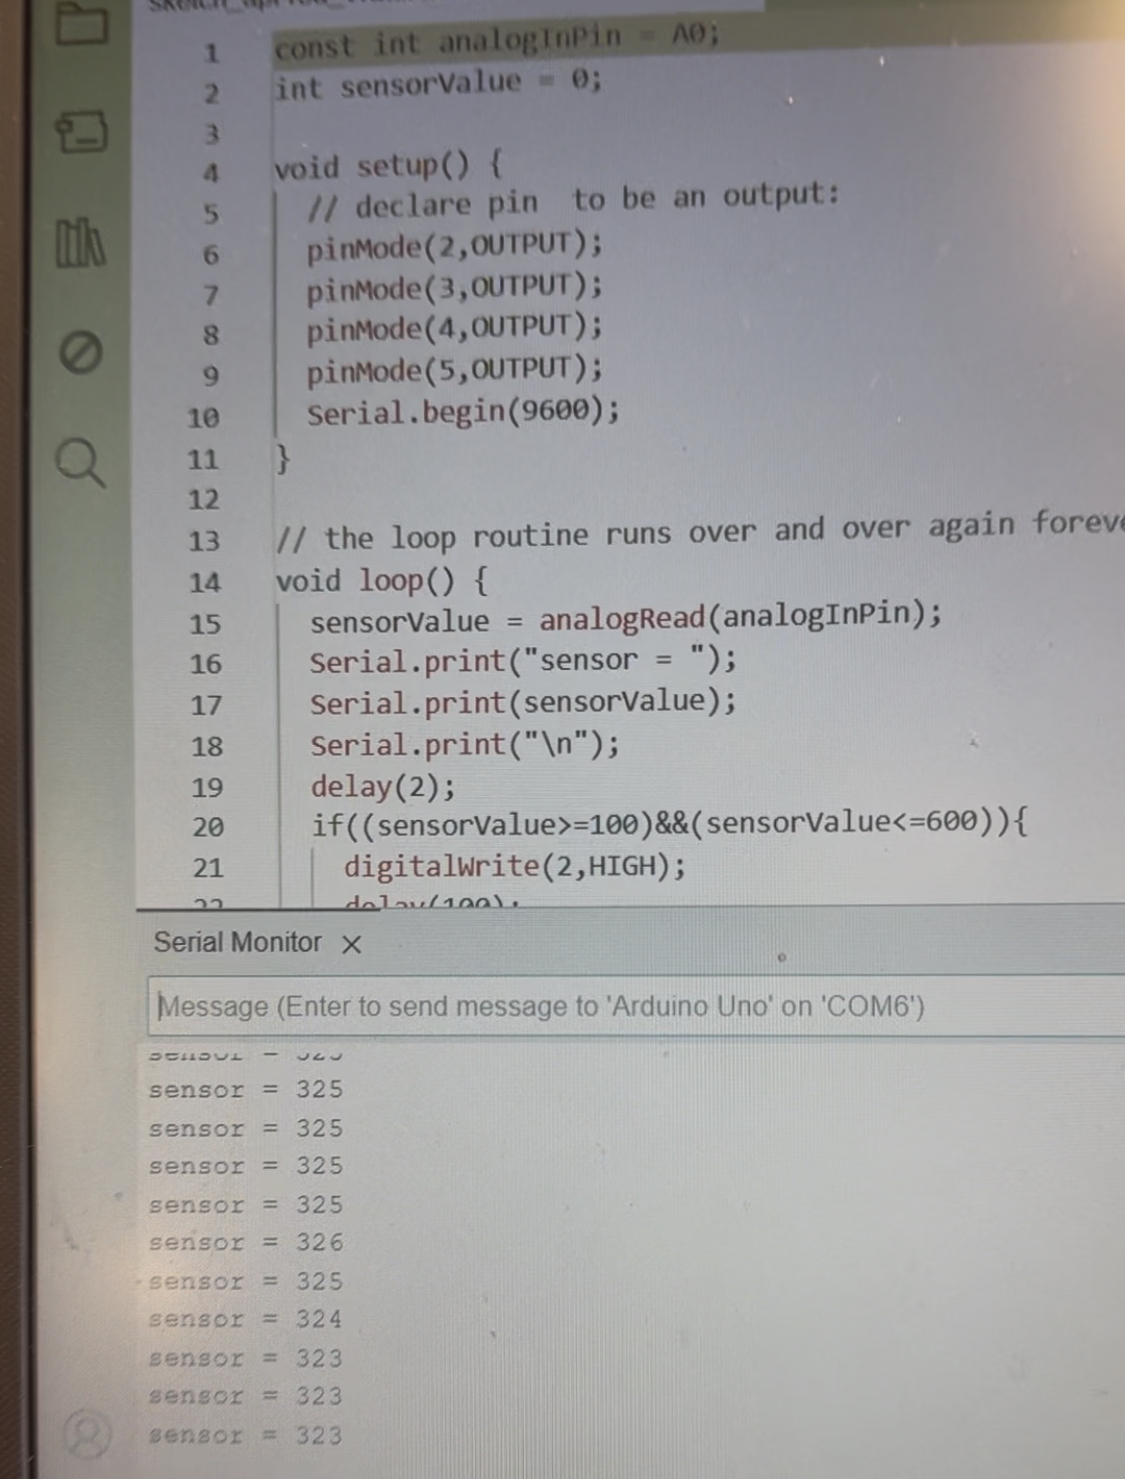
After uploading the code, I opened the Serial Monitor. I gradually dipped the sensor into a glass of water to simulate rising moisture levels. The serial monitor displayed real-time analog readings from the sensor, which decreased as water touched the sensor, confirming successful input detection.
Outcome:
The sensor correctly detected changes in water level. The analog values fluctuated depending on the depth and contact area with water. These results confirm that the input device was properly connected and functioning with the microcontroller board. This sensor can be integrated into automated systems or used to trigger alerts or outputs (like LEDs or pumps) in future prototypes.