Week 5 - 3D scanning and printing
As a group, working with Stanley and Shahmeer under the instruction of Behnaz and Toni, we tested the design rules for a few 3D printers, which helped us understand the capabilities and limitations of different types of 3D printers. Prior to this, my only 3D printing experience was printing a Benchy at the library. I found it especially useful to learn how large overhangs and bridges can be achieved without supports on a standard FDM printer. I was also surprised by the resin printer’s process and the impressive print quality it produces, although the messy post-processing makes it a bit less appealing.
These lessons were useful for this week's individual work, where I 3D printed and scanned objects.
3D design and print
The first task for this week was to design and 3D print an object that could not be easily made subtractively. I decided to make a net-like structure for the back end of the playing field of my final project to dampen the ball’s movement and roll it back to the launching position. I also considered designing the net with small interconnected echo chambers that produce a nice clinking sound when the ball hits it.
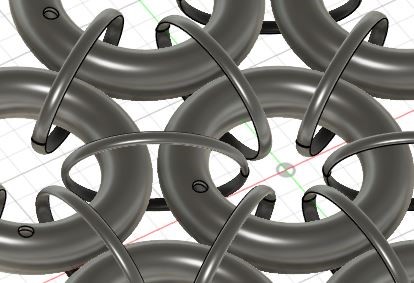
My first draft of such a net is shown below. However, I initially overlooked its manufacturability. The overhangs should be minimized, and it would be beneficial to design the structure so that as much of it rests on the printing surface as possible.
I created a second design but quickly abandoned it when I noticed that, according to Fusion 360, a single cylindrical structure with 2 cm diameter weighed almost 10 grams. Since a ping pong ball weighs only 2.7 grams, such a structure would not effectively dampen the ball’s motion. I then created a third version. However, I later realized that the default material in Fusion 360 is metal. After changing the material to ABS plastic, the estimated weight of the second version dropped to 1.3 grams per cylinder, making it a viable option for printing. The second version is shown below, with a section analysis revealing the inner structure of the "echo chambers."
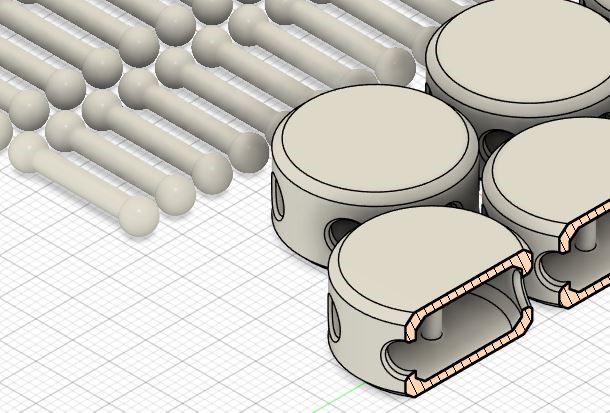
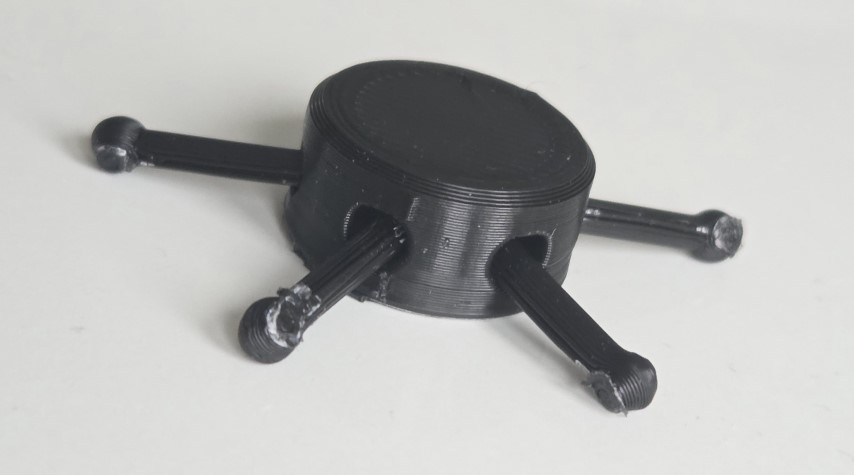
With the first 3D print, the connecting sticks did not stick to the printer's bed, resulting in a mess of '3D printer spaghetti.' Adding a 3 mm brim significantly improved adhesion, and the prints turned out well afterward. The brims had to be manually removed, and the sticks needed to be placed into the cylinder, but otherwise, the design functioned as intended.
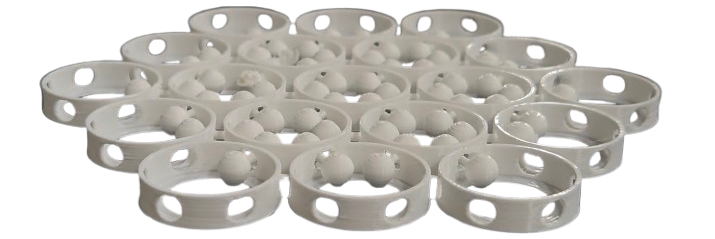
The third design consists of 2 cm diameter rings interconnected by ball-jointed sticks. A key advantage of this approach is that the sticks can be printed directly inside the ball joints, eliminating the need for assembly. The design was created in Fusion 360 using the same methods as in weeks 2 and 3. Parametric design was used, i.e., parameters such as ring_hole_clearance and stick_width can be adjusted afterward. The weight of one ring with its connecting sticks, printed in ABS plastic, is about 0.4 grams, which should help dampen the movement of the ping pong ball.
In this version of the design, approximately 90% of the prints succeeded even without a brim, as the larger balls at the ends of the connecting sticks provided better adhesion to the 3D printer's bed. To achieve a 100% success rate, a 3 mm inner brim was added, which had minimal impact on the functionality of the hinges. Manufacturing this subtractively (e.g., with CNC machining or laser cutting) would be difficult, especially with the connectors in place.
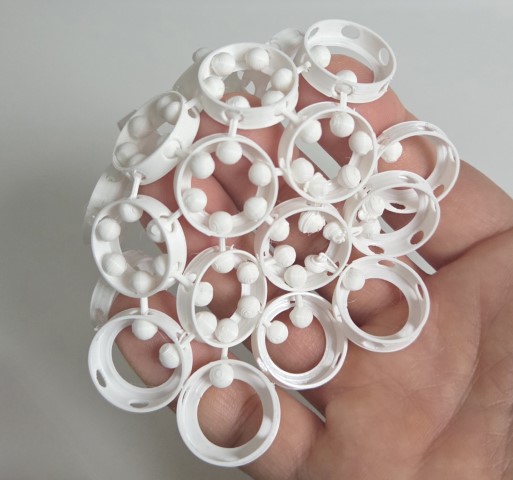
To print a larger 30 × 30 cm net, a Fortus 380mc printer was used, as it offers a larger build area. (to be continued)
3D Scanning
There are several methods to perform 3D scanning, such as:
- Light Detection and Ranging (LiDAR) scanning measures the flight time of light pulses in different directions.
- Stereoscopy captures 3D scenes by analyzing the disparity between images taken by two cameras positioned slightly apart.
- Structured light scanning casts a known light pattern onto the object, and the 3D shape is deduced based on the distortion (parallax) of the pattern.
- Photogrammetry involves taking overlapping photographs of an object from different angles. Specialized software reconstructs a 3D model from these images.
- AI-based scanning can use a single camera and relies on various visual cues and machine learning to estimate depth and structure.
Another task for this week was to scan an object using a 3D scanner. I decided to scan an owl using the 6th-generation iPad Pro. It has a LiDAR sensor, which has been analyzed in studies such as this one. I used the free Scaniverse app, which combines LiDAR data with the iPad's regular camera to reconstruct a full-color 3D model.
The owl was sitting on the floor, illuminated by a lamp from behind, a front-facing light, and a ceiling light from above. I selected Mesh Scanning mode and "Small Object" in the Scaniverse app. I performed the scan by slowly moving the iPad Pro around the owl for approximately 30 seconds, aiming to maintain a consistent distance. This helped capture both LiDAR-based 3D data and RGB imagery from all angles with minimal distortion.
The video below shows the result of the scan. The photo-textured 3D scan (which combines 3D geometry with standard camera imagery) looks quite good. I created this part of the video by screen recording the iPad while panning around the 3D model. The plain 3D geometry (.STL), also shown in the video, lacks fine detail but captures the general shape with an accuracy of a few centimeters. This level of accuracy may be sufficient for certain applications, especially if the data is manually cleaned up.
The total sizes of the photo-textured 3D model and the STL file are too large to share on the Fab Academy repository: 84 MB and 14 MB, respectively.
Updates after week 5
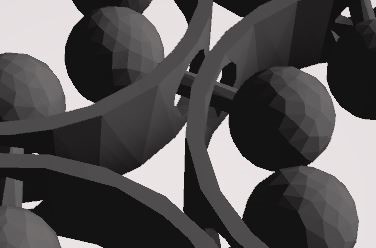
I made a larger 30×30 cm net design to be printed with the Fortus 380mc printer, but the slicer took too long to process the 250 MB STL file. Based on a ChatGPT prompt, “How to make a large STL file smaller in Blender?”, I imported the STL into Blender and applied the Decimate modifier in the Modifiers tab with a 10% ratio. This reduced the file size to a reasonable 25 MB without introducing too much jaggedness to the model:
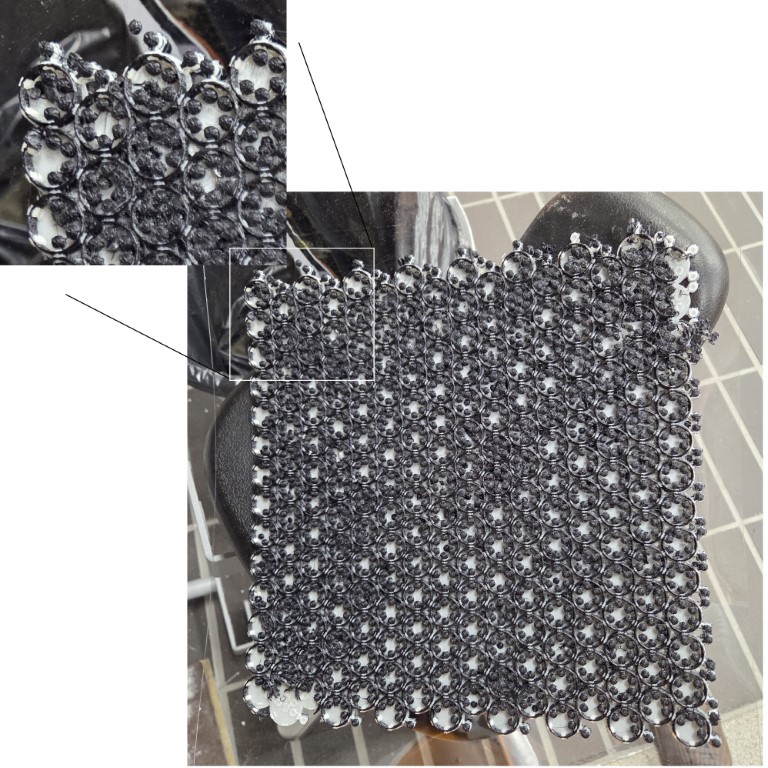
Despite this, slicing took six hours, and the print from the Fortus 380mc didn't come out well for some reason:
Finally, I was able to print a larger net using the Prusa MK4S with a 3 mm brim and 100% infill settings. The connecting sticks were stuck on the brims, but these connections could be manually twisted and detached. Below is a video showing the net with the brim side facing up.
Design files
Fusion 360 design file for the 3D printed net, version 1
Fusion 360 design file for the 3D printed net, version 2