
Week 1 - Project management
OK! Started off Fab Academy with Neil’s online lectures and an on-site tutorial with Ivan regarding Git and html. Next time, I’ll bring a mouse with me—it’s a little bit difficult to set it up and take notes for this online document using the touchpad and the small laptop screen. This week I also worked on defining my final project idea and started to getting used to the documentation process. I'll update the final project page each week.
Setting up Git
Git is a highly regarded version control system, invented by Linus Torvalds, for managing file changes efficiently. In the Academy, we’ll use GitLab, a platform built on Git, to manage all our files. GitLab also includes additional features such as task management and wikis, making collaboration easier.
I started by installing Git for Windows and used Git Bash from the command line to perform operations on the files in Git.
The first task was to add the Git username and email. Copying the commands from this Git tutorial didn’t work initially. After troubleshooting this issue with ChatGPT, I discovered that the website had used an en-dash (–, Unicode U+2013) instead of a regular double dash (--, ASCII). Replacing the en-dash with the correct double dash and ensuring proper double quotation marks fixed the issue.
Then, I created the SSH keys to enable encrypted file transfers:
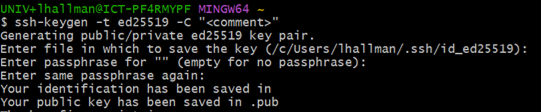
The files were stored in a wrong folder for some reason, so Ivan suggested to manually move them to the correct directory (C:\Users\lhallman\.ssh\id_ed25519.pub). Afterward, I opened the file containing the created public key and copied its contents.

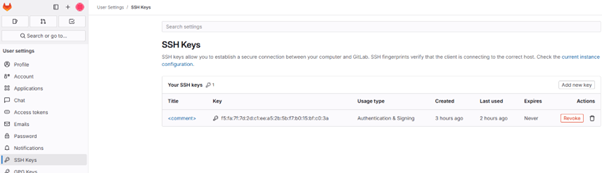
And pasted the public key into gitlab:
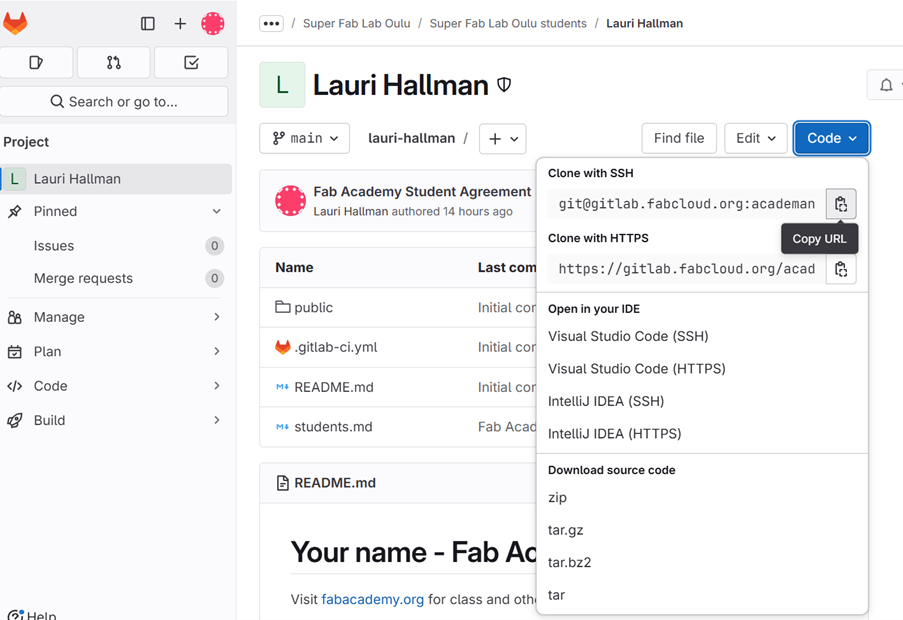
Next, to clone the repository I copied the name of the clone from gitlab.fabcloud.org:
In Git Bash, I went to the folder intended for use as my local repository and cloned the Fab Academy repository into it:
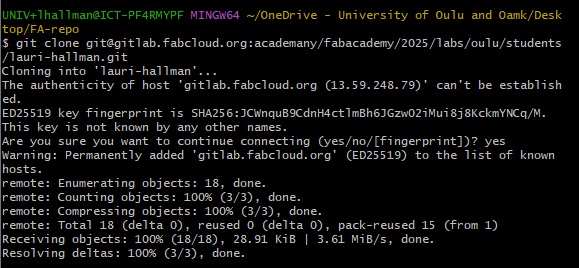
After navigating to the main directory:
cd '/c/Users/lhallman/OneDrive - University of Oulu and Oamk/Desktop/FA-repo/lauri-hallman'
I can now use regular Git commands to pull, add, commit, and push changes to the repository—preferably in this order to ensure the local branch is up-to-date before making changes.
To fetch changes from the remote repository gitlab.fabcloud.org and integrate with the local branch:
git pull
Tell Git to take a snapshot of the contents of all files under the current local directory in a local temporary staging area:
git add .
To permanently store the contents of the staging area in the local repository:
git commit -m "description of modification here"
To upload the local commits to the remote repository gitlab.fabcloud.org:
git push
Creation of web page and documentation
To create the web pages for this documentation, I used the "Forty" template from www.html5up.net, modifying it to suit my needs. I made HTML modifications and wrote the content in VS Code, previewing changes by simply opening the locally edited file (e.g., C:\...\FA-repo\lauri-hallman\public\index.html) in a browser.
To clearly indicate which texts are commands on this web page, I asked ChatGPT, 'How can I display Git Bash commands on a web page with a full-width black background, like a terminal?' I then added the following code between the <head> and </head> tags:
.git-bash {
background-color: black;
color: rgb(146, 146, 146);
padding: 10px;
border-radius: 0px;
font-family: monospace;
line-height: 1;
white-space: pre-wrap;
word-break: break-word;
}
After this, I could add the following in the main body to create text that looks like a command line:
<pre class="git-bash">example text</pre>
The only issue was the extra space surrounding this text line. Due to time constraints, I once again relied on ChatGPT with the prompt, 'Can I reduce the number of lines between paragraphs in HTML5 UP?' The solution was to edit main.css, which defines styles for the web pages.
p {
	margin: 0 0 2em 0;
	margin-bottom: 25px; /* Adjust spacing between paragraphs, Lauri added */
	line-height: 1.4; /* Adjust line height within the paragraph, Lauri added */
}
One of the Fab Academy recommendations was to include a "hero shot" (a key achievement image) at the top of each week's page, which I implemented with:
<img src="./images/week1/hero_week1.png" style="width:100%; height:auto;" alt="hero shot">
In Fab Academy, PNG images are not preferred due to the websites' archive space constraints. However, I used PNG for the hero shots because I needed transparent images, which JPG does not support. To quickly create transparent images, I usually use www.remove.bg.
I uploaded the pages to gitlab.fabcloud.org with Git bash using the above commands.
Each time the git push operation is made, Gitlab performs a set of commands defined in .gitlab-ci.yml, to publish the web site etc. I haven't modified this file yet.
Since our repository has a 10 MB per commit and 500 MB total limit, I reduced JPEG image sizes using the Image Resizer tool in MS PowerToys (a set of utilities for customizing Windows). I selected the image file(s), right-clicked, and chose "Resize pictures," usually selecting a resolution smaller than 854 × 480 pixels. This typically reduced image file sizes to just a few tens of kilobytes.
I also used ChatGPT to review my text with the prompt: "Is this text ok?