3. Computer-Controlled Cutting
Group assignment:
- Do your lab’s safety training
- Characterize your lasercutter’s focus, power, speed, rate, kerf, joint clearance and types.
- Document your work to the group work page and reflect on your individual page what you learned.
Individual assignments
- Design, lasercut, and document a parametric construction kit, accounting for the lasercutter kerf, which can be assembled in multiple ways.
- Cut something on the vinyl cutter.
Group assignment:
1. Safety Instructions for Laser Cutting Machines
- Personal protection: Use a smoke purifier, wear a mask, goggles, etc. when cuttingPersonal protection: Use a smoke purifier, wear a mask, goggles, etc. when cutting
- Working environment: exhaust smoke to the outside, keep indoor air circulation, and keep no debris and flammable materials around the laser cutting machine
- Material selection: You cannot cut/carve glass, marble, ceramics, rubber stamps, etc.
- Operation specification: When the machine is processing, someone needs to be on duty to watch over the machine.
- Equipment maintenance: Clean and maintain the equipment on time, and clean the laser head and lens regularly
2.Characterize my lasercutter’s focus, power, speed, kerf
2.1 lasercutter’s focus
-
The laser cutting machine I use is MakerBlock’s Laser Box, which has an external dimension of 958 x 528 x 268 mm and can cut an area of 500 x 300 mm. It uses a CO₂ glass laser.

-
You can access it on the Makeblock website Download and install software.
-
In the design interface - Create New Design - Import Files - Edit Files.

-
Add device - USB connection. If the device is successfully connected,At the laser processing interface, You can see these materials on the laser processing interface.


-
It has a camera, so it can use visual intelligent positioning to adjust the focal length, which is very convenient. (Unfortunately, due to the discontinuation of maintenance on this device, after a recent repair (replacement of the main control board), the machine’s autofocus has malfunctioned and cannot be used. Focus only by selecting the material thickness.)


-
You can also manually input the type and thickness of the material,It will automatically adjust the focal length.

-
You can set the processing parameters of the material based on official cutting/carving data. You can also save processing data based on your actual testing. So next time you don’t need to fill in the data again, just select the materials.
2.2 Cutting power/speed for different materials

-
Cutting 5mm acrylic, power/speed :


-
Cutting 3mm acrylic ,power/speed:


-
Cutting 5mm basswood, power/speed:


-
Cutting 3mm basswood, power/speed:


-
Cutting 2mm basswood, power/speed:


Conclusion: Based on these processing results, I got the approximate processing data of different materials, which saved me a lot of time in the later use of laser cutting machine. I will refer to this table later to make more precise applications.
2.3 Engraving power/speed for different materials
-
Basswood board vector engraving
Speed is 80, power from 2 to 100,This machine is not very effective in engraving wood boards with vector graphics, and the lowest power can burn the wood boards.

-
Acrylic solid vector engraving

Surprisingly, the vector graphics engraving was deeper than the cutting, and the effect was not as good as the low-power cutting, probably because of the limitation of the machine software.
2.4 acrylic(3mm) cutting kerf
Because when the laser cutter cuts the material, the final size will be unprepared due to burning. When making the splicing connection structure, if there is no accurate size, the connection of the work is not firm and it will fall apart easily, and it will take more time to fix the work with glue or glue gun. Therefore, it is important to measure the gap when the laser cutter cuts different materials. The following is the gap measurement tool I designed for 3MM acrylic.

Conclusion:The kerf of 3mm acrylic is 0.25mm.If a spliced structure is made, each gap has two edges that lose 0.25mm at the same time, and the total loss is 0.5mm.

I found some problems:
- The same material cut at different times has different cutting effects, probably because my machine is too old.
- n addition, acrylic will become very brittle and break easily after being left for a long time.
- Different colors of 3mm acrylic will have slightly different thicknesses, which is a very troublesome problem.
Individual assignments
Structural design (parametric)

I like these structures because they can create various interesting shapes without complicated parts. I want to use these simple parts to make a toy display stand. I chose Fusion360 to design my work. In Fusion360, I set several variables so that I can adjust the size of the work more easily. After 4 times of production and improvement, I finally completed this structure.

These are the parts of the final product, which only requires 2 structures. Very simple but very practical.

Structural design
I use 3 variables, which allows for flexible size adjustment and saves a lot of time. They are the radius of the arc, the material thickness, and a height.

Structural production
-
The square shape is very suitable for storage racks, and I wanted to be a little innovative, so I designed this curved square structure. However, I found a problem. The second layer only has one side for support, so it is difficult to stabilize the objects on it.

-
The 3 mortise and tenon structures on each side edge are changed to 4, so that the display stand has more support and is more stable when the height is increased.

-
Finally,Modify the sharp edges to rounded corners, so they are not prickly and are more convenient for assembly.

Cut something on the vinyl cutter.
This week, I tried using the Roland GX-24 cutting plotter. The machine can create adhesive stickers that adhere to glass or other surfaces, serving as beautiful decorations. Compared to a laser cutter, the results are cleaner and the process is more convenient. I plan to cut out a logo I designed for myself.

Material Preparation
Plastic Sheet Material & Specifications
- Materials: PVC, PET, PP
- Thickness: 0.1 mm - 0.5 mm
- Surface Requirements: Smooth and free of air bubbles
- Maximum Width: 24 inches / 610 mm (available in rolls or sheets)

Additional Materials: Transfer film、Backing paper、Squeegee、Tweezers、Craft knife、Cutting blade:

Production Steps
1. Computer Setup
-
Connect the computer to the device using a USB-to-Type-B cable

-
Install CutStudio software and drivers
- download the software and drivers for the Roland GX-24. The Windows version includes .exe files, Corel Plugin, and Ai Plugin, while macOS only supports the Ai Plugin.

- download the software and drivers for the Roland GX-24. The Windows version includes .exe files, Corel Plugin, and Ai Plugin, while macOS only supports the Ai Plugin.
2. Design Preparation
-
This is the logo I designed last week using Coreldraw. Because the extra material in the middle is difficult to remove, I tried to make the graphics discontinuous.

-
Create vector graphics I have tried to export the latest in
.aiformat, but because Cutting Studio is a very old version, the file could not be opened. Later, I referred to Pamela’s website ,Export the file of Illustrator 3 EPS version, solved the problem.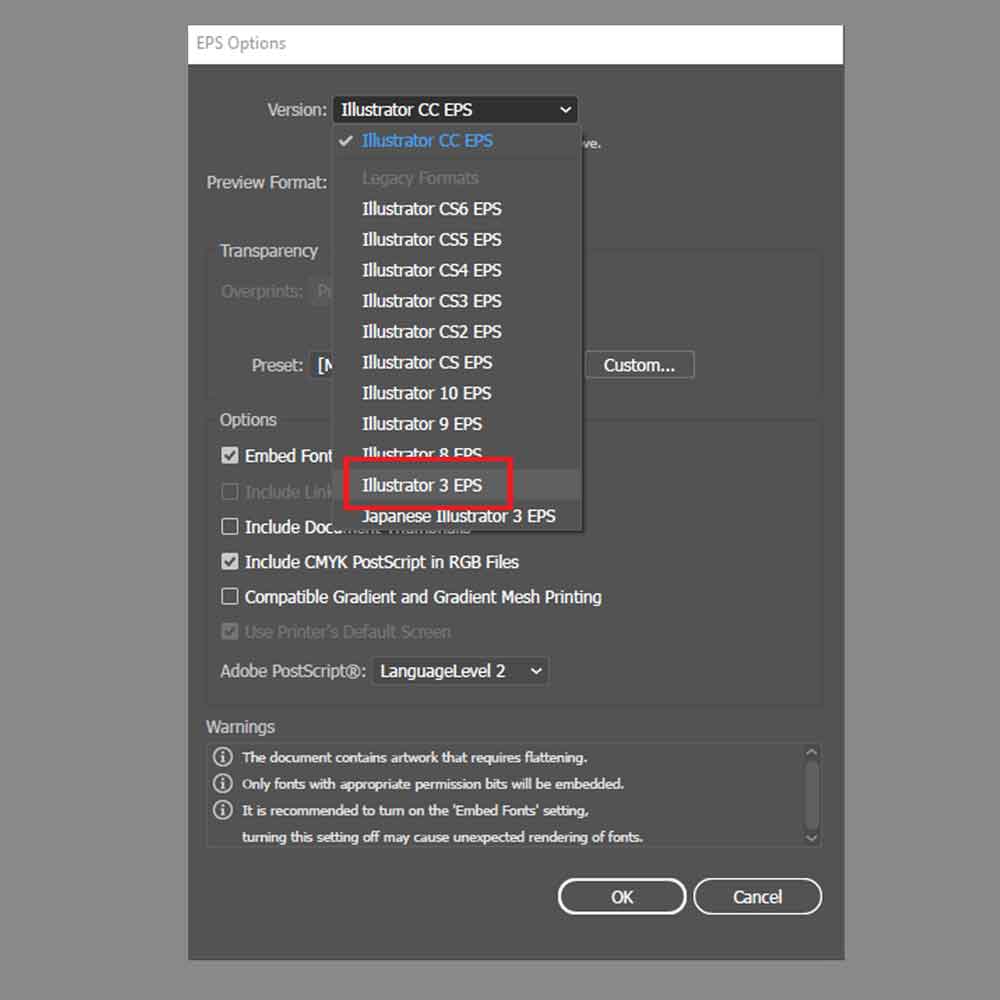
3. Material Loading
-
Place the sticker material (with adhesive backing) flat into the machine, with the adhesive backing facing down and the sticker surface facing up.

-
Secure the cutting material on the platform, ensuring rollers align with white markers

-
Small pieces of material need to be fixed on the cutting pad and fully utilized.In addition, if the material is uneven and not fixed on the cutting plate, the blade will definitely scratch the surface of the material.

4. Machine Configuration
The process of cutting stickers: Material loading → Select type (roll/piece) → Measure dimensions → Set origin → Test cutting → Formal operation.
-
Long strip roll material, press 【 MENU 】 ->select 【 PIECE/ROLL 】 ->select 【 ROLL 】, the machine will automatically feed the paper.
-
For a single small sticker, make sure the material is fixed on the cutting pad. Press 【 MENU 】 ->select 【 SHEET/ROLL 】 ->select 【 PIECE 】.

-
Press 【 MENU 】 ->select 【 MATIAL SIZE 】 ->select 【 DETECT 】, and the machine will move the blade to detect the width/length of the material.

-
Set the origin point ,Manually move the blade to the desired origin position (such as the bottom left corner of the material), and press 【 Origin 】 to set it.
-
Adjust pressure and speed parameters based on material thickness .
-
Force: Adjust according to the material (ordinary stickers usually have 30-80gf and need to be tested);
- Speed: Recommended 10-20cm/s (low speed can be set for the first time).

5. Cutting Process
- Perform a test cut , Send the design from CutStudio to the cutting plotter and start cutting
6. Post-Processing
- Weed out excess material from the cut sheet , Transfer stickers to transfer film and apply to desired surfaces

My beautiful sticker


Summary:
2D design and cutting are very interesting, especially suitable for novice makers. Even if you don’t have professional vector design skills, you can quickly create small products. Of course, if you are good at design and have laser cutting machines and paper cutting machines, you can open a studio at home and make money through them. Enjoy the joy of creation~
Choosing a good laser cutting machine is very important!!! The laser cutting machine I used this time has caused me a lot of trouble: although it is easy to operate, the data for each cutting/carving test is different due to the outdated version. (Helpless ╮(╯▽╰)╭ ). Anyway, I have learned the methods of testing tolerances and material power/speed, which is more important than data!!!
Files
Acrylic_tolerance_test.lq
comb kerf test 4mm.dxf
Bracket_design_diagram.dxf