
Design and produce something with a digital process (incorporating computer aided design and manufacturing) not covered in another assignment, documenting the requirements that your assignment meets, and including everything necessary to reproduce it.
Have you answered these questions?
- Documented the workflow(s) and process(es) you used ✅
- Explained how your process is not covered on other assignments ✅
- Described problems encountered (if any) and how you fixed them ✅
- Included original design files and source code ✅
- Included ‘hero shot’ of the result ✅
Embroidery Machine Workflow
To develop this task, I saw it convenient to use an embroidery machine, since it is a specialized, computer-assisted sewing machine designed to create patterns and designs on fabric using thread.
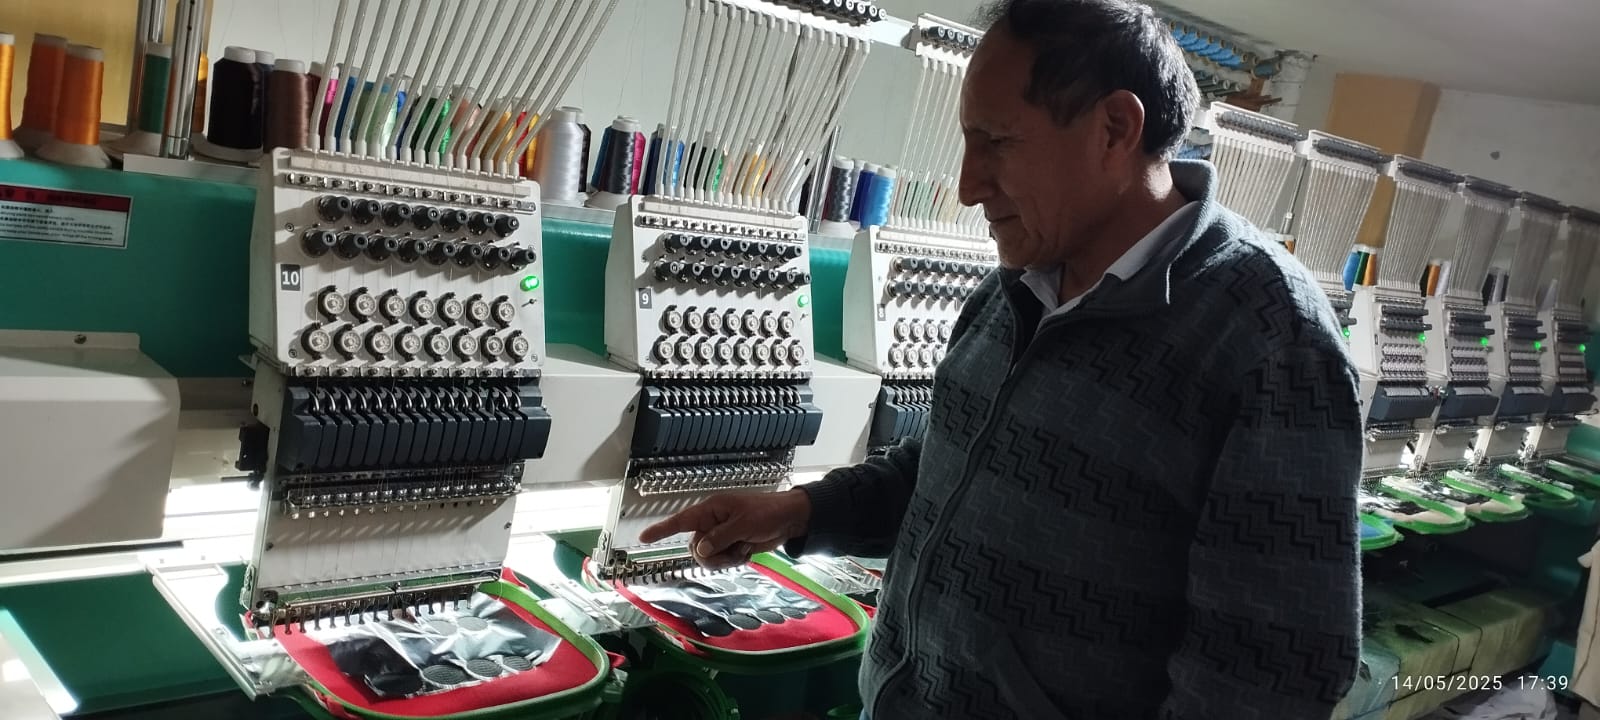
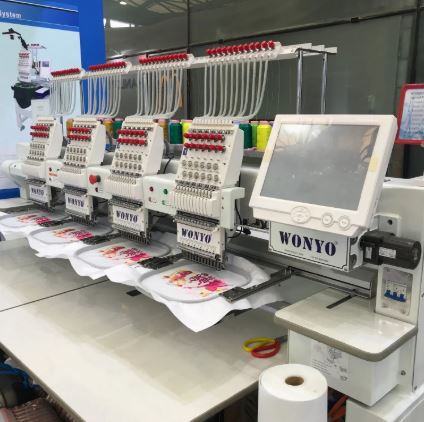
CFHS-1204 Embroidery Machine
The CFHS-1204 is a four-head, 12-needle computerized embroidery machine, commonly used in commercial settings for high-volume embroidery on items like caps, shirts, and flat garments. It's particularly favored by small to medium-sized businesses due to its efficiency and versatility.
CFHS-1204 Embroidery Machine Features
- Computerized embroidery machine with 4 heads.
- Each head has 12 needles, allowing up to 12 thread colors in one design.
- Approximate embroidery area per head: 400 mm x 450 mm.
- Maximum embroidery speed: up to 1,200 stitches per minute (varies by material and design).
- Control system: Dahao A15 or A18, with multiple languages and automatic functions like color change and thread trimming.
- Supports optional attachments for special effects, such as:
- Sequin embroidery.
- Cording embroidery.
- Chenille embroidery.
Embroidery Workflow with the CFHS-1204 Machine
1.- Embroidery Design
To begin the embroidery process, I created a simple design using Microsoft Paint. The design consists of a group of concentric circles with defined edges and solid colors to facilitate digitizing in the embroidery software.
The image was saved in .BMP format, compatible with Wilcom, as a background reference. This hand-drawn graphic served as a visual base for tracing and manually converting into embroidery layouts.

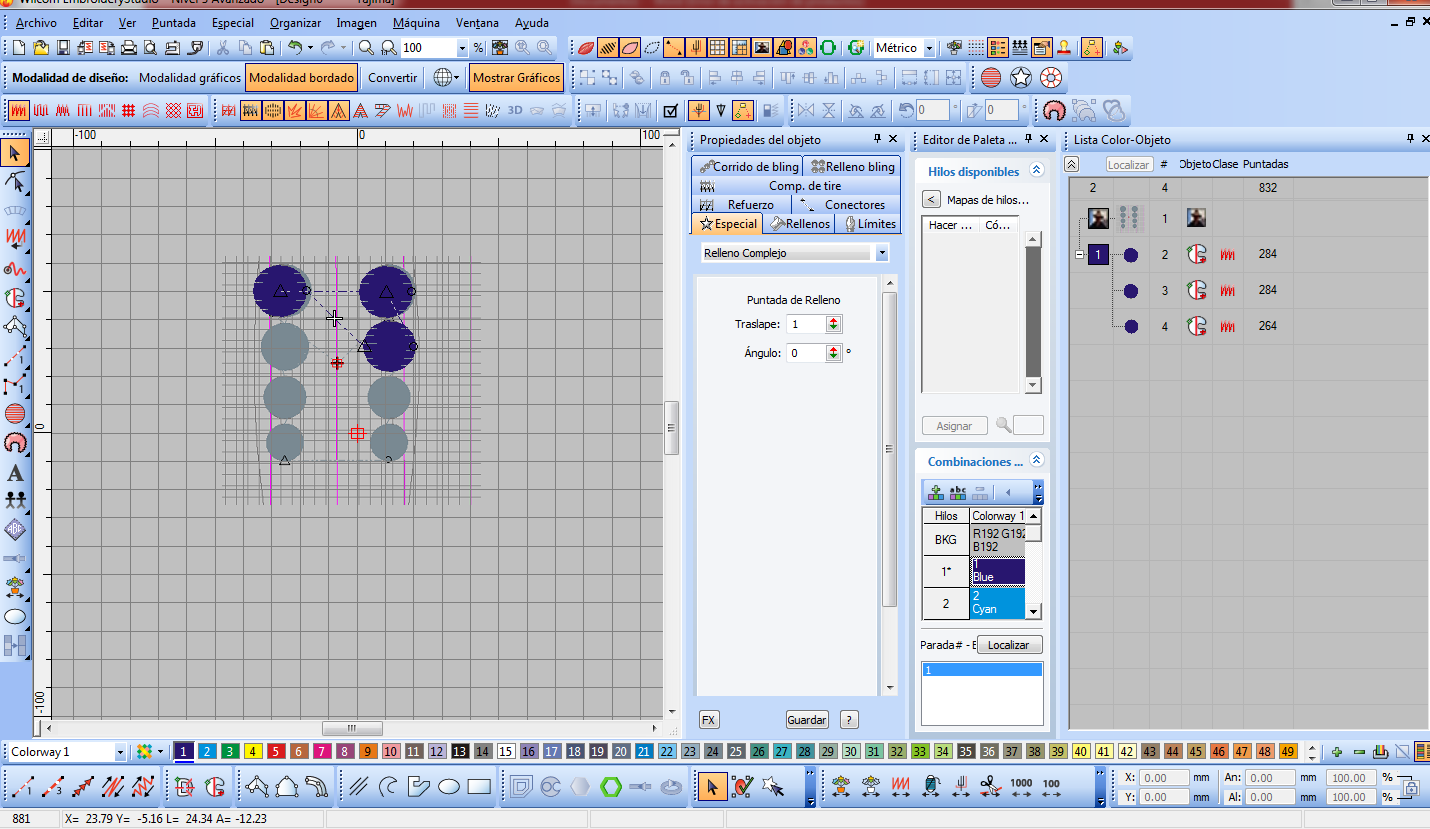
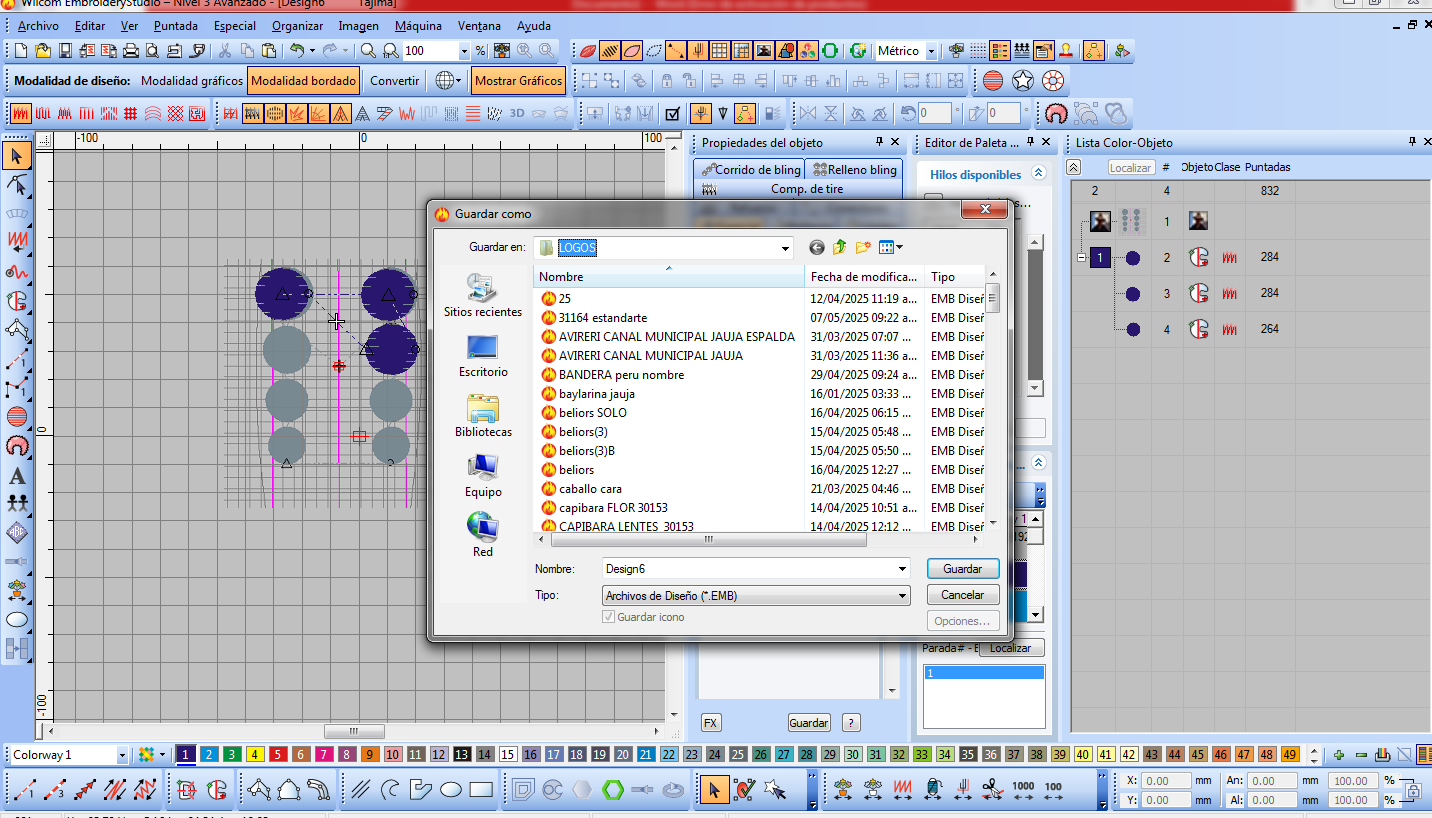
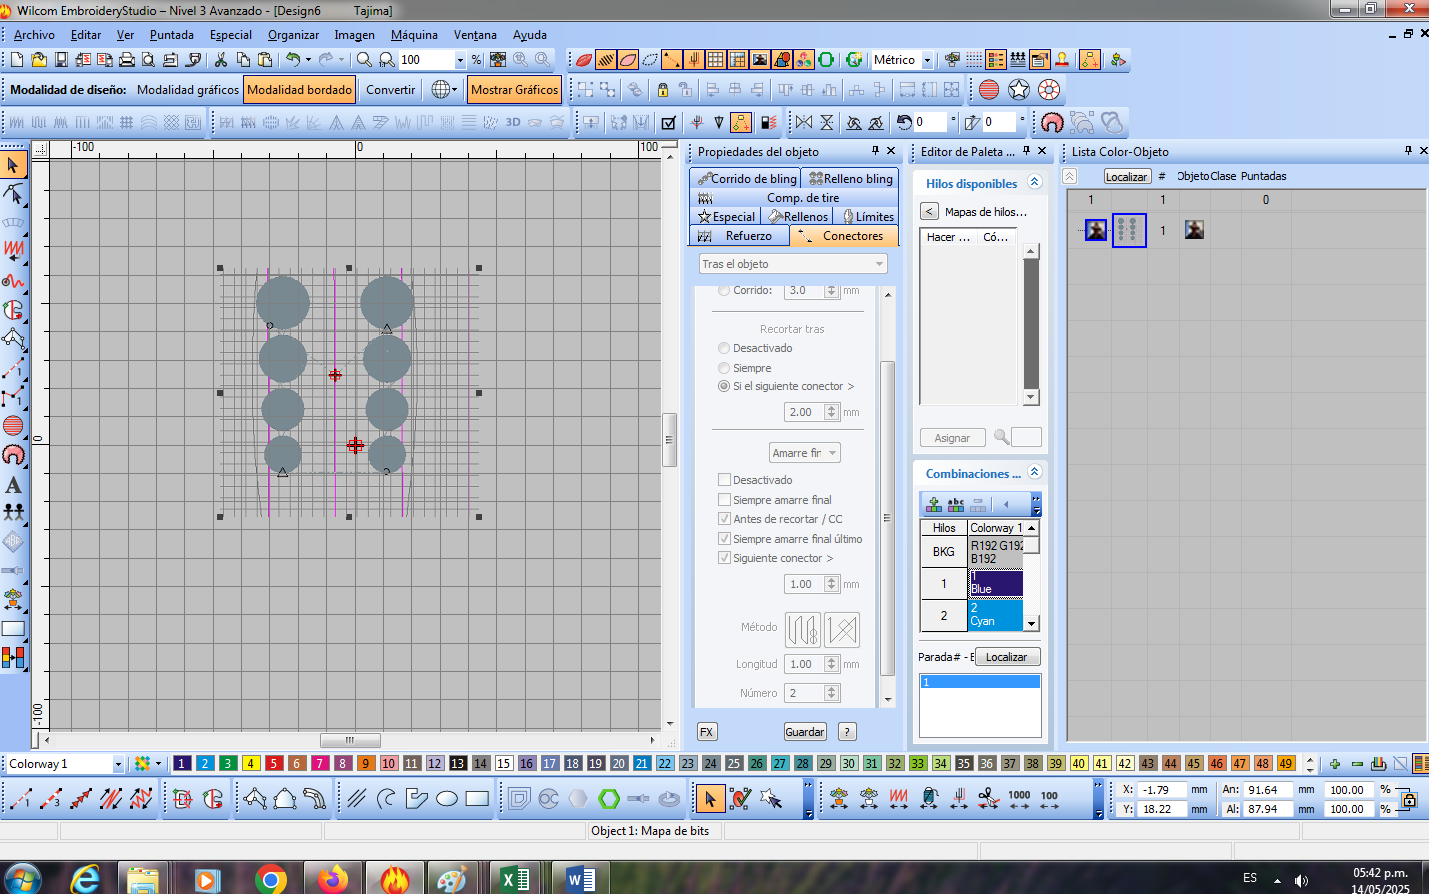
2.-Import the image into Wilcom
After creating the circle design in Paint, the image was imported into Wilcom EmbroideryStudio software. I used the digitizing tools to trace the shapes, define the colors, and assign the stitch types. At this stage, the design is being saved in .EMB format, which is compatible with the CFHS-1204 embroidery machine.
🧵 Parameters Adjusted in Wilcom
- Stitch Type: Bling run and bling fill stitches were applied for decorative embroidery.
- Object Layers: 4 embroidery objects corresponding to each circle in the design.
- Thread Colors: Different colors were assigned, with 284 and 264 stitches respectively.
- Design Mode: Set to Embroidery Mode to generate accurate stitches.
- File Format: Saved as
.EMBformat, preserving all embroidery data. - Alignment: Grid and guide lines were used for precise positioning of the shapes.
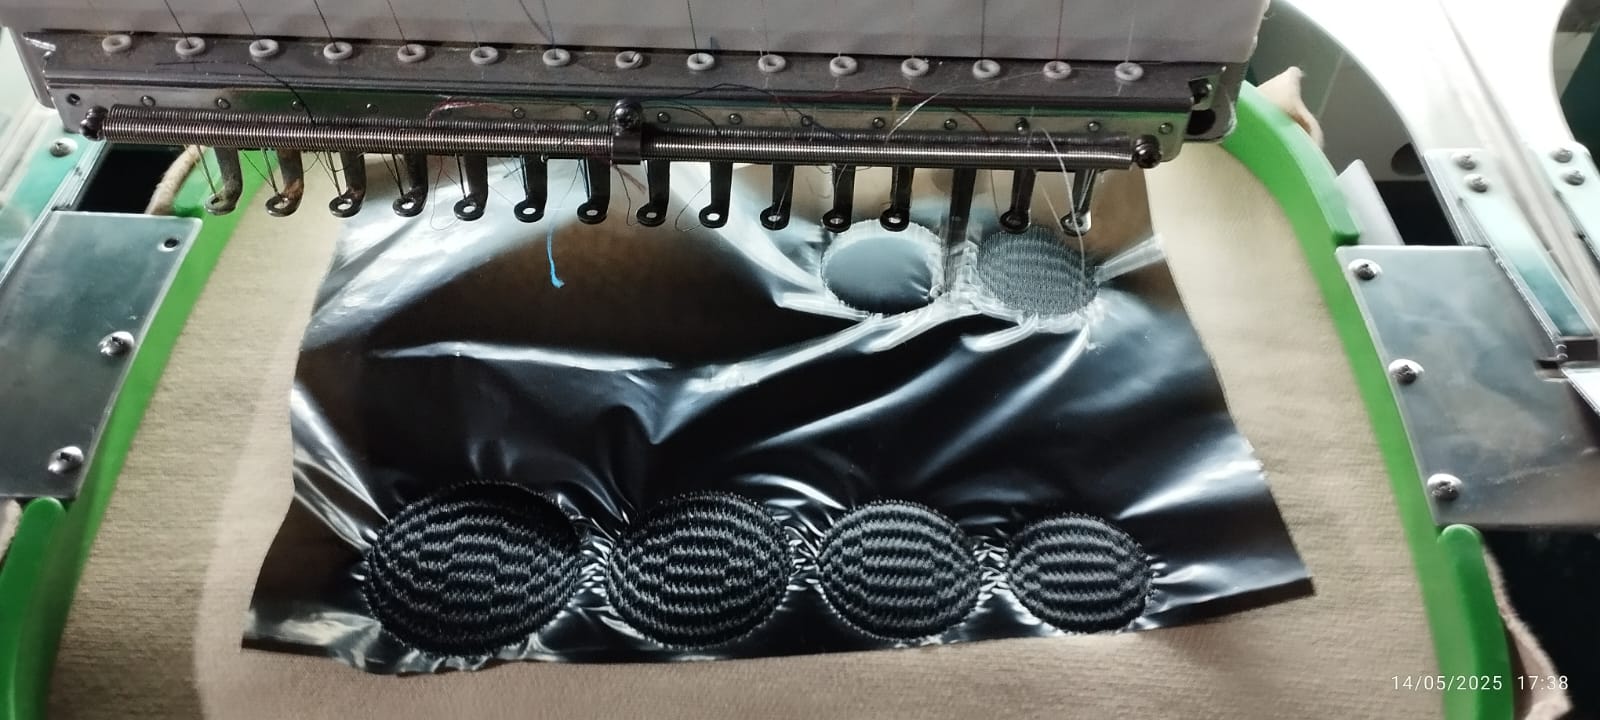
3.-Execution of Embroidery
The .EMB file generated in Wilcom was loaded into the embroidery machine. The design is displayed on the screen, with two groups of circles in different colors and stitch types. The machine is operating at a speed of 750 RPM. X/Y positioning coordinates for each element are shown.
Current embroidery progress: 58% complete. Green and gray thread have been assigned to two different areas of the design.

4.-Start of Embroidery
Reflections
- During this assignment, I understood the importance of precision in digital design and proper machine setup. I learned to anticipate potential problems and adjust the design to optimize the embroidery process.
- The experience gained from this project has expanded my skills in digital design and textile manufacturing. I'm motivated to explore more advanced applications and share this knowledge with others.
Did you have any problems
During the embroidery process, I experienced an unexpected thread break, which interrupted the continuity of the work and affected the efficiency of the process. This failure forced me to restart the embroidery from the beginning, generating delays. Well, this served as part of the learning process. This usually happens due to possible causes such as thread tension, which can ultimately cause breakage. That is why we must verify that there is no certain tension in the thread, to avoid any problems.