Week 5: 3D Scanning & Printing
Group Assignment (link): Test the design rules for your 3D printer(s)
Individual Assignment: 1) design, document, and 3D print an object that could not be made subtractively 2) 3D scan an object (and optionally print it)
Group Assignment & Testing the 3D-Printers
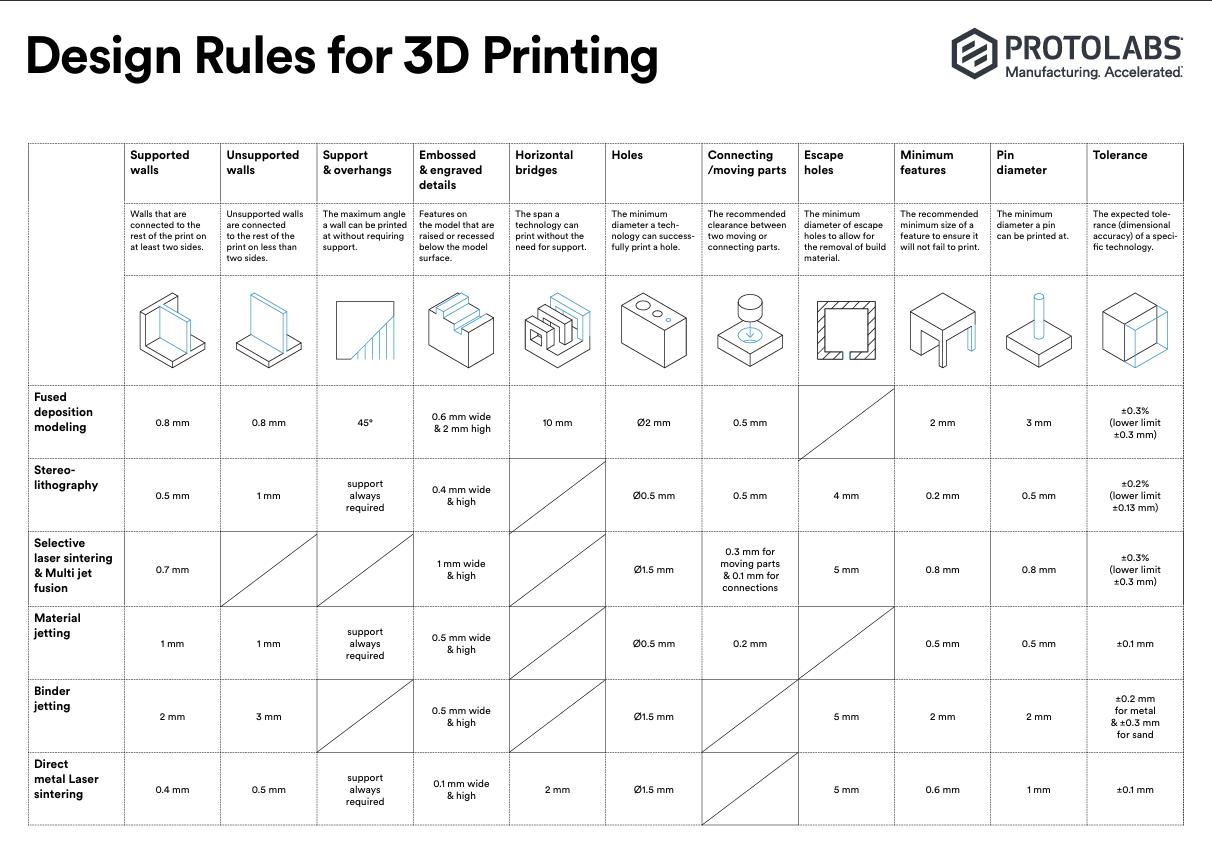
I was in Kerala with the group for only the first day of this week. On this day we generally discussed the different types of 3D-printing techniques as well as the design rules and tests for 3D printers. The following table also included in the group documentation provides a fine summary:
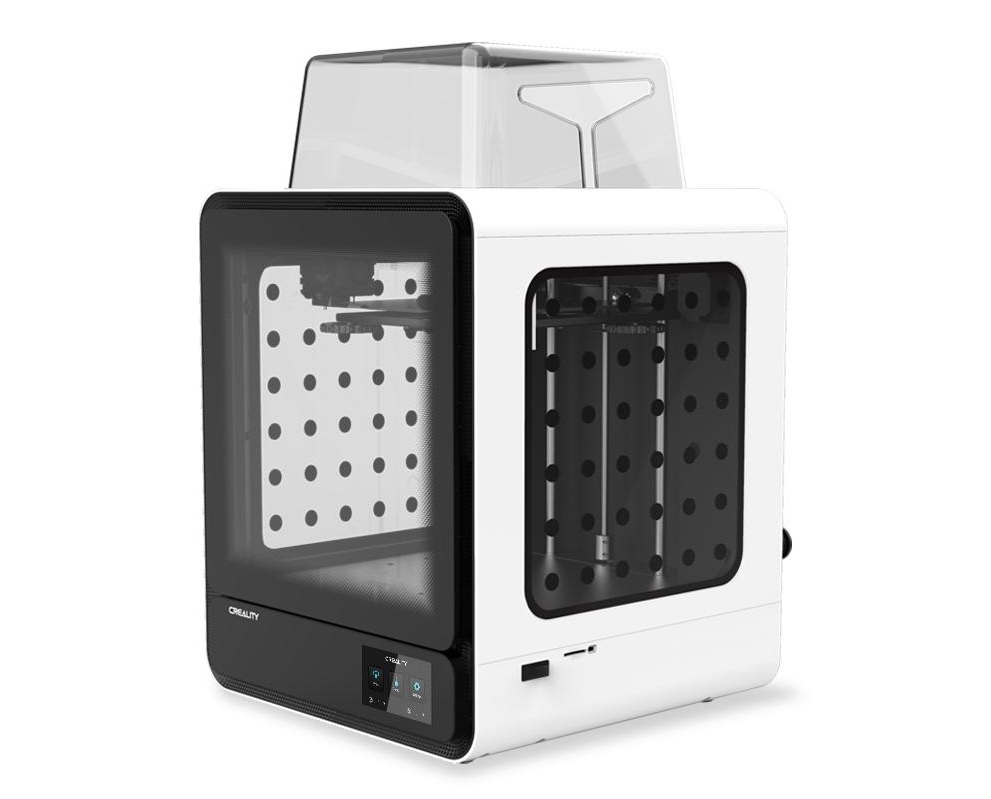
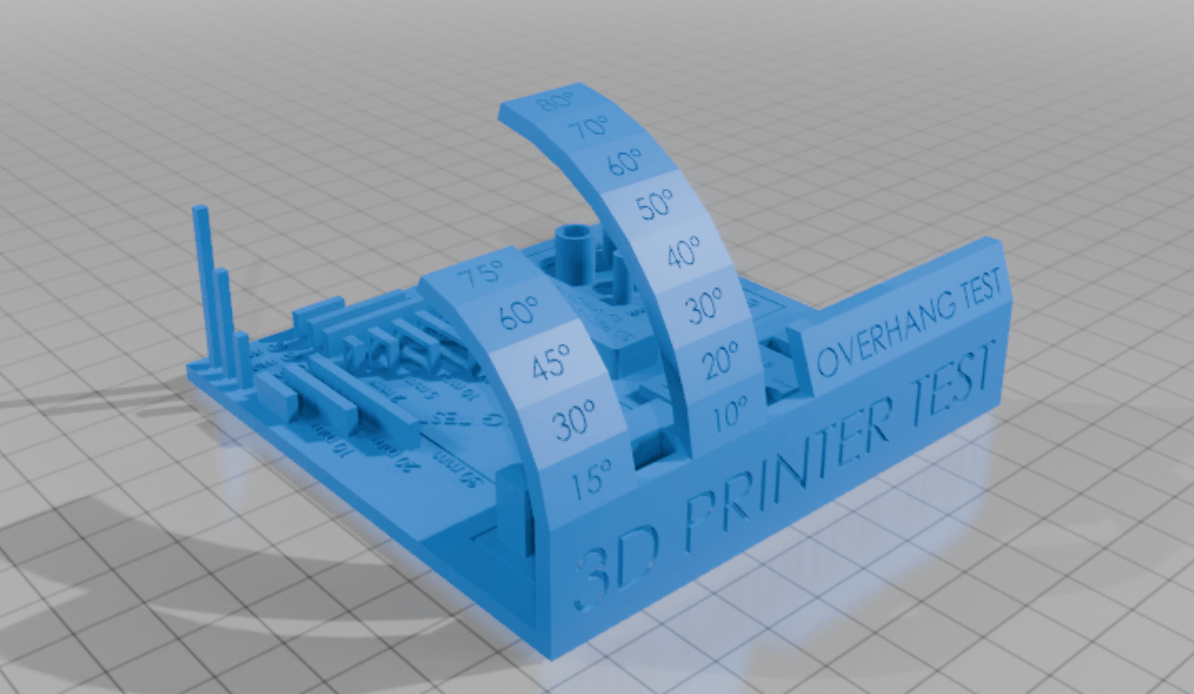
In Kazakhstan, I had a different 3D printer - a Creality CR-200B Fully Enclosed 3D Printer - and I performed some of the test prints on this printer and learned from that. Some of the most important tests are bridging and overhang tests as these will determine if one needs to generate support strucutures when preparing the file for printing.
Design & Print 3D object (which can't be made subtractively)
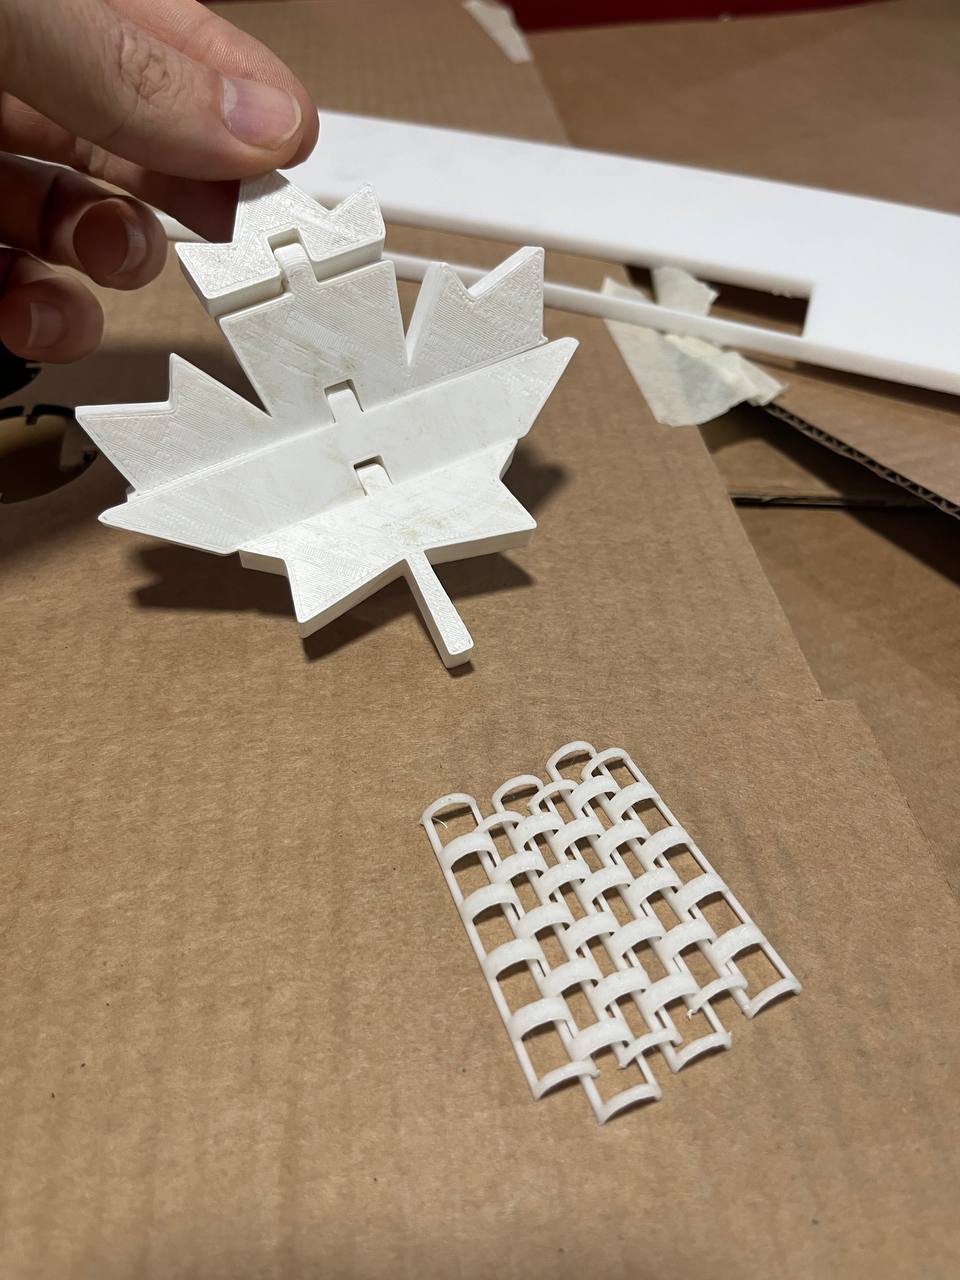
There were some examples in lab, including an articulated Maple Leaf - which I thought was really cool.
So I designed this beginning with a sketch, it went pretty quick since I used the reflect tool multiple times to generate the whole shape symetrically.
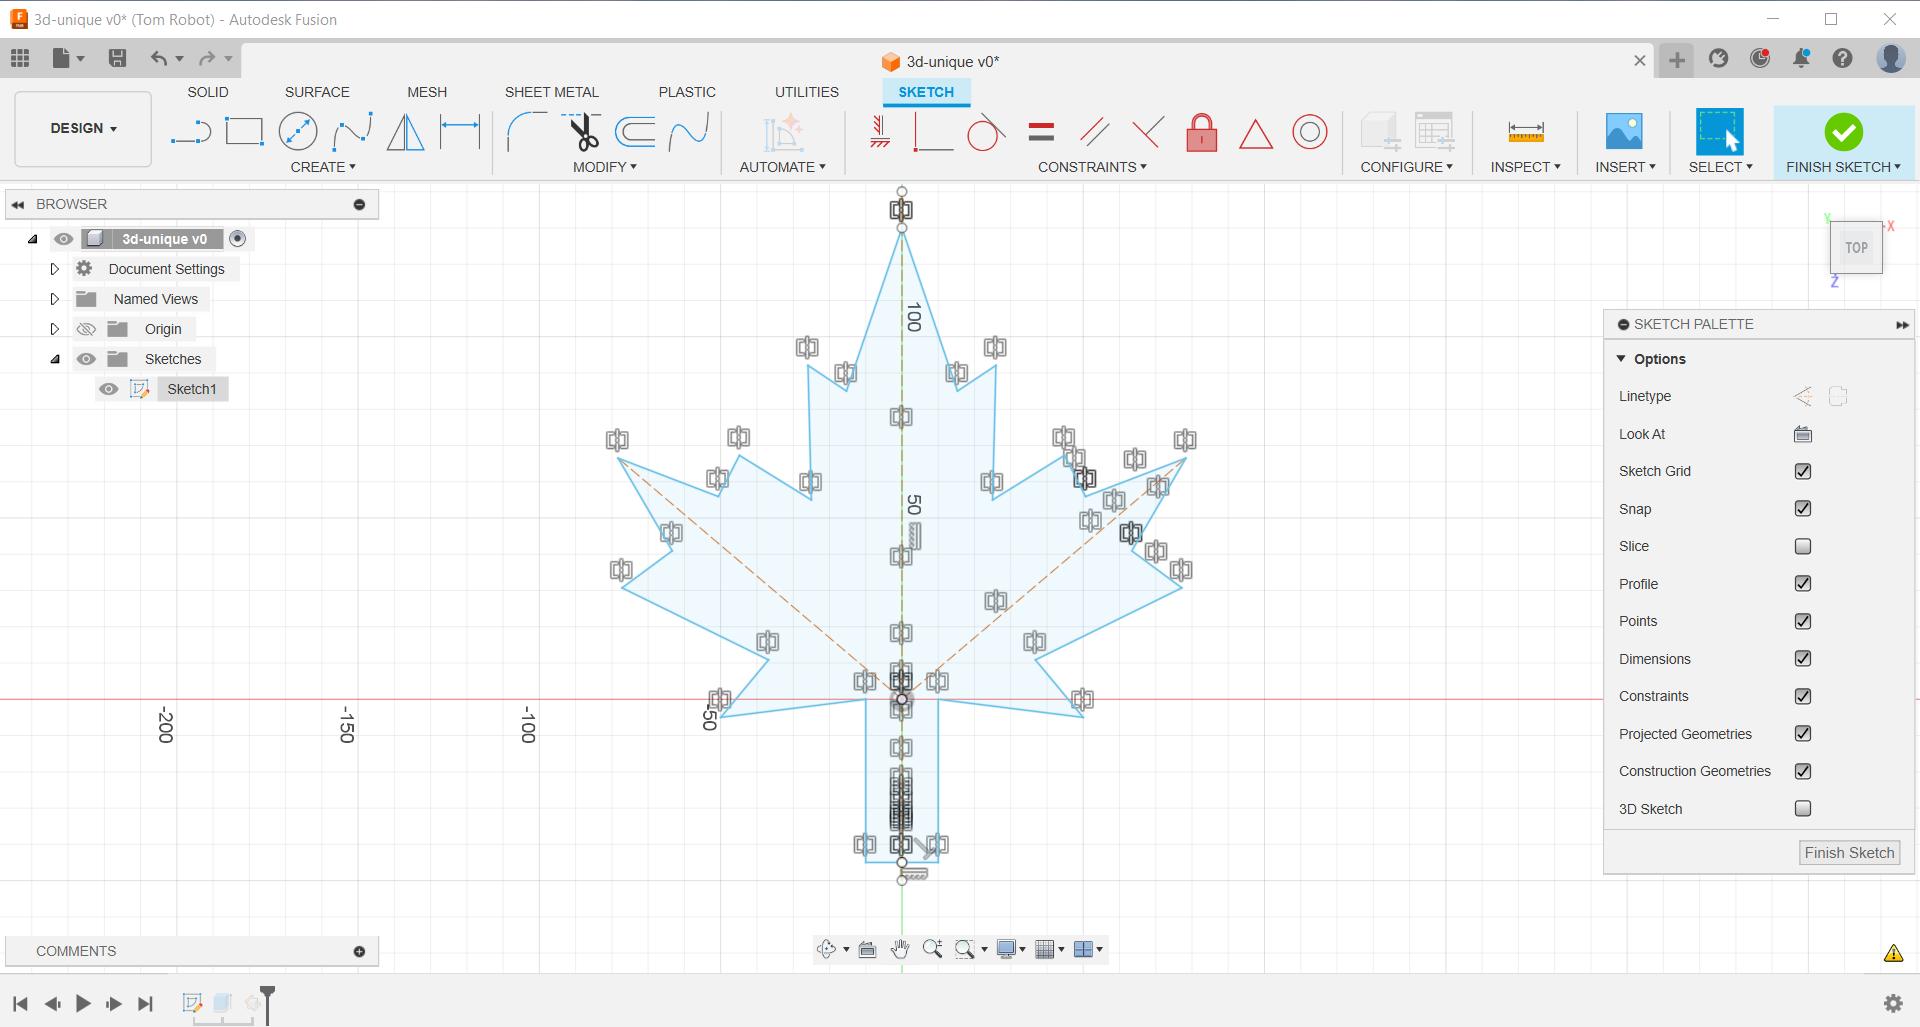
Next we extruded the shape, and yes, we have a nice leaf. We wanted it to be similar to the Canadian Maple Leaf and generally succeeded.
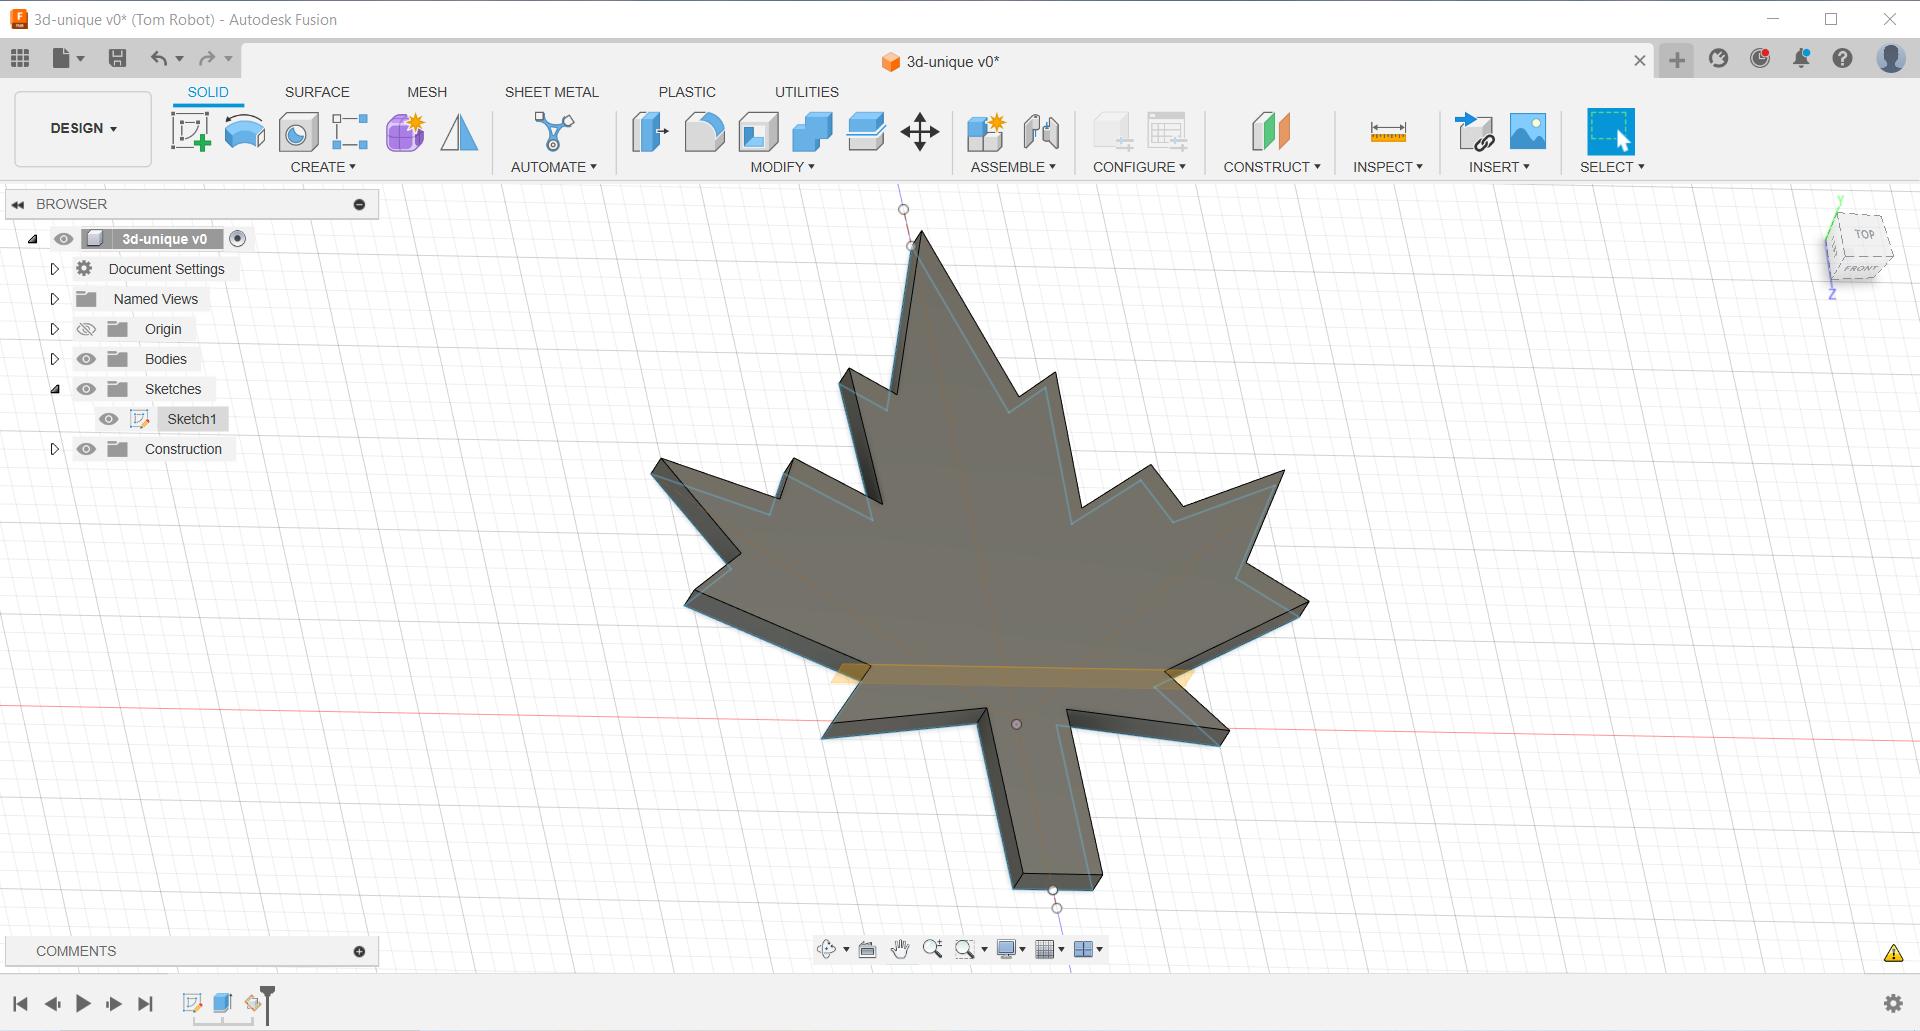
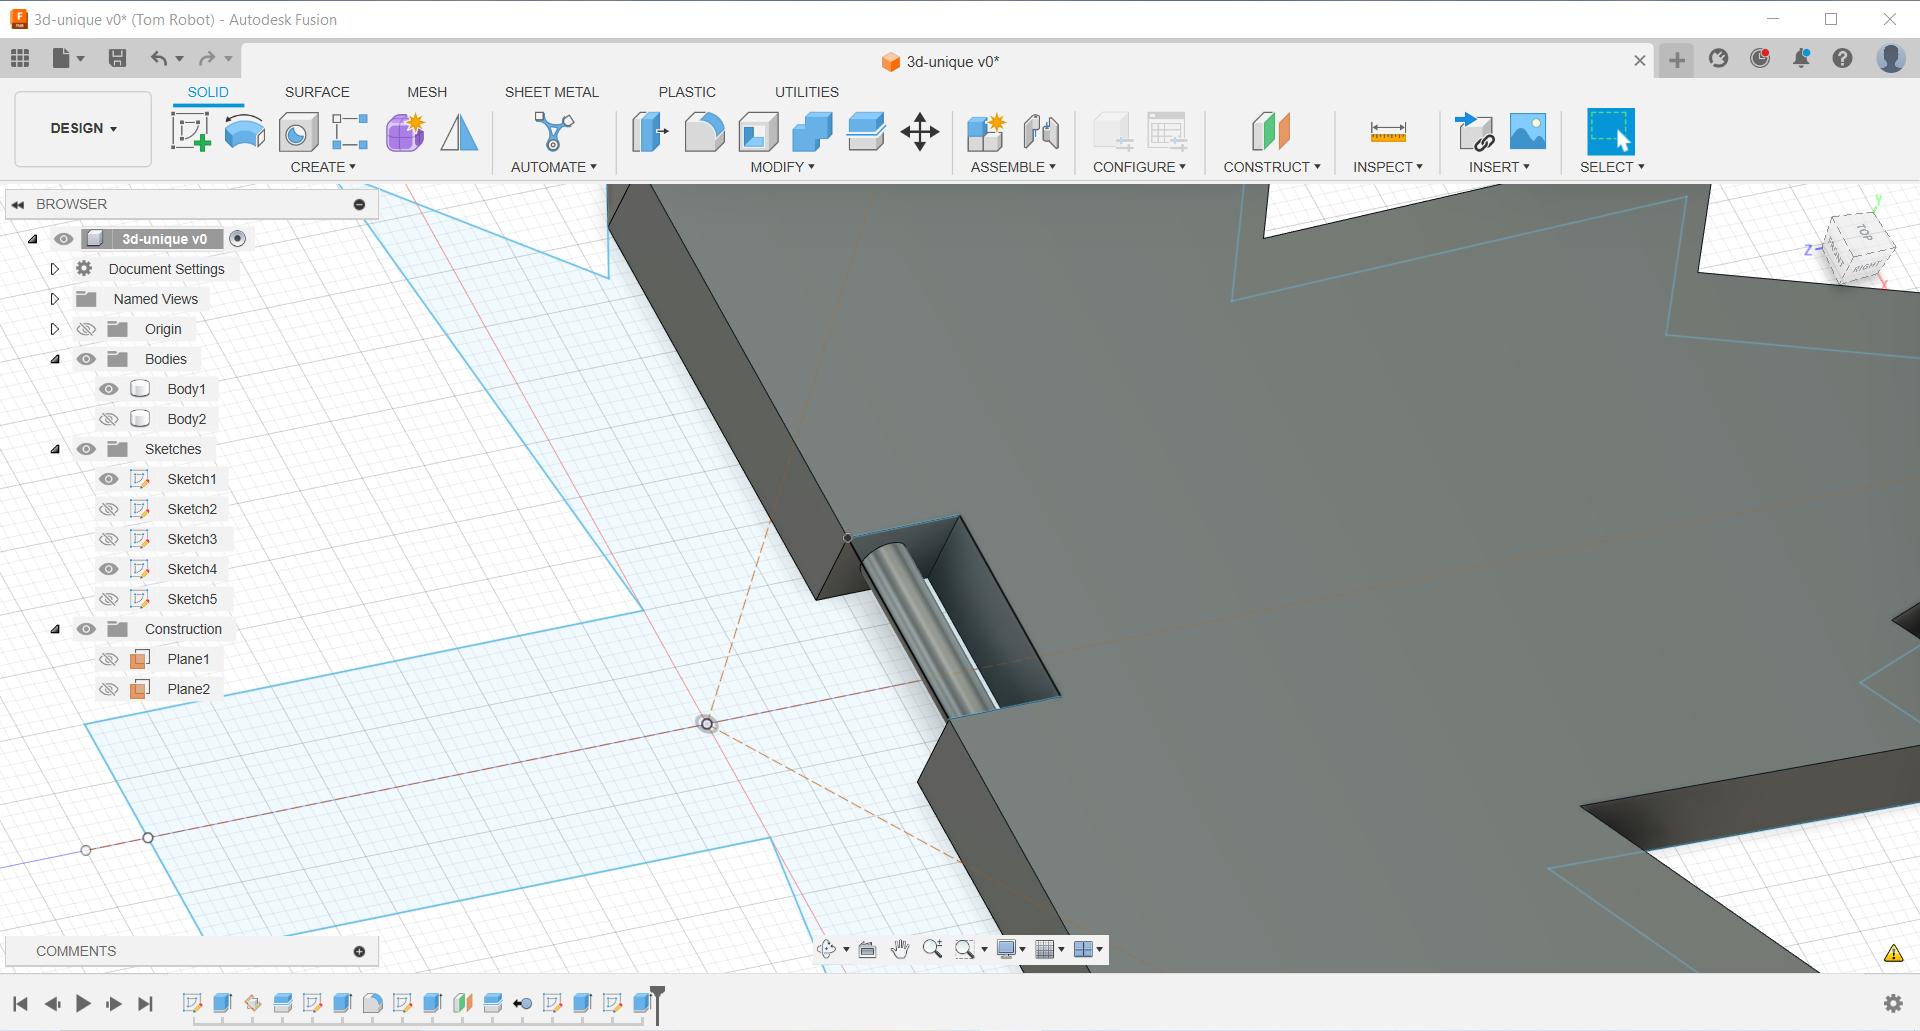
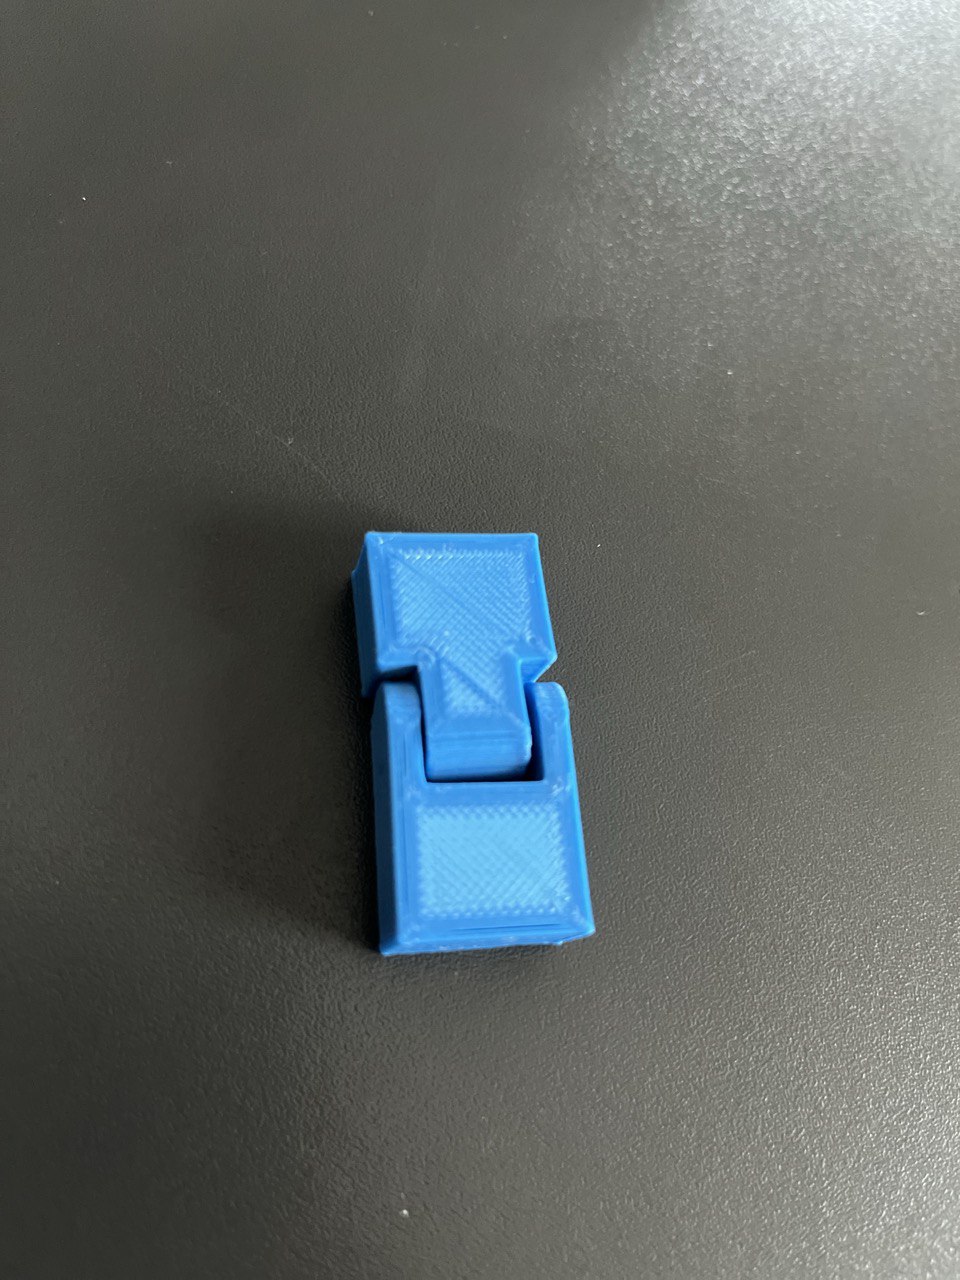
However, we want an articulated leaf, so we then proceeded to split the shape in 2 parts and designed the "hinge" to join them:
We proceeded by altering each part, one at a time, while hiding the other part so we could see the interior of our hinge.
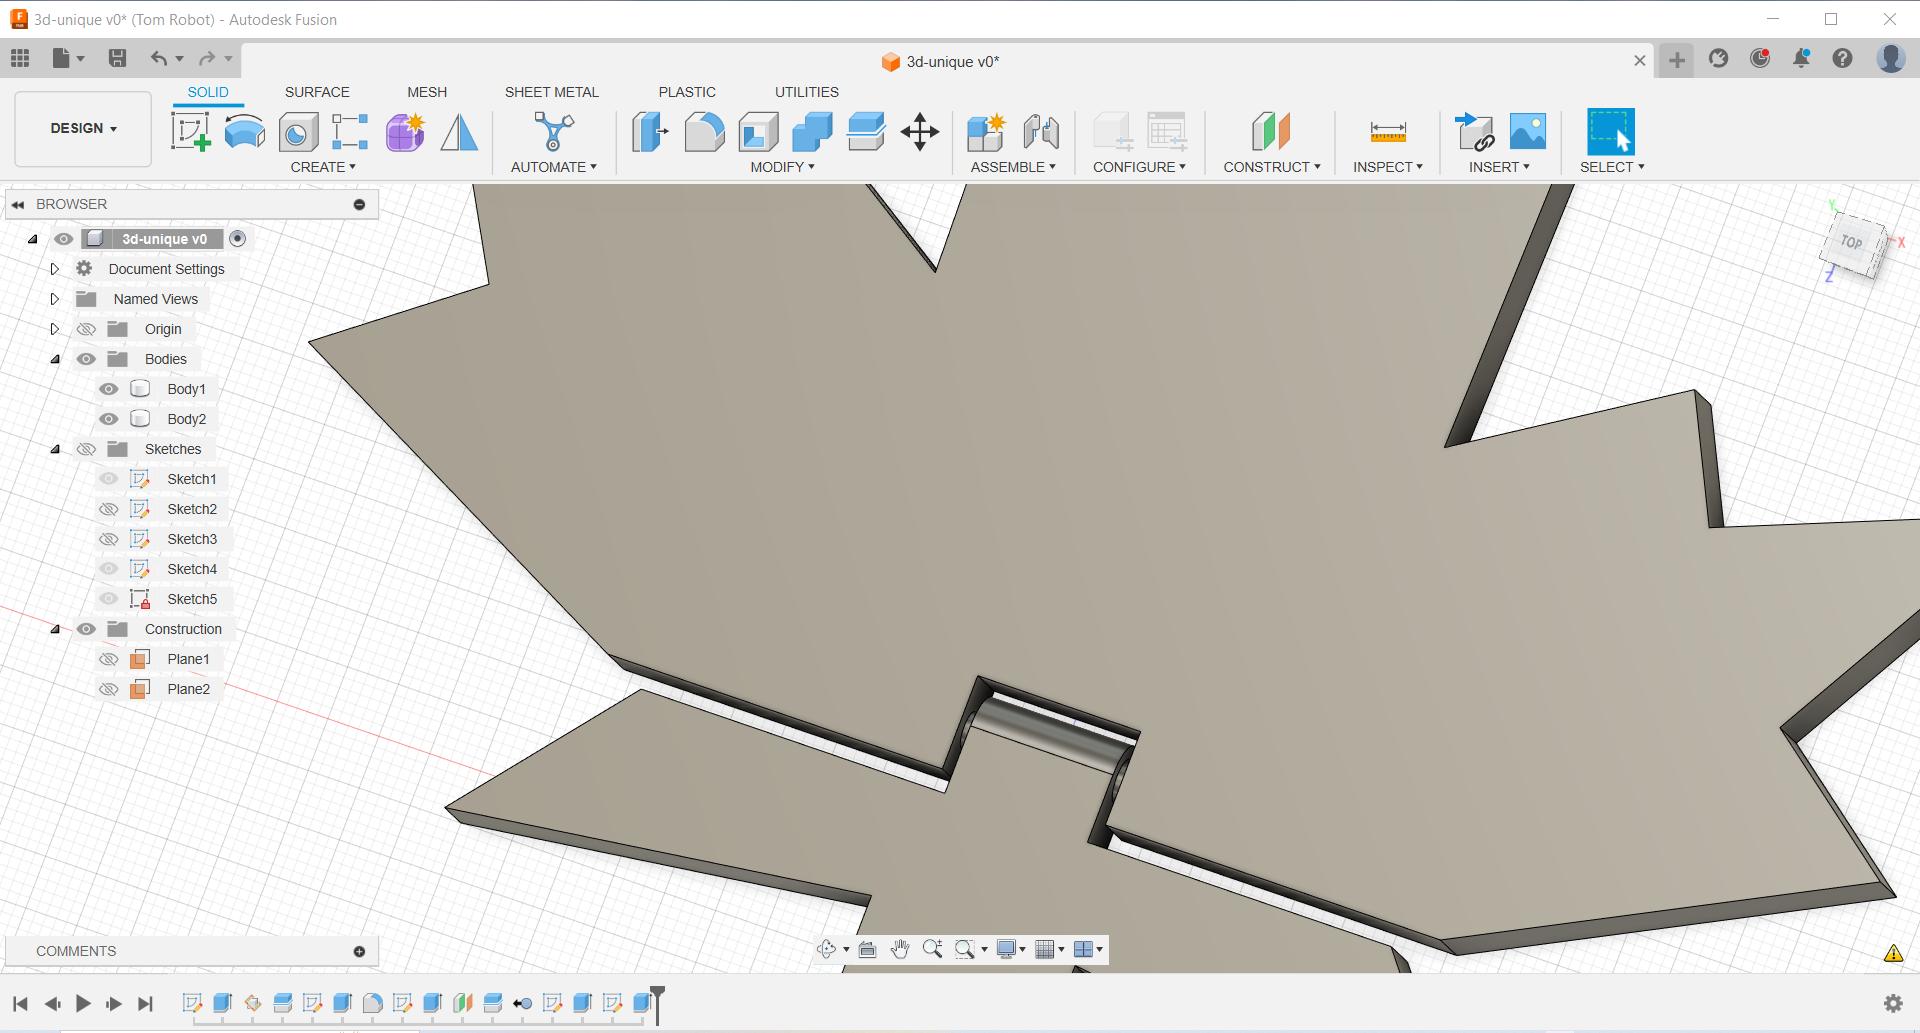
Here's the final form showing both parts connected with a single hinge:
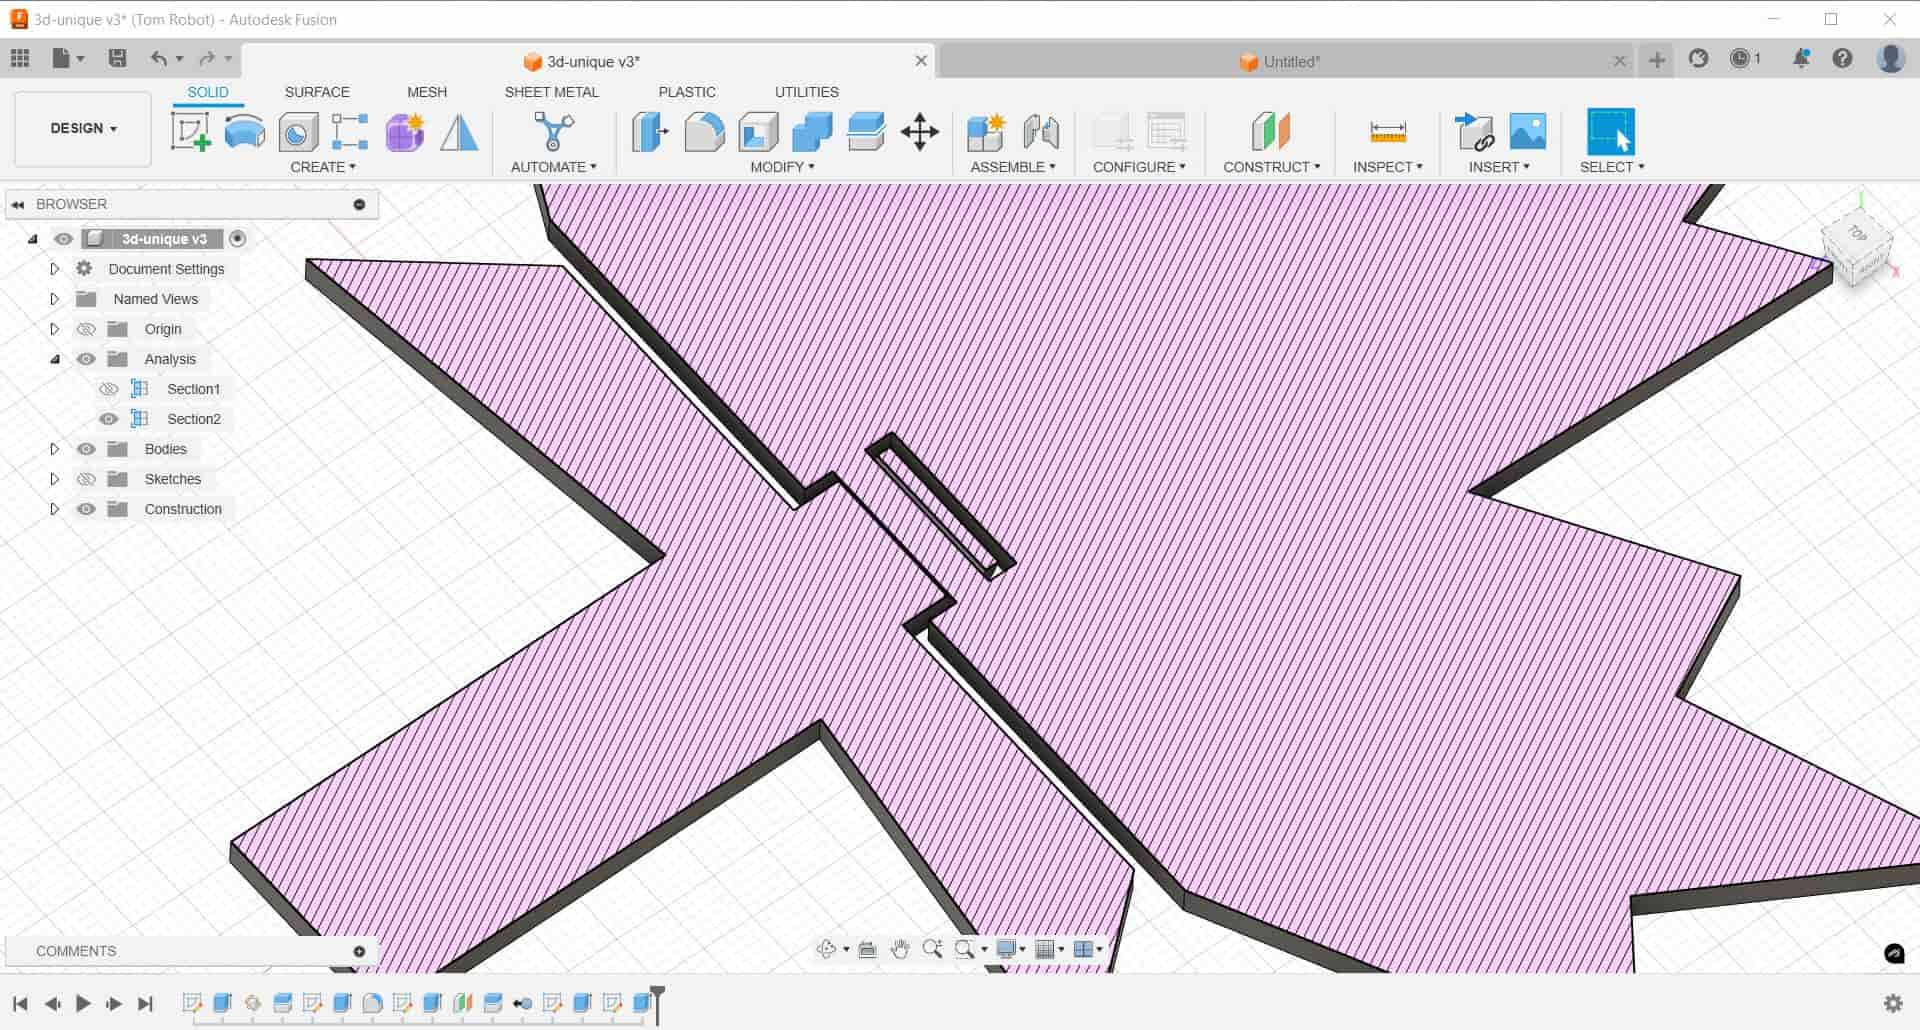
And finally here we have a cross sectional view to show why this would be difficult to impossible to manufacture subtractively.
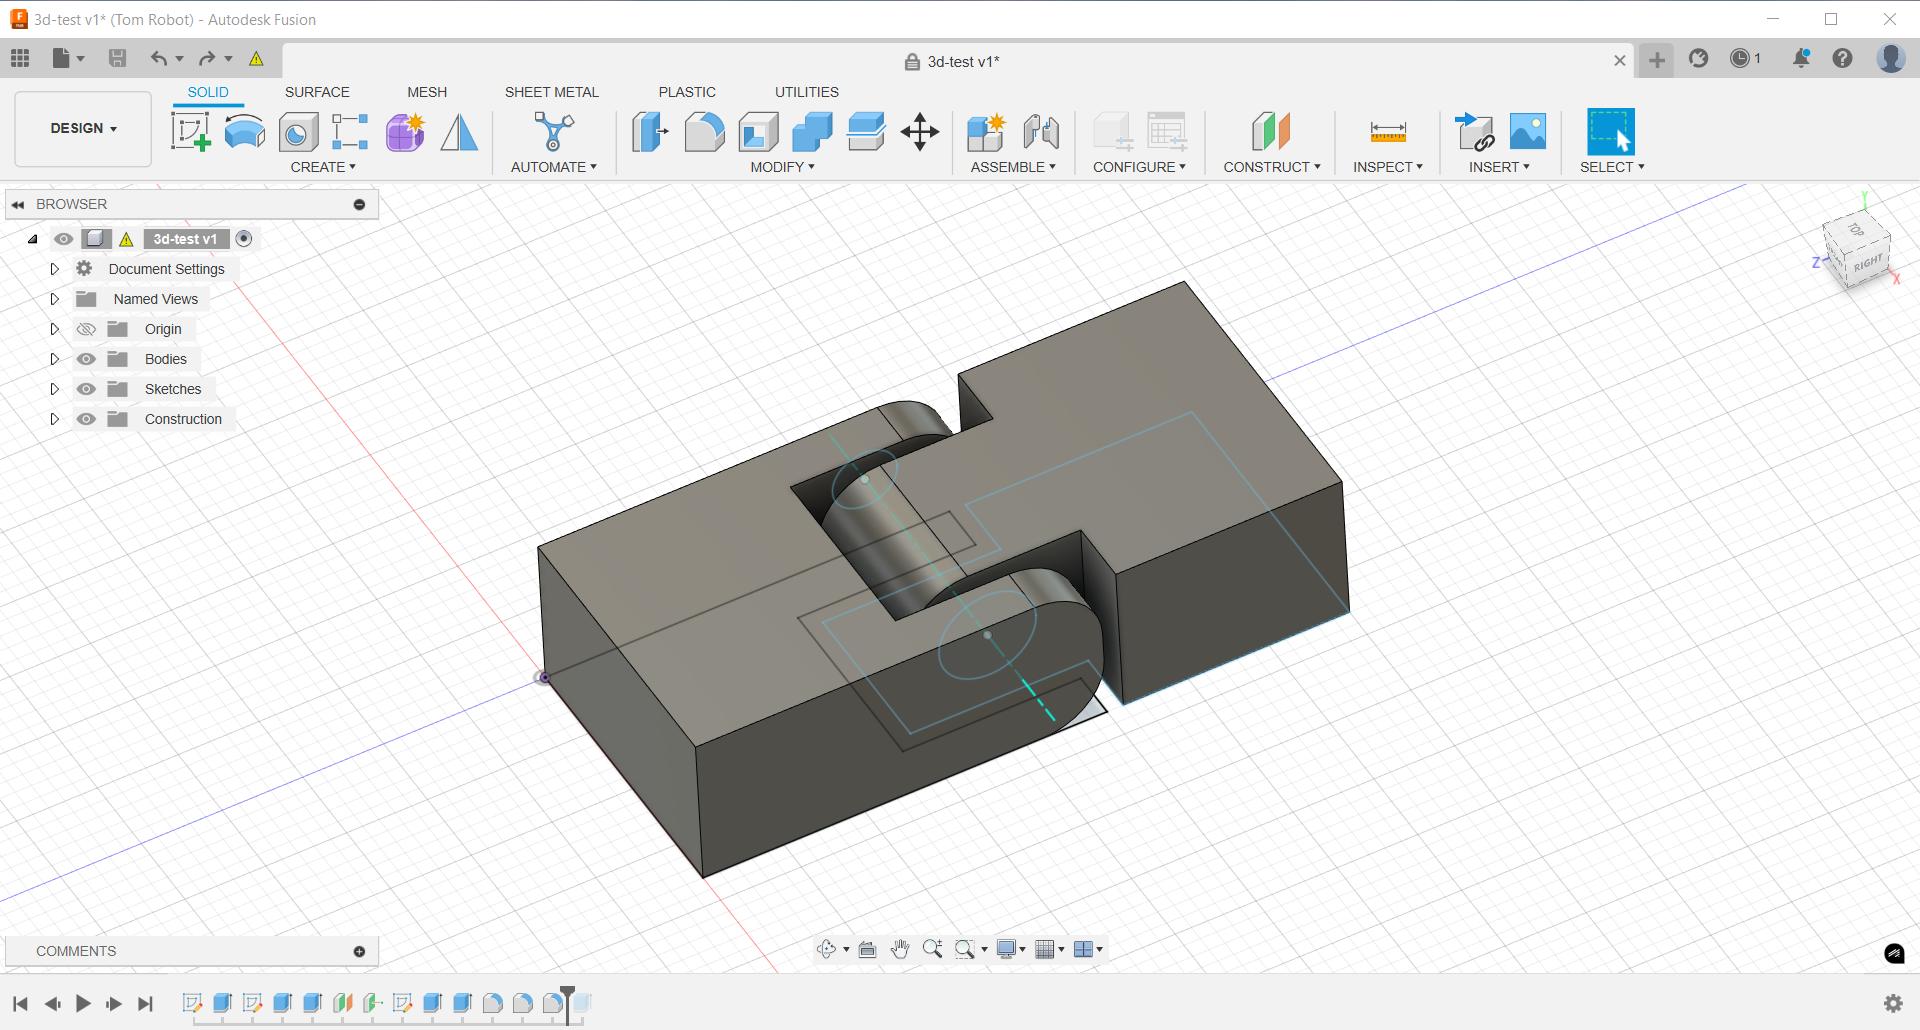
However, when I went to do a test-print, I saw that it will take several hours, which is not efficient when we really just wanted to test a small part (the hinge). For this reason I went to create a smaller version of the same idea just to test. It wasn't so hard to do:
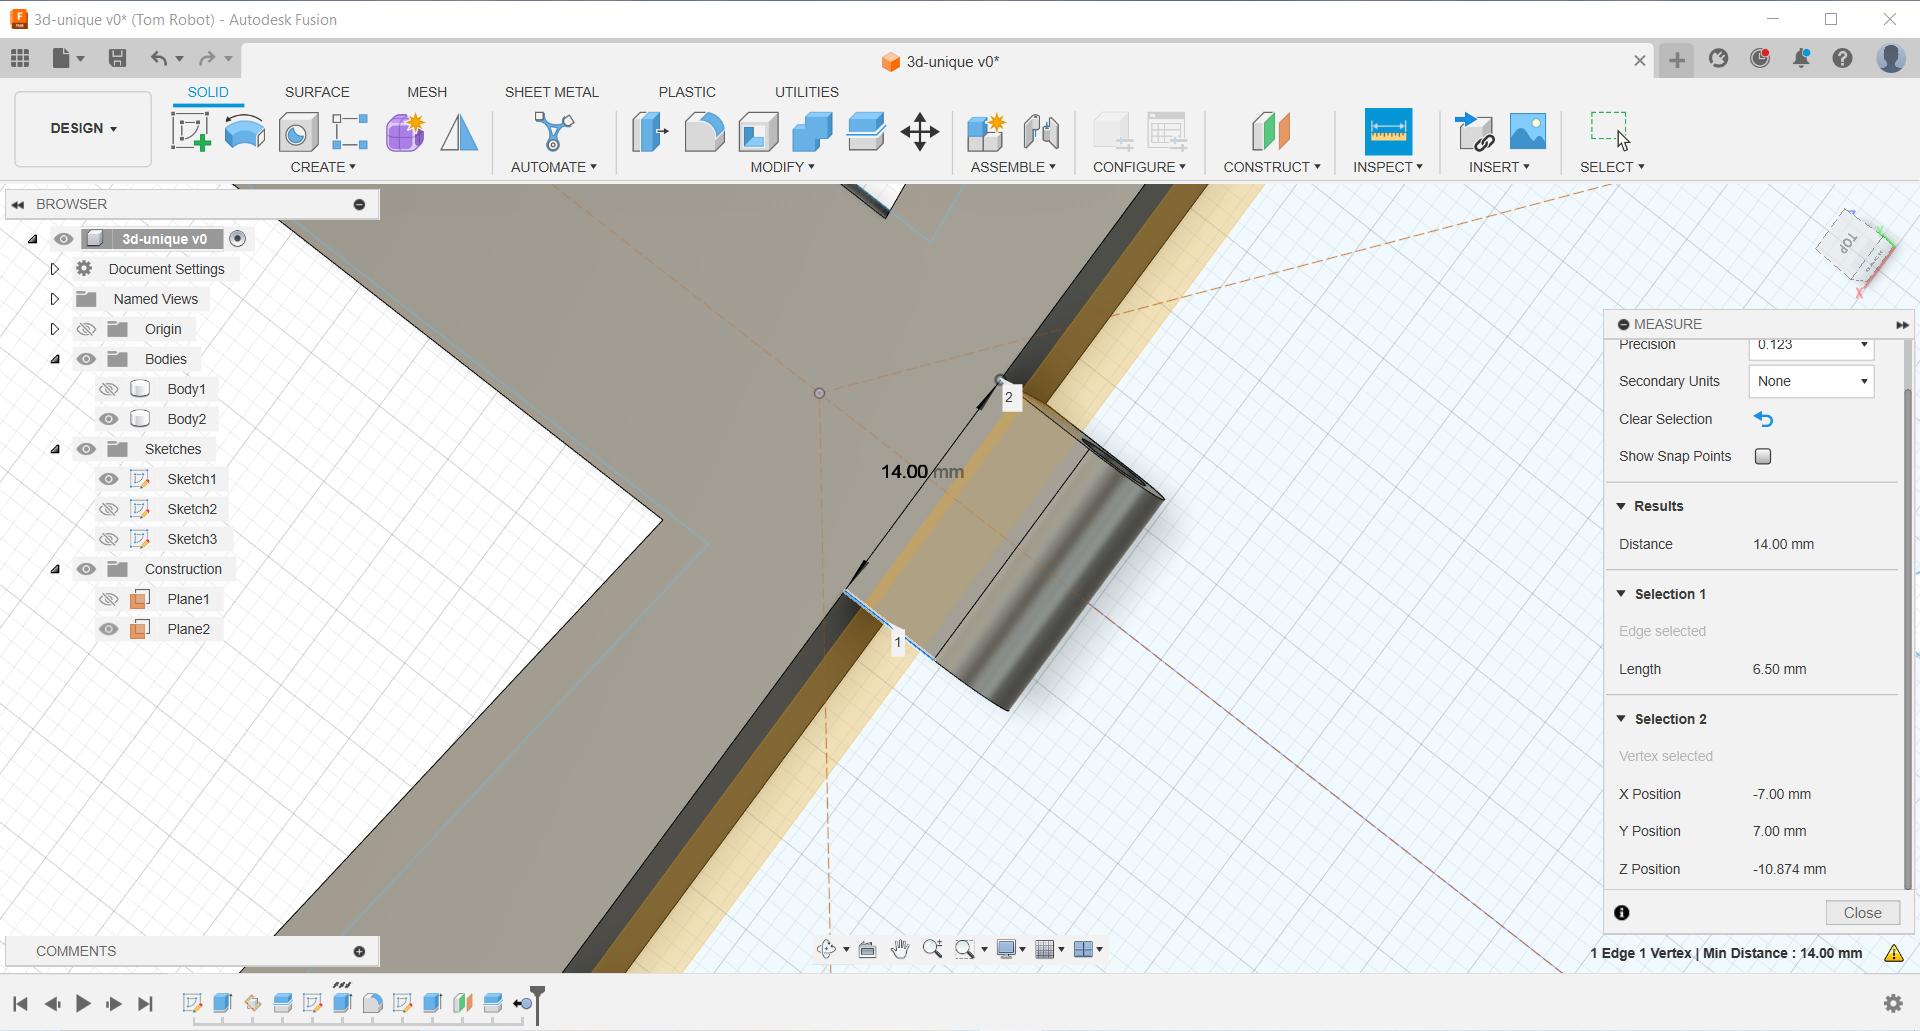
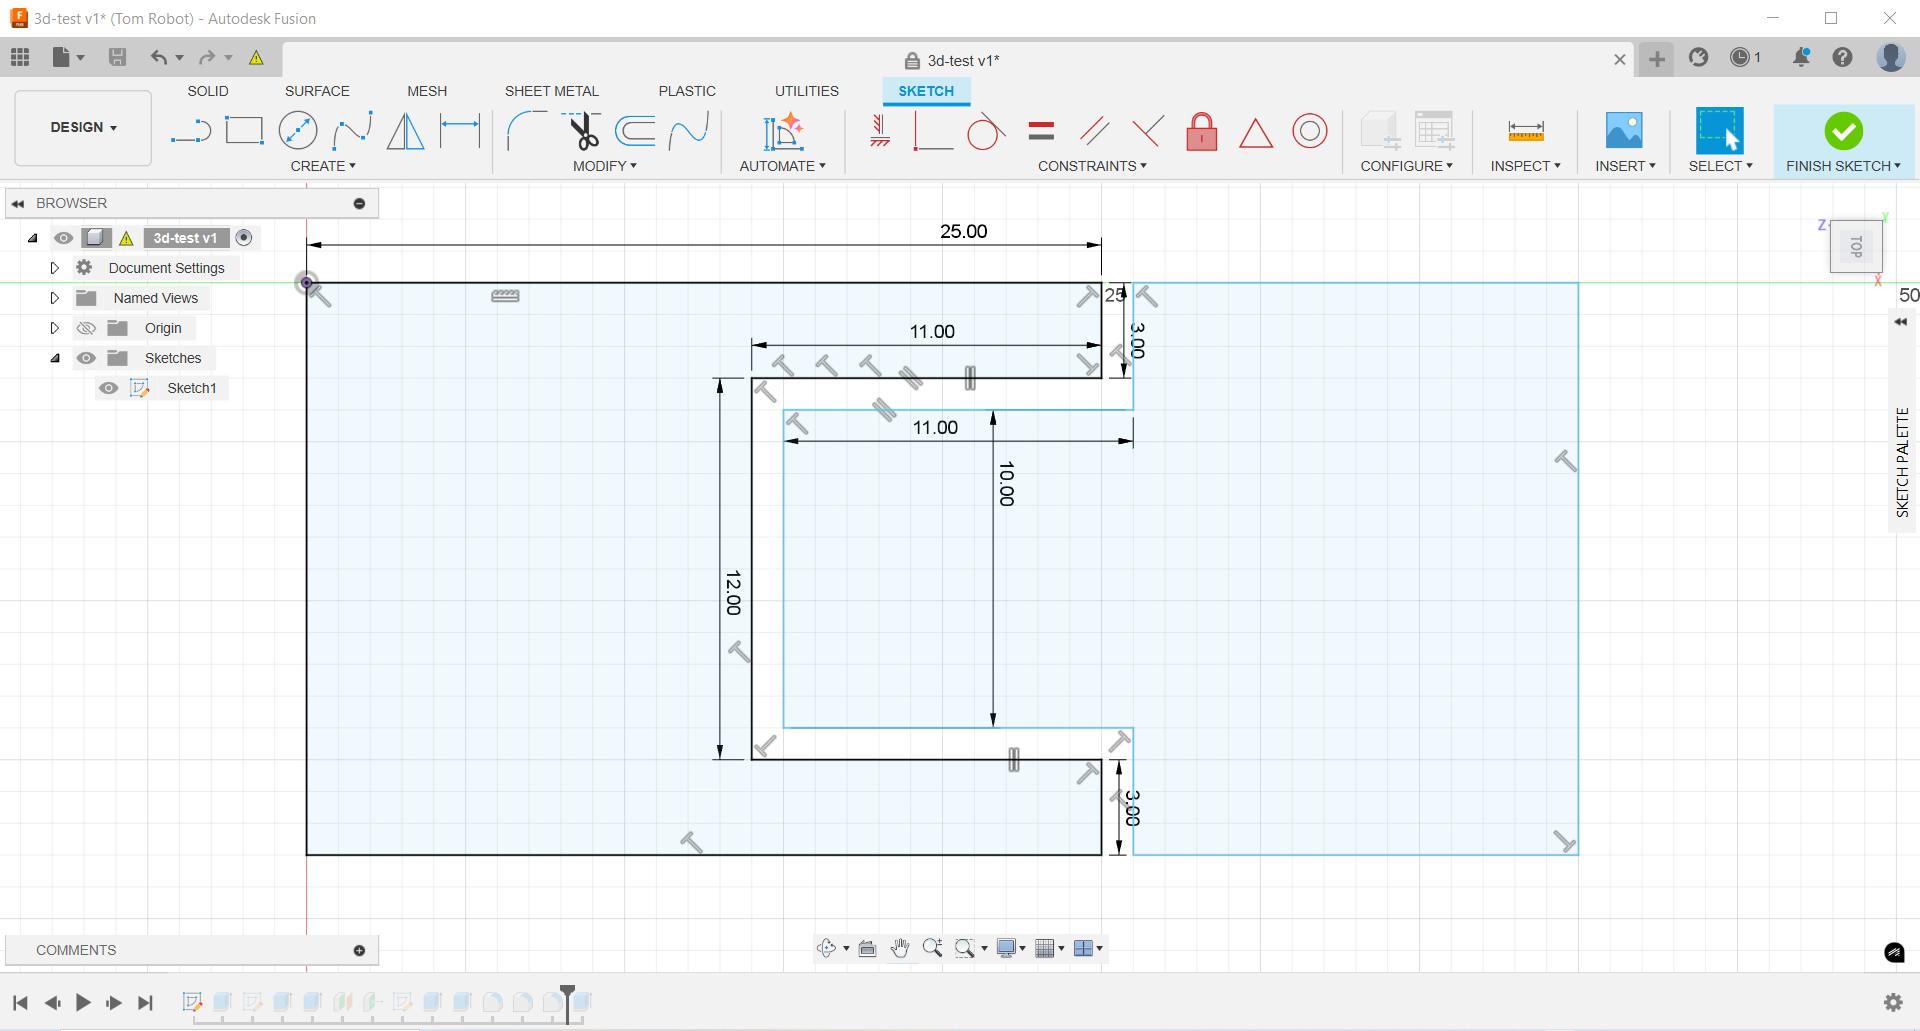
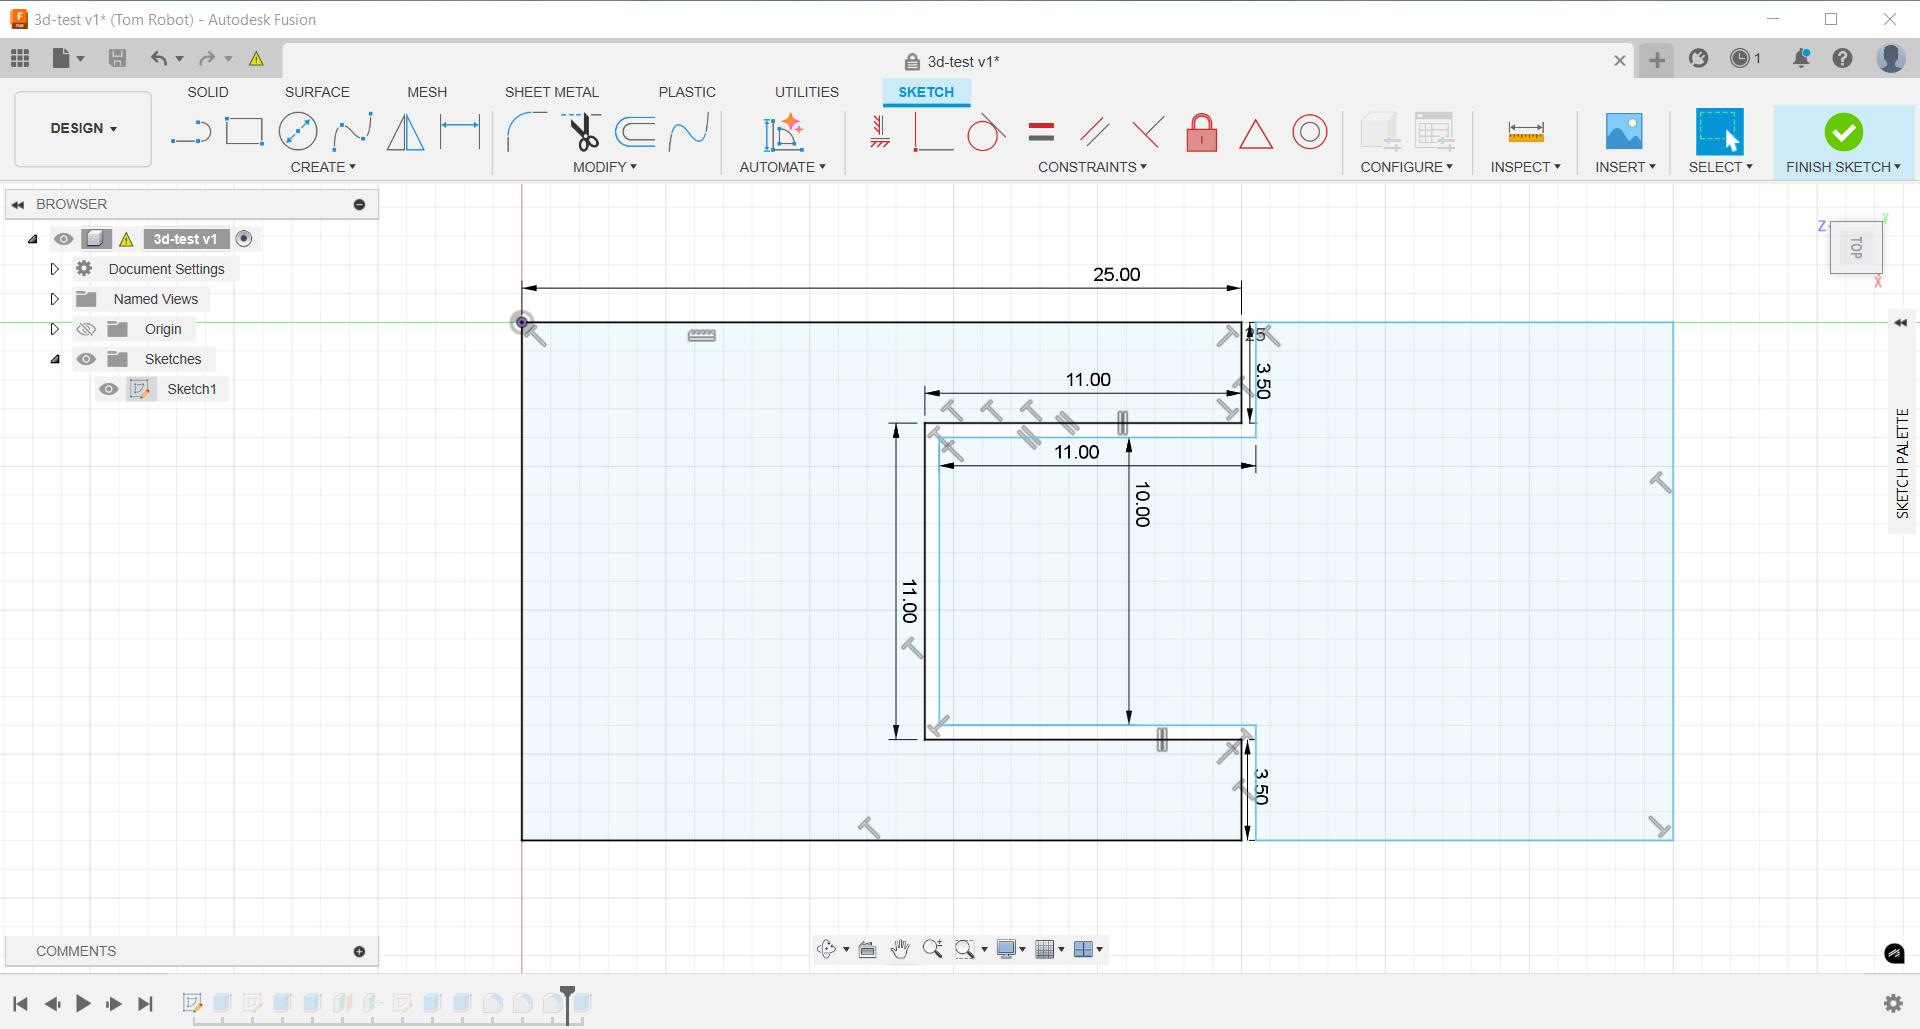
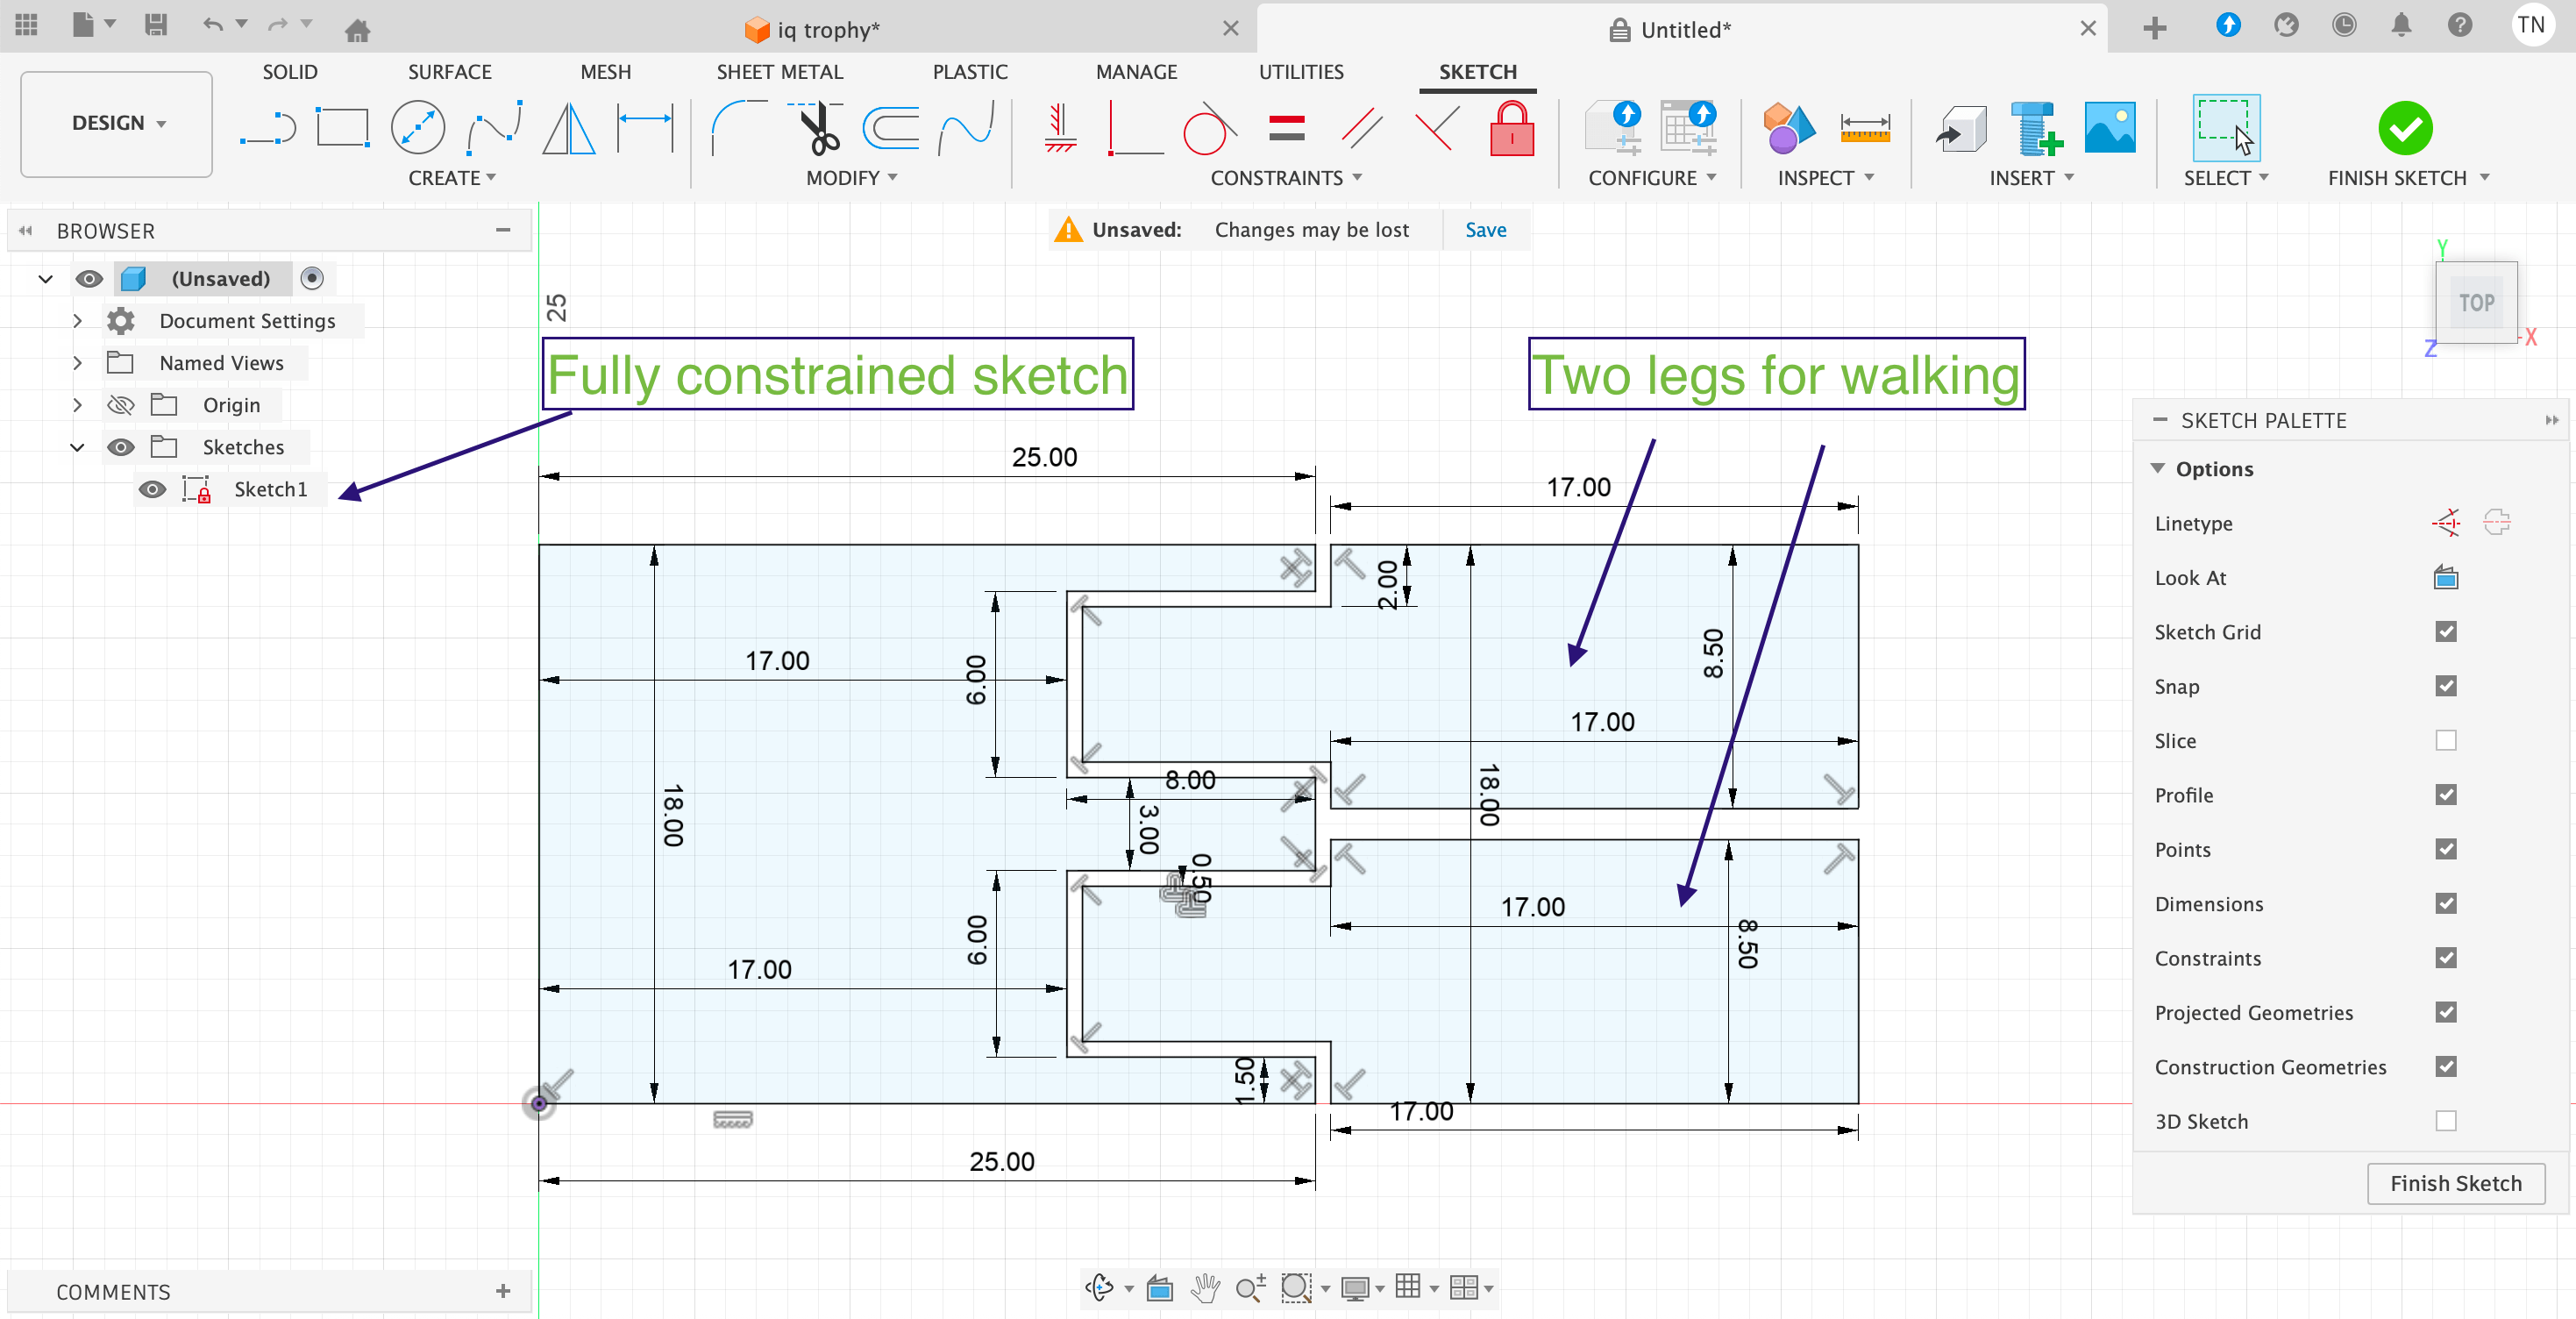
It was generated by the following sketch. Note that we are leaving a margin of 1 mm on both sides of the interior hinge. This was a design choice, and probably too much, but we wanted to be safe and make sure the hinge would have adequate room to move freely, especially because we were working on different printers, and didn't immediately know the dimensional accuracy of each.
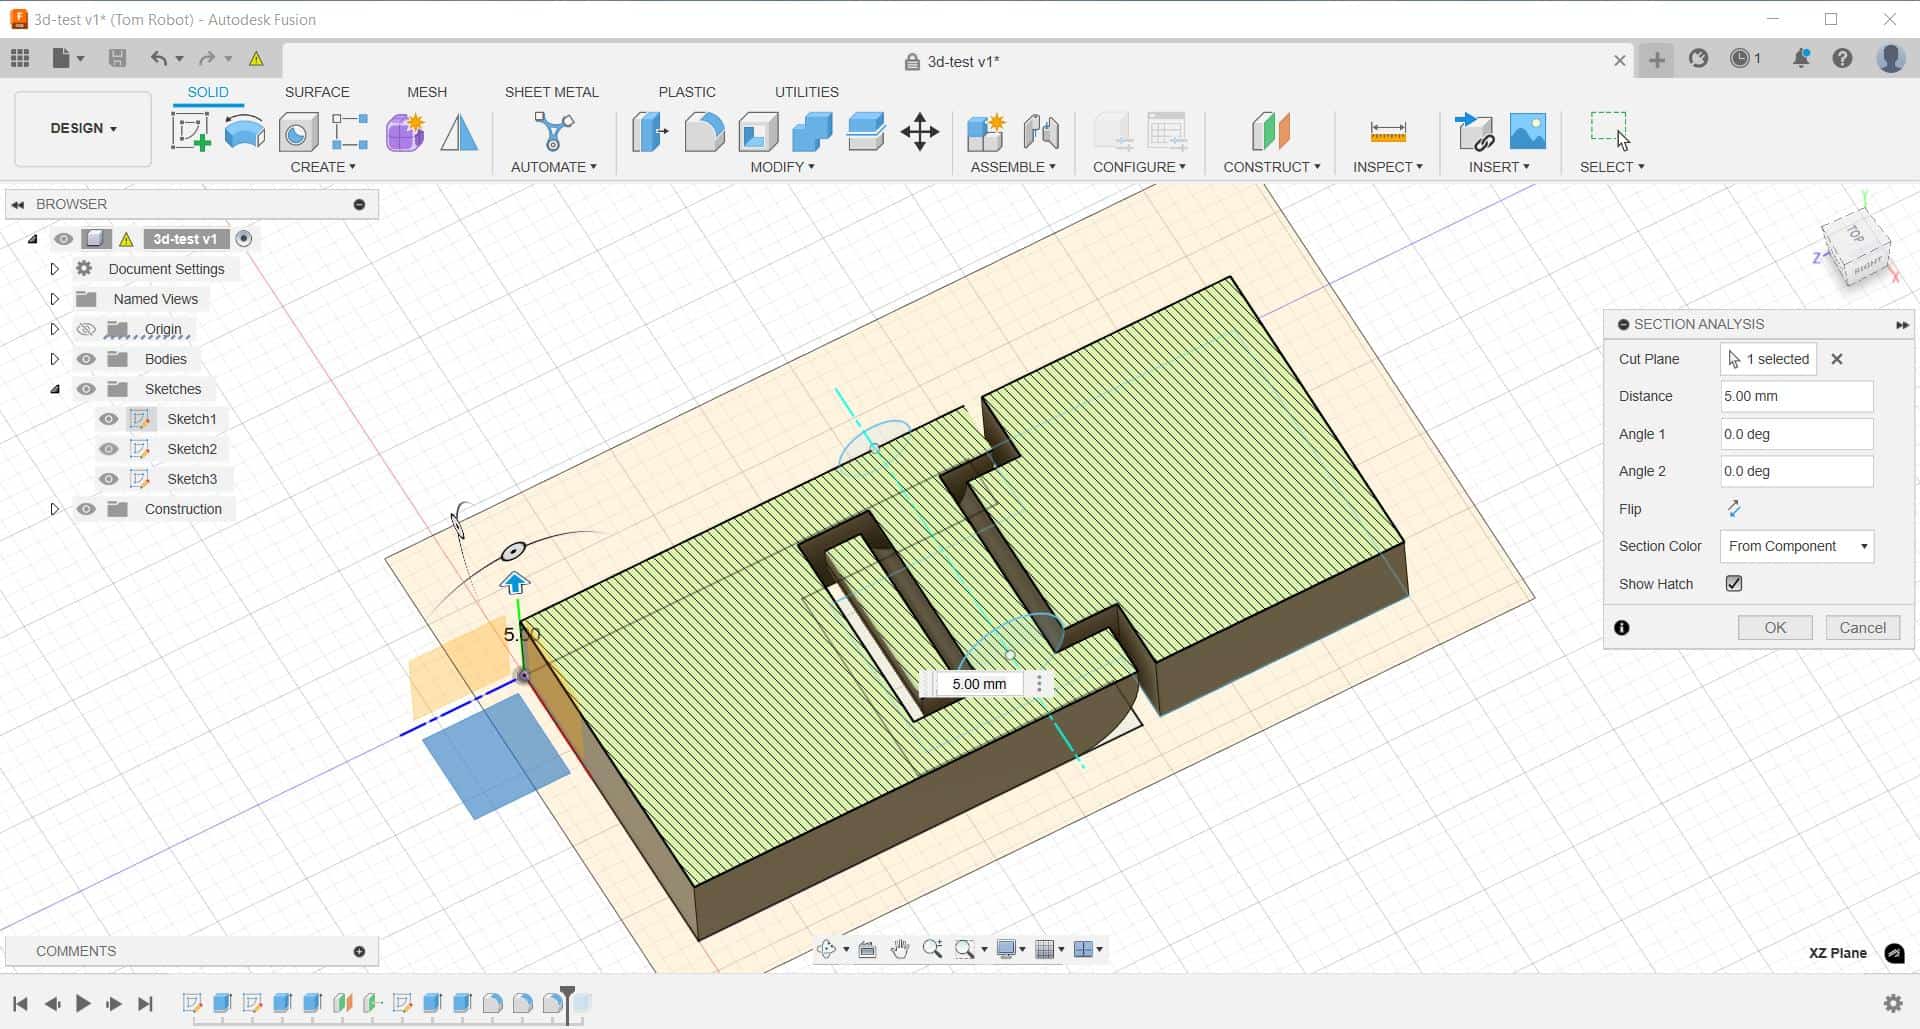
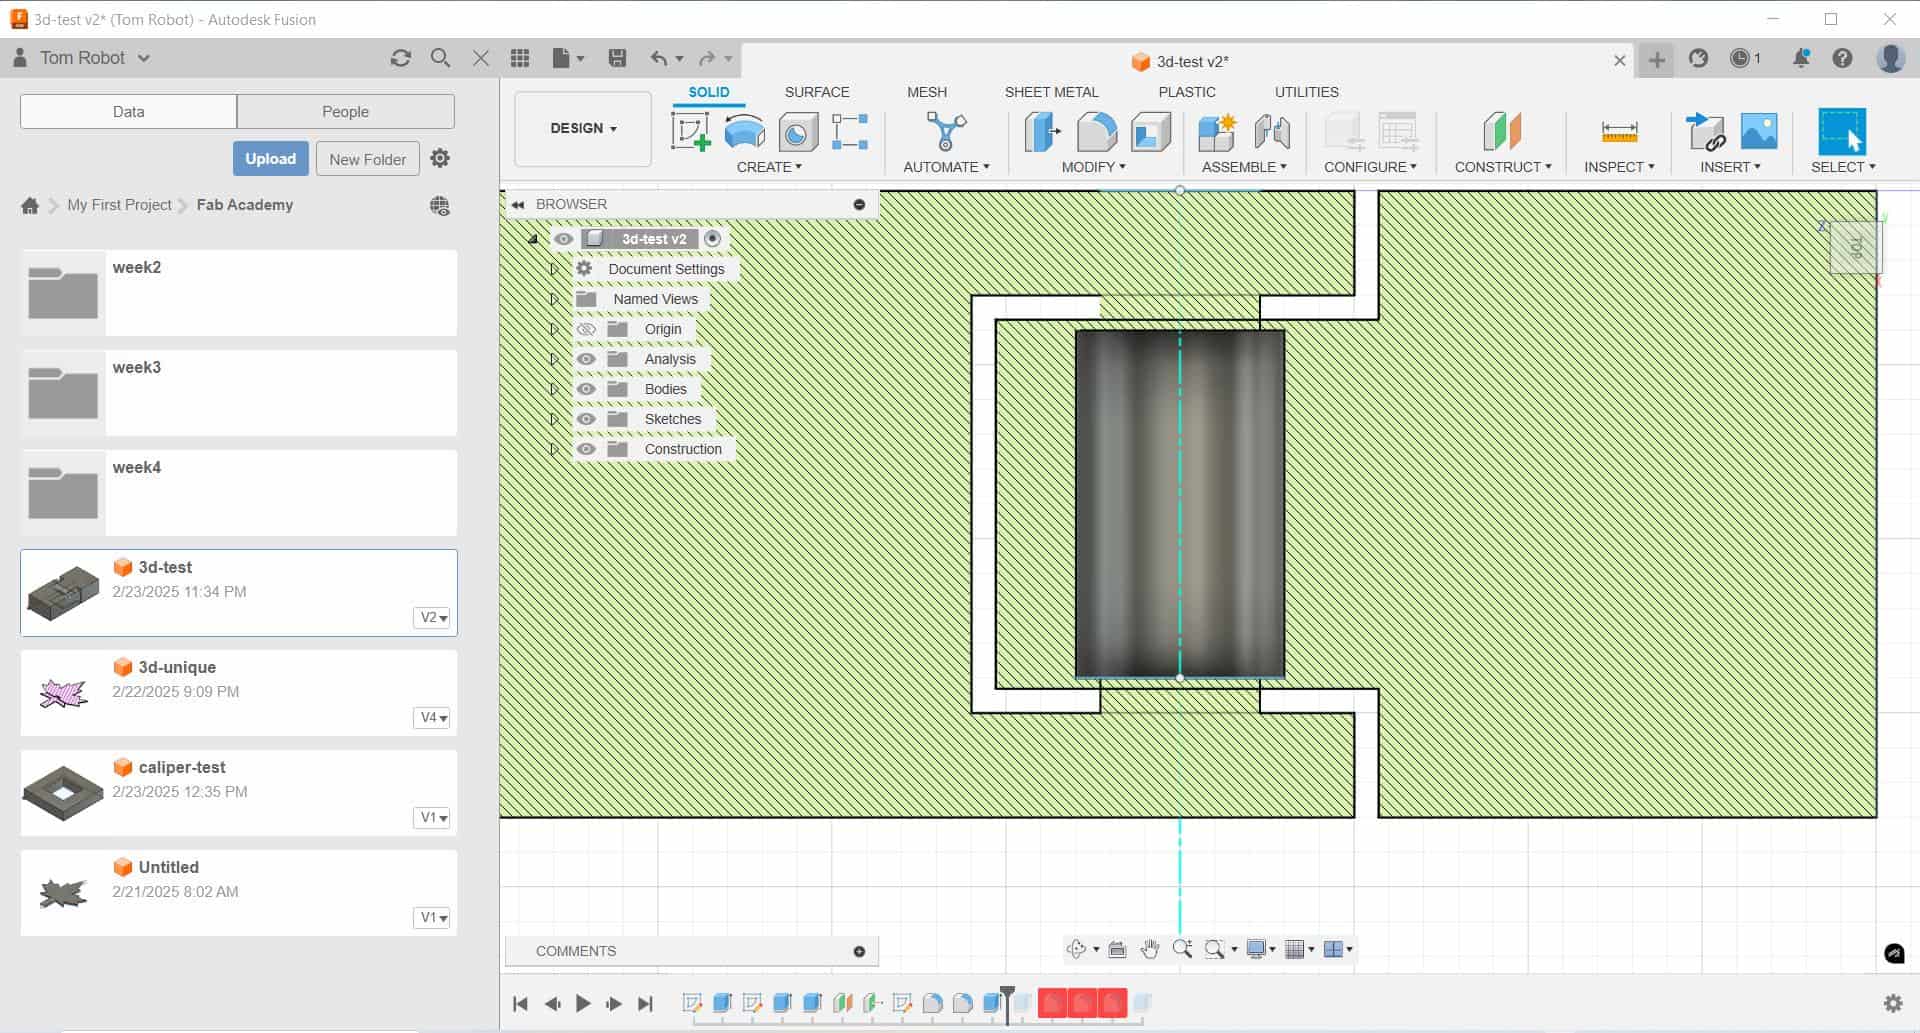
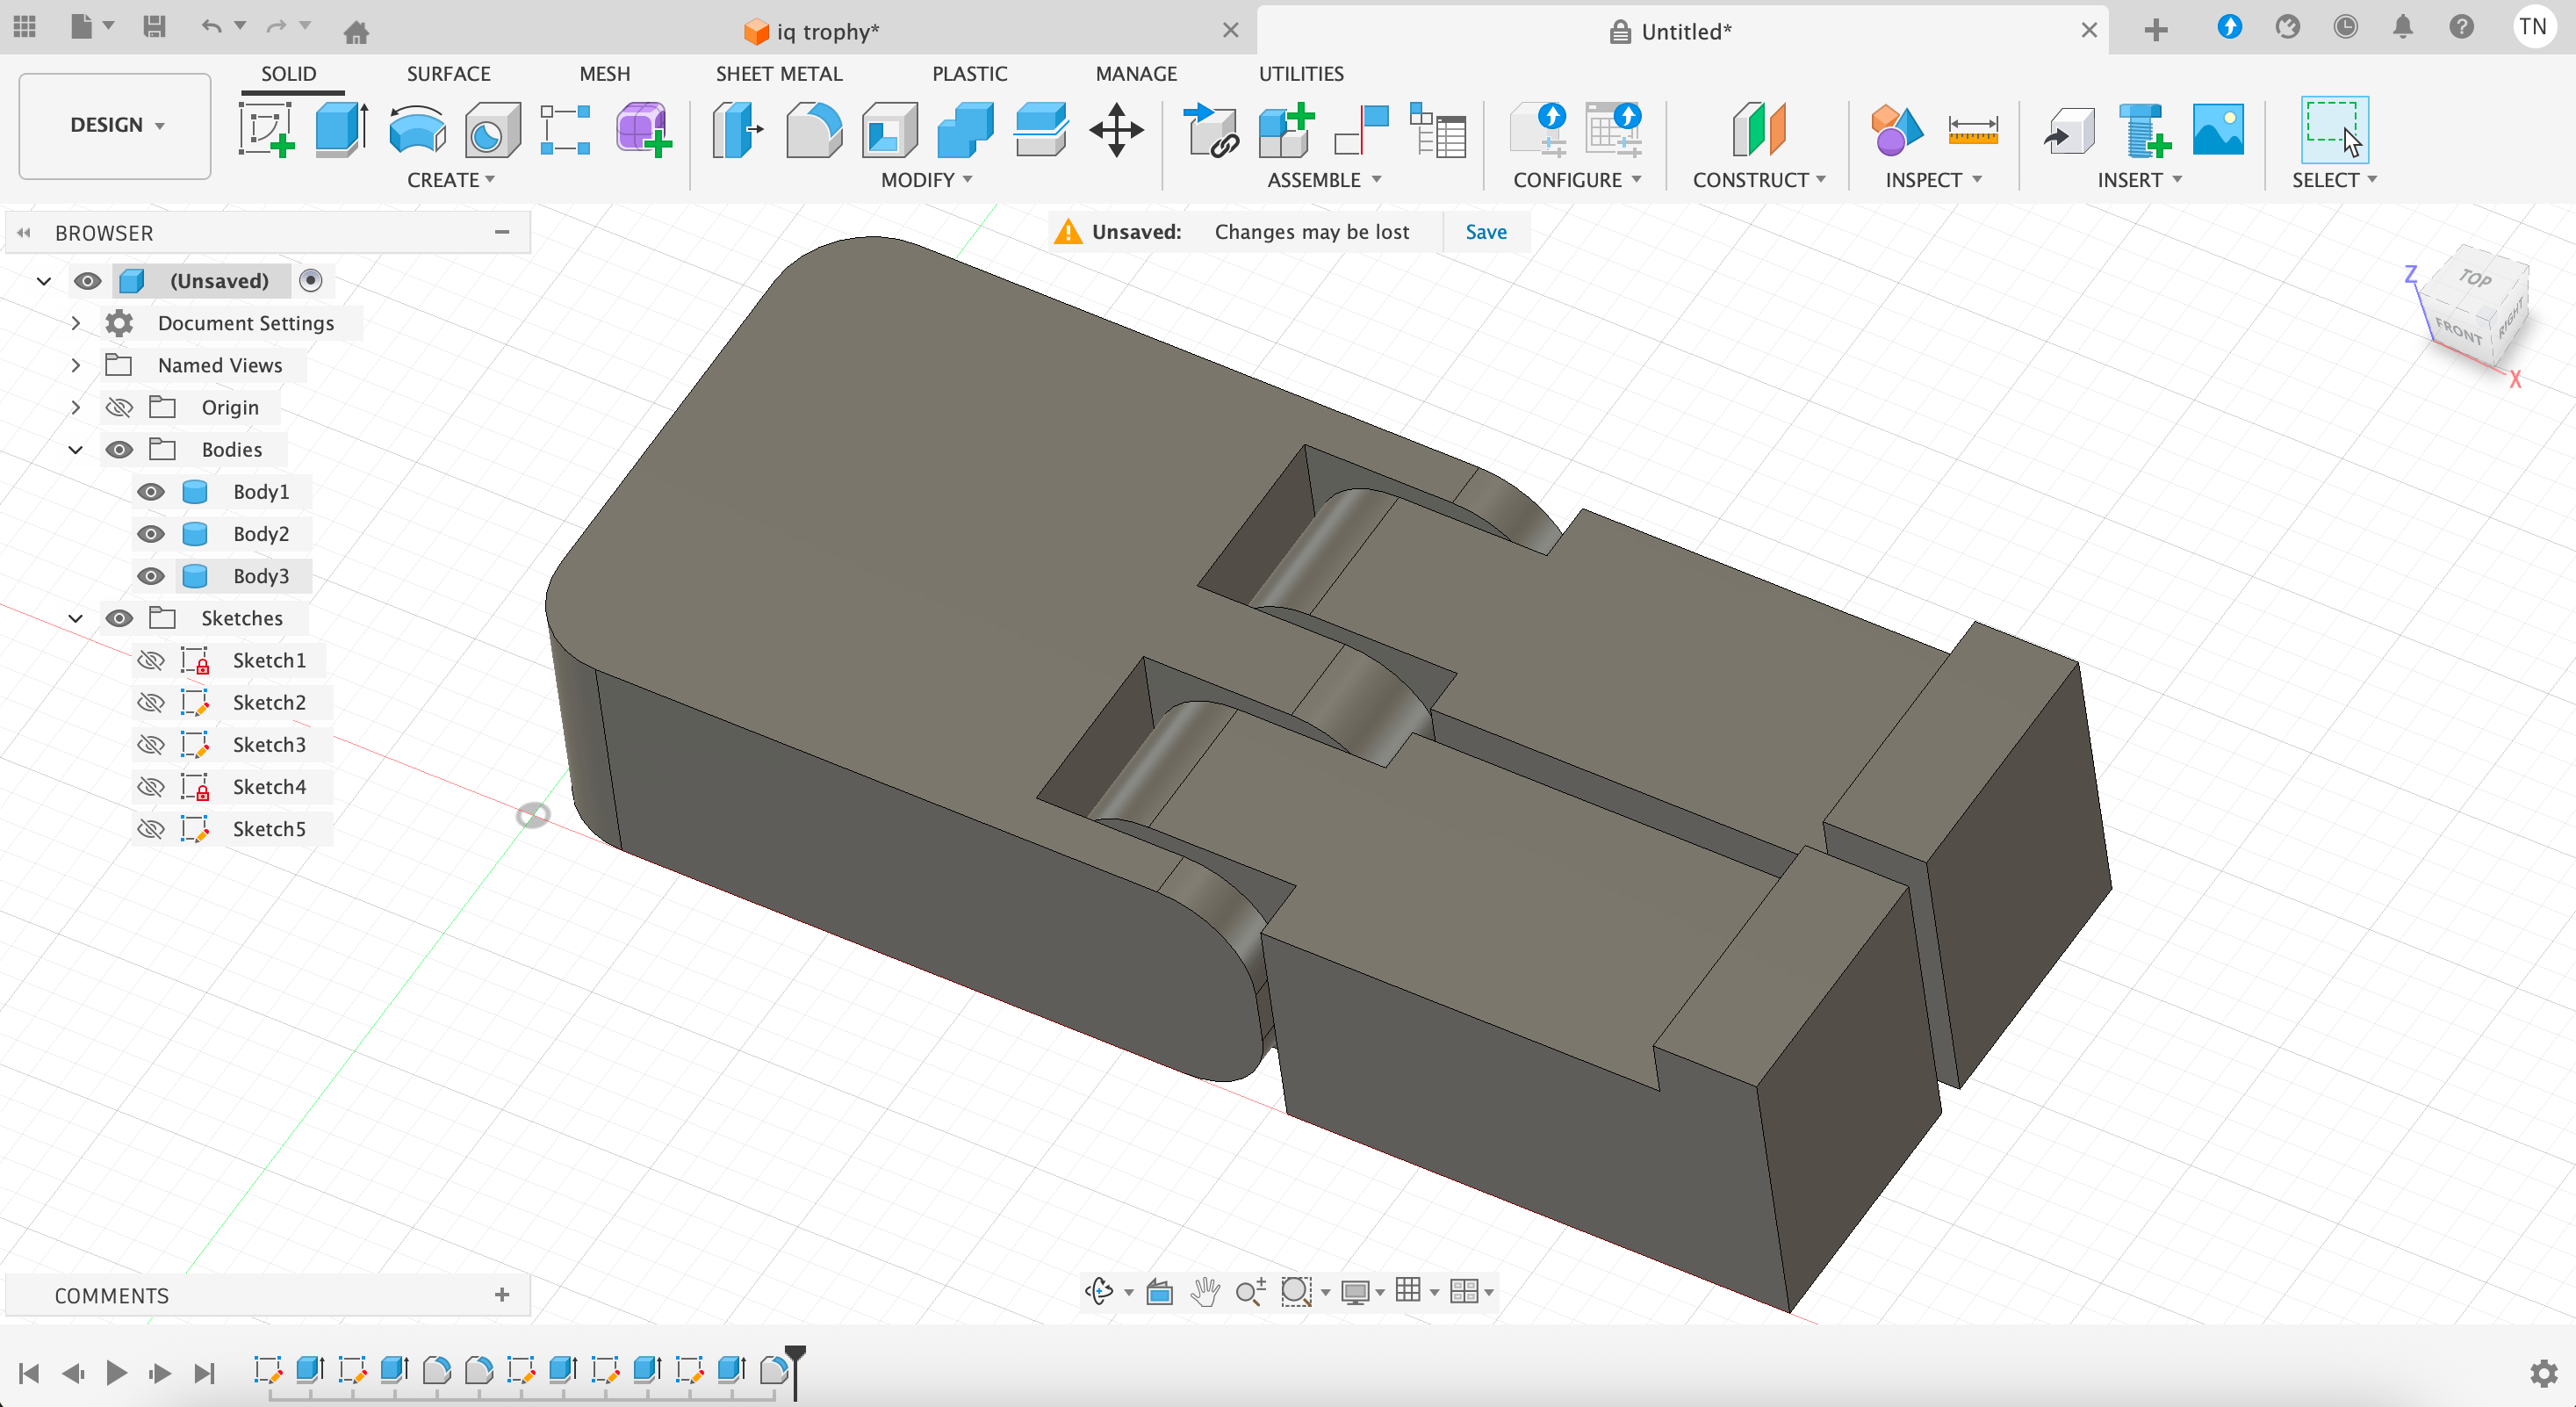
And here is the cross-section, again showing why it wouldn't be possible to produce subtractively.
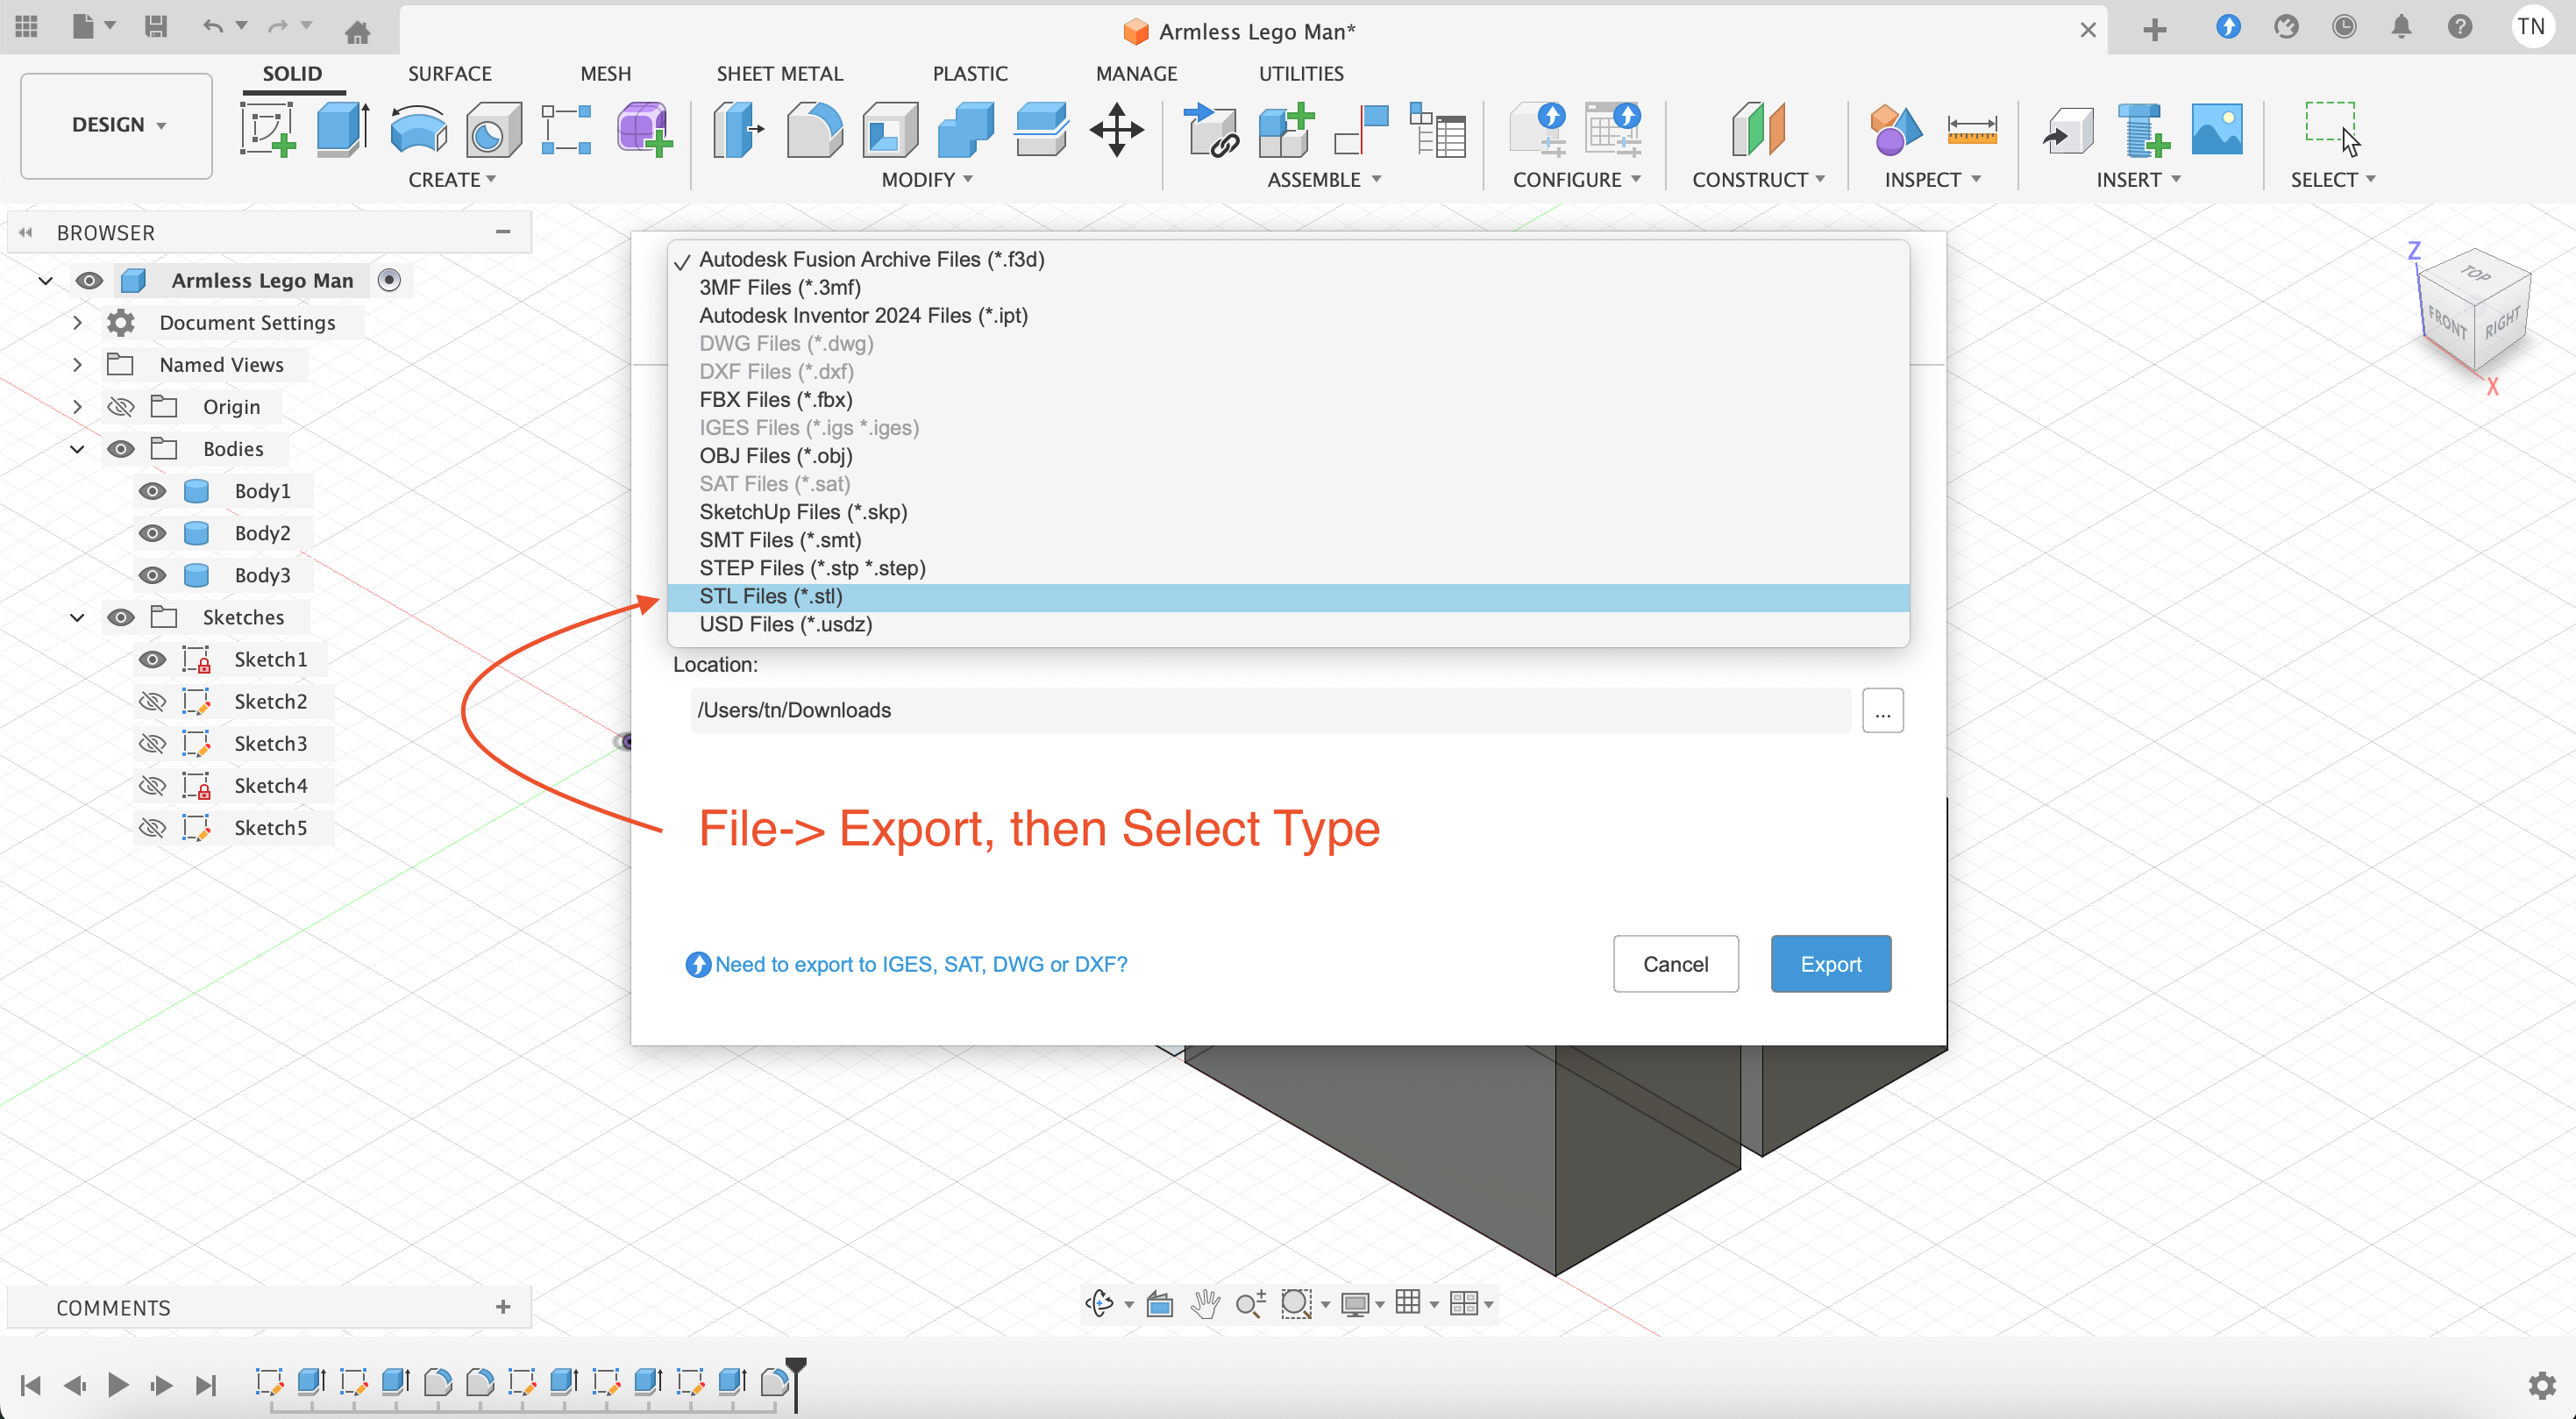
As we have finished design, we just need to export, in Fusion go to File->Export, select type .stl:
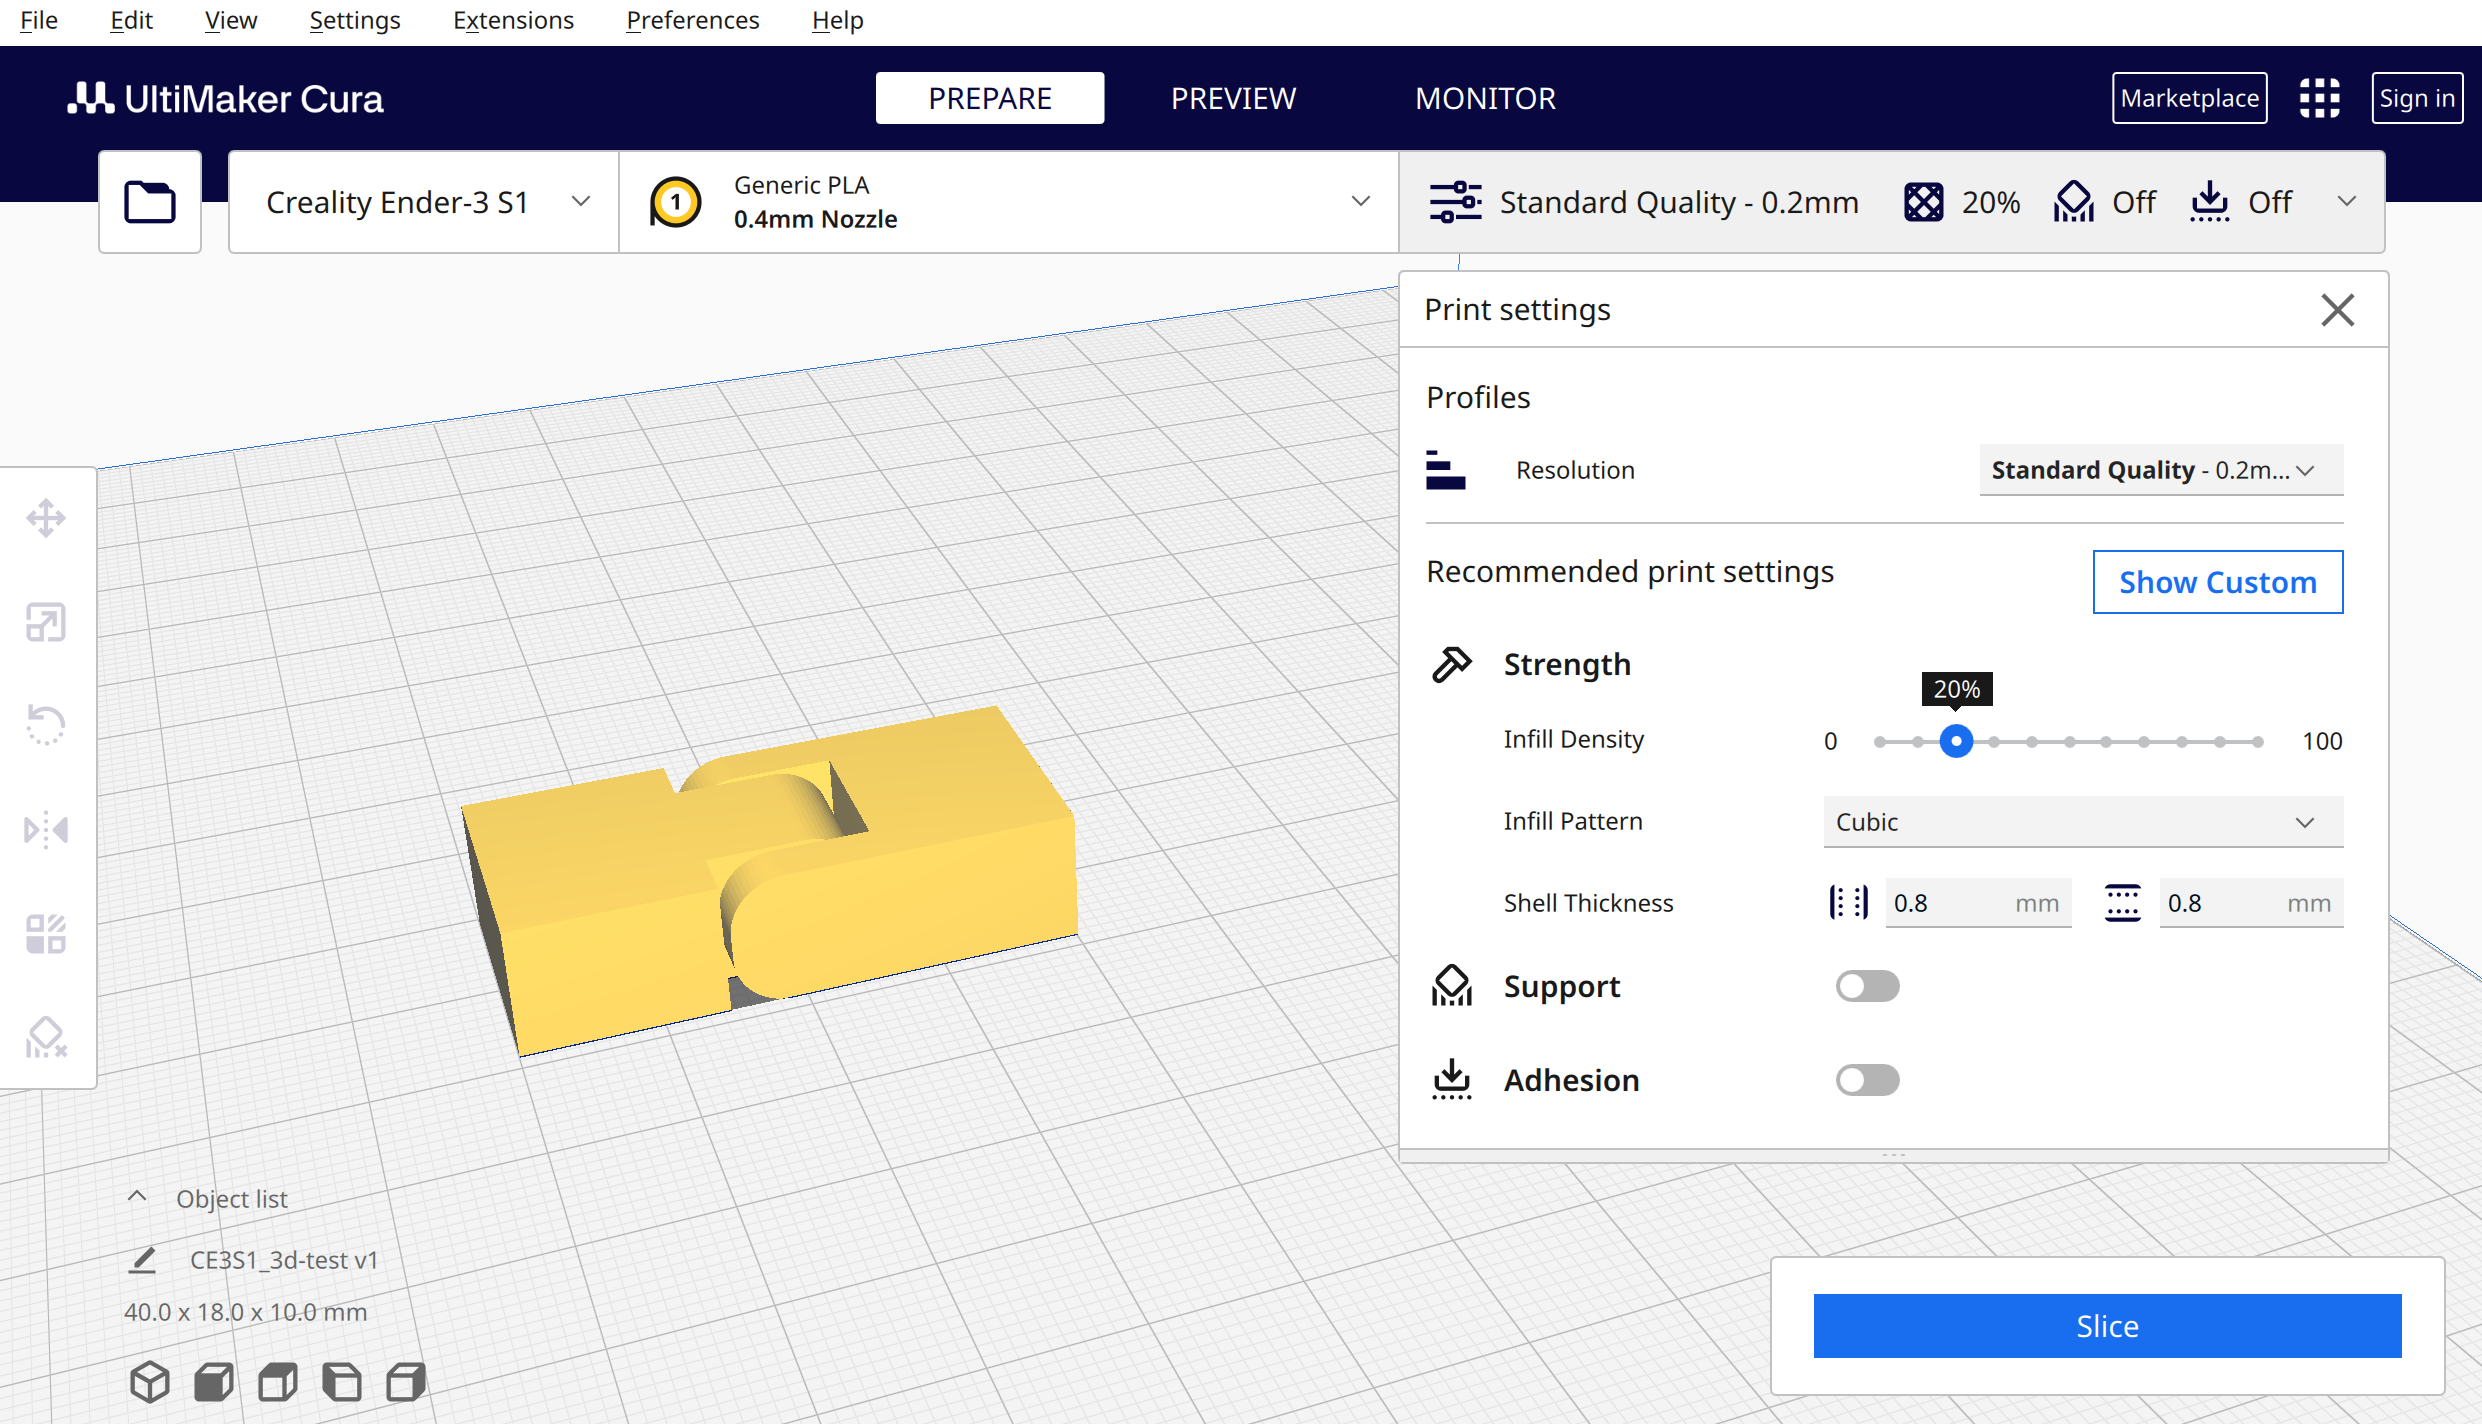
Next we'll open the exported .stl file into Cura slicer which we use in tandem with the Creality printer mentioned above. We'll rotate the object to sit flat, and check other settings.
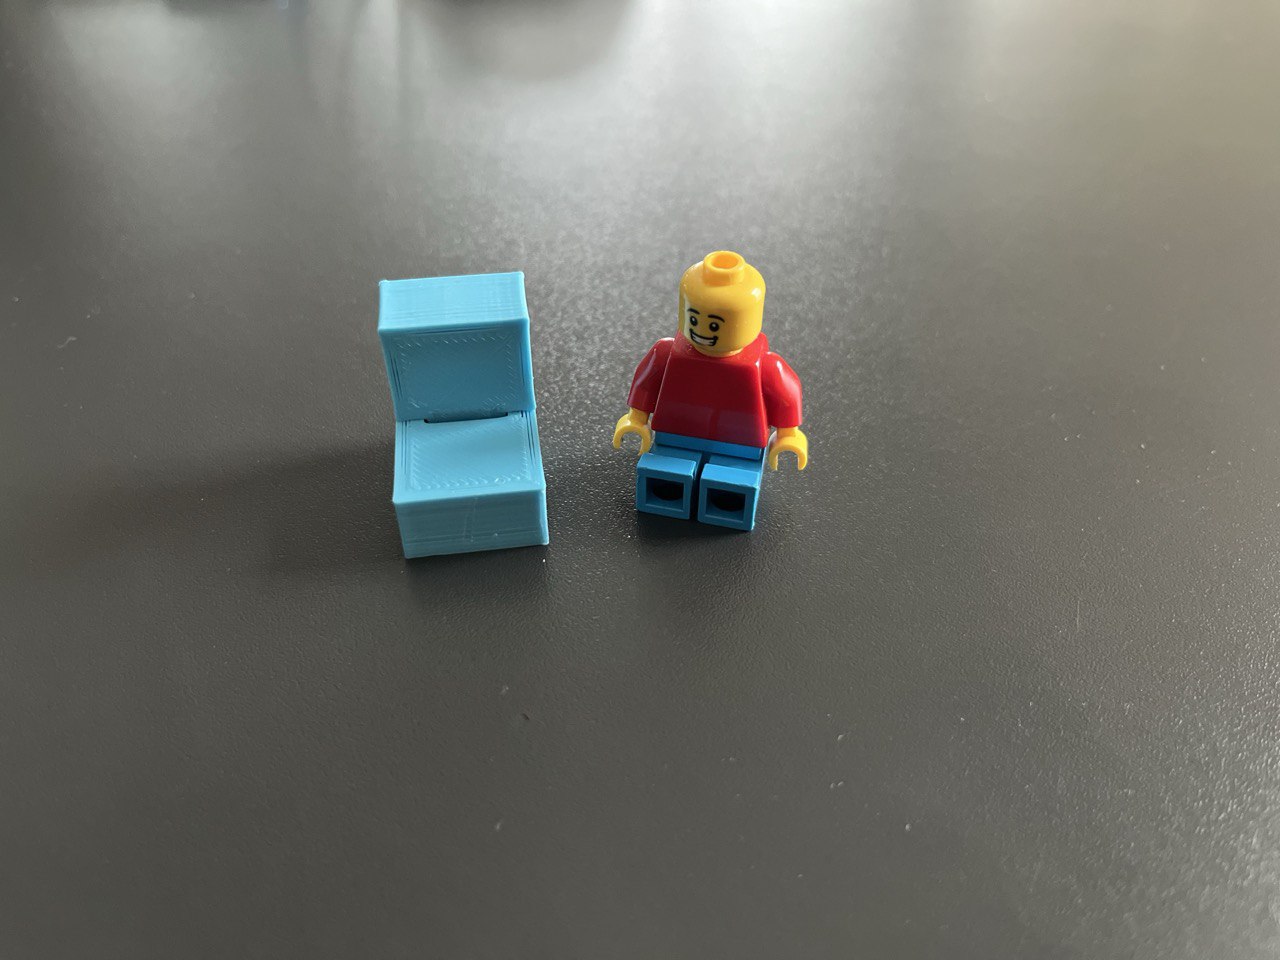
Printing was successful in 30 minutes. It worked, just the hinge was a bit loose because we had used 1 mm margin on each side. It wasn't a complete surprise, but a bit looser than expected.
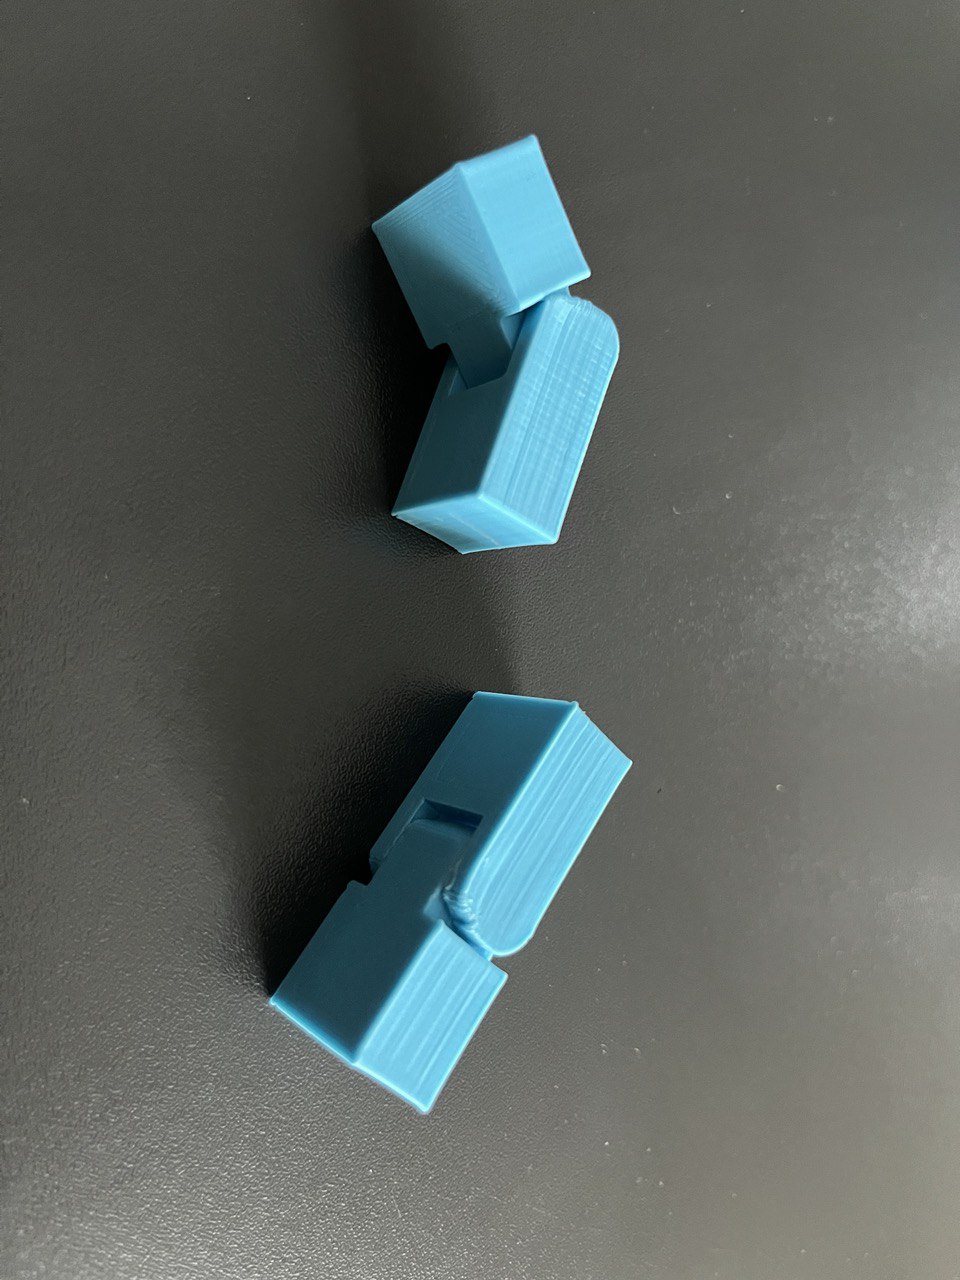
Therefore we next went to reduce the margin to make the hinge tighter. Here's the edited sketch:
Unfortunately when changing the parameters of the sketches it changed the prior positions of the extrusions
That resulted in a failed print, but then redid it carefully and successfully, resulting in a more secure hinge:
LEGO, Man
Actually the element I produced reminded me of a LEGO figure, so I'm inspired to see if I can make a 3D-printed LEGO-ish figure with more moving parts..
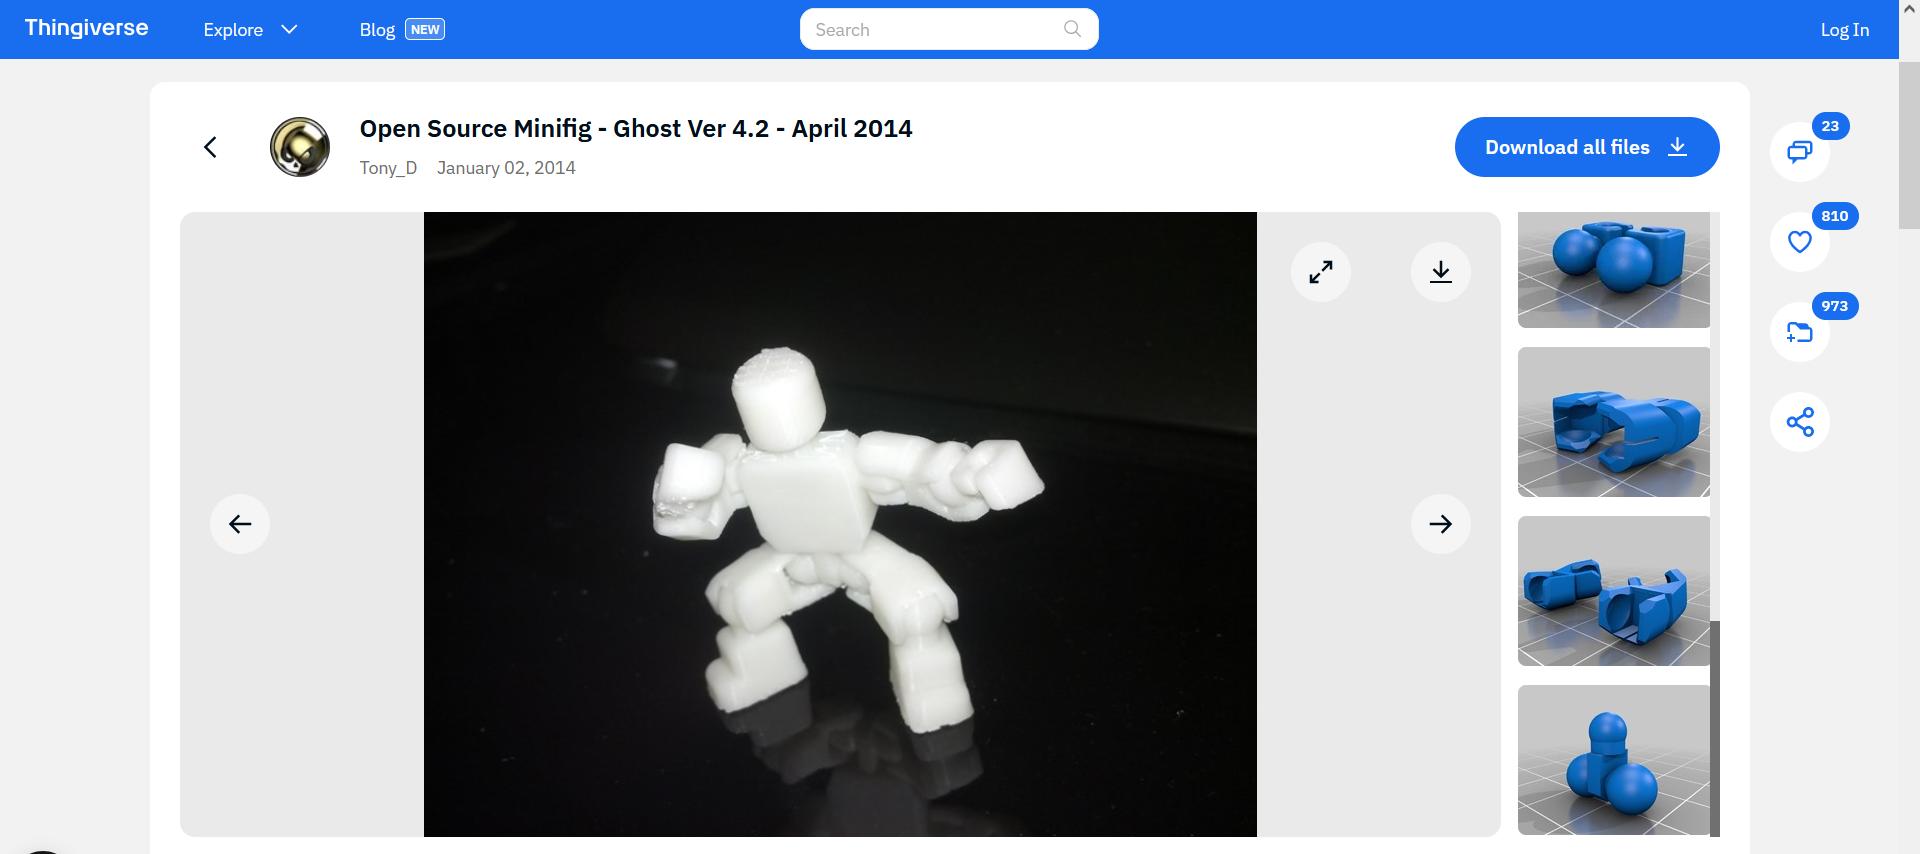
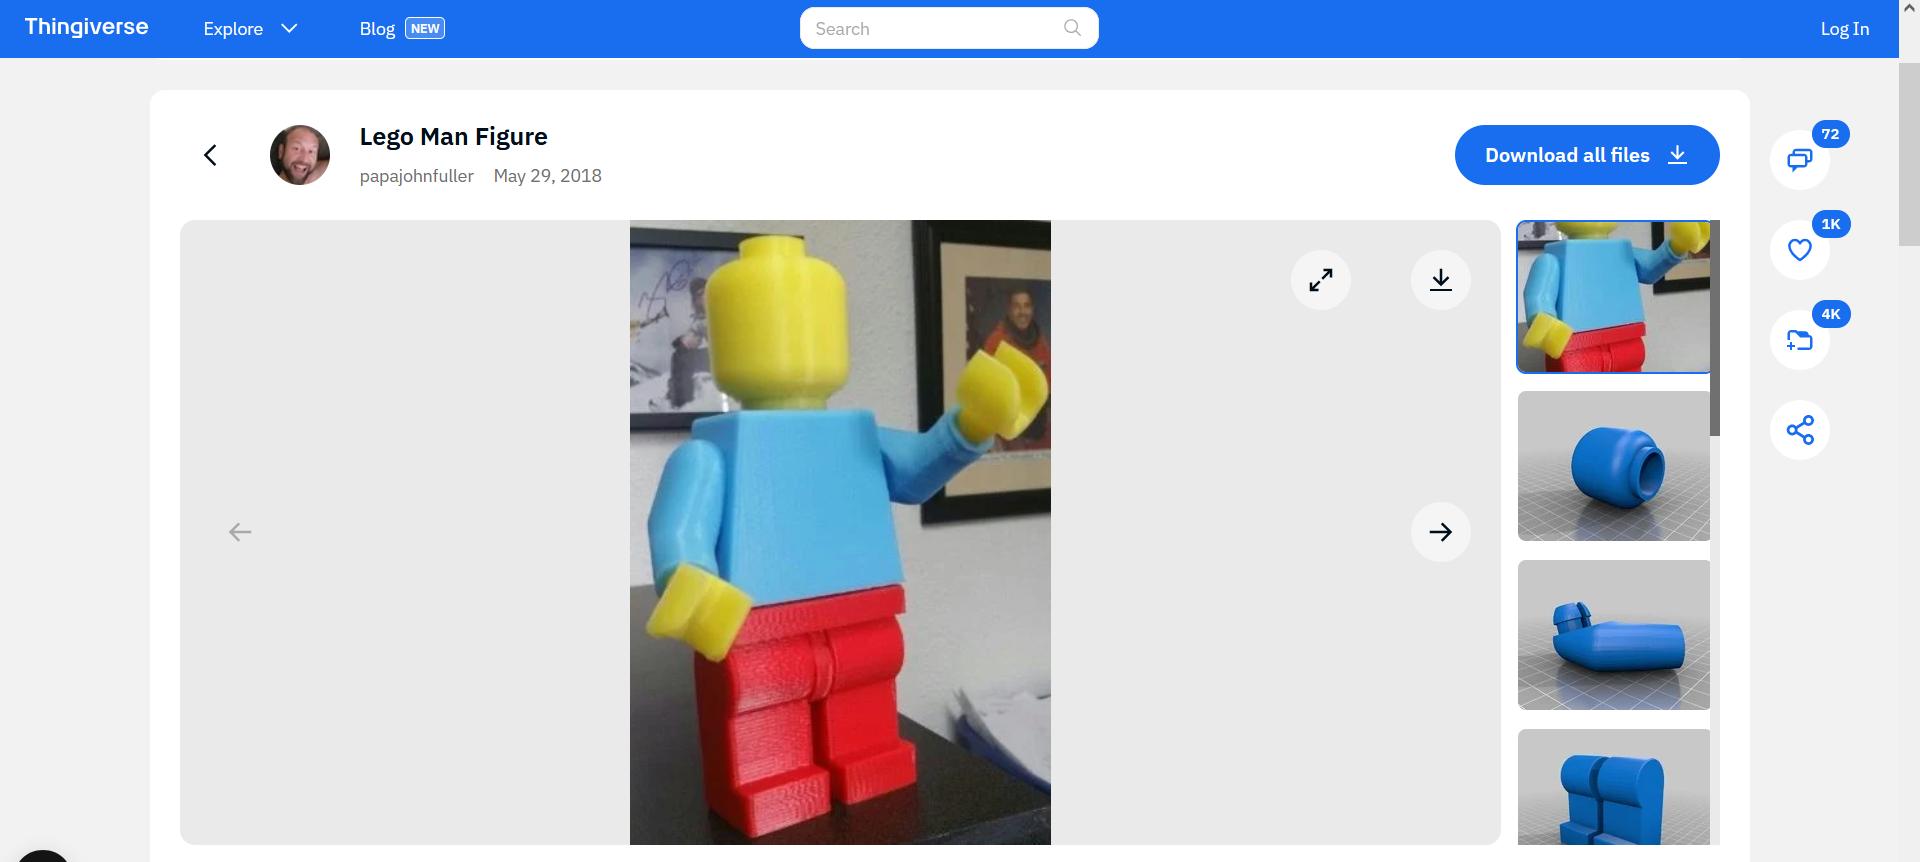
I went to Thingiverse for inspiration and ideas, but unfortunately the designs ( first second ) there could be made subtractively also.
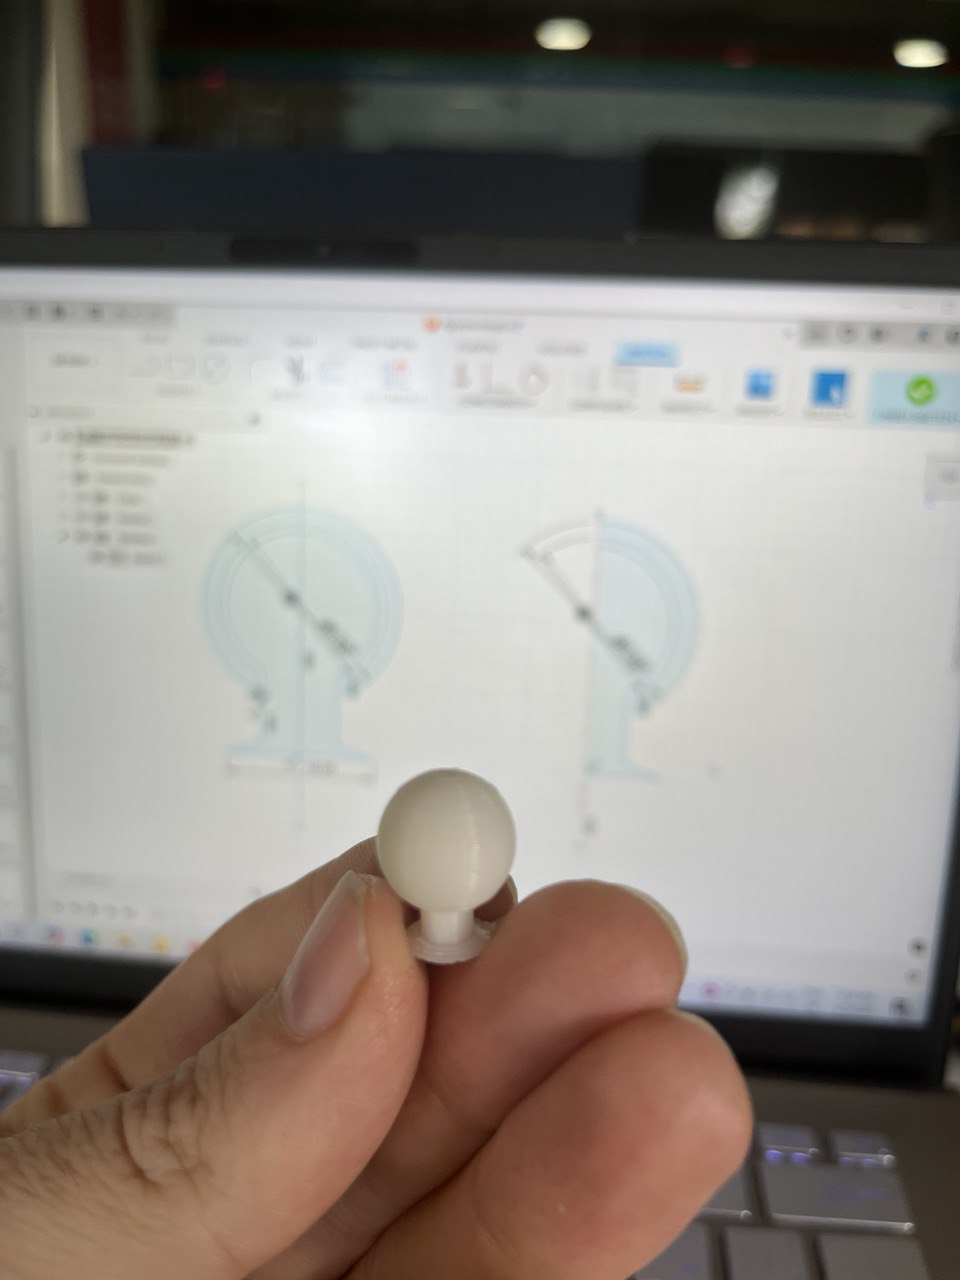
Hence I will need to be creative to continue this project. The next step was to design a head, because any kind of minifig would obviously be incomplete without it. Did that, printed it, here it is:
So my final project this week will be a half-complete LEGO figure. Just without arms. In any case the objective of the week - namely to design something that cannot (easily) be made subtractively - will be achieved. So I started a new design, starting with 2 legs.
Here's the extruded body with some chamfering for style:
Next we'll add the head, developed from a new sketch on a plane slicing the body neatly in 2. Here our design strategy is visible: we'll have an inner as well as an outer head, both are created by revolving around an axis on the top of the torso.

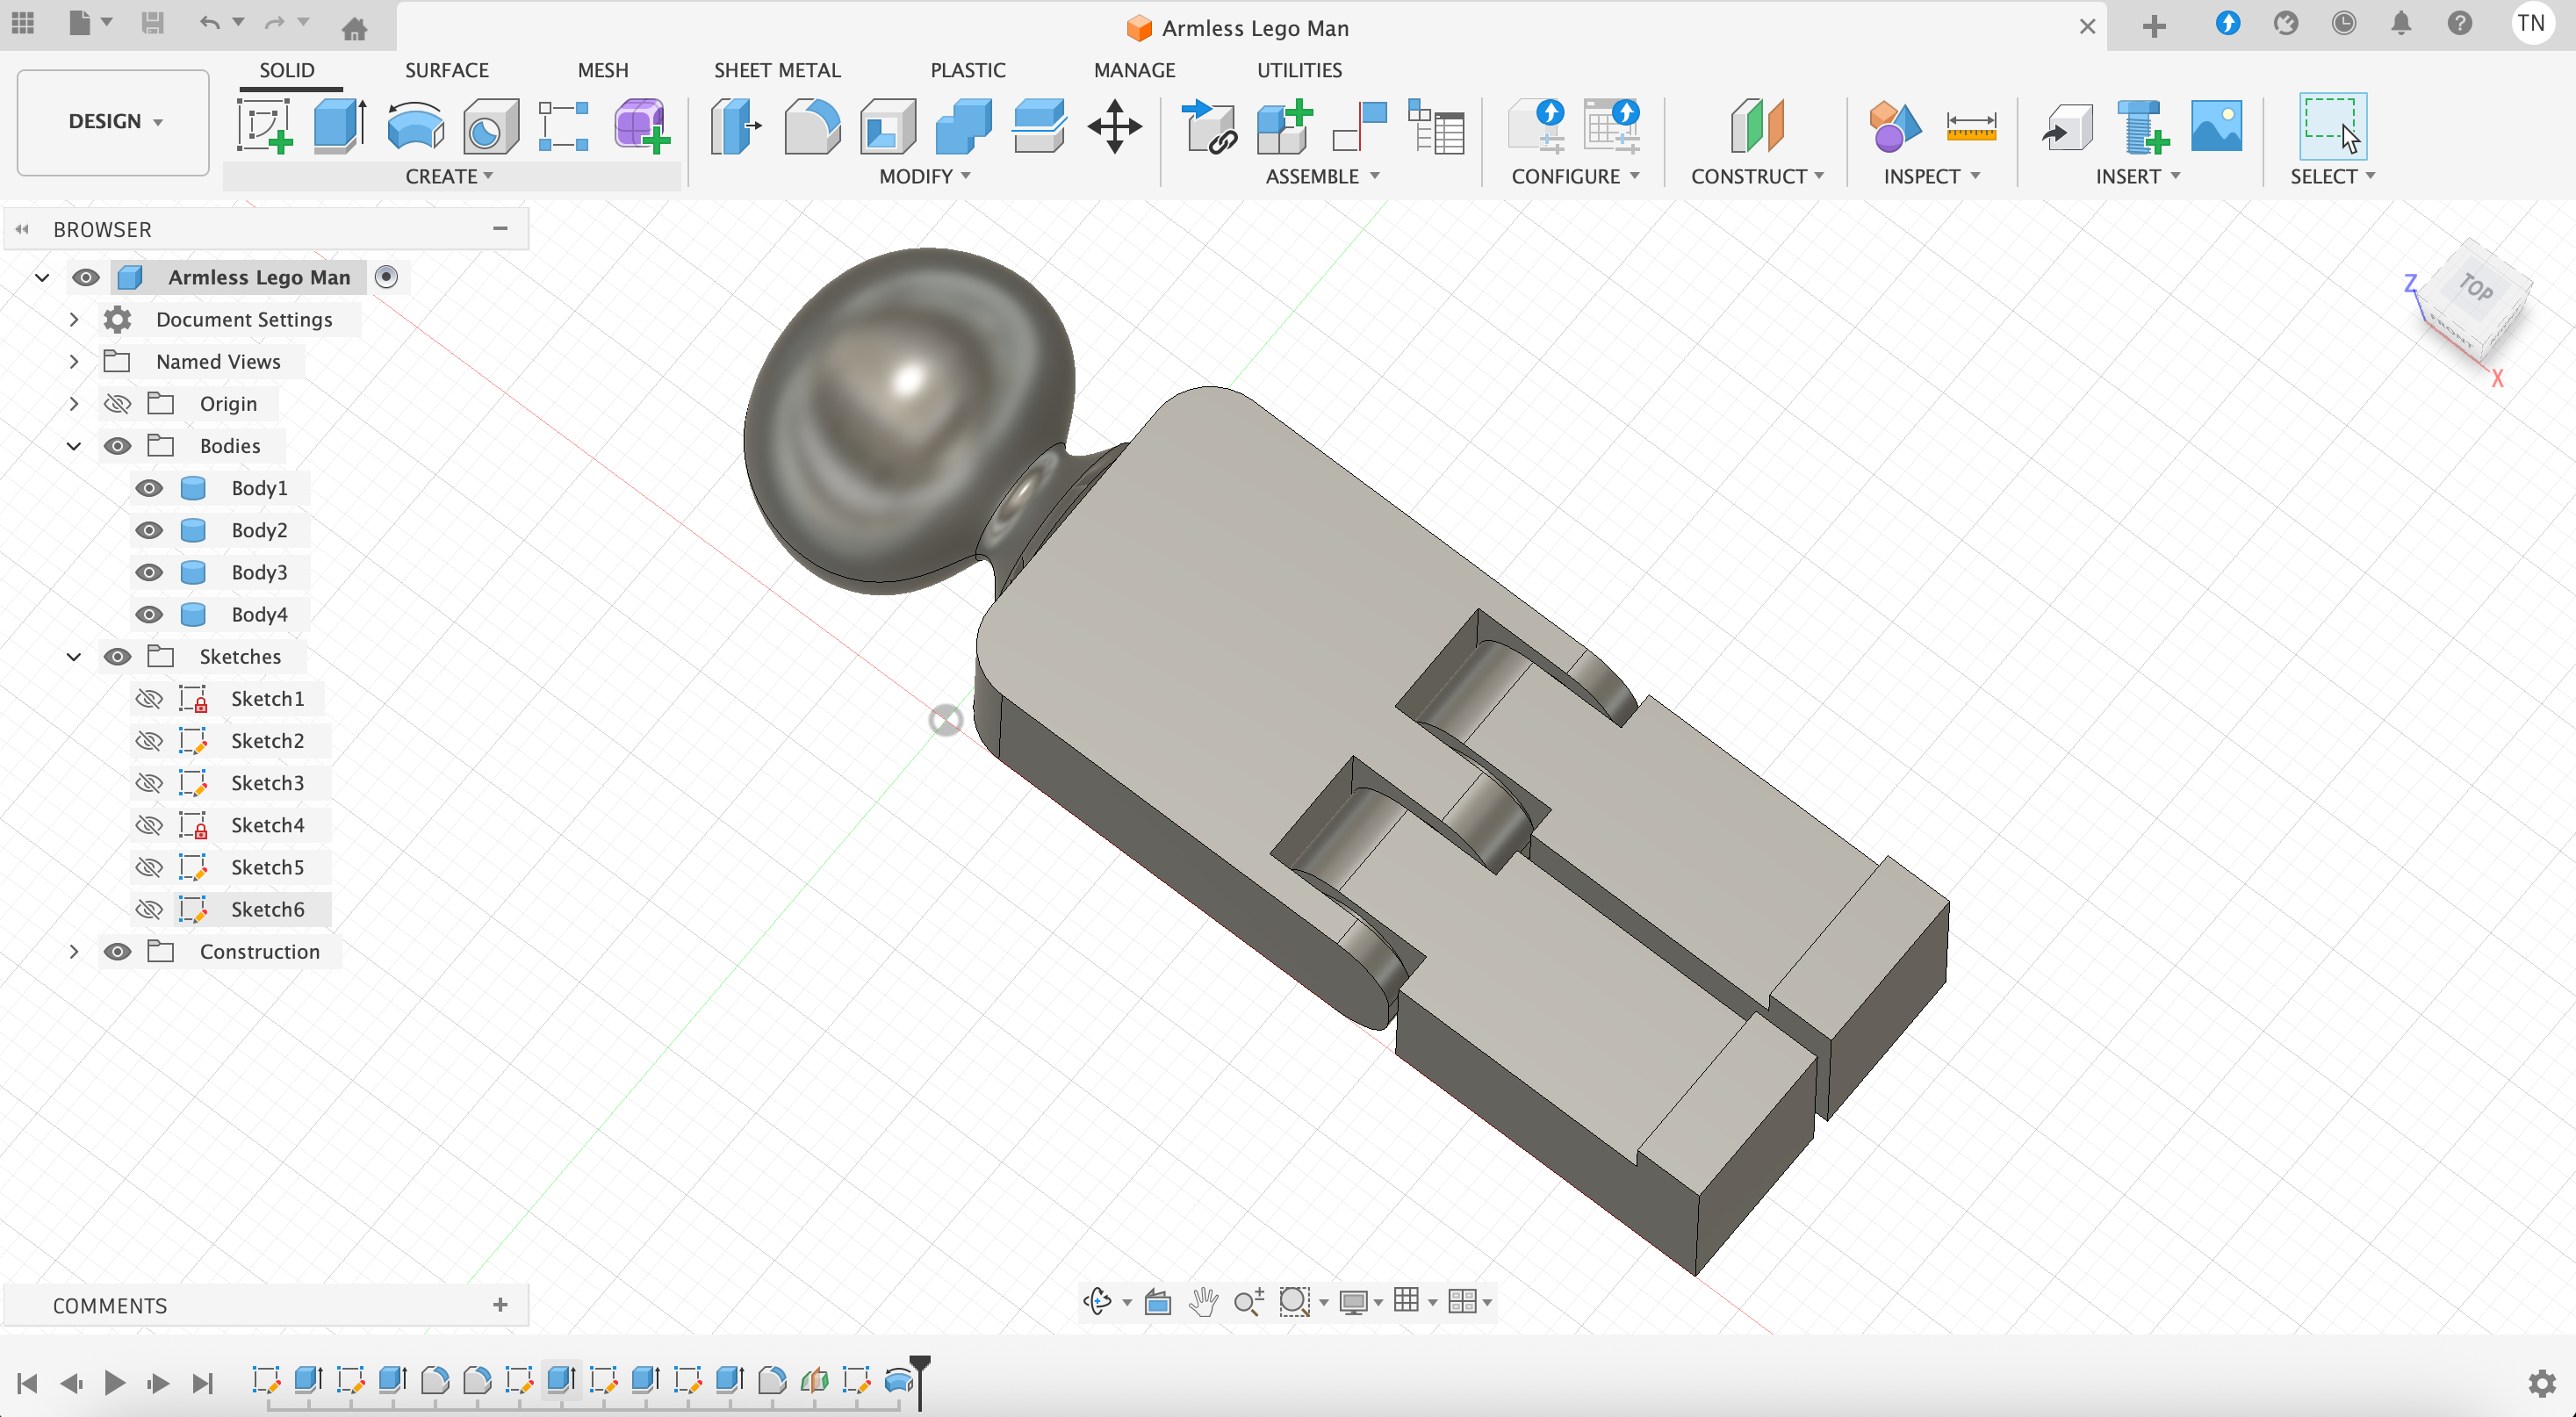
So here is our armless LEGO / Minifig guy. He's funny-looking, but the objective was not that, and once we add some arms he will look more normal. Anyway, time to print...
Creating the Week's Project with Bambu Lab
The lab has a Bambu Lab A1 Mini 3D printer which I loved so much that I got one. It is an amazing printer, far superior to other options out there, so since we have it available, we will use that to produce our week's project and will show the work flow here.
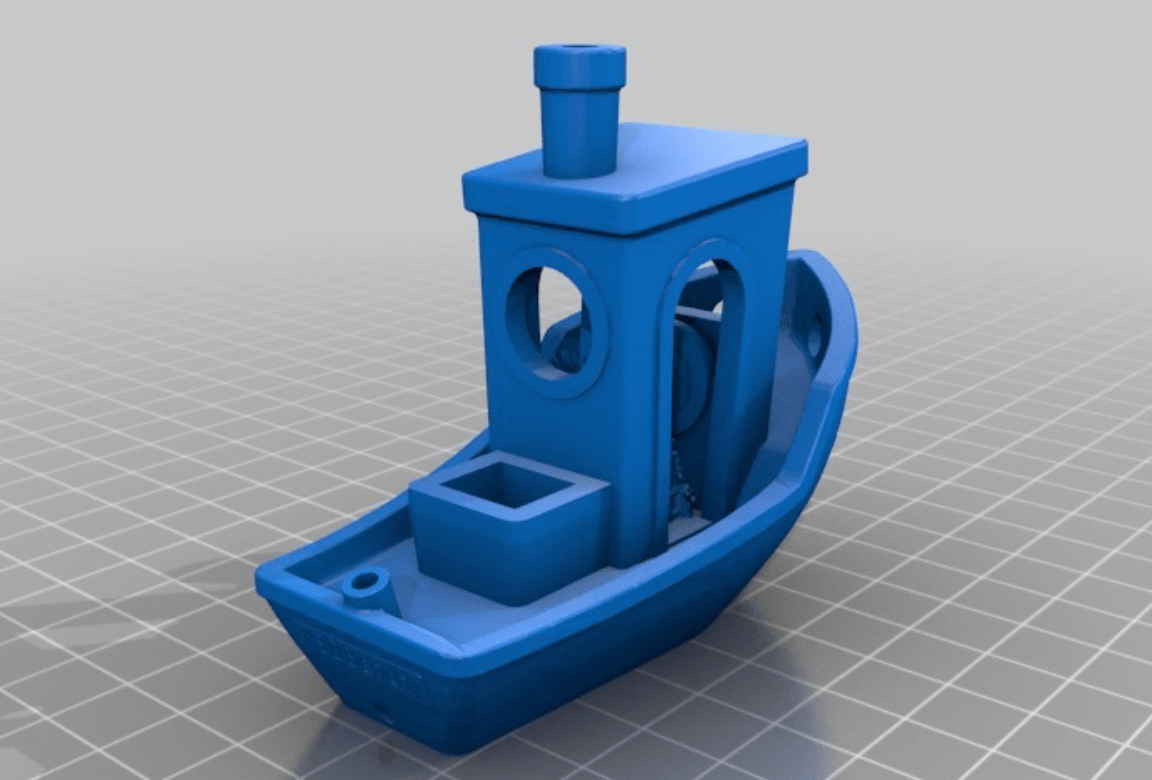
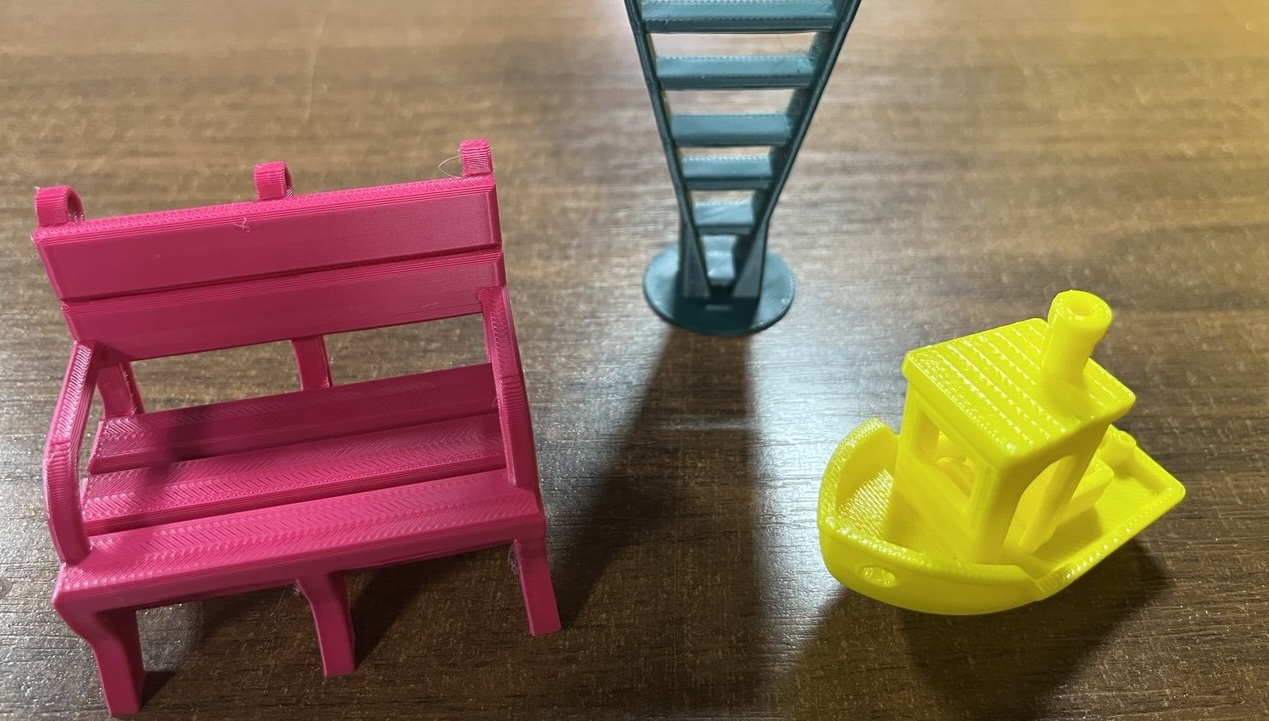
To showcase the Bambu Lab A1 Mini, we did some test prints including the Benchy, the Boaty and a fairly extreme bridging test.
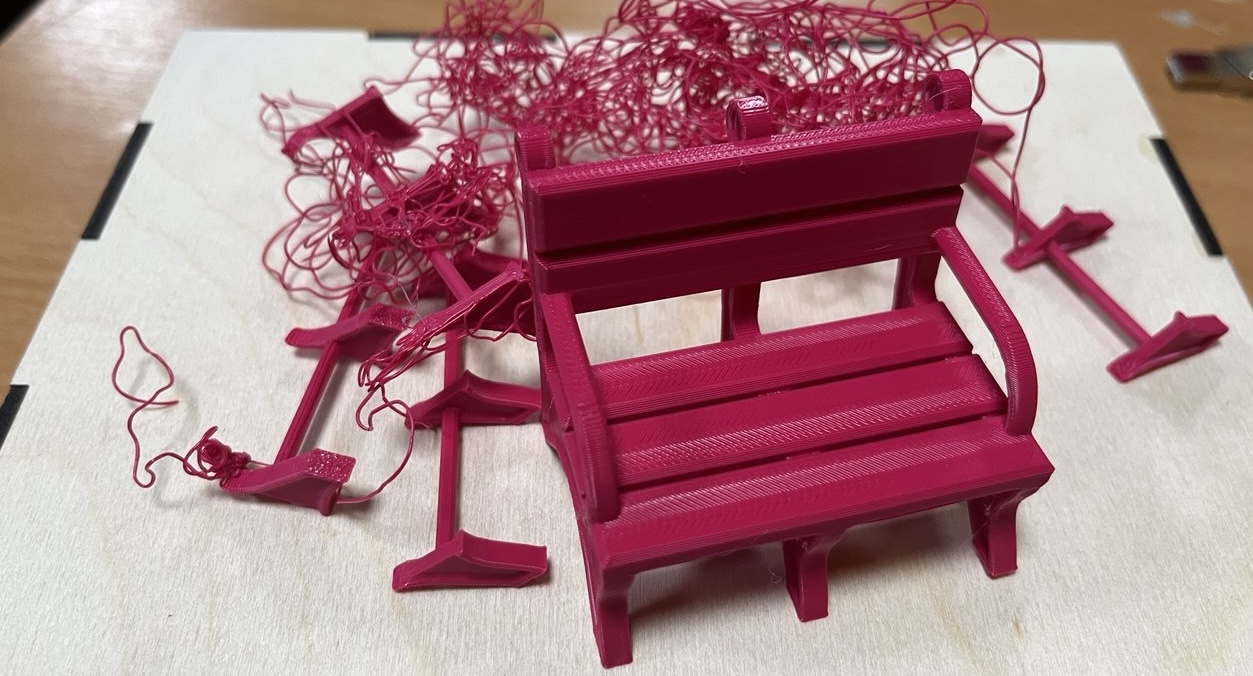
Actually the "boaty" test was by far the most difficult, and in fact we were only successful on the third try. The first time the print failed as the print could not stick to the plate as the legs of the bench were being created. So we washed the plate with dish soap as recommended. We printed again, but the same thing happened. Finally, for the third and final try we reduced the speed to 50% and it worked!
After exporting the .stl file from Fusion, the first step is to import the file into Bambu Studio, the dedicated slicer for Bambu printers. Here we should prepare the file for printing, a few thigns to check immediately are that the right printer is selected, the right filament, and the quality.
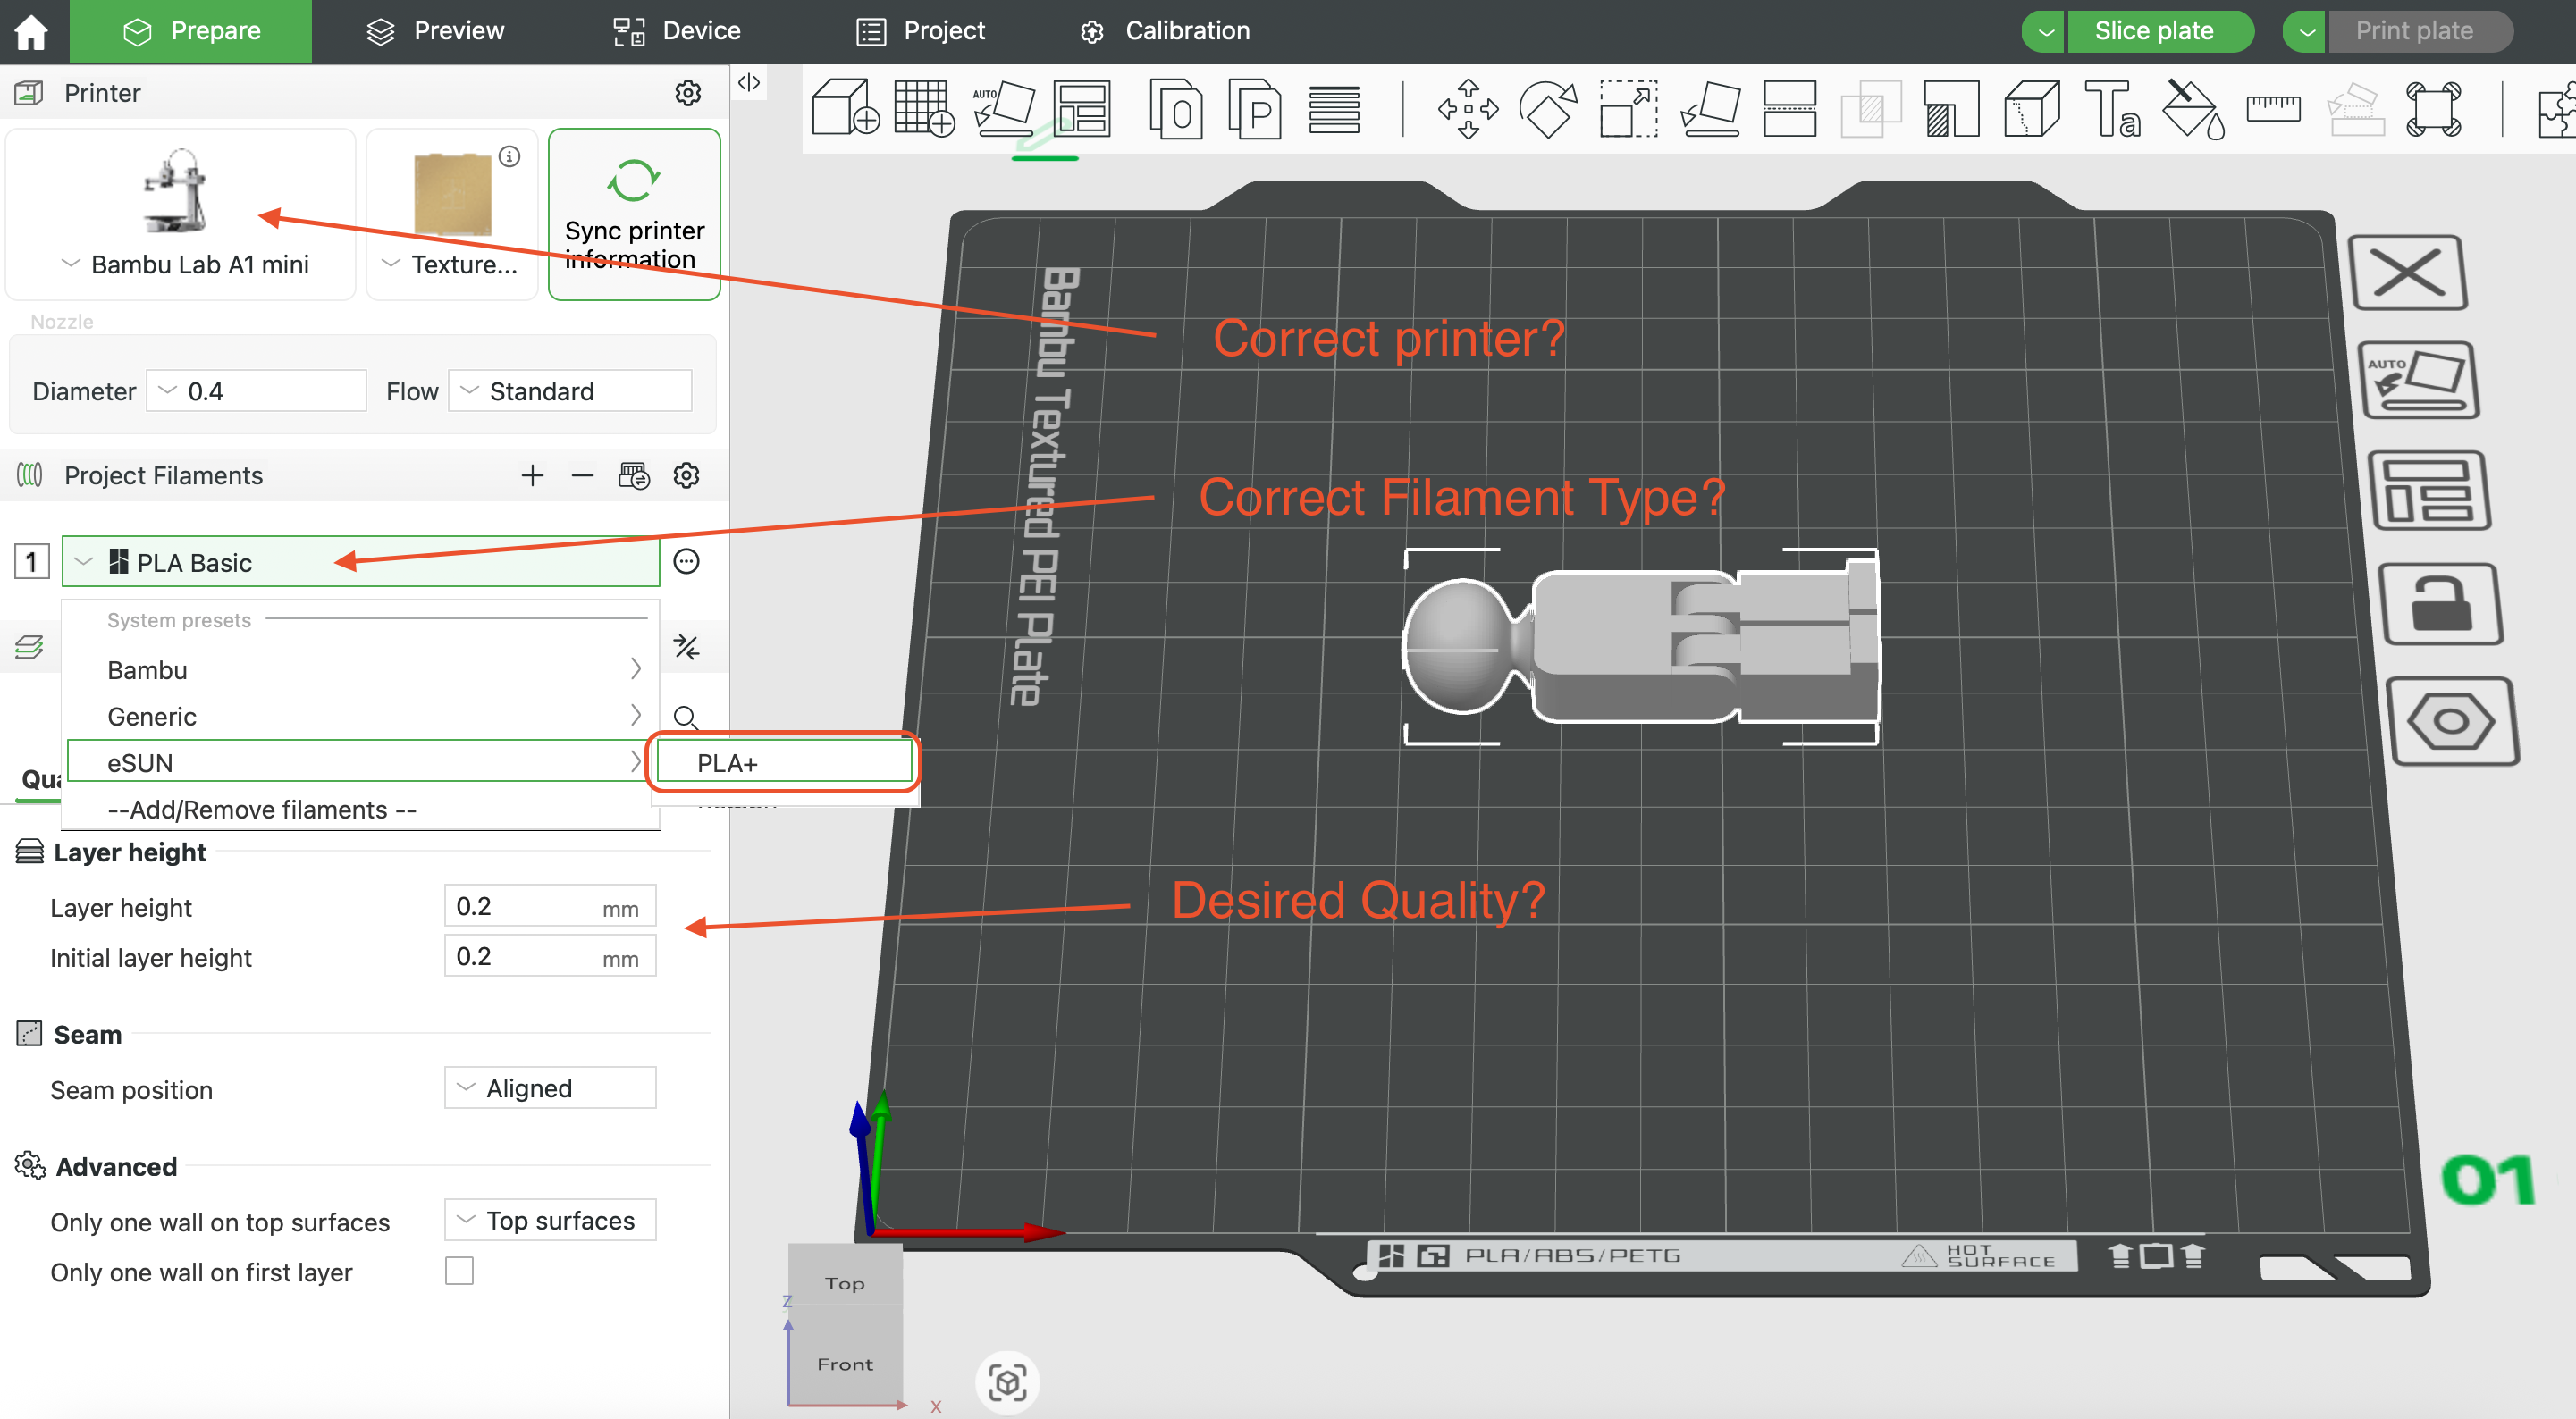
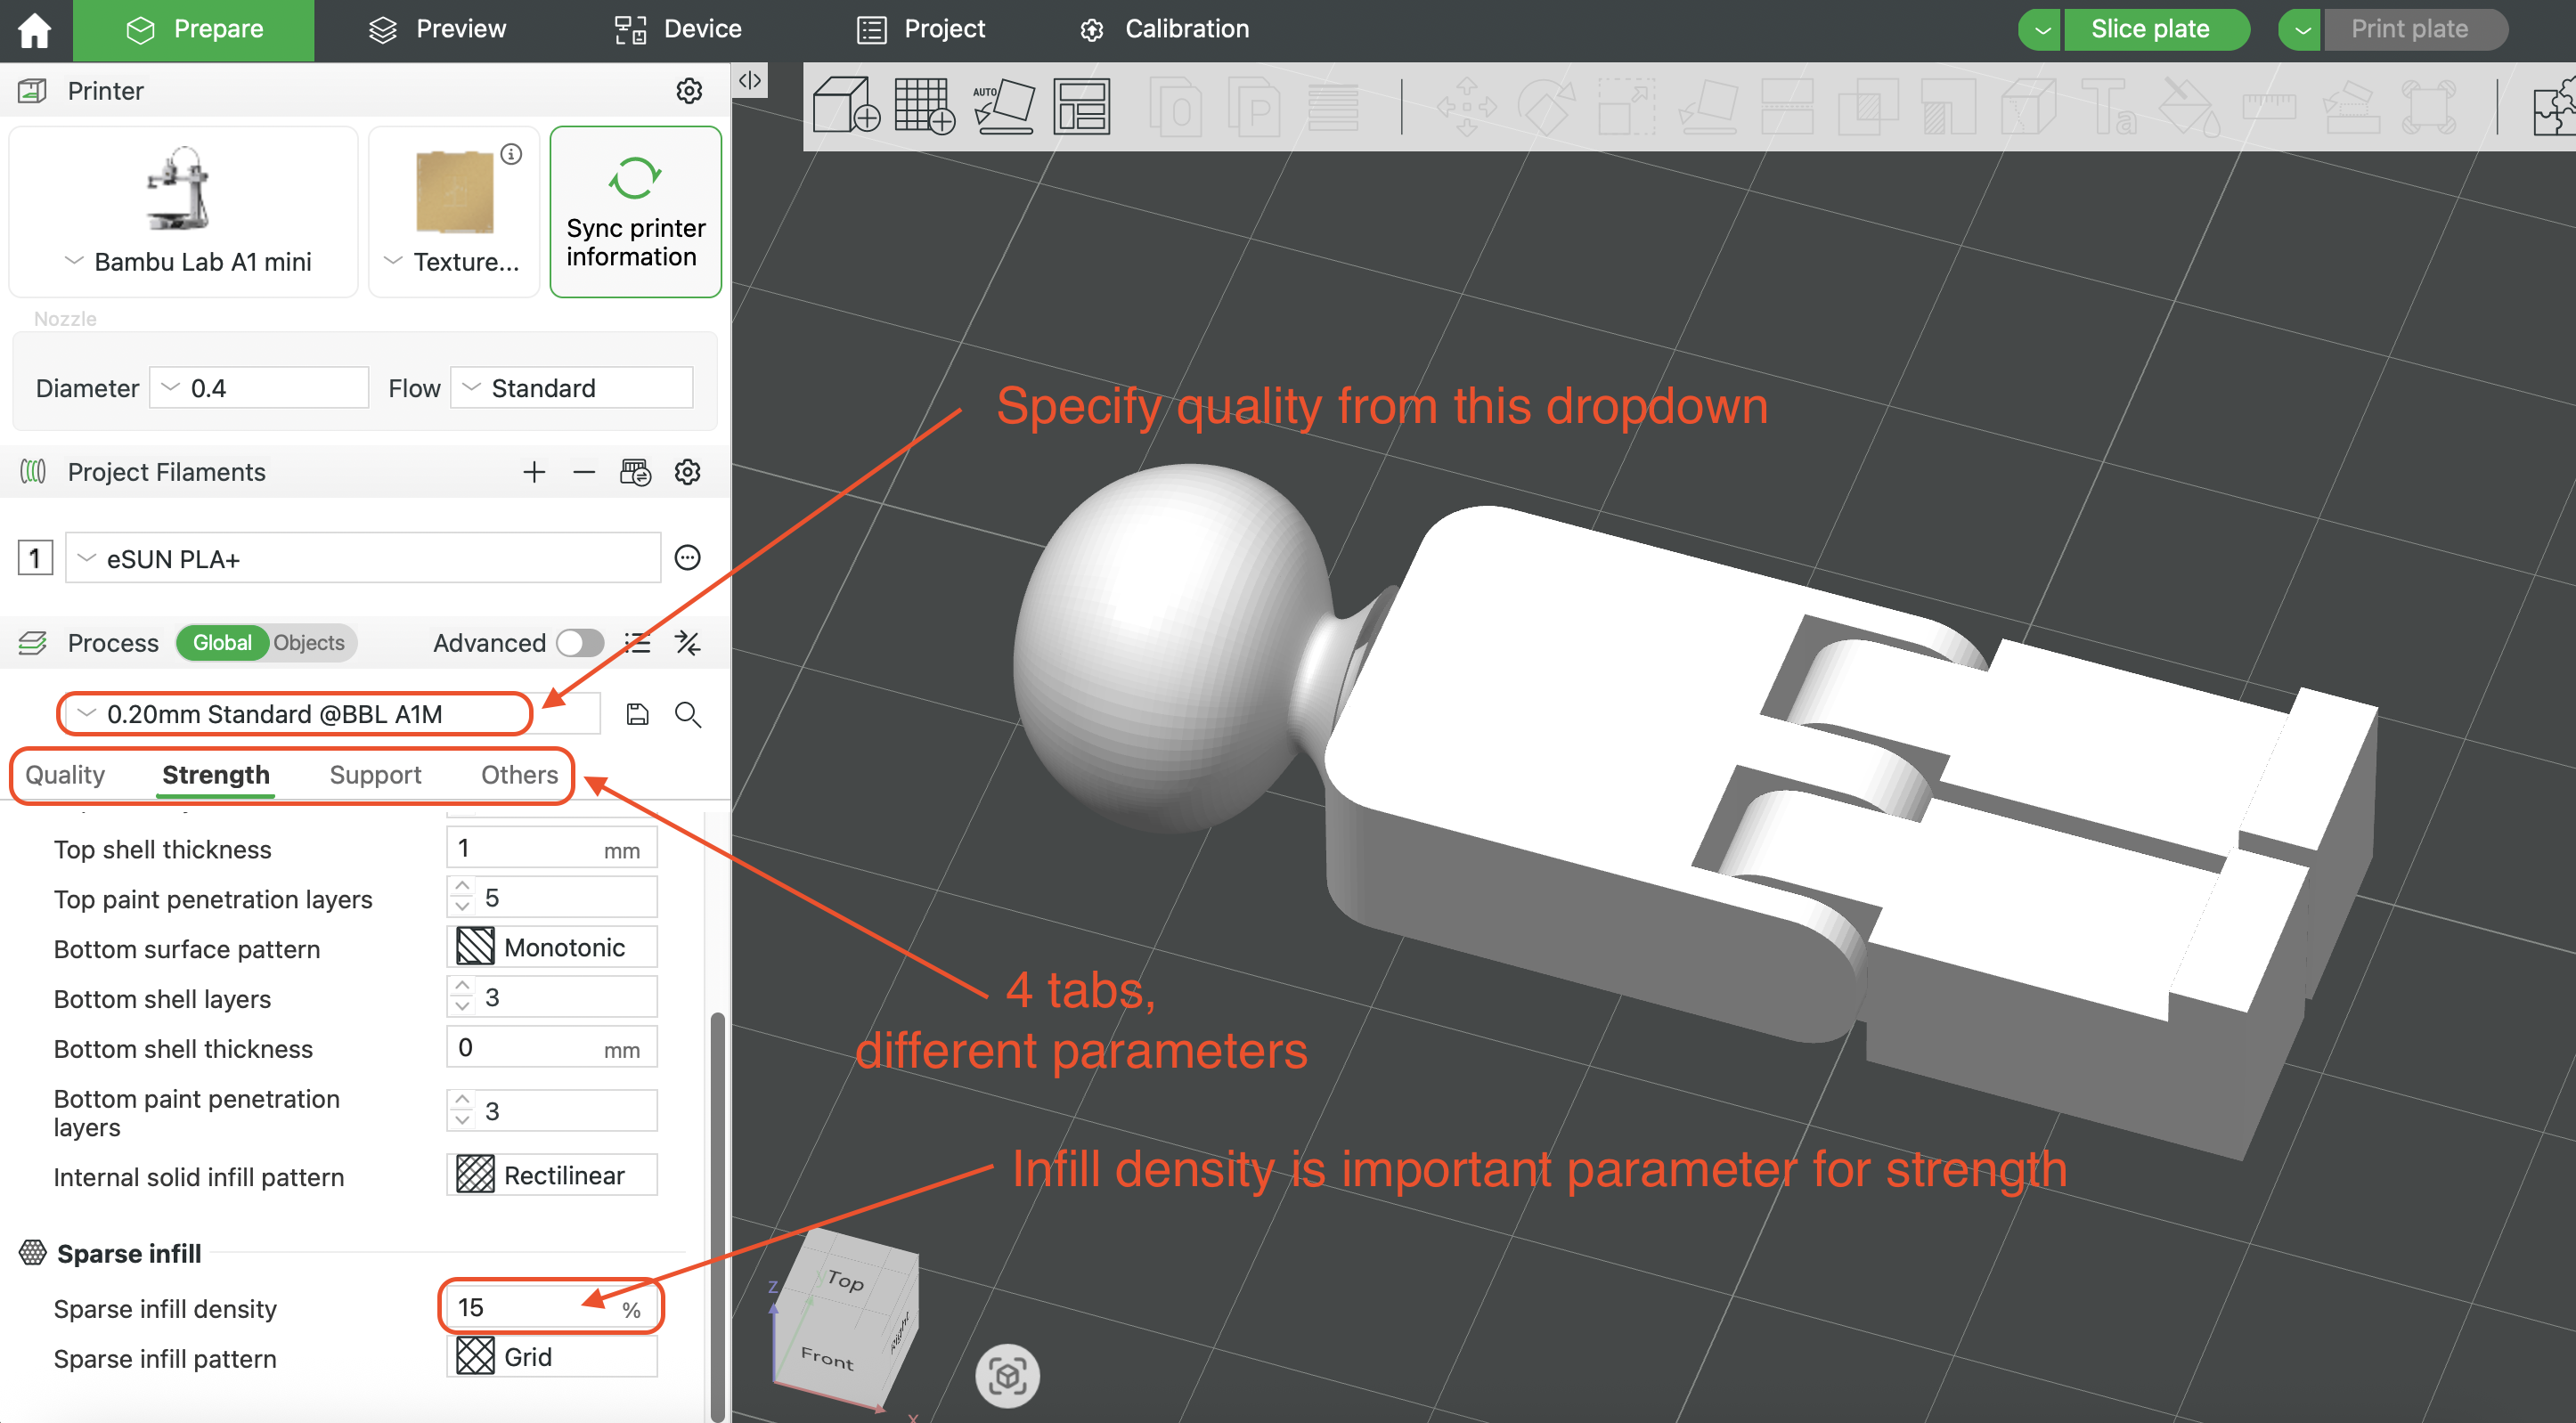
We can specify the quality precisely, higher quality will take more time. Then there are 4 tabs each with a variety of parameters. One to note is under strength where we can specify the percent infill; likewise here a higher infill percentage will take more time.
After the preparation is complete, we'll next click on 'Slice' to generate the G-Code, specific instructions for the printer on how to proceed with printing it. However, for us Bambu Studio automatically generates an error, as we have not enabled support. The whole body is floating!

Now that we have generated support (but only on the build plate) we can proceed. After slicing, Bambu Studio also informs the amount of material as well as time the print will take. In Kazakhstan we calculated that our cost per gram of filament is about 10 tenge, or 1.5 rupees. Hence this print will cost us about 10 rupees. Good deal!
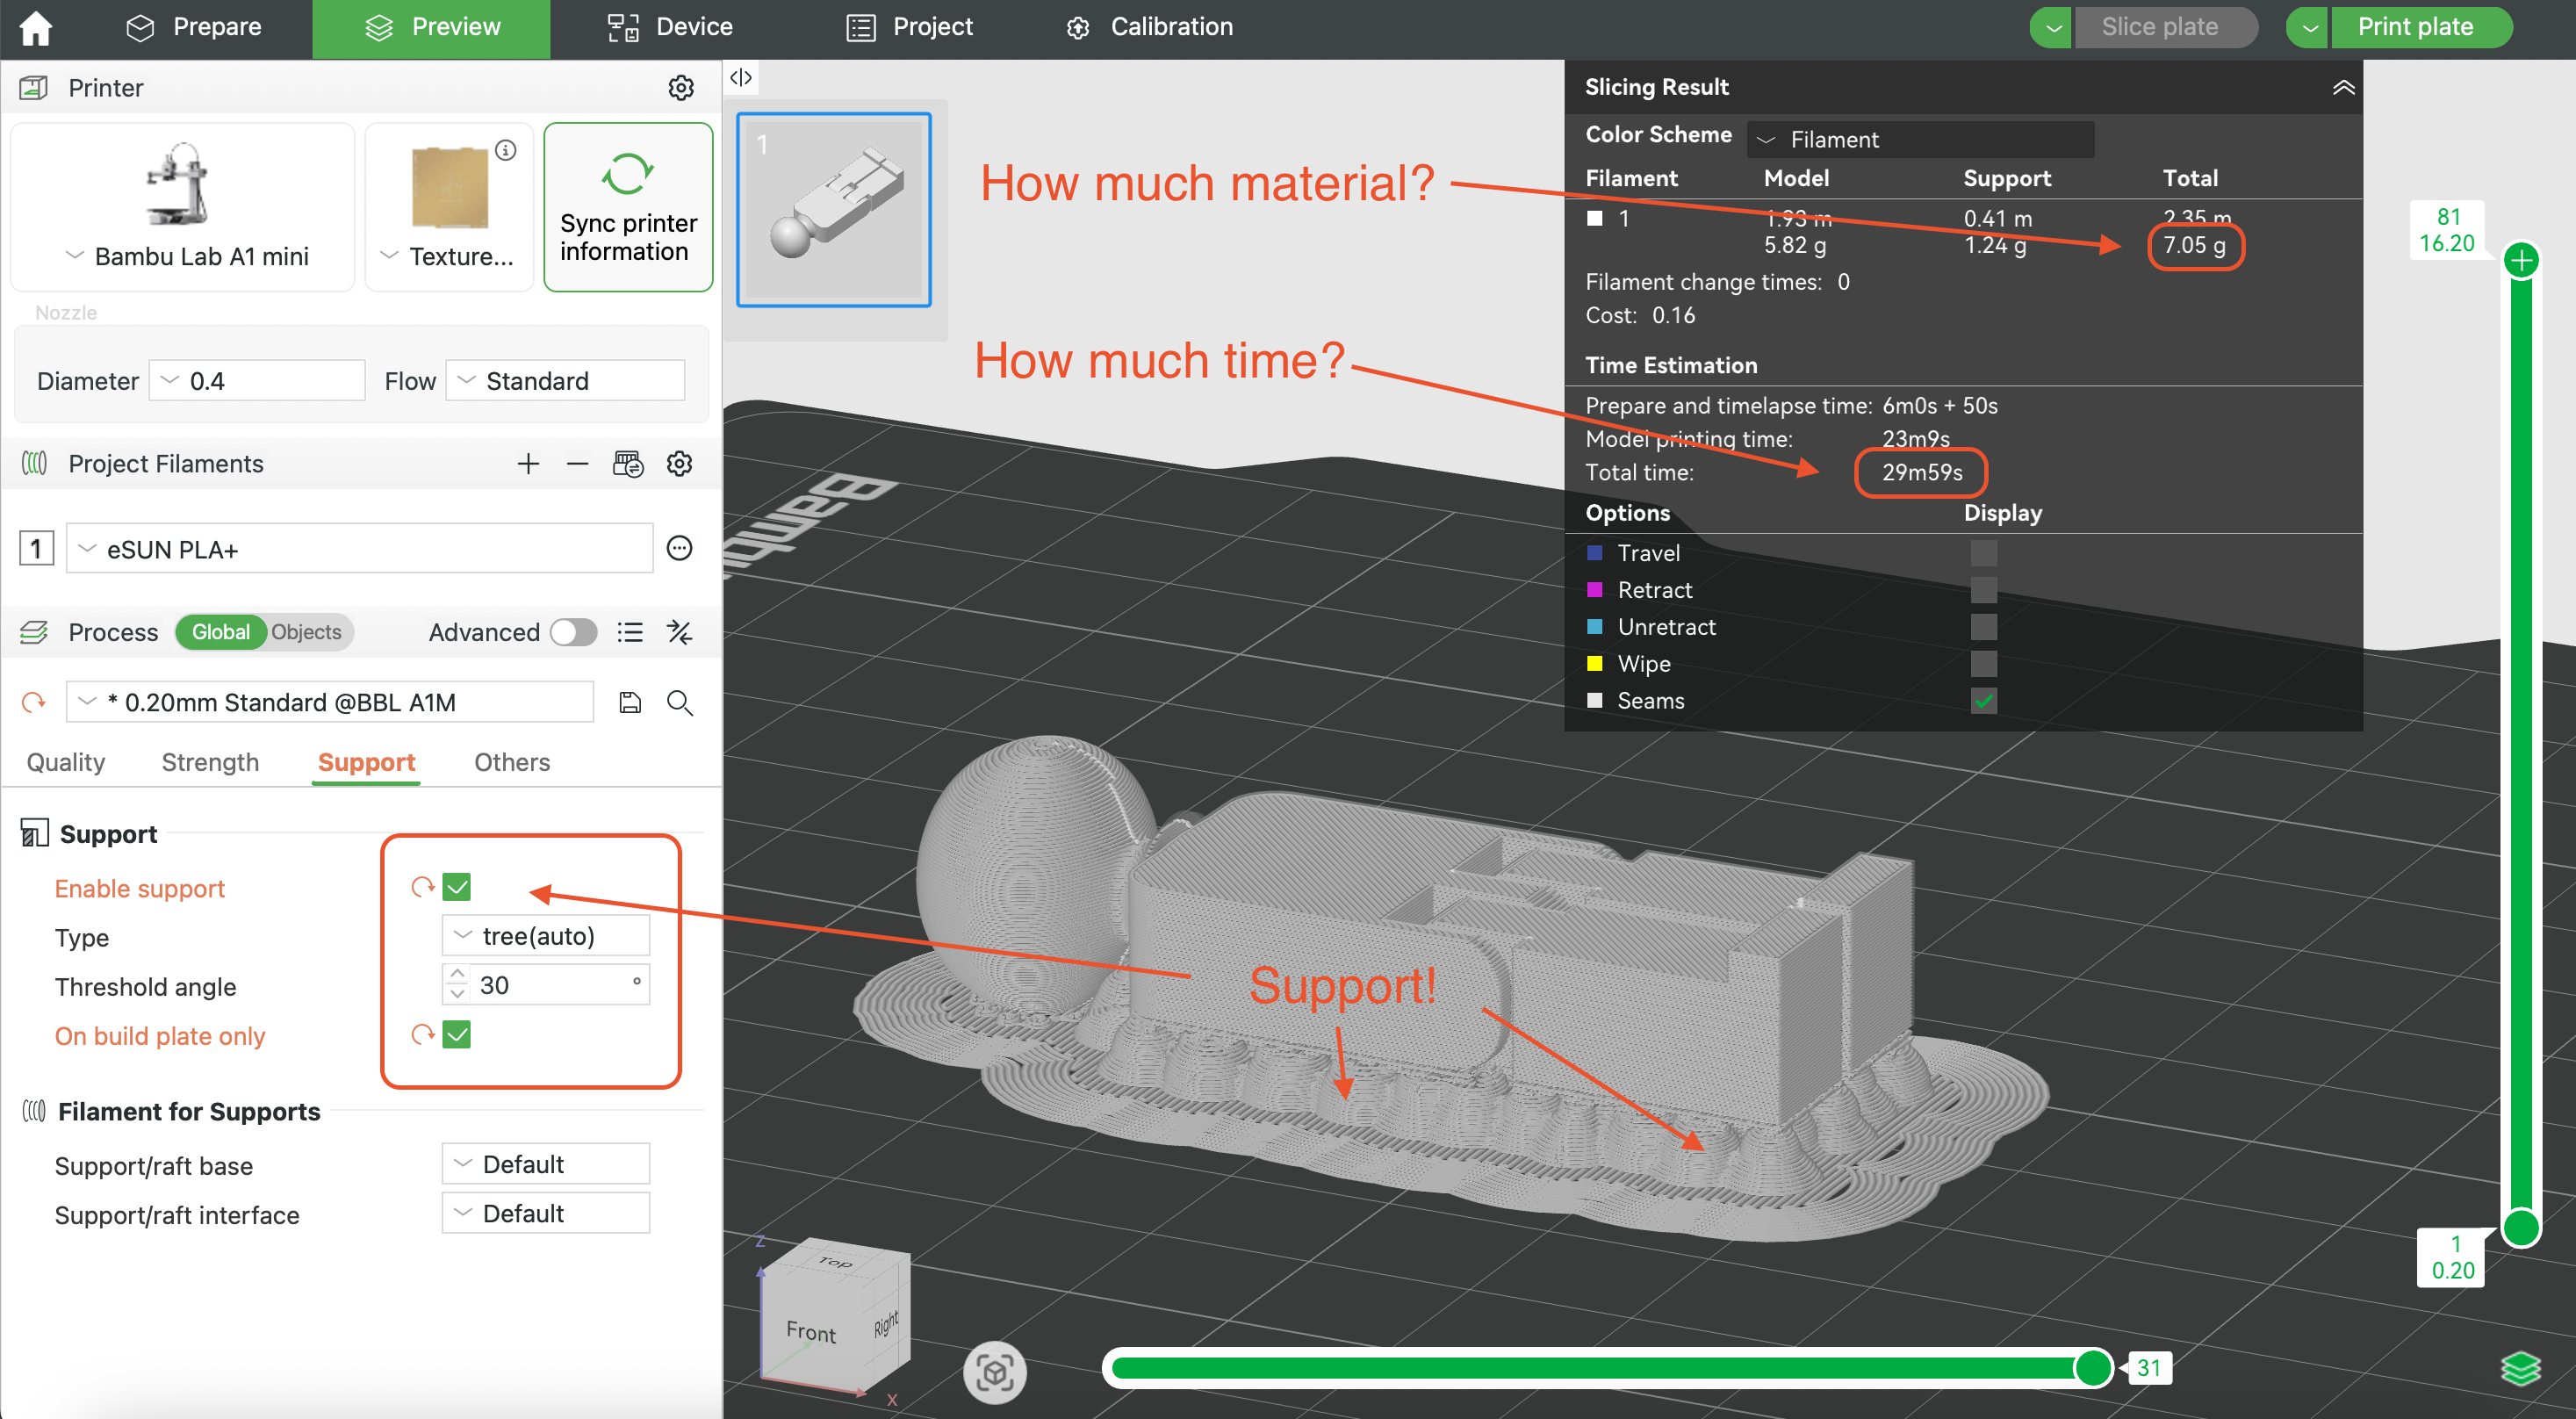
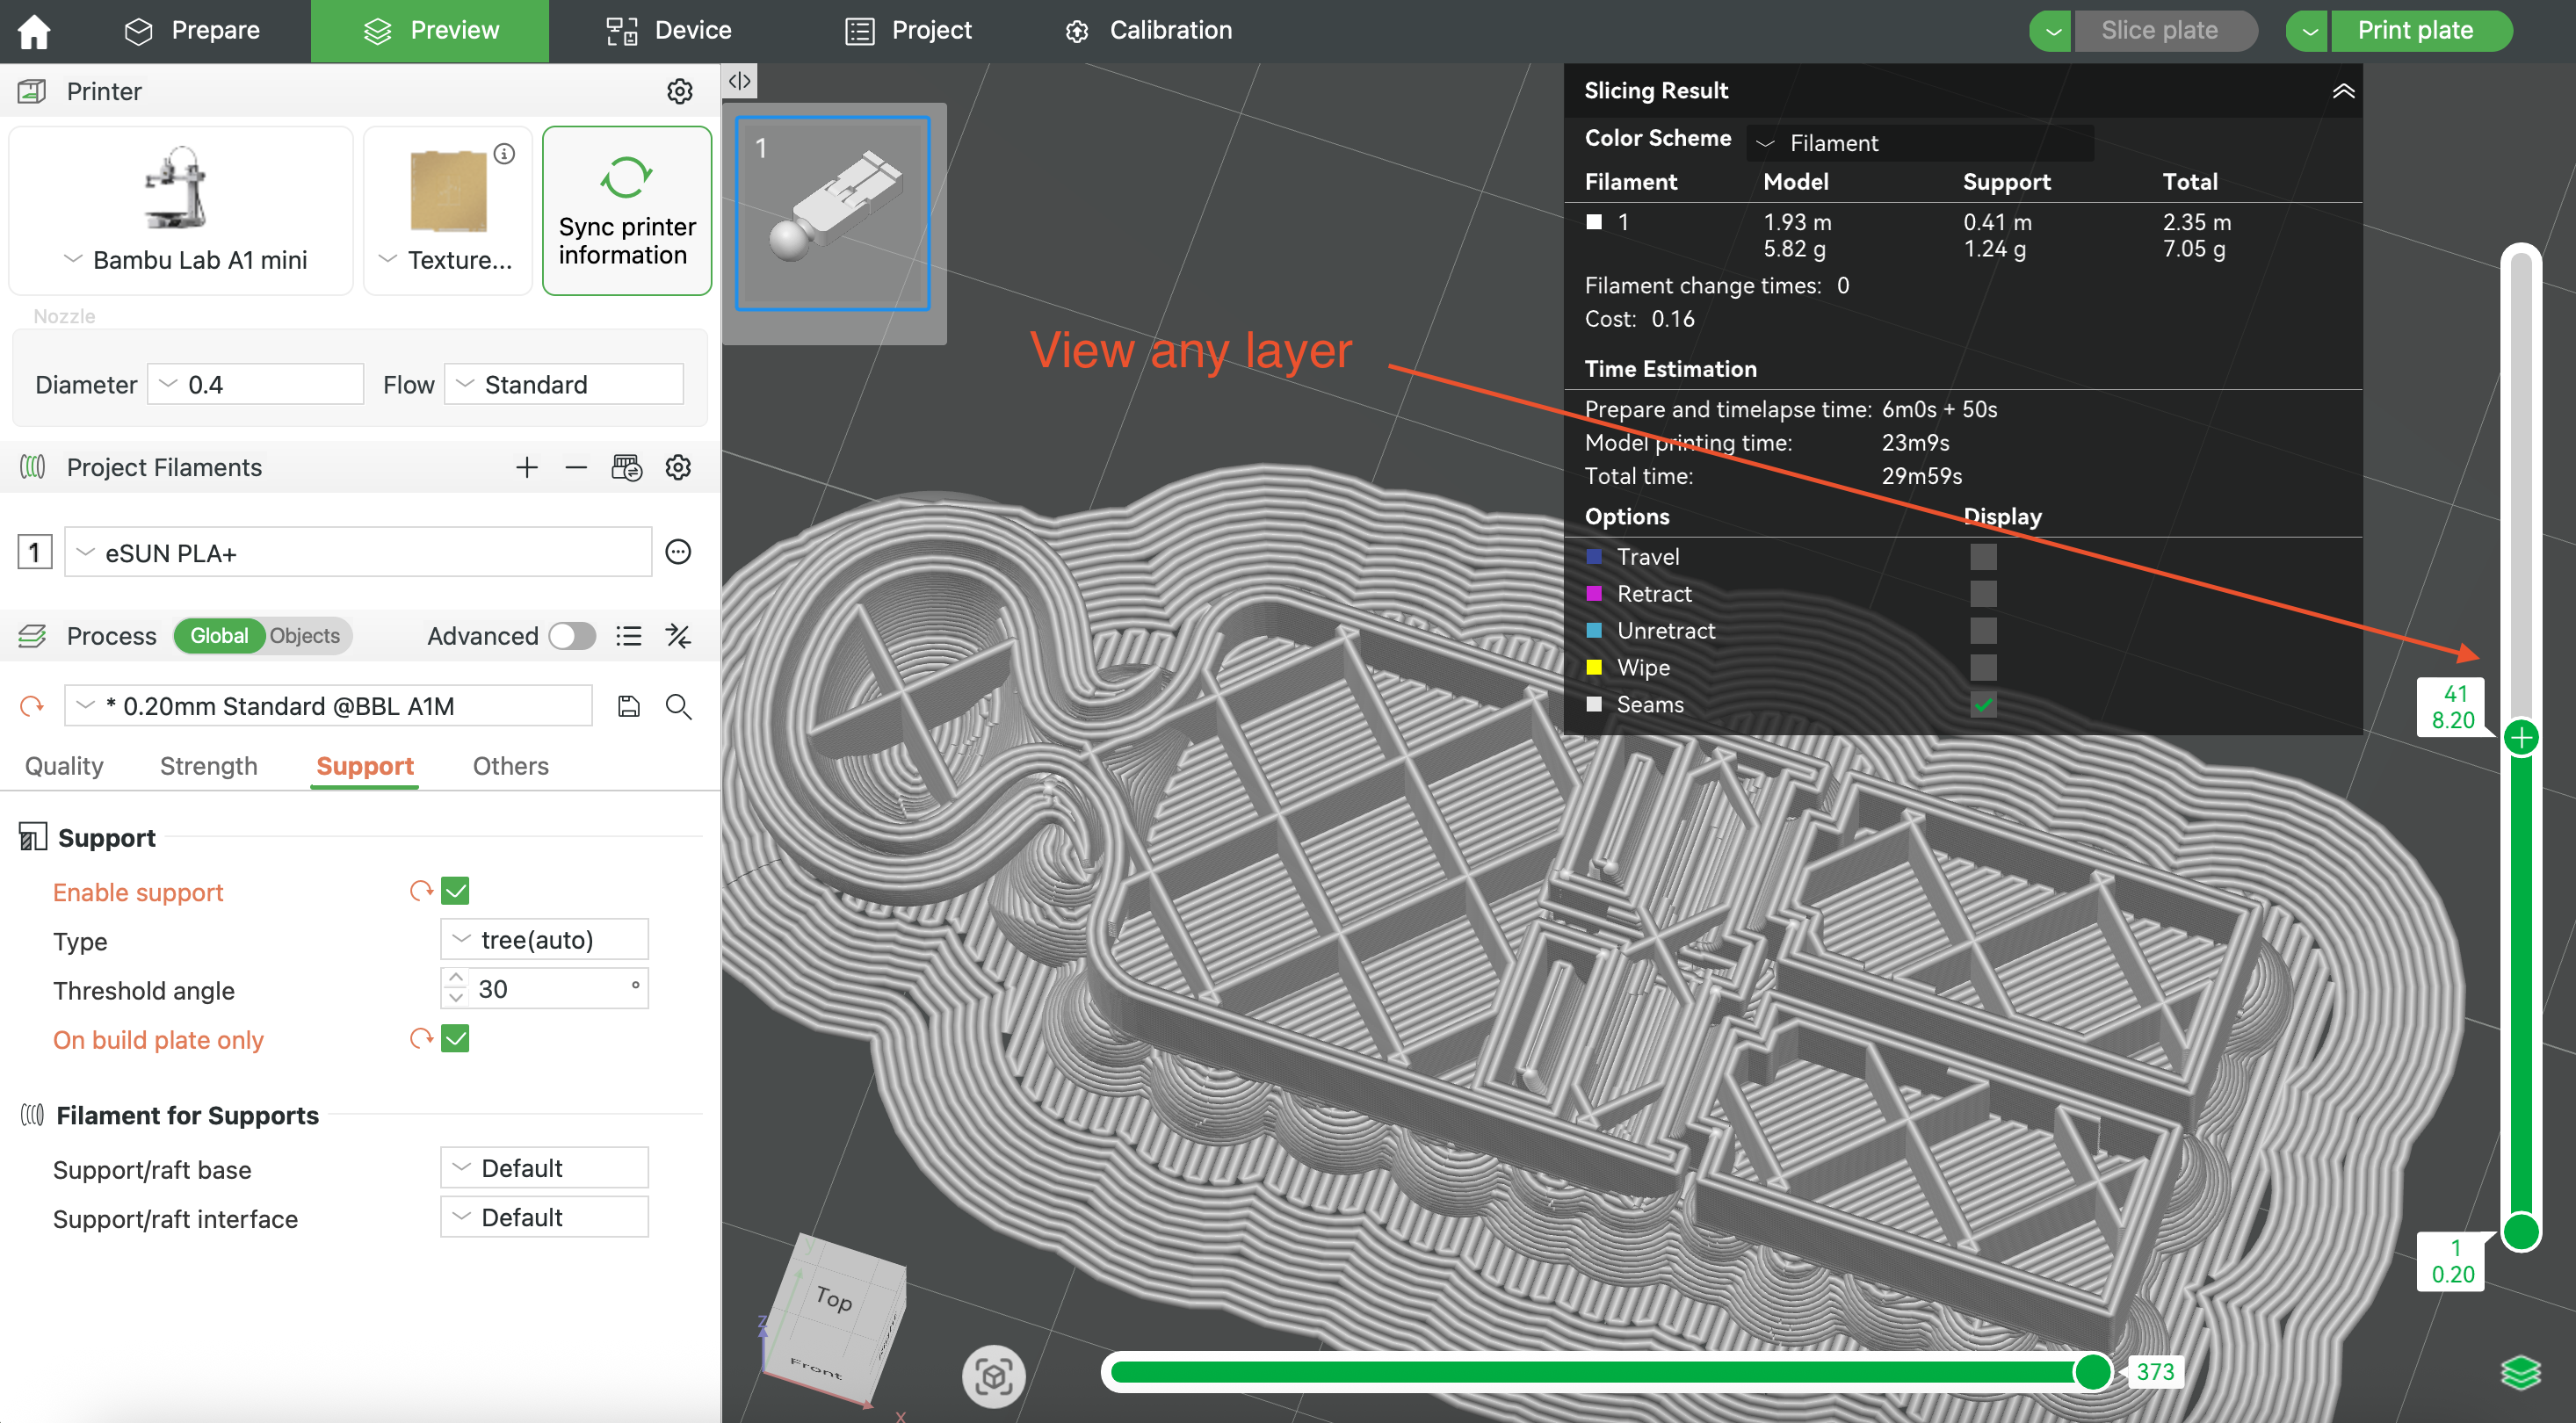
We can also inspect the layers before printing. This is helpful for us with this print since we have the moving parts, and want to check that nothing in the middle will disturb their functioning
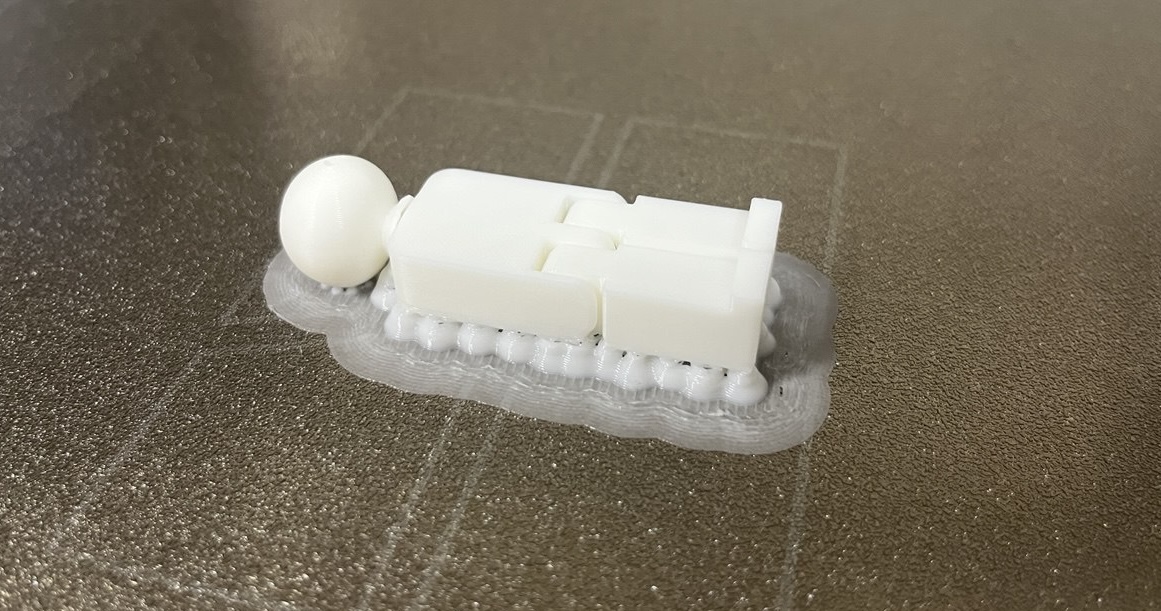
Here is our model still on the plate after being printed:
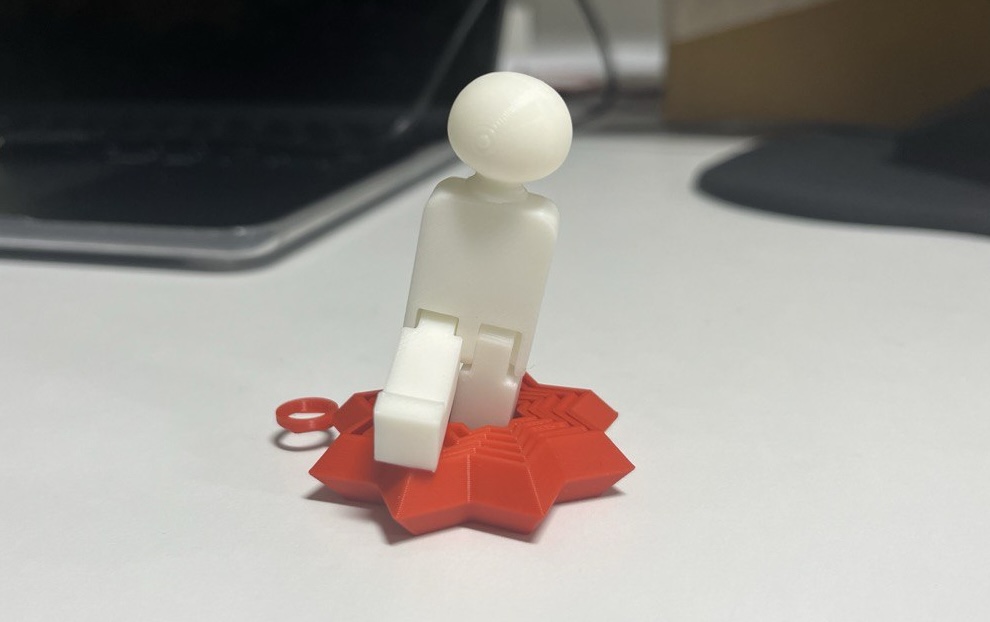
And I final glorious shot of our hero:
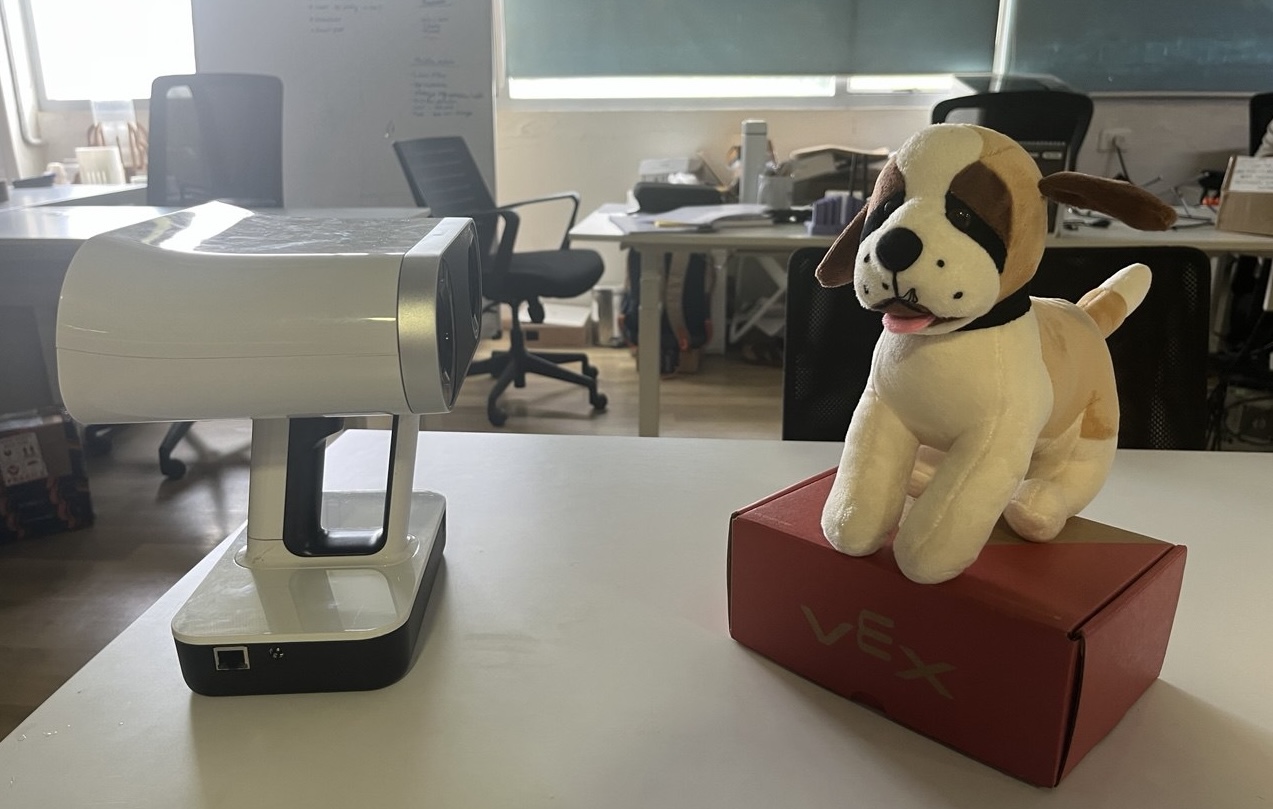
3D Scanner
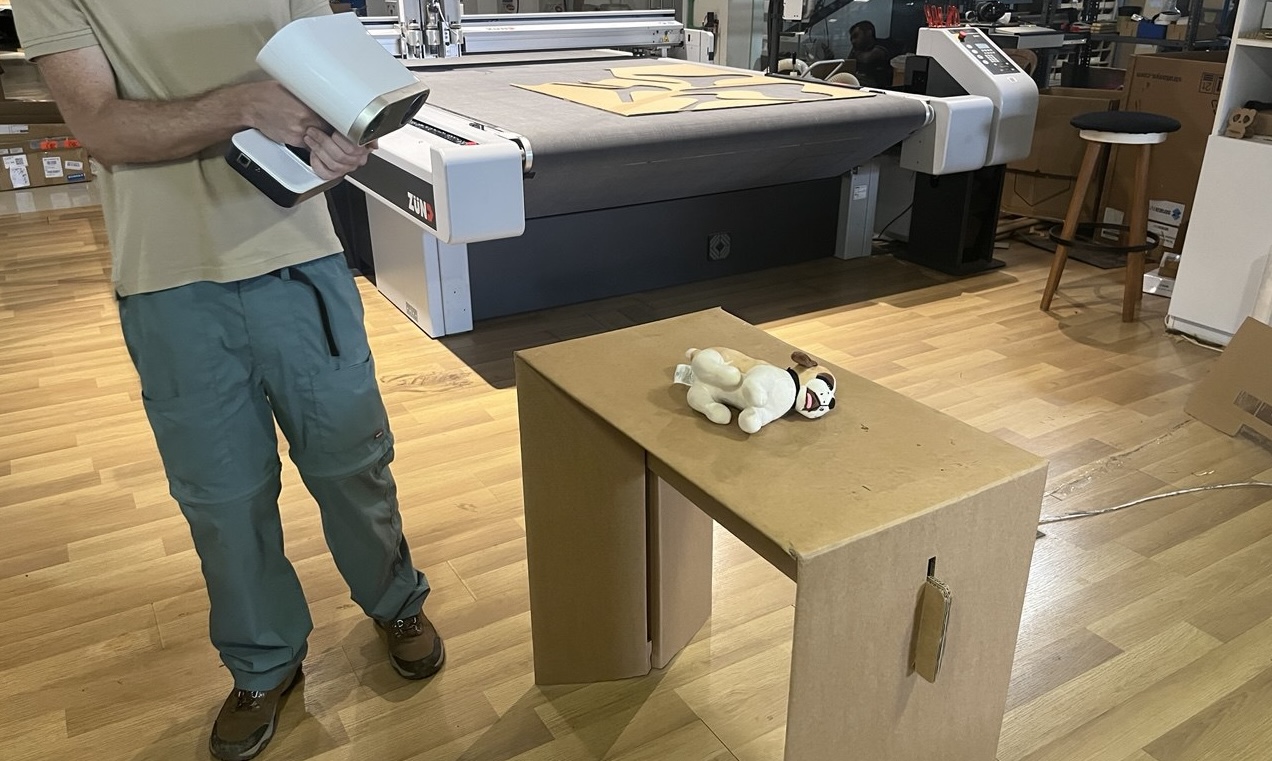
In the lab is an amazing (and expensive) 3D scanner from Artec. This particular model of scanner is called LEO, and is particularly suitable for larger objects, so our dog would be on the small side. Here is the scanner and the plush dog we will scan:
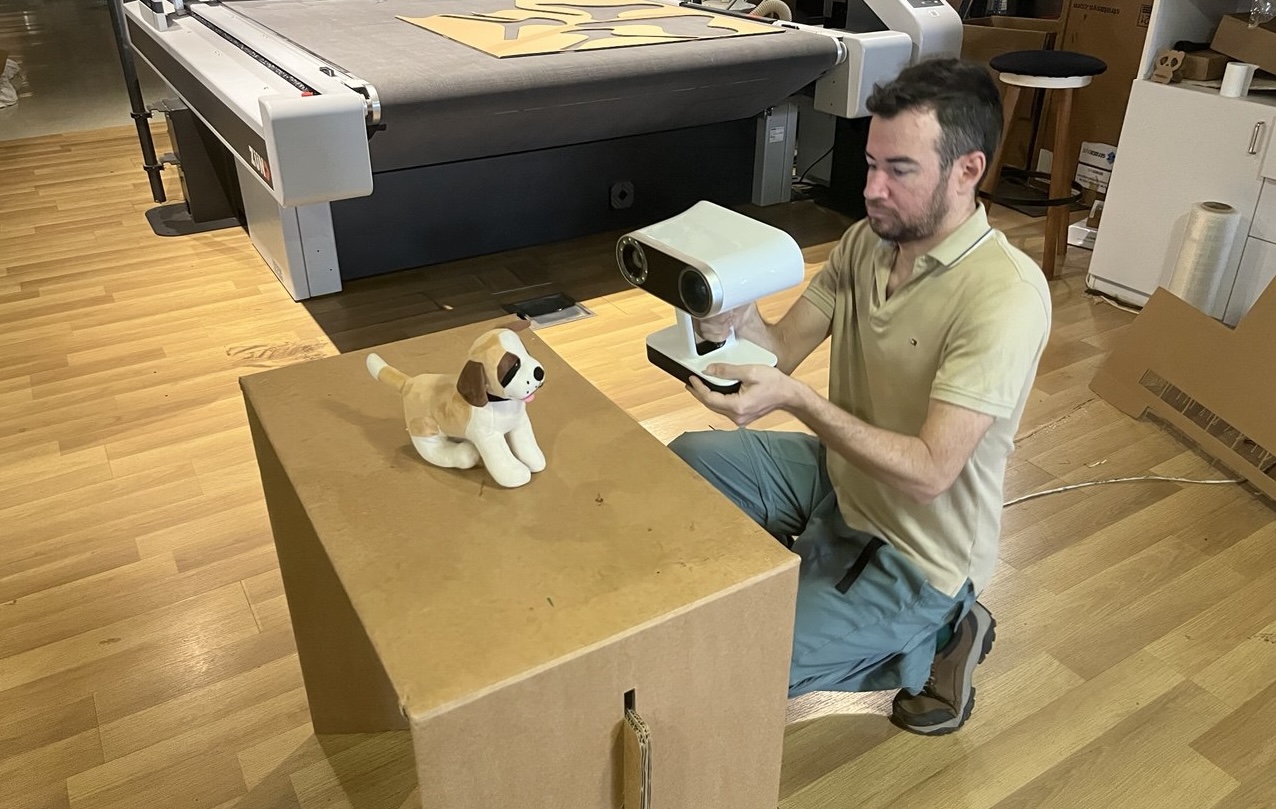
Shown in this picture is the setup, with the dog in the center of a plain cardboard table. Of course we'll want minimal other objects or items to distract the scanner from the object we'd like to capture.
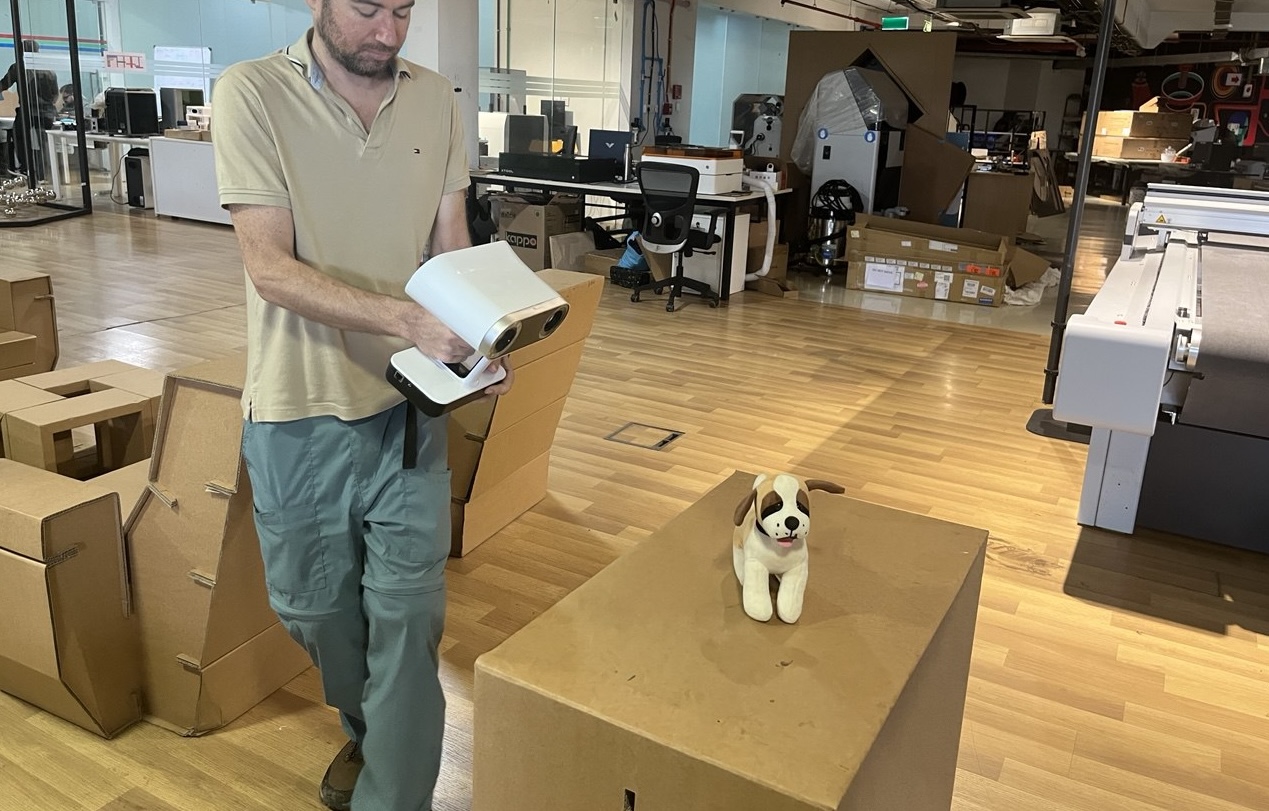
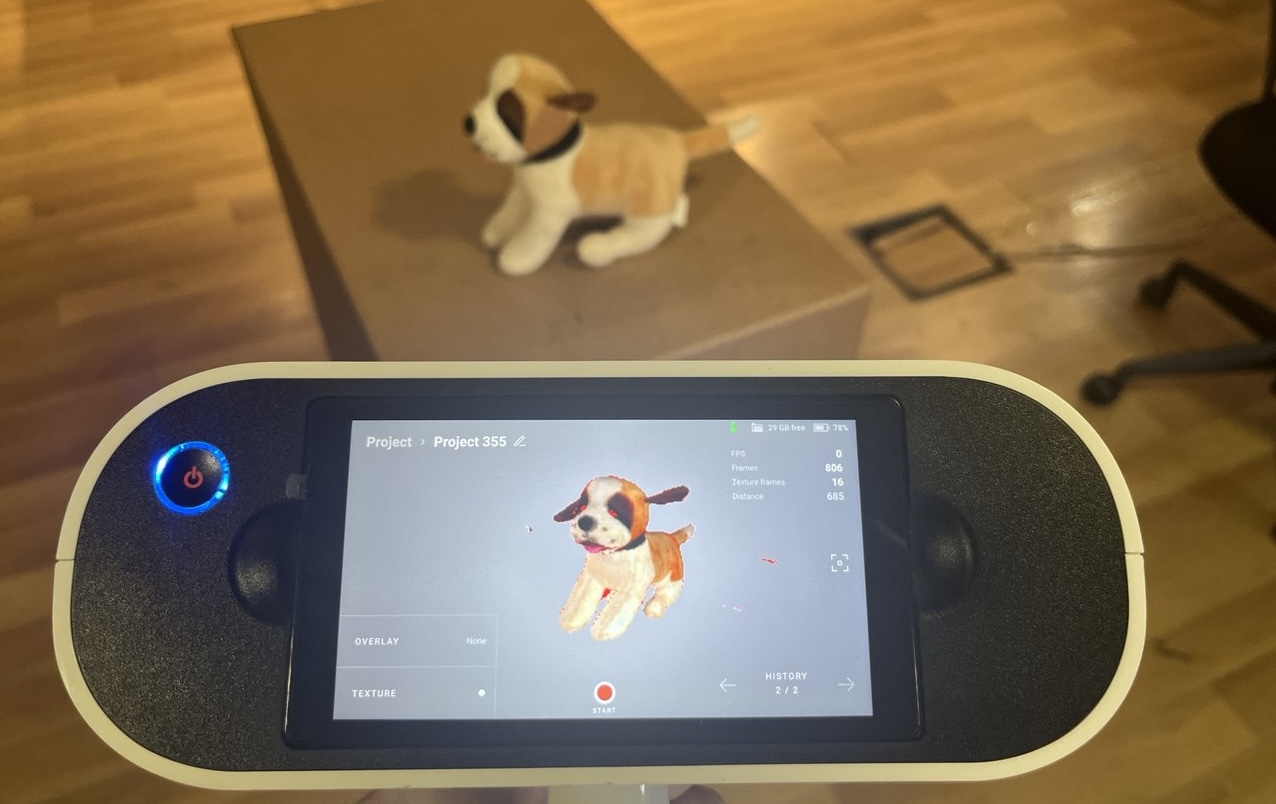
Now we also need to scan from the side and bottom as well as on top, to get all angles.
Here we can see all area of the dog are showing green, that means it has been scanned.
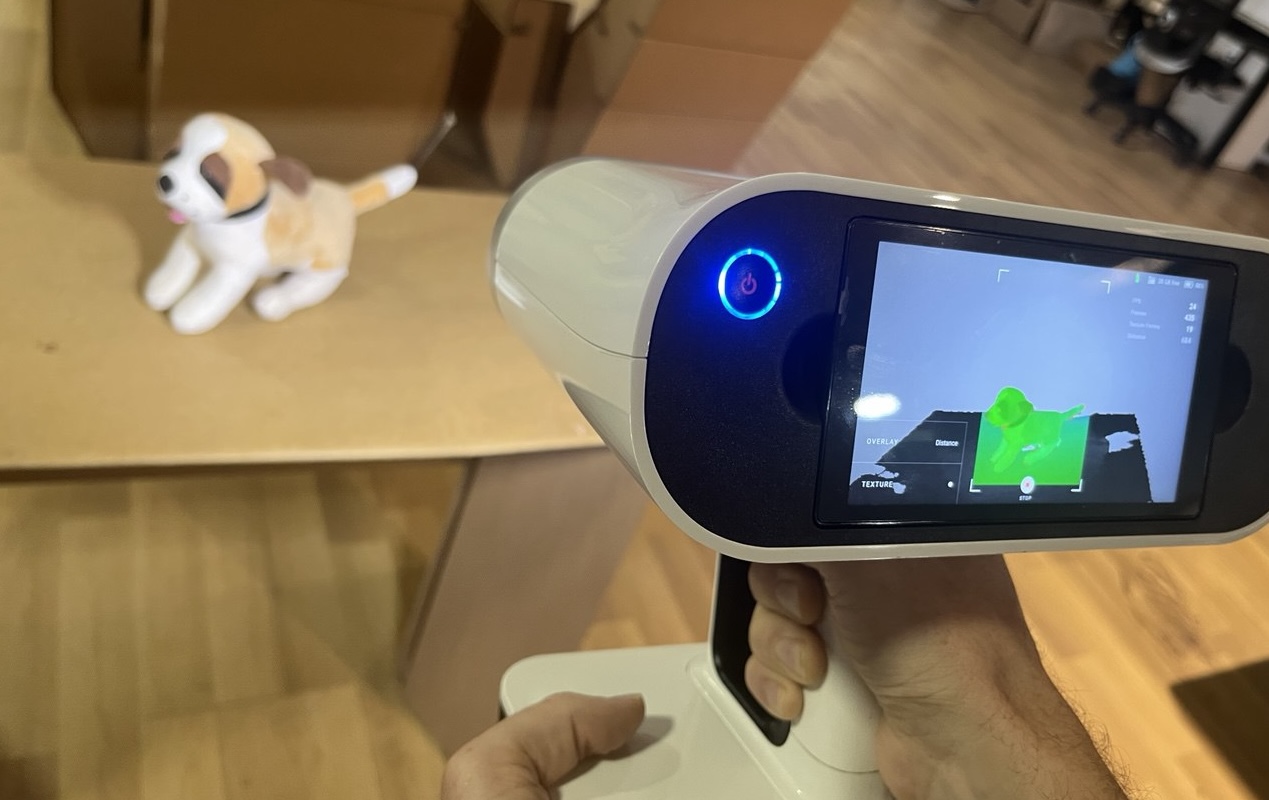
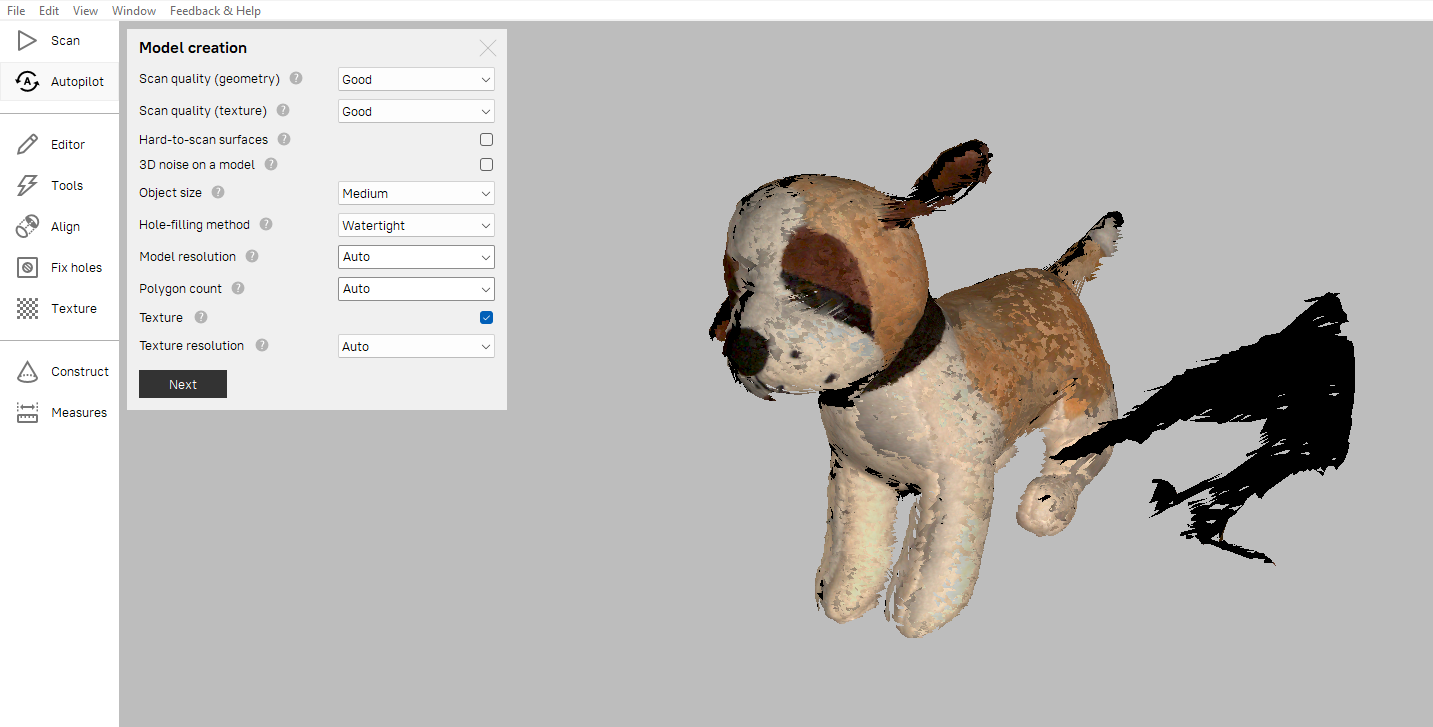
Except the underside and bottom of the dog. So we turned the dog over to scan the backside, however some difficulties were there, both with the scanner itself to recognize the same object, as well as issue with the dog, namely that the ear fell into a different position when laying on its side.
So we ended up scanning again and just ignoring the bottom, and this is the result.
Processing 3D Scan
Now that we took the 3D scan, we can process the results using the Artec Studio software. There is a mode called autopilot which guides the new user through the process. Anyway, here is what the output looks like initially. It is actually in 2 parts, and has picked up some extra data as seen in black. Ideally we will have just one scan, but we can also work with this data as it is.
Initially we apply a "fast fusion" to generate the 3D model. The model is separate from the texture which is fitted on top of the model.
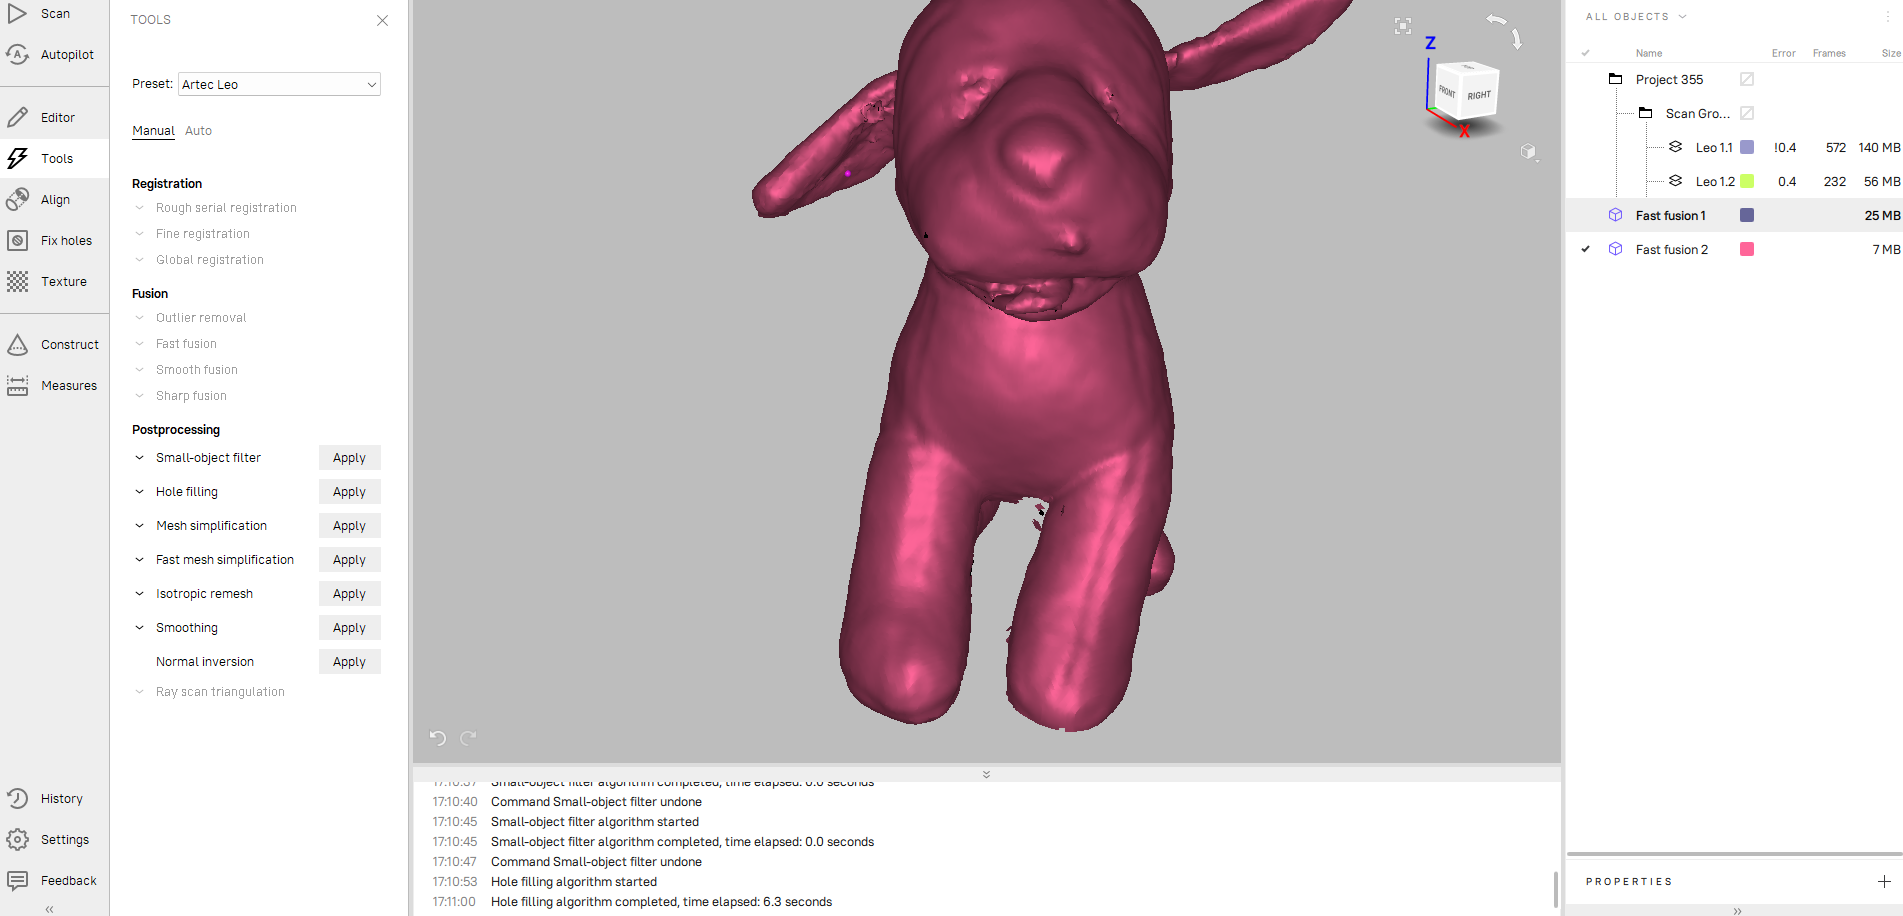
But if we look at the bottom side of the scan, we see that there are holes from missing data.
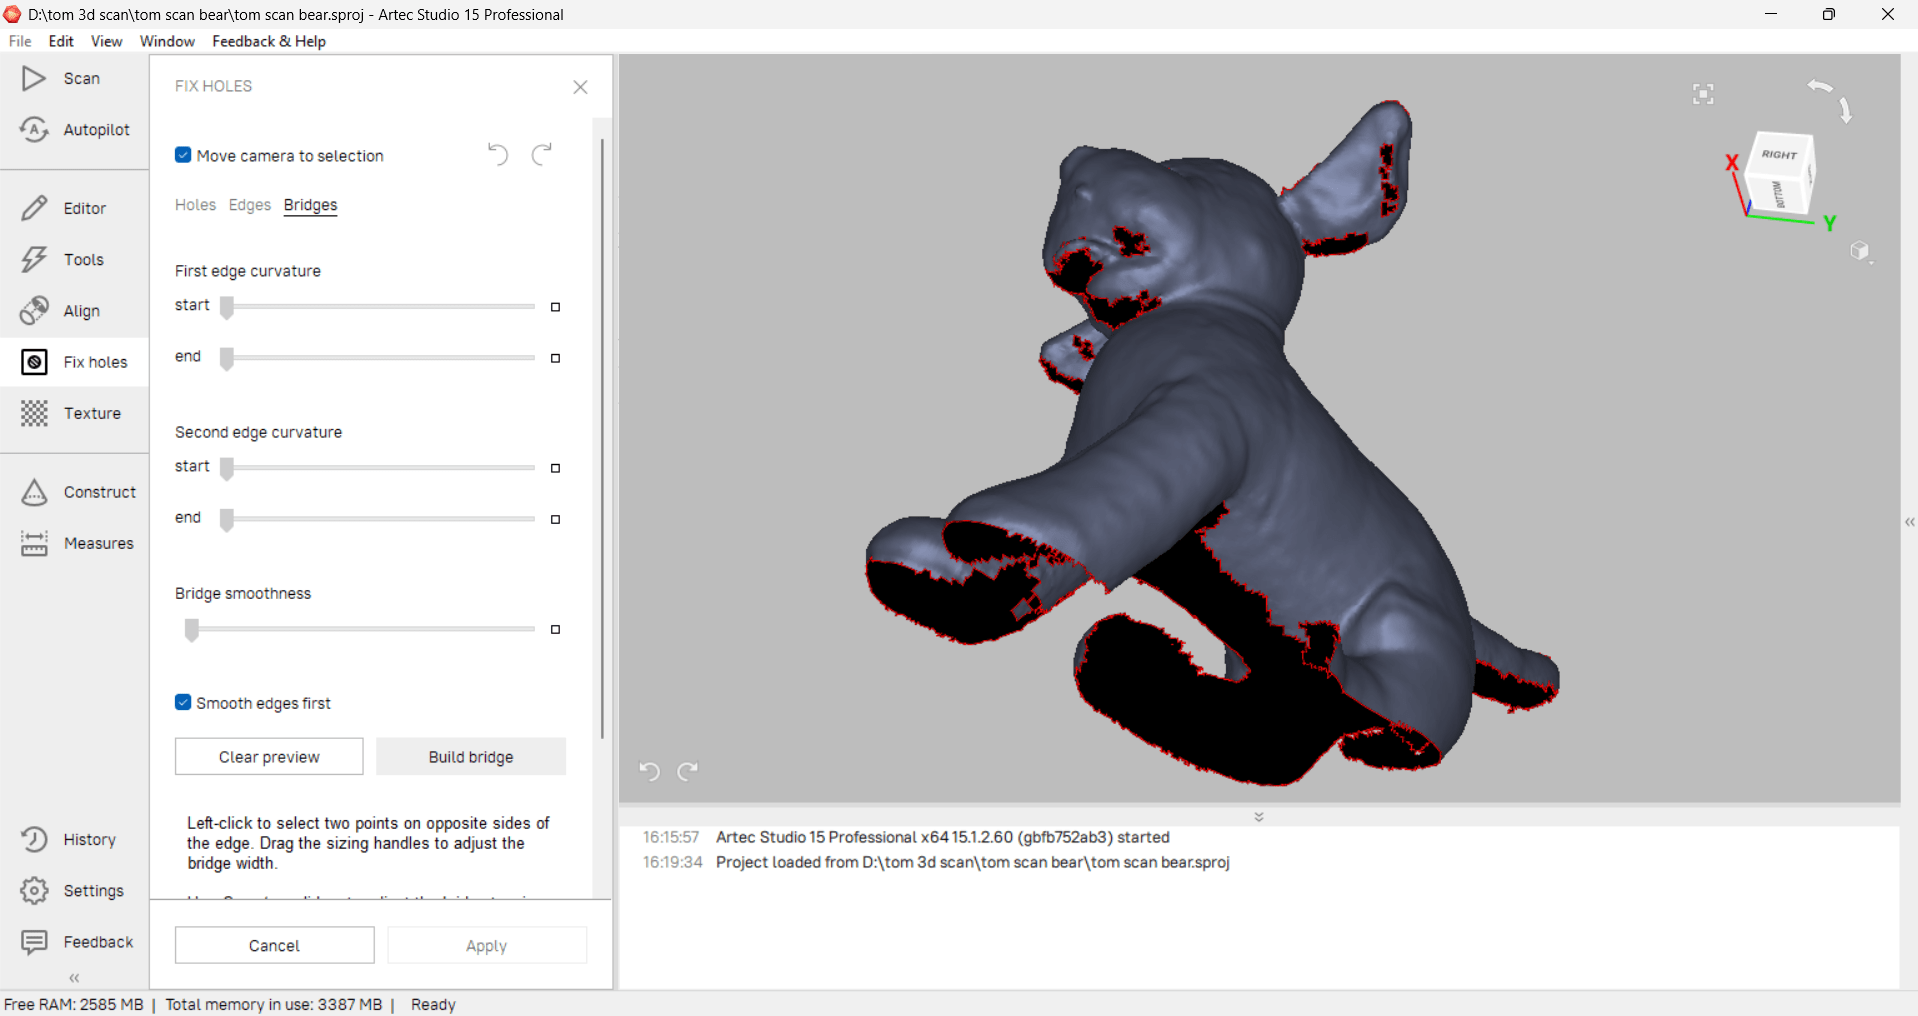
To fix this we can manually create bridges, and have some control over the shape of those bridges over the missing area.
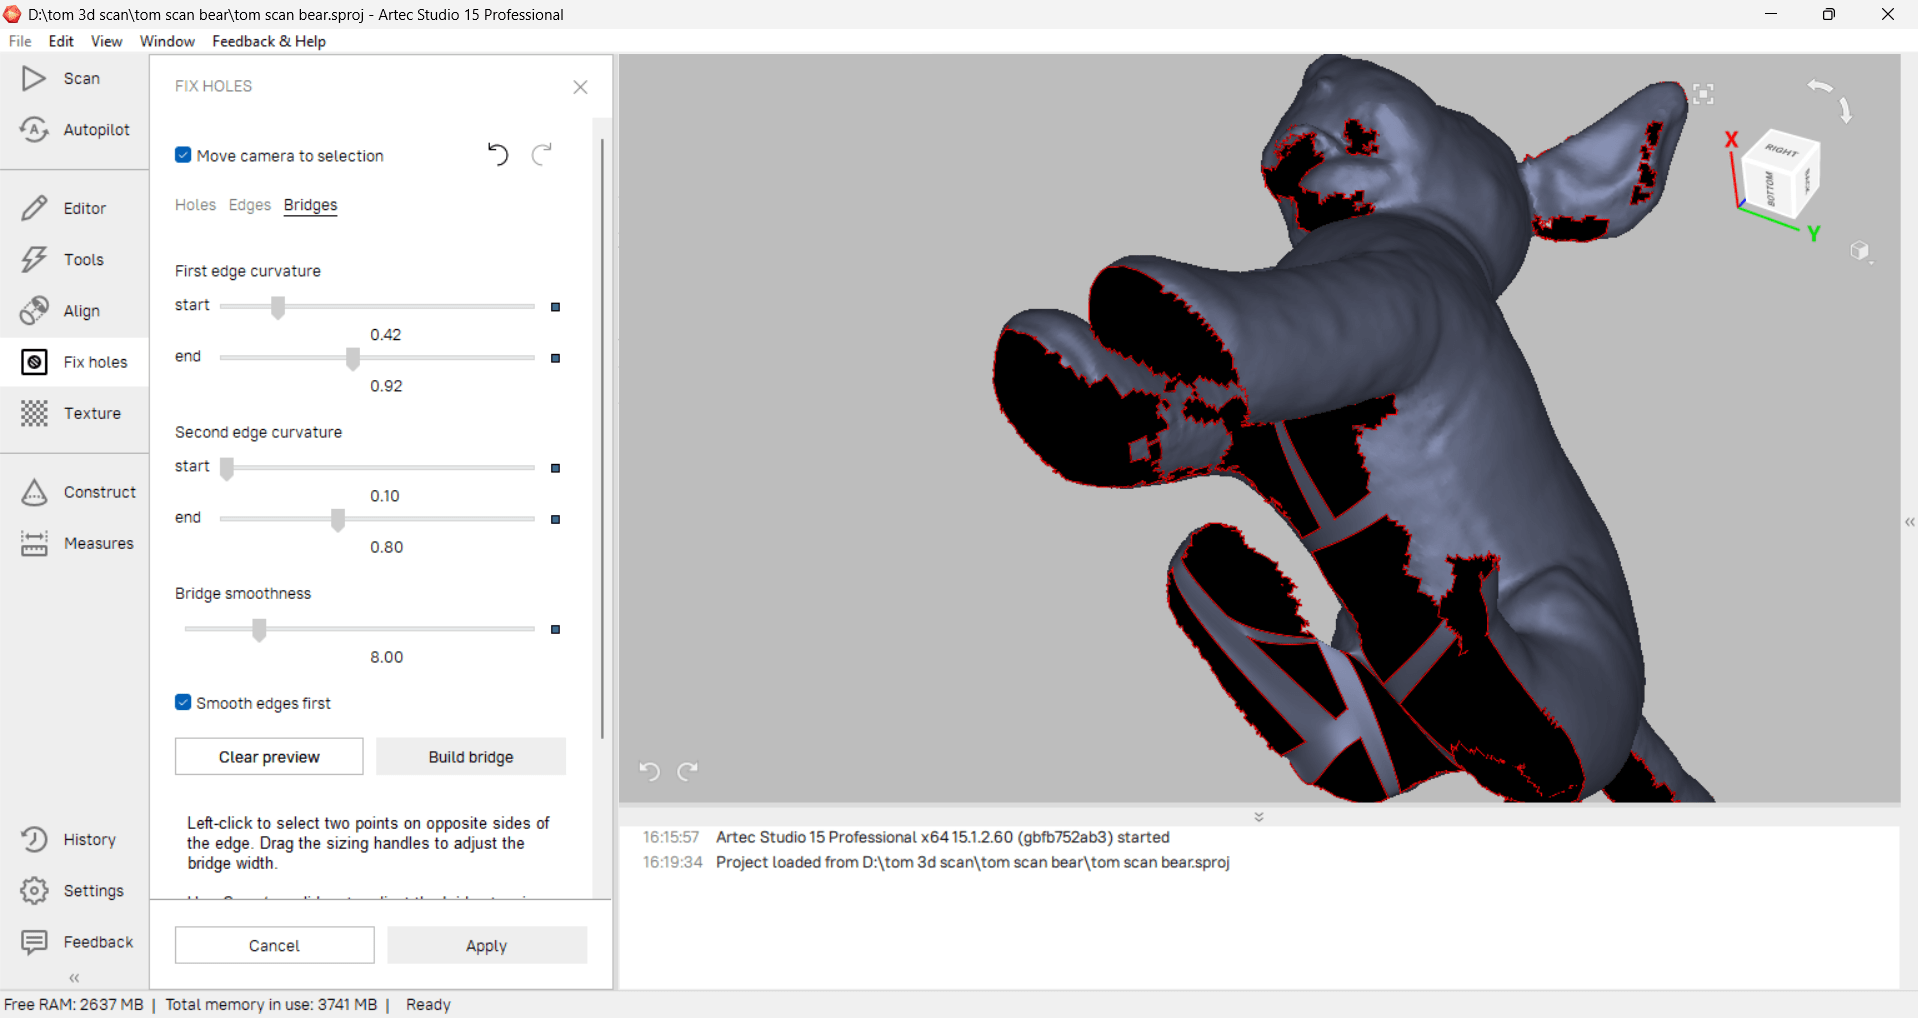
Now we have a better model, and can export the mesh into a .stl format
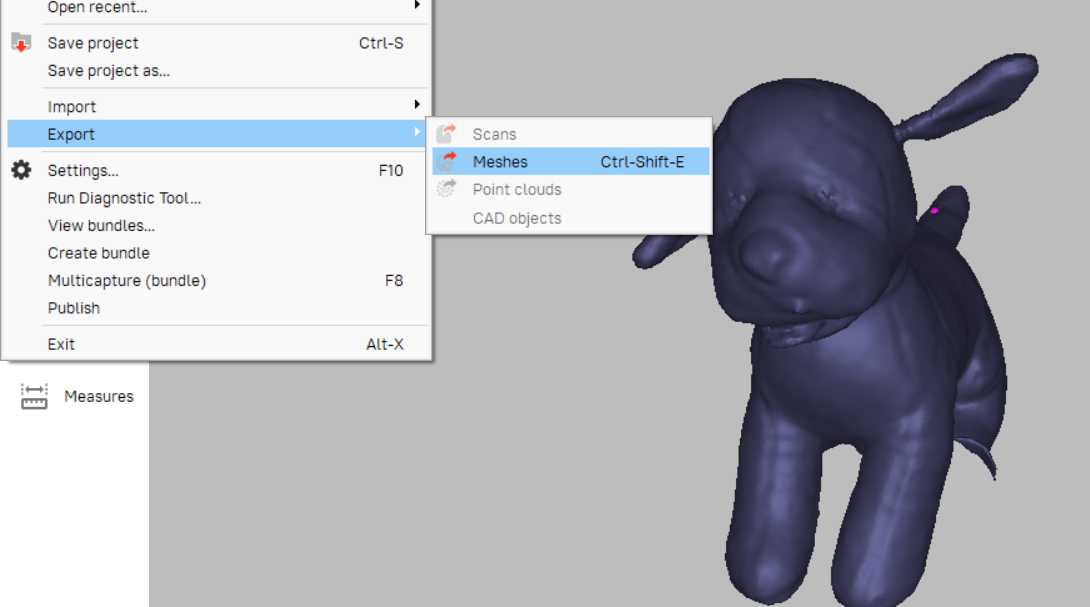
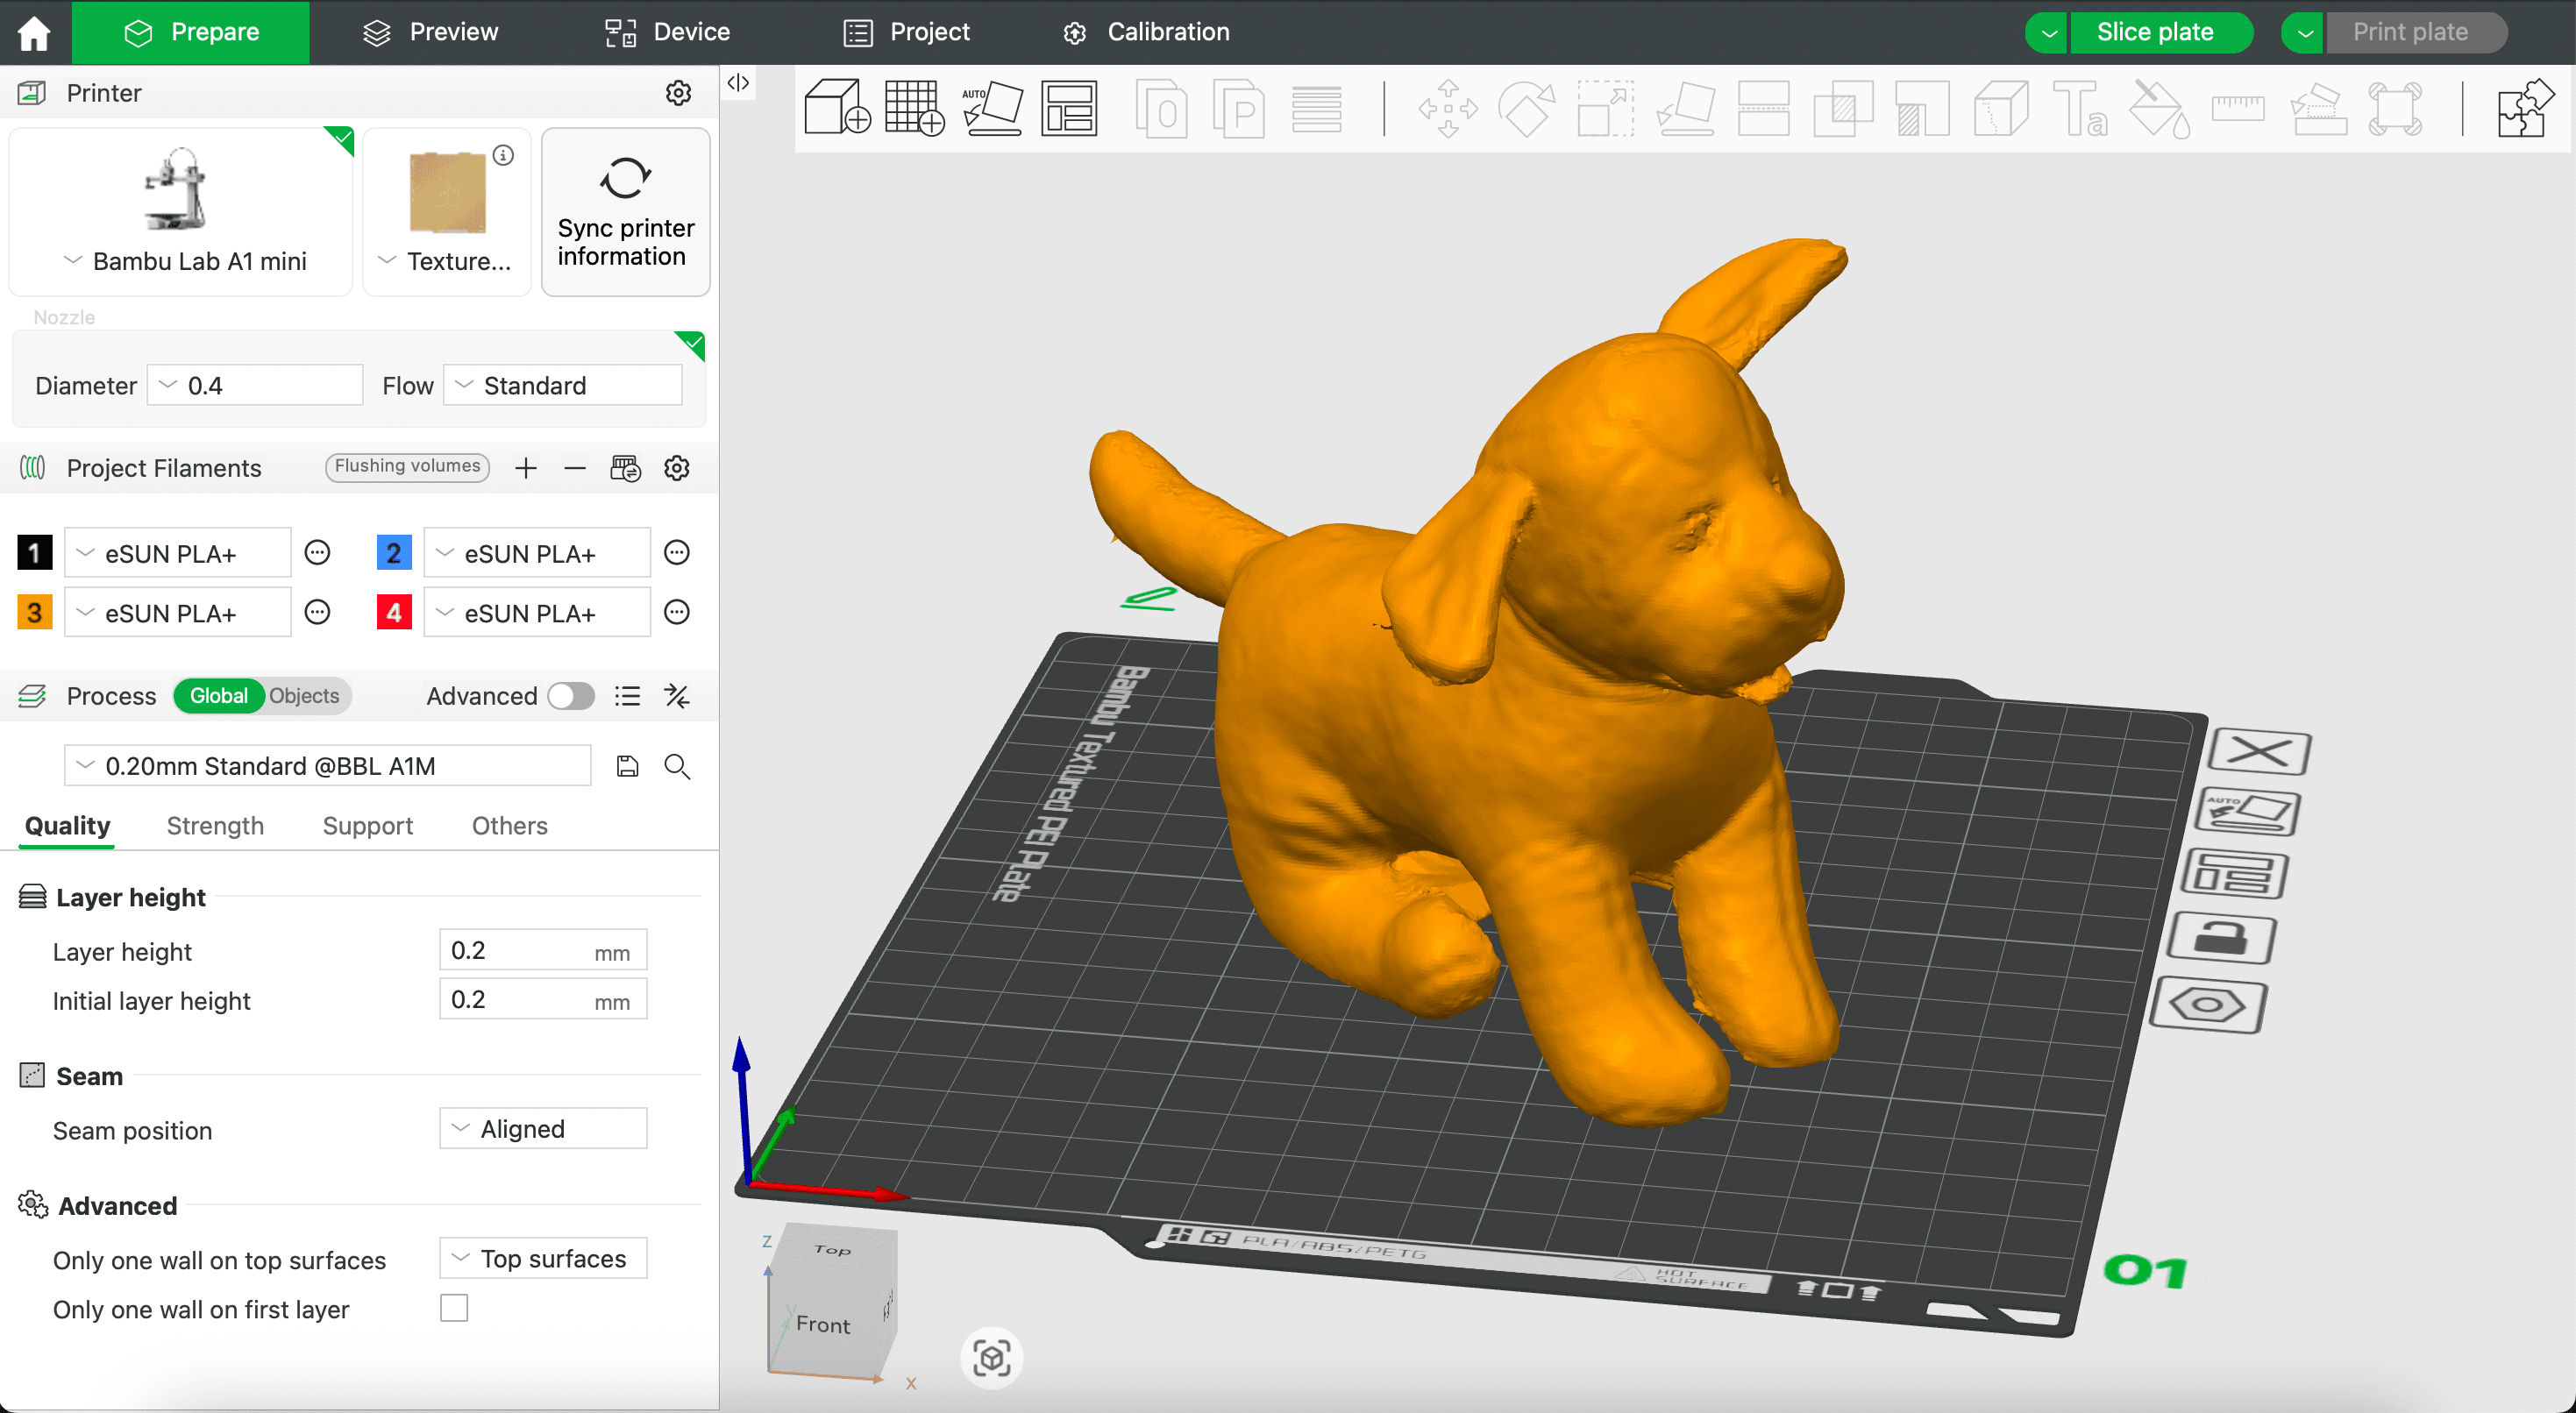
And now if we want we can even 3D print our dear puppy 'Hexi'!
Design files:
Initial test of concept (Fusion)Armless LEGO figure (Fusion)
Hexi Puppy 3D Scan in .stl