Week 2: Computer Aided Design
Individual Assignment: 1) explore various design tools, at least 3 for 2D-modeling and 3 for 3D-modeling; 2) model (raster, vector, 2D, 3D, render, animate, simulate, ...) a possible final project, compress your images and videos, and post a description with your design files on your class page
2D Design
Raster vs Vector
There are two general types of 2D-designs. Raster type is made up of pixels, for example photos are generally of this type. Vector images, however, are made up of lines, well vectors, that define images and shapes mathematically, so do not lose quality at any level of magnification.
Tool #1: Photopea
PhotoPea is intended as an online free version of PhotoShop. It can be used for raster and simple vector editing.
Here's a nice tutorial: 13 minute Intro to Photopea.
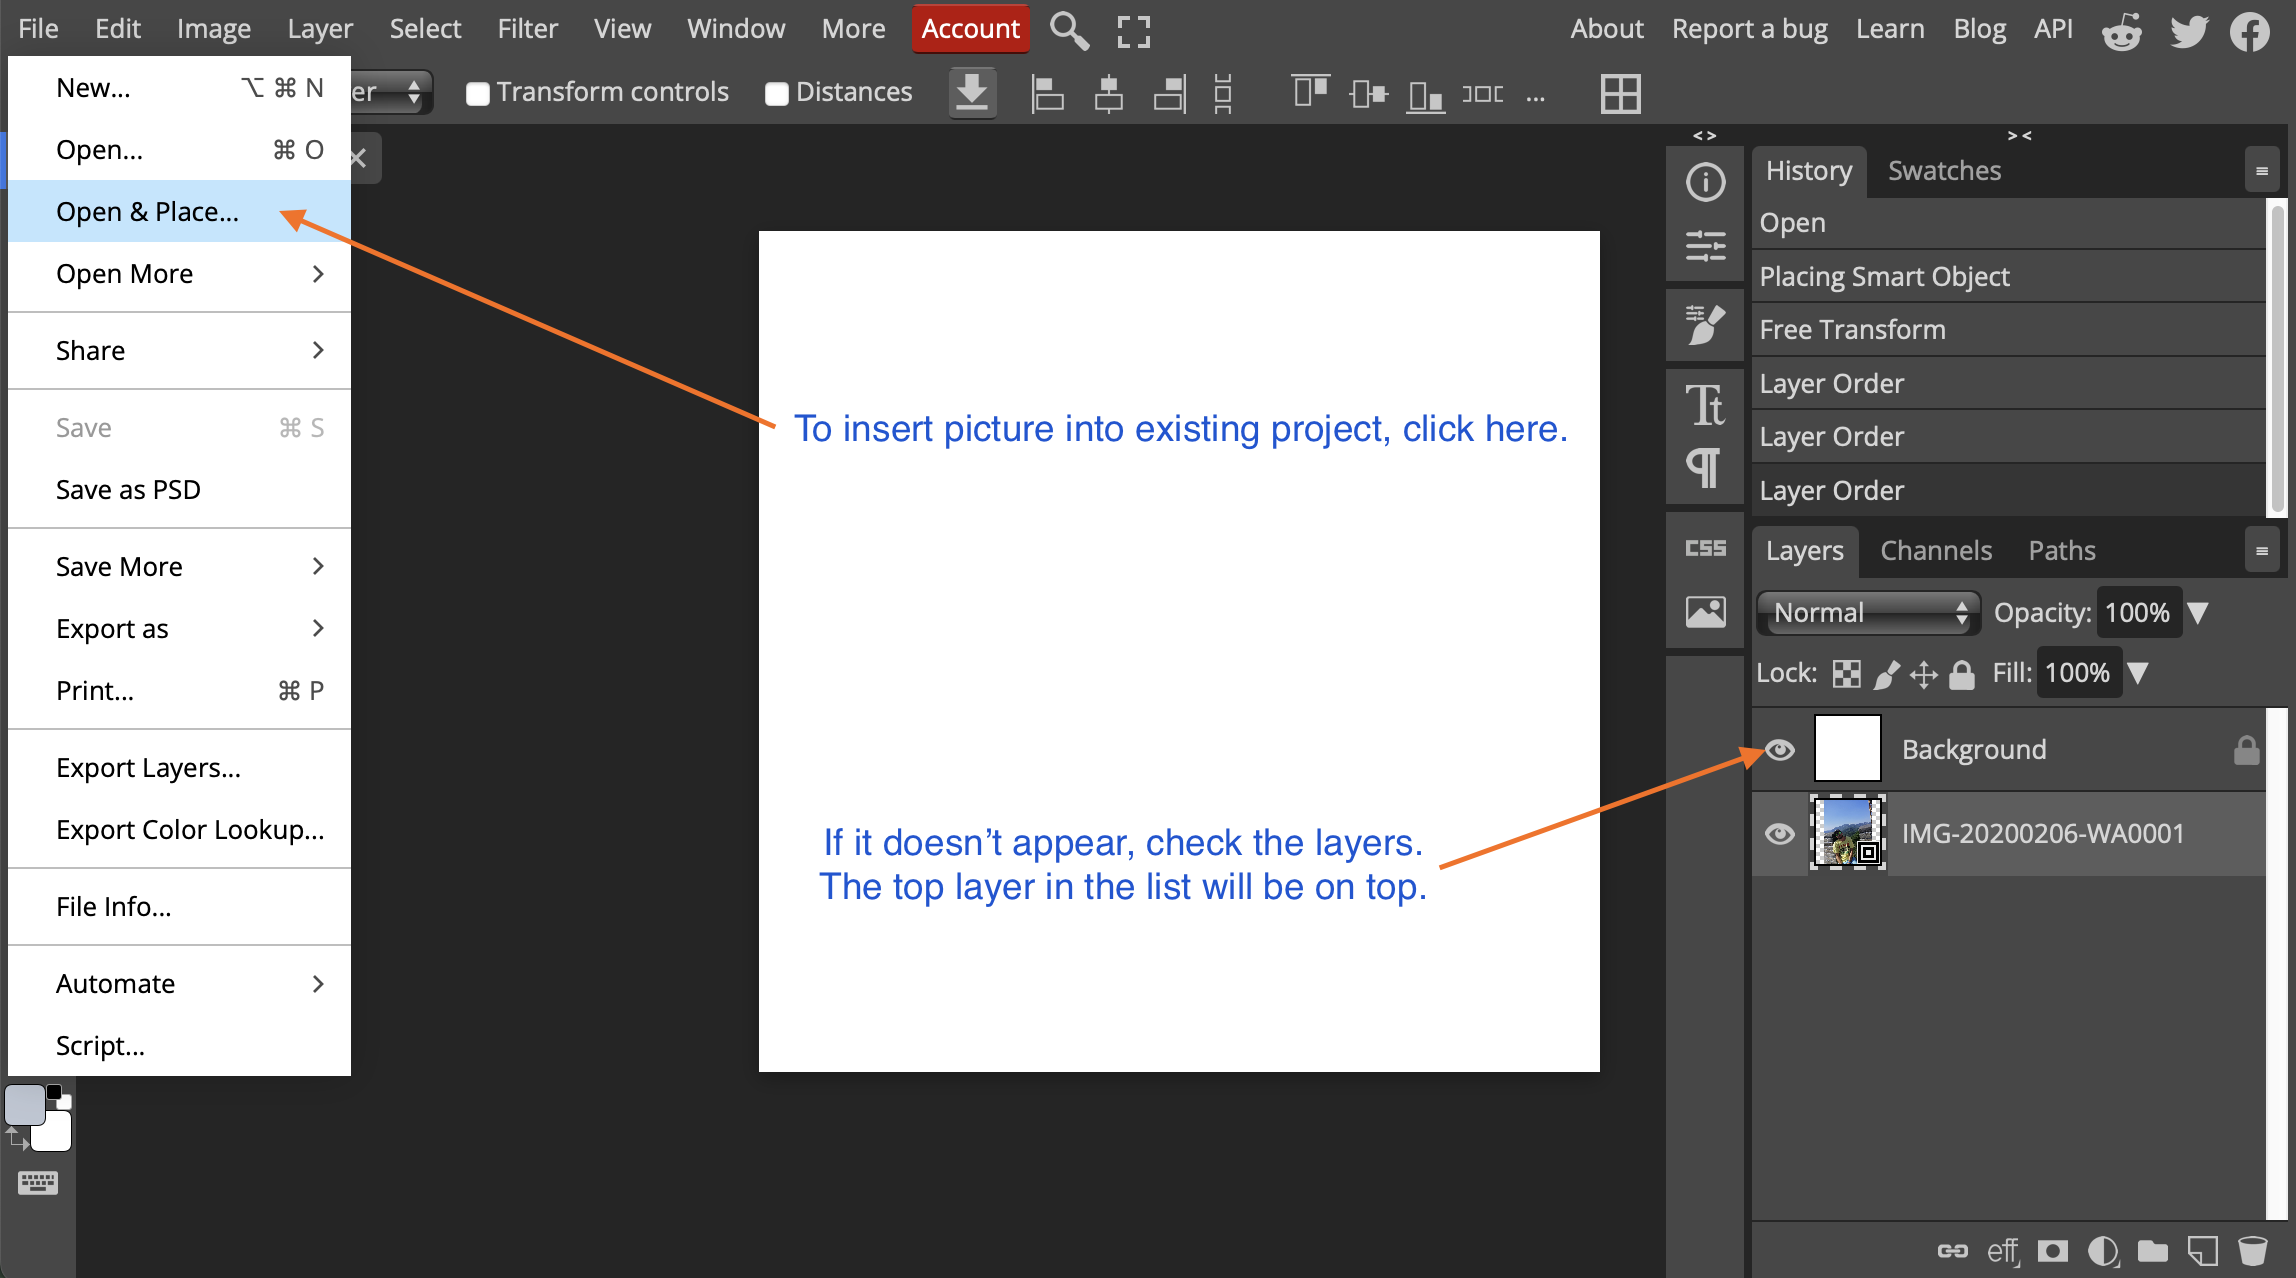
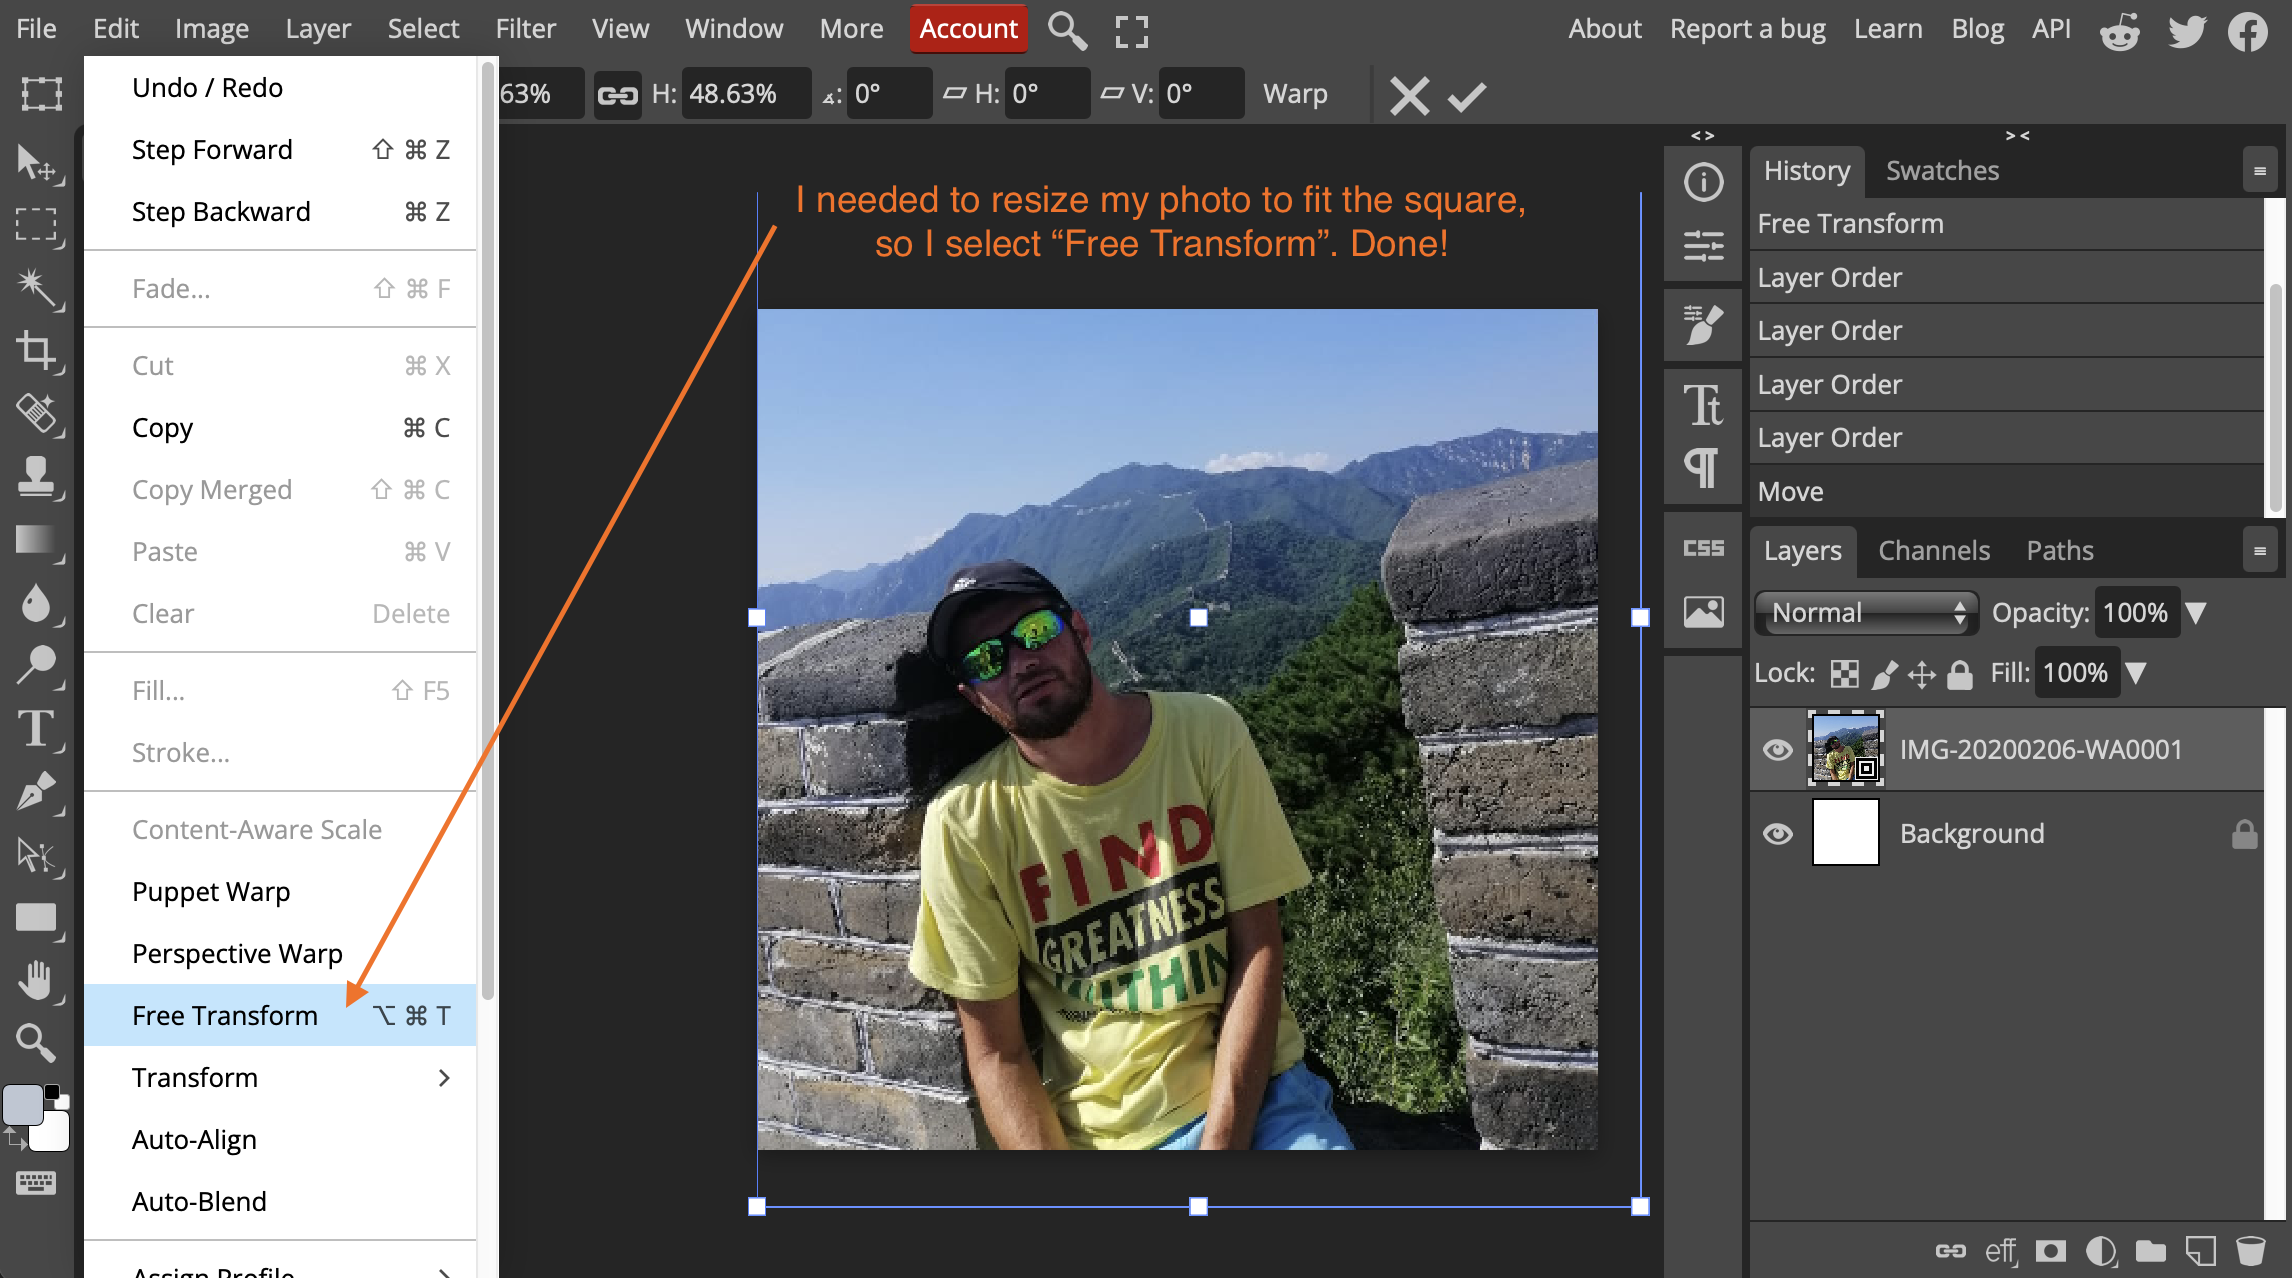
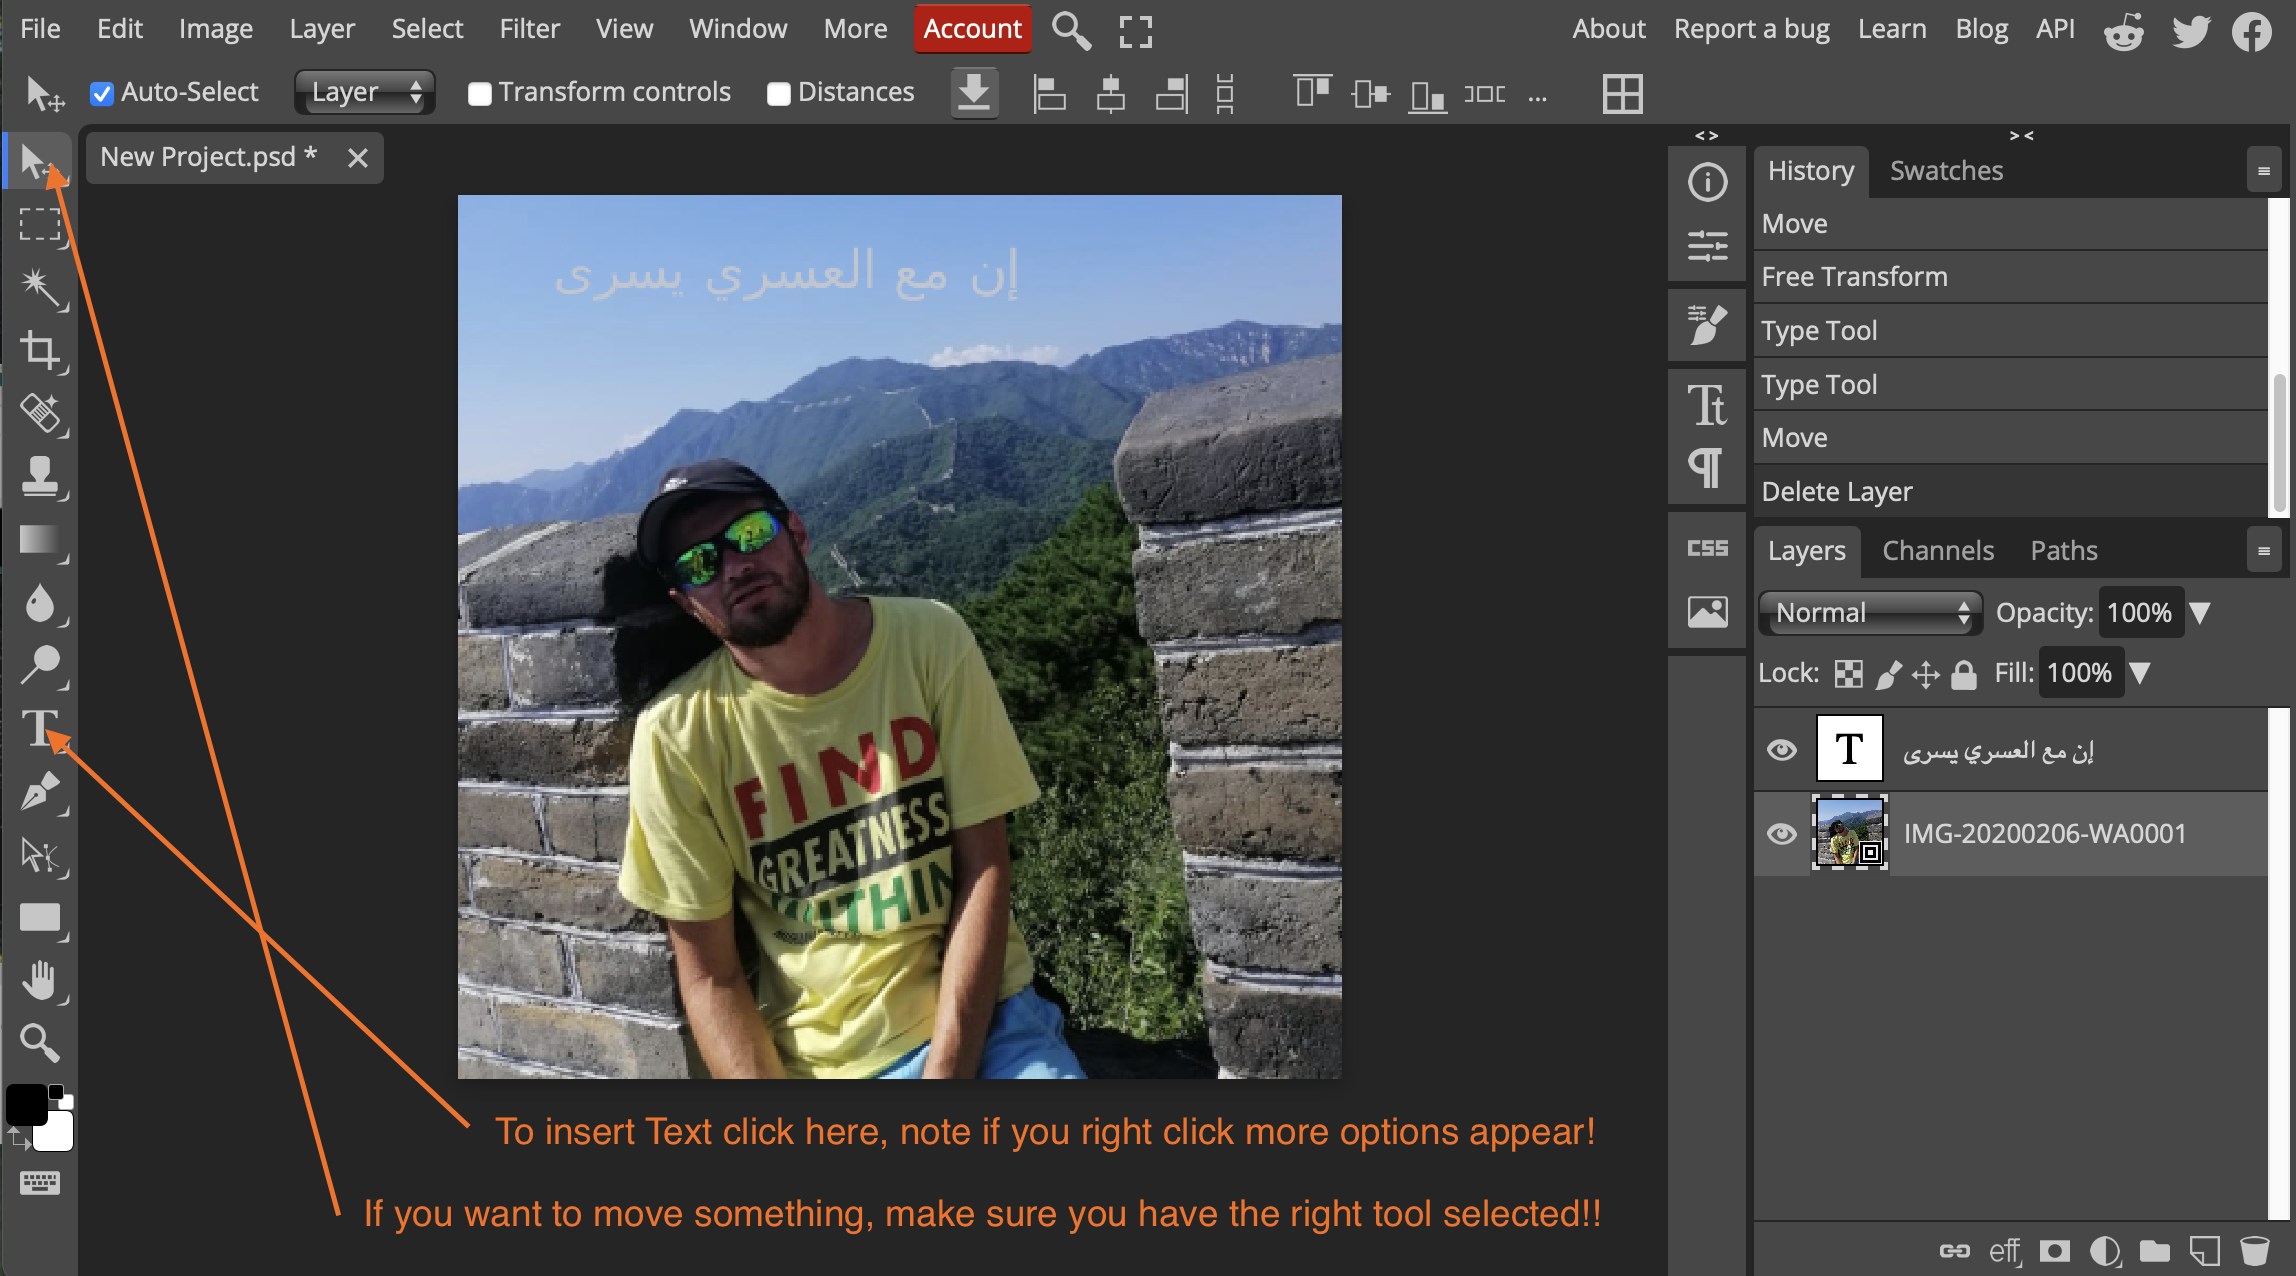
Now I want to make a new social media profile for myself. Here's the first one as a joke:
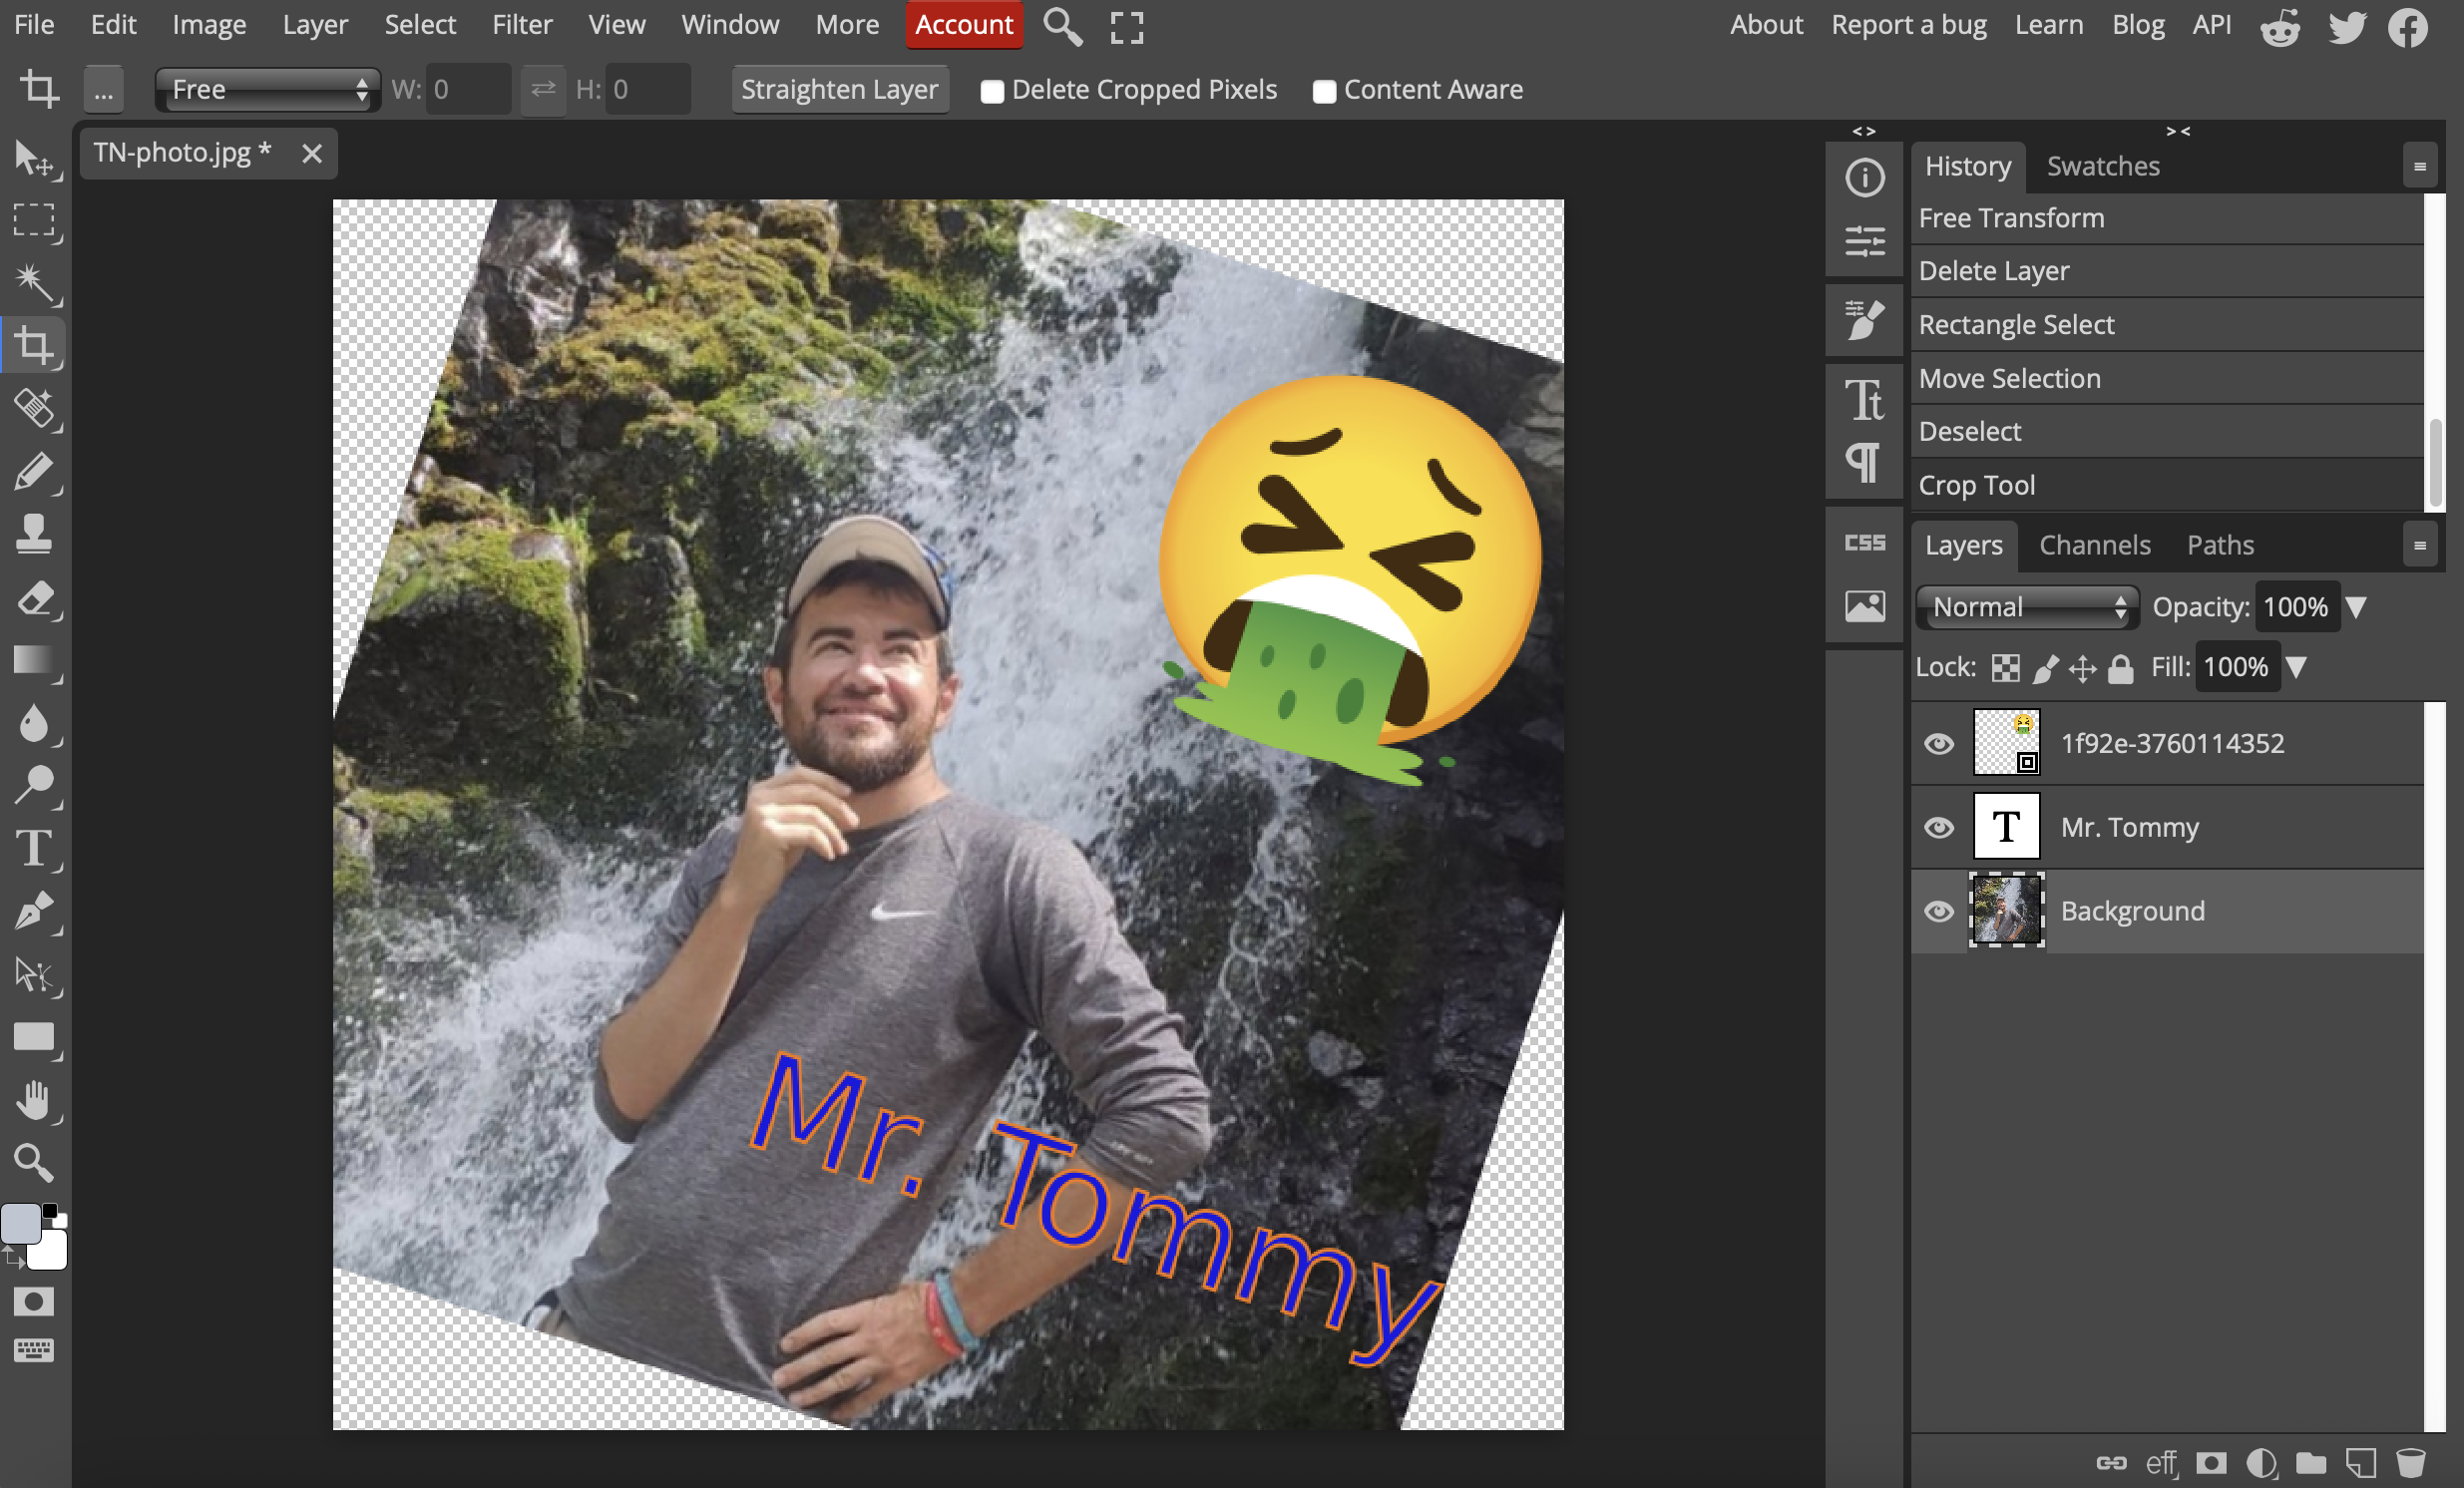
Now I'll make another, and highlight some of the steps and tools involved with Photopea:
Tool #2: Inkscape
Inkscape is the classic tool for 2D Vector design. A good tutorial can be found here: TJ FREE Inkscape Lessons.
Here is an example showing some of the basic functionality:
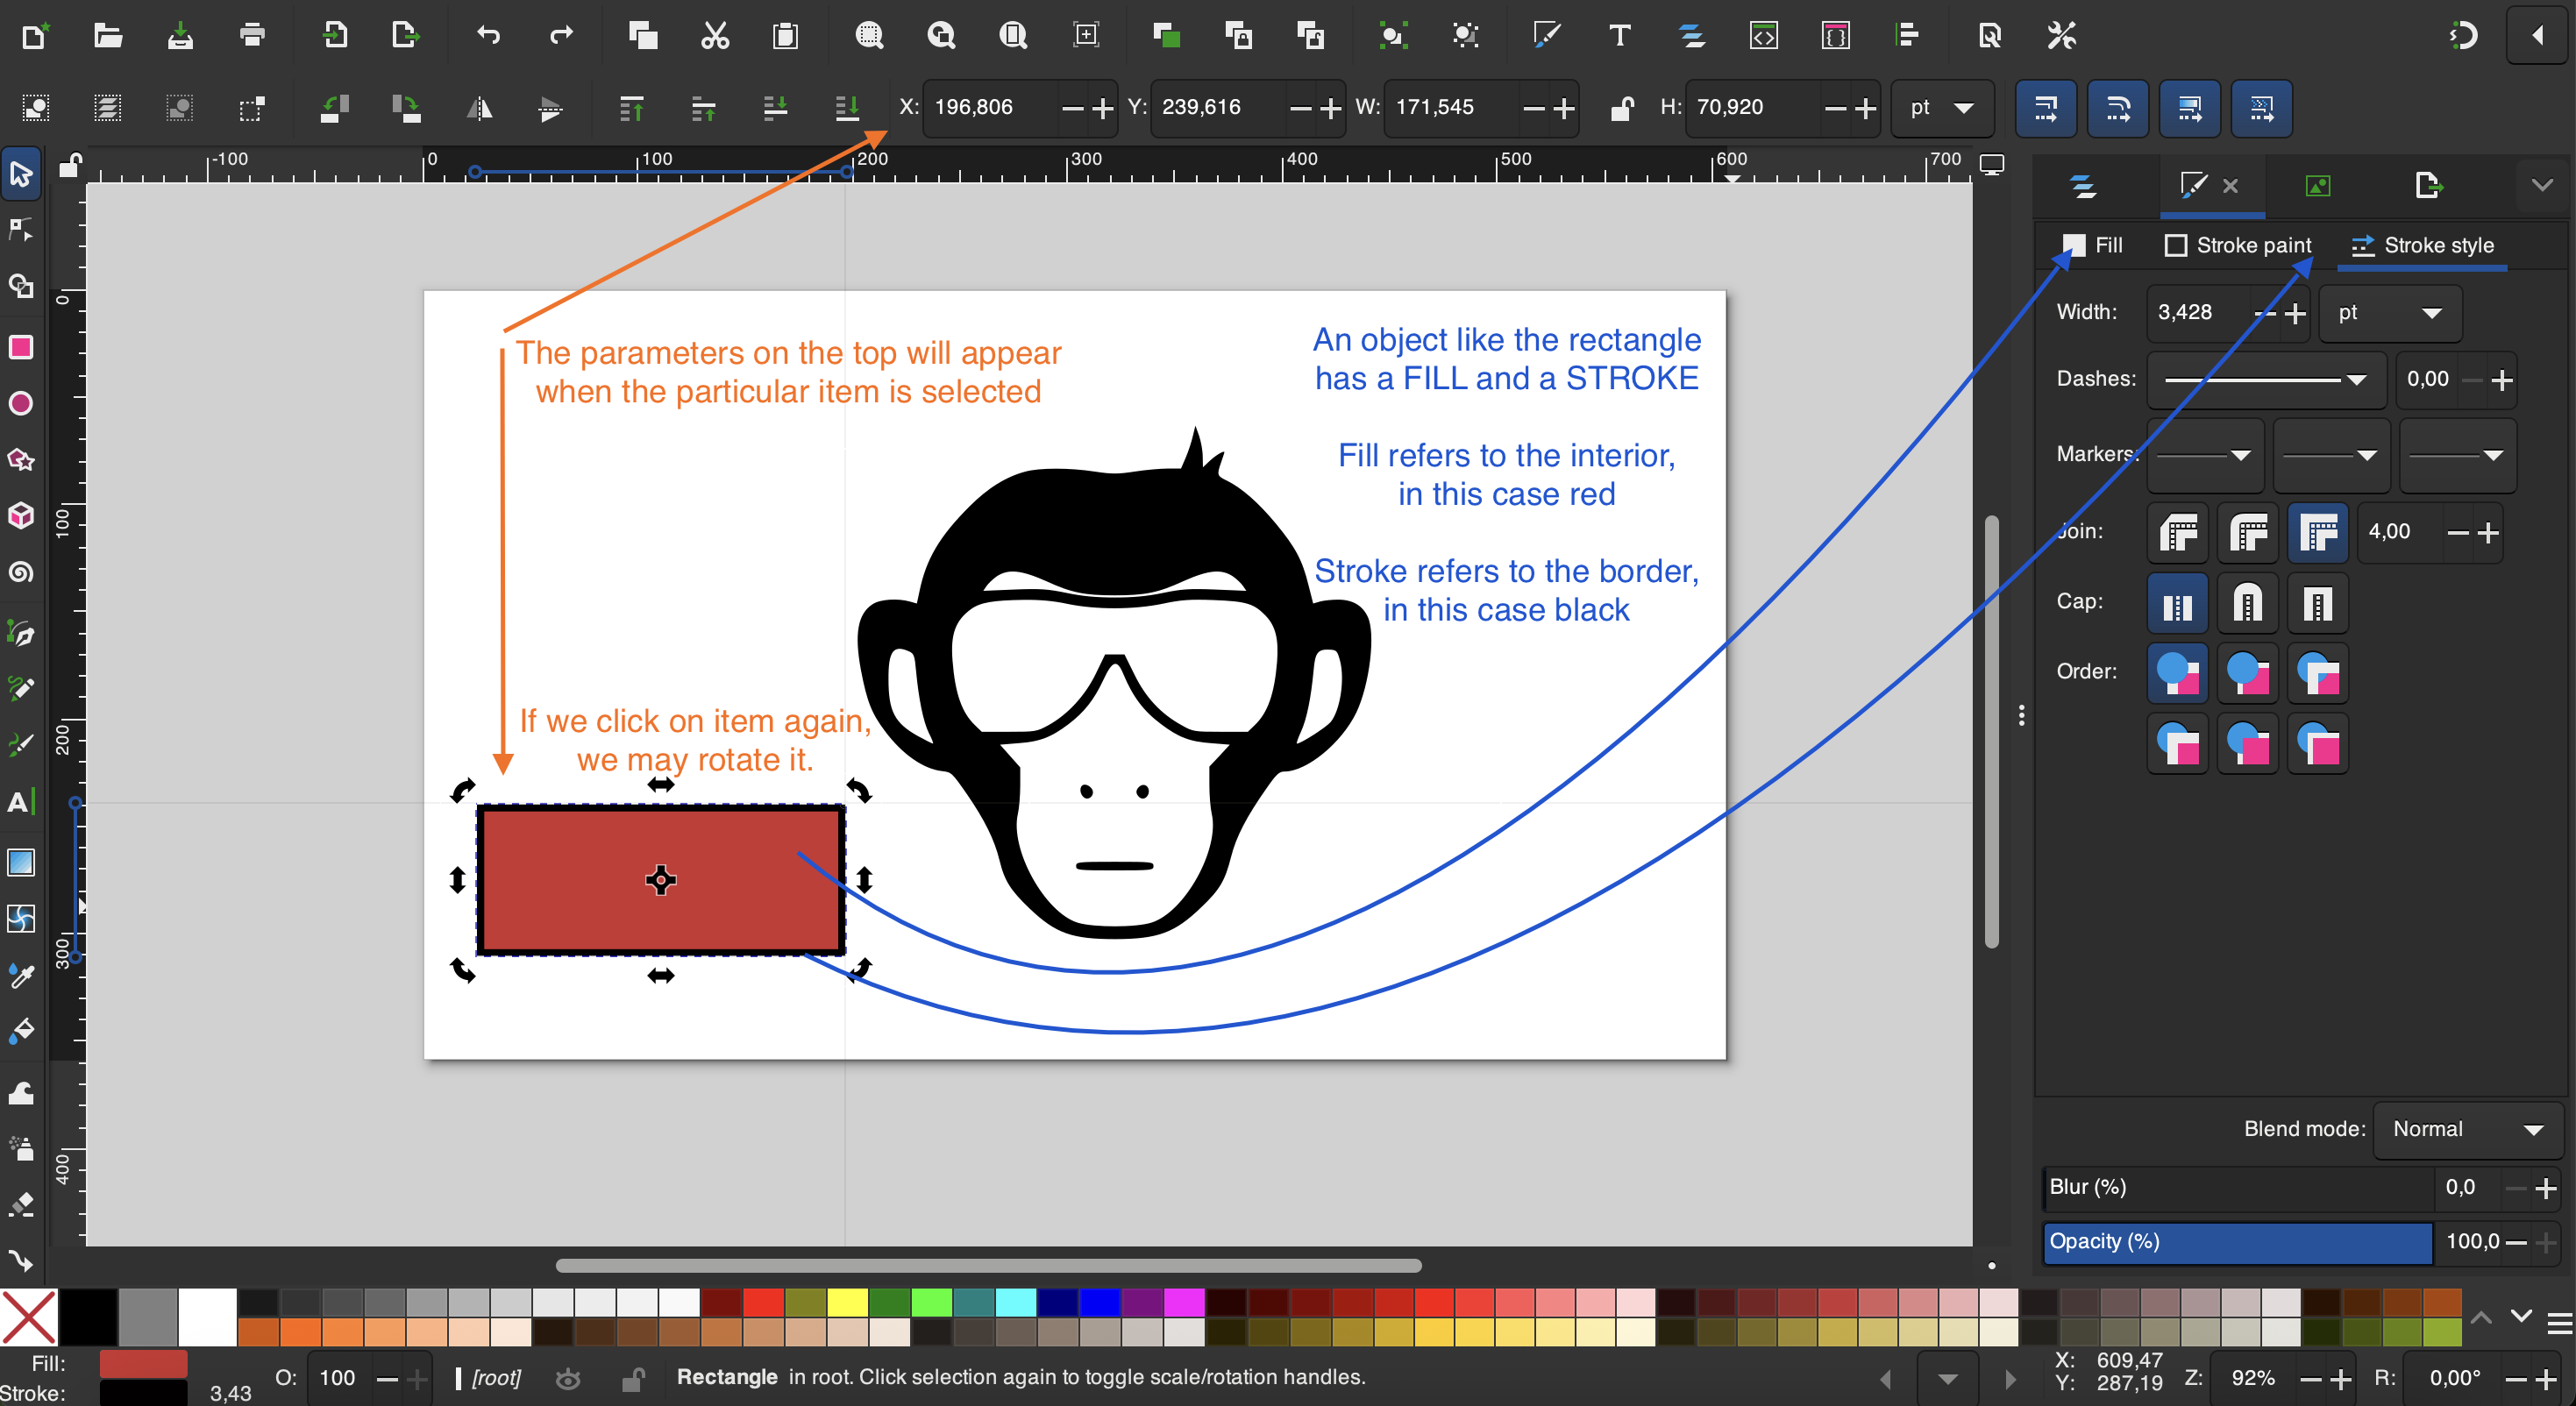
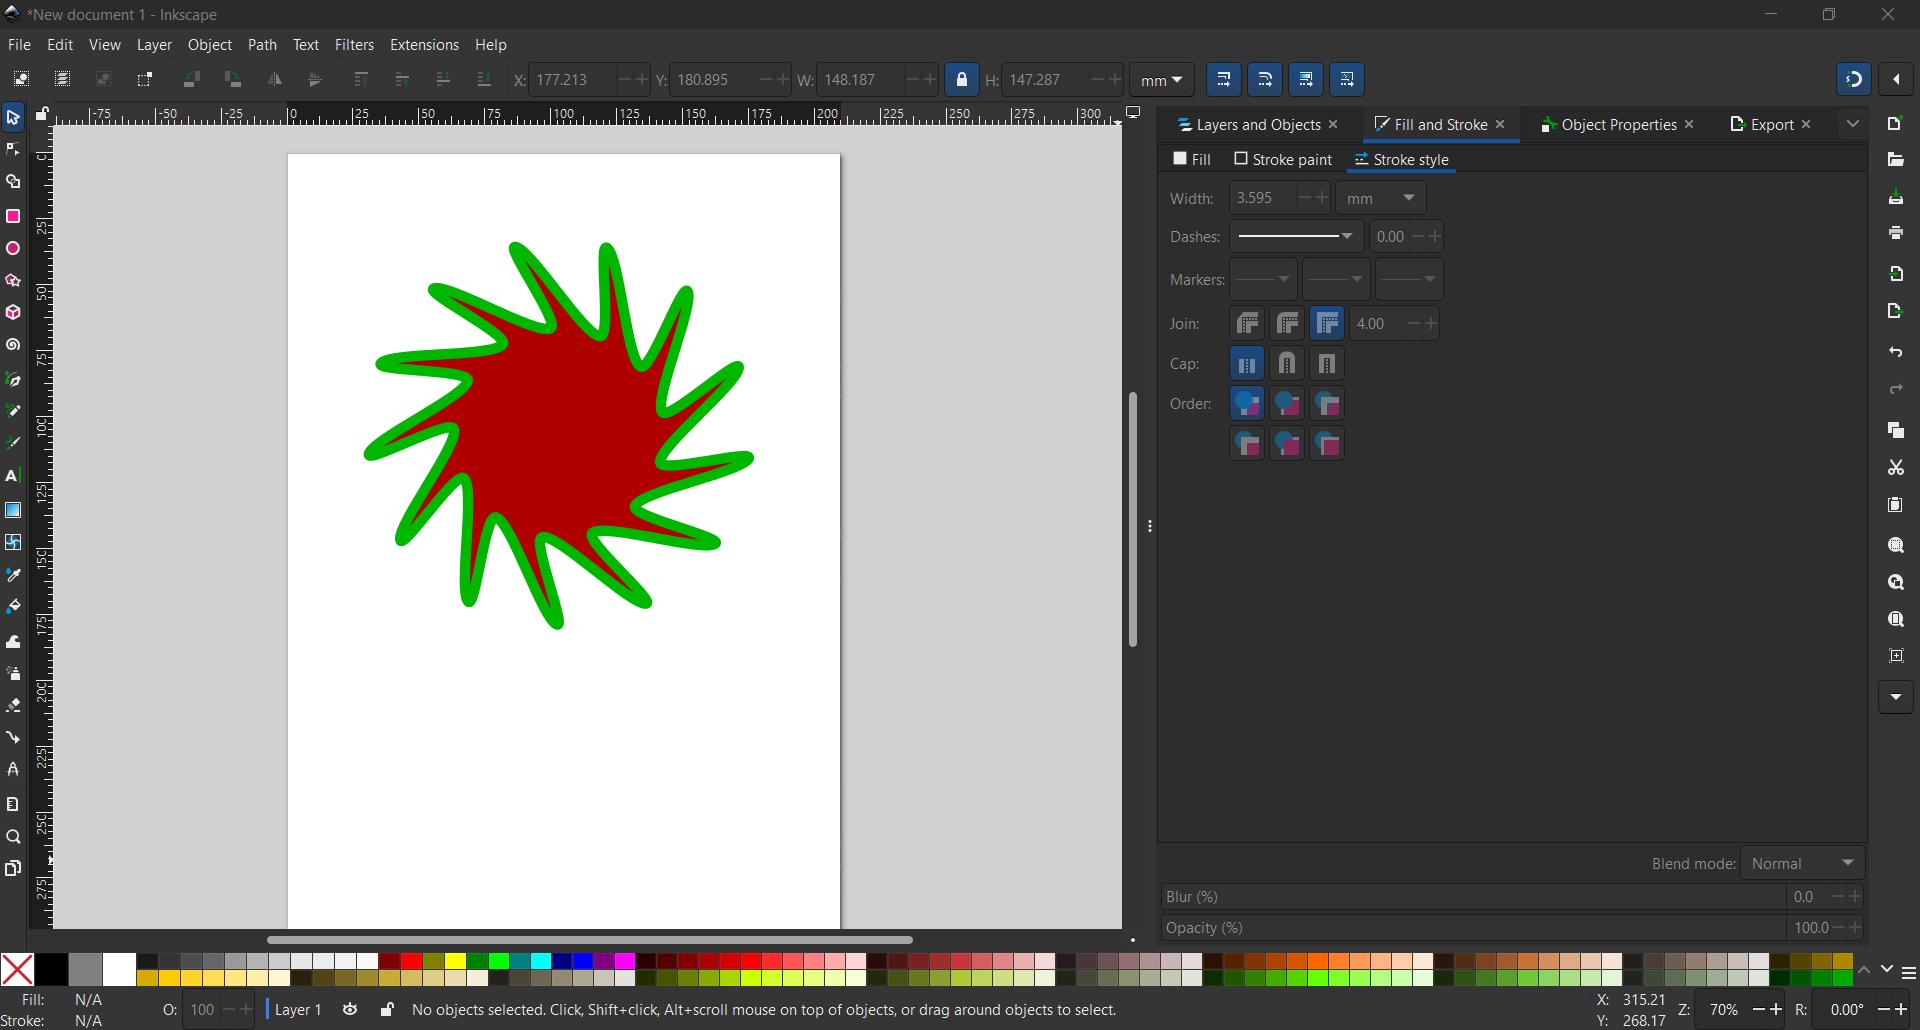
In Inkscape we can make all kind of cool shapes, like this star, which again demonstrates fill and stroke.
Tool #3: GIMP
GIMP is a free and open-source image editor, it's another similar program to PhotoShop.
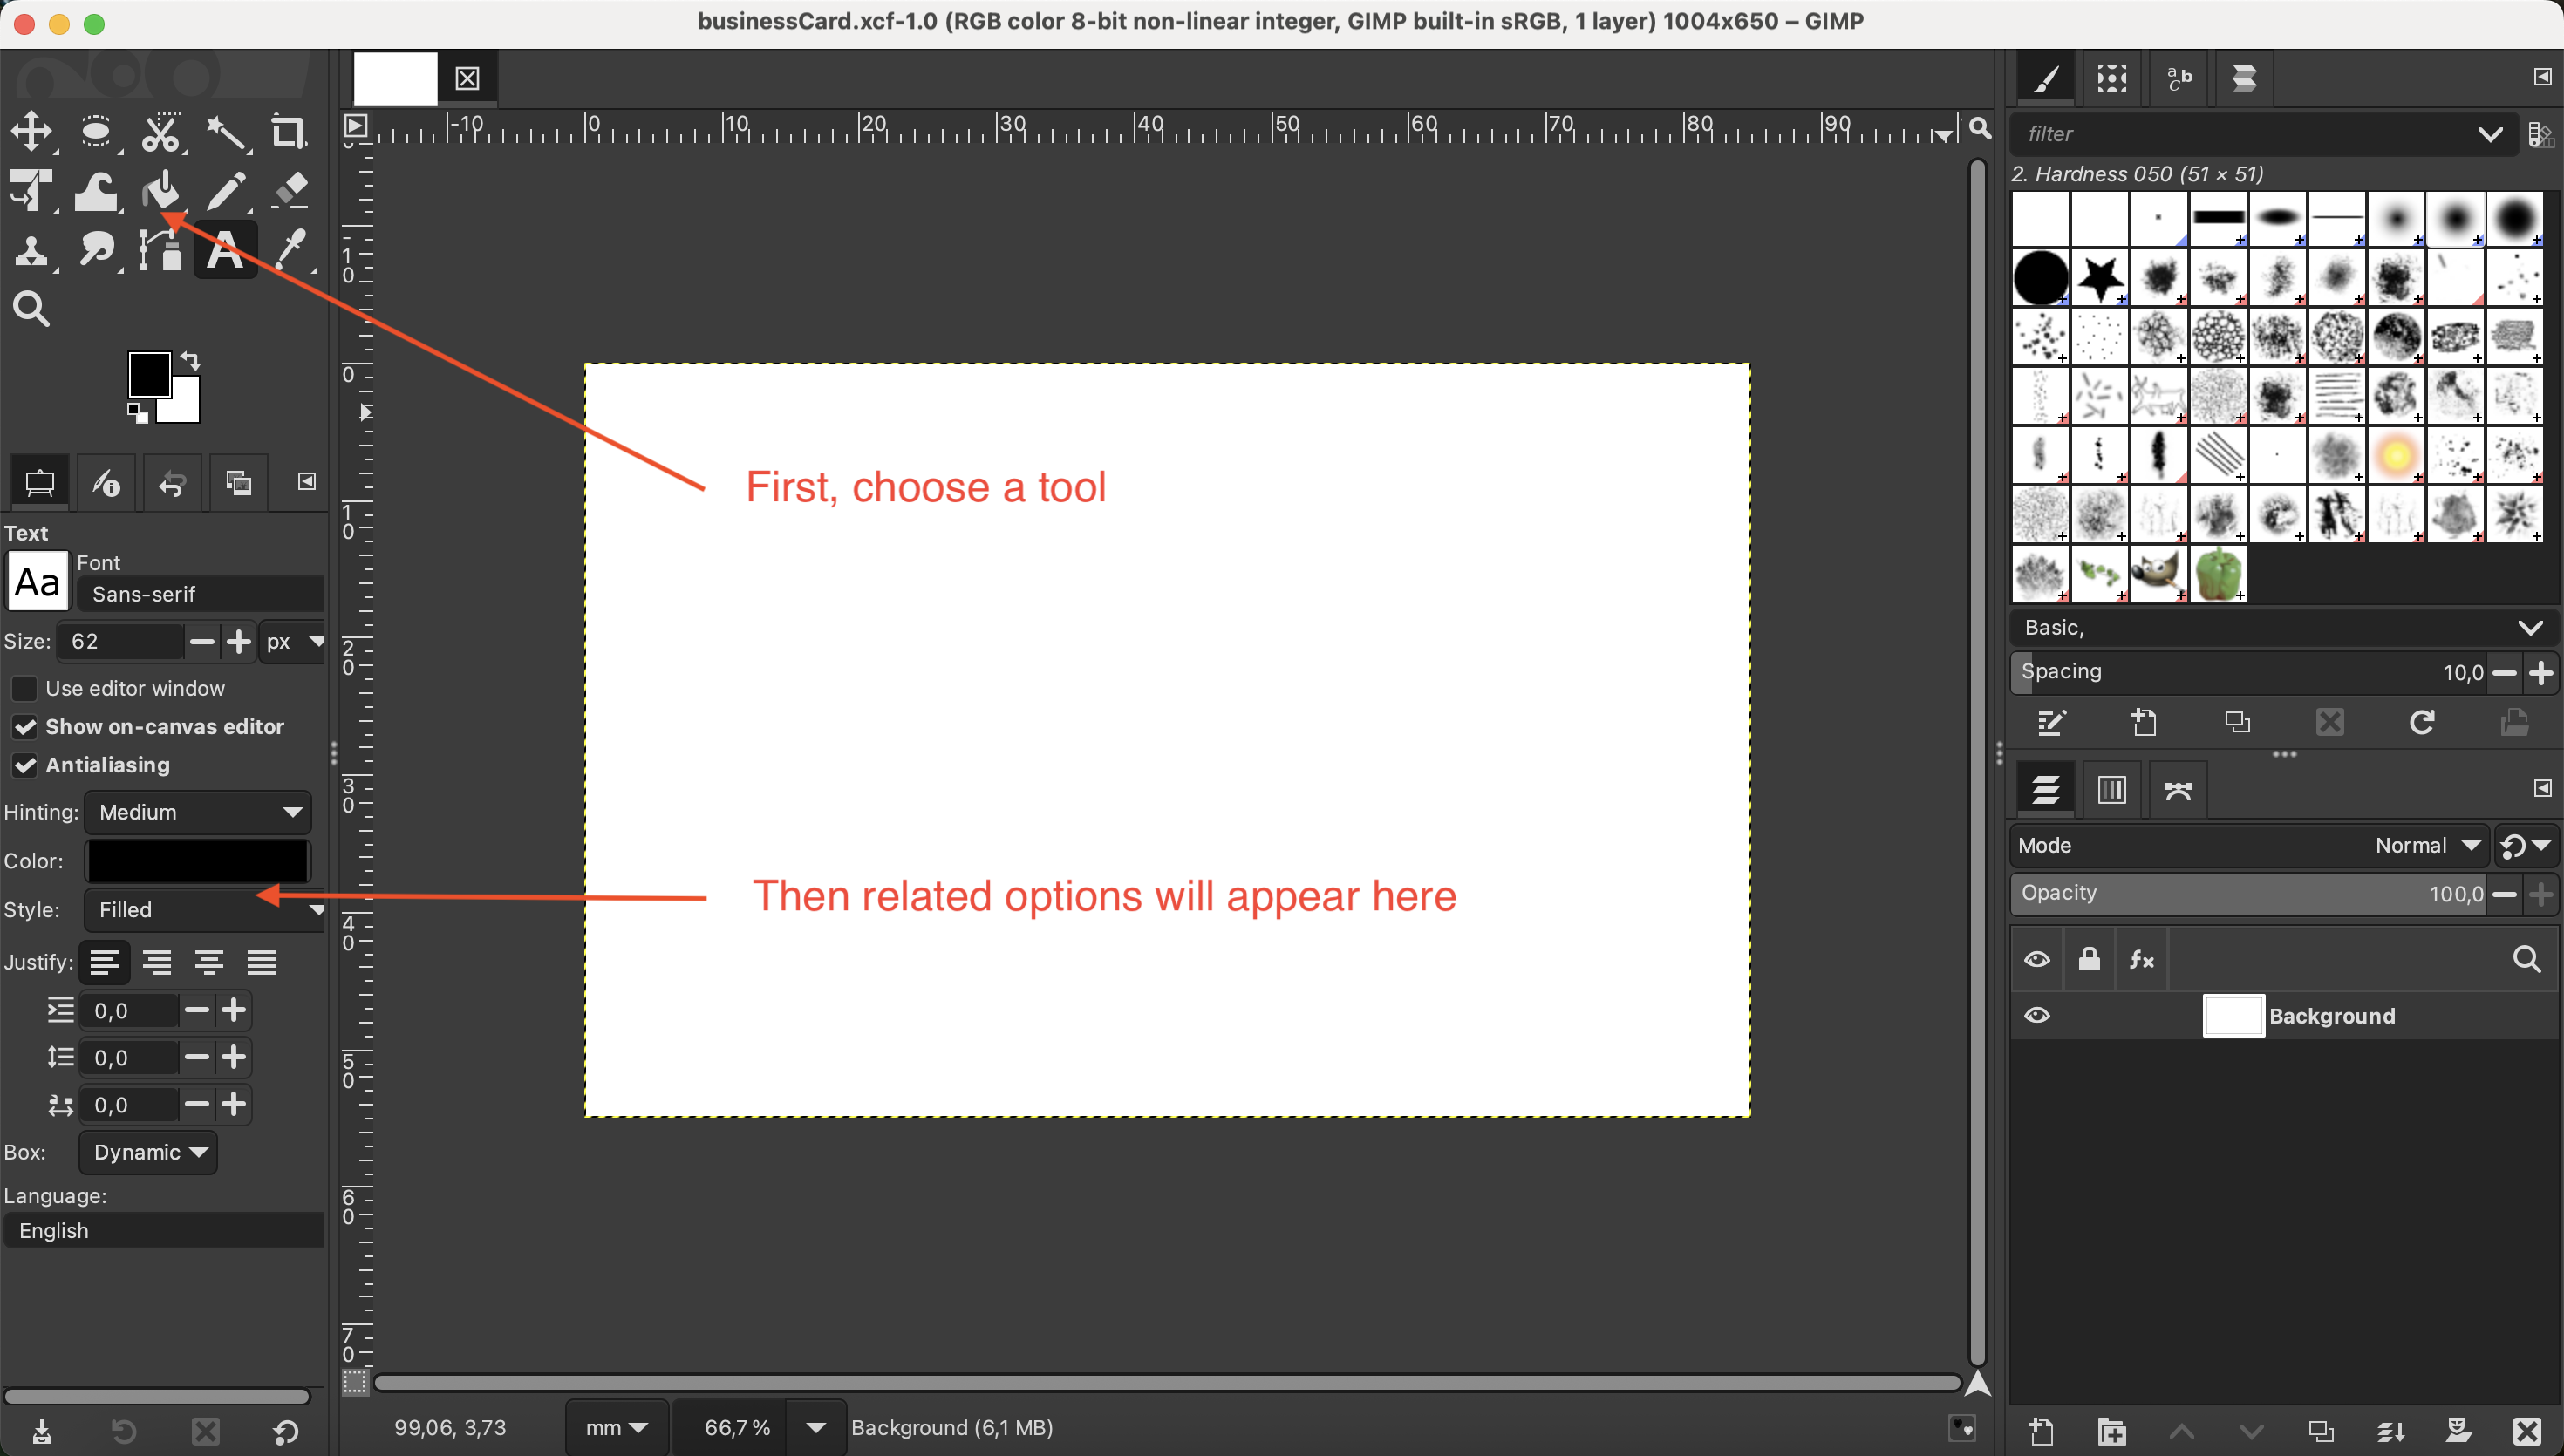
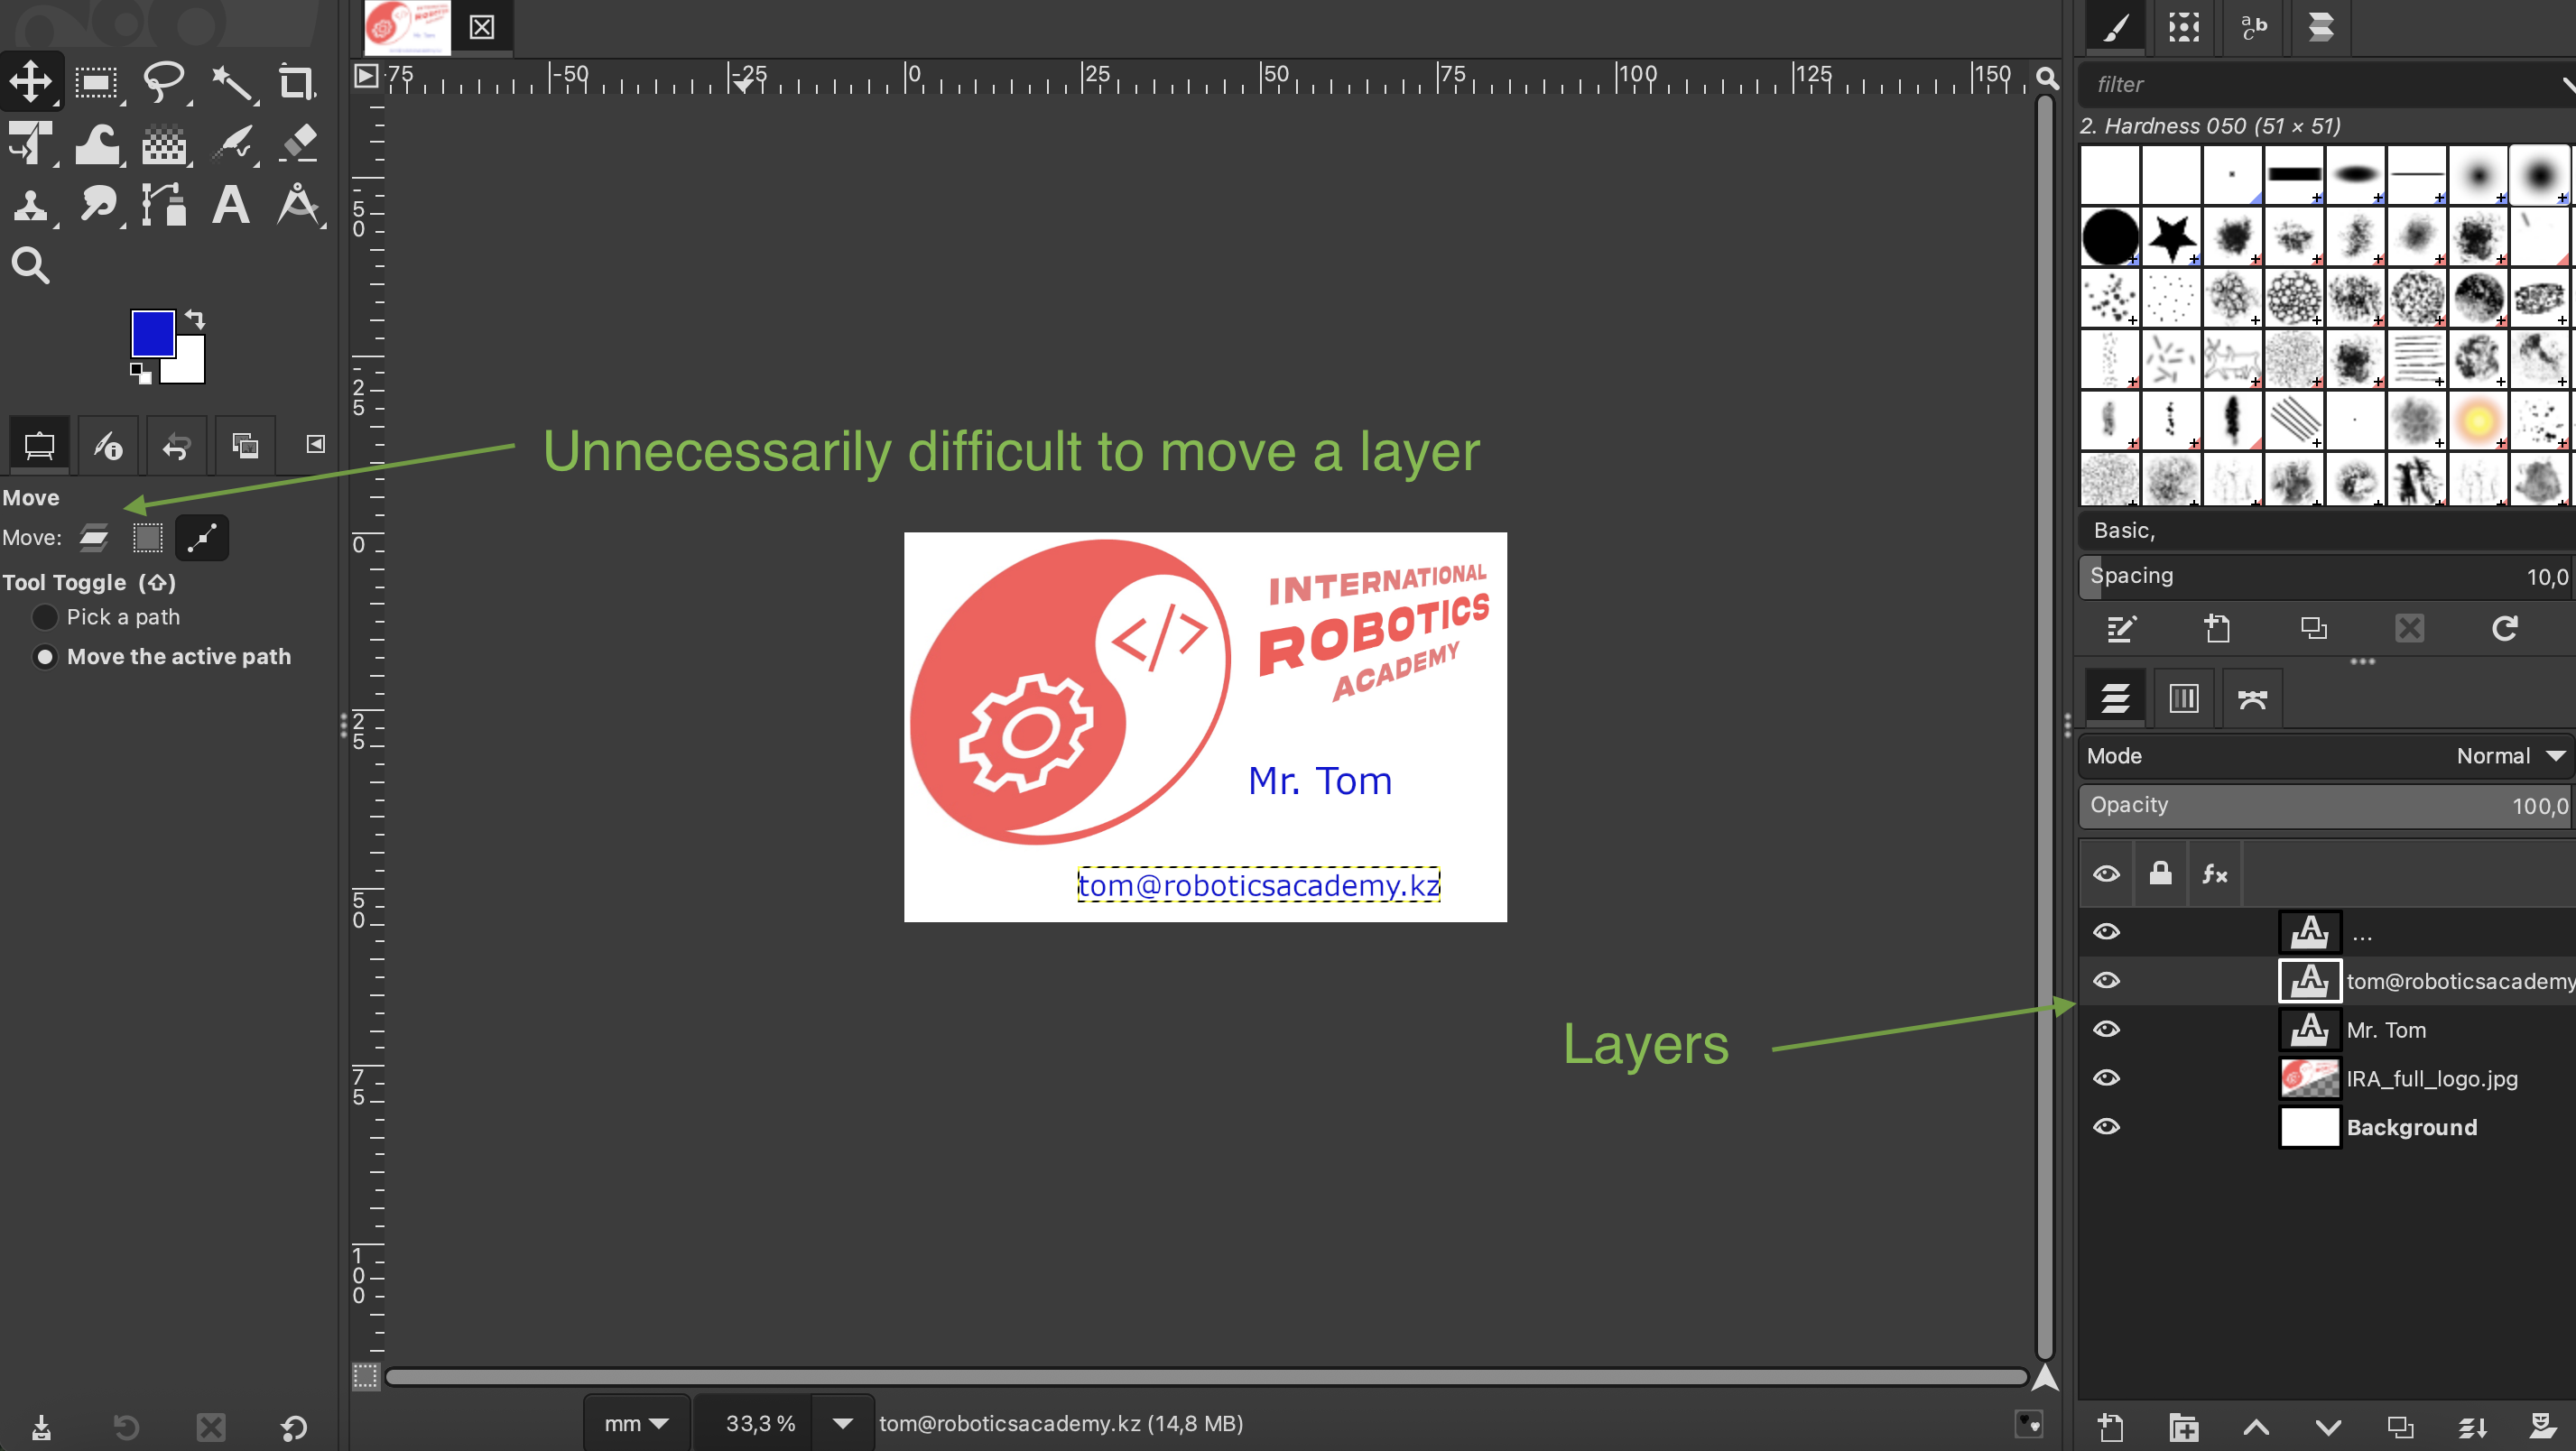
After downloading and installing from gimp.com, then creating a project (we chose Business card), the interface looks like this:
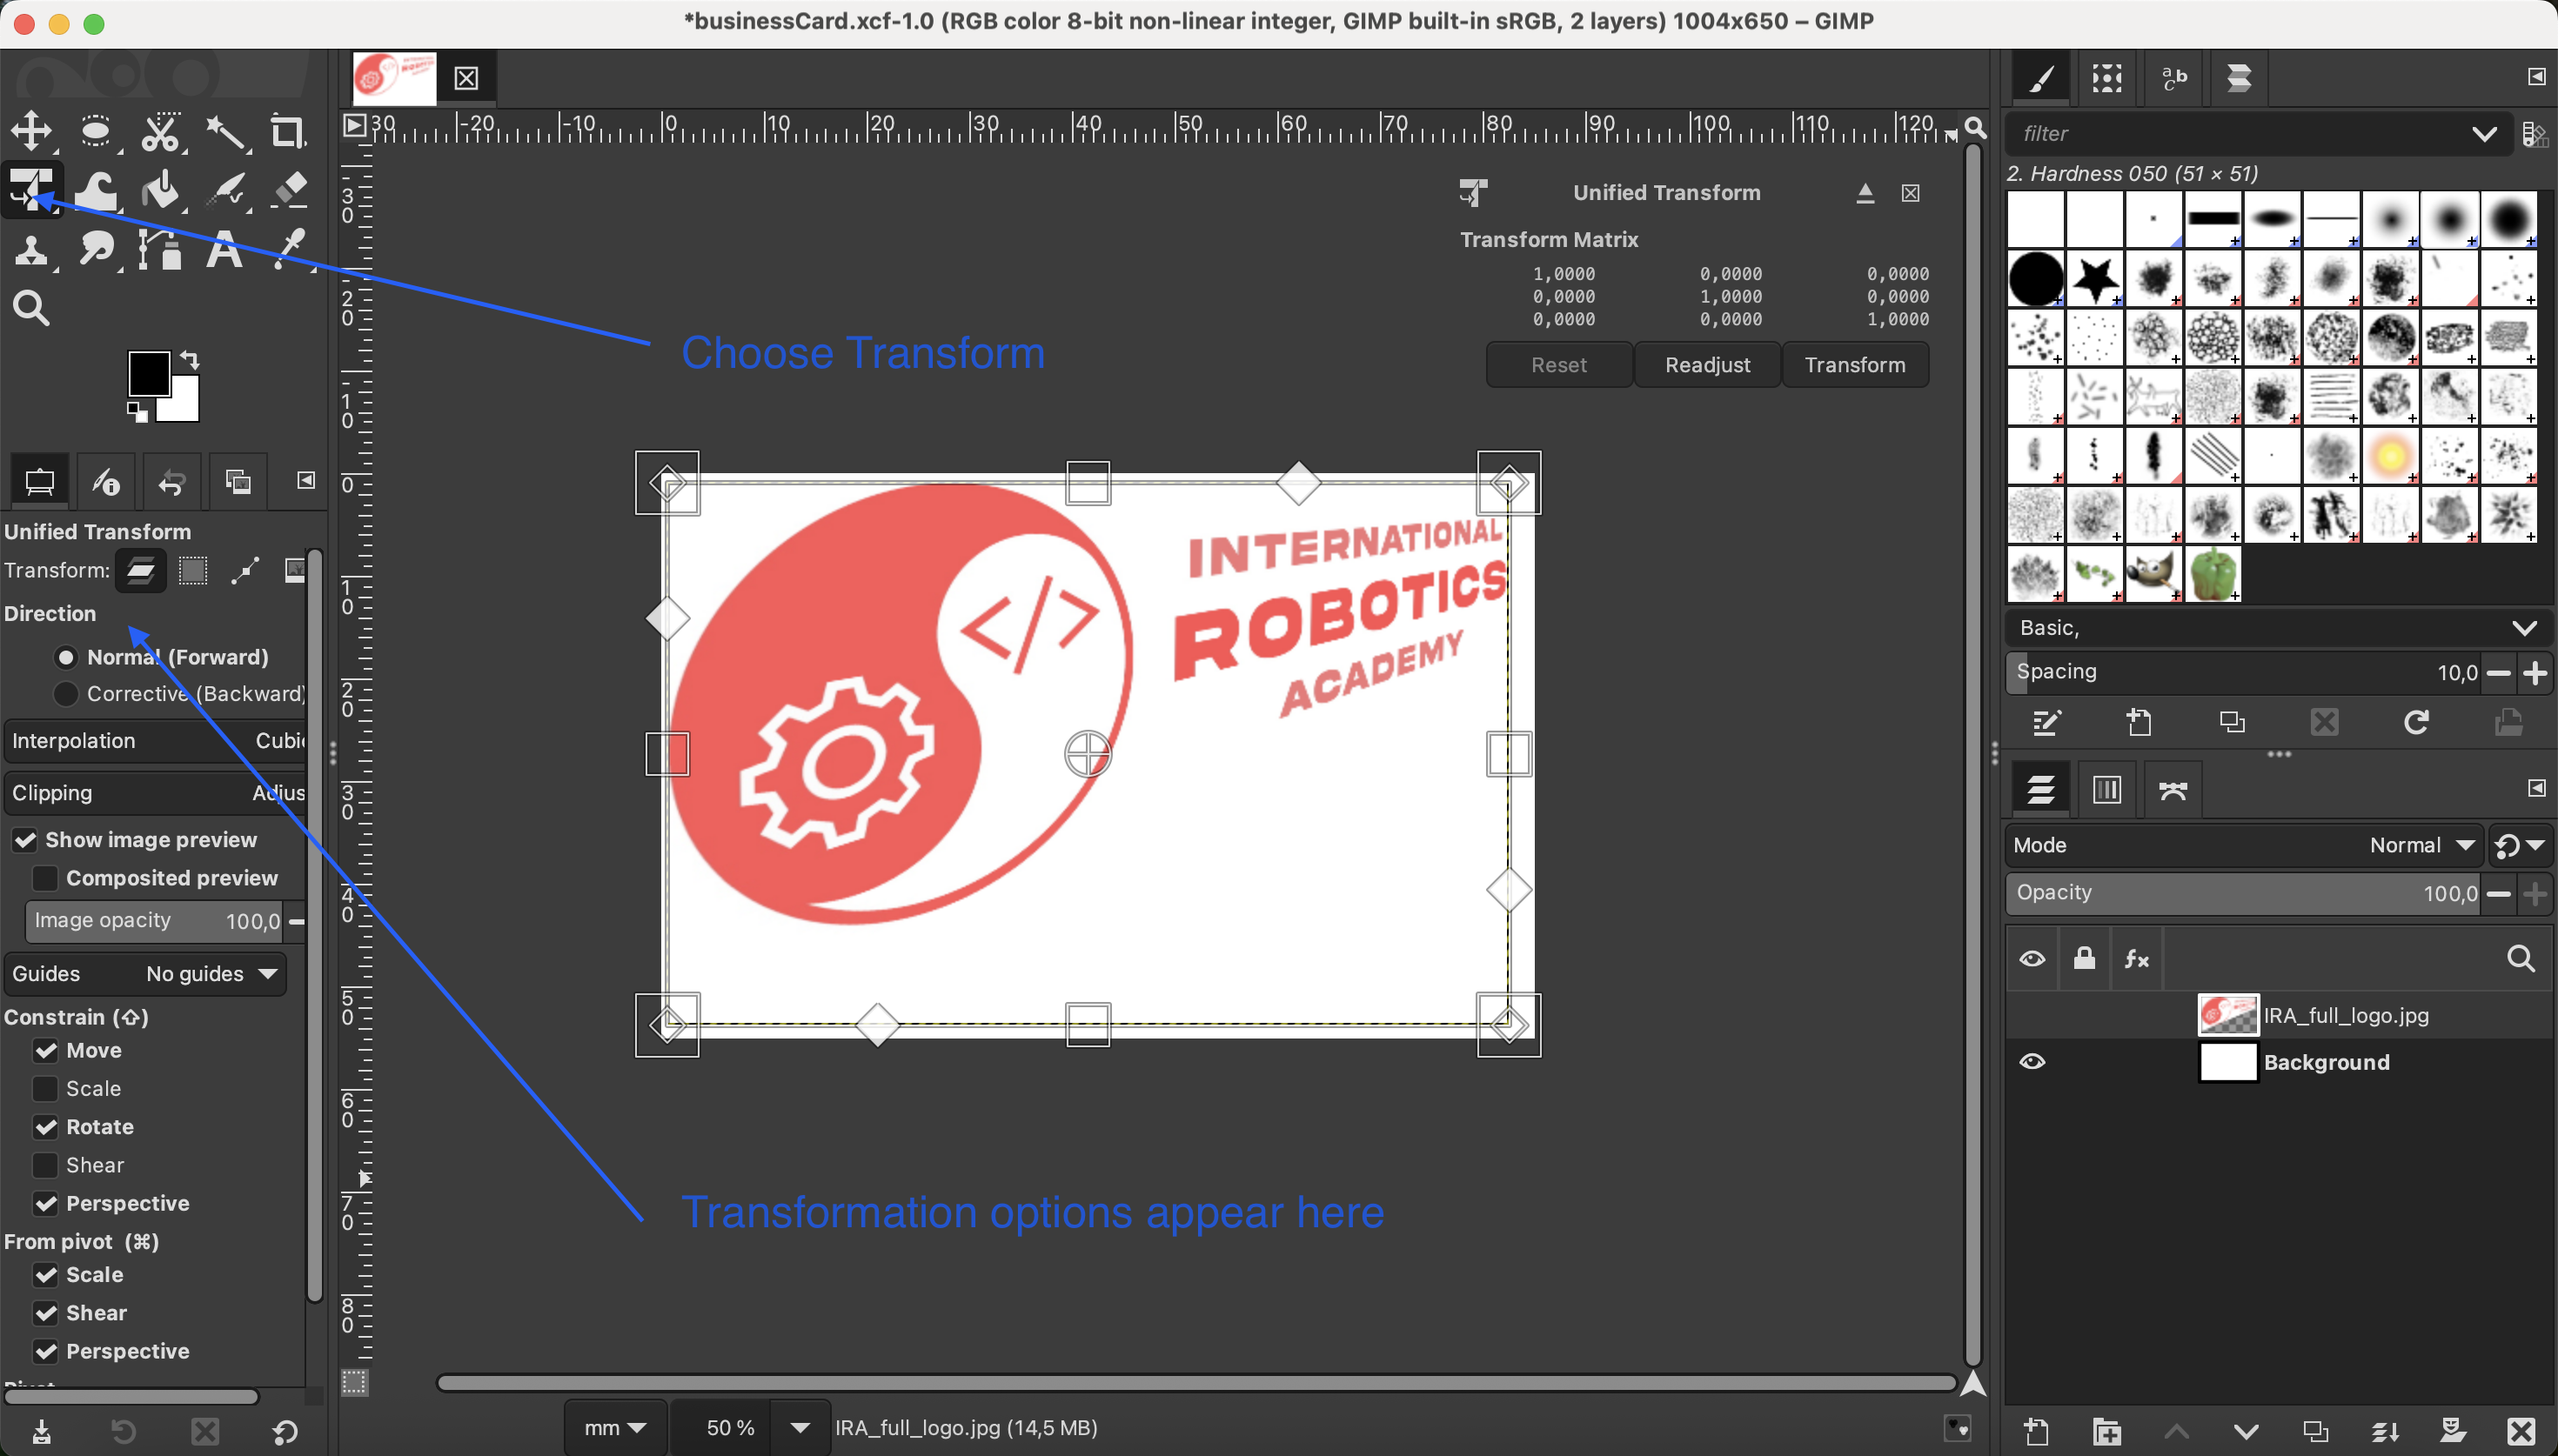
Now if we choose to transform the picture we have some interesting options and flexibility:
Unfortunately, some simple commands like "move" were not easy. A bit frustrating for a new user.
2D Design Conclusion:
There are many 2D design softwares, and each has its own workflow and capabilities. Each requires time to understand the tools, so I cannot say I mastered any. However, from those I tried, I liked Inkscape the most. It was both powerful and intuitive to use. Also I am more interested in vector graphics so that played a role. Photopea was also nice.
3D Design
Tool #1: FreeCAD
This program may be challenging to the newcomer, but there are nice tutorials available, for example: Learning FreeCAD with these basic steps.
In the aforementioned tutorial the author eloquently goes through the steps to create a holder for his Raspberry Pi Zero, and so I did that also:
Another sequence of wonderful tutorials is FreeCAD for beginners. The first video in this tutorial sequence is on constraints and the second tutorial on the topic of parametric modeling. As these are two topics emphasized by Dr. Neil as areas of focus I made sure to watch them and thoroughly document the process:
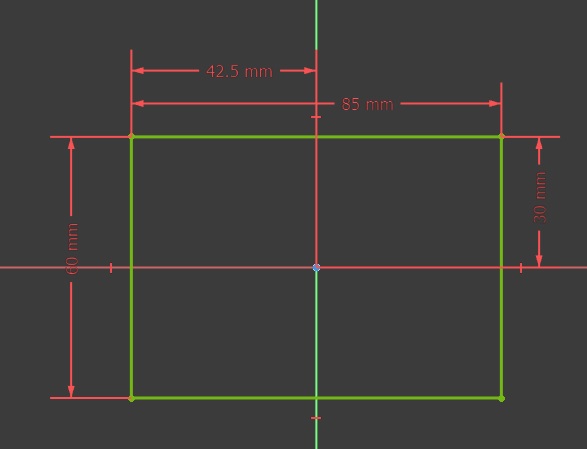
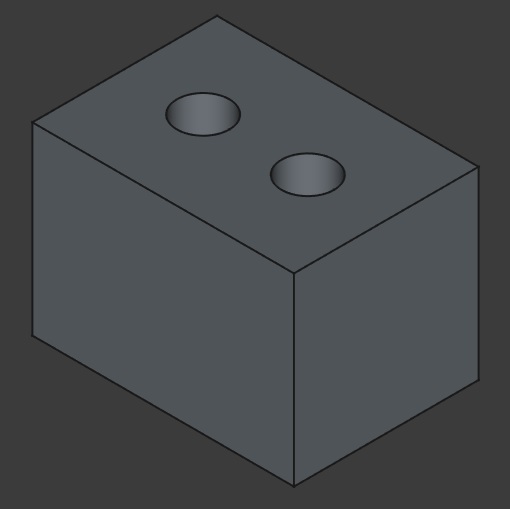
FreeCAD for Beginners Part 1 - Constraints: This was a good review of making sketches and creating simple shapes using pad and pocket. Here is the sketch and finished model:
FreeCAD For Beginners Part 2 - Parametric Modelling: This video conveniently started with the model which we created in part 1. It began by showing how we can go back into the sketch and change the values of some dimensions, but demonstrated how this can be time-consuming. For example, if we wanted to change dimensions of a cube, we must individually change the length, width, and height as well as re-centre it. Then he opened up the spreadsheet workbench...

Subsequently, we entered parameters into the spreadsheet and then assigned those paramters to the sketch as can be seen:
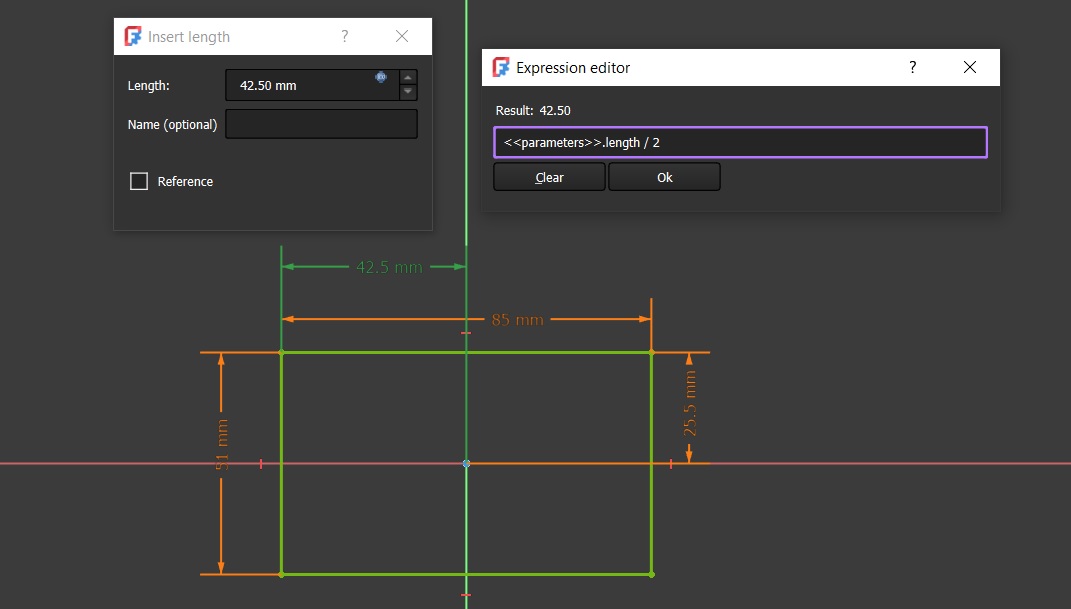
The benefit in the end is that we can now very easily change the size of any aspect of the figure in a very easy way, as may be seen in the reconfigured shape below:
Tool #2: Autodesk Fusion 360
Although it is initially difficult and uncomfortable, Fusion 360 is the king and all must learn. Here is a record of my initial projects and results with Fusion:
1. Sketch of base for my final project. It is so ugly.
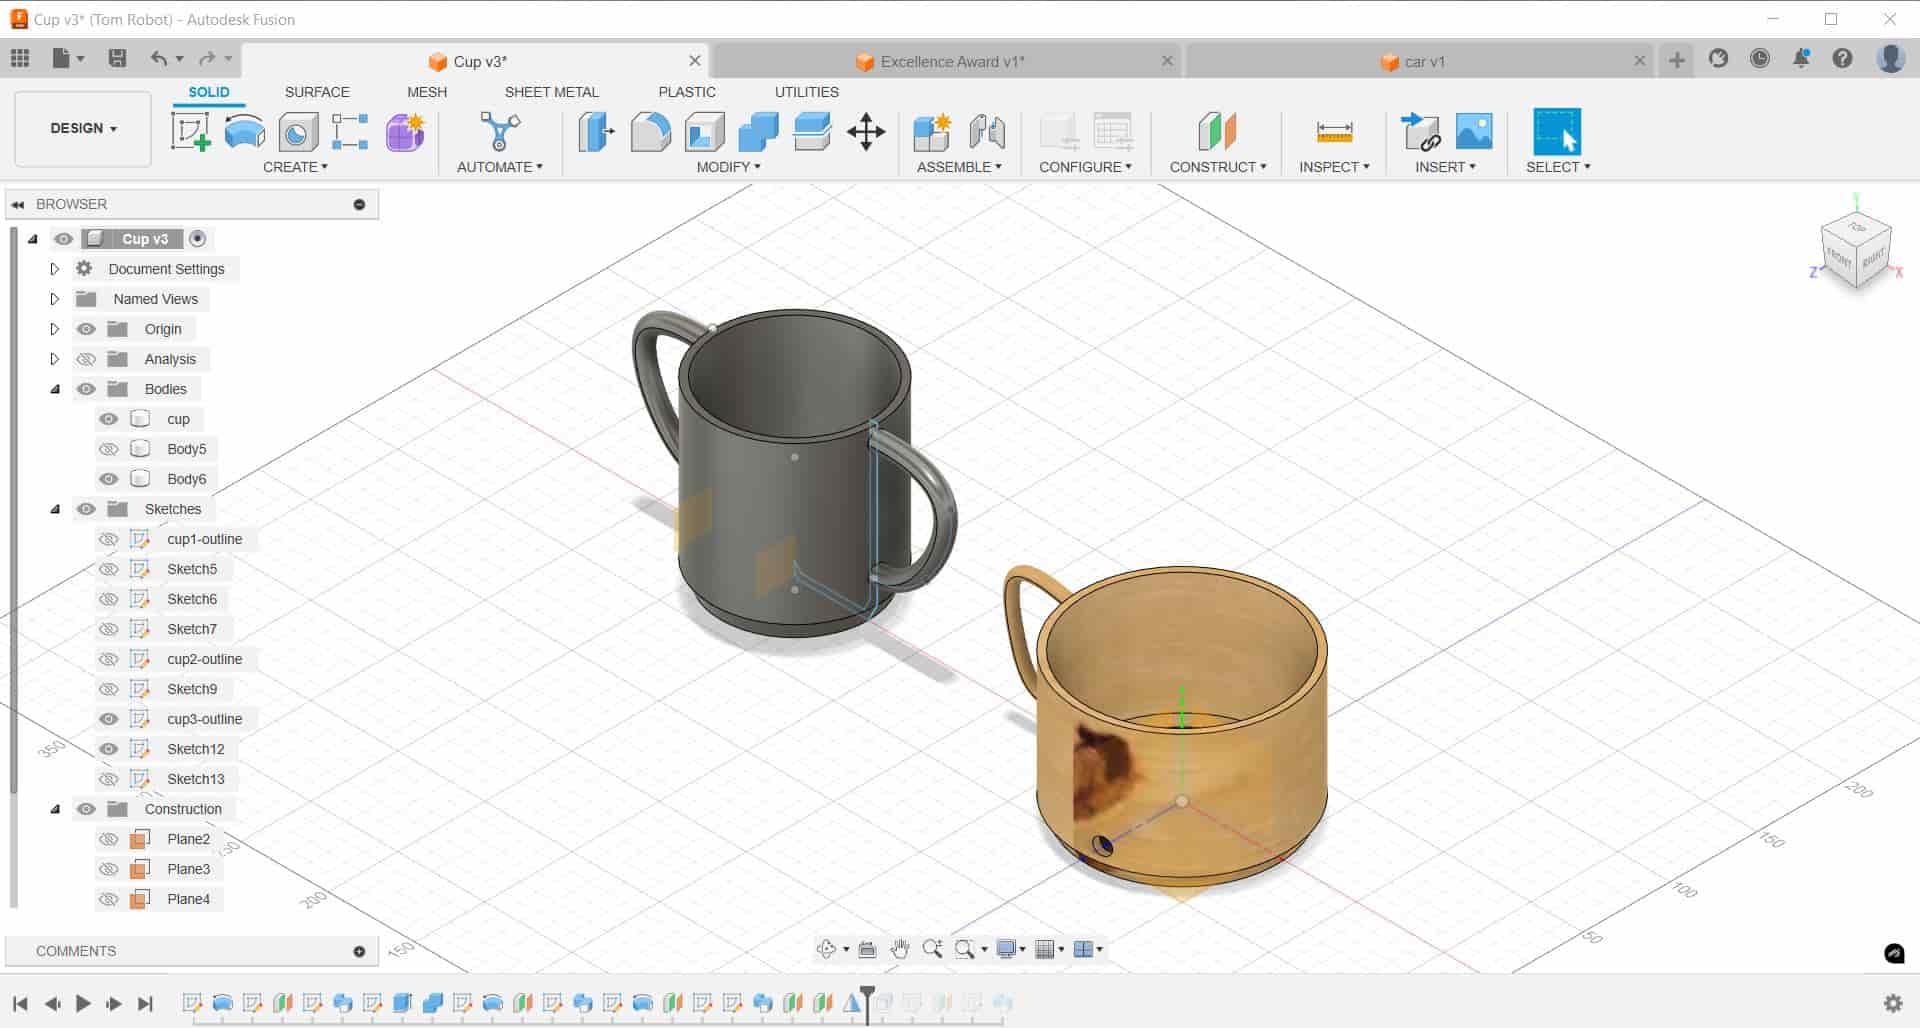
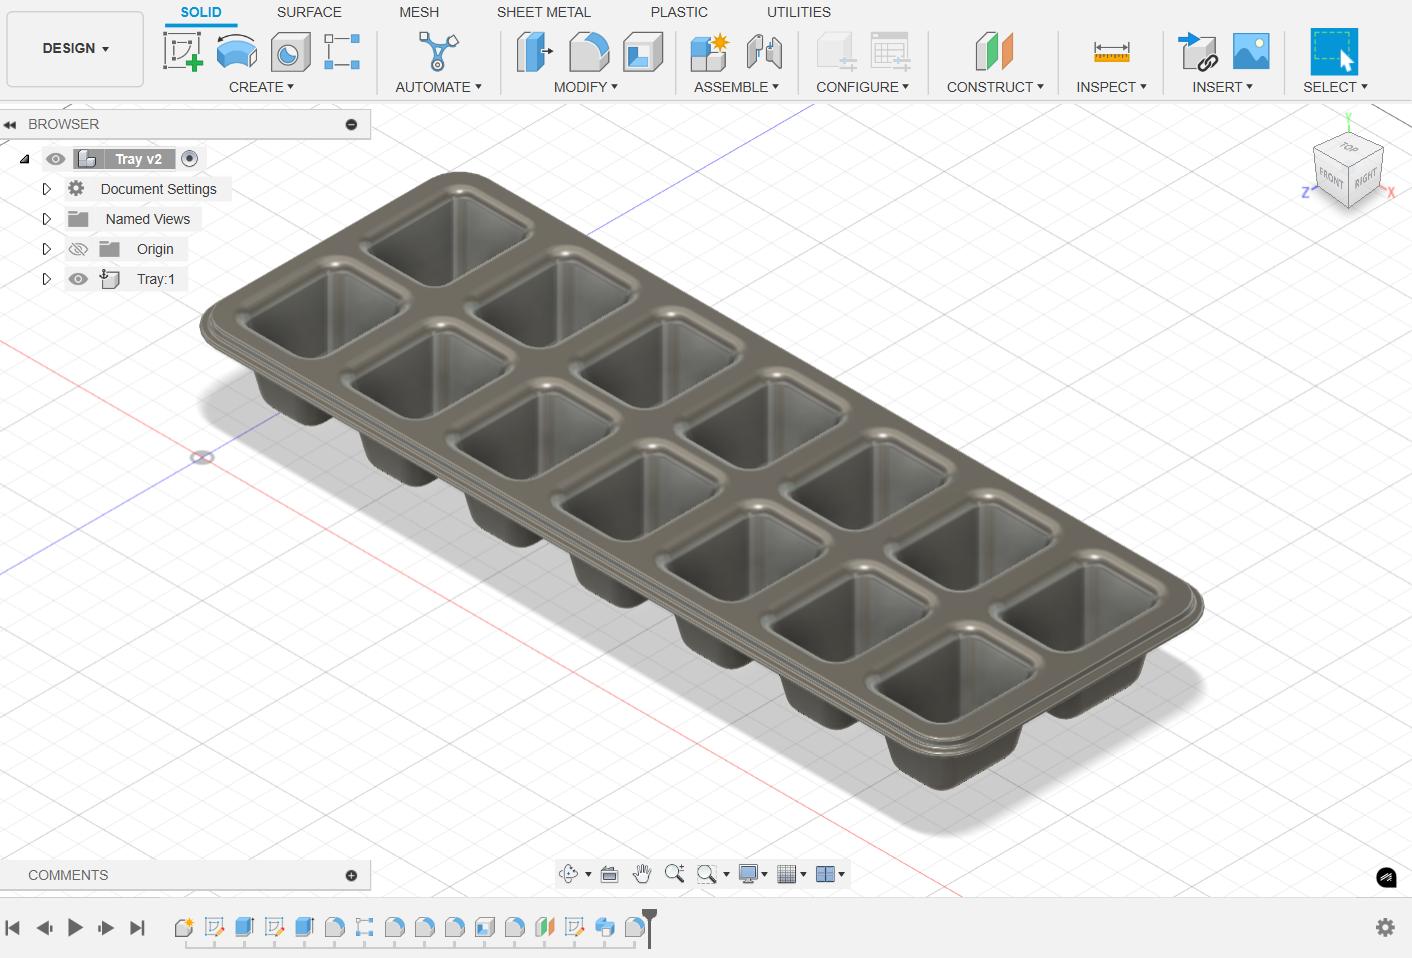
2. Cups. Instructor helped me and then I practice.
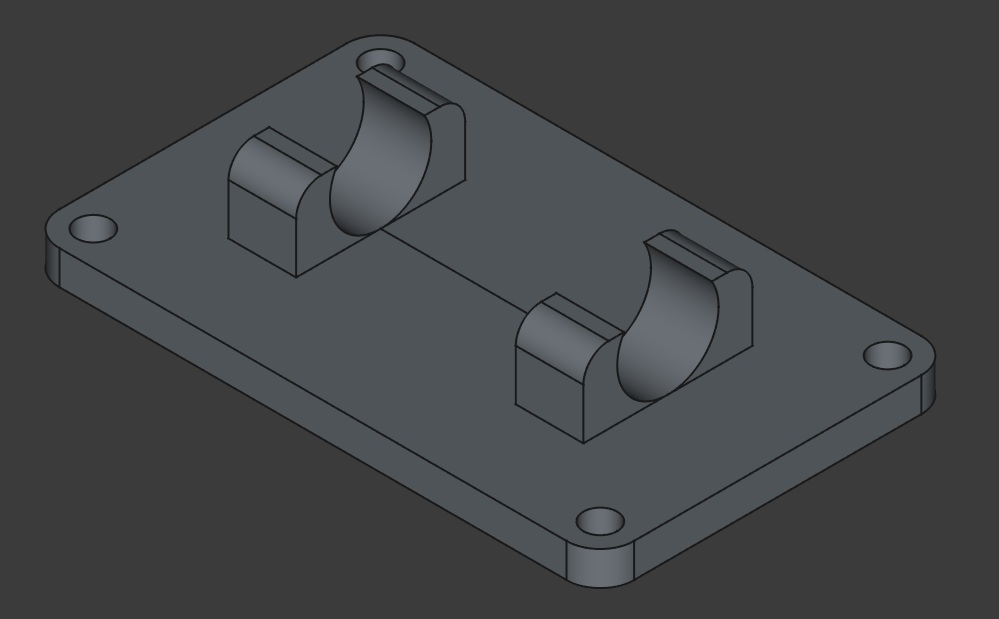
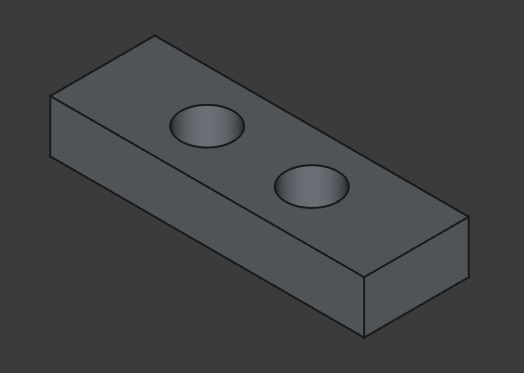
3. Plate. I did this myself. Perhaps I can import and put it on a cup like a trophy.

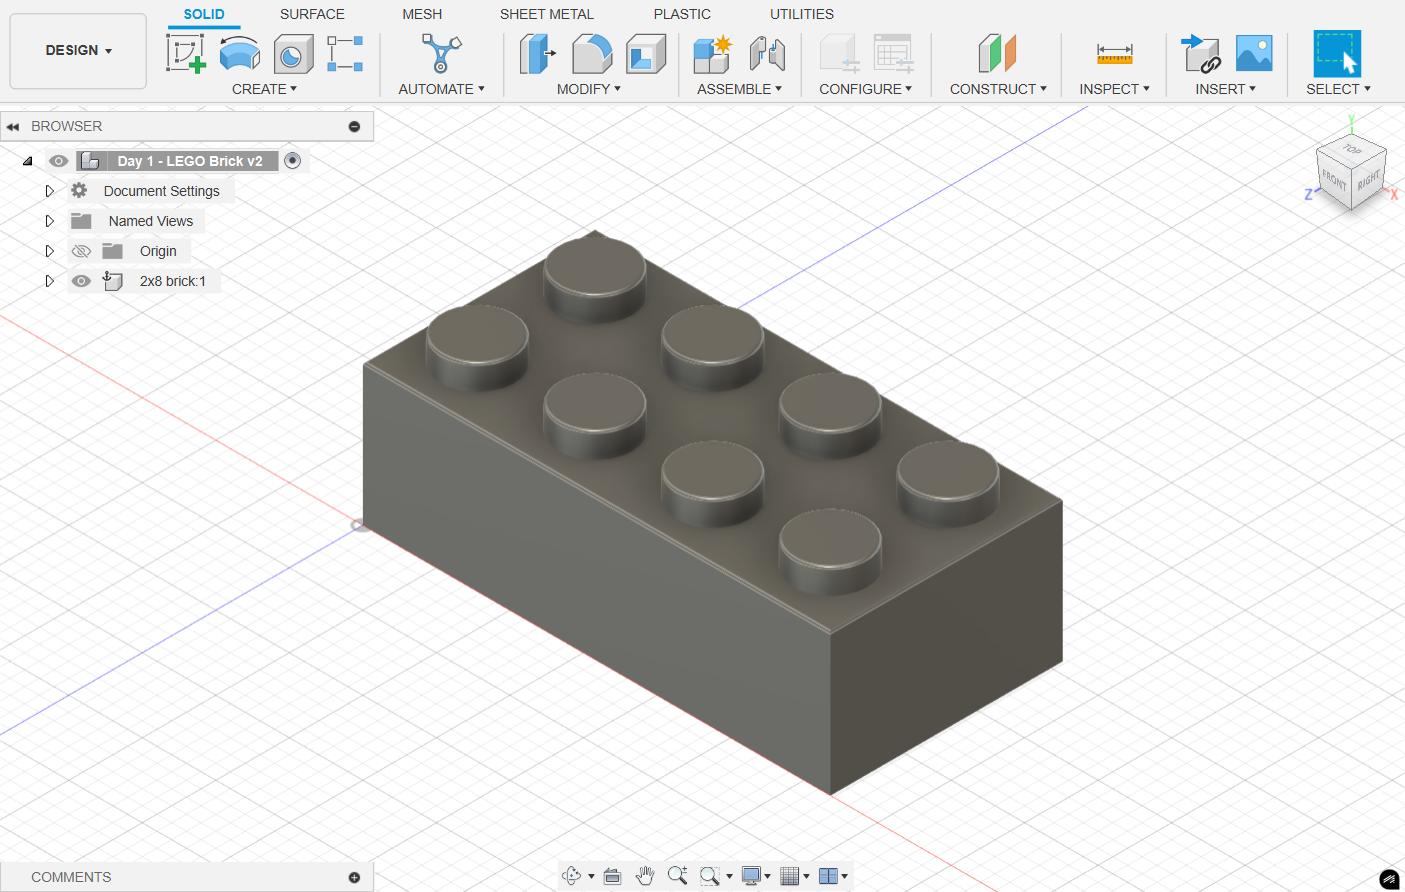
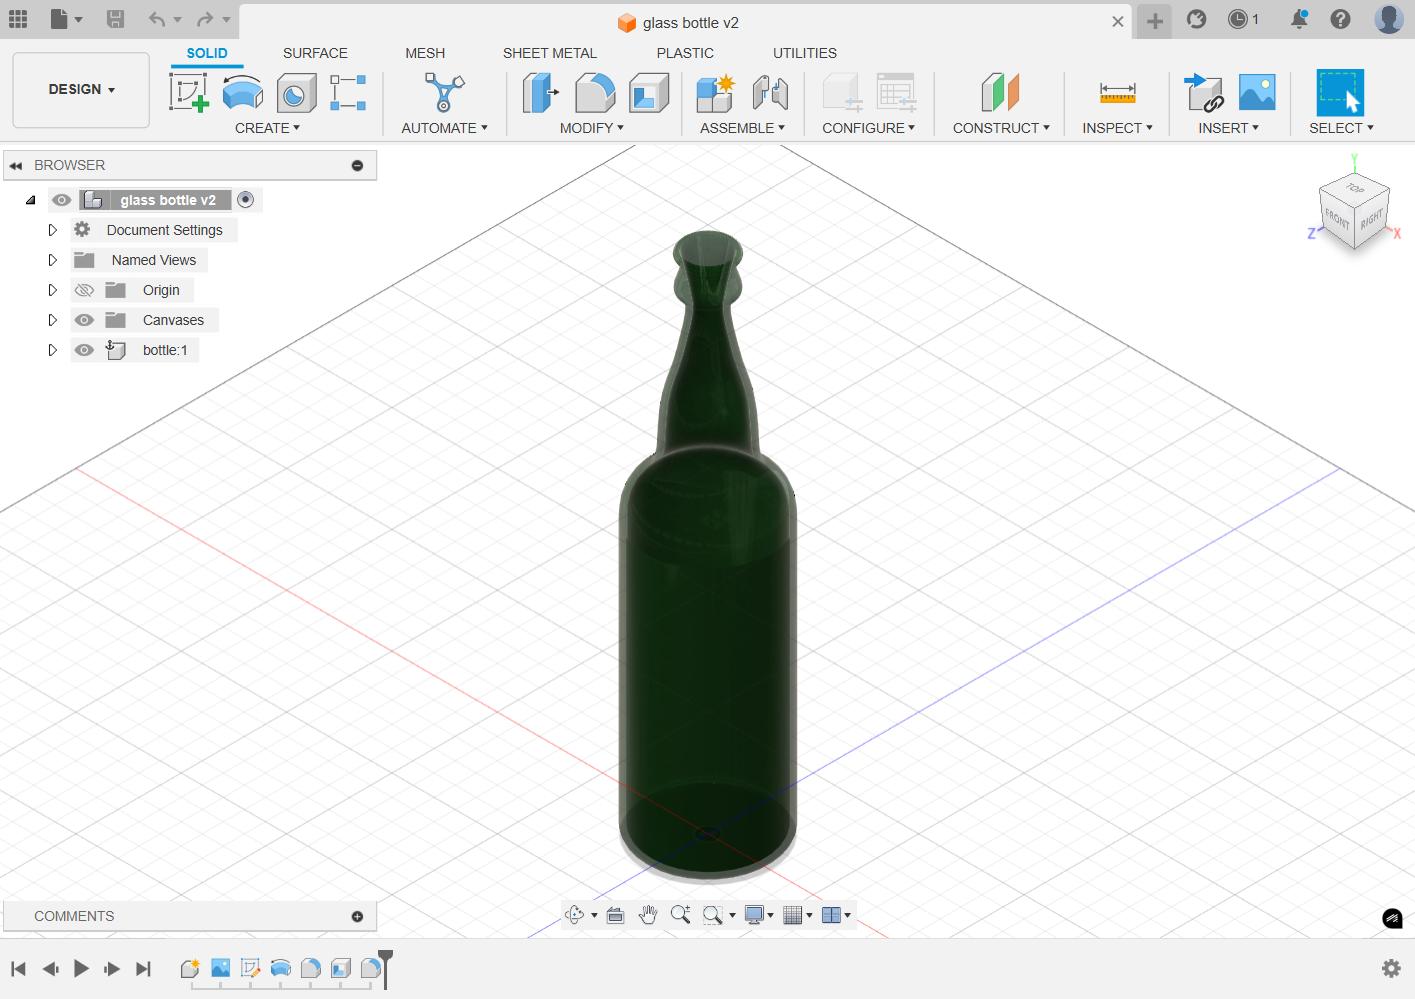
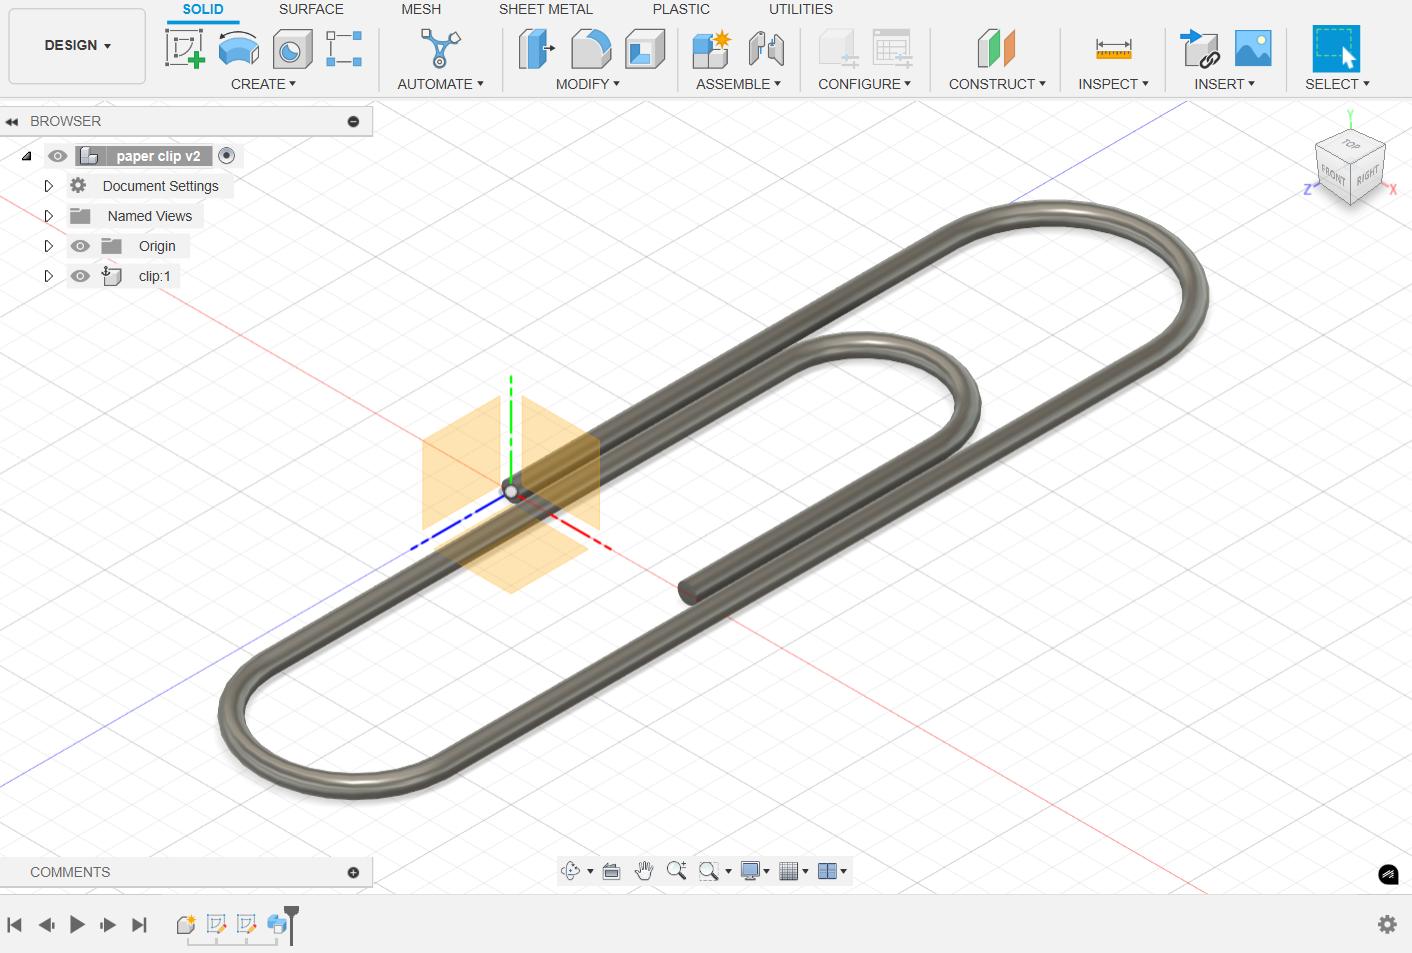
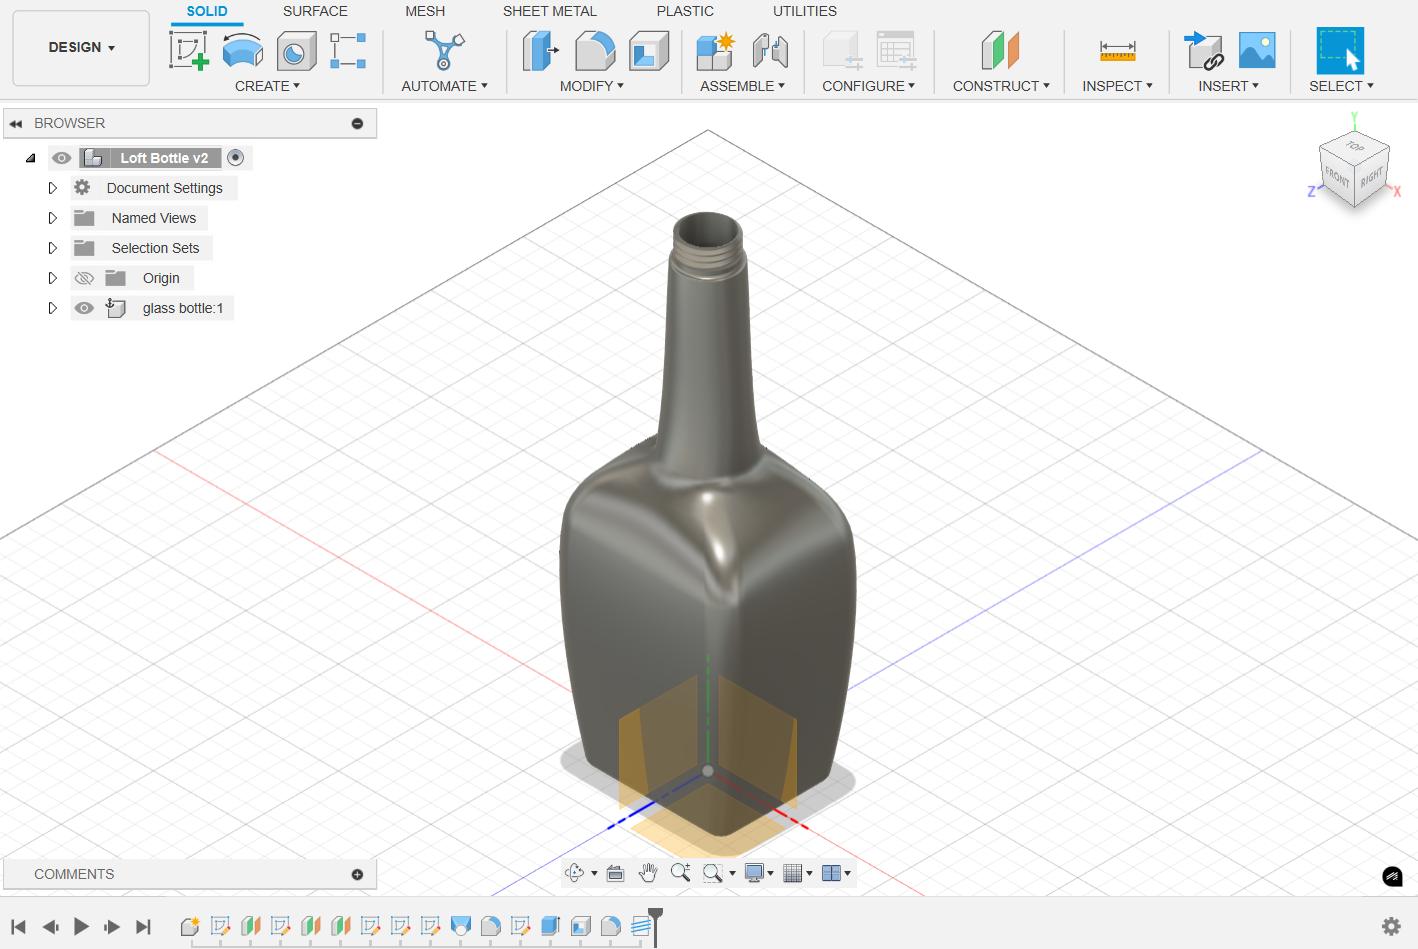
I continued to practice using FUSION 360 over the coming weeks and became much more comfortable with using the standard tools. Both following tutorials and trying to model my own ideas helped me to gain experience, confidence and love for Fusion.
Here are some of the practice designs I constructed through tutorials.
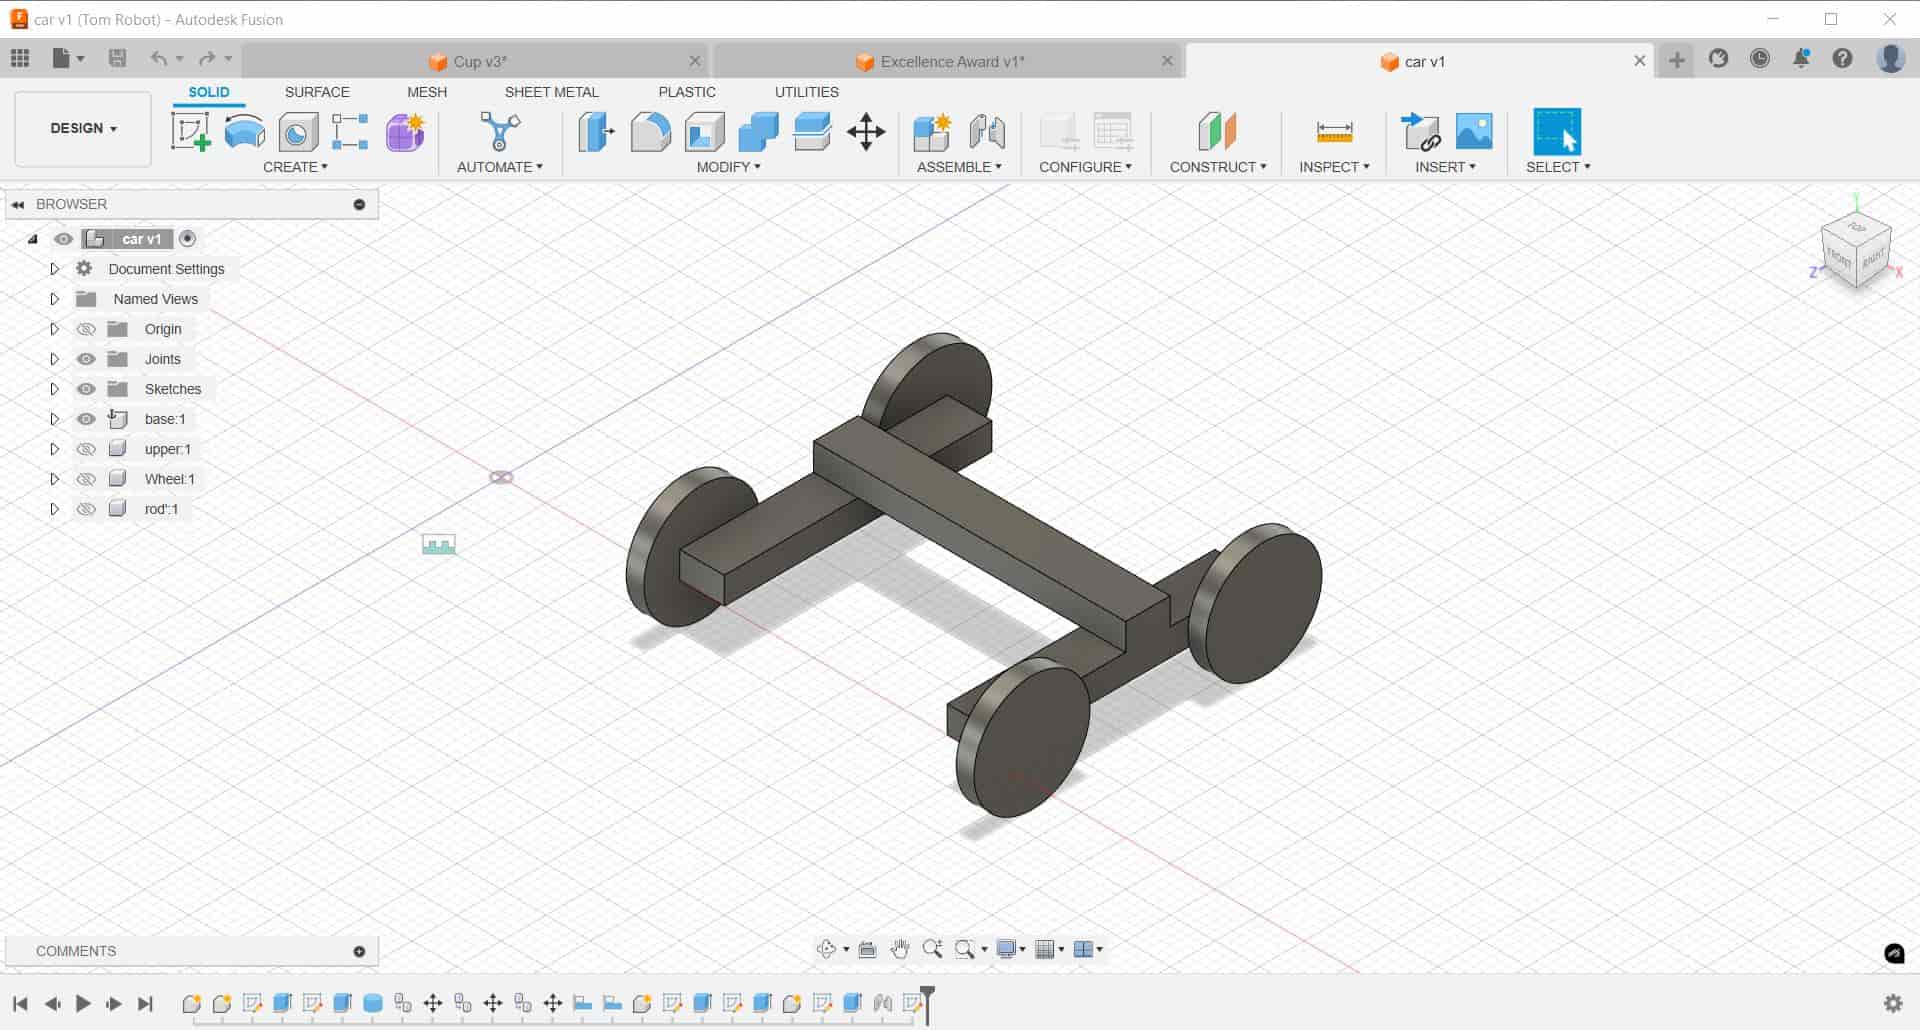
Mechanism for final project: later I made this, consider this the design for final project meeting this week's objective.
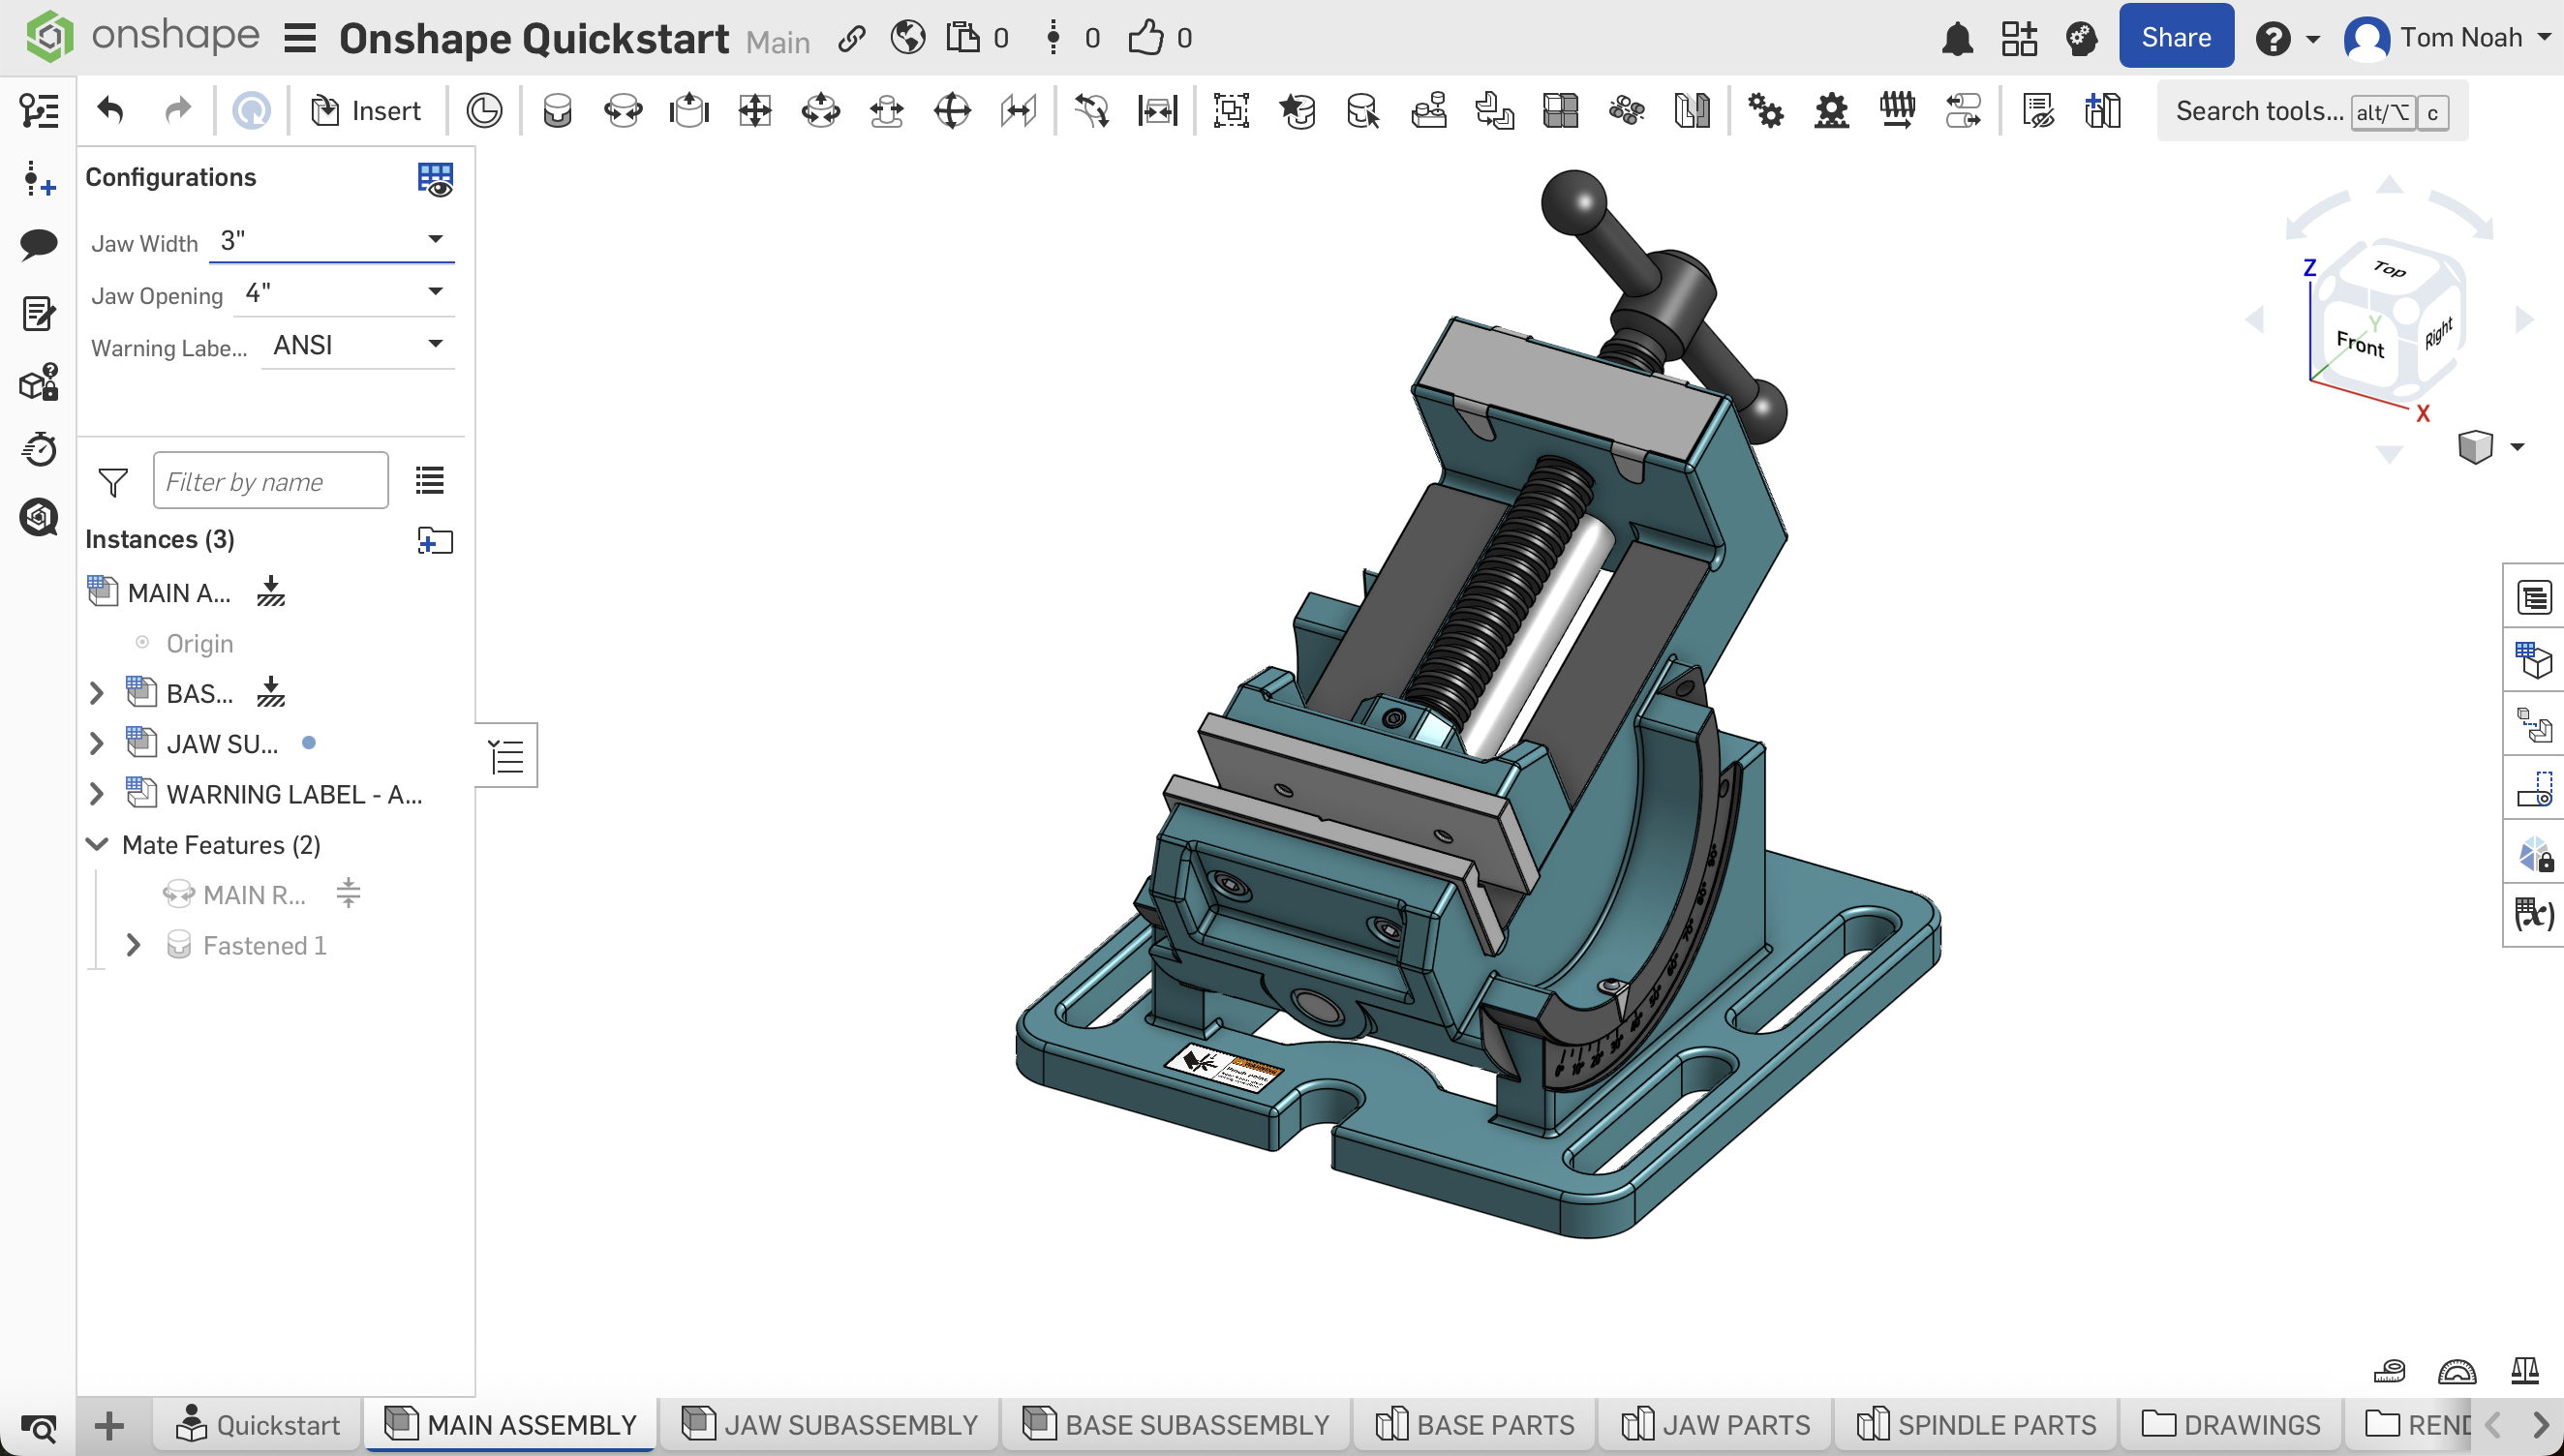
Tool #3: Onshape
Onshape is a cloud-based 3D-Modeling program. Signup and registration was quite easy when compared to Fusion. The layout and feel of this design program is a bit different but sure to have many advantages once the user is familiar with it. However it is clear that the program is powerful given the first provided example:
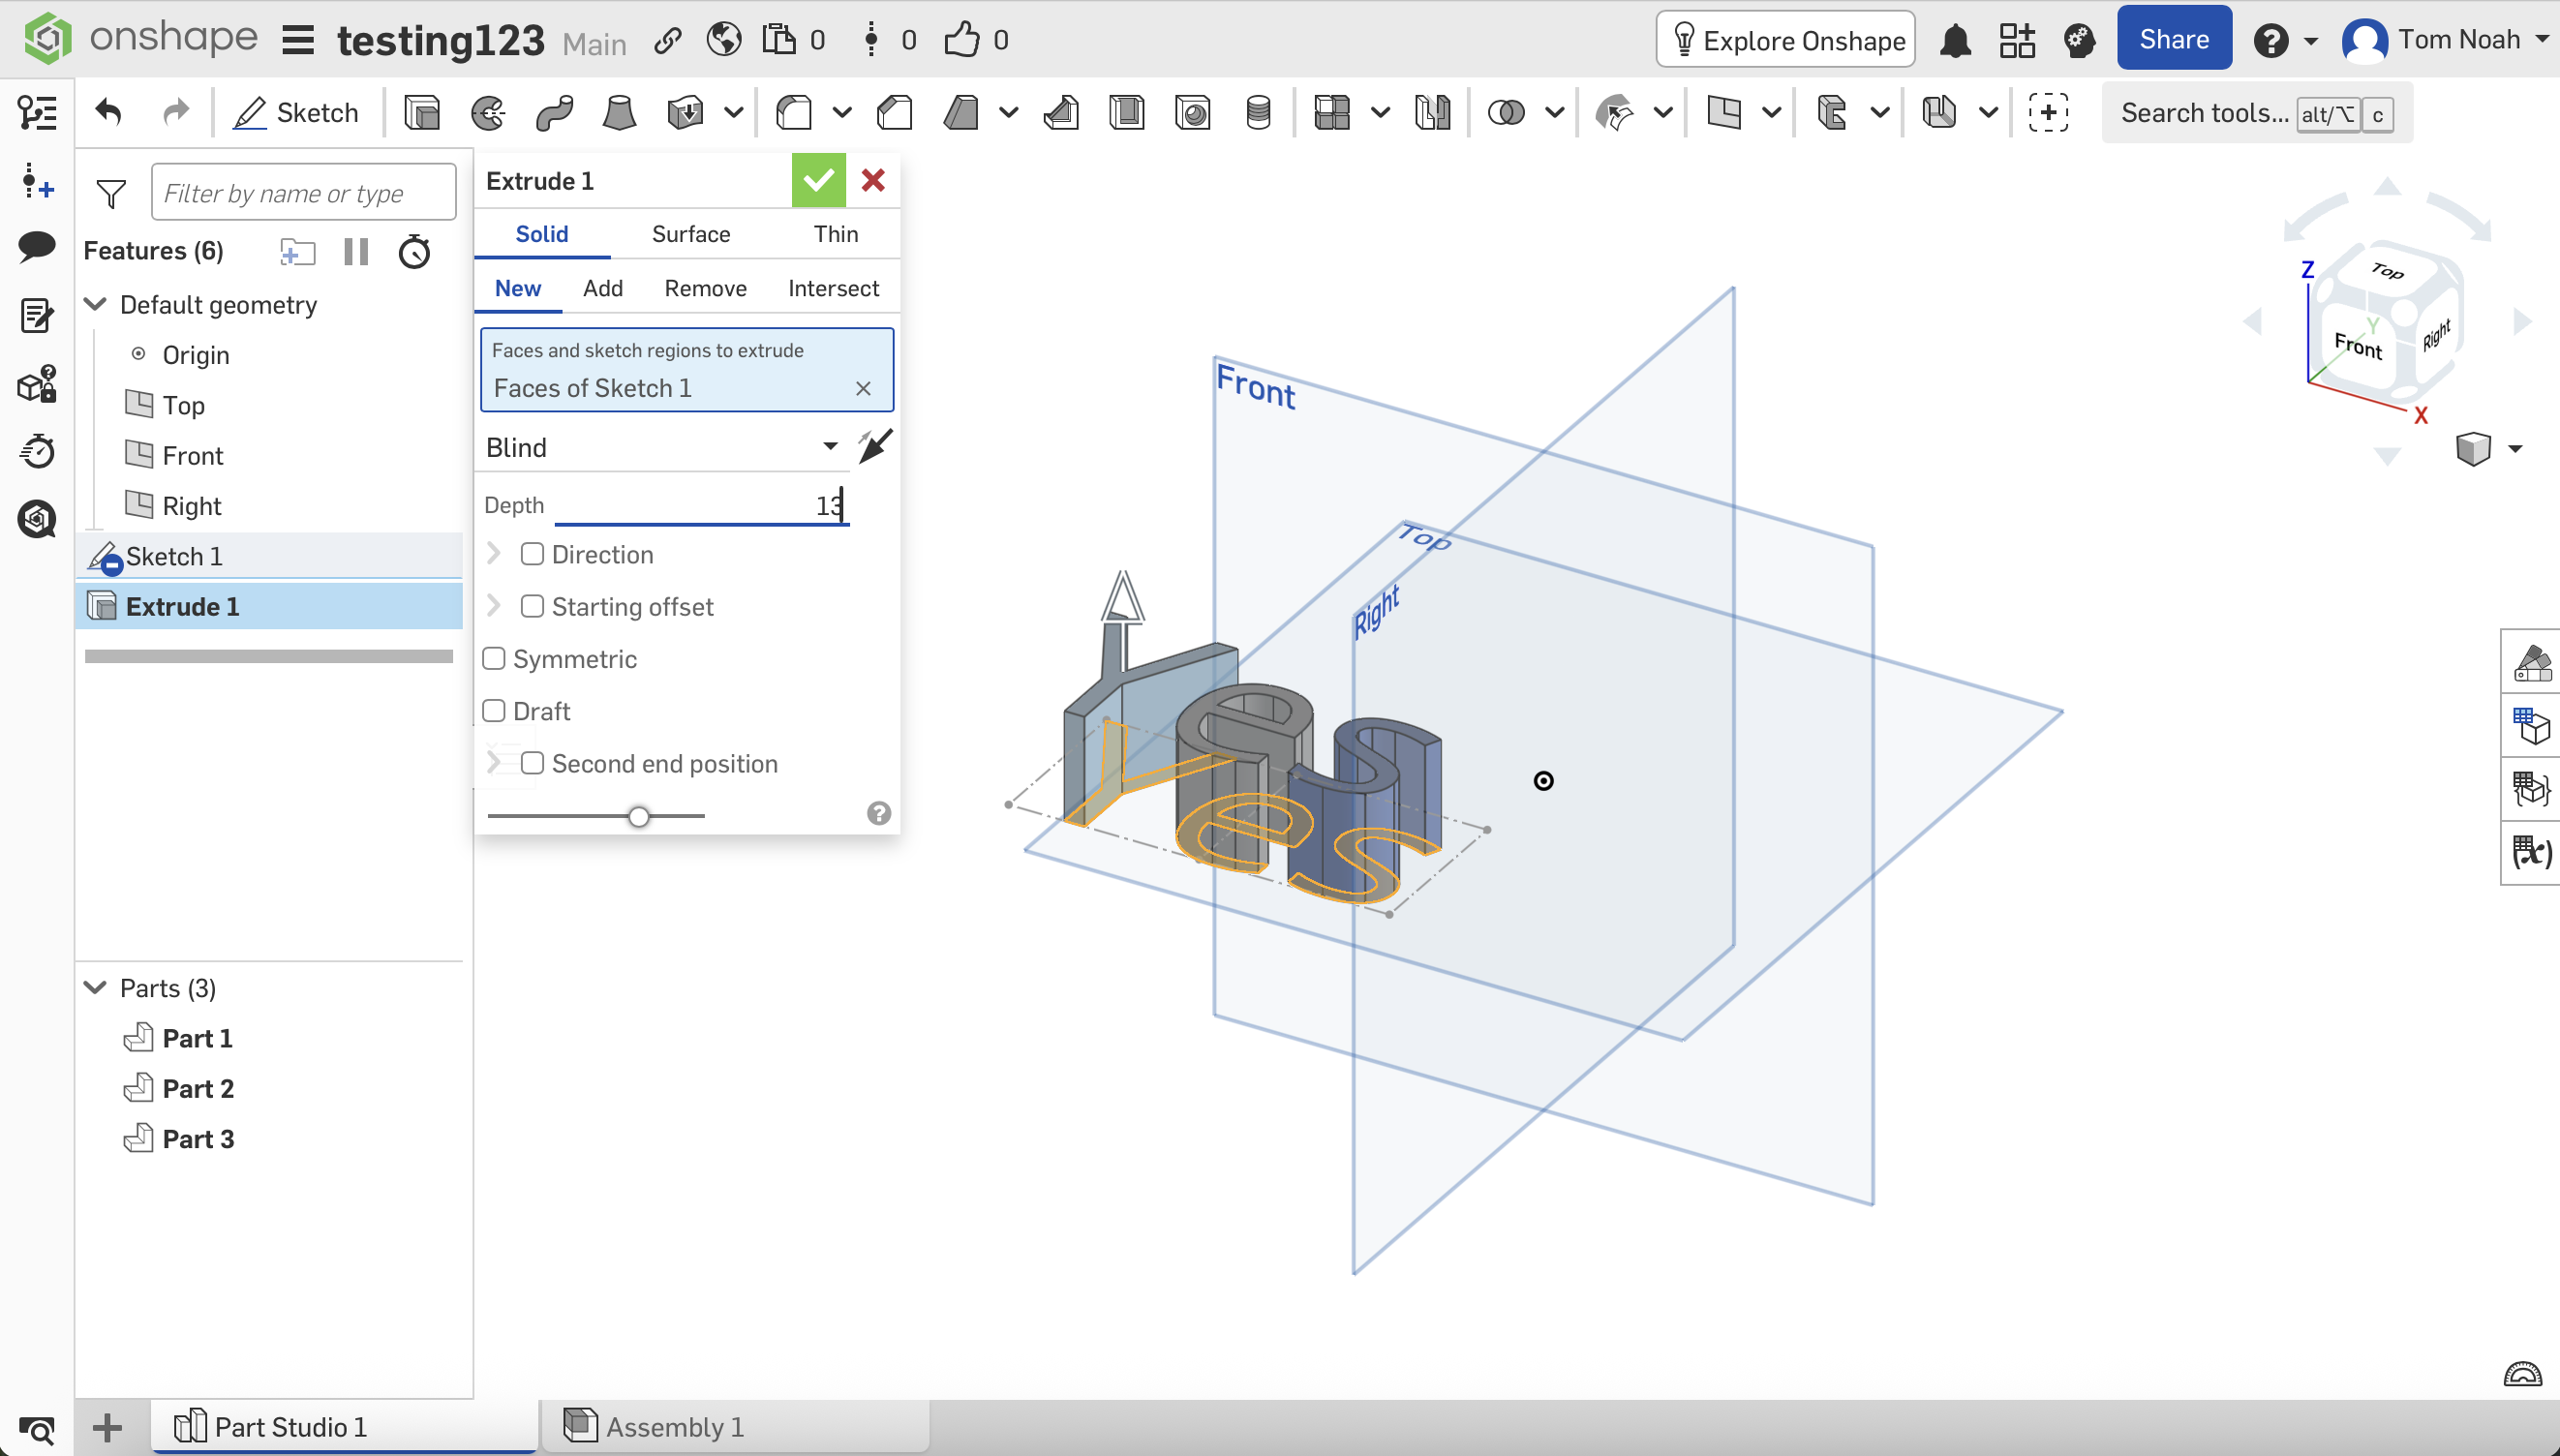
Now we'll try to make an example and familiarize ourselves with the same tools learned in Fusion.
First we found how to create a sketch and extrude:
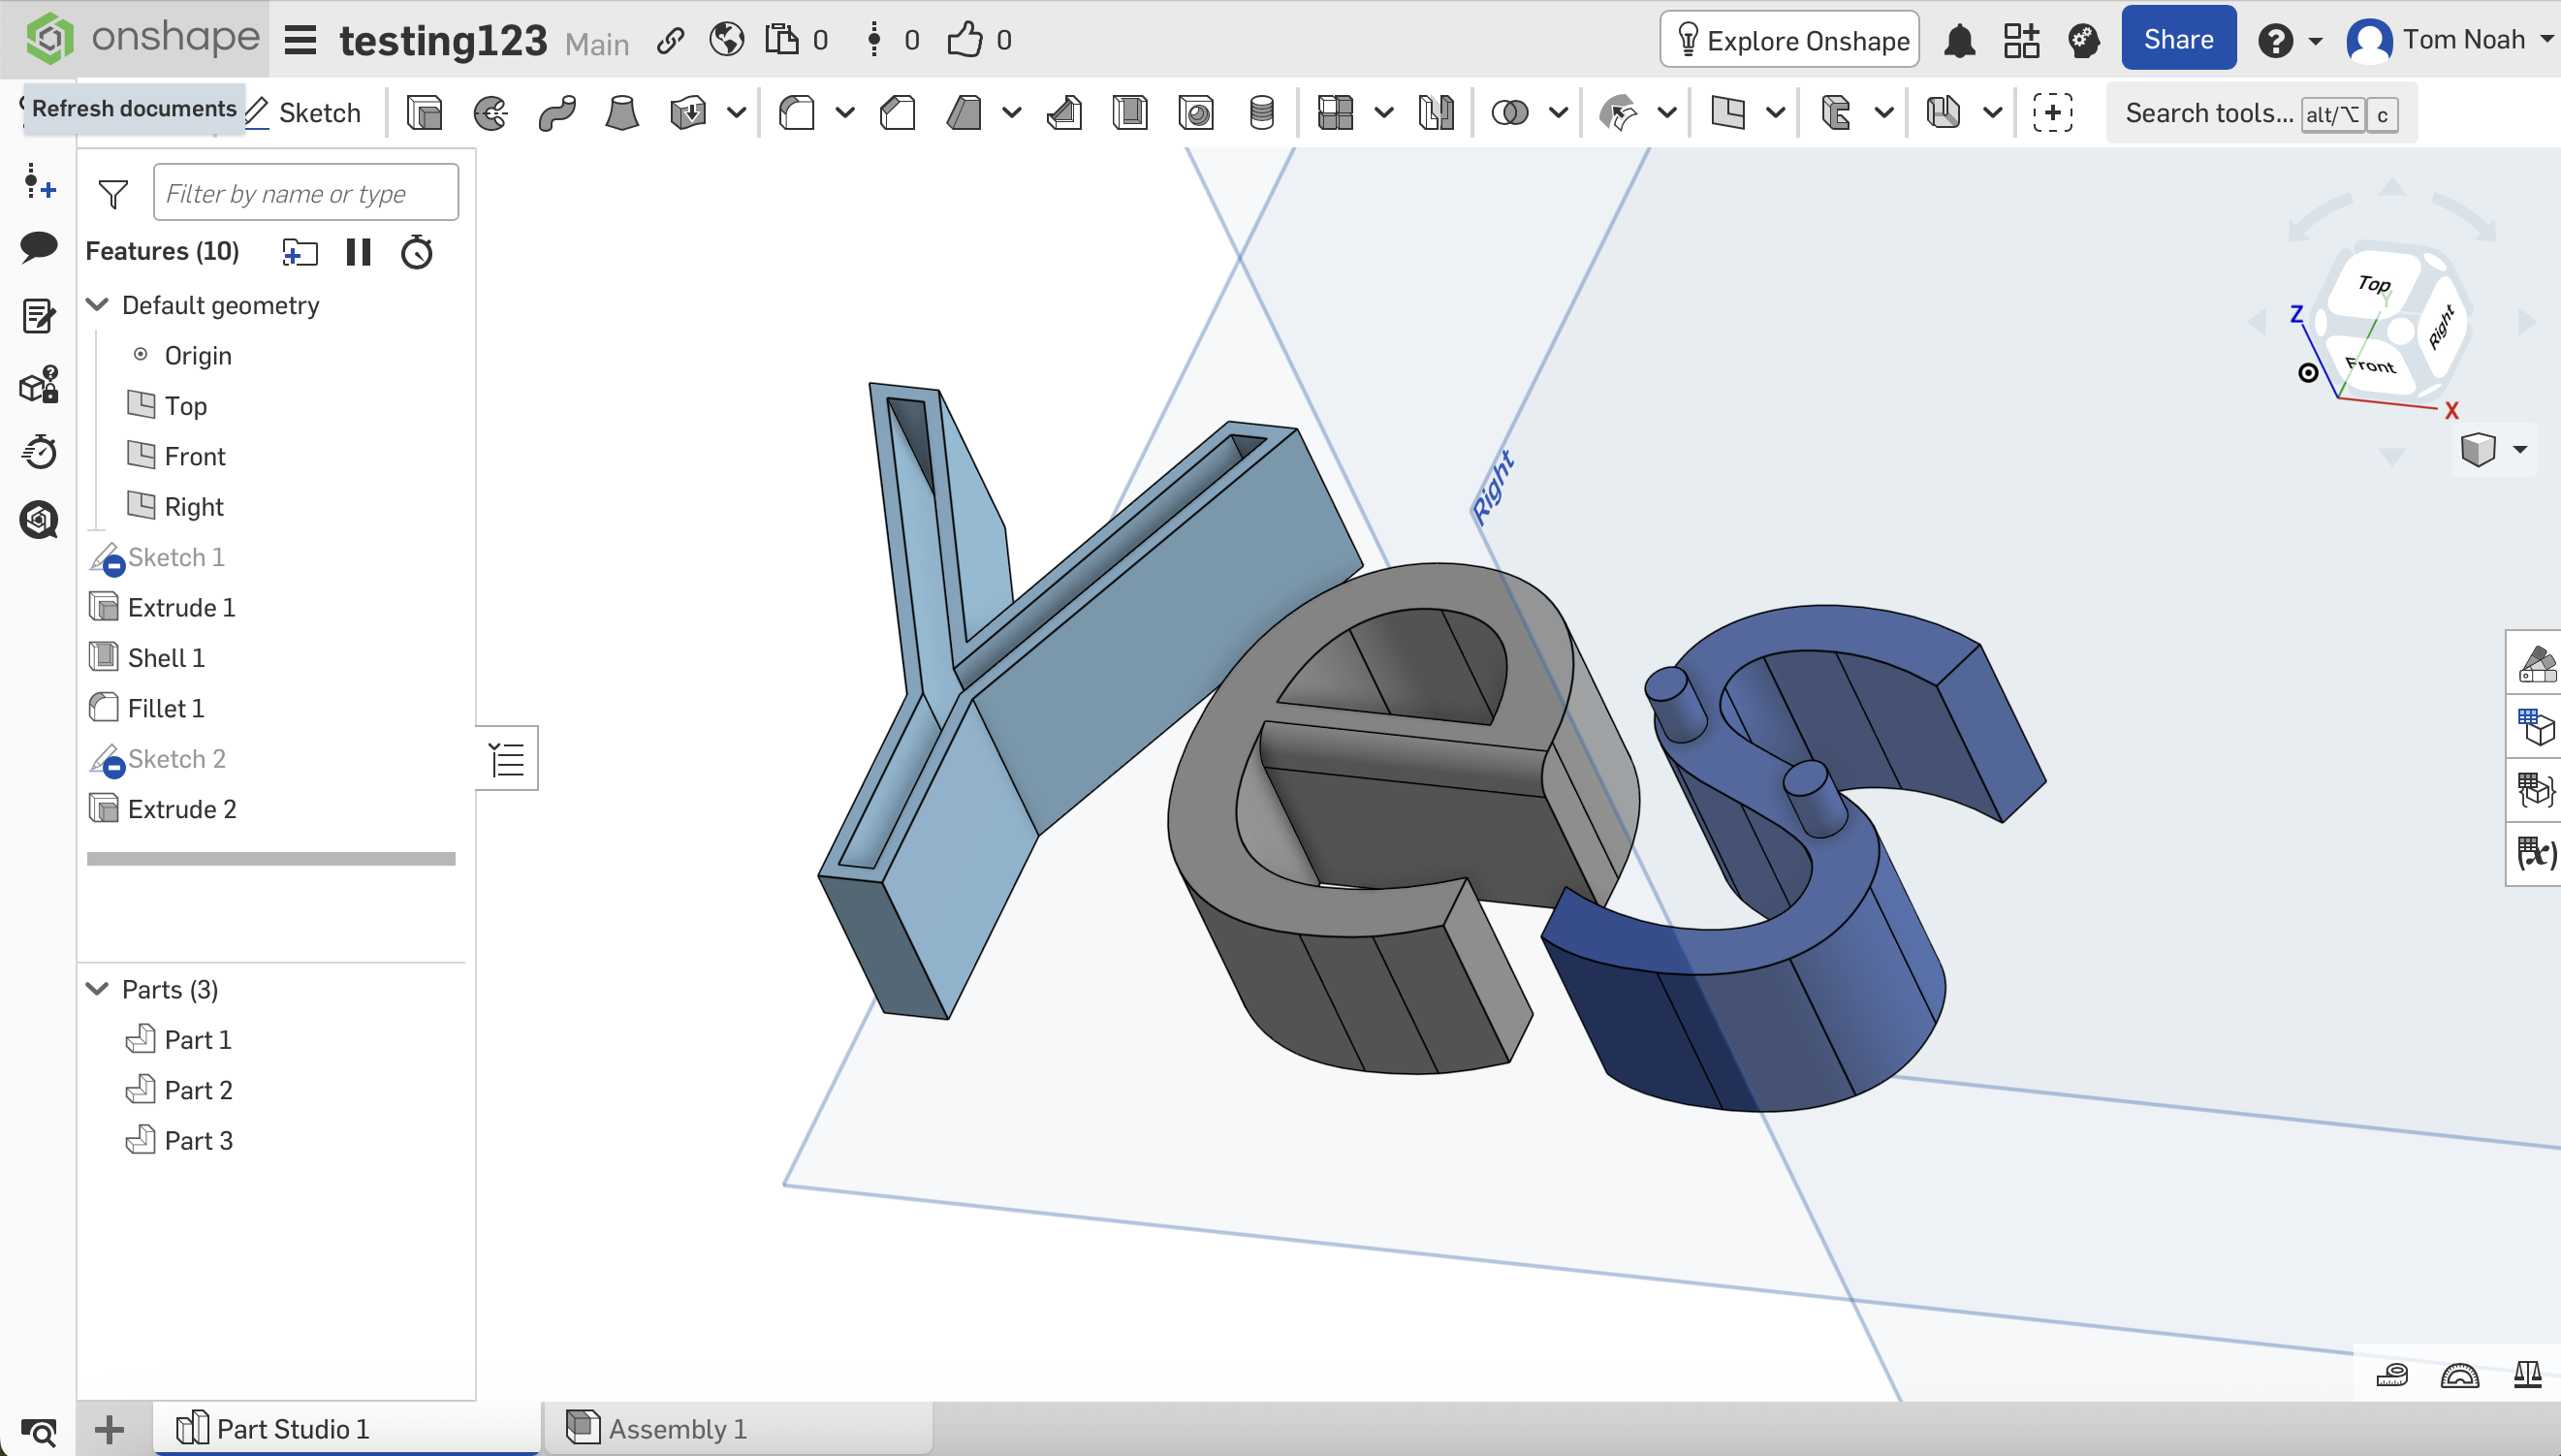
Next we experimented with features like "shell" and "fillet", then created a sketch on an offset plane and extruded something there!
The last step we took was to figure out how to export for our 3D-printer:
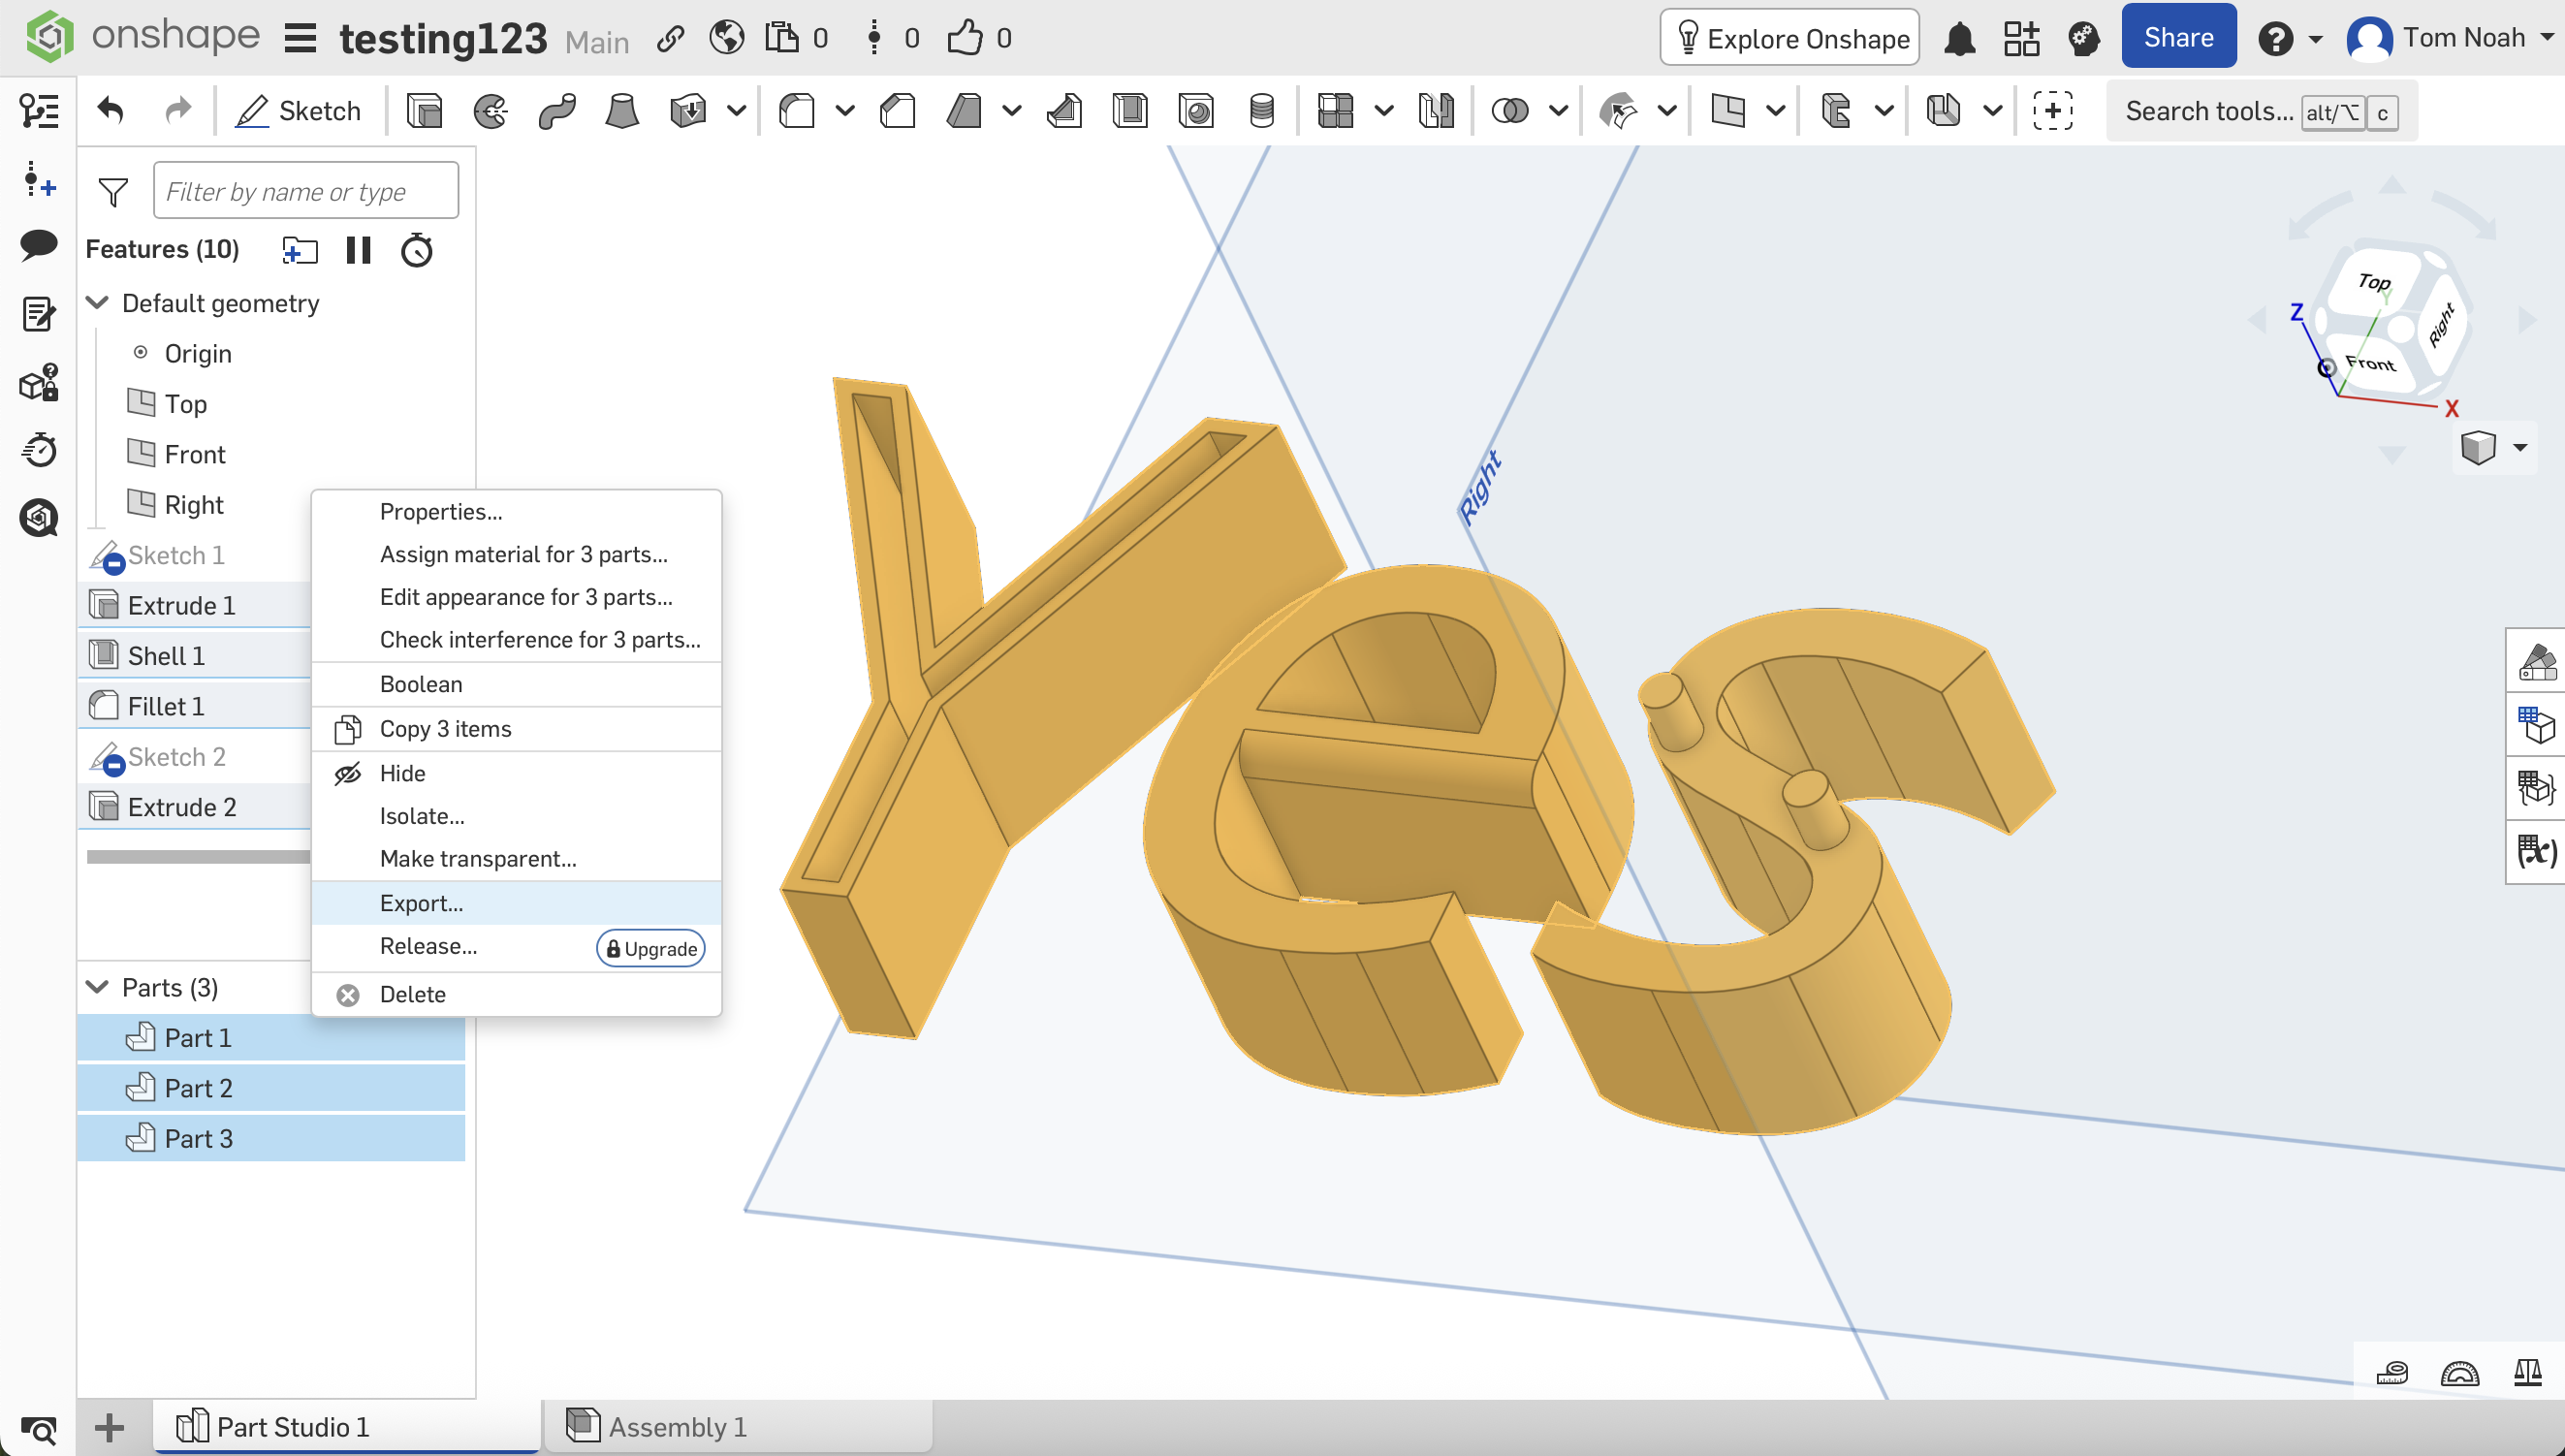
Overall, OnShape has some excellent attributes such as its ease of use and intuitive layout. For the average small project it should definitely suffice.
3D Design Conclusion:
There are many 3D design softwares. Although I initially preferred FreeCAD for its relative simplicity, I later came to appreciate Fusion 360 and regard it now as my favorite. It is powerful, and with many capabilities. Special thanks to Akash for his assistance to master the basics. However I'm also intrigued by Onshape, as intial interaction was interesting, and its had good reviews.
How to Compress Images & Video
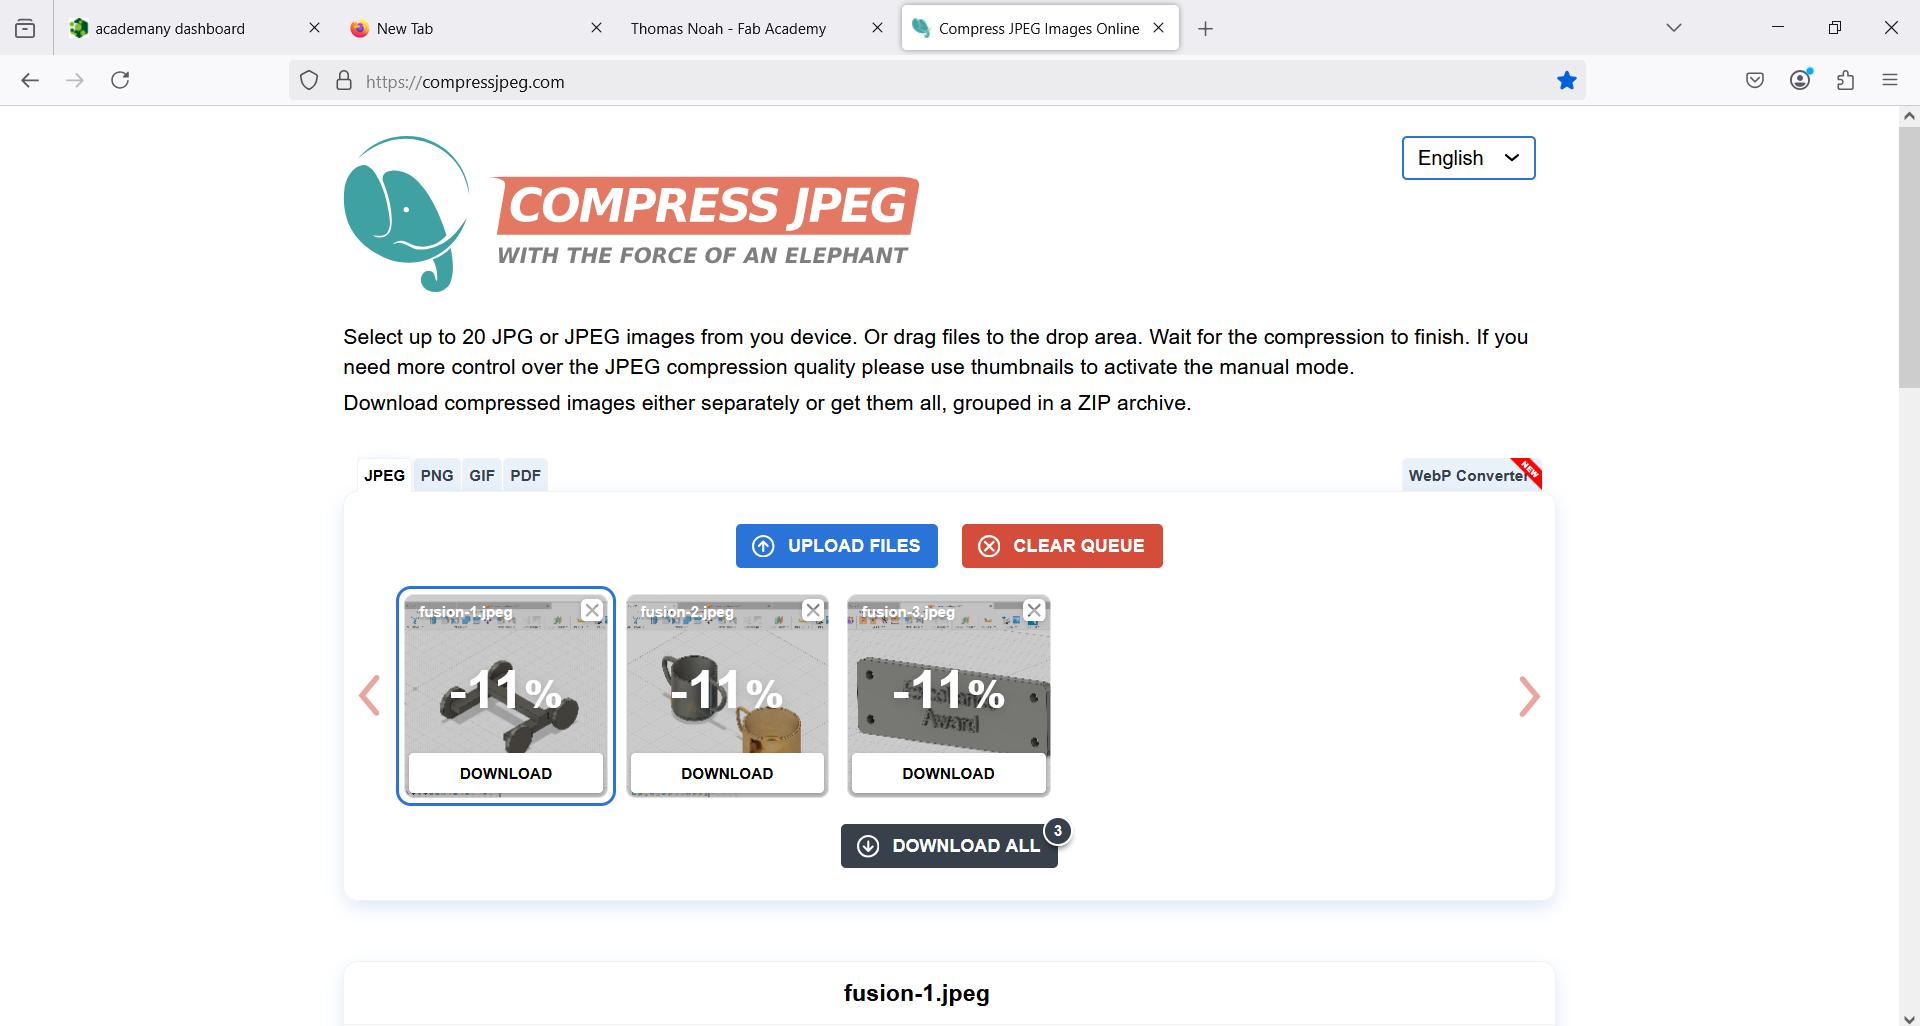
Neil informs that our individual academy pages should not take up so much space. As we are uploading more images to explain our work, we should be sure to compress them. Teacher Saheen recommended a nice site: compressjpeg.com. There is also compresspng.com. So I used those. Quick and easy.
Here are the steps: First, upload through drag and drop, and it will automatically compress (but often not by much)
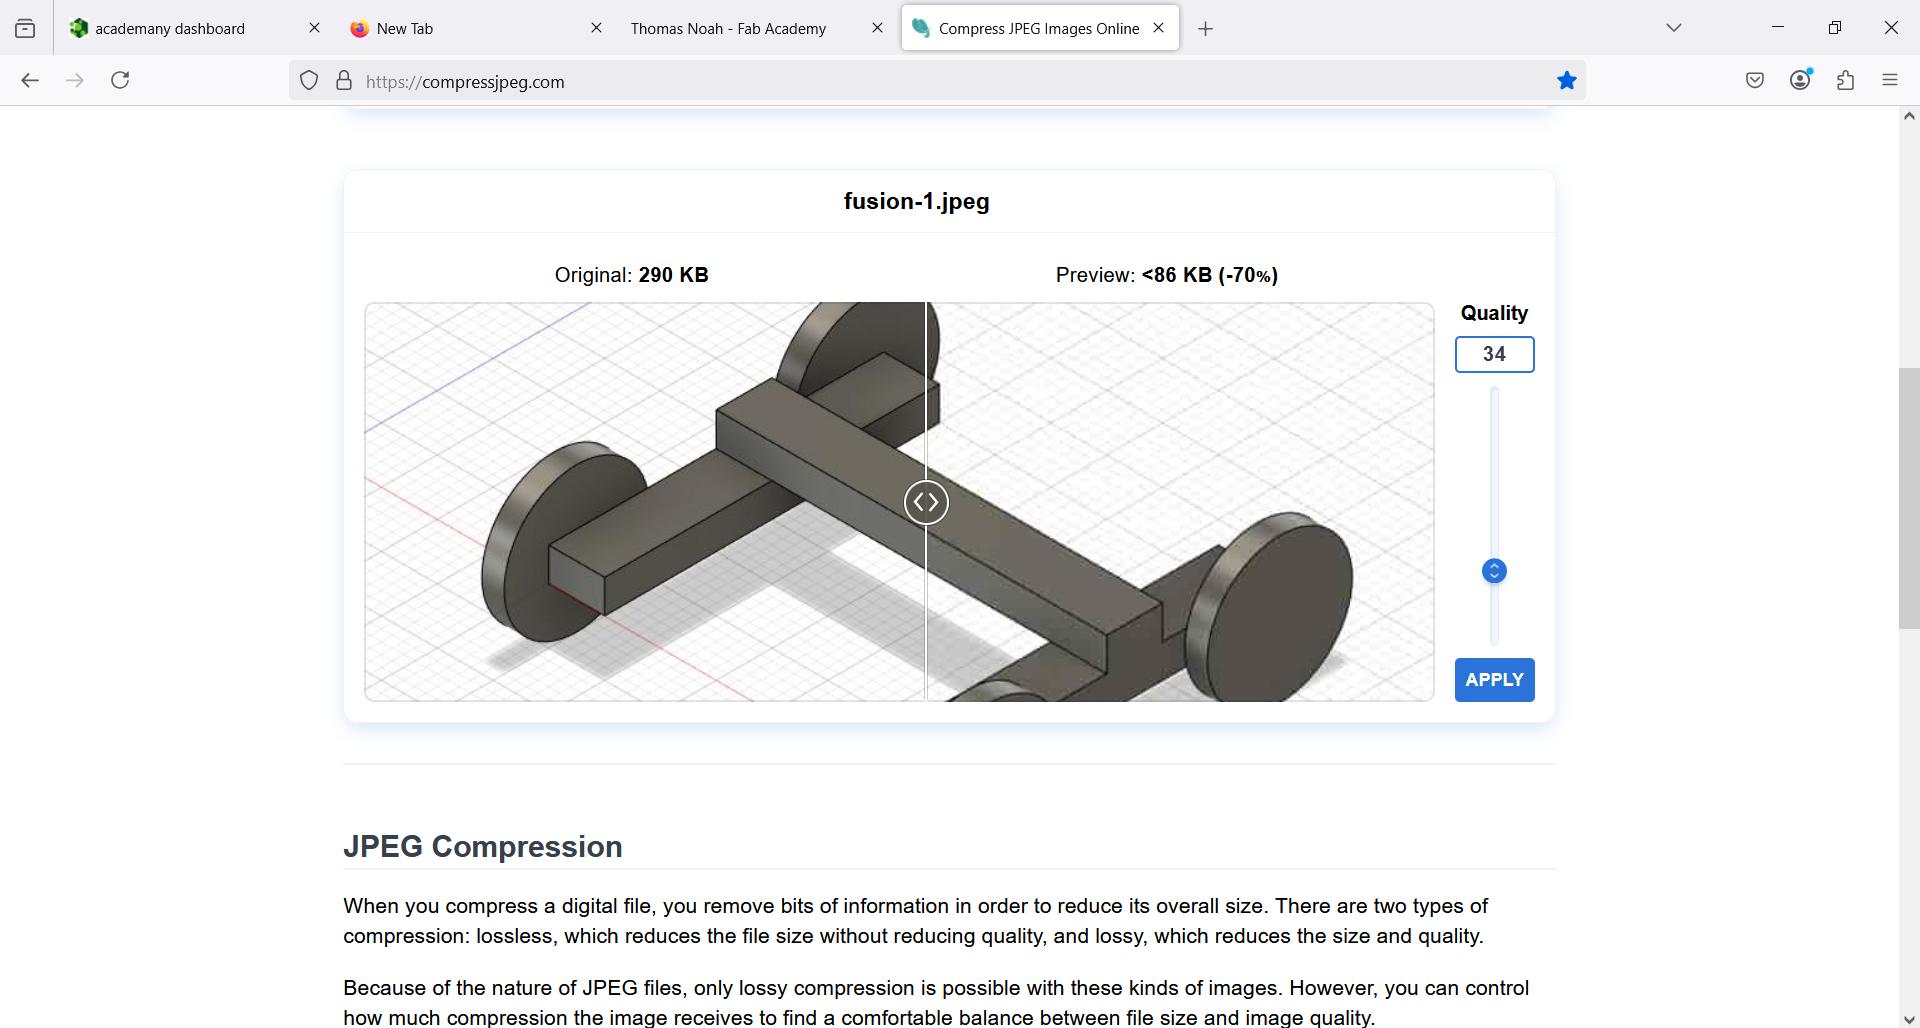
If we want we can compress each picture to the desired level:
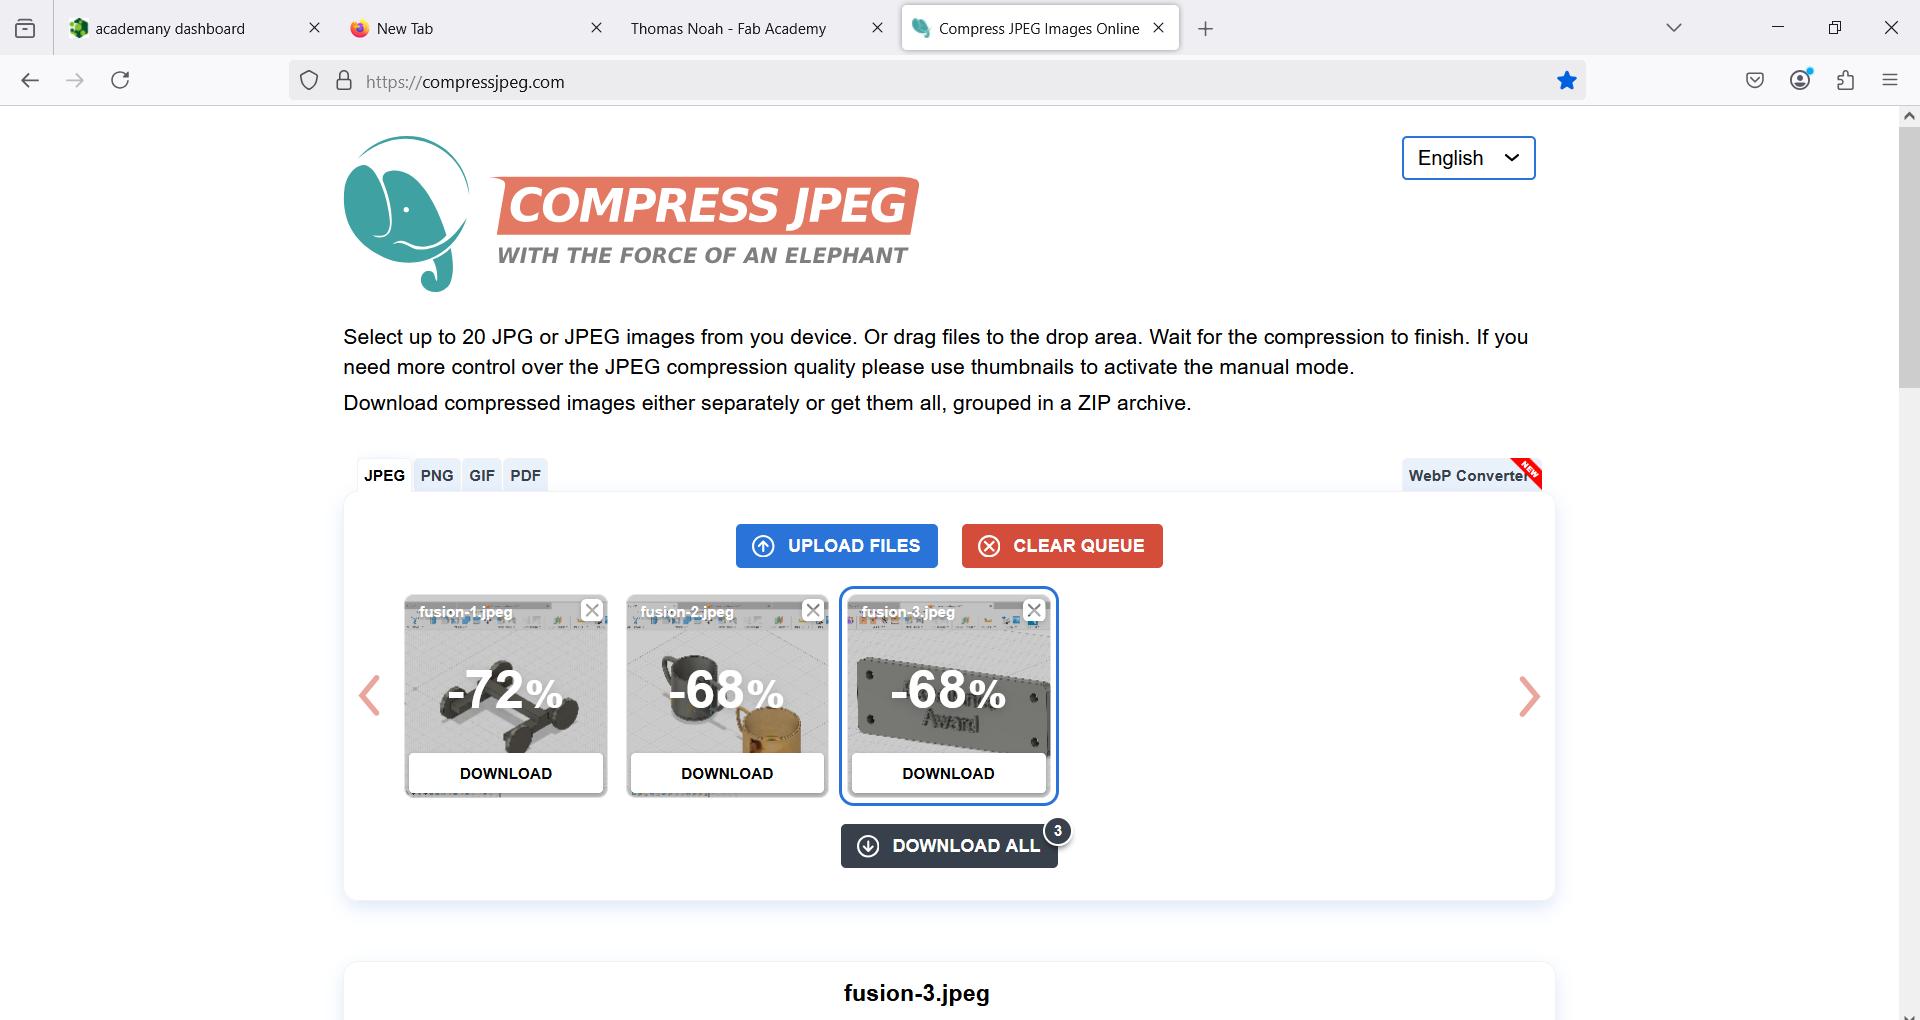
Finally then we may download them all!
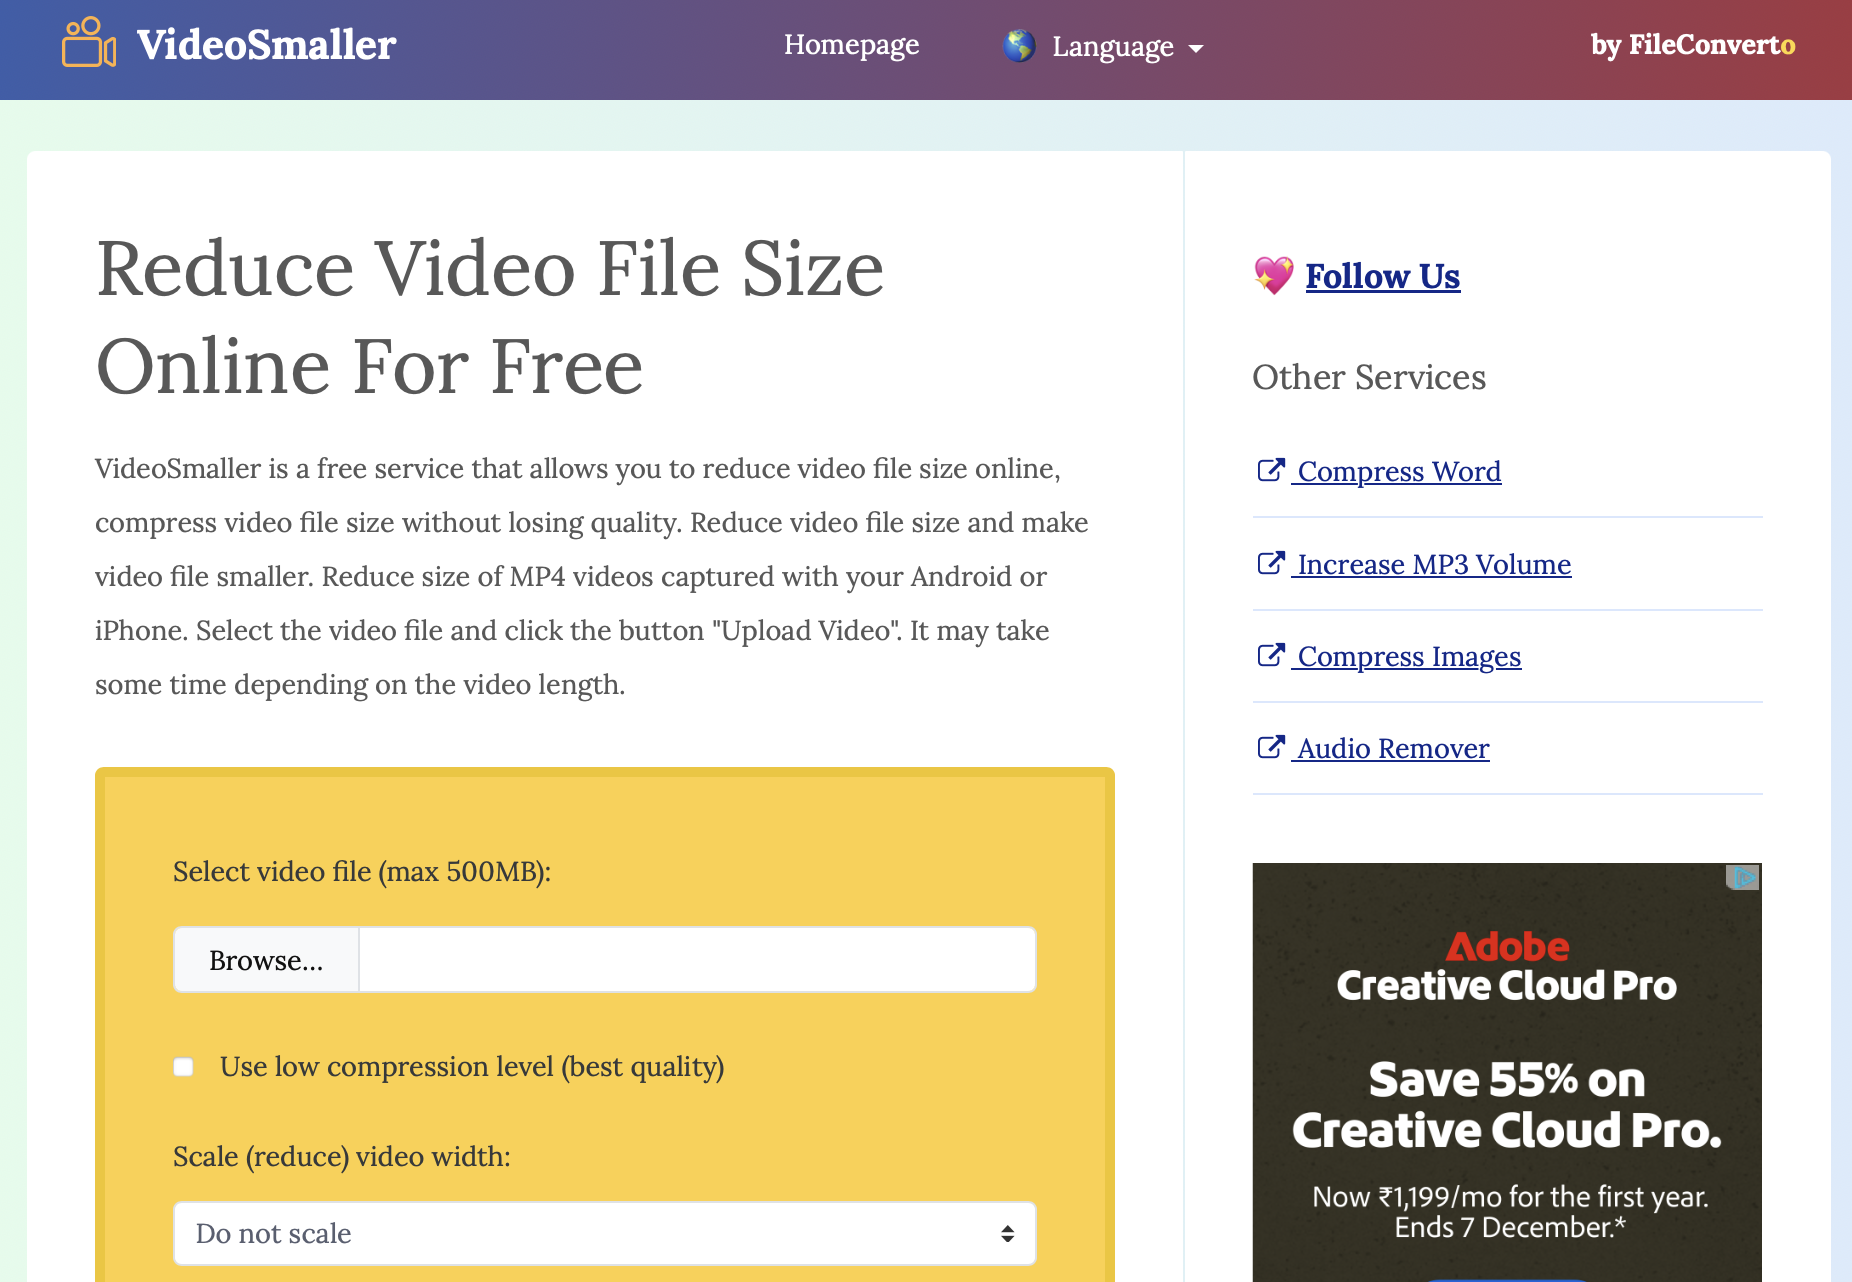
For compressing video, Ashish recommended a program called Handbrake, and I also used an online service videosmaller.com. It was very easy to use and recommend it:
Design files
2D:
PhotoPea: Social Media Profile in PhotoPea
Inkscape: Example in Inkscape
GIMP: Business Card in GIMP
3D:
Fusion 360: Award Plate in Fusion 360
Onshape: Example in Onshape