Computer Aided Design
Objectives for Week 2
- Model a possible Final project (raster, vector, @2D,3D).
- Render, animate and simulate the model.
- Compress the images and videos.
- Upload the compressed files along with a description on the class page.
Raster and Vector Images
Raster images are made up of pixels and typically use graphic formats such as GIF, JPEG, PNG, and PCX. They are not highly scalable but excel in photo editing. Additionally, raster files can be easily converted into various formats.
Vector images are created using lines, curves, and fills, and they support formats like SVG, AI, PDF, and DXF. They can be scaled to any size without losing quality, making them ideal for drawings, illustrations, and logos. However, vector files cannot be easily modified.
Learned from byjus.

Image Editors
1. GIMP
GIMP is a free, open-source raster graphics editor for photo editing, image composition, and design. It offers tools like layers, masks, brushes, and filters, supporting formats like JPEG, PNG, TIFF, and PSD.
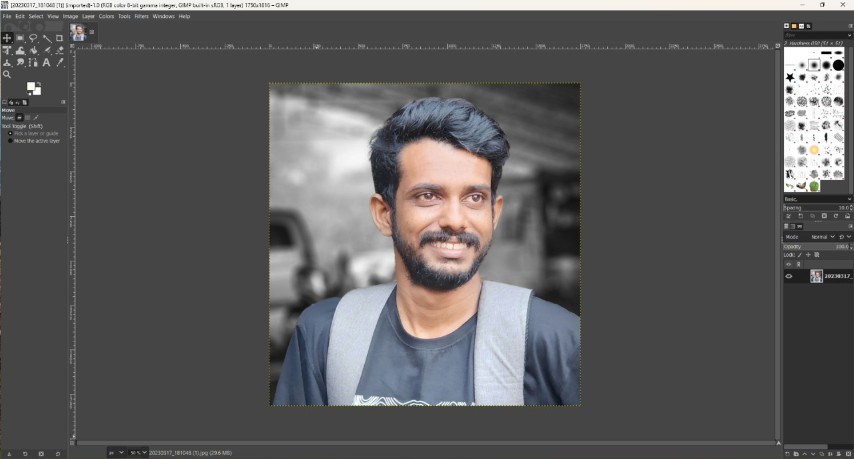
I used GIMP to remove the background from my image and add a new one. The following steps I took for it:
- Initially I imported my image.
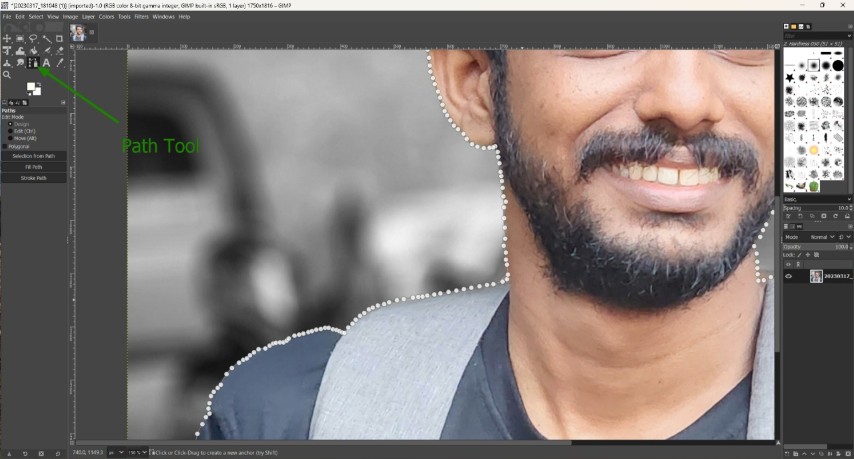
- I used the Path Tool to outline the edges of my image, then applied the "Invert" option to reverse the selection.
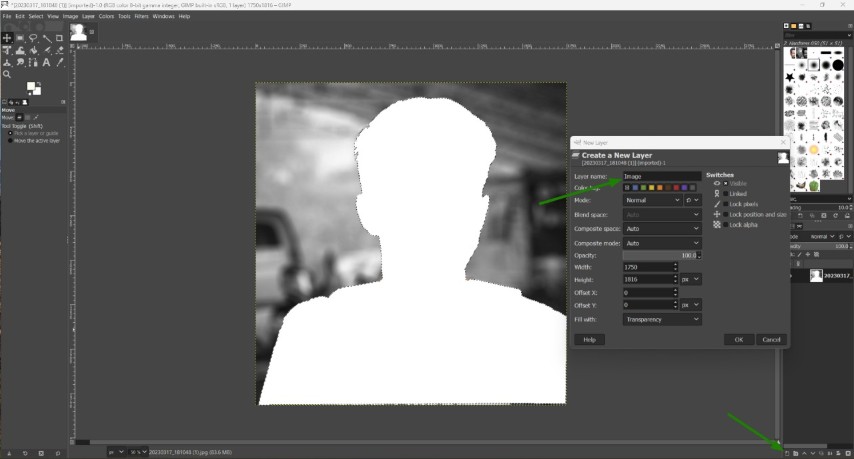
- Next, I cut the image using the shortcut Ctrl + X and pasted it onto a new layer.
- Then, I imported a new image for the background and placed it in a new layer called "background.” And the final result Looks like this.

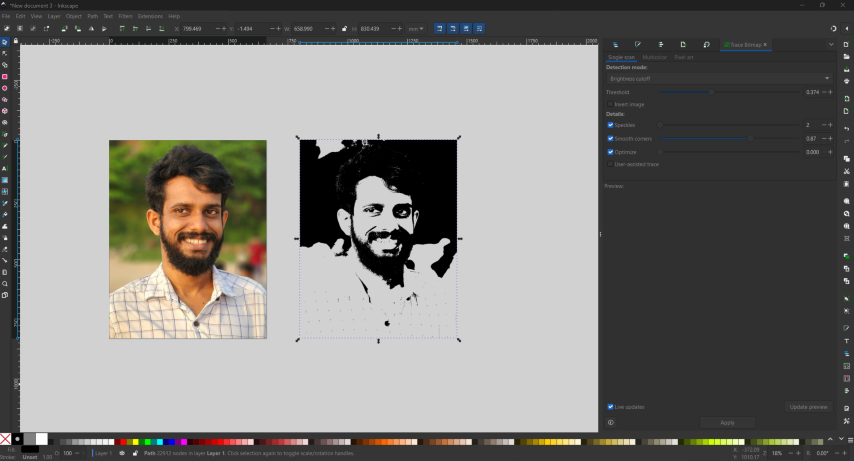
2. Inkscape
Inkscape is a free and open-source vector graphics editor used for creating and editing vector images, similar to Adobe Illustrator and CorelDRAW. It primarily works with SVG (Scalable Vector Graphics) format but supports various other formats like PNG, PDF, EPS, and AI.
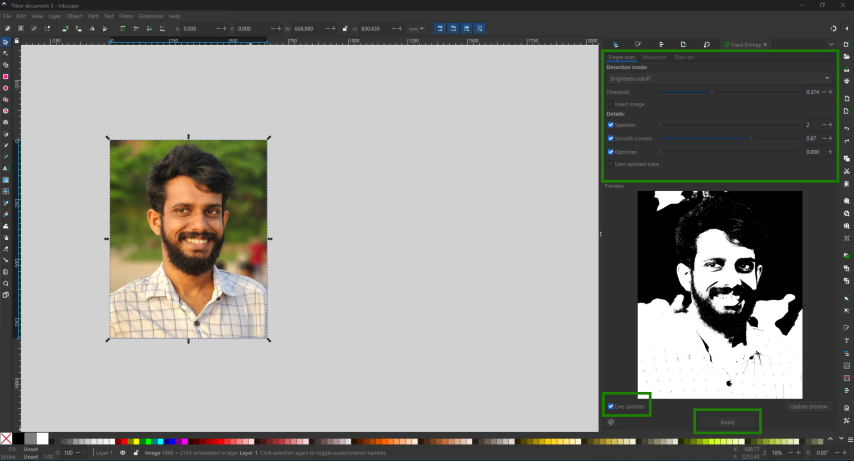
I used Inkscape to convert a raster image into a vector image for laser engraving next week. To achieve this, I utilized the Trace Bitmap feature (Path → Trace Bitmap). Since I only needed a black-and-white version for engraving, I selected the Brightness Cutoff option in Trace Bitmap. I then adjusted the threshold value until I achieved the desired output.
 |
 |
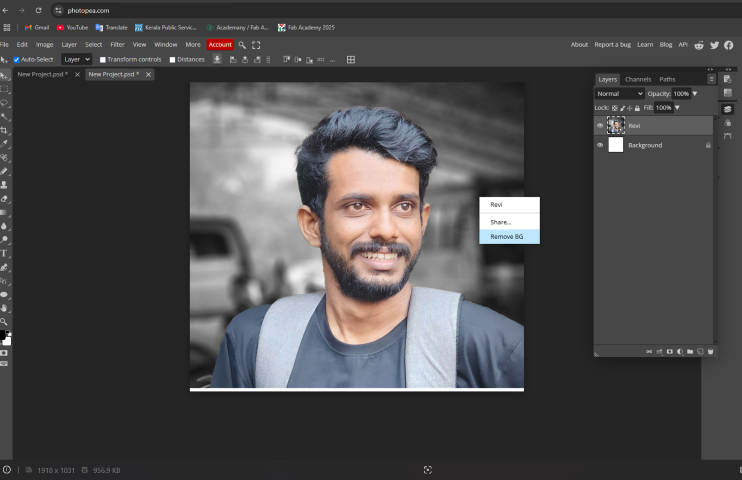
3. Photopea
Photopea is a free, web-based photo and graphics editor that works as an alternative to Adobe Photoshop. It supports raster and vector editing and is compatible with multiple file formats, including PSD, AI, XD, Sketch, SVG, and RAW images.
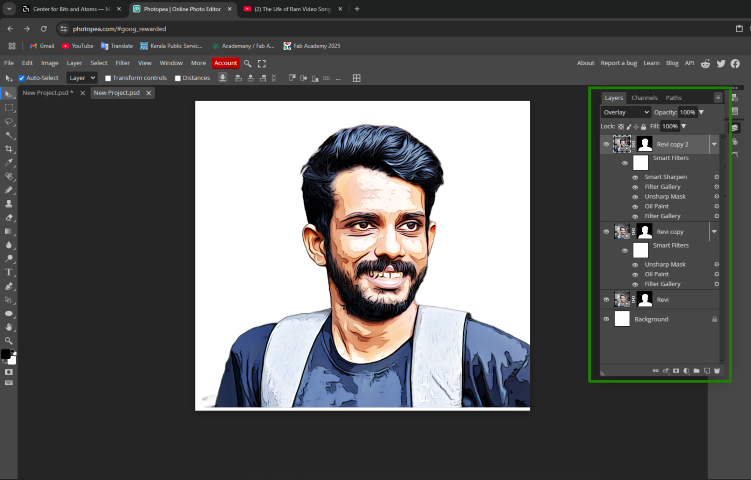
I used Photopea to apply a cartoon effect to my photo. First, I removed the background by right-clicking and selecting "Remove BG." Then, I duplicated the layer and adjusted the values of the following filters:
- Poster Edges (Filter → Filter Gallery → Poster Edges)
- Oil Paint (Filter → Stylize → Oil Paint)
- Unsharp Mask (Filter → Sharpen → Unsharp Mask)
Next, I duplicated the edited layer and further adjusted these filters:
- Poster Edges (Filter → Filter Gallery → Poster Edges)
- Smart Sharpen (Filter → Sharpen → Smart Sharpen)
Finally, I changed the blend mode from Normal to Overlay in the layers panel, which gave me the desired cartoon effect.
 |
 |
3D Softwares
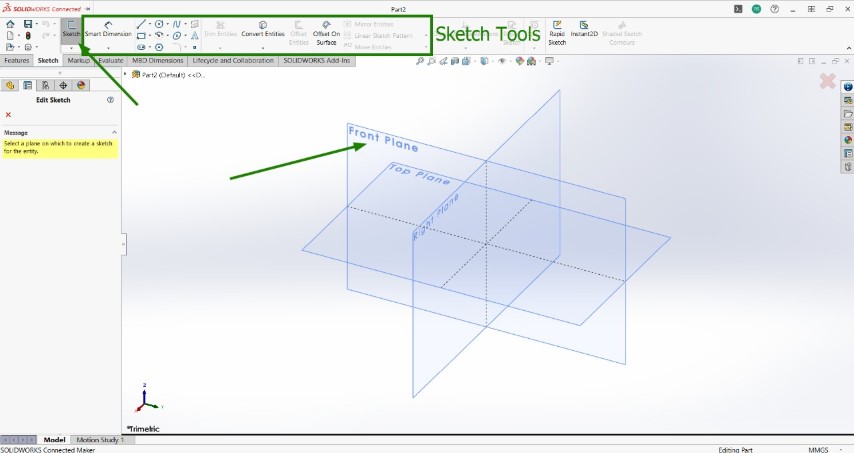
1. SolidWorks
SolidWorks is a powerful CAD software used for 3D modeling and design, allowing users to create detailed parts, assemblies, and technical drawings. It supports parametric modeling, making it easy to modify designs, and includes features for sheet metal, weldments, mold design, and surfacing. SolidWorks helps engineers and designers develop accurate and efficient product designs for various industries.
I designed and assembled a knuckle joint in SolidWorks, which consists of the following components:
- Fork – The double-ended part that holds the eye.
- Eye – The single-ended component that fits into the fork.
- Collar – A securing element to hold the assembly together.
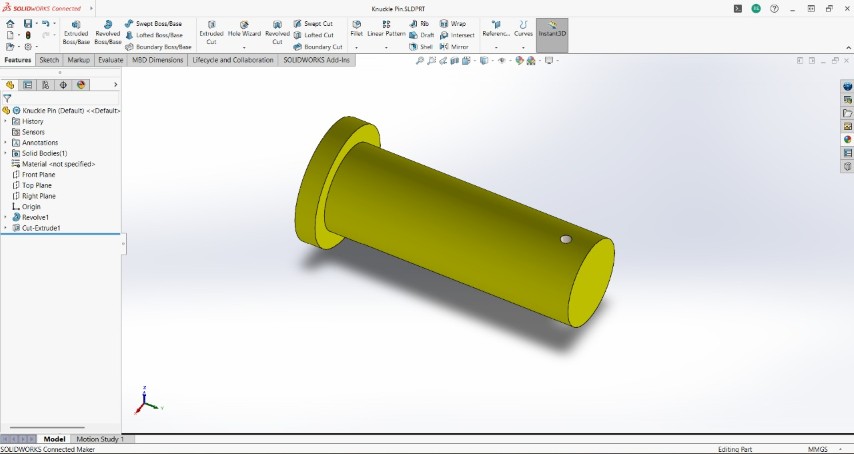
- Knuckle Pin – The main pin connecting the fork and eye.
- Taper Pin – A locking pin to prevent the knuckle pin from slipping.
I launched SolidWorks, created a sketch, and chose the Front Plane as the sketching surface.
I sketched the eye, applying all necessary constraints and dimensions.
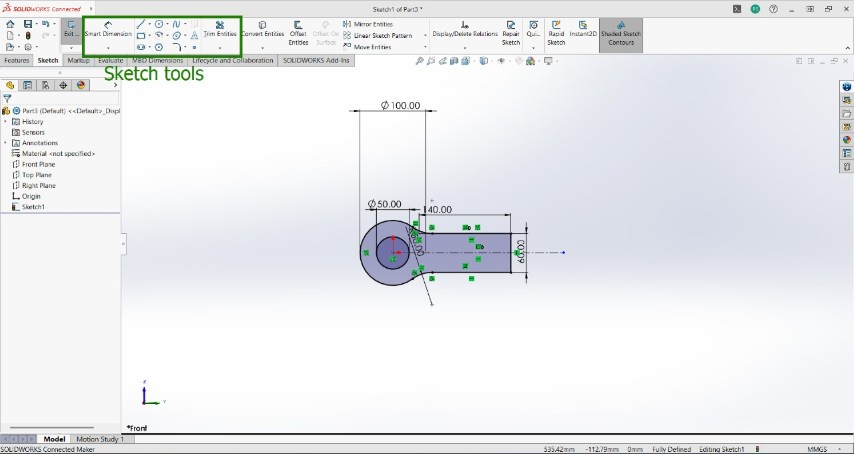
I then extruded the sketch to convert it into a 3D model.
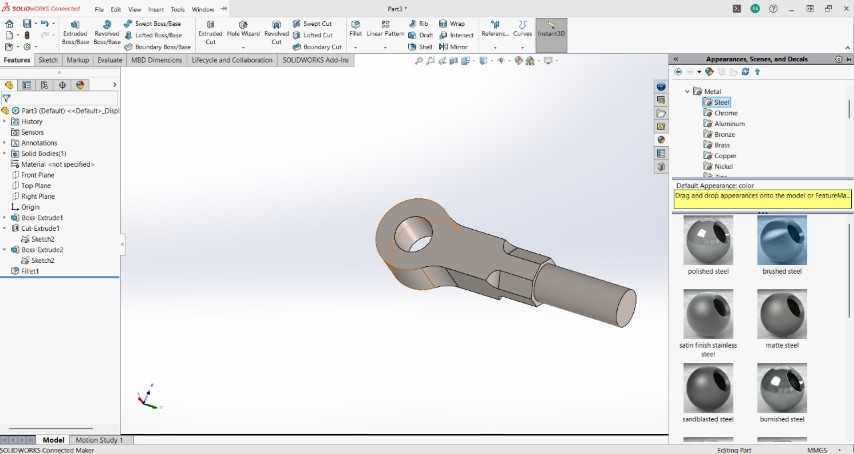
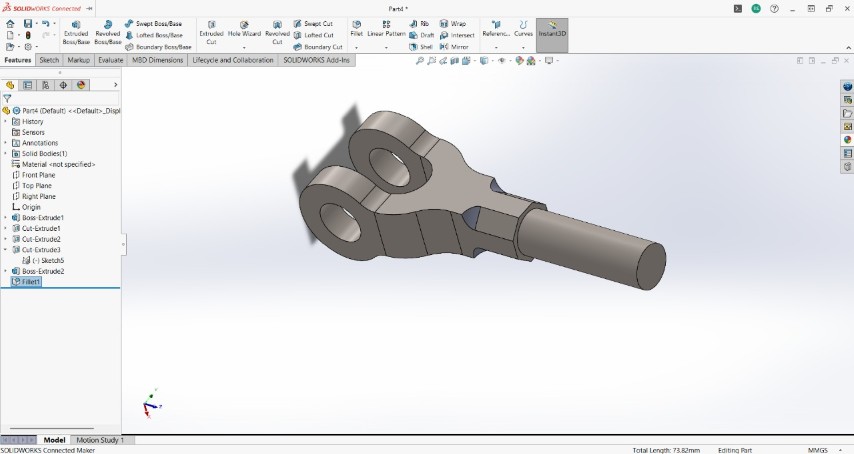
In the same way, I created all the other models, set their appearance to brushed metal, and applied different colors to easily distinguish each component.
 |
 |
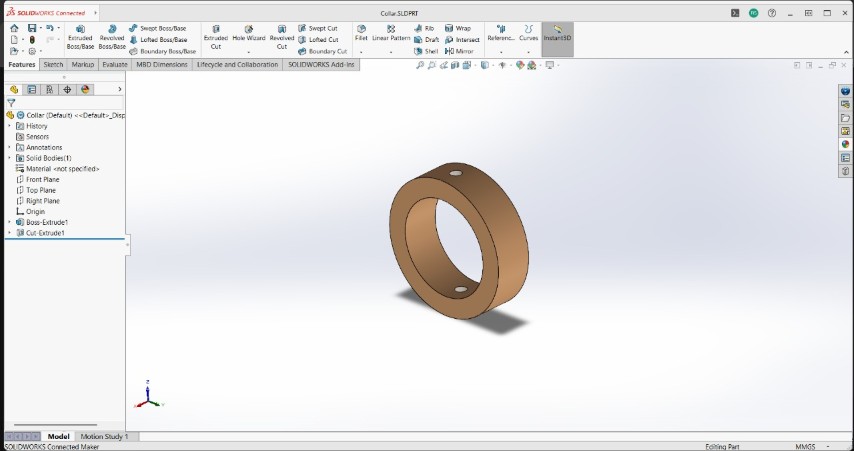 |
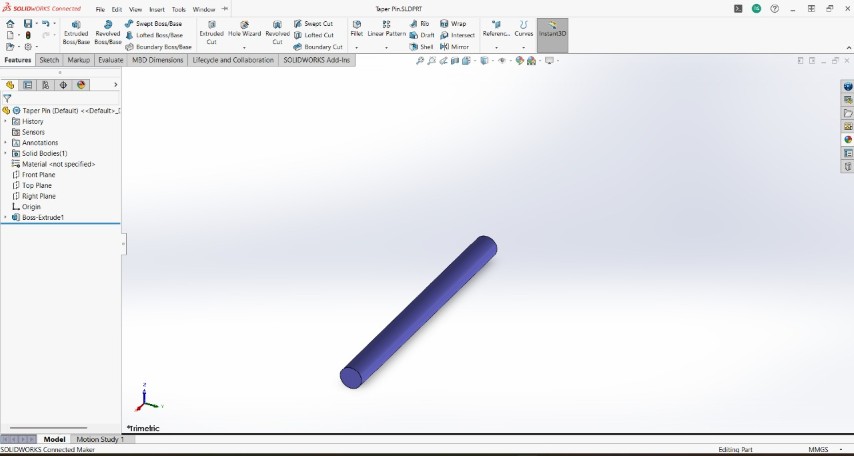 |
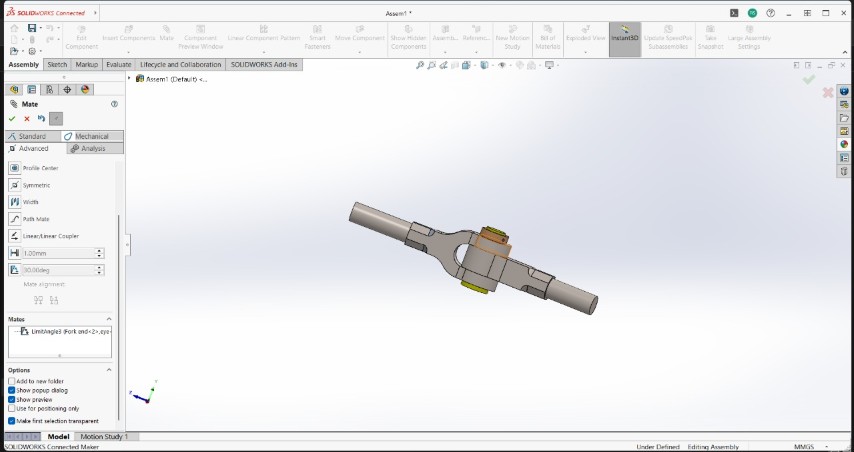
After completing all the models, I switched from Part to Assembly, where I assembled the designed parts to form the knuckle joint. Then, I imported the components for the assembly.
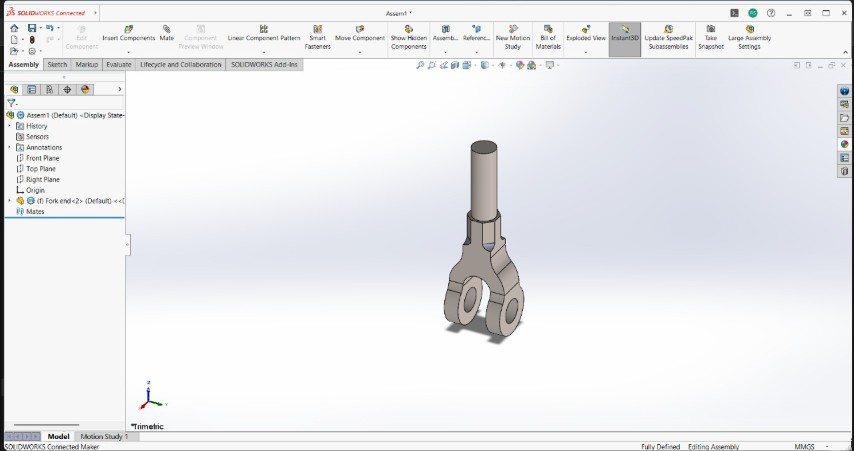
By defining the appropriate relations, I assembled the parts, and the final assembly appears as shown.
2. Onshape
Onshape is a cloud-based CAD (Computer-Aided Design) platform that allows users to design, collaborate, and manage product development in a fully digital environment. Unlike traditional CAD software that requires installation on a local computer, Onshape runs entirely in a web browser, enabling real-time collaboration and access from anywhere.
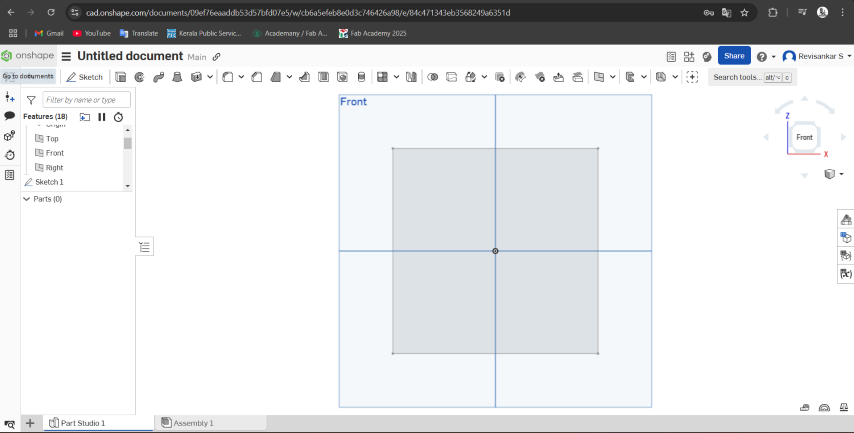
I created a simple but fascinating design in Onshape.
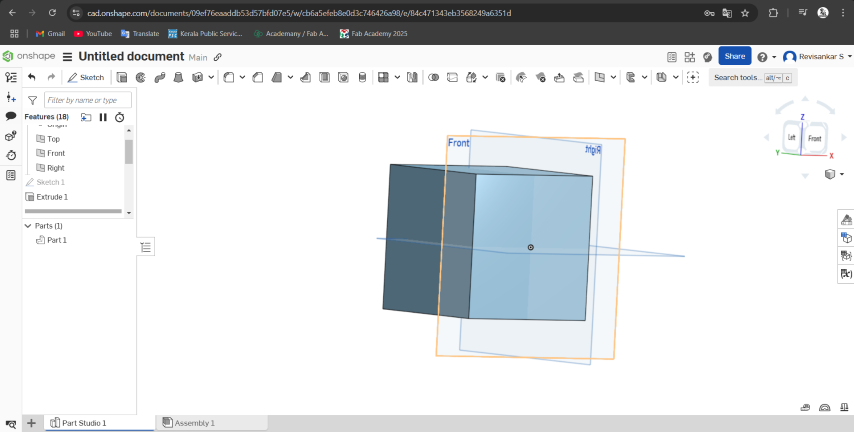
Initially I created a sketch and Extruded it.
 |
 |
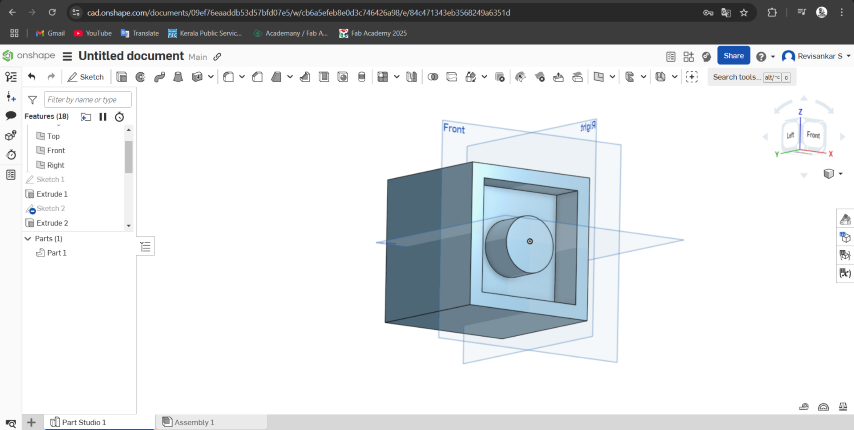
Next, I created a sketch on each of the six faces and extruded them. Finally, I achieved the desired design.
 |
 |
3. Autodesk Fusion 360
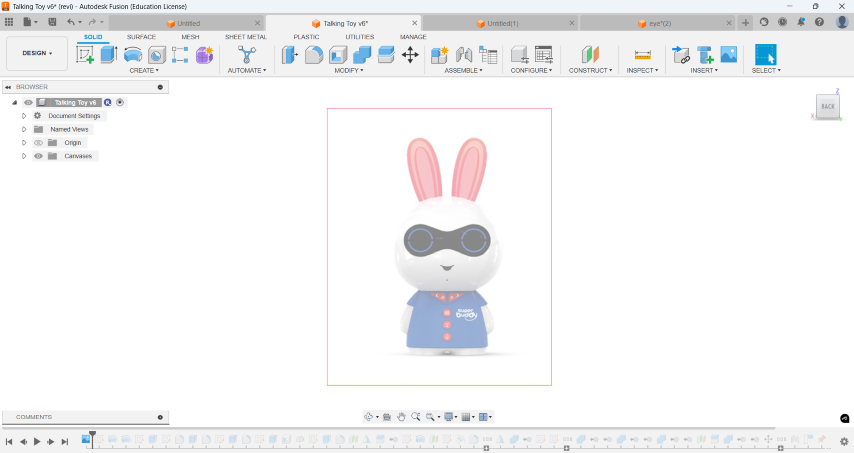
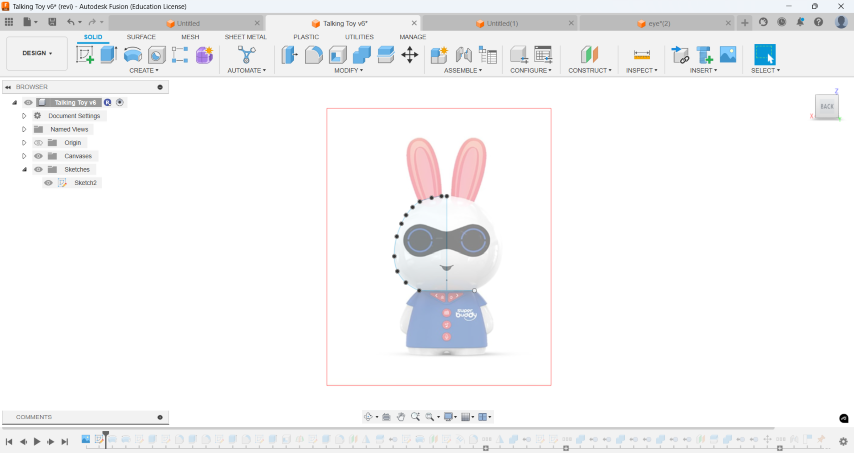
The third software I worked with was Fusion 360 , which I used to design my final project.
At first, I downloaded a similar image of my final project and imported it into Fusion 360 as a canvas.
I sketched and revolved half of the model, allowing me to mirror it to create the other side.
 |
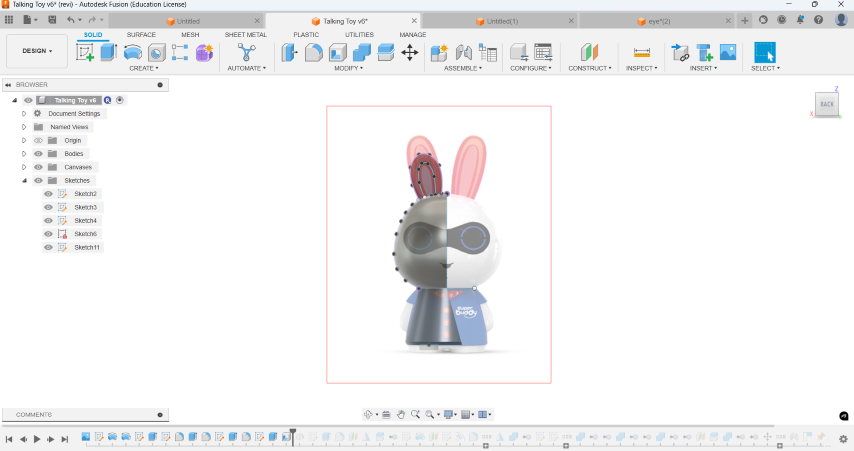 |
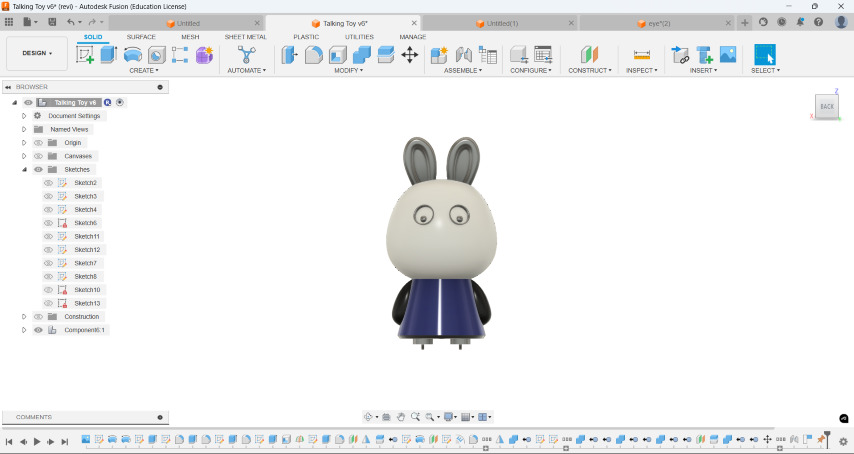
After that, I applied colors to the model and mirrored it to complete the full model.
 |
 |
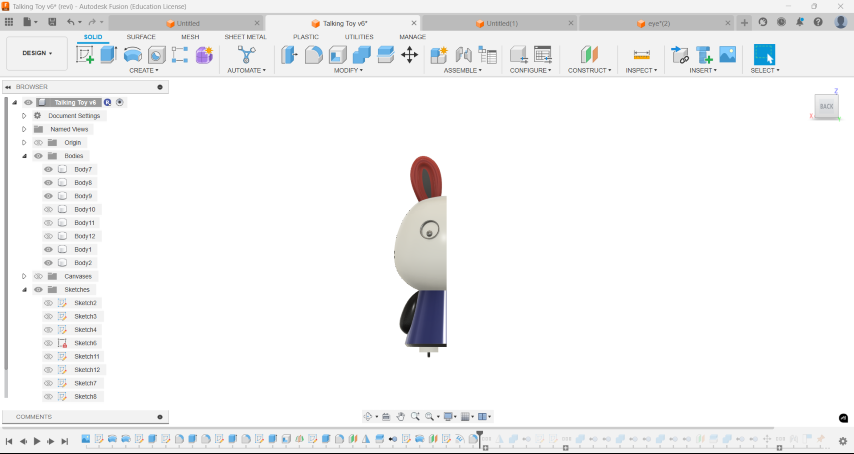
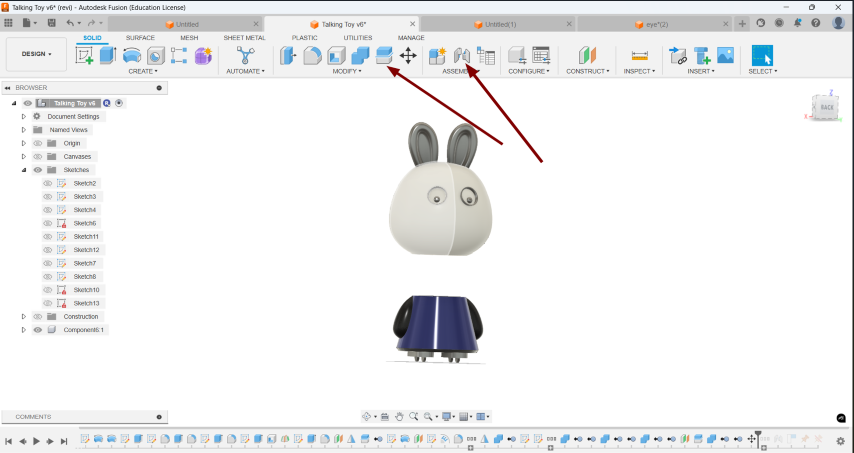
Then, I considered adding rotation to the head along the Z-axis. To achieve this, I split the body into two pieces using the 'Split Body' tool. Afterward, I reconnected the two parts using the 'Joint' option and applied a revolute motion along the Z-axis.
 |
Animation
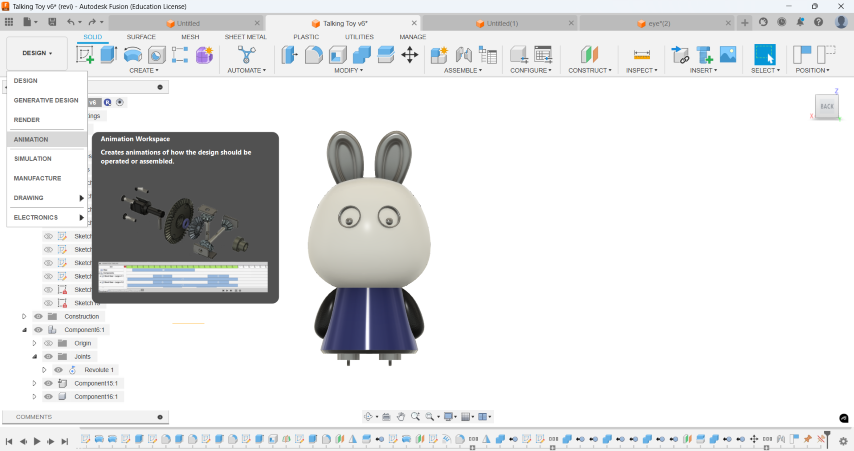
I used the Animation feature in Fusion 360 to animate the model. To do so, I switched the workspace from Design to Animation.
I created a new storyboard and used the transform tool to move the model, making the desired adjustments to the movements. Afterward, I exported the animation video using the publish option.
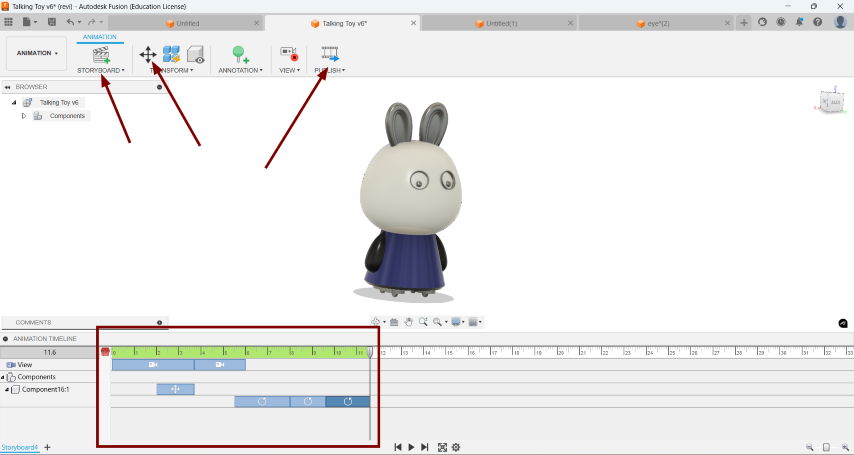
The output looks like this.
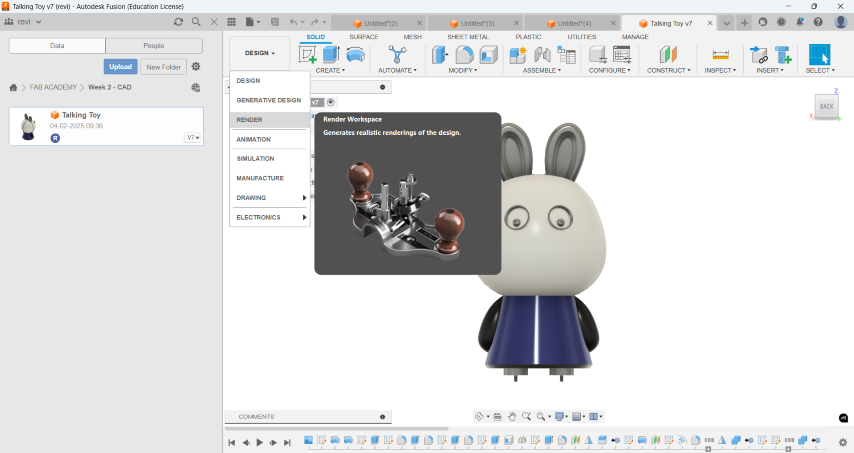
Rendering
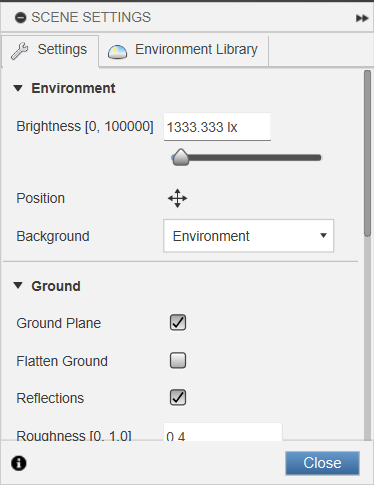
I used Fusion 360 for rendering my file. For that I switched from Design workspace to Rendering.
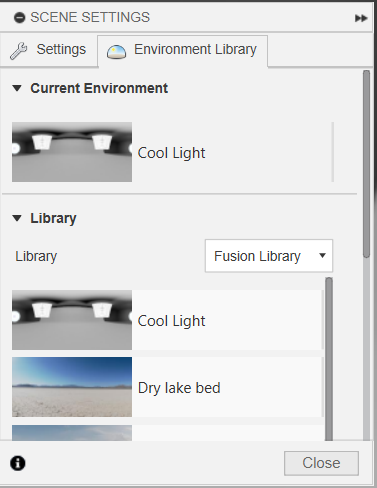
Adjusted the value of Brightness and changed the background to Environment. And from environment library I selected cool light.
 |
 |
Used incanvas render to render the model.
 |
 |
Image and Video Compressing
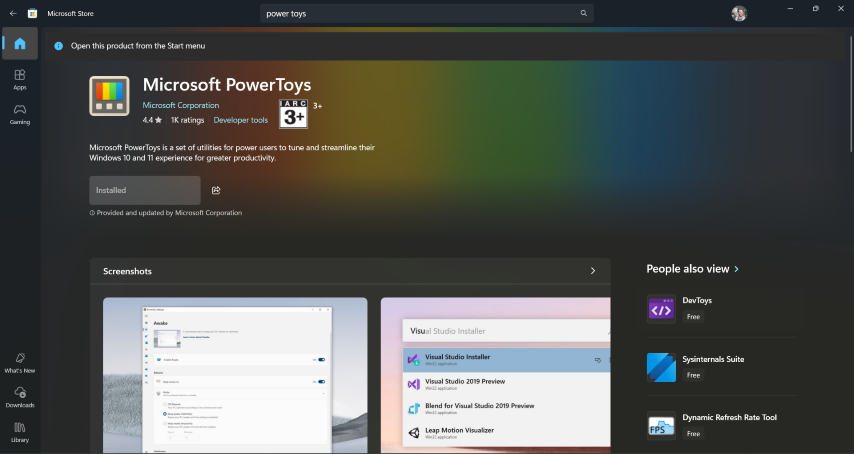
I used PowerToys for image compression and Microsoft Clipchamp for video compression.
- PowerToys
I installed PowerToys from Microsoft Store
Select the images you want to compress, then right-click and choose the "Resize with Image Resizer" option. I selected the images for compression and right-clicked to choose the 'Resize with Image Resizer' option. The images were 1.25MB each before compression.
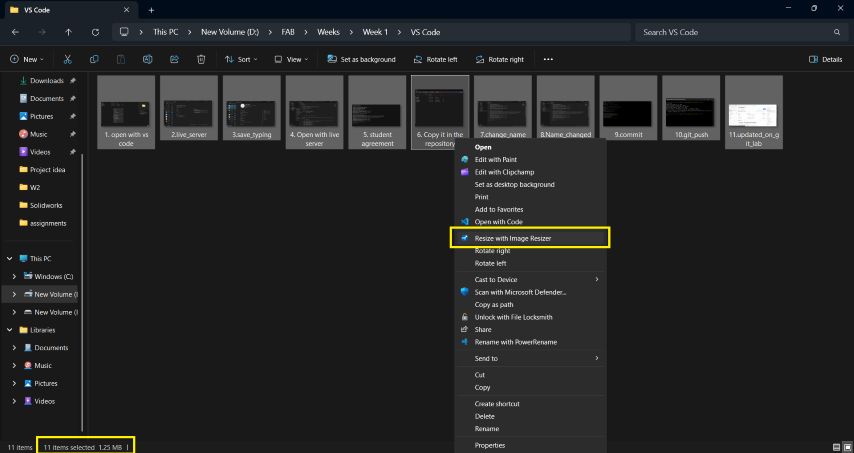
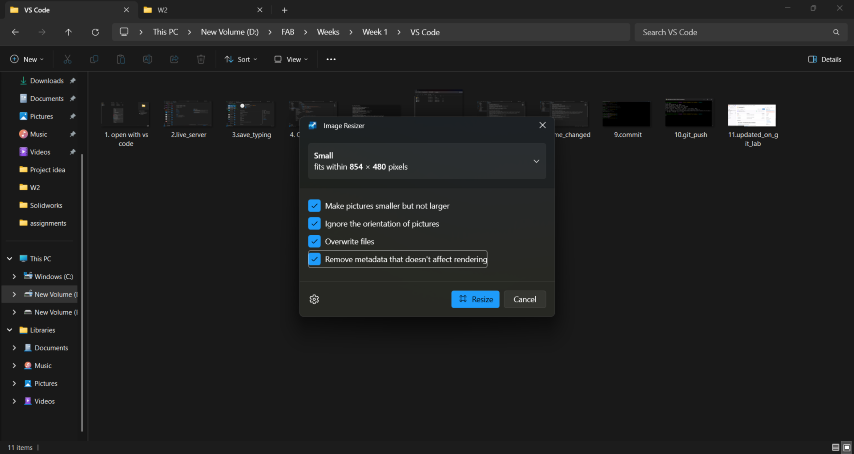
After compression, the file size decreased to 884KB.

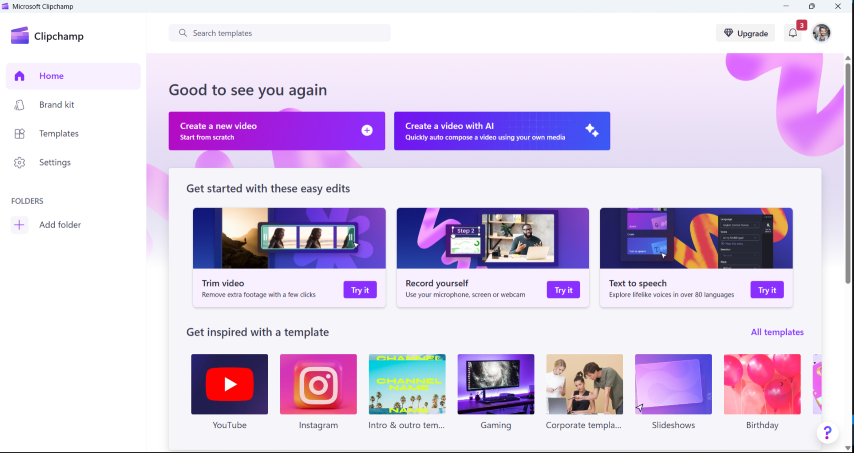
- Microsoft Clipchamp
I launched Clipchamp and imported the video for compression.
 |
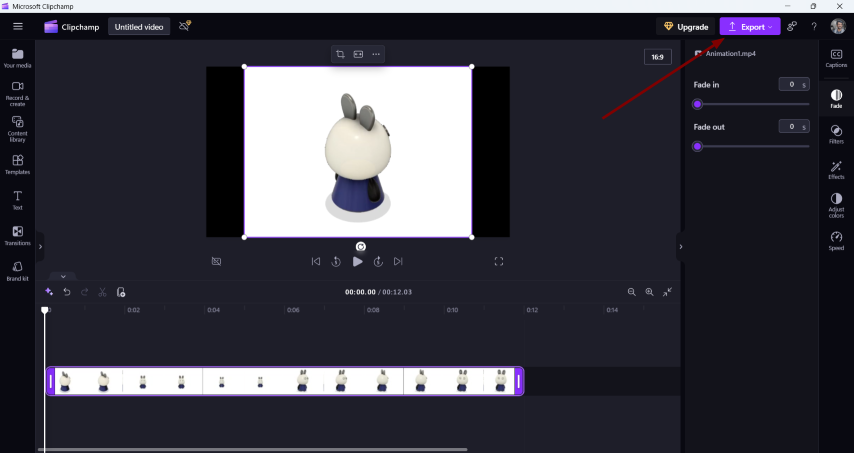 |
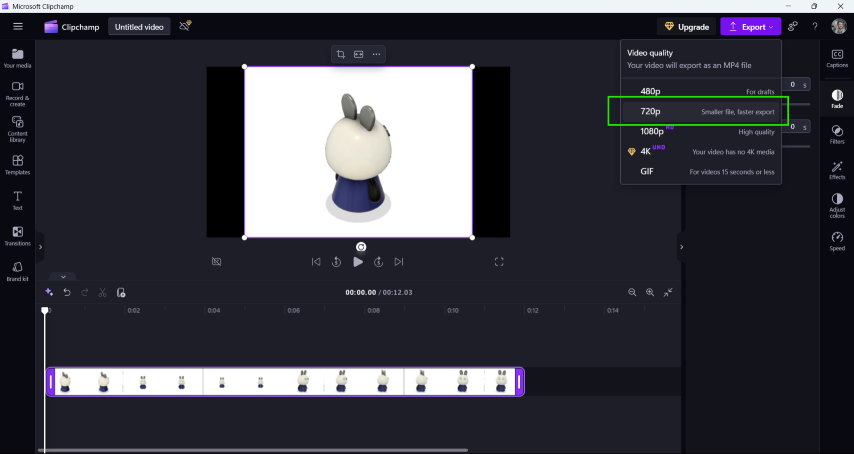
Then Exported the video in 720p to reduce the size.
ChatGPT is used for paraphrasing.
Conclusion
This week, I explored raster and vector graphics, experimented with 2D image software, and learned 3D design tools. I designed, animated, and rendered my final project while also trying out simulations. Additionally, I compressed images and videos before uploading the final compressed files.
References
Downloads
- 2D Design Files
- 3D Design files