5. 3D Printing and Scanning
This week's brief:
Group assignment:
test the design rules for your 3D printer
Individual assignment:
design and 3D print an object (small, few cm3, limited by printer time) that could not be made subtractively
- 3D scan an object
GROUP ASSIGNMENT
You can view our group assignment here!
The values obtained after testing the design rules of the 3D printer are:
- Bridge test - 20 mm
- Diameter test -
Actual value - 6mm
Measured value - 5.88mm
- Overhang test - 45 deg
- Clearance test - 0.3 mm
INDIVIDUAL ASSIGNMENT
Additive Manufacturing Processes
Additive manufacturing, also known as 3D printing, is a process that creates three-dimensional objects by adding
layers of material, typically from a digital model, rather than subtracting material like in traditional
manufacturing.
The additive approach allows for greater design freedom than conventional methods. With 3D printing it is possible
to obtain objects with complex geometries, impossible to obtain with subtractive technologies. This advantage opens
up new opportunities for custom product design.
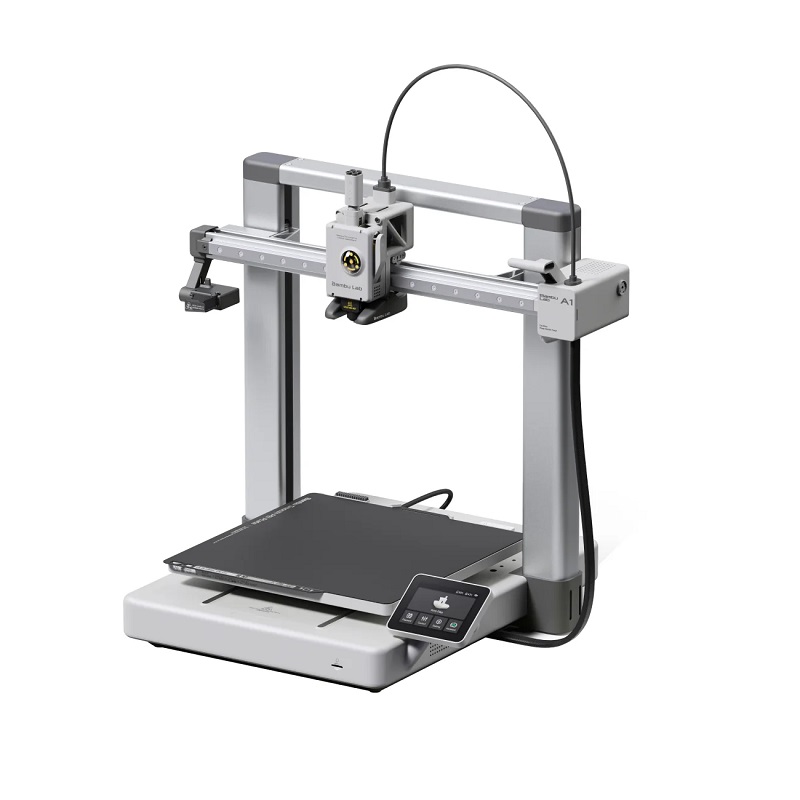
Bambu Lab A1
We use the bambu lab A1 printer for this week's assignment. The Bambu Lab A1 is a high-speed Core XY 3D printer ,
offering smart automation features like
- auto Z-offset
- Auto flow calibration
a
- Auto belt tensioning
- Real-time flow rate compensation.
Bambu labs have their own slicer software called Bambu Studio, where you can view the details of the print job.
Design
I wanted to make an animal. with articulate joints.Articulated 3D print models are great for model kits,
figures, puppets, miniatures, robots, concept prototypes, and any application
where flexibility, posing, and motion are desired. These dynamic and useful models have moving pieces that can
flex, spin, and bend. Action figures, mechanical components with axles, and even toys can all benefit from the
added interactivity that
articulated 3D models offer, which static printing just cannot match.
Initially i started to make a snake but since i was new to Fusion360 it was a little hard to manipulate some
curves. SO scrapped that and decided to make a manta sting ray.
3DModel
To make the 3d model first we have to create a sketch. You can either import a svg of the design or make the the
design in fusion.
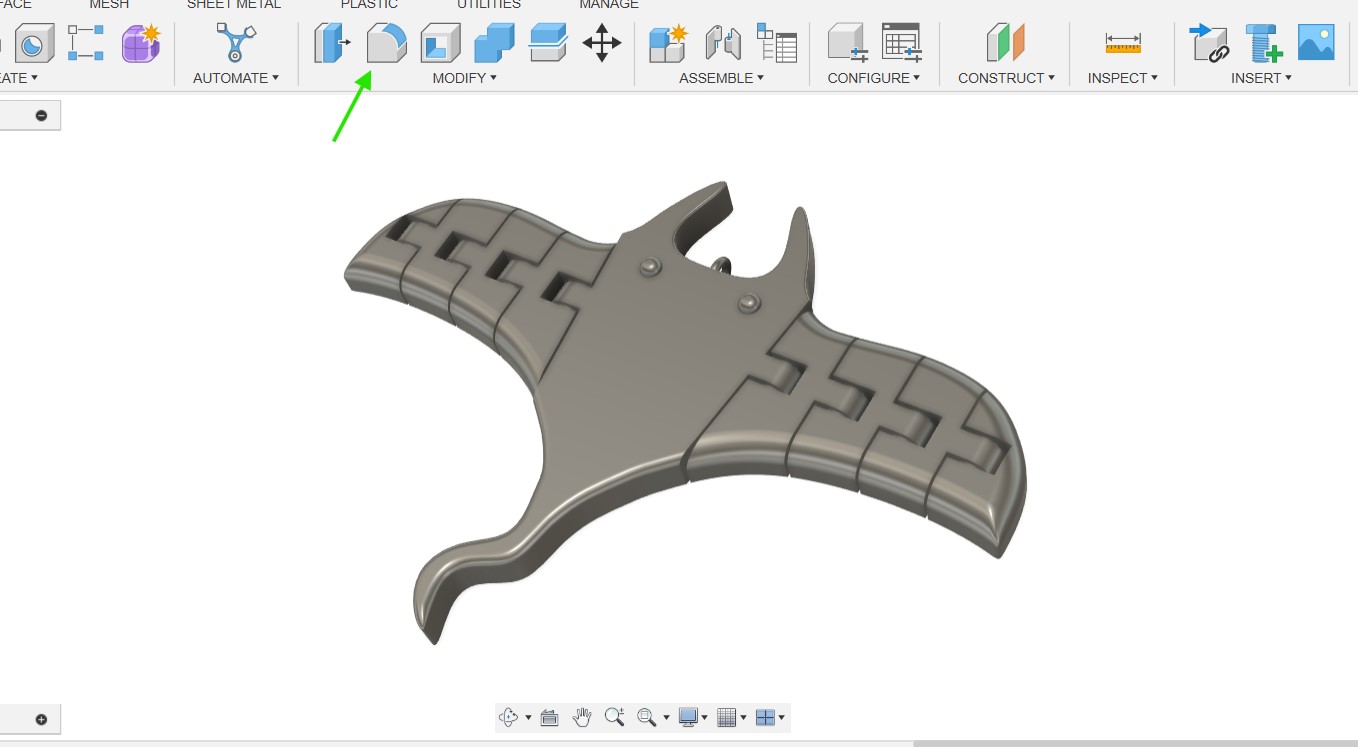
i made the the squid by making half of the the wing and the body and then mirroring it so that i will get both
side symmetric.
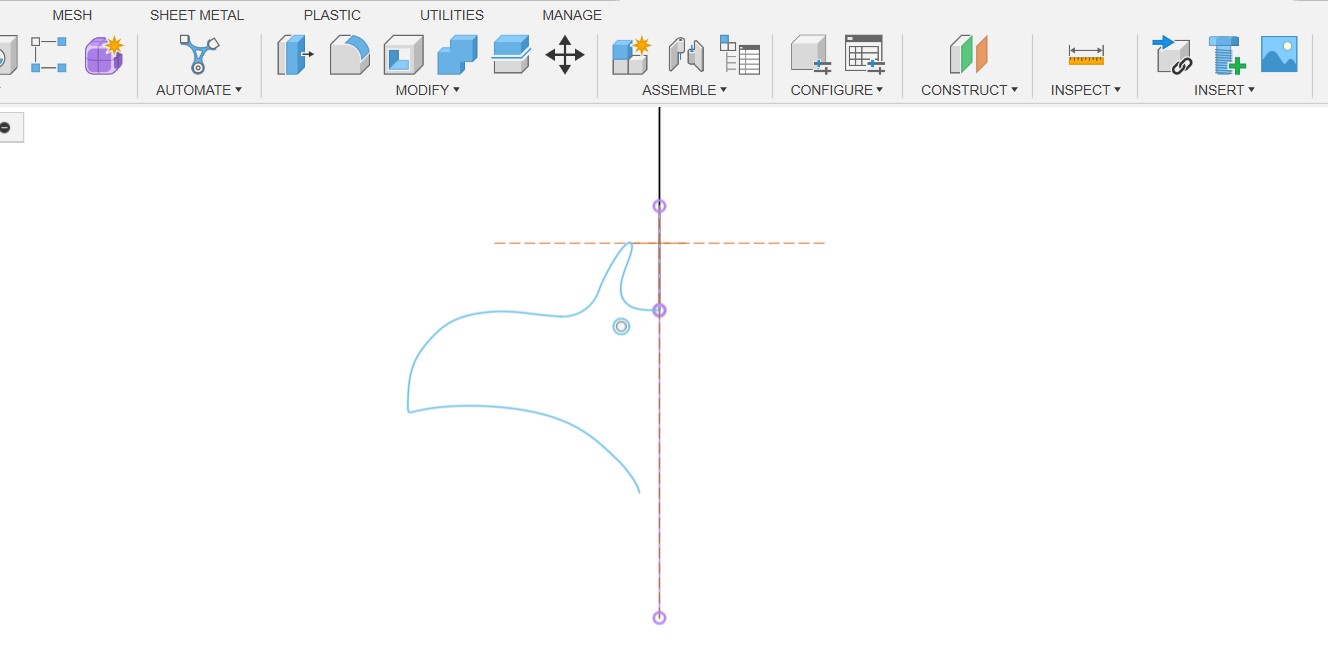
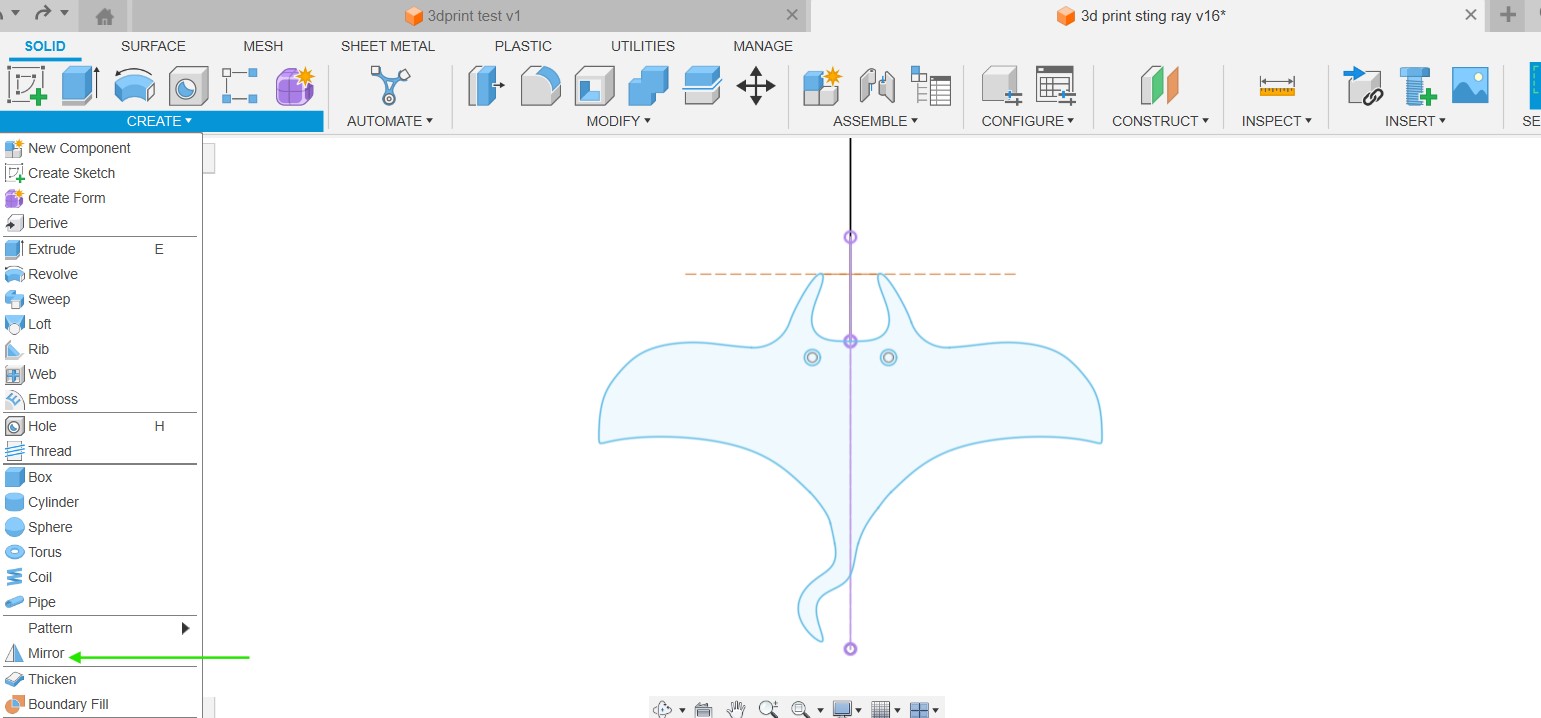
I added a tail too.
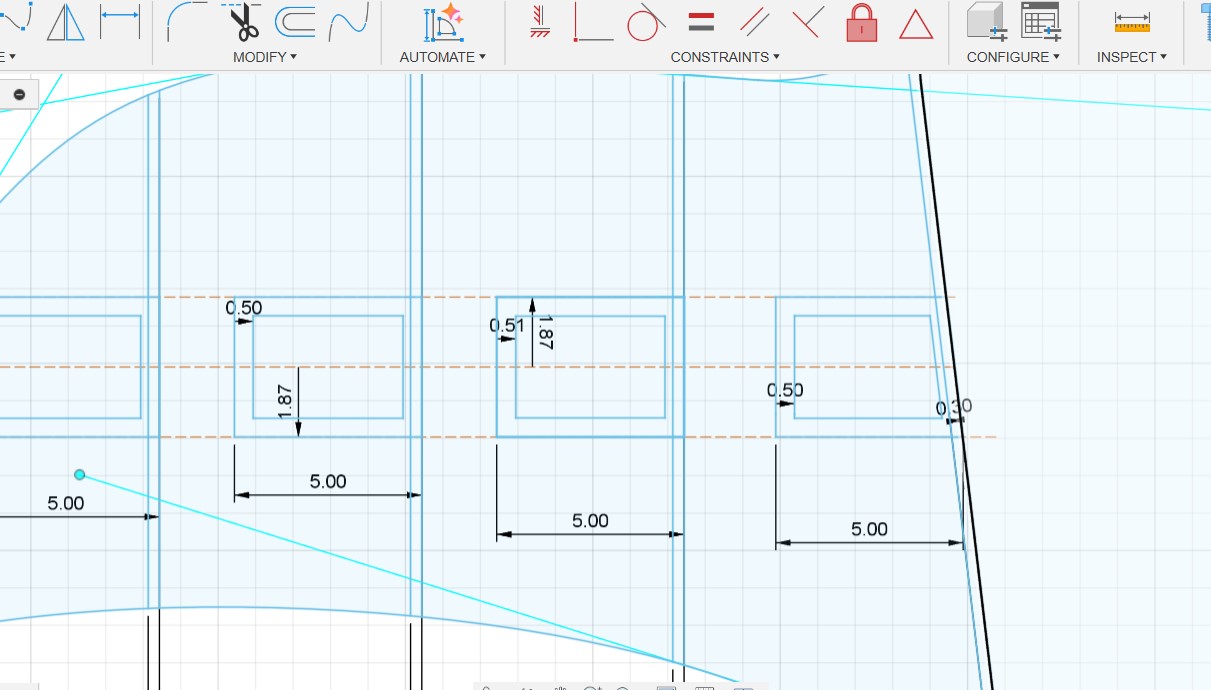
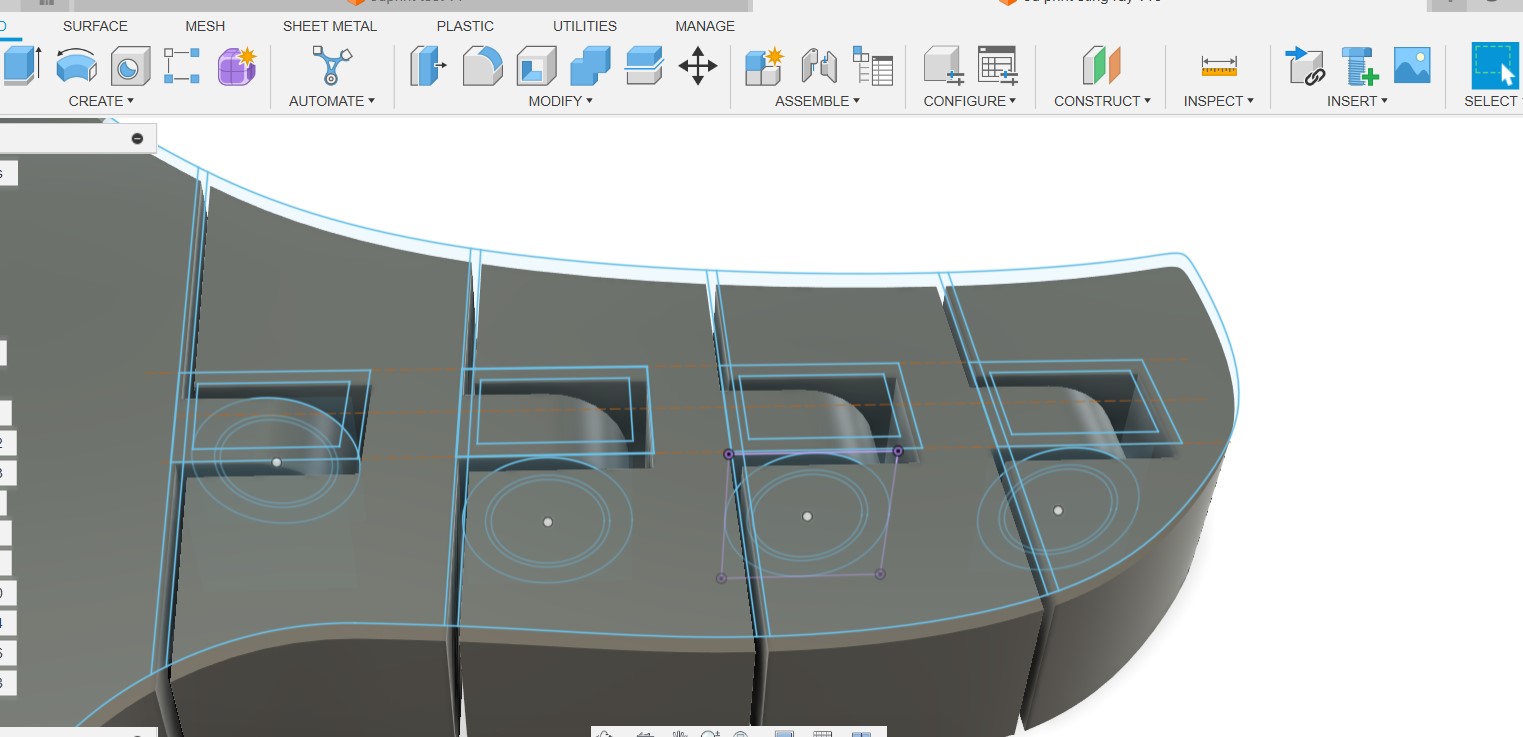
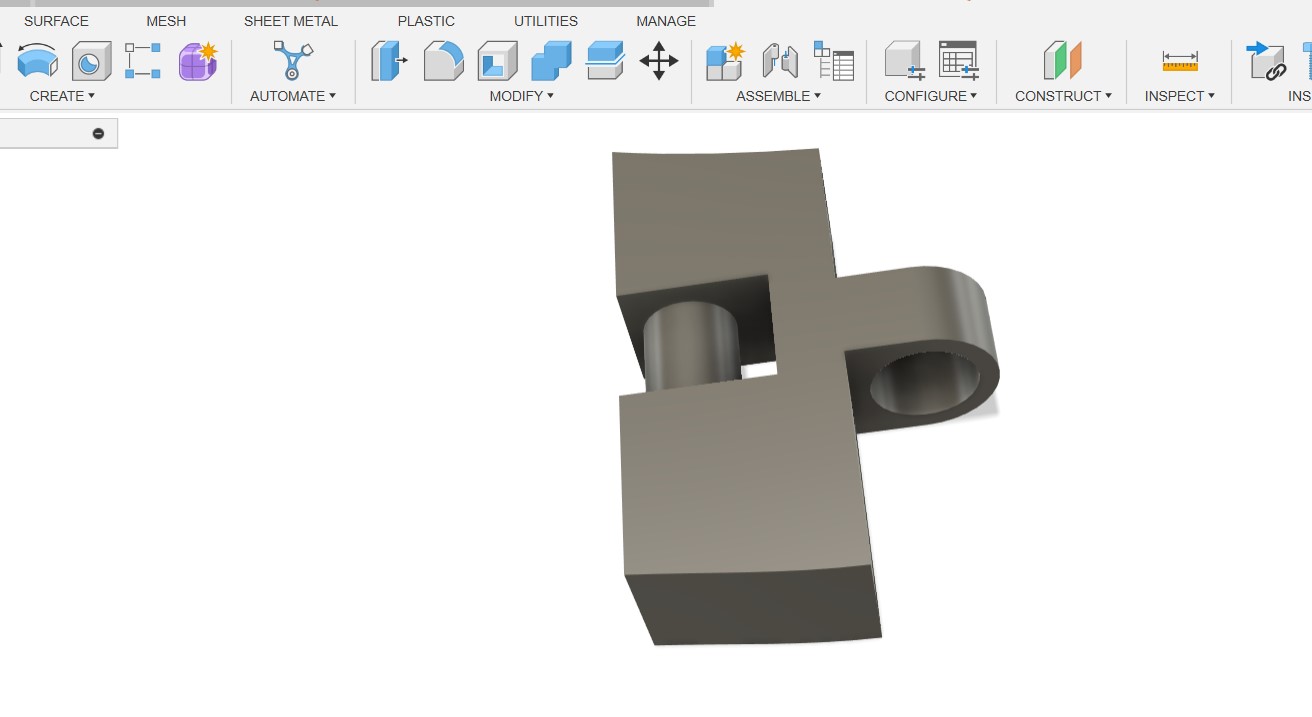
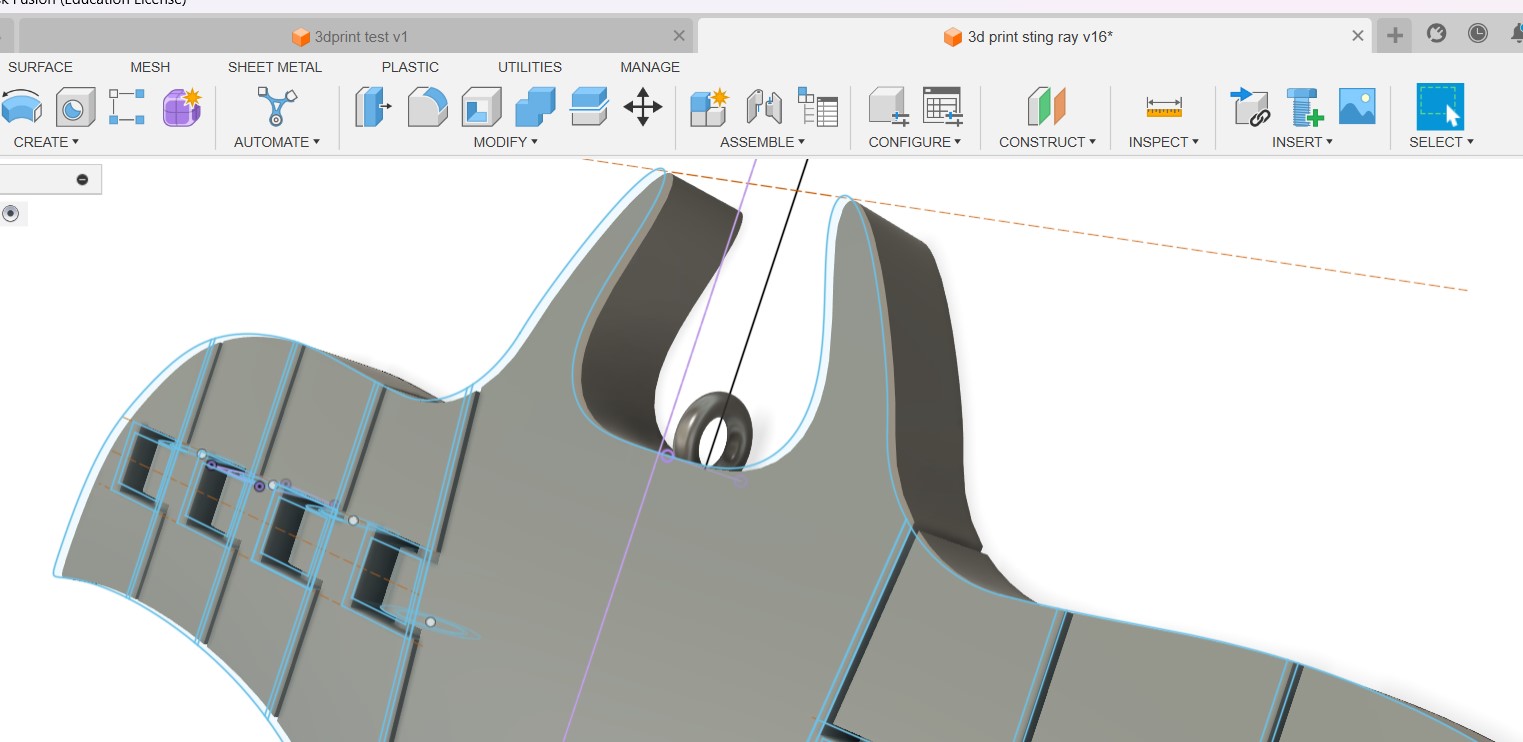
After finishing the sketch i extruded the parts required. we have to make the joints now. to do so i made
another sketch in the right plane and made circles so
that it can be extruded into the cylinder part required for the joints.
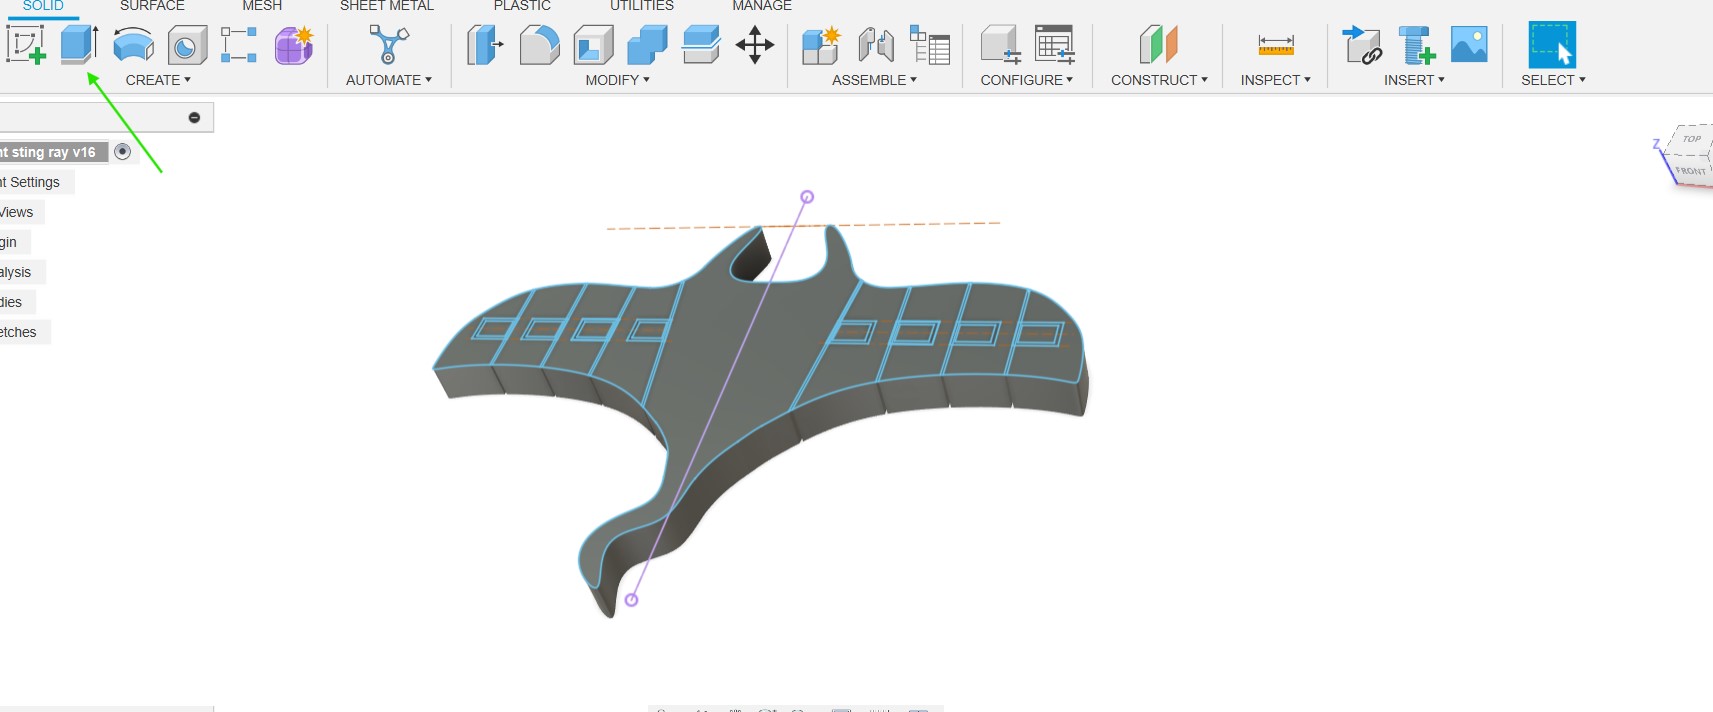 the cylindrical parts are joined to the body using the modify tool and setting the option as join.
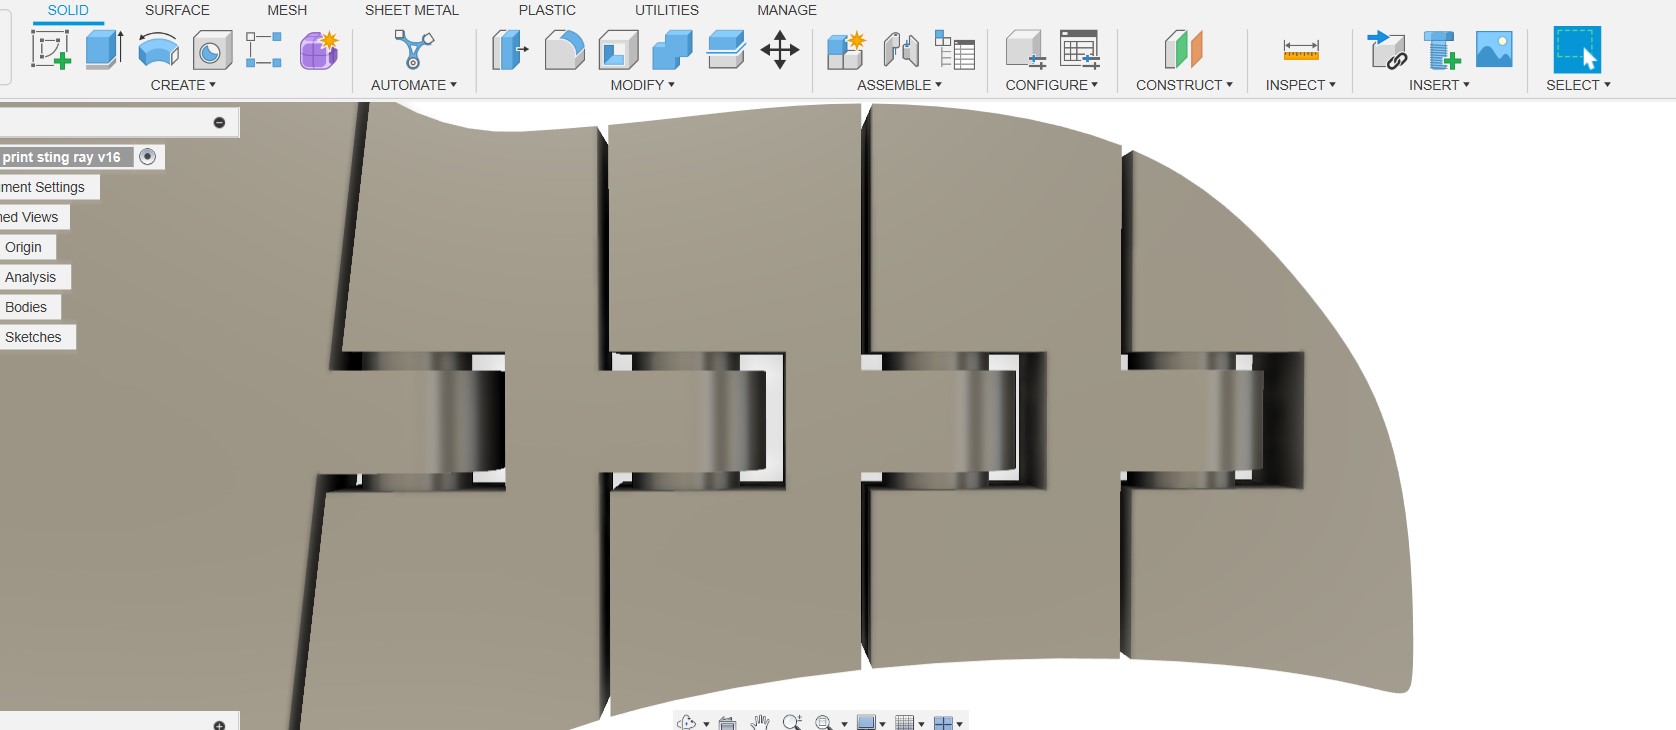 i added a small fillet to the outer edges to give it a smoother feel.
I also added a ring to the top of the head so that it can be used as a keychain.
i added a small fillet to the outer edges to give it a smoother feel.
I also added a ring to the top of the head so that it can be used as a keychain.
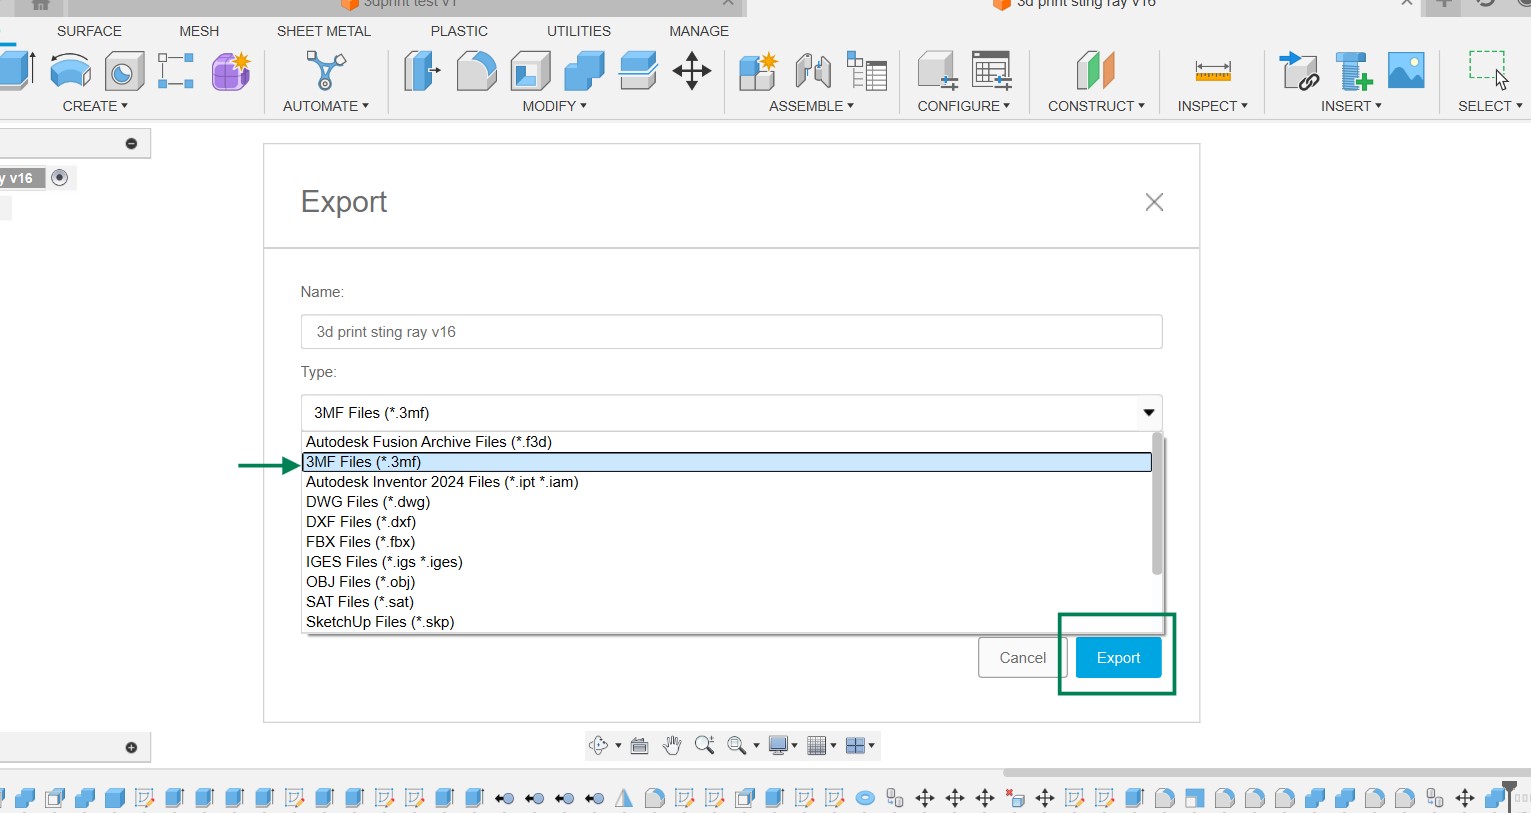
Printing
After finishing up the design we have to export the file into .3mf format so that we can bring it into Bambu
studio slicer.
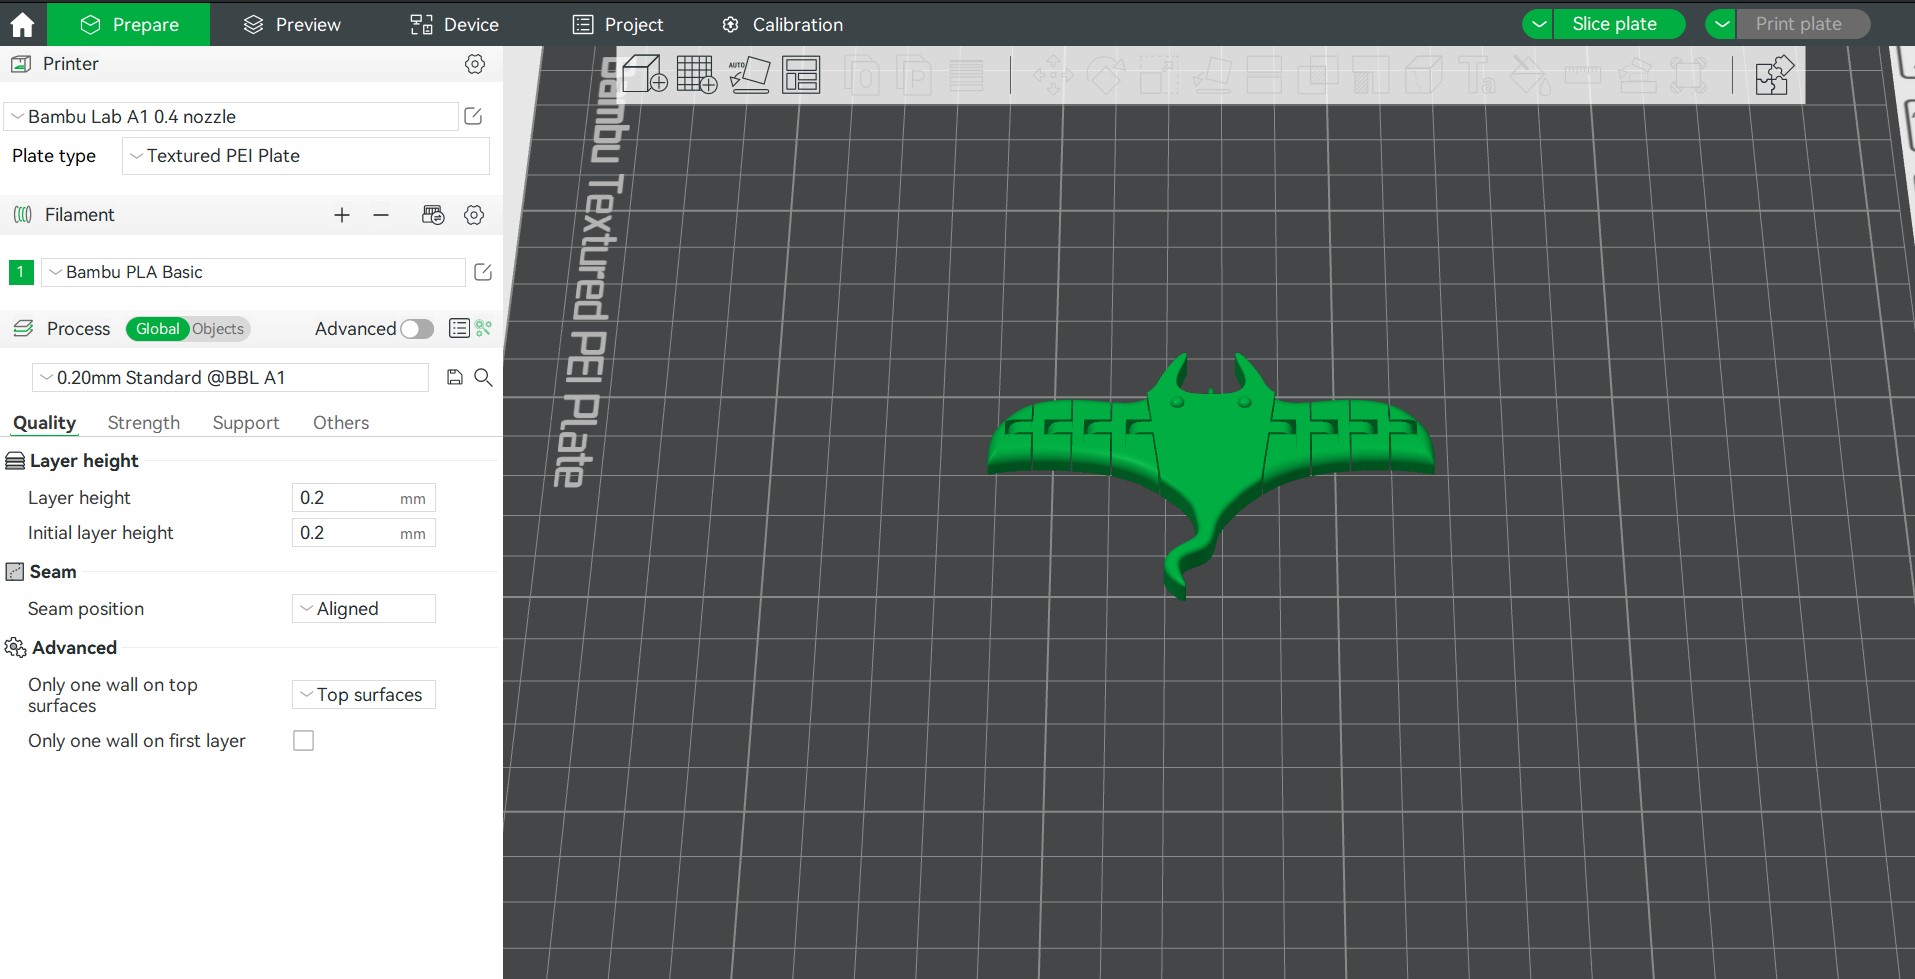
Bambu Studio - Slicer Software
Bambu Studio is a free, open-source, slicing software we
use to prepare models to 3D print on Bambu Lab 3D
printers.It contains project-based workflows, systematically optimized slicing algorithms, and an easy-to-use
graphic interface, bringing users an incredibly smooth printing experience.
Open bambu studio and open the exported file.
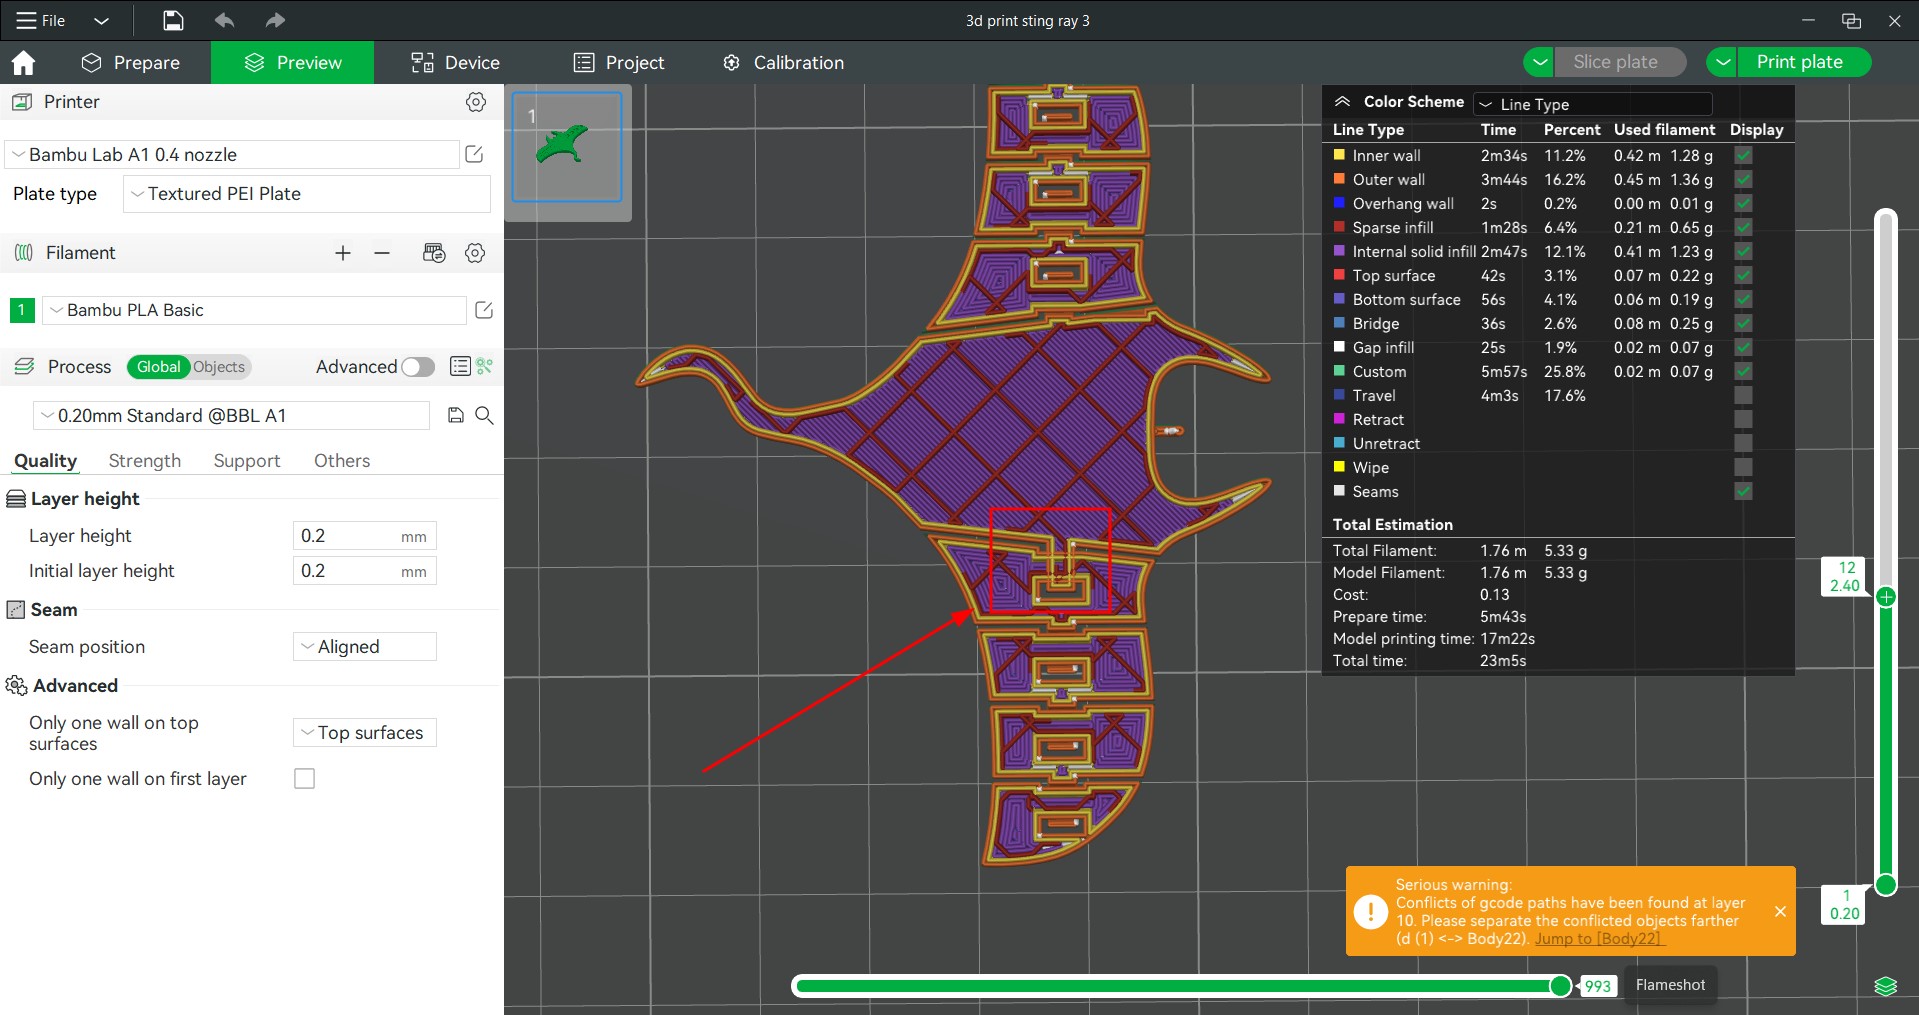
 We can view the how the printing process will occur by dragging the scrollbar on the side up or down .While
doing so i realised there was a mistake in one of the joints. I went back to fusion to fix the mistake
and exported it again. It worked out fine this time.
We can view the how the printing process will occur by dragging the scrollbar on the side up or down .While
doing so i realised there was a mistake in one of the joints. I went back to fusion to fix the mistake
and exported it again. It worked out fine this time.
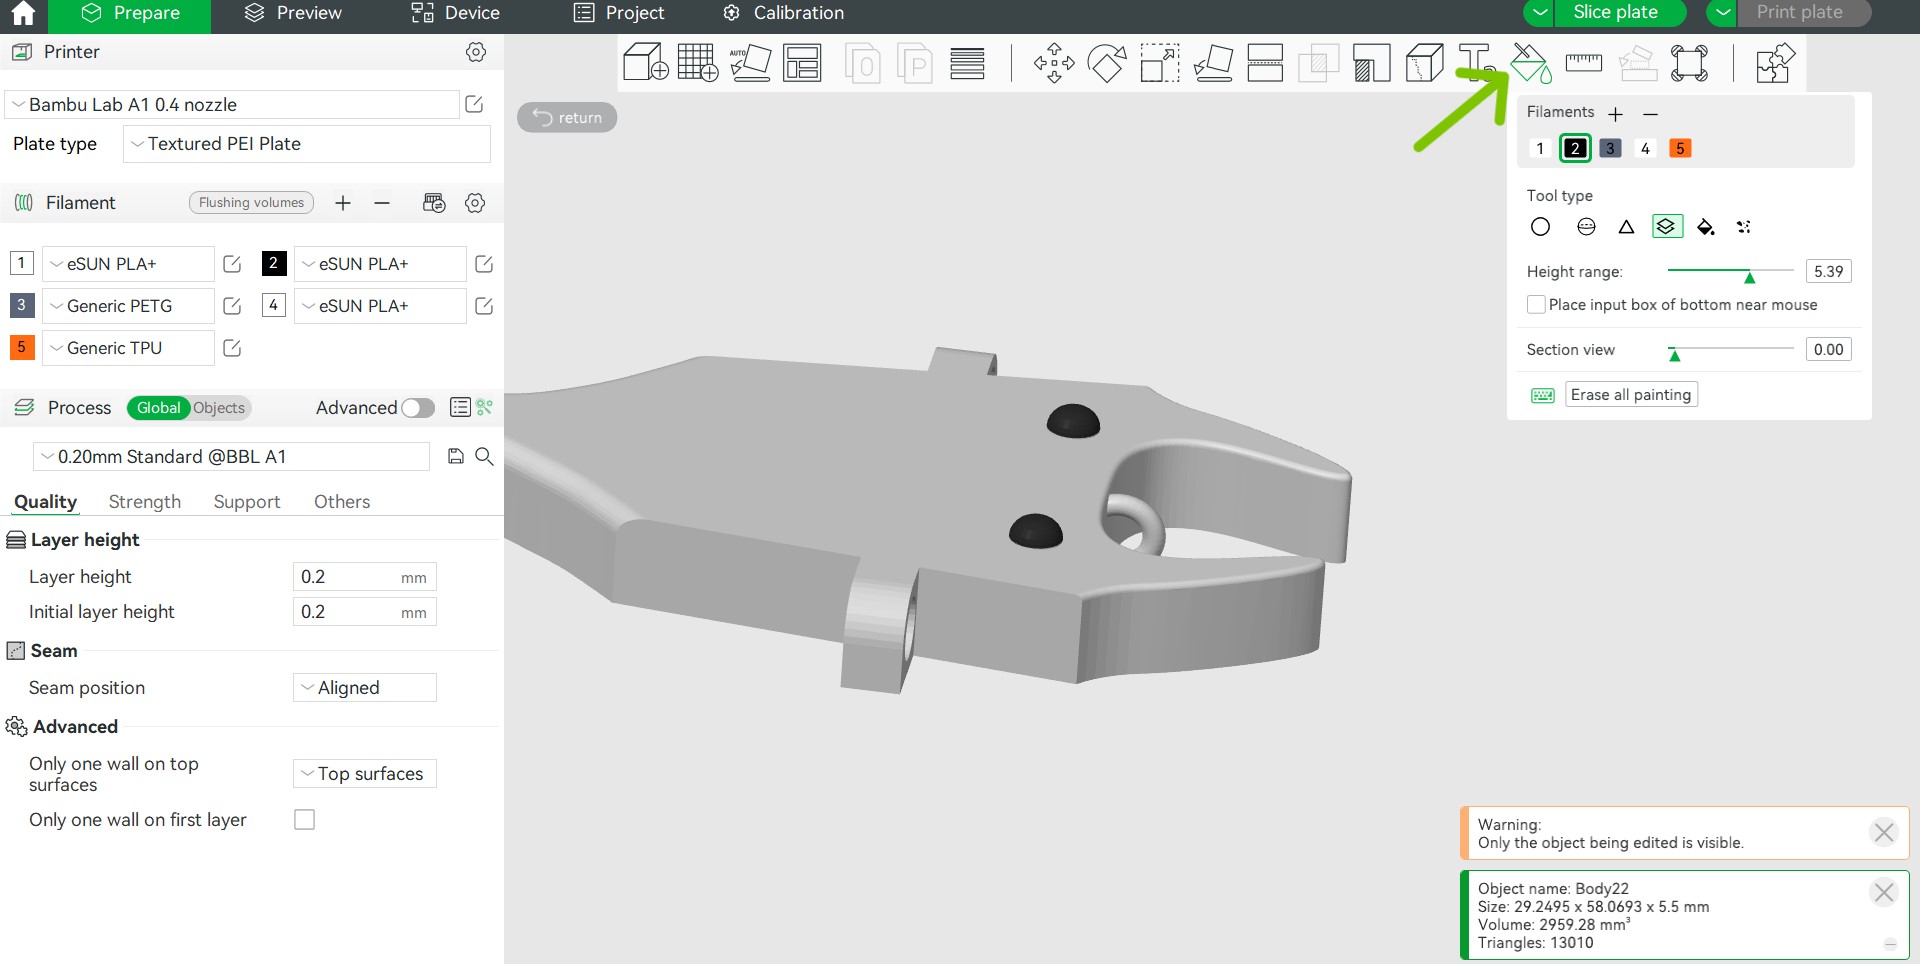
 We can also choose the colour of the filament required to print. I set the body to be white and the eyes to be
black. T
he project was sent to print
We can also choose the colour of the filament required to print. I set the body to be white and the eyes to be
black. T
he project was sent to print
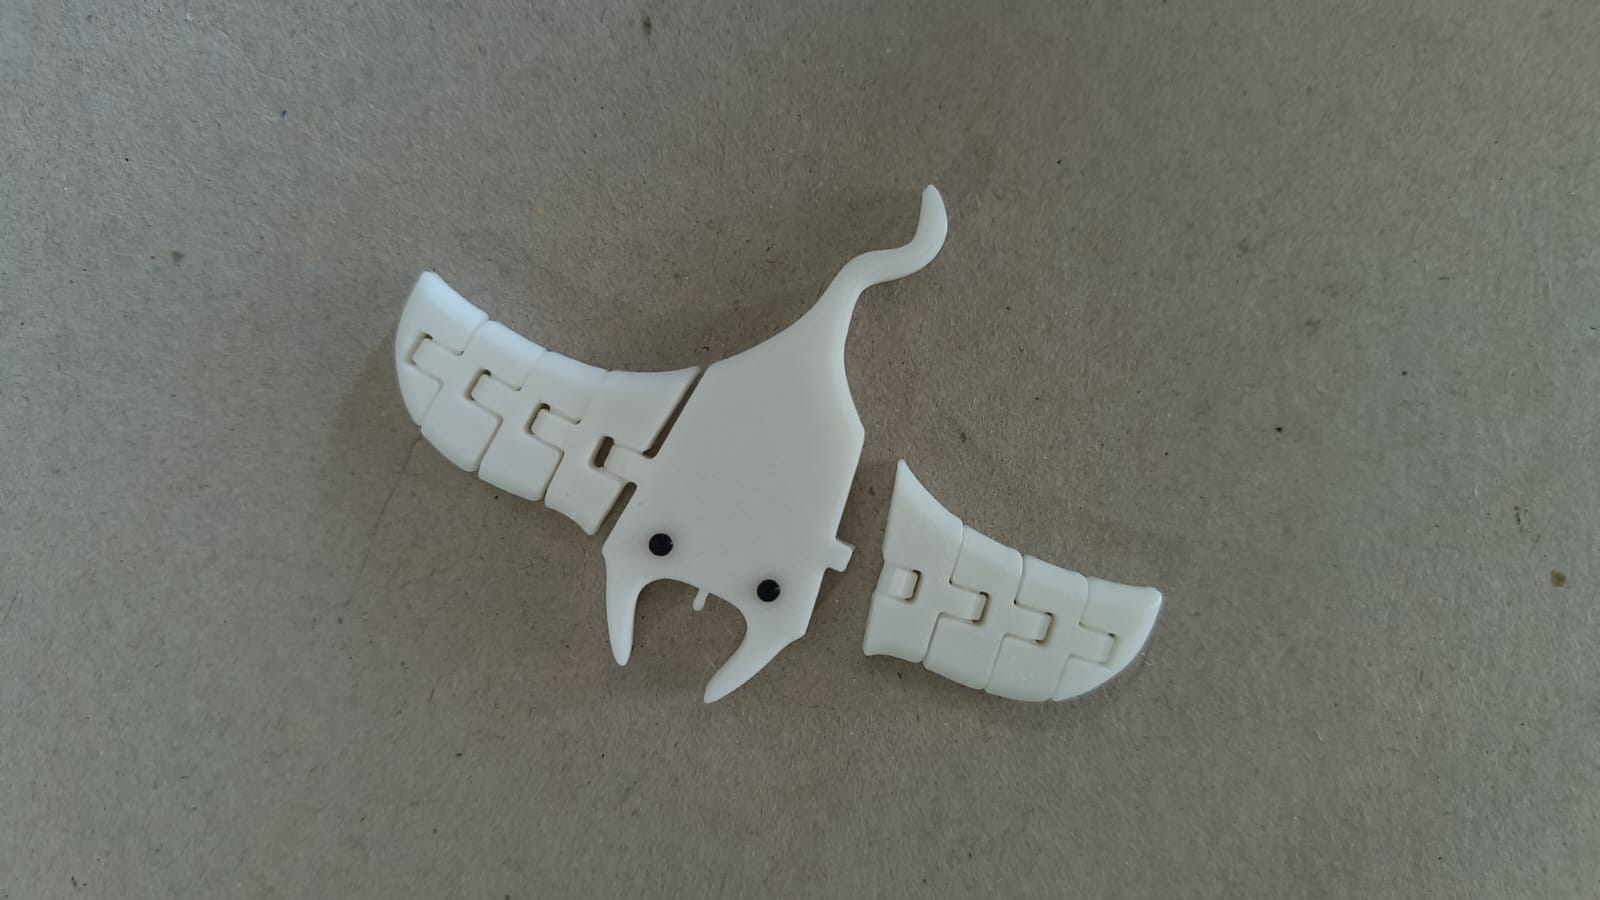
 After the print was done i found out that the tolerences i gave were too tight and the joints were barely moving
. While checking the joints one of the wings broke. So i had to go back again and adjusts the tolernce values and
print it again
After the print was done i found out that the tolerences i gave were too tight and the joints were barely moving
. While checking the joints one of the wings broke. So i had to go back again and adjusts the tolernce values and
print it again
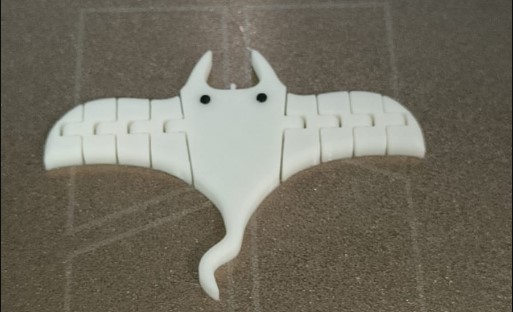
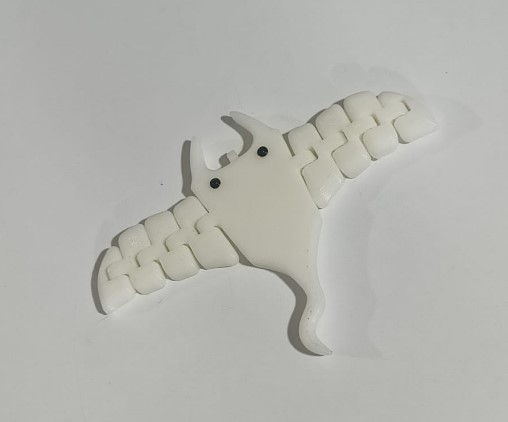
 This time around it worked perfectly! This was how mini manta sting ray keychain looked like at the end.

3D scanning
Artec 3D scanner
3D scanners capture the geometry of an object and produce a three-dimensional digital model. Artec's 3D
scanners are structured light scanners.They operate by projecting light in a pattern, usually in the form of
multiple parallel beams, onto an object. By projecting a grid pattern on the object, the scanners are able to
capture the deformation or distortion from multiple angles and then calculate the distance to specific points on
the object using triangulation.
The three-dimensional coordinates obtained are used to digitally reconstruction the real-world object.
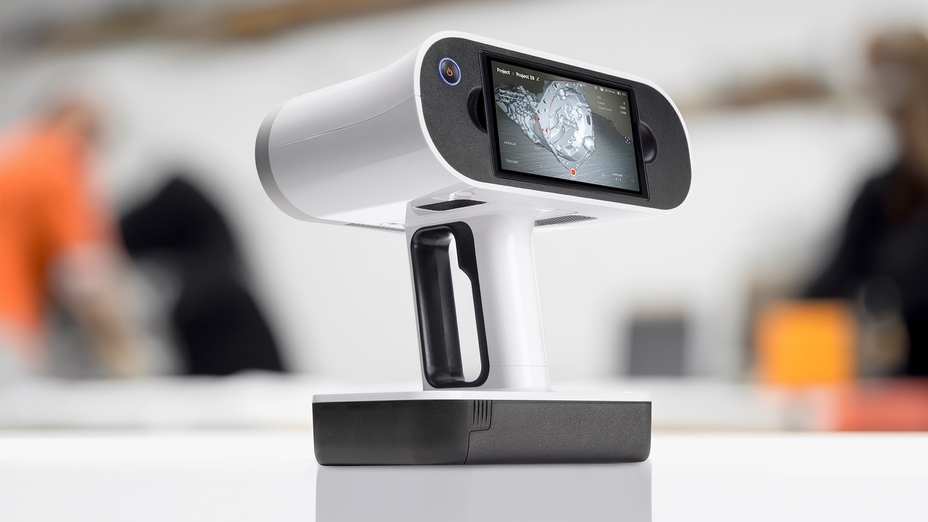 Leo is an ergonomic, handheld 3D color scanner with automatic, onboard processing, released in 2018. The Leo
features a touch screen panel so users can watch in real-time as a 3D replica of the scanned object comes to life.
By rotating and zooming the model, the user can see if any areas were missed, thus allowing full coverage in one
scan.
Artec Studio is a software program for 3D scanning and post-processing. Data is captured and split into several
"scans," which are then processed and fused into a 3D model.
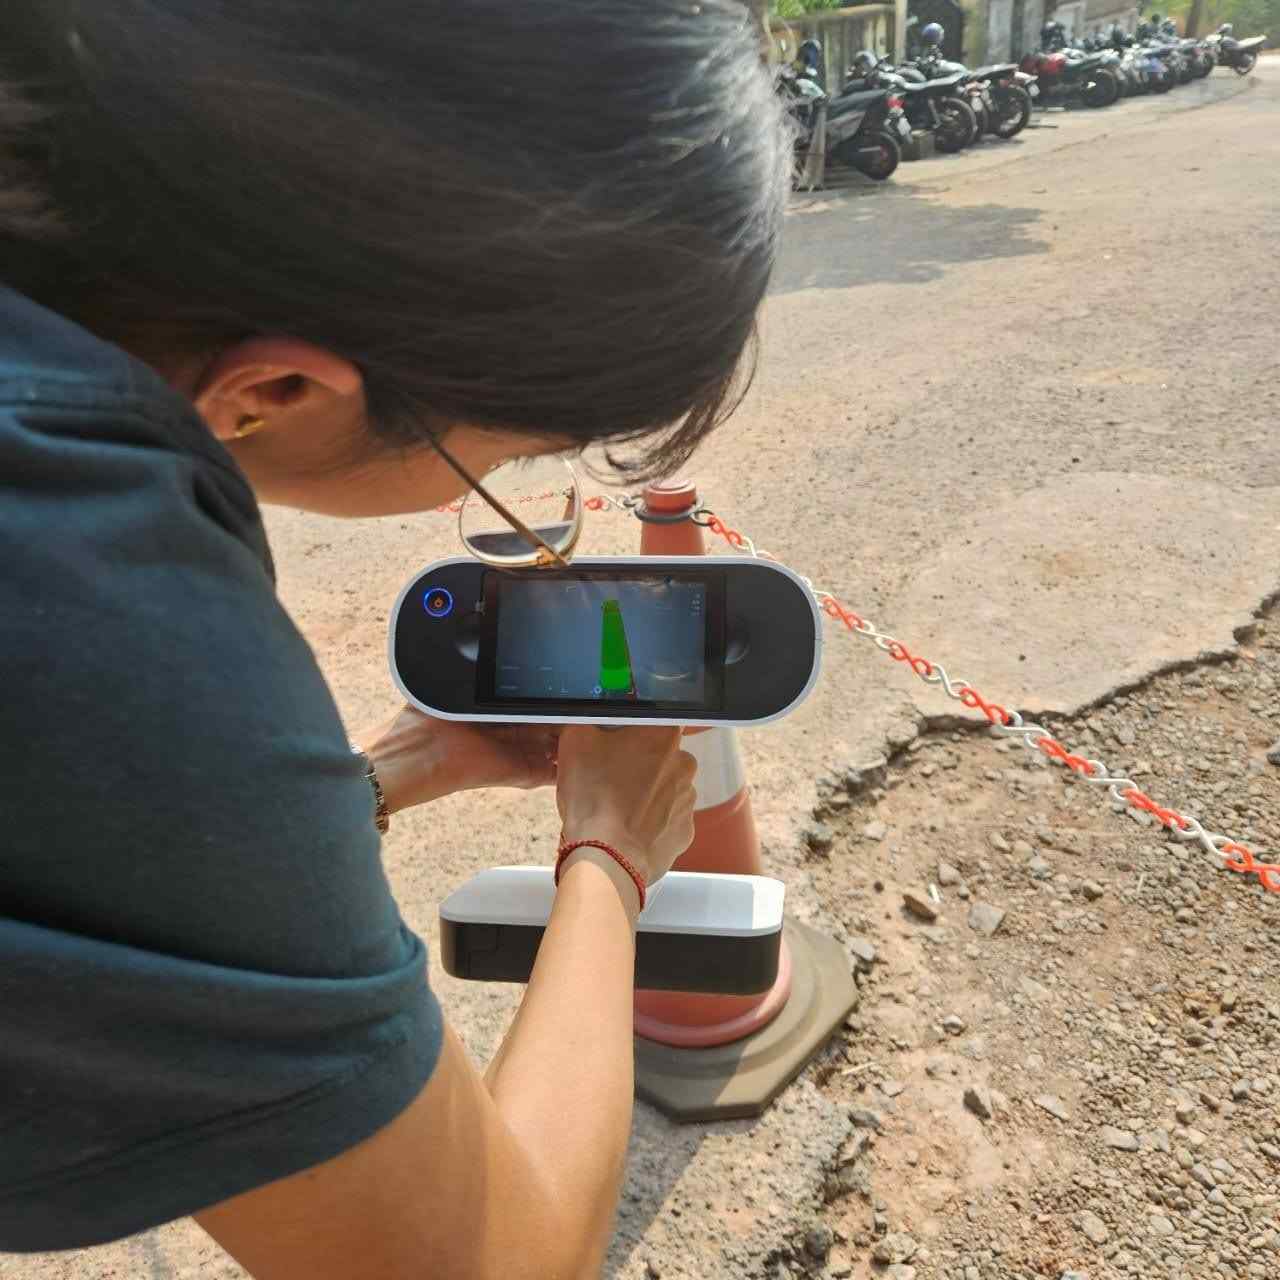
I tried to scan a traffic cone that was outside the building to understand the how to use the scanner.
Leo is an ergonomic, handheld 3D color scanner with automatic, onboard processing, released in 2018. The Leo
features a touch screen panel so users can watch in real-time as a 3D replica of the scanned object comes to life.
By rotating and zooming the model, the user can see if any areas were missed, thus allowing full coverage in one
scan.
Artec Studio is a software program for 3D scanning and post-processing. Data is captured and split into several
"scans," which are then processed and fused into a 3D model.
I tried to scan a traffic cone that was outside the building to understand the how to use the scanner.
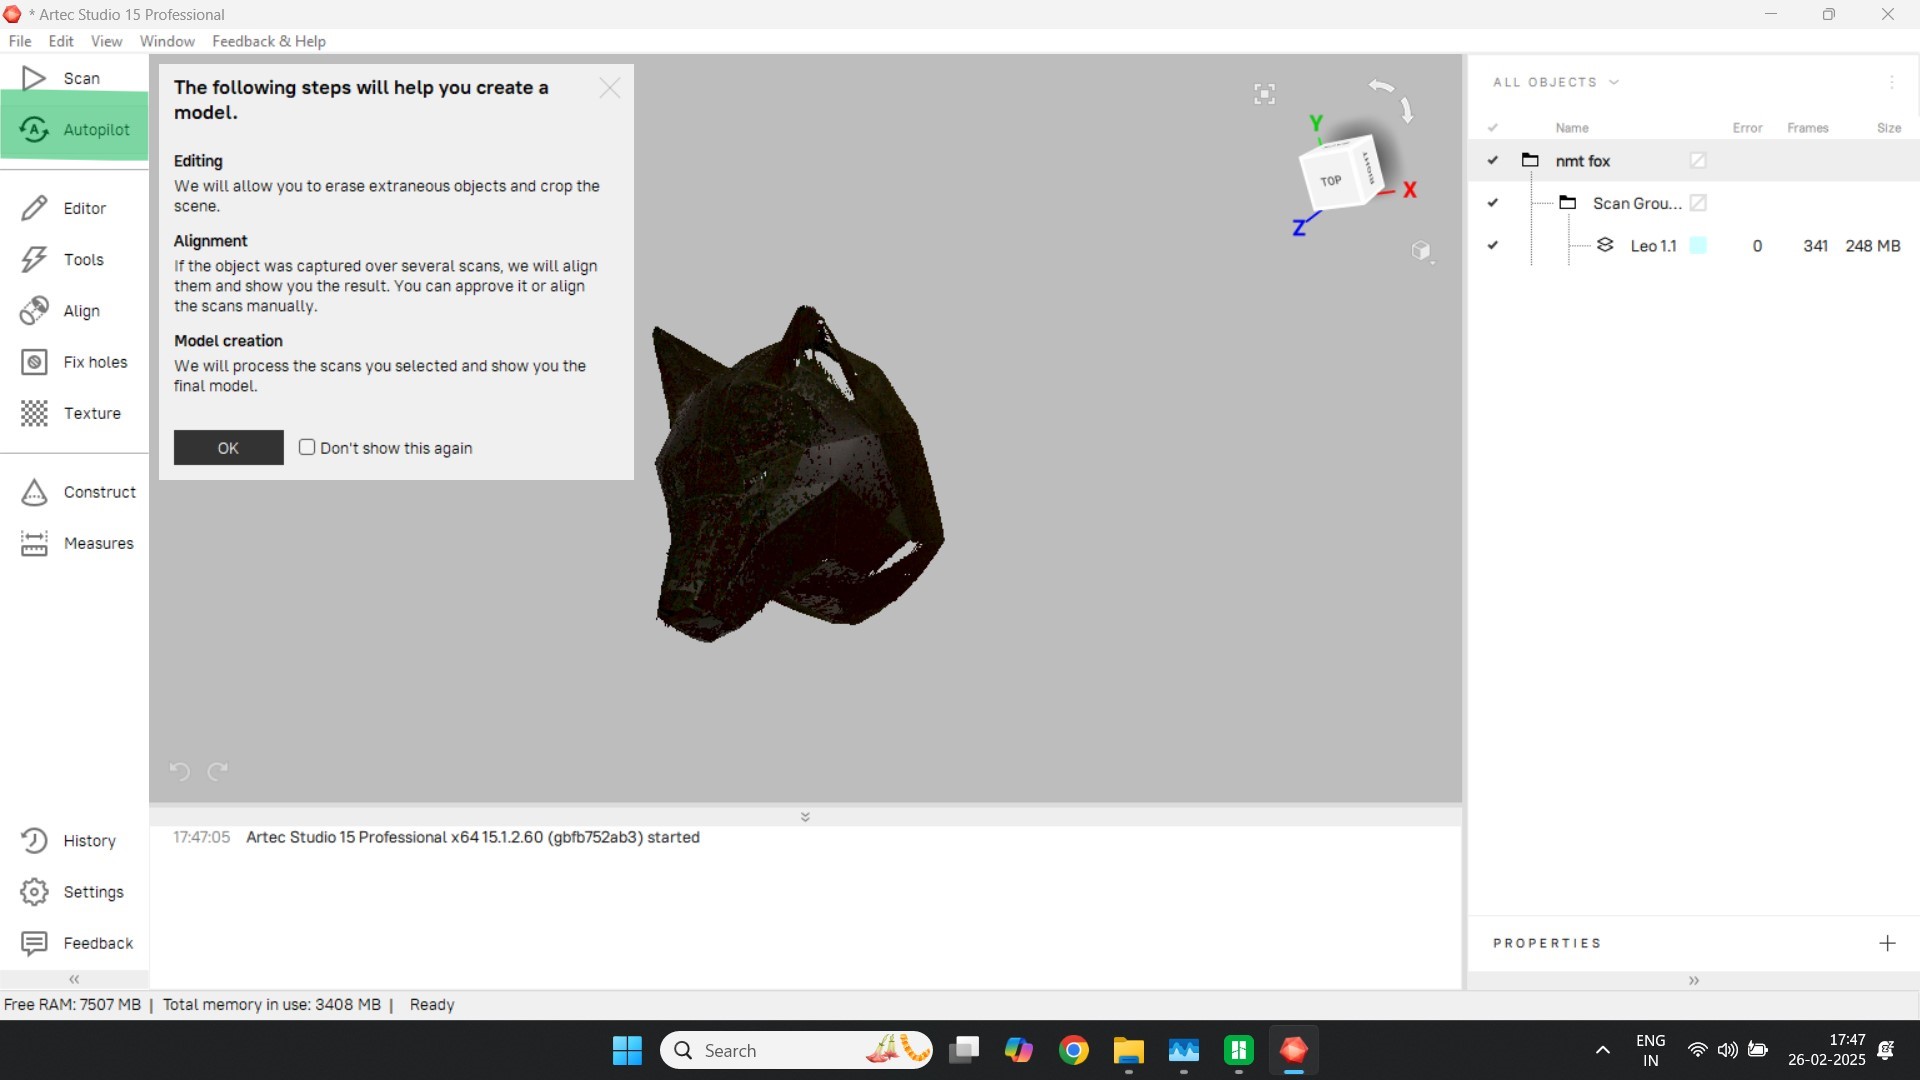
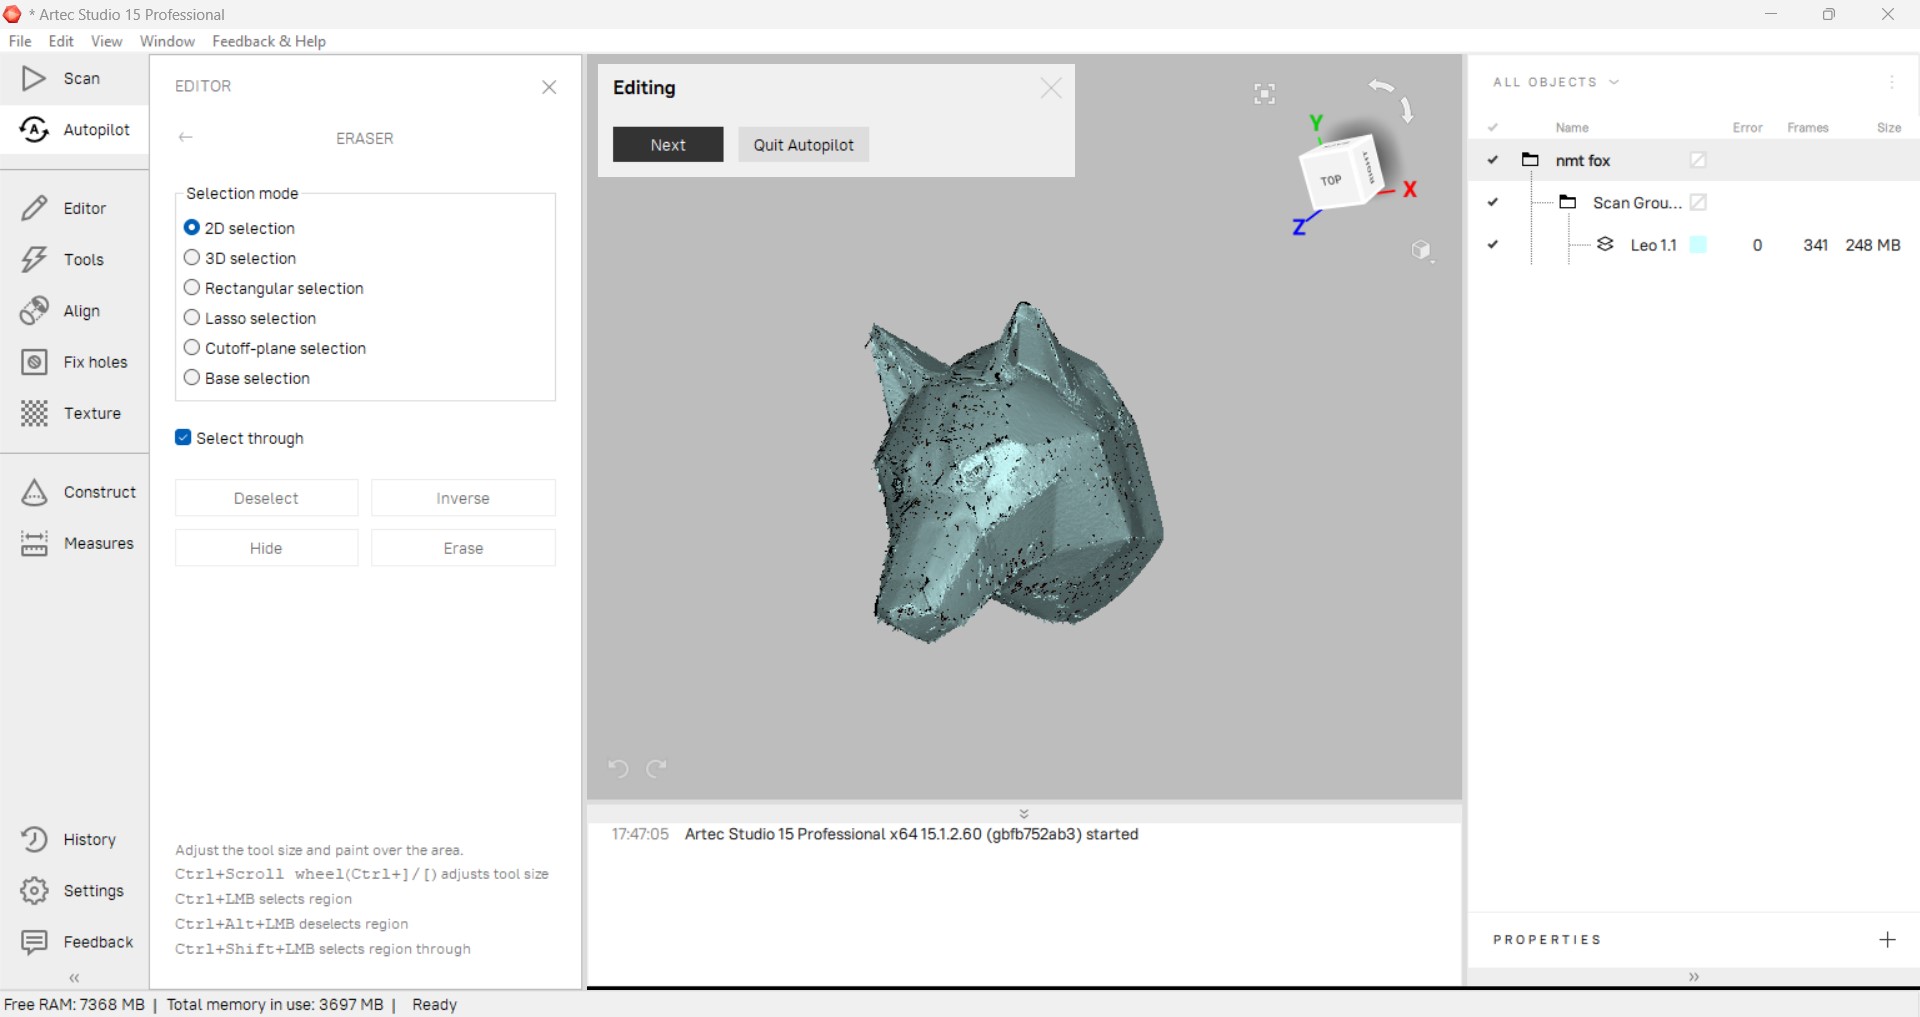
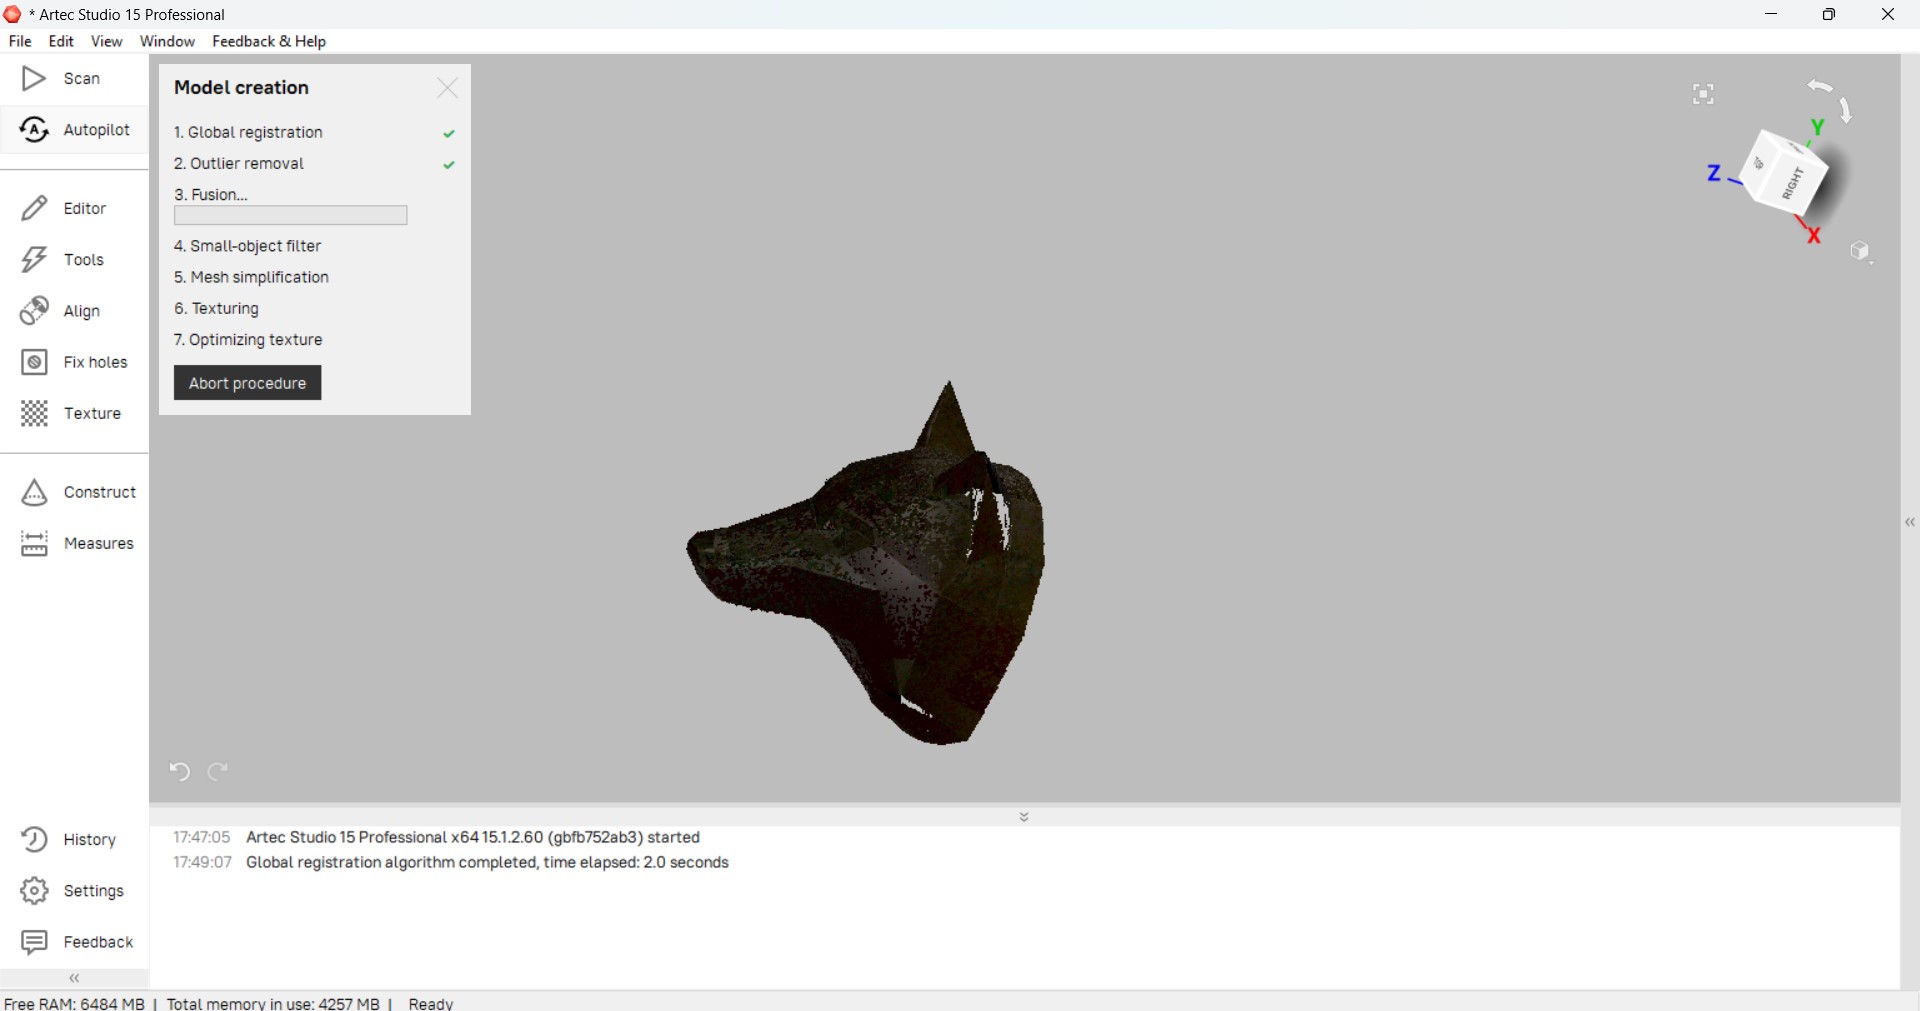
 Artec Studio includes a fully automatic post-processing mode called "Autopilot," which prompts users through
questions related to the characteristics of the object being scanned and provides the option to be guided through
the post-processing pipeline.The Autopilot mode will automatically align scans in a global coordinate system,
determine which algorithms to use for post-processing, clean captured data and remove base surfaces.
Upon completion, scan data can be directly exported to 3D Systems for further CAD processing.
You can see these processes being done using Autopilot in the below images.The fox head was another scan that i
had taken for this assignments.
Artec Studio includes a fully automatic post-processing mode called "Autopilot," which prompts users through
questions related to the characteristics of the object being scanned and provides the option to be guided through
the post-processing pipeline.The Autopilot mode will automatically align scans in a global coordinate system,
determine which algorithms to use for post-processing, clean captured data and remove base surfaces.
Upon completion, scan data can be directly exported to 3D Systems for further CAD processing.
You can see these processes being done using Autopilot in the below images.The fox head was another scan that i
had taken for this assignments.

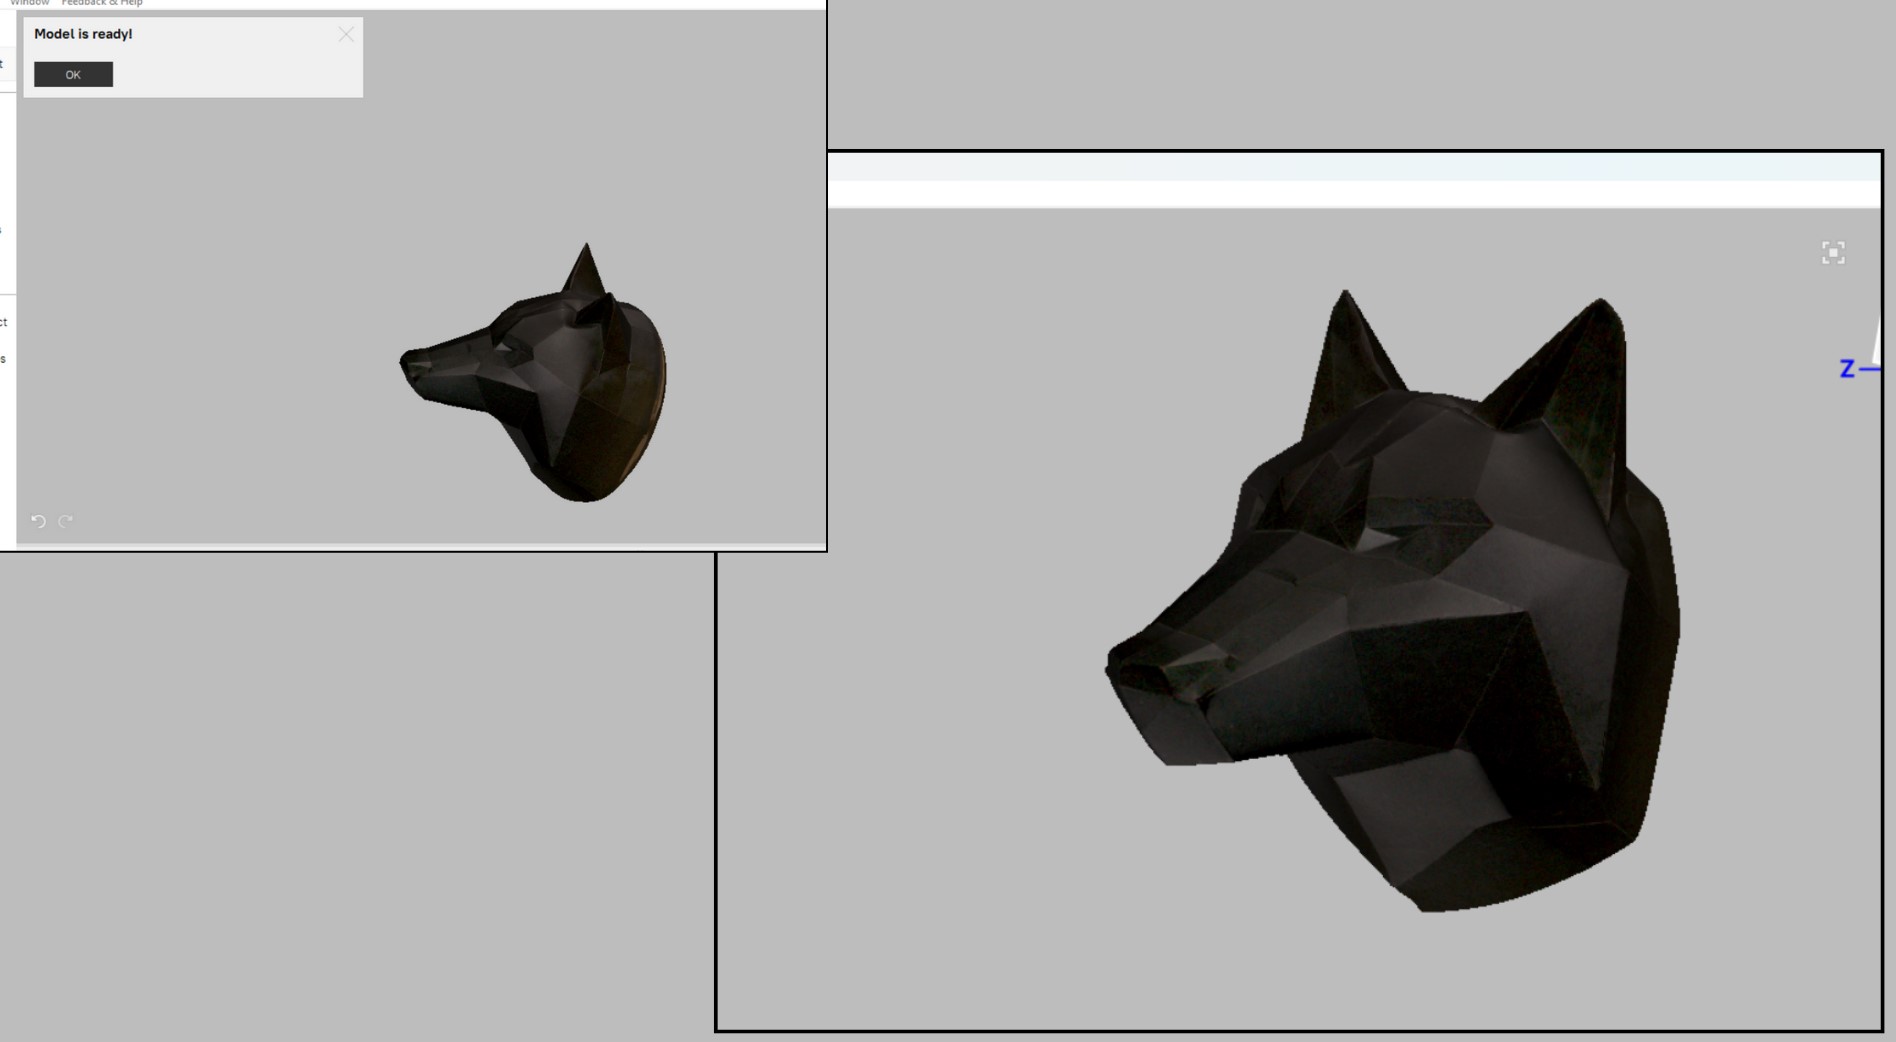
The output looked like this:
Downloads
mantis sting ray Fusion360 file
mantis sting ray .3mf file
3Dscan File
References
additive-manufacturing
Print in place joints.
Artec 3D