SYSTEM INTEGRATION
Objectives
Design and document the system integration for your final project
GLOW SENSE
Features
- Proximity-Based Dimming
- Automatic Lamp Control
- Energy Efficient
- Wireless App Control
- Customizable Lighting
- Lamp-to-Lamp Communication
INSPIRATION
 image
image
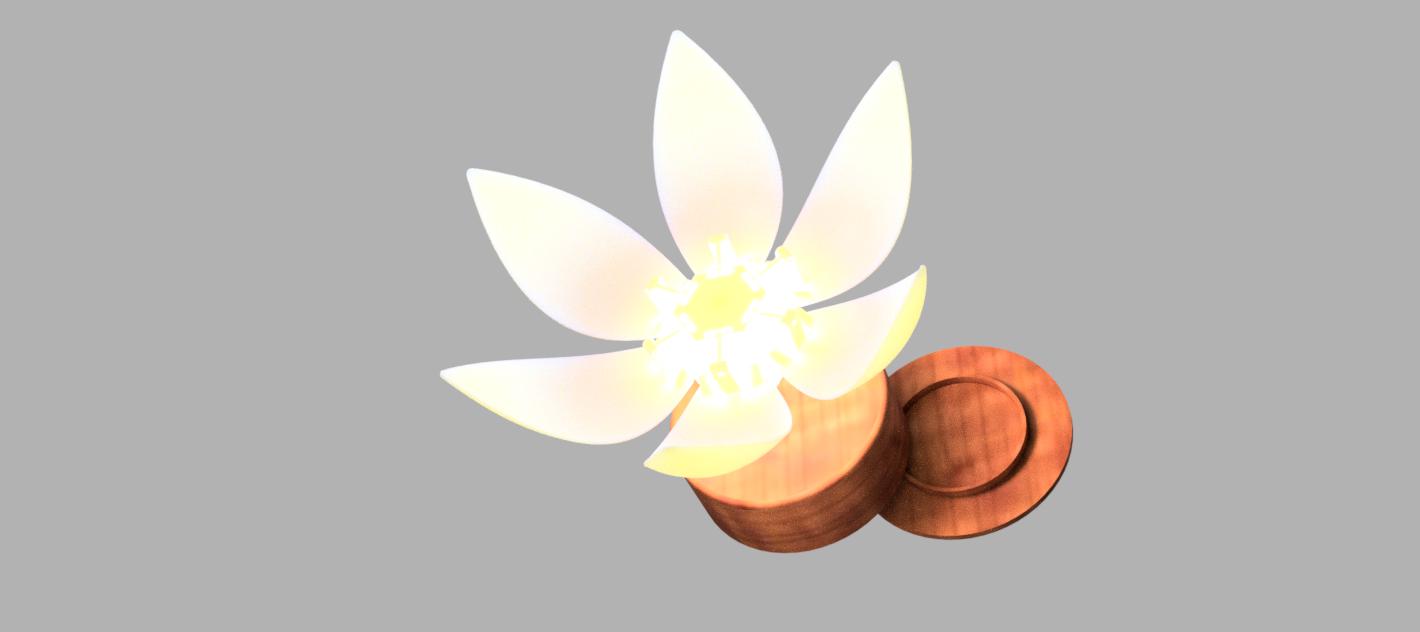
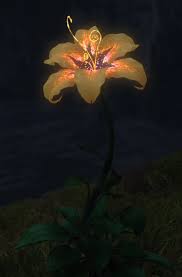
I decided to shape my project based on the Sundrop Flower from Tangled.In the story, the Sundrop Flower releases its healing magic through music, which I found enchanting. I wanted to recreate that sense of wonder in my own way, so I designed my flower to bloom when someone comes near, as if it senses their presence and responds to it. The final vision for my project is to create two interactive flower lamps. When someone approaches one flower, it will trigger the other flower—no matter how far away—to bloom.
My main inspiration came from the Ever-Blooming Mechanical Tulip by Jiří Praus. I was fascinated by the elegant petal motion, seamless integration of electronics, and the emotional, organic interaction it created. His blend of mechanical engineering and artistic design deeply influenced my own project. I was also motivated by the idea of creating something both aesthetic and comforting - a lamp that responds gently to presence and brings calm during nighttime. I wanted it to feel personal, almost alive, rather than just a static object.
Exploded view

Finalizing mechanism, functionality and user experience

The flower mechanism operates on a reciprocating motion principle, where the central stem moves vertically-up and down-to simulate a natural blooming effect. This vertical motion is driven by a MG90S servo motor, which is precisely controlled to push and pull the stem. The petals are connected through a mechanical linkage system that transforms the stem’s linear motion into a graceful, outward opening and inward closing of the petals. This mechanism results in a smooth and lifelike blooming experience.
Once the mechanical structure was finalized, I proceeded with integrating the electronic components. For structural stability and easy access, both the servo motor and the custom PCB were housed in the wooden base of the lamp.
A NeoPixel strip is installed inside the cup that holds the petals. When the flower blooms, the NeoPixels emit a soft, glowing light from within, enhancing the magical and calming effect of the interaction. A VL53L0X time-of-flight distance sensor is embedded near the bottom edge of the base, enabling the flower to detect when someone approaches. This triggers the blooming sequence automatically, making the interaction seamless and touch-free.
 |
 |
 |
In addition to the blooming motion, the flower lamp also offers customizable lighting, controlled via the GlowSense mobile app. Built using Kodular, this app communicates wirelessly with the flower through Wi-Fi, thanks to the onboard XIAO ESP32-C6 microcontroller. Users can change the color of the NeoPixels to suit their mood or environment, adding a personal and ambient touch to the lamp’s functionality.
The mechanical components—including the petals, cup, and stem—will be 3D printed for precision and ease of customization. The base is fabricated from wood, using CNC milling techniques, to provide durability and a contrasting natural aesthetic. The choice of materials not only supports the structural needs but also enhances the visual appeal of the lamp.
Electronics

Functionality


This image is created using chatgpt. Prompt:- I uploaded the image of my lamp and app. Create a moodboard.
The wiring plan
I planned to wire the modules following the layout shown in the Ever-Blooming Mechanical Tulip documentation. In that design, the wiring from the NeoPixel LEDs runs through the central axis of the flower, down the stem, and into the base, where it connects to the microcontroller. I adopted a similar approach for my project. The NeoPixel wires follow this same internal path into the base. The MG90S servo motor is mounted directly inside the base and connected to the pin headers on the custom PCB using its dedicated wire. For the VL53L0X distance sensor, I positioned the module externally, preferably at the bottom section of the base. Its wires are routed through a small opening and connected to the PCB via a JST connector. This wiring plan was designed to keep the internal structure clean, accessible, and free from tangling - ensuring easy maintenance and a tidy final assembly.
Electronics Overview
| Component | Type | Location | Description |
|---|---|---|---|
| XIAO ESP32-C6 | Microcontroller | PCB | Main controller with Wi-Fi; manages logic, sensors, and actuators. |
| Power LED | Status Indicator | PCB | Lights up when board is powered, helpful for debugging. |
| Resistors & Capacitors | Passive Components | PCB | Ensure stable operation and signal conditioning. |
| 3-pin Horizontal Header | Connector | PCB | Used to connect the MG90S servo motor. |
| 3-pin JST Male Connector | Connector | PCB | Connects to NeoPixel strip for lighting control. |
| 4-pin JST Male Connector | Connector | PCB | Connects to VL53L0X distance sensor. |
| MG90S Servo Motor | Actuator | Base (mounted) | Controls blooming motion by driving the flower stem up and down. |
| NeoPixel Strip | LED Strip | Inside flower cup | Provides customizable light effects controlled via app. |
| VL53L0X | Distance Sensor | Base (external) | Detects proximity and triggers flower response. |
Mockup
To get an overall idea of mechanism and to test if more petals are possible, I made a mokeup using paper.

I found that it is very difficult to add another layer of petals, as it will not facilitate smooth closing of petals. So I decided to add only six functional petals.
Schedule
I used Miro to plan the schedule and organize my workflow. It allowed me to visually map out milestones, list tasks per week, and adjust priorities as needed. The intuitive interface helped with both time management and design brainstorming
This is how I am planning to complete the project in time.
