Data Sheets
For this week’s group assignment, we reviewed the safety data sheets for each molding and casting material to understand their hazards and proper handling procedures. We then created test casts with the materials.
NEUKADUR PROTOCAST 105
Neukadur Protocast 105 Datasheet
Main characteristics:
- good flow characteristics
- High resistant to impact
- Easily colorable
- Withstands high temperature
- Cures to a white finish
- Designed for vacuum casting
| Component | Color | Mixing Ratio by Weight | Density (20°C) g/cm³ | Viscosity (25°C) mPa∙s |
|---|---|---|---|---|
| NEUKADUR ProtoCast 105 Component A | Slightly yellowish | 100 | 1.05 | 650 |
| NEUKADUR ProtoCast 105 Component B | Slightly yellowish | 200 | 1.16 | 160 |
| Mixture Properties (approximate values) | PC 105 A / PC 105 B |
|---|---|
| Mixing Viscosity (25°C) mPa∙s | 325 |
| Density (20°C) g/cm³ DIN 53479 | 1.13 |
| Processing Time (25°C) Minutes | 5 |
| Demolding Time (70°C) Minutes | 60 |
| Hardness Shore D DIN 53505 after storage 2 Hours at 70°C | 82 |
| Cured Color | White |
| Recommended Layer Thickness mm | 5 |
processing:
Before processing, NEUKADUR ProtoCast 105 Component A must be completely homogenized. Close containers tightly after each use. Demolding should be done carefully, especially when working with thin components, because the cured material takes around 1 to 2 hours at 70 °C to reach its maximum impact strength.
Before demoulding, it is advised to temper the compound for at least an hour at 70°C after pouring NEUKADUR ProtoCast 105 Comp. A/B into the ProtoSil RTV 240 molds that have been already prepared. The recommended maximum thickness for the cast layer is 5 mm.
Additionally, before adding the NEUKADUR ProtoCast 105 Comp. B, it is recommended to evacuate the NEUKADUR ProtoCast 105 Comp. A for 15 minutes at the maximum vacuum and then releasing it to 20 to 25 mbar. If both components are poured together, considerable foaming may happen at pressures lower than 20 mbar.
PROTOSIL RTV 245
Main characteristics:
- Shore hardness A 40
- very good flow properties, translucent
- shrinkage-free vulcanization at room temperature
- can be made thixotropic
- high resistance to initial tearing and tear propagation
| Properties in the non-crosslinked state | ProtoSil RTV 245 Comp. A | ProtoSil RTV 245 Comp. B 1 (dry surface) |
ProtoSil RTV 245 Comp. B 2 (oily surface) |
NEUKASIL Thixotropic Agent SN 200 |
|---|---|---|---|---|
| Colour | colourless | colourless | colourless | colourless |
| Mixing ratio p.b.w. | 100 | 10 | 10 | 0.1 – 0.3 |
| Density 20 °C (approx.) g/cm3 | 1.1 | 0.95 | 0.96 | 0.98 |
| Viscosity 20 °C (approx.) mPa·s | 60,000 | 320 | 400 | 1,000 |
| Properties of the mixture (approx. values) | Mixture A/B |
|---|---|
| Mixed viscosity | 35,000 mPa·s |
| Pot life (1000 g) | 80 minutes |
| Demouldable after | 12 hours |
| Shore A hardness points | DIN 53505 40 |
| Service temperature | 200 °C |
processing:
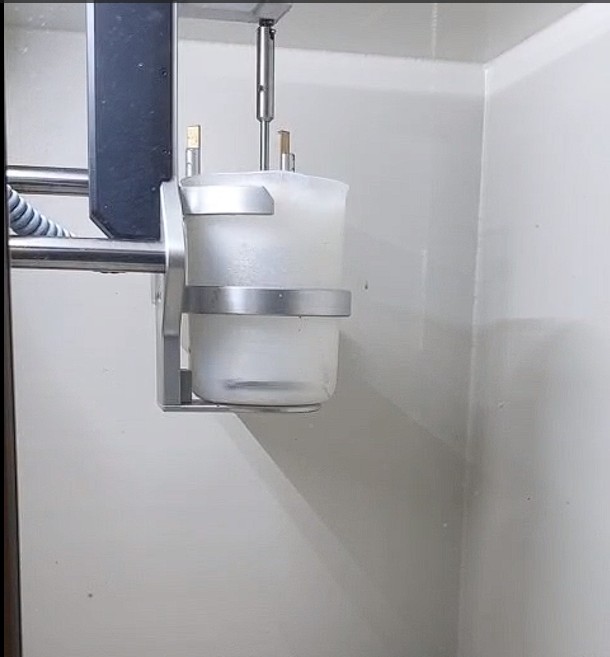
While stirring, make sure that as little air enters the compound as possible. We advise emptying the formulation containing the crosslinker (hardener) before proceeding to prevent bubbles formation.
The mixture may increase three to four times its initial volume when bubbles form as a result of the vacuum being formed. Therefore, it is advised to use a container three to four times bigger than the volume of the mixture.
When the bubbles have bursted and the formulation has returned to its initial volume, the procedure is complete. Lastly, gently and slowly cover the printed object to be casted with the silicon-hardener mixture and wait for it to cure for 12h minimum!
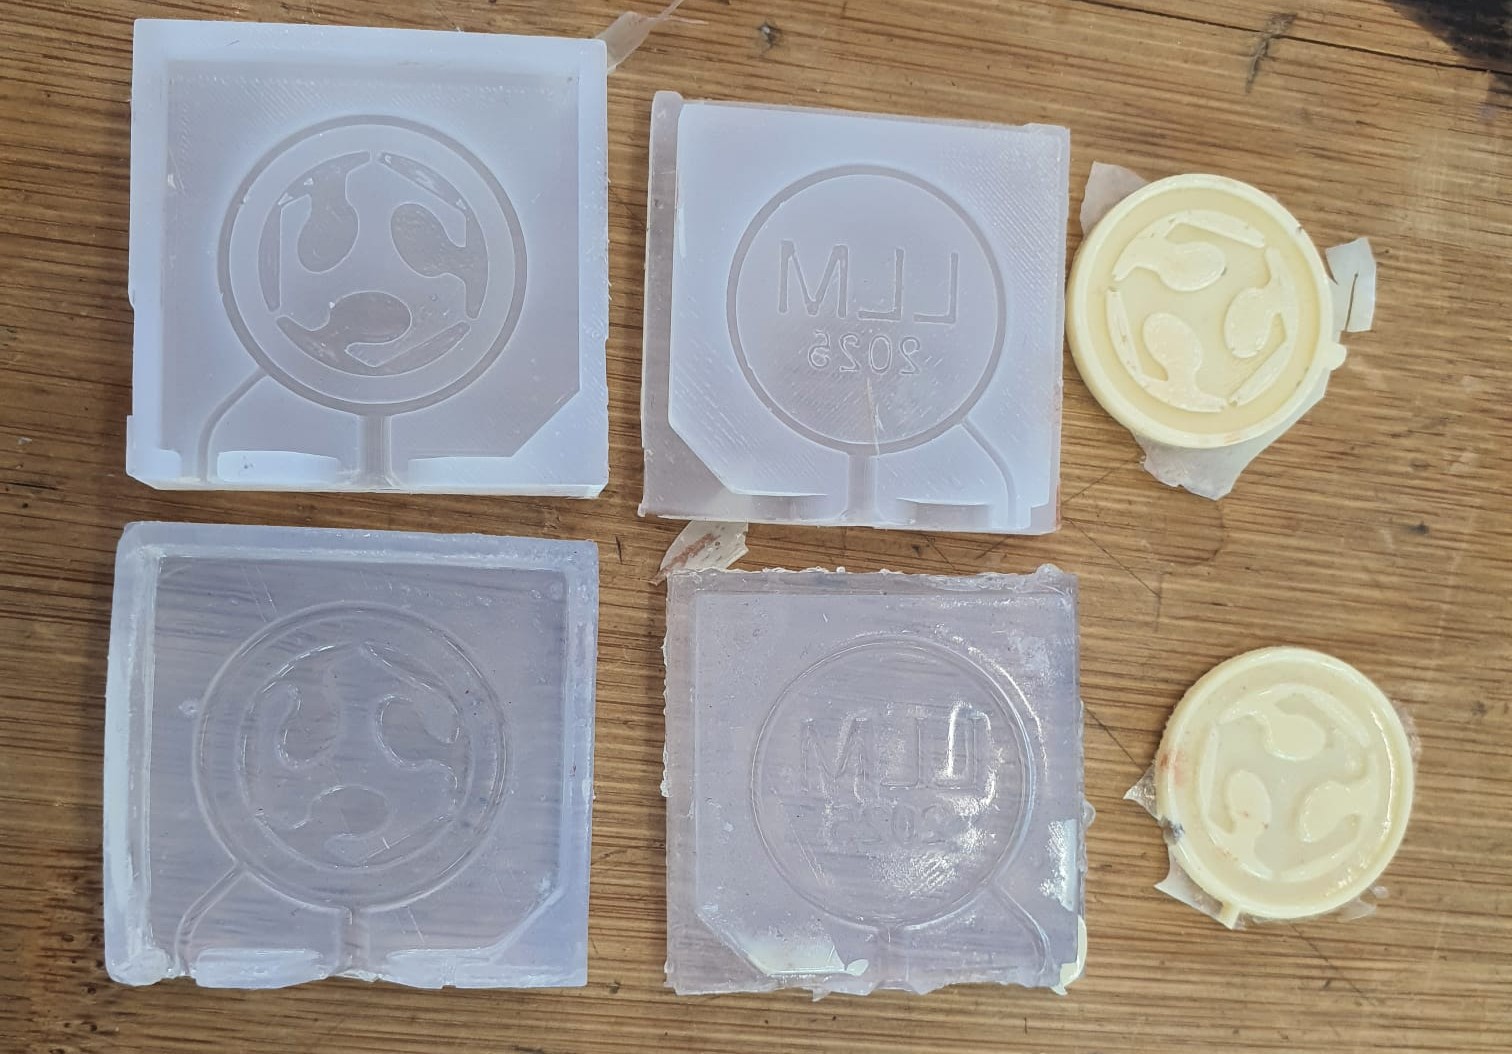
Comparing Molds
For comparing the molding Techniques, we used The LLM Coin Mold by Mika. He also showed, how to print them
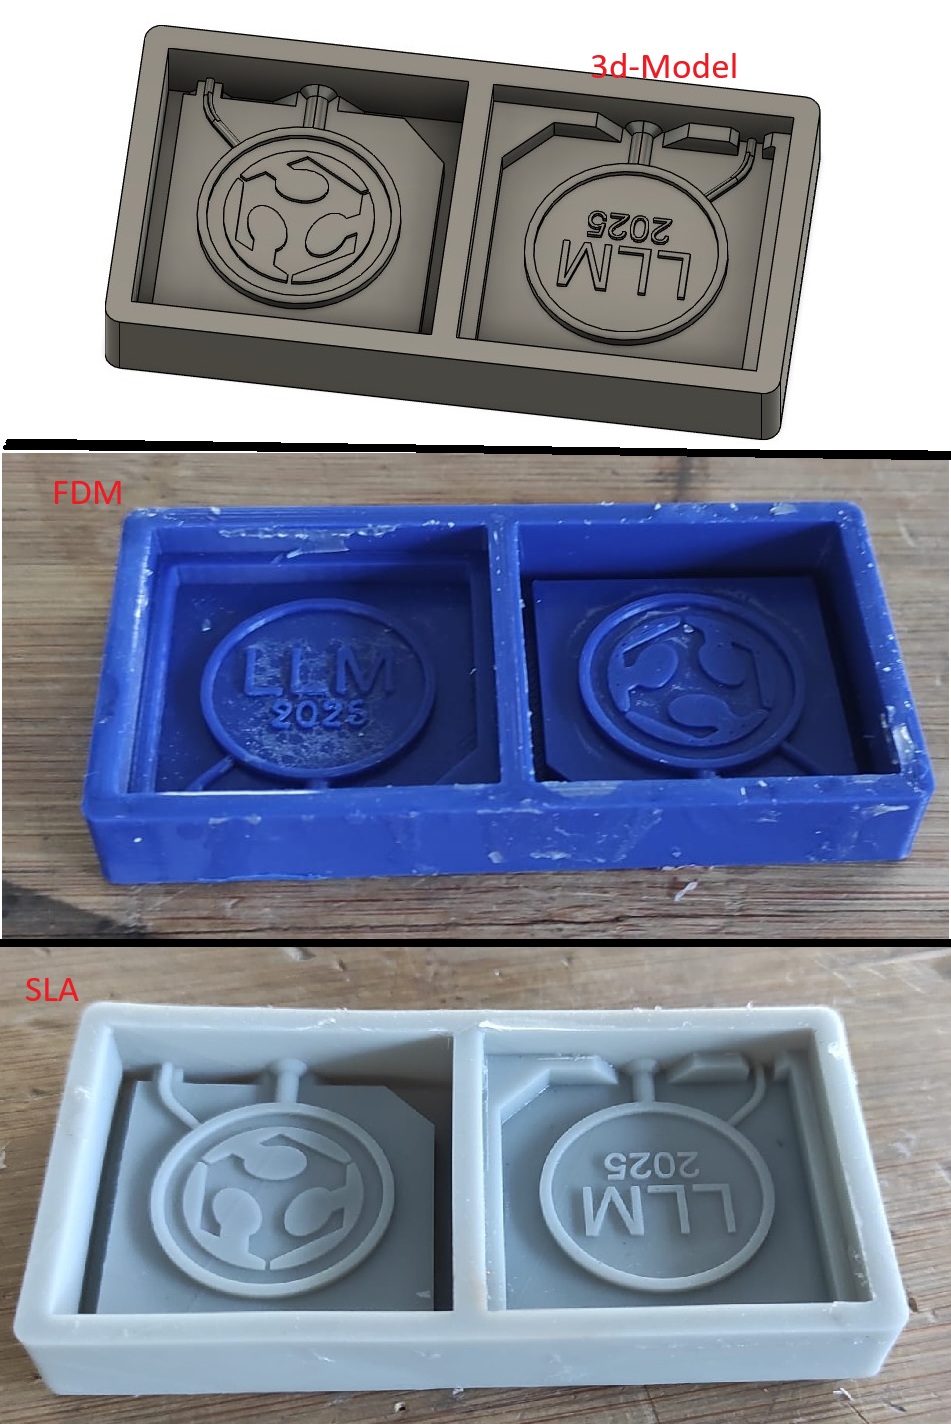
Final Quality Comparison
Although using FDM-printed positive parts of the mold is quick and inexpensive, small features may blur and the 0.1 mm layer height can still produce faint production roads on the surface that most likely need to be post-processed (primed or sanded). Moreover, the edges of the cast (coin) are rather sharp. Whereas SLA resin positive parts of the mold produce casts with smoother surface finishes, with a layer height of 0.05 mm, but they also cost more time and material. The edges here are rather smooth curves, and there are almost no visible layers.