Neopixels
Here's an example circuit with two Neopixels. This is enough to learn how addressable LEDs work. This is based on Hafey's design and the Adafruit NeoPixel Überguide. The Überguide mentions some nuances when using a 3.3V microcontroller and when you have many Neopixels, but you don't have to think about either of them when you just have a few Neopixels.
Neopixels can display any color, and a long series of them can be controlled with just a single pin on the microcontroller. The reason for this is that there is a tiny communication circuit built into each Neopixel, so it only executes the command addressed to it and forwards the remaining commands to the next Neopixels.
Schematic
![]()
PCB layout
![]()
Components
![]()
Connections
Then, you use jumper wires to connect the ground (GND) pin on the Neopixel board to the GND on the Raspberry Pi Pico W. You connect the 5V pin on the Neopixel board to the VBUS pin on the Raspberry Pi Pico W (since the USB voltage is 5V), and you connect the Data pin on the Neopixel board to pin number 0 on the Raspberry Pi Pico W. You can also integrate the Neopixels on a PCB with the Raspberry Pi Pico.
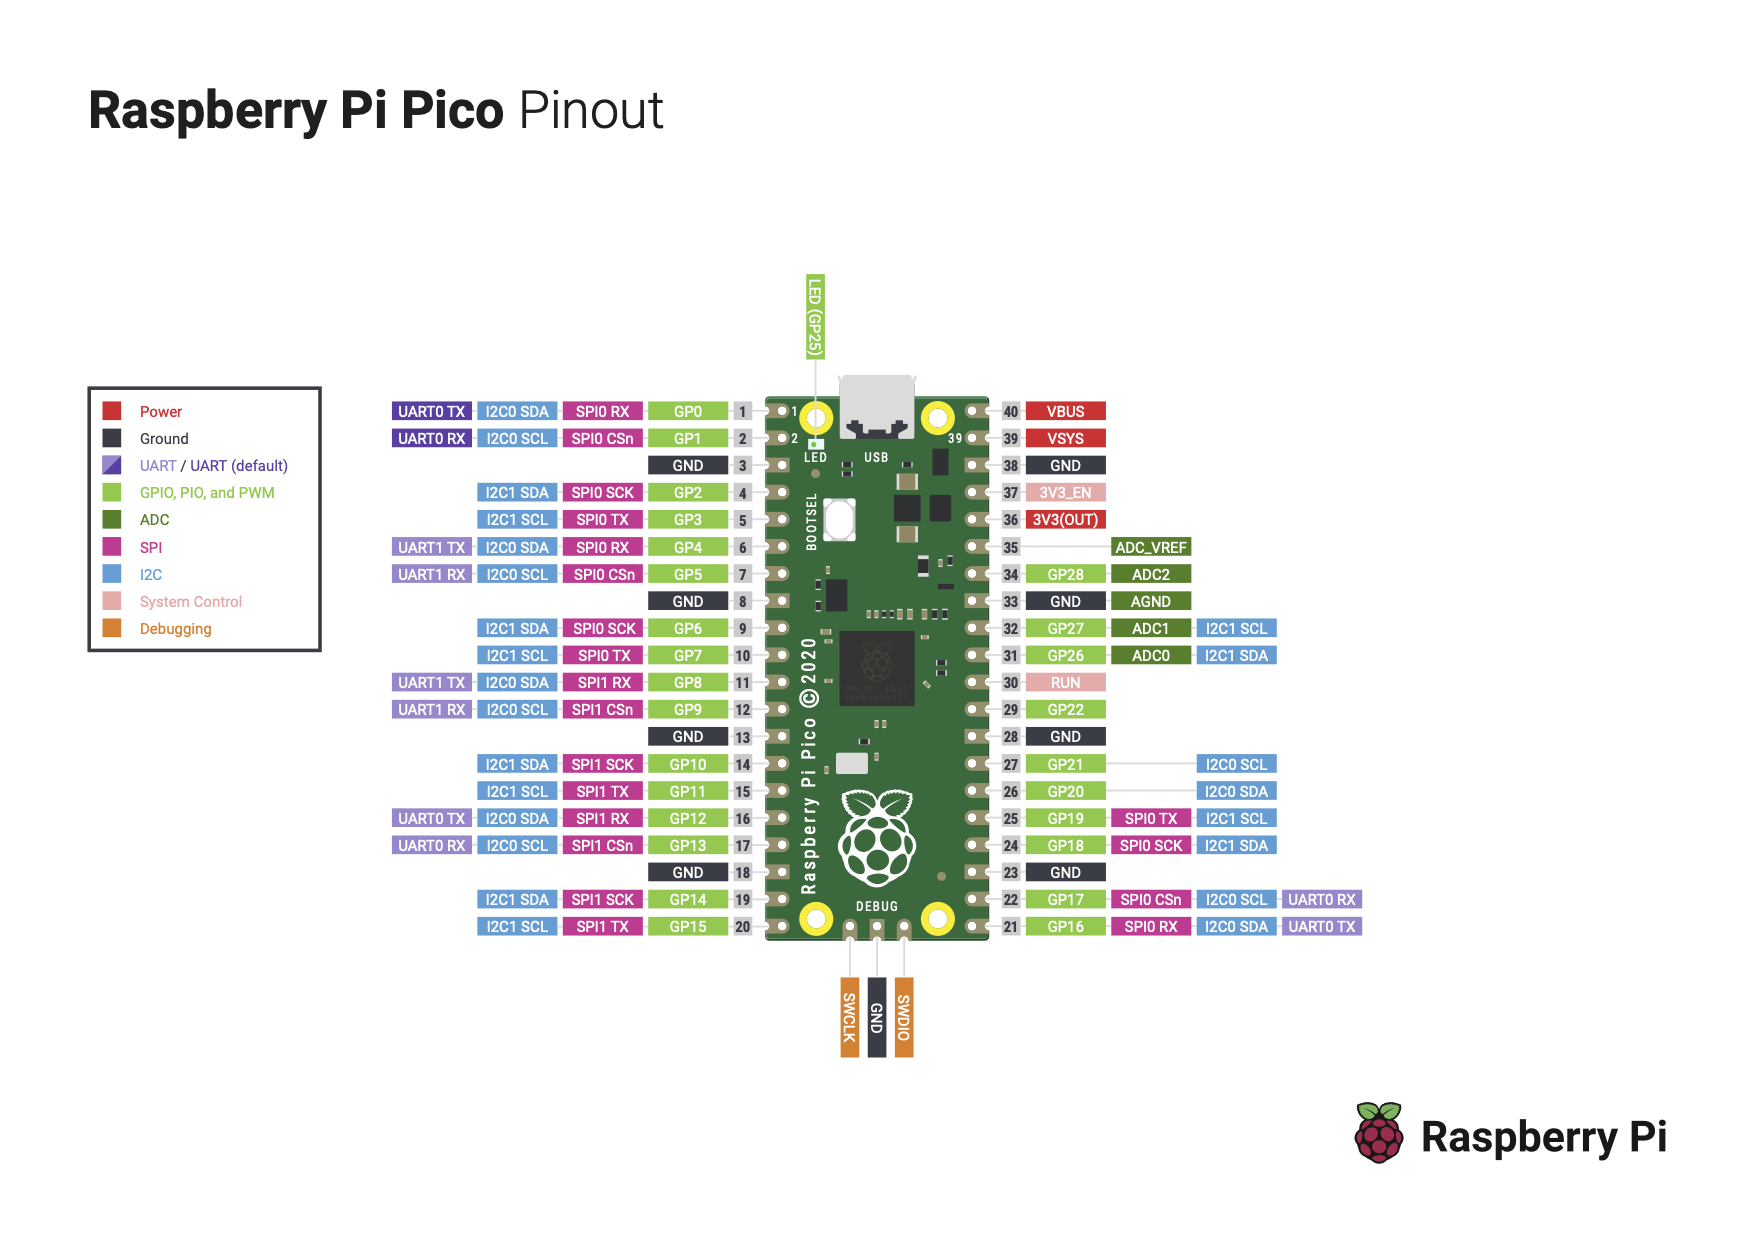
Raspberry Pi Pico Pinout:
You can also use the Xiao RP2040. Here's the Xiao RP2040 pinout from Adrián Torres; use pin D0, 5V and GND.
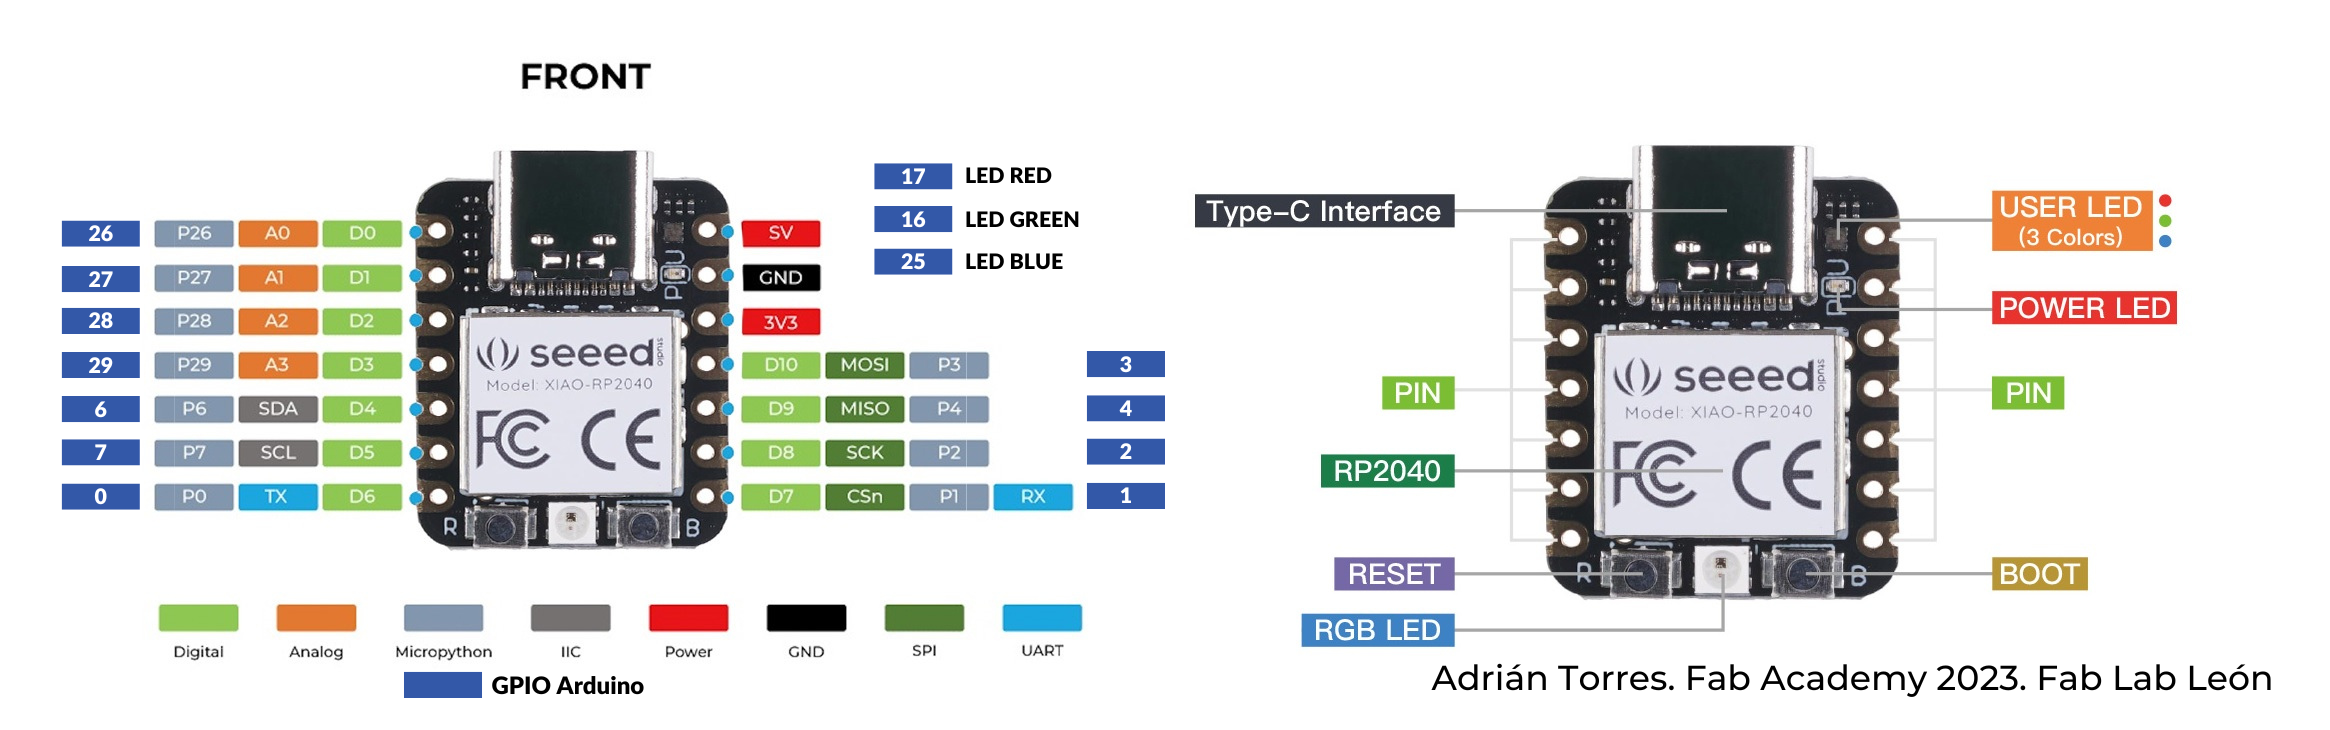
Programming
MicroPython code to make one Neopixel red:
import neopixel
from machine import Pin
import time

pixPin = 0
pixSize = 1
pix = neopixel.NeoPixel(Pin(pixPin), pixSize)

red = (255,0,0)
pix[0] = red
pix.write()
Your task now is to figure out how the code works by modifying it and observing what happens:
- Change the color of the LED by adjusting the RGB values.
- Modify the program to turn on the other LED. (Psst! Try adding a while loop like in the servo code, link to that coming soon)
- You are allowed to use Google and AI! You need MicroPython code to control Neopixels.
Note: When you get error messages, they indicate which line contains the error. Check that line carefully and try modifying it. But be aware that the compiler doesn't always know which line is actually causing the problem.
The import statements at the beginning of the code allow us to use specific software libraries. A software library is a collection of pre-written programs that someone has created for us, so we don’t have to build everything from scratch. We need the neopixel library to control the LEDs and the machine library to manage the microcontroller's pins.
- pixPin is the pin number on the Raspberry Pi Pico that the LED is connected to.
- pixSize is the number of Neopixel LEDs you want to control.
- You can rename pixPin and pixSize, but if you do, make sure to update them everywhere in the code. Also, avoid spaces and Icelandic characters in variable names.
In most programming languages, counting starts at zero. So, to turn the first Neopixel LED white, you use: pix[0] = white To turn the next LED white, use: pix[1] = white
You can rename pix and white, but remember to update them consistently throughout the program.
Each Neopixel LED consists of a red, green, and blue LED, along with a tiny circuit that handles communication with the microcontroller. We use RGB (red, green, blue) color codes to control the LED colors. The lowest possible value for each color is 0, and the highest is 255:
