Develop a plan for dissemination of your final project.
Complete your final project, tracking your progress: what tasks have been completed, and what tasks remain? what's working? what's not? what questions need to be resolved? what will happen when? what have you learned?
What I knew beforehand
As part of my work I regularly interact with entrepreneurs who develop tangible and intangible products. I am familiar with the general regulatory framework applicable in Peru related to patents, utility models, industrial designs, and copyright — the categories under which a physical invention like PitchLight could be protected.
I understand that intellectual property protection is not just a legal formality; it is a strategic decision that defines how an invention can be commercialized, licensed, or shared — and who controls those decisions.
This documentation was produced in June 2026. this one connects most directly to my professional background. I work regularly with entrepreneurs who develop tangible and intangible products, and intellectual property strategy — patents, utility models, industrial designs, copyright, licensing — is a topic I address with them from the earliest stages of a venture. For my project the choice of a CC BY-NC 4.0 license was deliberate: it aligns with the open-source philosophy of Fab Academy, allows the community to replicate and adapt the project freely for non-commercial purposes, and preserves the ability to negotiate commercial arrangements separately. The tension between sharing and protecting is real, and there is no single correct answer.
A. Final Project Dissemination Plan
The objective is to present the project to the target audience, which consists of students, entrepreneurs, and professors. To achieve this, the timer will be used during pitch competition events organized at the university.
1. Target Audience
Primary: Students and entrepreneurs participating in entrepreneurship workshops and incubation programs.
Secondary: Professors, mentors, and judges of these competitions.
Tertiary: The maker community and technology educators.
2. Dissemination Channels and Strategies
Live Demonstration in a Real-World Setting
Action: Organize a testing session with a university entrepreneurship workshop or a student group.
Objective: To obtain valuable feedback, validate usability, and generate the first potential users.
Creation of a Public Repository
Action: Upload all project materials to GitHub or a similar platform: code, enclosure designs (STL for 3D printing or DXF for laser cutting), electronic schematics, and bill of materials.
Objective: To promote an open-source approach so others can replicate, improve, or adapt the project, increasing its reach and impact.
Demonstration Video
Action: Produce a short, dynamic video (1–2 minutes) showing the timer's functionality: button activation, the timer in operation, color changes, and the alarm sound.
Objective: To publish it on YouTube and social media. A video is the most effective way to demonstrate the device's utility.
B. Final Project Tracking and Status
B.1 Completed Tasks vs. Pending Tasks
✅ Completed Tasks
⏳ Pending Tasks (In Process)
Problem and solution definition.
Mechanical Design: Finalize the enclosure design change for the timer, complete the 3D modeling of the enclosure, and perform the cutting/printing.
Research and selection of electronic components (RP2040, sensor, LEDs, display, buzzer).
Electronic Design: Design and manufacture the custom PCB in KiCad.
Basic circuit prototype on a breadboard.
Programming: Implement the logic for time selection (3, 5, 7 min.) via buttons or a web interface.
Basic timer programming with color changes (green → yellow → red).
Physical Integration: Assemble all components into the final enclosure in an orderly and secure manner.
Successful test of the button to activate the countdown.
Calibration and Optimization: Define the code for the display and the buzzer volume.
Test of the buzzer functionality.
Usability Testing: Conduct validation tests with real users.
Connection with the display that shows the timer.
Final Documentation: Polish the code, create the repository, and record the demonstration video.
B.2 What's Working? What's Not?
✅ What's working:
The core timer logic (countdown).
Control of the RGB LED strip and color change based on time.
System activation via the button on the breadboard prototype.
Buzzer activation when the time ends.
Connection with the display that shows the timer.
❌ What's NOT working (or needs improvement):
Configuration Interface: There is no easy way for the user to switch between the predefined times (3, 5, 7 min.).
Physical Robustness: The breadboard prototype is fragile and not suitable for continuous use. The PCB and enclosure are necessary.
Power Management: The prototype currently connects to a power source, but the future plan is to include a charging circuit and a battery for a portable power source.
B.3 Questions to Be Resolved
User Interface: What is the best way to allow time selection? Physical buttons on the enclosure, configuration on the display, or a rotary selector?
Power Supply: Will the device be desktop-only (with a USB cable) or portable (with a battery)? This affects the PCB and enclosure design.
Post-Alarm Behavior: What should happen when the alarm sounds? Does it turn off automatically after a while? Does it require someone to press a manual reset button?
Activation Feedback: Does the button give a clear signal (sound or light) to the user that the timer has started? This is crucial for usability.
B.4 Schedule
Week 1
Tasks: Finalize the 3D design of the enclosure. Design the PCB schematic in KiCad.
Result: Files ready for printing/cutting and for sending the PCB to manufacture.
Week 2
Tasks: Print/cut the enclosure. Meanwhile, program the time selection interface on the display.
Result: Physical enclosure ready. Code with functional time selection.
Week 3
Tasks: Receive and solder components onto the PCB. Assemble the electronics into the enclosure.
Result: Fully integrated and functional prototype.
Week 4
Tasks: Intensive durability and usability testing. Final adjustments (sound calibration). Record the demonstration video and prepare documentation for the repository.
Result: Polished final product ready for dissemination.
Reflections
The tension between open-source sharing — which is at the heart of the Fab Academy philosophy — and intellectual property protection is real and nuanced. Choosing a Creative Commons license such as CC BY-NC-SA means that the work can be used and adapted freely for non-commercial purposes, with attribution required. This aligns with the educational and community-oriented nature of PitchLight while still preserving the right to negotiate commercial arrangements separately.
This week reinforced a principle I apply in my work with entrepreneurs: understanding the intellectual property landscape of your own creation is not optional. It determines what can be copied freely, what requires permission, and what protections you have if someone uses your work without authorization. Starting this analysis early — rather than after the product is already in use — is far more effective.
- Product Design: How to identify a design that is visually appealing but also allows for the safe and stable integration of components.
- Systems Integration: How to unify software components (programming), hardware (electronics), and industrial design (enclosure) to create a cohesive product.
- Iterative Prototyping: The importance of starting with a breadboard to test ideas quickly before committing to a more complex final design (PCB).
- User-Centered Thinking: Designing not only for functionality but also to be intuitive and pleasant to use — for example, the color change as immediate visual feedback.
- Practical Electronics Challenges: Issues such as interference, the need for pull-up/pull-down resistors, and stable power management.
- Project Management: The need to break down a large project into smaller, manageable tasks and to constantly track progress.
License
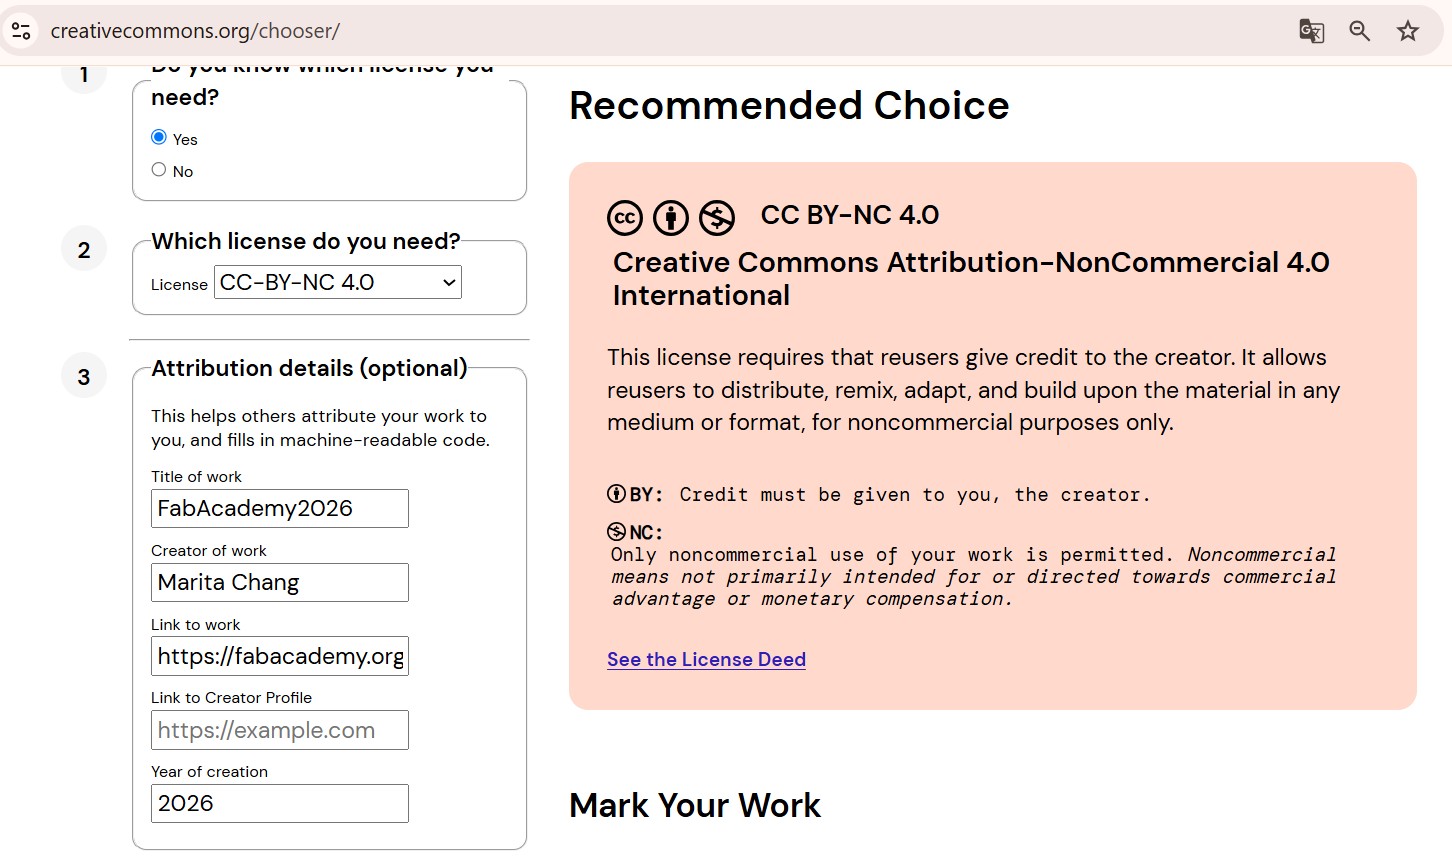
The following image shows the Creative Commons license generated to share this work. The selected license is CC BY-NC 4.0 (Attribution-NonCommercial 4.0 International), which allows others to distribute, remix, adapt, and build upon the material in any medium or format for noncommercial purposes only, as long as credit is given to the creator.
CC BY-NC 4.0 license generated at creativecommons.org/chooser for the work "FabAcademy2026" by Marita Chang (2026).