W17 | Wildcard Week
📝 Assignment:
- Design and produce something with a digital process (incorporating computer aided design and manufacturing) not covered in another assignment, documenting the requirements that your assignment meets, and including everything necessary to reproduce it.
Textiles Embroidery 🧵
Embroidery process setup
Tools
Software
Inkscape, with the Ink/Stitch extension for embroidery-specific path generation and machine export.
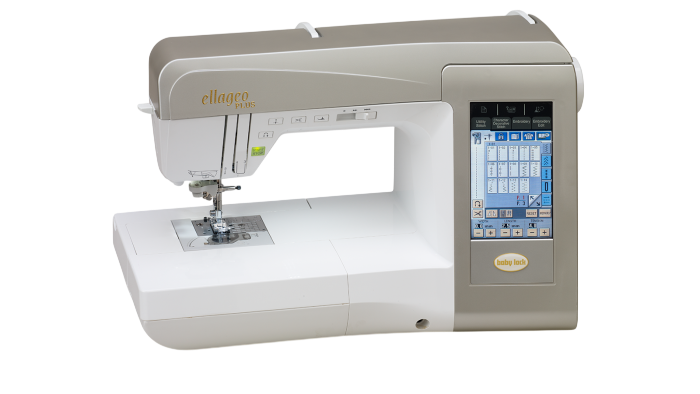
Machine
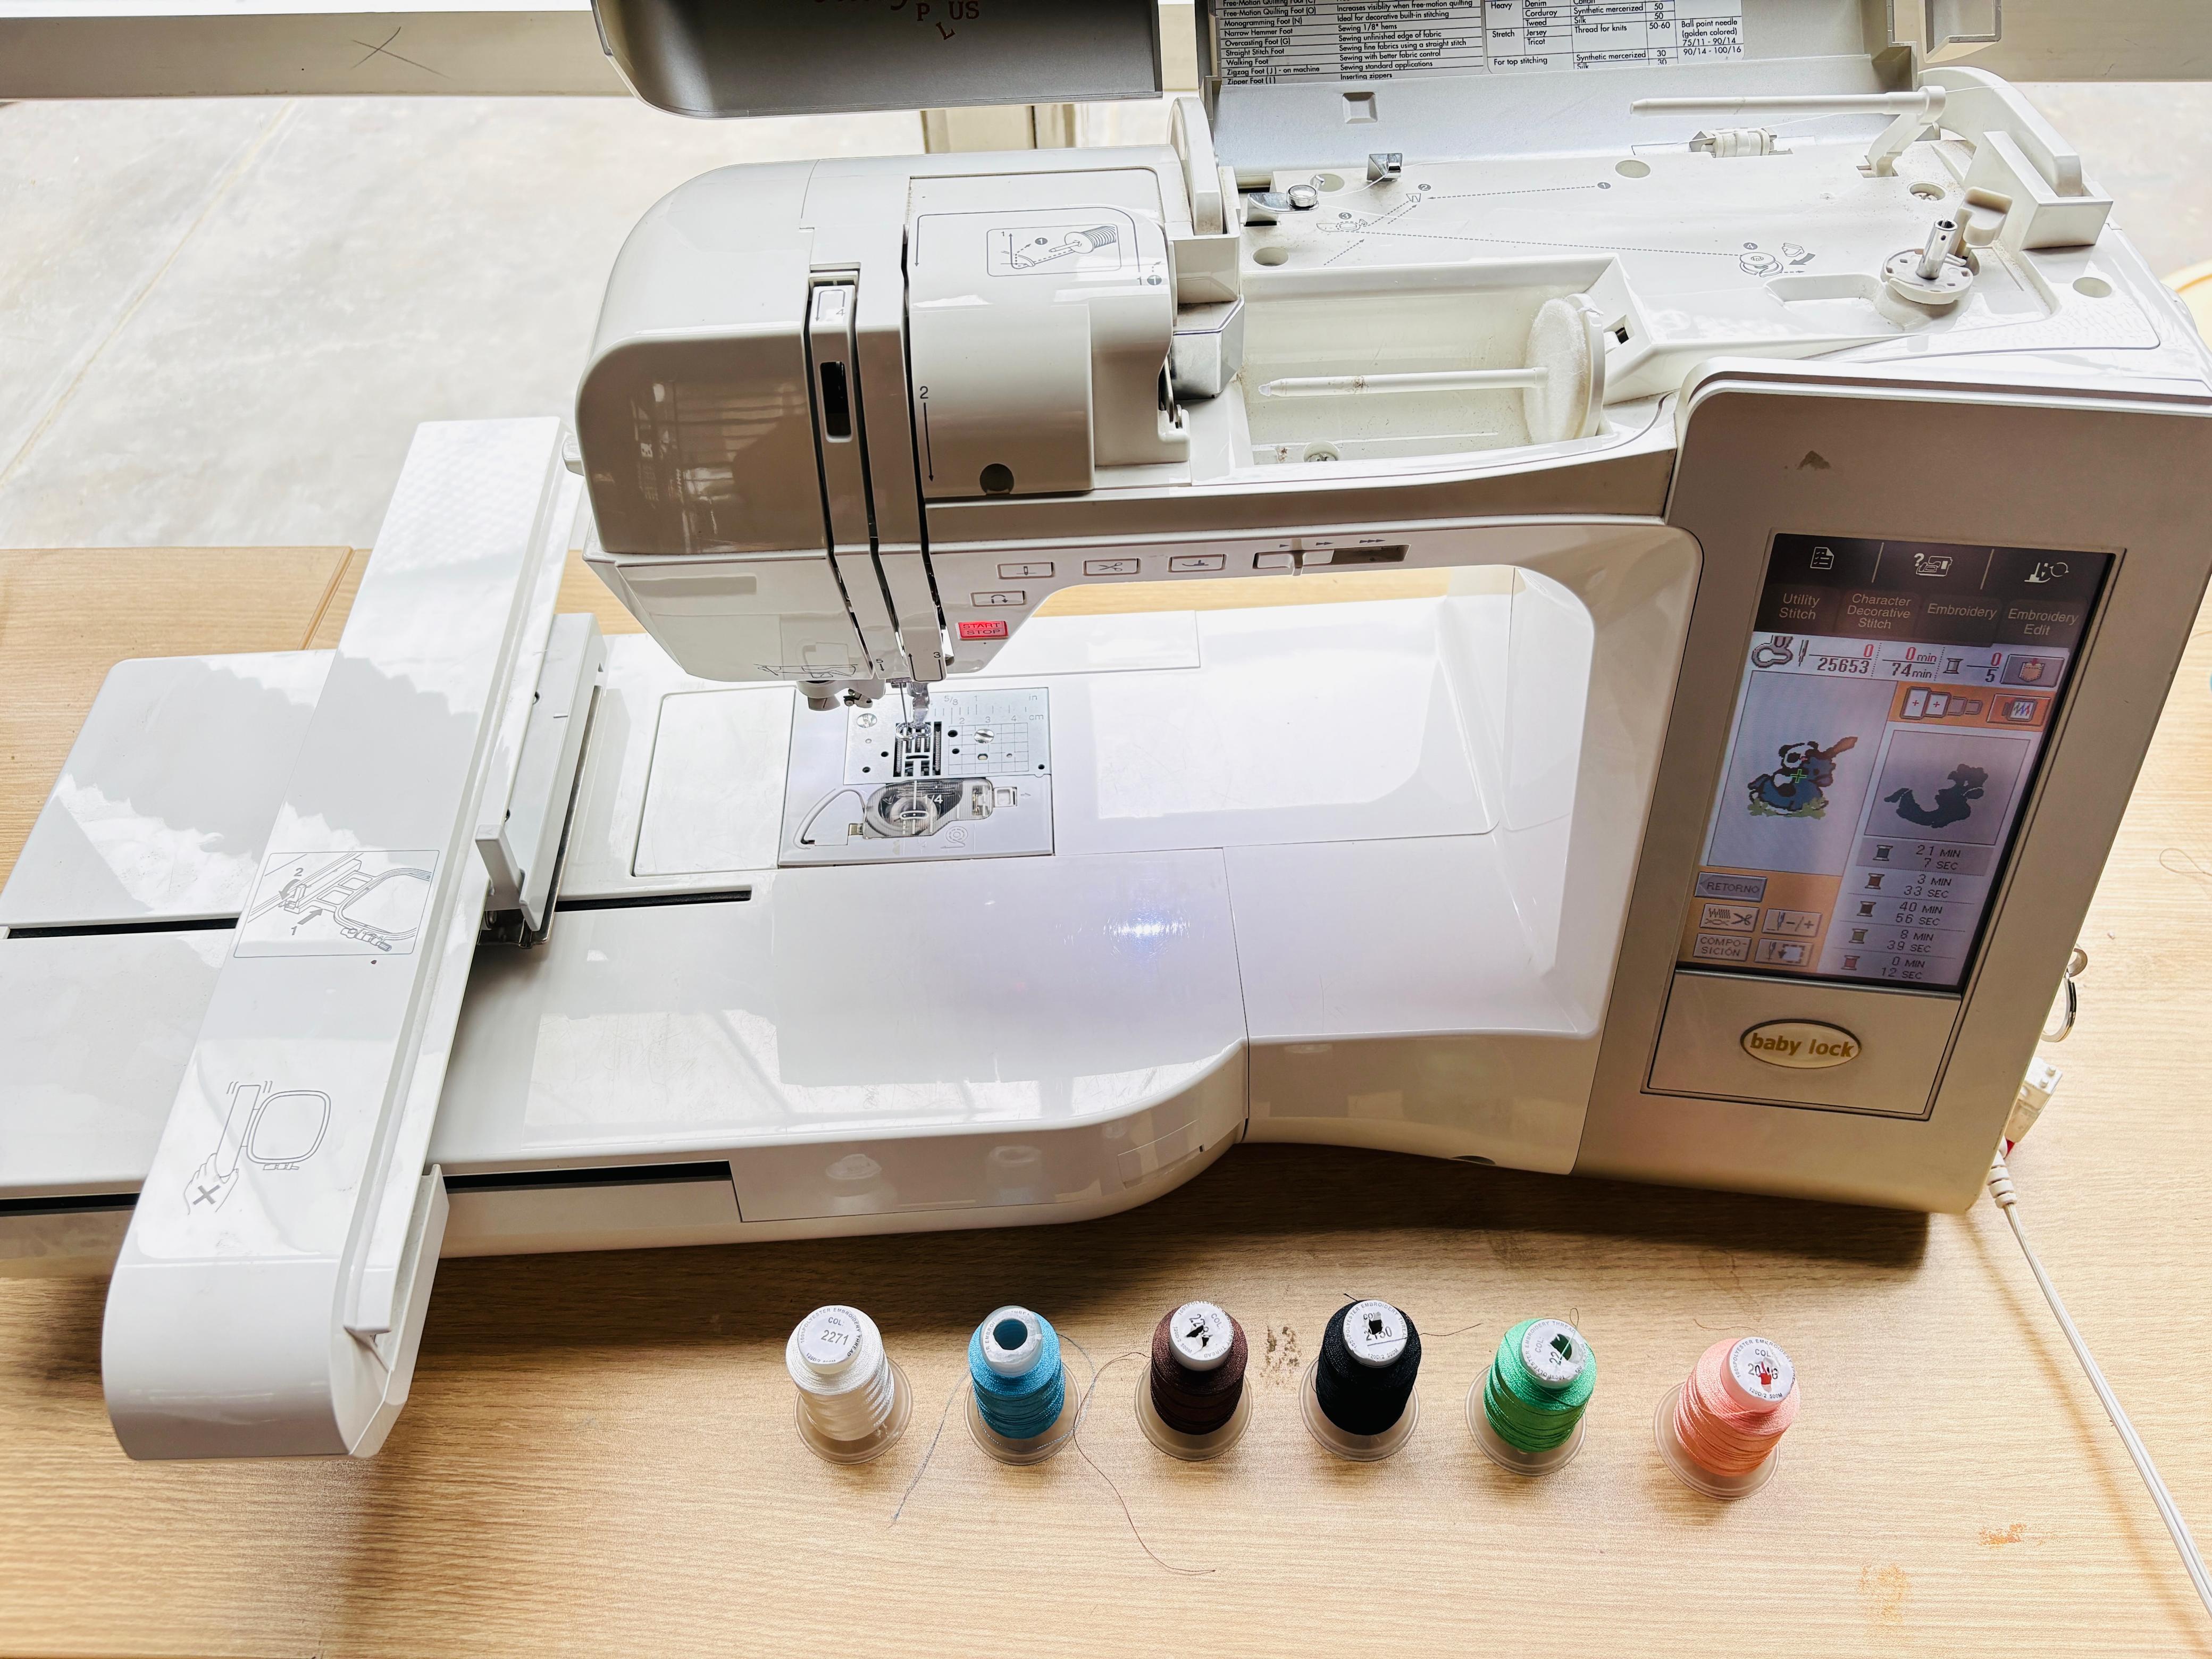
Brother ELLAGEO PLUS BLL2 embroidery machine.
Design
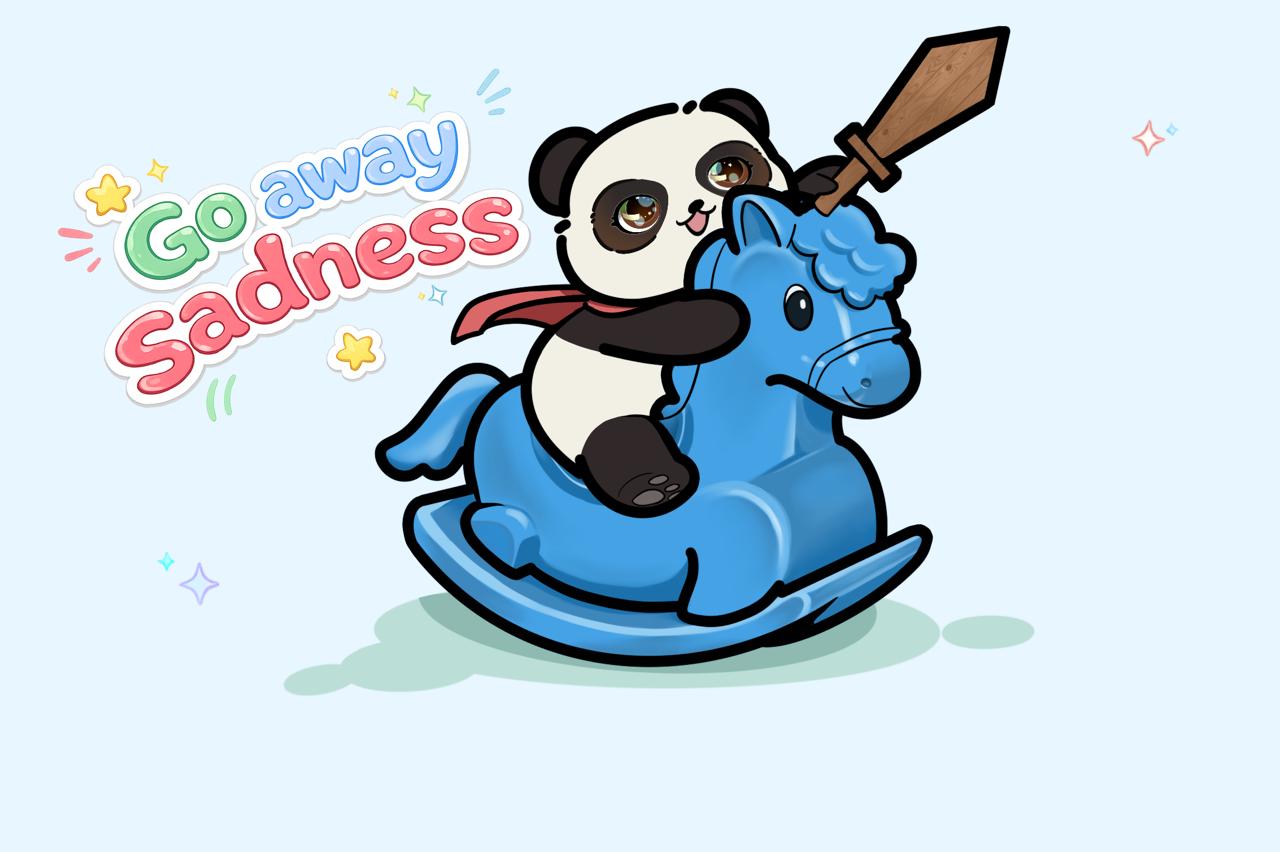
For the design, I used one of the illustrations I had previously created in Procreate, simplifying it into a vectorizable version that kept the character's personality while reducing it to flat shapes and colors that could be adapted for embroidery.
Why this process is not in other assignments
🧵🧶✂️
Digital embroidery works by stitching thread through fabric, following vector-defined paths and fill patterns generated by Ink/Stitch. It doesn't build volume layer by layer like 3D printing, nor does it cut or remove material like laser cutting or CNC milling — it works on an existing flexible material, adding thread to its surface rather than creating or subtracting geometry. The visual and physical result also depends on the chosen fill method, which changes how the stitches are routed across the same shape.
Vectorization in Inkscape
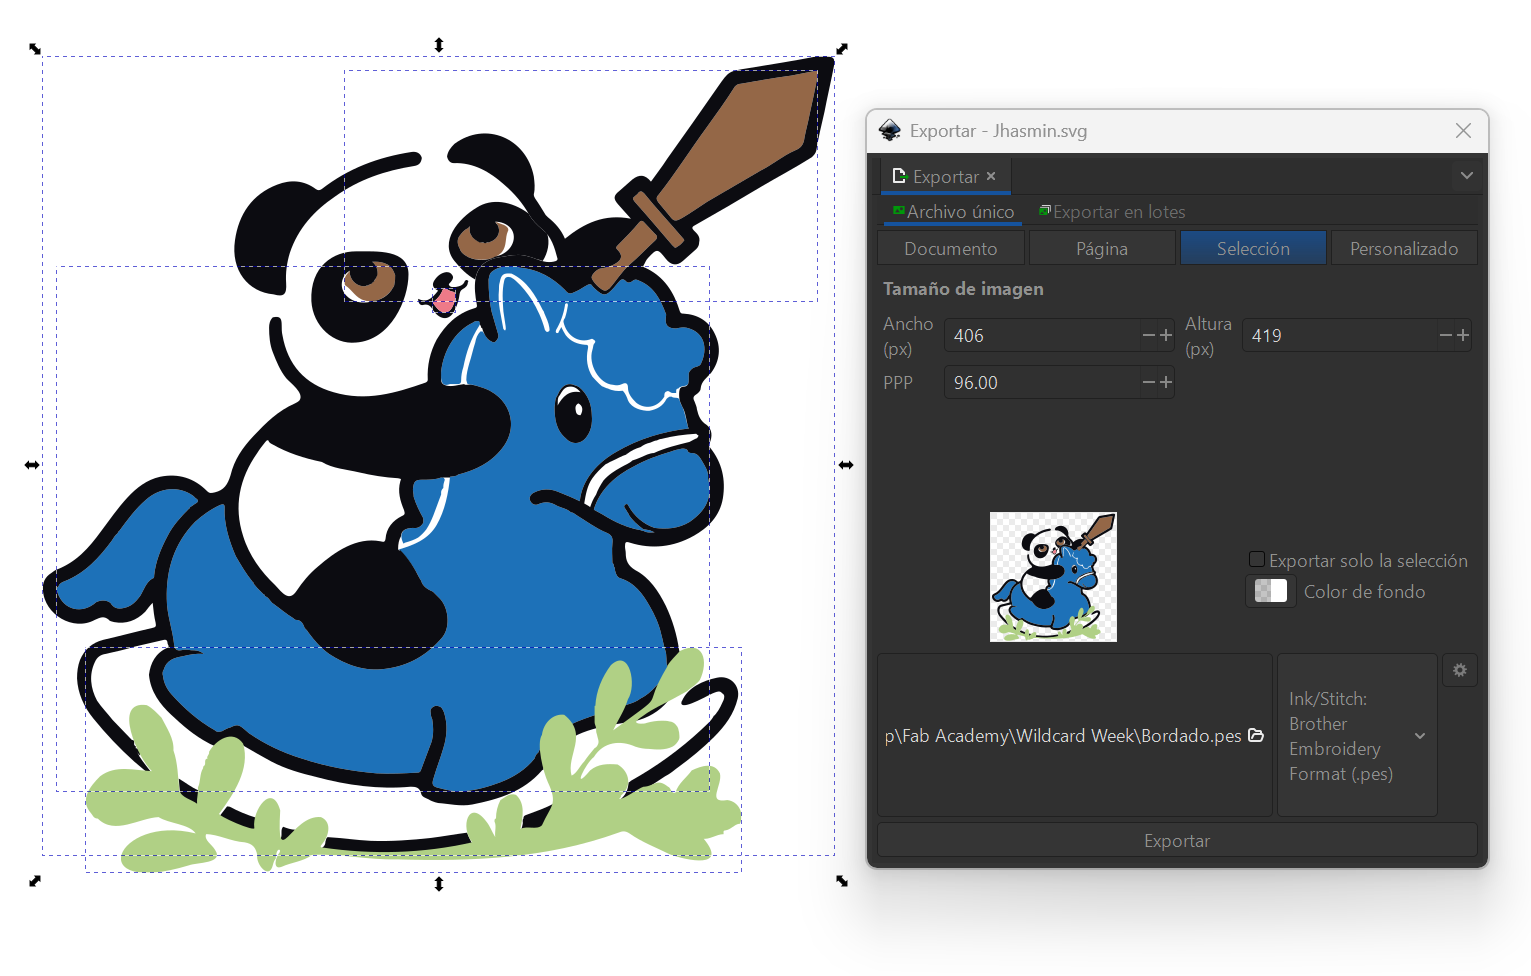
Starting from the simplified illustration, I used Inkscape's Path → Trace Bitmap tool to convert the image into vector paths, generating an independent path for each color area of the design.
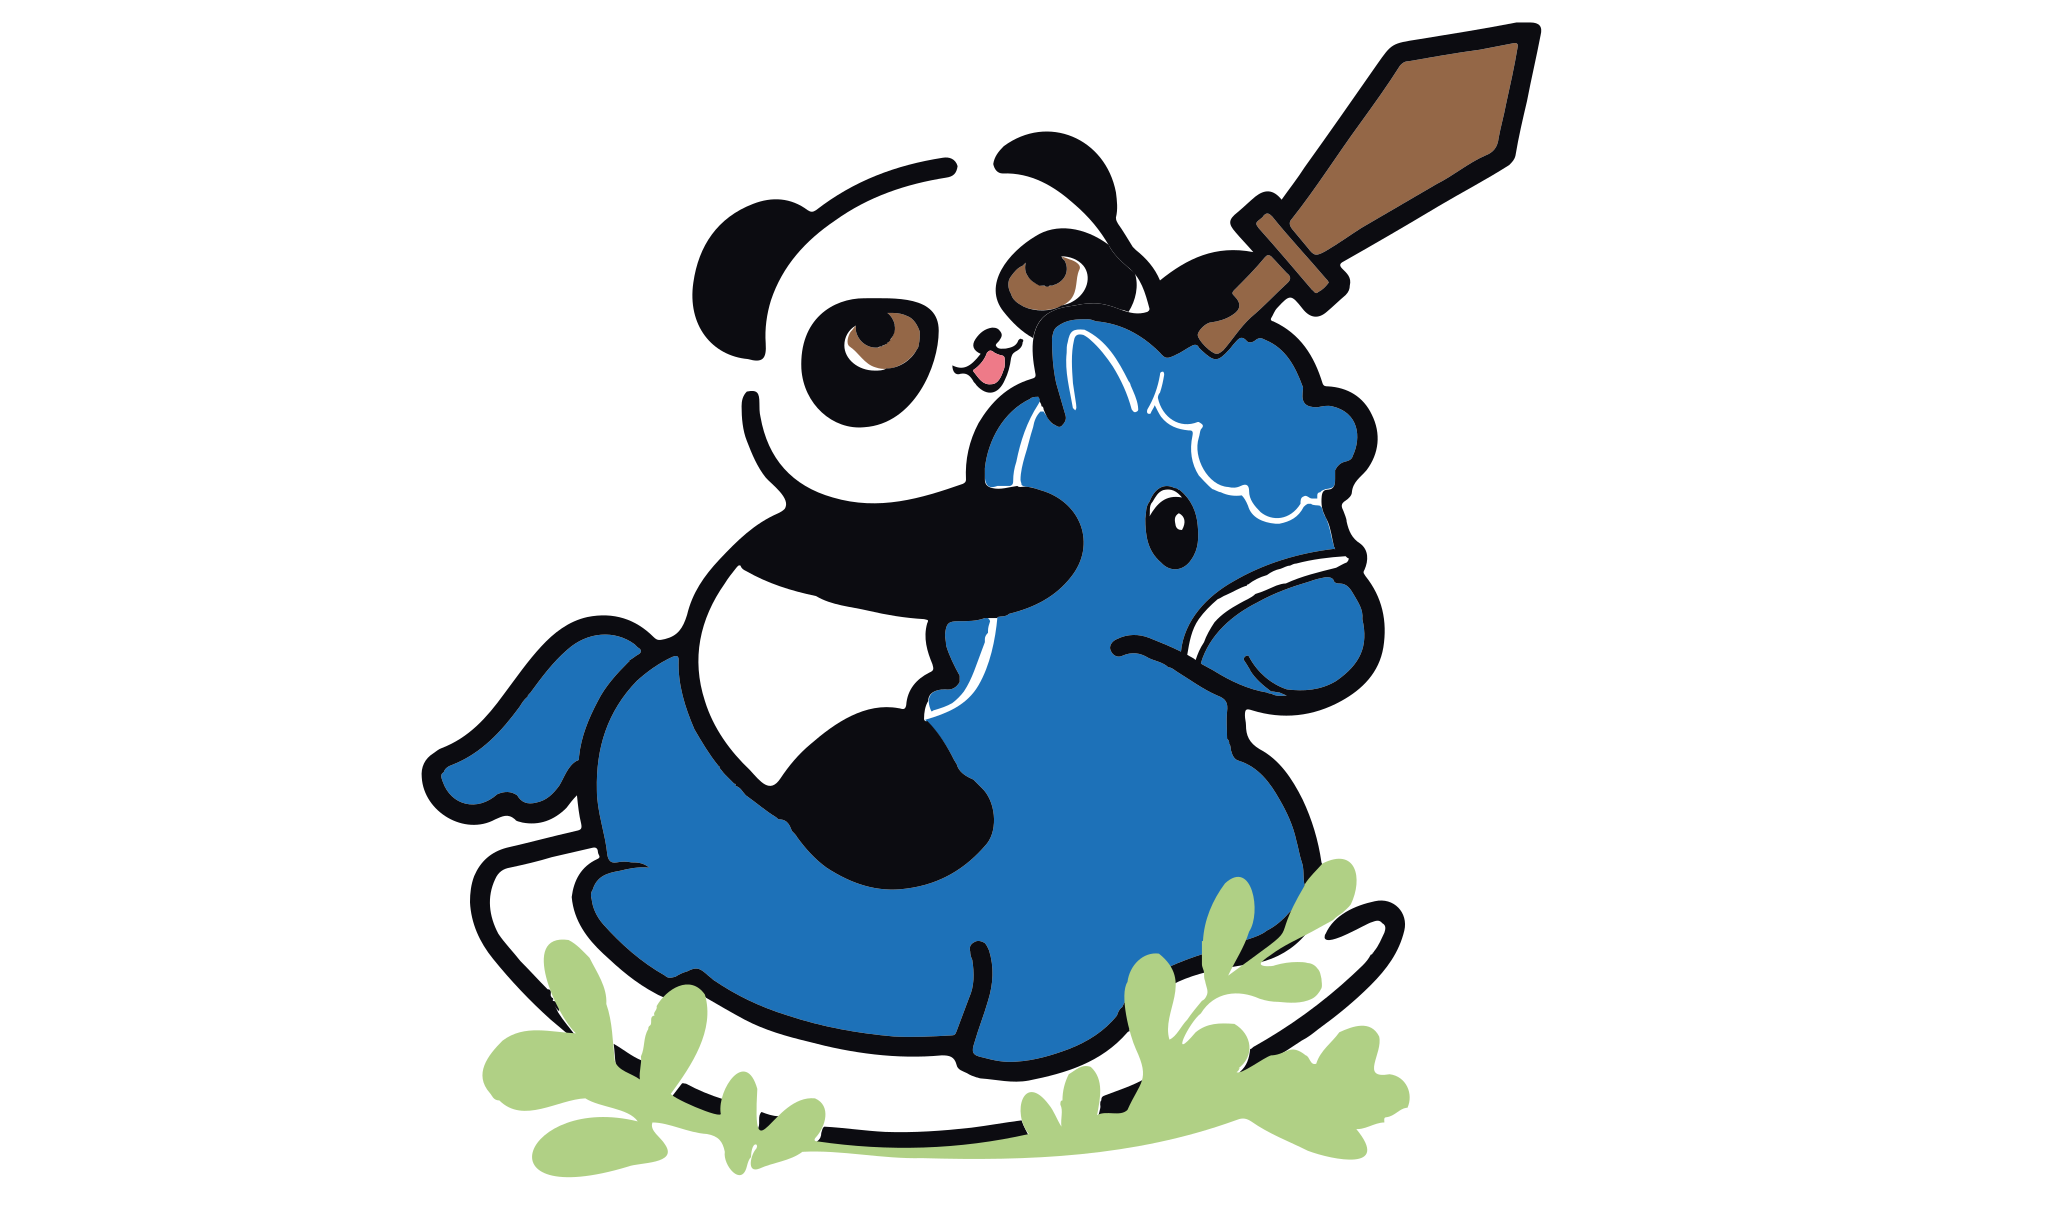
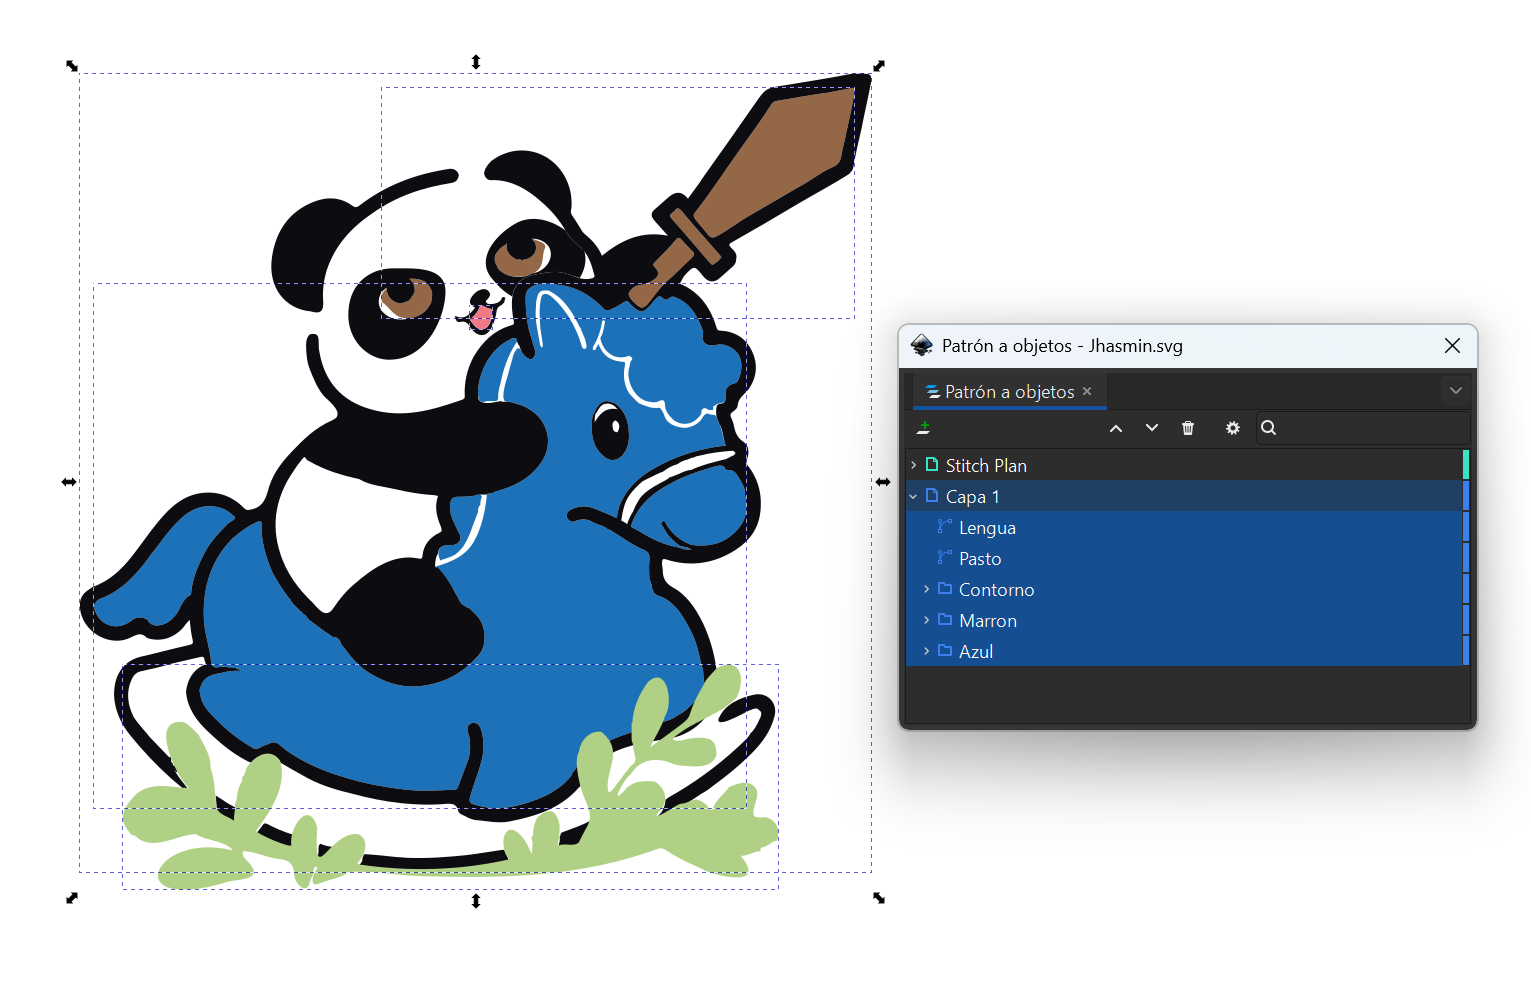
Once vectorized, I organized the resulting paths into groups by color using the Objects panel: Blue (the horse's body), Brown (sword and eyes), and Outline (black outlines), plus Tongue (pink) and Grass (green) as individual objects, which didn't need grouping since each contained a single path. This organization by layer was key for the next step, since each color is configured independently in Ink/Stitch.
Embroidery Configuration with Ink/Stitch
With the paths already organized by color, I configured how each one should be embroidered using Ink/Stitch's Params panel (Extensions → Ink/Stitch → Params). Each color group is configured independently, choosing a fill method that defines how stitches are distributed within that area. Beyond the fill method itself, this panel also exposes finer controls — such as row spacing, stitch length, and underlay settings — that affect stitch density and texture, though I kept most of these at their default values for this design.
I used two different methods:
Circular Fill, for the horse's body (Blue) and the grass (Green), which generates stitches in a spiral/radial pattern.
Auto Fill, for the Outline group (black) — covering both the design's linework and its solid-color areas, the sword and eyes (Brown), and the Tongue (pink).
Simulation
Before exporting the design to the machine, I used Ink/Stitch's Simulator (Extensions → Ink/Stitch → Visualize and Export → Simulator) to preview the full embroidery: the order in which each color would be stitched, and the stitch pattern resulting from each fill method. This makes it possible to catch issues — such as an impractical color order or a poorly filled area — and fix them directly in Inkscape without needing to test on the physical machine first.
Export
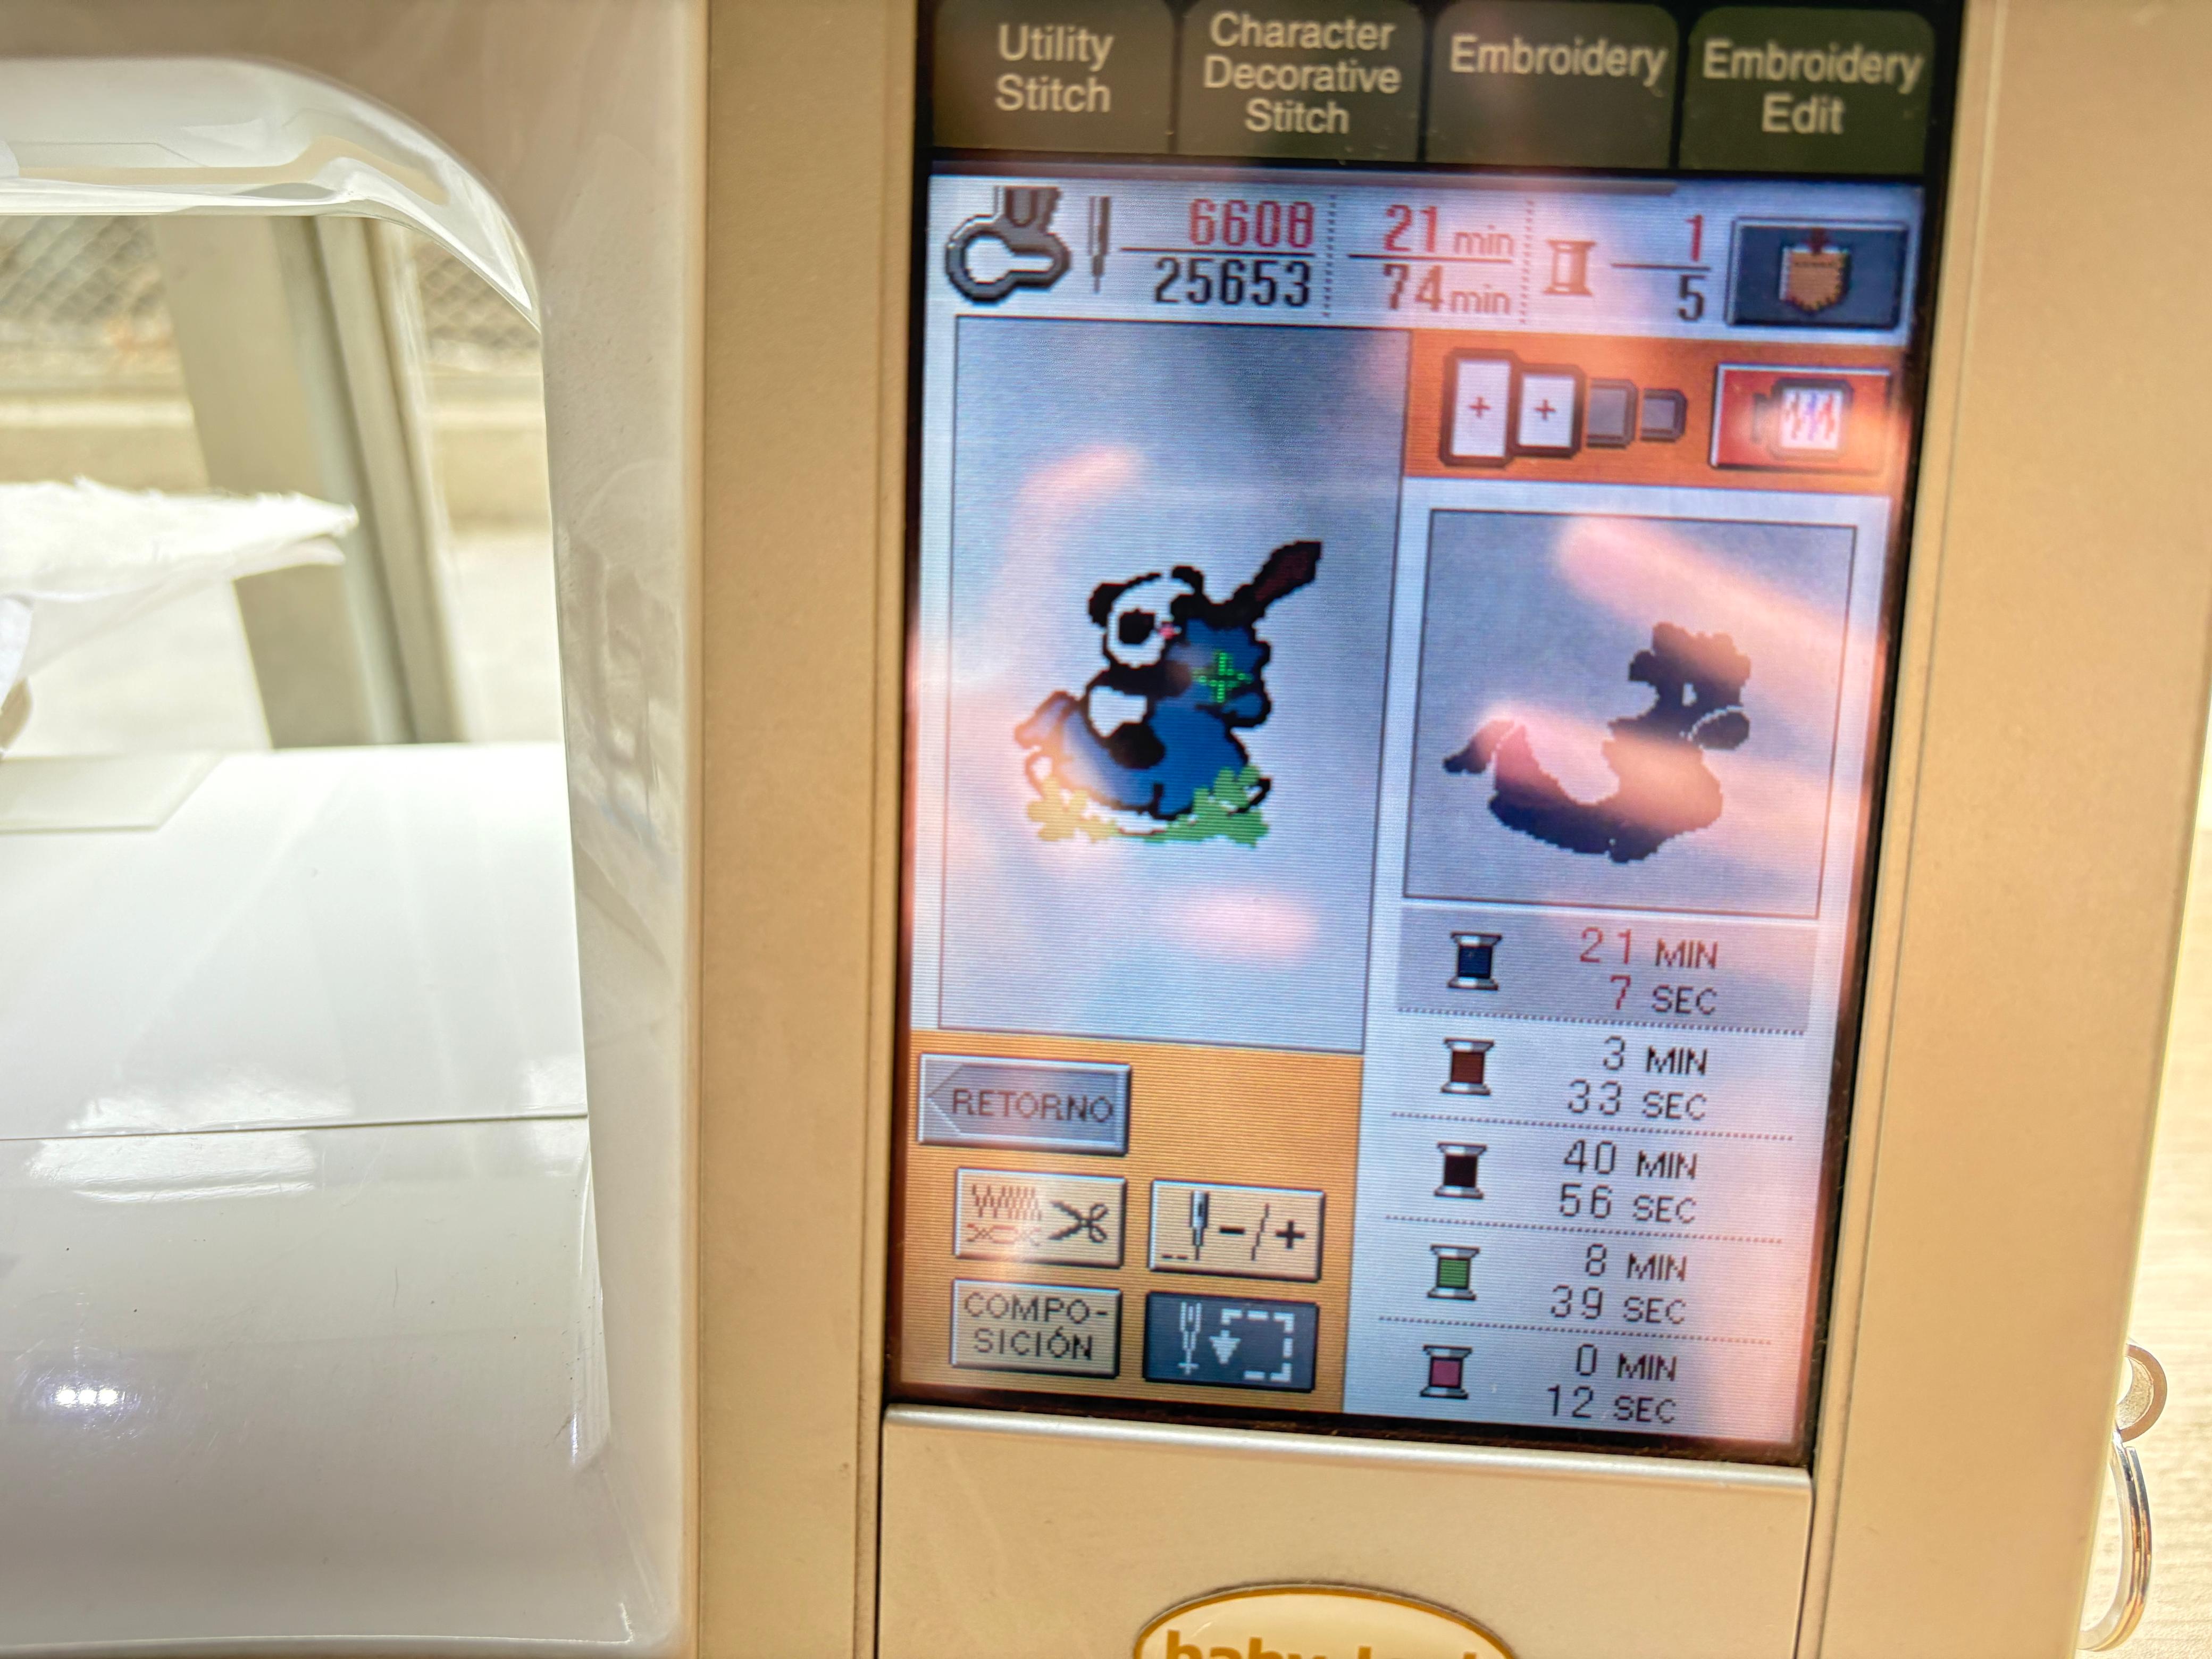
I exported the design using Extensions → Ink/Stitch → Visualize and Export, saving it in .pes format — the native format for Brother embroidery machines, compatible with the ELLAGEO PLUS BLL2. The final file combines all five color blocks into a single design of 25,680 stitches, approximately 107.5 × 111.0 mm.
Physical Embroidery Process
Physical Embroidery Process
Machine setup. Before starting, I powered on the embroidery machine through its 110V transformer and verified that it was properly connected and ready for operation.
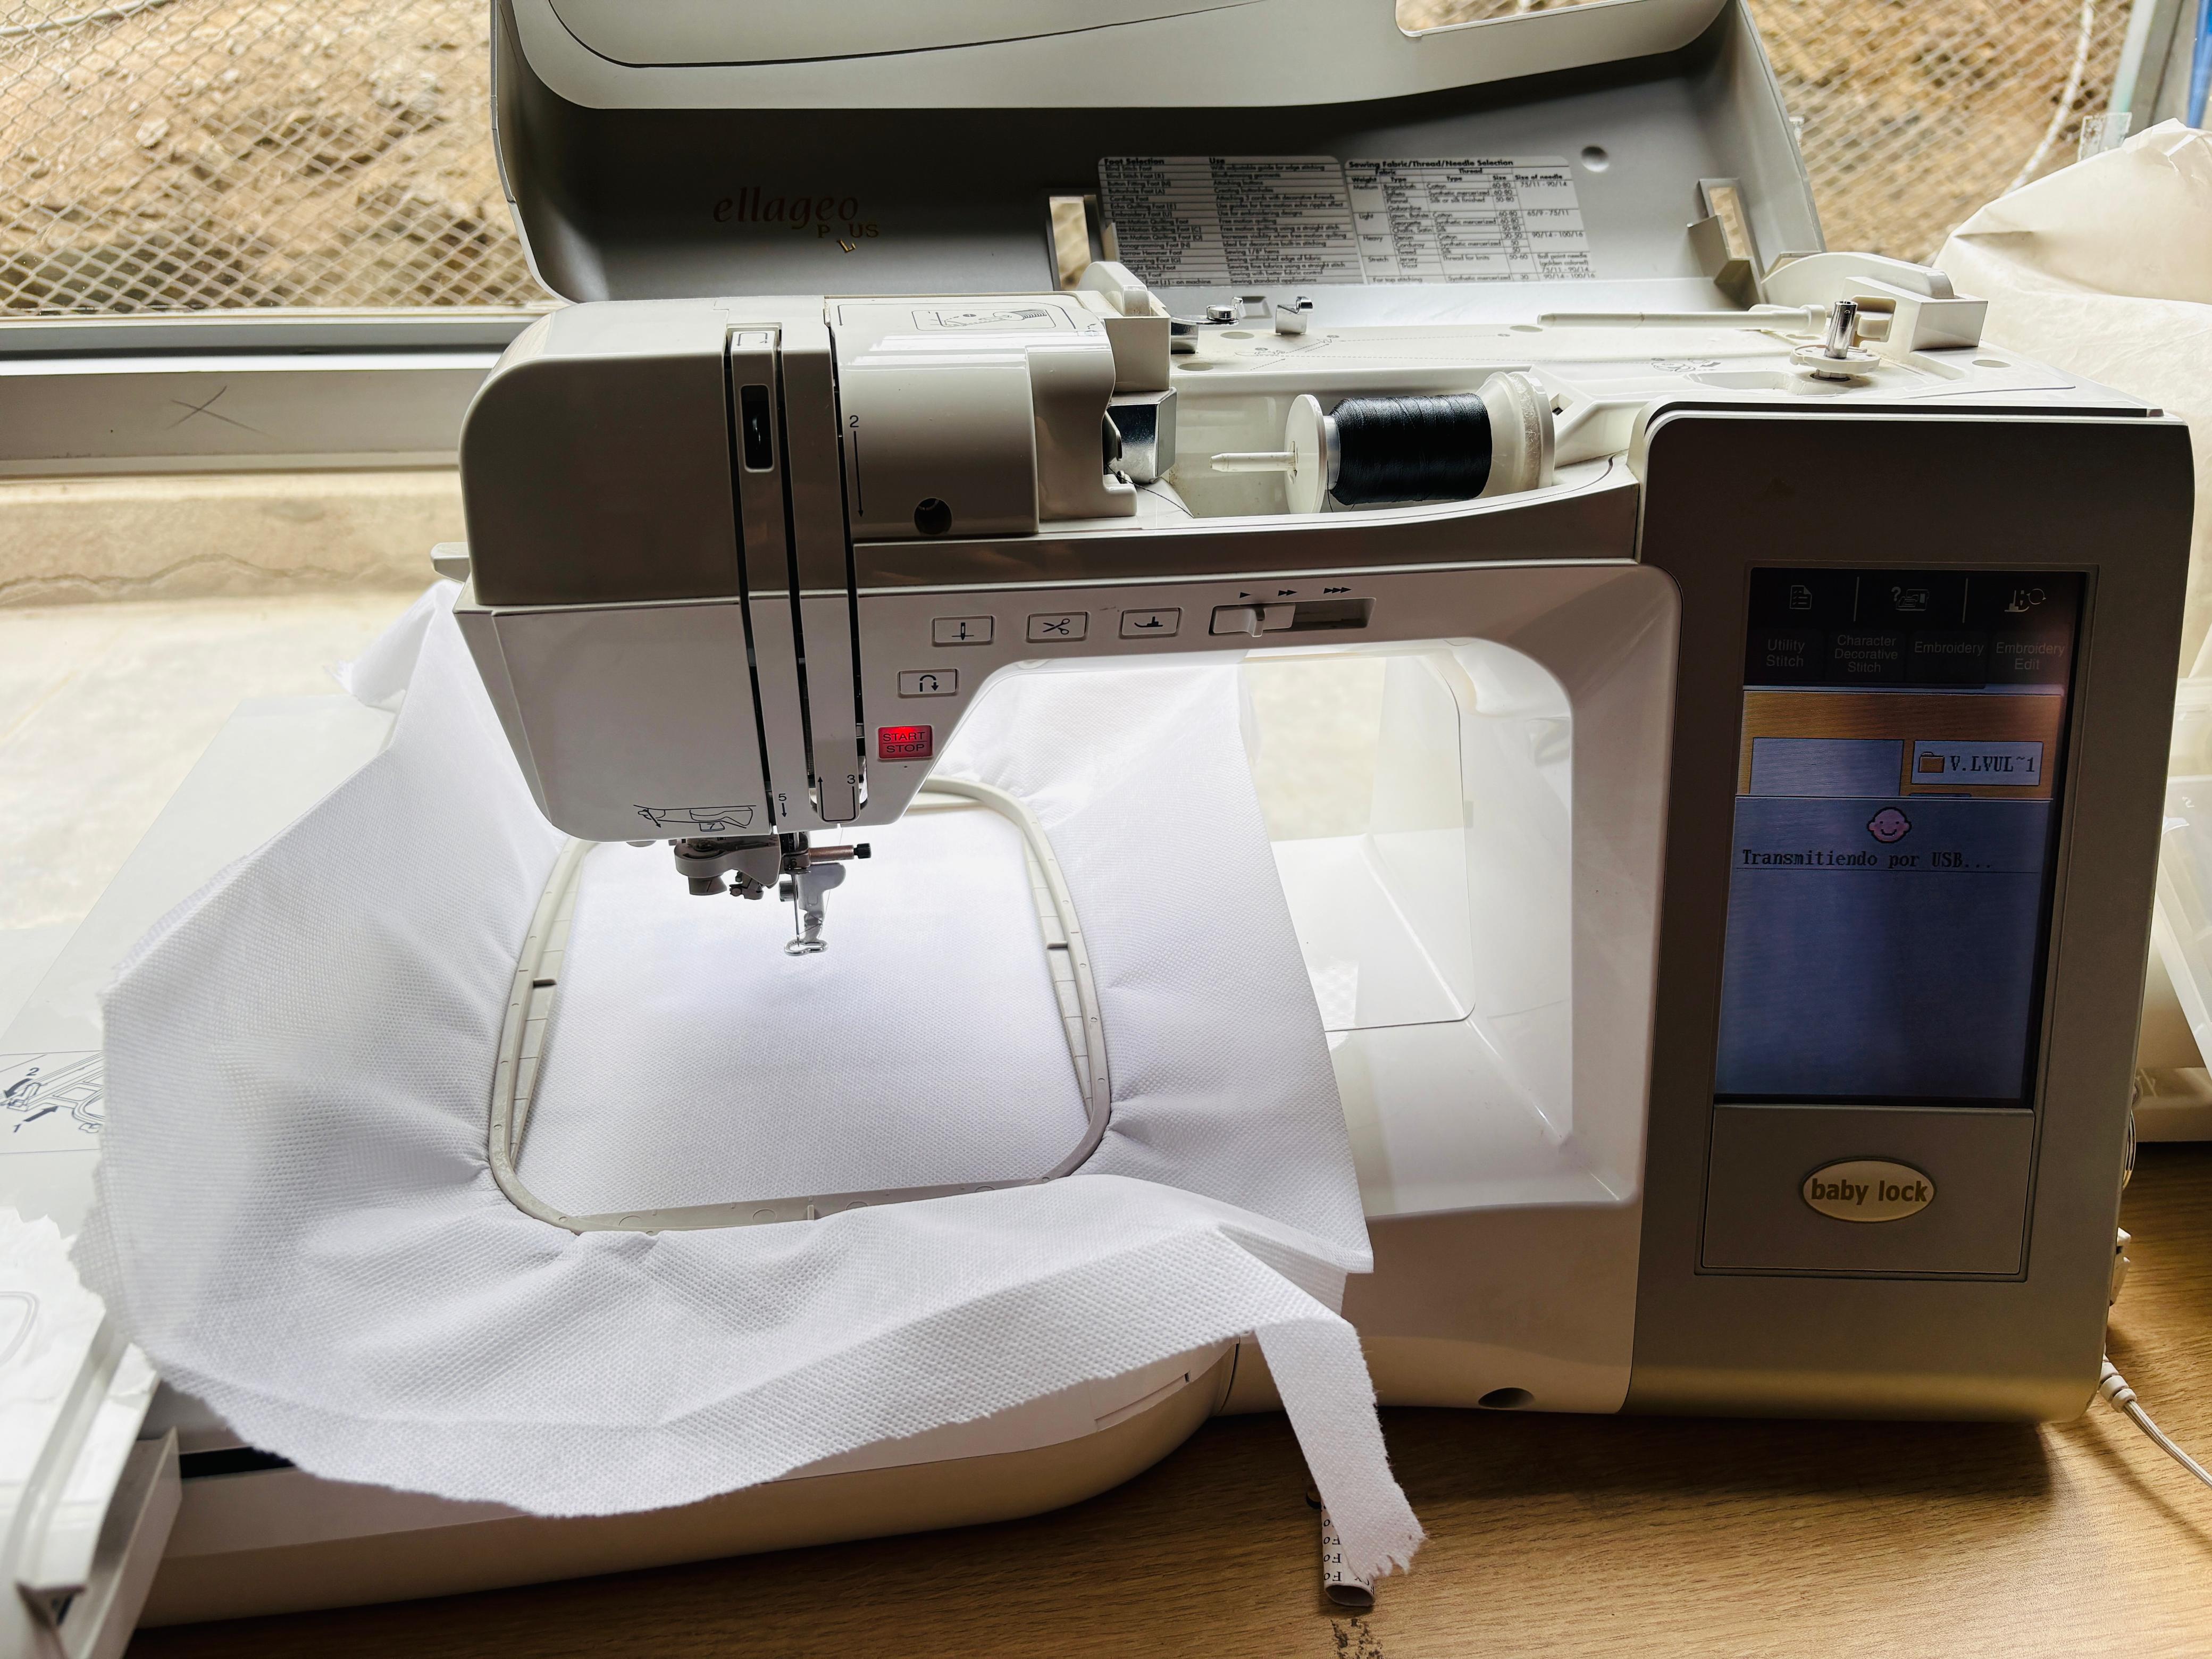
Material preparation. The embroidery was made on white linen fabric. To prevent deformation during stitching, a stabilizer (backing) was placed beneath the fabric. Both layers were secured within the embroidery hoop, ensuring they remained flat and properly tensioned throughout the process.
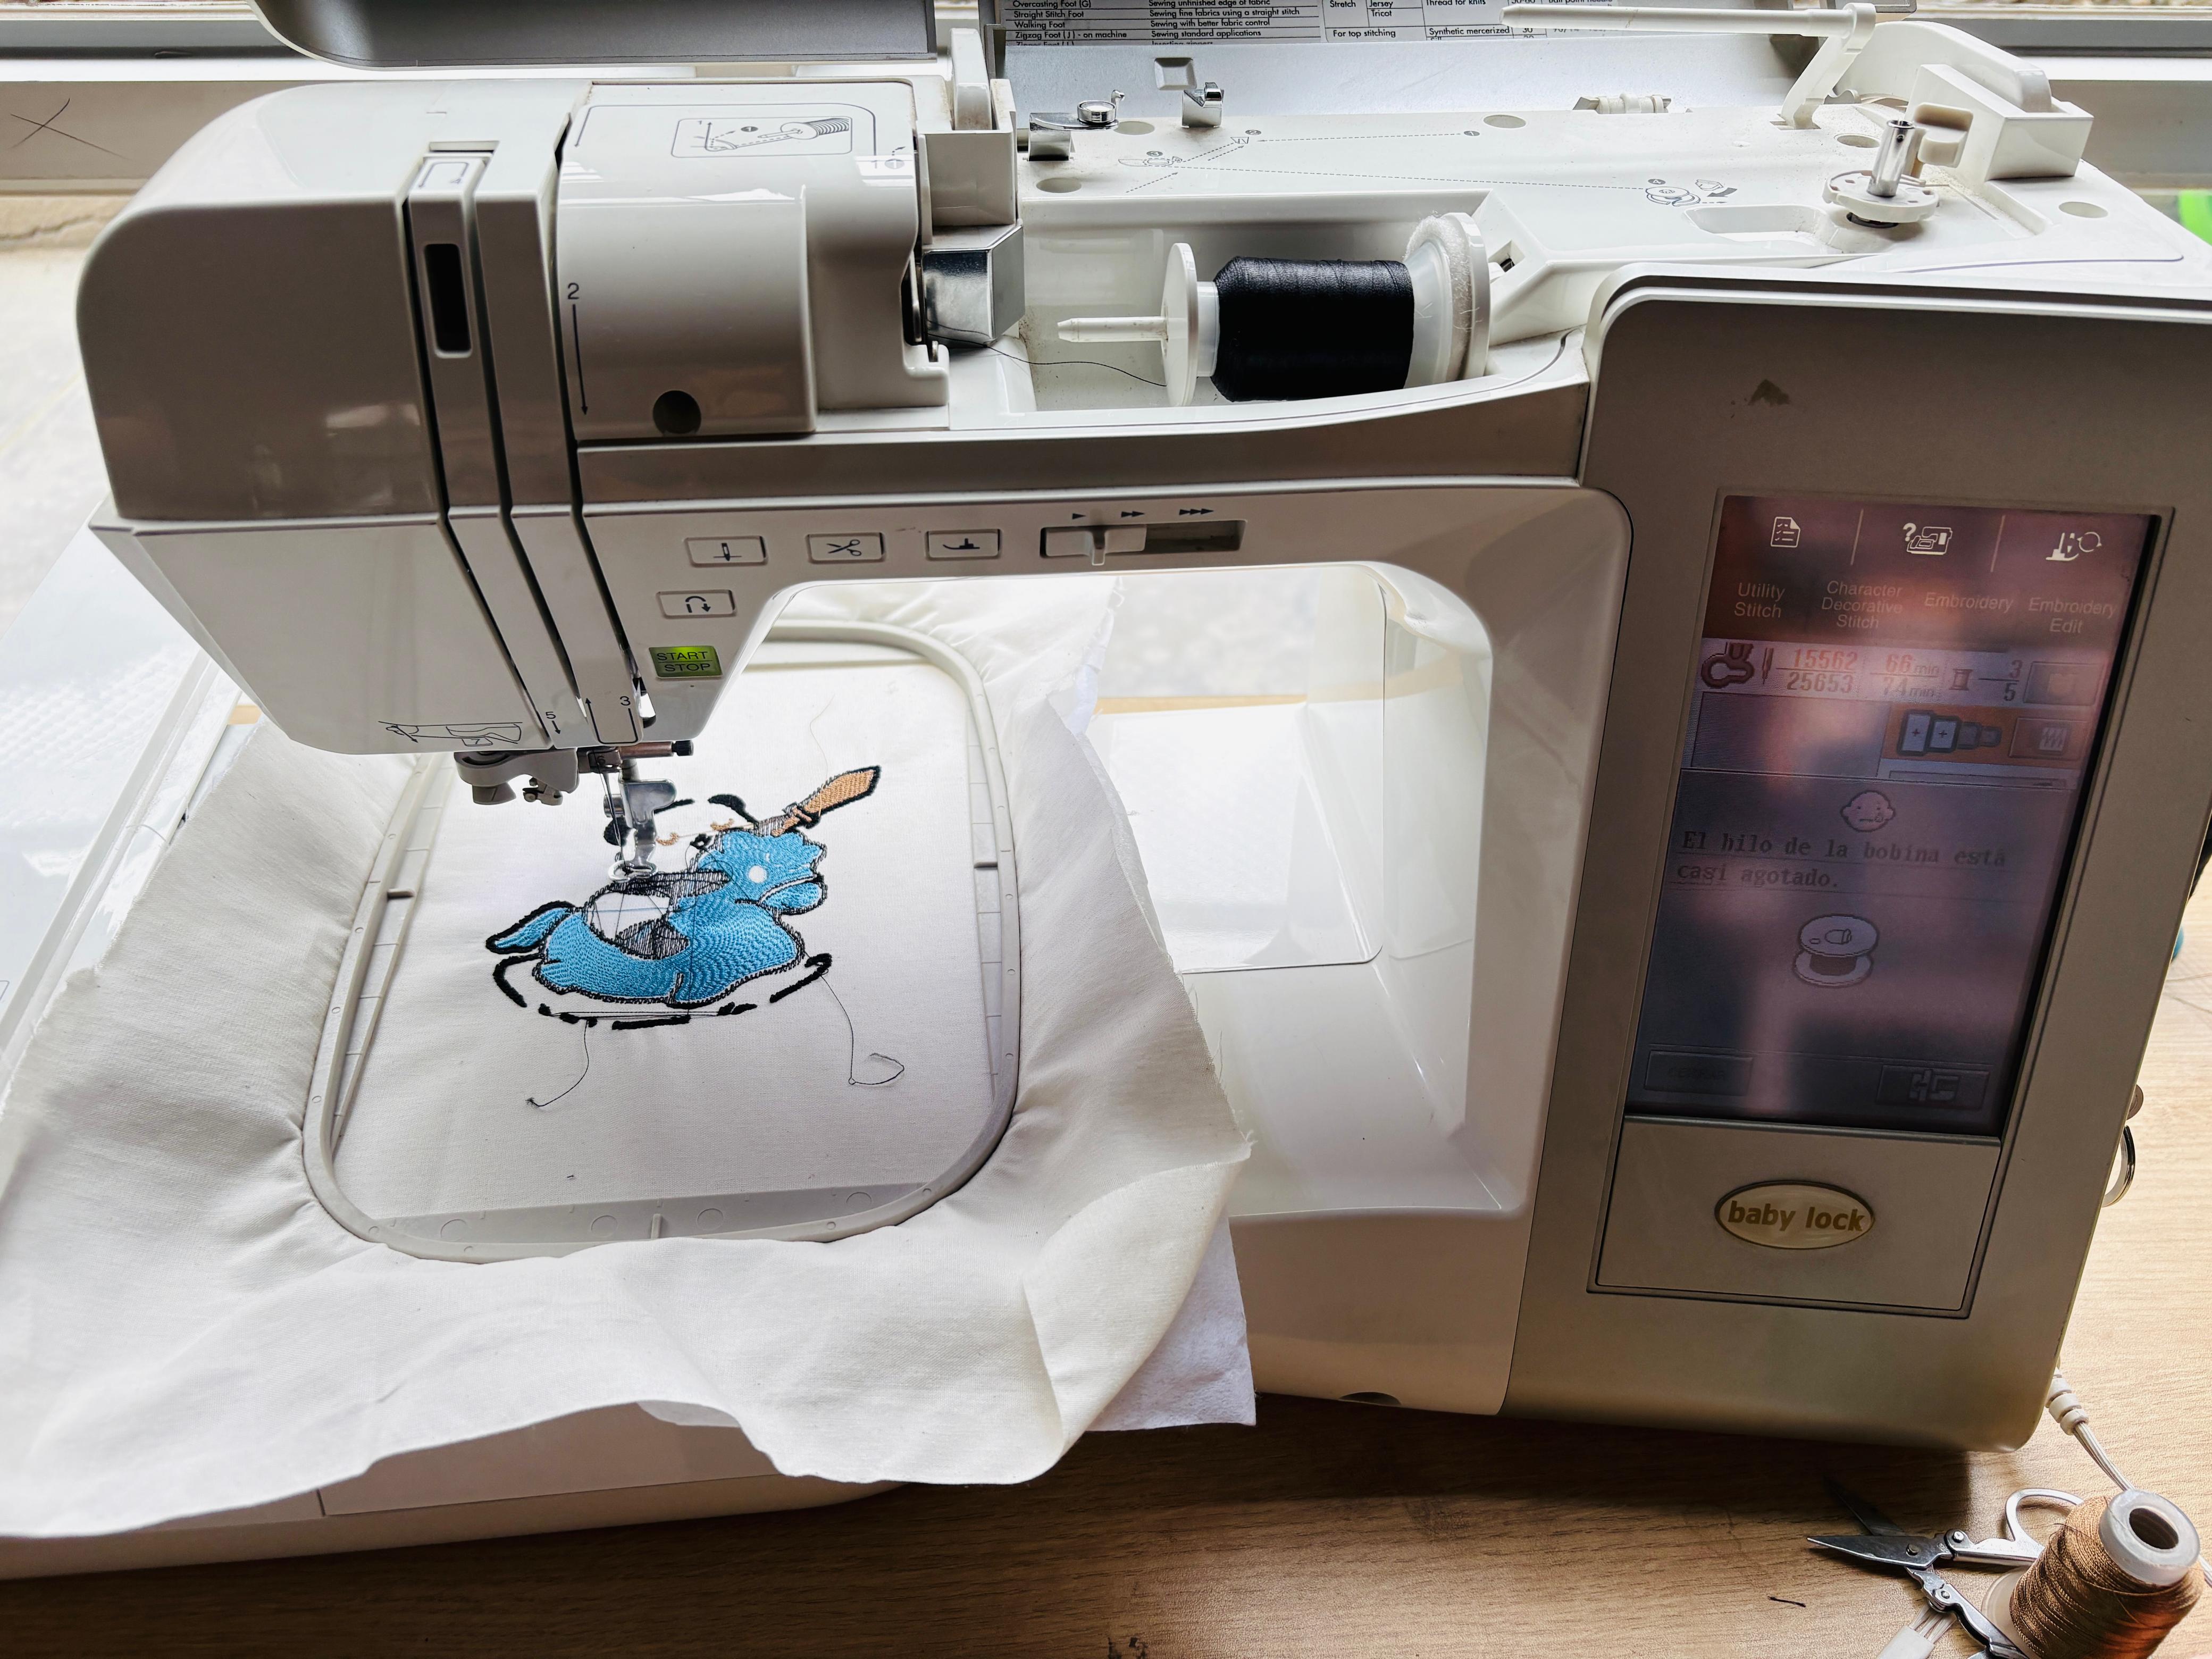
Thread preparation. A white bobbin thread was installed, matching the fabric color so that it would remain largely unnoticeable on the back side. The upper threads were then prepared according to the design's color palette: sky blue, light brown, black, mint green, and pink.
File transfer and design preview. The embroidery file (.pes) was transferred to the machine using a USB drive. Once loaded, the machine displayed a preview of the design, including the sequence of color changes and an estimated embroidery time of approximately 74 minutes.
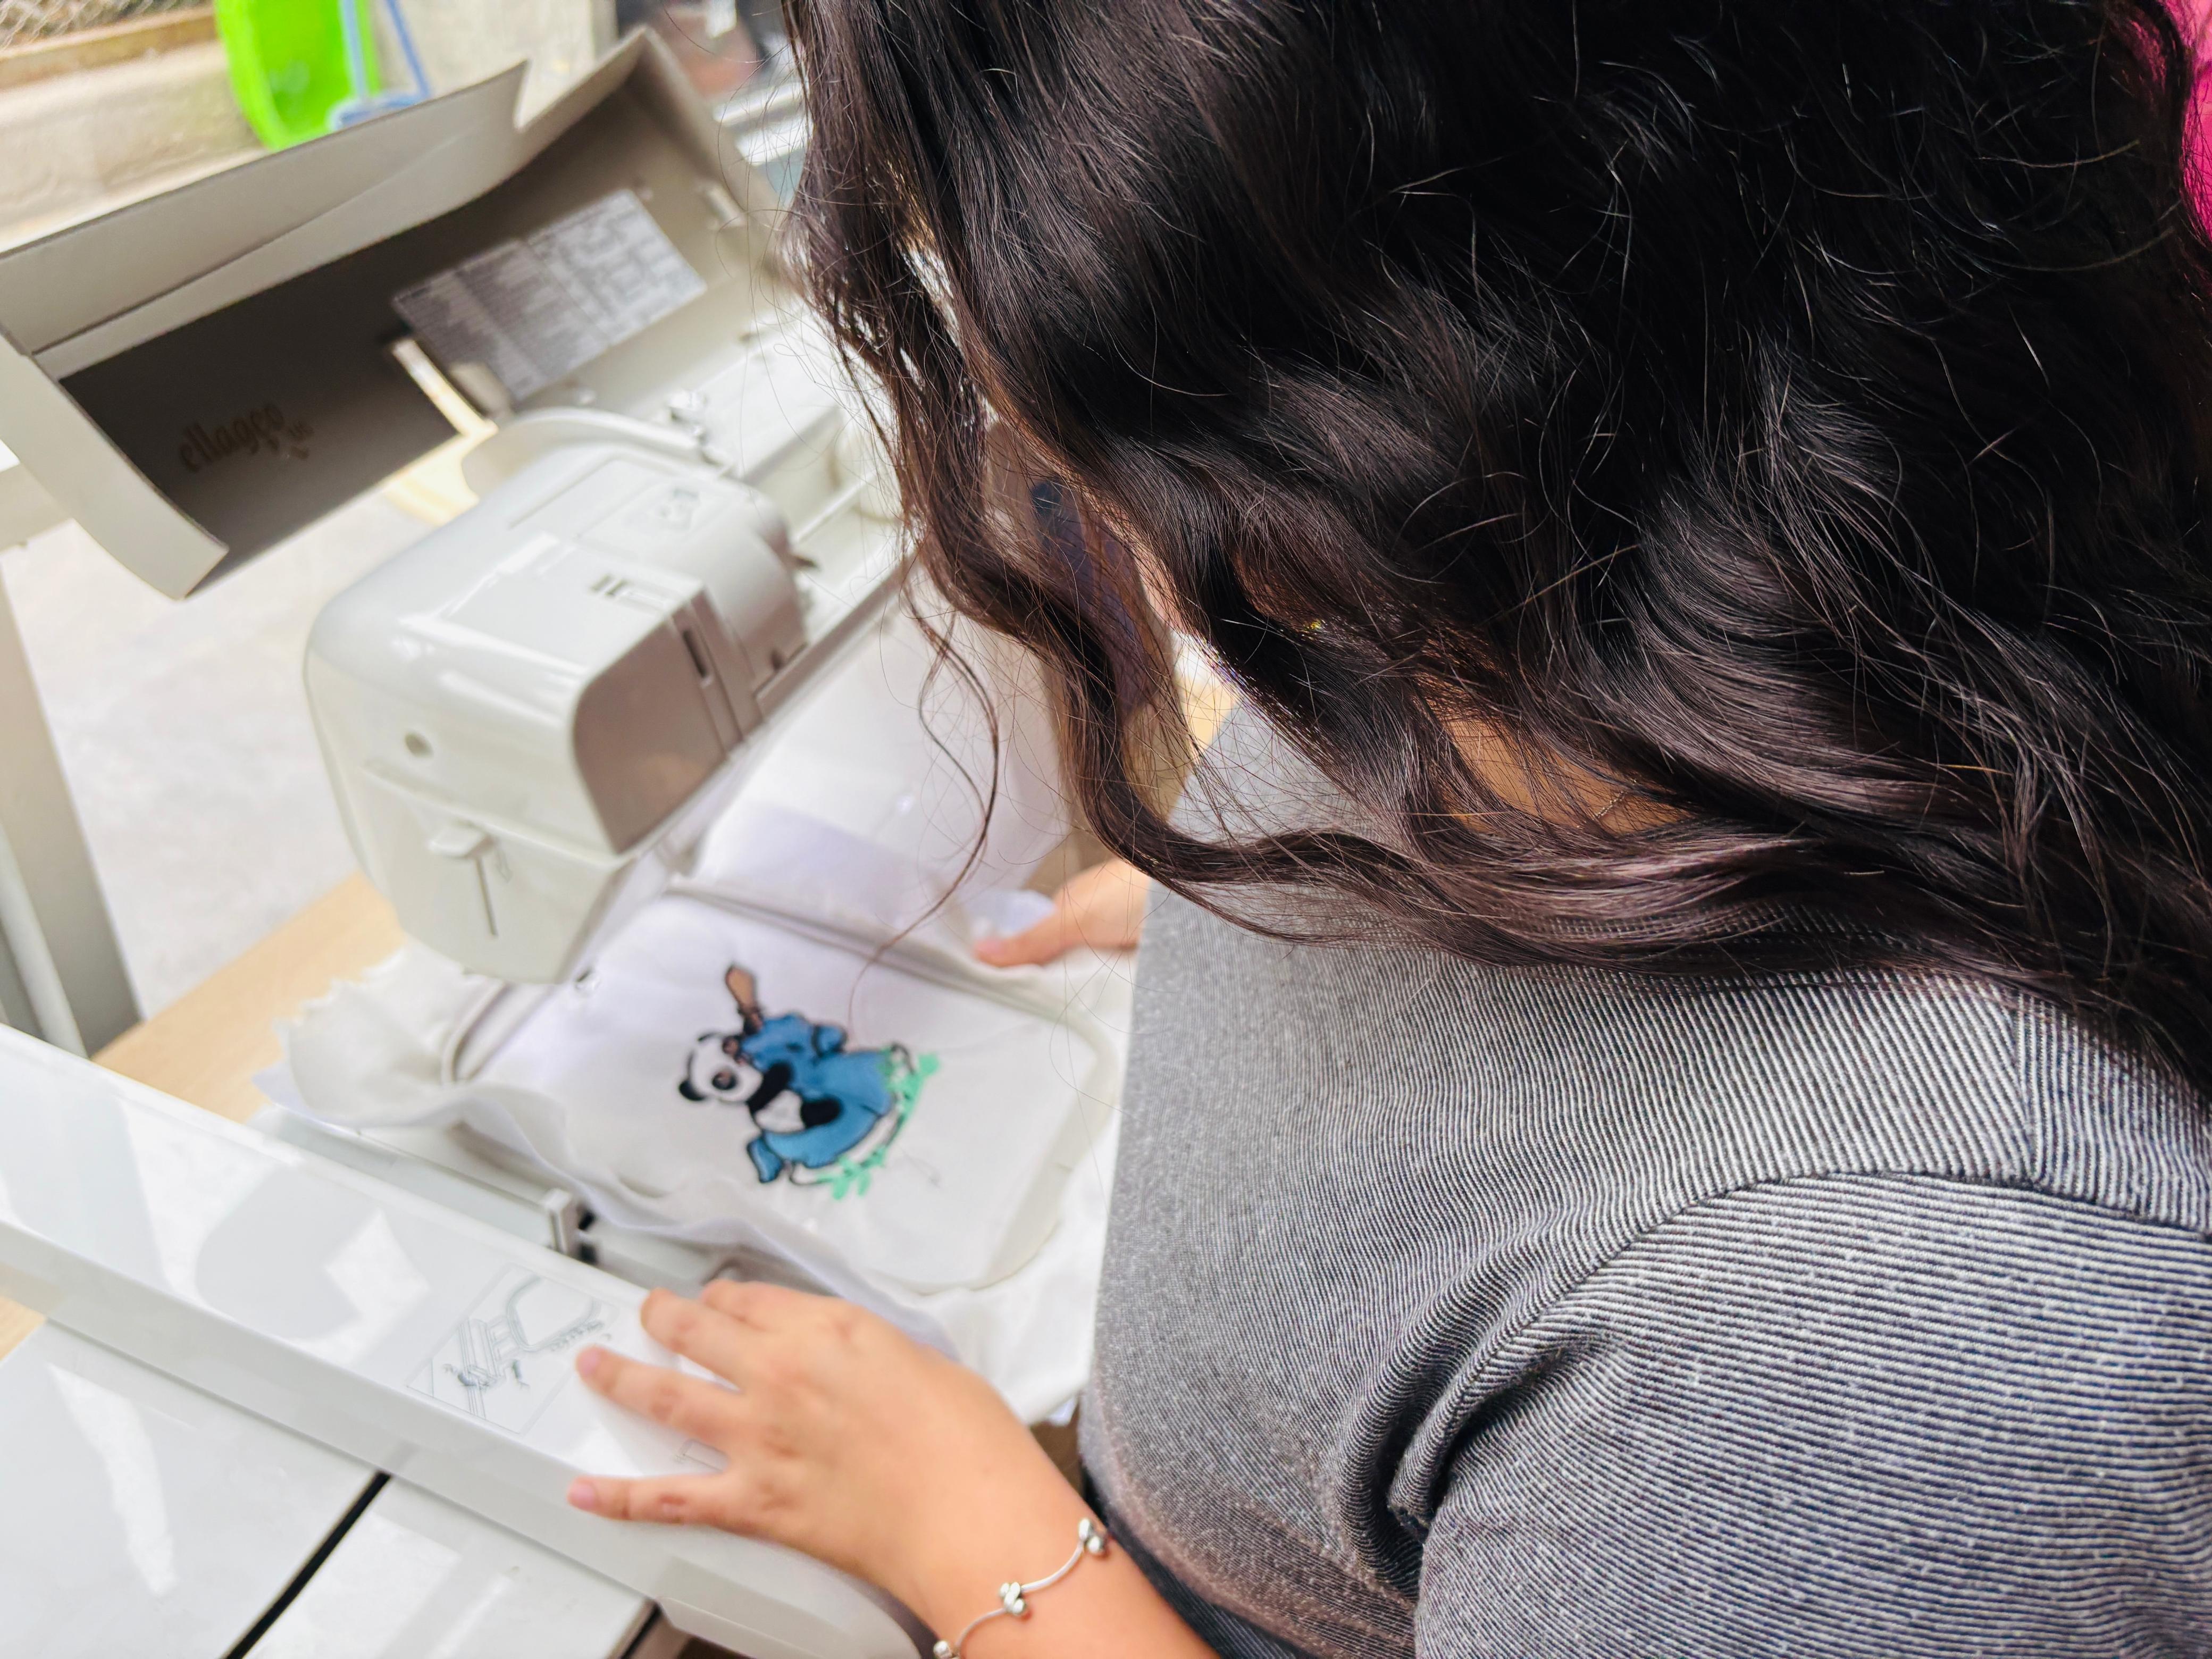
Positioning and start. After mounting the hoop onto the machine, the needle was positioned at the starting point and the embroidery process was initiated using the START/STOP control.
Color changes and bobbin alert. Throughout the embroidery process, the machine automatically paused whenever a thread color change was required, allowing the corresponding upper thread to be replaced before continuing. At one point, it also sent an alert indicating the bobbin thread was nearly empty, requiring a bobbin replacement before proceeding.
Finishing. Once the embroidery was complete, I removed the hoop and the fabric from the machine. The linen and the stabilizer are joined by the stitches themselves — the stabilizer can be removed afterwards if needed. The process concluded by removing loose threads from both sides of the fabric.
⚠️ Problems & Solutions
Problem — Unable to read .pes file
While transferring the design to the machine, it was unable to read the .pes file. The cause was that the design exceeded the maximum embroidery area supported by the machine.
✅ Solution
I went back to Inkscape, scaled down the design, and re-exported all the files. The final working size was 107.54 × 110.92 mm, which the machine read correctly.
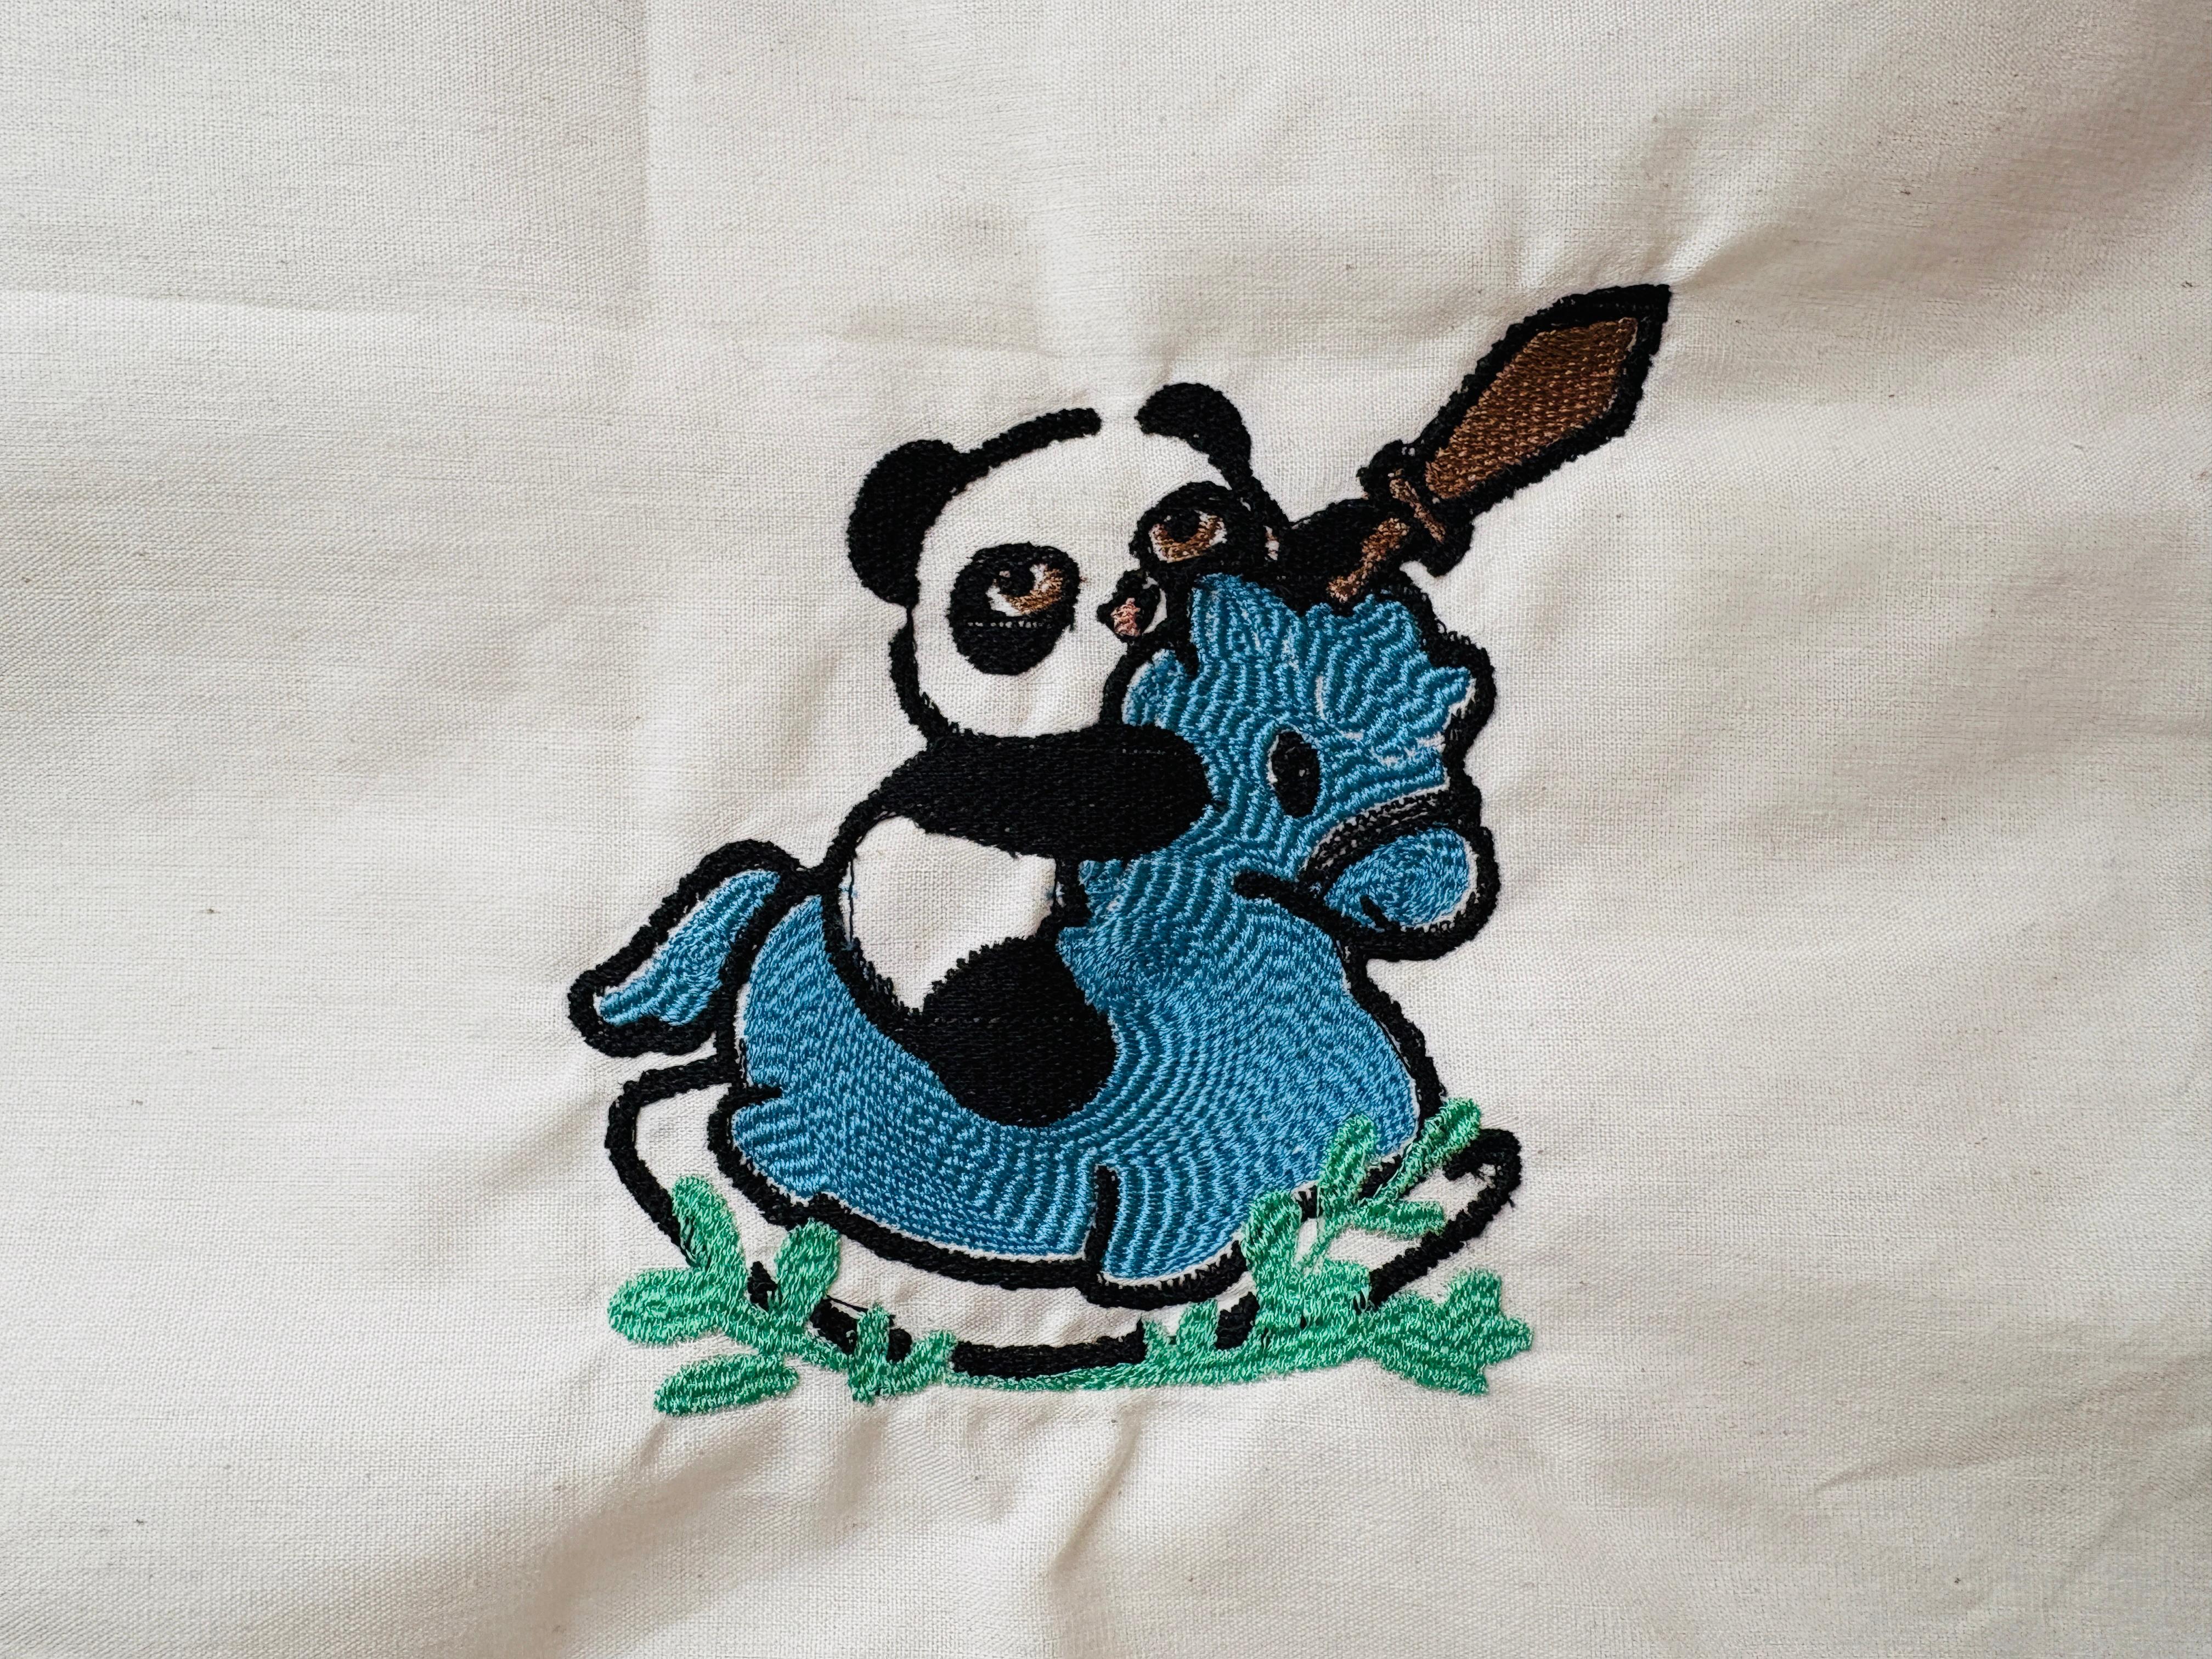
Hero Shot ✨
Before cleaning
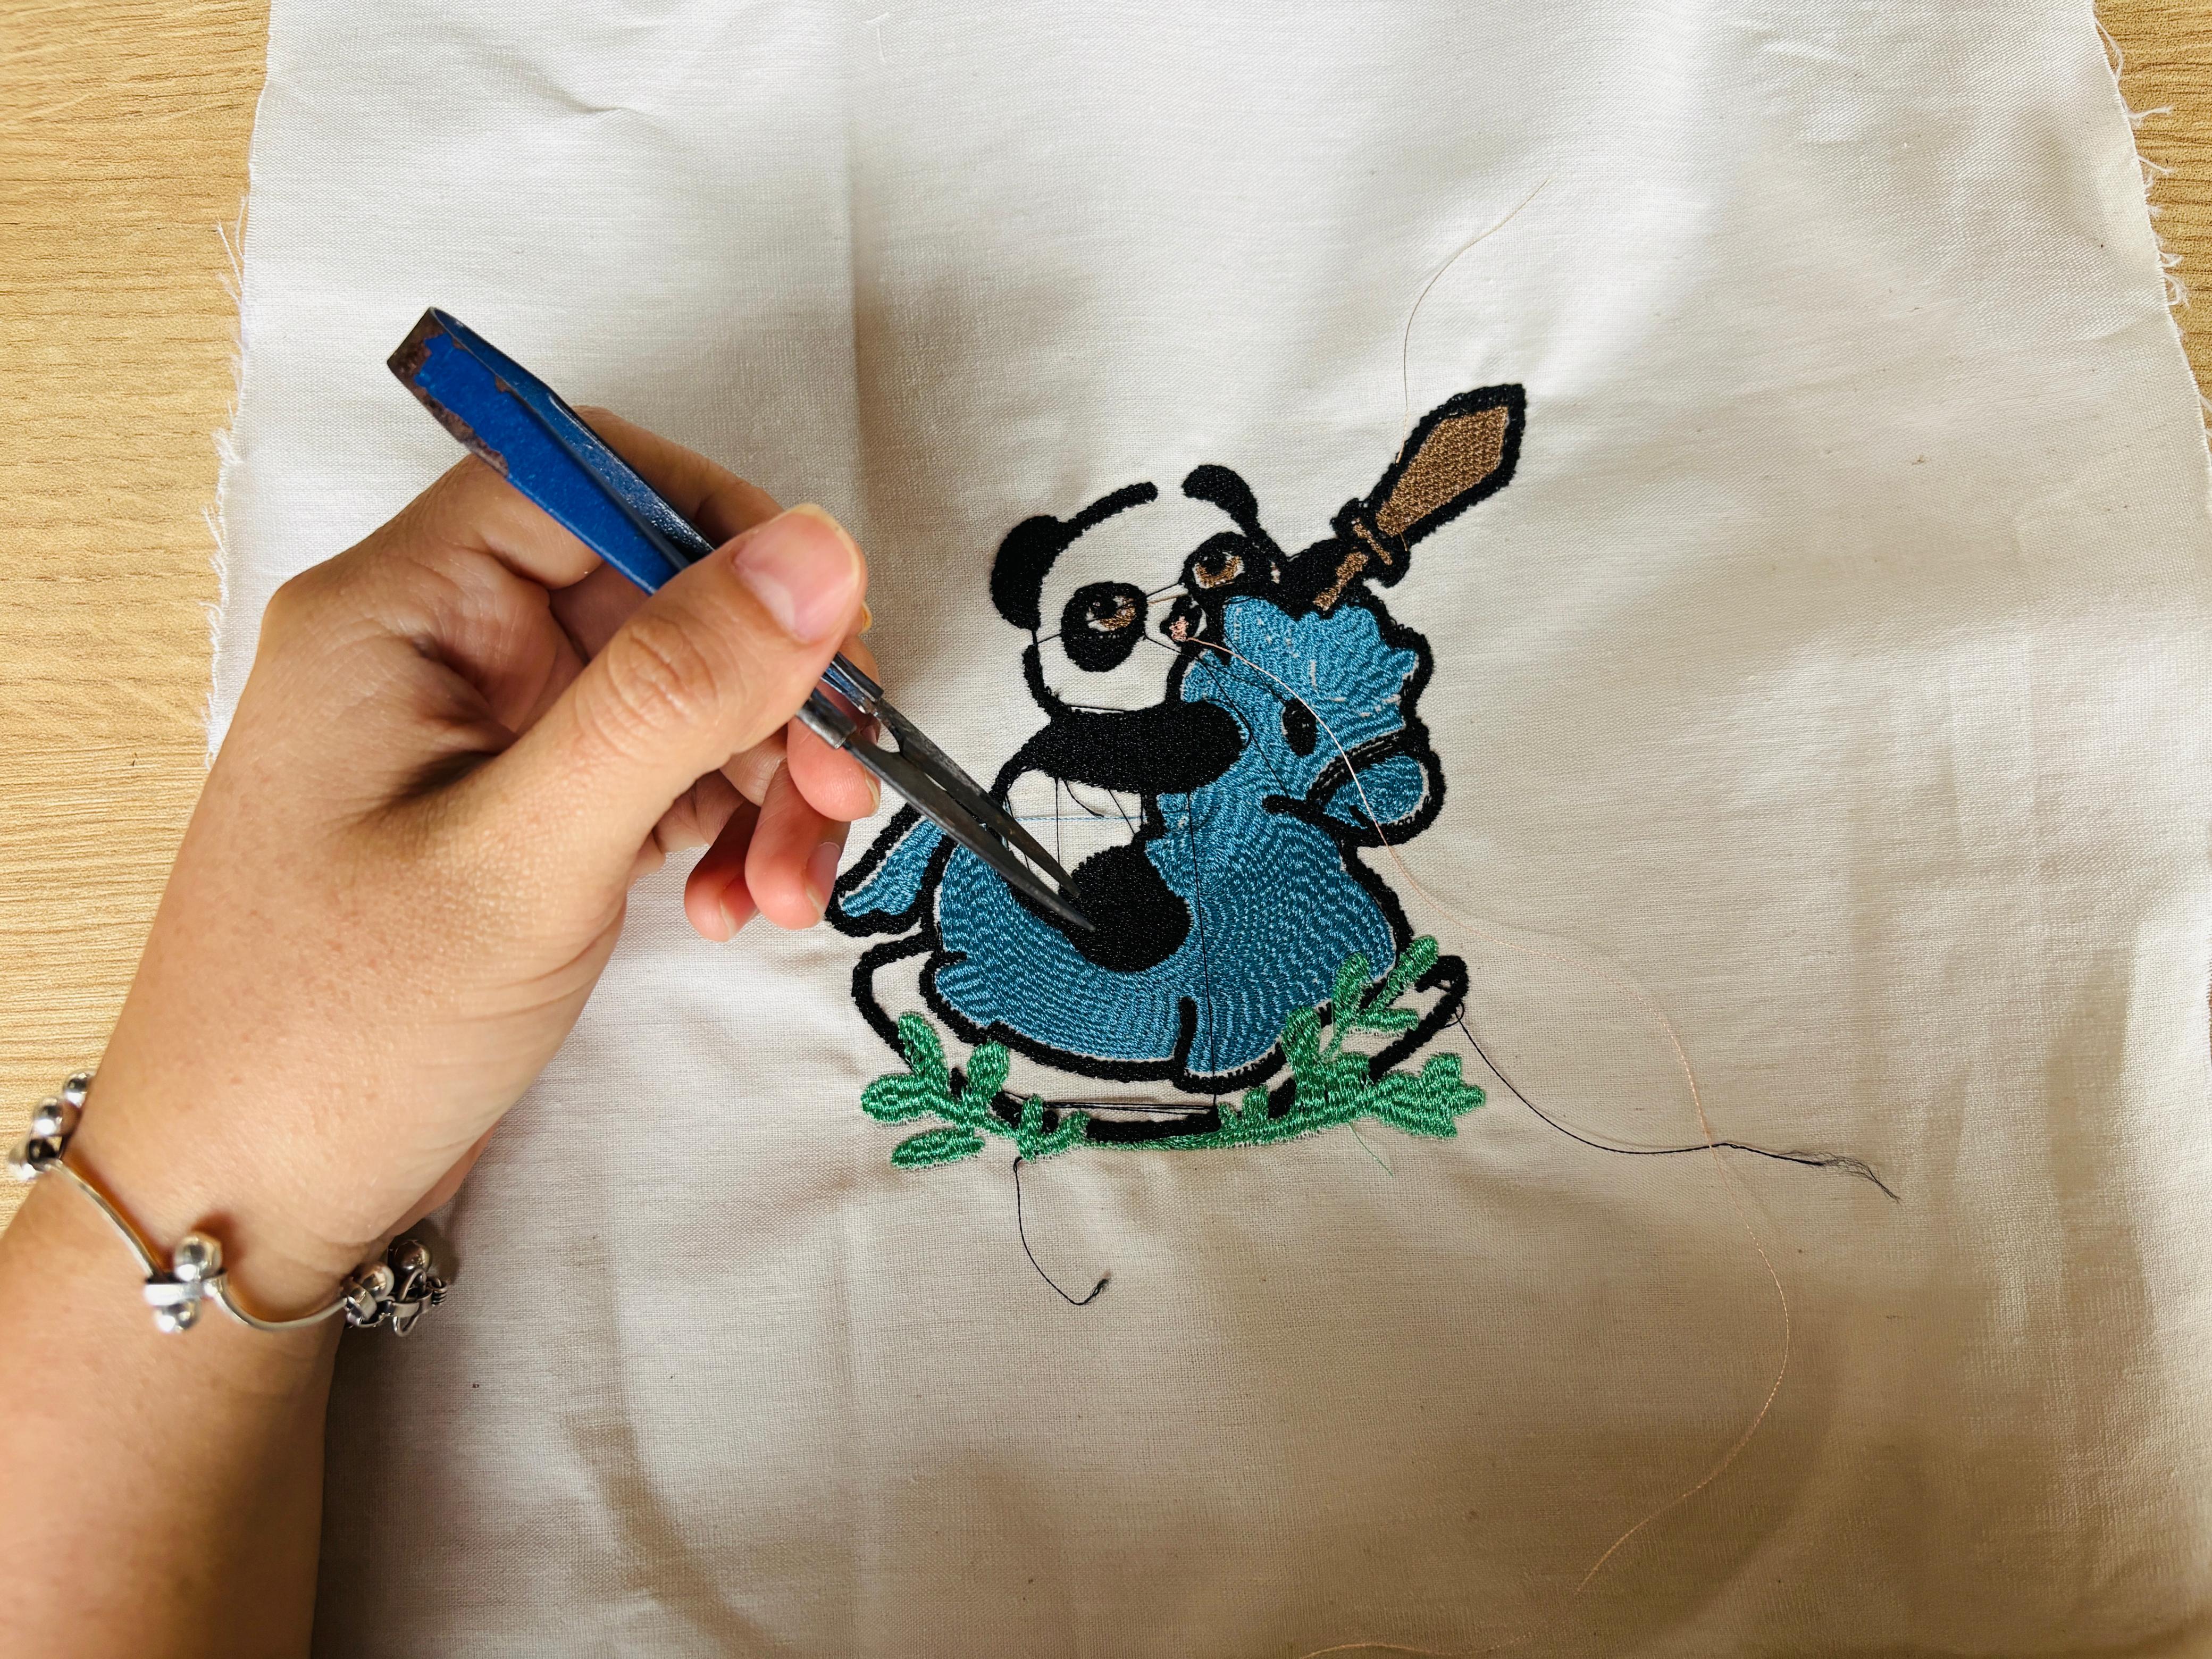
Here it is — the panda and his rocking horse, now stitched into fabric and ready to find a home on a bag.
Final Thought
As part of the 2026 cycle, this assignment introduced me to digital embroidery as a complete workflow — from vector design and stitch configuration in Inkscape with Ink/Stitch, to physical fabrication on an embroidery machine. It was a process I had never worked with before, and one I plan to apply directly to my final project's packaging.