Molding and Casting- Week 13
This week, I finalized the power supply for my project. The system will consist of an AC mains supply, stepped down and regulated to provide 9V for high-power components and 5V via a USB interface for the microcontroller. To achieve the required voltage levels, I will integrate two DC-DC buck converters for efficient step-down voltage regulation.
Rico san send me some videos to help me learn about power supply and learn and decide on it.
- How Buck, Boost & Buck-Boost DC-DC Converters Work
- The Most Versatile Voltage Converter you never heard of! The (S)EPIC Converter
- Power For Your Electronics Projects - Voltage Regulators and Converters
- Power ANY Arduino Project - The Ultimate Guide
- Everything You Need to Know about MOSFETs
Then I discussed and finalized my components with my local instructor, Mr.Anith Ghalley.
Applications and Interfaces -Week14
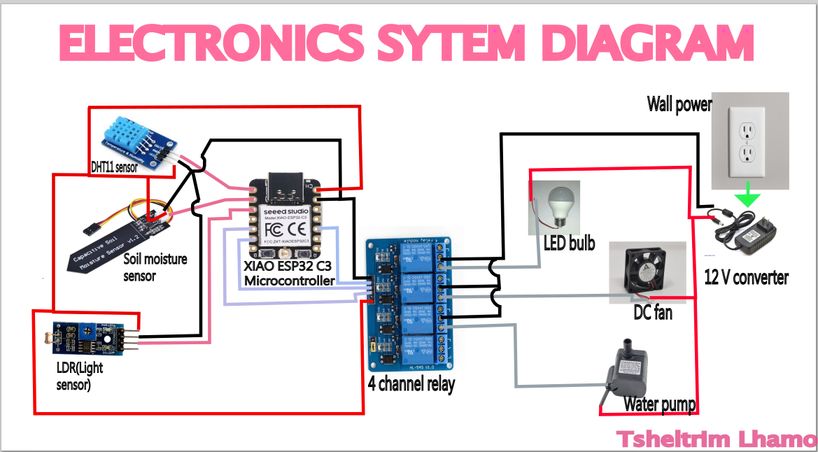
This week, I focused on testing and ensuring that the components functioned correctly. I worked with a 4-channel relay module connected to a DHT sensor. The setup was programmed so that when the DHT sensor detected a temperature above 30°C, it would trigger the relay to turn on a fan. To simulate this condition, I used the warmth of my hands to raise the temperature near the sensor—and it worked perfectly!
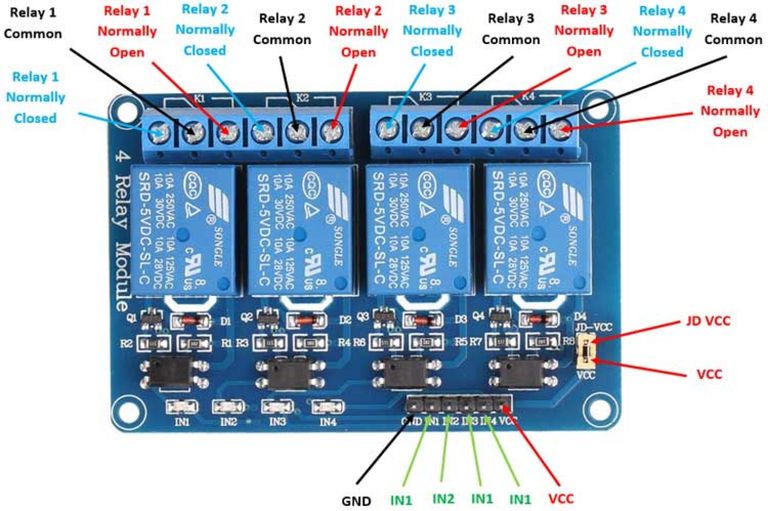
I used the PCB that I made during the Electronics production week , a 4 channel relay, a 9V battery, a 5V dc fan and then some jumper wires.
Connecting the relay to the fan and the power supply and the PCB!
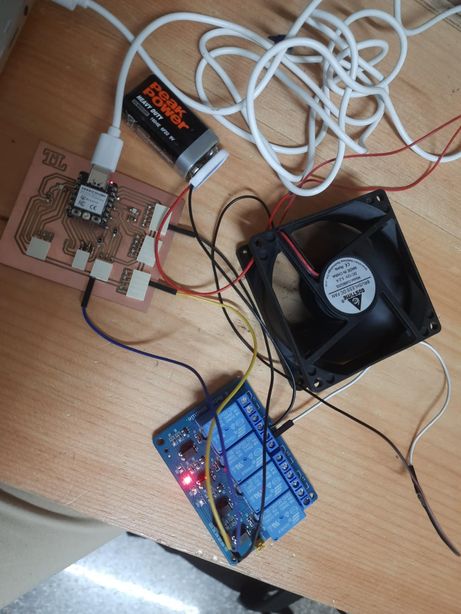
Connecting the dht to the already connected relay
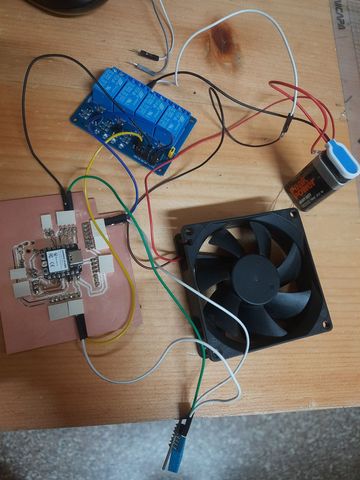
The codes that were uploaded kept on giving issues, so I used a multimetre and BINGO- realized there were some short circuits in my board. So then I remade and remilled a generic board this time and when I tested it with it, it worked fine!! Whoo! That debugging and troubleshooting process was very tiresome. I even tried booting my Xiao several times and even changed my code a lot of times. However the problem lied with my board.
This video showcases the successful test of my program in action. Initially, the fan remained off as the temperature was below 30°C. However, after applying heat to the DHT sensor using my hands—triggering heat transfer—the sensor detected a rise in temperature above 30°C. In response, it sent signals to the Xiao ESP32-C3, which then activated the relay, turning the fan on.
Initially the serial monitor displayed that DHT has failed to sense; it was because the wires were a little lose but then i plugged it properly.
System Integration!
Water Reservoir
While printing the water reservoir, I modified the base design, increasing its thickness to 8mm to increase its strength. I also changed the print settings as:
- Used the tallest layer height of 0.28mm for faster printing.
- Increased the perimeter walls to 3 for added durability.
- Set the infill density to 15% to balance strength and material usage.
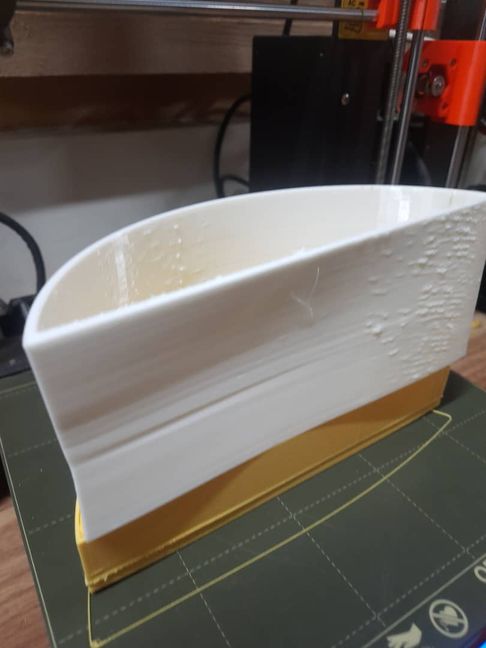
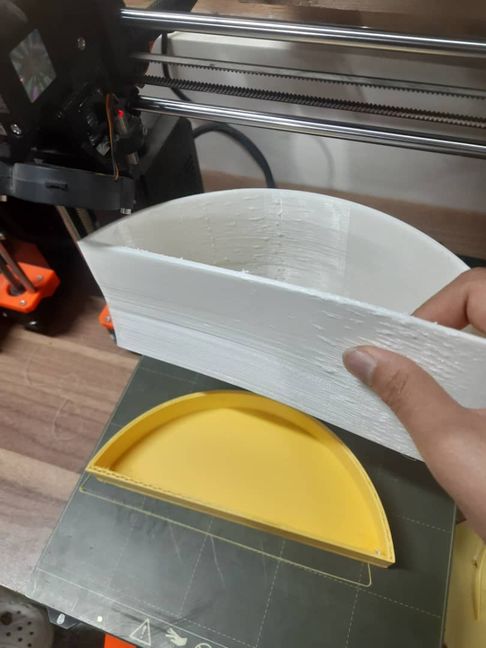
However, midway through printing, the filament ran out. We tried to find the same type but couldn’t, so we switched to a white filament. Unfortunately, it turned out to be TPU which was different from PLA(the yellow filament we used earlier), which caused issues:
- The print quality was affected due to material differences.
- The joint design failed, resulting in separate pieces instead of a cohesive structure.
Waiting for 14 hours for such undesired results was truly a memorable experience but I learned that all filaments werent of the same type and that PLA (Polylactic Acid) and TPU (Thermoplastic Polyurethane) have vastly different properties. PLA is rigid, easy to print, and great for structural parts, while TPU is flexible, elastic, and requires specialized settings for printing.
HEROSHOT
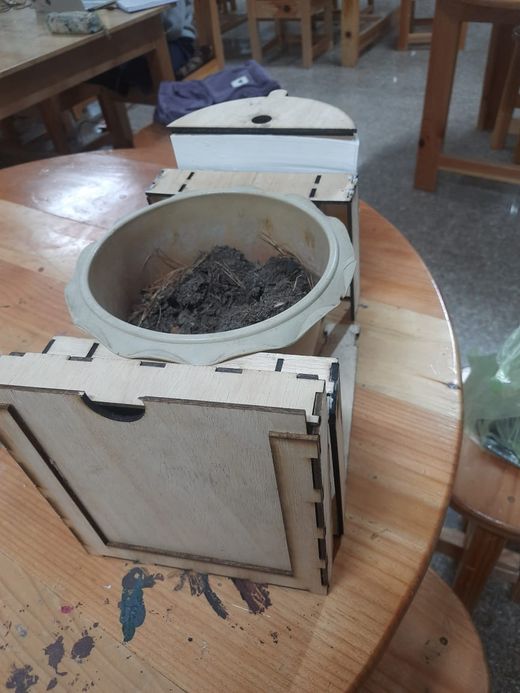
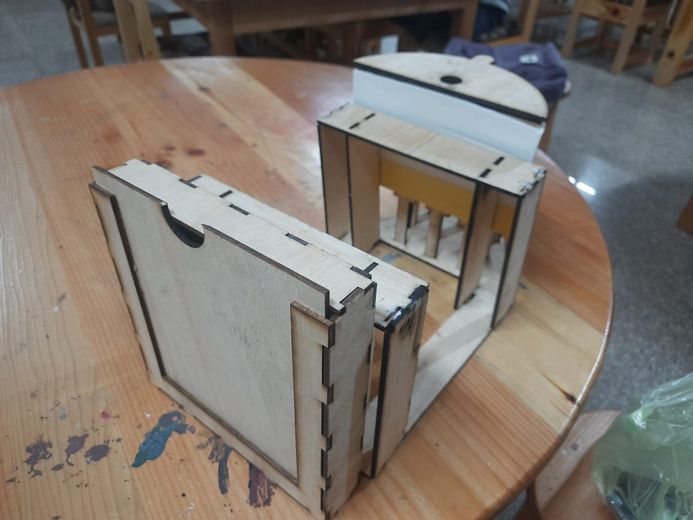
Laser cutting and 3d printing took hella lot of time(14 hours for my water reservoir). Though laser cutting took fairly less time as compared however once the pressfit were together, they did not hold up as tightly as I would have liked, so I had to glue it but now I plan on 3d printing corner connectors to connect them instead. And i also plan on using CNC for the middle module to increase it stability.