Wildcard Week
Design and produce something with a digital process (incorporating computer-aided design and manufacturing) not covered in another assignment, documenting the requirements that your assignment meets, and including everything necessary to reproduce it.
The topic I choose is UV printer.
UV Printer
The process of the UV printing can be simified as:
- Place the materials for print into the correct position, and set the platform to an suitable layer height
- Import the picture file to the software in the control computer, and send the processed data to the UV printer
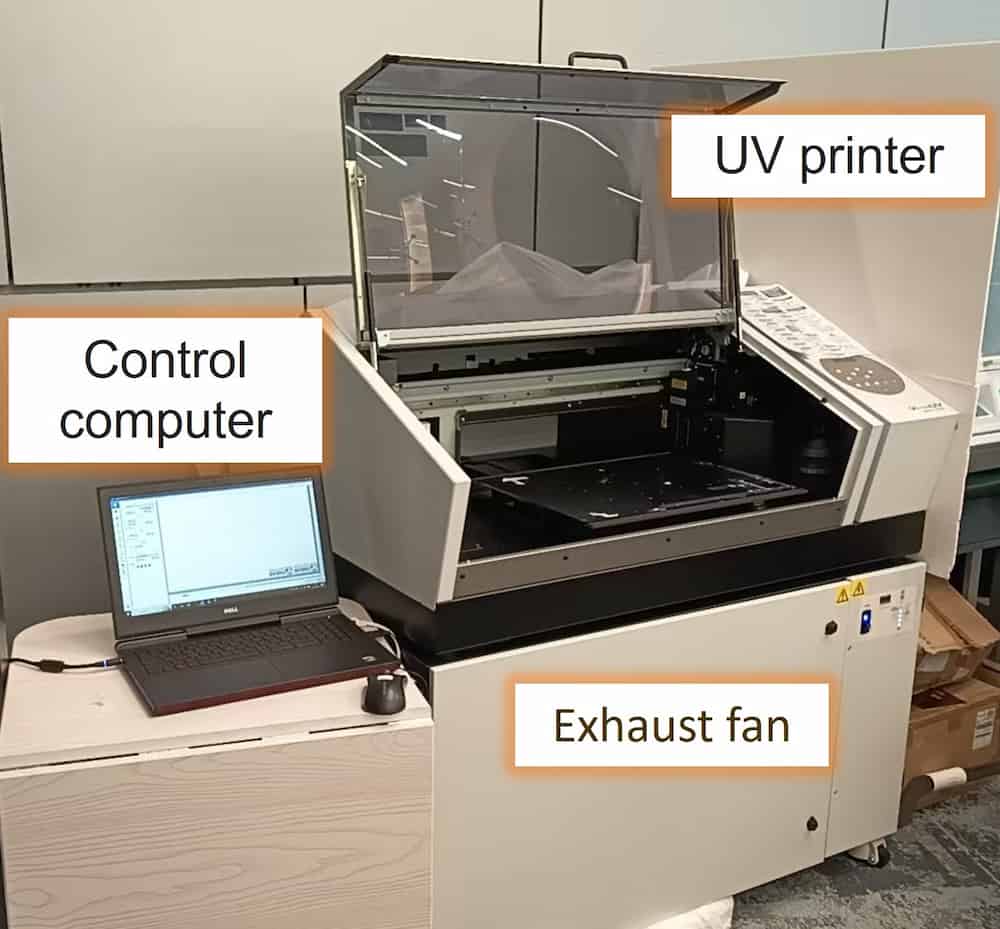
- Open the exhaust fan and start printing.
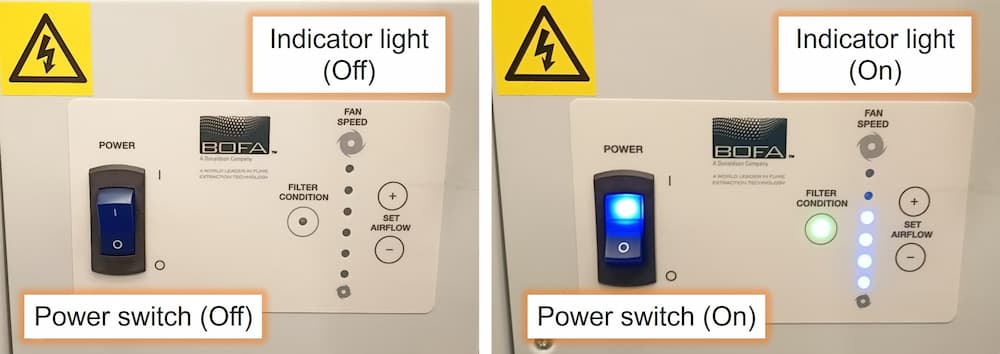
Remember to open the exhaust fan before printing! You can check the indicator light to confirm whether the fan is turned on.
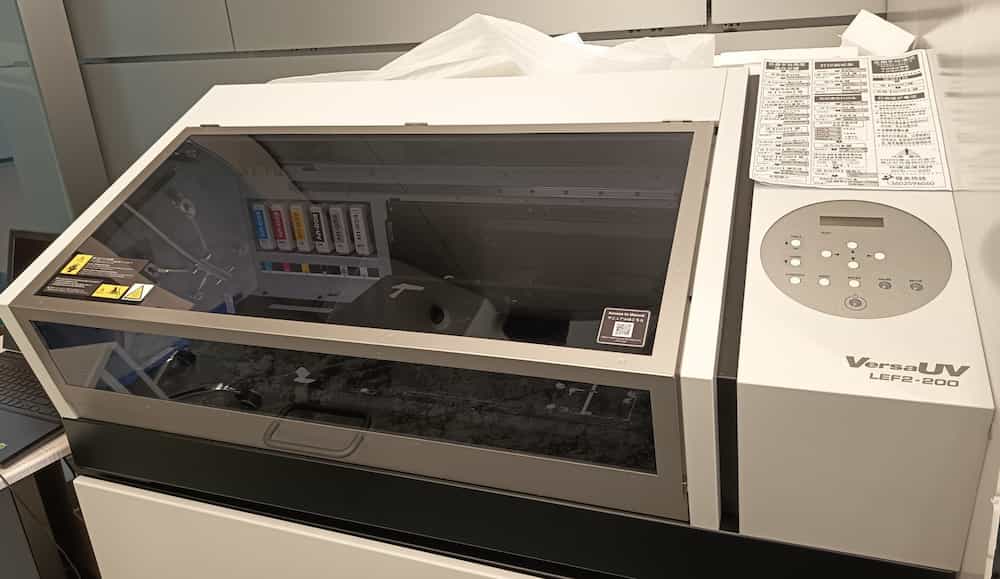
1. Set up the machine
A quick review on the machine:
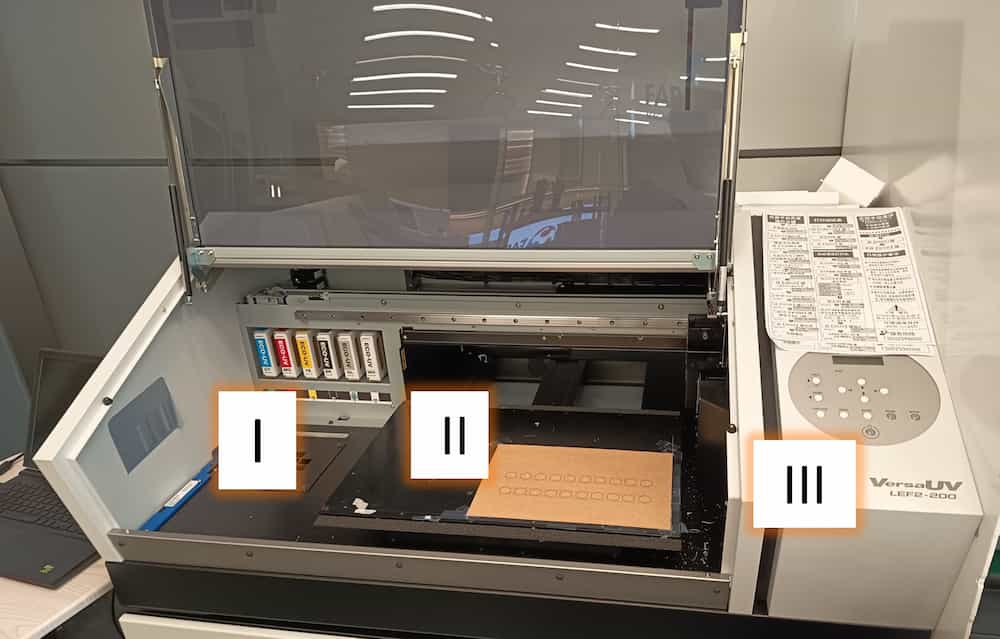
II. The platform for placing the material.
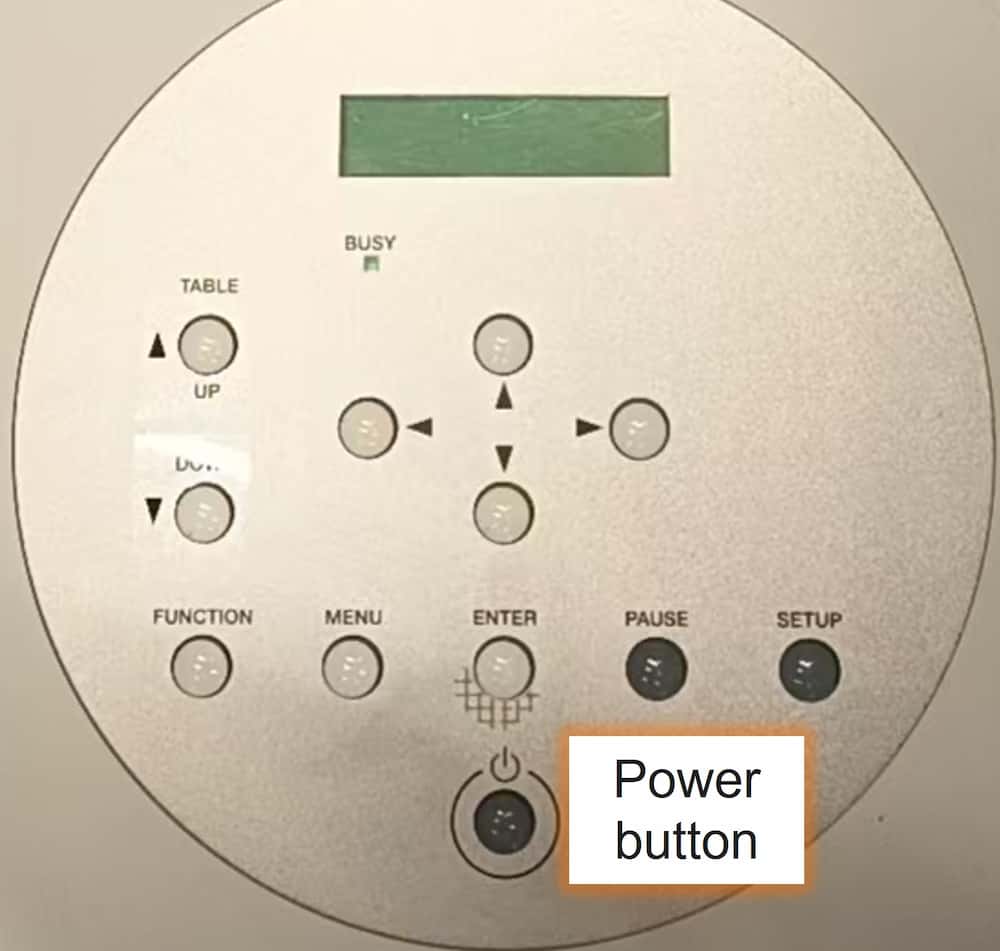
III. The control panel.
Detail process
- Turn on the machine by press the power button.
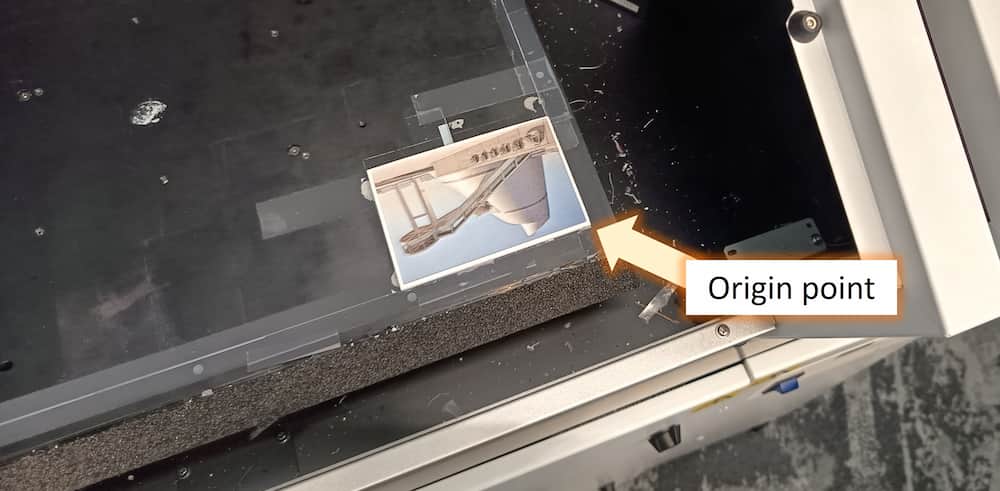
- Set the material to the right bottom corner, where is the origin point of the machine. As the printer head won't actually touch the material, we can just fix the material with double sided tape or Blu Tack to avoid it moving.
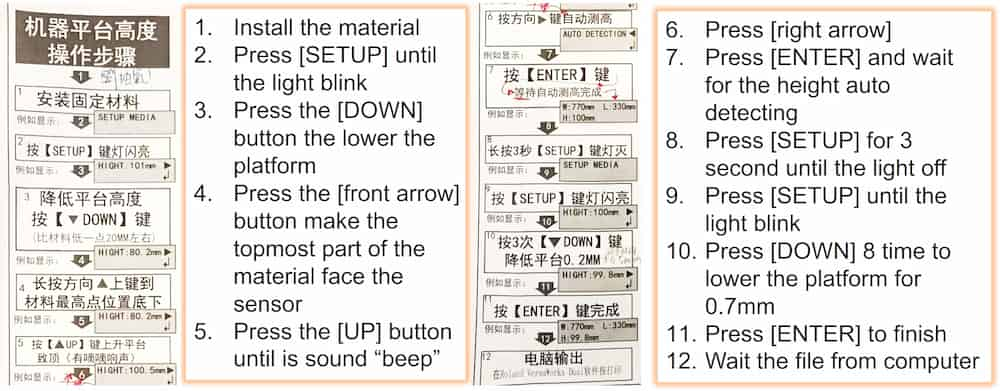
- Adjust the height of the platform. As the process is quite long, so an instruction paper is pasted on the control panel to remind the user.
- After the height is set, we will go to the computer part to set and send the printing file.
2. Send file by software
The software in the control computer is VersaWork.

pdf file, and it is convenient to adjust photo or create a new picture in pdf file with exactly size by the help of vector graphic design software. The following software is some of I used often.
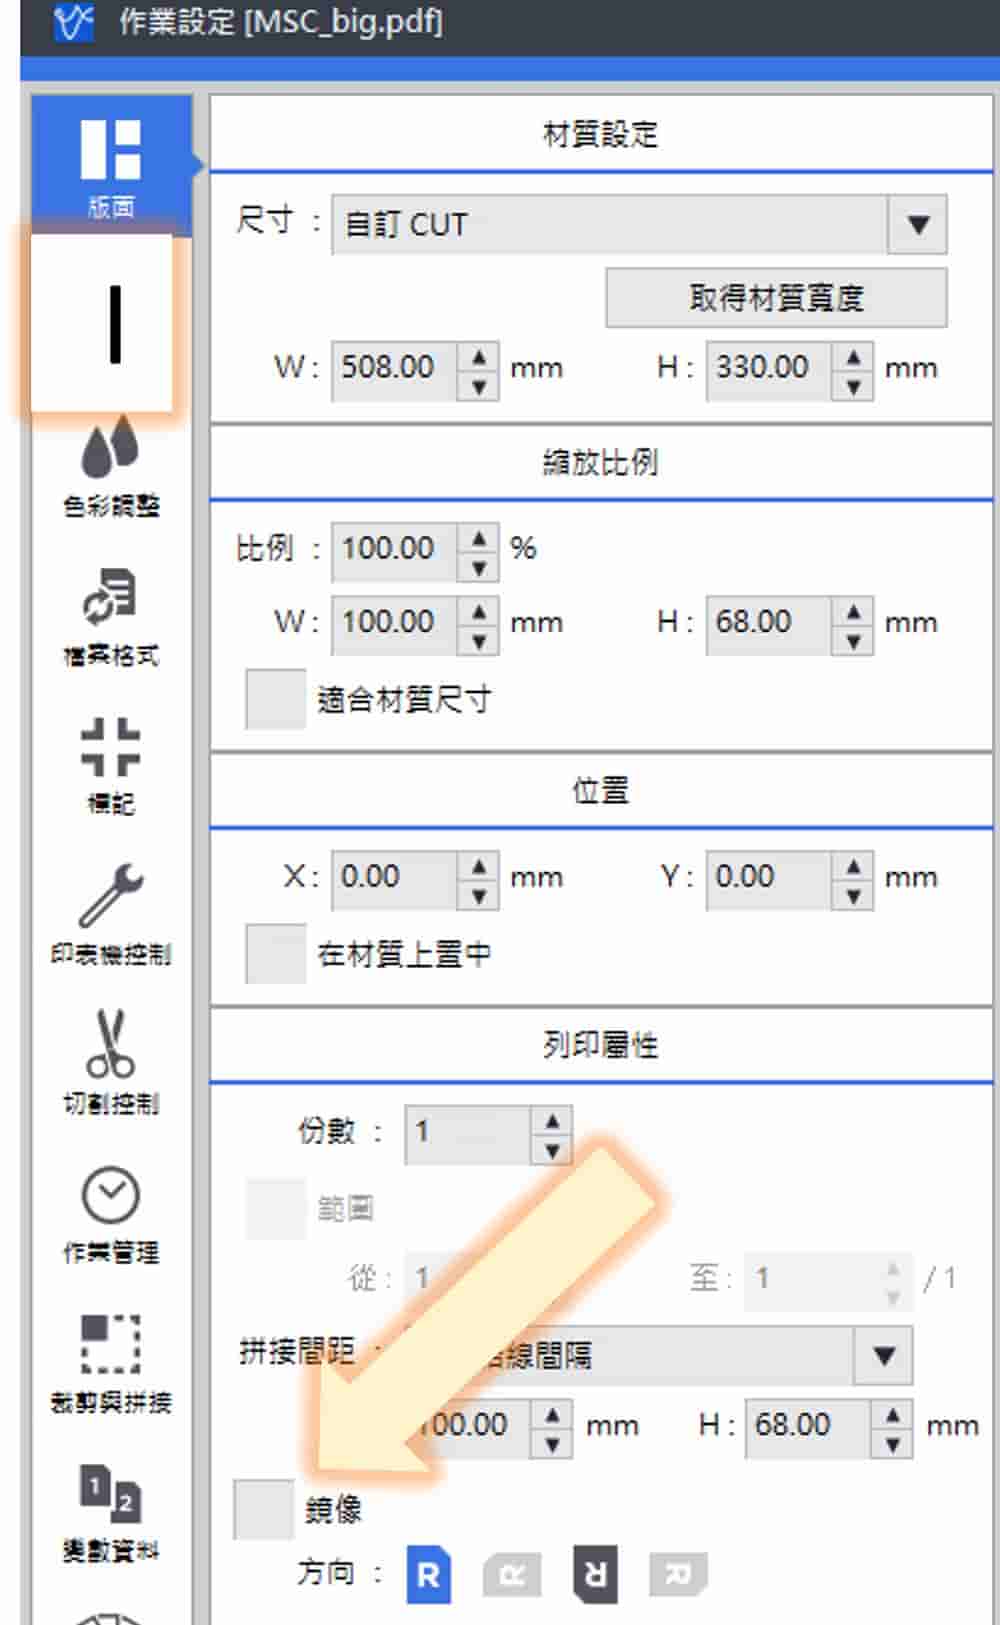
After open the VersaWork, here is interface of the software:
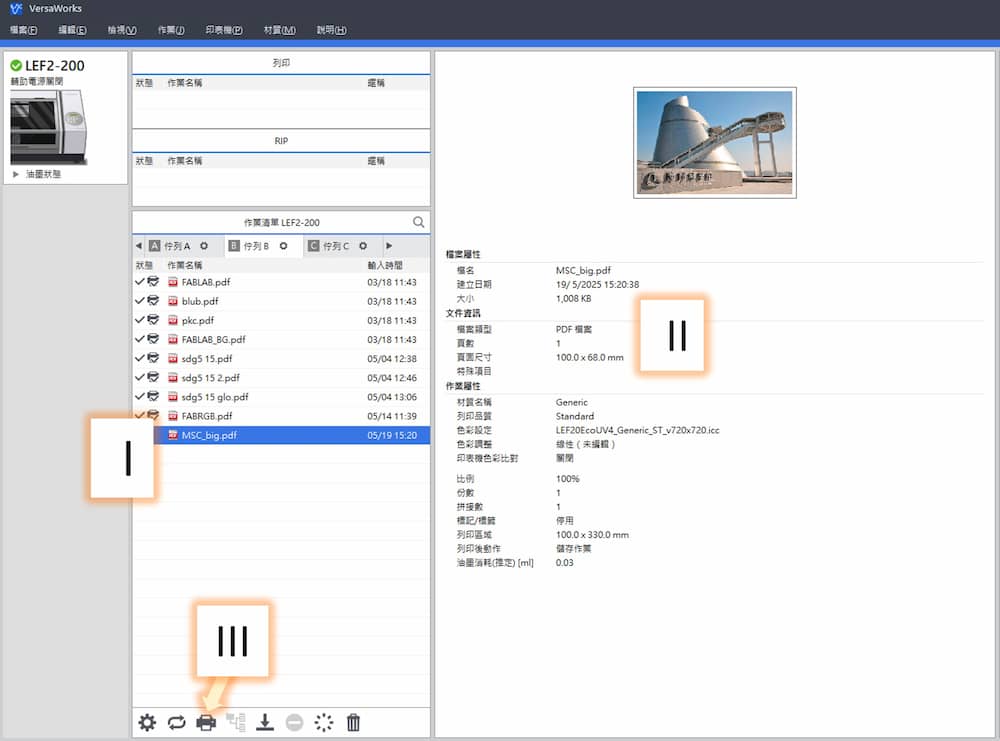
pdf file here to import the file. Double check the file if you want to adjust the detail setting.II. Check whether the size of the file is correct.
III. After both setting is confirmed, click the "Printer" icon and send the file to printer.
If you just want to print a basical picture with CMYK ink only, that's all for the setting. If you want to print with white ink and gloss ink, see the sample of the next section.
Application 1: Acrylic board
Basic CMYK printing
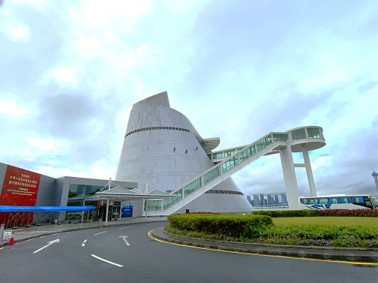
I will try to print the picture of the MACAO SCIENCE CENTER to the acrylic board.
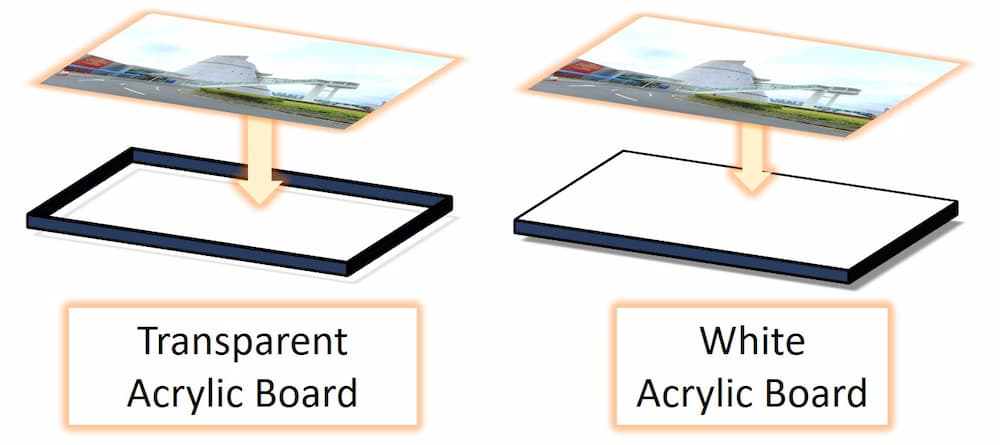
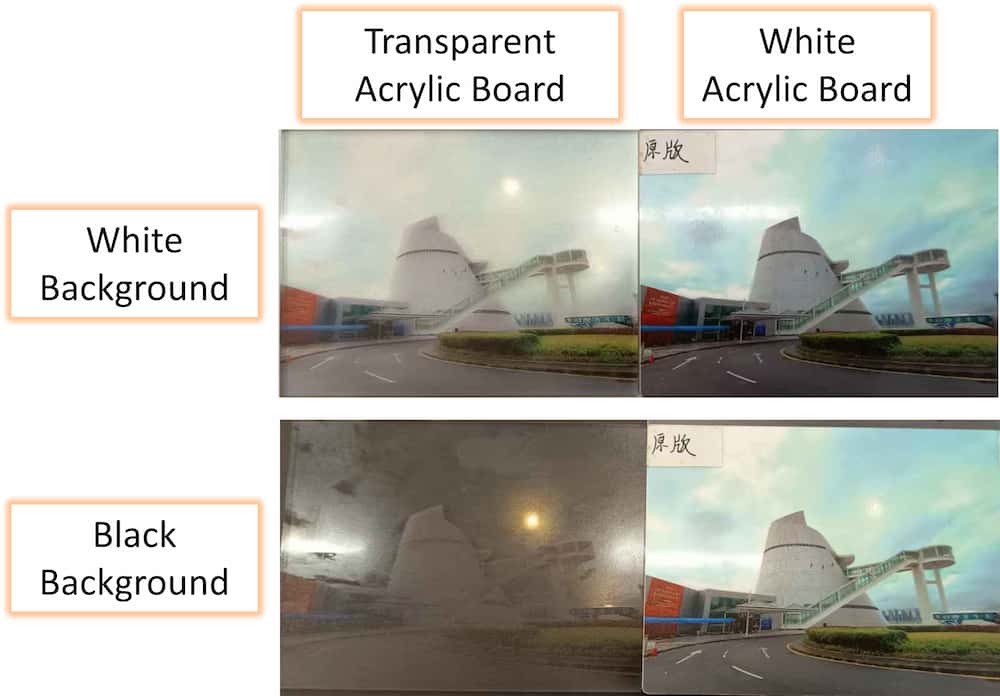
I try to print the picture on a transparent acrylic board and a white acrylic board.
CMYK with WHITE ink
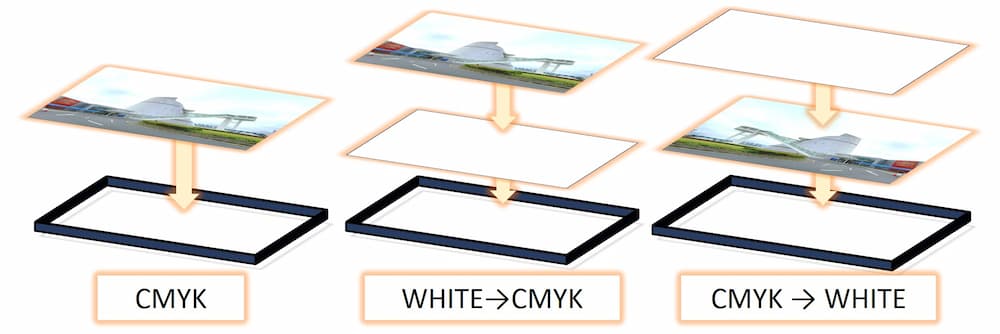
To solve the problem, we have to add a white layer with the white ink. In the software, we can choose to print the white color first of the CMYK first.
Detail process
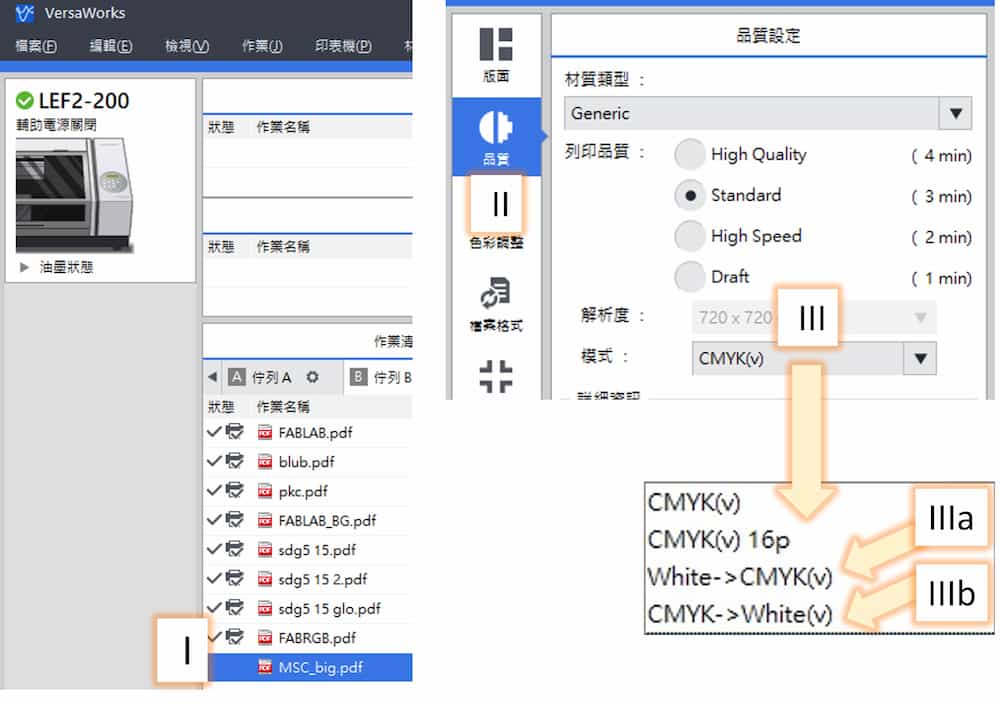
II. Find and click the
Quality(品質) tagIII. Find the CMYK bar, we can change the print ink to print the white ink first(
IIIa) or the CMYK first(IIIb)
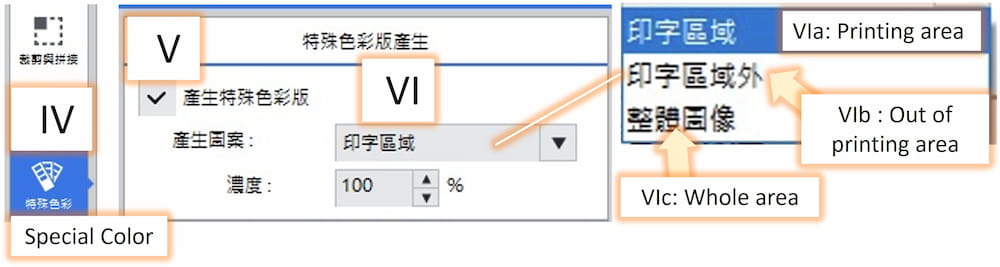
Special color(特殊色彩) tagV. Active the
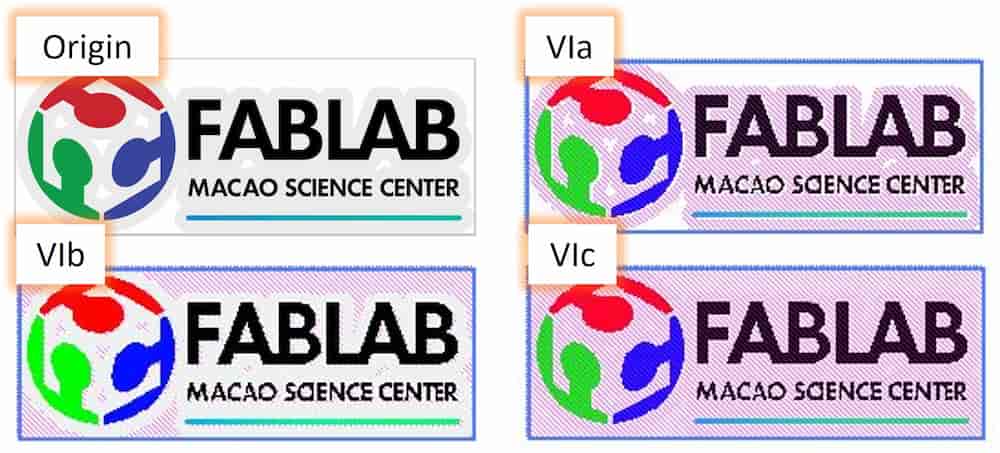
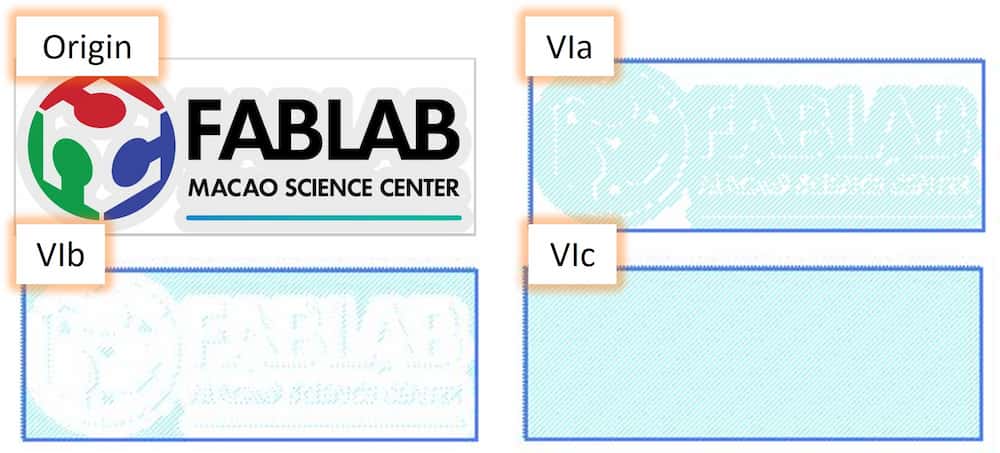
Generate special color(產生特殊色彩版) functionVI. Choose the area you want to add the white ink. If my sample, I will choose to print the whole area(
VIc).Here is a smaple to point out the difference between the printing area in part VI above. The software will determine the area with not exactly white color as printing area(VIa), and the area with exactly white color as out of printing area(VIb). The pink area mean the area will printing the white ink.
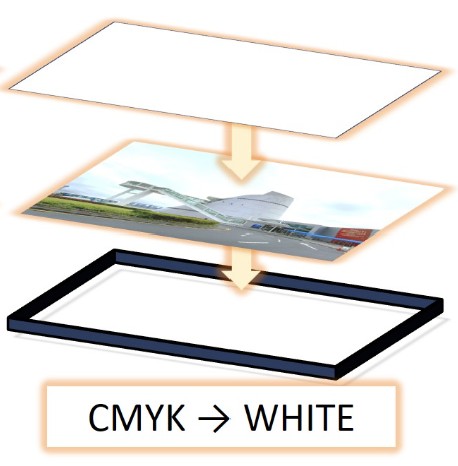
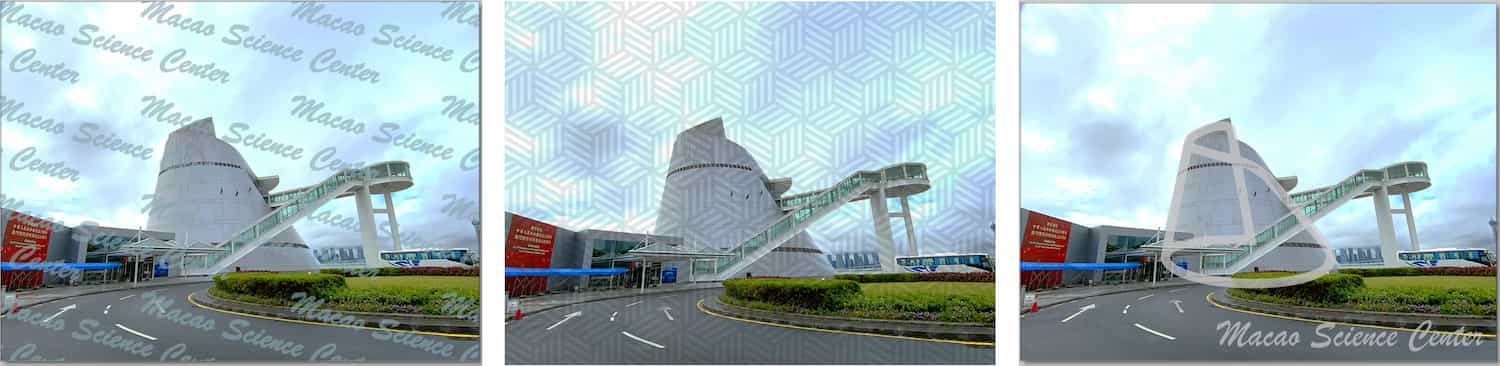
Here the result, both of them are same transparent acrylic board, from left to right is printing CMYK only, print with WHITE→CMYK, and print with CMYK→WHITE
Adding gloss ink
To emphasize some special part, we can add gloss ink too. It can also be word, pattern or symbol. Here is the effect I want:
Inkscape.The idea of printing gloss ink is print an extra layer of gloss ink above the material, so we just need to add a image with word/pattern/symbol only. The color set as any color, but should be dark enough for the software to classify it from the white background.

Detail process
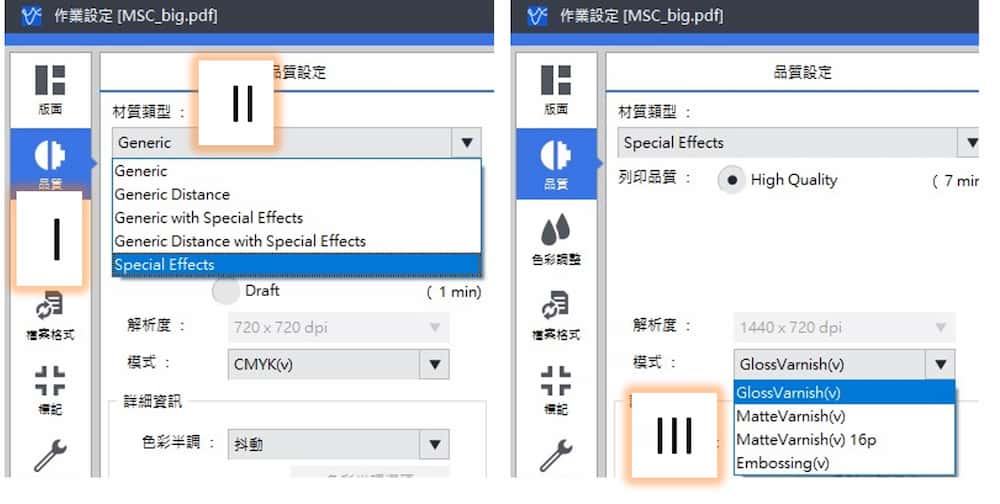
Quality(品質) tagII. Find the
Generic bar, we can change the print type to Special EffectsIII. There are different type of gloss printing method, and I choose the default one
GlossVarnish.The next step is similar to the white ink, as both white and gloss ink are count as special color.
Special color(特殊色彩) tagV. Active the
Generate special color(產生特殊色彩版) functionVI. Choose the area you want to add the gloss ink. In this case, I choose the printing area only(
VIa).The area that will print with gloss ink will show as light blue.
Here are the results:

Application 2: Color lithophane
A lithophane is a three-dimensional image created from a thin, translucent material, typically porcelain or plastic. When backlit, the varying thickness of the material allows different amounts of light to pass through, revealing detailed images or scenes.
We can make a photo to the lithophane stl by the website generator: https://lithophanemaker.com/Framed%20Lithophane.html
Detail process

Choose file(選擇檔案) button
Next step is setting the size parameter. Usually most of them don't need to be changed, just remind the following:
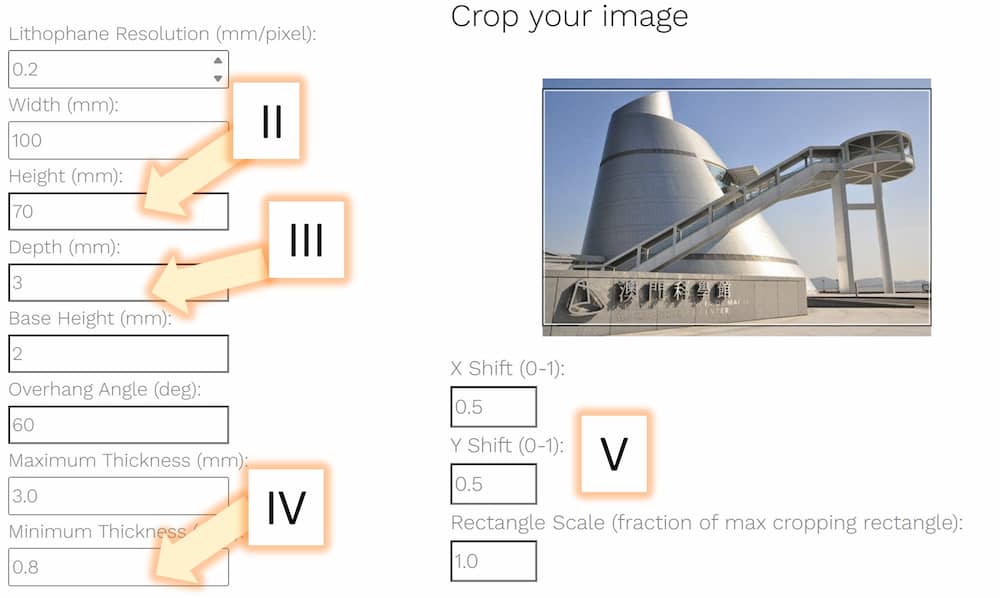
III. Should be fine about 3mm. Too thick will low the translucent effect, while too thin the model might collapsed during the painting
IV. As the common nozzle of the 3D printer is 0.4 nozzle, the minimum thickness should be at least two wall thickness, so not less than 0.8mm
V. Check the result. If the size of the outline is not the place you want, just adjust the position.

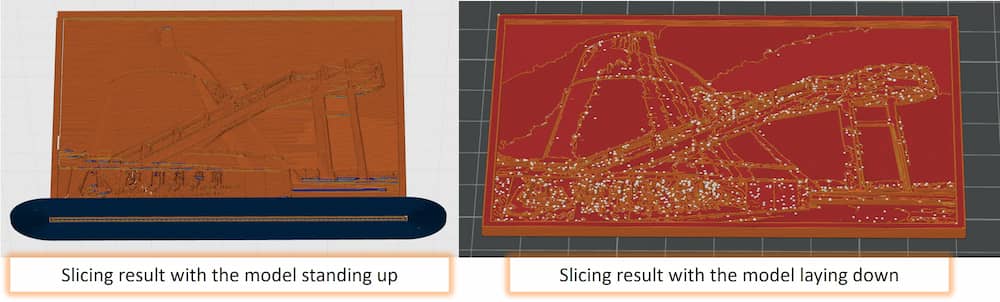
Create.stl button and download the file.When we slicing the lithophane model, remember to let the model printing with "standing up" position! Although the model will be print fast in a "laying down" position, the resolution will be very low due to the FDM slicing method. Also adding a brim will make the model more stable(optional).
By 3d printing, we can get a single color lithophane, usually in white color for the translucent effect. And we can UV print the add CMYK color on it to make the effect colorful. The process is exactly the same as the acrylic board above, just be careful to place the board at the exact orgin position.
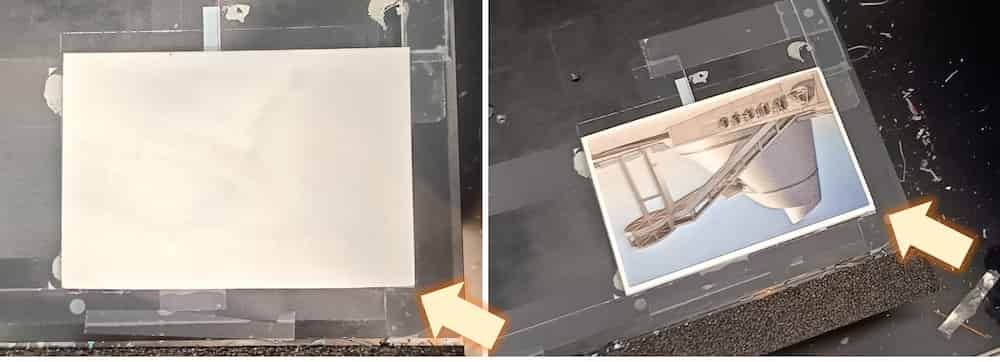
When we print the picture on the back of the 3D lithophane, the picture should be mirrored, so remember to active the mirror(鏡像) function in the Layout(版面) tag!

Here is the result:
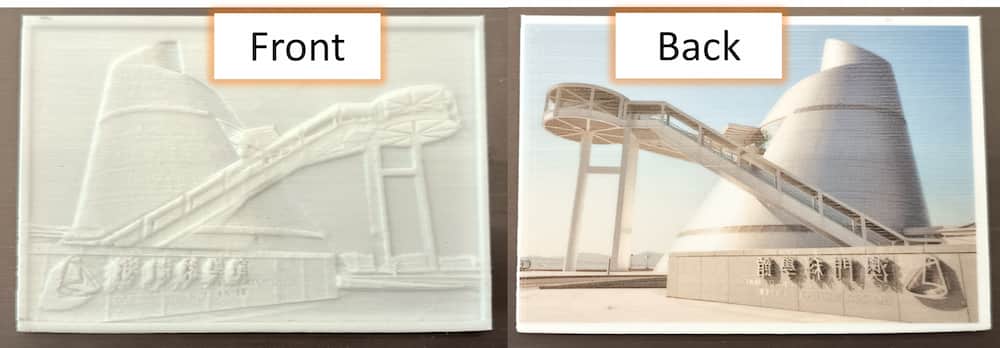
The top one in the video is origin white color and bottom one is the same but UV print the CMYK color at the back:
And with the back light, we can see the effect with color by UV printing.
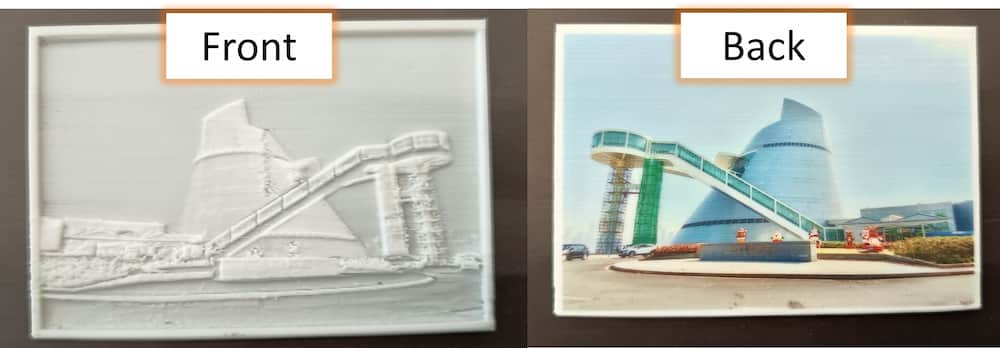
As the saturation of the picture is not very high, I make another version with a higher saturation photo, and here is the result:
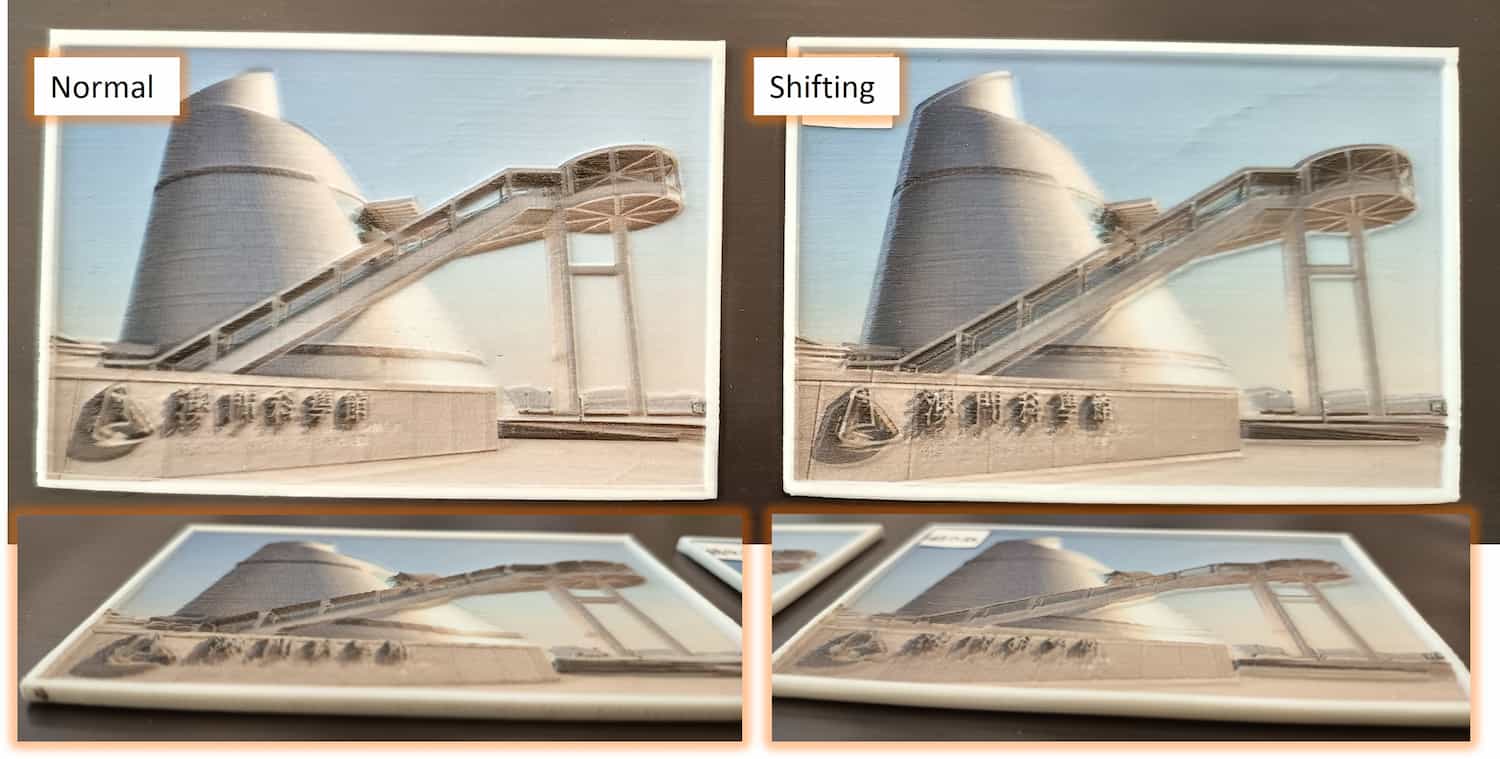
I also try to UV print in the front side, which can create a colorful relief effect, but need to align the lithophane carefully, or the ink will shift and making a dizzy effect.
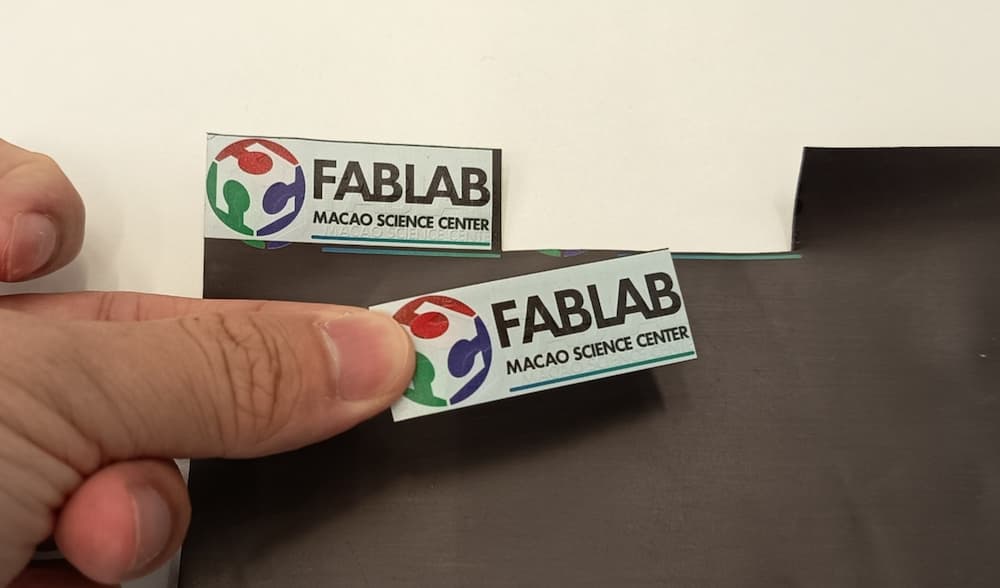
Application3: Sticker
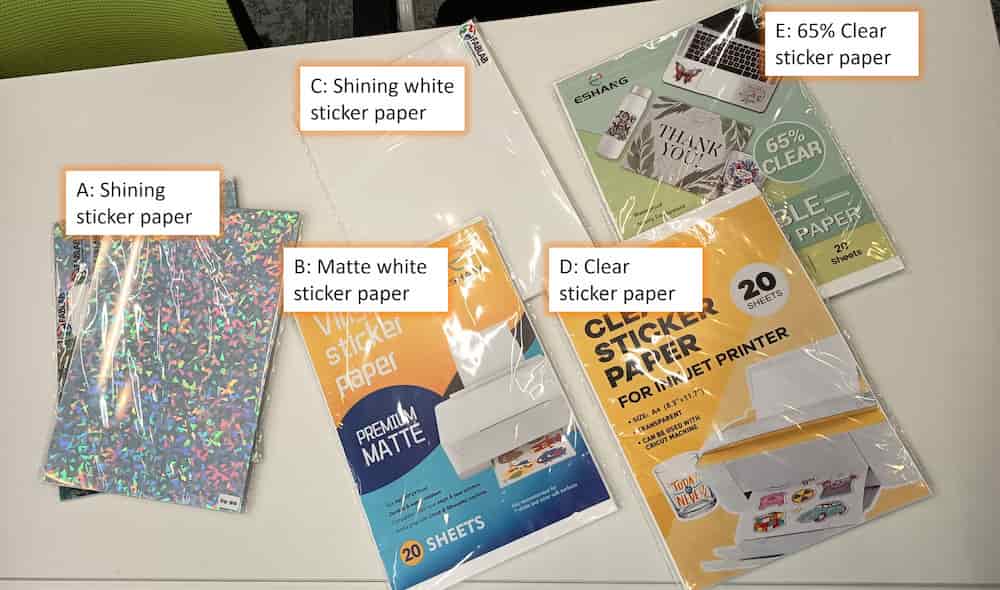
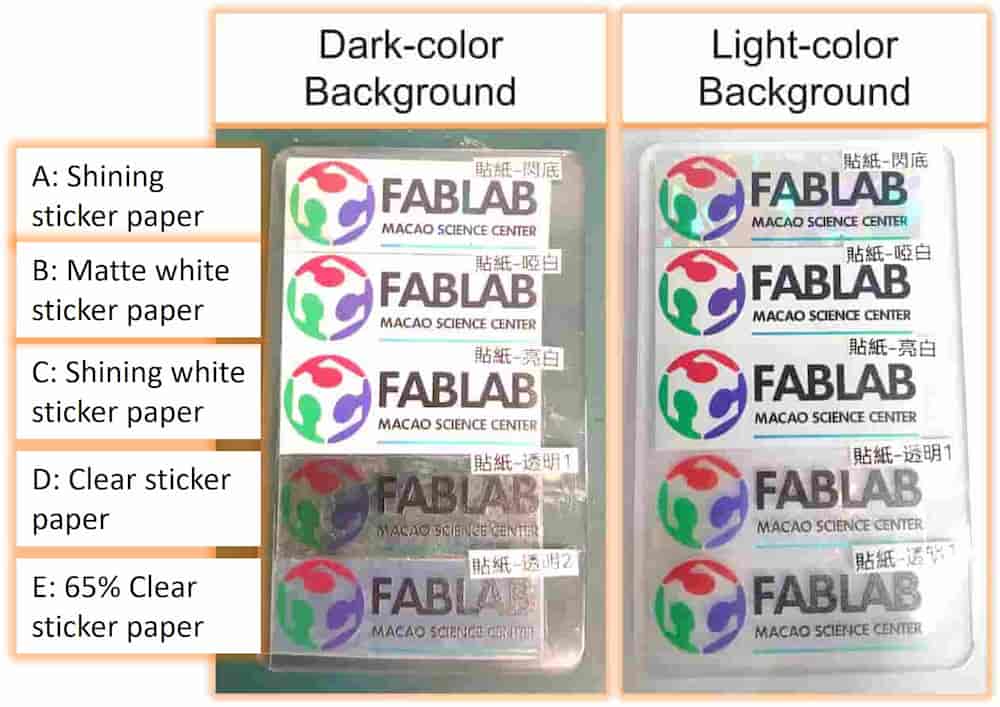
I plan to use UV printing to decorate my final project, but not everything is suitable to put inside the UV printer. So I tried the printing on different type of sticker paper, which are easy to be cut and paste to any surface. I tried for 5 different types of sticker paper
I also have a try on thin magnetic sheet. As the color of the sheet is dark, so I need to add a white ink in the whole area.