Project management and documentation
intro
The topic of the first week is project management and documentation. In order to begin with the end in mind also the first ideas for a final assignment need to be sketched. On the following page my efforts to (re-)learn git, the first edition of this (static) website and general tips, tools and tricks can be found.
- Direct link to the git repository
- A personal introduction page
- The final assignment
- The signed student agreement
git and sgg
The documentation system for the course is setup using gitlab and a site-generator. I pulled the (my) git repository using sourcetree and followed the instructions (so without the hugo new since it will not work in an existing folder). Git init ‘reinitialises’ (so I’m curious how it will work with the git push later, I might need to switch accounts..). Command line tools also prove to be quite convenient, although Visual Studio Code also supports commiting and pushing the changes made.
| git command | |
|---|---|
git clone [link] |
download a repository |
git add [file] |
add a file to the list ready(staged)for commit |
git commit -m "this is a minor update" |
commit the staged files |
git push |
upload to remote |
git pull |
download all new commits |
git log |
check history / log |
git status |
check what’s new, removed, changed |
I found it also quite convenient to do the commit and push directly from Visual Studio Code, or from sourcetree. However it is not immediately clear how connection (security) is handled. In the key repository there I did not generate an ssh key (had an old RSA one so the system -was- working without key) - generated an ED25519 key and put it in Gitlab. Note to self: don’t rely too much on ‘magic’ applications such as sourcetree, Follow The Fine Manual and Do Everything With Your Command Line Terminal Thing. ssh git@gitlab.fabcloud.org
different keys: make config file in ~/.ssh/. I have set a pass-phrase, so I might need to create a new key if I’m tired of typing it. Do the git steps manually. Might need to add username to git config file to handle multiple accounts (I also use GitHub).
For Visual Studio Code there are convenient plugins to insatall such as the Git Extension Pack and the Git Graph. For future work also try out the openScad extension and the copilot extension.
generators (ssg)
The workflow of using GitLab, markdown and a static site generator is new to me. I have been working with dokuwiki for my projects for the past two decades, where the emphasis is on quick documenting and storing files, without version management. What I like about dokuwiki and would like to see in the system I’d develop are:
- scalable, responsive, no-frills
- clear navigation
- resizable pictures, media files
Besides these, the system has to be as simple, clear and no-frill as possible. Part of the goal of my portfolio is to use it at Fablab Oldenzaal - a unique lab (like all the others) which is in this case run by - and partially aimed at - people with ASD.
I have looked at three different systems: mkdocs, hugo and jekyll. Especially the jekyll based site by previous participants michelle’s portfolio looks stunning… I would argue for my purpose even too pretty (moving, colourful, finished products/steps)
mkdocs
The first attempt is with mkdocs. The tutorial is very smooth, I have a page (locally) up and running in minutes.

mkdocs rendering of first *.md page
The papge content, formatting options and setup are very useful. I would definitely start using this for a project which is less show-case / portfolio and more ‘just plain practical documentation’
jekyll
jekyll looks a bit more complicated and elaborate (from the tutorial perspective). Where the mkdocs serve and hugo server -D instructions seem very straightforward for local testing, the instructions for jekyll to test a repository locally require more steps It seems however to be integrated very well in the GitHub / GitLab ecosystem.
hugo
For hugo there are many very different themes and ways to make-up a page. For instance the very elaborate looking theme ‘relearn’ looked like a strong candiate. Howver, I would like to have as little frill’s, menu’s and buttons as possible. this documentation is meant for the academy course, not for an entire lab or organisation. I found a theme called ’lightbi’ which seems to cover the needs (clear, no-frills, entry page with small cards, simple top menu row for the other pages). Installing the theme in a lean way (i.e. removing all unnecessary theme content) was fairly straightforward (but a bit more work than anticipated). I have installed Hugo using the following getting-started guide -> the version for macos through homebrew.
Instructions for hugo are pretty straightforward:
hugo new site quickstart
cd quickstart
git init
git submodule add https://github.com/binokochumolvarghese/lightbi-hugo.git themes/lightbi
echo "theme = 'lightbi'" >> hugo.toml
hugo server
Only the info has been added to the config.toml file manually instead. Also using ‘‘hugo server -D’’ helps to render everything, not the already published files apparently.
now, before the commit we probably have to run ‘‘hugo’’ to make sure the static site is generated.
- pulled my starting repository from the fablab server,
- added the theme files and content folders
- edited the config.toml file to link to the right theme
- added the theme in the .gitmodules file
The workflow until now:
- edit files in Visual Studio Code (while running
hugo server -D) - run
hugo - commit
- push
Next, I added a pipeline on GitLab to run Hugo locally. (pipelines -> jobs) with yml template for hugo from here.
todo: check what’s bootstrap doing in the theme folder and how to use it this tutorial might help.
editing
the last time I properly edited was on Windows. Currently on mac I use online editors like overleaf, std textedit, the arduino and processing editor, etc.
Recently, I needed visual studio code to compile Marlin firmware. Since it has git integration and hardware plugins like platform.io I think it is the best candidate for coding. next goal will also be find out how to setup Arduino programs (and perhaps processing etc.) using Visual Studio Code. I have switched to VS code for most of my editing for now and added a large number of plugins and extensions:
- Auto Build Marlin
- C/C++ (extension pack, themes, cmake, cmake tools, makefile tools)
- Git Extendion Pack, Git Graph, Git History, Github Copilot, gitignore, gitLens
- PlatformIO IDE (already to check Arduino and other MCU work)
- Processing Language
- OpenSCAD
- Pylance and Python
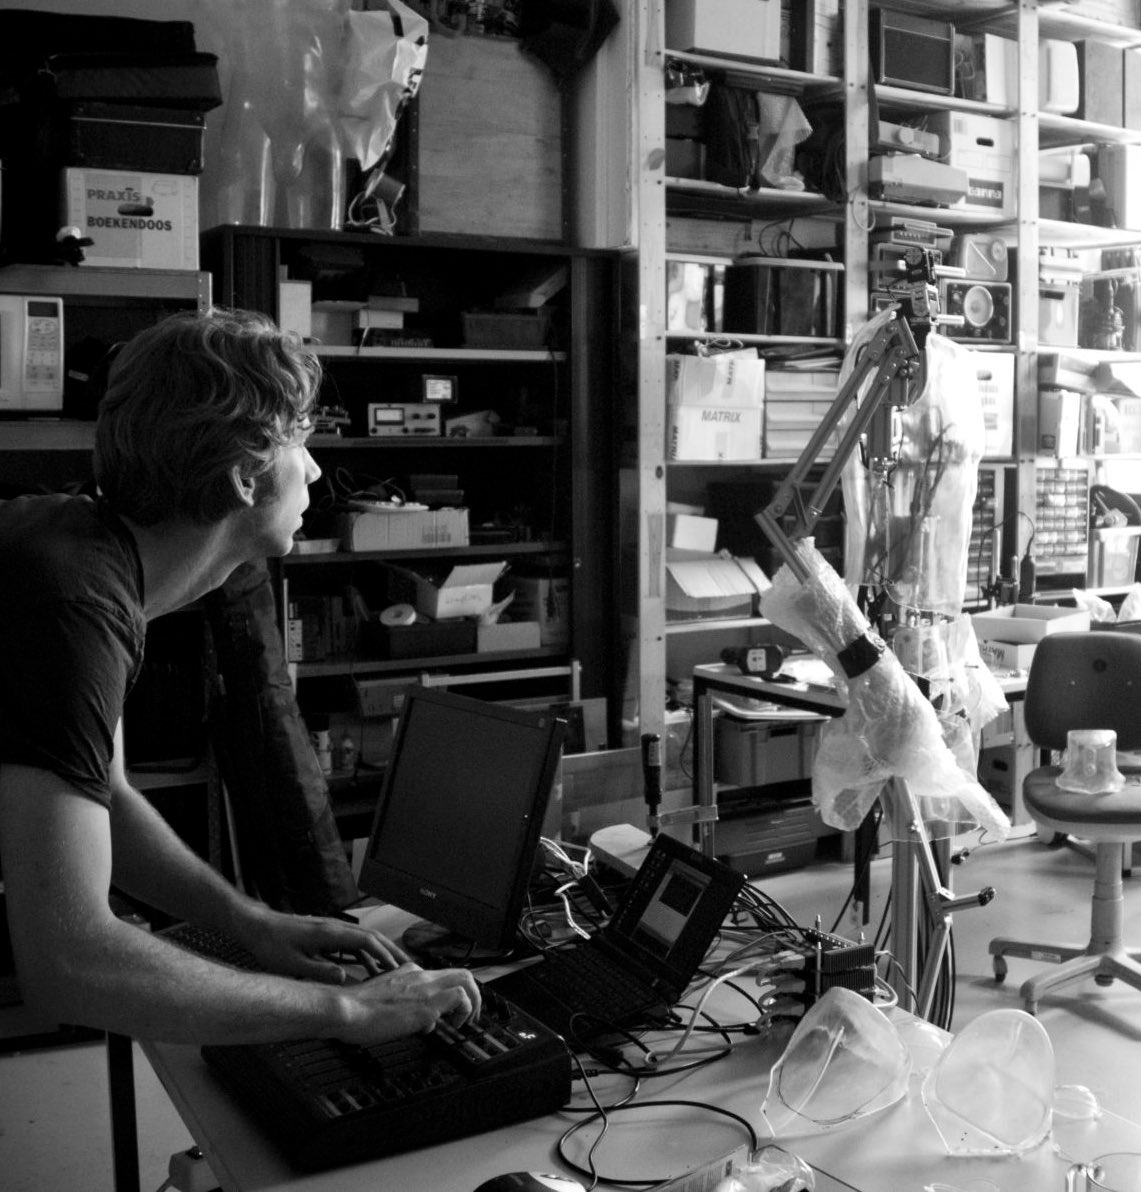
Especially the GIT tools smoothen the workflow. Below the folder structure (used for the hugo theme) in vscode:
Folder structure of git repository shown in visual studio code
markdown
Hugo is using markdown for content format, but there are times when Markdown cannot quite do the desired job. There are a number of shortcuts however (or shortcodes)
Figure and Split
A quick test of markdown -> hugo shortcodes for figures with captions, two-column work
With caption.
With caption.
folding
I use this a lot on my dokuwiki to paste longer scripts and sources in the text body. This simply adds the html5 detail attribute, supported on all modern browsers. Use it like this:
This is the details title (click to expand)
This is the content (hidden until clicked).syntax
(just checking: how can you work with code? syntax highlighting) - apparently it is four spaces or between a three-quote-block.
bool getBit(int num, int i) {
    return ((num & (1<<i)) != 0);
}
links
Cross-linking pages is also something to use shortcode for: check this page the following linking strategy
[link text]{{< relref "/toolbox/tools/openscad.md" >}}
should do the trick… Note that in order not to evaluate the string above, the curly brackets need an inside-escape with /* and */. See this blogpost
hugo theme install
I had some trouble in getting the theme to work, there were many differences between the empty archive created by the hugo new site command and the folder structure presented with the ’light-bi’ theme. Eventually it worked better to use the pre-defined example and compare this to the install directory. Most of the differences were in the config.toml file (which for the installed instructions yielded an almost empty file with theme reference)
I replaced the existing files with my own structure and *.md files. I think I will keep files/asset per assignment (week). After all the editing and removing I removed the files I edited (clean file archive) and deleted the git repo. Pulled again and put in the clean archive (including the .gitmodules file). This saved a 12 Mb .git archive being pushed (so also make sure not to put large images in the repo). Looking into the .gitignore file to make sure the ‘public’ dir is not indexed.
For more customisation I had to edit the html templates () in the themes -> layouts folder. Apparently everything inherits from everything(!). The ‘search in files’ from Visual studio code is a lifesaver!
Next up I made sure gitlab can also run hugo (so not needed to do locally). Check out this manual as described earlier.
All settings regarding themes need to be made in the config.toml file. I merged the one supplied with the theme with the one after hugo install, mainly updating the navbar items, site name, theme settings, etc.
Trying some other themes - apparently for some the ‘go’ compiler brew install go. THe theme `docuapi`` might be very interesting (from code - documentation point of view). Older themes (such as the creative-portfolio theme) might not work out-of-the-box (they were already quite old and not recently updated)
web design work
I like the (animated) pictures colourful pictures - but simple black and white icons for the first navigation pages might be clearer. I thought about one general ‘placeholder’ icon, but it seems more fun to find icons that match the weekly assignments - in order to have a good overview from the start.

icons for a 3D printer - generated by Dall-e, the prompt is given in the top row
I searched icons using google image, duck-duck go and had some weird ones generated by dall-e. Eventually I settled on a collection, assembled them in keynote and exported the icon images as presentation into a series of PNG images without background. File size was small enough especially after running the magick tricks…
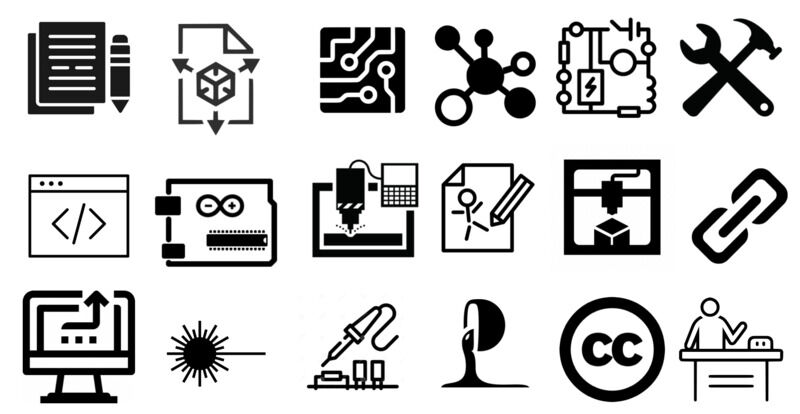
number of icons matching the weekly topics and assignments
using magick the following invocations were used (also ‘‘brew install rename’’ to be able to batch-rename the pictures from the command line. Iphone uses capitals in naming and I have bad memories of browsers that ignore cases in filename and browsers that don’t)
convert -background white -alpha remove -alpha off *.png
magick mogrify -format jpg *.png
magick mogrify -resize "800>" *.jpg
magick mogrify -quality 80% *.jpg

rename 's/\.JPG$/_small.jpg/' *.JPG %removing the caps *JPG
rename 's/_small\.jpg$/\.jpg/' *_small.jpg %and removing the word 'small' from the title once more
rename -c -s img image *  %general for turning caps into lowercase

identify .. %useful to check file size
The first one to reformat png screenshots to jpg. Then to limit at 800px and reduce quality (to filter out the 100% jpg) and finaly rename to lower case.
creating black-and-white versions of the icons (to augment the dark theme version) I ran this magick invocation
convert '*.png' -negate -set filename:fn '%[basename]-invert' '%[filename:fn].png'
with help from askubuntu to help with Filname Percent Escapes (using quotes) to tell what to do first - and augment the filename.
Some aditional work on the installed theme files was necessary to make the inverted icon files show up in dark mode. (apparently dark mode is the thing for interfaces and apps, since “light will attract bugs” the theme had one, so the icons I add -should- also have an inverted mode. The icons and buttons in the theme are part of a bootstrap font set, which can be coloured by the *.css, so no reload or different version is needed.
In order to have inverted icons with each ‘preview card’ I called in help of an experienced programmer (Kasper, member of the Fablab Oldenzaal crew) and made the following changes:
- every markdown page get’s another icon source added:
imageDark : "/icons/icons01-invert.png"and also thedefault.mdfile gets an (empty) entry for theimageDark: "" - the dark icons have been added to the
assets\iconsdirectory - the partial layout html file for getting the images was duplicated for the dark side:
get_image_dark.htmlis a copy of theget_image.htmlsource now adding the-invertto the filename: - the
get_picture_source.htmlhas been updated (so added references for a getImgDrk, identical to the original getImg - the
dark-mode.jshas been updated. - the
post_preview_bottom_card.htmlandpost_preview_top_img_cards.htmlhave been updated.
Also, eventually I’d probably like to add some moving images too. Not sure whether I need to include full mp4 movies, it seems possible to make small gif’s instead - which might be fun for small ‘memish’ things like blinking LEDs. Perhaps eventually my icons can move :). A number of useful ffmpeg invocations can be found here
ffmpeg -ss 30 -t 3 -i input.mp4 \
-vf "fps=10,scale=320:-1:flags=lanczos,split[s0][s1];[s0]palettegen[p];[s1][p]paletteuse" \
-loop 0 output.gif
learning outcomes
Goal for this week is to setup a portfolio system and work on a concept for a final project
evaluation checklist
The task list for this first week (for personal reference)
- Sketched your final project idea(s)
- Described briefly what it will do and who will use it
- Made a website and described how you did it
- Created a section about yourself on that website
- Added a page with a sketch and description of your final project idea(s)
- Documented steps for setting up your Git repository and adding files to it
- Pushed to your class GitLab repository
- Signed and uploaded Student Agreement
lessons learned, tips and tricks
(or, the most insightful mistakes I made)
- don’t commit before you actually cleaned everything up, otherwise you end up with a big git backlog / memory archive
- first commit (locally) - then push
- check your ‘magick’ invocations. Especially with the re-naming sometimes funny results turn up, especially running a batch on an entire directory repeatedly
- only use
mogrifyif you keep the original sources somewhere (!) - I -did- use the ohshitgit approach of moving the actual work files somewhere, deleting the archive, cloning the repository fresh = and do a painstaking manual ‘merge’. – see xkcd
left for todo
- change order for the posts. has something to do with the ‘date’ in each post, as well as hugo’s way of dealing with the lookup order - SOLVED! this was a piece of ‘go’ scripting needed in the main index.html file:
{{ $pag := .Paginate (where site.RegularPages "Type" "in" site.Params.mainSections).Reverse 9 }}-> the ‘reverse’ did it. - replace the icons with my own drawings -> perhaps develop my own handwriting in icon design! (not done yet, I’m still considering to replace them by actual project pictures, moving icons or something else)
- the site’s size is ok. Quite a large file in the theme template is the
bootstrapicon font with many useful icons. I might need to check out how to use that - more screenshots
- inter-page links
- rework nueval requirements into tables (like above) on other weeks
- find out how the dark-mode works and how to switch icon set :) done
reflection
Knowledge and use of git has been very much slap-dash in the last years. I probably have to put a bit more effort in understanding the tools I use (templates I borrow, etc) into a level of sufficient depth. After applying a hufo template I’m not immediately inclined to follow a ‘go’ tutorial, but it might have been useful. I have been using owncloud for a while, subversion, cvs, trac, and (indeed) github, but not for very active development. I have been documenting my own projects and education on a dokuwiki site for more than a decade. The similarities in approach are easy to recognise (markdown is very similar to dokuwiki markup).
I ended up in a theme search rabbit-hole (one activity which I recognise from building wordpress sites.) which I usually dislike (wrong kind of optimisation problem). Perhaps I should find a way to adhere to a ‘Try Three Times’ - or ‘Try Three Things’ routine to make sure to make most out of the learning experience while at the same time not getting lost. With the approach mentioned above I perhaps should also settle for ’the best I can come up with in 30 minutes’ . In the nice presentation about project management this is being referred to as ‘supply side time management’. Good food for thought to feed my students!
copyrights and references
- the Hugo theme is adapted from the lightbi-hugo theme
icons sources:
it is quite easy to track using google whether the icons are free (open source) or not. Still, better to draw my own. For now I have been re-using free icon files from the following online sources: