Week 06
Embedded Program
Brief Overview
In this week of FabAcademy, my individual assignment involved creating and implementing a program for a microcontroller development board that I made in Electronics production week. This program facilitates interaction with local input/output devices and communication with remote devices, utilizing both wired and wireless connections. As an extra credit endeavor, I incorporated different programming languages and development environments, and further expanded the project by connecting external components to the board. Concurrently, our group assignment revolved around an extensive exploration of the microcontroller's datasheet, allowing us to compare its performance and development workflows with other architectures. This comprehensive approach not only deepened my understanding of embedded programming but also provided valuable insights into the diverse landscape of microcontroller architectures and their applications, aligning seamlessly with the goals of FabAcademy.
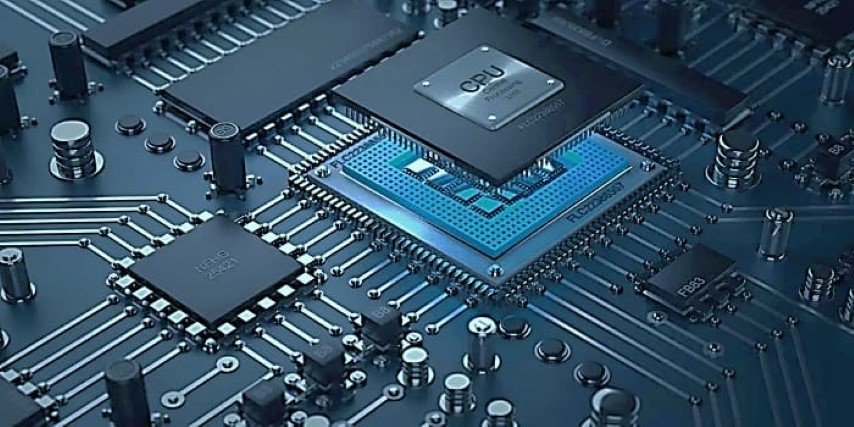
My Heroshot for this Week
 |
 |
 |
 |
Embedded Programing
Embedded programming is a specialized field of software development focused on creating software for embedded systems—small, specialized computing devices designed for specific tasks. These systems can be found in a wide range of applications, from consumer electronics and medical devices to industrial machinery and automotive systems.
Embedded programming involves writing code that is typically executed directly on the microcontroller or microprocessor within the embedded system. Key aspects of embedded programming include understanding the hardware architecture, dealing with resource constraints such as limited memory and processing power, and optimizing code for real-time performance.
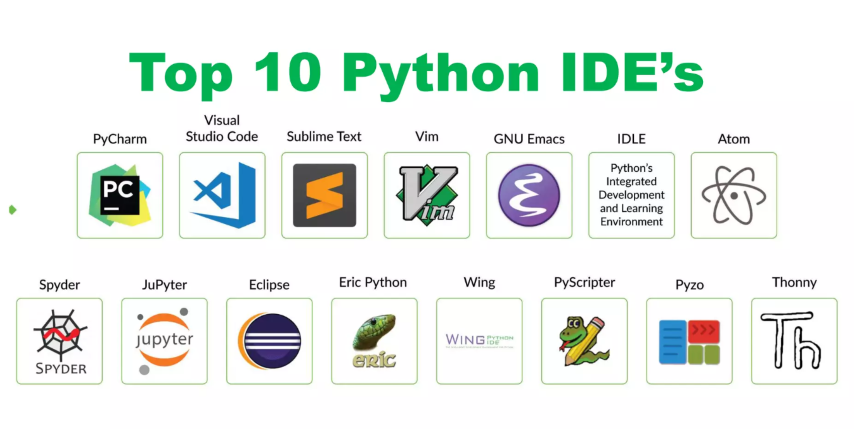
Common programming languages for embedded systems include C and C++, Python and the development process often involves using integrated development environments (IDEs) and debugging tools specific to the target hardware. The applications of embedded programming are diverse, playing a critical role in the functionality of everyday devices and complex industrial systems alike.
Architectures
Types of Architecture

Von Neumann Architecture:
- Unified Memory: Data and Instructions Share Memory
- Single Bus System: Single Path for Data and Instructions
- Stored Program Concept: Programs as Data
- Flexibility: Dynamic Program Modification is possible
Harvard Architecture:
- Separate Memory Spaces: Distinct Memory for Data and Instructions
- Parallel Access: Simultaneous Fetching of Data and Instructions
- Higher Bandwidth: Reduced Bus Contention, Potential for Increased Performance
- Program and Data Isolation: Enhanced Security due to Separation
Comparison:
- Flexibility: Von Neumann is more flexible, allowing dynamic program modification.
- Bandwidth and Speed: Von Neumann may have lower bandwidth; Harvard may offer higher bandwidth.
- Security: Von Neumann may be less secure; Harvard provides enhanced security due to separation.
- Common Usage: Von Neumann is common in general-purpose computers; Harvard is often used in embedded systems.
Microprocessor v/s Microcontroller
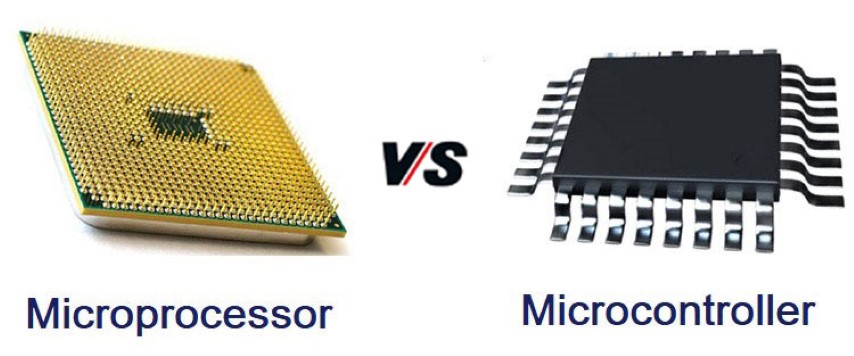
Difference between Microprocessor and Microcontroller
Functionality:
- Microcontroller: A compact integrated circuit that includes a processor core, memory (RAM and/or ROM), input/output peripherals, timers, and sometimes additional features like analog-to-digital converters. Designed for specific applications in embedded systems.
- Microprocessor: A central processing unit (CPU) that performs general-purpose processing tasks. Lacks built-in peripherals and is typically used in conjunction with external components like memory, input/output devices, and support chips. Found in devices requiring general-purpose computing capabilities.
Applications:
- Microcontroller: Commonly used in embedded systems for specific applications, such as in consumer electronics (e.g., washing machines, microwave ovens), automotive control systems, industrial automation, and various electronic gadgets.
- Microprocessor: Found in general-purpose computing devices, such as personal computers, servers, laptops, and workstations, where versatility and the ability to run a wide range of applications are crucial.
| Feature | Microprocessor | Microcontroller |
|---|---|---|
| Components | CPU only | CPU, memory (RAM, ROM), and I/O peripherals |
| Integration | Requires external components (memory, I/O) | All components integrated on a single chip |
| Complexity | More complex due to external connections | Simpler due to integrated components |
| Cost | Generally more expensive | Generally less expensive |
| Power consumption | Higher power consumption | Lower power consumption |
| Applications | Personal computers, laptops, smartphones | Embedded systems (washing machines, toys, drones) |
In summary, microprocessors are powerful and flexible general-purpose processors, while microcontrollers are self-contained, low-power devices designed for specific tasks in embedded systems.
Microcontroller
This week there are two types of assignments, one group and one individual.
Group Assignment :-
- Browse through the data sheet for your microcontroller
- Compare the performance and development workflows for other architectures
Visit our Group assignment page here
Group Assignment Brief:
Individual Assignment:
- Write a program for a microcontroller development board that you made, to interact (with local input &/or output devices) and communicate (with remote wired or wireless devices)
- Extra credit: use different languages &/or development environments
- Extra credit: connect external components to the board
Writing a Program for Microcontoller board
Steps to Create a Program for a Microcontroller
-
Select a Programming Language:
Choose a programming language suitable for the microcontroller (e.g., C, C++, assembly).
-
Write the Code:
Develop the program by writing the code that defines the logic and behavior.
-
Compile the Code:
Use a compiler or assembler to convert the code into machine language.
-
Load the Program onto the Microcontroller:
Transfer the compiled code onto the microcontroller using a programming tool.
-
Debug and Test:
Test the program on the microcontroller, check for errors, and make corrections.
-
Optimize if Necessary:
Optimize the code for performance and memory usage.
-
Deploy the Microcontroller:
Deploy the microcontroller to its intended application or device.
To write the code in embedded C language
Compiler for Code in C Language
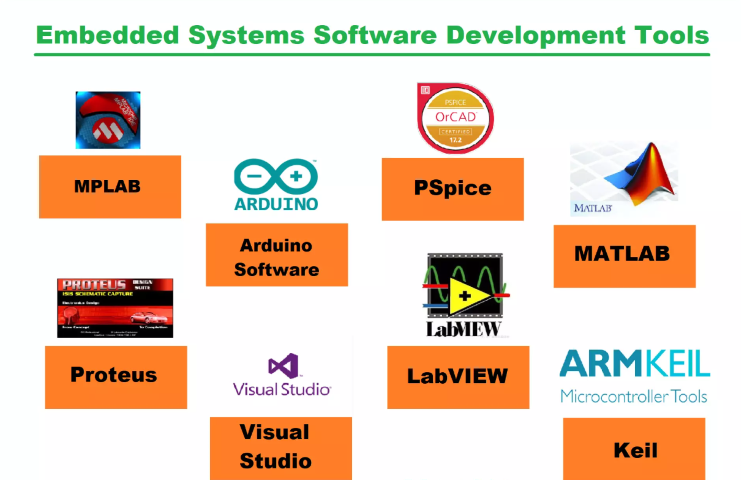
Compiler I have used
Arduino IDE User Guide
Step 1: Download and Install Arduino IDE
- Visit the official Arduino website: Arduino Software
- Download the latest version of the Arduino IDE for your operating system.
- Follow the installation instructions provided for your specific operating system.

Step 2: Launch Arduino IDE

- After installation, open the Arduino IDE.
Step 3: Configure Arduino Board
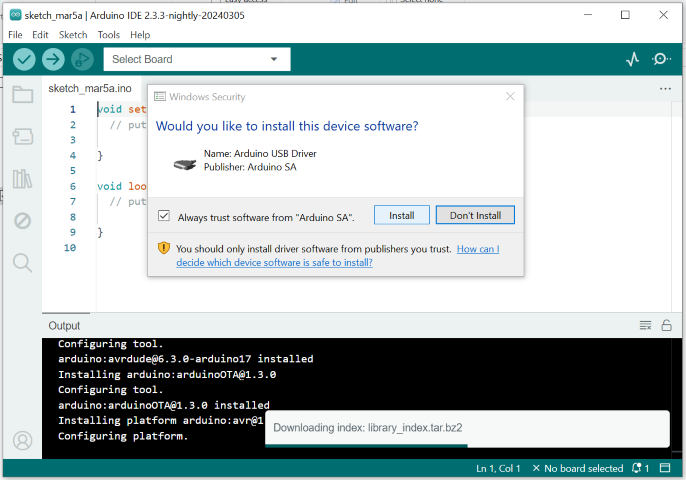
- Connect your Arduino board to your computer using a USB cable.
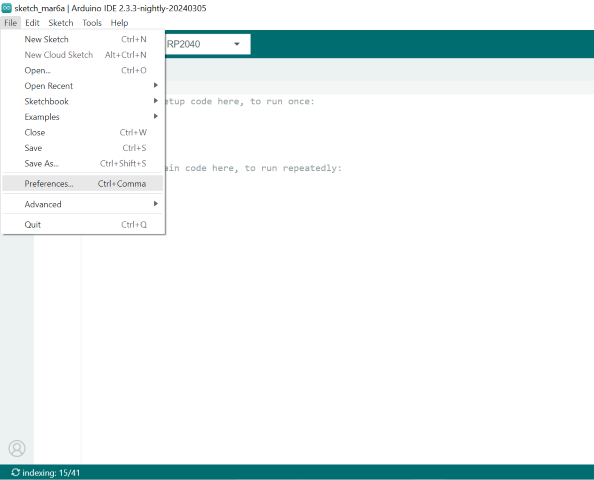
- Then, navigate to File -> Preferences and paste the link below into Additional Board Manager URLs
- Click “OK” to save these preferences.
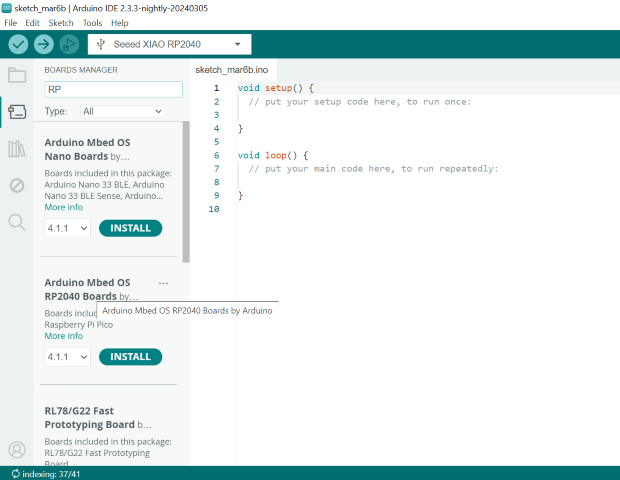
- Then, go to Tools -> Board -> Board Manager and type pico into the search bar, and hit enter. Select Raspberry Pi Pico/RP2040 by Earle F. Philhower, III and press Install. Then press close and you should be all set to connect your RP2040.
 |
 |
 |
 |
Step 4: Select Port
- Go to "Tools" > "Port" and select the port to which your Arduino is connected.

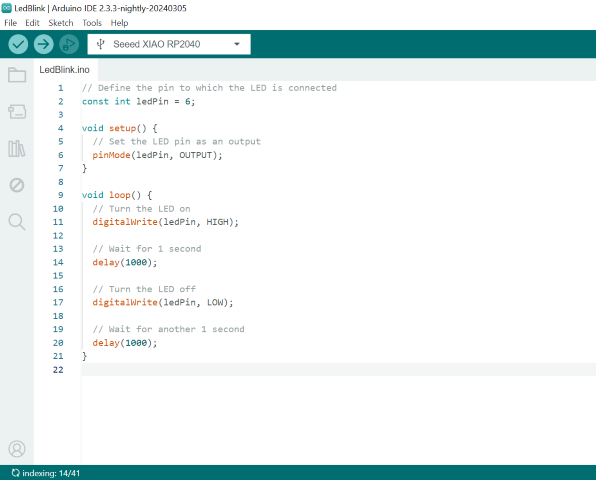
Step 5: Write Your Code
- In the Arduino IDE, you will see a default sketch with `void setup()` and `void loop()` functions.
- Write your Arduino code in between these functions.
Step 6: Verify/Compile Code
- Click on the checkmark icon (or go to "Sketch" > "Verify/Compile") to check for any syntax errors in your code.
Step 7: Upload Code to Arduino Board
- Click on the right arrow icon (or go to "Sketch" > "Upload") to upload your code to the Arduino board.
- Wait for the compilation process to finish, and you should see "Done uploading" at the bottom of the IDE.
Step 8: Open Serial Monitor (Optional)
- If your code involves serial communication, you can open the Serial Monitor by clicking on the magnifying glass icon in the upper-right corner or going to "Tools" > "Serial Monitor."
Step 9: Live Testing
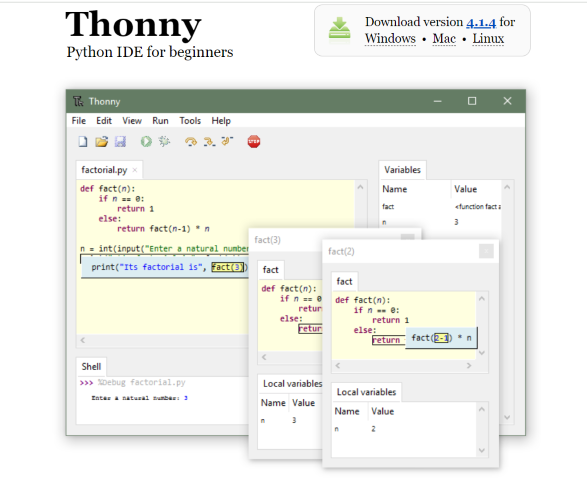
To write the code in MicroPython
Compiler for Code in Micro Python
Compiler I have used

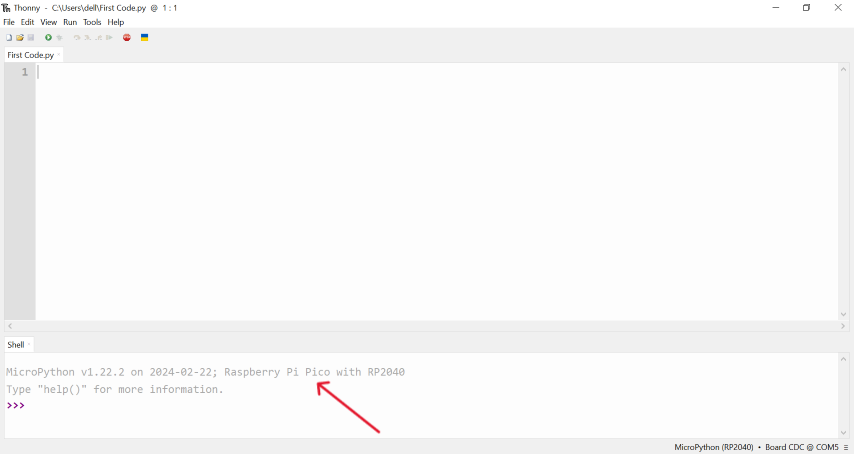
Thonny IDE User Guide
Step 1: Download and Install Thonny IDE
- Visit the official Thonny website: Thonny IDE
- Download the latest version of Thonny IDE for your operating system.
- Follow the installation instructions provided for your specific operating system.
Step 2: Launch Thonny IDE
- After installation, open the Thonny IDE.
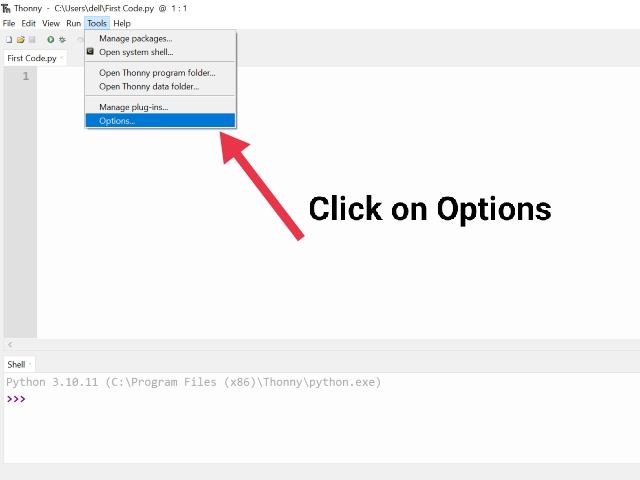
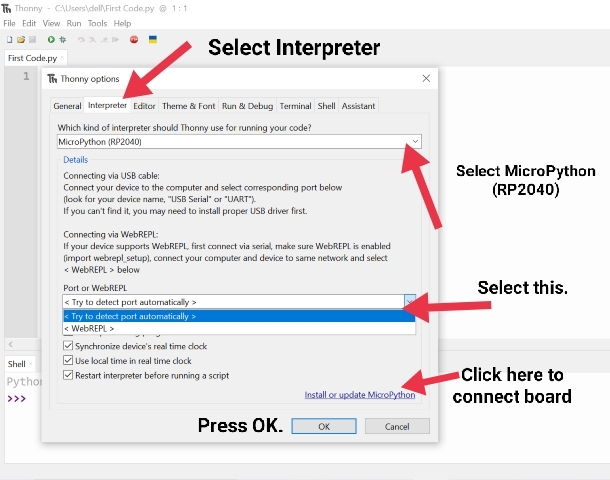
Step 3: Configure Python Interpreter
- If not automatically detected, set up the Python interpreter by selecting it in the top-right corner.
- Click "Tools-->Options" to open the settings
- Chose the "Interpreter" interface and select the device as "MicroPython(Raspberry Pi Pico)" and the port as "Try to detect prot automatically"
Step 4: Connect Seeed Studio XIAO RP2040 to the PC
- Press and hold the "BOOT" button and then connect the Seeed Studio XIAO RP2040 to the PC through the Type-C cable. If it works well, there is an "RPI-RP2" desk shown on the PC.
- Click on the Install button and close this page when the installation status says Done. The following information will be shown on the interface once the firmware is complete.

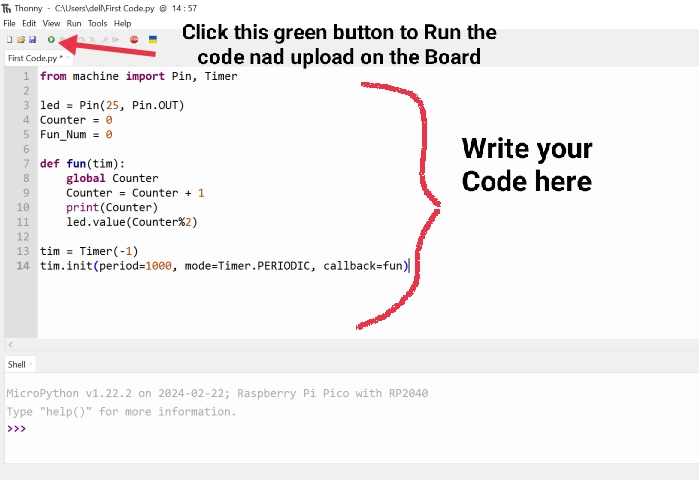
Step 5: Write Your Python Code
- Write your Python code in the editor.
Step 6: Save Your Python File
- Save your Python file using the "File" menu or keyboard shortcut (Ctrl + S).
Step 7: Run Your Python Code
- Click the "Run" button or use the "Run" option in the "Run" menu to execute your code.
Step 8: Debug Your Code (Optional)
- If needed, use the debugging tools provided by Thonny to identify and fix issues in your code.
Step 9: Live Testing
Reference Files
- To find code for C language click here
- To find code for Python click here