
Computer controlled machine week
assignment
group assignment
- do your lab's safety
training
- test runout, alignment, fixturing,
speeds, feeds, materials,
and toolpaths for your machine
individual assignment
- make
(design+mill+assemble) something big (~meter-scale)
extra credit: don't use fasteners or glue
extra credit: include curved surfaces
The quick rundown
So for this week I want to make a Puffin head.The idea is to use the Puffin 3d scan from the 3D scanning and printing week for making it. The plan is to use it as the front of a boat, like in the old days when some ships had mermaids or dragons.
You may be wondering, why for a ship??
Well, it was not really my idea. You see originally I had no plans for the week but the director of Leikfélag Vestmannaeyjar´s rendition of Spamalot reached out to me and needed something very specific for one scene. He needed a puffin head for the front of a boat, not an actual boat but a stage prop.
So the main challenges I face this week are:
- Choosing the perfect material
- calculating the exact measurements
- Making it look cool
- without making it heavy enough for the actors not to be able to lift it
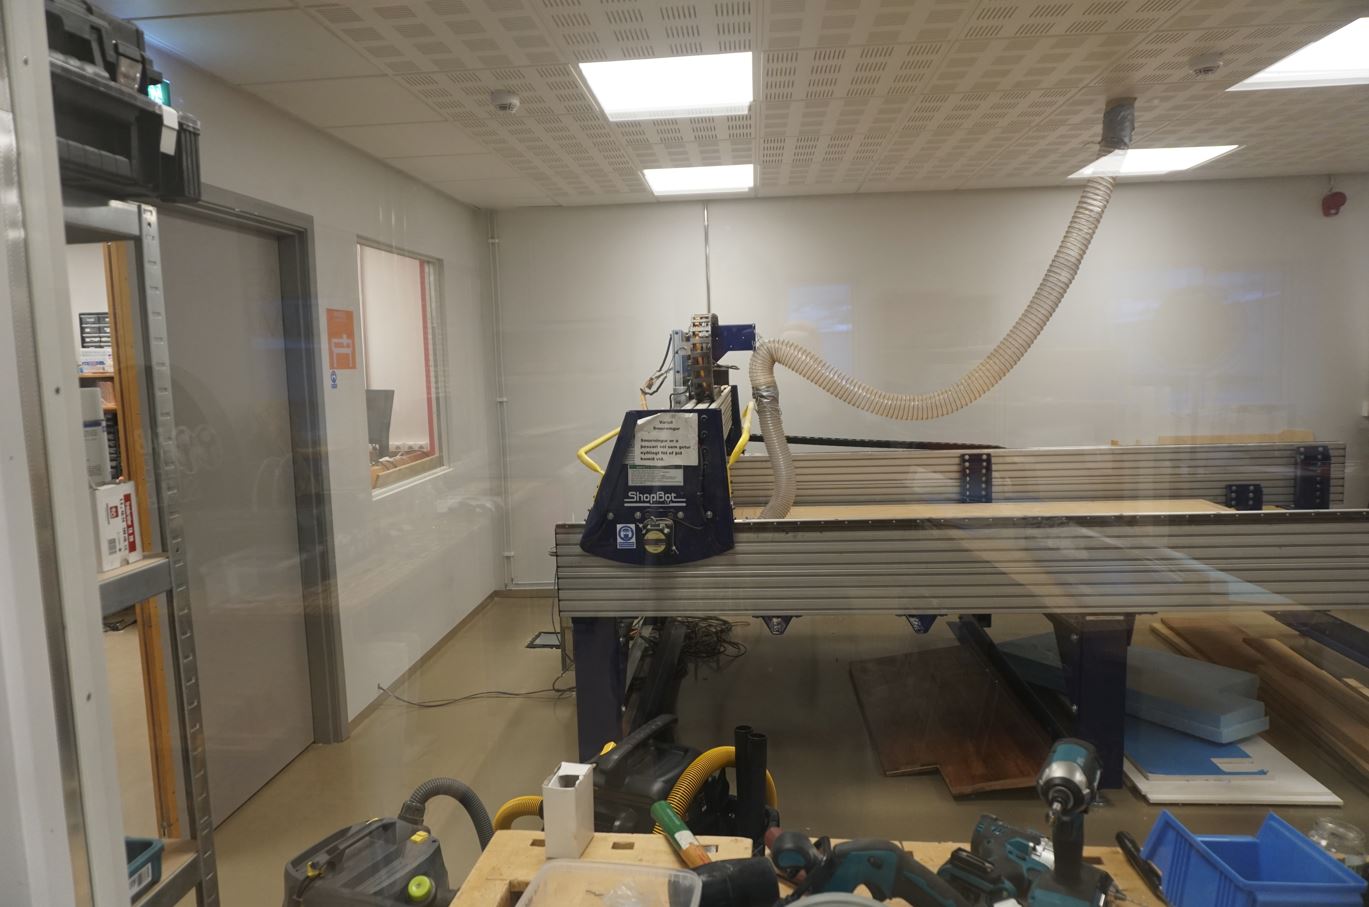
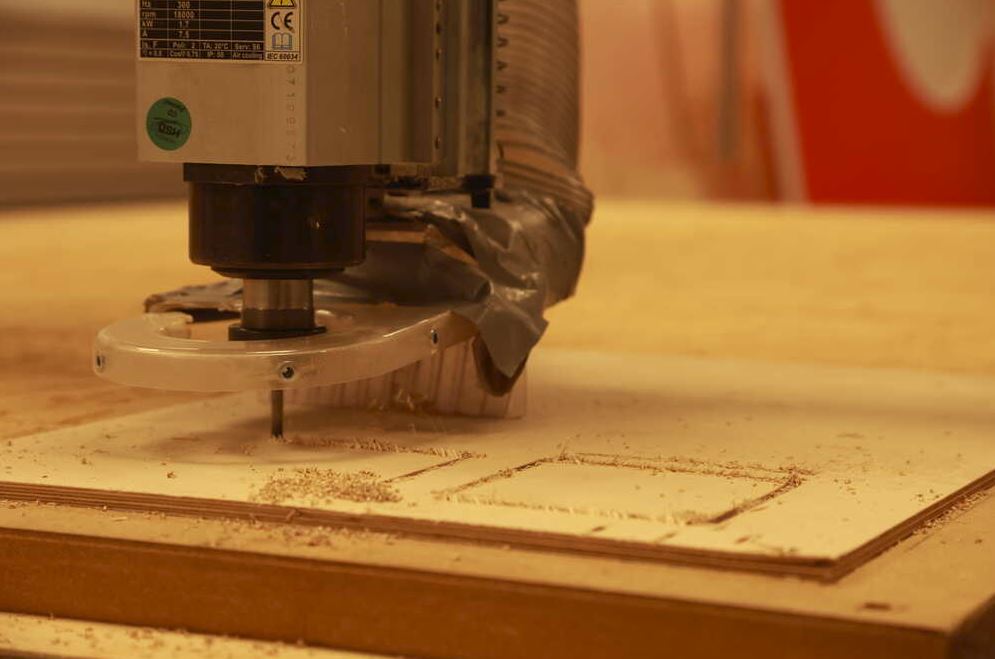
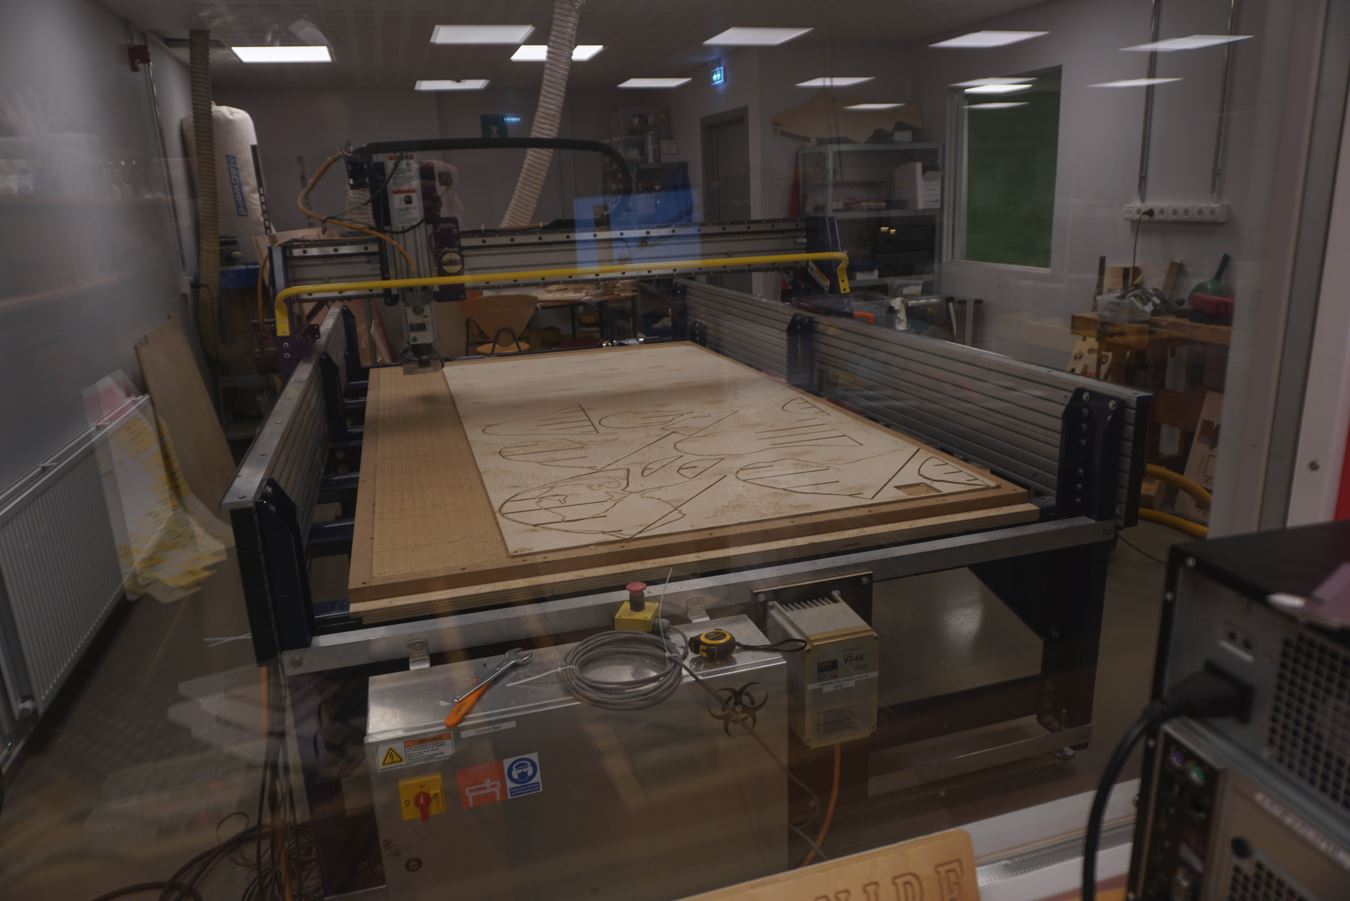
Our beautiful milling machine:
Preparation
in the 3d
scanning week I scanned a puffin. This week I am using
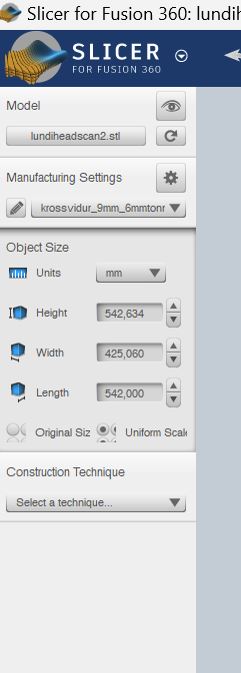
that 3d scan and slicing it into a big puffin head. First I
opened slicer for fusion and put the Stl file for the scan
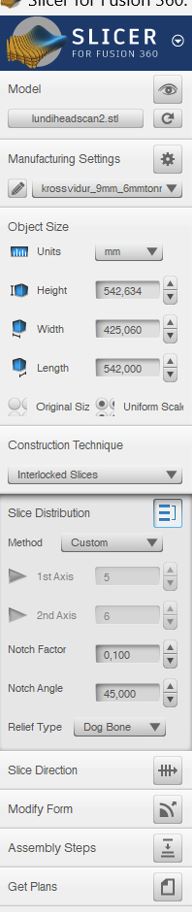
into it. I then put the desired height and selected 9mm
crosswood as the material
 s
s
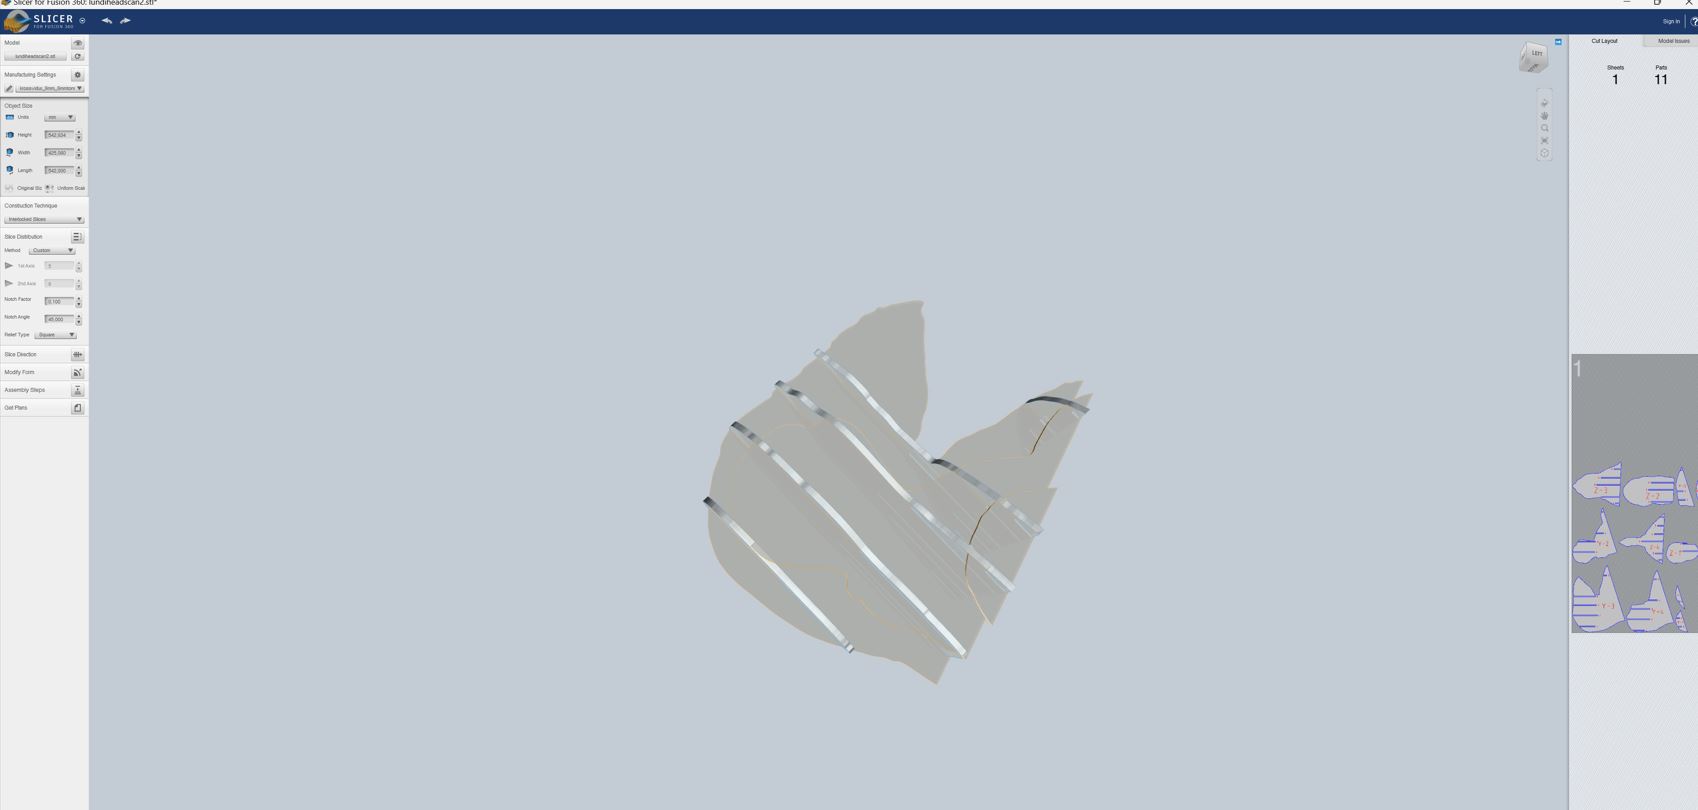
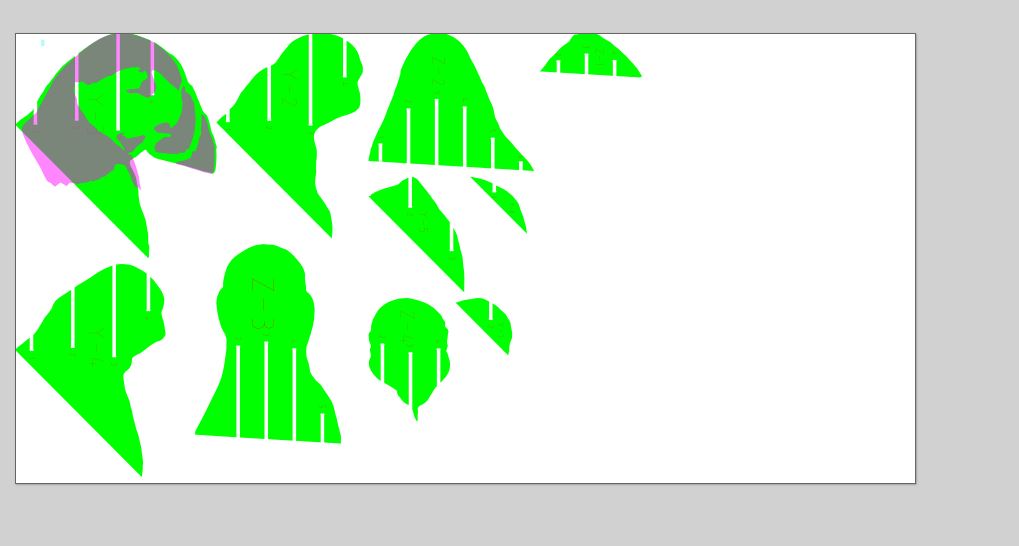
This is what it gave me:
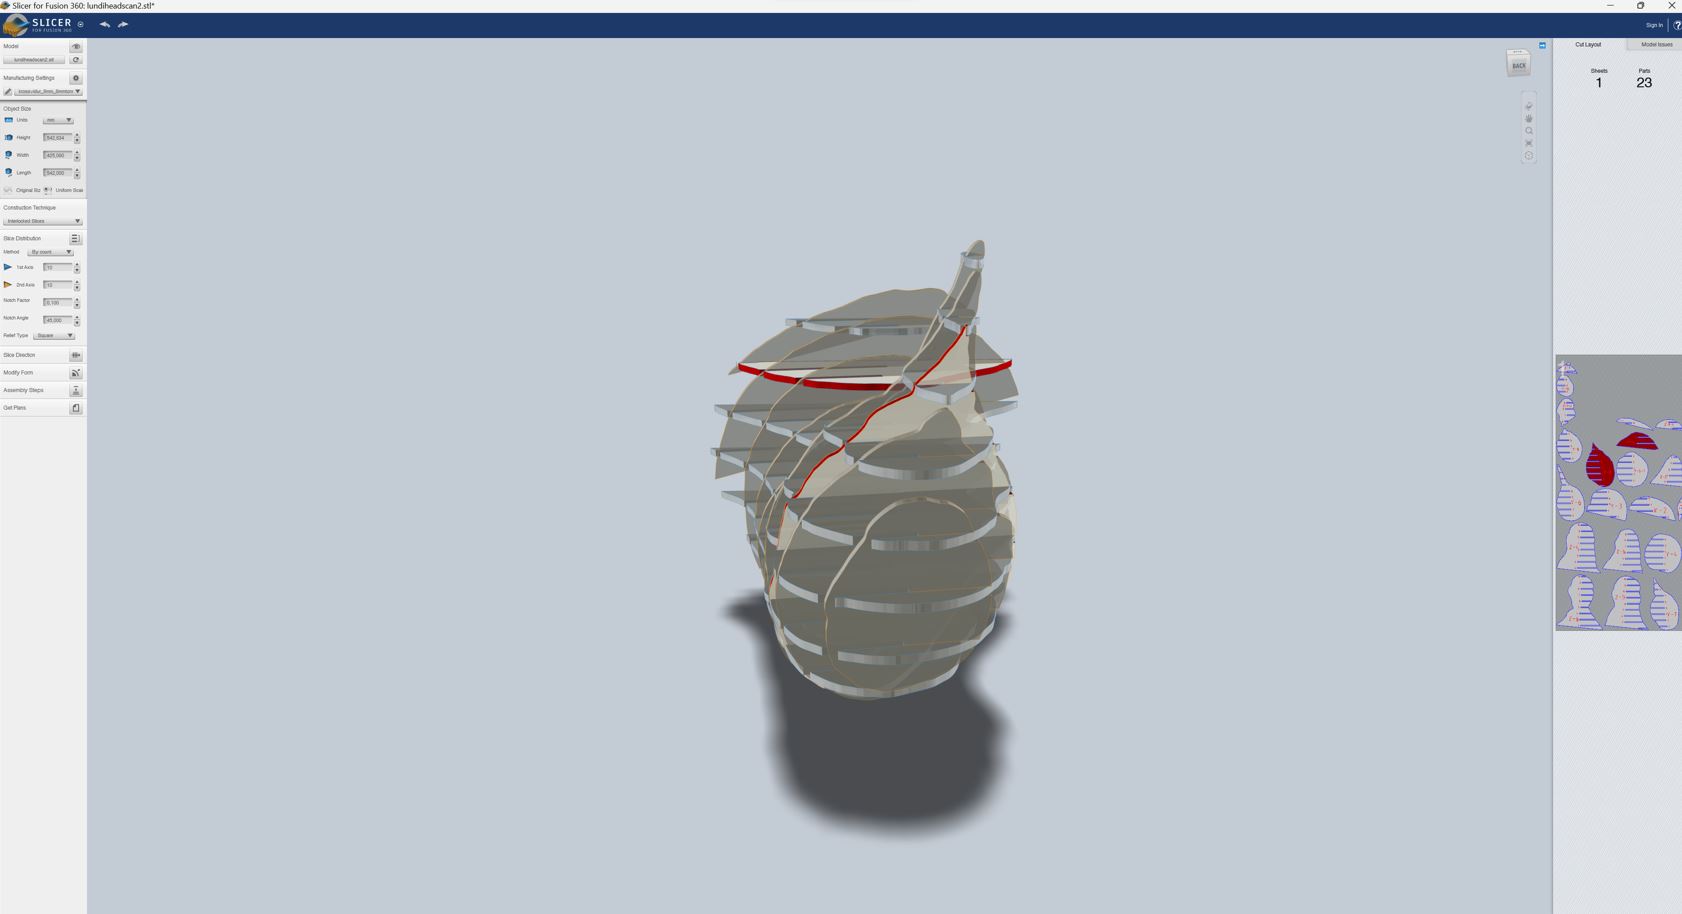
The red marks pieces that dont work and so I had to remove a
few pieces and changing the angle. This took a long time and
was honestly overall not an enjoyable process but after a
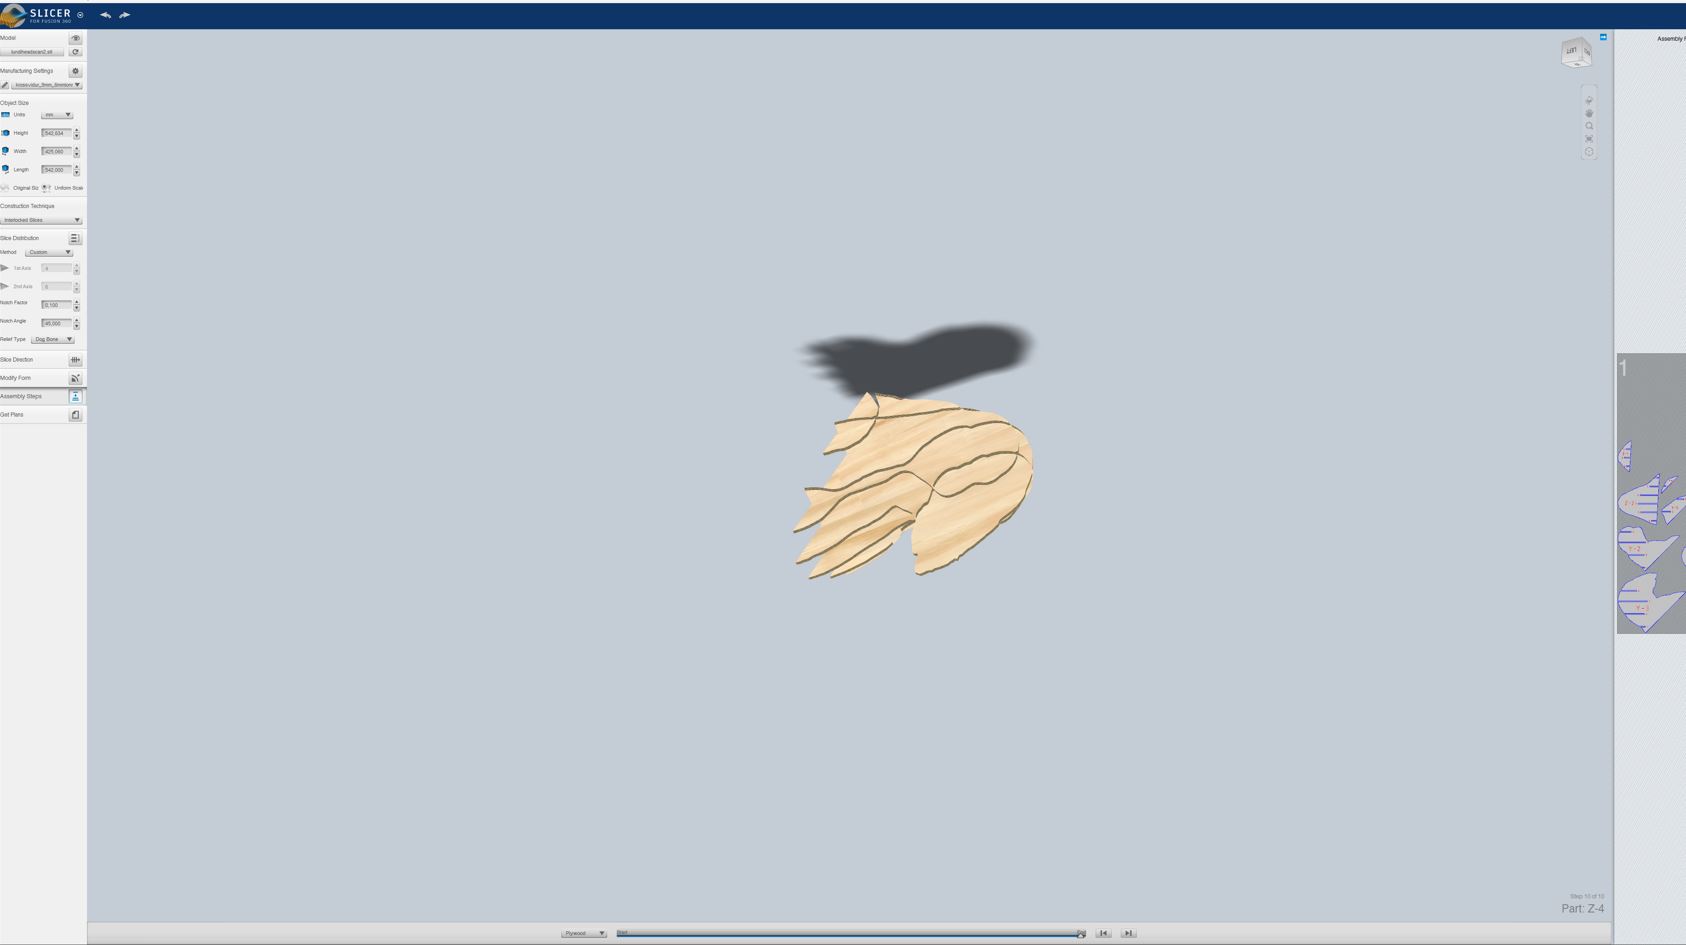
while it turned out like this:
Here are the settings:
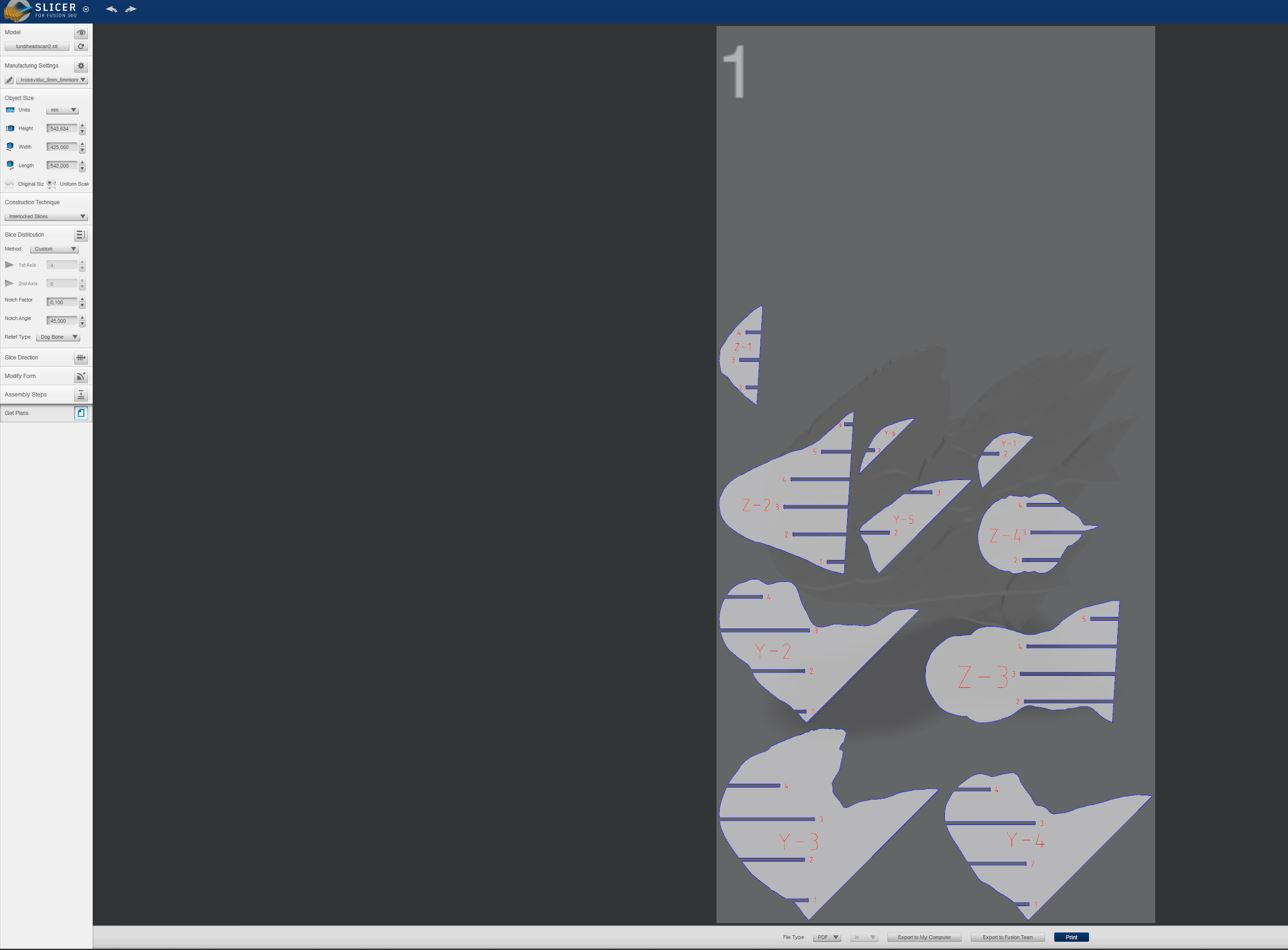
I then saved it as a pdf:
I then opened it in Inkscape. I put the wings that the director had designed into the file to check the scaling on it to see whether the size made sense.
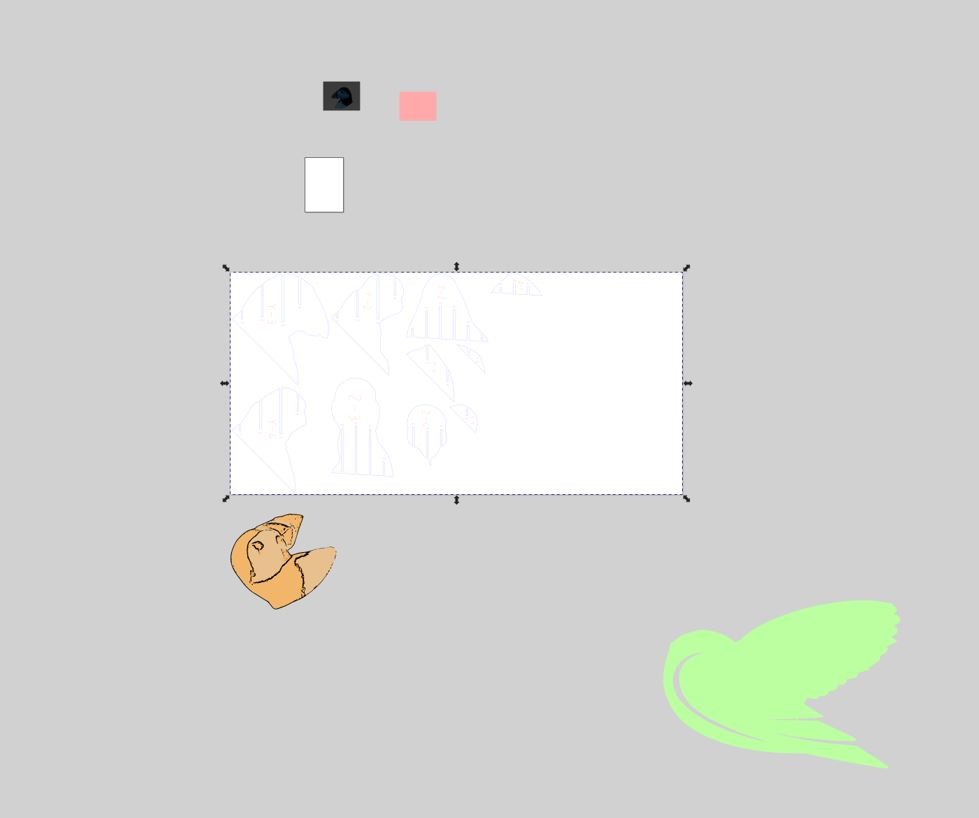
I then added a vector image on top of the side of the head for the machine to raster into the wood.
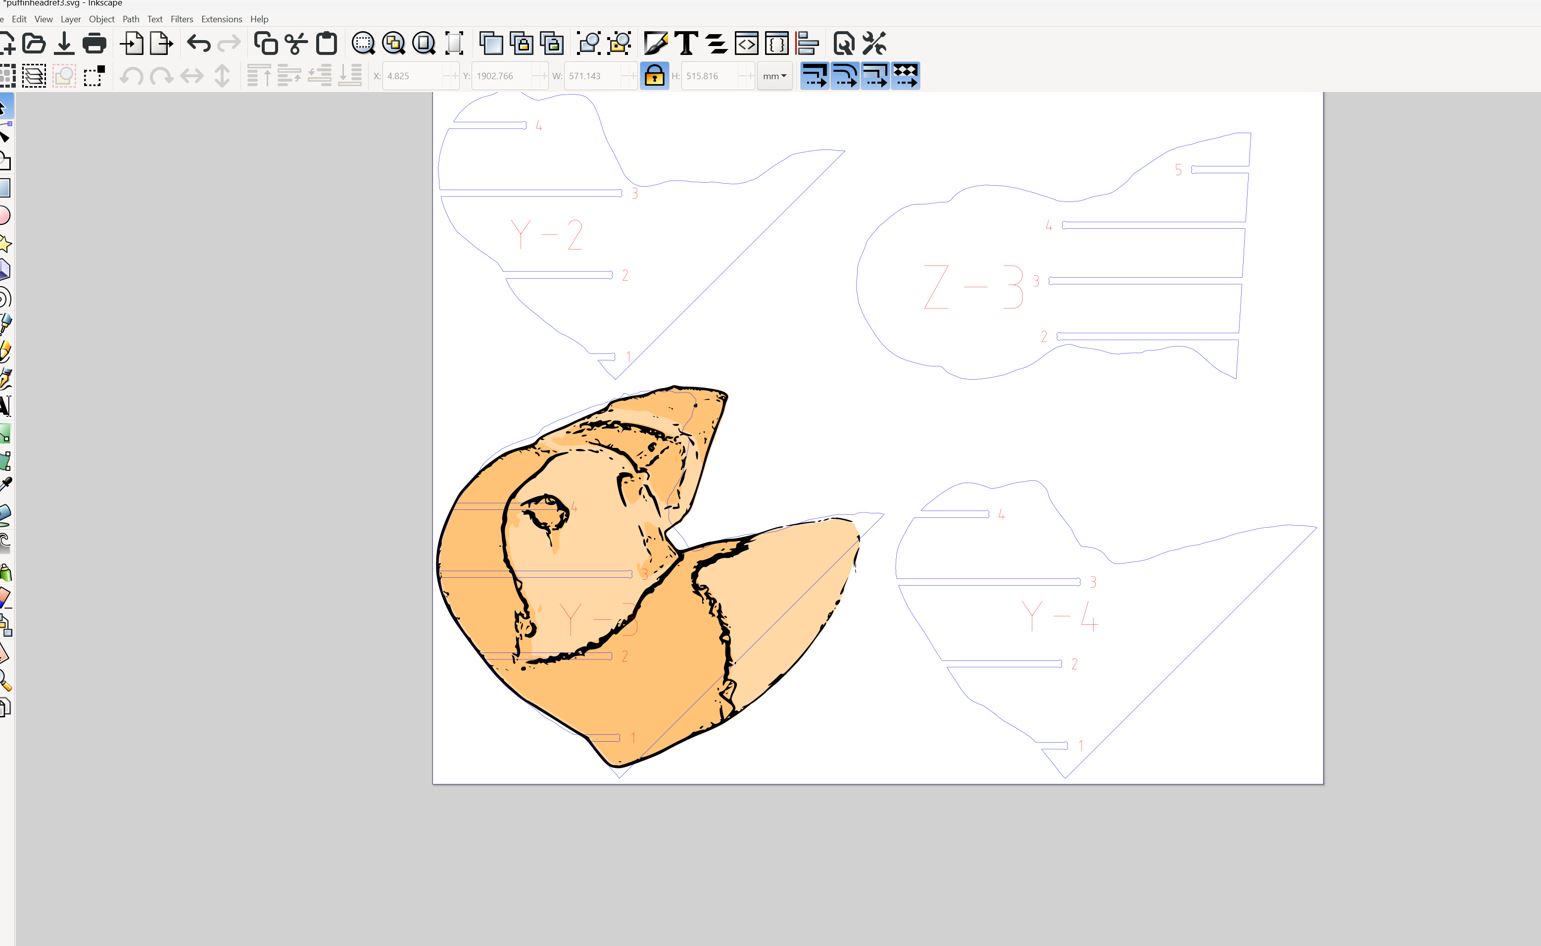
I then put colour and made the outlines red and 0.02mm thick for the machine to cut. Then I saved it into my computer and we were ready to move on to the next step.
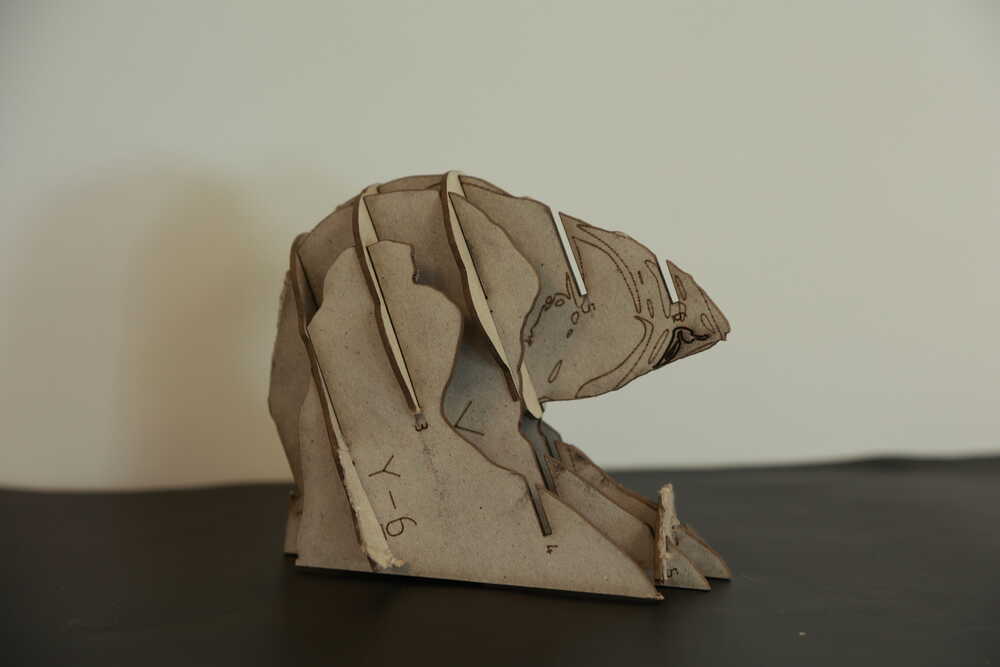
We made this small scale version through the laser cutter to see whether the design would work!
Puffin head
First we reviewed the safety and stuff. We screwed the wood
onto the machine and then began testing.
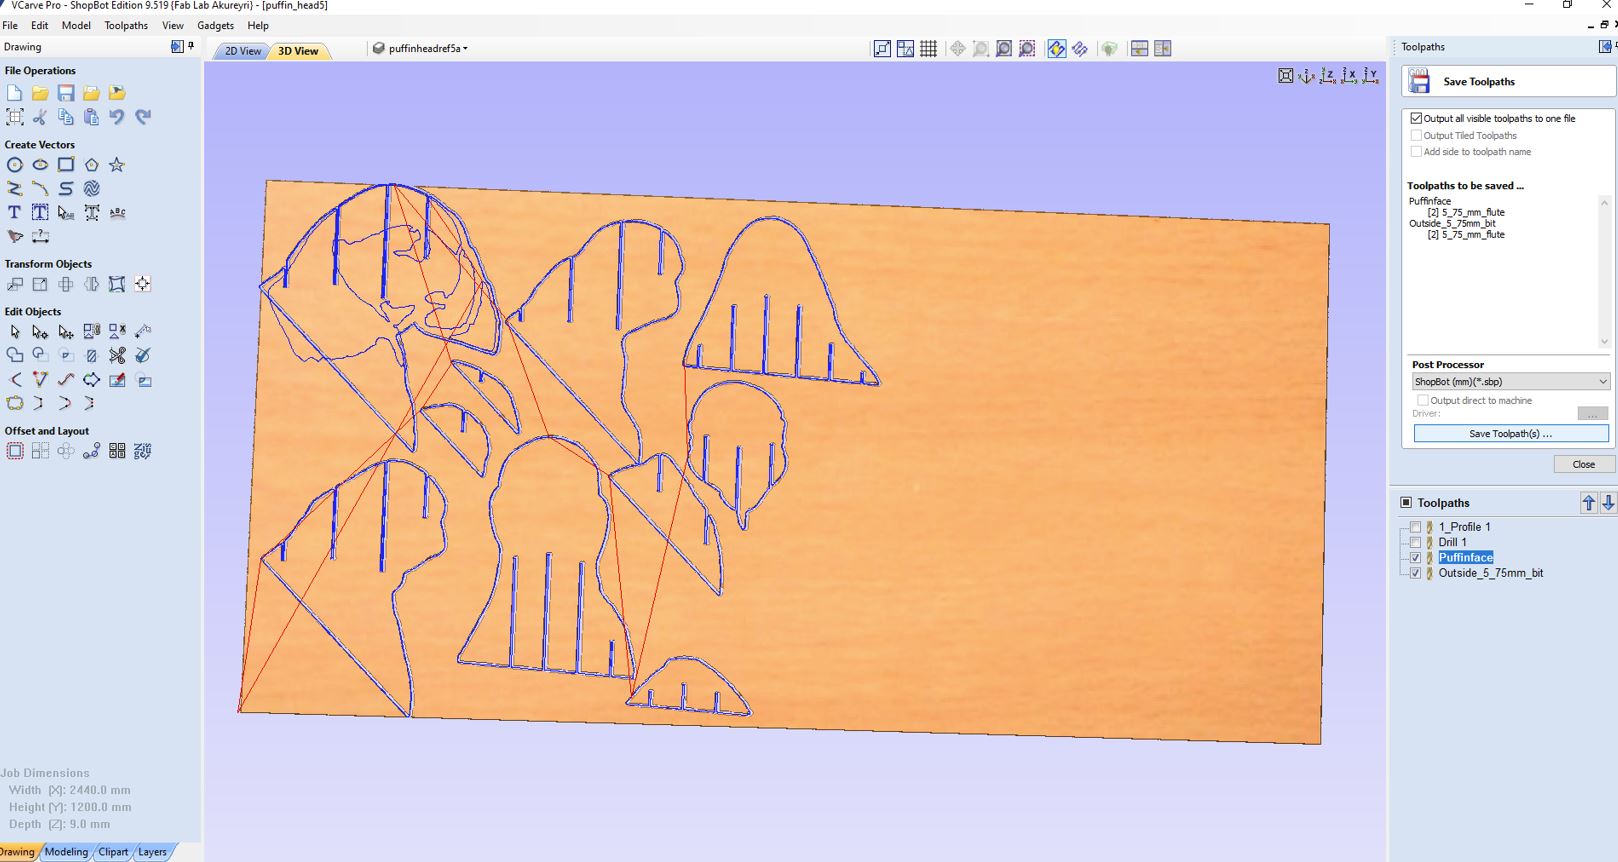
Wood thickness: 9mm
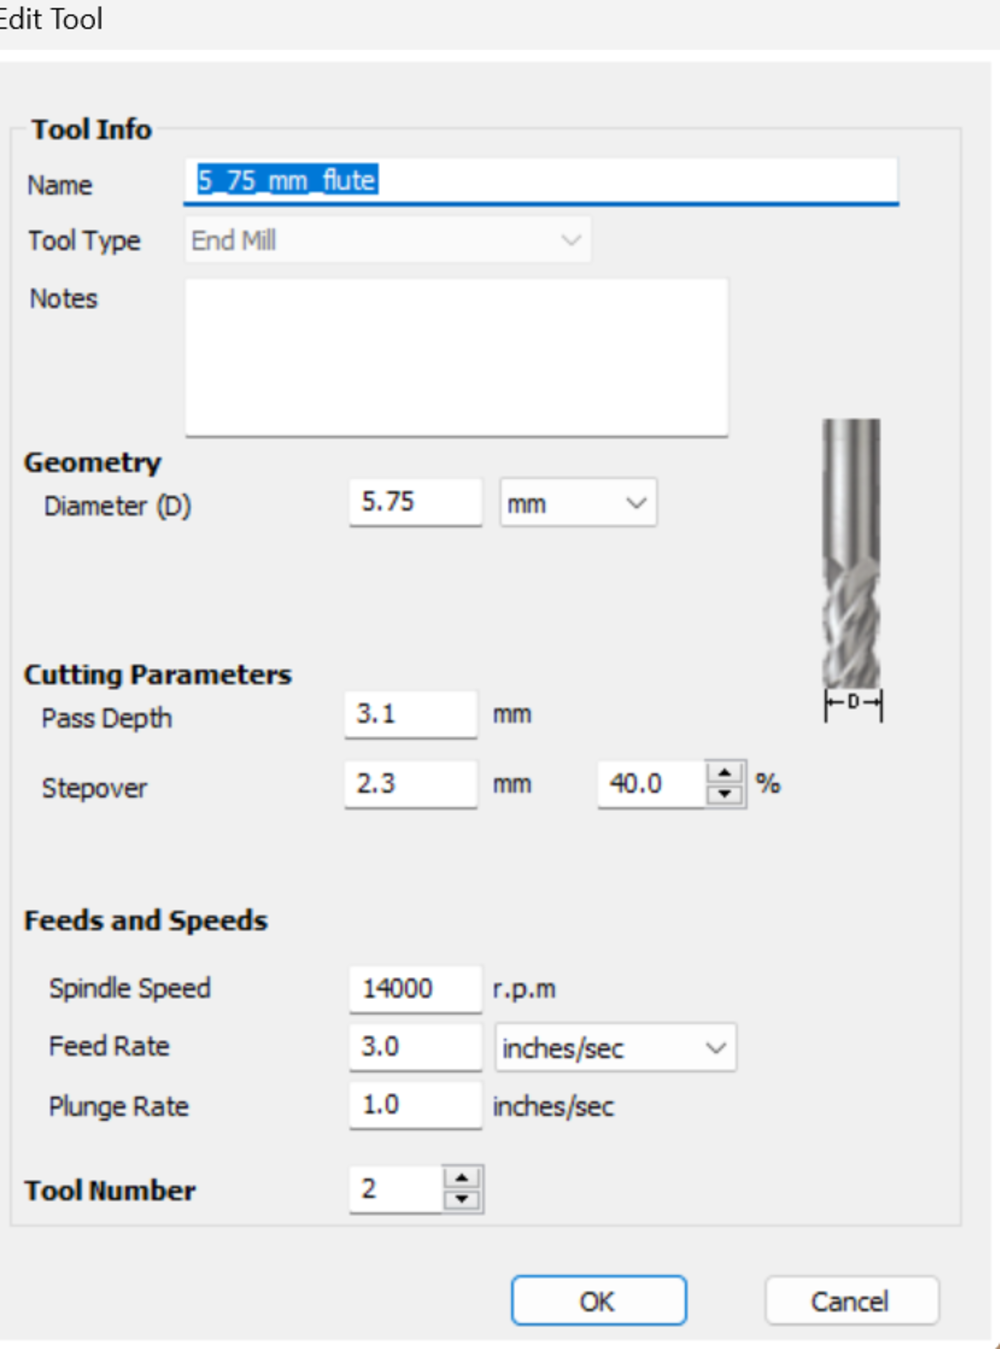
INFO:
Tool:5,75 mm flute
End mill
Diameter (D) 5.75 mm
Pass Depth 3.1 mm
Stepover 2.3 mm (40.0%)
Spindle speed 14.000 r.p.m.
Feed Rate 3.0 inches/sec
Plunge Rate 1.0 inches / sec
I used those settings for the machine, because I was using
9.0 mm plywood and this setting works well with that
material.
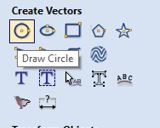
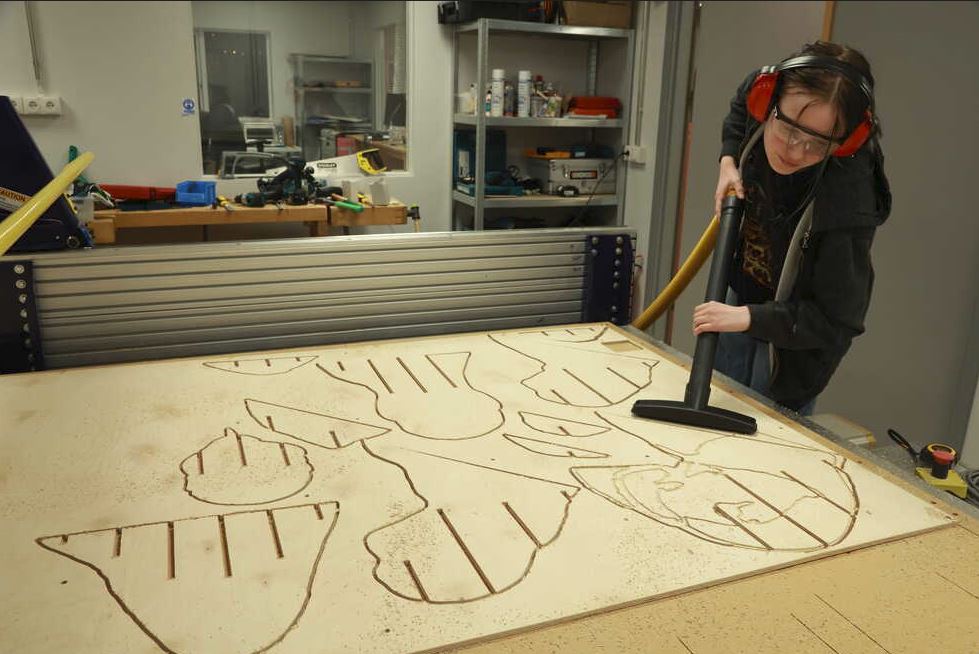
I added tabs to the pieces so that they would move when
finishing the milling outside.
Here are the steps to our wonderful milling machine:
- ⚠️ Check out safety rules ⚠️
- put correct bit in
- Turn machine on
- Press reset button (blue)
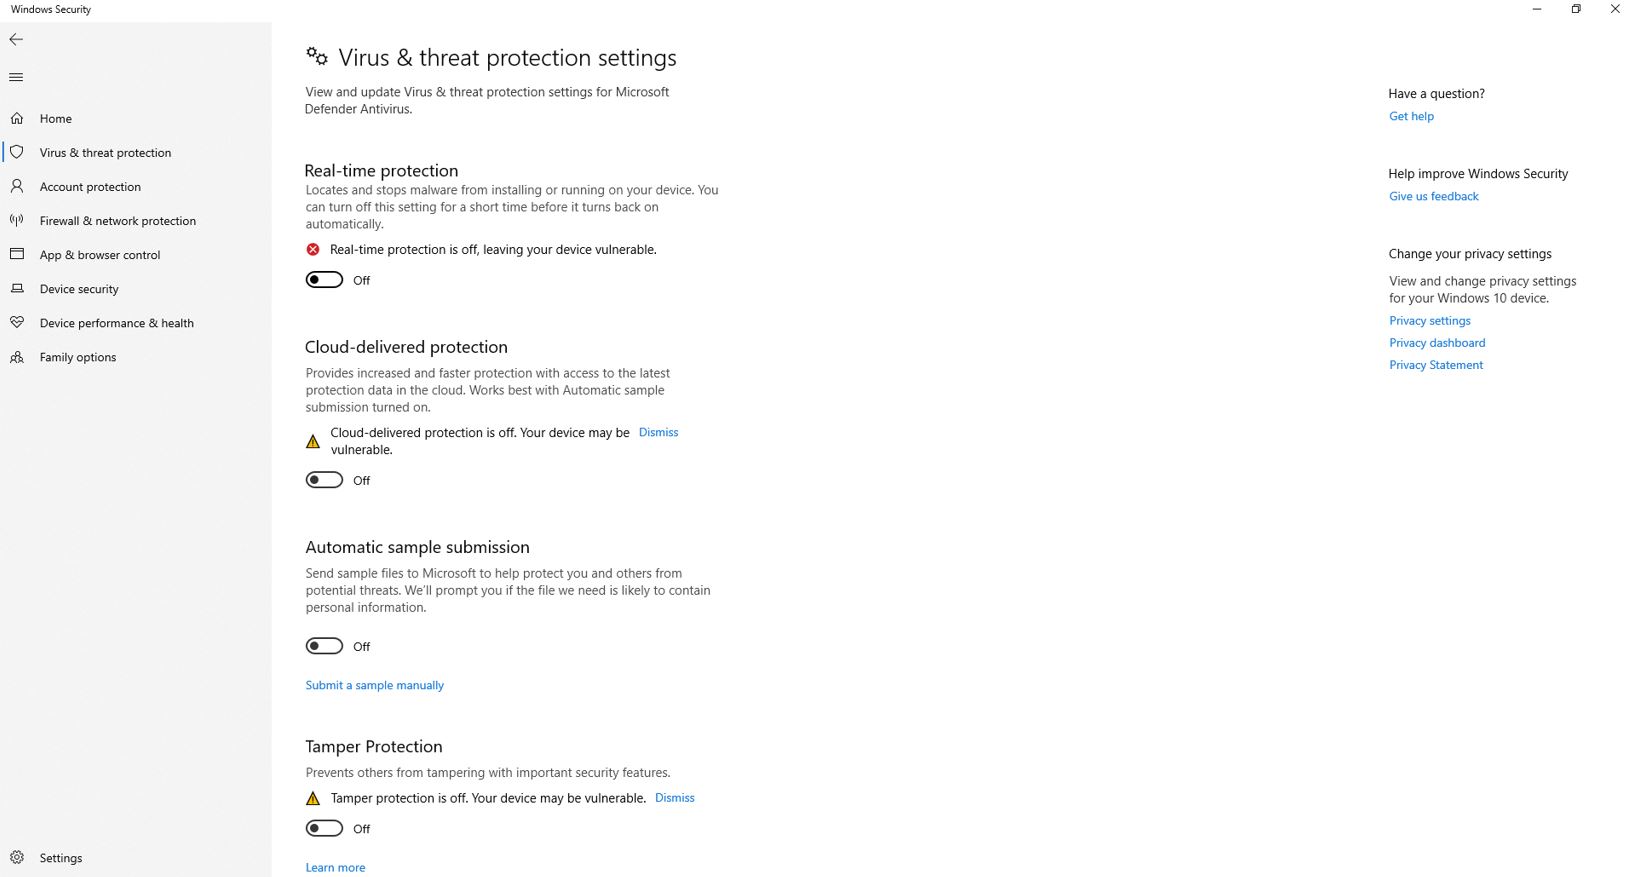
- Turn off virus real time protection
- Unplug ethernet cable
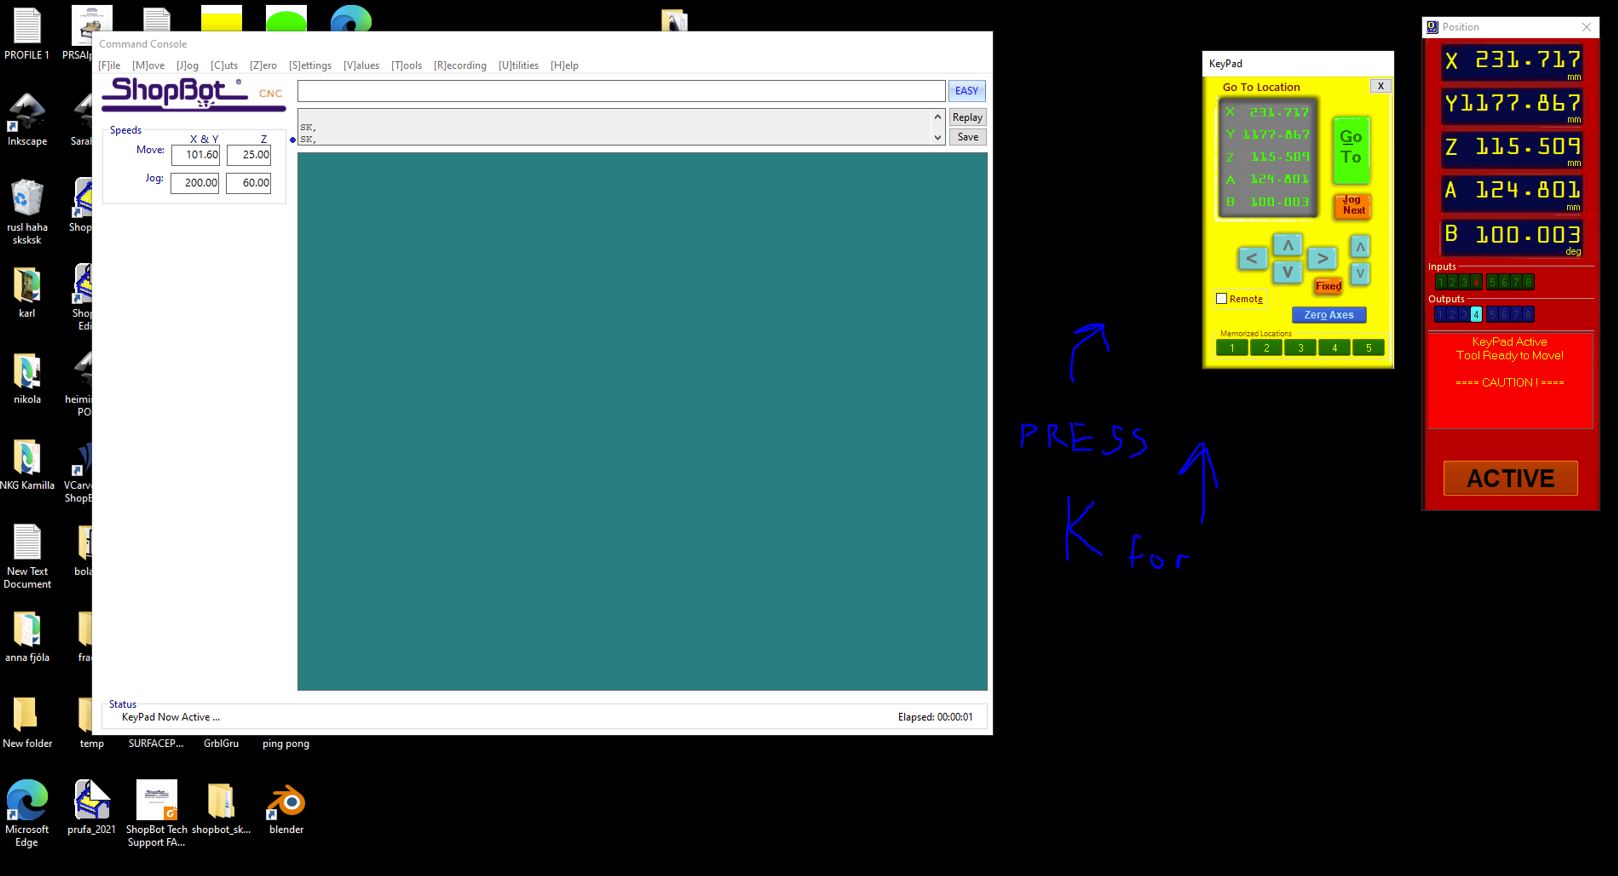
- Open SHOPBOT CONTROL software
- Press K for Keypad
- Do the xy zero routine.

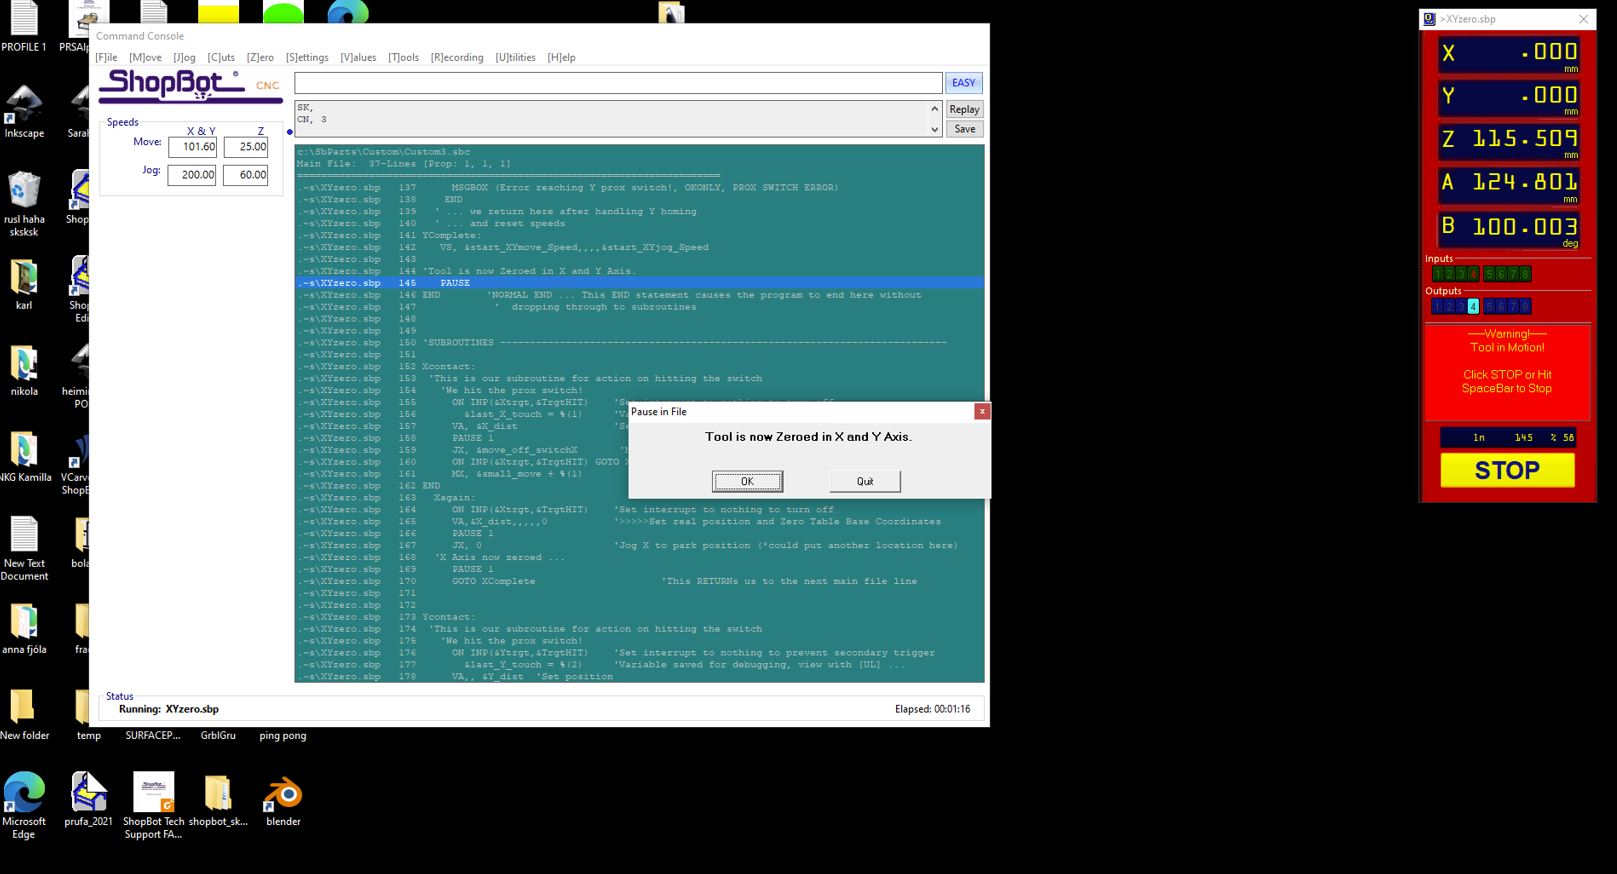
Press K and move to the new zero
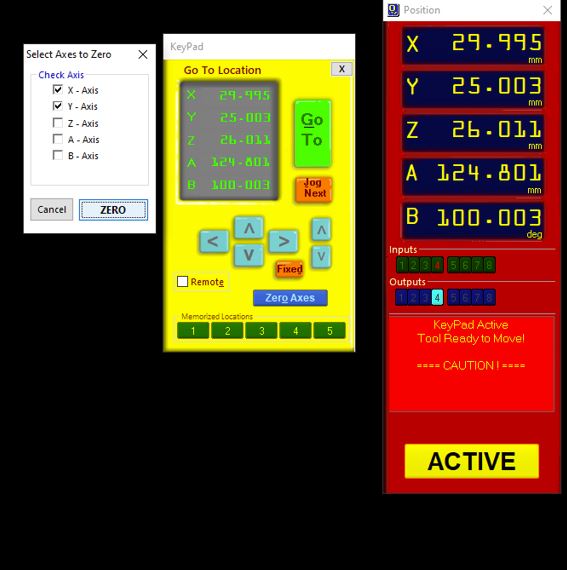

Put Z plate and check connection
Z zero routine/(hold elephant clip on the
material and let the machine find the Z zero

Move to a safe position and height
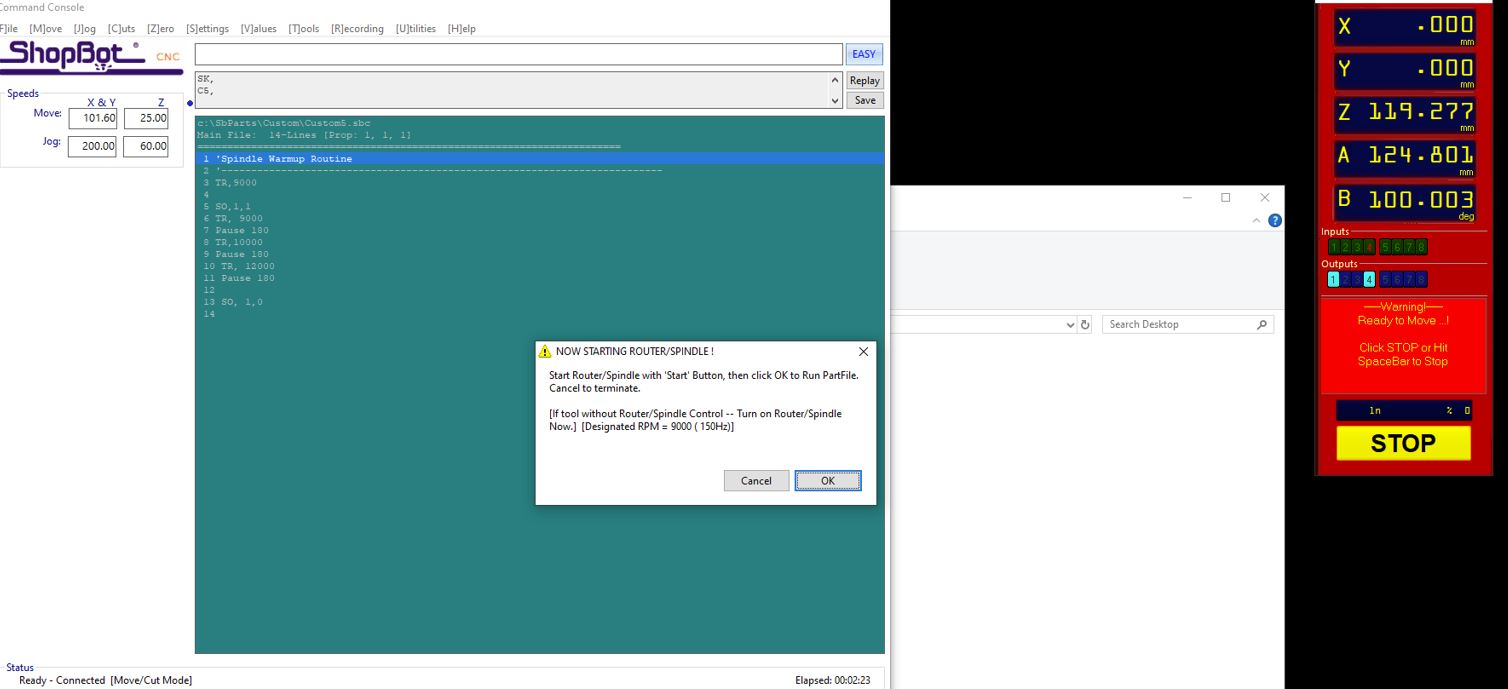
Cuts-> Spindle warmup routine

Testing testing
We started by making 2 pieces to see whether it would work
. Whether the size is accurate. We imported it onto V carve
Pro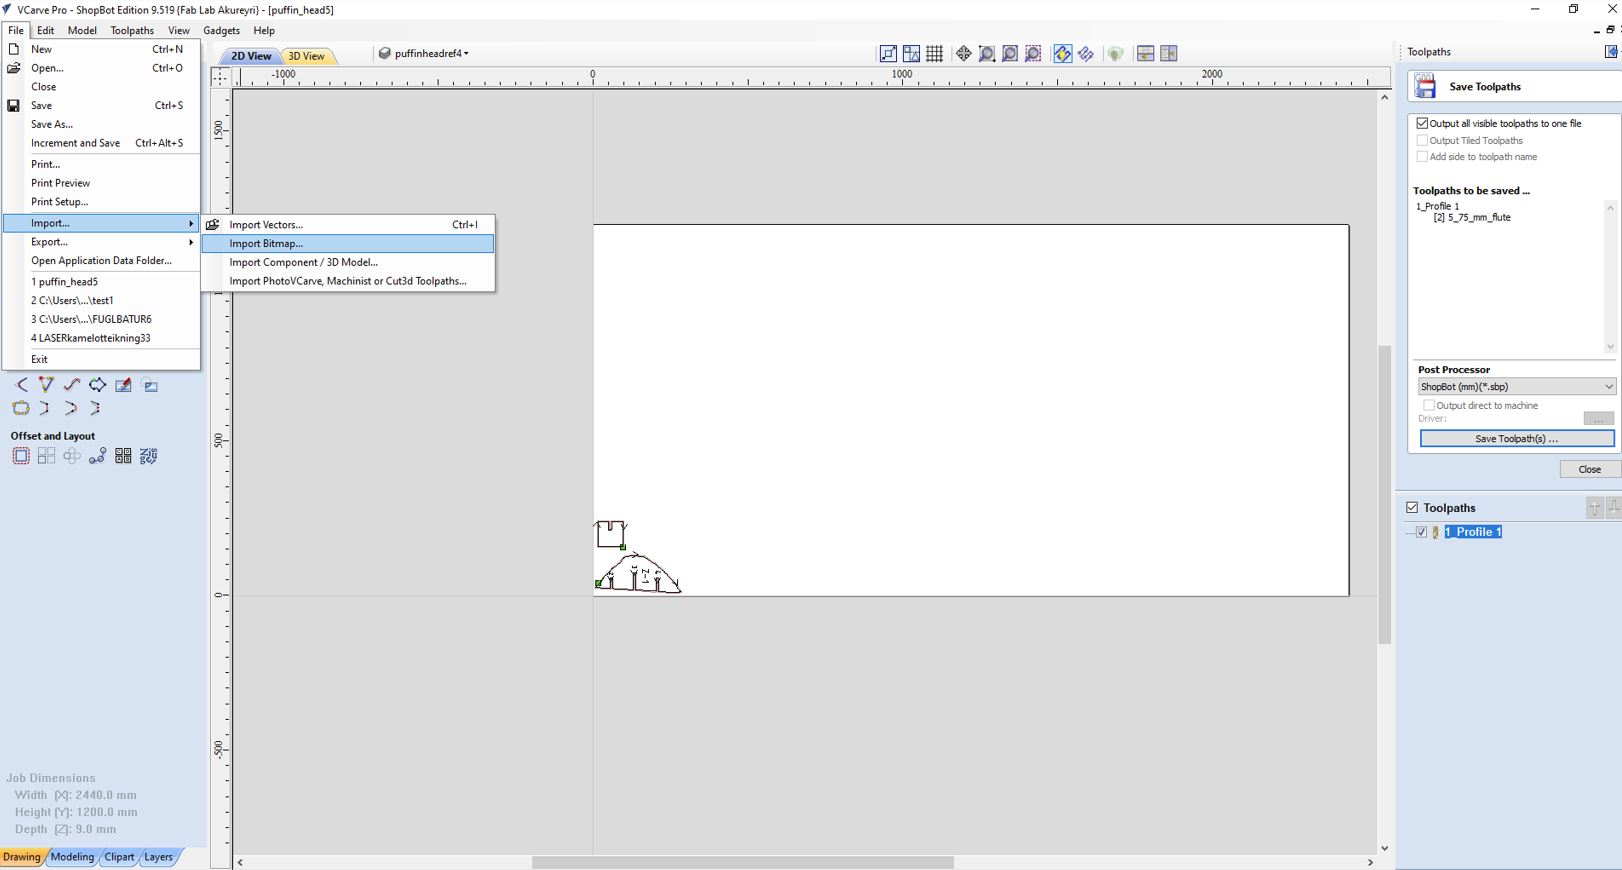
The first test did not turn out perfect, the machine
only made the hole 8mm thick despite the computer
calculating it as 9mm.
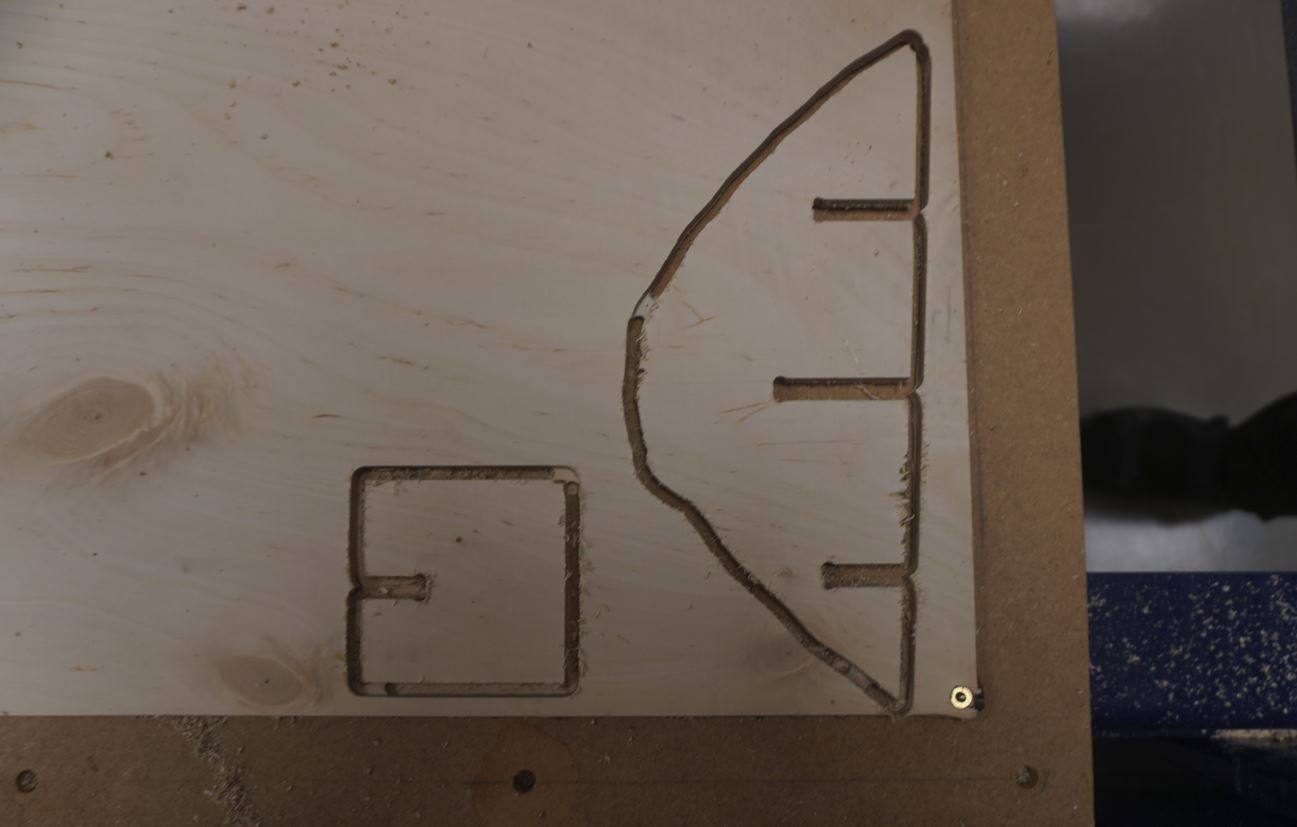
So we simply changed it to 10mm in the machine and
the next test worked!
It was ready for the big job!
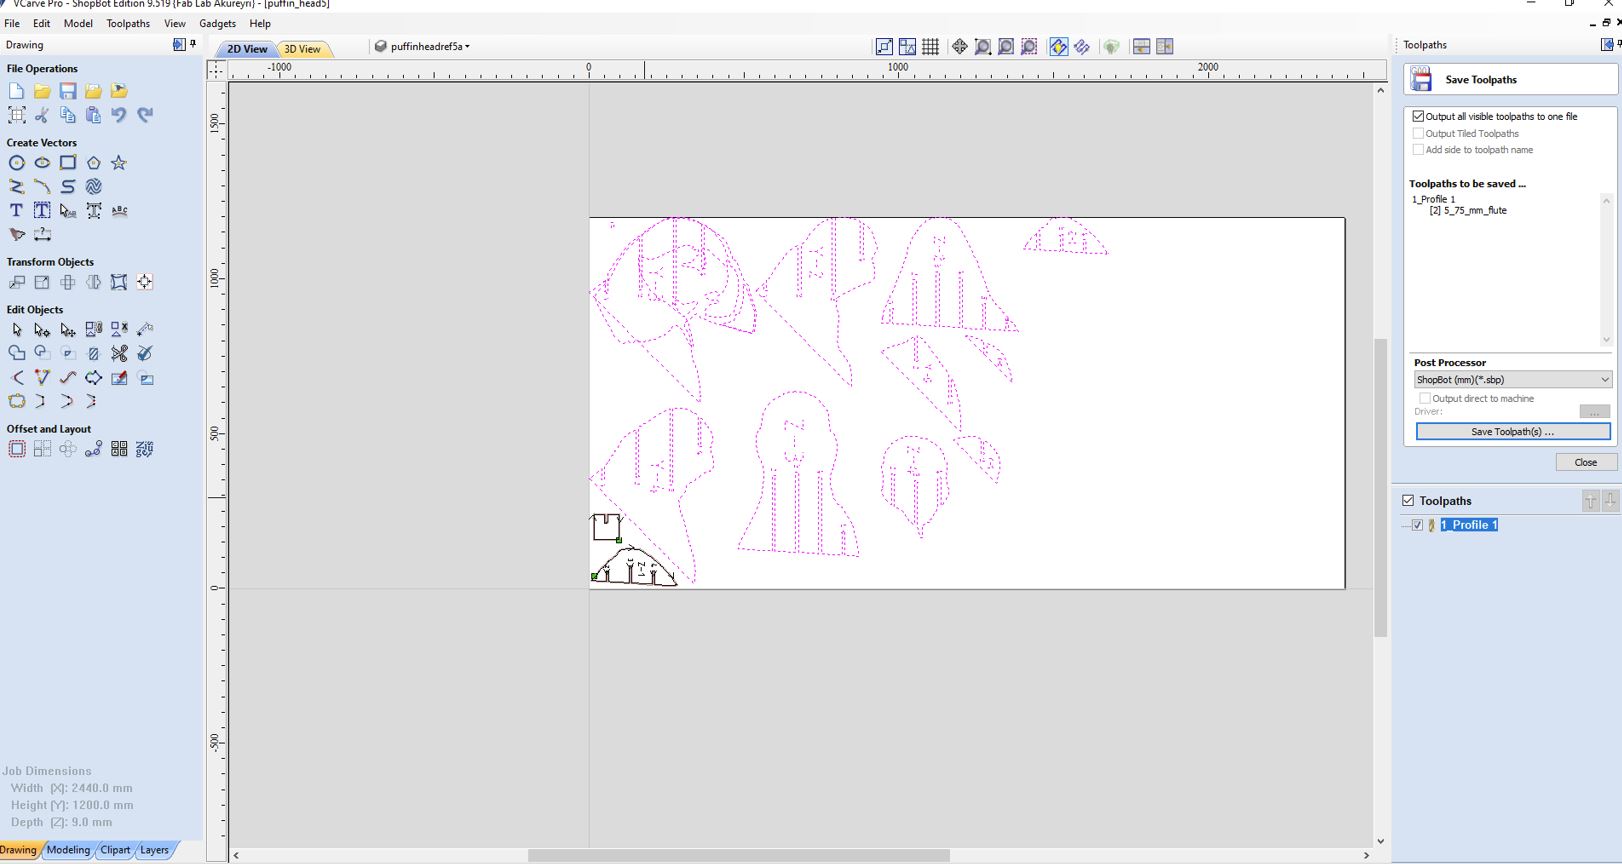
I then made a bunch of tiny circles for the machine to drill.

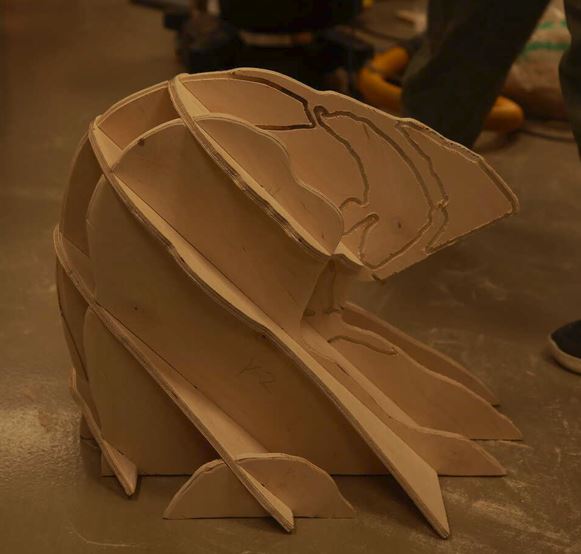
After milling
Assembling it took some time and effort. I used a sledgehammer to put it together. This was after sanding it down with sandpaper.
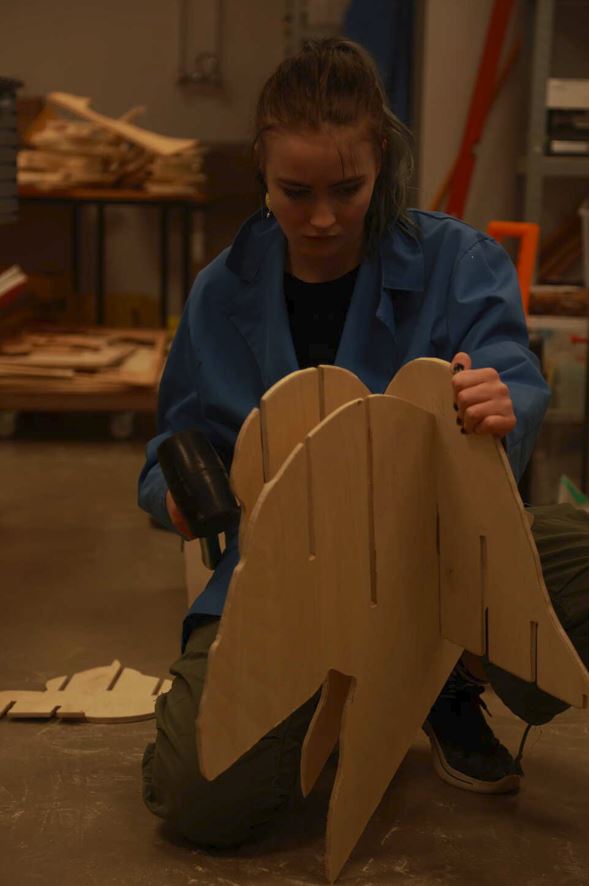
Final result:
Video:
Emergency Information
1. Injuries: . Do not attempt to remove foreign objects from the eye or body; it is better to have trained
medical personnel remove foreign objects from the eye or body.
Being ready to work
2. Do not operate equipment unless you have been properly trained to do so. If you’re unsure about
the safe operation of a tool or any aspect of a job – ask for help. If you can’t do a job safely, don’t
do it!
3. Never work when you are impaired.
4. Be prepared and have your file ready and plan ahead before coming to the Maker Lab.
Personal Protection
5. Never work alone. At least two people must be in the lab at all times when operating power tools
and equipment. An approved Maker Lab Supervisor must be present.
6. You must wear safety glasses with side shields at all times.
7. Hearing protection is recommended.
8. Must wear appropriate apparel. No loose clothing or jewelry, closed-toed shoes, hair tied back.
Shop and Tools
9. Always keep aisles, exits and access to emergency equipment (fire extinguishers, fire alarms,
first aid kit) clear at all times.
10. Become familiar with how the ShopBot works and the dangers before using it. Ask for help!
11. Verify the overall condition of the equipment and the material being used (e.g. condition of
bits, debris buildup, defects in the tool housing or anything that would compromise the safe use of
the ShopBot).
12. Keep the area around the machine clean and free of clutter and trip hazards.
13. Pay attention to the machine at all times.