3D Scanning and Printing
assignment assignment assignment
group assignment:
- test the design rules for your 3D printer(s)
- Link : Group
assignment
individual assignment:
- design and 3D print an object (small, few cm3,
limited by printer time)
that could not be made subtractively
- 3D scan an object (and optionally print it)
For this week we tested the different 3d printers, the Bambu
printer was by far the fastest compared to the Prusa
printers. It was significantly faster, for example one
of the tests took 38 minutes and 10 seconds on the Prusa
mini but only 20 minutes on the Bambu.
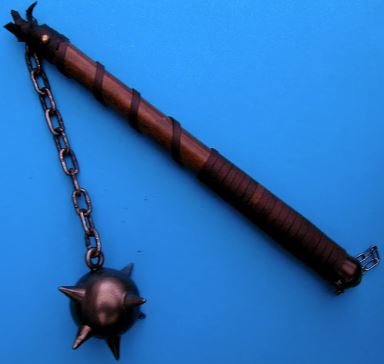
The beginning- Morningstar

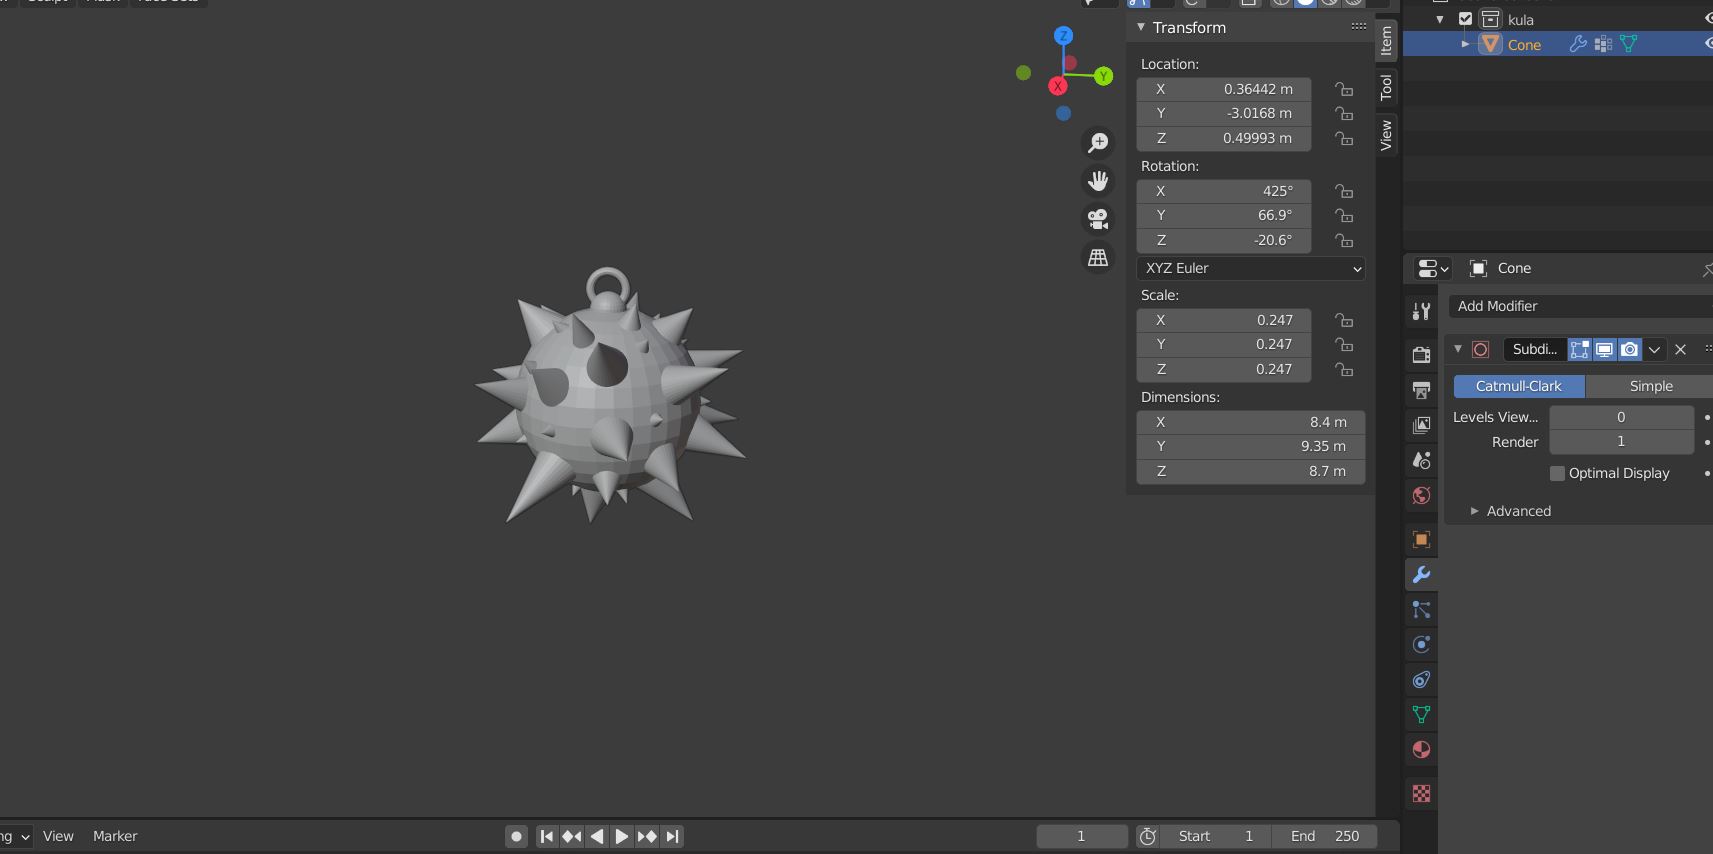
I did some 3d designing for blender and tried printing it
in order to learn to use the Bambu 3d printer
I made a spiky ball with a way to attach a chain to it: A
morning star
Now before you judge I want to clarify this weapon is NOT
being made for malicious purposes.
The story: Our local theater group; Leikfélag
Vestmannaeyja is setting up a play. The play is: SPAMALOT!
It's a musical based on Monty Python and the Holy Grail. :
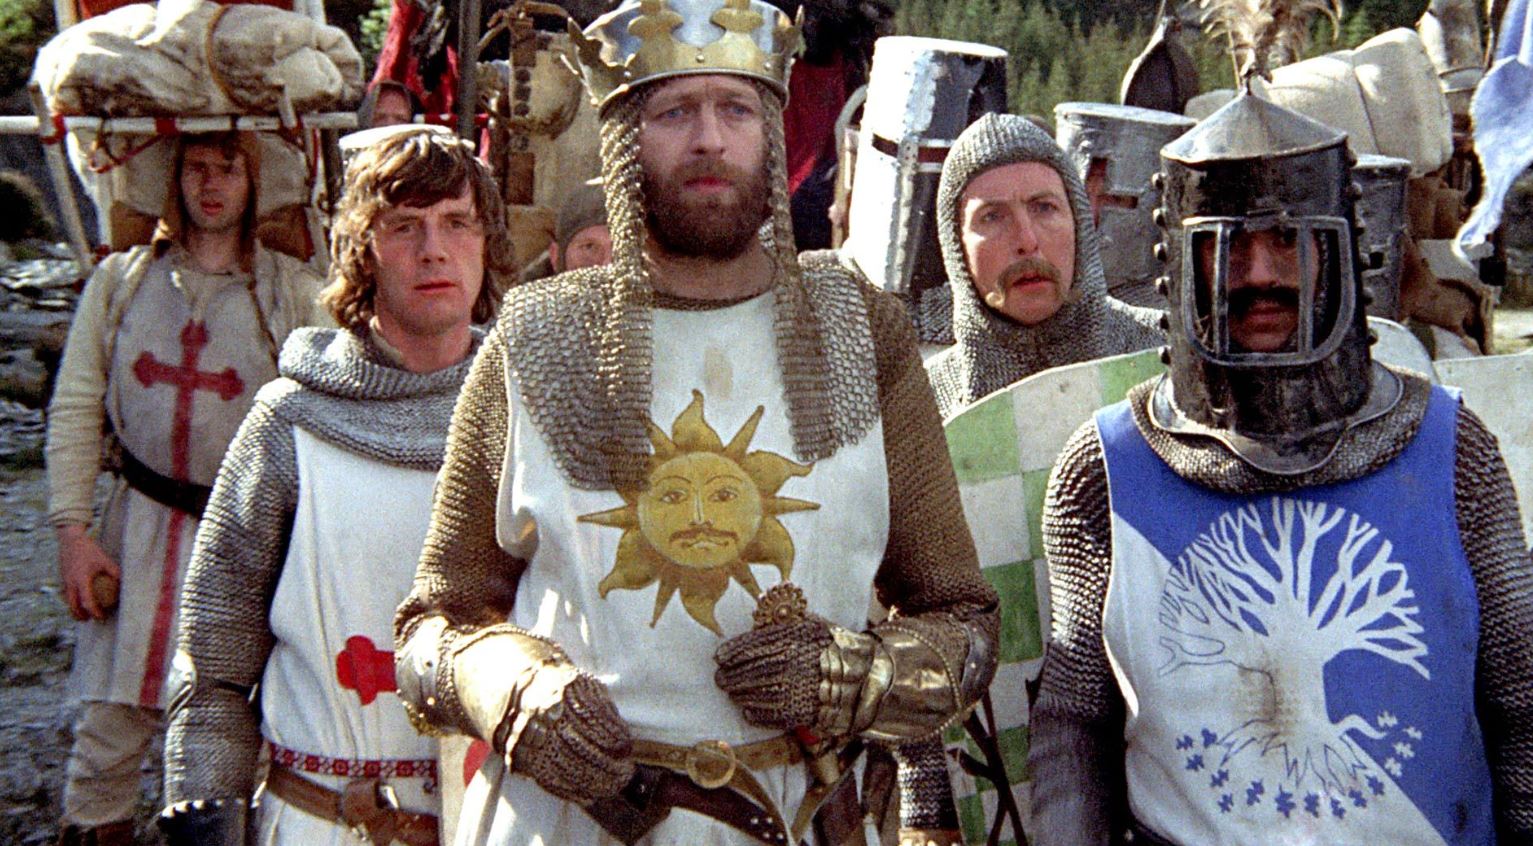
What they asked for: A spiky ball, heavy enough to be swung
around. The ball was supposed to be attachable to a chain.
This prop is for a dance where the dancers swing these
around. This is the inspiration picture I was given:
I Began trying to do it through FreeCad but eventually gave
up
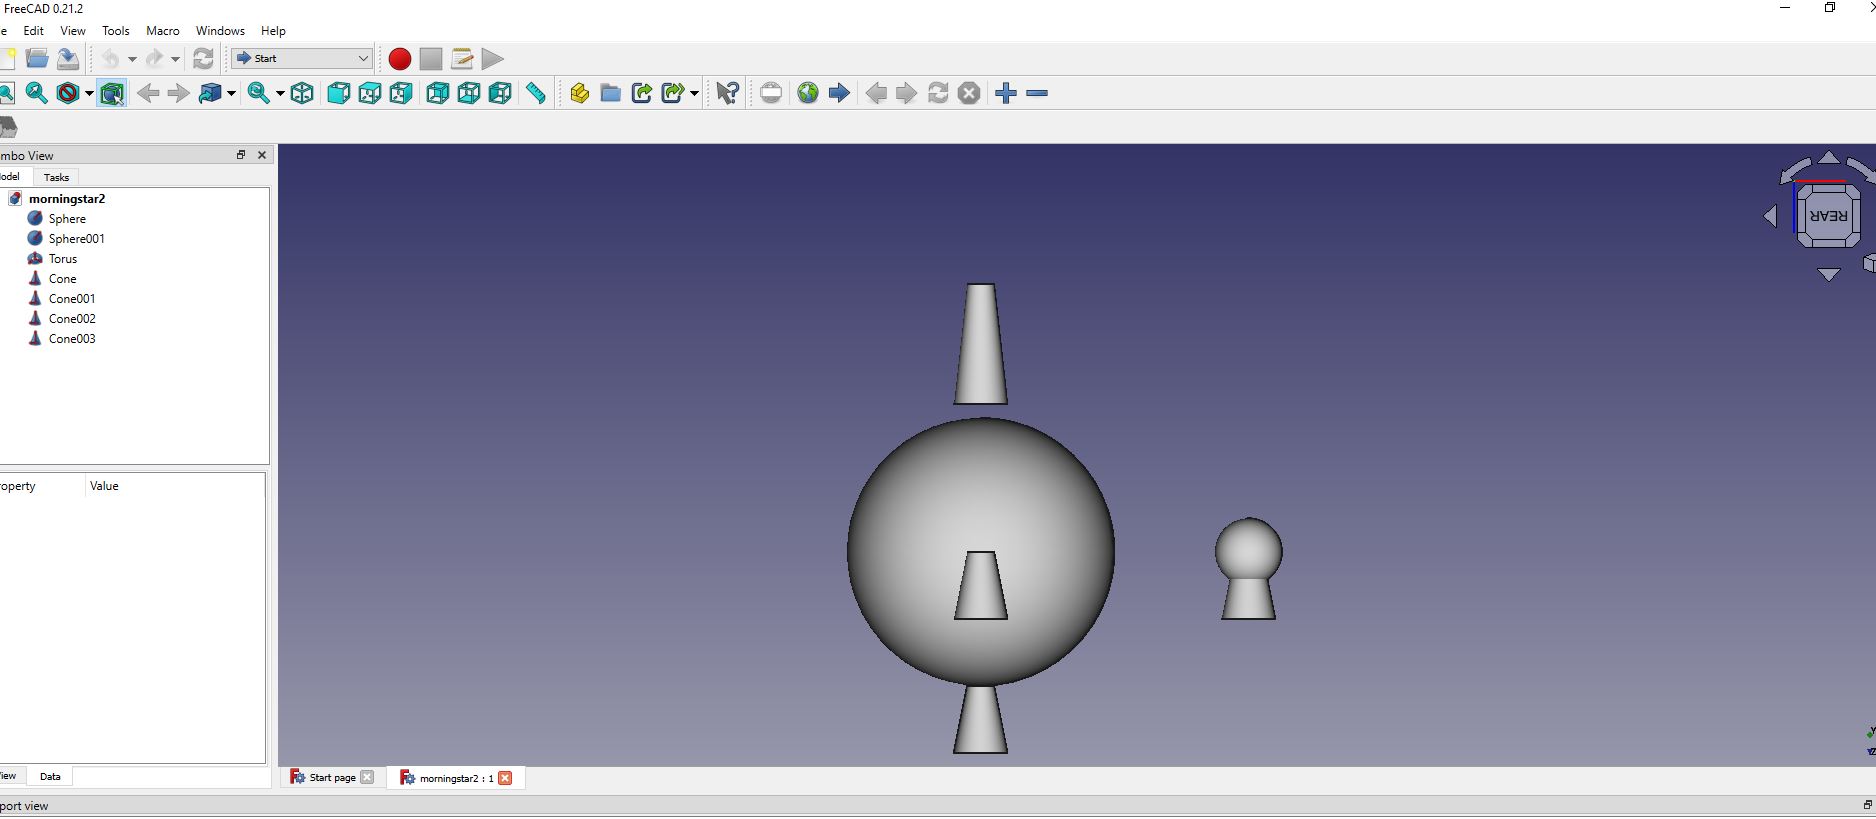
So I decided to create it through Blender.
The process consisted of adding cones to a sphere by
rotating and scaling them.
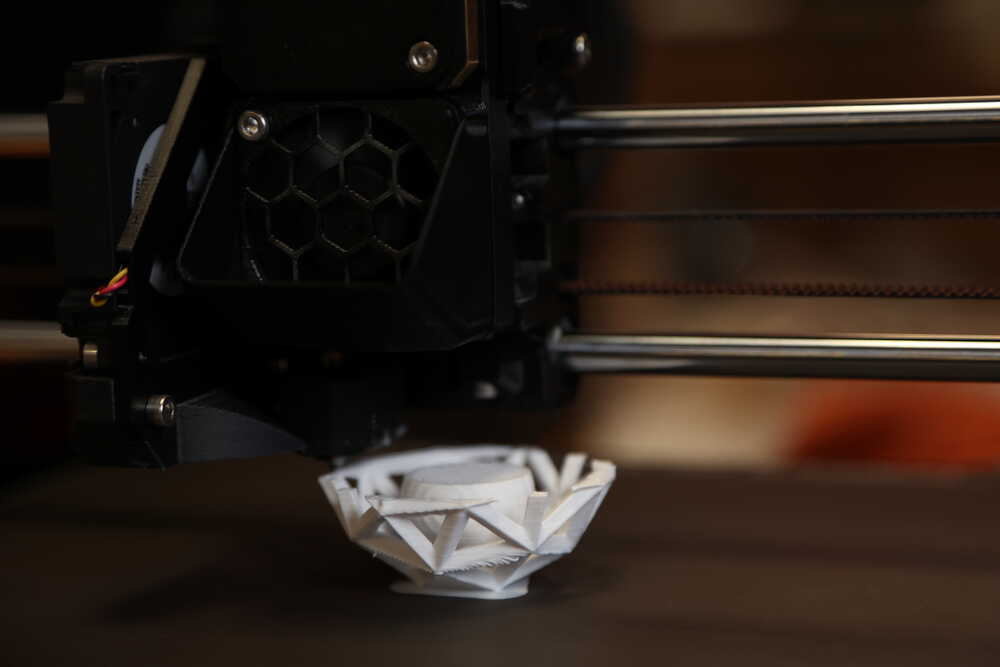
Then I ran it through our trusted Bambu printer
These are the results:
All in all it went pretty well although this happened>
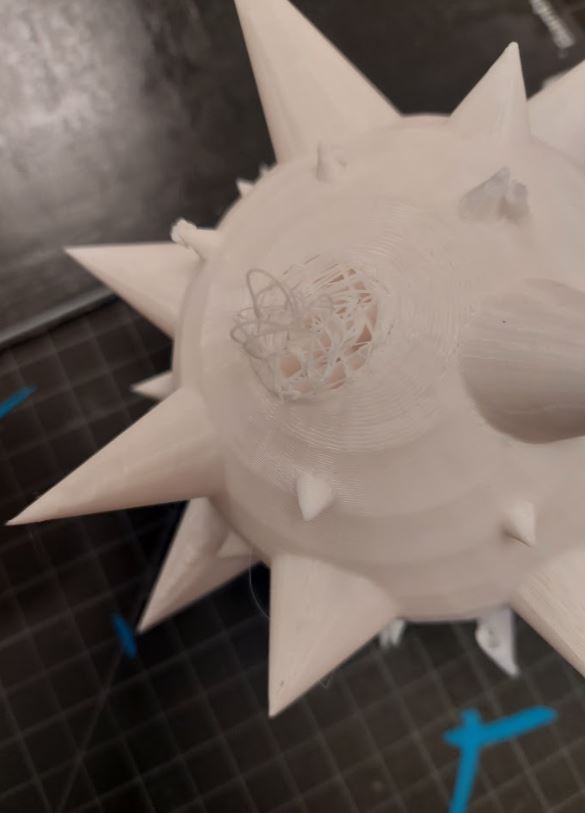
One of the sharp ends was loose, I fixed it with a hot glue gun by removing the unnecessary strings.
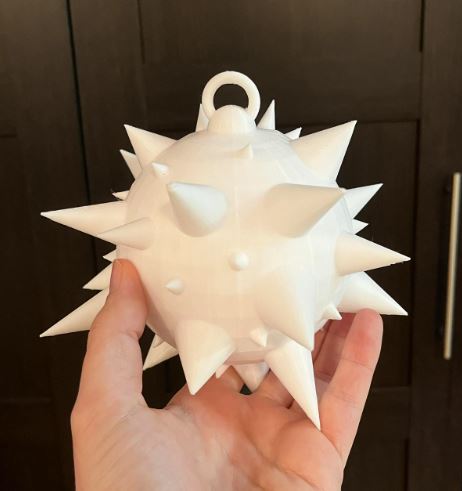
Here is the final result:
Video:
3D printing something only possible through additive
manufacturing
So the Morningstar may be possible through multi axes
milling. But this print on the otherhand is not possible
through such methods.
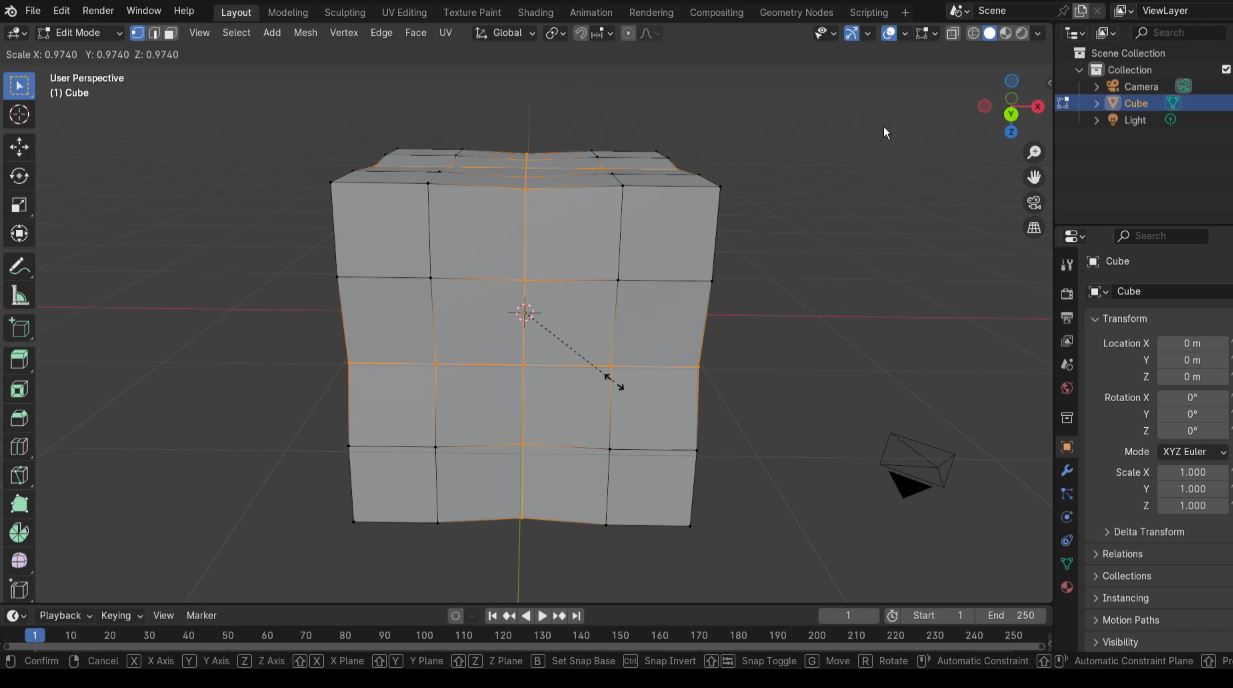
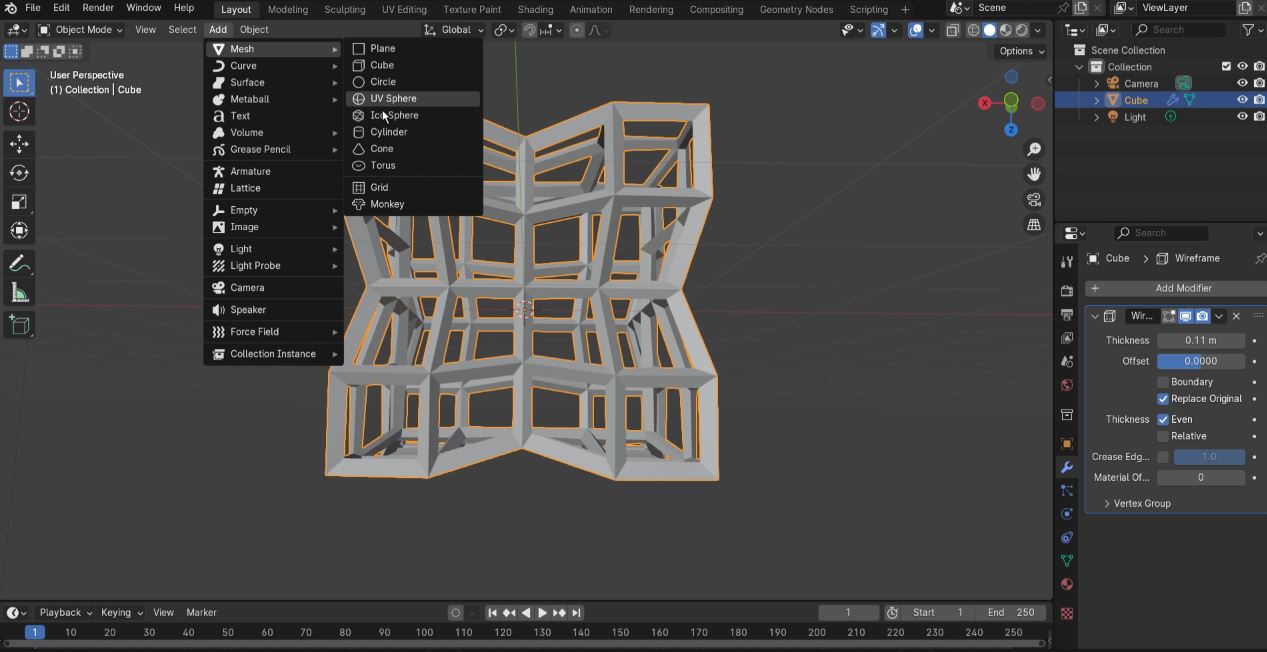
I began by creating a box through blender, used loop cut to
split each side into multiple parts and finally used the S
command to resize the middle parts.
Then I used the wireframe toolpath
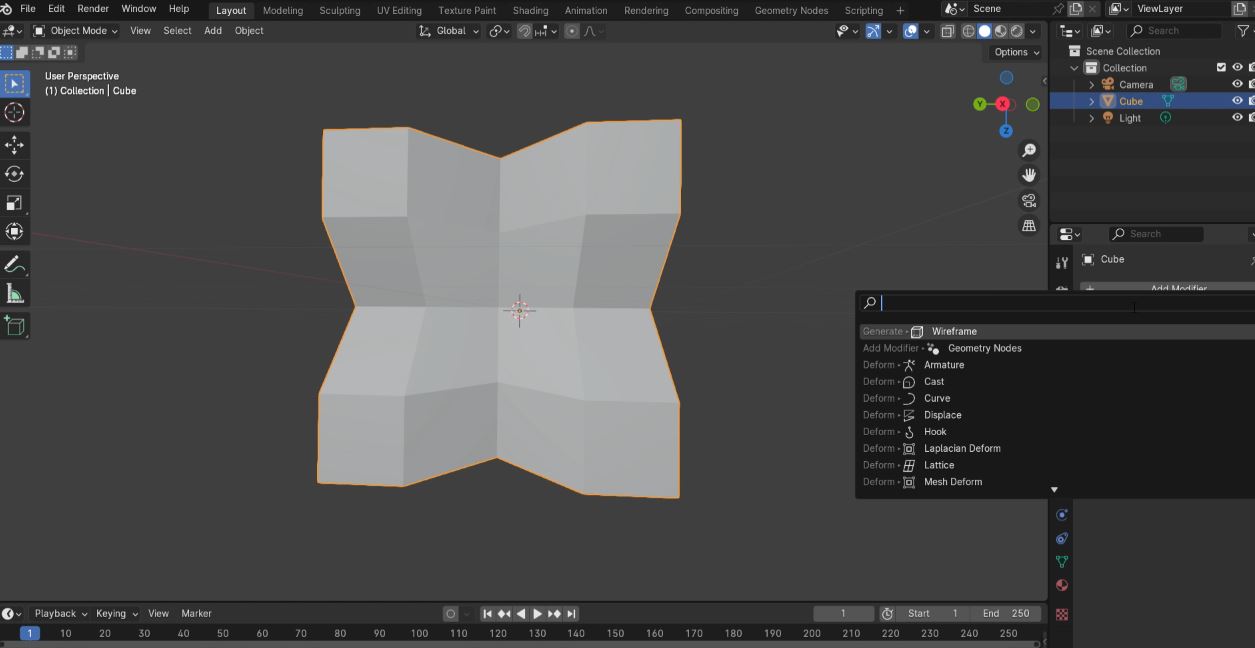
After that I changed the thickness and inserted a small sphere into the box.
Unfortunately due to the angle it produced too many strings so I had to redesign it
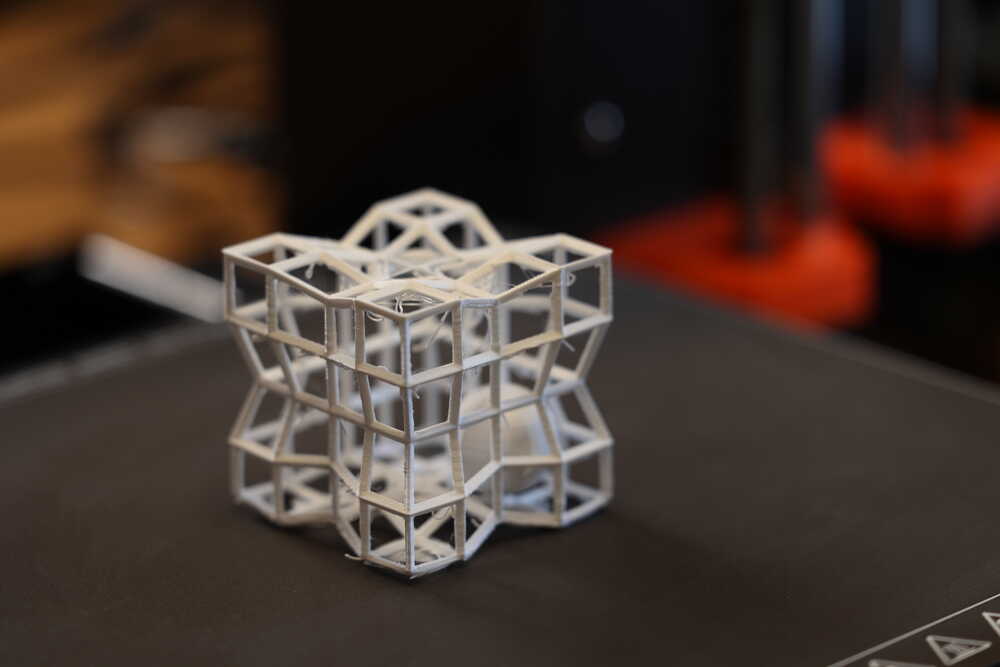
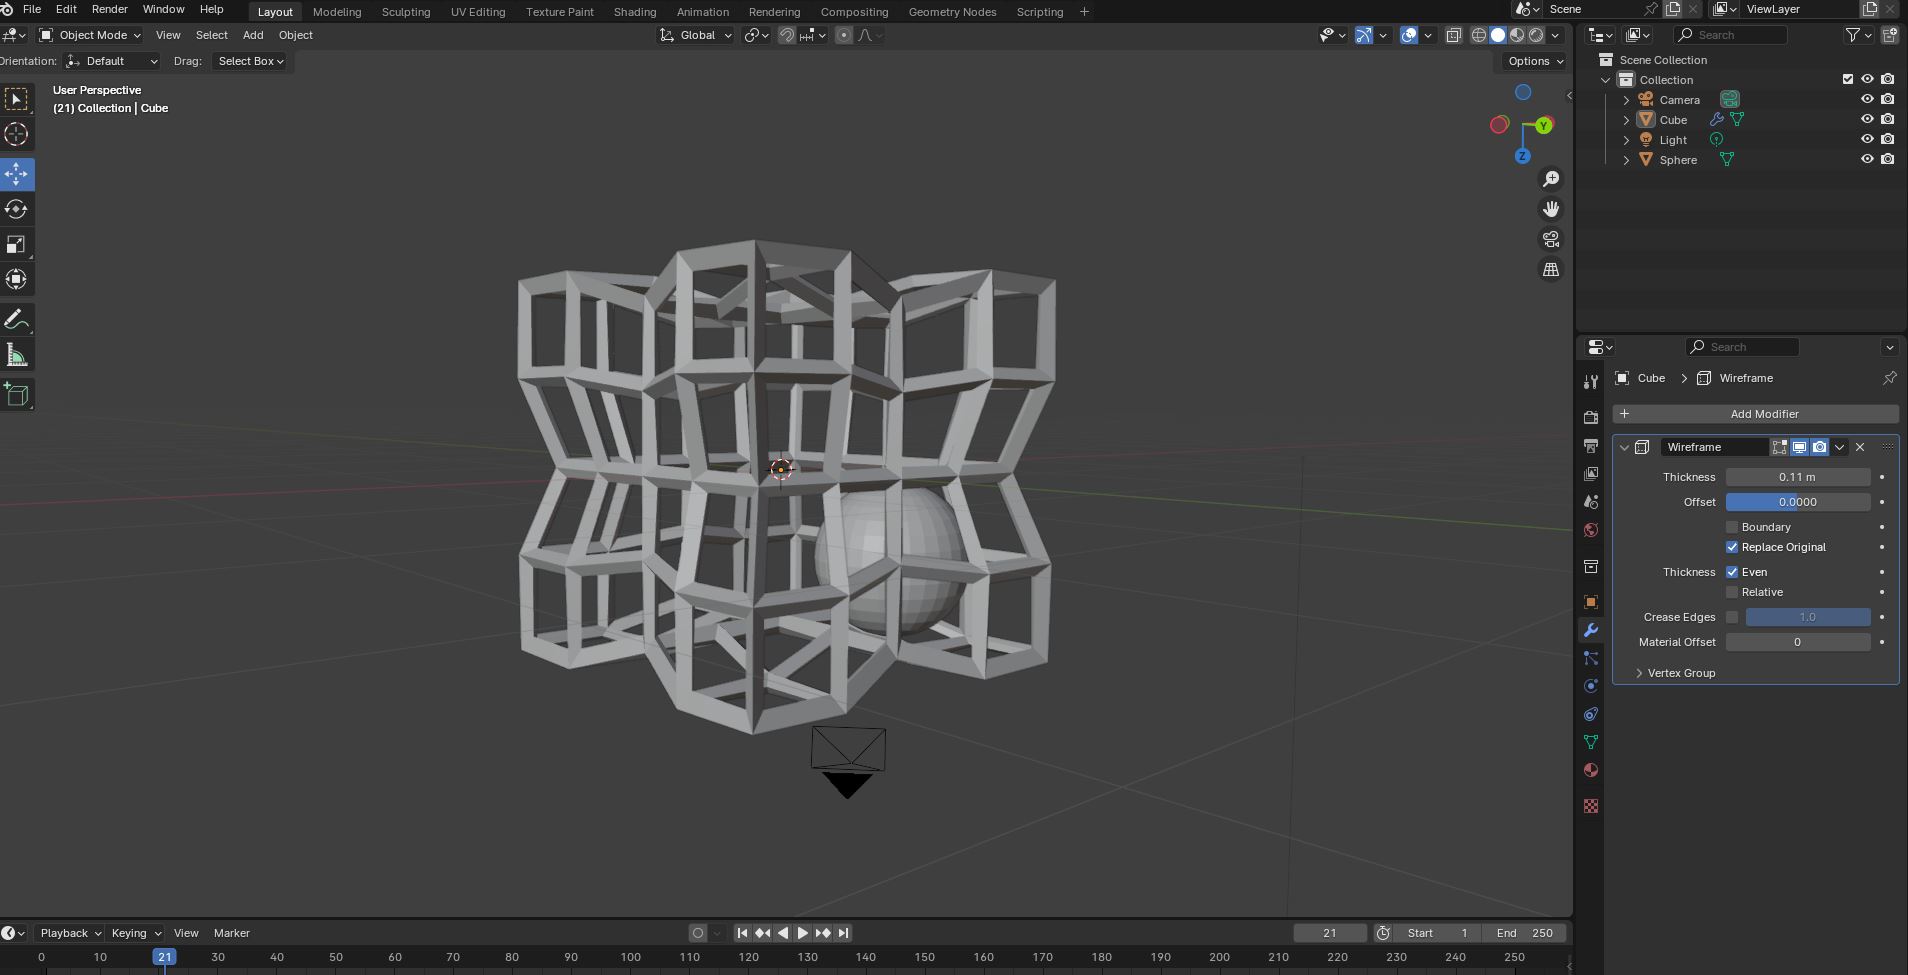
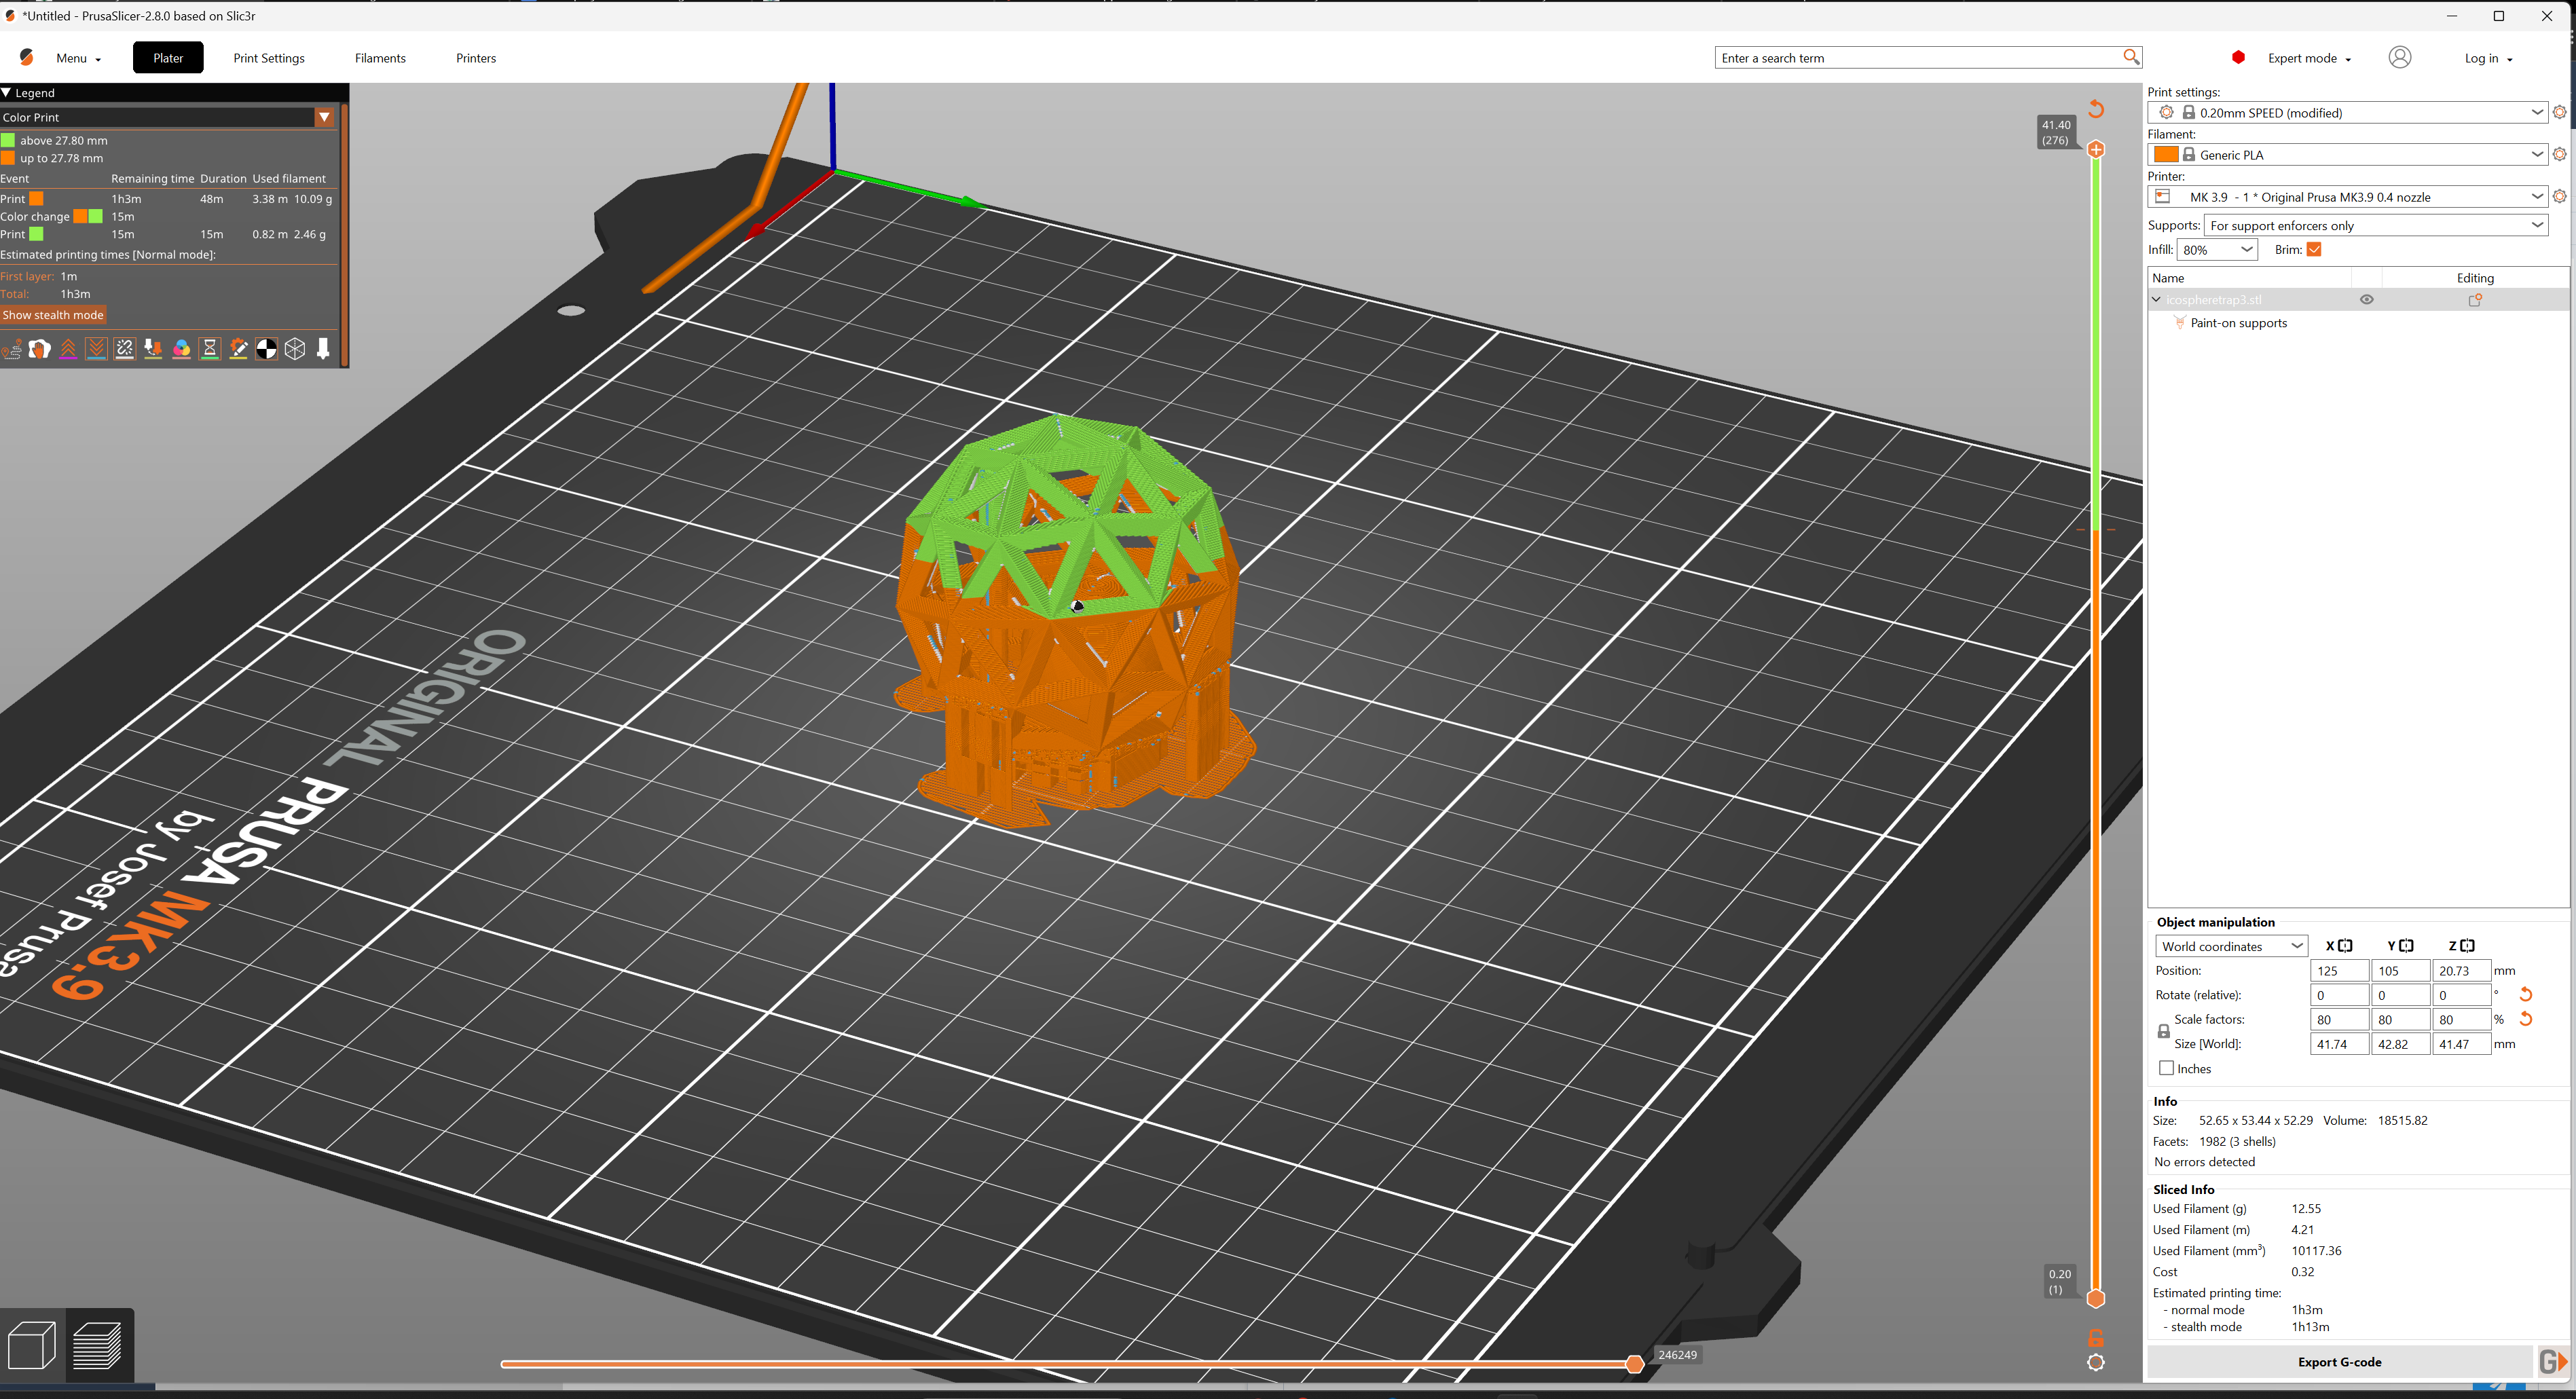
3D printing something only possible through additive manufacturing final part
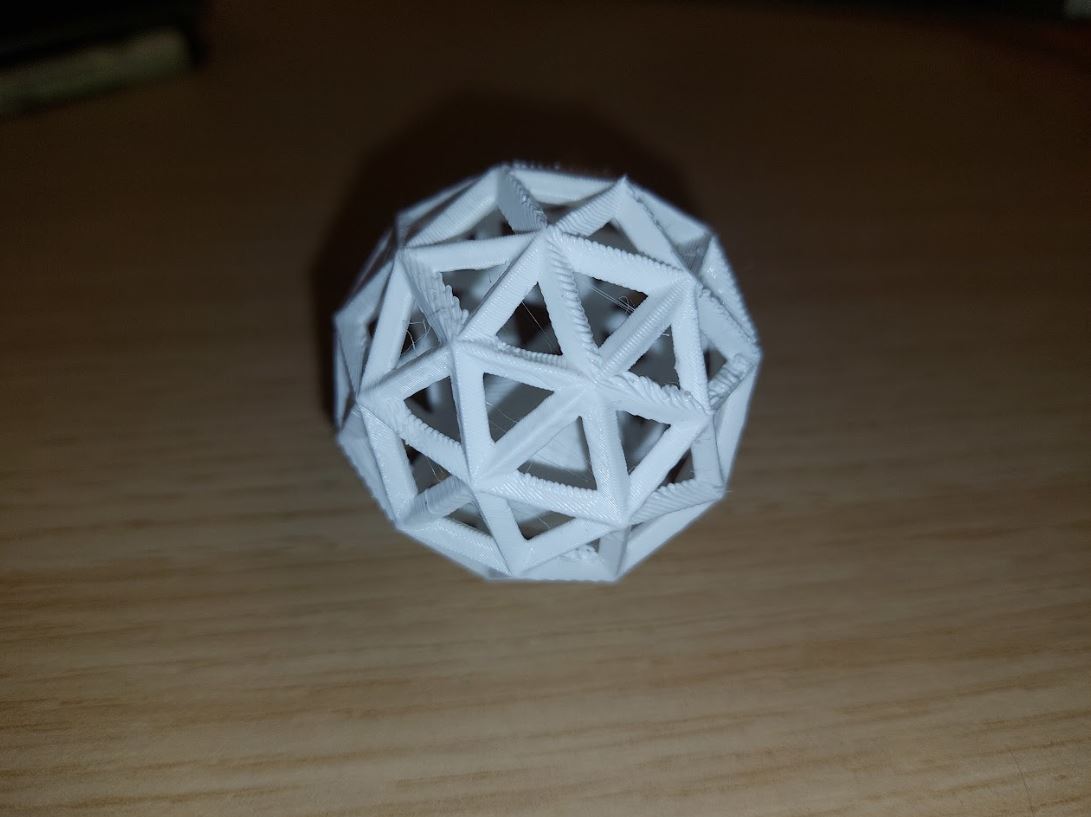
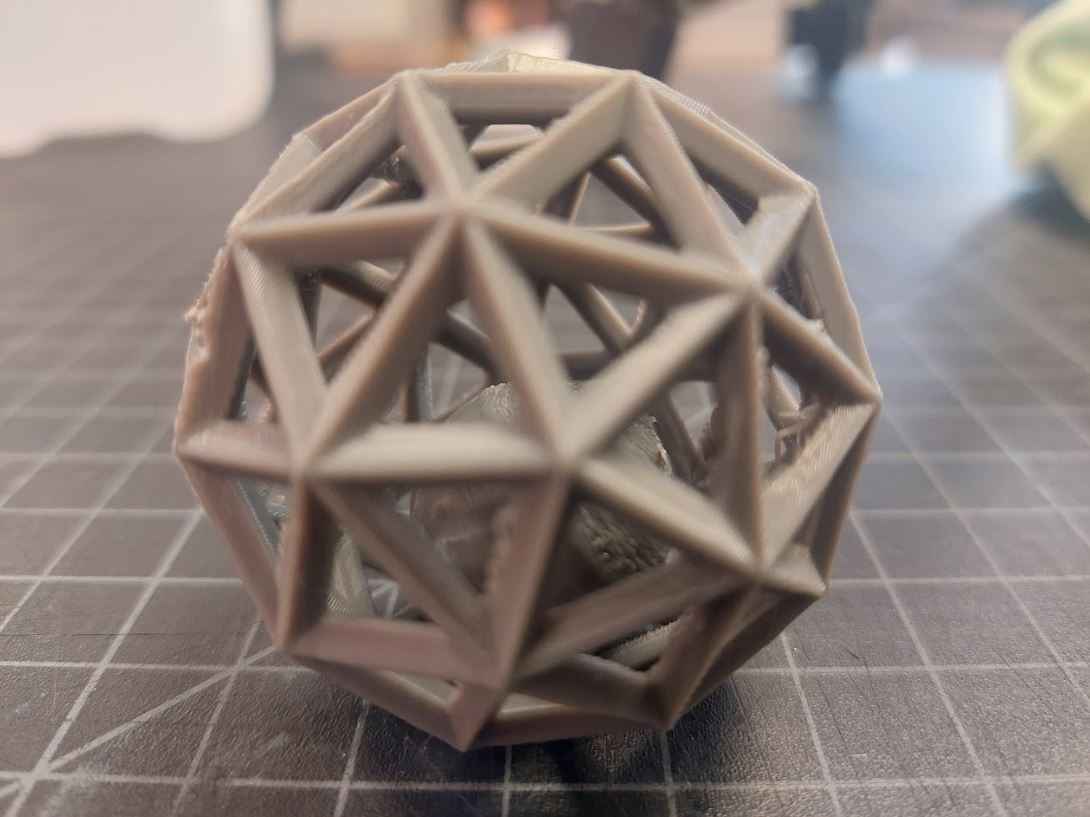
I began by just creating a simple sphere, then proceeded to
use the wireframe tool and placed a smaller sphere within
it.

At first it seemed that using supports was a waste and
unessecary but after a few failed tests where the sphere
began moving around too much I realised using supports might
be a good idea.
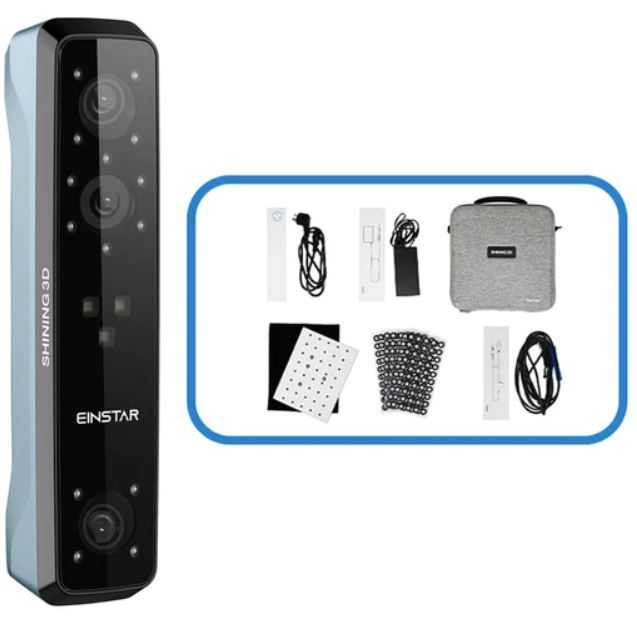
3D scanning-part 0: the equipment
- So for 3D scanning we use the Einstar 3D Scanner, made by SHINING 3D.
- User
manual
3D SCANNING PART 1:
I began by 3D scanning a puffin. More pics and info coming
soon.

Okay so here is something I learned
- its better to keep the brightness low, try to keep the red colour at a minumum (preferably no red)
- Make sure that the object is green and that the camera does not loose sight of the object, If it does you can simply slowly move the scanner back until it regonizes the object
- DO NOT MOVE TOO FAST

Here is how the first scan turned out:
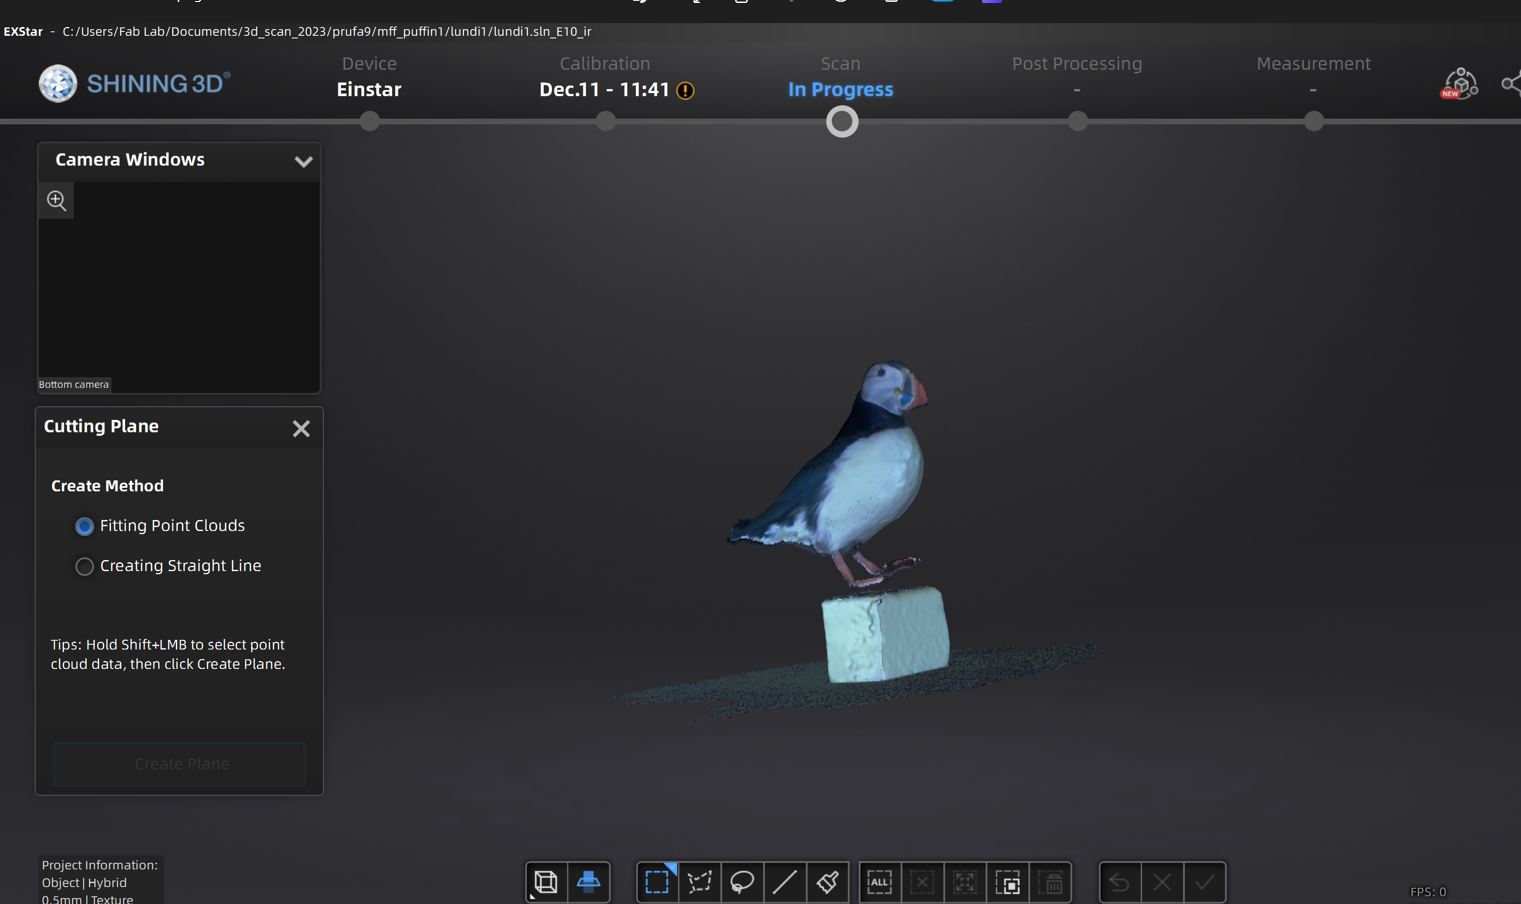
Next I optimized and generated Point Clouds
I then opened project group and started a new scan, where the puffin was laid on its side.
I used cutting tool to remove the styrofoam cube underneath it
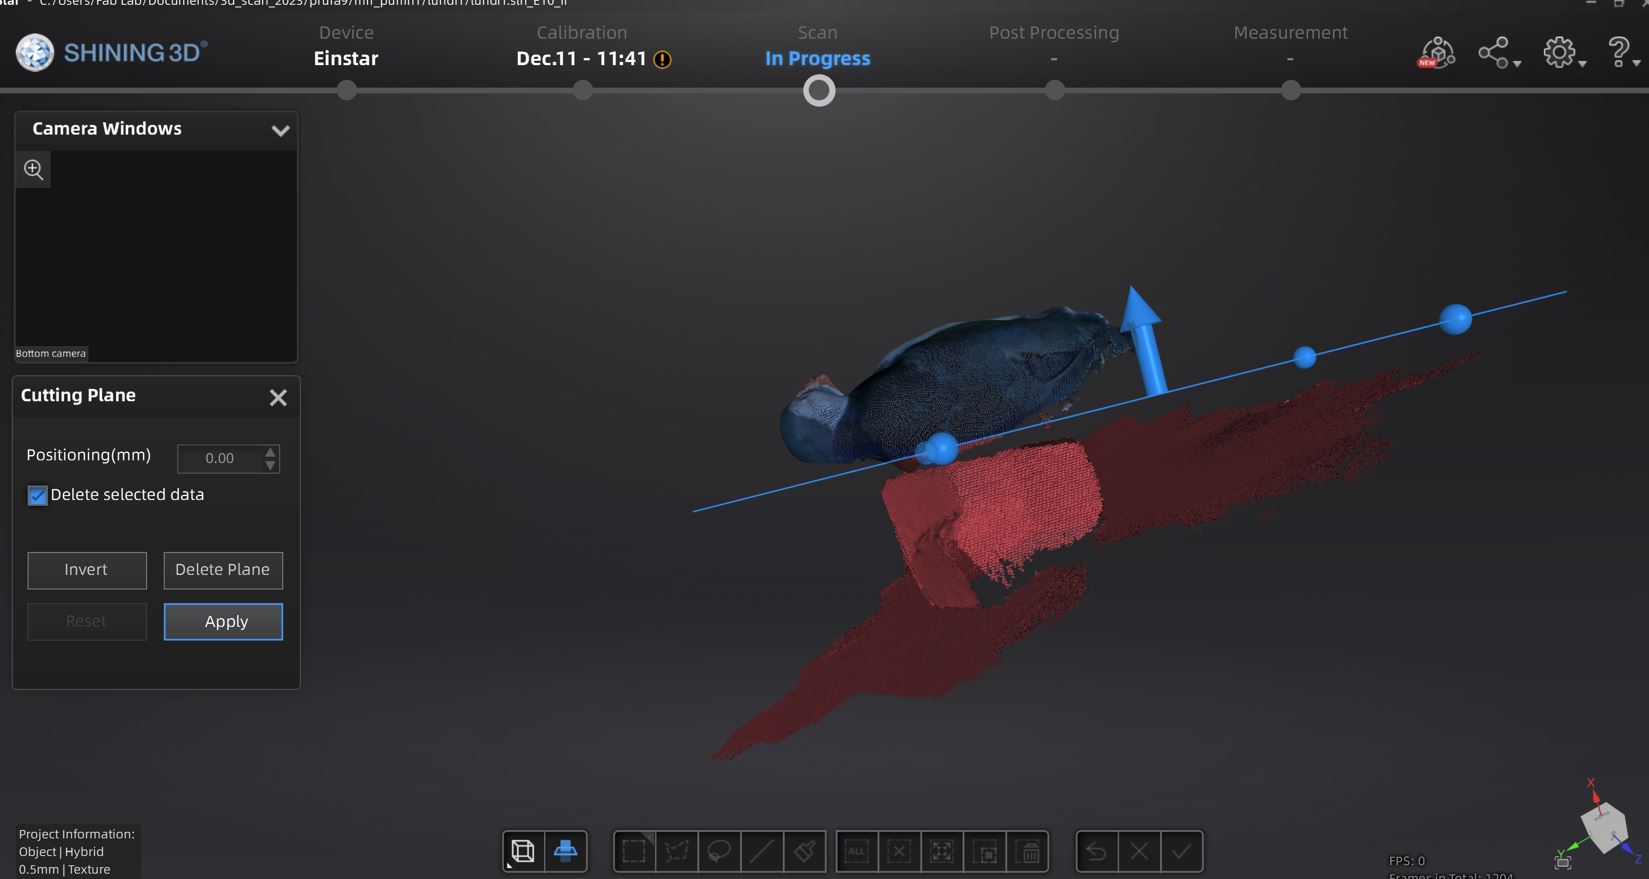
It ended up looking like this: (these are two seperate scans)
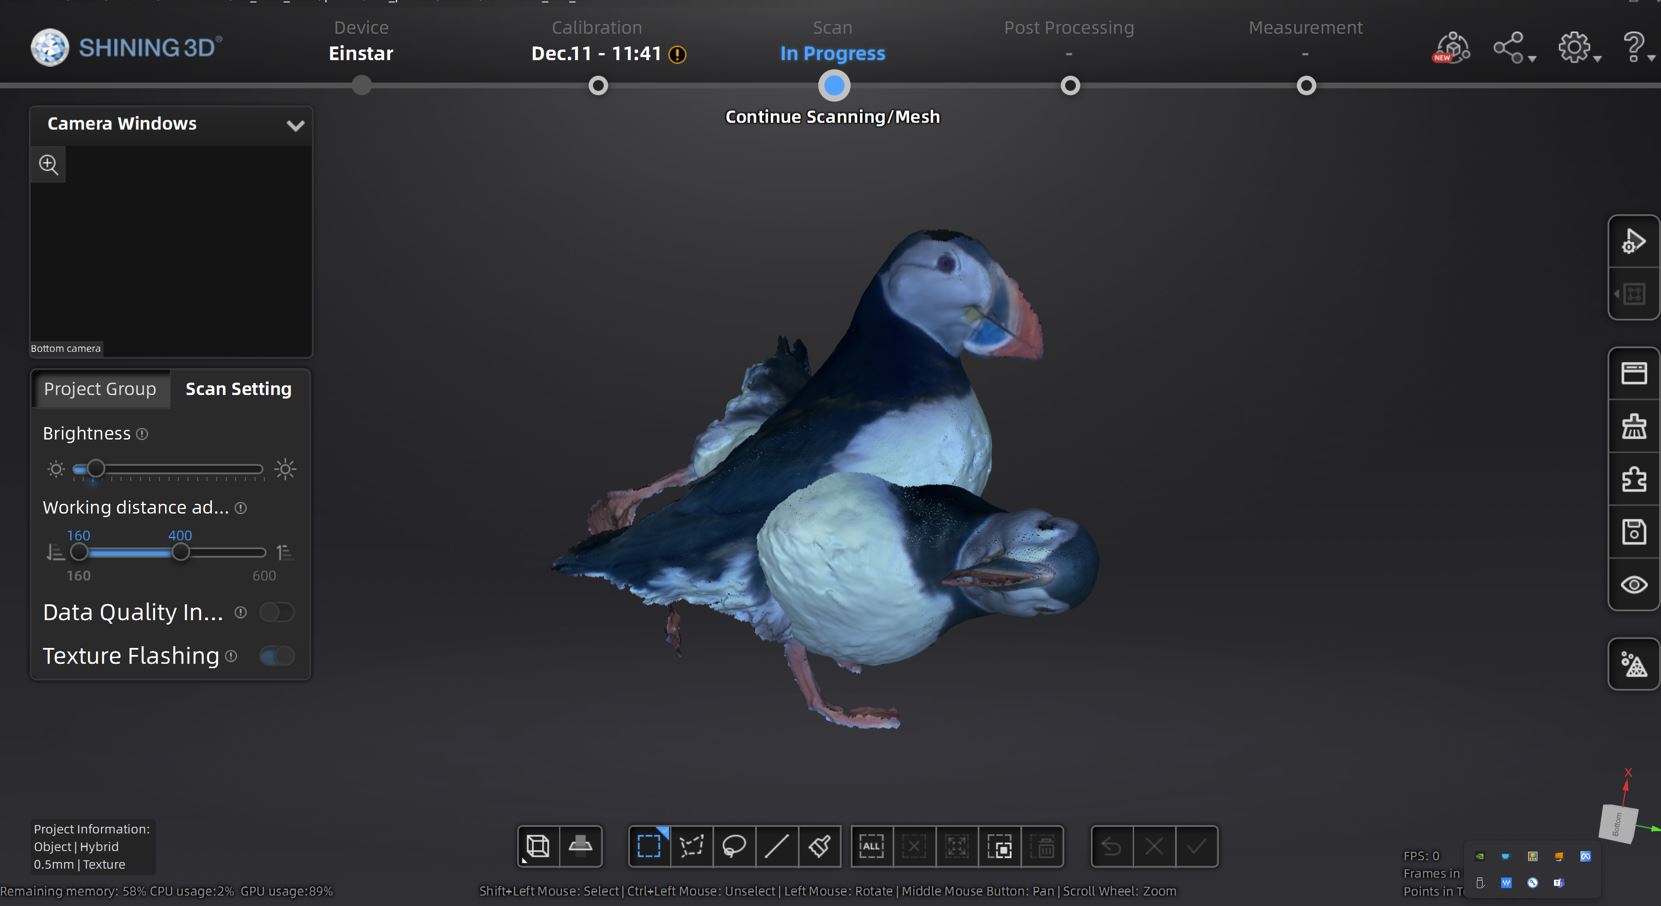
I then

I will use this 3d scan for one of the props that the theater needs for a scene
Used this scan in Computer controlled machining week
3d scanning-PART 2: tHE TRIAL AND ERROR
So I wanted to scan a person for this week, I called up one
of my friends up to the lab and we got to work! I wanted to
start experimenting on him before bringing in the actor I
was asked to scan!
He gracefully accepted and I´m glad he did since we have
tried to scan him on multiple occasions over the years but
it never succeeded.
The first scan was a failure since we didnt put ENOUGH
STICKERS. Seriously look at this he looks like an eldritch
being!
It's okay though because we
brought him in to
✨learn✨
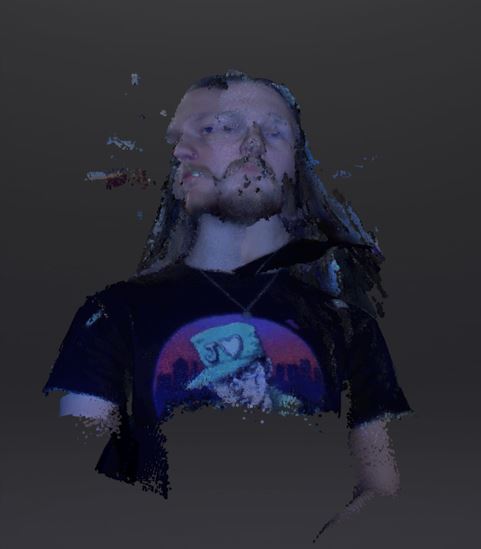
So the first thing we did for the second scan was to put a bunch of stickers all over him AND I MEAN ALL OVER! We put little yellow and purple stickers in his hair, on his neck and shoulders. This allowed us to make it easier for the scanner to be able to recognize him from all sides.
Here is the second look:
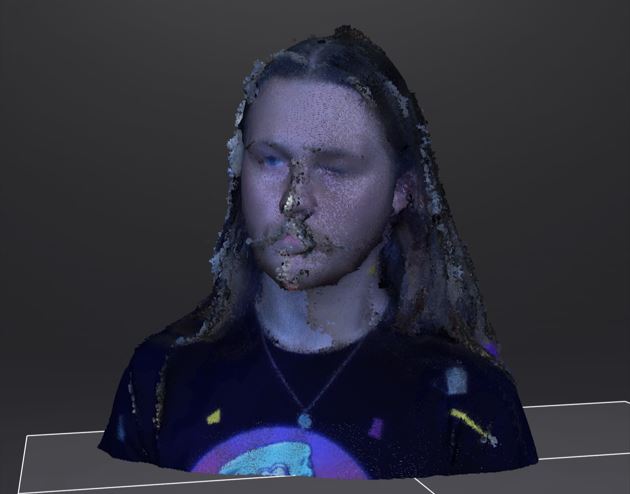

So then I pressed this button

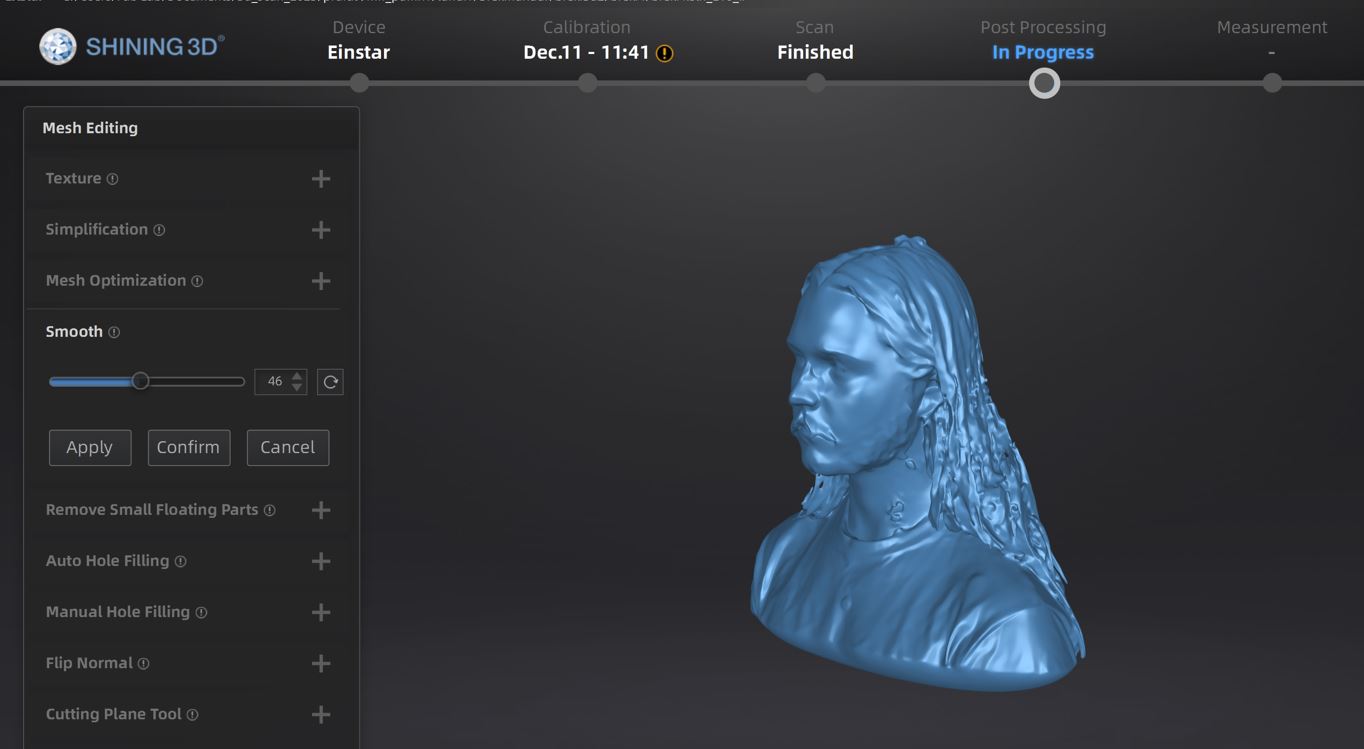
And then I generated the mesh with this button!
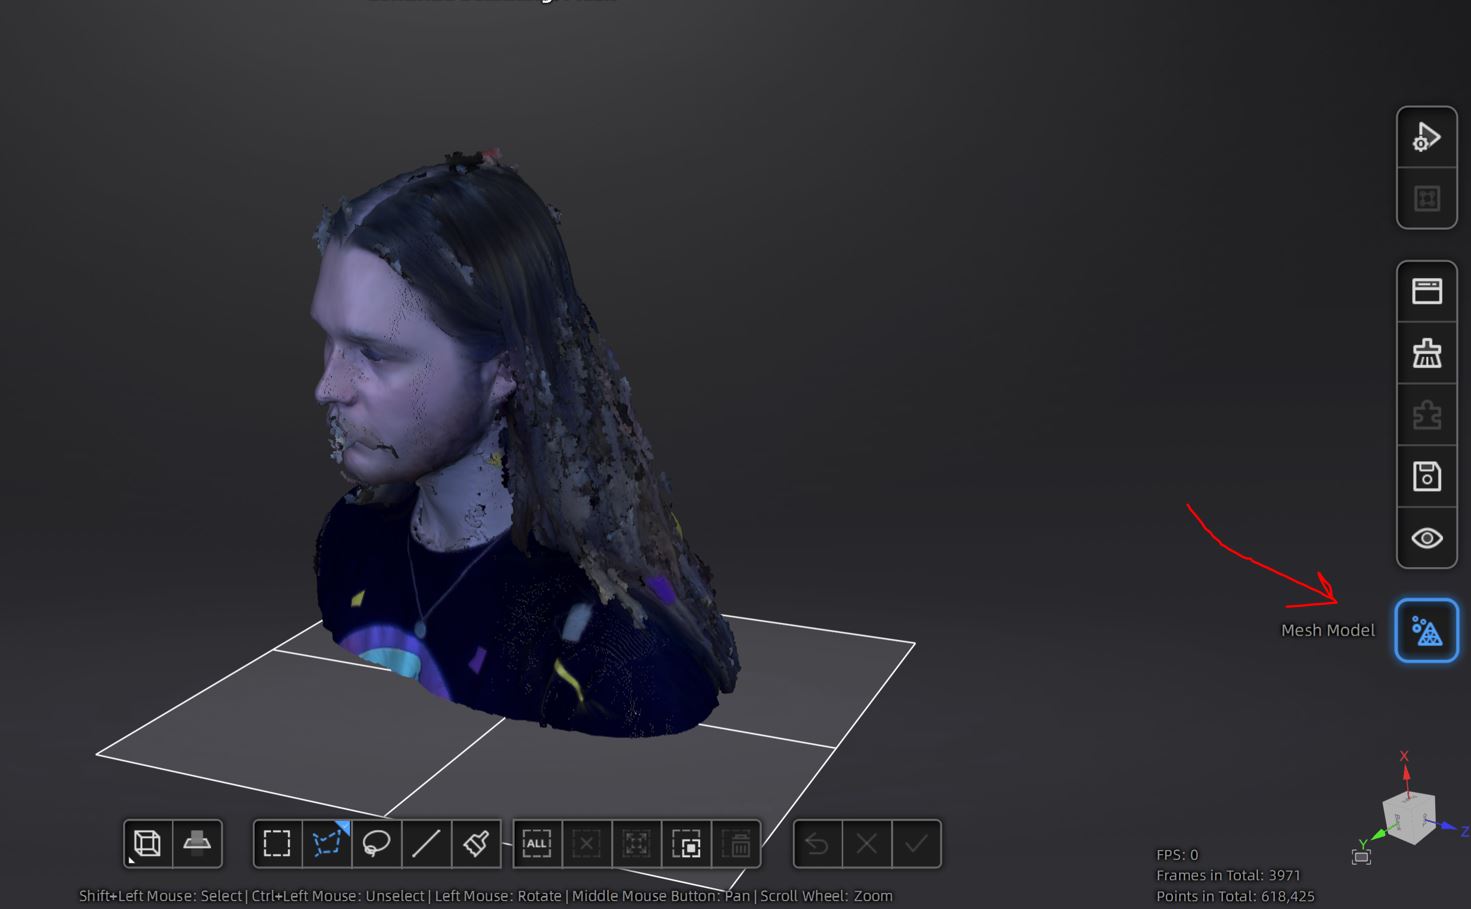
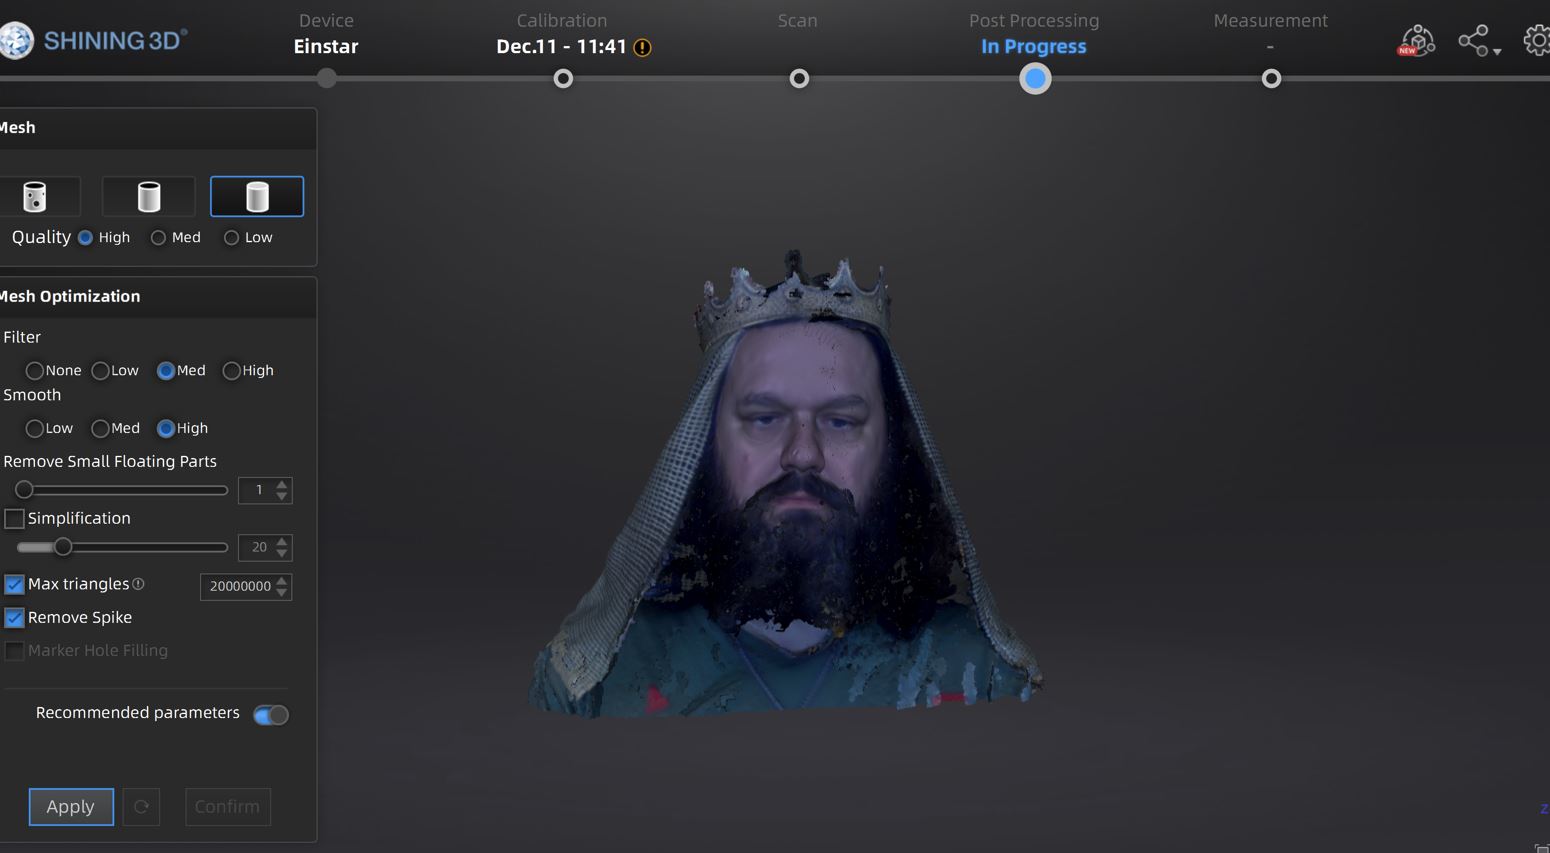
Next I went to the post Processing tab and began messing
with the settings:
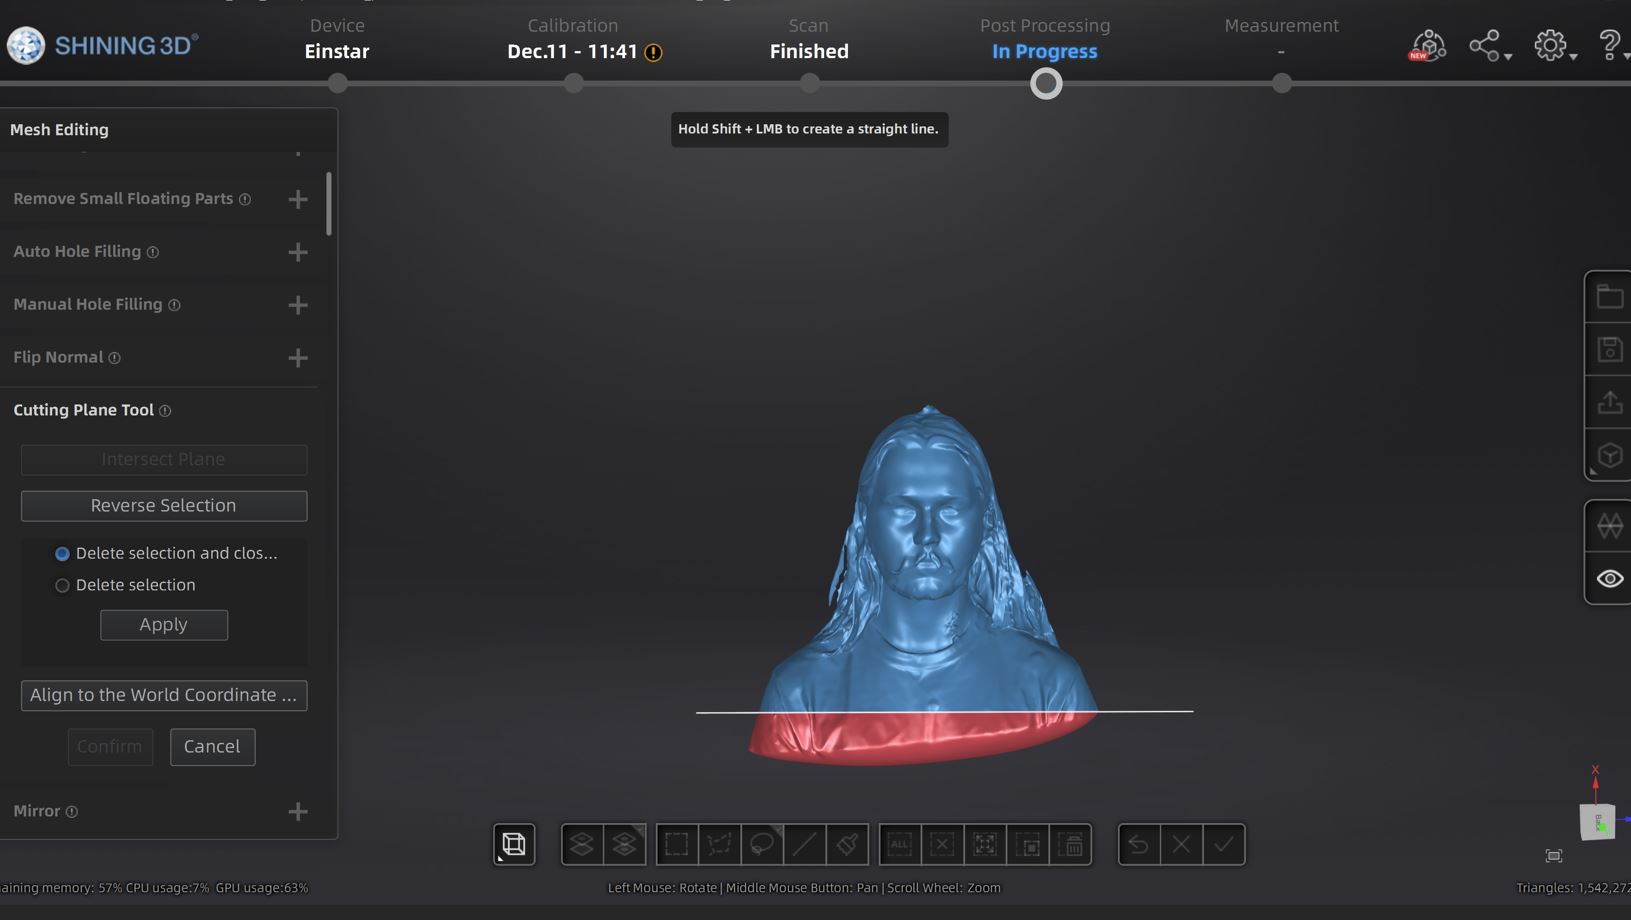
The cutting plane is so useful! It can be used to remove big
parts of the mesh by simply drawing a line by using Shift
and the Left Mouse Button
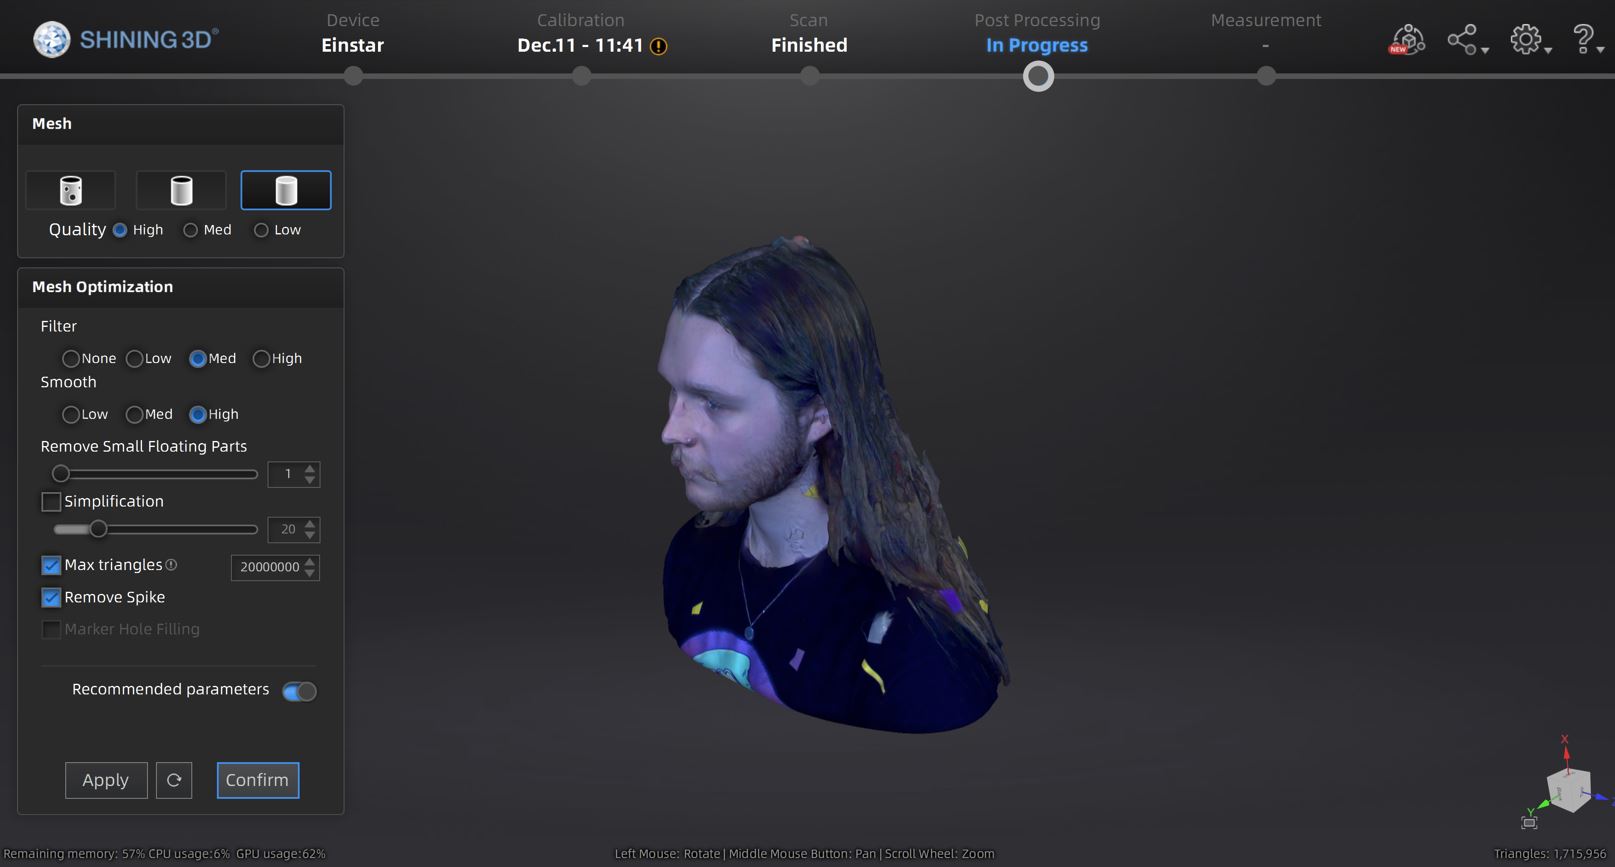
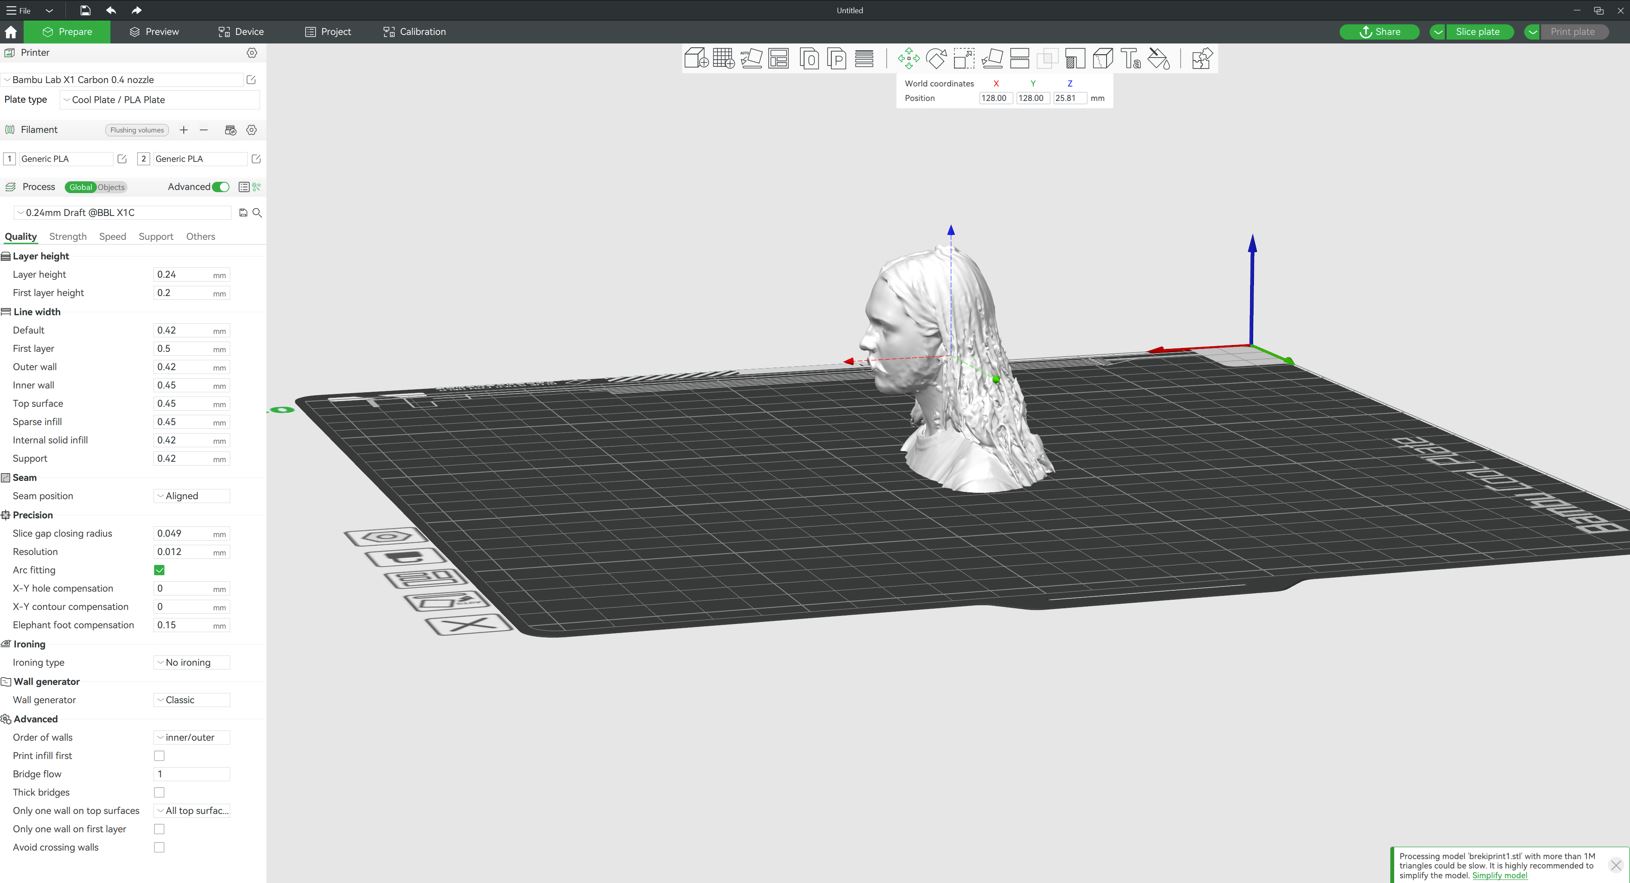
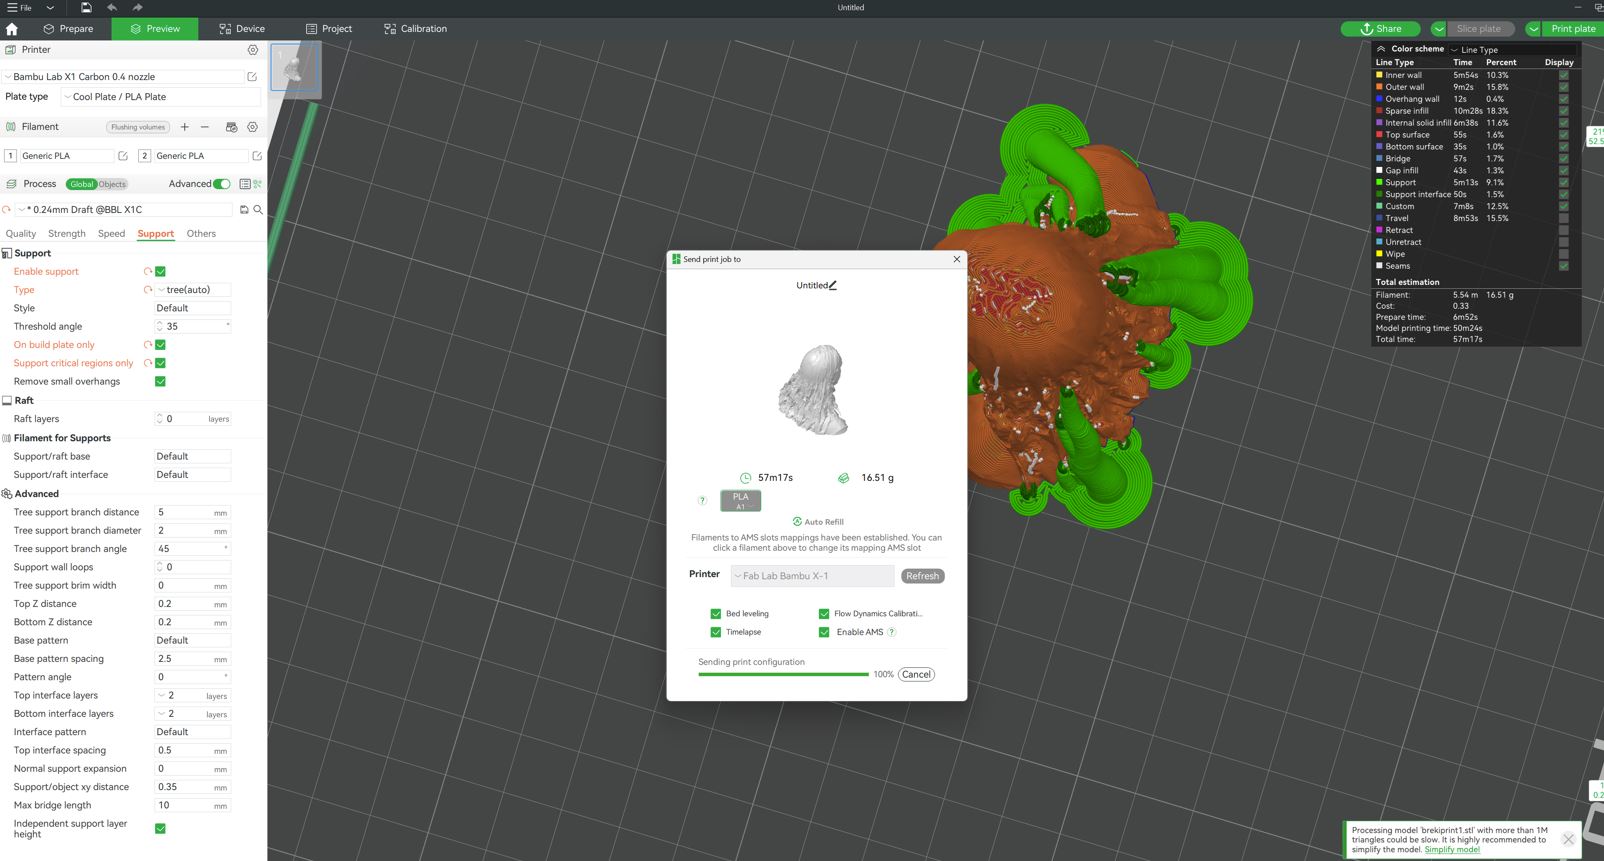
After I felt satisfied with it I exported the file as an stl and opened it through Bambu and resized it
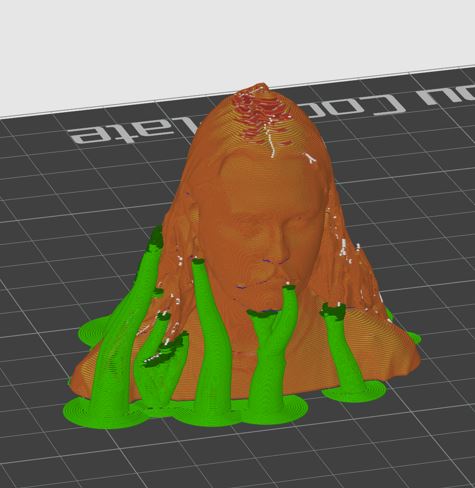
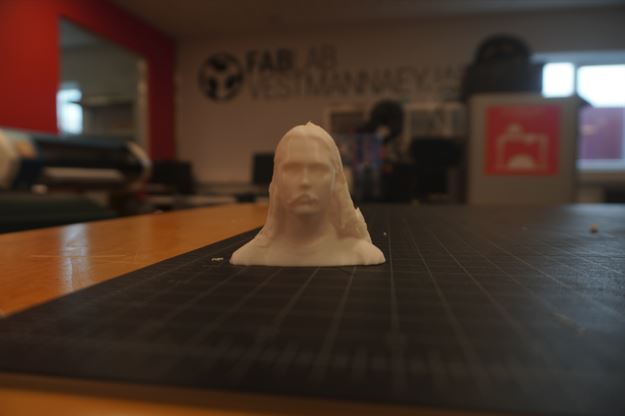
Final result:
Overall it went pretty well, the stickers are definitely a
very influential factor in the scanning process!
Very cool!
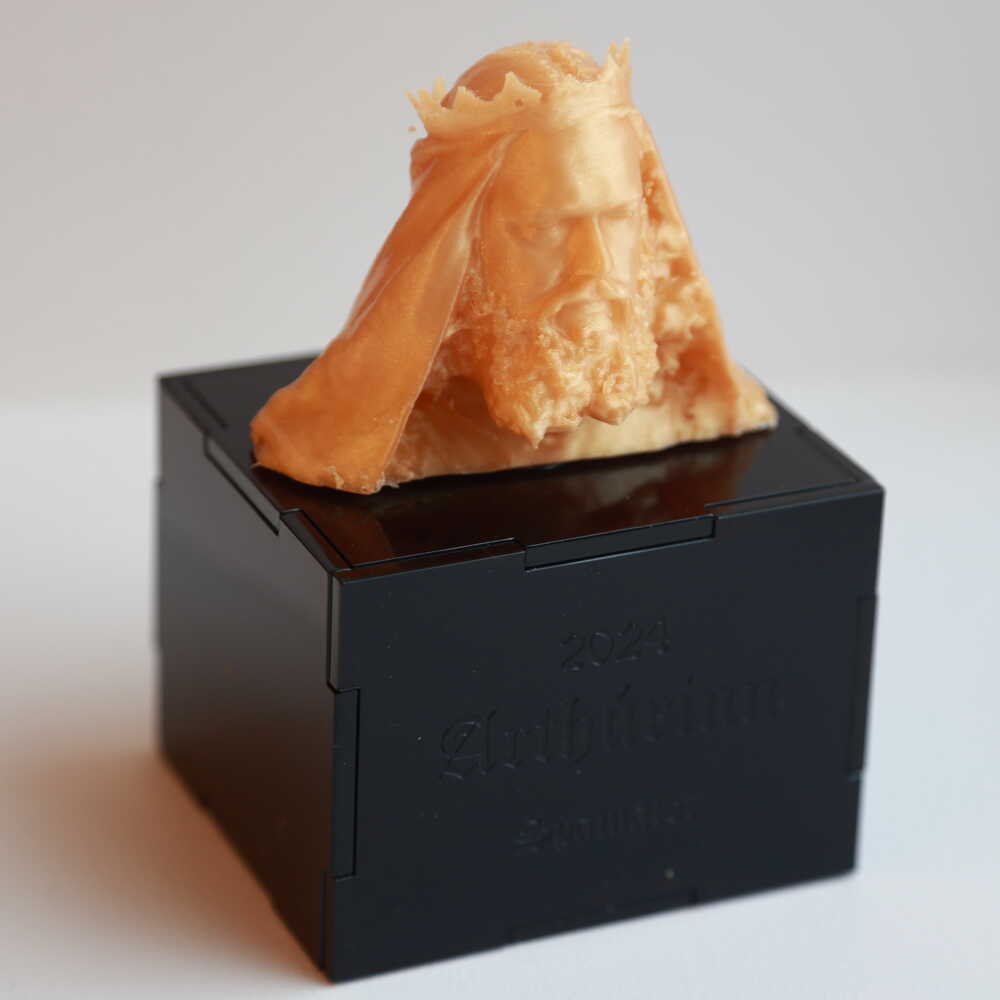
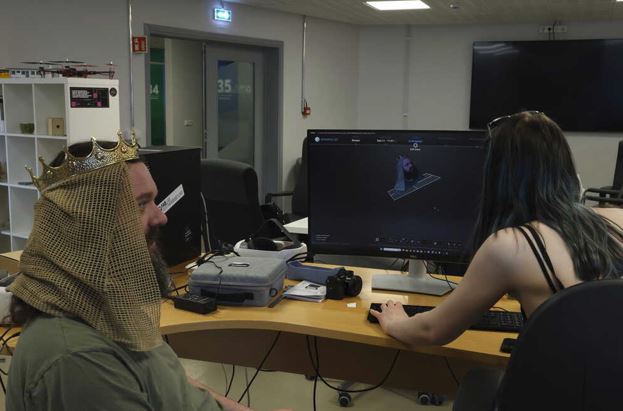
3D SCANNING PART 3: THE KING
The previous 3d scan was only a matter of trial and error.
The true testing of my abilities was yet to begin. I
received a task from the director of Spamalot, the task was
to 3d scan the king.
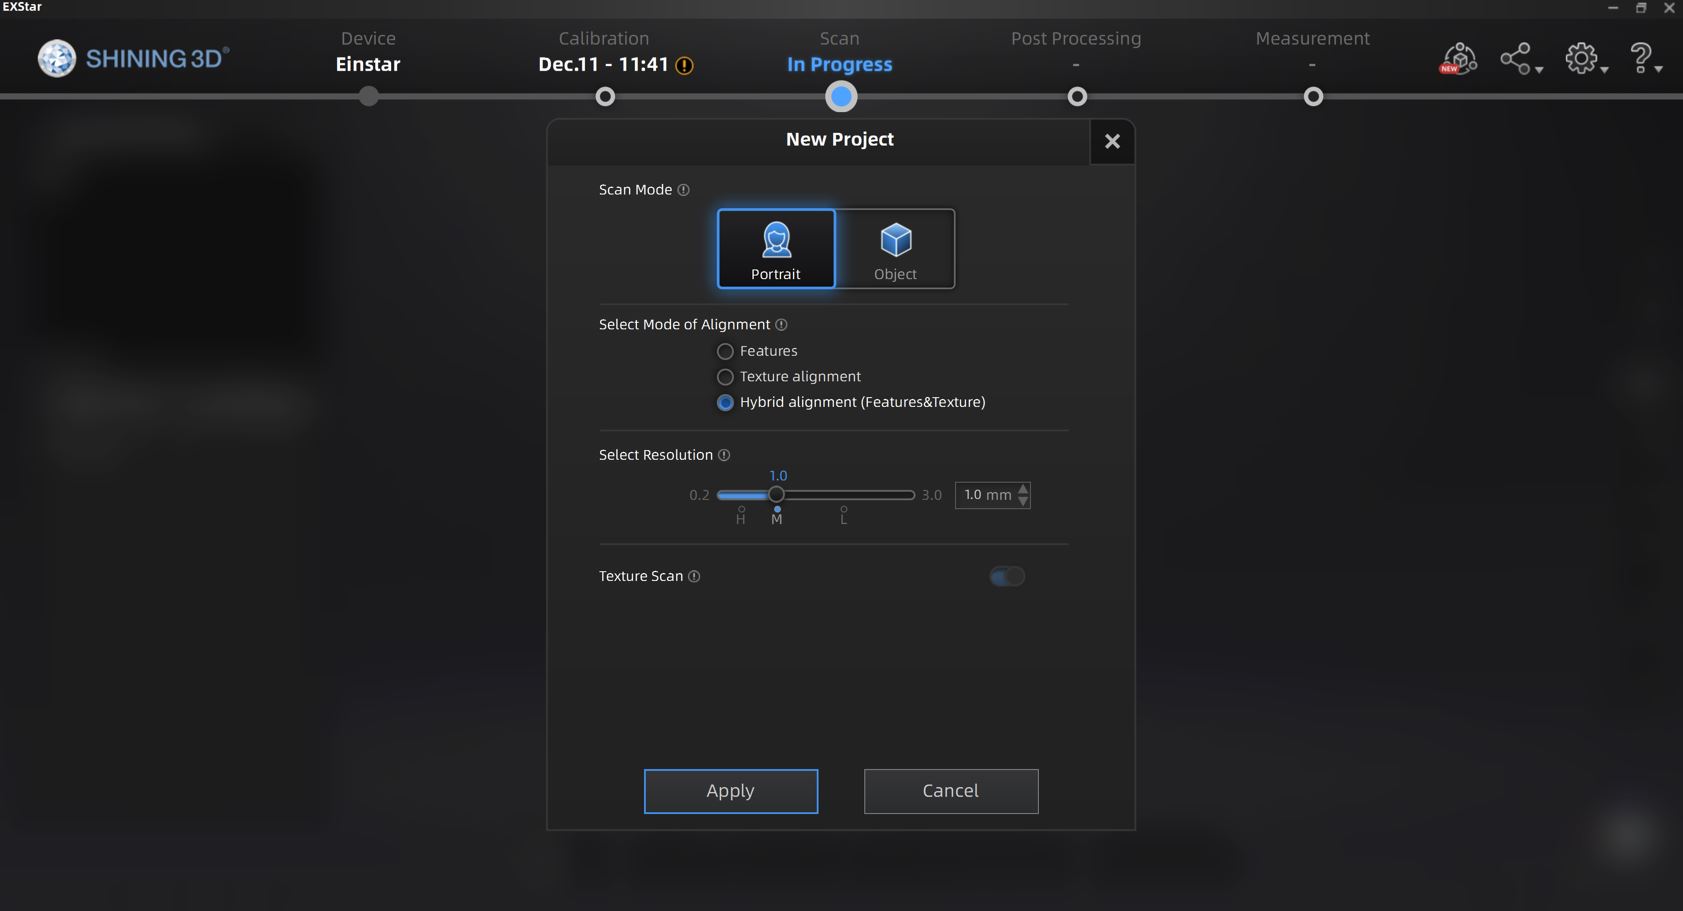
First step was to open the application and select portrait
mode.
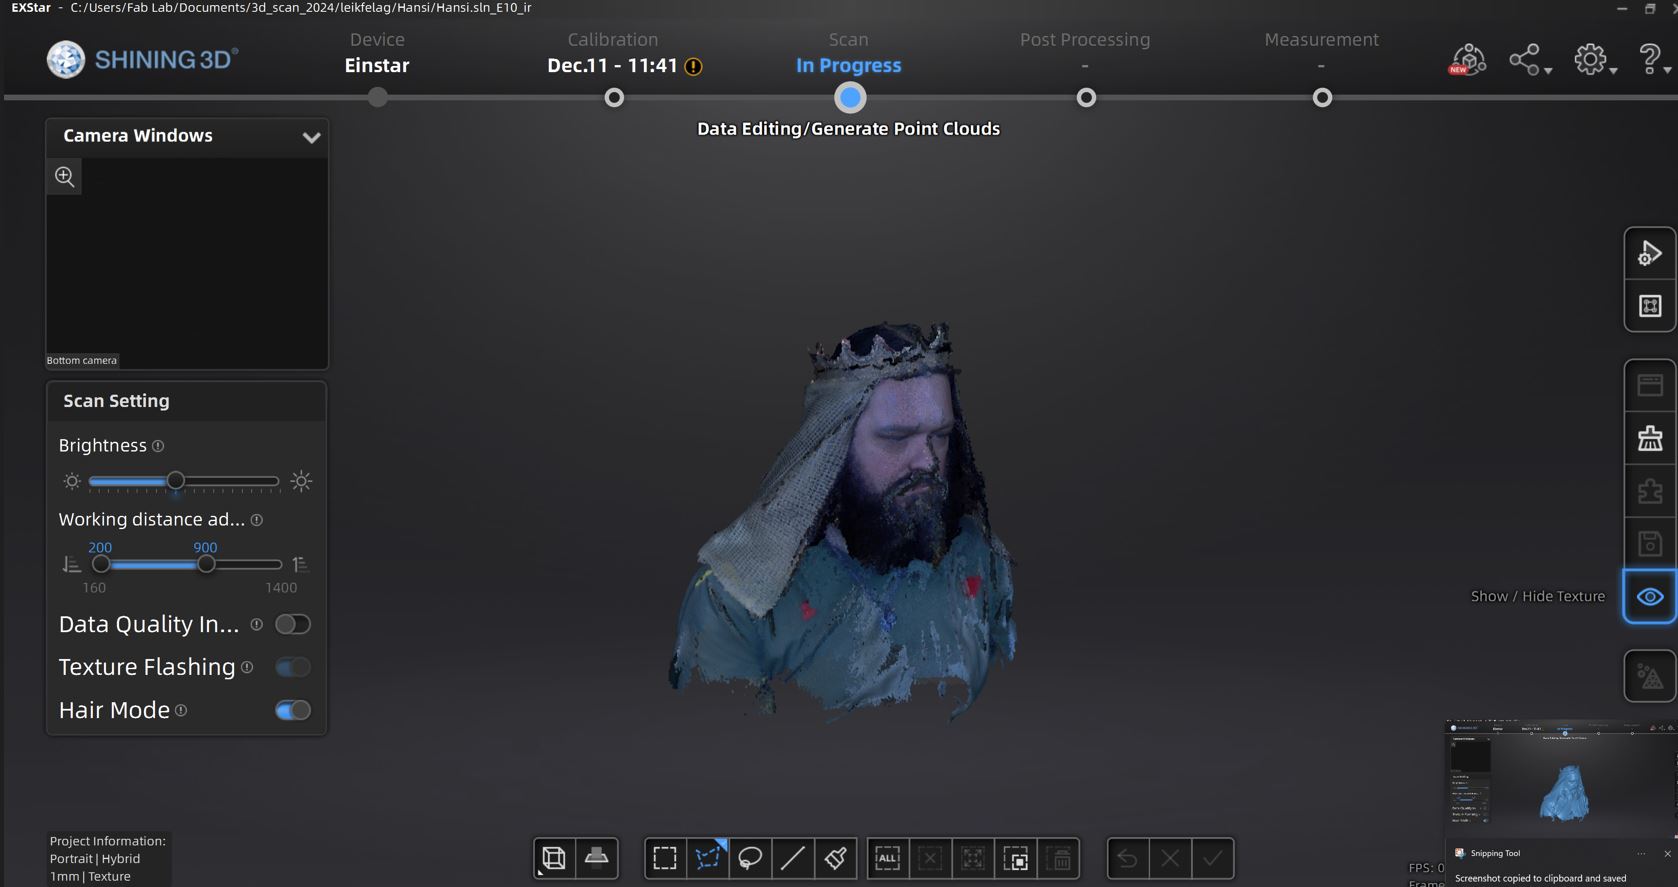
It went pretty well and after around 1 hour we had this;:
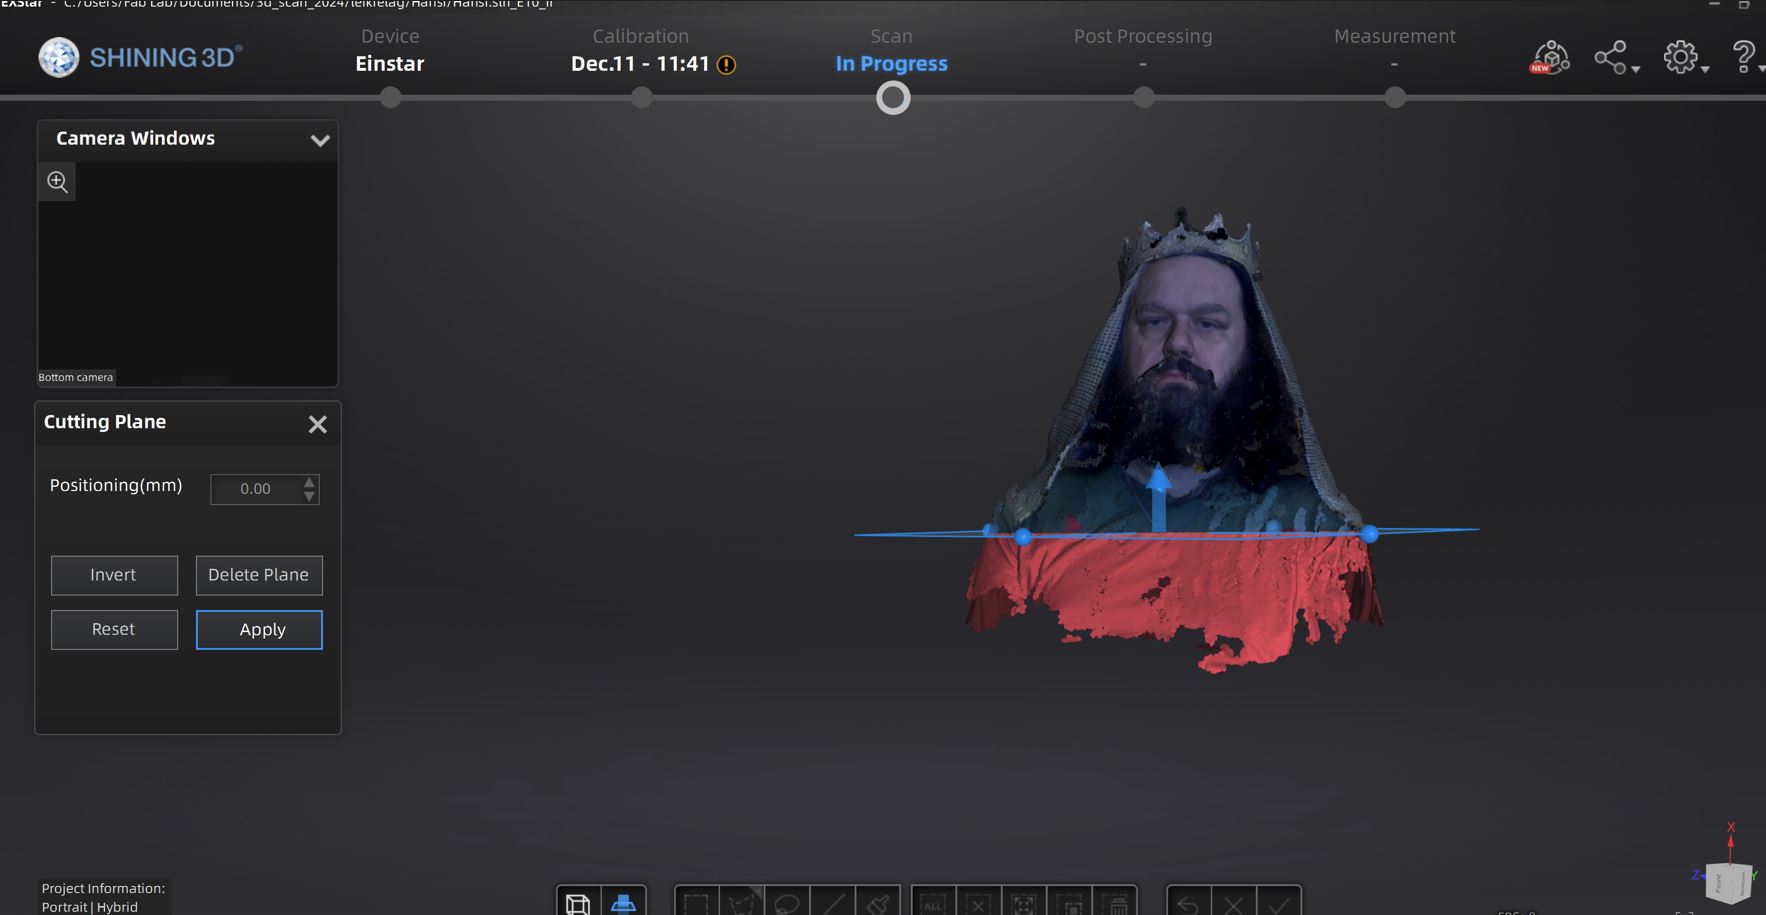
I use the lasso tool to select and delete unwanted points and parts.
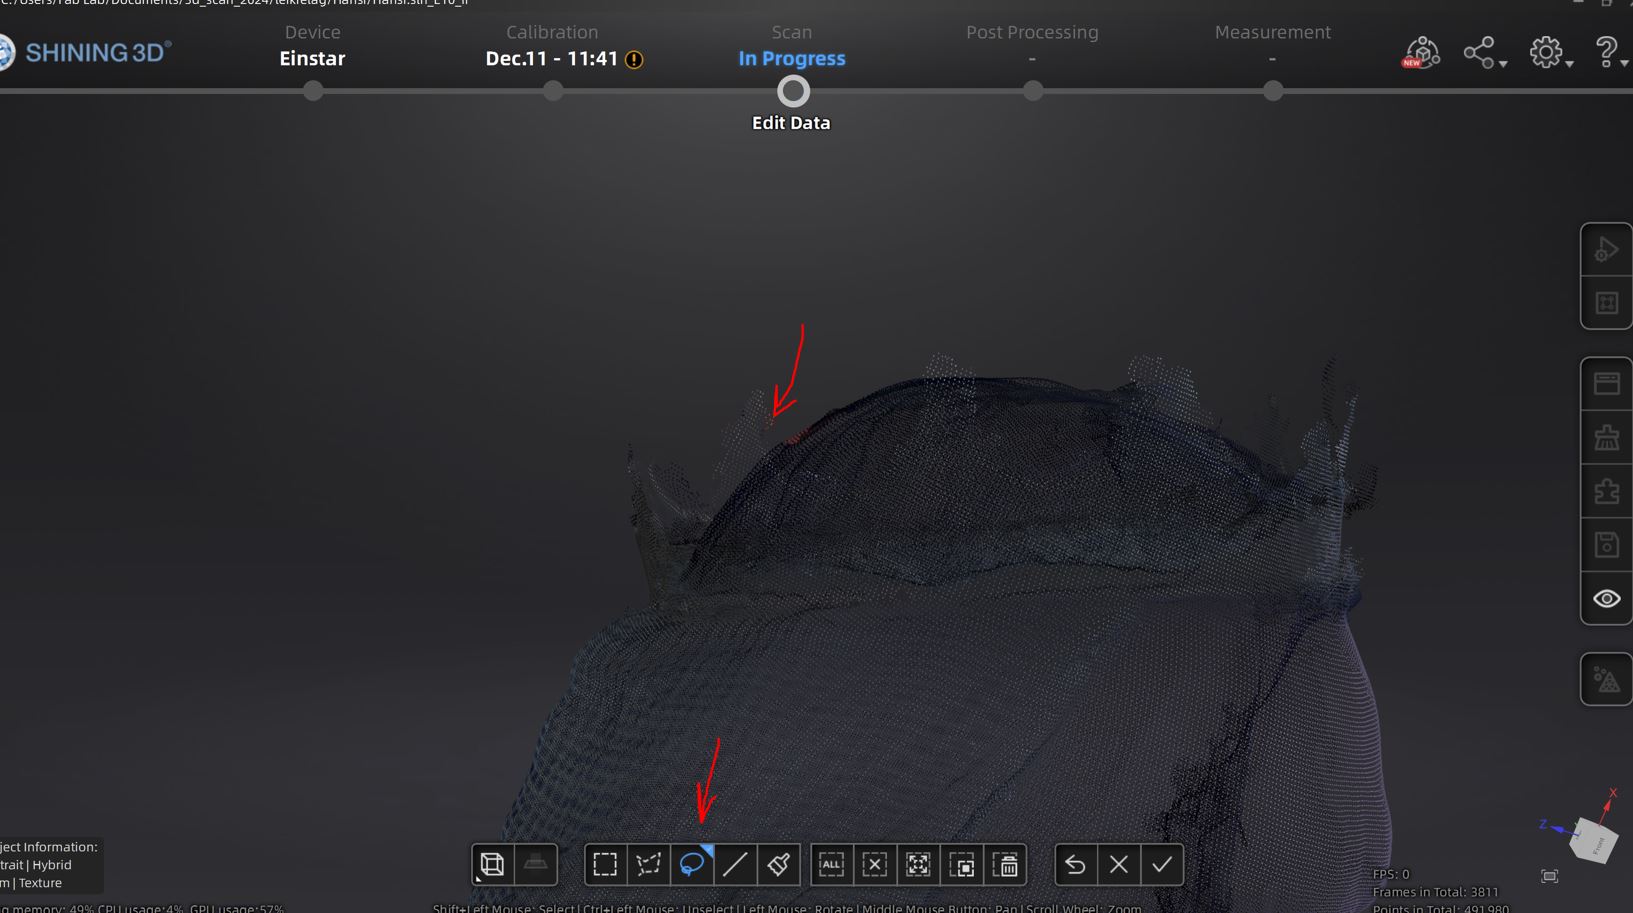
I then turned it into a mesh like in the previous scan AND VOILA !
There was a slight problem with the crown since it was way too shiny, the scanner would not recognize the crowns features
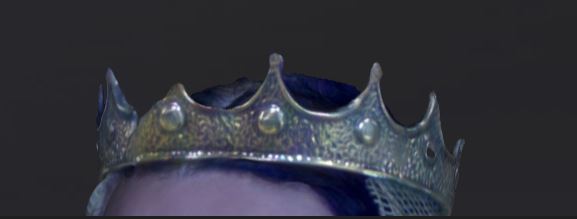
Going to try scanning the crown with powder to see how that goes
Final result: