
Embedded Programming
assignment
individual assignment:
- write a program for a microcontroller development board that you made,
- to interact (with local input &/or output devices)
- and communicate (with remote wired or wireless devices)
- extra credit: use different languages &/or development environments
- extra credit: connect external components to the board
group assignment:
- browse through the data sheet for your microcontroller
- compare the performance and development workflows for other architecture
- link: Group
assignment
Okay so for this week I started with downloading arduino.
Here is a wonderful video explaining the basics of Arduino!
While watching the video I followed through and connected a redboard to it, this way i was able to see the effects of changing the code.
After that I began following the Sik Guide, I followed through with the first 3 tutorials :)
I messed with the code for the third one and it wouldn't blink in different colored lights. Turns out I forgot to send the actual code to the board haha. But after that it worked!
Very fun so far
Oh boy it took so so long to get the LED to blink but eventually I realised it was missing the
const int command. After looking at 5 different tutorials I FINALLY GOT IT TO WORK
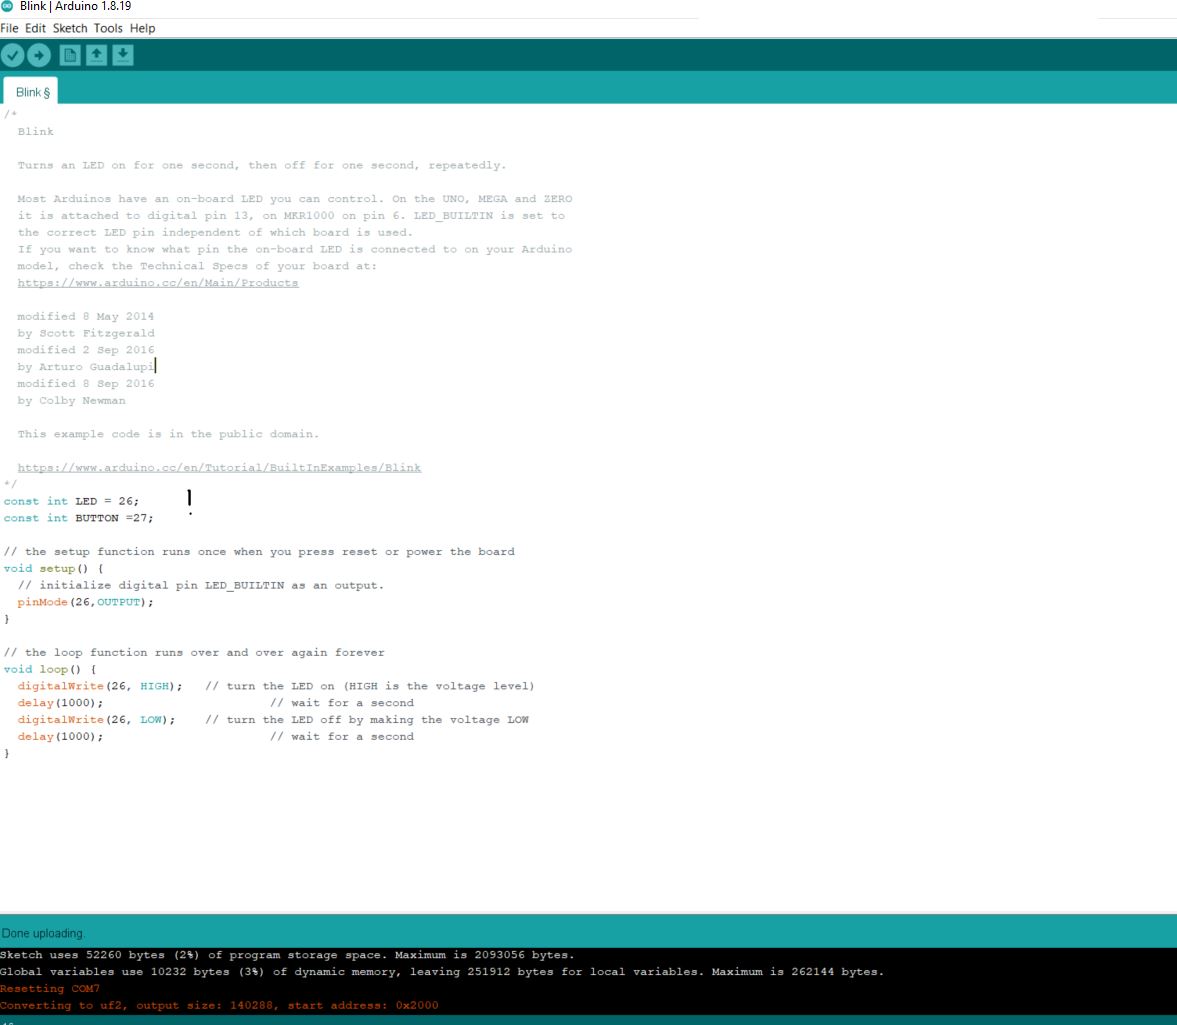
I tried playing around with the pre-made blink code to make the button activate the light, I decided to check what other students and I saw on Róbert´s page that he had defined the button and what it would do. So i tried mimicing his commands :
Borrowed code that Robert generated from chat-gpt
                    const int ledPin = 26;
                    const int buttonPin =27;

                    int buttonState = 0;
                    int ledState = LOW;

                    void setup() {
                      // put your setup code here, to run once:
                    pinMode(ledPin, OUTPUT);

                    pinMode(buttonPin, INPUT);
                    }

                    void loop() {
                    buttonState = digitalRead(buttonPin);
                      // put your main code here, to run repeatedly:
                    if (buttonState == HIGH){
                      ledState = !ledState;
                      digitalWrite(ledPin, ledState);
                      delay(100);
                    }
                    }
IT WORKED!
I decided to use Chat-GPT to help me figure out how I could get the button to control the other LEDs
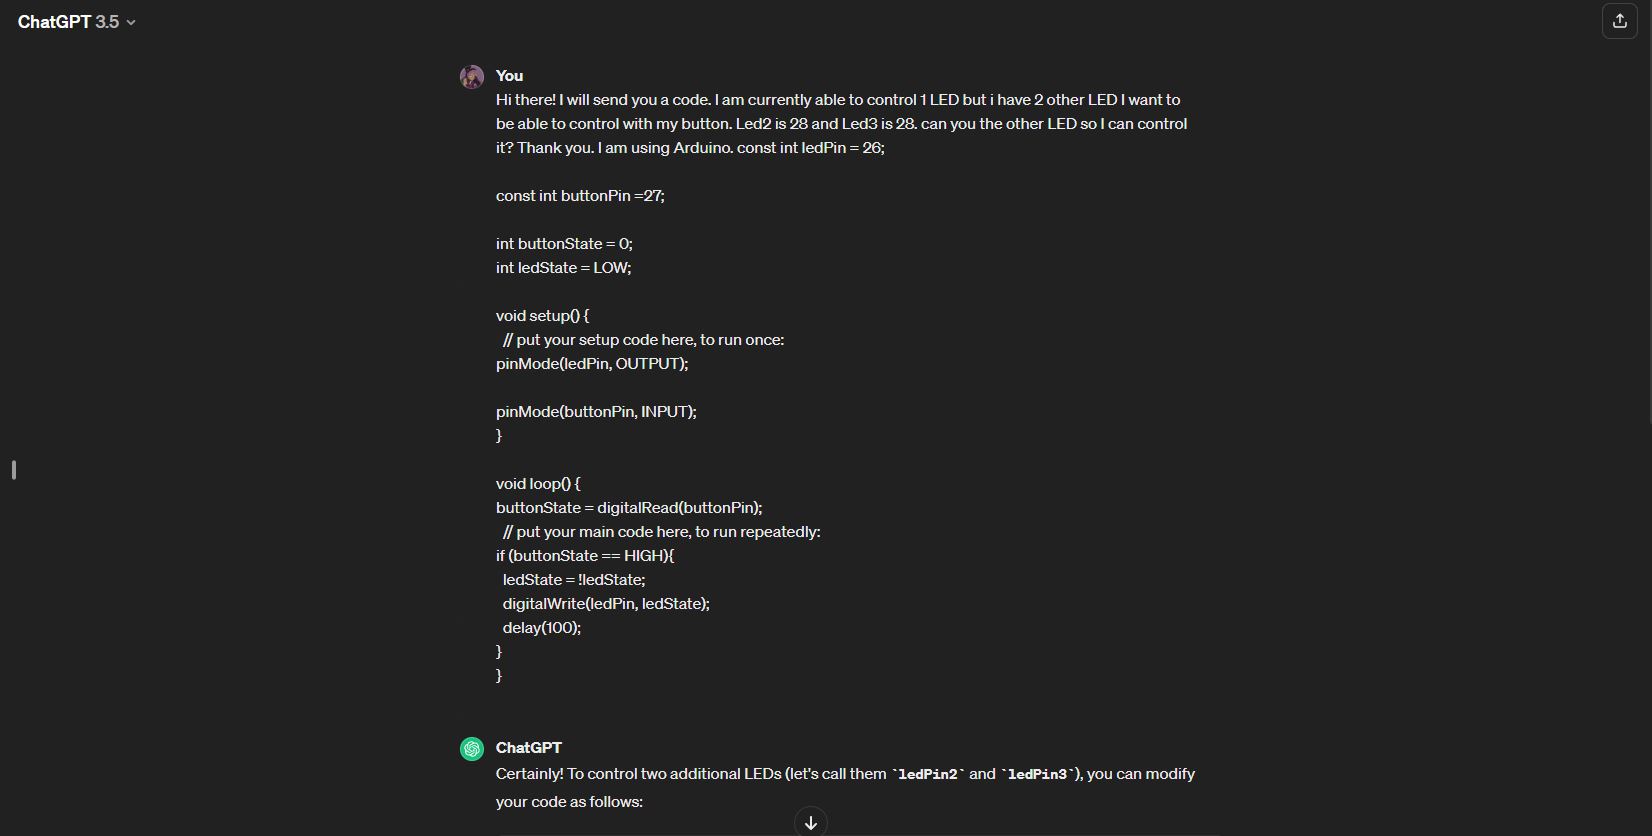
The code turned up like this: some of the led-pins had inaccurate numbers but I fixed that on Arduino.
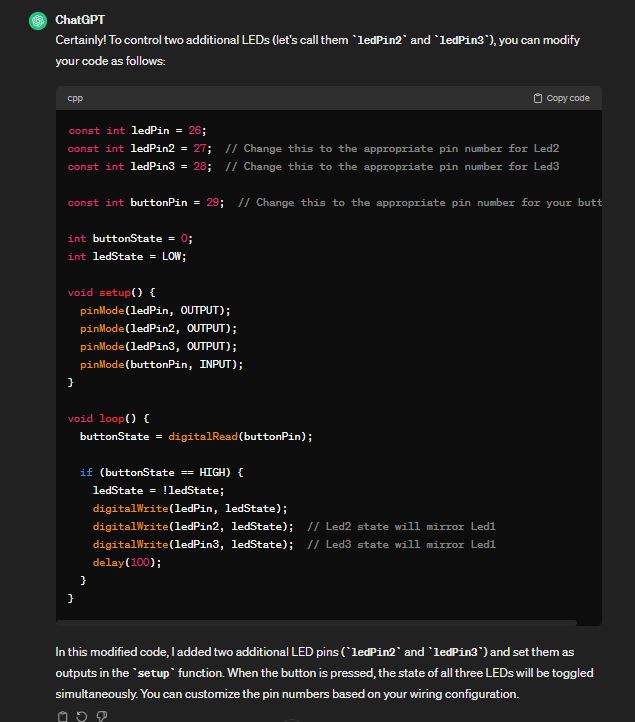
The fixed code:
const int ledPin = 26;
const int ledPin2 = 1;  // Change this to the appropriate pin number for Led2
const int ledPin3 = 0;  // Change this to the appropriate pin number for Led3

const int buttonPin = 27;  // Change this to the appropriate pin number for your button

int buttonState = 0;
int ledState = LOW;

void setup() {
  pinMode(ledPin, OUTPUT);
  pinMode(ledPin2, OUTPUT);
  pinMode(ledPin3, OUTPUT);
  pinMode(buttonPin, INPUT);
}

void loop() {
  buttonState = digitalRead(buttonPin);

  if (buttonState == HIGH) {
    ledState = !ledState;
    digitalWrite(ledPin, ledState);
    digitalWrite(ledPin2, ledState);  // Led2 state will mirror Led1
    digitalWrite(ledPin3, ledState);  // Led3 state will mirror Led1
    delay(100);
  }
}
After hours of not understanding why I never managed to figure out how to work the other LEDs I decided to test the other circuit board. It worked fine.
Here is the video:
I copied Ardian´s code for the Hall effect monitor and tested it. It worked. Yippey!